1
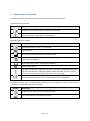
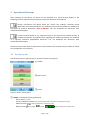
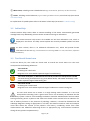
User Manual Sentiero Manufacturer PATH medical GmbH Landsberger Str. 63 D-82110 Germering Germany Email [email protected] Telephone Fax +49 800 765 02 +49 800 765 03 Manual Information Article number: Release date: Revision: Valid from: 100570 2014-01-27 0802_MA_Sentiero_Manual_EN_03 Firmware Rev. 1.7, Mira PC Software Rev. 1.5 Printed on paper without chlorine bleaching. All mentioned items, products, brands and trademarks are registered or owned by the mentioned companies. All information, illustrations, and specifications provided within this manual are based on the latest product information available at the time of publication. PATH medical reserves the right to make changes at any time without notice. The latest revision of the user manual is available online at www.pathme.de/support. Errors and omissions excepted. Copyright Notice No part of this manual may be reproduced, translated, stored, or transmitted, in any form or by any means, electronic, mechanical, photocopying, recording, or otherwise, without the prior written consent of PATH medical GmbH. Copyright © 2014 PATH medical GmbH 0124 Table of Contents 1 Overview.......................................................................................................................................... 5 1.1 Introduction ............................................................................................................................. 5 1.2 Device Versions ....................................................................................................................... 5 1.3 Intended Use ........................................................................................................................... 6 2 Explanation of Symbols ................................................................................................................... 9 3 Operational Concept ..................................................................................................................... 11 3.1 Screen Layout ........................................................................................................................ 11 3.2 Online Help ............................................................................................................................ 12 3.3 Test Result Status Icons ......................................................................................................... 12 3.4 Device Hardware ................................................................................................................... 13 3.4.1 On/Off Switch ................................................................................................................ 13 3.4.2 Device Reset .................................................................................................................. 13 3.4.3 Device Sockets ............................................................................................................... 14 3.4.4 Charging the Device ....................................................................................................... 15 3.5 4 Device Functions ................................................................................................................... 15 3.5.1 User Management ......................................................................................................... 16 3.5.2 Patient Management..................................................................................................... 16 3.5.3 Device Settings .............................................................................................................. 16 3.5.4 Hardware Tests.............................................................................................................. 16 3.5.5 License Management .................................................................................................... 17 3.5.6 Demo Mode ................................................................................................................... 18 3.5.7 System Information ....................................................................................................... 18 3.5.8 Test Module Information .............................................................................................. 18 3.5.9 Error Handling ............................................................................................................... 19 3.6 Mira PC Software ................................................................................................................... 19 3.7 PATH Service Tool.................................................................................................................. 20 Service and Maintenance .............................................................................................................. 21 4.1 General Service Information ................................................................................................. 21 4.2 Routine Maintenance and Calibration .................................................................................. 21 4.3 Repair .................................................................................................................................... 22 5 Cleaning ......................................................................................................................................... 23 6 Accessories .................................................................................................................................... 25 7 Warranty........................................................................................................................................ 27 8 Notes on Safety ............................................................................................................................. 29 8.1 General Usage ....................................................................................................................... 29 8.2 Handling, Transport, and Storage.......................................................................................... 29 8.3 Electrical Safety ..................................................................................................................... 30 8.4 Electromagnetic Compatibility .............................................................................................. 31 8.5 Accessories ............................................................................................................................ 31 8.6 Waste Disposal ...................................................................................................................... 32 9 Technical Specifications................................................................................................................. 33 9.1 General Device Information .................................................................................................. 33 9.2 Device Characteristics ........................................................................................................... 33 9.3 Power Supply ......................................................................................................................... 33 9.4 Storage, Transport, and Operating Conditions ..................................................................... 34 10 Electromagnetic Compatibility Information .............................................................................. 35 1 Overview 1.1 Introduction Thank you for purchasing a Sentiero. This manual is your guide for safely operating and maintaining your device. Please read this manual carefully before using Sentiero the first time. We recommend taking particular note of the safety (see section 8: Notes on Safety), intended use (see section 1.3: Intended Use), cleaning (see section 5: Cleaning) and maintenance (see section 4: Service and Maintenance) instructions. Sentiero is reliable, easy-to-use, and a mobile medical device. All devices provide easy navigation via touch-screen and are intended for hearing examinations (see section 1.3: Intended Use). Some of the mentioned firmware modules in this manual may not be included with your license. Please contact your distributor if you would like to upgrade your license to include more modules. 1.2 Device Versions There are multiple versions available within the Sentiero device family. HANDHELD DEVICES: Sentiero Including: + Sentiero, Sentiero , and Sentiero Eco (Model: SOH100098) Sentiero Advanced (Model: SOH100360) Sentiero+ differs from Sentiero in extended internal memory (e.g. for speech tests). Sentiero Eco is limited to otoacoustic emission (OAE) tests and does not offer patient management. Sentiero Advanced differs from Sentiero in socket layout and offers the additional ability to conduct acoustically evoked potential (AEP) tests. DESKTOP DEVICES: Sentiero Desktop (Model: SOD100497) Page 5 / 40 Sentiero Desktop offers the same modules as Sentiero together with the ability to conduct tympanometry and acoustic reflex measurements. 1.3 Intended Use Sentiero is a portable instrument to diagnose all ages for hearing loss. The instrument offers different test methods which can be configured to fit the professional’s needs for screening or diagnostic purposes. It offers physiological test methods such as: - Distortion Product Otoacoustic Emissions (DPOAE) Transient Evoked Otoacoustic Emissions (TEOAE) Auditory Brainstem Response (ABR) Auditory Steady State Response (ASSR) Auditory Impedance and acoustic reflex (TYMP) Additionally if offers standard audiometry (psycho-acoustical). All physiological test methods are especially indicated for use in defining the type and configuration of hearing loss particularly for individuals whose behavioral audiometric results are deemed unreliable or to assist in the diagnosis of otologic disorders. Estimation of behavioral hearing thresholds is possible at various frequencies without the need of cooperative interaction with the patient. Acoustic reflex and tympanometry are featured to evaluate the functional condition of the middle and outer ear. For each method, several protocols can be configured. The results are to be used to make further recommendations regarding appropriate intervention strategies. Therefore, Sentiero is intended for use by trained personnel such as audiologists, pediatricians, ENT doctors and other health care professionals. In the United States of America, Federal law restricts this device to sale by or on the order of a licensed physician. Available psycho-acoustical methods on Sentiero are especially indicated for use with cooperative patients starting at the age of 2 years or adequate development age, which enables them to do play/interactive audiometry. All other modules are suitable to be used for all ages. Sentiero is designed for: 1. Diagnostics, monitoring and follow-up after newborn hearing screening 2. Pre-school, school, and adult hearing screening 3. ENT diagnostics based on measurement of a. Otoacoustic emissions b. Tympanometry and acoustic reflex c. Auditory Brainstem Responses d. Auditory Steady State Responses Sentiero must not be used in cases of external otitis (outer ear canal infection) or in any case which yields to pain when inserting the ear probe or applying any other transducer. Page 6 / 40 Please note that the intended use depends on your individual combination of licensed modules and may be a subset of the above mentioned use cases. Sentiero is intended for indoor-use only and must be operated at defined environmental conditions. See also operating conditions in section 9: Technical Specifications and information about environmental conditions regarding electromagnetic disturbances in section 10: Electromagnetic Compatibility Information. Sentiero is not intended for use in oxygen-rich environments. Sentiero is intended for use by audiologists, ear-nose-throat (ENT) doctors, pediatricians, and other hearing health care professionals and audiologically trained technicians. Please consider local regulations regarding the qualification requirements for performing measurements with a specific test module. Sentiero is not intended for operational use by the general public. All test procedures must be supervised or conducted by qualified personnel. In the United States of America, Federal law restricts this device to sale by or on the order of a licensed physician. CONTRAINDICATIONS: Ear probes or insert earphones must not be used in cases of external otitis (outer ear canal infection) or in any case which yields to pain when inserting the ear probe or insert earphone. See also section 8: Notes on Safety. Page 7 / 40 Page 8 / 40 2 Explanation of Symbols This section explains all symbols used within this manual and on the device label. Symbols within this manual: Symbol Explanation Important notice: please read for important information. Warning: please read for safety-relevant information, which may cause risk of danger to persons and/or device if not followed. Symbols on the device label: Symbol Explanation Consult instruction for use, i.e. this manual. Serial number Manufacturer name and address, production date Compliance with applied part type BF (body floating) requirements according to IEC 60601-1 Device with safety class II according to IEC 60601-1 Direct current input The device is electronic equipment covered by the directive 2002/96/EC on waste electrical and electronic equipment (WEEE). When discarded, the item must be sent to separate collection facilities for recovery and recycling. CE mark to declare conformity with medical device directive 93/42/EEC. The number below the CE mark refers to the identifier of the notified body. For further symbols, e.g. on accessory labels, please refer to the respective manual or data sheet of the accessory. Important symbols may include: Symbol Explanation Single use only. Do not reuse the respective item. The respective item is provided non-sterile. Page 9 / 40 Page 10 / 40 3 Operational Concept After switching on the device, the device can be operated via a touch-sensitive display. In the following the most important device functions and screen elements are explained. Further information and details about the various test modules, potential clinical applications and recommendations for combining several test procedures are explained in the guide for practical application (How-To-Manual). You can download this document from www.pathme.de/support. Further technical details as e.g. maximum levels for the various test modules and for all available transducers and specifications regarding test module parameters are described in a separate Technical Specification document. You can download this document from www.pathme.de/support. Please note that screen shots or references to test modules in this manual may not reflect the actual test configuration of your device. 3.1 Screen Layout The device screen is in general split up in three sections (see Figure 1): ① Header ② Main screen ③ Footer Figure 1: Device screen layout ① Header, including the following elements: - Device time (e.g. 12:00) Screen-related information (e.g. selected patient name, selected test module/preset name) USB connection ( is shown if USB cable is connected to a PC) Battery status ( fully charged charging status indicator from empty to full) Page 11 / 40 ② Main screen, including screen-related elements (e.g. test module list, patient list, test data result view) ③ Footer, including control elements (e.g. for browsing to different screens) and online help (see section 3.2: Online Help) For explanation of symbols please refer to the device online help (see section 3.2: Online Help). 3.2 Online Help Context-sensitive help screens allow an intuitive handling of the device. Automatically generated message boxes may additionally present context-sensitive warnings or information. The context-sensitive help screens are available via the blue information icon, which is displayed in the footer. The help screens explain the currently available symbols and their functions. At some screens, there is an additional information icon, which will provide further information for the user (e.g. recommendations for measuring DPOAEs in a noisy environment, explanation of free-field calibration). 3.3 Test Result Status Icons In the test history list, test results are shown with an overall test result status icon. The icons correspond to the following definitions: Test result OK Screening test: valid result Diagnostic test: result within expected range of normal hearing Test result incomplete, in-between OK and not OK, further test interpretation needed Test with hearing threshold result (e.g. PTA, MAGIC Audio, and DPOAE Threshold): result within expected range of mild hearing loss Test result not OK Screening test: invalid result Diagnostic test: result within expected range of moderate to severe hearing loss The test result status icon is meant as a rough hearing status estimator. It is not to be interpreted as a binding result. A green status icon is not necessarily an indication that the full auditory system is normal. A full audiologic evaluation should be administered if concerns about hearing sensitivity persist. A yellow or red status icon should not be assumed to be an indicator of a lack of auditory function or the presence of pathology. However, it should be followed with full audiologic diagnostic testing as appropriate. In all cases, the examiner needs to check and interpret result data within the context of the patient’s case history, considering results from other measurements and additional influencing factors as appropriate (e.g. environmental conditions during the test, patient cooperativeness). Page 12 / 40 3.4 Device Hardware 3.4.1 On/Off Switch The on/off switch is located at the right side of the device housing for handheld devices and at the rear panel of the device housing for desktop devices (see Figure 2). The on/off switch can be used to switch on or off the device. For switching on the device, press the switch briefly. The welcome screen appears. For switching off the device, press the switch for about 10 seconds. Alternatively the device can be switched off via the off switch icon display. in the footer of the device In addition, the on/off switch can be used in some test modules to show the footer, which may be hidden in these modules during the test. Please refer to the online information provided in the context sensitive help screens. Figure 2: On/off switch for handheld (left) and desktop device (right, marked with blue circle) 3.4.2 Device Reset If the device is stalled (i.e., no reaction when pressing the touch screen), the device can be reset. After reset, the device can be started again with the on/off switch. The reset button does not reset any device or test module settings or any other data on the device. In order to reset the device, for handheld devices, press the reset button on the back side of the device below the rubber casing (see Figure 3). For desktop devices, press the on/off switch for several seconds. Figure 3: Device reset button for handheld device Page 13 / 40 3.4.3 Device Sockets Multiple accessories can be connected to the device. This includes transducers (e.g. headphones, ear probe), electrode cable, patient response button, label printer, communication cable (RS232, USB), and power supply unit. For further information see section 6: Accessories. Desktop devices: When printing via label printer, please make sure that both the device and the label printer are connected to the power supply unit; otherwise no printout will be possible. For handheld devices (see Figure 4 and Figure 5) the sockets can be used as described in Table 1. Socket Connectable accessory Blue Headphones, insert earphones, free-field loudspeaker Sentiero, Sentiero Advanced: 2nd ear probe Red Ear probe Sentiero Advanced: Bone conductor Grey Sentiero: Patient response button, label printer, power supply, bone conductor White Sentiero Advanced: Electrode cable, patient response button, label printer, power supply USB socket USB cable with type mini B connector + References to Sentiero also include Sentiero and Sentiero Eco Table 1: Device socket overview for handheld devices Figure 4: Socket panel of handheld devices (from left to right: Sentiero, Sentiero Advanced) Figure 5: USB socket Page 14 / 40 For desktop devices (see Figure 6) the sockets can be used as described in Table 2: Socket Connectable accessory Blue Sentiero Desktop: Headphones, insert earphones, free-field loudspeaker Red Sentiero Desktop: Bone conductor ③ ④ Patient response button Label printer ⑤ USB cable with type B connector ⑥ Power supply Table 2: Device socket overview for desktop devices ⑥ ⑤ ④ ③ Figure 6: Socket panel of desktop devices Please note that Sentiero Desktop contains an additional pressure outlet socket (not shown in Figure 6) nearby the ear probe connector socket (red socket in Figure 6 bottom). 3.4.4 Charging the Device Connect the power supply unit to the device (see section 3.4.3: Device Sockets). For charging the device, connect the power plug to a power mains socket with appropriate output voltage and frequency. For more information about power supply units please see section 9: Technical Specifications and information provided on the power supply unit. The charging process starts automatically and is finished within about 2 hours (handheld) or 8 hours (desktop), respectively. The battery status can be derived from the battery status icon symbol: fully charged; charging; status indicator from empty to full. 3.5 Device Functions Page 15 / 40 3.5.1 User Management With the Mira PC software you can activate or de-activate the user management on your device (see Mira online help for more information). If the user management is activated, after switching on the device, you will be asked to select a user and to enter the user password. Please follow the explanations on the device. If you would like to change a user you need to logoff from the device and restart the device. If the user management is active, you are only enabled to change module parameters when logged in as Administrator. 3.5.2 Patient Management After switching on the device (and if applicable after login) a patient can be added, selected from the list of patients or the test module selection can be called in “Anonymous” mode, i.e. without adding a patient. It is also possible to delete a single patient or all patients (Device Settings Data Management). In “Anonymous” mode tests can be conducted and saved to a session. The session can later be renamed with the appropriate patient data. This may be helpful e.g. for quickly testing a sleeping child if there is no time to enter the patient data in advance. When conducting data in “Anonymous” mode, always make sure that you are able to assign the test data later to the correct patient. For further information about patient management please see device online help (see section 3.2: Online Help) on the “Select Patient” screen. 3.5.3 Device Settings There are multiple options to configure the device to your needs. The device settings can be reached with the tools button from the main patient selection screen. The following device settings are available: - Date and time - Date and time format - Language - Sound (key click, result sound) - Display brightness - Preferences (e.g. BC symbol representation, speech calibration) For further information about device settings please see device online help (see section 3.2: Online Help) on the “Device Settings” screen and its submenus. 3.5.4 Hardware Tests The main device functions can be tested with the “Hardware Tests” option. Page 16 / 40 The device self-test examines several device properties as internal power supply, codec function, and memory integrity. If a device property is correctly working, a green checkmark icon is shown. Otherwise a red “x” icon is shown. If not all device properties are tested successfully (i.e., not only green checkmarks), please contact your distributor. The probe test examines ear probe functionality. Please use either the red test cavity (test cavity for probe tip A) for testing the large probe tip or the blue test cavity (test cavity for probe tip S) for testing the small probe tip. Do not use other combinations. The probe test either results in a pass (probe OK) or in one of the error messages shown in Table 3. Please follow the recommended actions for troubleshooting mentioned in Table 3. Error message Recommended actions for troubleshooting No probe found Check if the ear probe is properly connected to the device. If not, connect the ear probe to the device. Probe failed 1) Check if the ear probe is placed in the correct test cavity. If not, use the correct test cavity provided with the ear probe. 2) Check if the calibration curves* are within the upper and lower tolerance limit markers or if both of the calibration curves* are smooth lines. If not, make sure to use the correct test cavity and check if one or both channels of the probe tip are clogged. If so, change or clean the probe tip. * For EP-TE ear probes only one channel is available and hence only one curve is shown Table 3: Probe test error messages and recommended actions If the recommended actions in Table 3 or in the online FAQ (www.pathme.de/support/faq) do not help in solving the problem, please contact your distributor. The pump unit test examines the functionality of the pneumatic system of Sentiero Desktop. If the pump unit test fails (red icon), please contact your distributor. 3.5.5 License Management If you would like to add modules to your device please contact your distributor. You can also use the demo mode to evaluate the need for additional modules (see section 3.5.6: Demo Mode). When upgrading your license, from the distributor you will receive a new license key that needs to be entered on your device. Before entering a new license key on the device, please make sure that you keep a written note of the former license key details for potential reinstallation if needed. In order to update your license key you need to go to the “License Management” screen (Device Settings Device Configuration). The existing license key and all currently licensed modules are displayed. When correctly entering and confirming the new license key, the additional modules will be available on the device. Page 17 / 40 If you order a speech license, you will additionally receive a speech license file, which needs to be installed on the device via Mira. Please follow the speech file installation instructions that you receive together with the speech license file. 3.5.6 Demo Mode You can activate the demo mode a limited number of times. In demo mode, you are able to use all modules that are available for your device until the end of the day. Please note, that after activating the demo mode, you cannot change your device date and time until the end of the day. If you are interested in upgrading your device permanently with a specific module, please contact your distributor. 3.5.7 System Information On the system information screen, general information about the device and firmware version is displayed. Information about connected transducers is also displayed if the respective transducer has been connected before the system information screen is entered. When contacting your distributor regarding any service request (e.g. error message or module update) this data should be at hand. 3.5.8 Test Module Information Multiple test modules are available for each device. Please contact your distributor or check the PATH medical homepage for an up-to-date list of available modules and features. When conducting a measurement, please consider the following aspects: If necessary for appropriate test performance (Audiometry, DPOAE), the device must be used in a quiet environment (e.g. soundproof cabin, room with low ambient noise). For measurements with ear probes (e.g. OAE) also a sound insulation headphone can be used. In contrast to the above mentioned modules, for AEP measurements (e.g. ABR, ASSR) acoustical noise is less influential on measurement performance than muscle artefacts (e.g. patient movement). Please consider local regulations regarding requirements for the test environment. OAEs are most likely not present in ears with sound-conductive hearing loss, since both the stimulus and the response amplitude are reduced due to the damping of the middle ear. Please use only the large ear tips together with the large probe tip (PT-A) and the small ear tips together with the small probe tip (PT-S). A wrong combination of ear tip and probe tip may deteriorate test performance. See also advice in the accessory box. If in doubt about what combination is correct, please contact your distributor. If possible, do not hold the ear probe while it is placed inside the ear during OAE testing. This may introduce noise into the measurement. Common sources of noise are acoustical Page 18 / 40 (room noise), biological (patient breathing, moving, talking, chewing, etc.), or physical (ear probe movement) noise. For further information and details about the various test modules, potential clinical applications and recommendations for combining different test procedures please refer to the How-To-Manual, which can be downloaded from www.pathme.de/support. 3.5.9 Error Handling If an error occurs with your device please check the below list and proceed as recommended in Table 4. Further information about error handling can be found in section 3.5.4: Hardware Tests or in the online FAQ (www.pathme.de/support/faq). Error Recommended action for troubleshooting Black display The display is automatically deactivated after 2 minutes without user activity in order to increase use time without recharging. Touch the display in order to leave the power saving mode. No feedback, black display After 10 minutes without user activity the device automatically powers down completely. Start the device by pressing the on-switch. No feedback, black display, device stalled If the device does not respond to user action you might need to restart the device by pressing the reset switch (see section 3.4.2: Device Reset). Charge the battery if necessary. Error message: “Remove cable” Remove the connector cable of the label printer or the RS232 cable. Error message: “Touch screen error” The error message appears if there is a permanent pressure on the touch screen during startup of the device. Check if there is a particle between the display and the surrounding display frame. Remove the particle with a small and soft tool (e.g. paper strip). Table 4: Errors and recommended actions If the recommended actions in Table 4 or in the online FAQ do not help in solving the problem, please contact your distributor. 3.6 Mira PC Software The latest Mira PC software is available via download from the PATH medical homepage (see www.pathme.de/support). Mira includes the latest firmware and speech files for updating the device. Mira comes with an online help for further information about correct handling. Mira can be used for administering users, downloading data from the device, uploading and downloading patient information to and from the device, reviewing and archiving test data, printing test data to a standard PC printer, and exporting test data in various formats (e.g. GDT, Excel). Page 19 / 40 Some of the functionality only works with a communication license installed on the device (e.g. data download from device). You do not need a communication license installed for the following activities with MIRA: - updating your device to a new firmware - updating a speech license or speech files - updating user management on the device - uploading patients to the device Information about Mira error handling can be found at www.pathme.de/support/faq. 3.7 PATH Service Tool The PATH Service Tool is only available for authorized distributors and service partners. The latest PATH Service Tool software is available via download from the PATH medical homepage via restricted area login. The PATH Service Tool is needed for servicing devices and for calibrating transducers. Additional hardware (e.g. CaliPro device, loopback cable) and training from PATH medical is required. For further information see separate PATH Service Tool manual or contact PATH medical ([email protected]). Page 20 / 40 4 Service and Maintenance 4.1 General Service Information PATH medical is committed to customer satisfaction. Please contact your distributor for ordering supplies, obtaining information on training courses and service contracts, getting help with device-related problems, suggesting desired features, or finding answers not addressed in the device online help or associated manuals. General information on your device and on PATH medical can be found at www.pathme.de. Updates to software, firmware and documentation (e.g. user manual) are available on the PATH medical homepage. If updates are available, PATH medical distributors will be informed. It is the responsibility of the local distributor to inform the end customer. If you are not sure whether your software, firmware, or documentation is up-to-date please check www.pathme.de/support or contact your distributor. Service activities and repairs of the device and its electro-medical accessories must only be conducted by PATH medical or its authorized service partners. Authorized service partners are enabled from PATH medical with necessary documentation and training in order to conduct specified service activities and repairs. PATH medical reserves the right to decline any responsibility for the safety in operation, reliability, and capability of the device or accessory if any service activities or repairs were conducted by a nonauthorized service partner (see also section 7: Warranty). If in doubt, please contact PATH medical ([email protected]) before commissioning a service activity or repair. Please send the device or accessory in its original packaging to your distributor. 4.2 Routine Maintenance and Calibration To ensure safe operations and to keep measurements valid, it is stipulated by PATH medical to check the device and calibrate its transducers at least once a year or more frequently if required by local regulations or if there is any doubt about correct system function. A warning message is shown on the device if the device service date or a transducer calibration date has expired. Please return the device or accessory immediately to your distributor or service partner. Free-field loudspeakers need to be calibrated regularly by the user according to device instructions. Hence, free-field loudspeakers are exempt from the above mentioned annual calibration procedure. Please note that for all Sentiero devices it is easy to exchange transducers individually and recalibrate them separately. This will help you to increase uptime and availability of your device. Page 21 / 40 REGULATORY BACKGROUND: For the device and all transducers, an annual metrological inspection following §11 Clause 2 of the medical device operator act (MPBetreibV, Germany) must be conducted by a service partner who is authorized by PATH medical. Regarding the PTA module an annual inspection period is stipulated by ISO 8253-1 and by MPBetreibV annex 2. The measurement principle of otoacoustic emissions (OAE) or acoustically evoked potentials (AEP) is not explicitly described in MPBetreibV. Therefore, the manufacturer is obliged to define metrological inspection instructions. IEC 60645-6 (OAE) and IEC 60645-7 (AEP) both suggest an annual inspection interval. EXPLANATION: The device and its accessories contain parts, which are exposed to environmental impacts and contamination. In order to ensure an accurate measurement function, the fault tolerance provided by the manufacturer or defined by applicable standards needs to be controlled by specifically designed instrumentation and defined procedures. Therefore, metrological inspection must be conducted by authorized service partners instructed and trained by PATH medical. In addition to the annual metrological inspection, a regular visual inspection and a regular check for correct operation of the device and its accessories is recommended. Guidelines for routine inspections are provided e.g. in ISO 8253-1 for pure-tone audiometry. Before using the middle ear analyzer module each day, use the calibration volume cavities provided with your device to check the calibration of the ml/mmho meter. Please follow local regulations or guidelines. 4.3 Repair In case a device or accessory is defective or differs in any way from its original setup, PATH medical or an authorized service partner will repair, re-calibrate or exchange the device or accessory. All repairs are subject to parts and material availability. Please contact your distributor to find out about the lead time of any repair activity. Prior to sending any equipment for repair, please provide relevant information to your service partner (e.g. model, serial number, firmware version, contact information, shipping information, detailed description of experienced issue or defect). This may help in speeding up the repair process and failure analysis and in excluding issues that can be solved without sending the device. Additional information may be requested by your service partner. See also sections 4.1: General Service Information and 7: Warranty. Page 22 / 40 5 Cleaning Cleaning the device and its accessories is very important for compliance with hygienic requirements and to avoid any cross-infection. Please always consider local regulations and read this section carefully. Before cleaning the device, the device must be switched off and removed from all connected components (e.g. power supply unit). Wipe the surface of the device with a cloth slightly dampened with mild detergent or normal hospital bactericides or antiseptic solution. The following quantities of chemical substances are allowed: ethanol: 70-80%, propanol: 70-80%, aldehyde: 2-4%. Do not immerse the device and make sure that no liquid gets into the device. Dry the device with a lint-free cloth immediately after cleaning. Disposable accessories (e.g. ear tips and other accessories marked for single use only on the package label or data sheet) must be replaced between patients (or ears of the same patient) to avoid crossinfection. The ear probe test cavity must be used with a disinfected and clean new probe tip. In case of contamination with pathological material or suspected dirt inside the cavity, please discontinue the use of the test cavity. For external cleaning, please use a sterile alcohol wipe, typically containing 70% isopropyl alcohol. It is recommended that parts which are in direct contact with the patient (e.g. headphone cushions) are subject to standard disinfecting procedures between patients. This includes physical cleaning and use of recognized disinfectants. For further information about cleaning instructions for accessories (e.g. ear probe) please refer to the respective manual or data sheet of the accessory. When using a cleaning agent, please refer to the manufacturer's data sheet of the cleaning agent for the minimum time period in which the wipe has to be in direct contact with the surface of the device or accessory to ensure effectiveness of cleaning. The device and its accessories (if not stated otherwise on the respective package label or data sheet) are provided non-sterile and are not intended to be sterilized. Page 23 / 40 Page 24 / 40 6 Accessories Available accessories for Sentiero devices include: - headphones (e.g. Sennheiser HDA-280, Sennheiser HDA-300, Interacoustics DD-45, Holmco PD-81, GN Otometrics ME-70) - - - - insert earphones ear coupler cable (e.g. PATH ECC) bone conductor (e.g. RadioEar B-71) free-field loudspeaker (e.g. JBL Control 2P) and related accessories: o loudspeaker connection cable ear probe (e.g. PATH EP-TE, PATH EP-DP) and related accessories: o probe tips (adult and baby size) o ear tips (multiple sizes and types) o test cavity (corresponding to adult and baby size probe tip) o calibration volume cavities for middle ear analyzer (0.5, 2, 5 ml) o inspection/cleaning tool o fixation clip electrode cable and related accessories: o electrode testing device o electrodes (multiple brands) label printer (e.g. Seiko SLP 650 SE) and related accessories: o label printer connection cable o printout paper rolls patient response button sound insulation headphone (e.g. Peltor Optime III) communication cable (USB, RS232) and related accessories: o RS232-to-USB-converter transportation bag, case power supply unit (Sinpro MPU12C-104, Sinpro MPU16C-104, Friwo FW7662M/12) The above list of accessories may be subject to change. Accessories may be available only upon request, may be replaced by comparable equipment, or may be discontinued without prior notice. Please contact your distributor for an up-to-date list of available accessories. Please note that the same accessory may be available with different connectors and therefore different article numbers for different devices (see section 3.4.3: Device Sockets). When asking your distributor about accessories please always refer to your device (Sentiero, Sentiero Advanced, and Sentiero Desktop). Page 25 / 40 Page 26 / 40 7 Warranty PATH medical warrants that the supplied device and its accessories are free from defects in material and workmanship and, when properly used, will perform in accordance with applicable specifications during the defined warranty period. Please note that the warranty between the end user and the distributor cannot be managed by PATH medical as it is not under PATH medical's responsibility. Nevertheless, PATH medical encourages all regional distributors to provide at least the warranty stated by law or stated by the following rules. For the device a one year warranty period is provided. For the rechargeable battery pack, the touch screen and wearing parts a six months warranty period is provided. The warranty period starts at the date of shipment. In case longer warranty periods are defined by law, these warranty periods take precedence. This warranty is only valid for devices and accessories purchased from an authorized distributor. This warranty is not valid in cases of breakage, malfunction due to manipulation or unintended usage, negligence, non-observance of manufacturer’s instructions including cleaning instructions, crashes or accidents, damages by external causes (e.g. flood, fire) or damages due to shipment (see also disclaimer of warranty). This warranty is not valid for normal deterioration of wearing parts and cosmetic damages (e.g. scratches). Opening the device case or any accessory housing voids this warranty as well as modifications or changes in the device or accessory not approved in writing by PATH medical. This warranty includes material and labor costs and has to be in accordance with the manufacturer specifications. PATH medical reserves the right to credit, repair or replace (with a new or refurbished product) an “in-warranty” device or accessory at its sole option. When suspecting a warranty case, please inform your distributor about the defect. Send the device or accessory together with an error description to your distributor. Mailing expenses are not refundable and are to be paid by the customer. Please send the device or accessory in its original packaging to your distributor. See also section 4.1: General Service Information. Page 27 / 40 DISCLAIMER OF WARRANTY: The warranty contained herein is exclusive. PATH medical disclaims all other warranties expressed or implied, including, but not limited to, any implied warranty of merchantability or fitness for a particular purpose or application. PATH medical shall not be liable for any incidental, indirect, special or consequential damages whether resulting from the purchase, use, misuse or inability to use of the device or accessory or relating in any way to the defect in or failure of the device or accessory, including, but not limited to, claims based upon loss of use, lost profits or revenue, environmental damage, increased expenses of operation, cost of replacement goods. PATH medical's warranty and liability is directed to the distributor and limited to the regulations in the respective distribution contract and German law. The end user shall address warranty claims only to the authorized distributor from whom the device was purchased. PATH medical reserves the right to refuse warranty claims against products or services that are obtained and/or used in contravention of the laws of any country. Page 28 / 40 8 Notes on Safety In order to allow safe performance of Sentiero (handheld and desktop) please read the following notes on safety carefully and follow the provided instructions. If not followed, risks of danger to persons and/or the device may be the consequence. Retain this manual for later use and make sure to hand over this manual to any person who uses this device. Applicable local government rules and regulations must be followed at all times. 8.1 General Usage Follow relevant regulations in your facility regarding maintenance and calibration of audiometric equipment. This includes regular servicing of the device and calibration of transducers. See section 4: Service and Maintenance. Do not try to open or service the device and its components yourself. Return the device to the authorized service partner for all service. Do not operate the device if its power supply is connected to the device and shows a damaged cord or plug. Likewise, this is true for any accessory with a separate power supply (e.g. label printer). The device is capable of producing high stimulus levels for diagnostic purposes. Always make sure to use only stimulus levels, which will be acceptable for the patient. Do not present high stimulus levels to a patient if it could cause a hearing damage. The patient is allowed to operate the device during self-controlled tests (e.g. MAGIC) according to instructions from qualified personnel. Do not allow children, handicapped persons (e.g. mentally handicapped subjects) or other persons who may need assistance to operate the device without adequate supervision. Supervision by qualified personnel is recommended for all subjects at all times. The device needs to be operated in a quiet environment, so that measurements are not influenced by ambient noises. This may be determined by an appropriately skilled person trained in acoustics. ISO 8253-1 section 11 defines maximum ambient noise levels for audiometric hearing testing. If not followed, measurement data may not reliably represent the actual hearing status. See also section 3.5.8: Test Module Information. There are no device parts, which can be serviced during use with a patient. There are no device parts, which can be serviced by the patient when the patient is an intended operator (e.g. MAGIC). See also section 4: Service and Maintenance. 8.2 Handling, Transport, and Storage Do not drop or otherwise cause undue impact to the device or any accessory. If any damage is suspected (e.g. loose parts inside device), do not use the device or accessory anymore and return it to your local service partner for repair and/or calibration. Do not modify the device and its components in any way without written consent of the manufacturer. Failure to do so may result in a reduced level of safety of the system Page 29 / 40 and/or degradation of functionality. Do not transport, store or operate the device at environmental conditions exceeding those stated in section 9: Technical Specifications. If the device is moved from a cold location to a warmer one, there will be a risk of condensation. If condensation occurs, the device must be allowed to achieve normal temperature before it is switched on. Make sure that any platform, table, cart, or other surface used during the operation, transport, or temporary or permanent storage of the device and its components is adequate, sturdy, and safe. PATH medical is not responsible for any injury or damage that may result from inadequate, poorly constructed, or unapproved transports, carts, or operating surfaces. Do not allow any fluid to infiltrate the device. Do not immerse the device in fluids as e.g. cleaning agents. Dust particles may corrupt the touch pad. Please make sure to keep the touch pad clear of dust particles. Do not put excessive pressure on the device display or allow any item to puncture the device display. Do not place the device next to a radiator or any other heat source. 8.3 Electrical Safety The power supply is specified as a part of the device. Do not use any power supply other than the ones defined in section 9: Technical Specifications. Other power supplies made for other electronic devices such as notebook computers or printers may cause damage to the device. Likewise, using the Sentiero power supply on other types of devices may cause damage to those devices. Avoid accidental contact between connected but unused applied parts and other conductive parts including those connected to protective earth. Conductive parts of electrodes and their connectors including the neutral electrode are not allowed to contact other conductive parts and earth. Do not use the device during the application of high-frequency surgical devices, cardiac pacemakers, defibrillators or other electrical stimulators. If the device is used during surgery, the connectors must not touch conductive items including ground. When using the power supply unit Sinpro MPU16C-104 (protection class I), in order to avoid risk of electrical shock, the power supply unit must only be connected to a supply mains with protective earth. Do not connect the label printer cable or RS232 cable to the device during testing. If a connection is established from the device to a standard PC which is powered through the mains network, special precautions must be taken in order to maintain medical safety. A standard USB cable can only be used if the connected PC is outside the patient’s close range or if the PC is running on battery, is medically approved, or is powered via a medically approved safety transformer. In all other cases, a galvanic separator must be inserted in the USB connection. Page 30 / 40 8.4 Electromagnetic Compatibility The radio frequency emissions of the device are very low and are not likely to cause any interference in nearby electronic equipment. However, negative effects or loss of functionality of other electronic devices may occur if they are placed in close vicinity to Sentiero. It may be necessary to implement suitable corrective measures (e.g. new orientation or positioning of Sentiero or shielding). Please also refer to the suggestions provided in section 10: Electromagnetic Compatibility Information Strong electromagnetic radio frequency emissions may affect the operability of the device (e.g. occurrence of unwanted noise). PATH medical recommends restricting the use of other electronic devices with strong electromagnetic radiation (e.g. mobile phones, pagers) in close vicinity to Sentiero. Do not place Sentiero close to other electronic devices. If this cannot be avoided, the correct operation according to the intended use of Sentiero must be supervised. Please also refer to the suggestions provided in section 10: Electromagnetic Compatibility Information. Use of other accessories than the ones provided by PATH medical or use of extension cables may result in higher transmission or reduced immunity to interference of the device. 8.5 Accessories The probe tip of the ear probe must not be inserted into an ear without a disposable ear tip properly affixed to the probe tip. Make sure that the ear tip size corresponds to the patient’s ear canal size. Ear probes or insert earphones must not be used in cases of external otitis (outer ear canal infection) or in any case which yields to pain for the patient when inserting the ear probe or insert earphone. Disposable accessories (e.g. ear tips and other accessories marked for single use only on the package label or data sheet) must be replaced between patients (or ears of the same patient) to avoid cross-infection. Do not clean or reuse these items. Do not connect any accessories other than those provided by PATH medical. Other accessories are not compatible with the device and may result in device damage or improper functionality of the device. If connecting accessories which do not comply with the same safety requirements as this product, this may lead to a reduction in the overall system safety level. Cleaning the device and its accessories is very important for compliance with hygienic requirements and to avoid any cross-infection. For further information please refer to section 5: Cleaning. Always handle cables and transducers with care. Do not excessively bend or twist any cable. The cable may break and hence deteriorate overall device functionality or reduce the overall system safety level. Do not drop, throw or hit any transducer on a hard object. Sensitive parts (e.g. ear probe microphone and loudspeakers) may get damaged and deteriorate measurement performance. Do not use a cable or transducer if any damage is suspected. Keep small parts (e.g. ear tips) out of patient’s range (especially children) in order to prevent accidental swallowing. Page 31 / 40 No parts may be eaten, burnt, or in any other way used for purposes other than audiometry. Inspect the transducer channels of the insert earphone and/or ear probe (including probe tip and ear tip) before use. A blocked loudspeaker channel may yield lower stimulus levels or prevent successful calibration. A blocked microphone channel may yield lower response levels or prevent successful calibration. If in doubt conduct a probe test (see section 3.5.4: Hardware Tests). The sockets are intended to connect to the respective accessories (e.g. transducer, electrode cable, power supply unit, label printer). Do not connect any other item to these sockets. For correct connections see section 3.4.3: Device Sockets. Do not try to insert any plug into a device socket with excessive force. A plug fits only into a device socket if the mechanical coding of the plug is corresponding to the device socket. Color-codes help finding the correct device socket. For desktop devices, please also check the icons on the back panel of the device for correct insertion. See section 3.4.3: Device Sockets. When pulling a plug out of a socket always pull at the plug and not at the cable to avoid cable break. Do not expose the label printout to sunlight or heat. Printing on thermal paper fades with exposure to light or heat. 8.6 Waste Disposal The device includes a NiMH (handheld) or Li-Ion (desktop) rechargeable battery pack. In case the battery pack cannot be charged anymore or in case of any other suspected defect of the battery pack, the battery pack must be replaced by an authorized service partner. The service partner is responsible for the correct disposal and storage of the battery pack. Do not dispose of the batteries in your normal household waste bin. Please follow your local regulations for proper disposal. Within the European Union, the device must not be disposed of in your normal household waste bin since electronic waste may contain hazardous substances. The device is electronic equipment covered by the Directive 2002/96/EC on waste electrical and electronic equipment (WEEE). Please follow your local regulations for proper disposal of the device and its accessories. Page 32 / 40 9 Technical Specifications This section provides a summary of the most important technical specifications. Further technical details are described in a separate Technical Specification document, which can be downloaded from www.pathme.de/support/. 9.1 General Device Information Device classification (93/42/EEC) Device classification (MDR Canada) Class II a Class II Application part classification Type BF (body floating) Application parts Headphones, insert earphones, ear probe, bone conductor, electrode cable, patient response button Ingress protection rating (IP code) Handheld: IP30 Desktop: IP40 Applied standards ISO 389-1, ISO 389-2, ISO 389-3, ISO 389-4, ISO 389-5, ISO 389-8 (transducer calibration), ISO 10993-1 (biocompatibility), ISO 15223-1 (manual), IEC 60601-1 (electrical safety), IEC 60601-1-2 (EMC), IEC 60601-1-4 (PEMS), IEC 60601-1-6 (usability), IEC 60601-2-40 (AEP equipment), IEC 60645-1 (PTA), IEC 60645-5 (tympanometry), IEC 60645-6 (OAE), IEC 60645-7 (ABR), IEC 62304 (software lifecycle) 9.2 Device Characteristics Device dimension Handheld: ca. 209 x 98 x 52 mm Desktop: ca. 150 x 210 x 45 mm Device weight (including battery pack) Handheld: ca. 500 g Desktop: ca. 475 g Display properties 240 x 320 pixel, graphic LCD Handheld: 3.5‘‘, Desktop: 5.0‘‘ Maximum power consumption 2W 9.3 Power Supply For medical applications the following power supply units are exclusively allowed when used with Senti and Sentiero devices: - Sinpro MPU12C-104 Sinpro MPU16C-104 Friwo FW7662M/12 (GPP6) – for desktop devices only Page 33 / 40 For Sentiero do not use any power supply unit other than the ones mentioned above. Failure to do so may reduce electrical safety and may damage the device. When using the power supply unit Sinpro MPU16C-104 (protection class I), in order to avoid risk of electrical shock, the power supply unit must only be connected to a supply mains with protective earth. Input rating of power supply units Sinpro MPU12C-104: 100-240 V, AC, 47-63 Hz, 0.16-0.29 A Sinpro MPU16C-104: 100-240 V, AC, 47-63 Hz, 0.18-0.33 A Friwo FW7662M/12: 100-240 V, AC, 50-60 Hz, 0.15 A Output rating of power supply units Handheld: 9V, 1.2 A, Desktop: 9-12 V, 0.4 A Rechargeable battery pack Handheld: 4.8 V (NiMH), Desktop: 3.7 V Li-Ion Maximum operating time with fully charged batteries ca. 6 - 8 hours (dependent on usage) Maximum charging cycles 500 – 1000 (life time > 2 years for normal usage) Maximum charging time: Handheld: ca. 2 hours, Desktop: ca. 8 hours 9.4 Storage, Transport, and Operating Conditions For storage and transport, please keep the device and its accessories in the provided carrying case in order to protect all components against external forces and environmental impacts. Extreme storage and operating conditions may result e.g. in breakage of the touch screen display (at extremely low temperatures) or in impairment of the device and/or transducer calibration. If the device is moved from a cold location to a warmer one, there will be a risk of condensation. If condensation occurs, the device must be allowed to achieve normal room temperature before it is switched on. Also make sure that the below operating conditions are fulfilled. TRANSPORT AND STORAGE CONDITIONS: Transport temperature -20 to 60 °C (-4 to 140 °F) Storage temperature 0 to 40 °C (32 to 104 °F) Relative air humidity ≤ 90 % non-condensing Barometric pressure 50 to 106 kPa OPERATING CONDITIONS: Temperature 10 to 40 °C (50 to 104 °F) Relative air humidity 20 to 90 % non-condensing Barometric pressure 60* to 106 kPa * At locations where the normal air pressure is below 80 kPa (at altitudes of more than 2000 meters), it is recommended to recalibrate the transducers. Page 34 / 40 10 Electromagnetic Compatibility Information Electromagnetic compatibility (EMC) as stated by standard IEC 60601-1-2 (Medical electrical equipment Part 1-2: General requirements for basic safety and essential performance - Collateral standard: Electromagnetic and 60601-2-40 (Medical electrical equipment - Part 2-40: Particular requirements for the safety of electromyographs and evoked response equipment) was certified by an accredited laboratory with report number 4963. Additional information on the full report is available from PATH medical upon request. compatibility - Requirements and tests) The user must take care that the device is used in an environment with electromagnetic radiation as specified in Table 5 and in Table 6. Emitted interference measurement Compliance Electromagnetic environment High-frequency emission according to CISPR11 Emission of harmonic components according to IEC 61000-3-2 Group 1 The medical electric device uses high-frequency (HF) energy only for internal operation. Hence, its HF emissions are very low and it is unlikely that adjacent electronic devices are disturbed. Class B The medical electric device may be used in all establishments, including those in residential environments and those that are directly connected to a public power network that also supplies buildings used for residential purposes. Class A Emission of voltage fluctuation / Compliant flicker according to IEC 61000-3-3 Table 5: Compliance with electromagnetic emission guidelines and resulting requirements for electromagnetic environment (report nr. 3917, translated from German) Tests for immunity to interference IEC 60601 test level Concurrent level Electromagnetic environment Electrostatic discharge (ESD) according to IEC 61000-4-2 ± 6 kV contact discharge ± 8 kV air discharge ± 6 kV contact discharge ± 8 kV air discharge The ground floor shall consist of wood, concrete or ceramic tiles. If the ground floor consists of synthetic material, the relative air humidity must be ≥ 30 %. Fast transient electric disturbance; bursts according to IEC 61000-4-4 ± 2 kV for power lines ± 1 kV for input and output lines ± 2 kV for power lines ± 1 kV for input and output lines The quality of supply voltage shall correspond to typical hospital or commercial environment. Page 35 / 40 Impulse voltage, surges according to IEC 61000-4-5 ± 1 kV voltage outer conductor – outer conductor ± 1 kV voltage outer conductor – outer conductor The quality of supply voltage shall correspond to typical hospital or commercial environment. Voltage drop, short interruption and fluctuation of supply voltage according to IEC 61000-4-11 < 5 % UT (>95 % UT drop) for ½ period 40 % UT (60 % UT drop) for 5 periods 70 % UT (30 % UT drop) for 25 periods < 5 % UT (>95 % UT drop) for 5 seconds < 5 % UT (>95 % UT drop) for ½ period 40 % UT (60 % UT drop) for 5 periods 70 % UT (30 % UT drop) for 25 periods < 5 % UT (>95 % UT drop) for 5 seconds The quality of supply voltage shall correspond to typical hospital or commercial environment. If the user of the medical electric device also demands continued proper functioning of the device during an interruption of energy supply, the connection of the device to an uninterrupted power supply (UPS) or battery is recommended. Magnetic field at mains frequency (50/60 Hz) according to IEC 6000-4-8 3 A/m 3 A/m Magnetic fields at the mains frequency shall correspond to typical hospital or commercial environment. Note: UT is the mains AC voltage before applying the test level. Table 6: Compliance with immunity to interference tests and resulting requirements for electromagnetic environment (report nr. 3917, translated from German) The user must take care, that the device is used in an environment with minimum distances to potential radiators as described in Table 7 and Table 8. Tests for immunity to interference IEC 60601 test level Concurrent level Electromagnetic environment Conducted highfrequency disturbance according to IEC 61000-4-6 3 Veffective 3 Veffective Portable and mobile radio units shall not be used closer to the device and its components (i.e. connected cables) than defined by the recommended protection distance, which is calculated with the following formula dependent on the radio emitting frequency: d = 3.5/3 * sqrt(P) Radiated highfrequency disturbance according to IEC 61000-4-3 3 V/m 3 V/m For 80 MHz – 800 MHz: d = 3.5/3 * sqrt(P) For 800 MHz – 2.5 GHz: d = 7/3 * sqrt(P) (150 kHz – 80 MHz) (80 MHz – 2.5 GHz) Page 36 / 40 Note: P is the the nominal output of the sender in Watt (W) according to specifications from the manufacturer of the sender; d is the recommended protection distance in meter (m). Corresponding to an on-site investigation, the field strength of stationary radio units shall be lower than the concurrent level at all frequencies. In vicinity to devices which bear the antenna symbol disturbances are possible. At 80 MHz and 800 MHz the higher frequency range is applicable. These guidelines may not be applicable in all cases. The spread of electromagnetic properties is influenced by absorptions and reflections of buildings, objects and humans. Table 7: Minimum distance to potential radiators (report nr. 3917, translated from German) The device is intended for use in an environment in which high-frequency disturbances are controlled. The user of the device can help avoid electromagnetic disturbances by complying with minimum distances between the device including its connected cables and portable and mobile high-frequency telecommunication devices and other radio transmitters. The minimum distance is dependent on the output power of the radio transmitting device (see Table 8). Nominal power of the transmitter W Maximum nominal power of the transmitter Minimum distance, dependent on frequency 150 kHz – 80 MHz 80 MHz – 800 MHz 800 MHz – 2.5 GHz 0,01 Watt 0.1 m 0.1 m 0.2 m 0,1 Watt 0.4 m 0.4 m 0.7 m 1 Watt 1.2 m 1.2 m 2.3 m 10 Watt 3.7 m 3.7 m 7.4 m Table 8: Examples of minimum distances to potential radiators (report nr. 3917, translated from German) Page 37 / 40 Page 38 / 40 Page 39 / 40 Contact information from distributor/service partner: PATH medical GmbH Landsberger Straße 63 82110 Germering Germany Tel.: +49 89 800 76 502 0124 Fax: +49 89 800 76 503 Internet: www.pathme.de