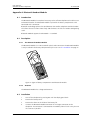
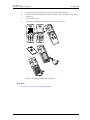
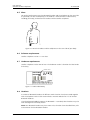
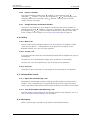
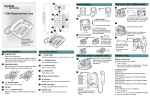
1
TD 92288GB
User Manual
OfficeM Cordless Telephone
2006-05-24/ Ver. C
User Manual
OfficeM Cordless Telephone
TD 92288GB
Contents
1 Introduction............................................................................................................. 1
2 Guideline for Safety and Efficiency ....................................................................... 2
2.1 Chemical Resistance ........................................................................................... 2
2.2 Exposure to Radio Frequency Signals .................................................................. 3
2.3 RF Exposure ....................................................................................................... 4
2.4 Potentially Explosive Atmospheres ...................................................................... 4
2.5 Operation Procedures ........................................................................................ 4
2.6 FCC Requirements ............................................................................................. 4
2.7 IC requirements ................................................................................................. 5
2.8 Warranty notification ......................................................................................... 5
2.9 Battery care ....................................................................................................... 5
2.10 Battery disposal ................................................................................................ 5
2.11 Modifications ................................................................................................... 5
2.12 FCC compliance statements ............................................................................. 5
3 Descriptions ............................................................................................................. 7
3.1 The OfficeM Telephone ...................................................................................... 8
3.2 Icons and Text in the Display .............................................................................. 9
3.3 Keys and Buttons ............................................................................................. 12
3.3.1 Volume button ........................................................................................ 12
3.3.2 Off hook, and YES key ............................................................................. 13
3.3.3 On hook, NO, and On/Off key .................................................................. 13
3.3.4 C (Clear), and MUTE key .......................................................................... 13
3.3.5 MENU Key ............................................................................................... 13
3.3.6 R/Message Key ......................................................................................... 13
3.3.7 Handsfree Key ......................................................................................... 13
3.3.8 Navigation Key ......................................................................................... 13
3.4 Enter Text and Numbers ................................................................................... 14
3.5 Accessories ...................................................................................................... 15
3.5.1 Desktop Charger ...................................................................................... 15
4 Operation............................................................................................................... 16
4.1 Switch the telephone on/off ............................................................................. 16
4.2 Calling ............................................................................................................. 16
4.2.1 Receive/end a call ..................................................................................... 16
4.2.2 Make a Call ............................................................................................. 16
4.2.3 Transfer a Call .......................................................................................... 16
4.3 Charge the Battery ........................................................................................... 17
4.4 Lock/Unlock the keypad ................................................................................... 17
4.5 Volume/Mute Control ...................................................................................... 17
2006-05-24/ Ver. C
User Manual
OfficeM Cordless Telephone
TD 92288GB
4.5.1 Adjust the Volume during a Call ............................................................... 17
4.5.2 Turn Loudspeaking Function On/Off ......................................................... 17
4.5.3 Turn the Ring Signal On/Off ..................................................................... 17
4.5.4 Turn the Microphone On/Off during a Call ............................................... 17
4.6 Change the Dialling Mode ............................................................................... 17
4.7 Send a Dial Tone Pause .................................................................................... 18
4.8 Messaging ....................................................................................................... 18
4.8.1 Receive a Text Message ............................................................................ 18
4.8.2 Read a Stored Text Message ..................................................................... 18
4.8.3 Write and send a Text message ................................................................ 18
4.8.4 Delete a Text Message .............................................................................. 18
4.8.5 Reply to a Text Message ........................................................................... 18
4.8.6 Confirm a Manual acknowledge request .................................................. 19
4.8.7 Forward a Text Message ........................................................................... 19
4.8.8 Call the Sender of the Text Message ......................................................... 19
4.8.9 Call a telephone number included in a Text Message ................................ 19
4.8.10 Read the next Text Message ................................................................... 19
4.9 Voice Mail ........................................................................................................ 19
4.9.1 Receive a Voice mail ................................................................................. 19
4.9.2 Check the Voice inbox ............................................................................. 19
4.9.3 One Key Voice Mail Access ....................................................................... 19
4.10 Phonebook .................................................................................................... 19
4.10.1 Add a New Entry .................................................................................... 20
4.10.2 Edit Name/Number ................................................................................ 20
4.10.3 Delete Name/Number ............................................................................ 20
4.11 Calculator ...................................................................................................... 20
5 Menu Operation.................................................................................................... 21
5.1 Navigate the Menu .......................................................................................... 21
6 Standby Menu Tree ............................................................................................... 22
6.1 Phonebook Tab ................................................................................................ 22
6.2 Message Tab .................................................................................................... 22
6.3 Call info Tab ..................................................................................................... 23
6.4 Call service Tab ................................................................................................ 23
6.5 Toolbox Tab ...................................................................................................... 24
7 Off Hook Menu Tree ............................................................................................. 25
7.1 3rd party Tab ................................................................................................... 25
7.2 Phonebook Tab, See 6.1 Phonebook Tab on page 21. ...................................... 25
7.3 Ongoing call Tab .............................................................................................. 25
7.4 User busy Tab ................................................................................................... 26
7.5 Call waiting Tab ............................................................................................... 26
2006-05-24/ Ver. C
User Manual
OfficeM Cordless Telephone
TD 92288GB
8 Settings .................................................................................................................. 27
8.1 Call service Settings ......................................................................................... 27
8.1.1 Absence Handling .................................................................................... 27
8.1.2 Call Diversion ........................................................................................... 27
8.2 Set/Clear the Alarm Clock ................................................................................ 28
8.3 Sound and Alert Settings ................................................................................. 28
8.3.1 Adjust the Ringer Volume ........................................................................ 28
8.3.2 Turn the Vibrator on/off ........................................................................... 28
8.3.3 Set different Ring Signals for Internal Call, External Call and Call Back ...... 28
8.3.4 Set Alarm Signal ...................................................................................... 28
8.3.5 Set different Message Alerts for Mail and Voice Messages ........................ 29
8.3.6 Set the Key Sound ................................................................................... 29
8.4 Display Settings ................................................................................................ 29
8.4.1 Backlight ................................................................................................. 29
8.4.2 Contrast .................................................................................................. 29
8.4.3 Enable/Disable Popup Info ........................................................................ 29
8.5 Time & Date Settings ....................................................................................... 30
8.5.1 Set Time Format ...................................................................................... 30
8.5.2 Set Date Format ....................................................................................... 30
8.6 Phone Lock settings ......................................................................................... 30
8.6.1 Activate the Keypad lock .......................................................................... 30
8.6.2 Activate the Phone Lock ........................................................................... 30
8.6.3 Deactivate the Phone Lock ....................................................................... 30
8.7 Select Answering Mode ................................................................................... 30
8.8 Change the Menu Language ............................................................................ 30
8.9 In Charger Mode ............................................................................................. 31
8.10 Master Reset .................................................................................................. 31
9 Advanced Functions.............................................................................................. 32
9.1 System Handling .............................................................................................. 32
9.2 Network Settings ............................................................................................. 32
9.2.1 Subscribe a New PBX System ................................................................... 32
9.2.2 Select PBX System .................................................................................... 32
9.2.3 Priority for the PBX Systems ..................................................................... 32
9.2.4 Unsubscribe a PBX System ....................................................................... 32
10 For System Administrators ................................................................................. 33
10.1 Look up the IPEI Code .................................................................................... 33
10.2 Cordless Phone Manager (CPM) Settings ........................................................ 33
11 Operation Notice................................................................................................. 34
11.1 Accessibility and Voice Quality ........................................................................ 34
11.2 Environmental Requirements .......................................................................... 34
2006-05-24/ Ver. C
User Manual
OfficeM Cordless Telephone
TD 92288GB
12 Maintenance........................................................................................................ 35
12.1 Replace the Battery ........................................................................................ 35
12.2 Attach the Hinge-type Clip ............................................................................. 35
12.3 Attach the Swivel-type Clip ............................................................................ 36
Appendix A: Bluetooth Headset Module ............................................................... 37
2006-05-24/ Ver. C
User Manual
OfficeM Cordless Telephone
1
TD 92288GB
Introduction
This document describes features and settings available for the OfficeM Cordless Phone.
The cordless phone is a feature-rich handset designed to be used in an office environment.
It’s suitable for users dependent of being reachable and/or having a need for mobile voice
and messaging functions.
The cordless phone is part of the System 9d, a system that integrates Messaging, Personal
Alarm, and Voice on a DECT platform. Hereby a system with digital voice quality, unique
messaging, and alarm possibilities can be created.
The System 9d consists of a Radio Exchange, DECT base stations, and a wide range of
cordless telephones. It is a system that integrates both the On-site Paging System and the
Personal Security System. The Ascom OfficeM has been tested for GAP compatibility.
However, this does not guarantee compatibility in an alien DECT system.
Note that your system may not support all functions described in this document. For more
information please contact your supplier, or the person responsible for the system in your
organization.
2006-05-24/ Ver. C
1
User Manual
OfficeM Cordless Telephone
2
TD 92288GB
Guideline for Safety and Efficiency
Please observe all necessary safety precautions when using the OfficeM Cordless
telephone.
Save this manual. It includes important safety information and operating instructions.
Save all instructions for future reference.
Before using the telephone, please follow the operating instructions and adhere to all
warnings and safety precautions located on the product and in the user guide.
Do not expose the telephone to open flame.
Do not expose the telephone and charger to direct sunlight for long periods. Keep the
telephone and charger away from excessive heat and moisture.
Do not allow heavy objects to fall on the telephone.
Do not use auxiliary equipment with the telephone which is not exclusively recommended
by the manufacturer, see 3.5 Accessories on page 15. The use of any auxiliary equipment
not recommended by the manufacturer may result in fire, electric shock, or injury, and will
void the warranty.
Connect AC (power supply) to the desktop battery charger only to designated power
sources as marked on the product.
Remove the electrical cord from an outlet by pulling gently on the AC adapter, not by
pulling the cord.
Position the electrical cord to the AC power supply where it is least likely to be subjected
to damage or stress.
Unplug the battery charger from a power source before cleaning the telephone to reduce
risk of electric shock.
Danger Never alter the AC cord or plug. If the plug will not fit into the outlet, have a
proper outlet installed by a qualified electrician. Improper connection increases the risk of
electric shock.
Do not attempt to disassemble the telephone. Doing so will void the warranty. Service
should be performed only by authorized service centers. The OfficeM cordless telephone
does not contain consumer serviceable components.
Do not allow children to play with the product packaging material. Product packaging
material is often small and may present a choking hazard.
Do not allow children to play with your telephone. It is not a toy. Children could hurt
themselves or others. Children could also damage the telephone.
2.1
Chemical Resistance
The alpha and numeric characters printed on the exterior of the OfficeM Cordless
telephone have been tested and found resistant to chipping, fading or wearing off when
the telephone is treated with common cleaners and disinfectants or perspiration. The
following chemicals have shown no harmful effect:
3% Hydrochloric Acid
M-alcohol (70% Methylated Ethanol)
60% Chlorhexidin 0.5mg/ml
Important: Read this information before using your OfficeM Cordless telephone.
2006-05-24/ Ver. C
2
User Manual
OfficeM Cordless Telephone
TD 92288GB
The cordless telephone is one of the most innovative products ever developed. With it, you
can maintain connectivity to traditional telephone services while remaining mobile around
the work environment. For the safe and efficient operation of your telephone, observe the
guidelines in this manual. Your cordless telephone is a radio transmitter and receiver.
When it is on it receives and sends out radio frequency (RF) energy. The telephone
operates in the frequency range of 1921.5 to 1928.5 MHz and employs commonly used
modulation techniques.
Note: Acetone can be damaging to the plastic casing of the cordless telephone and
should not be used.
2.2
Exposure to Radio Frequency Signals
The OfficeM Cordless telephone is a radio transmitter and receiver. It is designed and
manufactured not to exceed the emission limit for exposure to radio frequency (RF) energy
set by the Federal Communications Commission (FCC) of the U.S. Government and
Canada. These limits are part of comprehensive guidelines and established permitted
levels of RF energy for the general population. These guidelines are based on the safety
standards previously set by both U.S. and international standards bodies. These standards
include a substantial safety margin designed to assure the safety of all persons, regardless
of age and health. The exposure standards for wireless mobile telephones employs a unit
of measure known as the Specific Absorption Rate, or SAR. The SAR limit set by the FCC
and Canada is 1.6W/kg averaged over one gram of tissue.
Tests for SAR are conducted using standard operating positions specified by the FCC with
the telephone transmitting at its highest certified power level in all tested frequency
bands. Although the SAR is determined at the highest certified power level, the actual SAR
level of the telephone while operating can be well below the maximum value. This is
because the telephone is designed to operate at multiple power levels.
Before a telephone model is available for sale to the public, it must be tested and certified
to the FCC that it does not exceed the limit established by government-adopted
requirement for safe exposure. The tests are performed in positions and locations (for
example, at the ear and worn on the body) as required by the FCC for each model. The
highest SAR value for this telephone when tested for use is 0.067 W/kg. While there may
be differences between the SAR levels of various telephones and at various positions, they
all meet the government requirement for safe exposure.
For body worn operation, to maintain compliance with FCC RF exposure guidelines, use
only Ascom approved accessories. When carrying the telephone while it is on, use only the
specific Ascom belt clip that has been tested for compliance.
Use of non-Ascom approved accessories may violate the FCC RF exposure guidelines and
should be avoided.
Most modern electronic equipment (for example, equipment in hospitals and cars) is
shielded from RF energy. However, RF energy from cordless telephones may affect some
electronic equipment.
2006-05-24/ Ver. C
3
User Manual
OfficeM Cordless Telephone
2.3
TD 92288GB
RF Exposure
This device and its antenna must not be co-located or operating in conjunction with any
other antenna or transmitter.
This device has been shown to be capable of compliance for localized specific absorption
rate (SAR) for uncontrolled environment/general population exposure limits specified in
ANSI/IEEE Std. C95.1-1992 and had been tested in accordance with the measurement
procedures specified in FCC/OET Bulletin 65 Supplement C (2001) and IEEE Std. 15282003 December 2003).
2.4
Potentially Explosive Atmospheres
Turn the cordless telephone off when in an area with a potentially explosive atmosphere. It
is rare, but the telephone or its accessories could generate sparks. Sparks in such areas
could cause an explosion or fire resulting in bodily injury or even death.
Areas with a potentially explosive atmosphere are often, but not always, clearly marked.
They include fueling areas, (such as gas stations), below deck on boats, fuel or chemical
transfer or storage facilities, and areas where the air contains chemicals or particles (such
as grain, dust, or metal powders).
Do not transport or store flammable gas, liquid, or explosives in any compartment of a
vehicle which also contains the telephone and accessories.
In the U.S., vehicles powered by liquid petroleum gas (such as propane or butane) must
comply with the National Fire Protection Standard (NFPA-58). For a copy of this standard,
contact the National Fire Protection Association, One Battery march Park, Quince,
Massachusetts 02269, Attention: Publication Sales Division.
2.5
Operation Procedures
In the U.S, cordless telephones are subject to the rules and regulations of the FCC.
Following these rules will help to eliminate confusion, ensure the most efficient use of the
existing frequencies, and result in a smoothly functioning radio network.
The following offenses are punishable by fine, imprisonment, or both:
•
•
•
•
Use of profane, indecent, or obscene language.
Transmission of a false distress signaler call.
Willful or malicious interference with any other radio communications.
Refusal to yield a channel or radio frequency when informed that it is needed for an
emergency call. Emergency calls have priority over all messages.
• Adjustment of the equipment by anyone other than a qualified licensed technician.
2.6
FCC Requirements
This equipment has been tested and found to comply with the limits for a Class A digital
service, pursuant to Part 15 of the FCC rules. These limits are designed to provide
reasonable protection against harmful interference when the equipment is operated in a
commercial environment.
This equipment generates, uses, and can radiate radio frequency energy and, if not
installed and used in accordance with the instruction manual, may cause harmful
interference, in which case the user will be required to correct the interference at his or
her own risk.
2006-05-24/ Ver. C
4
User Manual
OfficeM Cordless Telephone
2.7
TD 92288GB
IC requirements
Operation of this device is subject to the following two conditions:
(1) this device may not cause interference, and
(2) this device must accept any interference, including interference that may cause
undesired operation of the device.
The term “IC:” before the radio certification number only signifies that Industry of Canada
technical specifications were met.
2.8
Warranty notification
Do not disassemble the telephone. Disassembling the telephone voids the warranty. The
OfficeM Cordless telephone consists of no consumer serviceable components. Service
should be performed only by Authorized Service center.
2.9
Battery care
• Do not leave a battery where it could be subjected to extremely high temperatures,
such as inside a car on a hot day.
• Do not allow the metal contacts on the battery to touch another metal object. This
could short-circuit and damage the battery.
• Do not attempt to take a battery apart.
• Do not expose a battery to an open flame. This could cause the battery to explode.
• Do not immerse the battery into water. This could short-circuit and damage the
battery.
• Do not charge a battery when the ambient room temperature is above 104ºF or 40ºC
or below 41ºF or 5ºC.
• Do not disconnect the battery unless it needs to be replaced.
• Do power the telephone off before removing the battery.
2.10 Battery disposal
Defective batteries must be returned to a collection point for chemical waste disposal.
2.11 Modifications
Modifications not expressly approved by Ascom could void the user's authority to operate
the equipment.
2.12 FCC compliance statements
This device complies with Part 15 of the FCC Rules. Operation is subject to the following
two conditions: (1) this device may not cause harmful interference, and (2) this device
must accept any interference received, including interference that may cause undesired
operation.
Note: This equipment has been tested and found to comply with the limits for a Class B
digital device, pursuant to Part 15 of the FCC Rules. These limits are designed to provide
reasonable protection against harmful interference in a residential installation. This
equipment generates, uses and can radiate radio frequency energy and, if not installed
and used in accordance with the instructions, may cause harmful interference to radio
communications.
2006-05-24/ Ver. C
5
User Manual
OfficeM Cordless Telephone
TD 92288GB
However, there is no guarantee that interference will not occur in a particular installation.
If this equipment does cause harmful interference to radio or television reception, which
can be determined by turning the equipment off and on, the user is encouraged to try to
correct the interference by one or more of the following measures:
• Reorient or relocate the receiving antenna.
• Increase the separation between the equipment and receiver.
• Connect the equipment into an outlet on a circuit different from that to which the
receiver is connected.
• Consult the dealer or an experienced radio/TV technician for help.
2006-05-24/ Ver. C
6
User Manual
OfficeM Cordless Telephone
3
TD 92288GB
Descriptions
Functions
OfficeM
Yes
Yes
Yes*
Yes
Yes
Yes
Yes
Yes
Yes
Yes
Yes
Yes*
Yes*
Personal phonebook (100 entries)
Company phonebook (1000 entries)
Central phonebook
Changeable display contrast
Vibrator
Headset connector
Microphone on/off during call
Loudspeaking function
SMS (Short Message Service)
Calculator
Alarm clock
Voice mail access
Conference call
Accessories
Desktop charger
Charging rack
Leather case
Belt Clip
hinge-type
swivel-type
Headset with microphone on boom
Headset with microphone on cable
Headset with hearing protection
Bluetooth Headset Module
* System dependent
1.
Yes
Yes
Yes
001
Yes
Yes
Yes
Yes
Yes
Yes
Figure
Figure 1. OfficeM Features and Accessories
LED
Volume up
Volume down
Earpiece
Display
Headset connector
Loudspeaker
(back side)
On hook, NO, and
On/Off key
Navigation key
Off hook, and
YES key
C/MUTE-key
MENU key
Microphone
Handsfree key
R/Message key
002
OfficeM
Figure 2. Description of the cordless phone.
2006-05-24/ Ver. C
7
User Manual
OfficeM Cordless Telephone
3.1
TD 92288GB
The OfficeM Telephone
IMPORTANT: The handset may retain small magnetic objects around the mouthcap or
earcap region.
Case
The plastic cover parts are made of durable PC/ABS material.
Antenna
The antenna is integrated inside the phone.
Display
The full graphic type display is 101 pixels wide and 80 pixels high. The display has white
back lightning that can be switched on/off manually or be set to do it automatically. The
display contrast can also be changed by the user. See 8.4 Display Settings on page 29.
Loudspeaker
The cordless phone has a separate loudspeaker for the loudspeaking function. It is placed
on the back side of the cordless phone.
Microphone
The microphone is placed on the bottom side of the phone. The three small holes placed
on the right side of the message key, is only a matter of design.
Headset connector
The headset connector is, besides for connecting a headset, used for connecting a datacable for downloading software and other data to the cordless phone. It is also used for
downloading and/or uploading EEPROM settings to the cordless phone with the CPM
Cordless Phone Manager (CPM) service tool.
Clip
The belt clip on the back side of the cordless phone, can either be a hinge-type clip
(standard) or a swivel-type clip. See 12.2 Attach the Hinge-type Clip on page 35, or 12.3
Attach the Swivel-type Clip on page 36. Use the clip to attach the phone to a belt or
similar.
Battery
The battery is a rechargeable Li-Ion battery, placed under a battery cover. See 12.1 Replace
the Battery on page 35.
The battery is fully charged within four hours. See 4.3 Charge the Battery on page 17.
The battery is not intended to be charged outside the telephone or to be frequently
exchanged.
Note: When a battery is connected to the OfficeM a full charging cycle is always required.
Failure to do so results in a very early low battery warning.
2006-05-24/ Ver. C
8
User Manual
OfficeM Cordless Telephone
3.2
TD 92288GB
Icons and Text in the Display
All functions and settings available to the user are shown as icons and text in the display.
In standby mode
Menu-tabs in standby mode
System information
User identity
(name and/or number)
Date
Key lock, Alarm icon,
and current time
003
Info row
Figure 3. Example of a display configuration in standby mode.
The menu-tab row is used for the menu tabs. The visible tabs in standby mode are
phonebook, message, call info, call service, and toolbox.
The next four rows are used for information such as the name of the system to which the
cordless phone is connected, the user identity (if supported by the network), and current
date and time. The network name, can for example be “System A” which indicates that
the system is in contact with system A.
The bottom row (info row) is used for icons which give the user information about the
signal strength, new messages, missed calls, battery status etc. see Icons on page 11.
Off hook
Menu-tabs when off hook
Duration time
Calling party identity
004
Info row
Called party identity
Info row
008
Redirected caller identity
Figure 4. Example of display information when calling.
2006-05-24/ Ver. C
9
User Manual
OfficeM Cordless Telephone
TD 92288GB
The upper row is used for the menu tabs. The visible menu tabs when off hook are 3rd
party, phonebook, ongoing call, user busy, and call waiting. See Menu tabs on page 12.
The phonebook and ongoing call are always available, the other tabs are system
dependent.
The following rows show information such as the call duration time and for incoming
calls, the name and/or the number of the caller (if supported by the network). The
redirected caller identity followed by the “redirected call” icon will be displayed if
redirected line information is available.
The bottom row (info row) is used for icons which give the user information about the
signal strength, new messages, missed calls, battery status etc. see Icons on page 11.
2006-05-24/ Ver. C
10
User Manual
OfficeM Cordless Telephone
TD 92288GB
Icons
“Signal strength” icon is visible when the cordless phone is connected to
a system. The staples shown in display depends on the signal strength.
“Ring signal muted” icon is shown when the MUTE key is pressed and
“Mute ringer?” selected.
“Battery” icon is always shown in the display in standby mode. When the
level is low it is time to charge the battery.
"Low battery” icon is shown when the battery only has 10% of its
capacity left. The icon is flashing when the battery capacity is equal to, or
lower, than 5%.
“Loudspeaking” icon is shown when the loudspeaker is activated.
“New message” icon indicates that a new text message (or messages) has
arrived. The icon remains in the display until all new messages in the
inbox are read.
“Voice message” icon is shown when a voice message is waiting.
“Confirm message” icon urges that a received message has to be
accepted or declined by the user of the cordless phone.
“Old message” icon in front of a message shows that this message once
has been read.
“Keys locked” icon indicates a locked keypad.
“Bluetooth” icon indicates that Bluetooth is enabled.
“Headset” icon indicates that a headset is connected to the phone.
"Bluetooth Headset" icon indicates that a Bluetooth headset is active.
“Microphone muted” icon indicates a silenced microphone. This means
that the other part in an ongoing call with you cannot hear you.
“Redirected call” icon indicates that all voice calls and SMS’s are
redirected when the phone is placed in the charger. The redirected caller
identity is shown in front of this icon.
“Outgoing call” icon is added to all outgoing calls in the call list.
“Answered call” icon is added to all answered calls in the call list.
“Missed call” icon is added to all missed calls in the call list.
“Call info” icon indicates that there are new missed calls in the call list.
The icon remains in the display until the calls are checked and either
called up or deleted.
“Datacable” icon is visible when a datacable is connected to the headset
connector on the phone.
2006-05-24/ Ver. C
11
User Manual
OfficeM Cordless Telephone
“Search phonebook” icon is visible when it is possible to press
search for a name/number in the phonebook.
TD 92288GB
key and
Menu tabs
The”Phonebook” menu contains all names/numbers in the personal and
the company phonebook. It is also possible to access a central phonebook
from this menu.
The “Message” menu contains all message handling such as reading,
writing, and sending messages.
The “Call info” menu contains call lists and call time.
The “Call service”* menu contains absent handling, and diversion of calls
and messages to another phone.
The “Toolbox” menu contains a calculator, alarm clock, and personal
phone settings such as changing the ringer volume, selecting language,
etc.
The”3rd party"* menu contains all functions for calls where a third (or
more) part is involved.
The “Ongoing call” menu contains short-cuts to the message menu and
to the call list, and possibility to change to DTMF signalling mode etc.
In the “User busy"* menu a call waiting can be initiated if the called
person is busy, or a call back when the called line no longer is busy. This
can only be done on internal calls.
In the “Call waiting"* menu information of the caller can be found if call
waiting is initiated by another party (if this information is available). A call
that is waiting can be picked up on another line while maintaining the
first connection.
* System dependent.
3.3
Keys and Buttons
3.3.1
Volume button
The two buttons placed on the upper left side of the cordless phone are used for
increasing/decreasing the earpiece and the loudspeaker volume.
2006-05-24/ Ver. C
12
User Manual
OfficeM Cordless Telephone
3.3.2
TD 92288GB
Off hook, and YES key
This key is used for connecting calls and is also as a “YES” key. One short
press in standby mode opens the call list, and pressing the key more than 2
seconds will perform a call to the VAA-routine (Voice Activated Assistance)
if this feature is activated. Always press this key to confirm choices when
working in the menu mode.
3.3.3
On hook, NO, and On/Off key
This key is used for disconnecting calls and returning to previous screen
when working in menu mode. If the key is pressed more than 3 seconds
the phone will be switched on/off.
3.3.4
C (Clear), and MUTE key
A press on the key in standby mode will mute the ringer signal, while a
press during a call will mute the microphone.
C (Clear) is used for erasing letters in the display.
3.3.5
MENU Key
A press on the MENU key in standby mode opens the “Phonebook” menu.
A press on the MENU key when off hook opens the “3rd party” menu. If
the MENU key has been used for leaving the menu, the last used menu will
stay marked when the phone is in standby mode. The next time the MENU
key is pressed the last used menu opens.
3.3.6
R/Message Key
A press on this key in standby mode will result in an outgoing call to a
specific extension number. If the “voice message” icon appears you can
enter your messaging system to retrieve the voice message. The use of this
feature depends on the network.
3.3.7
Handsfree Key
A press on the handsfree key turns the loudspeaker on/off during a call.
The key is also used for connecting an incoming or outgoing call in
loudspeaking mode.
3.3.8
Navigation Key
Use this key to step in the menu and when working in text mode. When
is pressed in standby mode and when off hook, the left most menu tab is
highlighted and when is pressed the rightmost menu tab is highlighted.
and are used for stepping up/down in the menu.
2006-05-24/ Ver. C
13
User Manual
OfficeM Cordless Telephone
3.4
TD 92288GB
Enter Text and Numbers
A B C a b c å ä æ à ç 2γ
Space 9 ? ! , . : ; " \ < = > ( ) _ 1
DEFdefèé3õ
JKLjkl5Λλ
MNOmnoñöøò6
GHIghiì4
WXYZwxyz9
PQRSpqrsß7πσ
TUVtuvüù8
#
Handsfree key
+&@/¤%$ £¥§\¿¡0θξω
006
R/Message key
Figure 5. Available characters
In standby, and number input mode
• A short press on a key enter the digits “0” - “9” and the characters and #.
• Enter “+” in number input mode by a long press on key 0.
• Enter a pause in number input mode by a long press on the
-key. The pause is
presented as a “-”.
• Delete a character by a short press on the C-key.
• Delete all characters by a long press on the C-key.
In text input mode
• A press on a key 0-9, , or #, displays the first available character on that specific key.
The marked character is selected after a timeout, or when another key is pressed.
• To change to upper/lower case, press the
-key before entering the character.
• To add space in the text, make a short press on key 1.
• The first character entered in a message, or when adding/editing a name in the
phonebook, will be an upper level character followed by lower level characters unless
the
-key is pressed before entering the character.
• Delete a character by a short press on the C-key.
• Delete all characters by a long press on the C-key.
2006-05-24/ Ver. C
14
User Manual
OfficeM Cordless Telephone
3.5
TD 92288GB
Accessories
Desktop Charger
007
3.5.1
Figure 6. Desktop charger.
The desktop charger is used for both charging and for storing your phone. The charger is
delivered with a plug-in power supply and is connected into an ordinary wall socket.
Note: Only use the charger within the temperature range of 5 - 40 º C.
IMPORTANT: Only use power adapters original delivered. See list below:
Art. number
DTX - 0208
EU
DTX - 0209
UK
DTX - 0210
AU
DTX - 0211
110V
2006-05-24/ Ver. C
15
User Manual
OfficeM Cordless Telephone
4
TD 92288GB
Operation
4.1
Switch the telephone on/off
Press and hold the NO key at least 3 seconds until the display lights up/turns blank.
4.2
Calling
4.2.1
Receive/end a call
When the signal sounds press YES to answer the call, or press the Handsfree key to answer
the call in loudspeaking mode. The name/number of the calling party is displayed if calling
line information is available.
Press NO to end the call. The duration of the call is shown in the display.
4.2.2
Make a Call
Dial a number
Dial the call number and press YES. The name of the called party is displayed if connecting
line information is available.
Call a number from the call list
Press YES to open the call list. Step with and select one of the twenty last received,
dialled or missed calls. If a number occurs more than once, the last time stamp together
with the total number of occurrences, is shown. Press YES to dial. The call list can also be
accessed via the call info menu.
Quick call by a name in the phonebook
Press and hold the key that holds the first character in the name. Use short presses on the
same key to step between the characters, and use to select the desired name. Press YES.
Example: if the name Eva is wanted, press key 3 (DEF) twice; the first press shows all
names starting with "D" and the second press shows all names starting with "E". Scroll
with to find the name. Press YES to dial.
Call by a name in the phonebook
Enter Phonebook in the menu, select “Call” and press YES; “Find” appears. Enter the first
character(s) or the whole name (or scroll with to find the name). Press YES to dial.
4.2.3
Transfer a Call
During the call, press the R key to put the call on hold. Dial the number you want to
transfer the call to. If the number is available press NO to transfer the call, or press the R
key to return the call.
Note: This function is system dependent.
2006-05-24/ Ver. C
16
User Manual
OfficeM Cordless Telephone
4.3
TD 92288GB
Charge the Battery
Place the telephone in the desktop charger. The battery is being charged when the green
LED on the charger is on (or flashing). An animated battery icon is also shown in the
display indicating charging by starting with its current charge and ending with the full
charge. A filled Battery icon indicates a fully charged battery.
Only use the prescribed desktop charger for charging. Always charge the battery for at
least one hour after connecting it to the telephone. Do not charge the battery outside the
telephone.
4.4
Lock/Unlock the keypad
To prevent accidentally pressing keys and making a call, the keys can be blocked by locking
the keypad.
Enter the “Toolbox” in the menu, see 6.5 Toolbox Tab on page 24, select “Locks” and
press YES. Select “Key lock”, press YES. Set to “Automatic” to lock the keypad and
confirm the choice by pressing YES. When a call is received the keys will automatically
unlock and be locked again 30 seconds after the call is ended.
Unlock the keypad by a press on the
4.5
-key and YES.
Volume/Mute Control
4.5.1
Adjust the Volume during a Call
Press the "Volume up" button to increase the volume, and the "Volume down" button to
decrease the volume. The phone will now store and keep the new volume level.
4.5.2
Turn Loudspeaking Function On/Off
Press the "Handsfree key" to turn on/off the loudspeaker. This is possible either before
dialling a number, or during an ongoing conversation.
4.5.3
Turn the Ring Signal On/Off
In stand-by mode a press on the MUTE key followed by a press on YES, changes between
ring signal on/off. The “Ring signal muted” icon indicates a silenced telephone.
4.5.4
Turn the Microphone On/Off during a Call
Press MUTE to turn the function on/off. The “Microphone muted” icon and low beeps
indicate a silenced microphone. This means that the other part in an ongoing call with you
cannot hear you.
4.6
Change the Dialling Mode
If your system normally uses pulse dialling you can switch between long and short DTMF
tones if required. For some teleservices the standard tones sent by the Cordless telephone
are too short. In this case the Cordless telephone must be switched to “Long DTMF”.
Switch to long DTMF tones
While calling, select the “Ongoing call” menu, see 7.3 Ongoing call Tab on page 25. Step
to “Long DTMF” and press YES.
2006-05-24/ Ver. C
17
User Manual
OfficeM Cordless Telephone
TD 92288GB
Switch to short DTMF tones
While calling, select the “Ongoing call” menu, se 7.3 Ongoing call Tab on page 25. Step
to “Short DTMF” and press YES.
4.7
Send a Dial Tone Pause
A long press on the
4.8
-key adds a pause. It is displayed as “-”.
Messaging
4.8.1
Receive a Text Message
When a text message is received, the LED starts flashing and the message alert signal
sounds. If the message is received during a call a beep notifies the user. The message is
stored in the message list. The “New message“icon is shown in the display. The icon will
remain in the display until all new messages are opened.
4.8.2
Read a Stored Text Message
Enter “Message” in the menu, see 6.2 Message Tab on page 22, select “Inbox” and press
YES. Scroll with to find the message, and press YES to view the message.
4.8.3
Write and send a Text message
Enter “Message” in the menu, see 6.2 Message Tab on page 22. Select “Send” and press
YES. Select “New” and press YES. Write the message. Keys 0-9,
or # can be used. Key
0 and 1 contains special characters, see 3.4 Enter Text and Numbers on page 14 to see all
characters.
The maximum message length is 160 characters.
Note: Some characters require 2 bytes in the final message, therefore the user will
sometimes not be able to enter 160 characters.
The first character entered will be an upper level character followed by lower level
characters unless the
-key is pressed before entering the character.
When pressing a key, the first available character on that specific key is displayed, see 3.4
Enter Text and Numbers on page 14. To get any of the other characters on that key, press
the key until that character appears in the display.
Example: to get the character E, press key 3 twice. "E" appears in the display and is
selected after a timeout or when another key is pressed.
Press YES, enter the call number and press YES to send the message.
4.8.4
Delete a Text Message
To delete the message press YES, a menu appears, see 6.2 Message Tab on page 22. Scroll
with to “Remove” and press YES. The Message is deleted.
4.8.5
Reply to a Text Message
To reply to the message press YES, a menu appears, see 6.2 Message Tab on page 22.
Select “Reply” and press YES. Write the message, see 4.8.3 Write and send a Text
message above. Press YES to send the reply.
2006-05-24/ Ver. C
18
User Manual
OfficeM Cordless Telephone
4.8.6
TD 92288GB
Confirm a Manual acknowledge request
If a message is sent with Manual acknowledge, the message has to be confirmed in the
handset.
Enter “Message” in the menu, select “Inbox” and press YES. Select the message and press
YES to open the message. The message appears with the question “Confirm?”. Press YES
to confirm. Press YES again when the question “Confirm msg?” pops up. Select “Accept”
or “Decline” and press YES.
4.8.7
Forward a Text Message
To forward the message to another telephone press YES, a menu appears, see 6.2
Message Tab on page 22. Scroll with to “Forward” and press YES. Write additional text,
see 4.8.3 Write and send a Text message above. Press YES to forward the message.
4.8.8
Call the Sender of the Text Message
To call the sender of the message press YES, a menu appears, see 6.2 Message Tab on
page 22. Scroll with to “Call sender” and press YES. Press YES twice to call the sender.
4.8.9
Call a telephone number included in a Text Message
If the sender has written a telephone number in the message it is possible to call the
number without dialling it. Press YES, a menu appears, see 6.2 Message Tab on page 22.
Scroll with to “Call (No. in text)” and press YES. Press YES twice to call the number in
the message.
4.8.10 Read the next Text Message
To read the next text message in the list press YES, a menu appears, see 6.2 Message Tab
on page 22. Scroll with to “Read next” and press YES.
4.9
Voice Mail
4.9.1
Receive a Voice mail
A new voice mail is indicated by a “Voice mail“ icon in the display. Information is stored in
the “Voice” inbox, see 6.2 Message Tab on page 22.
4.9.2
Check the Voice inbox
Enter “Message” in the menu, see 6.2 Message Tab on page 22, select “Voice” and press
YES. The “Voice mail” icon followed by the total number of new voice mails in the users
mailbox is displayed.
4.9.3
One Key Voice Mail Access
If the mailbox extension number is downloaded to the phone, see 10.2 Cordless Phone
Manager (CPM) Settings on page 33, a press on the “R” key in standby mode will call the
mailbox. If the extension number is not available an error beep is generated.
4.10 Phonebook
The telephone has a personal phonebook with 100 entries, where names and numbers
freely can be added, deleted, and edited by the user. In addition a company phonebook
2006-05-24/ Ver. C
19
User Manual
OfficeM Cordless Telephone
TD 92288GB
with up to 1000 entries can be download to the phone. The company phonebook name
and numbers can not be edited or deleted by the user. The phonebook lists all names in
alphabetical order. The personal and company phonebook appears in the same list but the
company names are indicated by a “Keys locked” icon in front of the name.
It is also possible to access a central phonebook, see 6.1 Phonebook Tab on page 22. The
user then sends a request to a messaging server with the first characters entered, and the
messaging server will return a list of names and numbers that matches the search.
4.10.1 Add a New Entry
Enter “Phonebook” in the menu, select “Add contact” and press YES. Select “New” or
“From call list”, press YES. If “New” is chosen enter the name, press YES, and enter the
call number, see 3.4 Enter Text and Numbers on page 14. Press YES to save the new entry.
4.10.2 Edit Name/Number
Enter “Phonebook” in the menu, see 6.1 Phonebook Tab on page 22, select “Edit
contact” and press YES. The names in the phonebook are shown in alphabetical order. To
search in the list, enter the first character(s) in the name, or step with . Change the
name/number and press YES to save the entry
4.10.3 Delete Name/Number
Enter “Phonebook” in the menu, see 6.1 Phonebook Tab on page 22, select “Delete
contact” and press YES. The names in the phonebook are shown in alphabetical order. To
search in the list, enter the first character(s) in the name, or step with . Press YES;
“Remove...?” is displayed. Press YES to delete the entry.
4.11 Calculator
The phone has a calculator that supports general arithmetic functions (addition,
subtraction, multiplication and division).
Enter “Toolbox” in the menu, see 6.5 Toolbox Tab on page 24, select “Calculator” and
press YES. Enter digit(s), to switch between “+”, “-”, “x”, and “/” press the # -key. Enter
new digit(s) and press YES to calculate.
2006-05-24/ Ver. C
20
User Manual
OfficeM Cordless Telephone
Menu Operation
5.1
Navigate the Menu
Off hookConfirm key
Up
Left
On hook- Backand On/Off key
Right
C (Clear )and MUTE key
MENU key
Down
005
5
TD 92288GB
Figure 7. Keys used for menu handling.
Enter/Exit the menu
Enter the Menu mode by either a press on the menu key or navigation keys or . Use
or to step between tabs. The selected tab is shown with inverted colours. A heading is
shown and the first alternative is marked. Use navigation key or to step in the
alternatives. Press YES. Press NO to go back one step in the menu. Confirm your
alternative/setting with a press on YES.
Exit the Menu mode and go back to standby mode by a long press on the NO key or by
pressing the MENU key.
When exiting by pressing the MENU key, the last used menu tab setting will be saved.
When pressing the MENU key again this menu will be opened.
2006-05-24/ Ver. C
21
User Manual
OfficeM Cordless Telephone
6
TD 92288GB
Standby Menu Tree
6.1
Phonebook Tab
——> • Name:
Albert E.
Bert A.
Christine
David
Eva
Fred C.
• Call
(All entries are shown
in alphabetic order)
• Add contact
—>
• Edit contact
—>
• New
• From Call list
• Name:
Christine
David
Eva
(All entries in the local
• Delete contact —> phonebook are shown
in alphabetic order)
010
• Open central* —> • Name:
(Search entries
in the central phonebook)
* System dependent
Message Tab
•
Voice*
• Inbox
——>
Access to your
voice mailbox
——> Message 1
Message 2
Message 10
——> • Unsent
• New
• Outbox
• Send
* System dependent
2.
2006-05-24/ Ver. C
——> • Remove
• Reply
• Confirm
• Forward
• Call sender
• Call (No. in text)
• Read next
011
6.2
Figure
22
User Manual
OfficeM Cordless Telephone
6.3
TD 92288GB
Call info Tab
• Missed calls
• Call list
—>
——>
7629
7682
7845
7629
03:31
05:26
23-Sep-03
20-Sep-03
7891
7629
7827
7682
7845
01:30
03:31
03:35
05:26
20-Oct-03
The 20 last calls are
shown
• Call time
—>
Total:
03:47:06
Last call:
00:00:07
012
• Dev services*
* Not visible for the normal user
Call service Tab
• Absence*
——>
The reason for being
absent and when you
are present again
can be specified here
• Divert*
——>
An incoming call can
be diverted to another
number
013
6.4
* System dependent
2006-05-24/ Ver. C
23
User Manual
OfficeM Cordless Telephone
6.5
TD 92288GB
Toolbox Tab
• Bluetooth
—> • Enable/Disable
• No 1
—> • Add new
• Headset
• Alarm clock
—> • Set
• Clear
—> Remove
Edit Name
Connect
• Calculator
• Ringer volume —> • Voice
• Mail
• Alarm
• On
• Vibrator alert —> • On when silent
• Sound & Alerts —>
• Off
Low 1
Low 2
Medium 1
Medium 2
High 1
High 2
Mix 1
Mix 2
Melody 1
Melody 6
• Internal
• Ring signals —> • External
–> User 1
• Call Back
• Alarm signal
——————————> User 10
• Display
———>
• Message alert —>
• Mail
• Voice
• Key sound ——>
• Silent
• Click
• Tone
• Backlight
——>
• Contrast
• On
• Off
• Automatic
• Popup info ——> • Enable
• Disable
• Subscribe
• Select
——> • Priority
• Rename subs
• Unsubscribe
• Network
• Time & Date
• Locks
–> None
Click
Tone
Low 1
Low 2
Medium 1
Medium 2
High 1
High 2
Mix 1
Mix 2
Melody 1
Melody 6
User 1
User 8
—> • Time format
• Date format
————> • Key lock
——> • Automatic
• Off
• Phone lock
—> • On
• Off
• Answering mode –> • Any key
——> • On
• Auto answer —> • Off
• Language
—>
Dansk, Nederlands,
English, etc.
• Master reset ——> • Settings only
• All
2006-05-24/ Ver. C
014
• On
• In charger mode –> • Off
• Redirect
24
User Manual
OfficeM Cordless Telephone
7
TD 92288GB
Off Hook Menu Tree
7.1
3rd party Tab
• Call 3rd party* —> Involve a second
part in the call
• Switch call* ——> Pick up a call
on another line
Transfer a call
——> to another number
• Transfer*
• Add to conf.*
Add persons to a
—> conference call
015
• End new call* —> End the current call
* System dependent
Phonebook Tab
7.3
Ongoing call Tab
, See 6.1 Phonebook Tab on page 22.
• Message
——>
• Call list
——> (See Call info Tab)
(See Message Tab)
• Long DTMF
—> Change to
long DTMF tones
• Short DTMF
—>
Change to
short DTMF tones
• Send pause
—>
Add a pause in a number
when dialling
• Dev services*
016
7.2
* Not visible for the normal user
2006-05-24/ Ver. C
25
User Manual
OfficeM Cordless Telephone
User busy Tab
• Call waiting* ——>
Initiate that a call
is waiting.
(Only on internal calls)
• Call back*
Activate a call back,
i.e. as soon as the
called line is free you
will be notified and
when you pick up the
phone the called party
will be called again
——>
017
7.4
TD 92288GB
* System dependent
Call waiting Tab
• Info*
——> Information of the caller
if available
• Switch*
——> Pick up the waiting call
018
7.5
* System dependent
2006-05-24/ Ver. C
26
User Manual
OfficeM Cordless Telephone
8
TD 92288GB
Settings
8.1
Call service Settings
8.1.1
Absence Handling
The reason for being absent and the return time can be specified here.
Enter “Call service”, see 6.4 Call service Tab on page 23. Select “Absence” and press YES.
Select “Activate”, press YES. If the cordless phone is preprogrammed a number of
absence reasons can be displayed, for example “Lunch”, “Meeting”, “Trip” etc. Press YES,
enter time or date, when present again (use to switch between am and pm) and press
YES.
Deactivate the absence setting
Enter “Call service” in the menu and select “Deactivate”. Press YES.
Note: Absence is a system dependent function.
8.1.2
Call Diversion
The user can divert calls to another extension.
Enter “Call service”, see 6.4 Call service Tab on page 23. Select “Divert” and press YES.
Choose “Select” or “Manual”, press YES.
In the first case (Select) a list with predefined extension names/numbers will appear if the
cordless phone is preprogrammed, select extension and press YES.
In the other case (Manual) the extension is manually set by the user. Press YES (or use
and to change from “Internal” to “External” extension, and press YES twice). Enter the
number or use to find a number in the phonebook. Press YES.
It will take eight seconds for the phone to dial and send the code to the PBX.
Note: Call diversion is a system dependent function.
Add a new entry to the diversion list
Enter “Call service”, see 6.4 Call service Tab on page 23. Select “Divert” and press YES.
Select “Add”, press YES (or use and to change from “Internal” to “External”
extension and press YES twice). Enter a name, press YES. Enter the number or use to
find a number in the phonebook. Press YES to save the entry.
Edit an entry in the diversion list
Enter “Call service”, see 6.4 Call service Tab on page 23. Select “Divert” and “Edit”. Press
YES. Select the entry and press YES. Do your changes and press YES to save the entry.
Remove an entry from the diversion list
Enter “Call service”, see 6.4 Call service Tab on page 23. Select “Divert” and “Remove”.
Press YES. “Remove XX?” will appear, press YES once again.
2006-05-24/ Ver. C
27
User Manual
OfficeM Cordless Telephone
TD 92288GB
Deactivate the divert setting
Enter “Call service”, see 6.4 Call service Tab on page 23. Select “Deactivate”. Press YES.
8.2
Set/Clear the Alarm Clock
Enter “Toolbox” in the menu, see 6.5 Toolbox Tab on page 24. Select “Alarm clock” and
press YES. Select “Set”, press YES. Enter the time the alarm is to be started. Use to
switch between am and pm (only needed if the time format is set to “12 hour”). Press YES
to activate the alarm. The alarm clock icon in the display shows that the alarm clock is
activated.
When the alarm sounds the question “Cancel alarm?” is shown in the display. Press YES
to cancel the alarm.
The alarm can also be cancelled by entering “Toolbox” in the menu, selecting “Alarm
clock” and then “Clear”. Pressing YES will remove the alarm clock setting.
8.3
Sound and Alert Settings
8.3.1
Adjust the Ringer Volume
019
Enter “Toolbox” in the menu, see 6.5 Toolbox Tab on page 24. Select “Sound & Alerts”
and press YES. Select “Ringer volume”. Choose desired setting for “Voice”, “Mail”, or
“Alarm clock”. Step with to increase the volume and with to decrease it. Press YES to
save the setting.
8.3.2
Turn the Vibrator on/off
Enter “Toolbox” in the menu, see 6.5 Toolbox Tab on page 24. Select “Sound & Alerts”
and press YES. Select “Vibrator alert”, press YES. Choose between “On”, “On when
silent” (i.e. the vibrator is on when the phone is muted), or “Off”. Press YES to save the
setting.
8.3.3
Set different Ring Signals for Internal Call, External Call and Call Back
Enter “Toolbox” in the menu, see 6.5 Toolbox Tab on page 24. Select “Sound & Alerts”
and press YES. Select “Ring signals”, press YES. Different signals for internal calls, external
calls and call back can be set. The cordless phone has 14 different ring signals, see 6.5
Toolbox Tab on page 24. 10 additional ring signals can be downloaded to the phone. Press
YES to save the setting.
8.3.4
Set Alarm Signal
Enter “Toolbox” in the menu, see 6.5 Toolbox Tab on page 24. Select “Sound & Alerts”
and press YES. Select “Alarm signal”, press YES. Choose a signal. The cordless phone has
14 different alarm signals, see 6.5 Toolbox Tab on page 24. 10 additional alarm signals can
be downloaded to the phone. Press YES to save the setting.
2006-05-24/ Ver. C
28
User Manual
OfficeM Cordless Telephone
8.3.5
TD 92288GB
Set different Message Alerts for Mail and Voice Messages
Enter “Toolbox” in the menu, see 6.5 Toolbox Tab on page 24. Select “Sound & Alerts”
and press YES. Select “Message alert”, press YES. Different message alerts for the two
types of messages can be selected. The cordless phone has 14 different message alerts
(default), see 6.5 Toolbox Tab on page 24. 10 additional message alerts can be
downloaded to the phone. Press YES to save the setting.
8.3.6
Set the Key Sound
This means that every time a key is used, the phone gives a small sound.
Enter “Toolbox” in the menu, see 6.5 Toolbox Tab on page 24. Select “Sound & Alerts”
and press YES. Select “Key sound”, press YES. Choose between “Silent, “Click”, or
“Tone”. Press YES to save the setting.
8.4
Display Settings
8.4.1
Backlight
Enter “Toolbox” in the menu, see 6.5 Toolbox Tab on page 24. Select “Display” and press
YES. Select “Backlight”, press YES. Set to “On”, “Off”, or “Automatic”. Automatic
means that the backlight turns on when a key is pressed, at an incoming call etc. and the
backlight turns off approx. 5 seconds after the phone has been used. Press YES to save the
setting.
8.4.2
Contrast
023
Enter “Toolbox” in the menu, see 6.5 Toolbox Tab on page 24. Select “Display” and press
YES. Select “Contrast”, press YES.
Step with
setting.
8.4.3
to increase the contrast, and with
to decrease it. Press YES to save the
Enable/Disable Popup Info
The system will send information in a popup window when working in menu mode during
a call. For example, if searching for a call number in the phonebook during a call and the
other part ends the call, the text "Hung up" will popup in a separate window.
Enter “Toolbox” in the menu, see 6.5 Toolbox Tab on page 24. Select “Display” and press
YES. Select “Popup info”, press YES. Set to “Enable” or “Disable”. Press YES to save the
setting.
2006-05-24/ Ver. C
29
User Manual
OfficeM Cordless Telephone
8.5
TD 92288GB
Time & Date Settings
8.5.1
Set Time Format
Enter “Toolbox” in the menu, see 6.5 Toolbox Tab on page 24. Select “Time & Date” and
press YES. Select “Time format, press YES. Choose “24” or “12” hours time format. Press
YES to save the setting.
8.5.2
Set Date Format
Enter “Toolbox” in the menu, see 6.5 Toolbox Tab on page 24. Select “Time &Date” and
press YES. Select “Date format”, press YES. Choose between DD-MMM-YY, MM/DD/YY,
DD-MM-YY or YYMMDD. Press YES to save the setting.
8.6
Phone Lock settings
8.6.1
Activate the Keypad lock
See 4.4 Lock/Unlock the keypad on page 17.
8.6.2
Activate the Phone Lock
The phone can be protected for unauthorized use. If this function is activated a PIN code
has to be entered at power on. The default phone lock code (0000) can be changed to
any 4 digit personalized code.
Enter “Toolbox” in the menu, see 6.5 Toolbox Tab on page 24. Select “Locks”and press
YES. Select “Phone lock”, press YES. Select “On”, press YES. Enter the old PIN code, press
YES. Enter the new PIN code, press YES and enter the new PIN code again. Press YES to
save the setting.
If forgotten the PIN code can be removed by your distributor.
8.6.3
Deactivate the Phone Lock
Enter “Toolbox” in the menu, see 6.5 Toolbox Tab on page 24. Select “Locks” and press
YES. Select “Phone lock”, press YES. Select “Off”. Enter the PIN code and press YES.
8.7
Select Answering Mode
The phone can be set to automatically answer a call, or answer a call by a press on any
key.
Note: The automatically answer mode is only relevant when a headset or a Bluetooth
headset is connected.
Enter “Toolbox” in the menu, see 6.5 Toolbox Tab on page 24. Select “Answering mode”
and press YES. Choose “Any key” or “Auto answer”, press YES. Select “On”. Press YES to
save the setting.
8.8
Change the Menu Language
Enter “Toolbox” in the menu, see 6.5 Toolbox Tab on page 24. Select “Language” and
press YES. Choose between Dansk (Danish), Nederlands (Dutch), English, Soumi (Finish),
Français (French), Deutsch (German), Italiano (Italian), Norska (Norwegian), Português
2006-05-24/ Ver. C
30
User Manual
OfficeM Cordless Telephone
TD 92288GB
(Portuguese), Español (Spanish), and Svenska (Swedish). These are the default languages.
One additional language can be downloaded to the phone. Press YES to save the setting.
8.9
In Charger Mode
Redirect Calls and Messages when placed in Charger
Calls can be redirected to another extension when the cordless phone is placed in charger.
The function is automatically cancelled when the phone is removed from the charger.
Enter “Toolbox” in the menu, see 6.5 Toolbox Tab on page 24. Select “In charger mode”
and press YES. Select “Redirect” and press YES to save the setting.
Detach from system while charging
When the cordless phone is placed in the charger the phone can be detached from the
system but still be switched on and charging.
Enter “Toolbox” in the menu, see 6.5 Toolbox Tab on page 24. Select “In charger mode”
and press YES. Select “Off” and press YES to save the setting.
8.10 Master Reset
The phone settings can be reset to default. Either only the user settings such as ringer
volume, vibrator alert etc., or all settings/information which includes all user settings, sms
messages, voice call list, and all entries in the personal phonebook.
Enter “Toolbox” in the menu, see 6.5 Toolbox Tab on page 24. Select “Master reset” and
press YES. Select “Settings only” or “All”. If the phone lock is activated the phone will ask
for the PIN code; enter the PIN code. Press YES.
2006-05-24/ Ver. C
31
User Manual
OfficeM Cordless Telephone
9
TD 92288GB
Advanced Functions
9.1
System Handling
The 9d System supports the GAP (Generic Access Profile) standard. This makes it possible
to log on to any GAP compatible system with your phone.
9.2
Network Settings
9.2.1
Subscribe a New PBX System
The cordless telephone can subscribe up to eight different PBX systems. To subscribe a
new system the “Park:” (Portable Access Right Key) and “Ac:” (Authentication code)
related to the system you are going to log on to are needed. Contact your system
administrator for more information.
Enter “Toolbox” in the menu, see 6.5 Toolbox Tab on page 24. Select “Network”and press
YES. Select “Subscribe”, press YES. Enter the “Park:”code, press YES, enter the “Ac:”
code, press YES. Give the new system a name, press YES. Finally chose if the new system is
to be protected or not. Switch between “Yes” and “No” by using or . Press YES to
save the setting.
9.2.2
Select PBX System
Enter “Toolbox” in the menu, see 6.5 Toolbox Tab on page 24. Select “Network” and
press YES. Choose “Select”. Select “Automatic” or a specific system. If the phone is set to
“Automatic” it selects a system according the priority list, see 9.2.3 Priority for the PBX
Systems below. Press YES. When the “Connect to XXX” appears press YES again. The text
“Please wait selecting XXX”appears.
9.2.3
Priority for the PBX Systems
The default order of priority is the order of entered subscriptions. This means that the first
subscribed PBX system has the highest priority. This list can be edited by the user.
Enter “Toolbox” in the menu, see 6.5 Toolbox Tab on page 24. Select “Network” and
press YES. Select “Priority”, press YES. Change the priority. Press YES to save the setting.
9.2.4
Unsubscribe a PBX System
Enter “Toolbox” in the menu, see 6.5 Toolbox Tab on page 24. Select “Network” and
press YES. Select “Unsubscribe”, press YES. Select the system you want to delete and
press YES. When “Unsubscribe XXX?” appears in the display; press YES again.
Note: It is not possible to delete a protected subscription.
2006-05-24/ Ver. C
32
User Manual
OfficeM Cordless Telephone
10
TD 92288GB
For System Administrators
10.1 Look up the IPEI Code
The International Portable part Equipment Identity (IPEI) code of the cordless phone may
be needed to enable telephone network subscription. It is also needed to unlock the
phone if the user enters the wrong phonelock code three times. The IPEI code is a unique
code which has been assigned to the cordless phone.
Enter #06# in standby mode and press YES. If the phone lock is on "Enter PIN Code:" is
shown. Enter the PIN code. A message box with text “IPEI” will be displayed followed by
the IPEI number.
10.2 Cordless Phone Manager (CPM) Settings
Dependent on the user rights the CPM Service Tool makes it possible to download new
software, ringing melodies, start-up screen, a 12h language, company phonebook etc.
The tool is also needed for the following settings;
•
•
•
•
•
•
•
•
•
•
•
•
•
•
VAA number
voicemail number
number to central phonebook
diversion types labels
absence labels
dialling codes for date format
inquiry
switch call
transfer call
add to conference
end current call
call waiting
call back
deactivate dialling code
2006-05-24/ Ver. C
33
User Manual
OfficeM Cordless Telephone
11
TD 92288GB
Operation Notice
11.1 Accessibility and Voice Quality
The base network is not always available. If you do not get in contact with your system,
contact your system administrator. For best voice quality, avoid positioning near computer,
radio or similar equipment.
Operating Area
You can only use your cordless phone in the area that is covered by your system. Outside
this area you will loose contact with the system. The signal strength icon will disappear
and “No network” will be displayed.
Out of Range
When you leave the system's coverage area a short beep will sound and the text “No
System” will appear in the display.
When re-entering the coverage area it can take a couple of minutes before the phone
automatically has registered into the system.
11.2 Environmental Requirements
Cordless Telephone
• Only use the phone in temperatures between 0 o C to +40 oC.
• Avoid exposing in direct sunlight or close to other heat sources.
• Protect your phone from aggressive liquids and vapours.
• Keep the phone away from strong electromagnetic fields.
2006-05-24/ Ver. C
34
User Manual
OfficeM Cordless Telephone
12
TD 92288GB
Maintenance
12.1 Replace the Battery
022
If the standby time for the cordless phone becomes too low, the battery should be
replaced by a new one. Please contact your system administrator or your supplier, for
information about new batteries. Attach the battery as described in the illustration below.
The battery is connected to the cordless phone in such a way that no miss-contact is
possible.
Note: After replacing the battery with a new one, the “Battery” icon can indicate an
empty battery even though it is fully charged. Charge the battery for at least one hour to
get the correct reading.
IMPORTANT: Do not disconnect the battery unless it needs to be replaced.
12.2 Attach the Hinge-type Clip
021
Attach the hinge clip as described in the illustration below.
2006-05-24/ Ver. C
35
User Manual
OfficeM Cordless Telephone
TD 92288GB
12.3 Attach the Swivel-type Clip
020
Attach the swivel clip as described in the illustration below.
3.
2006-05-24/ Ver. C
Figure
36
User Manual
OfficeM Cordless Telephone
TD 92288GB
Appendix A: Bluetooth Headset Module
A.1
Introduction
The Bluetooth Module is an optional accessory to the OfficeM telephone to be able to use
a Bluetooth headset. The Bluetooth Module is placed in the battery compartment and
connected with a connector.
Bluetooth technology replaces the cord between the cordless telephone and the headset.
This allows the user to move more freely and eliminates the risk of a headset cord getting
stuck.
Bluetooth Module supports the Bluetooth 1.2 standard.
A.2
Description
A.2.1
The Bluetooth Headset Module
024
The Bluetooth Module is a PCB casted with plastic and a connector. The Bluetooth Module
is easily installed in the battery compartment by the user. See A.3 Installation on page 37.
4.
Figure
Figure 8. Figure of battery compartment and Bluetooth Module
A.2.2
Antenna
The Bluetooth Module has a integrated antenna.
A.3
Installation
1
Turn off the telephone by pressing NO until the display goes blank.
2
Remove the battery cover.
3
Remove the foam on the inside of the battery lid.
4
Connect the Bluetooth Module connector in the largest connector on the
telephone. The connector is connected to the cordless phone in such a way that no
miss-contact is possible.
2006-05-24/ Ver. C
37
User Manual
OfficeM Cordless Telephone
TD 92288GB
Remove the backing paper on the tape on the Bluetooth Module.
6
Place the Bluetooth Module centred on the battery and the support at the end of
the battery.
7
Close the battery lid.
8
Turn on the telephone by pressing NO until the display starts.
025
5
5.
Figure
Figure 9. Installation of the Bluetooth Module.
A.4
Icon
See 3.2 Icons and Text in the Display on page 9.
2006-05-24/ Ver. C
38
User Manual
OfficeM Cordless Telephone
A.5
TD 92288GB
Wear
026
For optimal performance wear the Bluetooth headset and the telephone on the same side
of your body. The best audio quality in the headset is achieved when no obstructions,
including your body, are between the headset and the cordless telephone.
6.
Figure
Figure 10. Wear the headset and the telephone on the same side of your body.
A.6
Software requirements
Cordless telephone version 11.12 or later.
A.7
Hardware requirements
Cordless telephone version R2A or later. The hardware version is found on the label under
the battery.
Hardware version
7.
Figure
027
R2A
Figure 11. Label under battery
A.8
Headsets
A number of Bluetooth headsets for different work situations have been tested together
with the telephone. Refer to the Ascom Wireless Extranet Website for a list of verified
Bluetooth headsets.
Since the Bluetooth Module supports the Bluetooth 1.2 standard, other headsets may also
work although not verified by Ascom.
Note: Your Bluetooth headset may have more or less functions than described here, refer
to the Manual for the Bluetooth headset.
2006-05-24/ Ver. C
39
User Manual
OfficeM Cordless Telephone
A.9
TD 92288GB
Operation
Step between the menus with the navigation key,
with by pressing the YES button on the telephone.
A.9.1
or
. Confirm each menu selection
Enable Bluetooth
To enable the Bluetooth function enter “Toolbox” in the telephone menu, select
Bluetooth and press the YES button on the telephone, select “Enable” and press YES.
A.9.2
Connect a Bluetooth headset
Before a headset can be used a connection (pairing) between the headset and the
telephone must be established.
1
Place the Bluetooth headset and the telephone next to each other.
2
On the telephone enter
“Add new”.
3
Put the headset in pairing mode* and press the YES button on the telephone. The
telephone starts to search for the headset.
4
The headset is displayed in the telephone menu “Headset”. Press the YES button
on the telephone to select the headset. The pairing starts.
5
After a few seconds a PIN-code is requested for the Bluetooth headset. Enter the
PIN-code* and press the YES button on the telephone. “Succeeded” is shown on
the telephone display.
6
The paired headset is displayed in the telephone menu “Headset”. Select the
headset and press the YES button on the telephone, select “Connect” and press
YES again. The headset is now active and ready to be used.
A.9.3
“Toolbox” in the menu, “Bluetooth”
“Headset”,
Add another Bluetooth headset
Up to four headsets can be paired to the telephone, but only one at a time can be active.
To pair another headset repeat section “Connect a headset” steps 1-6.
The paired headsets are displayed by a default name in the telephone menu “Headset”.
See A.9.7 Change the name of Bluetooth headset
A.9.4
Activate a Bluetooth headset
To activate a Bluetooth headset, enter “Toolbox” in the telephone menu, “Bluetooth”,
“Headset”. Step with the navigation key, or to the headset to be activated and
press the YES button on the telephone, select “Connect” and press YES again. The
headset is now active.
Note: The current active headset must be deactivated before another headset can be
activated.
A.9.5
Deactivate a Bluetooth headset
To deactivate the active Bluetooth headset, enter "Toolbox" in the telephone menu,
"Bluetooth", "Headset". Step with the navigation key, or to the headset to be
deactivated and press the YES button on the telephone, select “Disconnect” and press
YES again. The headset is deactivated but is still paired and can be found in the headset
menu.
2006-05-24/ Ver. C
40
User Manual
OfficeM Cordless Telephone
A.9.6
TD 92288GB
Remove a headset
To remove a Bluetooth Headset enter "Toolbox" in the telephone menu,
"Bluetooth", "Headset". Step with the navigation key, or to the headset to be
removed and press the YES button. Select "Remove" and press the YES button.
Confirm with the YES button.
A.9.7
Change the name of Bluetooth headset
The name, in the headset list, of the headset is the default name for the headset. To
change the name enter “Toolbox” in the menu, “Bluetooth”, “Headset”. Step with
the navigation key, or , select the headset and press the YES button. Select “Edit
name” and press the YES button. See 3.4 Enter Text and Numbers on page 14.
A.10 Calling
A.10.1 Make a call
Dial the number on the telephone and press the YES button on the telephone. When
“Transfer call to phone?” is displayed press NO or ignore the message to use the
Bluetooth Headset. Press YES to use the telephone.
A.10.2 Answer a call
A ring signal sounds in both the active Bluetooth headset and the telephone to signal an
incoming call.
To answer the call in the Bluetooth headset, press the button* on the headset.
To answer the call in the telephone press the YES button on the telephone.
A.10.3 End a call
To end the call press the button* on the headset or the NO button on the telephone.
A.11 Volume/Mute Control
A.11.1 Adjust the Volume during a Call
Depending on the Bluetooth headset it might be possible to adjust the volume on the
headset*. On the telephone press the upper Volume button on the upper left side to
increase the volume and the lower Volume button to decrease the volume in the headset.
A.11.2 Turn the microphone On/Off during a Call
Mute the headset and the telephone with the Mute button on the telephone. See 4.5.4
Turn the Microphone On/Off during a Call on page 17.
A.12 Messaging
When a text message is received a beep sounds in the Bluetooth headset.
2006-05-24/ Ver. C
41
User Manual
OfficeM Cordless Telephone
TD 92288GB
A.13 Transfer a call
A.13.1 Transfer a call to the telephone
To transfer a call to the telephone from the Bluetooth headset step with the navigation
key, to the “Ongoing call” menu, select “Audio transfer” and press the YES button on
the telephone. Select “To phone” and press YES again.
A.13.2 Transfer a call to the Bluetooth headset
To transfer the call to the Bluetooth headset step with the navigation key, to the
“Ongoing call” menu, select “Audio transfer” and press the YES button on the telephone.
Select the headset and press YES again.
It is also possible to transfer a call to the Bluetooth headset by pressing the button* on the
Bluetooth headset.
A.14 Switch to a headset with cord
If a headset with a cord is connected during a call, the call is transferred to this headset
automatically.
A.15 Menu tree
See 6.5 Toolbox Tab on page 24.
A.16 Operation notice
A.16.1 Accessibility and Voice quality
Bluetooth uses the frequency of 2.45 GHz. WLan, microwave oven and other devices that
use the same frequency can disturb the use of a Bluetooth headset.
A.16.2 Operation Area
Maximum distance between the headset and the telephone is 10 metre according to
standard 1.2. The communication distance between the handset and headset may vary
considerably due to the environment and disturbances from other 2.45 GHz equipment.
Different headsets can also give different communication distances.
A.16.3 Out of Range
If a connection can not be made with the connected Bluetooth headset the call is
transferred automatically to the telephone.
If the Bluetooth headset and the telephone get out of range from each other the
connection is temporarily lost. The connection is automatically established again when a
call is made or received.
A.17 Environmental Requirements
A.17.1 Bluetooth headset Battery
See the manual for the Bluetooth headset.
2006-05-24/ Ver. C
42
User Manual
OfficeM Cordless Telephone
TD 92288GB
A.17.2 Bluetooth Module
Dispose of properly.
A.18 Maintenance
A.18.1 Replace the battery
Carefully remove the Bluetooth Module from the battery. See 12.1 Replace the Battery on
page 35 and fasten the Bluetooth Module. See A.3 Installation on page 37.
IMPORTANT: Do not disconnect the Bluetooth Module unless it needs to be replaced.
A.18.2 Replace the Bluetooth Module
The Bluetooth Module is not reparable. Dispose of properly.
Note: Replace the battery if the battery case is damaged when the Bluetooth module is
removed.
A.19 Trouble Shooting
Problem
Reason
Solution
No headset found
Headset is turned off
Turn on headset
Headset is out of battery Charge headset
Pairing fails
Headset is out of range
Move headset closer to phone
Headset is not in pairing
mode
Turn headset into pairing/
discoverable mode (see headset
manual for details)
Headset is not in pairing/ Turn headset into pairing/
discoverable mode
discoverable mode (see headset
manual for details)
Incorrect PIN entered
Try again and enter correct PIN (see
headset manual for details)
Connecting fails/Failed to Headset is not turned on Turn on headset
connect headset
Headset is out of range
Move headset closer to phone
Link key in headset has
been deleted
Repeat pairing procedure
Headset is already
connected to another
phone
Disconnect headset from the other
phone
Too close to a WLAN area Shut down WLAN equipment
and headset is not
supporting Bluetooth
standard v1.2
2006-05-24/ Ver. C
43
User Manual
OfficeM Cordless Telephone
TD 92288GB
Headset can not connect Phone is not turned on
to phone (see headset
manual for details on
how to connect)
Turn on phone
Phone is out of range
Move phone closer to headset
Bluetooth module is
disabled
Enable Bluetooth chip in Bluetooth
menu
Another headset is
Disconnect the connected headset
already connected to the
phone
Link key is missing in
Repeat pairing procedure
either headset or phone.
Too close to a WLAN area Shut down WLAN equipment
and headset is not
supporting Bluetooth
standard v1.2
* Refer to the Manual for the Bluetooth headset.
2006-05-24/ Ver. C
44
User Manual
OfficeM Cordless Telephone
TD 92288GB
Index
I
Numerics
IC requirements .............................................. 5
Icons ............................................................ 11
3rd party ................................................. 12, 25
L
A
Antenna.......................................................... 8
Loudspeaker ............................................. 8, 13
Loudspeaking ................................... 11, 16–17
B
M
Battery ...................................................... 8, 35
low battery ........................................ 11, 35
Bluetooth Headset Module............................ 37
Manual acknowledge ................................... 19
Menu Key..................................................... 13
Menu tabs .................................................... 12
Message
confirm message ..................................... 11
new message .................................... 11, 18
old message ............................................ 11
voice message ......................................... 11
Microphone.................................................... 8
Microphone muted................................. 11, 17
Mute button................................................. 13
C
C (Clear) button ............................................ 13
Call diversion................................................. 27
add a new entry....................................... 27
deactivate the divert setting ..................... 28
edit an entry ............................................ 27
remove an entry....................................... 27
Call info ............................................ 11–12, 23
Call service ........................................ 12, 23, 27
Call waiting............................................. 12, 26
Calling
answered call ........................................... 11
call a number from the call list ................. 16
call by a name in the phonebook ............. 16
dial a number........................................... 16
missed call ............................................... 11
outgoing call............................................ 11
quick call by a name in the phonebook .... 16
redirected call .......................................... 11
Case ............................................................... 8
Centralized phonebook ................................. 20
Chemical resistance......................................... 3
Clip ................................................................. 8
Company phonebook.................................... 20
Confirm ........................................................ 19
D
Datacable...................................................... 11
Delete a Text Message................................... 18
Display ............................................................ 8
DTMF ...................................................... 17–18
long DTMF ............................................... 17
short DTMF .............................................. 18
E
Earpiece .......................................................... 8
Enable Bluetooth........................................... 40
Enter/Exit the menu....................................... 21
Exposure to radio frequency signals................. 4
F
N
Navigation Key ............................................. 13
Navigation key.............................................. 21
Number input mode ..................................... 14
O
Off hook ........................................................ 9
call duration time .................................... 10
redirected caller identity .......................... 10
redirected line information ...................... 10
On/Off button .............................................. 13
Ongoing call ........................................... 12, 25
Operating Area............................................. 34
Out of Coverage........................................... 34
P
Personal phonebook ..................................... 19
PIN code ................................................. 30–31
R
R/Message Key ............................................. 13
Read a Stored Text Message ......................... 18
Reply to a Text Message ............................... 18
Ring signal muted................................... 11, 17
S
Search phonebook ....................................... 12
Signal strength ............................................. 11
Special characters ......................................... 18
Standby mode ................................................ 9
date .......................................................... 9
network name........................................... 9
time .......................................................... 9
user identity .............................................. 9
FCC ............................................................ 4–5
FCC requirements ........................................... 5
Forward a Text Message................................ 19
T
G
User busy ............................................... 12, 26
GAP .............................................................. 32
H
Handsfree ..................................................... 17
Handsfree key ........................................... 7, 13
Headset connector ...................................... 7–8
2006-05-24/ Ver. C
Text input mode ........................................... 14
U
V
VAA-routine (Voice Activated Assistance)...... 13
verified Bluetooth headsets........................... 39
Volume ........................................................ 17
45
User Manual
OfficeM Cordless Telephone
TD 92288GB
W
Warrenty notification ...................................... 6
Writing Text/Numbers
add space in text...................................... 14
delete a character .................................... 14
delete all characters ................................. 14
enter “+” in number................................ 14
pause....................................................... 14
upper/lower case...................................... 14
2006-05-24/ Ver. C
46