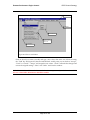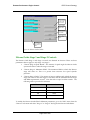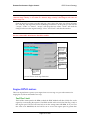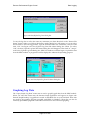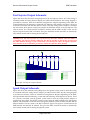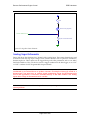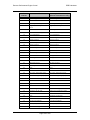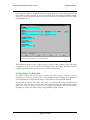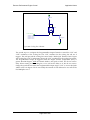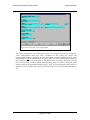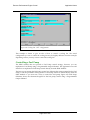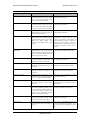
1
Extreme Performance Engine Control M-12650-C80 M-12650-C81 Ford Motor Company Copyright © 1994-1997 General Systems Research Extreme Performance Engine Control Table of Contents Topic______________________________________________________________ Page Getting Started________________________________________________________10 Thank You________________________________________________________________ 11 EPEC System Overview ____________________________________________________ 11 Off-Highway or Racing Use Warning________________________________________ 12 No Parts Warranty _________________________________________________________ 12 What You Need to Use the EPEC System _____________________________________ 12 Computer Requirements for EPEC Software _________________________________________12 Vehicle Applications _____________________________________________________________13 + EPEC Kit Contents ______________________________________________________ 13 < Installing EPEC for Windows Software____________________________________ 13 Starting and Quitting EPEC for Windows Software ___________________________ 14 Starting EPEC for Windows _______________________________________________________14 Quitting EPEC for Windows ______________________________________________________14 EPEC for Windows License Agreement ______________________________________ 16 EPEC System Registration ________________________________________________________17 EPEC System Problem/Suggestion Report __________________________________________18 Additional EPEC System Items _____________________________________________ 19 Low Impedance Injector Drivers ___________________________________________________19 EPEC User Manual ______________________________________________________________20 Serial Interface Cables ____________________________________________________________21 EPEC for Windows ____________________________________________________23 EPEC for Windows a Closer Look ___________________________________________ 24 EPEC for Windows Desktop ________________________________________________ 24 EPEC for Windows Main Menu ___________________________________________________24 EPEC for Windows Status Bar _____________________________________________________25 File Menu ________________________________________________________________ 26 Open Calibration… ______________________________________________________________26 Save Calibration… _______________________________________________________________27 Save Calibration As… ____________________________________________________________28 Close Calibration ________________________________________________________________26 Delete Calibration… _____________________________________________________________29 Export Calibration _______________________________________________________________30 Import Calibration _______________________________________________________________31 Exit ____________________________________________________________________________32 Edit Menu ________________________________________________________________ 32 Data Acquisition Menu ____________________________________________________ 33 Data Logging Menu _______________________________________________________ 34 Tools Menu_______________________________________________________________ 34 Options Menu ____________________________________________________________ 35 Communications ________________________________________________________________36 Page 2 of 198 Extreme Performance Engine Control Units___________________________________________________________________________36 Window Menu ____________________________________________________________ 36 Help Menu _______________________________________________________________ 37 EPEC Control Strategy _________________________________________________40 Fuel Strategy______________________________________________________________ 41 Base Fuel (Idle, Part Throttle, WOT Air/Fuel Ratio) __________________________________46 Fuel Modifiers __________________________________________________________________48 Air Charge Temperature (ACT) Fuel _______________________________________________48 Engine Coolant Temperature (ECT) Fuel ____________________________________________50 Throttle Position (TP) Fuel ________________________________________________________52 Manifold Absolute Pressure (MAP) Fuel ____________________________________________54 Cranking Fuel___________________________________________________________________56 Injector Offset ___________________________________________________________________58 Transitional Fuel Enrichment (TFE) ________________________________________________60 Transitional Fuel Enrichment TP Multiplier _________________________________________62 Programmable Output 0-3 Fuel Multipliers__________________________________________64 Analog Channel 0-2 Fuel Multipliers _______________________________________________66 Spark Strategy ____________________________________________________________ 69 Idle Spark Advance ______________________________________________________________74 Part Throttle Spark Advance ______________________________________________________76 WOT Spark Advance_____________________________________________________________78 Air Charge Temperature (ACT) Spark ______________________________________________80 Boost Retard ____________________________________________________________________82 Engine Coolant Temperature (ECT) Spark___________________________________________84 Manifold Absolute Pressure (MAP) Spark___________________________________________86 Nitrous Oxide Spark Retard_______________________________________________________88 Throttle Position (TP) Spark _______________________________________________________90 Programmable Output Channel 0-3 Spark___________________________________________92 Analog Channel 0-2 Spark ________________________________________________________94 Nitrous Oxide Strategy_____________________________________________________ 96 Nitrous Oxide Globals____________________________________________________________98 Nitrous Oxide Stage 1 and Stage 2 Controls ________________________________________100 Engine RPM Limiters _____________________________________________________ 101 Fuel Rev Limit _________________________________________________________________101 Spark Rev Limit ________________________________________________________________102 Stage Rev Limit ________________________________________________________________102 Manual Fuel/Spark Control________________________________________________ 104 Engine Configuration _____________________________________________________ 106 Input/Output Configuration _______________________________________________ 109 ACT Transfer Function __________________________________________________________109 ECT Transfer Function __________________________________________________________111 MAF Transfer Function__________________________________________________________113 MAP Transfer Function__________________________________________________________115 TP Transfer Function ____________________________________________________________117 TP Sensor Configuration_________________________________________________________120 PIP Configuration ______________________________________________________________123 Spark Output (SPOUT) Configuration _____________________________________________126 Module Configuration ____________________________________________________ 128 Page 3 of 198 Extreme Performance Engine Control Programmable Output Channels 0 - 3_______________________________________ 130 Data Acquisition _____________________________________________________139 Data Acquisition Overview _______________________________________________ 140 Creating a New Acquisition Set ____________________________________________ 140 Opening a Stored Acquisition Set __________________________________________ 142 Deleting an Acquisition Set _______________________________________________ 142 Viewing the Data Acquisition Window _____________________________________ 143 Data Logging ________________________________________________________145 Data Logging Overview ___________________________________________________ 146 New Log Set… ___________________________________________________________ 146 Open Log Set… __________________________________________________________ 149 Delete Log Set… _________________________________________________________ 150 New/Upload Log Data ____________________________________________________ 151 Graphing Log Data _______________________________________________________ 152 Opening Log Data Files__________________________________________________________153 EPEC Hardware ______________________________________________________156 Fuel Injector Output Schematic ____________________________________________ 157 Spark Output Schematic __________________________________________________ 157 Programmable Output Schematic __________________________________________ 158 Nitrous Controls Schematic _______________________________________________ 159 Data Logging Schematic __________________________________________________ 160 TP Sensor Schematic______________________________________________________ 161 MAP Sensor Schematic ___________________________________________________ 162 ACT Sensor Schematic ____________________________________________________ 162 ECT Sensor Schematic ____________________________________________________ 163 MAF Sensor Schematic ___________________________________________________ 163 Stage Rev Limiter Schematic ______________________________________________ 164 Analog Input Schematic___________________________________________________ 165 Computer Interface Schematic _____________________________________________ 166 Power/Ground Schematic _________________________________________________ 166 EPEC Module Pin Assignments ____________________________________________ 167 EEC-IV Module Pin Assignments __________________________________________ 169 1988-1993 5.0L EPEC Adapter Harness Schematic ____________________________ 171 1994-1995 5.0L EPEC Adapter Harness Schematic ____________________________ 172 Application Notes ____________________________________________________175 Programmable Output Application Notes ___________________________________ 176 Adding an Additional Nitrous Oxide Stage ________________________________________176 Controlling Shift Lamp __________________________________________________________178 Controlling a Cooling Fan________________________________________________________180 Controlling a Fuel Pump_________________________________________________________183 Page 4 of 198 Extreme Performance Engine Control Acronyms and Terms __________________________________________________186 Acronyms _______________________________________________________________ 187 EPEC Parameters and Terms _______________________________________________ 187 User Notes___________________________________________________________197 Your Notes ______________________________________________________________ 197 Page 5 of 198 Extreme Performance Engine Control Table of Figures Figure _____________________________________________________________ Page Figure 1: EPEC System Block Diagram____________________________________________________12 Figure 2: Setup Program Invocation ______________________________________________________14 Figure 3: EPEC Desktop _______________________________________________________________25 Figure 4: File Menu ___________________________________________________________________26 Figure 5: Open Calibration Dialog Box ___________________________________________________27 Figure 6: Save Calibration Dialog Box ____________________________________________________28 Figure 7: Save Calibration As… Dialog Box ________________________________________________29 Figure 8: Delete Calibration Dialog Box___________________________________________________30 Figure 9: Export Calibration Dialog Box __________________________________________________30 Figure 10: Export Calibration Save Dialog Box _____________________________________________31 Figure 11: Import Calibration Dialog Box _________________________________________________31 Figure 12: Import Calibration Save Dialog Box _____________________________________________32 Figure 13: Edit Menu __________________________________________________________________33 Figure 14: Data Acquisition Menu________________________________________________________33 Figure 15: Data Logging Menu __________________________________________________________34 Figure 16: Tools Menu _________________________________________________________________35 Figure 17: Options Menu _______________________________________________________________35 Figure 18: Communication Configuration Dialog Box ________________________________________36 Figure 19: Window Menu_______________________________________________________________37 Figure 20: Help Menu _________________________________________________________________38 Figure 21: Fuel Strategy Block Diagram___________________________________________________44 Figure 22: Idle/Part/WOT Fuel Strategy Diagram ___________________________________________46 Figure 23: Idle/Part/WOT Fuel Menu _____________________________________________________46 Figure 24: Idle - RPM Air/Fuel Function __________________________________________________48 Figure 25: ACT Fuel Strategy Diagram____________________________________________________49 Figure 26: ACT Fuel Menu _____________________________________________________________49 Figure 27: ACT Fuel Function___________________________________________________________50 Figure 28: ECT Fuel Strategy Diagram____________________________________________________50 Figure 29: ECT Fuel Menu _____________________________________________________________51 Figure 30: ECT Fuel Function___________________________________________________________52 Figure 31: TP Fuel Strategy Diagram _____________________________________________________52 Figure 32: TP Fuel Menu_______________________________________________________________53 Figure 33: TP Fuel Function ____________________________________________________________54 Figure 34: MAP Fuel Strategy Diagram ___________________________________________________54 Figure 35: MAP Fuel Menu _____________________________________________________________55 Figure 36: MAP Fuel Function __________________________________________________________56 Figure 37: Cranking Fuel Strategy Diagram ________________________________________________56 Figure 38: Cranking Fuel Menu _________________________________________________________57 Figure 39: Cranking Fuel Function _______________________________________________________58 Figure 40: Injector Offset Fuel Strategy Diagram ____________________________________________59 Figure 41: Injector Offset Fuel Menu _____________________________________________________59 Figure 42: Injector Offset Function _______________________________________________________60 Figure 43: Base Transitional Fuel Strategy Diagram _________________________________________61 Figure 44: Transitional Fuel Enrichment Menu _____________________________________________61 Figure 45: Base Transitional Fuel Enrichment Function ______________________________________62 Figure 46: Transitional Fuel Enrichment TP Multiplier Strategy Diagram ________________________63 Figure 47: Transitional Fuel Enrichment TP Multiplier Menu __________________________________63 Figure 48: Transitional Fuel Enrichment TP Multiplier Function _______________________________64 Page 6 of 198 Extreme Performance Engine Control Figure 49: Programmable Output Channel 0 -3 Menu ________________________________________65 Figure 50: Programmable Output 0-4 Fuel Function _________________________________________66 Figure 51: Analog Channel 0-2 Fuel Strategy Diagram _______________________________________66 Figure 52: Analog Channel 0 - 2 Fuel Menu ________________________________________________67 Figure 53: Analog Channel 0-3 Fuel Function ______________________________________________68 Figure 54: Spark Strategy Block Diagram__________________________________________________72 Figure 55: Idle/Part Throttle/WOT Spark Strategy Diagram ___________________________________74 Figure 56: Idle Spark Menu _____________________________________________________________75 Figure 57: Idle - RPM Spark Advance Function _____________________________________________76 Figure 58: Idle/Part Throttle/WOT Spark Strategy Diagram ___________________________________76 Figure 59: Part Throttle Spark Menu______________________________________________________77 Figure 60: Part Throttle - RPM Spark Advance Function ______________________________________78 Figure 61: Idle/Part Throttle/WOT Spark Strategy Diagram ___________________________________78 Figure 62: WOT Spark Menu ____________________________________________________________79 Figure 63: Wide Open Throttle - RPM Spark Advance Function ________________________________80 Figure 64: ACT Spark Strategy Diagram___________________________________________________80 Figure 65: ACT Spark Menu ____________________________________________________________81 Figure 66: ACT Spark Advance Function __________________________________________________82 Figure 67: Boost Retard Spark Strategy Diagram ____________________________________________82 Figure 68: Boost Retard Spark Menu______________________________________________________83 Figure 69: Boost Retard Function ________________________________________________________84 Figure 70: ECT Spark Strategy Diagram___________________________________________________85 Figure 71: ECT Spark Menu ____________________________________________________________85 Figure 72: ECT Spark Advance Function __________________________________________________86 Figure 73: MAP Spark Strategy Diagram __________________________________________________87 Figure 74: MAP Spark Menu ____________________________________________________________87 Figure 75: MAP Spark Advance Function __________________________________________________88 Figure 76: Nitrous Spark Menu __________________________________________________________89 Figure 77: Nitrous Spark Retard Values ___________________________________________________90 Figure 78: TP Spark Strategy Diagram ____________________________________________________90 Figure 79: TP Spark Menu______________________________________________________________91 Figure 80: TP Spark Advance Function____________________________________________________92 Figure 81: Programmable Output Spark Menu ______________________________________________93 Figure 82: Programmable Output 0-4 Spark Function ________________________________________94 Figure 83: Analog Channel 0-2 Spark Strategy Diagram ______________________________________94 Figure 84: Analog Channel 0 -2 Spark Menu _______________________________________________95 Figure 85: Analog Channel 0-3 Spark Function _____________________________________________96 Figure 86: Nitrous Oxide Menu __________________________________________________________99 Figure 87: Nitrous Oxide Globals _______________________________________________________100 Figure 88: Nitrous Oxide Stage Parameters _______________________________________________101 Figure 89: Engine RPM Limits Menu ____________________________________________________103 Figure 90: Engine RPM Limiter Parameters _______________________________________________104 Figure 91: Manual Fuel/Spark Control Menu ______________________________________________105 Figure 92: Manual Fuel/Spark Control ___________________________________________________106 Figure 93: Engine Configuration Menu ___________________________________________________107 Figure 94: Engine Configuration ________________________________________________________108 Figure 95: ACT Sensor Strategy Block Diagram ____________________________________________109 Figure 96: ACT Transfer Function Menu__________________________________________________110 Figure 97: ACT Sensor Transfer Function_________________________________________________111 Figure 98: ECT Sensor Strategy Block Diagram ____________________________________________111 Figure 99: ECT Transfer Function Menu__________________________________________________112 Figure 100: ECT Sensor Transfer Function________________________________________________113 Figure 101: MAF Sensor Strategy Block Diagram __________________________________________114 Figure 102: MAF Transfer Function Menu ________________________________________________114 Page 7 of 198 Extreme Performance Engine Control Figure 103: MAF Sensor Transfer Function _______________________________________________115 Figure 104: MAP Sensor Strategy Block Diagram __________________________________________116 Figure 105: MAP Transfer Function Menu ________________________________________________116 Figure 106: MAP Sensor Transfer Function _______________________________________________117 Figure 107: TP Sensor Strategy Block Diagram ____________________________________________118 Figure 108: TP Sensor Transfer Function Menu ____________________________________________119 Figure 109: TP Sensor Transfer Function _________________________________________________120 Figure 110: TP Sensor Strategy Block Diagram ____________________________________________121 Figure 111: Throttle Modes ____________________________________________________________122 Figure 112: TP Sensor Configuration Menu _______________________________________________122 Figure 113: TP Sensor Configuration ____________________________________________________123 Figure 114: PIP Strategy Block Diagram _________________________________________________124 Figure 115: PIP Configuration Menu ____________________________________________________125 Figure 116: PIP Configuration _________________________________________________________126 Figure 117: SPOUT Output Configuration Menu ___________________________________________127 Figure 118: Spark Output Configuration __________________________________________________128 Figure 119: Module Configuration Menu _________________________________________________129 Figure 120: Module Configuration ______________________________________________________130 Figure 121: Programmable Output 0-4 Menu ______________________________________________133 Figure 122: Programmable Output Channels 0-4 ON Conditions ______________________________134 Figure 123: Programmable Output Channels 0-4 OFF Conditions _____________________________135 Figure 124: Data Acquisition Menu______________________________________________________140 Figure 125: New Acquisition Set Dialog Box_______________________________________________142 Figure 126: Save Acquisition Set Dialog Box ______________________________________________142 Figure 127: Open Acquisition Set Dialog Box ______________________________________________142 Figure 128: Delete Acquisition Set Dialog Box _____________________________________________143 Figure 129: Delete Acquisition Confirmation ______________________________________________143 Figure 130: Data Acquisition Window____________________________________________________144 Figure 131: Data Logging Menu ________________________________________________________146 Figure 132: New Data Log Set Dialog Box (Log Parameters) _________________________________147 Figure 133: New Data Log Set Dialog Box (Log Trigger)_____________________________________148 Figure 134: Save Log Set Dialog Box ____________________________________________________149 Figure 135: Open Log Set Dialog Box____________________________________________________150 Figure 136: Delete Log Set Dialog Box ___________________________________________________151 Figure 137: Delete Log Set Confirmation _________________________________________________151 Figure 138: New/Upload Log Data Dialog Box ____________________________________________152 Figure 139: New/Upload Log Data File Name Dialog Box____________________________________152 Figure 140: Extreme Graph Desktop _____________________________________________________153 Figure 141: Open Log Data Dialog Box __________________________________________________153 Figure 142: Log Data Selection Dialog Box _______________________________________________154 Figure 143: Data Logging Graph _______________________________________________________155 Figure 144: Fuel Injector Output Schematic _______________________________________________157 Figure 145: Ignition System Schematic ___________________________________________________158 Figure 146: Programmable Output Schematic with a Relay ___________________________________159 Figure 147: Programmable Output Schematic without relay __________________________________159 Figure 148: Nitrous Controls Schematic Diagram __________________________________________160 Figure 149: Data Logging Schematic ____________________________________________________161 Figure 150: TP Sensor Schematic Diagram________________________________________________161 Figure 151: MAP Sensor Schematic______________________________________________________162 Figure 152: ACT Sensor Schematic ______________________________________________________163 Figure 153: ECT Sensor Schematic ______________________________________________________163 Figure 154: MAF Sensor Schematic______________________________________________________164 Figure 155: Stage Rev Limit Schematic ___________________________________________________165 Figure 156: Analog Input Schematic _____________________________________________________166 Page 8 of 198 Extreme Performance Engine Control Figure 157: Computer Interface Schematic ________________________________________________166 Figure 158: Power/Ground Schematic____________________________________________________167 Figure 159: 1988-1993 5.0L Mustang Adapter Harness Schematic _____________________________172 Figure 160: 1994-1995 5.0L Mustang Adapter Harness Schematic _____________________________173 Figure 161: Programmable Output Nitrous Oxide Schematic __________________________________176 Figure 162: Programmable Output “ON” Nitrous Configuration ______________________________177 Figure 163: Programmable Output “OFF” Nitrous Configuration _____________________________178 Figure 164: Shift Lamp Schematic _______________________________________________________179 Figure 165: Shift Lamp “ON” Configuration ______________________________________________179 Figure 166: Shift Lamp “OFF” Configuration _____________________________________________180 Figure 167: Cooling Fan Schematic _____________________________________________________181 Figure 168: Cooling Fan “ON” Configuration _____________________________________________182 Figure 169: Cooling Fan “OFF” Configuration ____________________________________________183 Figure 170: Fuel Pump Schematic_______________________________________________________184 Figure 171: Fuel Pump “ON” Configuration ______________________________________________184 Figure 172: Fuel Pump “OFF” Configuration _____________________________________________185 Page 9 of 198 Getting Started In This Chapter Thank You EPEC System Overview Off-Highway or Racing Use Warning No Parts Warranty What You Need to Use the EPEC System Computer Requirements for EPEC Software Vehicle Applications + EPEC Kit Contents < Installing EPEC for Windows Software Starting and Quitting EPEC for Windows Software Starting EPEC for Windows Quitting EPEC for Windows EPEC for Windows License Agreement EPEC System Registration EPEC System Problem/Suggestion Report Additional EPEC System Items Low Impedance Injector Drivers EPEC User Manual Serial Interface Cables Extreme Performance Engine Control Getting Started Thank You Ford Motorsport SVO and General Systems Research is very proud of the Extreme Performance Engine Control System (EPEC). We believe that with the flexibility and power, the EPEC System can give you hours of hot rodding enjoyment and gratification. The EPEC System is the most sophisticated aftermarket engine control systems available today, and with its ease of use, will put the power of calibration into your hands – exactly where you want it to be. With only basic knowledge of Microsoft Windows and engine control you should be up and running in no time at all. We have supplied some default calibrations to get you started. These will only get you started and running, the rest is up to you. Calibrate the EPEC any way your engine operates the best, that is why we designed it. So if your ready, lets go make some HORSEPOWER!! Happy calibrating – Enjoy. IMPORTANT: We STRONGLY recommend that you read this manual from front to back and be sure you understand all aspects of the EPEC system before installing the EPEC system in your vehicle. You must understand the operation of the EPEC system or you can get yourself into trouble and the system will not perform as you expect. EPEC System Overview The EPEC system consists of several major components delivered with you kit. The EPEC system has the EPEC Module, an Adapter Harness, an Auxiliary Harness and a PC Serial Interface Cable. The EPEC system is supplied as a piggy back system to the EEC-IV system, however, if your system requires a standalone type of operation, the EPEC system can also fit your needs. The EPEC module connects to the EEC-IV system through an adapter harness. This adapter harness is a “T” type harness that uses both the EEC-IV module and the EPEC module to control the powertrain the engine. You can calibrate exactly when the EEC-IV module is controlling the engine or the EPEC module is controlling the engine. This piggy back arrangement gives you the greatest flexibility and allow you to only control or modify the fuel or spark delivery where you see fit. The EPEC adapter harness connects the EPEC and EEC-IV modules to the engine sensors and actuators in such a way that the EPEC module can decide which module is to perform the controlling functions, for more information on the wiring harness schematics see the EPEC Hardware chapter. A small pig tail wiring harness is also supplied with the EPEC system. This is for all the auxiliary functions that are supported within the production Ford wiring harness, such as nitrous oxide controls, analog inputs, programmable outputs, etc. The EPEC module communicates with the EPEC for Windows software through a serial port on your PC. Through this link, the EPEC system provides all the calibration, data acquisition and data logging functionality. The EPEC for Windows software is your “window” or “view” inside of the EPEC module. The EPEC system is a very flexible control system and its specific operation is entirely up to you. Figure 1: EPEC System Block Diagram shows a block diagram of the EPEC system and its connections to the EEC-IV system. In the next chapters of this book, we will take you through the EPEC for Windows user interface, EPEC Module Strategy, Data Acquisition, Data Logging and all the different calibration parameters that are contained within the EPEC module. So if you are ready, lets take a journey into the EPEC world of engine control. Page 11 of 198 Extreme Performance Engine Control Getting Started 24 24 32 32 To EPEC Auxiliary Functions EPEC Module To PC 9 EEC-IV 60 60 60 60 EPEC Adapter Harness To Engine Vehicle Wiring Harness Figure 1: EPEC System Block Diagram Off-Highway or Racing Use Warning Because US, Canadian, state or provincial laws and regulations may prohibit removal or modification of components that were installed on vehicles by Ford Motor Company to meet emission requirements or to comply with motor vehicle safety regulations applicable to vehicles manufactured for use on public roads, Ford Motor Company recommends that vehicles equipped with parts designated “for off-highway use” not be operated on public roads and offers such parts only for track or off-highway competitive or performance use. Such parts have a special “warning” label which reads: This part has been designated and is intended for off-highway applications only. Installation on a vehicle intended for use on public roads may violate US, Canadian, state or provincial laws and regulations including those relating to emission requirements and motor vehicle safety standards. (NOTE: In California this part may legally be used only on a racing vehicle which will never be operated on public roads.) In addition, installation of this part may adversely affect the warranty coverage on you vehicle. No Parts Warranty Competition parts are sold “as is” without any warranty whatsoever. Implied warranties, including warranties of merchantability or fitness for a particular purpose, are excluded. The entire risk as to the quality and performance of such parts is with the buyer. Should such parts prove defective following their purchase, the buyer and not the manufacturer, distributor or retailer, assumes the entire cost of all necessary servicing or repair. Ford Motor Company vehicle and parts warranties are voided if the vehicle or part is used for competition or if they fail as a result of modification. What You Need to Use the EPEC System Computer Requirements for EPEC Software To use the EPEC Calibration Software for Windows, you need: 7 Any IBM-compatible machine with a 80486-66 processor or higher. Page 12 of 198 Extreme Performance Engine Control Getting Started Microsoft Windows operating system V3.1, V3.11 or Windows 95. A 3.5-inch floppy disk drive. A hard disk with at least 25 MB of free disk space. At least 8 megabytes of RAM, 16 megabytes is recommended, but the more you have the better. 8 A mouse type pointing device is optional, however it is much easier to navigate with a mouse. • A printer is optional. ÿ < < • Vehicle Applications The EPEC Module is compatible with: • • • • 1986 - 1988 5.0L Mustang with Ford Motorsport SVO Mass Air Conversion Kit. 1989 - 1993 5.0L Mustang. 1994 - 1995 5.0L Mustang. Any vehicle that conforms to the Mustang engine control specifications. + EPEC Kit Contents Before you install the EPEC Module, unpack all of the contents. The kit should include the following components: 1. EPEC Module. 2. EPEC for Windows Calibration Software. 3. Vehicle adapter wiring harness. Note be sure you have the correct kit for your vehicle. 1988-1993 Mustang: M-12650-A50, 1994-1995 Mustang: M-12650-A51. 4. 9 pin interface cable. 5. 24 pin accessory connector. < Installing EPEC for Windows Software Before you install the EPEC Calibration software, you may want to create a backup copy of the installation disks. The license agreement allows you to make one backup copy. The license agreement also allows you to install EPEC on another computer, such as a laptop computer, provided that you are the computer’s primary user and that you use only one copy of the EPEC software at a time. For more information, see your EPEC license agreement. IMPORTANT: The EPEC software installation program may not require all disks supplied with EPEC for Windows. Which disks are specifically used depends on the version of MSWindows you are running. IMPORTANT: If you use a virus protection program on your computer, override it or turn it off before you run the EPEC Setup Program. EPEC Setup may not run properly with virus protection turned on. After running Setup, be sure to restart your virus protection program. „ To Install EPEC for Windows 1. Restart your computer. 2. Start Microsoft Windows (either Windows 95 or Windows 3.1x) 3. Insert the disk labeled “Disk 1 - Setup” in drive A. 4. From the File menu in the Program Manager, Choose Run. Page 13 of 198 Extreme Performance Engine Control 5. 6. 7. Getting Started Type a:\setup (See Figure 2: Setup Program Invocation) Press ENTER. Follow the Setup instructions on the screen. Figure 2: Setup Program Invocation You must install the Acrobat Reader to obtain access to the on line help. This is done the first time you run EPEC for Windows. If you do not currently have the Acrobat Reader installed, EPEC for windows will install it for you. If the Acrobat installation program starts, follow the directions on the screen. Starting and Quitting EPEC for Windows Software Starting EPEC for Windows 1. In Windows 3.1 or 3.11, open the program group Ford Motorsport Extreme Performance. 2. Double-click the Ford Motorsport EPEC icon. - OR 1. In Windows 95, click the Start button on the Task Bar. 2. Click the Programs menu. 3. Select the Ford Motorsport EPEC menu item 4. Select the Ford Motorsport EPEC program item. For information about using your computer’s operating system or the mouse, see your Windows system documentation. Once you’ve started EPEC for Windows, the EPEC desktop will appear after the program loads. This is your interface to the EPEC Control Module. All calibration, configuration, logging etc. will be performed by using the EPEC menu. Quitting EPEC for Windows 1. Select the File Menu on the EPEC desktop menu. 2. Select the “Exit” menu item. -ORPage 14 of 198 Extreme Performance Engine Control 1. Getting Started Hit the “x” key while holding down the “ctrl” key <ctrl-x>. Page 15 of 198 Extreme Performance Engine Control Getting Started EPEC for Windows License Agreement Authorized Licenses: 1 IMPORTANT-READ CAREFULLY: By opening the sealed packet(s) OR exercising your rights to make and use copies of the SOFTWARE (as may be provided for below), you agree to be bound by the terms of this General Systems Research License Agreement. If you do not agree to the terms of this agreement, promptly return this kit to the place from which you obtained it for a full refund. General Systems Research License 1. GRANT OF LICENSE. General Systems Research grants you the right to use the enclosed General Systems Research software product, which includes “online” or electronic documents (the “SOFTWARE”), in the manner provided below. General Systems Research grants to you as an individual, a personal, nonexclusive license to make and use copies of the SOFTWARE for the sole purposes of managing, designing, developing, and testing your system. You may install copies of the SOFTWARE on an unlimited number of computers provided that you are the only individual using the SOFTWARE. If you are an entity, General Systems Research grants you the right to designate one individual within your organization to have the right to use the SOFTWARE in the manner described above. If this is a License Pack, General Systems Research grants you the right to designate as many individuals as the primary user of the SOFTWARE as described in this section, up to the number of individual licenses authorized above. 2. UPGRADES. If the SOFTWARE is an upgrade, whether from General Systems Research or another supplier, you may use or transfer the SOFTWARE only in conjunction with the upgraded product. If the SOFTWARE is an upgrade from a General Systems Research product, you may now use that upgraded product only in accordance with this license agreement. 3. COPYRIGHT. The SOFTWARE (including images, “applets”, photographs, animation’s, video, audio, music and text incorporated into the SOFTWARE) is owned by General Systems Research and protected by United States copyright laws and international treaty provisions. Therefore, you must treat the SOFTWARE like any other copyrighted material (e.g. a book or musical recording) except that you either (a) make one copy of the SOFTWARE solely for backup or archival purposes, or (b) transfer the SOFTWARE to a single hard disk provided you keep the original solely for backup purposes. You may not copy the printed materials accompanying the SOFTWARE. 4. OTHER RESITRICTIONS. You may rent or lease the SOFTWARE, but you may transfer the SOFTWARE and user documentation on a permanent basis provided you retain no copies and the recipient agrees to the terms of this license agreement. You may NOT reverse engineer, decompile, or disassemble the SOFTWARE except to the extent such foregoing restriction is expressly prohibited by applicable law. Page 16 of 198 Extreme Performance Engine Control Getting Started EPEC System Registration If you would like to be notified of future updates to the EPEC system, such as EPEC for Windows upgrades, Module upgrades etc., fill out the registration form below and we will be happy to send you any future information on the EPEC system. EPEC System Registration (97EM-6000-AA) To: General Systems Research EPEC System Registration PO Box 604 Dearborn, MI 48128 From: First Name MI Last Name Company Address City Phone ( Store/Reseller Name ) EPEC for Windows Software Version (Found in “Help - About”) EPEC Module Software Version (Found in “Help - About”) Describe your application Page 17 of 198 State Extreme Performance Engine Control Getting Started EPEC System Problem/Suggestion Report The EPEC System, both hardware and software, has been extensively tested under most conditions. However, if you believe the system is not functioning properly for any reason, or if you have a suggestion for the EPEC system, please fill out the Bug/Suggestion Form below in as much detail as possible. Please include any steps taken to re-create the bug and send it to us. We would love to hear from you. EPEC Bug Report/Suggestion Form To: General Systems Research EPEC Bug Report PO Box 604 Dearborn, MI 48128 From: Name: Address: Page 18 of 198 Extreme Performance Engine Control Getting Started Additional EPEC System Items Low Impedance Injector Drivers The EPEC Module as delivered will not support low impedance injectors, these require Peak and Hold type injector drivers. These injector drivers can be installed at an additional cost if your application requires them. If you require peak and hold type injector drivers, fill out the order form, enclose a check for the total amount and ship the EPEC module for the upgrade to the address shown below. EPEC Peak and Hold Driver Order Form To: General Systems Research Peak and Hold Drivers PO Box 604 Dearborn, MI 48128 Quantity Cost Each Total 8 X $15.00 $120.00 Shipping & Handling $10.00 (Allow 2-4 weeks for delivery) Total: From: Name: Address: Page 19 of 198 $130.00 Extreme Performance Engine Control Getting Started EPEC User Manual If you do not have the facility to print a full copy of the EPEC User Manual, a bound copy can be purchased for $75.00 plus $10.00 shipping and handling. If you wish to purchase a copy of the EPEC User Manual fill out the order form below and enclose a check or money order for the proper amount: EPEC User Manual Order Form To: General Systems Research EPEC User Manual PO Box 604 Dearborn, MI 48128 Quantity Cost Each Total X 75.00 Shipping & Handling (Allow 2-4 weeks for delivery) Total: From: Name: Address: Page 20 of 198 $10.00 Extreme Performance Engine Control Getting Started Serial Interface Cables A 6 ft. serial interface cable was supplied with your EPEC kit, however, if you require an extra long cable, one can be custom manufactured to your specific requirements. If you wish to purchase a custom serial interface cable, fill out the order form below and enclose a check or money order for the proper amount: EPEC Serial Cable Order Form To: General Systems Research EPEC Serial Cable PO Box 604 Dearborn, MI 48128 Length Cost per foot Total (Up to 75 ft.) X 2.00 Shipping & Handling (Allow 2-4 weeks for delivery) Total: From: Name: Address: Page 21 of 198 $10.00 Extreme Performance Engine Control Getting Started Page 22 of 198 EPEC for Windows In This Chapter EPEC for Windows a Closer Look EPEC for Windows Desktop EPEC for Windows Main Menu EPEC for Windows Status Bar File Menu Open Calibration… Save Calibration… Save Calibration As… Close Calibration Delete Calibration… Export Calibration Import Calibration Exit Edit Menu Data Acquisition Menu Data Logging Menu Tools Menu Options Menu Communications Units Window Menu Help Menu Extreme Performance Engine Control EPEC for Windows EPEC for Windows a Closer Look The EPEC for Windows software is your interface to the EPEC module. This interface includes the opening of calibrations, calibration editing, data acquisition and data logging. This interface is a very advanced, easy to use interface not found in any other aftermarket engine control system. This chapter will take you through the basics of EPEC for Windows including the menu and navigating your way around the EPEC system. EPEC for Windows is a fully menu driven software package specifically written for Microsoft Windows. It has a very logical menu layout which is easy to understand and navigate through and contains many advanced features not available on any other engine control or calibration system today. EPEC for Windows provides the following advanced features not found in any other calibration system available today: • Easy to use and understand menu system • On screen status bar of calibration and module connection status. • Low battery computer crash protection. • On line Users Manual. • Most advanced calibration editing functions available. • Calibration Revision Control • Calibration Revision Notes. • On Screen Data Acquisition for watching internal EPEC Parameters. • High Speed Data Logging. EPEC for Windows Desktop The desktop is the main window in the EPEC for Windows calibration software. From the desktop, you can access the EPEC module calibration screens, Data Acquisition screens and Data Logging screens. IMPORTANT: If you do not have a mouse, all menus and buttons with an underlined letter such as File can be opened by holding the “Alt” key and pressing the underlined letter, i.e. “Alt-F” for “File”. EPEC for Windows Main Menu Figure 3: EPEC Desktop shows the EPEC desktop. When EPEC for Windows is started the main menu will appear at the top of the desktop window. There are various menu items contained on the EPEC for Windows desktop; File, Edit, Data Acquisition, Data Logging, Tools, Options, Window and Help. All of the EPEC functions can be accessed from these menus including opening calibrations, viewing a data acquisition window and uploading logged data from the EPEC module. Page 24 of 198 Extreme Performance Engine Control EPEC for Windows NOTE: When EPEC for Windows is started, the “EDIT” menu will not appear. The “EDIT” menu will appear when you open a calibration. EPEC for Windows Status Bar The EPEC for Windows status bar is located along the bottom of the desktop window. The status bar is an onscreen display of the currently open calibration and the module connection status. The status bar is split into 4 different areas; the open calibration name is shown on the left of the status bar. The “Connected” button indicates when the EPEC module is connect to the PC, a blank button box means the EPEC for Windows software does see the EPEC module attached to the PC. The “Powered” button indicates when the EPEC module is powered up and ready to communicate, a blank button means the EPEC module is not powered. The “Loaded” button indicates if the current open calibration has been written and verified in the EPEC module, a blank button means that the current calibration has not been verified in the EPEC module. The “Metric” button indicates which units are currently selected, this button will either display “English” or “Metric”. IMPORTANT: Many computers have modems installed. If the EPEC for Windows software is using a comm. port that is connected to a modem, the “Connected” button may appear. Title Bar EPEC Menu Bar Currently Selected Units Calibration Loaded Status Module Powered Status Status Bar Currently Open Calibration Name Module Connected Status Figure 3: EPEC Desktop Page 25 of 198 Extreme Performance Engine Control EPEC for Windows File Menu The File Menu contains the following menu items; “Open Calibration”, “Save Calibration”, “Save Calibration As…”, “Close Calibration”, “Delete Calibration”, “Export Calibration”, “Import Calibration”, “Upload Calibration from Module” and “Exit”. The file menu is shown in Figure 4: File Menu. This menu can be accessed by either clicking on it with the mouse or pressing “Alt-F”. Figure 4: File Menu Open Calibration… The “Open Calibration…” menu item is used to open a previously stored EPEC module calibration. When you select this menu item the “Open Calibration” dialog box will appear see Figure 5: Open Calibration Dialog Box. To open a calibration click on the calibration you want to open in the calibration list, then click on the revision of that calibration you want to open. The current selections should be highlighted, then click on the “Open” button. The “Cancel” button will close the Open Calibration dialog box without opening it. The “Help” button will open the on line help for the Open Calibration dialog box. NOTE: The Open Calibration dialog box can be selected at any time by pressing the control key and pressing “O” (ctrl-O). IMPORTANT: If the EPEC module is connected to the PC when you open a calibration, it WILL be written to the EPEC module. Page 26 of 198 Extreme Performance Engine Control EPEC for Windows NOTE: You can edit the revision comments when you save a calibration or at any time by clicking in the comments box in the Open Calibration dialog box and typing new comments. Calibration Revisions Calibration List Revision Notes "Open" Button "Cancel" Button "Help" Button Figure 5: Open Calibration Dialog Box Save Calibration… The “Save Calibration…” menu item is used to save a new revision of the currently open calibration. When you select this menu item the “Save Calibration” dialog box will appear see Figure 6: Save Calibration Dialog Box. To save a calibration revision, click on the “File” menu and select “Save Calibration”. The “Save New Revision” dialog box will then appear. Type the new name in the “New Revision Name” box. You can enter any notes for the new revision in the “Revision Notes” box (or you can enter them later from the “Open Calibration” dialog box). When you click on the “OK” button, the currently open calibration will be saved as a new revision. IMPORTANT: If the EPEC module is connected to the PC when you open a calibration, it WILL be written to the EPEC module. NOTE: You are not limited to the MS-DOS 8.3 file naming convention, you can enter revision and calibration names up to 32 characters in length. You can include any characters including spaces. Page 27 of 198 Extreme Performance Engine Control EPEC for Windows Figure 6: Save Calibration Dialog Box Save Calibration As… The “Save Calibration As…” menu item is used to save the currently open calibration as a new Calibration and Revision. When you select this menu item the “Save Calibration As…” dialog box will appear see Figure 7: Save Calibration As… Dialog Box. To save a calibration, click on the “File” menu and select “Save Calibration As…”. The “Save Calibration As” dialog box will then appear. Type the new calibration name in the “New Calibration Name” box. Click on the “Initial Revision Name” box and type the new initial revision name. You can enter any notes for the new revision in the “New Calibration Comment” box (or you can enter them later from the “Open Calibration” dialog box). When you click on the “OK” button, the currently open calibration will be saved as a new calibration. IMPORTANT: If the EPEC module is connected to the PC when you open a calibration, it WILL be written to the EPEC module. NOTE: You are not limited to the MS-DOS 8.3 file naming convention, you can enter revision and calibration names up to 32 characters in length. You can include any characters including spaces. Page 28 of 198 Extreme Performance Engine Control EPEC for Windows Figure 7: Save Calibration As… Dialog Box Close Calibration The “Close Calibration” menu item is used to close the currently opened calibration. If you close the calibration and changes have been made, EPEC for windows will warn you that you have made changes and ask if you would like to save the changes. Select “Yes” or “No”. If you select “Yes”, the “Save Calibration” dialog box will appear. Delete Calibration… The “Delete Calibration…” menu item is used to delete stored calibrations. When you select this menu item the “Delete Calibration” dialog box will appear see Figure 8: Delete Calibration Dialog Box. To delete a calibration, click on the calibration you want to delete in the calibration list, then click on the revision of that calibration you want to delete. The current selections should be highlighted, then click on the “Delete” button. The “Cancel” button will close the Delete Calibration dialog box without deleting any calibrations. The “Help” button will open the on line help for the Delete Calibration dialog box. IMPORTANT: If you select a parent calibration that has calibrations below it, the parent calibration along with the calibrations below it WILL be deleted. IMPORTANT: You cannot delete a calibration from the MS-DOS command line, you must use the “Delete Calibration…” menu item. None of the calibrations exist as MS-DOS file names, they are all stored in the “cal.mdb” file. DO NOT FOR ANY REASON DELETE THE “CAL.MDB” FILE. IF YOU DO ALL CALIBRATIONS WILL BE LOST AND THE EPEC FOR WINDOWS SOFTWARE WILL HAVE TO BE REINSTALLED. Page 29 of 198 Extreme Performance Engine Control EPEC for Windows Figure 8: Delete Calibration Dialog Box Export Calibration The “Export Calibration” menu item is used to export a stored calibration to a file. This is used to share calibrations with other people. When you select this menu item the “Export Calibration” dialog box will appear see Figure 9: Export Calibration Dialog Box. To export a calibration, click on the calibration you want to export in the calibration list, then click on the revision of that calibration you want to export. The current selections should be highlighted, then click on the “Export” button. The “Cancel” button will close the Export Calibration dialog box. The “Help” button will open the on line help for the Export Calibration dialog box. Figure 9: Export Calibration Dialog Box Page 30 of 198 Extreme Performance Engine Control EPEC for Windows Once you select the “Export” button, the “Export Calibration Save” dialog box will appear. See Figure 10: Export Calibration Save Dialog Box. Type the MS-DOS path and file name in the “File Name” box and select “OK” to save the selected calibration as a MS-DOS file. IMPORTANT: Once the calibration is exported to a MS-DOS file, you can “import” the calibration on another computer. Figure 10: Export Calibration Save Dialog Box Import Calibration The “Import Calibration” menu item is used to import an exported MS-DOS file to a calibration. This is used to share calibrations with other people. When you select this menu item the “Import Calibration” dialog box will appear see Figure 11: Import Calibration Dialog Box. To import a calibration, click on or type the MS-DOS file you want to import, then click “OK”. The “Cancel” button will close the “Import Calibration” dialog box. The “Help” button will open the on line help for the “Import Calibration” dialog box. Figure 11: Import Calibration Dialog Box Page 31 of 198 Extreme Performance Engine Control EPEC for Windows Once you select the “OK” button, the “Import Calibration Save” dialog box will appear. Type the new calibration name in the “Import Calibration Name” box then type the new revision name in the “Import Revision Name” box and select “OK” to save the MS-DOS file as a new calibration, see Figure 12: Import Calibration Save Dialog Box. IMPORTANT: The MS-DOS file must be an exported calibration from EPEC for Windows. Figure 12: Import Calibration Save Dialog Box Exit The “Exit” menu item is used to exit the EPEC for Windows program. This menu item can be accessed holding the control key and pressing “X” (ctrl-X) at any time while in the program. Edit Menu The Edit Menu contains the following menu items; “Fuel”, “Spark”, “Nitrous Oxide”, “Engine RPM Limits”, “Manual Fuel/Spark Control”, “Engine Configuration”, “Input/Output Configuration”, “Module Configuration”, “Programmable Outputs” and “Analog Channel Calibration”. The edit menu is shown in Figure 13: Edit Menu. This menu can be accessed by either clicking on it with the mouse or pressing “Alt-E”. All of the calibration parameters contained within the EPEC Module are accessed from the edit menu. The Edit menu has a very logical layout for ease of use. The “Fuel” sub-menu is for accessing all of the fuel parameters contained within the EPEC Module. The “Spark” sub-menu is for accessing all the spark parameters within the EPEC module and so on. For detailed descriptions of each of the “Edit” sub-menus refer to EPEC Control Strategy chapter.. Page 32 of 198 Extreme Performance Engine Control EPEC for Windows Title Bar EPEC Menu Bar "Edit" Menu An Arrow indicates another level of sub-menus exist Figure 13: Edit Menu Data Acquisition Menu The Data Acquisition Menu contains the following menu items; “New Acquisition Set…”, “Open Acquisition Set…”, and “Delete Acquisition Set…”. The Data Acquisition menu is shown in Figure 14: Data Acquisition Menu. This menu can be accessed by either clicking on it with the mouse or pressing “Alt-D”. Data Acquisition is an on screen display of internal EPEC parameters. For more information on Data Acquisition, see the EPEC for Windows chapter. Figure 14: Data Acquisition Menu Page 33 of 198 Extreme Performance Engine Control EPEC for Windows Data Logging Menu The Data Logging Menu contains the following menu items; “New Log Set…”, “Open Log Set…”, “Delete Log Set…”, “New/Upload Log Data” and “Open/Graph Log Data”. The Data Logging menu is shown in Figure 15: Data Logging Menu. This menu can be accessed by either clicking on it with the mouse or pressing “Alt-L”. The Data Logging menu is used to setup, upload and display the data that is recorded internally within the EPEC module. For more information on Data Logging, see the Data Logging chapter. Figure 15: Data Logging Menu Tools Menu The Tools menu only contains 1 menu item, the calculator. The calculator is the MS Windows calculator that is shipped with Windows. This is provided as a convenient way to access it, instead of searching though the program manager to find it. Figure 16: Tools Menu shows the Tools Menu. Page 34 of 198 Extreme Performance Engine Control EPEC for Windows Figure 16: Tools Menu Options Menu The Options Menu contains the following menu items; “Communications…” and “Units”. The Options menu is shown in Figure 17: Options Menu. This menu can be accessed by either clicking on it with the mouse or pressing “Alt-O”. Figure 17: Options Menu Page 35 of 198 Extreme Performance Engine Control EPEC for Windows Communications The Communications menu item is used to select which PC communication port the EPEC module will be connected to. This port can be changed at any time and once set will retain that setting until it is changed. Communications ports 1 - 4 are supported by the EPEC for Windows software (com1 - com4). To access the Communications settings, select the “Options” menu by either clicking on it with the mouse or pressing “Alt-O”. Then select “Communications”. The “Communications” dialog box will then appear as shown in Figure 18: Communication Configuration Dialog Box. To select a different communications port, either click on it or hold the “Alt” key while pressing the port number 1 - 4, then select “OK”. NOTE: If a port is “grayed” out, this means that port is not available and you cannot select it. Figure 18: Communication Configuration Dialog Box Units The units menu item has 2 sub-menus to select the display units for all of the calibration edit screens. If you select a unit from this menu, it will globally change all of the open edit windows. Window Menu The Window Menu contains the following menu items; “Minimize”, “Close”, “Close All”, “Tile” and “Cascade”. The Window menu is shown in Figure 19: Window Menu. This menu can be accessed by either clicking on it with the mouse or pressing “Alt-W”. The “Minimize” menu item is used to shrink the current window down to an icon view. The “Close” menu item is used to close the window. This close is the same as the “Close” button on each window. The “Close All” menu item is a short cut to close all open windows instead of closing each one manually. The “Tile” menu item is used to tile all open windows within the desktop window. The “Cascade” menu item will arrange all open windows in the desktop on top of each other, but they are still accessible. Below the “Cascade” menu item is a list of all open windows on the desktop. You can use this list to bring the window to the top if it is open but not visible. Page 36 of 198 Extreme Performance Engine Control EPEC for Windows Figure 19: Window Menu Help Menu The Help Menu contains menu items associated with the help system. The Help menu is shown in Figure 20: Help Menu. This menu can be accessed by either clicking on it with the mouse or pressing “Alt-H”. From the Help menu you can open different parts of the EPEC Users Guide or you can open the entire book on line. You do not have a carry a large printed book with you to the track. To Access any of the Help topics, simply click on the topic you want or press the hot key while holding down the “Alt” key. Page 37 of 198 Extreme Performance Engine Control EPEC for Windows Figure 20: Help Menu Page 38 of 198 EPEC Control Strategy In This Chapter Fuel Strategy Base Fuel (Idle, Part Throttle, WOT Air/Fuel Ratio) Fuel Modifiers Air Charge Temperature (ACT) Fuel Engine Coolant Temperature (ECT) Fuel Throttle Position (TP) Fuel Manifold Absolute Pressure (MAP) Fuel Cranking Fuel Injector Offset Transitional Fuel Enrichment (TFE) Transitional Fuel Enrichment TP Multiplier Programmable Output 0-3 Fuel Multipliers Analog Channel 0-2 Fuel Multipliers Spark Strategy Idle Spark Advance Part Throttle Spark Advance WOT Spark Advance Air Charge Temperature (ACT) Spark Boost Retard Engine Coolant Temperature (ECT) Spark Manifold Absolute Pressure (MAP) Spark Nitrous Oxide Spark Retard Throttle Position (TP) Spark Programmable Output Channel 0-3 Spark Analog Channel 0-2 Spark Nitrous Oxide Strategy Nitrous Oxide Globals Nitrous Oxide Stage 1 and Stage 2 Controls Engine RPM Limiters Fuel Rev Limit Spark Rev Limit Stage Rev Limit Manual Fuel/Spark Control Engine Configuration Input/Output Configuration Extreme Performance Engine Control EPEC Control Strategy ACT Transfer Function ECT Transfer Function MAF Transfer Function MAP Transfer Function TP Transfer Function TP Sensor Configuration PIP Configuration Spark Output (SPOUT) Configuration Module Configuration Programmable Output Channels 0 - 3 Analog Channels 0 - 2 Calibration Page 40 of 198 Extreme Performance Engine Control EPEC Control Strategy Fuel Strategy The fuel strategy calculates the fuel flow to your engine. If you are familiar with carburetors, this is equivalent to setting main jet sizing, power valve selection, and idle air bleeds. This section will take you through the basic fuel control strategy and typical settings. If you are not already familiar with Air/Fuel ratios, the following will help. The air/fuel ratio setting is the ratio of the pounds of air the engine is ingesting (measured by the Mass Air Flow meter) divided by the amount of fuel delivered. The limiting factor on performance is the engine hardware and the amount of air the engine is capable of ingesting. The goal is to have the EPEC deliver the amount of fuel to get the maximum engine output (torque and horsepower). Typical Air/Fuel ratios for optimum output range from 11.5:1 to 13.5:1 depending on the camshaft overlap, engine burn rate, and cylinder to cylinder air and fuel distribution. That’s right even with port fuel injection the air and fuel to each cylinder is not the same as all fuel injectors do not flow exactly the same and intake manifold design does not provide the same air flow to each cylinder, based on local restrictions. With that said a typical starting point for Wide Open Throttle Air/Fuel ratio is 12.5:1. Part throttle and idle typically run closer to 14.6:1 or stoichiometry. stoichiometry is the chemically correct amount of fuel that would be completely burned if all the air in the combustion chamber was to mix with all the fuel. The reason why WOT Air/Fuel ratios are richer (more fuel for each unit of air) is to ensure all the oxygen mixes with fuel and thus ensuring all the oxygen is utilized. Another factor is during camshaft overlap, some raw fuel is scavenged or goes directly out the exhaust port and thus is not available for combustion. Figure 21: Fuel Strategy Block Diagram shows all of the fuel parameters available.. This includes 2 dimensional functions, scalar values, and control options. Table 1: Fuel Strategy Parameters outlines both the calibratable and non-calibratable functions for the entire fuel strategy. The noncalibratable values can be either generated by another function or directly from a sensor. Name Type Notes Calibratable Functions/Scalars Injector Offset 2 dimensional function Used for correction Idle Fuel 2 dimensional function Used when Throttle Mode is Idle to determine Air/Fuel Ratio. Part Throttle Fuel 2 dimensional function Used when Throttle Mode is Part Throttle to determine Air/Fuel Ratio. WOT Fuel 2 dimensional function Used when Throttle Mode is WOT to determine Air/Fuel Ratio. TP Fuel 2 dimensional function Used to determine Multiplier. ACT Fuel 2 dimensional function Used to determine Multiplier ECT Fuel 2 dimensional function Used to determine Multiplier. Page 41 of 198 injector response the time TP Fuel the ACT Fuel the ECT Fuel Extreme Performance Engine Control Name EPEC Control Strategy Type Notes MAP Fuel 2 dimensional function Used to determine the MAP Fuel Multiplier. Analog Channel 0-2 Fuel 2 dimensional function Used to determine the each of the Analog Channel 0-2 Fuel Multiplier. Crank Fuel 2 dimensional function Used to determine the Fuel PW in crank mode. Base Fuel 2 dimensional function Used to determine the Base Transitional Fuel Enrichment. 2 dimensional function Used to determine the Transitional Fuel TP Correction. Scalar There is 2 fuel multipliers for each channel, an “ON” and “OFF” fuel multiplier. Injector Size Scalar Used to specify injector size Manual Ratio Scalar Used to specify desired A/F in manual mode Scalar Used to specify the Control Type either “Automatic” or “Manual”. Transitional TP Correction Programmable Fuel 0-3 Air/Fuel Control Type Non-Calibratable Values Base Transitional Fuel Enrichment Scalar This value is the current Transitional Fuel amount. Engine Speed Scalar Current Engine Speed. Air Mass Scalar Current Air Mass determined by the MAF Transfer Function. Battery Voltage Scalar Current Battery Voltage. Throttle Mode Scalar Current Throttle Mode (Idle, Part Throttle or WOT) based on the Relative Throttle Position. Relative Position Scalar Current Throttle Position “relative” to the initial Throttle Position. ACT Scalar Current Air Charge (inlet) Temperature, determined from the ACT Transfer Function. ECT Scalar Current Engine Coolant Temperature, determined from the ECT Transfer Function. MAP Scalar Current Manifold Absolute Pressure, determined from the MAP Transfer Function. Throttle Page 42 of 198 Base Extreme Performance Engine Control Name EPEC Control Strategy Type Notes Analog Channel 0-3 Volts Scalar Current input voltage on each of the Analog Channels. Desired Air/Fuel Scalar Current Desired Air/Fuel Ratio based on Throttle Mode and one of the 3 tables; Idle Fuel, Part Throttle Fuel or WOT Fuel. TP Fuel Scalar Current Throttle Position Fuel Multiplier, determined from the TP Fuel Function. ACT Fuel Scalar Current Air Charge (inlet) Temperature Fuel Multiplier, determined from the ACT Fuel Function. ECT Fuel Scalar Current Engine Coolant Temperature Fuel Multiplier, determined from the ECT Fuel Function. MAP Fuel Scalar Current Manifold Absolute Pressure Fuel Multiplier, determined from the MAP Fuel Function. Analog Channel 0-2 Fuel Scalar Current Analog Channel 0-2 Fuel Multipliers, determined from each of the Analog Channel 0-2 Fuel Function. Throttle Angle Rate Scalar Current Throttle Angle Rate determined from the Relative Throttle Position. Transitional Enrichment Scalar Current Transitional Fuel Enrichment based on Base Transitional Fuel function. Transition TP Fuel Scalar Current Transitional TP Fuel Multiplier based on the TP Correction function. Transitional PW Scalar Current Transitional Fuel PW based on Transitional Fuel Enrichment and Transitional TP Fuel values. Scalar Current Fuel Pulse Width that is being delivered to the engine. Fuel Fuel Fuel Pulse Width Table 1: Fuel Strategy Parameters IMPORTANT: All of the fuel multipliers are cumulative so be very cautious, if you take advantage of the full flexibility of this system you will have several multipliers to the base fuel tables and will more than likely need to look at the Data Acquisition Window or use Data Logging to see the actual requested A/F ratio and/or Fuel Pulse Width. Page 43 of 198 Extreme Performance Engine Control EPEC Control Strategy Engine Speed Injector Size Air Mass Battery Voltage Injector Offset Injector Offset Idle Idle Fuel Engine Speed Part Throttle Mode WOT Desired A/F Part Throttle Fuel Manual Air/Fuel WOT Fuel Relative TP TP Fuel Calculate Manual Fuel PW Calc Base PW TP Fuel ACT ACT Fuel ACT Fuel ECT ECT Crank Pulse Width Crank Fuel Base Fuel PW ECT Fuel ECT Fuel MAP MAP Fuel MAP Fuel Fuel Pulse Width Analog Channel 0 Volts Analog Channel 0 Fuel Calculate Final Fuel PW Analog Channel 0 Fuel Control Type Analog Channel 0 Volts Analog Channel 0 Volts Analog Channel 1 Fuel Analog Channel 2 Fuel Crank Flag Analog Channel 1 Fuel Analog Channel 2 Fuel Programmable Output 0 Fuel Programmable Output 1 Fuel Throttle Angle Rate Base Transitional Fuel Transitional Fuel Enrichment Programmable Output 2 Fuel TFE PW Calculation Programmable Output 3 Fuel Relative TP Transitional TP Fuel TP Correction Figure 21: Fuel Strategy Block Diagram Page 44 of 198 Transitional PW Extreme Performance Engine Control EPEC Control Strategy Page 45 of 198 Extreme Performance Engine Control EPEC Control Strategy Base Fuel (Idle, Part Throttle, WOT Air/Fuel Ratio) The Base Fuel control strategy is comprised of either Idle, Part Throttle or WOT Air/Fuel ratio tables. Only one of these tables are used at once and is selected by the current Throttle Mode (Idle/Part/WOT), see Figure 22: Idle/Part/WOT Fuel Strategy Diagram. Idle Idle Fuel Engine Speed Part Throttle Mode WOT Part Throttle Fuel Desired A/F WOT Fuel Figure 22: Idle/Part/WOT Fuel Strategy Diagram To change to base fuel, click on the “Edit” menu. Once the options appear, click on “Fuel”, see Figure 23: Idle/Part/WOT Fuel Menu. Window Title Bar Main Menu Bar An arrow indicates another level of submenus exist Main "Edit" Menu "Fuel" Sub-Menu Figure 23: Idle/Part/WOT Fuel Menu Page 46 of 198 Extreme Performance Engine Control EPEC Control Strategy By clicking on one of the options, Idle Fuel , Part Throttle Fuel or WOT Fuel, a two dimensional function (table) will appear for the requested fuel range. This function (table) allows you to specify an Air/Fuel curve based on Engine Speed (RPM). The three functions (Idle, Part, WOT) allow you to specify a different Air/Fuel curve for each operating condition. Recommended starting points for each function are shown in Table 2: Recommended Air/Fuel Ratios. Operating Range Recommended Air/Fuel Notes Idle Air/Fuel Ratio 13.0:1 to 14.0:1 Depends on camshaft overlap Part Throttle Air/Fuel Ratio 12.5:1 to 15.0:1 Depends on camshaft overlap and fuel economy WOT Air/Fuel Ratio 11.0:1 to 13.5:1 for optimal power Table 2: Recommended Air/Fuel Ratios To modify one of the functions (Idle, Part Throttle, or WOT), click on the cell you want to modify and type a new value, then move out of that cell using the arrow keys. See Figure 24: Idle - RPM Air/Fuel Function. NOTE: You can change either the Air/Fuel Ratio or the RPM value EPEC gives you full tuning control. Also note the original curve is shown in a blue solid line and the new curve is displayed in a red dashed line. This indicates how much you are changing the calibration from it original value. At this point you can click on “Accept”, “Undo” or “Close”. “Accept” will accept the new values and the red dashed line will disappear. “Undo” will undo the changes and restore the original settings shown on the blue solid line. “Close” will “Undo” and close the window. IMPORTANT: If the EPEC module is attached to the computer and you click on “ACCEPT”, the new values WILL BE written to the EPEC module. Page 47 of 198 Extreme Performance Engine Control EPEC Control Strategy Type in a new value and use the arrow keys to change cells Changes shown as red dashed line Currentlly selected cell is highlighted by an outline box Current values shown as blue solid line Click on "Help" to get help on current window Click on "Accept" to record changes and save to the EPEC module Click on "Undo" to restore changes to original values Click on "Close" to "Undo" changes and close window Use "TAB" key to move to different objects within the window Figure 24: Idle - RPM Air/Fuel Function Fuel Modifiers The base fuel functions are used for a fully warmed up engine, however, to obtain good driveability, you may need to modify one or more of the following fuel modifiers. NOTE: If you are drag racing your vehicle, you will want to make sure you have a very good base calibration such that on a fully warmed up engine does not use the fuel modifiers, especially the temperature modifiers. These fuel modifiers can drastically affect the repeatability of your runs and thus the ability to win bracket races. Air Charge Temperature (ACT) Fuel The Air Charge Temperature Fuel (ACT) function is a fuel multiplier that allows you to modify your delivered fuel amount based on Air Inlet Temperature. A value of 1.1 will add 10% fuel and a value of 0.90 will remove 10% fuel. Be careful since this table can make sizable modifications to your fuel flow. Under most “Warm Engine” conditions, you will not need to use this; however, under very cold operating conditions, you may need to richen (fuel multiplier greater than 1.0) the Air/Fuel ratio for good engine operation. The ACT Fuel Multiplier is calculated from the ACT Fuel Function, see Figure 25: ACT Fuel Strategy Diagram. Page 48 of 198 Extreme Performance Engine Control EPEC Control Strategy ACT ACT Fuel Multiplier ACT Fuel Figure 25: ACT Fuel Strategy Diagram To change the ACT Fuel Function, click on the “Edit” menu and then the “Fuel” sub-menu and then click on “ACT Fuel”. The ACT Fuel function will then appear. See Figure 26: ACT Fuel Menu.. Window Title Bar Main Menu Bar An arrow indicates another level of submenus exist Main "Edit" Menu "Fuel" Sub-Menu Figure 26: ACT Fuel Menu Click on the cell you want to modify and type a new value, then move out of that cell using the arrow keys. See Figure 27: ACT Fuel Function. Note the original curve is shown in a blue solid line and the new curve is displayed in a red dashed line. This indicates how much you are changing the calibration from it original value. At this point you can click on “Accept”, “Undo” or “Close”. “Accept” will accept the new values and the red dashed line will disappear. “Undo” will undo the changes and restore the original settings shown on the blue solid line. “Close” will “Undo” and close the window. IMPORTANT: If the EPEC module is attached to the computer and you click on “ACCEPT”, the new values WILL BE written to the EPEC module. Page 49 of 198 Extreme Performance Engine Control EPEC Control Strategy Type in a new value and use the arrow keys to change cells Changes shown as red dashed line Currentlly selected cell is highlighted by an outline box Current values shown as blue solid line Click on "Help" to get help on current window Click on "Accept" to record changes and save to the EPEC module Click on "Undo" to restore changes to original values Click on "Close" to "Undo" changes and close window Use "TAB" key to move to different objects within the window Figure 27: ACT Fuel Function Engine Coolant Temperature (ECT) Fuel The Engine Coolant Temperature Fuel (ECT) function is a fuel multiplier that allows you to modify your delivered fuel amount based on Engine Coolant Temperature. A value of 1.1 will add 10% fuel and a value of 0.90 will remove 10% fuel. Be careful since this table can make sizable modifications to your fuel flow. Under most “Warm Engine” conditions, you will not need to use this; however, under very cold operating conditions, you may need to richen (fuel multiplier greater than 1.0) the Air/Fuel ratio for good engine operation. The ECT Fuel Multiplier is calculated from the ECT Fuel Function, see Figure 28: ECT Fuel Strategy Diagram. ECT ECT Fuel Mutiplier ECT Fuel Figure 28: ECT Fuel Strategy Diagram Page 50 of 198 Extreme Performance Engine Control EPEC Control Strategy To change the ECT Fuel Function, click on the “Edit” menu and then the “Fuel” sub-menu and then click on “ECT Fuel”. The ECT Fuel function will then appear. See Figure 29: ECT Fuel Menu. Window Title Bar Main Menu Bar An arrow indicates another level of submenus exist Main "Edit" Menu "Fuel" Sub-Menu Figure 29: ECT Fuel Menu Click on the cell you want to modify and type a new value, then move out of that cell using the arrow keys. See Figure 30: ECT Fuel Function. Note the original curve is shown in a blue solid line and the new curve is displayed in a red dashed line. This indicates how much you are changing the calibration from it original value. At this point you can click on “Accept”, “Undo” or “Close”. “Accept” will accept the new values and the red dashed line will disappear. “Undo” will undo the changes and restore the original settings shown on the blue solid line. “Close” will “Undo” and close the window. IMPORTANT: If the EPEC module is attached to the computer and you click on “ACCEPT”, the new values WILL BE written to the EPEC module. Page 51 of 198 Extreme Performance Engine Control EPEC Control Strategy Type in a new value and use the arrow keys to change cells Changes shown as red dashed line Currentlly selected cell is highlighted by an outline box Current values shown as blue solid line Click on "Help" to get help on current window Click on "Accept" to record changes and save to the EPEC module Click on "Undo" to restore changes to original values Click on "Close" to "Undo" changes and close window Use "TAB" key to move to different objects within the window Figure 30: ECT Fuel Function Throttle Position (TP) Fuel The Throttle Position Fuel (TP) function is a fuel multiplier that allows you to modify your delivered fuel amount based on Relative Throttle Angle. A value of 1.1 will add 10% fuel and a value of 0.90 will remove 10% fuel. Be careful since this table can make sizable modifications to your fuel flow. The TP Fuel Multiplier is calculated from the TP Fuel Function, see Figure 31: TP Fuel Strategy Diagram. Relative Throttle Angle Injec I TP Fuel Multiplier TP Fuel Figure 31: TP Fuel Strategy Diagram To change the TP Fuel Function, click on the “Edit” menu and then the “Fuel” sub-menu and then click on “TP Fuel”. The TP Fuel function will then appear. See Figure 32: TP Fuel Menu. Page 52 of 198 Extreme Performance Engine Control EPEC Control Strategy Window Title Bar Main Menu Bar An arrow indicates another level of submenus exist Main "Edit" Menu "Fuel" Sub-Menu Figure 32: TP Fuel Menu Click on the cell you want to modify and type a new value, then move out of that cell using the arrow keys. See Figure 33: TP Fuel Function. Note the original curve is shown in a blue solid line and the new curve is displayed in a red dashed line. This indicates how much you are changing the calibration from it original value. At this point you can click on “Accept”, “Undo” or “Close”. “Accept” will accept the new values and the red dashed line will disappear. “Undo” will undo the changes and restore the original settings shown on the blue solid line. “Close” will “Undo” and close the window. IMPORTANT: If the EPEC module is attached to the computer and you click on “ACCEPT”, the new values WILL BE written to the EPEC module. Page 53 of 198 Extreme Performance Engine Control EPEC Control Strategy Type in a new value and use the arrow keys to change cells Changes shown as red dashed line Currentlly selected cell is highlighted by an outline box Current values shown as blue solid line Click on "Help" to get help on current window Click on "Accept" to record changes and save to the EPEC module Click on "Undo" to restore changes to original values Click on "Close" to "Undo" changes and close window Use "TAB" key to move to different objects within the window Figure 33: TP Fuel Function Manifold Absolute Pressure (MAP) Fuel The Manifold Absolute Pressure Fuel (MAP) function is a fuel multiplier that allows you to modify your delivered fuel amount based on Manifold Absolute Pressure. A value of 1.1 will add 10% fuel and a value of 0.90 will remove 10% fuel. Be careful since this table can make sizable modifications to your fuel flow. The MAP Fuel Multiplier is calculated from the MAP Fuel Function, see Figure 34: MAP Fuel Strategy Diagram. Injec I Manifold Pressure MAP Fuel Multiplier MAP Fuel Figure 34: MAP Fuel Strategy Diagram This is useful on boosted engines where you may want to add fuel as a function of boost pressure. Page 54 of 198 Extreme Performance Engine Control EPEC Control Strategy NOTE: The MAP sensor indicates only ABSOLUTE PRESSURE, not gauge pressure where atmospheric pressure is 29.92 In Hg. At 10 In Hg of vacuum, the MAP sensor will indicate 19.92 In Hg. At 10 psi of boost, the MAP sensor will indicate approximately 49.92 In Hg. To change the MAP Fuel Function, click on the “Edit” menu and then the “Fuel” sub-menu and then click on “MAP Fuel”. The MAP Fuel function will then appear. See Figure 35: MAP Fuel Menu. Window Title Bar Main Menu Bar An arrow indicates another level of submenus exist Main "Edit" Menu "Fuel" Sub-Menu Figure 35: MAP Fuel Menu Click on the cell you want to modify and type a new value, then move out of that cell using the arrow keys. See Figure 36: MAP Fuel Function. Note the original curve is shown in a blue solid line and the new curve is displayed in a red dashed line. This indicates how much you are changing the calibration from it original value. At this point you can click on “Accept”, “Undo” or “Close”. “Accept” will accept the new values and the red dashed line will disappear. “Undo” will undo the changes and restore the original settings shown on the blue solid line. “Close” will “Undo” and close the window. IMPORTANT: If the EPEC module is attached to the computer and you click on “ACCEPT”, the new values WILL BE written to the EPEC module. Page 55 of 198 Extreme Performance Engine Control EPEC Control Strategy Type in a new value and use the arrow keys to change cells Changes shown as red dashed line Currentlly selected cell is highlighted by an outline box Current values shown as blue solid line Click on "Help" to get help on current window Click on "Accept" to record changes and save to the EPEC module Click on "Undo" to restore changes to original values Click on "Close" to "Undo" changes and close window Use "TAB" key to move to different objects within the window Figure 36: MAP Fuel Function Cranking Fuel The Cranking Fuel function is a time based value which allows you to modify your delivered fuel amount at crank. The value entered in the Cranking Fuel function is the pulse width delivered to the injectors every cylinder event. Start with a low value and increase gradually until the engine fires. You must be careful not to make this value to large or engine flooding, or even cylinder bore washing can result. Cranking fuel is a function of Engine Coolant Temperature, and colder starting conditions will most likely require more Cranking Fuel. The Cranking Fuel PW is calculated from the Cranking Fuel Function, see Figure 37: Cranking Fuel Strategy Diagram. IMPORTANT: When the engine is in “Crank” mode, fuel delivery is shut off at Wide Open Throttle. ECT Cranking Fuel PW Cranking Fuel Figure 37: Cranking Fuel Strategy Diagram Page 56 of 198 Extreme Performance Engine Control EPEC Control Strategy To change the Cranking Fuel Function, click on the “Edit” menu and then the “Fuel” submenu and then click on “Cranking Fuel”. The Cranking Fuel function will then appear. See Figure 38: Cranking Fuel Menu. Window Title Bar Main Menu Bar An arrow indicates another level of submenus exist Main "Edit" Menu "Fuel" Sub-Menu Figure 38: Cranking Fuel Menu Click on the cell you want to modify and type a new value, then move out of that cell using the arrow keys. See Figure 39: Cranking Fuel Function. Note the original curve is shown in a blue solid line and the new curve is displayed in a red dashed line. This indicates how much you are changing the calibration from it original value. At this point you can click on “Accept”, “Undo” or “Close”. “Accept” will accept the new values and the red dashed line will disappear. “Undo” will undo the changes and restore the original settings shown on the blue solid line. “Close” will “Undo” and close the window. IMPORTANT: If the EPEC module is attached to the computer and you click on “ACCEPT”, the new values WILL BE written to the EPEC module. Page 57 of 198 Extreme Performance Engine Control EPEC Control Strategy Type in a new value and use the arrow keys to change cells Changes shown as red dashed line Currentlly selected cell is highlighted by an outline box Current values shown as blue solid line Click on "Help" to get help on current window Click on "Accept" to record changes and save to the EPEC module Click on "Undo" to restore changes to original values Click on "Close" to "Undo" changes and close window Use "TAB" key to move to different objects within the window Figure 39: Cranking Fuel Function Injector Offset The Injector Offset Fuel function is a time based function which is an adder to the fuel pulse width which allows you to compensate for different injectors. As the battery voltage is reduced, the fuel injectors respond slower, thus taking longer to open. The Injector Offset function is intended to compensate for this “lag time”. Injector Offset is a function of Battery Voltage however, you should never let the battery voltage get low. You should either run an alternator, or make sure your batteries are fully charged. NOTE: The Injector Offset value is added to the Fuel Pulse Width and is not affected by any of the fuel multipliers such as MAP Fuel, ACT Fuel, ECT Fuel, Transitional Fuel or TP Fuel. The Injector Offset is added to the fuel pulse in the following manner: FuelPulseWidth = ( BaseFuelPulseWidth × FuelMultipliers) + InjectorOffset The Injector Offset is calculated from the Injector Offset Function, see Figure 40: Injector Offset Fuel Strategy Diagram. Page 58 of 198 Extreme Performance Engine Control Battery Voltage EPEC Control Strategy Injec I Injector Offset Adder Injector Offset Figure 40: Injector Offset Fuel Strategy Diagram To change the Injector Offset Fuel Function, click on the “Edit” menu and then the “Fuel” sub-menu and then click on “Injector Offset”. The Injector Offset function will then appear. See Figure 41: Injector Offset Fuel Menu. Window Title Bar Main Menu Bar An arrow indicates another level of submenus exist Main "Edit" Menu "Fuel" Sub-Menu Figure 41: Injector Offset Fuel Menu Click on the cell you want to modify and type a new value, then move out of that cell using the arrow keys. See Figure 42: Injector Offset Function. Note the original curve is shown in a blue solid line and the new curve is displayed in a red dashed line. This indicates how much you are changing the calibration from it original value. At this point you can click on “Accept”, “Undo” or “Close”. “Accept” will accept the new values and the red dashed line will disappear. “Undo” will undo the changes and restore the original settings shown on the blue solid line. “Close” will “Undo” and close the window. IMPORTANT: If the EPEC module is attached to the computer and you click on “ACCEPT”, the new values WILL BE written to the EPEC module. Page 59 of 198 Extreme Performance Engine Control EPEC Control Strategy Type in a new value and use the arrow keys to change cells Changes shown as red dashed line Currentlly selected cell is highlighted by an outline box Current values shown as blue solid line Click on "Help" to get help on current window Click on "Accept" to record changes and save to the EPEC module Click on "Undo" to restore changes to original values Click on "Close" to "Undo" changes and close window Use "TAB" key to move to different objects within the window Figure 42: Injector Offset Function Transitional Fuel Enrichment (TFE) The Transitional Fuel Enrichment function is the equivalent to “Pump Shot” on a carburetor. This is required because your foot can move the accelerator and the engine can begin to take in air faster than the Mass Air Flow meter can respond. The quicker you move the accelerator the more you will have to compensate. The EPEC module measures how fast you move the accelerator by calculating the “Throttle Angle Rate” (deg/sec). Fuel enrichment is specified in percent. This percentage enrichment is applied to the current fuel pulse width. You will need to experiment with this on your vehicle. Typically transient engine response is worse at low engine speeds, however, if your vehicle has good transient response with the base fuel calibration, do not play with this parameter too much. The Base Transitional Fuel is calculated from the Base Transitional Fuel Enrichment Function, see Figure 43: Base Transitional Fuel Strategy Diagram. Page 60 of 198 Extreme Performance Engine Control Throttle Angle Rate EPEC Control Strategy Injec I Transitional Fuel Enrichment Base Transitional Fuel Figure 43: Base Transitional Fuel Strategy Diagram NOTE: The TFE percent enrichment value uses the current fuel pulse width to calculate the additional fuel delivered. This additional fuel is added and delivered to the engine with the normal fuel injector pulses. The Transitional Fuel Enrichment value is calculated as follows: TransitionalFuelPulseWidth( ms) = FuelPulseWidth( ms) × TFE(%) × TFETPMultiplier To change the Transitional Fuel Enrichment Function, click on the “Edit” menu and then the “Fuel” sub-menu and then the “Transitional Fuel” sub-menu. Click on the “Base Transitional Fuel” menu item. The Base Transitional Fuel function will then appear. See Figure 44: Transitional Fuel Enrichment Menu. Window Title Bar Main Menu Bar An arrow indicates another level of submenus exist Main "Edit" Menu "Fuel" Sub-Menu Figure 44: Transitional Fuel Enrichment Menu Click on the cell you want to modify and type a new value, then move out of that cell using the arrow keys. See Figure 45: Base Transitional Fuel Enrichment Function. Note the original curve is shown in a blue solid line and the new curve is displayed in a red dashed line. This Page 61 of 198 Extreme Performance Engine Control EPEC Control Strategy indicates how much you are changing the calibration from it original value. At this point you can click on “Accept”, “Undo” or “Close”. “Accept” will accept the new values and the red dashed line will disappear. “Undo” will undo the changes and restore the original settings shown on the blue solid line. “Close” will “Undo” and close the window. IMPORTANT: If the EPEC module is attached to the computer and you click on “ACCEPT”, the new values WILL BE written to the EPEC module. Type in a new value and use the arrow keys to change cells Currentlly selected cell is highlighted by an outline box Changes shown as red dashed line Current values shown as blue solid line Click on "Help" to get help on current window Click on "Accept" to record changes and save to the EPEC module Click on "Undo" to restore changes to original values Click on "Close" to "Undo" changes and close window Use "TAB" key to move to different objects within the window Figure 45: Base Transitional Fuel Enrichment Function Transitional Fuel Enrichment TP Multiplier The EPEC module also supplies a Transitional Fuel Enrichment Throttle Position Correction. This allows you to change the transitional fuel enrichment amount based on current throttle position. Frequently, the additional fuel enrichment demands will decrease as current throttle position increases, even though the throttle angle rate remains the same. The Transitional Fuel Enrichment TP Correction is calculated from the Transitional Fuel Enrichment TP Multiplier Function, see Figure 46: Transitional Fuel Enrichment TP Multiplier Strategy Diagram. Page 62 of 198 Extreme Performance Engine Control Relative Throttle Angle EPEC Control Strategy Injec I Transitional TP Fuel Transitional Fuel TP Multiplier Figure 46: Transitional Fuel Enrichment TP Multiplier Strategy Diagram NOTE: The TFE percent enrichment value uses the current fuel pulse width to calculate the additional fuel delivered. This additional fuel is added and delivered to the engine with the normal fuel injector pulses. The Transitional Fuel Enrichment value is calculated as follows: TransitionalFuelPulseWidth( ms) = FuelPulseWidth( ms) × TFE(%) × TFETPMultiplier To change the Transitional Fuel TP Multiplier Function, click on the “Edit” menu and then the “Fuel” sub-menu and then the “Transitional Fuel” sub-menu. Click on the “TP Multiplier” menu item. The TFE TP Multiplier function will then appear. See Figure 47: Transitional Fuel Enrichment TP Multiplier Menu. Window Title Bar Main Menu Bar An arrow indicates another level of submenus exist Main "Edit" Menu "Fuel" Sub-Menu Figure 47: Transitional Fuel Enrichment TP Multiplier Menu Click on the cell you want to modify and type a new value, then move out of that cell using the arrow keys. See Figure 48: Transitional Fuel Enrichment TP Multiplier Function. Note the original curve is shown in a blue solid line and the new curve is displayed in a red dashed Page 63 of 198 Extreme Performance Engine Control EPEC Control Strategy line. This indicates how much you are changing the calibration from it original value. At this point you can click on “Accept”, “Undo” or “Close”. “Accept” will accept the new values and the red dashed line will disappear. “Undo” will undo the changes and restore the original settings shown on the blue solid line. “Close” will “Undo” and close the window. IMPORTANT: If the EPEC module is attached to the computer and you click on “ACCEPT”, the new values WILL BE written to the EPEC module. Type in a new value and use the arrow keys to change cells Current values shown as blue solid line Currentlly selected cell is highlighted by an outline box Changes shown as red dashed line Click on "Help" to get help on current window Click on "Accept" to record changes and save to the EPEC module Click on "Undo" to restore changes to original values Click on "Close" to "Undo" changes and close window Use "TAB" key to move to different objects within the window Figure 48: Transitional Fuel Enrichment TP Multiplier Function Programmable Output 0-3 Fuel Multipliers The EPEC module has 4 user Programmable Outputs available. Each of these outputs has 2 fuel multipliers associated with it, for a total of 8 fuel multipliers. One fuel multiplier is used when the output is “OFF” and the other is used when the output is “ON”. These fuel multipliers provide the ability to modify the amount of fuel delivered when external devices are switched “ON” and “OFF”. The Programmable Output Fuel multipliers are accessible from the Programmable Output configurations. To edit these fuel multipliers, click on the “Edit” menu and then the “Programmable Outputs” sub-menu and then the desired Programmable Output channel. The Programmable Output configuration window will appear for the selected output channel. See Figure 49: Programmable Output Channel 0 -3 Menu. Page 64 of 198 Extreme Performance Engine Control EPEC Control Strategy Window Title Bar Main Menu Bar Main "Edit" Menu "Programmable Outputs" sub-menu Figure 49: Programmable Output Channel 0 -3 Menu Click on the “On Fuel Multiplier” or on the “Off Conditions” tab then the “Off Fuel Multiplier” cell and type a new value, then move out of that cell by using the tab key. See Figure 50: Programmable Output 0-4 Fuel Function. At this point you can click on “Accept”, “Undo” or “Close”. “Accept” will accept the new values and the red dashed line will disappear. “Undo” will undo the changes and restore the original settings shown on the blue solid line. “Close” will “Undo” and close the window. IMPORTANT: If the EPEC module is attached to the computer and you click on “ACCEPT”, the new values WILL BE written to the EPEC module. Page 65 of 198 Extreme Performance Engine Control EPEC Control Strategy Use "TAB" key to move to different objects within the window "ON" Fuel Multiplier "OFF" Condition Tab Click on "Accept" to record changes and save to the EPEC module Click on "Undo" to restore changes to original values Click on "Close" to "Undo" changes and close window Click on "Help" to get help on current window Figure 50: Programmable Output 0-4 Fuel Function Analog Channel 0-2 Fuel Multipliers There are 3 Analog Input channels and each of them have a input voltage range of 0v-10v. The Analog Channel fuel multipliers can be used to modify fuel delivered to the engine based on any external analog type sensor or input. The values entered in these tables are straight multipliers to your fuel flow so a value of 1.1 will deliver 10% extra fuel and a value of 0.9 will deliver 10% less fuel. Be careful since this table can make sizable modifications to your fuel flow. The Analog Channel Fuel Multiplier is calculated from the Analog Channel Fuel Function, see Figure 51: Analog Channel 0-2 Fuel Strategy Diagram. Analog Channel 0-2 Volts Injec I Analog Channel 0-2 Fuel Multiplier Analog Channel 0-2 Fuel Figure 51: Analog Channel 0-2 Fuel Strategy Diagram To change one of the Analog Channel’s Fuel Function, click on the “Edit” menu and then the “Fuel” sub-menu and then one of the “Analog Channel x Fuel” menu items. The selected Analog Channel fuel function will then appear. See Figure 52: Analog Channel 0 - 2 Fuel Menu. Page 66 of 198 Extreme Performance Engine Control EPEC Control Strategy Window Title Bar Main Menu Bar An arrow indicates another level of submenus exist Main "Edit" Menu "Fuel" Sub-Menu Figure 52: Analog Channel 0 - 2 Fuel Menu Click on the cell you want to modify and type a new value, then move out of that cell using the arrow keys. See Figure 53: Analog Channel 0-3 Fuel Function. Note the original curve is shown in a blue solid line and the new curve is displayed in a red dashed line. This indicates how much you are changing the calibration from it original value. At this point you can click on “Accept”, “Undo” or “Close”. “Accept” will accept the new values and the red dashed line will disappear. “Undo” will undo the changes and restore the original settings shown on the blue solid line. “Close” will “Undo” and close the window. IMPORTANT: If the EPEC module is attached to the computer and you click on “ACCEPT”, the new values WILL BE written to the EPEC module. Page 67 of 198 Extreme Performance Engine Control EPEC Control Strategy Type in a new value and use the arrow keys to change cells Current values shown as blue solid line Currentlly selected cell is highlighted by an outline box Changes shown as red dashed line Click on "Help" to get help on current window Click on "Accept" to record changes and save to the EPEC module Click on "Undo" to restore changes to original values Click on "Close" to "Undo" changes and close window Figure 53: Analog Channel 0-3 Fuel Function Page 68 of 198 Use "TAB" key to move to different objects within the window Extreme Performance Engine Control EPEC Control Strategy Spark Strategy The spark strategy calculates the total spark advance delivered to the engine. If you are familiar with distributor curve springs, and weights, the spark strategy replaces these mechanical parts and allows you to program the exact spark advance curve you desire. This section will take you through the basic spark control strategy and typical settings. Fundamentally the spark advance works off three basic tables, Idle Spark, Part Throttle Spark and Wide Open Throttle (WOT) Spark. These 3 functions deliver spark based on which throttle mode the engine is currently operating under. The Total Spark advance my then be modified based on other inputs or outputs, such as Nitrous Oxide Controls or Boost Retard. Typically, Total Spark advance values for optimum output range from 26 to 36 BTC depending on the cylinder head, piston dome, combustion chamber, fuel type etc. However, the spark advance values can be greatly influenced by multitude of other things and the proper spark advance is very engine dependent. You will need to experiment to obtain the exact spark advance curve that is required for your particular application. Figure 54: Spark Strategy Block Diagram shows all of the Spark parameters available. This includes 2 dimensional functions, scalar values, and control options. Table 3: Spark Strategy Parameters outlines the both the calibratable and non-calibratable functions for the entire Spark strategy. The non-calibratable values can be either generated by another function or directly from a sensor. Name Type Notes Calibratable Functions/Scalars Boost Retard 2 dimensional function Used when the engine is under boost to determine the Boost Retard per psi. Idle Spark 2 dimensional function Used when the Throttle Mode is Idle to determine Spark advance. Part Throttle Spark 2 dimensional function Used when Throttle Mode is Part Throttle to determine Spark advance. WOT Spark 2 dimensional function Used when the Throttle Mode is WOT to determine Spark advance. TP Spark 2 dimensional function Used to determine the TP Spark adder. ACT Spark 2 dimensional function Used to determine the ACT Spark adder. ECT Spark 2 dimensional function Used to determine the ECT Spark adder. MAP Spark 2 dimensional function Used to determine the MAP Spark Adder Analog Channel 0-2 Spark 2 dimensional function Used when to determine the Analog Channel 0-2 Spark adders. Programmable Output 0-3 Spark Scalar There are 2 spark adders for each channel, “ON” and “OFF” spark adders. Page 69 of 198 Extreme Performance Engine Control Name EPEC Control Strategy Type Notes Nitrous Stage 1 Spark Scalar Used when the Nitrous Oxide Stage 1 is active to retard spark. Nitrous Stage 2 Spark Scalar Used when the Nitrous Oxide Stage 2 is active to retard spark. Manual Spark Angle Scalar Used only in Manual Control as the Total Spark Advance. Control Type Calibration Switch Used to specify the Control Type either “Automatic” or “Manual”. Non-Calibratable Values Engine Speed Scalar Current Engine Speed. Throttle Mode Scalar Current Throttle Mode based on Relative Throttle position. Relative Throttle Position Scalar Current Relative Throttle Position relative to initial Throttle Position. ACT Scalar Current Air Charge (inlet) Temperature. ECT Scalar Current Engine Coolant Temperature. Boost Pressure Scalar Current intake manifold boost pressure. Boost Retard Scalar Current boost retard based on Boost Retard Function. TP Spark Scalar Current Throttle Position Spark adder based on TP Spark Function. ACT Spark Scalar Current ACT Spark adder based on ACT Spark Function. ECT Spark Scalar Current Engine Coolant Temperature Spark adder based on ECT Spark Function. Analog Channel 0-2 Spark Scalar Current Analog Channel 0-2 Spark adder based on Analog Channel 0-2 Spark Functions. Total Spark Advance Scalar The total spark advance delivered to the engine. Table 3: Spark Strategy Parameters Page 70 of 198 Extreme Performance Engine Control EPEC Control Strategy IMPORTANT: If you are using a distributor type ignition system, the actual spark advance will be the sum of all the spark advance values from all the tables PLUS your initial set “Base Spark Advance”. Typically you should set “Base Spark Advance” to 10 degrees before top dead center. Thus, if your total spark advance from the EPEC module is delivering 20 degrees, you will be delivering 20 degrees (your requested spark advance) PLUS 10 degrees (your base spark advance) for a total spark advance of 30 degrees before top dead center. If you are using the EDIS ignition system, the spark advance will be the sum of all the spark advance values from all the functions (tables). There is no base timing considerations. IMPORTANT: All of the spark adders are cumulative so be very cautious, if you take advantage of the full flexibility of this system you will have several adders or subtractors to the base spark tables and will more than likely need to look at the Data Acquisition Window or use Data Logging to see the actual spark advance angle. The total spark advance value is also clipped internally in the EPEC module between -40 and 50 degrees, so if all your tables call for 70 degrees of spark advance the EPEC module will only deliver 50 degrees. Page 71 of 198 Extreme Performance Engine Control EPEC Control Strategy Boost Pressure Calculate Boost Retard Boost Retard Boost Retard Idle Idle Spark Engine Speed Part Throttle Mode WOT Part Throttle Spark RPM Spark Adder WOT Spark Manual Spark Angle Relative TP TP Spark Adder TP Spark Calculate Final Spark Advance ACT ACT Spark Adder ACT Spark ECT Control Type ECT Spark Adder ECT Spark MAP MAP Spark Adder MAP Spark Analog Channel 0 Volts Analog Channel 0 Volts Analog Channel 0 Volts Total Spark Advance Analog Channel 0 Spark Analog Channel 1 Spark Analog Channel 2 Spark Analog Channel 0 Spark Adder Analog Channel 1 Spark Adder Analog Channel 2 Spark Adder Programmable Output 0 Spark Adder Programmable Output 1 Spark Adder Programmable Output 2 Spark Adder Programmable Output 3 Spark Adder Nitrous Stage 1 Spark Retard Nitrous Stage 1 Spark Retard Figure 54: Spark Strategy Block Diagram Page 72 of 198 Extreme Performance Engine Control EPEC Control Strategy Page 73 of 198 Extreme Performance Engine Control EPEC Control Strategy Idle Spark Advance The Spark Control Strategy is comprised of either Idle, Part Throttle or WOT spark Functions (tables). Only one of these tables are used at once and is selected by the current Throttle Mode (Idle/Part/WOT). The Idle, Part Throttle and WOT Spark advance is calculated from one of 3 functions, Idle Spark, Part Throttle Spark or WOT Spark. See Figure 55: Idle/Part Throttle/WOT Spark Strategy Diagram. Idle Idle Spark Engine Speed Part Throttle Mode WOT Part Throttle Spark RPM Spark Adder WOT Spark Figure 55: Idle/Part Throttle/WOT Spark Strategy Diagram To change the Idle Spark Advance, click on the “Edit” menu. Once the options appear, click on “Spark”, see Figure 56: Idle Spark Menu. Page 74 of 198 Extreme Performance Engine Control EPEC Control Strategy Window Title Bar Main Menu Bar Main "Edit" Menu "Spark" Sub-Menu Figure 56: Idle Spark Menu By clicking on the “Idle Spark” menu item, a two dimensional function (table) will appear for the Idle throttle range. Idle is typically from a closed throttle plate to 10 degrees of throttle movement. This function (table) allows you to specify a spark curve based on Engine Speed (RPM). To modify the Idle Spark Advance function, click on the cell you want to modify and type a new value, then move out of that cell using the arrow keys. See Figure 57: Idle - RPM Spark Advance Function. NOTE: You can change either the Spark Advance value or the RPM value EPEC gives you full tuning control. Also note the original curve is shown in a blue solid line and the new curve is displayed in a red dashed line. This indicates how much you are changing the calibration from it original value. At this point you can click on “Accept”, “Undo” or “Close”. “Accept” will accept the new values and the red dashed line will disappear. “Undo” will undo the changes and restore the original settings shown on the blue solid line. “Close” will “Undo” and close the window. IMPORTANT: If the EPEC module is attached to the computer and you click on “ACCEPT”, the new values WILL BE written to the EPEC module. Page 75 of 198 Extreme Performance Engine Control EPEC Control Strategy Type in a new value and use the arrow keys to change cells Current values shown as blue solid line Currentlly selected cell is highlighted by an outline box Changes shown as red dashed line Click on "Help" to get help on current window Click on "Accept" to record changes and save to the EPEC module Click on "Undo" to restore changes to original values Use "TAB" key to move to different objects within the window Click on "Close" to "Undo" changes and close window Figure 57: Idle - RPM Spark Advance Function Part Throttle Spark Advance The Spark Control Strategy is comprised of either Idle, Part Throttle or WOT spark tables. Only one of these tables are used at once and is selected by the current Throttle Mode (Idle/Part/WOT). The Idle, Part Throttle and WOT Spark advance is calculated from one of 3 functions, Idle Spark, Part Throttle Spark or WOT Spark. See Figure 58: Idle/Part Throttle/WOT Spark Strategy Diagram. Idle Idle Spark Engine Speed Part Throttle Mode WOT Part Throttle Spark RPM Spark Adder WOT Spark Figure 58: Idle/Part Throttle/WOT Spark Strategy Diagram Page 76 of 198 Extreme Performance Engine Control EPEC Control Strategy To change the Part Throttle Spark Advance, click on the “Edit” menu. Once the options appear, click on “Spark”, see Figure 59: Part Throttle Spark Menu. Window Title Bar Main Menu Bar Main "Edit" Menu "Spark" Sub-Menu Figure 59: Part Throttle Spark Menu By clicking on the “Part Throttle Spark” menu item, a two dimensional function (table) will appear for the Part Throttle range. Part Throttle is typically from 10 degrees to 50 degrees of throttle movement. This function (table) allows you to specify a spark curve based on Engine Speed (RPM). To modify the Part Throttle Spark Advance function, click on the cell you want to modify and type a new value, then move out of that cell using the arrow keys. See Figure 60: Part Throttle - RPM Spark Advance Function. Also note the original curve is shown in a blue solid line and the new curve is displayed in a red dashed line. This indicates how much you are changing the calibration from it original value. At this point you can click on “Accept”, “Undo” or “Close”. “Accept” will accept the new values and the red dashed line will disappear. “Undo” will undo the changes and restore the original settings shown on the blue solid line. “Close” will “Undo” and close the window. IMPORTANT: If the EPEC module is attached to the computer and you click on “ACCEPT”, the new values WILL BE written to the EPEC module. Page 77 of 198 Extreme Performance Engine Control EPEC Control Strategy Type in a new value and use the arrow keys to change cells Current values shown as blue solid line Currentlly selected cell is highlighted by an outline box Changes shown as red dashed line Click on "Help" to get help on current window Click on "Accept" to record changes and save to the EPEC module Click on "Undo" to restore changes to original values Use "TAB" key to move to different objects within the window Click on "Close" to "Undo" changes and close window Figure 60: Part Throttle - RPM Spark Advance Function WOT Spark Advance The Spark Control Strategy is comprised of either Idle, Part Throttle or WOT spark tables. Only one of these tables are used at once and is selected by the current Throttle Mode (Idle/Part/WOT). The Idle, Part Throttle and WOT Spark advance is calculated from one of 3 functions, Idle Spark, Part Throttle Spark or WOT Spark. See Figure 61: Idle/Part Throttle/WOT Spark Strategy Diagram. Idle Idle Spark Engine Speed Part Throttle Mode WOT Part Throttle Spark RPM Spark Adder WOT Spark Figure 61: Idle/Part Throttle/WOT Spark Strategy Diagram Page 78 of 198 Extreme Performance Engine Control EPEC Control Strategy To change the Wide Open Throttle Spark Advance, click on the “Edit” menu. Once the options appear, click on “Spark”, see Figure 62: WOT Spark Menu. Window Title Bar Main Menu Bar Main "Edit" Menu "Spark" Sub-Menu Figure 62: WOT Spark Menu By clicking on the “WOT Spark” menu item, a two dimensional function (table) will appear for the wide open throttle range. Wide Open Throttle is typically from 50 degrees to 90 degrees of throttle movement. This function (table) allows you to specify a spark curve based on Engine Speed (RPM). To modify the Wide Open Throttle Spark Advance function, click on the cell you want to modify and type a new value, then move out of that cell using the arrow keys. See Figure 63: Wide Open Throttle - RPM Spark Advance Function. Also note the original curve is shown in a blue solid line and the new curve is displayed in a red dashed line. This indicates how much you are changing the calibration from it original value. At this point you can click on “Accept”, “Undo” or “Close”. “Accept” will accept the new values and the red dashed line will disappear. “Undo” will undo the changes and restore the original settings shown on the blue solid line. “Close” will “Undo” and close the window. IMPORTANT: If the EPEC module is attached to the computer and you click on “ACCEPT”, the new values WILL BE written to the EPEC module. Page 79 of 198 Extreme Performance Engine Control EPEC Control Strategy Type in a new value and use the arrow keys to change cells Current values shown as blue solid line Currentlly selected cell is highlighted by an outline box Changes shown as red dashed line Click on "Help" to get help on current window Click on "Accept" to record changes and save to the EPEC module Click on "Undo" to restore changes to original values Click on "Close" to "Undo" changes and close window Use "TAB" key to move to different objects within the window Figure 63: Wide Open Throttle - RPM Spark Advance Function Air Charge Temperature (ACT) Spark ACT Spark is a spark modifier (a positive value adds spark, a negative value subtracts spark), which allows you to modify spark from the base spark as air inlet temperature changes. The ACT spark function is supplied for driveability, however, it will affect vehicle repeatability. If you are experiencing detonation at elevated temperatures, and a higher octane fuel is not available, then you can use this parameter to subtract spark advance (retard) to a level where the detonation disappears. The ACT Spark adder is calculated from the ACT Spark Function, See Figure 64: ACT Spark Strategy Diagram. ACT ACT Spark Adder ACT Spark Figure 64: ACT Spark Strategy Diagram Page 80 of 198 Extreme Performance Engine Control EPEC Control Strategy NOTE: In order for the ACT spark function to be functional, you must have an ACT sensor installed, connected and have the correct transfer function programmed into the EPEC module. To change the ACT Spark Advance, click on the “Edit” menu. Once the options appear, click on “Spark”, see Figure 65: ACT Spark Menu. By clicking on the “ACT Spark” menu item, the ACT Spark function will appear. Window Title Bar Main Menu Bar Main "Edit" Menu "Spark" Sub-Menu Figure 65: ACT Spark Menu To modify the ACT Spark Advance function, click on the cell you want to modify and type a new value, then move out of that cell using the arrow keys. See Figure 66: ACT Spark Advance Function. Also note the original curve is shown in a blue solid line and the new curve is displayed in a red dashed line. This indicates how much you are changing the calibration from it original value. At this point you can click on “Accept”, “Undo” or “Close”. “Accept” will accept the new values and the red dashed line will disappear. “Undo” will undo the changes and restore the original settings shown on the blue solid line. “Close” will “Undo” and close the window. IMPORTANT: If the EPEC module is attached to the computer and you click on “ACCEPT”, the new values WILL BE written to the EPEC module. Page 81 of 198 Extreme Performance Engine Control EPEC Control Strategy Type in a new value and use the arrow keys to change cells Changes shown as red dashed line Currentlly selected cell is highlighted by an outline box Current values shown as blue solid line Click on "Help" to get help on current window Click on "Accept" to record changes and save to the EPEC module Click on "Undo" to restore changes to original values Click on "Close" to "Undo" changes and close window Use "TAB" key to move to different objects within the window Figure 66: ACT Spark Advance Function Boost Retard Boost Retard is only a spark subtractor (a positive value subtracts spark) which allows you to retard spark from the base spark as boost pressure increases. This function of course is intended to be used on engines with either superchargers or turbochargers. The boost retard function is dependent on engine speed (RPM) and is specified in terms of degrees retard per PSI of boost. Typical values range from 0.5 degrees/psi to 2 degrees/psi. The boost retard function is only functional under boost and will not modify spark advance under vacuum. For a value of 0.5 degrees/psi and if boost is at 10 psi, 5 degrees of spark will subtracted. The Boost Retard is calculated from the Boost Retard Function, see Figure 67: Boost Retard Spark Strategy Diagram. Boost Pressure Engine Speed Boost Retard Boost Retard Figure 67: Boost Retard Spark Strategy Diagram Page 82 of 198 Calculate Boost Retard Current Total Boost Retard Extreme Performance Engine Control EPEC Control Strategy NOTE: In order for the Boost Retard to be functional, you must have a analog MAP sensor capable of measuring vacuum and boost (GM or Chrysler type) installed, connected and have the correct transfer function programmed into the EPEC module. To change the Boost Retard, click on the “Edit” menu. Once the options appear, click on “Boost Retard”, see Figure 68: Boost Retard Spark Menu. Window Title Bar Main Menu Bar Main "Edit" Menu "Spark" Sub-Menu Figure 68: Boost Retard Spark Menu By clicking on the “Idle Spark” menu item, a two dimensional function (table) will appear for the Idle throttle range. Idle is typically from a closed throttle plate to 10 degrees of throttle movement. This function (table) allows you to specify a spark curve based on Engine Speed (RPM). To modify the Idle Spark Advance function, click on the cell you want to modify and type a new value, then move out of that cell using the arrow keys. See Figure 69: Boost Retard Function. Also note the original curve is shown in a blue solid line and the new curve is displayed in a red dashed line. This indicates how much you are changing the calibration from it original value. At this point you can click on “Accept”, “Undo” or “Close”. “Accept” will accept the new values and the red dashed line will disappear. “Undo” will undo the changes and restore the original settings shown on the blue solid line. “Close” will “Undo” and close the window. Page 83 of 198 Extreme Performance Engine Control EPEC Control Strategy IMPORTANT: If the EPEC module is attached to the computer and you click on “ACCEPT”, the new values WILL BE written to the EPEC module. Type in a new value and use the arrow keys to change cells Changes shown as red dashed line Currentlly selected cell is highlighted by an outline box Current values shown as blue solid line Click on "Help" to get help on current window Click on "Accept" to record changes and save to the EPEC module Click on "Undo" to restore changes to original values Click on "Close" to "Undo" changes and close window Use "TAB" key to move to different objects within the window Figure 69: Boost Retard Function Engine Coolant Temperature (ECT) Spark ECT Spark is a spark modifier (a positive value adds spark, a negative value subtracts spark), which allows you to modify spark from the base spark as engine temperature changes. The ECT spark function is supplied for driveability, however, it will affect vehicle repeatability. If you are experiencing detonation at elevated temperatures, and a higher octane fuel is not available, then you can use this parameter to subtract spark advance (retard) to a level where the detonation disappears. The ECT Spark adder is calculated from the ECT Spark Function, See Figure 70: ECT Spark Strategy Diagram. Page 84 of 198 Extreme Performance Engine Control EPEC Control Strategy ECT Spark ECT Spark Adder ECT Spark Figure 70: ECT Spark Strategy Diagram NOTE: In order for the ECT spark function to be functional, you must have an ECT sensor installed, connected and have the correct transfer function programmed into the EPEC module. To change the ECT Spark Advance, click on the “Edit” menu. Once the options appear, click on “Spark”, see Figure 71: ECT Spark Menu. By clicking on the “ECT Spark” menu item, the ECT Spark function will appear. Window Title Bar Main Menu Bar Main "Edit" Menu "Spark" Sub-Menu Figure 71: ECT Spark Menu To modify the ECT Spark Advance function, click on the cell you want to modify and type a new value, then move out of that cell using the arrow keys. See Figure 72: ECT Spark Advance Function. Also note the original curve is shown in a blue solid line and the new curve is displayed in a red dashed line. This indicates how much you are changing the calibration from it original Page 85 of 198 Extreme Performance Engine Control EPEC Control Strategy value. At this point you can click on “Accept”, “Undo” or “Close”. “Accept” will accept the new values and the red dashed line will disappear. “Undo” will undo the changes and restore the original settings shown on the blue solid line. “Close” will “Undo” and close the window. IMPORTANT: If the EPEC module is attached to the computer and you click on “ACCEPT”, the new values WILL BE written to the EPEC module. Type in a new value and use the arrow keys to change cells Changes shown as red dashed line Currentlly selected cell is highlighted by an outline box Current values shown as blue solid line Click on "Help" to get help on current window Click on "Accept" to record changes and save to the EPEC module Click on "Undo" to restore changes to original values Click on "Close" to "Undo" changes and close window Use "TAB" key to move to different objects within the window Figure 72: ECT Spark Advance Function Manifold Absolute Pressure (MAP) Spark MAP Spark is a spark modifier (a positive value adds spark, a negative value subtracts spark), which allows you to modify spark from the base spark as intake manifold pressure changes. The MAP spark function is supplied for driveability, however, it will affect vehicle repeatability. The MAP Spark adder is calculated from the MAP Spark Function, See Figure 73: MAP Spark Strategy Diagram. Page 86 of 198 Extreme Performance Engine Control EPEC Control Strategy MAP MAP Spark Adder MAP Spark Figure 73: MAP Spark Strategy Diagram NOTE: In order for the Boost Retard to be functional, you must have a analog MAP sensor capable of measuring vacuum (GM or Chrysler type) installed, connected and have the correct transfer function programmed into the EPEC module. To change the ECT Spark Advance, click on the “Edit” menu. Once the options appear, click on “Spark”, see Figure 74: MAP Spark Menu. By clicking on the “MAP Spark” menu item, the MAP Spark function will appear. Window Title Bar Main Menu Bar Main "Edit" Menu "Spark" Sub-Menu Figure 74: MAP Spark Menu To modify the MAP Spark Advance function, click on the cell you want to modify and type a new value, then move out of that cell using the arrow keys. See Figure 75: MAP Spark Advance Function. Also note the original curve is shown in a blue solid line and the new curve is displayed in a red dashed line. This indicates how much you are changing the calibration from it original Page 87 of 198 Extreme Performance Engine Control EPEC Control Strategy value. At this point you can click on “Accept”, “Undo” or “Close”. “Accept” will accept the new values and the red dashed line will disappear. “Undo” will undo the changes and restore the original settings shown on the blue solid line. “Close” will “Undo” and close the window. IMPORTANT: If the EPEC module is attached to the computer and you click on “ACCEPT”, the new values WILL BE written to the EPEC module. Type in a new value and use the arrow keys to change cells Changes shown as red dashed line Currentlly selected cell is highlighted by an outline box Current values shown as blue solid line Click on "Help" to get help on current window Click on "Accept" to record changes and save to the EPEC module Click on "Undo" to restore changes to original values Click on "Close" to "Undo" changes and close window Use "TAB" key to move to different objects within the window Figure 75: MAP Spark Advance Function Nitrous Oxide Spark Retard Nitrous Oxide Spark Retard is only a spark subtractor (a positive value subtracts spark) which allows you to retard spark from the base spark when each stage of Nitrous Oxide is activated. There are two values for Nitrous Oxide Spark Retard, one for each stage of nitrous the E.P.E.C controls. These two values are additive, i.e. if stage one is calibrated for 5 degrees retard and stage 2 is calibrated for 7 degrees retard and both stages of Nitrous Oxide are activated, a total of 12 degrees of spark will be removed from the base spark. Page 88 of 198 Extreme Performance Engine Control EPEC Control Strategy NOTE: In order for the Nitrous Oxide Controls to be functional the Nitrous Enable Switch, Nitrous Arm Switch, Throttle Position Sensor and each stage of Nitrous Oxide must be connected to the EPEC module. To change the Nitrous Spark Retard, click on the “Edit” menu. Once the options appear, click on “Spark”, see Figure 76: Nitrous Spark Menu. Window Title Bar Main Menu Bar Main "Edit" Menu "Spark" Sub-Menu Figure 76: Nitrous Spark Menu By clicking on the “Nitrous Spark Retard” menu item, window with a spark retard value for each stage will appear. NOTE: You can also access the spark retard values for each stage in the Nitrous Oxide Control windows under the “Nitrous Oxide Stage 1 or Nitrous Oxide Stage 2” menu items. To modify the Nitrous Spark Retard for each stage, click on the cell you want to modify and type a new value, then move out of that cell using the “TAB” key. See Figure 77: Nitrous Spark Retard Values. IMPORTANT: If the EPEC module is attached to the computer and you click on “ACCEPT”, the new values WILL BE written to the EPEC module. Page 89 of 198 Extreme Performance Engine Control EPEC Control Strategy Type in a new value and use the arrow keys to change cells Click on "Accept" to record changes and save to the EPEC module Click on "Undo" to restore changes to original values Click on "Close" to "Undo" changes and close window Click on "Help" to get help on current window Use "TAB" key to move to different objects within the window Figure 77: Nitrous Spark Retard Values Throttle Position (TP) Spark TP Spark is a spark modifier (a positive value adds spark, a negative value subtracts spark), which allows you to modify spark from the base spark as Throttle Angle changes. The TP Spark adder is calculated from the TP Spark Function, See Figure 78: TP Spark Strategy Diagram. Relative TP TP Spark Adder TP Spark Figure 78: TP Spark Strategy Diagram NOTE: In order for the TP spark function to be functional, you must have an TP sensor installed, connected and have the correct transfer function programmed into the EPEC module. To change the TP Spark Advance, click on the “Edit” menu. Once the options appear, click on “Spark”, see Figure 79: TP Spark Menu By clicking on the “TP Spark” menu item, the TP Spark function will appear. Page 90 of 198 Extreme Performance Engine Control EPEC Control Strategy Window Title Bar Main Menu Bar Main "Edit" Menu "Spark" Sub-Menu Figure 79: TP Spark Menu To modify the TP Spark Advance function, click on the cell you want to modify and type a new value, then move out of that cell using the arrow keys. See Figure 80: TP Spark Advance Function. Also note the original curve is shown in a blue solid line and the new curve is displayed in a red dashed line. This indicates how much you are changing the calibration from it original value. At this point you can click on “Accept”, “Undo” or “Close”. “Accept” will accept the new values and the red dashed line will disappear. “Undo” will undo the changes and restore the original settings shown on the blue solid line. “Close” will “Undo” and close the window. IMPORTANT: If the EPEC module is attached to the computer and you click on “ACCEPT”, the new values WILL BE written to the EPEC module. Page 91 of 198 Extreme Performance Engine Control EPEC Control Strategy Type in a new value and use the arrow keys to change cells Changes shown as red dashed line Currentlly selected cell is highlighted by an outline box Current values shown as blue solid line Click on "Help" to get help on current window Click on "Accept" to record changes and save to the EPEC module Click on "Undo" to restore changes to original values Click on "Close" to "Undo" changes and close window Use "TAB" key to move to different objects within the window Figure 80: TP Spark Advance Function Programmable Output Channel 0-3 Spark The EPEC module has 4 user Programmable Outputs available. Each of these outputs has 2 Spark Adders associated with it, for a total of 8 Spark Adders. One Spark Adder is used when the output is “OFF” and the other is used when the output is “ON”. These Spark Adders provide the ability to modify the total spark advance delivered when external devices are switched “ON” and “OFF”. The Programmable Output Spark Adders are accessible from the Programmable Output configurations. To edit these Spark Adders, click on the “Edit” menu and then the “Programmable Outputs” sub-menu and then the desired Programmable Output channel. The Programmable Output configuration window will appear for the selected output channel. See Figure 81: Programmable Output Spark Menu. Page 92 of 198 Extreme Performance Engine Control EPEC Control Strategy Window Title Bar Main Menu Bar Main "Edit" Menu "Programmable Outputs" sub-menu Figure 81: Programmable Output Spark Menu Click on the “On Spark Adder” or on the “Off Conditions” tab then the “Off Spark Adder” cell and type a new value, then move out of that cell by using the tab key. See Figure 82: Programmable Output 0-4 Spark Function. At this point you can click on “Accept”, “Undo” or “Close”. “Accept” will accept the new values and the red dashed line will disappear. “Undo” will undo the changes and restore the original settings shown on the blue solid line. “Close” will “Undo” and close the window. IMPORTANT: If the EPEC module is attached to the computer and you click on “ACCEPT”, the new values WILL BE written to the EPEC module. Page 93 of 198 Extreme Performance Engine Control EPEC Control Strategy Use "TAB" key to move to different objects within the window "ON" Spark Adder "OFF" Condition Tab Click on "Accept" to record changes and save to the EPEC module Click on "Undo" to restore changes to original values Click on "Close" to "Undo" changes and close window Click on "Help" to get help on current window Figure 82: Programmable Output 0-4 Spark Function Analog Channel 0-2 Spark There are 3 Analog Input channels and each of them have a input voltage range of 0v-10v. The Analog Channel Spark Adders can be used to modify total spark advance to the engine based on any external analog type sensor or input. The values entered in these tables are straight adders to your spark advance (a positive value adds spark advance, a negative value subtracts spark advance). The Analog Channel Spark adder is calculated from the Analog Channel Spark Function, See Figure 83: Analog Channel 0-2 Spark Strategy Diagram Analog Channel 0-2 Volts Injec I Analog Channel 0-2 Spark Adder Analog Channel 0-2 Spark Figure 83: Analog Channel 0-2 Spark Strategy Diagram To change one of the Analog Channel’s Spark Function, click on the “Edit” menu and then the “Spark” sub-menu and then one of the “Analog Channel X Fuel” menu items. The selected Analog Channel spark function will then appear. See Figure 84: Analog Channel 0 -2 Spark Menu. Page 94 of 198 Extreme Performance Engine Control EPEC Control Strategy Window Title Bar Main Menu Bar Main "Edit" Menu "Spark" Sub-Menu Figure 84: Analog Channel 0 -2 Spark Menu Click on the cell you want to modify and type a new value, then move out of that cell using the arrow keys. See Figure 85: Analog Channel 0-3 Spark Function. Note the original curve is shown in a blue solid line and the new curve is displayed in a red dashed line. This indicates how much you are changing the calibration from it original value. At this point you can click on “Accept”, “Undo” or “Close”. “Accept” will accept the new values and the red dashed line will disappear. “Undo” will undo the changes and restore the original settings shown on the blue solid line. “Close” will “Undo” and close the window. IMPORTANT: If the EPEC module is attached to the computer and you click on “ACCEPT”, the new values WILL BE written to the EPEC module. Page 95 of 198 Extreme Performance Engine Control EPEC Control Strategy Type in a new value and use the arrow keys to change cells Changes shown as red dashed line Currentlly selected cell is highlighted by an outline box Current values shown as blue solid line Click on "Help" to get help on current window Click on "Accept" to record changes and save to the EPEC module Click on "Undo" to restore changes to original values Click on "Close" to "Undo" changes and close window Use "TAB" key to move to different objects within the window Figure 85: Analog Channel 0-3 Spark Function Nitrous Oxide Strategy The EPEC module has built in Nitrous Oxide Controls. This will enables you to have the computer turn on the Nitrous Oxide System and retard spark advance for you. You will have to wire the output from the computer to a relay system which turn on your Nitrous System CAUTION: Do not connect the output from the EPEC module directly to the nitrous oxide solenoids. The current draw of typical nitrous oxide solenoids is too high for the EPEC Module to activate directly and damage may occur. Once your Nitrous Oxide system hardware is wired, which includes the Nitrous Oxide Arm Switch (the device to trigger or start the Nitrous timers, which typically can be a transmission brake button, clutch switch, or line lock button), nitrous oxide solenoids, Nitrous Oxide Indicator Lamps and Nitrous Oxide Enable switch, the calibration is quite simple as described below. IMPORTANT: Be sure to solder and tape all connections, wiring is the most common cause of system problems. The EPEC system allows for two stages of nitrous oxide controls. Each stage is activated (turned on) after a programmable time delay, once the trigger is activated. There are two steps to “Arm” the Nitrous Oxide system. First you must enable the Nitrous System by closing the Nitrous Oxide Enable Switch. Page 96 of 198 Extreme Performance Engine Control EPEC Control Strategy IMPORTANT: The Nitrous Oxide Enable switch cannot be “ON” when the EPEC module is powered up. If it is, the Nitrous System will not “ARM” when the Nitrous Oxide Arm Switch is depressed. If the Nitrous Oxide Enable Switch is “ON” when the EPEC module is powered up, you must turn the switch off then back on again. This is done intentionally to protect against accidental Nitrous Oxide discharge. Secondly, you must depress the Nitrous Oxide Arm Switch. This switch has two functions, when depressed this switch will arm the Nitrous System and when it is released, the nitrous timers start. For example if your Nitrous Oxide Arm input is connected to the transmission brake, when you press the transmission brake, the Nitrous Oxide System will arm nitrous indicator lamps will illuminate indicating that the Nitrous System is armed and is ready. Once you release the transmission brake, the Nitrous Oxide System will activate in the programmed number of Milliseconds. So, if you entered 50ms (Note: 1ms = 0.001 seconds) and a spark retard of 4 degrees for stage one activation and 1100ms and a spark retard of 6 degrees for stage two. The first stage will activate 0.050 seconds after you released the transmission brake and the spark will be retarded 4 degrees. The second stage will come on 1.100 seconds after you after you released the transmission brake and the spark will be retarded an additional 6 degrees (total 10 degrees = 4 degrees from stage one + 6 degrees for stage two). This is explained further in the table below: Time from transmission brake release Comments 0 Car staged at the line, transmission brake applied, Throttle at WOT, total WOT spark advance calibrated to 32 degrees BTC 0 Christmas tree activated, you release trans. Brake 0.050 sec (50 ms) 1.100 sec (1100 ms) First stage of Nitrous is activated, spark retarded 4 degrees Total Spark advance = 28 degrees BTC Second stage of Nitrous is activated, spark retarded 6 additional degrees Total Spark Advance = 22 degrees BTC NOTE: You could calibrate stage II to come on before stage I as both stages are timed independently from the trigger. Page 97 of 198 Extreme Performance Engine Control EPEC Control Strategy IMPORTANT: The timer starts from the time the trigger is activated AND the Relative Throttle Angle is greater than Minimum Throttle Angle AND RPM is greater than Minimum RPM for operation of the Nitrous Oxide System, in other words if you release the trigger and the Throttle Angle is not at the Minimum Angle for the Nitrous Oxide system to be operational the timer will start after the Throttle Angle gets to the specified Minimum Angle. Nitrous Oxide Globals The Nitrous Oxide Globals apply to both Stage 1 and Stage 2. There are four parameters that are apply to both Stage 1 and Stage 2. 1. “Nitrous On Throttle Angle”: The minimum throttle angle for the Nitrous Oxide system to activate. 2. “Nitrous Off Throttle Angle”: The throttle angle at which the Nitrous Oxide system will turn off. 3. “Nitrous Maximum RPM”: The engine speed at which the Nitrous Oxide system will turn off, this is to protect from over revving the engine. 4. “Nitrous on Delay After Max. RPM”: The amount of time (in milliseconds) it will take the nitrous system to turn back on after the engine speed drops below the “Nitrous Maximum RPM”. IMPORTANT: The system will not turn the nitrous solenoids back on once you remove your foot, so if you lift, the system will not come back on. To modify the Nitrous Oxide Global calibration parameters, go to the “Edit” menu, then the “Nitrous” sub-menu and select “Globals” See Figure 86: Nitrous Oxide Menu. Page 98 of 198 Extreme Performance Engine Control EPEC Control Strategy Window Title Bar Main Menu Bar "Nitrousl" Sub-Menu An arrow indicates another level of submenus exist Main "Edit" Menu Figure 86: Nitrous Oxide Menu Click on the cell you want to modify and type a new value, then move out of that cell using the “TAB” key. See Figure 87: Nitrous Oxide Globals. At this point you can click on “Accept”, “Undo” or “Cancel”. “Accept” will accept the new values. “Undo” will undo the changes and restore the original settings. “Close” will “Undo” and close the window. IMPORTANT: If the EPEC module is attached to the computer and you click on “ACCEPT”, the new values WILL BE written to the EPEC module. Page 99 of 198 Extreme Performance Engine Control EPEC Control Strategy Click on "Accept" to record changes and save to the EPEC module Click on "Undo" to restore changes to original values Click on "Cancel" to "Undo" changes and close window Click on "Help" to get help on current window Use "TAB" key to move to different objects within the window Figure 87: Nitrous Oxide Globals Nitrous Oxide Stage 1 and Stage 2 Controls The Nitrous Oxide Stage 1 and Stage 2 controls are identical in function. There are three parameters that are apply to only Stage 1 or Stage 2. 1. “Nitrous Stage X Spark Retard”: The amount of spark angle the Nitrous Oxide system will remove when the stage is activated. 2. “Nitrous Stage X Minimum RPM”: The minimum RPM at which the Nitrous stage will come on. This is to protect from excessive low speed cylinder pressures. 3. “Nitrous Stage X Delay”: The amount of time, in milliseconds, which the nitrous stage will come on after the trigger is activated, and the minimum throttle angle and RPM requirements are met. Note that 1ms is equal to 0.001 seconds. The following table is provided for reference: Milliseconds Seconds 1 0.001 10 0.010 100 0.100 1000 1.000 To modify the Nitrous Oxide Global calibration parameters, go to the “Edit” menu, then the “Nitrous” sub-menu and select “Stage 1” or “Stage 2” See Figure 86: Nitrous Oxide Menu. Page 100 of 198 Extreme Performance Engine Control EPEC Control Strategy NOTE: Each stage works independently and each are timed from the trigger. So if the time for “Nitrous Stage 2 Delay” is less than for “Nitrous Stage 1 Delay” then Stage 2 will come on before stage one. Click on the cell you want to modify and type a new value, then move out of that cell using the “TAB” key. See Figure 88: Nitrous Oxide Stage Parameters. At this point you can click on “Accept”, “Undo” or “Cancel”. “Accept” will accept the new values. “Undo” will undo the changes and restore the original settings. “Close” will “Undo” and close the window. IMPORTANT: If the EPEC module is attached to the computer and you click on “ACCEPT”, the new values WILL BE written to the EPEC module. Click on "Accept" to record changes and save to the EPEC module Click on "Undo" to restore changes to original values Click on "Cancel" to "Undo" changes and close window Click on "Help" to get help on current window Use "TAB" key to move to different objects within the window Figure 88: Nitrous Oxide Stage Parameters Engine RPM Limiters These are engine limits to protect your engine from over-revving or to provide assistance for staging the car, like an aftermarket two step. Fuel Rev Limit The Fuel Rev Limit specifies the RPM at which the EPEC Module will shut off fuel flow to the engine by not activating the injectors. The EPEC module will cut fuel (Fuel Cut Flag = ON) at this engine speed. The fuel will turn back on at this setting minus 200 RPM. So if you have this value set at 6000 RPM, the fuel will be cut as soon as the engine speed is greater than Page 101 of 198 Extreme Performance Engine Control EPEC Control Strategy 6000 RPM and the fuel will turn back on at 5800 RPM. This is typically set slightly higher than the spark rev. limiter (described below). NOTE: The fuel rev limiter does not lean out the engine. If the fuel rev limiter is active, no fuel is delivered. Spark Rev Limit The Spark Rev Limit specifies the RPM at which the computer will shut off spark delivery to the engine by not firing the coil. This is updated every cylinder event, and is similar to other aftermarket spark type rev limiters. The EPEC module will cut spark (Spark Cut Flag = ON) at this engine speed. The spark will turn back on at this setting minus 200 RPM. So if you have this value set at 6000 RPM, the spark will be cut as soon as the engine speed is greater than 6000 RPM and the spark will turn back on at 5800 RPM. IMPORTANT: If you are running the EPEC module with an EDIS type ignition system, Spark cannot be cut. You must rev limit the Fuel Rev Limit. Stage Rev Limit This is similar to a two-step device. It cuts the spark, at each cylinder event. This is activated when a trigger is activated, such ac a clutch pedal depressed. It will cut the spark to hold the engine at a given speed. IMPORTANT: If you are running the EPEC module with an EDIS type ignition system, Spark cannot be cut. You cannot use this feature. To modify the Engine RPM Limits parameters, go to the “Edit” menu, then select “Engine RPM Limits” See Figure 89: Engine RPM Limits Menu. Page 102 of 198 Extreme Performance Engine Control EPEC Control Strategy Window Title Bar Main Menu Bar "Engine RPM Limits" Menu Item An arrow indicates another level of sub-menus exist Main "Edit" Menu Figure 89: Engine RPM Limits Menu Click on the cell you want to modify and type a new value, then move out of that cell using the “TAB” key. See Figure 90: Engine RPM Limiter Parameters. At this point you can click on “Accept”, “Undo” or “Cancel”. “Accept” will accept the new values. “Undo” will undo the changes and restore the original settings. “Close” will “Undo” and close the window. IMPORTANT: If the EPEC module is attached to the computer and you click on “ACCEPT”, the new values WILL BE written to the EPEC module. Page 103 of 198 Extreme Performance Engine Control EPEC Control Strategy Click on "Accept" to record changes and save to the EPEC module Click on "Undo" to restore changes to original values Click on "Cancel" to "Undo" changes and close window Click on "Help" to get help on current window Use "TAB" key to move to different objects within the window Figure 90: Engine RPM Limiter Parameters Manual Fuel/Spark Control This should be used cautiously. It is intended to be used when testing on the dynamometer, it allows you to specify the spark advance and Air/Fuel ratio the engine is operating regardless of any other fuel or spark function. This is a total override of any values calibrated in the base program, so no mater what speed and throttle angle you are at, the computer will deliver the spark advance and Air/Fuel ratio specified in this window, if you have selected “Manual Mode”. NOTE: If you are using the “TFI” or “CCDTFI” ignition types, the spark value here needs to be added to the base spark advance, so if you have 10 degrees base spark and 16 degrees specified in this cell, then you will actually have 26 degrees of spark delivered to the engine. If you are running the “EDIS” ignition system, the value specified here will reflect the actual spark advance. To modify the Manual Fuel/Spark Control parameters, go to the “Edit” menu, then select “Manual Fuel/Spark Control” See Figure 91: Manual Fuel/Spark Control Menu. Page 104 of 198 Extreme Performance Engine Control EPEC Control Strategy Window Title Bar Main Menu Bar "Manuel Fuel/Spark Control" Menu Item An arrow indicates another level of submenus exist Main "Edit" Menu Figure 91: Manual Fuel/Spark Control Menu To use the Manual Fuel/Spark control, the “Control Type” must be set for “Manual Control”. If the “Control Type” is set to “Automatic Control”, the “Manual A/F Ratio” and “Manual Spark Angle” values are not used. To change the “Control Type”, “click” on the down arrow in the box and click on “Manual Operation”. Once you do this the engine will have the spark advance and Air/Fuel you have specified, so be sure you are ready for these values! The engine should be running with the EPEC module connected to the IBM PC. To change either Air/Fuel or Spark advance “click” on the desired cell and type in your new value, then move out of that cell using the “TAB” key. See Figure 92: Manual Fuel/Spark Control. At this point you can click on “Accept”, “Undo” or “Cancel”. “Accept” will accept the new values. “Undo” will undo the changes and restore the original settings. “Close” will “Undo” and close the window. IMPORTANT: If the EPEC module is attached to the computer and you click on “ACCEPT”, the new values WILL BE written to the EPEC module. Page 105 of 198 Extreme Performance Engine Control EPEC Control Strategy Click on "Accept" to record changes and save to the EPEC module Click on "Undo" to restore changes to original values Click on "Cancel" to "Undo" changes and close window Click on "Help" to get help on current window Use "TAB" key to move to different objects within the window Figure 92: Manual Fuel/Spark Control Engine Configuration The Engine Configuration allows you to specify the Number of Cylinders, Engine Displacement and Injector Size. To modify the Engine Configuration parameters, go to the “Edit” menu, then select “Engine Configuration” See Figure 93: Engine Configuration Menu. Page 106 of 198 Extreme Performance Engine Control EPEC Control Strategy Window Title Bar "Engine Configuraiton" Menu item Main Menu Bar An arrow indicates another level of submenus exist Main "Edit" Menu Figure 93: Engine Configuration Menu Click on the cell you want to modify and type a new value, then move out of that cell using the “TAB” key. See Figure 94: Engine Configuration. At this point you can click on “Accept”, “Undo” or “Cancel”. “Accept” will accept the new values. “Undo” will undo the changes and restore the original settings. “Close” will “Undo” and close the window. IMPORTANT: If the EPEC module is attached to the computer and you click on “ACCEPT”, the new values WILL BE written to the EPEC module. Page 107 of 198 Extreme Performance Engine Control EPEC Control Strategy Click on "Accept" to record changes and save to the EPEC module Click on "Undo" to restore changes to original values Click on "Cancel" to "Undo" changes and close window Click on "Help" to get help on current window Use "TAB" key to move to different objects within the window Figure 94: Engine Configuration Page 108 of 198 Extreme Performance Engine Control EPEC Control Strategy Input/Output Configuration There are 6 basic sensors for the EPEC system. These are Air Charge Temperature Sensor (ACT), Engine Coolant Temperature Sensor (ECT), Mass Air Flow Sensor (MAF), Manifold Absolute Pressure Sensor (MAP), Throttle Position Sensor (TP) and Profile Ignition Pickup (PIP from the distributor). The Input/Output Configuration allows you to enter values for each of these sensors. These values describe each of the sensors to the EPEC module. These values should only be entered once and should only change if you install new hardware. The default configuration has standard 86-93 5.0L MAF Mustang or 1994 and 1995 5.0L MAF Mustang configurations. The EPEC module is compatible with all Ford Sensors except the MAP sensor which must be a GM or Chrysler analog type MAP sensor. Ford MAP sensors are not capable of measuring positive manifold pressure or boost, however, GM manufactures a 2 bar and a 3 bar MAP sensor. ACT Transfer Function The Air Charge Temperature (ACT) sensor measures the temperature of the incoming air into the engine. The EPEC Strategy uses the ACT Transfer Function to correlate the voltage read from the ACT Sensor to the actual Air Temperature that is entering the engine. The ACT sensor is a Thermistor which is an electronic device that changes resistance with temperature. The EPEC module is compatible with the Ford ACT sensors. The ACT sensor is first converted to a voltage “ACT Volts”. This voltage value is then used as the input or “X” value to the ACT Transfer Function. The output or “Y” of the ACT Transfer Function is the temperature that corresponds to the input voltage. Figure 95: ACT Sensor Strategy Block Diagram shows the block diagram from the ACT Sensor to the actual ACT °F value. ACT Sensor ACT Volts ACT ACT Transfer Function Figure 95: ACT Sensor Strategy Block Diagram To change the A.CT. Transfer Function, click on the “Edit” menu and then the “Input/Output Configuration” sub-menu. Click on the “ACT Transfer Function” menu item. The ACT Transfer Function will then appear. See Figure 96: ACT Transfer Function Menu. Page 109 of 198 Extreme Performance Engine Control EPEC Control Strategy Window Title Bar An arrow indicates another level of submenus exist Main Menu Bar Main "Edit" Menu "Input/Output Configuration" sub-menu Figure 96: ACT Transfer Function Menu Click on the cell you want to modify and type a new value, then move out of that cell using the arrow keys. See Figure 97: ACT Sensor Transfer Function. Note the original curve is shown in a blue solid line and the new curve is displayed in a red dashed line. This indicates how much you are changing the calibration from it original value. At this point you can click on “Accept”, “Undo” or “Close”. “Accept” will accept the new values and the red dashed line will disappear. “Undo” will undo the changes and restore the original settings shown on the blue solid line. “Close” will “Undo” and close the window. IMPORTANT: If the EPEC module is attached to the computer and you click on “ACCEPT”, the new values WILL BE written to the EPEC module. Page 110 of 198 Extreme Performance Engine Control EPEC Control Strategy Type in a new value and use the arrow keys to change cells Changes shown as red dashed line Current values shown as blue solid line Currentlly selected cell is highlighted by an outline box Click on "Help" to get help on current window Click on "Accept" to record changes and save to the EPEC module Click on "Undo" to restore changes to original values Click on "Close" to "Undo" changes and close window Use "TAB" key to move to different objects within the window Figure 97: ACT Sensor Transfer Function ECT Transfer Function The Engine Coolant Temperature (ECT) sensor measures the coolant temperature of the engine. The EPEC Strategy uses the ECT Transfer Function to correlate the voltage read from the ECT Sensor to the actual Engine Temperature. The ECT sensor is a Thermistor which is an electronic device that changes resistance with temperature. The EPEC module is compatible with the Ford ECT sensors. The ECT sensor is first converted to a voltage “ECT Volts”. This voltage value is then used as the input or “X” value to the ECT Transfer Function. The output or “Y” of the ECT Transfer Function is the temperature that corresponds to the input voltage. Figure 98: ECT Sensor Strategy Block Diagram shows the block diagram from the ECT Sensor to the actual ECT °F value. ECT Sensor ECT Volts ECT ECT Transfer Function Figure 98: ECT Sensor Strategy Block Diagram Page 111 of 198 Extreme Performance Engine Control EPEC Control Strategy To change the ECT Transfer Function, click on the “Edit” menu and then the “Input/Output Configuration” sub-menu. Click on the “ECT Transfer Function” menu item. The ECT Transfer Function will then appear. See Figure 99: ECT Transfer Function Menu. Window Title Bar An arrow indicates another level of submenus exist Main Menu Bar Main "Edit" Menu "Input/Output Configuration" sub-menu Figure 99: ECT Transfer Function Menu Click on the cell you want to modify and type a new value, then move out of that cell using the arrow keys. See Figure 100: ECT Sensor Transfer Function. Note the original curve is shown in a blue solid line and the new curve is displayed in a red dashed line. This indicates how much you are changing the calibration from it original value. At this point you can click on “Accept”, “Undo” or “Close”. “Accept” will accept the new values and the red dashed line will disappear. “Undo” will undo the changes and restore the original settings shown on the blue solid line. “Close” will “Undo” and close the window. IMPORTANT: If the EPEC module is attached to the computer and you click on “ACCEPT”, the new values WILL BE written to the EPEC module. Page 112 of 198 Extreme Performance Engine Control EPEC Control Strategy Type in a new value and use the arrow keys to change cells Changes shown as red dashed line Current values shown as blue solid line Currentlly selected cell is highlighted by an outline box Click on "Help" to get help on current window Click on "Accept" to record changes and save to the EPEC module Click on "Undo" to restore changes to original values Click on "Close" to "Undo" changes and close window Use "TAB" key to move to different objects within the window Figure 100: ECT Sensor Transfer Function MAF Transfer Function The Mass Air Flow (MAF) sensor measures amount of air entering the engine. The base fuel amount (Idle/Part/WOT Air/Fuel ratio) is based on the readings from the MAF sensor. The EPEC Strategy uses the MAF Transfer Function to correlate the voltage read from the MAF Sensor to the actual engine air flow. The MAF sensor is a hot wire anemometer. The EPEC module is compatible with the Ford type MAF sensors. The MAF sensor is first converted to a voltage “MAF Volts”. This voltage value is then used as the input or “X” value to the MAF Transfer Function. The output or “Y” of the MAF Transfer Function is the air mass that corresponds to the input voltage. Figure 101: MAF Sensor Strategy Block Diagram shows the block diagram from the MAF Sensor to the actual Air Mass value. VERY IMPORTANT: The base fuel flow is based on the air flow into the engine. This air flow is determined by the MAF Transfer Function. If this function is not configured correctly, the Air/Fuel values in the Idle/Part/WOT fuel functions will give incorrect results. Page 113 of 198 Extreme Performance Engine Control EPEC Control Strategy MAF Volts MAF Sensor Air Mass MAF Transfer Function Figure 101: MAF Sensor Strategy Block Diagram To change the MAF Transfer Function, click on the “Edit” menu and then the “Input/Output Configuration” sub-menu. Click on the “MAF Transfer Function” menu item. The MAF Transfer Function will then appear. See Figure 102: MAF Transfer Function Menu. Window Title Bar An arrow indicates another level of submenus exist Main Menu Bar Main "Edit" Menu "Input/Output Configuration" sub-menu Figure 102: MAF Transfer Function Menu Click on the cell you want to modify and type a new value, then move out of that cell using the arrow keys. See Figure 103: MAF Sensor Transfer Function. Note the original curve is shown in a blue solid line and the new curve is displayed in a red dashed line. This indicates how much you are changing the calibration from it original value. At this point you can click on “Accept”, “Undo” or “Close”. “Accept” will accept the new values and the red dashed line will disappear. “Undo” will undo the changes and restore the original settings shown on the blue solid line. “Close” will “Undo” and close the window. Page 114 of 198 Extreme Performance Engine Control EPEC Control Strategy IMPORTANT: If the EPEC module is attached to the computer and you click on “ACCEPT”, the new values WILL BE written to the EPEC module. Type in a new value and use the arrow keys to change cells Current values shown as blue solid line Currentlly selected cell is highlighted by an outline box Changes shown as red dashed line Click on "Help" to get help on current window Click on "Accept" to record changes and save to the EPEC module Click on "Undo" to restore changes to original values Click on "Close" to "Undo" changes and close window Use "TAB" key to move to different objects within the window Figure 103: MAF Sensor Transfer Function MAP Transfer Function The Manifold Absolute Pressure (MAP) sensor measures the ABSOLUTE manifold pressure in the intake manifold. The Boost Retard and MAP Fuel functions are based on the MAP sensor. The EPEC Strategy uses the MAP Transfer Function to correlate the voltage read from the MAP Sensor to the actual intake manifold pressure. IMPORTANT: The EPEC module is not compatible with the Ford MAP sensors. Ford MAP sensors cannot measure positive pressure (over 30 In of Hg) they can only measure manifold vacuum (up to 30 In of Hg). You MUST use a GM analog type 2 or 3 bar MAP Sensor OR a Chrysler analog type MAP Sensor. The MAP sensor is first converted to a voltage “MAP Volts”. This voltage value is then used as the input or “X” value to the MAP Transfer Function. The output or “Y” of the MAP Transfer Function is the absolute intake manifold pressure that corresponds to the input voltage. Figure 104: MAP Sensor Strategy Block Diagram shows the block diagram from the MAP Sensor to the actual Manifold Pressure value. There two other values that are calculated Page 115 of 198 Extreme Performance Engine Control EPEC Control Strategy from the MAP Sensor. The Boost Pressure and Barometric Pressure are calculated based on the MAP Sensor. Calculate BP Barometric Pressure Calculate Boost Pressure Boost Pressure N yO Ke MAP Sensor MAP Input Voltage Manifold Pressure MAP Transfer Function Figure 104: MAP Sensor Strategy Block Diagram To change the MAP Transfer Function, click on the “Edit” menu and then the “Input/Output Configuration” sub-menu. Click on the “MAP Transfer Function” menu item. The MAP Transfer Function will then appear. See Figure 105: MAP Transfer Function Menu. Window Title Bar An arrow indicates another level of submenus exist Main Menu Bar Main "Edit" Menu "Input/Output Configuration" sub-menu Figure 105: MAP Transfer Function Menu Click on the cell you want to modify and type a new value, then move out of that cell using the arrow keys. See Figure 106: MAP Sensor Transfer Function. Note the original curve is shown in a blue solid line and the new curve is displayed in a red dashed line. This indicates how much you are changing the calibration from it original value. At this point you can click on “Accept”, “Undo” or “Close”. “Accept” will accept the new values and the red dashed line will disappear. “Undo” will undo the changes and restore the original settings shown on the blue solid line. “Close” will “Undo” and close the window. Page 116 of 198 Extreme Performance Engine Control EPEC Control Strategy IMPORTANT: If the EPEC module is attached to the computer and you click on “ACCEPT”, the new values WILL BE written to the EPEC module. Type in a new value and use the arrow keys to change cells Changes shown as red dashed line Currentlly selected cell is highlighted by an outline box Current values shown as blue solid line Click on "Help" to get help on current window Click on "Accept" to record changes and save to the EPEC module Click on "Undo" to restore changes to original values Click on "Close" to "Undo" changes and close window Use "TAB" key to move to different objects within the window Figure 106: MAP Sensor Transfer Function TP Transfer Function The Throttle Position (TP) sensor measures the angular throttle opening. There are several values calculated from the TP sensor including Absolute TP, Relative TP, Throttle Angle Rate and TP Mode. Absolute TP is the absolute throttle opening assuming a starting point of 0 degrees. The Absolute TP however, is only used to calculate the Relative TP and Initial TP. The Relative TP value is the amount of throttle opening using the Initial TP as the starting point, i.e. if the Initial TP is 5 degrees and the Absolute TP is 7 degrees then the Relative TP is 2 degrees. IMPORTANT: All calibration functions based on Throttle Position are based on the Relative TP value. The EPEC module uses this strategy to alleviate the user of precise TP settings. The idle hard stop setting does not matter to the EPEC module since it uses Relative TP as long as it has enough range to span idle, part throttle and wide open throttle. Page 117 of 198 Extreme Performance Engine Control EPEC Control Strategy The Throttle Angle Rate is also calculated from the Absolute TP value. The Throttle Angle Rate is how fast the throttle is being opened in degrees per second. The TP Mode is determined based on the Relative TP value and the programmable breakpoints. The EPEC Strategy uses the TP Transfer Function to correlate the voltage read from the TP Sensor to the actual throttle position. The TP sensor is first converted to a voltage “TP Volts”. This voltage value is then used as the input or “X” value to the TP Transfer Function. The output or “Y” of the TP Transfer Function is the absolute throttle position that corresponds to the input voltage. Figure 107: TP Sensor Strategy Block Diagram shows the block diagram from the TP Sensor to the actual throttle position value and the calculation of all other throttle related parameters. Initial TP TP Sensor TP Volts Absolute TP Calc Relative TP Relative TP TP Transfer Function Idle->Part Breakpoint Calc TP Rate Part->WOT Breakpoint Deterimine TP Mode Throttle Mode Hysterysis Throttle Angle Rate TP Mode Figure 107: TP Sensor Strategy Block Diagram To change the TP Transfer Function, click on the “Edit” menu and then the “Input/Output Configuration” sub-menu. Click on the “TP Transfer Function” menu item. The TP Transfer Function will then appear. See Figure 108: TP Sensor Transfer Function Menu. Page 118 of 198 Extreme Performance Engine Control EPEC Control Strategy Window Title Bar An arrow indicates another level of submenus exist Main Menu Bar Main "Edit" Menu "Input/Output Configuration" sub-menu Figure 108: TP Sensor Transfer Function Menu Click on the cell you want to modify and type a new value, then move out of that cell using the arrow keys. See Figure 109: TP Sensor Transfer Function. Note the original curve is shown in a blue solid line and the new curve is displayed in a red dashed line. This indicates how much you are changing the calibration from it original value. At this point you can click on “Accept”, “Undo” or “Close”. “Accept” will accept the new values and the red dashed line will disappear. “Undo” will undo the changes and restore the original settings shown on the blue solid line. “Close” will “Undo” and close the window. IMPORTANT: If the EPEC module is attached to the computer and you click on “ACCEPT”, the new values WILL BE written to the EPEC module. Page 119 of 198 Extreme Performance Engine Control EPEC Control Strategy Type in a new value and use the arrow keys to change cells Changes shown as red dashed line Currentlly selected cell is highlighted by an outline box Current values shown as blue solid line Click on "Help" to get help on current window Click on "Accept" to record changes and save to the EPEC module Click on "Undo" to restore changes to original values Click on "Close" to "Undo" changes and close window Use "TAB" key to move to different objects within the window Figure 109: TP Sensor Transfer Function TP Sensor Configuration The Throttle Position (TP) Configuration values include three parameters, Idle -> Part Breakpoint, Part -> WOT Breakpoint and the Throttle Mode Hysteresis. These three parameters are used by the EPEC Module to determine the current operating throttle mode. The “Idle -> Part Breakpoint” is the throttle angle at which the EPEC Module changes from Idle to Part Throttle. The “Part -> WOT Breakpoint” is the throttle angle at which the EPEC Module changes from part throttle to WOT. The “Throttle Mode Hysteresis” is the amount of throttle angle that is used as a filter (buffer zone) so the EPEC does not switch from one mode to the other due to the noise on the TP signal line. Figure 110: TP Sensor Strategy Block Diagram shows how the “Throttle Mode” is determined using the Throttle Mode Configuration values. Figure 111: Throttle Modes shows how the Throttle Mode Configuration values relate to actual throttle movement. The blue section as shown is the Idle area of throttle movement. The red section as shown is the Part Throttle area of throttle movement and the green section as shown is the Wide Open Throttle area of throttle movement. The gray sections are the Hysteresis bands. Parameter Idle -> Part Breakpoint Value Meaning 5 Change from Idle Mode to Part Throttle Mode as 5 degrees of relative throttle opening. Page 120 of 198 Extreme Performance Engine Control Parameter EPEC Control Strategy Value Meaning Return to idle Mode at 5 - 2 or 3 degrees Part -> WOT Breakpoint 60 Change from Part Throttle Mode to Wide Open Throttle Mode at 60 degrees of relative throttle opening. Return to Part Throttle Mode at 60 -2 or 58 degrees Throttle Mode Hysteresis 2 Throttle Filter range IMPORTANT: Do not set the Throttle Mode Hysteresis value greater than the Idle -> Part Breakpoint. If this is done, the EPEC module will never return to the Idle Mode of operation. IMPORTANT: All calibration functions based on Throttle Position are based on the Relative TP value. The EPEC module uses this strategy to alleviate the user of precise TP settings. The idle hard stop setting does not matter to the EPEC module since it uses Relative TP as long as it has enough range to span idle, part throttle and wide open throttle. Initial TP TP Sensor TP Volts Absolute TP Calc Relative TP Relative TP TP Transfer Function Idle->Part Breakpoint Calc TP Rate Part->WOT Breakpoint Deterimine TP Mode Throttle Mode Hysterysis Throttle Angle Rate TP Mode Figure 110: TP Sensor Strategy Block Diagram Page 121 of 198 Extreme Performance Engine Control EPEC Control Strategy Part -> WOT Breakpoint WOT Part Throttle Idle -> Part Breakpoint Idle Figure 111: Throttle Modes To change the TP Configuration Values, click on the “Edit” menu and then the “Input/Output Configuration” sub-menu. Click on the “TP Sensor Configuration” menu item. The TP Configuration Window will then appear. See Figure 112: TP Sensor Configuration Menu. Window Title Bar An arrow indicates another level of submenus exist Main "Edit" Menu "Input/Output Configuration" sub-menu Figure 112: TP Sensor Configuration Menu Page 122 of 198 Main Menu Bar Extreme Performance Engine Control EPEC Control Strategy Click on the cell you want to modify and type a new value, then move out of that cell using the “TAB” key. See. Figure 113: TP Sensor Configuration. At this point you can click on “Accept”, “Undo” or “Cancel”. “Accept” will accept the new values. “Undo” will undo the changes and restore the original settings. “Close” will “Undo” and close the window. IMPORTANT: If the EPEC module is attached to the computer and you click on “ACCEPT”, the new values WILL BE written to the EPEC module. Click on "Accept" to record changes and save to the EPEC module Click on "Undo" to restore changes to original values Click on "Cancel" to "Undo" changes and close window Click on "Help" to get help on current window Use "TAB" key to move to different objects within the window Figure 113: TP Sensor Configuration PIP Configuration The Profile Ignition Pickup (PIP) Configuration values include the following parameters; Crank to Run Transition RPM, Crank to Run Hysteresis and the Signature PIP Angle. These five parameters are used by the EPEC Module to determine the current “Crank/RUN” operation mode, and how the EPEC module synchronizes with the distributor signal. The “Crank to Run Transition RPM” and “Crank To Run Hysteresis” values are used in conjunction to determine when the engine mode changes from “CRANK” to “RUN”. The “Crank to Run Transition RPM” is the engine speed in which the EPEC module will change from “CRANK” to “RUN”. The “Crank to Run Hysteresis” is the filter (buffer zone) so the EPEC module does not switch from one mode to the other due to engine instantaneous acceleration/decelerations. Page 123 of 198 Extreme Performance Engine Control EPEC Control Strategy The “Signature PIP Angle” tells the EPEC module what the angular difference is between a normal PIP and the PIP for the number 1 cylinder. The EPEC module uses this value to determine the location of the number 1 cylinder. Figure 114: PIP Strategy Block Diagram shows how the different parameters are used and calculated. The “Number of Engine Cylinders”, “PIP Edge Filter”, “PIP Time Filter”, “Signature PIP Angle”, “Crank to Run Transition RPM” and “Crank to Run Hysteresis” are all programmable for your specific application. The following table shows typical values for a 5.0L Mustang. Parameter Value Crank to Run Transition RPM 400 Meaning Crank to Run at 400 RPM Run to Crank at 350 RPM Crank to Run Hysteresis 50 Signature PIP Angle 13.5 Filter (buffer zone) for changing modes The number 1 cylinder PIP is 13.5 degrees shorter than a normal PIP. A normal PIP angle is 360/cylinders Number Of Engine Cylinders Calc RPM Engine Speed Calc Engine Position Engine Position Determine Crank Flag Crank Flag Distributor (PIP) Signature PIP Angle Crank to Run Transition RPM Crank to Run Hysterysis Figure 114: PIP Strategy Block Diagram To change the PIP Configuration Values, click on the “Edit” menu and then the “Input/Output Configuration” sub-menu. Click on the “PIP Configuration” menu item. The PIP Configuration Window will then appear. See Figure 115: PIP Configuration Menu. Page 124 of 198 Extreme Performance Engine Control EPEC Control Strategy Window Title Bar An arrow indicates another level of submenus exist Main Menu Bar Main "Edit" Menu "Input/Output Configuration" sub-menu Figure 115: PIP Configuration Menu Click on the cell you want to modify and type a new value, then move out of that cell using the “TAB” key. See. Figure 116: PIP Configuration. At this point you can click on “Accept”, “Undo” or “Cancel”. “Accept” will accept the new values. “Undo” will undo the changes and restore the original settings. “Close” will “Undo” and close the window. IMPORTANT: If the EPEC module is attached to the computer and you click on “ACCEPT”, the new values WILL BE written to the EPEC module. Page 125 of 198 Extreme Performance Engine Control EPEC Control Strategy Click on "Accept" to record changes and save to the EPEC module Click on "Undo" to restore changes to original values Click on "Cancel" to "Undo" changes and close window Click on "Help" to get help on current window Use "TAB" key to move to different objects within the window Figure 116: PIP Configuration Spark Output (SPOUT) Configuration The Spark Output (SPOUT) Configuration values include the following parameters; Ignition Type, Dwell Angle, Dwell Time and SPOUT Level. These four parameters are used by the EPEC Module to determine the current Spark Output mode of operation. The “Ignition Type” parameter gives you the ability to select three different types of ignition systems. The EPEC module supports the Standard TFI Ignition system, Computer Controlled Dwell TFI Ignition System and the Ford Distributorless Ignition System (EDIS). The Dwell Angle and Dwell Time values are not used at the same time by the EPEC module. The Dwell Angle is used ONLY when the Standard TFI Ignition System is selected. The Dwell Time is used ONLY when the Computer Controlled Dwell TFI (CCDTFI) Ignition System is selected. Typical values for the Dwell Angle are 30 - 45 degrees and 6 ms (6000 µs) for CCDTFI. The last parameter “Spout Level” gives you the ability to invert the Spark Output signal for compatibility with other ignition systems. The following table shows typical settings for the Spark Output Configuration parameters. Parameter Ignition Type Value Standard TFI Meaning Use with 1988-1993 5.0L Mustang Use CCDTFI for 1994-1995 5.0L Mustang Dwell Angle 45 Used with Standard TFI ONLY Page 126 of 198 Extreme Performance Engine Control Parameter EPEC Control Strategy Value Meaning Dwell Time 6000 Used with CCDTFI ONLY Spout Level Rising Edge Standard Ford Mode To change the Spark Output Configuration Values, click on the “Edit” menu and then the “Input/Output Configuration” sub-menu. Click on the “Spark Output Configuration” menu item. The Spark Output Configuration Window will then appear. See Figure 117: SPOUT Output Configuration Menu. Window Title Bar An arrow indicates another level of submenus exist Main Menu Bar Main "Edit" Menu "Input/Output Configuration" sub-menu Figure 117: SPOUT Output Configuration Menu Click on the cell you want to modify and type a new value, then move out of that cell using the “TAB” key. See. Figure 118: Spark Output Configuration. At this point you can click on “Accept”, “Undo” or “Cancel”. “Accept” will accept the new values. “Undo” will undo the changes and restore the original settings. “Close” will “Undo” and close the window. IMPORTANT: If the EPEC module is attached to the computer and you click on “ACCEPT”, the new values WILL BE written to the EPEC module. Page 127 of 198 Extreme Performance Engine Control EPEC Control Strategy Click on "Accept" to record changes and save to the EPEC module Click on "Undo" to restore changes to original values Click on "Cancel" to "Undo" changes and close window Click on "Help" to get help on current window Use "TAB" key to move to different objects within the window Figure 118: Spark Output Configuration Module Configuration The Module Configuration values include the following parameters; “Module Type”, “Override Type”, “Override Engine Speed”, and “Override Throttle Angle”. These three parameters are used by the EPEC Module to determine when to “Override” the EEC-IV Module. The “Module Type” parameter gives you the ability to select either a piggy back (Extender) or a stand alone type of operation. If you are using the supplied wiring harness, you must select the Extender mode of operation. This parameter gives you the ability to adapt the EPEC module to a variety of different applications. The “Override Type” parameter gives you the ability to select four different types of EEC-IV override. The EPEC module supports the “Always Override”, “Use RPM as Override”, “Use TP as Override” and “Use RPM AND TP as Override”. Table shows the function of each of the “Override Type” settings. Override Type Meaning Always Override Always override EEC-IV module in all conditions (operates like a standalone module) Use RPM as Override Use RPM ONLY to override EEC-IV module. Note: EPEC Override Throttle Angle setting is ignored. Use TP as Override Use TP ONLY to override EEC-IV module. Note: EPEC Override Engine Speed setting is ignored. Use RPM and RP as Override Use RPM AND TP to override EEC-IV module. Note: Both the EPEC Override Engine Speed setting and the EPEC Override Throttle Angle settings are used. The RPM must be greater than the set point AND Throttle angle must be greater than the set point before the EPEC Page 128 of 198 Extreme Performance Engine Control EPEC Control Strategy Override Type Meaning module will override the EEC-IV module. To change the Module Configuration Values, click on the “Edit” menu and then the “Module Configuration” menu item. The Module Configuration Window will then appear. See Figure 119: Module Configuration Menu. Window Title Bar An arrow indicates another level of submenus exist Main Menu Bar "Module Configuration" Menu Item Main "Edit" Menu Figure 119: Module Configuration Menu To change the “Module Type” value select the down arrow on the right side of the Module Type value and select either “Extender Mode” (piggy back) or “Stand Alone”. To change the “Override Type” value select the down arrow on the right side of the EPEC Override Type value and select the override type you would like to use. Move to the EPEC Override Engine Speed or EPEC Override Throttle Angle values by pressing the “TAB” key. Type a new value, then move out of that cell using the “TAB” key. See. Figure 120: Module Configuration. At this point you can click on “Accept”, “Undo” or “Cancel”. “Accept” will accept the new values. “Undo” will undo the changes and restore the original settings. “Close” will “Undo” and close the window. IMPORTANT: If the EPEC module is attached to the computer and you click on “ACCEPT”, the new values WILL BE written to the EPEC module. Page 129 of 198 Extreme Performance Engine Control EPEC Control Strategy Click on "Accept" to record changes and save to the EPEC module Click on "Undo" to restore changes to original values Click on "Cancel" to "Undo" changes and close window Click on "Help" to get help on current window Use "TAB" key to move to different objects within the window Figure 120: Module Configuration Programmable Output Channels 0 - 3 The EPEC module contains 4 Programmable Output Channels. These channels can be used to drive indicator lamps, external loads, or relays. These output functions can be used to control anything from a simple control such as a fuel pump to more complex functions such a third stage of Nitrous Oxide output. These outputs are limited to “low” speed type operations and cannot be used to drive “high” speed type outputs such as additional injectors. Below is a list of some possible output functions that the Programmable Output Channels can control: • Cooling Fan Controls • Electric Water Pump Control • Fuel Pump Control • Additional Nitrous Oxide Stages • Alternator Cutout • Air Conditioning Compressor Cutout • Burn out RPM range indicator • Shift Lamp • Transmission Shift Control These outputs are driven by the EPEC software and have a resolution (update rate) of approximately 2 - 4 milliseconds. The Programmable Output Channels are all identical in function and any of the 4 channels can be used for any function you wish. There are 4 different calibration properties to the Programmable Output channels for both the “ON” condition and the Page 130 of 198 Extreme Performance Engine Control EPEC Control Strategy “OFF” condition. The Programmable Output channels provide a ground path through the EPEC module to the external load that you connect. This means to connect an indicator lamp for example, you would connect one terminal of the lamp to +12v and the other terminal of the lamp to one of the Programmable Output Channels, see EPEC Hardware chapter. The “ON” condition means the ground path is supplied and the “OFF” condition means the ground path is open. The first property is the “Trigger Enable” property. The channel must be “Enabled” before it will be functional. If the channel is not enabled, all of the other properties will be ignored by the EPEC module and the output will not be functional. NOTE: You can disable an output channel by setting the “Trigger Enable” property to “Disable”. If the output is disabled it will be driven to the “OFF” state. This gives you the ability to disabling a channel without having to change the triggers. The second property that must be configured are the “Trigger” conditions. There are 2 trigger conditions for both the “ON” condition and the “OFF” condition. These 2 triggers can be AND’ed or OR’ed together to perform logical trigger operations. Each trigger has three programmable fields, “Parameter”, “Operator” and the “Constant”. The Parameter field can be any internal EPEC value such as Engine Speed, Air Charge Temperature, etc. The Operator is the mathematical operator such as “Greater Than”, “Greater Than or Equal-to”, “Less Than” etc. The Constant field is the programmable value that the parameter field will be compared against. The programming for a typical trigger may look as follows: Parameter Operator Constant Logical Engine Speed > 4000 AND Throttle Mode = WOT This trigger configuration states that in order for the trigger to be true, the Engine Speed must be greater than 4000 RPM AND the Throttle Mode must be equal to Wide Open Throttle. If the current Engine Speed is not greater than 4000 RPM or the Throttle mode is not equal to Wide Open Throttle, then the trigger will not be true. IMPORTANT: If you set the logical value to “N/A”, the second trigger condition will be ignored regardless of its configuration. IMPORTANT: You must be VERY CAREFUL not to program the triggers in such a way that they will turn “ON” and “OFF” at a very high rate. It is very easy to program an “ON” trigger and an “OFF” trigger to simultaneously be true. An example of this would be an “ON” trigger that was set to: ON Trigger: Engine Speed > 4000 Page 131 of 198 Extreme Performance Engine Control EPEC Control Strategy OFF Trigger: Engine Speed < 4100 This would cause the output to “toggle” at a very high rate when the Engine Speed is between 4000 and 4100 rpm, probably not a condition that is desirable. The third property that must be set is the “Delay” property. This value is programmed in milliseconds and is the time delay from the trigger occurrence to the output being driven. This value can be programmed to a value anywhere between 0 ms and 32000 ms (32 seconds). The fourth and fifth property to complete the configuration are the “Fuel Multiplier” and “Spark Adder”. You have the ability to modify the amount of fuel and spark delivered to the engine while the output is “ON” or “OFF”. IMPORTANT: The fuel multiplier is cumulative with all the other fuel multipliers in the system so BE CAREFUL. A value 1.1 will richen the fuel amount by 10% and a value of 0.90 will lean the fuel amount by 10%. There is a fuel multiplier for both the “ON” condition and the “OFF” condition for each of the Programmable Output channels for a total of 8 fuel multipliers. IMPORTANT: The spark adder is cumulative with the other spark adders in the system so BE CAREFUL. A positive value will add spark advance and a negative value will remove spark advance (retard). There is a spark adder for both the “ON” condition and the “OFF” condition for each of the Programmable Output channels for a total of 8 spark adders. To change the Programmable Output Channel configuration, click on the “Edit” menu and then the “Programmable Outputs” sub-menu. Then click on the desired channel number. The Programmable Output Window will then appear. See Figure 121: Programmable Output 0-4 Menu. Page 132 of 198 Extreme Performance Engine Control EPEC Control Strategy Window Title Bar Main Menu Bar Main "Edit" Menu "Programmable Outputs" sub-menu Figure 121: Programmable Output 0-4 Menu To change the “Trigger Enable” value select the down arrow on the right side of the box and select “Enable” or “Disable”. To change the trigger, you must first select the parameter category for the parameter list, i.e. fuel, spark, etc. then select the desired parameter in the trigger. Once you select the desired parameter, you must select the operator that will be used as the comparison. These operators depend on the parameter you select. The table below shows all the operator types, however, not all of these operators will be available for all the parameters available. Operator Symbol Operator Meaning = Equal To != Not Equal To > Greater Than >= < <= Greater Than or Equal To Less Than Less Than Or Equal To Imm Immediate Nvr Never Page 133 of 198 Extreme Performance Engine Control EPEC Control Strategy Once the parameter and the operator are selected, you must enter a value that will be used in the comparison, type a new value, then move out of that cell using the “TAB” key. See. Figure 122: Programmable Output Channels 0-4 ON Conditions and Figure 123: Programmable Output Channels 0-4 OFF Conditions. IMPORTANT: If you select “Imm” or “Nvr” as the comparison type, the parameter and the constant values are ignored. Enable/Disable Channel "ON" Trigger Filter Use "TAB" key to move to different objects within the window "ON" Fuel Multiplier "ON" Spark Adder "OFF" Condition Tab Click on "Accept" to record changes and save to the EPEC module Click on "Undo" to restore changes to original values Click on "Close" to "Undo" changes and close window Figure 122: Programmable Output Channels 0-4 ON Conditions Page 134 of 198 Click on "Help" to get help on current window Extreme Performance Engine Control EPEC Control Strategy "OFF" Trigger Filter Use "TAB" key to move to different objects within the window "OFF" Fuel Multiplier "OFF" Spark Adder "ON" Condition Tab "OFF" Condition Tab Click on "Accept" to record changes and save to the EPEC module Click on "Undo" to restore changes to original values Click on "Close" to "Undo" changes and close window Click on "Help" to get help on current window Figure 123: Programmable Output Channels 0-4 OFF Conditions At this point you can click on “Accept”, “Undo” or “Cancel”. “Accept” will accept the new values. “Undo” will undo the changes and restore the original settings. “Close” will “Undo” and close the window. IMPORTANT: If the EPEC module is attached to the computer and you click on “ACCEPT”, the new values WILL BE written to the EPEC module. Analog Channels 0 - 2 Calibration The EPEC module contains 3 Analog Input Channels. These channels can be used for other type inputs to the EPEC module that are not directly supported by the EPEC module. These input sources can range from thermocouples to Air/Fuel Meters. These input channels can be used to modify fuel and spark, Programmable Output triggers or just to data log for additional information. Below is a list of some possible input sources that the Analog Channels can be used to measure: • Additional Switch inputs • Air/Fuel Ratio meters • Temperature Probes such as thermocouples • Drivers seat adjustable Fuel/Spark modifiers Page 135 of 198 Extreme Performance Engine Control • EPEC Control Strategy Additional Analog type Sensors IMPORTANT: Many external devices such as thermocouples CANNOT be connected directly to the EPEC module analog input channels. Thermocouples require an external signal conditioning circuit that will accept the thermocouple type input and have an output of 0v - 5v or 0v - 10v. The analog input channels have an input voltage range from 0v - 10v DC. Each analog input channel has a positive (+) and a negative (-) input. If the device you are using does not have a negative terminal, connect the negative (-) input of the analog channel to the ground of the external device. The Analog Channel calibration parameters allow you to calibrate the analog channel. This calibration accounts for input circuit component tolerances to get more accurate input voltage measurements. To change the Analog Input Channel calibration, click on the “Edit” menu and then the “Analog Input Calibration” sub-menu. Then click on the desired channel number. The Analog Input Calibration Window will then appear. See Figure 124: Analog Channel 0-3 Calibration Menu. There are 2 calibration parameters for each of the Analog Input Channels. This is a 2 step process in which you must calibrate the zero and span of the input channel. You will need an accurate digital voltmeter and a good adjustable voltage source to calibrate the analog inputs. You will need to setup a Data Acquisition window to view the analog input channels indicated voltage. See EPEC for window. Windows chapter on setting up a Data Acquisition Step 1: Set the zero value equal to “0”. Step 2: Set the span value equal to 10.00 Step 3: Using the voltmeter, monitor the actual input voltage. Set the input voltage on the analog input channel as indicated by the Data Acquisition to 10.00 volts. Record the value indicated by the voltmeter. Step 4: Enter the value that you recorded in Step 3 in the “Span” parameter of the Analog Input Channel Calibration window and click on “Accept”. Your analog input channel should now be calibrated and indicate a more accurate voltage value in the Data Acquisition window. IMPORTANT: If the value entered in the “Span” parameter is less than 10.00 volts, the maximum input voltage value that can be measured by the Analog Input Channel is equal to the value of the “Span” parameter. IMPORTANT: If the E.P.E.C. module is attached to the computer and you click on “ACCEPT”, the new values WILL BE written to the E.P.E.C. module. Page 136 of 198 Extreme Performance Engine Control EPEC Control Strategy Window Title Bar An arrow indicates another level of submenus exist Main Menu Bar Main "Edit" Menu "Analog Channel Calibration" Sub-Menu Figure 124: Analog Channel 0-3 Calibration Menu Click on "Accept" to record changes and save to the EPEC module Click on "Undo" to restore changes to original values Click on "Cancel" to "Undo" changes and close window Click on "Help" to get help on current window Use "TAB" key to move to different objects within the window Figure 125: Analog Channel 0-3 Calibration Page 137 of 198 Data Acquisition In This Chapter Data Acquisition Overview Creating a New Acquisition Set Opening a Stored Acquisition Set Deleting an Acquisition Set Viewing the Data Acquisition Window Page 138 of 198 Extreme Performance Engine Control Data Acquisition Data Acquisition Overview Data Acquisition is the on screen view of internal EPEC module parameters. This can be used to watch parameters within the EPEC module for calibration, system debug, or any other purpose. Data Acquisition is a very easy way to find out how the EPEC module is controlling the system. The data acquisition screen is updated 4 times a second depending on the speed of your computer. If you require more resolution, you have to use the Data Logging feature which takes samples of data at a very high rate, see Data Logging chapter. Data Acquisition is completely controlled from the Data Acquisition Menu on the EPEC for Windows Desktop, See Figure 126: Data Acquisition Menu. Figure 126: Data Acquisition Menu Creating a New Acquisition Set The “New Acquisition Set…” menu item is used to configure a new data acquisition set. When you select this menu item the “New Acquisition Set” dialog box will appear see Figure 127: New Acquisition Set Dialog Box. To create a new acquisition set, you must select the parameters you wish to view. This is a 2 step process, the parameter category is used to sort the available parameters by a logical grouping. As you change the Parameter Category, the Available Parameters list will change. You should become familiar with the Parameter Categories and the Available Parameters in each category. Page 139 of 198 Extreme Performance Engine Control Data Acquisition Figure 127: New Acquisition Set Dialog Box To add parameters to the Data Acquisition Set, simply select the Parameter Category, then from the Available Parameters list, select the desired parameter and click on “Add”. The parameter will disappear from the Available Parameters list and appear on the Selected Parameters list. Once you have selected all the parameters you would like to view, click on “Accept” to save the Data Acquisition Set. When you click on “Accept”, the Save Acquisition Set Dialog box will appear, see Figure 128: Save Acquisition Set Dialog Box. “Cancel” will cancel close the New Data Acquisition Dialog box and not save your configuration. Figure 128: Save Acquisition Set Dialog Box Opening a Stored Acquisition Set The “Open Acquisition Set…” menu item is used to open a stored Data Acquisition configuration. When you select this menu item the “Open Acquisition Set” dialog box will appear see Figure Page 140 of 198 Extreme Performance Engine Control Data Acquisition 129: Open Acquisition Set Dialog Box. Select the Acquisition Set you would like to open and click on “Open”. This will open the previously stored Data Acquisition Set. Figure 129: Open Acquisition Set Dialog Box Deleting an Acquisition Set The “Delete Acquisition Set…” menu item is used to delete a stored Data Acquisition set. When you select this menu item the “Delete Acquisition Set” dialog box will appear see Figure 130: Delete Acquisition Set Dialog Box. Select the Acquisition Set you would like to delete and click on “Delete”. Page 141 of 198 Extreme Performance Engine Control Data Acquisition Figure 130: Delete Acquisition Set Dialog Box When you select “Delete”, the Data Acquisition Delete Confirmation dialog box will appear. This is your last chance not to delete the selected Data Acquisition Set. If you select “Yes”, the Data Acquisition Set will be deleted and cannot be restored. See Figure 131: Delete Acquisition Confirmation Figure 131: Delete Acquisition Confirmation Viewing the Data Acquisition Window To view the data acquisition window you must either create a new data acquisition set (See Creating a New Acquisition Set) or open a previously stored acquisition set (see Opening a Stored Acquisition Set). Once you create or open an acquisition set, the Data Acquisition Set window will appear see Figure 132: Data Acquisition Window. Page 142 of 198 Extreme Performance Engine Control Data Acquisition IMPORTANT: You must have the EPEC Module attached to the computer before you use a Data Acquisition set, otherwise the Data Acquisition will not work correctly. You can create a new Data Acquisition set without being connected to the EPEC Module, however, do not start the Data Acquisition until the EPEC Module has been connected. Display data in English or Metric Units Start Sampling Data Stop Sampling Data Take one sample of Data Close the Acquisition Window Get Help Figure 132: Data Acquisition Window The Data Acquisition Window has various controls on it. While the Data Acquisition Window is open, you can start or stop taking data, Take one sample of data, close the window, display the data in English or Metric units. The data acquisition window also tells you how many samples have been taken. As EPEC for windows takes data from the EPEC module, you will see the data values changing. IMPORTANT: You can take data while you are calibrating the EPEC module, however, this may slow down the response of your computer. If you find the computer speed unacceptable while the Data Acquisition Window is taking data, you can Stop the Data Acquisition Window from taking data while you are calibrating. You do not have to close the Data Acquisition Window to calibrate any parameter within the EPEC module. Page 143 of 198 Data Logging In This Chapter Data Logging Overview New Log Set… Open Log Set… Delete Log Set… New/Upload Log Data Graphing Log Data Opening Log Data Files Page 144 of 198 ? Extreme Performance Engine Control Data Logging Data Logging Overview Data Logging is the high speed internal recording EPEC module parameters. Data Logging offers many advantages over the Data Acquisition, such as high speed up to 100 samples per second instead of 4 samples per second., data is logged internal to the EPEC module and uploaded instead of logged by a computer inside the car. You also have the ability to set a log trigger which will start the logging of data. Once the data is logged, it can be uploaded by the EPEC for windows software for viewing. All of the data logging features are controlled through the Data Logging menu. See Figure 133: Data Logging Menu. IMPORTANT: You must have the Logger Arm switch and lamp wired to the EPEC module in order for the Data Logging features to operate. See EPEC Hardware Chapter. Figure 133: Data Logging Menu New Log Set… The “New Log Set…” menu item is used to configure a new Data Log Set. When you select this menu item the “New Log Set” dialog box will appear see Figure 134: New Data Log Set Dialog Box (Log Parameters) and Figure 135: New Data Log Set Dialog Box (Log Trigger). Creating a new Log Set is a 2 step process, you must select the parameters you wish to Data Log and configure the trigger that will start the data logging. To select the parameters to data log, select the Parameter Category. The Parameter Category is used to sort the Available Parameters by a logical grouping. As you change the Parameter Category, the Available Parameters list will change. You should become familiar with the Parameter Categories and the Available Parameters in each category. Page 145 of 198 Extreme Performance Engine Control Data Logging Figure 134: New Data Log Set Dialog Box (Log Parameters) To add parameters to the Data Log Set, simply select the Parameter Category, then from the Available Parameters list, select the desired parameter and click on “Add”. The parameter will disappear from the Available Parameters list and appear on the Selected Parameters list. As you fill the Selected Parameters list, the Max Samples value will change. The value of the Max Samples depends on how many parameters you select. Once you have selected all the parameters you wish to log, move to the Total Sample Time entry box and type the total time you wish to log data. Typical sample times are 9 - 20 seconds. When you type a new value for the Total Sample Time, the Number of Samples and the Sample Rate values will change. The maximum Sample Sate is 100 samples per second. The Number of Samples is the total number of samples the EPEC module will take. Once this many samples are taken the EPEC module will stop logging data. IMPORTANT: The Sample Rate and Number of Samples depends on the number of parameters you have selected and the Total Sample Time. You should balance the number of selected parameters and the Total Sample Time to obtain the highest Sample Rate. This is however up to you. Page 146 of 198 Extreme Performance Engine Control Data Logging Figure 135: New Data Log Set Dialog Box (Log Trigger) The second step in creating the Log Set, is to configure the trigger. The trigger is the conditions that will start the data logging. This trigger can range from a simple trigger to a complex trigger. A simplest trigger would be to set the condition to “Imm”. This will trigger as soon as you press and release the Logger Arm switch. A complex trigger can be based on 2 parameters that you select. IMPORTANT: You must have the Logger Arm switch and lamp wired to the EPEC module in order for the Data Logging features to operate. See EPEC Hardware Chapter. Once you have selected all the parameters you would like to view and configured the Logger Trigger, click on “Accept” to save the Data Log Set. When you click on “Accept”, the Save Log Set Dialog box will appear, see Figure 136: Save Log Set Dialog Box. “Cancel” will cancel close the New Log Set Dialog box and will not save your configuration. IMPORTANT: If the EPEC module is attached to the computer and you click on “ACCEPT”, the new Data Logging configuration values WILL BE written to the EPEC module. Page 147 of 198 Extreme Performance Engine Control Data Logging Figure 136: Save Log Set Dialog Box Open Log Set… The “Open Log Set…” menu item is used to open a stored Data Logging configuration. When you select this menu item the “Open Log Set” dialog box will appear see Figure 137: Open Log Set Dialog Box. Select the Log Set you would like to open and click on “Open”. This will open the previously stored Data Log Set. IMPORTANT: Once you have the log set open, you must have the EPEC module connected to the computer to save the currently open log set to the EPEC module. When you open a previously stored log set, you will have to re-enter the total sample time. This gives you the ability to change the total sample time each time you open a stored log set. Page 148 of 198 Extreme Performance Engine Control Data Logging Figure 137: Open Log Set Dialog Box Delete Log Set… The “Delete Log Set…” menu item is used to delete a stored Data Log set. When you select this menu item the “Delete Log Set” dialog box will appear see Figure 138: Delete Log Set Dialog Box. Select the Log Set you would like to delete and click on “Delete”. Page 149 of 198 Extreme Performance Engine Control Data Logging Figure 138: Delete Log Set Dialog Box When you select “Delete”, the Data Log Delete Confirmation dialog box will appear. This is your last chance not to delete the selected Data Acquisition Set. If you select “Yes”, the Data Acquisition Set will be deleted and cannot be restored. See Figure 139: Delete Log Set Confirmation IMPORTANT: You cannot delete any of the log sets from the MS-DOS prompt. These log sets are all stored in a single file and cannot be deleted from the MS-DOS prompt. Figure 139: Delete Log Set Confirmation New/Upload Log Data The “New/Upload Log Data” menu item is used to upload logged data from the EPEC module. When you select this menu item, the “New/Upload Log Data” dialog box will appear see Figure 140: New/Upload Log Data Dialog Box. Logged data is stored as individual files on your hard disk. These files are used by the graphing utility provided with EPEC for Windows and can be loaded by spreadsheet programs such as Microsoft Excel for more analyzing. Page 150 of 198 Extreme Performance Engine Control Data Logging Figure 140: New/Upload Log Data Dialog Box To save the log data to a file, first enter any comments you desire then click on the “Browse File Name” button. When you click on this button, another dialog box will appear so you can select the file name to store the logged data. Type the desired name in the “File Name” entry box and click “OK”. See Figure 141: New/Upload Log Data File Name Dialog Box. When you select “OK”, the New/Upload Log Data File Name Dialog Box will disappear. Then click on “Accept” in the New/Upload Log Data Dialog Box. EPEC for Windows will then begin to upload the data from the EPEC module. A progress bar will be displayed to indicate the uploading progress. Figure 141: New/Upload Log Data File Name Dialog Box Graphing Log Data The “Open/Graph Log Data” menu item is used to graph logged data from the EPEC module. When you select this menu item, the Extreme Graph application will appear see Figure 142: Extreme Graph Desktop. Logged data is stored as individual files on your hard disk. These files are used by the graphing program provided with EPEC for Windows. These files can also be loaded by spreadsheet programs such as Microsoft Excel for more advanced graphing. Page 151 of 198 Extreme Performance Engine Control Data Logging Graph Menu Bar Open Log file button Figure 142: Extreme Graph Desktop Opening Log Data Files To open a log data file, click either on the Open Log File button on the Extreme Graph toolbar or select “File” then “Open”. When you select “Open”, the Open Log Data File dialog box will appear, see Figure 143: Open Log Data Dialog Box. To open a stored log data file, select the file name in the file list box, then select “OK”. File List Box Directory tree Current Drive Comments for selected log file. Figure 143: Open Log Data Dialog Box Once you select the file to load, the Log Data Selection Dialog Box will appear, see Figure 144: Log Data Selection Dialog Box. This dialog box will list all of the parameters that are stored in Page 152 of 198 Extreme Performance Engine Control Data Logging the log data file you have opened. There is also 4 buttons to aid in the selection process. The “Select All” button will select all of the parameters in the list. The “Deselect All” button will reset the selection so none of the parameters are selected. The “Accept” button will accept the currently selected parameters and the “Cancel” button will close the dialog box. You can also select each parameter in the list manually by clicking on it. Once you have selected all of the parameters you would like to view, click on the “Accept” button and the graph will then appear, Figure 144: Log Data Selection Dialog Box. IMPORTANT: Only select the parameters that you wish to view. The more parameters you select to graph the slower the response time of your computer will be. If you select all of the parameters, the response time my be unacceptable. Select All Parameters in list Deselect all Parameters in list Accept selected parameters in list Cancel and close Log Dat a Parameter List Figure 144: Log Data Selection Dialog Box Once the graph window appears you have many controls to view the data. You can zoom in, print the graph, toggle grids on or off, select how many graphs are displayed simultaneously, and select which graph is displayed at the top of the window, see Figure 145: Data Logging Graph. A sample of log data is supplied with EPEC for Windows so you can play the Extreme Graph and become familiar with it. Page 153 of 198 Extreme Performance Engine Control Open Log Data Data Logging Extreme Graph Menu Bar Right Mouse Cursor Left Mouse Cursor Print Graphs Number of graphs to display simultaneously Current "Y" value at cursor Current Parameter Selection Zoom between Cursors Display Grid Current Time Value at cursor Figure 145: Data Logging Graph Page 154 of 198 Clear Cursors EPEC Hardware In This Chapter Fuel Injector Output Schematic Spark Output Schematic Programmable Output Schematic Nitrous Controls Schematic Data Logging Schematic TP Sensor Schematic MAP Sensor Schematic ACT Sensor Schematic ECT Sensor Schematic MAF Sensor Schematic Stage Rev Limiter Schematic Analog Input Schematic Computer Interface Schematic Power/Ground Schematic EPEC Module Pin Assignments EEC-IV Module Pin Assignments 1988-1993 5.0L EPEC Adapter Harness Schematic 1994-1995 5.0L EPEC Adapter Harness Schematic Page 155 of 198 Extreme Performance Engine Control EPEC Hardware Fuel Injector Output Schematic Figure 146 shows the schematic wiring diagram for the fuel injector control. All of this wiring is contained within the wiring harness adapter provided with the EPEC kit, this wiring diagram is provided for reference. There are 2 different wiring harness adapters depending on the EPEC kit required;1988-1993 5.0L Mustang or 1994-1995 5.0L Mustang. Both adapters are shown. There are 16 circuits associated with the fuel injector control. Once the wiring harness adapter is installed into the vehicle, the 8 injector outputs are routed from the EPEC module to the fuel injectors. The other 8 circuits are routed between the EEC-IV module and the EPEC module. These are the injector outputs from the EEC-IV module. This gives the EPEC module the ability to dynamically select which module will be driving the fuel injectors. IMPORTANT: The fuel injectors are only driven by the EPEC module when the EPEC is “overriding” the EEC-IV module. Otherwise the EEC-IV module is driving the injectors and the EPEC module strategy is (your calibration) is not having any effect on engine operation. This includes all fuel calibration parameters contained within the EPEC Module. To EEC Power Relay +12v Injector 1 Injector 2 Injector 3 Injector 4 Injector 5 Injector 6 Injector 7 Injector 8 To EPEC Module Pin C12 To EPEC Module Pin C14 To EPEC Module Pin D11 To EPEC Module Pin D13 To EPEC Module Pin C11 To EPEC Module Pin C13 To EPEC Module Pin D12 To EPEC Module Pin D14 1988-1993 5.0L Mustang Pin Number To EPEC Module Pin C7 To EPEC Module Pin C8 To EPEC Module Pin C10 To EPEC Module Pin C9 To EPEC Module Pin D9 To EPEC Module Pin D10 To EPEC Module Pin D8 To EPEC Module Pin D7 EEC-IV Injector 1 EEC-IV Injector 2 EEC-IV Injector 3 EEC-IV Injector 4 EEC-IV Injector 5 EEC-IV Injector 6 EEC-IV Injector 7 EEC-IV Injector 8 To EEC-IV Pin 58 To EEC-IV Pin 59 To EEC-IV Pin 12 To EEC-IV Pin 13 To EEC-IV Pin 14 To EEC-IV Pin 15 To EEC-IV Pin 42 To EEC-IV Pin 52 1994-1995 5.0L Mustang Pin Number To EEC-IV Pin 58 To EEC-IV Pin 59 To EEC-IV Pin 39 To EEC-IV Pin 35 To EEC-IV Pin 15 To EEC-IV Pin 12 To EEC-IV Pin 13 To EEC-IV Pin 14 Figure 146: Fuel Injector Output Schematic Spark Output Schematic Figure 147 shows the schematic wiring diagram for the ignition system control. All of this wiring is contained within the wiring harness adapter provided with the EPEC kit, this wiring diagram is provided for reference. There are 2 different wiring harness adapters depending on the EPEC kit required;1988-1993 5.0L Mustang or 1994-1995 5.0L Mustang. Both adapters are shown. There are 3 circuits associated with the ignition system control. Once the wiring harness adapter is installed into the vehicle, the SPOUT output is routed from the EPEC module to the TFI Ignition Module. The IGNGND is routed from the TFI Ignition Module to both the EPEC Module and the EEC-IV Module. The last circuit is the EEC-IV SPOUT signal. This signal is routed between the EPEC Module and the EEC-IV Module. This gives the EPEC module the ability to dynamically select which module will be driving the ignition system. Page 156 of 198 Extreme Performance Engine Control EPEC Hardware IMPORTANT: The ignition system is only driven by the EPEC module when the EPEC is “overriding” the EEC-IV module. Otherwise the EEC-IV module is driving the ignition system and the EPEC module strategy is (your calibration) is not having any effect on engine operation. This includes any spark calibration parameters contained within the EPEC Module. To Ignition Switch (CRANK) To Ignition Switch +12v Coil Wire to Distributor IGNITION COIL To EEC-IV Pin 4 (IDM) 2 1 22K To EPEC Module Pin D5 (PIP) To EPEC Module Pin C6 (SPOUT) 1 12 1 2 3 4 5 6 2 SPOUT SHORTING PLUG To EPEC Module Pin C15 and EEC-IV Pin 16 (IGNGND) PIP SPOUT Crank +12v +12v COIL IGNGND TFI Module To Engine Block 1988-1993 5.0L Mustang 1994-1995 5.0L Mustang To EPEC Module Pin D6 To EEC-IV Pin 36 To EEC-IV Pin 36 To EPEC Module Pin C5 To EEC-IV Pin 56 To EEC-IV Pin 56 Figure 147: Ignition System Schematic Programmable Output Schematic Figure 148 and Figure 149 show a typical schematic of one programmable output channel. There are two ways of wiring a programmable output depending on the current requirements of the load which is to be driven. Each channel of the programmable outputs is capable of driving 0.5 amp of current. If the load is less than 0.5 amps, such as an indicator lamp, the load can be connected directly to the EPEC Module as shown in Figure 149. If the load current is greater than 0.5 amp then a relay must be used because the EPEC Module will not drive the load directly as shown in Figure 148. IMPORTANT: Be sure to solder and tape all connections, wiring is the most common cause of system problems. Page 157 of 198 Extreme Performance Engine Control EPEC Hardware +12v FUSE RELAY To EPEC Module Channel 0: Pin A1 Channel 1: Pin A4 Channel 2: Pin A3 Channel 3: Pin A2 Load LAMP Figure 148: Programmable Output Schematic with a Relay +12v FUSE Load To EPEC Module Channel 0: Pin A1 Channel 1: Pin A4 Channel 2: Pin A3 Channel 3: Pin A2 Figure 149: Programmable Output Schematic without relay Nitrous Controls Schematic Figure 150 shows the inputs to the Nitrous Oxide Control System and one stage of the outputs. The nitrous solenoids must be driven by a relay since most nitrous oxide solenoids have a very low impedance (typically 2-8 ohms). There are two indicator lamp outputs to the nitrous oxide control system. These lamps indicate when the nitrous oxide system is armed and ready to operate. There are two inputs to the nitrous oxide control system, first is the Nitrous Oxide Enable Switch and the Nitrous Arm Switch. The Nitrous Oxide Enable Switch is used to enable and disable the nitrous oxide system. The nitrous oxide enable is a switch connected between EPEC pin A7 and ground. This is a normally open switch. The second input to the nitrous oxide control system is the Nitrous Oxide Arm Switch. This switch is connected between EPEC pin A5 and ground, however this switch must be a normally open momentary type switch. An optional indicator lamp is shown connected in parallel with the nitrous oxide solenoid. This indicator lamp will turn on whenever the nitrous oxide solenoid is activated. IMPORTANT: Be sure to solder and tape all connections, wiring is the most common cause of system problems. Page 158 of 198 Extreme Performance Engine Control EPEC Hardware +12v FUSE To EPEC Module Stage 1: Pin B3 Stage 2: Pin B2 Nitrous Arm Lamp RELAY To EPEC Module Stage 1: Pin B1 Stage 2: Pin B4 Nitrous Solenoid Optional Indicator Lamp To EPEC Module Pin A5 Nitrous Arm Switch To EPEC Module Pin A7 Nitrous Enable Switch Figure 150: Nitrous Controls Schematic Diagram Data Logging Schematic Figure 151 shows schematic diagram for the input to the High Speed Data Logger. This input circuit consists of a switch and an indicator lamp. The switch is used to arm the data logger. Once the data logger is armed it will look for the programmed trigger. Once the trigger condition is true, the EPEC module will then begin taking data. The indicator lamp performs 2 functions. First, it shows when the data logger is armed and is looking for the log trigger to occur. Second, the indicator lamp will flash when the EPEC Module is currently taking data. When the data logging is complete the lamp will stay off. NOTE: If the ignition switch is turned off before the EPEC module is finished taking data, the data set will not be complete, however, the data can still be uploaded by the calibration software. IMPORTANT: The data that is logged by the EPEC module is stored in battery backed memory. This memory is powered by the Keep Alive +12v power to the EPEC module. In order for the data logging function to work properly, the Keep Alive power must be connected directly to the vehicle battery. Page 159 of 198 Extreme Performance Engine Control EPEC Hardware IMPORTANT: Be sure to solder and tape all connections, wiring is the most common cause of system problems. +12v Data Logging Arm Lamp To EPEC Module Pin B5 Data Logging Arm Switch Figure 151: Data Logging Schematic TP Sensor Schematic Figure 152 shows the schematic wiring diagram for the Throttle Position Sensor. All of this wiring is contained within the wiring harness adapter provided with the EPEC kit, this wiring diagram is provided for reference. There are 2 different wiring harness adapters depending on the EPEC kit required;1988-1993 5.0L Mustang or 1994-1995 5.0L Mustang. Both adapters are shown. There are 3 circuits associated with the TP Sensor. Once the wiring harness adapter is installed into the vehicle, the TP signal is routed from the TP sensor to both the EEC-IV module and the EPEC module. The other 2 circuits are routed between the EEC-IV module and the TP Sensor. The TP Sensor input is always visible from the EPEC module even when the EEC-IV is running the engine. IMPORTANT: The readings seen on the TP Sensor from the EPEC module are always available, however, these do not reflect the reading taken by the EEC-IV module. None of the readings taken by EEC-IV are available to the EPEC module. To EEC-IV Module Pin 26 (VREF) To EEC-IV Module Pin 47 (TP) and EPEC Module Pin D4 To EEC-IV Module Pin 46 (SIGRTN) Figure 152: TP Sensor Schematic Diagram Page 160 of 198 TP Sensor Extreme Performance Engine Control EPEC Hardware MAP Sensor Schematic Figure 153 shows the schematic wiring diagram for the Manifold Absolute Pressure (MAP) Sensor. This sensor is NOT contained within the production Ford wiring harness and must be installed by you. The production Ford MAP/BP sensor can only measure vacuum so this MAP sensor must be an analog type capable of measuring both vacuum and boost. Sensors such as the GM 2 or 3 bar or the Chrysler 2 bar are capable of measuring both vacuum and boost. The EPEC Module is compatible with both the GM and Chrysler MAP sensors, however the MAP Sensor Transfer Function must be calibrated to the specific sensor you are using. There are 3 circuits associated with the MAP sensor, VREF (+5v), Signal Return and the MAP signal. The VREF and Signal Return can be obtained within the production Ford wiring harness from the TP sensor or the production Ford MAP/BP sensor. The MAP sensor is only connected to the EPEC module and does not connect to the EEC-IV module in any way. This sensor must be added to your system if you will be using the Boost Retard or MAP Fuel functionality of the EPEC module. If you do not plan on using the MAP sensor functions, the MAP sensor does not need to be installed. IMPORTANT: Be sure to solder and tape all connections, wiring is the most common cause of system problems. To EEC-IV Module Pin 26 (VREF) Analog MAP Sensor GM or Chrysler Type To EPEC Module Pin B7 (MAP) To EEC-IV Module Pin 46 (SIGRTN) Figure 153: MAP Sensor Schematic ACT Sensor Schematic Figure 154 shows the schematic wiring diagram for the Air Charge Temperature Sensor. The connections between the sensor and the EEC-IV module are contained within the production wiring harness. The EPEC kit contains the same wiring harness adapter as the Ford Motorsport Extender. The Extender wiring harness adapter does NOT contain the ACT circuit therefore, connections between the ACT signal and the EPEC Module must be made by you. The ACT readings from the EPEC module are always available, even when EEC-IV is controlling the engine. IMPORTANT: The readings seen on the ACT Sensor from the EPEC module are always available, however, the EPEC readings do not reflect the readings taken by the EEC-IV module. None of the readings taken by EEC-IV are available to the EPEC module or software. Page 161 of 198 Extreme Performance Engine Control EPEC Hardware To EEC-IV Module Pin 25 (ACT) and EPEC Module Pin A8 ACT Sensor t To EEC-IV Module Pin 46 (SIGRTN) Figure 154: ACT Sensor Schematic ECT Sensor Schematic Figure 155 shows the schematic wiring diagram for the Engine Coolant Temperature Sensor. The connections between the sensor and the EEC-IV module is contained within the production wiring harness. The EPEC kit contains the same wiring harness adapter as the Ford Motorsport Extender. The Extender wiring harness adapter does NOT contain the ECT circuit therefore, connections between the ECT signal and the EPEC Module must be made by you. The ECT readings from the EPEC module are always available, even when EEC-IV is controlling the engine. IMPORTANT: The readings seen on the ECT Sensor from the EPEC module are always available, however, the EPEC readings do not reflect the readings taken by the EEC-IV module. None of the readings taken by EEC-IV are available to the EPEC module or software. IMPORTANT: Be sure to solder and tape all connections, wiring is the most common cause of system problems. To EEC-IV Module Pin 7 (ECT) and EPEC Module Pin B8 ECT Sensor t To EEC-IV Module Pin 46 (SIGRTN) Figure 155: ECT Sensor Schematic MAF Sensor Schematic Figure 156 shows the schematic wiring diagram for the Mass Air Flow Sensor. All of this wiring is contained within the wiring harness adapter provided with the EPEC kit, this wiring diagram is provided for reference. There are 2 different wiring harness adapters depending on the EPEC kit required;1988-1993 5.0L Mustang or 1994-1995 5.0L Mustang. Both adapters are shown. There are 4 circuits associated with the MAF Sensor. Once the wiring harness adapter is installed into the vehicle, the MAF and MAF Return signals are routed from the MAF sensor to both the EEC-IV Page 162 of 198 Extreme Performance Engine Control EPEC Hardware module and the EPEC module. The other 2 circuits are the power and ground connections to the MAF Sensor. IMPORTANT: The readings seen on the MAF Sensor from the EPEC module are always available even if EEC-IV is running the engine, however, the EPEC readings do not reflect the readings taken by the EEC-IV module. None of the readings taken by EEC-IV are available to the EPEC module. IMPORTANT: Be sure to solder and tape all connections, wiring is the most common cause of system problems. To EEC Power Relay (+12v) MAF To EEC-IV Pin 50 (MAF) and EPEC Module Pin D3 Mass Air Flow Sensor MAFRTN To EEC-IV Module Pin 9 (MAFRTN) and EPEC Module Pin C2 Figure 156: MAF Sensor Schematic Stage Rev Limiter Schematic Figure 157 shows schematic diagram for the input to the Stage Rev Limiter. This input circuit consists of a switch connected between the EPEC pin A6 and ground. The switch is used to enable the Stage Rev Limiter (2 step). The Stage Rev Limiter will be enabled whenever the Stage Rev Limit switch is depressed. This switch should be a normally open momentary switch. IMPORTANT: The Stage Rev Limiter is ONLY functional when the EPEC module is running the engine. If EEC-IV is running the engine, the Stage Rev Limiter is not functional. You must calibrate the Stage Rev Limiter value higher than the EEC-IV Override Engine Speed. IMPORTANT: Be sure to solder and tape all connections, wiring is the most common cause of system problems. Page 163 of 198 Extreme Performance Engine Control EPEC Hardware +12v FUSE Indicator Lamp (Optional) To EPEC Module Pin A6 Stage Rev Limit Enable Switch Figure 157: Stage Rev Limit Schematic Analog Input Schematic Figure 158 shows the schematic for 1 channel of the Analog Input. These input channels are used to measure and data log input voltages from external devices such as pressure transducers, thermocouples etc. These inputs can be logged along with other parameters such as Air Mass, Fuel Pulse Width etc. They can also be used as a trigger condition for the data logger, or an “ON” or “OFF” condition for the Programmable Output channels. IMPORTANT: Many sensors cannot be connected directly to the EPEC Module, they must be conditioned by an external device to produce a 0v-10v. An example of this type would be a thermocouple. You must have an external signal conditioning circuit for the thermocouple used in the application, it cannot be connected directly to the EPEC module. The Analog Inputs have a range of measurement of 0v - 10v DC. IMPORTANT: Be sure to solder and tape all connections, wiring is the most common cause of system problems. Page 164 of 198 Extreme Performance Engine Control To EPEC Module Channel 0: Pin A11 Channel 1: Pin A10 Channel 2: Pin A9 EPEC Hardware V(+) External Voltage Source To EPEC Module Channel 0: Pin B11 Channel 1: Pin B10 Channel 2: Pin B9 V(-) Figure 158: Analog Input Schematic Computer Interface Schematic Figure 159 shows the pin out of the serial communication cable between the EPEC Module and the IBM PC. This cable is very simple consisting of a male DB9 connector and a female DB9 connector and is a 1 to 1 connection, i.e. Pin 1 on the EPEC Module is connected to Pin 1 of the IBM PC etc. This cable can be found at any computer retail store or can be made to a custom length that you require. IMPORTANT: You should keep the serial cable shorter than 100 ft. Depending on the electrical noise conditions around the area that you are working, communication errors could arise making communication between the EPEC Module and the IBM PC. Communication errors will not adversely affect your calibration, it will only slow down the saving process. If the IBM PC cannot communicate with the EPEC module, your calibrations cannot be sent to the EPEC module. EPEC Module 5 9 4 8 3 7 2 6 1 1 6 2 7 3 8 4 9 5 IBM PC Figure 159: Computer Interface Schematic Power/Ground Schematic Figure 160: Power/Ground Schematic shows the schematic diagram for the Power and Ground circuits required for the EPEC and EEC-IV system. There are 2 ground pins on the EEC-IV module and 4 ground pins on the EPEC module. There are 2 power pins on the EEC-IV module and 2 power pins on the EPEC module. There is also 1 Case Ground pin on each both the EEC-IV module and EPEC module. All of these connections are contained within the EPEC wiring harness adapter cable except the ground connections on EPEC pins A12 and B12. These must be connected directly to the battery by you for proper operation. Page 165 of 198 Extreme Performance Engine Control EPEC Hardware IMPORTANT: If you move the battery from the stock location, you must move the computer grounds. DO NOT FOR ANY REASON connect the computer grounds to the chassis of the vehicle, this includes EEC-IV pins 40 and 60 and EPEC pins A12, B12, C16 and D16. These pins must be connected the battery ground using at least a 12 Ga. wire for each pin. Failure to connect the computer grounds directly to the battery will result in unreliable and erratic computer operation. IMPORTANT: ALWAYS solder your connections, wrapping them by hand and tapping will not provide the proper connection required by the sensitive electronics. Without proper ground connections, the EPEC module will produce unpredictable results. IMPORTANT: It is good practice to isolate your ignition system grounding from the EECIV/EPEC grounds, especially if you are using an aftermarket ignition system. Connect the ground of the ignition system through a dedicated wire (recommended by the ignition system manufacturer) to the negative terminal of the battery. Do not connect all the computer grounds and the ignition system ground at the front of the vehicle and then run a very large wire to the negative terminal of the battery. This may cause interference between the ignition system and the EEC-IV/EPEC modules and unpredictable results can occur. To Ignition Switch Key Power Fuse Link (Hot in Start and Run) EEC Power Relay + BATTERY - To EEC-IV Pins 37 and 57 To EEC-IV Pins 40 and 60 To EEC-IV Pin 20 EEC-IV/EPEC Power EEC-IV/EPEC Ground EEC-IV/EPEC Case Ground To Chassis Figure 160: Power/Ground Schematic EPEC Module Pin Assignments The following table describes the EPEC module pin numbers and their associated functions. Page 166 of 198 Extreme Performance Engine Control Pin Number EPEC Hardware Pin Name Notes A1 Programmable Output Channel 0 0.5 A output. Typically used to drive an indicator lamp directly or a relay for higher current loads. A2 Programmable Output Channel 3 0.5 A output. Typically used to drive an indicator lamp directly or a relay for higher current loads. A3 Programmable Output Channel 2 0.5 A output. Typically used to drive an indicator lamp directly or a relay for higher current loads. A4 Programmable Output Channel 1 0.5 A output. Typically used to drive an indicator lamp directly or a relay for higher current loads. A5 Nitrous Arm Connect a momentary switch between this pin and ground. A6 Stage Rev Limit Enable Connect a momentary switch between this pin and ground A7 Nitrous Enable Connect a normally open switch between this pin and ground A8 Air Charge Temperature Sensor “T” this pin into the ACT Sensor A9 Analog Input Channel 2 (+) Analog Input Channel 2 positive input A10 Analog Input Channel 1 (+) Analog Input Channel 1 Positive Input A11 Analog Input Channel 0 (+) Analog Input Channel 0 Positive Input A12 Power Ground Connect directly to the negative terminal of the battery B1 Stage 1 Nitrous Output Connect to relay to drive the stage 1 nitrous and fuel solenoids (0.5 A Max output load) B2 Stage 2 Nitrous indicator Lamp Connect to an indicator lamp directly.(0.5 A Max output load) B3 Stage 1 Nitrous Indicator Lamp Connect to an indicator lamp directly.(0.5 A Max output load) B4 Stage 1 Nitrous Output Connect to relay to drive the stage 1 nitrous and fuel solenoids (0.5 A Max output load) B5 Data Logging Arm Connect to an indicator lamp and a momentary switch for data logging arming B6 OPEN Do Not Connect B7 Manifold Absolute Pressure Sensor Connect to Analog type MAP sensor B8 Engine Coolant Temperature “T” this pin into the ECT Sensor B9 Analog Input Channel 2 (-) Analog Input Channel 2 Negative input B10 Analog Input Channel 1 (-) Analog Input Channel 1 Negative Input B11 Analog Input Channel 0 (-) Analog Input Channel 0 Negative Input B12 Power Ground Connect directly to the negative terminal of the battery C1 Power (+12v) Connect to positive terminal of battery through the Power relay C2 Mass Air Flow Sensor(-) MAF Sensor negative output C3 OPEN Do not connect C4 Reference Voltage +5v Output for sensors C5 PIP Output/Signal Return Connect to EEC-IV PIP if EPEC is being used as a Piggy back system. If the EPEC is being used as a Standalone, this is the ground for the sensors (SIGRTN). C6 Spark Output (SPOUT) Connect to Ignition Module Page 167 of 198 Extreme Performance Engine Control Pin Number EPEC Hardware Pin Name Notes C7 Injector 1 Input Connected to Injector 1 Output of EEC-IV C8 Injector 2 Input Connected to Injector 2 Output of EEC-IV C9 Injector 4 Input Connected to Injector 4 Output of EEC-IV C10 Injector 3 Input Connected to Injector 3 Output of EEC-IV C11 Injector 8 Output Connected to Fuel Injector 8 C12 Injector 1 Output Connected to Fuel Injector 1 C13 Injector 7 Output Connected to Fuel Injector 7 C14 Injector 2 Output Connected to Fuel Injector 2 C15 Ignition Ground Connected to TFI module C16 Power Ground Connect directly to battery negative terminal D1 Power (+12v) Connect to positive terminal of battery through the Power relay D2 Keep Alive Power (+12v) Connect to positive terminal of battery D3 Mass Air Flow Sensor(+) MAF Sensor Positive Output D4 Throttle Position Sensor Connected to TP Sensor D5 PIP Input Connector distributor, engine reference signal D6 Spark Input Connected to EEC-IV Spark Output D7 Injector 8 Input Connected to Injector 8 Output of EEC-IV D8 Injector 7 Input Connected to Injector 7 Output of EEC-IV D9 Injector 5 Input Connected to Injector 5 Output of EEC-IV D10 Injector 6 Input Connected to Injector 6 Output of EEC-IV D11 Injector 3 Output Connected to Fuel Injector 3 D12 Injector 6 Output Connected to Fuel Injector 6 D13 Injector 4 Output Connected to Fuel Injector 4 D14 Injector 5 Output Connected to Fuel Injector 5 D15 Case Ground Connected to Chassis D16 Power Ground Connect directly to battery negative terminal EEC-IV Module Pin Assignments The following table describes the EEC-IV pin assignments and their associated functions. Pin Number 1988-1993 Pin Name 1994/1995 Pin Name (Manual Transmission Only) 1 Keep Alive Power (+12v) Keep Alive Power (+12v) 2 None Brake On/Off Switch 3 Vehicle Speed Sensor(+) Vehicle Speed Sensor (+) Page 168 of 198 Extreme Performance Engine Control Pin Number EPEC Hardware 1988-1993 Pin Name 1994/1995 Pin Name (Manual Transmission Only) 4 Ignition Diagnostic Monitor Ignition Diagnostic Monitor 5 None None 6 Vehicle Speed Sensor(-) Vehicle Speed Sensor (-) 7 Engine Coolant Temperature Sensor Engine Coolant Temperature Sensor 8 None Fuel Pump Monitor 9 Mass Air Flow Sensor (-) Mass Air Flow Sensor (-) 10 A/C Clutch Signal A/C Clutch Signal 11 None Canister Purge 12 Injector 3 Output Injector 6 Output 13 Injector 4 Output Injector 7 Output 14 Injector 5 Output Injector 8 Output 15 Injector 6 Output Injector 5 Output 16 Ignition Ground Ignition Ground 17 Self Test Output Self Test Output 18 None Data (+) 19 Fuel Pump Monitor Data (-) 20 Case Ground Case Ground 21 Idle Speed Control Idle Speed Control 22 Fuel Pump Control Fuel Pump Control 23 None None 24 None None 25 Air Charge Temperature Sensor Air Charge Temperature Sensor 26 Reference Voltage Output (+5v) Reference Voltage Output (+5v) 27 EGR Valve Position EGR Valve Position 28 None None 29 Right EGO Sensor None 30 Neutral Gear Switch None 31 Canister Purge Thermactor Air Bypass 32 Thermactor Air Diverter High Speed Cooling Fan Control 33 EGR Valve Control EGR Valve Control 34 None Thermactor Air Diverter 35 None Injector 4 Output 36 Spark Output (SPOUT) Spark Output (SPOUT) 37 Power (+12v) Power (+12v) 38 Thermactor Air Bypass None Page 169 of 198 Extreme Performance Engine Control Pin Number EPEC Hardware 1988-1993 Pin Name 1994/1995 Pin Name (Manual Transmission Only) 39 None Injector 3 Output 40 Power Ground Power Ground 41 None OCS 42 Injector 7 Output A/C Pressure Switch 43 Left EGO Sensor Left EGO Sensor 44 None Right EGO Sensor 45 Barometric Pressure Sensor None 46 Signal Return Signal Return 47 Throttle Position Sensor Throttle Position Sensor 48 Self Test Input Self Test Input 49 EGO Ground None 50 Mass Air Flow Sensor (+) Mass Air Flow Sensor (+) 51 None None 52 Injector 8 Output None 53 None None 54 WOT A/C Cut Control WOT A/C Cut Control 55 None Low Speed Cooling Fan Control 56 Profile Ignition Pickup (PIP) Profile Ignition Pickup (PIP) 57 Power (+12v) Power (+12v) 58 Injector 1 Output Injector 1 Output 59 Injector 2 Output Injector 2 Output 60 Power Ground Power Ground 1988-1993 5.0L EPEC Adapter Harness Schematic Page 170 of 198 Extreme Performance Engine Control EPEC Hardware To EEC-IV Module To Vehicle Harness Connector Keep Alive Power Keep Alive Power Vehicle Speed Sensor (+) IDM Vehicle Speed Sensor (+) IDM Vehicle Speed Sensor (-) Engine Coolant Temperature Vehicle Speed Sensor (-) Engine Coolant Temperature Mass Air Flow (-) A/C Clutch Signal Mass Air Flow (-) A/C Clutch Signal Injector 3 Injector 4 Injector 5 Injector 6 Ignition Ground Self Test Output Injector 3 Injector 4 Injector 5 Injector 6 Ignition Ground Self Test Output 19 20 21 22 Fuel Pump Monitor Case Ground Idle Speed Control Fuel Pump Control Fuel Pump Monitor Case Ground Idle Speed Control Fuel Pump Control 19 20 21 22 25 26 27 Air Charge Temperature VREF (+5) EGR Valve Position Air Charge Temperature VREF (+5) EGR Valve Position 25 26 27 29 30 31 32 33 Right EGO Sensor Neutral Gear Switch Canister Purge Control Thermactor Air Diverter EGR Valve Regulator Right EGO Sensor Neutral Gear Switch Canister Purge Control Thermactor Air Diverter EGR Valve Regulator 29 30 31 32 33 Spark Output +12v Spark Output +12v GND GND Injector 7 Left EGO Sensor Injector 7 Left EGO Sensor Barometric Pressure Sensor Signal Return Throttle Position Self Test Input EGO Ground Mass Air Flow (+) Barometric Pressure Sensor Signal Return Throttle Position Self Test Input EGO Ground Mass Air Flow (+) Injector 8 Injector 8 WOT A/C Cut Control WOT A/C Cut Control 54 PIP +12v Injector 1 Injector 2 GND PIP +12v Injector 1 Injector 2 GND 56 57 58 59 60 1 3 4 1 21 41 6 7 9 10 12 13 14 15 16 17 36 37 40 60 40 20 42 43 44 45 46 47 48 49 50 52 53 54 56 57 58 59 60 1 3 4 6 7 C1 C2 C3 C4 C5 C6 C7 C8 C9 C10 C11 C12 C13 C14 C15 C16 VPWR (+12v) Mass Air Flow (-) Open Open PIP Output Spark Output Injector 1 Input Injector 2 Input Injector 4 Input Injector 3 Input Injector 8 Output Injector 1 Output Injector 7 Output Injector 2 Output Ignition Ground GND (Battery -) D1 D2 D3 D4 D5 D6 D7 D8 D9 D10 D11 D12 D13 D14 D15 D16 VPWR (+12v) Keep Alive Power Mass Air Flow (+) Throttle Position PIP Input Spark Input Injector 8 Input Injector 7 Input Injector 5 Input Injector 6 Input Injector 3 Output Injector 6 Output Injector 4 Output Injector 5 Output Case Ground GND (Battery -) 41 36 37 40 42 43 45 46 47 48 49 50 52 D16 C16 NOTE: All Connector Views are looking into the mating face of the connector. Figure 161: 1988-1993 5.0L Mustang Adapter Harness Schematic 1994-1995 5.0L EPEC Adapter Harness Schematic Page 171 of 198 21 12 13 14 15 16 17 To EPEC Module D1 C1 1 9 10 20 40 60 Extreme Performance Engine Control EPEC Hardware To EEC-IV Module Vehicle Speed Sensor (-) Engine Coolant Temperature Fuel Pump Monitor Mass Air Flow (-) A/C Clutch Signal Canister Purge Control Injector 6 Injector 7 Injector 8 Injector 5 Ignition Ground Self Test Output Data(+) Data(-) Case Ground Idle Speed Control Fuel Pump Control To EEC-IV Vehicle Harness Keep Alive Power 1 Brake On/Off Switch 2 Vehicle Speed Sensor (+) 3 IDM 4 Vehicle Speed Sensor (-) Engine Coolant Temperature 6 1 7 21 Fuel Pump Monitor 41 8 Mass Air Flow (-) 9 A/C Clutch Signal 10 Canister Purge Control 11 Injector 6 12 Injector 7 13 Injector 8 14 Injector 5 15 Ignition Ground 16 Self Test Output 17 Data(+) 18 Data(-) 19 Case Ground 20 Idle Speed Control 21 Fuel Pump Control 22 Air Charge Temperature VREF (+5) EGR Valve Position Air Charge Temperature VREF (+5) EGR Valve Position Thermactor Air Bypass High Fan Control EGR Valve Regulator Thermactor Air Diverter Injector 4 Spark Output +12v Thermactor Air Bypass High Fan Control EGR Valve Regulator Thermactor Air Diverter Injector 4 Spark Output +12v 39 40 41 42 43 44 45 46 47 48 Injector 3 GND OCS A/C Pressure Switch Left EGO Sensor Right EGO Sensor Barometric Pressure Sensor Signal Return Throttle Position Self Test Input Injector 3 GND OCS A/C Pressure Switch Left EGO Sensor Right EGO Sensor Barometric Pressure Sensor Signal Return Throttle Position Self Test Input 39 40 41 42 43 44 45 46 47 48 50 Mass Air Flow (+) Mass Air Flow (+) 50 1 2 3 4 1 21 41 6 7 8 9 10 11 12 13 14 15 16 17 18 19 20 21 22 25 26 27 31 32 33 34 35 36 37 60 40 20 54 55 56 57 58 59 60 To EPEC Module D1 C1 Keep Alive Power Brake On/Off Switch Vehicle Speed Sensor (+) IDM WOT A/C Cut Control Low Fan Control PIP +12v Injector 1 Injector 2 GND C1 C2 C3 C4 C5 C6 C7 C8 C9 C10 C11 C12 C13 C14 C15 C16 VPWR (+12v) Mass Air Flow (-) Open Open PIP Output Spark Output Injector 1 Input Injector 2 Input Injector 4 Input Injector 3 Input Injector 8 Output Injector 1 Output Injector 7 Output Injector 2 Output Ignition Ground GND (Battery -) D1 D2 D3 D4 D5 D6 D7 D8 D9 D10 D11 D12 D13 D14 D15 D16 VPWR (+12v) Keep Alive Power Mass Air Flow (+) Throttle Position PIP Input Spark Input Injector 8 Input Injector 7 Input Injector 5 Input Injector 6 Input Injector 3 Output Injector 6 Output Injector 4 Output Injector 5 Output Case Ground GND (Battery -) WOT A/C Cut Control Low Fan Control PIP +12v Injector 1 Injector 2 GND D16 C16 NOTE: All Connector Views are looking into the mating face of the connector. Figure 162: 1994-1995 5.0L Mustang Adapter Harness Schematic Page 172 of 198 25 26 27 31 32 33 34 35 36 37 54 55 56 57 58 59 60 20 40 60 Extreme Performance Engine Control EPEC Hardware Page 173 of 198 Application Notes In This Chapter Programmable Output Application Notes Adding an Additional Nitrous Oxide Stage Controlling Shift Lamp Controlling a Cooling Fan Controlling a Fuel Pump Page 174 of 198 Extreme Performance Engine Control Application Notes Programmable Output Application Notes This section details some of the common applications that can be implemented with the Programmable Output Channels. Though not a complete list, these should get you started with your own applications. Adding an Additional Nitrous Oxide Stage The EPEC module provides a very good Nitrous Oxide control strategy, however, there are only 2 stages provided. This application note will detail how to add a third or more Nitrous Oxide stages. The first step in creating another Nitrous Oxide Output stage is to fabricate the wiring required for the additional Nitrous Oxide Output stage. Nitrous Oxide solenoids should be controlled using a relay since the current requirements for the solenoid are much higher than the EPEC module can drive directly. Figure 163: Programmable Output shows the schematic diagram for a Nitrous Oxide solenoid using a Programmable Output Channel. +12v FUSE RELAY To EPEC Module Channel 0: Pin A1 Channel 1: Pin A4 Channel 2: Pin A3 Channel 3: Pin A2 Nitrous Solenoid Optional Indicator Lamp Figure 163: Programmable Output Nitrous Oxide Schematic The second step is to configure the Programmable Output Channel to control the “ON” and “OFF” conditions of the third stage of nitrous oxide. There are many ways to configure this output to control the nitrous solenoid depending on how you may want the solenoid to function. For this application note, we will assume you are using the first two nitrous oxide output stages supplied by the EPEC Module. The “ON” condition for the third stage of nitrous oxide will only use the second stage of Nitrous Oxide as the trigger. By setting the Programmable Output to trigger on the second stage of nitrous oxide output, the third stage will “inherit” all the Stage 2 nitrous parameters and the Nitrous Global Parameters such as; Minimum Engine Speed, Maximum Engine Speed, Minimum Throttle Angle, etc. For this example we will also want the third stage of Page 175 of 198 Extreme Performance Engine Control Application Notes nitrous to be delayed 1.5 seconds after the second stage of nitrous. Figure 164: Programmable Output “ON” Nitrous Configuration shows the “ON” conditions for the 3rd stage of Nitrous Oxide control. The Programmable Output is triggered when the 2nd stage of nitrous turns on, but will turn on 1500 milliseconds (1.5 seconds) after the 2nd stage turns on. We also will retard the spark 5 degrees when the Programmable Output stage is “ON” so we set the Spark Adder value to -5.0 degrees. We will not modify the amount of fuel delivered so we will set the Fuel Multiplier to 1.0. Figure 164: Programmable Output “ON” Nitrous Configuration The “OFF” condition for the third stage of nitrous oxide will only use the second stage of Nitrous Oxide as the trigger, except the “OFF” trigger will be set to the opposite value of the “ON” trigger. We will also not want any delay after the “OFF” trigger is reached. Figure 165: Programmable Output “OFF” Nitrous Configuration shows the “OFF” condition for the 3rd stage of Nitrous Oxide control. The Programmable Output is triggered when the 2nd stage of nitrous turns off, and will not delay after the 2nd stage turns off. We will not retard spark when the Programmable Output turns off so we set the Spark Adder value to 0.0. We will also not modify fuel so we set the Fuel Multiplier to 1.0. Page 176 of 198 Extreme Performance Engine Control Application Notes Figure 165: Programmable Output “OFF” Nitrous Configuration This example is shown only to give an idea of how to add additional nitrous oxide output stages. The actual configuration you use to add nitrous oxide output stage may be slightly different from this example depending on how you may want to control the 3rd stage of nitrous oxide. Controlling Shift Lamp The EPEC module does not provide a shift lamp control strategy, however, you can implement a shift lamp using a Programmable Output Channel. This application note will detail how to implement a shift lamp control directly from the EPEC Module. The first step in creating shift lamp control is to fabricate the wiring required for the shift lamp. Indicator lamps can be driven directly from the EPEC Module if the indicator lamp does not require more than 0.5 amps of current. Figure 166: Shift Lamp Schematic shows the schematic diagram for a shift indicator lamp using a Programmable Output Channel. Page 177 of 198 Extreme Performance Engine Control Application Notes +12v FUSE Shift Lamp To EPEC Module Channel 0: Pin A1 Channel 1: Pin A4 Channel 2: Pin A3 Channel 3: Pin A2 Figure 166: Shift Lamp Schematic The second step is to configure the Programmable Output Channel to control the “ON” and “OFF” conditions of the shift lamp. The “ON” condition for the shift lamp will only use Engine Speed as the trigger. You could use other conditions such as Throttle Mode depending on the functionality you require. Figure 167: Shift Lamp “ON” Configuration shows the “ON” conditions for the Shift Lamp control. The Programmable Output is triggered when the Engine Speed is greater than 5200 rpm. We do not want to change the spark advance when the Programmable Output stage is “ON” so we set the Spark Adder value to 0 degrees. We will not modify the amount of fuel delivered so we will set the Fuel Multiplier to 1.0. Figure 167: Shift Lamp “ON” Configuration The “OFF” condition for the shift lamp will only use Engine Speed. Figure 168: Shift Lamp “OFF” Configuration shows the “OFF” condition for the shift lamp control. The Page 178 of 198 Extreme Performance Engine Control Application Notes Programmable Output is triggered when the engine speed is less than 5000 rpm, and will delay 100 ms before it will turn off. We will not retard spark when the Programmable Output turns off so we set the Spark Adder value to 0.0. We will also not modify fuel so we set the Fuel Multiplier to 1.0. Figure 168: Shift Lamp “OFF” Configuration This example is shown to give an idea of how to control a shift indicator lamp. The actual configuration you use to control the shift indicator may be slightly different from this example depending on how you may want to control the shift lamp. Controlling a Cooling Fan The EPEC module does not provide a cooling fan control strategy, however, you can implement a cooling fan control using a Programmable Output Channel. This application note will detail how to implement cooling fan control directly from the EPEC Module. The first step in creating the cooling fan control is to fabricate the wiring required for the cooling fan. You must use a relay to drive the cooling fan since the EPEC module cannot drive the cooling fan directly. Figure 169: Cooling Fan Schematic shows the schematic diagram for a cooling fan control using a Programmable Output Channel. Page 179 of 198 Extreme Performance Engine Control Application Notes +12v FUSE RELAY To EPEC Module Channel 0: Pin A1 Channel 1: Pin A4 Channel 2: Pin A3 Channel 3: Pin A2 Cooling Fan Figure 169: Cooling Fan Schematic The second step is to configure the Programmable Output Channel to control the “ON” and “OFF” conditions of the cooling fan. The “ON” condition for the cooling fan will use 2 triggers. This will provide the cooling fan control with a Wide Open Throttle Cutoff. Figure 170: Cooling Fan “ON” Configuration shows the “ON” conditions for the cooling fan control. The Programmable Output is triggered when the Engine Coolant Temperature (ECT) is greater than 200 degrees AND the Throttle Mode is not equal to WOT. We do not want to delay before turning on the cooling fan, so we will set the delay to 0. We do not want to change the spark advance when the Programmable Output stage is “ON” so we set the Spark Adder value to 0 degrees. We do not modify the amount of fuel delivered so we will set the Fuel Multiplier to 1.0. Page 180 of 198 Extreme Performance Engine Control Application Notes Figure 170: Cooling Fan “ON” Configuration The “OFF” condition for the cooling fan will also use 2 triggers. Figure 171: Cooling Fan “OFF” Configuration shows the “OFF” conditions for the cooling fan control. The Programmable Output is triggered off when the Engine Coolant Temperature (ECT) is less than 180 degrees OR the Throttle Mode is equal to WOT. We want to delay before turning on the cooling fan, so we will set the delay to 3000 milliseconds (3 seconds). This delay will stop the fan from turning on and off rapidly during shifting. We do not want to change the spark advance when the Programmable Output stage is “OFF” so we set the Spark Adder value to 0 degrees. We do not modify the amount of fuel delivered so we will set the Fuel Multiplier to 1.0. Page 181 of 198 Extreme Performance Engine Control Application Notes Figure 171: Cooling Fan “OFF” Configuration This example is shown to give an idea of how to control a cooling fan. The actual configuration you use to control the cooling fan may be slightly different from this example depending on how you may want to control the cooling fan. Controlling a Fuel Pump The EPEC module does not provide a Fuel Pump control strategy, however, you can implement a Fuel Pump using a Programmable Output Channel. This application note will detail how to implement a Fuel Pump control directly from the EPEC Module. The first step in creating the Fuel Pump control is to fabricate the wiring required for the Fuel Pump or use the production wiring harness. Fuel Pumps cannot be driven directly from the EPEC Module so you must use a relay to control the fuel pump. Figure 172: Fuel Pump Schematic shows the schematic diagram for the fuel pump control using a Programmable Output Channel. Page 182 of 198 Extreme Performance Engine Control Application Notes +12v FUSE RELAY To EPEC Module Channel 0: Pin A1 Channel 1: Pin A4 Channel 2: Pin A3 Channel 3: Pin A2 Fuel Pump Figure 172: Fuel Pump Schematic The second step is to configure the Programmable Output Channel to control the “ON” and “OFF” conditions of the fuel pump. The “ON” condition for the fuel pump will only use Time Since Last PIP as the trigger. Figure 173: Fuel Pump “ON” Configuration shows the “ON” conditions for the fuel pump control. The Programmable Output is triggered when the Time Since Last PIP is less than 1,000,000 microseconds (1 second). We do not want to change the spark advance when the Programmable Output stage is “ON” so we set the Spark Adder value to 0 degrees. We will not modify the amount of fuel delivered so we will set the Fuel Multiplier to 1.0. Figure 173: Fuel Pump “ON” Configuration Page 183 of 198 Extreme Performance Engine Control Application Notes The “OFF” condition for the fuel pump will also use Time Since Last PIP as the trigger condition. Figure 174: Fuel Pump “OFF” Configuration shows the “OFF” condition for the fuel pump control. The Programmable Output is triggered when the Time Since Last PIP is greater than 1,500,000 microseconds (1.5 seconds). There is no delay before it will turn off, so we will set the delay to 0.0. We will not retard spark when the Programmable Output turns off so we set the Spark Adder value to 0.0. We will also not modify fuel so we set the Fuel Multiplier to 1.0. Figure 174: Fuel Pump “OFF” Configuration This example is shown to give an idea of how to control a fuel pump. The actual configuration you use to control the fuel pump may be slightly different from this example depending on how you may want to control the fuel pump. Page 184 of 198 Acronyms and Terms In This Chapter Acronyms EPEC Parameters and Terms Page 185 of 198 Extreme Performance Engine Control Acronyms and Terms Acronyms The Table 4 shows the acronyms and their associated meanings. Acronym Meaning ACT ECT MAP MAF TP PIP SPOUT TFE EPEC WOT A/F Ratio mS µS PW ºBTC ºATC Air Charge Temperature Engine Coolant Temperature Manifold Absolute Pressure Mass Air Flow Throttle Position Profile Ignition Pickup Spark Output Transitional Fuel Enrichment Extreme Performance Engine Control Wide Open Throttle Air/Fuel Ratio Milliseconds (1/1000 second) Microseconds (1/1000000 second) Pulse Width Degrees Before Top Center Degrees After Top Center Table 4:Acronym List EPEC Parameters and Terms Parameter/Term Definition Notes ACT Sensor Transfer Function 2 dimensional function used to convert from ACT volts to ACT °F. The input or X value to this function is ACT Volts and the output or Y value is the ACT value. ECT Sensor Transfer Function 2 dimensional function used convert from ECT volts to ECT °F. to The input or X value to this function is ECT Volts and the output or Y value is the ECT value. MAF Sensor Function 2 dimensional function used to convert from MAF volts to Air Mass. The input or X value to this function is MAF Volts and the output or Y value is the Air Mass value. TP Sensor Transfer Function 2 dimensional function used to convert from TP volts to Throttle Angle The input or X value to this function is TP Volts and the output or Y value is the TP value. ACT Fuel Function 2 dimensional function used to determine the ACT Fuel multiplier value. The input or X value to this function is ACT and the output or Y value is the ACT Fuel. ACT Spark Function 2 dimensional function used to determine the ACT Spark adder value. The input or X value to this function is ACT and the output or Y value is the ACT Spark. Transfer Page 186 of 198 Extreme Performance Engine Control Parameter/Term Acronyms and Terms Definition Notes Crank Fuel Function 2 dimensional function used to determine the Cranking Fuel Pulse Width based on ECT. The input or X value to this function is ECT and the output or Y value is the Crank PW. ECT Fuel Function 2 dimensional function used to determine the ECT Fuel Multiplier value. The input or X value to this function is ECT and the output or Y value is the ECT Fuel. ECT Spark Function 2 dimensional function used to determine the ECT Spark Adder value. The input or X value to this function is ECT and the output or Y value is the ECT Spark. Injector Offset Function 2 dimensional function used to determine the Injector offset (adder) based on battery voltage. The input or X value to this function is Battery Voltage and the output or Y value is the Injector Offset value. TP Fuel Function 2 dimensional function used to determine the TP Fuel Multiplier value. The input or X value to this function is TP and the output or Y value is the TP Fuel. Transfer 2 dimensional function used to convert from MAP volts to MAP In of Hg. The input or X value to this function is MAP Volts and the output or Y value is the MAP value. Transitional Fuel Enrichment Function 2 dimensional function used to determine the fuel enrichment percentage based on Throttle Angle Rate. The input or X value to this function is Throttle Angle Rate and the output or Y value is the Transitional Fuel Enrichment. TP Spark Function 2 dimensional function used to determine the TP Spark Adder value. The input or X value to this function is TP and the output or Y value is the TP Spark. Idle-RPM Spark Function 2 dimensional function used to determine the Idle Spark advance based on Engine Speed. This function is only used when the Throttle Mode is equal to “Idle”. The input or X value to this function is RPM and the output or Y value is the RPM Spark value. Part-RPM Spark Function 2 dimensional function used to determine the Part Throttle Spark advance based on Engine Speed. This function is only used when the Throttle Mode is equal to “Part Throttle”. The input or X value to this function is RPM and the output or Y value is the RPM Spark value. WOT-RPM Spark Function 2 dimensional function used to determine the WOT Spark advance based on Engine Speed. This function is only used when the Throttle Mode is equal to “WOT”. The input or X value to this function is RPM and the output or Y value is the RPM Spark value. Idle-RPM Air/Fuel Function 2 dimensional function used to determine the Idle Air/Fuel value based on Engine Speed. This function is only used when the Throttle Mode is equal to “Idle”. The input or X value to this function is RPM and the output or Y value is the Desired A/F Ratio. Part-RPM Air/Fuel Function 2 dimensional function used to determine the Part Throttle Air/Fuel value based on Engine Speed. This function is only used when the Throttle Mode is equal to “Part Throttle”. The input or X value to this function is RPM and the output or Y value is the Desired A/F Ratio. MAP Sensor Function Page 187 of 198 Extreme Performance Engine Control Acronyms and Terms Parameter/Term Definition Notes WOT-RPM Air/Fuel Function 2 dimensional function used to determine the WOT Air/Fuel value based on Engine Speed. This function is only used when the Throttle Mode is equal to “WOT”. The input or X value to this function is RPM and the output or Y value is the Desired A/F Ratio. Boost Retard Function 2 dimensional function used to determine the Boost Spark Retard value based on Engine Speed. This function is only used when the engine is under boost. The input or X value to this function is RPM and the output or Y value is the Boost Retard in deg/psi. MAP Fuel Function 2 dimensional function used to determine the MAP Fuel Multiplier value. The input or X value to this function is MAP and the output or Y value is the MAP Fuel. Fuel 2 dimensional function used to determine the Analog Channel 0 Fuel Multiplier value. The input or X value to this function is Analog Channel 0-2 volts and the output or Y value is the Analog Channel 0-2 Spark Adder. Spark 2 dimensional function used to determine the Analog Channel 0 Spark Adder value. The input or X value to this function is Analog Channel 0-2 volts and the output or Y value is the Analog Channel 0-2 Fuel Multiplier. PIP Edge Filter The PIP Edge Filter is a calibration switch to enable the PIP Edge Filter. The PIP edge filter verifies proper edges be received from the distributor signal. This parameter “Enabled”. should be set to PIP Time Filter The PIP Time Filter is a calibration switch to enable the PIP Time Filter. The PIP time filter verifies proper edge timing received from the distributor signal. This parameter “Enabled”. should be set to Crank Flag The Crank Flag is a status flag that indicates when the EPEC module is in crank mode. If the EPEC module is in crank mode, the fuel pulse width is based on the Cranking Fuel Function and the Spark Timing is fixed at base timing. This value is not calibratable directly, it is calibrated by the Crank to Run transition RPM and the Crank to Run Hysteresis values. Fuel Cut Flag The Fuel Cut Flag is a status flag that indicates when the EPEC module is in fuel cut mode. This flag is set when the Fuel Rev Limiter is active. This value is not calibratable directly, it is calibrated by the Fuel RPM limiter. Nitrous Enable Input Switch The Nitrous Enable Input Switch is the current state of the Nitrous Oxide Enable Switch. When the switch is closed this input is connected to ground and this value will be “Enabled” This value is not calibratable it is driven by the Nitrous Enable Input Switch. Analog Channel Function Analog Channel Function 0 0 Page 188 of 198 Extreme Performance Engine Control Acronyms and Terms Parameter/Term Definition Notes Stage Rev Limit Input Switch The Stage Rev Limit Input Switch is the current state of the Stage Rev Limit Input Switch. When the switch is closed this input is connected to ground and this value will be “Enabled” This value is not calibratable it is driven by the Stage Rev Limit Input Switch. Nitrous Stage 1 Output The Nitrous Stage 1 Output is the current state of the Nitrous Stage 1 Output. This value is not calibratable it is driven by the output pin. Nitrous Stage 2 Output The Nitrous Stage 2 Output is the current state of the Nitrous Stage 2 Output. This value is not calibratable it is driven by the output pin. Nitrous Stage 1 Lamp Output The Nitrous Stage 1 Lamp Output is the current state of the Nitrous Stage 1 Indicator lamp. This value is not calibratable it is driven by the output pin. Nitrous Stage 2 Lamp Output The Nitrous Stage 2 Lamp Output is the current state of the Nitrous Stage 2 Indicator lamp. This value is not calibratable it is driven by the output pin. Signature Pickup The Signature Pickup flag indicates that the EPEC module has detected a signature PIP signal from the distributor. This value is not calibratable. Spark Cut Flag The Spark Cut Flag is a status flag that indicates when the EPEC module is in Spark cut mode. This flag is set when the Spark Rev Limiter is active. This value is not calibratable directly, it is calibrated by the Spark RPM limiter. Spout Level The SPOUT Level is a calibration flag that will invert the SPOUT Output. This value is calibratable and for Ford applications, it should be set to “Normal”. This parameter is supplied to interface to different Ignition modules. Logger Arm Input Switch The Logger Arm Input Switch is the current state of the Logger Arm Input Switch. When the switch is closed this input is connected to ground and this value will be “Armed”. NOTE: If the logger is armed, this value will always indicate “Armed”. This value is not calibratable it is driven by the Logger Arm Input Switch. If the data logger is armed, it will always reflect “Armed”. Log Lamp Output The Log Lamp Output is the current state of the Log Indicator lamp. This value is not calibratable. It will reflect the output state of the Logger lamp. EPEC Override The EPEC Override flag is a status flag that indicates which module is controlling the engine. NOTE: if this value is indicates “EEC-IV”, none of the calibration parameters you have set in the EPEC module have an effect on the operation of the engine. This value is calibratable by the Module configuration parameters. Nitrous Oxide Arm Input Switch The Nitrous Oxide Arm Input Switch is the current state of the Nitrous Oxide Arm Input Switch. When the switch is closed this input is connected to ground and this value will be “On” This value is not calibratable. It is driven by the Nitrous Oxide Arm Input switch. Page 189 of 198 Extreme Performance Engine Control Acronyms and Terms Parameter/Term Definition Notes Programmable Output Enable This is a calibration value that will enable or disable the Programmable Output Channels. This values are calibratable by the programmable output channels. They are provided as a simple method of disabling each of the Programmable Output Channels. Throttle Mode The Throttle Mode is a status value that indicates which throttle mode the EPEC module is currently in. NOTE: You can change the points at which the EPEC module changes from idle to part throttle to wide open throttle in the TP Sensor Configuration. This value is not calibratable directly, the throttle mode is calibratable through the TP Sensor Configuration parameters. Ignition Type The Ignition Type is a calibration switch that tells the EPEC module what type of ignition system you are using. This item is calibratable through the SPOUT Configuration parameters. EPEC Override Type The EPEC Override Type is a calibration switch that tells the EPEC module how to override the EEC-IV module. This item is calibratable through the Module Configuration parameters. Air Mass The Air Mass is the current indicated amount of air in (Lbm/Hr) that the engine is ingesting. This value is not calibratable directly. It is calibrated using the MAF Transfer function. MAF Input Voltage The MAF Input Voltage is the current input voltage from the MAF Meter. This value is not calibratable, it is driven by the MAF Sensor. Air Charge (ACT) The Air Charge Temperature (ACT) is the current indicated Air temperature. This value is not calibratable directly. It is calibrated using the ACT Transfer function. ACT Input Voltage The ACT Input Voltage is the current indicated input voltage from the ACT sensor. This value is not calibratable, it is driven by the ACT Sensor. Engine Coolant Temperature (ECT) The Engine Coolant Temperature (ECT) is the current indicated Engine temperature. This value is not calibratable directly. It is calibrated using the ECT Transfer function. ECT Input Voltage The ECT Input Voltage is the current indicated input voltage from the ECT sensor. This value is not calibratable, it is driven by the ECT Sensor. Barometric Pressure The Barometric Pressure is the current indicated barometric pressure. NOTE: this value is obtained from the MAP sensor when the EPEC module is powered up. This value is not calibratable, it is driven by the MAP Sensor. Absolute Throttle Position The Absolute Throttle Position is the current indicated absolute throttle position. This value is not calibratable directly. It is calibrated using the TP Transfer Function. TP Input Voltage The TP Input Voltage is the current indicated input voltage from the TP sensor. This value is not calibratable, it is driven by the TP sensor. ACT Fuel Multiplier The ACT Fuel Multiplier is the current value of the ACT Fuel Multiplier. This value is not calibratable directly. It is calibrated through the ACT Fuel Function. Temperature Page 190 of 198 Extreme Performance Engine Control Parameter/Term Acronyms and Terms Definition Notes ACT Spark Adder The ACT Spark Adder is the current value of the ACT Spark Adder. This value is not calibratable directly. It is calibrated through the ACT Spark Function. Crank Fuel PW The Crank Fuel PW is the current value of the Crank Fuel PW. This value is not calibratable directly. It is calibrated through the Crank Fuel Function. ECT Fuel Multiplier The ECT Fuel Multiplier is the current value of the ECT Fuel Multiplier. This value is not calibratable directly. It is calibrated through the ECT Fuel Function. ECT Spark Adder The ECT Spark Adder is the current value of the ECT Spark Adder. This value is not calibratable directly. It is calibrated through the ECT Spark Function. Injector Offset Adder The Fuel Offset Adder is the current value of the Injector Offset Adder. This value is not calibratable directly. It is calibrated through the Injector Offset Function. Battery Voltage The Battery Voltage is the current battery voltage. This value is not calibratable it is driven by the input voltage to the EPEC module. Engine Speed The Engine Speed is the current engine speed in RPM. This value is not calibratable. It is driven by the distributor (PIP) signal. RPM Spark Adder The RPM Spark Adder is the current value of the RPM spark. This value is not calibratable directly. It is calibrated through one the 3 functions; Idle Spark, Part Throttle Spark or WOT spark depending on the current Throttle Mode. TP Fuel Multiplier The TP Fuel Multiplier is the current value of the TP Fuel Multiplier. This value is not calibratable directly. It is calibrated through the TP Fuel Function. Manifold Pressure The Manifold Pressure is the current value of the intake manifold pressure in In of Hg. This value is not calibratable directly. It is calibrated through the MAP Transfer Function. MAP Input Voltage The MAP Input Voltage is the current value of the of the MAP Sensor voltage. This value is not calibratable. This value is driven by the MAP Sensor. Throttle Angle Rate The Throttle Angle Rate is the current value of the Throttle Angle Rate. This value is not calibratable. This value is driven by how fast the throttle is opened. TP Spark Adder The TP Spark Adder is the current value of the TP Spark Adder. This value is not calibratable directly. It is calibrated through the TP Spark Function. Number Of Engine Cylinders The Number of Engine Cylinders tells the EPEC module how many cylinders the engine has. This value is calibratable through the Engine Configuration parameters. Engine Displacement The Engine Displacement value tells the EPEC module the displacement of the engine. This value is calibratable through the Engine Configuration parameters. Injector Size The Injector Size value tells the EPEC module the size of the injectors attached to the EPEC module. This value is calibratable through the Engine Configuration parameters. Page 191 of 198 Extreme Performance Engine Control Parameter/Term Acronyms and Terms Definition Notes Fuel Rev Limit The Fuel Rev Limit value tells the EPEC module where you would like to cut fuel. When the Engine Speed is above this value the “Fuel Cut Flag” will be set. This value is calibratable through the Engine RPM Limiters parameters. Stage Rev Limit The Stage Rev Limit value tells the EPEC module where you would like to set the Stage Rev Limiter. This rev limiter is only active when the Stage Rev Limit input switch input is grounded. This value is calibratable through the Engine RPM Limiters parameters. Nitrous Stage 1 Spark Retard The Nitrous Stage 1 Spark Retard value tells the EPEC module how much to retard spark advance when the Stage 1 Nitrous is activated. This value is calibratable through one of 2 places, either the Nitrous Spark Retard or the Nitrous Stage 1 configuration. Nitrous Stage 2 Spark Retard The Nitrous Stage 2 Spark Retard value tells the EPEC module how much to retard spark advance when the Stage 2 Nitrous is activated. This value is calibratable through one of 2 places, either the Nitrous Spark Retard or the Nitrous Stage 2 configuration. Nitrous Stage 1 Minimum RPM The Nitrous Stage 1 Minimum RPM value tells the EPEC module the minimum engine speed before the Stage 1 Nitrous will be activated. This value is calibratable through the Nitrous Stage 1 configuration. Nitrous Stage 1 Delay The Nitrous Stage 1 Delay value tells the EPEC module how long to delay after the Nitrous Oxide Arm Switch has been released. This value is calibratable through one Nitrous Stage 1 configuration. Nitrous Stage 2 Minimum RPM The Nitrous Stage 2 Minimum RPM value tells the EPEC module the minimum engine speed before the Stage 2 Nitrous will be activated. This value is calibratable through the Nitrous Stage 2 configuration. Nitrous Stage 2 Delay The Nitrous Stage 2 Delay value tells the EPEC module how long to delay after the Nitrous Oxide Arm Switch has been released. This value is calibratable through one Nitrous Stage 2 configuration. Nitrous “ON” Throttle Angle The Nitrous “ON” Throttle Angle tells the EPEC module the minimum throttle angle before either stage of nitrous will be activated. This value is calibratable through the Nitrous Oxide Global parameters. Nitrous “OFF” Throttle Angle The Nitrous “OFF” Throttle Angle tells the EPEC module the throttle angle at which both stages of nitrous will deactivate. This value is calibratable through the Nitrous Oxide Global parameters. Spark Rev Limit The Spark Rev Limit value tells the EPEC module where you would like to cut Spark. When the Engine Speed is above this value the “Spark Cut Flag” will be set. This value is calibratable through the Engine RPM Limiters parameters. Desired Air/Fuel Ratio The Desired Air/Fuel Ratio is the current value of the Desired Air/Fuel Ratio. This value is not calibratable directly, it is calibratable through one of 3 different functions; Idle Fuel, Part Throttle Fuel or WOT Fuel. Page 192 of 198 Extreme Performance Engine Control Parameter/Term Acronyms and Terms Definition Notes Idle -> Part Transition Point The Idle->Part Transition Point tells the EPEC module where you would like to set the Idle transition point between Idle and Part Throttle. This value is calibratable through the TP Configuration parameters. Part -> WOT Transition Point The Part->WOT Transition Point tells the EPEC module where you would like to set the Part Throttle transition point between Part Throttle and WOT. This value is calibratable through the TP Configuration parameters. Throttle Mode Hysteresis The Throttle Mode Hysteresis tells the EPEC module how much of a filter on throttle modes is required. This value is calibratable through the TP Configuration parameters. Nitrous Maximum RPM The Nitrous Maximum RPM tells the EPEC module the maximum engine speed. When the engine is above this RPM, the EPEC module will deactivate the BOTH nitrous oxide stages. This parameter is provided for manual transmissions, many times the rev limiters are hit during a shift. This will turn off the nitrous oxide so it will not be flowing while the engine is being rev limited. Once the engine RPM is below this value, the nitrous system will reactivate. Nitrous “ON” Delay After Max RPM The Nitrous “ON” Delay After Max RPM parameter is the amount of time after the engine speed falls below the Nitrous Maximum RPM before the nitrous stages will re-activate. This parameter is provided so the nitrous system does not oscillate during a shift. Background Timer The Background Timer is the amount of time the EPEC module takes to update fuel and spark calculations. This parameter is not calibratable, it is only provided for reference. Total Spark Advance The Total Spark Advance value is the amount of spark advance delivered to the engine. This value is not calibratable directly, it is calibrated by all of the spark functions. Fuel Pulse Width The Fuel Pulse Width value is the amount of time the injectors are turned on. This value is not calibratable directly, it is calibrated by all of the fuel functions. Time Since Last PIP The Time Since Last PIP value is the length of time since the EPEC module has seen a signal from the distributor. This value is not calibratable. It is only provided for reference. Analog Channel 0-2 Volts The Analog Channel 0-2 Volts value is the input voltage on each of the channels. This value is not calibratable. It is driven by the external device connected each of the channels. EPEC Override Engine Speed The EPEC Override Engine Speed value tells the EPEC module where you would like the EPEC module to override the EEC-IV module. This value is used in conjunction with the EPEC Override Throttle Angle. This value is calibratable through the Module Configuration parameters. Crank to Run Transition RPM The Crank to Run Transition RPM value tells the EPEC module where the split between Crank and Run. This value is calibratable through the PIP Configuration parameters. Dwell Angle The Dwell Angle is the amount of crank angle the spark output signal is left on. This value is calibratable through the SPOUT Configuration parameters. This value for most systems should be set to 45 deg. Page 193 of 198 Extreme Performance Engine Control Parameter/Term Acronyms and Terms Definition Notes Dwell Time The Dwell Time is the length of time the spark output signal is left on. This value is calibratable through the SPOUT Configuration parameters. This value for Ford ignition systems should be set to 6 ms (6000). Manual A/F Ratio The Manual A/F Ratio is the Air/Fuel ratio that will be used while the EPEC module is in Manual Mode. This value is calibratable through the Manual Fuel/Spark Control. This value is ONLY used when the EPEC module is in Manual Mode. Signature PIP Angle The EPEC Module synchronizes with the engine using the #1 PIP. This signal is shorter in duration than all the other signals from the distributor. The Signature PIP Angle is the difference between a normal signal and the #1 signal. This value is calibratable through the PIP Configuration parameters. Manual Spark Angle The Manual Spark Angle is the Spark advance that will be used while the EPEC module is in Manual Mode. This value is calibratable through the Manual Fuel/Spark Control. This value is ONLY used when the EPEC module is in Manual Mode. Boost Retard The Boost Retard value is the amount of Spark Retard the EPEC is delivering to the engine. This value is not calibratable directly, it is calibratable thorough the Boost Retard Function. EPEC Override Throttle Angle The EPEC Override Throttle Angle value tells the EPEC module where you would like the EPEC module to override the EEC-IV module. This value is used in conjunction with the EPEC Override Engine Speed. This value is calibratable through the Module Configuration parameters. Crank to Run Hysteresis The Crank to Run Hysteresis tells the EPEC module how much of a filter on Crank mode is required. This value is calibratable through the PIP Configuration parameters. Injector Duty Cycle The Injector Duty Cycle is the current duty cycle of the injectors. This value should be kept under 95%, however, it is driven by the current air/fuel setting and all of the fuel multipliers. Boost Pressure The Boost Pressure is the current boost the engine is under in psi. This value is not calibratable. It is driven by the MAP sensor. MAP Fuel Multiplier The MAP Fuel Multiplier is the current value of the MAP Fuel Multiplier. This value is not calibratable directly. It is calibrated through the MAP Fuel Function. Transitional Fuel PW The Transitional Fuel PW value is the amount of additional fuel PW the EPEC is delivering to the engine. This value is not calibratable directly, it is calibratable thorough the Base Transitional Fuel and the TP Correction Functions. The Transitional TP Fuel Multiplier is the current value of the Transitional TP Fuel Multiplier. This value is not calibratable directly. It is calibrated through the TP Correction Function. The Transitional Fuel Enrichment is the current value of the Transitional Fuel Enrichment. This value is not calibratable directly. It is calibrated through the Base Transitional Fuel Function. Transitional Multiplier TP Fuel Transitional Fuel Enrichment Page 194 of 198 Extreme Performance Engine Control Parameter/Term Acronyms and Terms Definition Notes Fuel The Analog Channel 0-2 Fuel Multiplier values are the current fuel multiplier values from the Analog Channel 0-2 Fuel Multiplier Functions. This value is not calibratable directly. It is calibrated through the Analog Channel 02 Fuel Functions. Analog Channel 0-2 Spark Adder The Analog Channel 0-2 Spark Adder values are the current Spark adder values from the Analog Channel 0-2 Spark Functions. This value is not calibratable directly. It is calibrated through the Analog Channel 02 Spark Functions. Analog Channel Multiplier 0-2 Page 195 of 198 Extreme Performance Engine Control User Notes User Notes In This Chapter Notes YourYour Notes Page 196 of 198 Extreme Performance Engine Control (EPEC) Page 197 of 198 User Notes