1
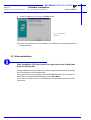
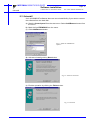
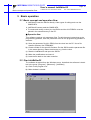
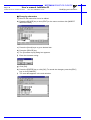
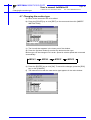
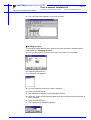
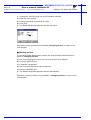
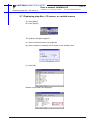
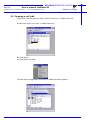
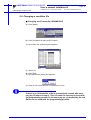
MOTOMAN
MOTOMAN XRC
USER’S MANUAL
JobEditor32
Upon receipt of the product and prior to initial operation, read these instructions thoroughly,
and retain for future reference.
MOTOMAN ROBOTICS EUROPE
A subsidiary of YASKAWA Electric Corporation
MANUAL NO. MRS55010
MOTOMAN ROBOTICS EUROPE
Reference list
MOTOMAN XRC Basic Operator’s manual
Revision
000316
Preliminary release of this manual, valid for software version 2.0 Beta.
Revision
010803
Update to version 2.23.
MOTOMAN ROBOTICS EUROPE
User’s manual JobEditor32
Created: 99-12-17 Revised: 01-08-06
Page: 3
Doc. name: MRS55010TOC.fm
1. General ................................................................. 5
Copyright
JobEditor32-kit
❏ JobEditor32-kit comprises
❏ JobEditor32-kit does not comprise
❏ Further you may have need for
Hardware and software demands
6
6
6
6
6
6
2. Software installation ............................................. 7
Installation
After installation
Uninstall
7
10
11
3. Basic operation ................................................... 13
Basic concept and operation flow
❏ Operation flow
Start JobEditor32
Softkey tree
Features
❏ Key operations
❏ Valid operations
Selecting a job
❏ Opening one job
❏ Opening multiple job at the same time
Creating a new job
❏ Select parameter file
❏ Creating a job
❏ Set options
❏ Set job name
Copying a job
Delete job
❏ Delete a single job
❏ Delete multiple job simultaneously
When no job is provided
❏ Opening a parameter file
Changing a job name
Closing a file
Saving a file
Printing
Exit
13
13
13
14
15
15
15
16
16
17
18
18
18
19
19
20
21
21
21
22
22
23
24
25
26
27
4. Editing ................................................................. 29
Adding an instruction
Deleting an instruction
❏ Deleting one line
❏ Deleting multiple lines
Selecting multiple lines
❏ Using the keyboard
❏ Using the mouse
Copying an instruction
❏ Copying one line
❏ Copying Multiple Lines
29
30
30
30
31
31
31
32
32
32
MOTOMAN ROBOTICS EUROPE
Page: 4
User’s manual JobEditor32
Created: 99-12-17 Revised: 01-08-06
Doc. name: MRS55010TOC.fm
Pasting an instruction
❏ Paste
❏ Reverse
Modifying an instruction
❏ Changing numerical values (1)
❏ Changing numeral values (2)
❏ Changing characters
Changing the motion type
Editing in the detail edit window
❏ Changing an item
❏ Adding an item
❏ Deleting an item
Searching
❏ Searching for character strings
33
33
34
36
36
37
38
39
40
40
41
42
43
43
5. Editing other items .............................................. 45
Changing the speed
❏ Changing according to speed type
❏ Changing speed relatively
Defining control groups
❏ Adding a combination
❏ Changing a combination
❏ Deleting a combination
Defining position variables
Adding comments
Number of local variables
Increasing the instruction types to be used
❏ Language level
❏ Parameter option
❏ Instruction list
Displaying step Nos., I/O names, or variable names
Opening a call jobb
Changing a condition file
❏ Changing an I/O name file (IONAME.DAT)
❏ Changing a variable name file (VARNAME.DAT)
Editing an expression
Using a macro command
Create a binary job
❏ Convert JBI to JBB
Customizing JobEditor32
❏ Changing the font
❏ Changing background colour
❏ Changing the comment color
Change language
45
45
46
47
47
48
48
49
50
51
52
52
52
53
55
56
57
57
58
59
63
64
64
65
65
65
65
66
MOTOMAN ROBOTICS EUROPE
User’s manual JobEditor32
Created: 99-12-16 Revised: 01-08-06
Page: 5
Doc. name: MRS55010-ch1.fm
JobEditor32
Valid for software version 2.23 (MOTOMAN P/N: 441137-99)
This job editor is only valid for jobs in the XRC robot controller.
Fig.1 Main window
1. General
JobEditor32 is a 32-bit PC-software.
The purpose with JobEditor32 is....
✔ Programming in INFORM language
✔ Create new robot jobs, rename and delete jobs
✔ Edit and modify instructions
✔ Register group combinations, etc.
✔ No communication function to handle jobs between controller and PC is
included.
✔ This is a multi language version of the software which gives the facility to
switch between 11 european languages.
For more basic information about installation and handling of the
software, icons, menu bars, etc. refer to the operator’s manual for
Windows 95/98 or Windows NT.
✔
✔ This manual shall always be available to the operator
✔ This user’s manual comprises information about: Installation, Setup, Handling
✔ Text written i bars t.ex. [SPACE] means button on key board or in menu.
✔ Text written in ITALIC means text shown in display.
MOTOMAN ROBOTICS EUROPE
User’s manual JobEditor32
Page: 6
Created: 99-12-16 Revised: 01-08-06
Doc. name: MRS55010-ch1.fm
Copyright
1.1 Copyright
The diskettes/CD for the JobEditor32 softwaremay not be copied or imparted to a
third party nor be used for an unauthorized purpose. Copies may be done only for
own backup.
This manual many not be copied or imparted to a third party nor be used for an
unauthorized purpose.
1.2 JobEditor32-kit
■ JobEditor32-kit comprises
✔ One set of diskettes or one CD
✔ One hardware key
✔ One manual
✔ One registration card
■ JobEditor32-kit does not comprise
✔ Functions or software for file transfer between PC and robot controller.
MOTOMAN software FDDWIN32 or JobExchanger32 is recommended.
■ Further you may have need for
✔ Programming manual for MOTOMAN XRC robot controller
✔ Operator’s manual for Windows 95/98 or Windows NT
1.3 Hardware and software demands
✔ One PC type Pentium 90 MHz, 16 Mb RAM, 30 Mb disc space
✔ 3,5” diskett station or CD-ROM drive
✔ Colour monitor, at least 256-colours
✔ Mouse, supported by Windows
✔ Operating system Windows 95/98 or Windows NT 4.0
✔ Parallel port for hardware key connection
Note!
This software is valid for robot controller type MOTOMAN XRC.
Other software exist to be used together with YASNAC MRC/MRCII.
MOTOMAN ROBOTICS EUROPE
Software installation
Installation
Created: 96-01-31 Revised: 01-08-02
Page: 7
Doc. name: Software-installation.fm
2. Software installation
Note
This chapter shows a general installation phase of any software. In this example
the software FDDWIN is installed. Select the right software by choosing the
appropriate software name.
2.1 Installation
There are three ways to start installation of this software, all will give the same
result. The most common way is described below.
a) Put the first diskette named #1 in the disk-drive.
b) Click on the Start button on the menu-bar.
c) Choose Run from the menu.
d) Browse to drive A:\
e) Choose the file named SETUP.EXE
f) Click OK.
Fig.2 Choose installation file
g) Choose OK and the installation guide will start.
h) You can quit the installation att any time by clicking the Cancel-button and
then confirm by Yes-button.
Fig.3 You can cancel
installation at any time
i) Mark the language you want to use during installation. Note! This will not influence the language you use in FDDWIN32 later.
MOTOMAN ROBOTICS EUROPE
Software installation
Page: 8
Created: 96-01-31 Revised: 01-08-02
Installation
Doc. name: Software-installation.fm
j) Click on the OK-button.
Fig.4 Language selection
during installation
k) Pass this information screen by clicking the Next-button.
Fig.5 Information screen
l) Read through the license agreement and accept by clicking on the Next-button.
Fig.6 License
agreement. Accept by
clicking Next.
m) Set directory for FDDWIN32. It’s advisable to install the software in the directory which is set as default by the installation guide.
MOTOMAN ROBOTICS EUROPE
Software installation
Installation
Created: 96-01-31 Revised: 01-08-02
Page: 9
Doc. name: Software-installation.fm
n) Accept by clicking Next-button.
Fig.7 Choose
directory
o) Accept installation process by clicking Next-button.
Fig.8 Start installation
p) Installation starts.
Fig.9 Installation
progress counter
q) After some time you are told to enter disk #2/2.
r) Insert disk and click on OK-button.
Fig.10 Insert disk #2
s) The installation is finished and the last screen appears.
MOTOMAN ROBOTICS EUROPE
Software installation
Page: 10
Created: 96-01-31 Revised: 01-08-02
After installation
Doc. name: Software-installation.fm
t) Accept installation by clicking the Finish-button.
Fig.11 Installation
complete
u) Before it is possible to run the software, the hardware key must be installed on
the parallel port.
2.2 After installation
After installation, fill in and return the registration card to Motoman
Robotics Europe AB.
During installation the main directory is automatically created and all necessary
files are installed in the specified drive.
In the end of the setup a program group (MOTOMAN) and a icon is created. To
start FDD for Windows just double-click on the Start Menu.
If you want to create a shortcut to FDDWIN32, see Windows manual for further
information
MOTOMAN ROBOTICS EUROPE
Software installation
Uninstall
Page: 11
Created: 96-01-31 Revised: 01-08-02
Doc. name: Software-installation.fm
2.3 Uninstall
As in all WIN95/NT softwares there are an uninstall facility if you want to remove
the software from the hard disk.
a) Start the Control panel from the start menu. Select Add/Remove button from
the menu.
b) Mark the line FDDWIN32 from the menu.
c) Click Add/Remove button.
Fig.12 Mark the FDDWIN32
software
d) Activate uninstall guide by Next-button.
Fig.13 Automatic uninstall
e) End the operation by clicking the Finish-button.
Fig.14 Uninstall
MOTOMAN ROBOTICS EUROPE
Page: 12
Created: 96-01-31 Revised: 01-08-02
Software installation
Doc. name: Software-installation.fm
Uninstall
MOTOMAN ROBOTICS EUROPE
User’s manual JobEditor32
Basic concept and operation flow
Created: 99-12-16 Revised: 01-08-06
Page: 13
Doc. name: MRS55010-ch3.fm
3. Basic operation
3.1 Basic concept and operation flow
✔ JobEditor32 uses the JBI-file directly. Other types of editing tools use the
CMOS.HEX.
✔ JobEditor32 cannot read the CMOS.HEX.
✔ To create and modify a robot job, the JBI-file and the ALL.PRM file must be
placed in the same directory in the PC.
■ Operation flow
This software requires only parameter files. To edit the same instructions as the
programming pendant, save the parameter file from the programming pendant in
advance.
a) Save the parameter file (ALL.PRM) from the robot into the PC. Use a file
transfer software, like FDDWIN32.
b) Create a folder for the specific file/robot. Put the JBI-file and the parameter file
in the same directory. Name the directory e.g. like the robot.
c) Start the JobEditor32 and open the JBI-file.
d) Make the modifications and save it.
e) Load the file back to the robot controller.
3.2 Start JobEditor32
The software is started from the Windows menu. As default the software is installed in the group: [Program] - [Motoman] - [JobEditor].
a) Click on the program icon.
b) Main window is started.
MOTOMAN ROBOTICS EUROPE
User’s manual JobEditor32
Page: 14
Created: 99-12-16 Revised: 01-08-06
Softkey tree
Doc. name: MRS55010-ch3.fm
3.3 Softkey tree
JobEditor32
File
Edit
View
Mode
Create Job...
Select Job
Modify Name
Copy Job
Delete Job
Close
Save
Save As...
Print
Print Preview
Page Setup...
Exit
Cut
Copy
Paste
Reverse
Find
Modify Speed
Insert Instruction
Modify Instruction
Copy on the clipboard
Copy on the clipboard all
Header
Position variable
Back Colour
Font
Comment Colour
Change language
Toolbar
Statusbar
Open call job
Level of inform
Match Control Group
Option
Condition file edit
Window
Cascade
Tile
Arrange Icons
Help
Contents
About JobEditor
Main
Detail
Input Buffer
Robot
Base
Station
Reduction
Standard
Extension
I/O name
Variable name
MOTOMAN ROBOTICS EUROPE
User’s manual JobEditor32
Features
Created: 99-12-16 Revised: 01-08-06
Page: 15
Doc. name: MRS55010-ch3.fm
3.4 Features
JobEditor32 is a job editing software for the MOTOMAN XRC robot controller.
JobEditor32 is used in the same way as the programming pendant.
■ Key operations
The displays where the editing can be done, such as the job contents, the line
editing and the detail editing display are the same as those for the programming
pendant. Anyone who can edit with the programming pendant can easily use the
software.
The programming pendnat keys korrespond to the keys as follows.
XRC p-pendant
PC keys
Cursor key
Arrow keys
Select key
Space key
Enter key
Enter key
[Space]
■ Valid operations
File functions
Create new job
Open existing job
Change job name
Copy job
Delete job
Editing functions
Add instruction
Change instruction
Delete instruction
Copy instruction
Paste instruction
Reverse paste instruction
Edit multiple jobs
Edit line
Edit details
Search
Change interpolation type
Change speed
Register group combinations
Change language level
Display functions
Display header
Display auxiliary header
Display position variables
MOTOMAN ROBOTICS EUROPE
User’s manual JobEditor32
Page: 16
Created: 99-12-16 Revised: 01-08-06
Doc. name: MRS55010-ch3.fm
Selecting a job
3.5 Selecting a job
Various basic parameter files and jobs are provided in “Sample” directory setup in
the computer during installation.
■ Opening one job
a) Click [File].
b) Click [Select Job...] or use [Ctrl]+[o] keys.
c) The dialog box appear.
d) Go to the directory you want to open.
e) Mark the file to be opened.
f) Click [Open].
Note!
The XRC parameter file must be available in the same directory. If there is no
ALL.PRM file, following warning will be displayed.
MOTOMAN ROBOTICS EUROPE
User’s manual JobEditor32
Selecting a job
Created: 99-12-16 Revised: 01-08-06
Page: 17
Doc. name: MRS55010-ch3.fm
■ Opening multiple job at the same time
a) Click [File].
b) Click [Select Job...] or use [Ctrl]+[o] keys.
c) The dialog box appear.
d) Go to the directory you want to open.
e) Mark the files to be opened. By holding [Ctrl] key down, several files may be
selected at the same time.
f) Click [Open].
MOTOMAN ROBOTICS EUROPE
User’s manual JobEditor32
Page: 18
Created: 99-12-16 Revised: 01-08-06
Doc. name: MRS55010-ch3.fm
Creating a new job
3.6 Creating a new job
Note!
Before it is possible to create a new job, the parameter file for the specific robot
must be selected.
■ Select parameter file
a) Click [File].
b) Click [Select Job] or use [Ctrl]+[o] keys.
c) The [Open] dialog box appears.
d) Change seletion of file types to *.PRM.
e) All avalilable parameterfiles in selected directory appears.
f) Mark the All.PRM file.
g) Click [Open].
■ Creating a job
a) Click [File].
b) Click [Create Job...] or use [Ctrl]+[n] keys.
c) The [Create Job] dialog box appear.
MOTOMAN ROBOTICS EUROPE
User’s manual JobEditor32
Creating a new job
Created: 99-12-16 Revised: 01-08-06
Page: 19
Doc. name: MRS55010-ch3.fm
■ Set options
d) Select [JBI] or [JBB] file type.
e) Select [Robot] or [Non Robot] job type. A robot job contains position data and
a concurrent job doesn’t.
f) Select control group. If wanted group doesn’t exist it must be created first. See
separate chapter “Group combination registry”.
■ Set job name
g) Enter a job name using lower-case letters, maximum 8 characters.
h) Click [OK].
If the job name already exist in the folder, a warning message is displayed.
i) A new job appears.
Note!
New job is automatically saved in the same directory as the ALL.PRM-file.
File extension may be switched between JBI and JBB.
JBI is ASCII coded, suitable for MOTOMAN XRC controller.
JBB is binary coded, suitable for PC/XRC (not for XRC robot controller).
MOTOMAN ROBOTICS EUROPE
User’s manual JobEditor32
Page: 20
Created: 99-12-16 Revised: 01-08-06
Doc. name: MRS55010-ch3.fm
Copying a job
3.7 Copying a job
a) Open the job that shall be copied.
b) Click [File].
c) Click [Copy Job].
d) The [Copied Job Name Input] dialog box appears.
e) Enter the new job name.
f) Click [OK].
g) The new job appears in the main window.
Note!
An existing name can not be be used. To select the name of an existing job, delete
the existing job first.
MOTOMAN ROBOTICS EUROPE
User’s manual JobEditor32
Delete job
Created: 99-12-16 Revised: 01-08-06
Page: 21
Doc. name: MRS55010-ch3.fm
3.8 Delete job
Use windows explorer to delete a job file.
■ Delete a single job
a) Click [File].
b) Click [Delete File].
c) The [Delete Job] dialog box appears.
d) Select the job to be deleted.
e) Click [Open].
■ Delete multiple job simultaneously
Refer to the earlier chapter “Opening multiple job at the same time”.
MOTOMAN ROBOTICS EUROPE
Page: 22
User’s manual JobEditor32
Created: 99-12-16 Revised: 01-08-06
Doc. name: MRS55010-ch3.fm
When no job is provided
3.9 When no job is provided
When no job is provided, select the parameter file to create an environment for
making a new job.
■ Opening a parameter file
a) Click [FILE]
b) Click [SELECT JOB]
The [OPEN] dialog box appears.
Click here
c) Click [PRM Files]
PRM Files appear.
d) Click [All.prm].
e) Click [OPEN]
MOTOMAN ROBOTICS EUROPE
User’s manual JobEditor32
Changing a job name
Created: 99-12-16 Revised: 01-08-06
Page: 23
Doc. name: MRS55010-ch3.fm
3.10 Changing a job name
a) Click file
b) Click [Modify name]
The [Modified job name input] dialog box apperas
c) Enter a job name using upper-case letters, maximum 8 characters.
Any existing job cannot be specified for the Modified Job Name Input.
If selected, the following message appears. Enter a different name. To
select the name of an existing job for the Modofoed Job Name Input,
delete the existing job first.
MOTOMAN ROBOTICS EUROPE
Page: 24
User’s manual JobEditor32
Created: 99-12-16 Revised: 01-08-06
Doc. name: MRS55010-ch3.fm
Closing a file
3.11 Closing a file
a) Click [File].
b) Click [Close].
c) If the file has been created or modified in any way the following dialog message is displayed.
d) Choose [Yes] to save the changes.
Choose [No] to close without saving.
Choose [Cancel] to go back to editing mode.
MOTOMAN ROBOTICS EUROPE
User’s manual JobEditor32
Saving a file
Created: 99-12-16 Revised: 01-08-06
Page: 25
Doc. name: MRS55010-ch3.fm
3.12 Saving a file
a) Click [File].
b) Click [Save] or use [Ctrl]+[s] keys.
Note!
The following error message may appear when saving a file. This message
appears when the position variable is not defined, although there is an instruction
using a position variable in the job which to be saved.
Select [View] and then [Position Variable] to define the position variable.
MOTOMAN ROBOTICS EUROPE
Page: 26
User’s manual JobEditor32
Created: 99-12-16 Revised: 01-08-06
Doc. name: MRS55010-ch3.fm
3.13 Printing
a) Click [File].
b) Click [Print] or use [Ctrl]+[p] keys.
c) The [Print] dialog box appears.
d) Click [OK].
Printing
MOTOMAN ROBOTICS EUROPE
User’s manual JobEditor32
Exit
Created: 99-12-16 Revised: 01-08-06
Page: 27
Doc. name: MRS55010-ch3.fm
3.14 Exit
a) To quit the software, click [File].
b) Click [Exit].
Note!
If there is any job that has not been saved when the exit command is used, a dialog will appear to ask if the edited job is to be saved.
MOTOMAN ROBOTICS EUROPE
Page: 28
User’s manual JobEditor32
Created: 99-12-16 Revised: 01-08-06
Doc. name: MRS55010-ch3.fm
Exit
MOTOMAN ROBOTICS EUROPE
User’s manual JobEditor32
Adding an instruction
Created: 99-12-16 Revised: 01-08-03
Page: 29
Doc. name: MRS55010-ch4.fm
4. Editing
4.1 Adding an instruction
Press the cursor keys to highlight the address of the line where an instruction is to
be added. This can be also done by clicking the mouse directly.
a) Move the address of the line where an instruction is to be inserted.
b) Press the [SPACE] key or click [EDIT] on the menu and then click [INSERT
INSTRUCTION].
c) The [Instruction List] dialog box appears.
Press [ESC] key to release the ADD-mode
d) Select a line by moving the cursor or by clicking the mouse.
e) Press the [ENTER] key or double-click the mouse.
f) The line-edit box appears in the lower-left of the window.
g) Press the [ENTER] key or click [OK].
MOTOMAN ROBOTICS EUROPE
Page: 30
User’s manual JobEditor32
Created: 99-12-16 Revised: 01-08-03
Doc. name: MRS55010-ch4.fm
Deleting an instruction
h) The instruction has been inserted.
4.2 Deleting an instruction
■ Deleting one line
i) Select the address or instruction to be deleted.
j) Click [EDIT].
k) Click [CUT].
a) The dialog box appears asking if you are sure you want to delete the line.
b) Click [YES].
Since the cut contents are copied to the buffer, they can be pasted on another
place or job.
■ Deleting multiple lines
Select multiple lines to delete at one time, and perform the same operation as
described in “Deleting one line.”
MOTOMAN ROBOTICS EUROPE
User’s manual JobEditor32
Selecting multiple lines
Created: 99-12-16 Revised: 01-08-03
Page: 31
Doc. name: MRS55010-ch4.fm
4.3 Selecting multiple lines
■ Using the keyboard
a) Move to the first line to be selected.
b) Press the [SHIFT] key.
c) Move the cursor holding the [SHIFT] key down to select additional lines.
■ Using the mouse
a) Click the first line to be selected.
b) Drag over adjacent lines to select multiple lines.
Note!
To select multiple lines using the mouse, it is very important to include all letters/
figures in the last line to be selected. Otherwise, the selection is neglected.
MOTOMAN ROBOTICS EUROPE
Page: 32
User’s manual JobEditor32
Created: 99-12-16 Revised: 01-08-03
Doc. name: MRS55010-ch4.fm
Copying an instruction
4.4 Copying an instruction
■ Copying one line
a) Move to the lin to be copied.
b) Click [EDIT].
c) Click [COPY] or [Ctrl]+[c].
Perform the same operation as described in 4.5 “Pasting an Instruction.”
There is no limitation to the number of instructions that can be copied. Move instructions can also be copied, but pay attention operating.
■ Copying Multiple Lines
Perform the procedure described in “Selecting multiple lines,” and then perform
the procedures as described in steps of “Copying one line.”
MOTOMAN ROBOTICS EUROPE
User’s manual JobEditor32
Pasting an instruction
Created: 99-12-16 Revised: 01-08-03
Page: 33
Doc. name: MRS55010-ch4.fm
4.5 Pasting an instruction
Note!
Pasting or reverse pasting always take place underneath the line of the cursor.
■ Paste
a) Move to the line where data is to be pasted.
b) Click [EDIT].
c) Click [PASTE] or [Ctrl]+[v].
d) A dialog box appears asking if you are sure you want to paste the data.
e) Click [YES].
MOTOMAN ROBOTICS EUROPE
Page: 34
User’s manual JobEditor32
Created: 99-12-16 Revised: 01-08-03
Doc. name: MRS55010-ch4.fm
Pasting an instruction
■ Reverse
“Reverse” pastes several copied lines in the opposite order of how they were
copied.
To create a group of move instructions for returning, copy the group of move instructions for going and reverse-pasting them.
a) Select multiple lines and copy them.
b) Move to the position where the data is to be inserted. The data will be inserted
on the next line
c) Click [EDIT].
d) Click [REVERSE].
e) A dialog box appears asking if you are sure you want to reverse-paste the
data.
f) Click [YES].
MOTOMAN ROBOTICS EUROPE
User’s manual JobEditor32
Pasting an instruction
Created: 99-12-16 Revised: 01-08-03
g) The data has been reverse-pasted.
Page: 35
Doc. name: MRS55010-ch4.fm
MOTOMAN ROBOTICS EUROPE
Page: 36
User’s manual JobEditor32
Created: 99-12-16 Revised: 01-08-03
Doc. name: MRS55010-ch4.fm
Modifying an instruction
4.6 Modifying an instruction
■ Changing numerical values (1)
a) Move to the instruction line to be edited.
b) Press the [SPACE] key or click [EDIT] on the menu and then click [INSERT
INSTRUCTION].
c) The line-edit box appears in the lower part of the window.
or use the arrow keys
d) Press the [left/right buttons] to manouver to right position.
e) Press the [upp/down buttons] until obtaining the desired value.
f) Press the [ENTER] key or click [OK].
g) To cancel the changes, press the [ESC] key or click [CANCEL].
h) The new data appears in the main window.
MOTOMAN ROBOTICS EUROPE
User’s manual JobEditor32
Modifying an instruction
Created: 99-12-16 Revised: 01-08-03
Page: 37
Doc. name: MRS55010-ch4.fm
■ Changing numeral values (2)
Select the numeral value for line editing with the same procedures as described in
“Changing numeral values (1)”.
a) Press the [SPACE] key.
b) The [Value Input] dialog box appears.
c) Change the value, using one of these methods.
1) Enter the value directly.
2) Press the [up/down buttons].
d) Press [ENTER] or click [OK].
e) The new data appears in the main window.
Lines cannot be moved in the main window during line editing.
MOTOMAN ROBOTICS EUROPE
Page: 38
User’s manual JobEditor32
Created: 99-12-16 Revised: 01-08-03
Doc. name: MRS55010-ch4.fm
Modifying an instruction
■ Changing characters
a) Move to the instruction line to be edited.
b) Press the [SPACE] key or click [EDIT] on the menu and then click [INSERT
INSTRUCTION].
c) Press the [Arrow] keys to go to desired item.
d) Press the [SPACE] key.
e) The [Character Input] dialog box appears.
f) Enter the character string.
g) Click [OK].
h) Press the [ENTER] key or click [OK]. To cancel the changes, press the [ESC]
key or click [CANCEL].
i) The new data appears in the main window.
MOTOMAN ROBOTICS EUROPE
User’s manual JobEditor32
Changing the motion type
Created: 99-12-16 Revised: 01-08-03
Page: 39
Doc. name: MRS55010-ch4.fm
4.7 Changing the motion type
a) Move to the instruction line to be edited.
b) Press the [SPACE] key or click [EDIT] on the menu and then click [INSERT
INSTRUCTION].
c) The line-edit box appears in the lower part of the window.
d) Press the [up/down buttons] to select the desired motion type.
Motion type can be changed in this order. Speed is relative speed and converted
automatically.
MOVJ
MOVL
MOVC
MOVS
e) Press the [ENTER] key or click [OK]. To cancel the changes, press the [ESC]
key or click [CANCEL].
f) The instruction line with the new motion type appears in the main window.
MOTOMAN ROBOTICS EUROPE
Page: 40
User’s manual JobEditor32
Created: 99-12-16 Revised: 01-08-03
Doc. name: MRS55010-ch4.fm
Editing in the detail edit window
4.8 Editing in the detail edit window
■ Changing an item
a) Move to the instruction line to be edited.
b) Press the [SPACE] key or click [EDIT] on the menu and then click [INSERT
INSTRUCTION].
c) The line-edit box appears in the lower part of the window.
d) Press the [SPACE] key.
e) The Detail Edit window appears.
f) Use the [Arrow] keys to move the cursor to the item to be changed.
g) Press the [SPACE] key.
h) A selection list appears.
i) Use the [up/down buttons] to select an item.
j) Press the [ENTER] key to select. Press [ESC] key to cancel.
k) The new item appears in the Detail Edit window.
l) Click [OK].
m) The line-edit box appears in the lower-left of the window.
n) Press the [ENTER] key.
MOTOMAN ROBOTICS EUROPE
User’s manual JobEditor32
Editing in the detail edit window
Created: 99-12-16 Revised: 01-08-03
Page: 41
Doc. name: MRS55010-ch4.fm
o) The new instruction appears in the main window.
■ Adding an item
To call up the Detail Edit window, perform the same procedure as described in
steps above of “Changing an item.”
a) Use the [Arrow] keys to move the cursor to the item to be changed.
b) Press the [SPACE] key.
c) A selection list appears.
d) Use the [up/down buttons] to make a selection.
e) Press the [ENTER] key.
f) The added item appears in the Detail Edit window.
g) Move the cursor to the numerical data when the numerical value of the item is
to be changed.
h) Press the [SPACE] key.
i) The [Value Input] dialog box appears.
MOTOMAN ROBOTICS EUROPE
Page: 42
User’s manual JobEditor32
Created: 99-12-16 Revised: 01-08-03
Doc. name: MRS55010-ch4.fm
Editing in the detail edit window
j) Change the value by using one of the following methods.
1) Enter the value directly.
2) Press the [up/down buttons] to set value.
k) Click [OK].
l) The Detail Edit window appears with the new value.
Perform the same procedure as described “Changing an Item” to return to the
main window.
■ Deleting an item
To call up the Detail Edit window, perform the same procedure as described in
steps of “Changing an item.”
a) Use the [Arrow] keys to move the cursor to the item to be deleted.
b) Press the [SPACE] key.
c) A selection list appears.
d) Use the [up/down] key to make a selection.
e) Press the [ENTER] key.
f) The Detail Edit window appears with the item deleted.
Perform the same procedure as described in “Changing an Item” to return to the
main window.
MOTOMAN ROBOTICS EUROPE
User’s manual JobEditor32
Searching
Created: 99-12-16 Revised: 01-08-03
Page: 43
Doc. name: MRS55010-ch4.fm
4.9 Searching
■ Searching for character strings
a) Click [Edit]
b) Click [Find]
c) Enter the character string to be found (disregarding whether upper-case or
lower-case characters are used.)
d) Click [Next]
The search for the character string starts.
The search starts from the cursor´s position and goes down the list.
Moving the line number or step number
To call upp the [Find and Jump] dialog box, perform the same procedure as described in above.
a) Select a line no. or step no.
b) Click to select the no.
c) Click [Jump]
The search for the line no or step no. starts.
The search starts from the cursor´s position and goes down the list.
MOTOMAN ROBOTICS EUROPE
Page: 44
User’s manual JobEditor32
Created: 99-12-16 Revised: 01-08-03
Doc. name: MRS55010-ch4.fm
Searching
MOTOMAN ROBOTICS EUROPE
User’s manual JobEditor32
Changing the speed
Created: 99-12-17 Revised: 01-08-06
Doc. name: MRS55010-ch5.fm
5. Editing other items
5.1 Changing the speed
■ Changing according to speed type
a) Select the range to be changed.
b) Click [Edit].
c) Click [Modify Speed].
d) The [Modify Speed] dialog box appears.
e) Select [Target Type]. Select the type to be changed.
f) Click [OK].
g) Select [Speed].
h) Write the new value.
i) Click [OK].
Page: 45
MOTOMAN ROBOTICS EUROPE
User’s manual JobEditor32
Page: 46
Created: 99-12-17 Revised: 01-08-06
Doc. name: MRS55010-ch5.fm
Changing the speed
j) Click [OK] to activate changes.
Note!
If “Target Type” is set to V, only this type is changed within the selected range.
Depending on type of motion, speed is set in percentage or in mm/min.
■ Changing speed relatively
a) Call up the [Modify Speed] dialog box like in previous chapter.
b) Select [Target Type].
c) Select [RELATIVE].
d) Select [Speed].
e) Set value to e.g. 50 (reduce by 50%).
f) Click [OK].
g) Click [OK] to activate changes.
Note!
If “Target Type” is set to RELATIVE, all speed settings are reduced/increased by
the same ratio.
MOTOMAN ROBOTICS EUROPE
User’s manual JobEditor32
Defining control groups
Created: 99-12-17 Revised: 01-08-06
Page: 47
Doc. name: MRS55010-ch5.fm
5.2 Defining control groups
When there is more than one control group, the combinations can be defined.
Unless defined here, the control group to be selected for new job creation, etc.
does not appear in the window when creating a new job.
■ Adding a combination
a) Click [Mode]
b) Click [Match Control Group].
c) The [Regist Match of Groups] dialog box appears.
d) Click [Add].
e) The [Select Group] dialog box appears.
f) Select [1st Control Group]. Click [OK].
g) Select [2nd Control Group] if needed. Click [OK].
h) Select [Master] if needed. Click [OK].
i) R1+S1 has been added to the [regist Match of Groups] list.
j) Confirm by clicking [OK].
MOTOMAN ROBOTICS EUROPE
Page: 48
User’s manual JobEditor32
Created: 99-12-17 Revised: 01-08-06
Doc. name: MRS55010-ch5.fm
Defining control groups
■ Changing a combination
Call up the [Regist Match of Group] dialog box, described in the section above.
a) Select the combination to be changed.
b) Click [Modify].
c) The [Select Group] dialog box appears.
d) Redefine the group combinations, according to the method described in the
section above.
e) Click [OK] to activate the changes.
■ Deleting a combination
Call up the [Regist Match of Group] dialog box, described in the section above.
a) Select the combination to be deleted.
b) Click [Del].
c) The group combination has been deleted. Click [OK] to return to main window.
MOTOMAN ROBOTICS EUROPE
User’s manual JobEditor32
Defining position variables
Created: 99-12-17 Revised: 01-08-06
Page: 49
Doc. name: MRS55010-ch5.fm
5.3 Defining position variables
a) Click [View].
b) Click [Position Variable].
c) Click [Robot], [Base] or [Station].
d) The [Position Variable] dialog box appears.
e) Select position variable number.
f) Select coordinate system.
g) Set [Value].
h) Set [Tool] number.
i) Set [Robot Configuration].
j) Save the settings by clicking [OK].
Note!
To create a job using position variables, the position variable must be defined in
this window before saving the data.
MOTOMAN ROBOTICS EUROPE
User’s manual JobEditor32
Page: 50
Created: 99-12-17 Revised: 01-08-06
Doc. name: MRS55010-ch5.fm
5.4 Adding comments
a) Click [View].
b) Click [Header].
c) The [Header of Job] dialog box appears.
d) Enter comment character string.
e) Click [OK].
Note!
Maximum 32 characters may be used in the comment string.
Adding comments
MOTOMAN ROBOTICS EUROPE
User’s manual JobEditor32
Number of local variables
Created: 99-12-17 Revised: 01-08-06
Page: 51
Doc. name: MRS55010-ch5.fm
5.5 Number of local variables
a) Click [View].
b) Click [Header].
c) The [Header of Job] dialog box appears.
d) Click [More].
e) The [Local Variable Num] text box appear.
f) Set the number of local variables for each type.
g) Save settings by clicking [OK].
Note!
The [More] button may be disabled by parameters to prevent using of local varables.
MOTOMAN ROBOTICS EUROPE
User’s manual JobEditor32
Page: 52
Created: 99-12-17 Revised: 01-08-06
Doc. name: MRS55010-ch5.fm
Increasing the instruction types to
5.6 Increasing the instruction types to be used
■ Language level
As default, the language level is set to [Reduction], the number of available instructions are limited. Changing the language level to [Standard] or [Extension]
increases the number of available instructions.
a) Click [Mode].
b) Click [Standard] or [Extension]. The list is now increased.
Note!
Some instructions are restricted to special software applications e.g. arc welding
commands are not available in handling applications. Some combinations are not
possible at all.
This is controlled by the parameter file (ALL.PRM). If the number of instructions
doesn’t match your robot station, check that you are using the right parameter file.
■ Parameter option
For example, the SRCH tag is one of several instructions that can be added to
MOVL. Because theinstruction is a parameter option, it requires the parameter
file, where the flag permitting the use of the SRCH tag is valid from the programming pendant.
MOTOMAN ROBOTICS EUROPE
User’s manual JobEditor32
Increasing the instruction types to
Created: 99-12-17 Revised: 01-08-06
Page: 53
Doc. name: MRS55010-ch5.fm
■ Instruction list
Standard set of instructions in a MOTOMAN-UP6 with arc welding application.
Reduced
Standard
plus. Reduced
Extension
DOUT
AOUT
Same as Standard
DIN
ARATION
WAIT
ARATIOF
PULSE
NOP
JUMP
PAUSE
CALL
CWAIT
TIMER
DEC
LABLE
ADD
COMMENT
SUB
RET
MUL
ARCON
DIV
ARCOF
CNVRT
VWELD
AND
AWELD
OR
ARCOUT
ARCSET
NOT
WVON
XOR
WVOF
MFRAME
ARCCTS
SETE
ARCCTE
GETE
MOVJ
GETS
MOVL
SQRT
MOVC
SIN
MOVS
COS
IMOV
ATAN
SPEED
MULMAT
REFP
INVMAT
CLEAR
MSHIFT
INC
MWSEND
SET
MWWAIT
SFTON
ARCMONON
SFTOF
FORMCUT
SHCKSET
PSTART
SHCKRST
PWAIT
TSYNC
ADVINIT
ADVSTOP
SETTOOL
GETTOOL
MOTOMAN ROBOTICS EUROPE
Page: 54
User’s manual JobEditor32
Created: 99-12-17 Revised: 01-08-06
Reduced
Doc. name: MRS55010-ch5.fm
Standard
plus. Reduced
PMT
SETFILE
GETFILE
LOADJ
SAVEJ
LOADV
SAVEV
DELETEJ
SWAIT
FLOATON
FLOATOF
COMARCON
COMARCOF
COMARCSET
MEMON
MEMOF
Increasing the instruction types to
Extension
MOTOMAN ROBOTICS EUROPE
User’s manual JobEditor32
Displaying step Nos., I/O names, or
Created: 99-12-17 Revised: 01-08-06
Doc. name: MRS55010-ch5.fm
5.7 Displaying step Nos., I/O names, or variable names
a) Click [Mode]
b) Click [Option]
The [Option] dialog box appears.
c) Click the desired items to be displayed.
d) Set the position to displayy the I/O name or the variable name.
e) Click [OK]
Names and numbers are displayed
Page: 55
MOTOMAN ROBOTICS EUROPE
Page: 56
User’s manual JobEditor32
Created: 99-12-17 Revised: 01-08-06
Doc. name: MRS55010-ch5.fm
Opening a call jobb
5.8 Opening a call jobb
This function can be used only with a CALL instruction or a JUMP instruction.
a) Move the cursor to a CALL or JUMP instruction.
b) Click [View]
c) Click [Open call jobb]
The jobb that is designated in the CALL or JUMP instruction appears.
MOTOMAN ROBOTICS EUROPE
User’s manual JobEditor32
Changing a condition file
Created: 99-12-17 Revised: 01-08-06
Page: 57
Doc. name: MRS55010-ch5.fm
5.9 Changing a condition file
■ Changing an I/O name file (IONAME.DAT)
a) Click [Mode]
b) Click [Condition file edit] and [I/O name].
The [Condition file edit] dialog box appears.
c) Select I/O
d) Click [Edit]
The [Character edit] dialog box appears.
e) Enter an I/O name that has 16 characters or less.
If there is no I/O name file, a file is automatically created after entering the I/O name in step e). This I/O name file can also be used with
the programming pendant in the same way as a job edited by the Job
Editor can be used with the programming pendant.
MOTOMAN ROBOTICS EUROPE
Page: 58
User’s manual JobEditor32
Created: 99-12-17 Revised: 01-08-06
Doc. name: MRS55010-ch5.fm
Changing a condition file
■ Changing a variable name file (VARNAME.DAT)
a) Click [Mode]
b) Click [Condition file edit] and [Variable name]
The [Condition file edit] dialog box appears.
c) Select variable
d) Click [Edit]
The [Character edit] dialog box appears.
e) Enter a variable name that has 16 characters or less.
If there is no variable name file, a file is automatically created after
entering the variable name in step e). This I/O name file can also be
used with the programming pendant in the same way as a job edited
by the Job Editor can be used with the programming pendant.
MOTOMAN ROBOTICS EUROPE
User’s manual JobEditor32
Editing an expression
Created: 99-12-17 Revised: 01-08-06
Page: 59
Doc. name: MRS55010-ch5.fm
5.10 Editing an expression
To edit an expression, use a “SET” instruction.
To edit an expression, set the language level to “standard” or “extension”.
a) Move to the adress area of the line to be inserted.
b) Press the [Space] key, or click [Edit] on the menu and then click [Insert instruction].
The [Select inst] dialog box for each group of instruction appears.
c) Select a line by pressing the cursor keys or clicking the mouse.
d) Press the [Enter] key or double-click.
*)Press the [Esc] key to exit the Add mode.
The [Select inst] dialog box appears.
e) Select a line by pressing the cursor keys or clicking the mouse.
f) Press the [Enter] key or double-click.
*) Click [..] or press the [Esc] key to return to the [Select inst] dialog box for each
group of instructions.
MOTOMAN ROBOTICS EUROPE
Page: 60
User’s manual JobEditor32
Created: 99-12-17 Revised: 01-08-06
Doc. name: MRS55010-ch5.fm
The line-edit box appears in the lower-left of the window.
g) Press the space key
The [Detail edit] dialog box for the SET instruction appears.
h) Press the [Space] key.
A selection list appears.
i) Press the [Enter] key.
*) press the [Esc] key to cancel.
The [Detail edit] dialog box for EXPRESS appears.
j) Set an expression.
k) Click [OK].
*) Displays the set expression.
l) Click “Ins line” to add the data.
m) Click “Del line” to delete the data.
Editing an expression
MOTOMAN ROBOTICS EUROPE
User’s manual JobEditor32
Editing an expression
Created: 99-12-17 Revised: 01-08-06
Page: 61
Doc. name: MRS55010-ch5.fm
Double-click the position or click [Edit] to select the following items.
(a) Left parenthesis
Each time you click or double-click [Edit] the display changes in the following
order.
(•((•(((•-(•-((•-(((
(b) Data
The [Value input] box appears.
a) Enter the value
b) Click [OK]
(c) Changing the data type.
A selection list appears.
a) Use the the arrow keys, upp and down, to select the data.
b) Press the [Enter] key
c) Enter the value
d) Click [OK]
(d) Right parenthesis
Each time you click or double-click [Edit], the display changes in the following
order.
)•))•)))
(e) Operator
A Selection list appears.
MOTOMAN ROBOTICS EUROPE
Page: 62
User’s manual JobEditor32
Created: 99-12-17 Revised: 01-08-06
Doc. name: MRS55010-ch5.fm
Editing an expression
a) Use the the arrow keys, upp and down, to select the operator.
b) Press the [Enter] key.
The [Detail edit] dialog box for the SET instruction appears again.
c) Click [OK]
The line-edit box appears in the lower-left of the window.
d) Press the [Enter] key.
The changed main window appears.
MOTOMAN ROBOTICS EUROPE
User’s manual JobEditor32
Using a macro command
Created: 99-12-17 Revised: 01-08-06
Page: 63
Doc. name: MRS55010-ch5.fm
5.11 Using a macro command
By storing the macro definition file (MACRO.DAT) in the same folder as the parameter file (All.prm), the defined macro command can be used.
a) Move the cursor to the address area of the line to be added.
b) Press the [Space] key or click [Edit] on the menu and then click [Insert instruction].
The [Select inst] dialog box for each group of instruction appears.
c) Move the cursor to “MACRO” and select it by clicking it.
The [Select inst] dialog box appears.
Instructions that have been defined in the macro definition file appear. These instructions are used to add or edit the the macro caommand.
The job Editor can use a macro command but cannot create the command.
To use this function, use the parameter files that are provided with
the “Macro command function” (optional).
MOTOMAN ROBOTICS EUROPE
User’s manual JobEditor32
Page: 64
Created: 99-12-17 Revised: 01-08-06
Doc. name: MRS55010-ch5.fm
Create a binary job
5.12 Create a binary job
JobEditor32 can also create a binary job (*.JBB). Binary jobs are not used in the
MOTOMAN XRC robot controller.
XRC robot controller uses ASCII coded jobs (*.JBI).
■ Convert JBI to JBB
a) Open the JBI-job to convert.
b) Click [File].
c) Click [Save As...]
d) The [Save As] dialog box appear.
e) Change file type to [JBB Files (*.jbb)].
f) Set a file name. Maximum 8 characters.
g) Click [Open]. The binary job is now displayed in the window.
Note!
The original file (*.JBI) is not overwritten. Both files exist in the same directory.
MOTOMAN ROBOTICS EUROPE
User’s manual JobEditor32
Customizing JobEditor32
Created: 99-12-17 Revised: 01-08-06
Page: 65
Doc. name: MRS55010-ch5.fm
5.13 Customizing JobEditor32
■ Changing the font
The font used in JobEditor32 can be changed. Different fonts can be used in different dialog boxes.
a) Click [View].
b) Click [Font].
c) Choose the dialog box to change, [Main], [Detail] or [ Input Buffer].
d) The [Font] dialog box appears.
e) Click [OK].
■ Changing background colour
The colour used in JobEditor32 can be changed. Different colours can be used in
different dialog boxes.
a) Click [View].
b) Click [Back Colour].
c) Choose the dialog box to change, [Main], [Detail] or [ Input Buffer].
d) The [Colour] dialog box appears.
e) Select colour from the menu.
f) Click [OK].
Note!
Changing font or colour does only affect the JobEditor32 window. Text in XRC
programming pendant or Job running is not affected.
■ Changing the comment color
a) Click [View]
b) Click [Comment color].
The [Color] dialog box appears.
c) Select the color
d) Click [OK].
MOTOMAN ROBOTICS EUROPE
User’s manual JobEditor32
Page: 66
Created: 99-12-17 Revised: 01-08-06
Doc. name: MRS55010-ch5.fm
Change language
5.14 Change language
JobEditor32 is a multi language software. It is possible to switch language of
menus and instructions by a simple key operation.
a) Click [View].
b) Click [Change language].
c) The language dialogue box appears.
d) Select language and click [Ok].
e) A warning message is displayed. All open jobs will be closed automatically
when the OK button is clicked. An ALL.PRM file must be selected again.
f) If there are unsaved changes in the open jobs, following message appears.
Yes = Save changes and close all open jobs. Language is changed.
No = Close all jobs without saving. Language is changed.
Cancel = Go back. However, the language of the menus is changed.
Note!
To get the instructions in the job files in right language, all jobs must be closed.
Language file for commands is checked at initializing of the ALL.PRM file.
Notes
Headquarters:
Sweden
Group companies:
France
Germany
Germany
Great Britain
Italy
Netherlands
Slovenia
Spain
Sweden
Distributors:
Czech Republic
Denmark
Finland
Greece
Hungary
Israel
Norway
Portugal
South Africa
Switzerland
MOTOMAN Robotics Europe AB
Box 504, SE-385 25 Torsås, Sweden
Tel: +46-486-48800, +46-486-41410
MOTOMAN Robotics SARL
Rue Nungesser et Coli, D2A Nantes-Atlantique, F-44860 Saint-Aignan-de-Grand-Lieu, France
Tel: +33-2-40131919, Fax: +33-40754147
MOTOMAN Robotec GmbH
Kammerfeldstraße 1, DE-85391 Allershausen, Germany
Tel: +49-8166-90-0, Fax: +49-8166-90-103
MOTOMAN Robotec GmbH
Im Katzenforst 2, DE-61476 Kronberg/Taunus, Germany
Tel: +49-6173-60-77-30, Fax: +49-6173-60-77-39
MOTOMAN Robotics UK (Ltd)
1 Swan Industrial Estate, Banbury, OXON OX16 8DJ, England
Tel: +44-1295-272755, Fax: +44-1295-267127
MOTOMAN Robotics Italia SRL
Via Emilia 1420/16, IT-41100 Modena, Italy
Tel: +39-059-280496, Fax: +39-059-280602
MOTOMAN benelux B.V
Zinkstraat 70, NL-4823 AC Breda, Netherlands
Tel: +31-76-5424278, Fax: +31-76-5429246
RISTRO d.o.o.
Lepovce 23, SI-1310 Ribnica, Slovenia
Tel: +386-61-861113, Fax: +386-61-861227
MOTOMAN Robotics Iberica S.L.
Avenida Marina 56, Parcela 90, ES-08830 St. Boi de Llobregat (Barcelona), Spain
Tel: +34-93-6303478, Fax: +34-93-6543459
MOTOMAN Mecatron Robotic Systems AB
Box 4004, SE-390 04 Kalmar, Sweden
Tel: +46-480-444600, Fax: +46-444699
MGM Spol s.r.o.
Trebízského 1870, CZ-39002 Tábor, Czech Republic
Tel: +420-361-254571, Fax: +420-361-256038
Robia A/S
Hjulmagervej 4, DK-7100 Vejle, Denmark
Tel: +45-79428000, Fax: +45-79428001
Robia Suomi OY
Messinkikatu 2, FI-20380 Turku, Finland
Tel: +358-22145600, Fax: +358-22145660
Kouvalias Industrial Robots
25, El. Venizelou Ave., GR-17671 Kallithea, Greece
Tel: +30-1-9589243-6, Fax: +30-1-9567289
REHM Hegesztéstechnika Kft.
Tápiószele, Jászberényi út 4., H-2766, Hungary
Tel: +36-30-9510065, Fax: +36-1-2562012
KNT Engineering Ltd.
9 Hapalmach Street, IL-Kfar Azar 55905, Israel
Tel: +972-39231944, Fax: +972-39231933
ROBIA ASA
Industriveien 1, NO-3300 Hokksund, Norway
Tel: +47-32252820, Fax: +47-32252840
Electro-Arco S.A.
Rua Vice-Almirante Azevedo Coutinho 4, Venda Nova, PT-2700 Amadora, Portugal
Tel: +351-21-4968160, Fax: +351-21-4990319
Robotic Systems S.A. PTY Ltd
P.O Box 90741, ZA-Bertsham 2013, South Africa
Tel: +27-11-4943604, Fax: +27-11-4942320
Messer SAG
Langweisenstrasse 12, CH-8108 Dällikon, Switzerland
Tel: +41-18471717, Fax: +41-18442432
MOTOMAN ROBOTICS EUROPE AB
a subsidiary of YASKAWA Electric Corporation