Download Orbit 56082 Installation Guide
Transcript
■
To remove manual watering (turn off), turn dial to OFF.
To resume programmed cycle turn the dial back to AUTO.
reproduced or distributed
in any way without their
express permission.
© 2011 Fluid Studio. This
work is the property of Fluid
Studio, and cannot be used,
on this form.
additional instructions:
· Font sizes cannot be smaller than 7 pt.
·
·
PMS
???
color non
printing
Die
Registration
colors
Black
sku: 56497
upc: N/A
color non
printing
Glue Area
PMS
???
must be approved by the
client and Fluid Studio.
printed piece must meet
designated specifications
color non
printing
Product Position
© 2011 Orbit Irrigation Products, Inc.
All rights reserved. All trade names are
registered trademarks of respective
manufacturers listed.
PN 56497-24 rA
software: InDesign CS5
■
Orbit® Irrigation Products, Inc.
North Salt Lake, UT 84054
1-800-488-6156
www.orbitonline.com
1065 South 500 West
Bountiful, Utah 84010
D
Working Water Pressure:
Minimum: 25 psi Maximum: 100 psi
Working Temperature:
Maximum: Do not exceed 120°F
Minimum: Keep from freezing
Warnings:
For outdoor use with cold water only.
file name: 56497-24 rA.indd
C
Water won’t turn off.
Check if:
1. Watering duration is set to desired time.
2. Start times overlap.
www.fluid-studio.net
B
When expecting freezing temperatures,
timers should be removed from the hose
bib to avoid potential freeze damage.
p 801 295 9820
f 801 951 5815
a
To water without interrupting the set cycle, press [MANUAL]
button and then use + and – buttons to set from
1 to 240 minutes.
E
client: ORBIT
Mounting to the wall:
1. Use nut and bolt to attach brace to timer bracket.
2. Mark where support rod touches the wall.
3. Drill a pilot hole.
4. Attach the support rod using the screw provided.
Rain Delay
■ When in AUTO, press + button for 24 hrs, 48 hrs, or 72 hrs.
■ Screen will flash between clock and hours remaining
before programmed cycle resumes.
■ To remove rain delay, turn dial to OFF and then back to
AUTO MANUAL/hand watering.
C
job no: N/A
Installation
■ After it is programmed attach it to your outdoor faucet.
AUTO
Timer waters according to programmed time, station,
duration, and frequency.
F
finished: w 3.0" d: 0 h 3.0"
installing the batteries
■ Remove the tray on the back of the timer by sliding it out.
■ Insert two AA (1.5V) alkaline batteries (batteries not
included) and replace the tray.
■ Replace batteries when low battery icon appears.
HOW OFTEN
Set watering frequency as every 6 hrs, 12 hrs, or from 1 to
7 days using the + and – buttons. 1 is every day, 2 is every
other day etc. up to 7 days.
Timer does not water.
Check if:
1. Timer is set to AUTO.
2. Hose faucet and manifold shut-off for that station are open.
3. Batteries are low.
4. Clock is set to correct time including AM and PM.
5. Rain Delay is on.
D
b
des: SH spck: SH
HOW LONG
Set watering duration from 1 to 240 minutes using the
+ and – buttons.
Water does not come on at desired time.
Check if:
1. Clock is set to correct time including AM and PM.
2. Start time is set to desired time including AM and PM.
3. Rain Delay is on.
4. There are overlapping start time.
3
START TIME
■ Press the + button to advance start time (hold button for
quick advance).
■ Press the – button to reverse start time (hold button for
quick reverse).
Printers are responsible for
meeting print production
requirements. Any changes
Valve will not open/close.
Check if:
1. Pressure exceeds 100 PSI.
2. Batteries are low.
a
flat: w: 12.0" h: 6.0"
SET CLOCK
■ Press the + button to advance clock time (hold button for
quick advance).
■ Press the – button to reverse clock time (hold button for
quick reverse).
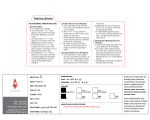
Product Includes:
a (1) 7 1/4 in. Brace
b (1) #14 Round Head Screw
C (1) Bolt
D (1) Lock Washer
E (1) Nut
F
(1) Timer Bracket
date: 08.30.11
Troubleshooting
Timer shows 6 am all the time:
Check if:
1. There is a sticker over the display.
dimensions:
Programming the Timer
■ Rotate the dial to positions indicated or setup.
■ Press the arrow button to switch between station
1, 2, or 3 for all programming.
proof no:
Three-Port DIGITAL timer
PN 56497-24 rA
reproduced or distributed
in any way without their
express permission.
© 2011 Fluid Studio. This
work is the property of Fluid
Studio, and cannot be used,
on this form.
color non
printing
Glue Area
color non
printing
Product Position
PMS
???
color non
printing
Die
Black
Registration
additional instructions:
· Font sizes cannot be smaller than 7 pt.
·
·
software: InDesign CS5
Orbit® Irrigation Products, Inc.
North Salt Lake, UT 84054
1-800-488-6156
www.orbitonline.com
1065 South 500 West
Bountiful, Utah 84010
1-800-488-6156
www.orbitonline.com
© 2011 Orbit Irrigation Products, Inc.
Todos los derechos reservados. Todos
los nombres comerciales son marcas
comerciales registradas de los fabricantes
respectivos mencionados.
must be approved by the
client and Fluid Studio.
printed piece must meet
designated specifications
PMS
???
SERVICIO AL CLIENTE
file name: 56497-24 rA.indd
El flujo de agua no se detiene.
Revise si:
1. La duración del riego está configurada al tiempo deseado.
2. Las horas de inicio se superponen.
Cuando se esperen temperaturas de congelación, los
temporizadores deben retirarse de los grifos para manguera
para evitar daños potenciales por causa de la congelación.
www.fluid-studio.net
Postergación por lluvia
■ Cuando está en AUTO, presione el botón + para 24 h,
48 h o 72 h.
■ La pantalla destellará entre el reloj y las horas restantes
antes de que el ciclo programado se reactive.
■ Para eliminar la postergación por lluvia, gire la esfera a
OFF y luego de nuevo a AUTO Manual/riego manual.
E
upc: N/A
AUTO (AUTOMÁTICO)
El temporizador riega de acuerdo al tiempo, duración y
frecuencia programados.
El temporizador no riega.
Revise si:
1. El temporizador está colocado en AUTO.
2. El grifo de la manguera y la llave de paso del distribuidor
de esa estación están abiertos.
3. Las baterías están bajas.
4. El reloj se ha colocado en la hora correcta incluyendo
AM y PM.
5. La postergación por lluvia está activada.
C
p 801 295 9820
f 801 951 5815
Montaje en la pared:
1. Utilice tuercas y pernos para fijar el refuerzo al soporte
del temporizador.
2. Marque donde el soporte toca la pared.
3. Taladre un agujero guía.
4. Fije la varilla de soporte utilizando el tornillo que
se suministra.
HOW OFTEN (FRECUENCIA)
Configure la frecuencia de riego cada 6 h, 12 h o de 1 a 7 días
utilizando los botones + y –. 1 es todos los días, 2 es en días
alternos, etc. hasta 7 días.
F
sku: 56497
Instalación
■ Después de que esté programado fíjelo a su grifo
de exteriores.
HOW LONG (DURACIÓN)
Configure la duración del riego de 1 a 240 minutos utilizando
los botones + y –.
D
b
client: ORBIT
Colocación de las baterías
■ Retire la bandeja en la parte posterior del temporizador
deslizándola hacia afuera.
■ Inserte dos baterías alcalinas AA (1.5V) (No se incluye)
y vuelva a colocar la bandeja.
■ Cambie las baterías cuando aparezca el icono de
batería baja.
El agua no se activa a la hora deseada.
Revise si:
1. El reloj se ha colocado en la hora correcta incluyendo
AM y PM.
2. La hora de inicio se ha colocado en la hora deseada
incluyendo AM y PM.
3. La postergación por lluvia está activada.
4. Hay horas de inicio superpuestas.
a
job no: N/A
START TIME (HORA DE INICIO)
■ Presione el botón + para adelantar la hora de inicio
(mantenga presionado el botón para avanzar rápidamente).
■ Presione el botón - para atrasar la hora de inicio (mantenga
presionado el botón para atrasar rápidamente).
La válvula no se abre/cierra.
Revise si:
1. La presión excede de 100 PSI.
2. Las baterías están bajas.
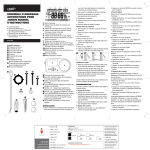
El producto incluye:
a (1) Refuerzo de 7 1/4 pulg (18.4 cm)
b (1) Tornillo cabeza redonda Nº 14
C (1) Perno
D (1) Arandela de bloqueo
E (1) Tuerca
F
(1) Soporte del temporizador
colors
SET CLOCK (CONFIGURE LA HORA)
■ Presione el botón + para adelantar la hora del reloj
(mantenga presionado el botón para avanzar rápidamente).
■ Presione el botón – para atrasar la hora del reloj (mantenga
presionado el botón para atrasar rápidamente).
Identificación y solución de problemas
El temporizador muestra 6 am todo el tiempo:
Revise si:
1. Hay una etiqueta adhesiva sobre la pantalla.
finished: w 3.0" d: 0 h 3.0"
Programación del temporizador
■ Gire la esfera a las posiciones indicadas o configure.
■ Presione el botón con la flecha para cambiar entre las
estaciones 1, 2 ó 3 para toda la programación.
Presión de agua de riego:
Mínima: 25 psi Máxima: 100 psi
Temperatura de trabajo:
Máxima: No exceder de 120° F (48.9° C).
Mínima: Evite el congelamiento
Advertencias:
Para uso en exteriores con agua fría solamente.
des: SH spck: SH
Para desactivar el riego manual (apagarlo), gire la
esfera a OFF.
■ Para volver al ciclo programado gire la esfera de
nuevo a AUTO.
■
Printers are responsible for
meeting print production
requirements. Any changes
Para regar sin interrumpir el ciclo establecido, presione el
botón [MANUAL] y luego utilice los botones + y – para fijar
entre 1 y 240 minutos.
flat: w: 12.0" h: 6.0"
D
date: 09.07.11
C
dimensions:
B
5
a
proof no:
Temporizador Digital de Tres Puertos
This document in other languages
- español: Orbit 56082


