1
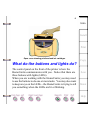
Intro
Install
Print
Copy
Scan
Maint
Help
2
Chapter 1
Introduction
Intro
Introduction
Finding your way around the HomeCentre
What do the buttons and lights do?
The buttons
The LEDs
Using the HomeCentre software
Choosing the HomeCentre as your default printer
Changing your printer settings
From a Windows application:
From Windows 95:
Specifying print quality
Selecting and ordering supplies
Cartridges and print heads
Paper and media
HomeCentre Specifications
Safety and Legal Requirements
Install
Print
Copy
Scan
Maint
Help
3
Introduction
Your Xerox Document HomeCentre is a dependable and
efficient multifunction PC companion that handles your
home computing tasks with ease. With your HomeCentre
and the software that comes with it, you can work quickly
to create quality projects for work, school, or home. Here’s
what you can do with the HomeCentre:
• Scan art, graphics, photographs, or text
• Make color copies of documents
• Print directly from your PC
The HomeCentre does all this in color or black and white.
You can scan or make copies with the scanner attached by
feeding individual pages into the HomeCentre. You can
also detach the scanner if you want to scan or make copies
of books, magazines, or other bound and large documents.
The HomeCentre CD-ROM includes Pagis Pro97 and
TextBridge© Pro 96 software. Pagis is the scanning
software that also lets you edit, organize, and file all of your
scanned images and documents.
Intro
Install
Print
Copy
Scan
Maint
Help
4
Award-winning TextBridge optical character recognition
software lets you easily convert your paper documents to
electronic documents, while retaining text formatting and
pictures. Once you have scanned a document, you can edit
it to fit your project needs.
The HomeCentre is easy-to-use, and makes scanning,
copying, and printing words and pictures simple and fun
with just a few mouse clicks. The HomeCentre’s unique
design and compact size lets it fit easily in your home office
environment.
Intro
Install
Print
Copy
Scan
Maint
Help
5
Finding your way around the
HomeCentre
You’ll need to know your way around the HomeCentre as
you perform your scanning, copying, and printing tasks.
Take a moment to familiarize yourself with the
HomeCentre.
Intro
Install
Print
Copy
Scan
Rear view of the HomeCentre showing cables and PC connection
Maint
Help
6
Intro
Install
Print
Open cover showing printhead and ink cartridges
Copy
What do the buttons and lights do?
The control panel on the front of the printer is how the
HomeCentre communicates with you. Notice that there are
three buttons with lights (LEDs).
When you are working with the HomeCentre you may need
to use the buttons to do one or more tasks. You may also want
to keep an eye on the LEDs—the HomeCentre is trying to tell
you something when the LEDs are lit or blinking.
Scan
Maint
Help
7
The buttons
Use the buttons to do the following:
Left button—Press and quickly release this button
to clean the cartridge, or move the print head into
position before you change an ink cartridge or
remove the print head. When the left button is
pressed and held, the cartridge is primed.
Center button—Press and release this button to
reset the HomeCentre if a fault occurs. Pressing the
center button also toggles the HomeCentre between
the on-line and off-line states.
Right button—Press and quickly release this button
to clear a paper jam, eject paper, or clear other
errors. Pressing and holding the right button prints
the demo page.
Intro
Install
Print
Copy
The LEDs
Each LED means something different, depending on
whether the light is steadily lit or blinking:
Yellow LED—When lit, you need to change or clean the
ink cartridge.
Green LED—When lit, the HomeCentre is online and
ready to print. When blinking, the HomeCentre is
processing data.
Scan
Maint
Help
8
Note If you press the green LED button during the
print cycle, the HomeCentre completes the current
line before it stops printing.
Intro
Red LED—When lit, an error has occurred. For example,
you stopped or suspended printing, the paper has jammed,
or the HomeCentre has run out of paper.
Install
Using the HomeCentre software
Print
The HomeCentre includes TWAIN-compliant PC scanning
software that is compatible with most scanning
applications. Included on your HomeCentre CD-ROM is
Pagis and TextBridge Pro 96 software.
Pagis and TextBridge Pro 96 are the scanning and optical
character recognition (OCR) software you need to convert
paper documents to electronic documents, then edit and
save them on your PC.
You use the Pagis software on your PC to work with the
HomeCentre and perform your printing, copying, and
scanning tasks. With the Pagis software, you control the
image quality, edit the scanned material, and save images
for future use.
Copy
Scan
Maint
Help
9
For more information on how to use the Pagis software,
refer to the Pagis tutorial, the Pagis online documentation
documentation or the Pagis software application online
help.
Choosing the HomeCentre as your
default printer
You should choose the HomeCentre as your default printer
during installation. Refer to your Windows documentation
or online help for information on how to choose and set up
the default printer.
To use the HomeCentre, do one of the following:
• To use the scanning software, double-click the Pagis
icon on your desktop.
• From the Start menu, select Programs, then select
the HomeCentre application.
Intro
Install
Print
Copy
Scan
Maint
Help
10
Changing your printer settings
You can change your printer settings from the Windows
Printer driver dialog. You access the HomeCentre printer
driver in one of two ways:
• From a Windows application, select Print or Print
Setup from the File menu, then select Setup.
• From Windows 95 select Start, Settings, then
Printers. Highlight the HomeCentre printer and
select Properties, Details, then Setup.
Intro
Install
Print
Copy
Scan
Maint
Help
11
Specifying print quality
Intro
You can specify print quality and control from within the
Pagis dialog box. Refer to the Pagis documentation or
online help for details.
Install
Print
Copy
Scan
Maint
Help
12
Selecting and ordering supplies
This section lists the Xerox supplies you can order and
provides guidelines for selecting other types of media. To
order supplies for the HomeCentre, contact your local
Xerox retailer or dealer
Intro
Install
Cartridges and print heads
The following supplies are available for the HomeCentre.
Print
Item
Color ink cartridges
Black
Cyan
Magenta
Yellow
Color print head
Copy
Storage box
Description
Reorder number
Black ink cartridge
Cyan ink cartridge
Magenta ink cartridge
Yellow ink cartridge
Black housing that
holds the color ink cartridges
Storage box for the
color print head, when
not in use.
8R7660
8R7661
8R7662
8R7663
8R7659
Scan
60K01010
Maint
Help
13
Paper and media
Intro
Most types of paper will work well in the HomeCentre,
although some variables in paper composition may affect
print quality. Paper width is limited to 8.5 inches. Most
high-grade photocopying papers and cotton bond papers
produce good results. You should fully test a paper before
purchasing large quantities.
Install
Region
North America
United States
Canada
South America
Brazil
Description
Reorder number
Print
Xerox Image Series LX
(8.5x11 in, 24 lb)
Xerox Select Ink Jet
3R3874
Xerox Image Series LX
3R4284
Xerox Select Ink Jet
3R5433
Papel Xerox
(210x297 mm, 75 g/m2
Papel Xerox
(210x297 mm, 90 g/m2
3R70033
3R5433
Copy
Scan
3R70355
Maint
Help
14
Intro
Europe
Xerox LaserPrint
3R93556
(210x297 mm, 80 g/m2)
Xerox Colotech
3R93022
2
(210x297 mm, 90 g/m )
Xerox Colotech
3R91290
(210x297 mm, 100 g/m2)
Other Countries Contact Xerox for correct
reorder numbers
Install
Print
HomeCentre Specifications
Power
110/220 VAC; 50/60 Hz
Power consumption 14 watts in idle mode
Size
11.5 in. (292mm) high
17.125 in. (438.4 mm) wide
9.5 in. (243.2 mm) deep (w/o paper tray)
Environment
Temperature range:
o
o
o
Copy
Scan
o
50 F (10 C) to 90 F (32 C)
Humidity range:
20% to 80%, non-condensing
Maint
Help
15
Safety and Legal Requirements
Your system and supplies have been designed and tested to
meet strict safety requirements. These include safety
agency examination and approval, and compliance to
established environmental standards. Please read the
following instructions and refer to them as needed to ensure
the continued safe operation of your system.
Follow all warnings and instructions marked on, or
supplied with, the product.
Unplug this system from the wall outlet before cleaning.
Always use materials specifically designated for this
system. Use of other materials may result in poor
performance and could create a hazardous situation.
Do not use this system near water, wet locations, or
outdoors.
Do not place this system on an unstable cart, stand, or table.
The system may fall, causing personal injury or serious
damage to the system.
This system is equipped with a 3-wire, grounding-type plug
(i.e., a plug having a third grounding pin). This plug will
only fit into a grounding-type power outlet. This is a safety
feature. To avoid the risk of electric shock, contact your
Intro
Install
Print
Copy
Scan
Maint
Help
16
electrician to replace the receptacle if you are unable to
insert the plug into the outlet. Never use a ground adapter
plug to connect the system to a power source receptacle that
lacks a ground connection terminal.
This system should be operated from the type of power
source indicated on the marking label. If you are not sure of
the type of power available, consult your local power
company.
Do not allow anything to rest on the power cord. Do not
locate the system where persons will step on the cord.
Use of an extension cord with this system is not
recommended or authorized. Users should check building
codes and insurance requirements if an extension cord is to
be used. Ensure that the total of the ampere ratings of the
products plugged into the extension cord does not exceed
the extension cord ampere rating. Make sure that the total
amperage of all products plugged into the wall outlet does
not exceed the outlet rating.
Slots and openings in the cabinet and in the back and
bottom of the system are provided for ventilation. To
ensure reliable operation of the system and to protect it
from overheating, these openings must not be blocked or
covered. The system should never be placed near or over a
Intro
Install
Print
Copy
Scan
Maint
Help
17
radiator or heat register. This system should not be placed
in a built-in installation unless proper ventilation is
provided.
Never spill liquid of any kind on the system.
Never remove any covers or guards that require a tool for
removal. There are no operator serviceable areas within
these covers.
Never defeat interlock switches. Machines are designed to
not allow operator access to unsafe areas. Covers, guards,
and interlock switches are provided to ensure that the
system will not operate with covers opened.
WARNING: During normal operation, this system will
produce ozone gas. The amount of ozone produced
does not present a hazard to the operator. However,
it is advisable that the system be operated in a well
ventilated area.
Intro
Install
Print
Copy
Scan
Maint
Help
18
FCC Part 15 rules, Radio
Frequency Interference
This equipment has been tested and found to comply with
the limits for a Class B (certified) digital device, pursuant
to Part 15 of the FCC rules. These limits are designed to
provide reasonable protection against harmful interference
when the equipment is operated in a residential
environment. This equipment generates, uses, and can
radiate radio frequency energy, and if not installed and used
in accordance with the instruction manual, may cause
harmful interference to radio communications. However,
there is no guarantee that interference will not occur in any
particular installation. If this equipment does cause
harmful interference to radio or television reception, which
can be determined by turning the equipment off and on, the
user is encouraged to try to correct the interference by one
or more of the following measures:
• Reorient or relocate the receiving antenna.
• Increase the separation between the equipment and
receiver.
Intro
Install
Print
Copy
Scan
Maint
Help
19
• Connect the equipment into an outlet on a circuit
different from that to which the receiver is
connected.
• Consult the dealer or an experienced radio/TV
technician for help.
Intro
Install
Print
Copy
Scan
Maint
Help
20
Chapter 2
HomeCentre installation
basics
HomeCentre installation basics
HomeCentre system requirements
Selecting a good location
Attaching the power and parallel cables
Loading paper
Installing the software
Intro
Install
Print
Copy
Scan
Maint
Help
21
Skip this chapter if you have already set up the HomeCentre
and installed the software by following the steps in the
HomeCentre Quick Installation Guide.
This chapter contains some of the same information as in
the HomeCentre Installation Guide, with more detail. It
may come in handy if you are moving your HomeCentre
and have misplaced the Quick Installation Guide, or need
more information about a particular setup procedure.
HomeCentre system requirements
For your HomeCentre to work as it should, the
recommended configuration is:
• A 486DX, or faster processor
• At least 16 megabytes (MB) of RAM
• Windows95
• 100 MB free hard disk space (this is recommended
to store the operating software and to have room for
the swap file and the various images to be scanned)
• Minimum 2X CD-ROM drive
Note The Xerox HomeCentre is a personal device
and is not supported in network configurations.
Intro
Install
Print
Copy
Scan
Maint
Help
22
Selecting a good location
Where you place your HomeCentre is important. The
HomeCentre requires the following in order to work at its
best:
• Open space around the HomeCentre for adequate
ventilation
• A room with a temperature range 50 to
90°Fahrenheit (10 to 32° Celsius) and 20 to 80%
humidity (RH)
• A flat, level surface with enough space for you to
scan in detached mode
Avoid exposing the HomeCentre to the following:
• Direct sunlight or extreme cold
• Extreme changes in temperature or humidity
• Excessive shock; do not drop or hit the machine
• Vibration
• Dust
Intro
Install
Print
Copy
Scan
Maint
Help
23
Attaching the power and parallel
cables
Intro
The HomeCentre comes with a power cord that you use to
connect it to an electrical outlet. To connect the
HomeCentre to your PC, see the steps below.
Install
Print
Copy
Plugging in the parallel cable
Note Before proceeding, lift the HomeCentre’s top lid
and look inside to see if there is any shipping tape
attached to the Carriage. Also, check the paper guide
to see if there is any tape attached. Carefully remove
any tape you find. Finally, lift the HomeCentre’s top
lid and remove the two foam pads from the inside.
Scan
Maint
Help
24
1. Make sure that your PC is turned off.
2. Plug one end of the printer cable into the HomeCentre,
as shown below.
3. Plug the other end of the cable into a free parallel
printer port on your PC.
Make sure that the connectors on the cable are attached
properly and securely.
4. Plug one end of the power cord firmly into the back of
the HomeCentre.
Plug the other end into a grounded electrical outlet.
Inserting the color print head and
the ink cartridges
1. Lift the HomeCentre lid, then press and release the
middle button on the front of the HomeCentre. The
printer carriage will move to the center and stop.
2. Open the Color Print Head box and remove the Color
Print Head from the plastic bag.
Caution Be careful not to touch the Ink Nozzles when
removing the Color Print Head from the plastic bag
Intro
Install
Print
Copy
Scan
Maint
Help
25
3. Find the bag containing the Black Ink Cartridge.
4. Following the instructions on the outside of the bag,
slowly remove the Black Ink Cartridge from its plastic
bag. Next, remove the protective strip of plastic from
the Ink Cartridge.
Caution Do not touch the uncovered Ink Nozzle area
of the Black Ink Cartridge. The ink will get on your
hands and the Black Ink Cartridge may become
contaminated, if you touch it.
Intro
Install
Print
5. Grasping the Color Print Head, insert the Black Ink
Cartridge into the first location
Caution Do not force the Ink Cartridge into the Color
Print Head.
6. Snap the Ink Cartridge firmly into position.
Copy
Scan
Maint
Help
26
7. Repeat steps 5-7 for the other three ink cartridges
(cyan, magenta, yellow). Each cartridge is numbered
and will correspond to the correct number on the Color
Print Head as shown below.
Intro
Install
Print
Four ink cartridges installed
8. Move the green Cartridge Lock Lever forward to insert
the Color Print Head, as shown in the following figure.
Copy
Scan
Maint
Releasing the green lever
Help
27
9. Install the Color Print Head by aligning the hole in the
Color Print Head with the green post of the Printer
Carriage. Lower the Color Print Head down gently into
position, as shown below.
Intro
Install
Print
Copy
Installing the color printhead
Scan
Maint
Help
28
10. Gently push the green cartridge lock lever up until it
snaps into place. This secures the print head. Close the
Top Cover.
Intro
Install
Print
Moving the Green Cartridge Lever backward
Copy
11. Plug your computer and the HomeCentre into the wall
socket.
12. Press and release the Left button. The printer will
prepare the Color Print Head for printing.
Scan
Note If the carriage is not positioned at the far left,
after the Left button is pressed, try removing and
reinstalling the Color Print Head assembly.
Maint
Help
29
Loading paper
Intro
1. Slide the paper adjuster in the tray all the way to the
right.
2. Put the paper in the tray.
3. Slide paper adjuster to rest flush (squarely) against the
right side of the paper.
Install
Print
Copy
Installing the software
Scan
1. Insert the Xerox Document HomeCentre CD-ROM in
your PC.
2. Click on the desktop Start button, select "Settings,"
then "Printers." A dialog box then appears - click on
"add printers" and follow the steps as the Windows 95
Maint
Help
30
Wizard walks you through the process of installing
your HomeCentre. This process only takes a few
minutes to complete.
You’re done setting up your HomeCentre. You can try
printing a page right now, just to see what your
HomeCentre can do. Print as you normally would from
Windows, selecting the HomeCentre as your printer.
Note Do not use an extension cord or a power strip
with the HomeCentre. The HomeCentre requires a
small amount of power, even when off, in order to
maintain the print head. Also, do not use a parallel
cable longer than 6 feet; additionally, do not attempt
to use the HomeCentre with an "A/B switch."
Intro
Install
Print
Copy
Scan
Maint
Help
31
Chapter 3
Printing documents
Printing documents
Loading media and printing documents
Printing a document from Windows
Setting printer options
Setting advanced image quality options
Using preset files
Saving printer options to a preset file
Editing the printer options defined in a preset file
Using a preset file for a print job
Deleting a preset file
Using printer services
Checking the status of your current job
Maintaining the color print head or high capacity ink jet cartridge
Choosing the printer status display options
Checking the status of your pending print jobs
Loading envelopes
Printing from DOS
Enhanced Capabilities Port
Media
Print Media
More entries on the following page
Intro
Install
Print
Copy
Scan
Maint
Help
32
Paper Size
Paper Weight
Automatic Feed Tray
Manual Feed
Output Tray
Intro
Install
You can use the HomeCentre to print documents directly
from the PC.
Loading media and printing
documents
You can print any document from your PC directly to the
HomeCentre. You can print on paper up to 8 ½ inches wide,
envelopes, label sheets, A-4 size paper, or transparencies.
1. Insert the paper you want to print on in the paper tray.
Make sure you adjust the right paper guide to fit the
paper size.
For envelopes, snap up the envelope paper guide in the
center of the paper tray.
2. Select the HomeCentre as the default printer. See your
Windows documentation for more information.
3. In Windows 95, select the file you want to print.
Print
Copy
Scan
Maint
Help
4. Select Print from the File menu.
5. Specify the printing details and click OK. The page is
printed.
33
Printing a document from
Windows
You print a document on the HomeCentre from a Windows
application. The HomeCentre prints within these margins:
Left: 5mm
Right: 5mm
Top:
5mm
Bottom: 12mm
1. At your PC, open the document you want to print.
2. On the File menu, click Print.
3. In the Print dialog box (see next page), choose the
options you want and click OK
Intro
Install
Print
Copy
Scan
Maint
Help
34
To Print from Pagis, select the Copy button on the
Pagis toolbar, then click on the Printer button, shown
below
Intro
Install
Print
Copy
Scan
Maint
Help
35
Setting printer options
Before you print a document, you can change the size and
orientation of the document, select the printing media, and
set the print quality. The settings you choose are used until
you change them.
Note Some applications may override any of the
options you choose.
Intro
Install
Print
Copy
Scan
Maint
Help
36
1. At your PC, do the following:
From the application’s File menu, click Print. In the
Print dialog box, click Properties (or Setup). The Main
Controls property page displays.
Intro
Install
Print
Copy
Scan
Maint
Help
37
2. Change the defaults for any of these options:
Mode
Prints the document in Color or Black and White. To
print in color, the color print head and ink cartridges
must be installed in the HomeCentre. To print in
black and white, either the color print head and
cartridges or the high capacity ink jet cartridge can
be installed.
Type
Selects the image quality to use based on the
contents of the document. Options are Auto, Photo,
Graphics, and Text.
Print quality
Sets printing at different speed and print quality
combinations. Fast uses the fastest speed appropriate
for the selected media, Normal provides letter
quality printing, and High Quality provides high
quality printing at a slower speed.
Preset name
Loads a file with predefined printer settings. Select
none if you don’t have a file of predefined settings.
Intro
Install
Print
Copy
Scan
Maint
Help
38
Copies
Specifies the number of copies to print, from 1 to 99.
Collate
Arranges, in sequential order, multiple copies of the
same document.
Reverse order
Prints the document from last page to first page.
Media
Specifies the type of paper used for printing.
Media size
Sets the paper size used for printing.
Portrait or Landscape
Sets the paper orientation.
3. Click OK.
Intro
Install
Print
Copy
Scan
Maint
Help
Setting advanced image quality
options
39
You can control advanced image quality features, including
image brightness and halftone printing.
1. At your PC, do the following:
From the application’s File menu, click Print. In the
Print dialog box, click Properties (or Setup).
2. Click the Advanced tab to display the Advanced
property page.
Intro
Install
Print
Copy
Scan
Maint
Help
40
3. Change the defaults for any of these options:
Intensity
Adjusts the image brightness, by darkening or
lightening text and graphics.
Automatic image enhancement
Sets optimum print quality for pictures and
photographs.
Mirror image
Reverses the image from left to right for special
applications such as transfer media.
Halftone
Sets the halftone rendering. Use None to print solid
colors and black, Fine Dither for business graphics
such as pie charts and bar graphs, High Speed Air
Brush for pictures and photographs with the best
combinations of quality and speed, and High Quality
Air Brush for high quality pictures and photographs.
4. Click OK.
Intro
Install
Print
Copy
Scan
Maint
Help
41
Using preset files
You can save your printer options to a file called a preset.
You can later open the saved preset file and use the
predefined printer options for a print job.
Using preset files eliminates specifying printer options for
each type of print job. For example, you can create a preset
file that defines the options for printing color transparencies
and use the file each time you print color transparencies.
Intro
Install
Print
Saving printer options to a preset file
You can save printer and advanced image quality options to
a preset file.
1. At your PC, do one of the following:
• From the application’s File menu, click Print.
• In the Print dialog box, click Properties (or Setup).
2. Click the Presets tab to display the Presets property
screen (see next page).
3. Under Main Controls and Advanced, set the options
you want.
4. Click Save As.
Copy
Scan
Maint
Help
42
5. In the Save As dialog box, type a name in the Preset
name box and click OK.
6. Click OK.
Intro
Install
Print
Copy
Scan
Maint
Help
43
Editing the printer options defined in a preset file
You can change any of the options defined in a preset file.
1. At your PC, do the following:
• From the application’s File menu, click Print.
• In the Print dialog box, click Properties (or Setup).
2. Click the Presets tab.
3. Select the preset file you want to edit from the List of
presets.
4. Under Main Controls and Advanced, change the
options you want. Refer to the sections "Setting printer
options" and "Setting advanced image quality options"
for information on the options.
5. Click OK.
6. In the confirmation box, click Yes to save the changes.
7. Click OK to save the changes to the same preset file.
Intro
Install
Print
Copy
Scan
Using a preset file for a print job
1. At your PC, do the following:
• From the application’s File menu, click Print.
• In the Print dialog box, click Properties (or Setup).
Maint
Help
44
2. Click the Main Controls tab.
3. In the Preset name box, select the preset file to use for
the print job.
4. Click OK.
Intro
Install
Deleting a preset file
When you no longer need a preset file, you can delete it.
1. At your PC, do the following:
• From the application’s File menu, click Print.
• In the Print dialog box, click Properties (or Setup).
2. Click the Presets tab.
3. Select the preset file you want to delete from the List
of presets.
4. Click Delete.
5. In the confirmation box, click Yes.
Print
Copy
Scan
Maint
Help
45
Using printer services
Intro
You can use printer services to view the status of your
current print job and the ink level in the cartridges, maintain
the color print head and high capacity ink jet cartridge, and
choose the conditions under which the printer icon or Status
property page displays on your desktop.
Install
Checking the status of your current print job
The Status property page lets you monitor the progress of
the current print job, and view any printer status messages
or errors. You can also determine the level of ink in the
currently loaded ink cartridge(s).
1. At your PC, do the following:
2. In Windows 95, click the Xerox Document
HomeCentre button on the taskbar. The Status property
page displays (see following page).
Print
Copy
Scan
Maint
Help
46
Intro
Install
Print
Copy
• To cancel the current print job, click Cancel Print.
• To pause the print job, click Pause.
3. Do one of the following:
• Click Close to exit the printer settings.
• Click Print Driver to return to the Main Controls
property page and keep the Status property page open.
Scan
Maint
Help
47
Maintaining the color print head or high capacity
ink jet cartridge
You use the Print Head property page to perform
maintenance tasks such as cleaning, replacing, and aligning
the color print head and high capacity ink jet cartridge.
1. At your PC, double-click the HomeCentre icon.
2. Click the Print Head tab to display the Print Head
property page.
3. Under Default Print Head, click the type of print head
currently installed in the HomeCentre:
Color
Color print head and ink cartridges.
High Capacity Black
High capacity ink jet cartridge.
Intro
Install
Print
Copy
Scan
Maint
Help
48
4. Under Maintenance, click one of the following
buttons:
Clean
Cleans the color print head or high capacity ink jet
cartridge.
Change
Moves the printer carriage to the center position so you
can remove the color print head or high capacity ink jet
cartridge.
Intro
Install
Print
Choosing the printer status display options
You can choose the conditions under which the printer icon
or Status property page displays on your desktop. You can
specify the display settings for idle, printing, and error
conditions.
1. At your PC, double-click the HomeCentre icon.
2. Click the Options tab to display the Options property
page.
3. Under Display Conditions, select the action you want
performed when the printer is Idle, Printing, and in
need of attention
Copy
Scan
Maint
Help
49
Icon
Displays a printer icon on the desktop.
Window
Opens the Status property page on the desktop.
4. Click Close.
Intro
Install
Checking the status of your pending print jobs
The HomeCentre Spool Manager holds the documents
queued for printing. You can view the status of a pending
document and change its status.
1. In Windows 95, click the Xerox HomeCentre Spool
Manager button on the taskbar. The Spool Manager
window displays, showing the list of print jobs pending
on the HomeCentre and the status of each job.
2. To change the status of a print job, click the document
name and then click one of the following options from
the Document menu:
Hold
A toggle action button that does not print the
document, but keeps it in the queue, or prints the
document if it was held in the queue.
Print
Copy
Scan
Maint
Help
50
Keep after printing
Keeps the document in the queue after it’s printed
for printing at a later time.
Delete
Removes the document from the print queue.
Requeue
Advances or delays a document’s position in the
print queue.
Info
Displays information about the print job.
3. To change the status of the print queue, do the
following:
• On the Queue menu, click Hold to stop printing the
documents in the print queue, or to release a held
print queue.
Intro
Install
Print
Copy
Scan
Maint
Help
51
Loading envelopes
You can load either letter- or legal-size envelopes.
1. Remove the printer output tray and any media from the
paper tray.
2. Lift the envelope guide located on the paper tray.
3. Load up to 10 envelopes flap side up and against the
envelope guide in the paper tray.
4. Slide the paper guide to the left until it rests lightly
against the envelopes.
5. Install the printer output tray.
Intro
Install
Print
Copy
Scan
Maint
Help
52
Printing from DOS
Intro
If you print from DOS or a DOS application, the
HomeCentre includes a software application called the
DOS Control Panel. The DOS Control Panel enables you to
change DOS printing options such as font, point size, and
page orientation.
1. In DOS, change to the following directory:
Install
c:\Program Files\Xerox\HomeCentre
Note If you installed your software in another
directory, change to the appropriate directory.
2. Type: x400cnpl.
3. In the Control Panel window, change the options you
want.
4. Type O (for OK).
The options you chose are set on the HomeCentre.
Note Some DOS applications override the options
you set on the Control Panel.
Print
Copy
Scan
Maint
Help
53
Enhanced Capabilities Port
If your PC came with a default setting of LPT=ECP
Enhanced Capabilities Port), then the HomeCentre will not
operate. The port must be set to Standard Printer Port, not
ECP Port. To change to Standard Printer Port from ECP
Port, follow these instructions (depending on the version of
Windows 95 that is installed on your PC, the wording could
differ slightly):
1. Click on the Start Button; then choose the Settings/
Control Panel.
2. Double click the System icon; select the Device
Manager tab.
3. Click the + (plus sign) to the left of the Ports icon, then
double click on ECP Port.
4. Select the Driver tab in the Printer Port Properties
screen, then click the Change Driver button at the
bottom right of the screen.
5. The Select Device screen next comes up; click the
option button titled Show All Devices at the bottom
left of the screen. Two display boxes appear:
Manufacturers and Models. Select Printer Port from
the list on the right, then click OK
Intro
Install
Print
Copy
Scan
Maint
Help
54
6. At this time you’ll be asked to insert the Windows 95
CD-ROM; do so, then wait while the operating system
finds and installs the Standard Printer Port setting and
removes the ECP Port setting. Click OK after the
installation is complete, then re-boot your PC.
Intro
Install
Media
The HomeCentre will print on a wide range of media, the
mainline media being quality plain paper for general usage.
The recommended plain paper is Xerox Image Series LX,
24 lb. 8.5 x11. Other materials can be used for specific
applications. 600 DPI paper should be used for high
resolution printing.
Print
Copy
Paper Size
The HomeCentre will support various fixed sizes plus the
capability to accept variable or custom sized medias. The
system will have the following sizes plus custom sizes
defined by the user. The printer will not print off the page
and will notify the user that the image is truncated if page
size is smaller than the expected image area.
Scan
Maint
Help
55
Letter: 8.5 x 11.0 in.(216 x 276 mm)
Legal: 8.5 x 14.0 in. (216 x 356 mm)
A4: 210 x 297 mm
A5: 148 x 210 mm
B5: 182 x 257 mm
Executive: 7.25 x 10.5 (184 x 267 mm)
US Cards: 4 x 6 in (102 x 152 mm)
US Cards: 5 x 8 in (127 x 203 mm)
A6 Cards: 105 x 148 mm
Hagaki Postcards: 100 x 148 mm
#10 Envelopes: 4.125 x 9.5 in (105 x 241 mm)
DL Envelopes: 110 x 220 mm
C6 Envelopes: 114 x 162 mm
Custom size: 100 - 229 mm (3.9 - 9 in.) wide x 100 - 356
mm (3.9 - 14 in.) long
Manual Feed: Same as Main feeder
Intro
Install
Print
Copy
Scan
Maint
Help
56
Paper Weight
Paper: 60 - 90 g/m2 (16 lb. to 24 lb.)
Paper*: 91 - 135 g/m2 (24 lb. to 36 lb.)
Envelopes*: 75 - 90 g/m2 (20 lb. to 24 lb.)
Cards*: 110-200 g/m2 (110 index maximum)
Intro
Install
Automatic Feed Tray
Media should be loaded face up, short end fed, and left side
registered. The tray has an adjustable side guide with
indicators for Letter, Legal, A4, and A5.
Both plain and coated papers, transparencies and envelopes
may be fed from the main tray.
Paper
Paper capacity (all except A5):150 sheets of 20 lb.
(75 gm2)
Paper capacity (A5):50 sheets of 20 lb. (75 gm2)
Transparencies
Transparencies capacity:10 sheets of 3RXXXX.
Envelopes
Envelope capacity:10 envelopes of 20 lb. (75 gm2).
Print
Copy
Scan
Maint
Help
57
Cardstock
Cardstock capacity:10 sheets of 90 lb. index (143
gm2).
Manual Feed
A manual feed insertion is performed by placing a sheet on
top of existing media, the system automatically feed the
inserted sheet without additional customer interaction.
Intro
Install
Print
Output Tray
Output tray capacity of 50 sheets of 20 lb. (75 g/m2). Paper
is delivered image up.
Copy
Scan
Maint
Help
58
Chapter 4
Copying documents
What to consider when choosing paper
How does copying work?
Copy modes
Copying single pages
If you want to copy another document page
If you don’t have any more pages to copy
Copying large or bound documents
If you want to copy another document page
If you don’t have any more pages to copy
Intro
Install
Print
Copy
Scan
Maint
Help
59
The HomeCentre lets you do high quality copying. You can
copy documents one page at a time, or use the scanner in
detached mode to copy larger sized or bound documents.
Most plain photocopy paper will work well in your
HomeCentre. For best results, use Xerox Image Series LX
or Xerox Selected Ink Jet Paper. Both are available at most
office supply stores, or call Xerox direct at 1-800-TEAMXRX.
What to consider when choosing
paper
Size. You can use paper that is up to 8 ½ inches wide. The
paper you select should fit within the paper adjusters.
Weight. Use 20 to 28 lb plain paper for your tasks.
Brightness. Some papers are whiter than others and create
sharper colors. Use photo paper for printing or copying
photographs. Use white paper for other types of documents.
Surface smoothness. The smoothness of the paper affects
the printer output quality. Paper with a high cotton content
(25% to 100%) has greater surface smoothness. Glossy,
coated paper works well for pictures and charts to create
sharp lines with good color.
Intro
Install
Print
Copy
Scan
Maint
Help
60
TIP: Explore the wide range of papers that are
available. Check your local office supply store,
browse through computer magazines or paper supply
catalogs for ideas. Most mail order companies will
send you a sampler kit of paper in stock.
You can also copy or print on iron-on transfers, envelopes,
stickers, and transparencies that are designed for inkjet
printers.
Intro
Install
Print
Copy
Scan
Maint
Help
61
How does copying work?
Intro
To make a copy, simply place the original in the scanner,
select the number of copies required using the Pagis
software, and start the copy process.
Install
Copy modes
You can copy in one of two ways:
Attached—The scanner remains attached to the
HomeCentre base while you feed documents through the
space between scanner and base one page at a time, as
shown below. Use this type of copying to copy pages that
are 8 1/2 inches wide or less.
Print
Copy
Scan
Maint
HomeCentre attached mode
Help
62
Detached—You detach the scanner from the HomeCentre
base, place it on the document you want to copy, and guide
the scanner along as it scans the page, as shown below. The
scanner starts to move when it detects the document, and
stops when it reaches the end of the document.
Intro
Install
Print
Copy
HomeCentre detached mode
TIP: Use detached mode to scan bound material from
books or other documents, or items wider than 8 ½
inches.
Scan
Maint
Help
63
Copying single pages
1. Pull out the paper tray extension until it clicks into
place.
2. Load paper into the paper tray.
3. Insert the document image-side-up into the base of the
scanner.
Make sure that the paper edges are flush with the
scanner’s paper guides. Adjust the scanner’s paper
guide if necessary. Paper wider than 8 ½ inches will
not feed through the scanner.
4. Specify the copy settings. On the Pagis tool bar, click
Copy. Specify copy quality, printer, whether to copy in
color or monochrome, and the number of copies. See
the Pagis online help or documentation for more
information.
5. Click Copy Now to start copying.
6. Let the scanner pull the paper through. The image or
text displays on the screen as it is processed. To stop
processing, click Stop.
Intro
Install
Print
Copy
Scan
Maint
Help
64
Note If you select 800 DPI, it will take longer to scan
and print; also, more disk space is used when
resolution (DPI) is set to higher settings.
Intro
If you want to copy another document page
Install
Remove the scanned document. Insert another page and
click No More Pages - a dialog box will appear; select More
Pages.
Print
If you don’t have any more pages to copy
Remove the scanned document and click No More Pages;
when the dialog box appears, click Print Copy.
A copy of the scanned document is printed.
Copy
Copying large or bound
documents
Scan
1. Pull out the paper tray extension until it snaps into
place.
2. Load paper into the paper tray.
3. Detach the scanner by lifting it off the HomeCentre
base. Use one hand to keep the base stable.
Maint
Help
65
4. Place the scanner at the edge of the image to be copied.
Make sure that the document you’re scanning lays flat;
leave enough slack in the cable for the scanner to move
freely to the end of the document.
5. Specify the copy settings. On the Pagis tool bar, click
Copy. Specify copy quality, printer, whether to copy in
color or monochrome, and the number of copies. See
the Pagis online help or documentation for more
information.
7. Click Copy Now to start.
6. Gently guide the scanner--do not press down or push
the scanner as it moves. The scanner is motorized, and
will stop when it reaches the end of the page or you lift
it off the page.
7. To stop processing, click Stop.
If you want to copy another document page
Click Stop and place the scanner at the top of the next
document. Click No More Pages. When the dialog box
appears, select More Pages.
Intro
Install
Print
Copy
Scan
Maint
Help
66
If you don’t have any more pages to copy
Intro
Click No More Pages. When the dialog box appears, click
Print Copy. The scanned document is printed. Reattach the
scanner to the HomeCentre base. Press it gently until it
clicks into place.
Install
Print
Copy
Scan
Maint
Help
67
Chapter 5
Scanning documents
Scanning documents
What can be scanned?
How does scanning work?
Scanning modes
Scanning tips
Scanning single pages
If you want to scan another document page
Scanning large-sized or bound documents
If you want to scan another document page
If you have no more pages to scan
Intro
Install
Print
Copy
Scan
Maint
Help
68
You can scan documents or originals one page at a time, or
use the detachable scanner to scan larger documents.
Magazines, books, or other bound material may be scanned
using the detachable scanner.
For more information on how to use the Pagis software,
refer to the Pagis on-line documentation or the Pagis
software application online help.
What can be scanned?
Here are some examples of what you can scan into your PC
with the HomeCentre:
• Color or black-and-white photographs
• Drawings that you or you children have drawn
• Magazines, articles, newspapers and books.
• Letters, recipes
Your imagination is your only limitation. You can scan
entire pages, or parts of a page. As you experiment with
your HomeCentre, you will find more and more uses for it.
Try it out and have some fun!
Intro
Install
Print
Copy
Scan
Maint
Help
69
How does scanning work?
Scanning works like this:
First you choose the drawing, photo, or text you want to
scan into your PC.
You then use the Pagis software to select the scan settings,
such as paper size, orientation, and scan quality
If the document you want to scan is the width of a normal
piece of paper or narrower (8 ½ inches or less), you can
feed one sheet at a time through the attached scanner.
Before scanning in a document, make sure that the
Document Guide is correctly positioned.
If the document is larger, or if it is a page in a book or
magazine, you can detach the scanner and place it on the
page to scan. The scanner will move across the page as it
scans. Note that when scanning in the detached mode, (with
your hand on top of the scanner) you must gently guide the
scanner; be sure not to press down or push the scanner as it
moves across the page.
As you scan the document, the scanner sends the
information to the Pagis program on your PC.
Intro
Install
Print
Copy
Scan
Maint
Help
70
After scanning is complete, you can use the Pagis software
to work with the scanned images. You can insert the
scanned graphics or text directly into an open document. Or
you can edit the text or graphics and save the information
into a separate file. You can then print your completed
project on the HomeCentre.
Intro
Install
Scanning modes
You can scan in one of two ways:
Attached—The scanner remains attached to the
HomeCentre base while you feed documents through the
space between scanner and base one page at a time, as
shown below. Use this type of copying to copy pages that
are 8 1/2 inches wide or less.
Print
Copy
Scan
Maint
HomeCentre attached mode
Help
71
Detached—You detach the scanner from the HomeCentre
base, place it on the document you want to copy, and guide
the scanner along as it scans the page, as shown below. The
scanner starts to move when it detects the document, and
stops when it reaches the end of the document.
Intro
Install
Print
Copy
HomeCentre detached mode
TIP: Use detached mode to scan bound material from
books or other documents, or items wider than 8 ½
inches.
Scan
Maint
Help
72
Scanning tips
Here are some tips and hints that may increase the quality
of your scanned images and help you create a sharperlooking result:
Resolution. Using a high resolution when scanning
pictures is not necessarily better than using a resolution of
100 or 200 dpi. A higher resolution always uses more disk
space to store the scanned document. When you are
scanning in color, you can set the scanning resolution to be
lower than your printer’s resolution. Experiment with your
scanning to see what works best. Note: color resolution is
100 to 800 dpi; black and white resolution is 100 to 1200
dpi.
Glossy or matte paper. Images that are printed on glossy
paper will scan better, and produce brighter results with
more contrast than images that are printed on paper that has
a matte finish. However, glossy surfaces may reflect
scanner light and distort the scanned image.
Proper Scan Mode. Even though it’s possible to scan
using the Auto Image Enhance mode, it’s best to use the
normal scan mode to scan your documents. Use Auto
Image Enhance to edit/enhance images, such as photos,
Intro
Install
Print
Copy
Scan
Maint
Help
73
color pictures, etc. Note: Auto Image Enhance mode is
accessed from the Pagis Editor.
Recalibrating the scanner. If image quality gets worse
with time, you may need to recalibrate the scanner.
Keeping the scanner calibrated ensures that the scanner is
doing its best to capture images and text and that your
project will look good too.
Working space. You should also make sure that you have
enough space on your desk or area where the HomeCentre
is located to complete the scanning. If you are scanning in
detached mode, always use a flat, clean surface. Important:
when using detached mode, do NOT scan on a glass or
other reflective surface; image quality deteriorates when
scanning over reflective surfaces.
Scanning and Editing Text. Scanning using the text
option allows you to perform text editing after the
document has been scanned into the PC. When scanning
using the graphics mode, it is not possible to edit text; only
images can be edited in graphics scan mode.
Positioning the Detached Scanner. Make sure that the
small black scanner actuator sensor (located on the
underside of the detached scanner) is positioned over the
document before starting to scan when in the detached
mode.
Intro
Install
Print
Copy
Scan
Maint
Help
74
Scanning Magazine Pages. If you want to scan a page that
has been torn from a book or magazine, make sure that the
sides of the page are even, and not torn in an uneven
manner. Otherwise, the scanner may eject the document
halfway through the scan. Note: the more even side of the
page should be fed into the left side of the scanner - this will
result in the scanner accepting the torn page.
Scanning text that contains black and different colored
text. The TextBridge Pro OCR system can only scan black
or dark colored text; different colored text is not supported
using TextBridge Pro OCR. If the text you wish to scan has
different colored characters, try scanning it as a picture
instead of as "text only."
Intro
Install
Print
Copy
Scanning single pages
1. Pull out the paper tray extension until it clicks into
place.
2. Insert the document image side up into the front of the
HomeCentre. Make sure that the paper edges are flush
with the scanner’s paper guides. Adjust the scanner’s
paper guide if necessary. Paper wider than 8 ½ inches
will not feed through the scanner.
Scan
Maint
Help
75
3. Specify the scanning settings.
On the Pagis tool bar, select the Scan button to display
the scan Tool window. Next, select the type of
document you want to scan - magazine article, letter,
photograph - and the location where you want the
scanned document to reside on your hard disk drive.
Next, specify the scanner settings for the text or image.
See the Pagis online help or documentation for more
information.
1. Click Scan Now to start scanning.
Let the scanner pull the paper through. To stop
processing, click Stop.
Note If you select 800 DPI, it will take longer to scan
and print; also, more disk space is used when
resolution (DPI) is set to higher settings.
Intro
Install
Print
Copy
Scan
Maint
Help
76
Intro
Install
Print
Copy
Scan
The Scanner Tab in Pagis
Maint
Help
77
If you want to scan another document page
Insert another page and click No More Pages - a dialog box
will appear; select More Pages.
If you don’t have any more pages to scan
Click No More Pages; when the dialog box appears, click
Save.
Now you can work with the image or text. See the Pagis
online help or documentation for more information about
working with the scanned text or image.
Scanning large-sized or bound
documents
1. Detach the scanner by lifting it off the HomeCentre
base. Use one hand to keep the base stable.
2. Place the scanner at the edge of the image to be
scanned. Make sure that the document you’re scanning
lays flat; leave enough slack in the cable for the
scanner to move freely to the end of the document.
3. Specify the scanning settings.
On the Pagis tool bar, if you are scanning text, click
Intro
Install
Print
Copy
Scan
Maint
Help
78
Scan Text. If you are scanning an image, click Scan
Picture. Specify the scanner settings for the text or
image. For text, specify document type, area,
destination, original document format, output format,
and document language. For an image, specify
document type, destination, and resolution. See the
Pagis online help or documentation for details.
4. Click Start to start scanning.
With your hand on top of the scanner, gently guide the
scanner--do not press down or push the scanner as it
moves. The scanner is motorized, and moves by itself,
and will stop when it reaches the end of the page or
you lift it off the page.
5. To stop processing, click Stop, or lift the scanner off
the page.
If you want to scan another document page
1. Click Stop and place the scanner on the next document
page.
2. Click Next Page.
Intro
Install
Print
Copy
Scan
Maint
Help
79
If you have no more pages to scan
1. Click No More Pages.
2. Reattach the scanner to the HomeCentre base. Press it
gently until it clicks into place. See the Pagis online
help or documentation for more information about
working with the scanned text or image.
Intro
Install
Print
Copy
Scan
Maint
Help
80
Chapter 6
Maintaining the
HomeCentre
Intro
Install
Replacing the print head
Removing the print head
Reinstalling the print head
Adding paper
Removing and Replacing the Paper Cassette
Cleaning the HomeCentre surface
Cleaning the print head
Printing a test page
Calibrating the scanner
In case of calibration problems
Print
Copy
Scan
Maint
Help
81
To keep your HomeCentre in good operating condition,
you need to perform periodic maintenance tasks.
Intro
Replacing the print head
You need to remove the print head to:
• Replace it with a new one
• Protect it when moving the HomeCentre to another
location
• Switch from a black-only cartridge to color ink
cartridges and vice versa.
Store the print head in a safe place when you aren’t using it
or moving it.
Install
Print
Copy
Removing the print head
1. Detach the scanner by lifting it off the HomeCentre
base. Use one hand to keep the base stable. Place the
scanner on the table.
2. Open the top cover.
3. Press and release the yellow LED button (the left-most
button).
Scan
Maint
Help
82
4. Wait until the printer carriage moves to the center and
stops, then move the green cartridge lock lever all the
way forward to release the print head.
5. Gently pull up and remove the print head.
Intro
Reinstalling the print head
Install
Caution Make sure that the green carriage lock lever
is STILL moved all the way forward before you
reinstall the print head.
Print
1. Line up the hole in the print head with the green post
on the printer carriage. Lower the print head down gently into position.
2. Gently push the green cartridge lock lever up until it
snaps into place. This secures the print head.
3. Close the top cover and reattach the scanner.
4. Press and release the yellow LED button. The printer
will prepare the cartridge for printing.
Note If the carriage does not move from the center
position after you press the cartridge change button,
remove and reinstall the print head.
Copy
Scan
Maint
Help
83
Adding paper
Before you add paper, make sure that the paper matches the
paper size setting in Windows. Keep in mind that you can’t
use paper that is wider than 8 ½ inches in the HomeCentre.
1. Pull up the paper tray extension until it snaps into
place.
2. Move the paper guide all the way to the right.
3. Fan the paper and put up to 125 sheets into the paper
tray.
Intro
Install
Print
Note Add the paper with the surface to be printed on
facing down.
4. Adjust the paper guide to fit snugly against the right
edge of the paper.
Copy
Scan
Maint
Help
84
Removing and Replacing the
Paper Cassette
In normal operation you do not need to remove the
HomeCentre’s paper cassette. However, if you do need to
remove the cassette, use the following procedure.
Intro
Install
To remove the cassette:
1. Grasp the cassette and tab as shown below. Gently
squeeze the lever and cassette together until the tab
unsnaps. Do the same with the other tab.
Print
Copy
Scan
Maint
Help
85
To insert the cassette:
Intro
1. Before inserting the paper cassette, push the cam ito the
right as far as you can as shown in the figure below.
Install
Print
2. Squeeze the cassette as shown below and insert
underneath the cam.
Copy
Scan
Maint
Help
86
3. Grasp each green tab and push straight down to lock
into place.
Intro
Install
Print
Copy
Scan
Maint
Help
87
Cleaning the HomeCentre surface
Intro
You should clean the HomeCentre surface from time to
time to remove dust and dirt.
Caution Don’t pour or spray water directly onto the
HomeCentre. Use enough water to moisten the
cleaning cloth. Don’t use detergent, alcohol, and
similar cleaners to clean with.
1. Press and hold the green LED button to stop the
printer.
2. Unplug the power cord from the wall outlet.
3. Slightly dampen a soft clean cloth with water and wipe
the HomeCentre cover.
4. Wipe the HomeCentre cover dry with a clean cloth.
5. Plug the power cord back in.
Install
Print
Copy
Scan
Maint
Help
88
Cleaning the print head
You should clean the print head now and then to keep print
quality at its best.
Press and hold the yellow LED button for two seconds. The
cleaning cycle starts.
Intro
Install
Note You can clean the print cartridge only when the
green LED is lit or while printing. The HomeCentre will
finish printing the current line, clean the head, then start
printing again.
Print
Printing a test page
Copy
You can print a test page to check the print quality and test the
printer. You should print a test page each time you move the
HomeCentre or replace an ink cartridge. You can also use the
test page to help diagnose HomeCentre problems.
1. Make sure that at least 4 or 5 sheets of paper are in the
paper tray.
Scan
Maint
Help
89
2. Make sure that the green LED is lit and is not blinking.
If the LED is blinking, press and release the red LED
button to reset the HomeCentre.
3. Press and hold the red LED button for 2 seconds.
When the test page has printed, the HomeCentre
returns to normal mode.
If the test page does not print, repeat steps 1 through 3.
Calibrating the scanner
If your scanned images don’t look as sharp and crisp as they
used to, you may need to recalibrate the scanner.
Calibrating the scanner restores a sharp image quality and
helps the scanner capture clear images and text.
You use the HomeCentre calibration card (included with
the printer) for this procedure. Handle the calibration card
carefully and keep it in a safe place when you’re not using
it.
1. From the Start menu, select Programs, HomeCentre,
Calibrate HomeCentre.
Intro
Install
Print
Copy
Scan
Maint
Help
90
2. Insert the calibration card face up into the scanner with
the arrows pointing toward the scanner, as shown
below.
Intro
Install
Print
Copy
Calibrating the scanner
Scan
Maint
Help
91
3. Select Next on the Calibrate HomeCentre screen.
Intro
Install
Print
Copy
Scan
Maint
Help
92
The calibration progress dialog box is displayed while the
scanner is being calibrated.
Intro
Install
Print
In case of calibration problems
If your power supply is not plugged in, the scanner is not
connected to the PC, or the printer is not powered on, then
this screen will appear:
Copy
Scan
Maint
Help
93
Chapter 7
Troubleshooting and Help
Xerox customer help
Clearing paper jams
Clearing paper misfeeds from the printer
Clearing a paper jam
Solving HomeCentre problems
Intro
Install
Print
Copy
Scan
Maint
Help
94
This chapter gives you the Xerox Customer Support Center
telephone number, explains how you can solve common
HomeCentre problems, and describes the HomeCentrerelated messages you might see on the Windows
workspace.
Intro
Install
Xerox customer help
If you find you can’t solve a HomeCentre problem using
this guide or the online help, call the Xerox Customer
Support Center to speak with someone for technical help or
repair information.
Call from a phone that is near your HomeCentre and PC.
This helps the support representative diagnose your
problem. You’ll get your problem solved faster if you have
the following information handy when you call:
• What is your HomeCentre’s serial number? (Check
the back of the machine.)
• What version of the HomeCentre’s software firmer
are you using? (Check the About box on your PC.)
• How much memory does your PC have?
• How did the problem start, what you did to try to
correct it, and did you see any error messages?
Print
Copy
Scan
Maint
Help
95
Note: If you can receive faxes, you may use Xerox’s
faxback service to receive a list of answers to FAQs
(frequently asked questions); you may also access
the following Xerox customer support website: http://
www.xerox.com/products/
The Xerox Customer Support Center telephone number in
the United States and Canada is:
1-800-TEAM XRX (1-800-832-6979)
Intro
Install
Print
Clearing paper jams
Paper can jam in the printer or not feed correctly into the
scanner. When a jam occurs, the HomeCentre red LED will
blink and the printer or scanner will stop working.
Copy
Clearing paper misfeeds from the printer
1. Remove all paper from the paper tray.
2. Fan the paper and put it back in the paper tray; if you
notice any sheet of paper that is non-uniform or
uneven, discard.
3. Press and release the red LED button to continue
printing.
Scan
Maint
Help
96
4. If misfeeds happen again, flip the paper over and press
and release the red LED button to continue printing.
Intro
Clearing a paper jam
1. Press and hold the red LED button for two seconds.
The paper is released.
2. Gently pull the jammed sheet out from the feed roller.
3. Throw the damaged sheet away and press the red LED
button again to continue printing.
Install
Print
Solving HomeCentre problems
This section helps you solve any problems that might occur
when you use the HomeCentre.
What if the printer doesn’t have any power.?
Check the power cord. Connect the power cord to a
different outlet. Make sure the power cord is securely
connected to the power outlet and printer. Check and
replace the power cord if it’s damaged.
Copy
Scan
Maint
Help
97
What if while printing or copying I can’t print or copy
at all?
Make sure of the following:
• The parallel cable connects the HomeCentre to the
PC.
• The HomeCentre is set as your default printer or
appears in the Print dialog box.
• You’re using the provided IEEE 1284-1994compliant bi-directional cable.
What if while printing or copying I see horizontal lines
and streaks on the pages?
• Clean the print head. If the streaks or lines still
appear, replace the print head.
• Check to see if all (4) ink cartridges have ink.
• To isolate horizontal streak problems to the printer
or scanner, try scanning the same page; if there are
no horizontal streaks, then the problem is in the
printhead. Clean or replace faulty printhead.
Intro
Install
Print
Copy
Scan
Maint
Help
98
What if while printing or copying the pages are faint or
are missing print?
• Clean the print head. If the print still has problems,
replace the print head. Check the ink supply and
replace the empty ink cartridge, if necessary. Print a
test page
What if while printing or copying I get blank pages after
changing the ink cartridge?
• Make sure you removed the protective tape from the
ink cartridge.
• If the test page prints okay, check the cable or PC. If
blank, remove and reinstall the print head, then
clean it. Replace the print head if necessary. To print
a test page, press and hold the red LED button.
What if while printing or copying the paper doesn’t feed
properly into the printer?
• Remove the paper from the paper tray and fan the
pages. Don’t load more than 125 pages of 16 to 28 lb
paper in the tray. Adjust the paper guide to fit
against the right edge of the paper.
Intro
Install
Print
Copy
Scan
Maint
Help
99
What if I look at the LEDs and the red LED is lit?
Check or do the following:
The HomeCentre is out of paper. Add paper to the paper
tray, then press the red LED button.
• The print head is not correctly installed. Remove
and reinstall the print head.
• A carriage position error occurred. Press the red
LED button to clear the error and eject the loaded
paper.
• A paper feed error occurred. Remove the jammed
paper.
What if I look at the LEDs and the red LED is flashing?
• An internal printer error occurred. Unplug the
HomeCentre, then plug it back in. If this doesn’t
help, contact your Xerox representative.
What if I look at the LEDs and the yellow LED is lit?
• The ink cartridges are running low. Check and
replace any low ink cartridges.
Intro
Install
Print
Copy
Scan
Maint
Help
100
What if I look at the LEDs and the yellow LED is
flashing?
Check or do the following:
• An ink cartridge is empty; replace it.
• The wrong type or brand of ink cartridge is installed.
Replace the ink cartridge with a Xerox Ink
Cartridge.
• An ink cartridge is not installed correctly. Press
down on the cartridges to make sure they are fully
seated.
What if the scanner doesn’t work?
Check or do the following:
• Make sure the parallel cable connects the
HomeCentre to the PC.
• Make sure a scanning application (such as Pagis) is
installed on your PC.
• Make sure the scanner is connected to the
HomeCentre.
Intro
Install
Print
Copy
Scan
Maint
Help
101
What if the scanner is leaving stripes or lines on the
image?
• Use a damp, lint-free cloth to wipe the dust and dirt
buildup from the scanner plastic window and rollers.
Recalibrate the scanner.
What if the scanner is not detected?
• Check that the cable connections at the parallel port
and electrical outlet are secure.
• Make sure you are not using an ECP port.
• Try another parallel port, add a parallel port, or use
another PC.
Intro
Install
Print
Copy
Scan
Maint
Help