1
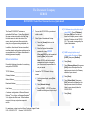
The Document Company
XEROX
DC220/230ST CentreWare® Internet Services Quick Install
The Xerox DC220/230ST contains an
embedded Web Server. CentreWare Internet
Services contains tools within the Web Page
that allow users to check the status of the
queue, submit print ready files as print jobs,
scan jobs, configure scanning templates, etc.
1.
2.
Control Panel.
b) Enter the System Administrator
password by typing #22222
(# key and 22222) on the keypad and
pressing [Enter] on the screen.
Before Installation:
Note: #22222 is the factory default
password and may be changed by
your Xerox service representative to
suit your needs.
Record the following information for use during
setup at the DC220/230:
Gateway Address:_______________________
Subnet Address:_________________________
Enter System Administrator Setups:
a) Press the [Access] button on the
In addition, after Internet Services is enabled,
machine network configuration and setup can be
accomplished from the System Administrator’s
desktop (password required).
TCP/IP Address:_________________________
d) IP Address setup (skip this step if
Connect the DC220/230 to your network
outlet or cable.
3.
Access the TCP/IP Network Setups
screen:
a) On the screen display, press [Print
Setups].
Broadcast Address:______________________
b) Press [Network Setups].
Host Name:_____________________________
c) Press [TCP/IP]. If TCP/IP has been
enabled and configured, skip to step 4.
A minimum configuration of Microsoft Internet
Explorer ® 4.x or higher, or Netscape Navigator®
3.x or higher should be used. Other browsers
may work, but may not produce expected
results.
For assistance, contact your local Xerox Customer Support Center:
USA: 1-800-821-2797
Canada: 1-800-939-3769
using RARP): Press [IP Address],
then press [Edit] and use the keyboard on the display screen to enter
the static IP address for the DC220/
230. This number is assigned by the
System Administrator
OR
d) RARP setup (skip this step if
using a static IP address): Press
[RARP], then press [Enabled].
e) Press [Save].
f) Press [Gateway Address], then press
[Edit] and use the keyboard on the
display screen to enter the Gateway
address of your network.
g) Press [Save].
h) Press [Subnet Mask], then press
[Edit], and use the keyboard on the
display screen to enter the Subnet
Mask for your network (default is
255.255.255.0.
i) Press [Save].
Over
The Document Company
XEROX
DC220/230ST CentreWare® Internet Services Quick Install
j) Press [Broadcast Address], then
press [Edit] and use the keyboard on
the display screen to enter the
Broadcast Address of your network.
Note: The Broadcast Address is the address
where all host bits are set to either zero (0) or
one (1).
k) Press [Save].
l) Press [Host Name], then press [Edit]
and use the keyboard on the display
screen to enter the Host Name you
want your DC220/230 to use.
m) Press [Save].
5.
6.
Press [HTTP].
Enable HTTP:
a) Press [Enablement].
b) Press [Enabled].
Note:The Port Number and the Maximum Number of Connections are predetermined.
7.
8.
Press [Save].
Press [Exit] on the Network Setups
screen. The DC220/230 will reboot and
print a configuration sheet in approximately 3 minutes.
n) Press [Save] on the TCP/IP screen to
9.
Check the settings on the configuration
sheet against those that were entered.
10. At a client workstation on the network,
open the Internet Browser.
11. In the URL field, enter http:// followed
by the IP address of your DC220/230.
Example: If the IP address is 127.0.0.1,
the URL would be http://127.0.0.1.
Refer to the CentreWare manual, Getting
Started with Print and Fax Services for additional information.
Additional information on network installation
can be found in the DC220/230 System
Administration Guide.
save all the network settings.
o) Press [Exit] on the Network Setups
screen.
4.
Press [Additional Setups] in the upper
right corner of the screen.
For assistance, contact your local Xerox Customer Support Center:
USA: 1-800-821-2797
Canada: 1-800-939-3769
©1998 Xerox Corporation
701P97996
Version 1.1, 5-98