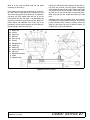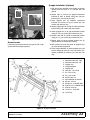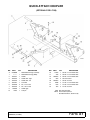
1
(Rev. 1/6/2011) MAN0556 LF138 LF156 Tested. Proven. Unbeatable. OPERATOR'S MANUAL LOADERS TO THE DEALER: Assembly and proper installation of this product is the responsibility of the Woods® dealer. Read manual instructions and safety rules. Make sure all items on the Dealer’s Pre-Delivery and Delivery Check Lists in the Operator’s Manual are completed before releasing equipment to the owner. The dealer must complete the online Product Registration form at the Woods Dealer Website which certifies that all Dealer Check List items have been completed. Please contact your dealer to complete this form. Dealers can register all Woods product at dealer.WoodsEquipment.com under Product Registration. Failure to register the product does not diminish customer’s warranty rights. TO THE OWNER: Read this manual before operating your Woods equipment. The information presented will prepare you to do a better and safer job. Keep this manual handy for ready reference. Require all operators to read this manual carefully and become acquainted with all adjustment and operating procedures before attempting to operate. Replacement manuals can be obtained from your dealer. To locate your nearest dealer, check the Dealer Locator at www.WoodsEquipment.com, or in the United States and Canada call 1-800-319-6637. The equipment you have purchased has been carefully engineered and manufactured to provide dependable and satisfactory use. Like all mechanical products, it will require cleaning and upkeep. Lubricate the unit as specified. Observe all safety information in this manual and safety decals on the equipment. For service, your authorized Woods dealer has trained mechanics, genuine Woods service parts, and the necessary tools and equipment to handle all your needs. Use only genuine Woods service parts. Substitute parts will void the warranty and may not meet standards required for safe and satisfactory operation. Record the model number and serial number of your equipment in the spaces provided: Model: _______________________________ Date of Purchase: _____________________ Serial Number: (see Safety Decal section for location) ____________________________________ Provide this information to your dealer to obtain correct repair parts. Throughout this manual, the term NOTICE is used to indicate that failure to observe can cause damage to equipment. The terms CAUTION, WARNING, and DANGER are used in conjunction with the Safety-Alert Symbol (a triangle with an exclamation mark) to indicate the degree of hazard for items of personal safety. 2 Introduction Gen’l (Rev. 3/5/2010) TABLE OF CONTENTS Introduction . . . . . . . . . . . . . . . . . . . . . . . . . . . . . . . . . . . . . . . . . . . . . . . . . . 2 General Information . . . . . . . . . . . . . . . . . . . . . . . . . . . . . . . . . . . . . . . . . . . . 3 Specifications. . . . . . . . . . . . . . . . . . . . . . . . . . . . . . . . . . . . . . . . . . . . . . . . . 4 Safety Rules . . . . . . . . . . . . . . . . . . . . . . . . . . . . . . . . . . . . . . . . . . . . . . . . . 6 Safety & Instructional Decals. . . . . . . . . . . . . . . . . . . . . . . . . . . . . . . . . . . . 10 Operation . . . . . . . . . . . . . . . . . . . . . . . . . . . . . . . . . . . . . . . . . . . . . . . . . . . 12 Owner Service . . . . . . . . . . . . . . . . . . . . . . . . . . . . . . . . . . . . . . . . . . . . . . . 22 Troubleshooting . . . . . . . . . . . . . . . . . . . . . . . . . . . . . . . . . . . . . . . . . . . . . . 23 Dealer Service . . . . . . . . . . . . . . . . . . . . . . . . . . . . . . . . . . . . . . . . . . . . . . . 26 Assembly . . . . . . . . . . . . . . . . . . . . . . . . . . . . . . . . . . . . . . . . . . . . . . . . . . 31 Dealer Check Lists. . . . . . . . . . . . . . . . . . . . . . . . . . . . . . . . . . . . . . . . . . . . 25 Installation . . . . . . . . . . . . . . . . . . . . . . . . . . . . . . . . . . . . . . . . . . . . . . . . . . 35 Parts Lists LF138 & LF156 Loader Assembly. . . . . . . . . . . . . . . . . . . . . . . . . . 38 - 39 Quick Attach Bucket Assembly . . . . . . . . . . . . . . . . . . . . . . . . . . . . . . . 40 Pin-on Bucket Assembly . . . . . . . . . . . . . . . . . . . . . . . . . . . . . . . . . . . . 40 Quick Attach Coupler . . . . . . . . . . . . . . . . . . . . . . . . . . . . . . . . . . . . . . 41 Hydraulic Hose Routing & Parts Lists . . . . . . . . . . . . . . . . . . . . . . . . . . 42 Hydraulic Cylinder Seal Kit & Assembly . . . . . . . . . . . . . . . . . . . . . . . . 43 Grapple Assembly (Optional) . . . . . . . . . . . . . . . . . . . . . . . . . . . . . 44 - 45 Bolt Torque Chart. . . . . . . . . . . . . . . . . . . . . . . . . . . . . . . . . . . . . . . . . . . . . 46 Bolt Size Chart & Abbreviations . . . . . . . . . . . . . . . . . . . . . . . . . . . . . . . . . 47 Index . . . . . . . . . . . . . . . . . . . . . . . . . . . . . . . . . . . . . . . . . . . . . . . . . . . . . . 48 Product Warranty. . . . . . . . . . . . . . . . . . . . . . . . . . . . . . . . . Inside Back Cover Replacement Parts Warranty. . . . . . . . . . . . . . . . . . . . . . . . . . . . . Back Cover GENERAL INFORMATION The purpose of this manual is to assist you in operating and maintaining your loader. Read it carefully. It furnishes information and instructions that will help you achieve years of dependable performance. These instructions have been compiled from extensive field experience and engineering data. Some information may be general in nature due to unknown and varying operating conditions. However, through experience and these instructions, you should be able to develop procedures suitable to your particular situation. MAN0556 (9/21/2007) The illustrations and data used in this manual were current at the time of printing, but due to possible inline production changes, your machine may vary slightly in detail. We reserve the right to redesign and change the machines as may be necessary without notification. Throughout this manual, references are made to right and left directions. These are determined by standing behind the equipment facing the direction of forward travel. Introduction 3 SPECIFICATIONS Specifications will vary with tractor, tire size, hydraulic system and bucket used. The specifications are given for a loader equipped with a 84" (LF138) and 96" (LF156) material bucket, operated with an average tractor hydraulic system of 10-20 gpm with engine operating at rated PTO rpm and a control valve relief setting of 2750 psi. A B C D E F G Maximum Lift Height Clearance with Attachment Dumped Reach at Maximum Height Maximum Dump Angle Reach with Attachment on Ground Attachment Rollback Angle Digging Depth Overall Height in Carrying Position Length of Attachment Lift Capacity to Full Height at Bucket Pin Lift Capacity to Full Height - 31.5" Forward of Bucket Pin Breakout Capacity at Bucket Pin Breakout Capacity - 31.5" Forward of Bucket Pin System Pressure Tested Recommended Hydraulic Flow Recommended Tractor PTO Horsepower Lift Cylinder Bore Bucket Cylinder Bore Model LF138 138" 103" 32" 50° 85" 35° 6" 74" 42" 4280 lbs. 2940 lbs. 6410 lbs. 4440 lbs. 2750 psi 10-20 gpm 65-105 hp 2.76" 2.76" BUCKET HEAPED CAPACITY WEIGHT 84" QA 84" Pin 96" QA 28.7 cu. ft. 28.7 cu. ft. 33.0 cu. ft. 690 lbs. 660 lbs. 760 lbs. 4 Introduction Model LF156 156" 121" 36" 50° 94" 35° 6" 81" 42" 4850 lbs. 3480 lbs. 7140 lbs. 4990 lbs. 2750 psi 12-25 gpm 85-140 hp 2.95" 2.76" MAN0556 (9/121/2007) LIFT CAPACITY & BREAKOUT VS PRESSURE Pressure (psi) LF138 Lift Capacity at Bucket Pin (lbs.) LF138 Breakout 31.5" Forward of Bucket Pin (lbs.) LF156 Lift Capacity at Bucket Pin (lbs.) LF156 Breakout 31.5" Forward of Bucket Pin (lbs.) 2250 3160 3410 3700 3820 2500 3720 3920 4270 4400 2750 4280 4440 4850 4990 Capacities measured in accordance with ASAE S301.4 ATTACHMENTS APPROVED FOR USE ON LF138 & LF156 LOADERS Description Model Weight Agricultural Grapple Attachment GF5000 700 lbs. Bale Spear BS32E 275 lbs. Bale Clamp BC22E 570 lbs. Pallet Fork PF6048E 600 lbs. MAN0556 (9/21/2007) Introduction 5 SAFETY RULES ATTENTION! BECOME ALERT! YOUR SAFETY IS INVOLVED! Safety is a primary concern in the design and manufacture of our products. Unfortunately, our efforts to provide safe equipment can be wiped out by an operator’s single careless act. In addition to the design and configuration of equipment, hazard control and accident prevention are dependent upon the awareness, concern, judgement, and proper training of personnel involved in the operation, transport, maintenance, and storage of equipment. It has been said, “The best safety device is an informed, careful operator.” We ask you to be that kind of operator. INSTALLATION During installation, the tractor engine should be off, the key removed and the brakes locked. Do not disconnect hydraulic lines until attachments are removed or lowered to the ground and system pressure is released by operating valve levers. Never operate any hydraulic cylinders during any phase of the installation process. After connecting hoses, check that all control lever positions function as instructed in the Operator's Manual. Do not put into service until control lever and equipment movements are correct. Hydraulic fluid under pressure can easily penetrate skin and will cause serious injury or death. Make sure that all operating and service personnel know that if hydraulic fluid penetrates skin, it must be surgically removed as soon as possible by a doctor familiar with this form of injury or gangrene, serious injury, or death will result. CONTACT A P HYS ICIA N IM ME DIATE LY IF FLUID ENTERS SKIN OR EYES. DO NOT DELAY. Never allow children or untrained persons to operate equipment. PREPARATION Check that all hardware is properly installed. Always tighten to torque chart specifications unless instructed otherwise in this manual. Air in hydraulic systems can cause erratic operation and allows loads or equipment components to drop unexpectedly. When connecting equipment or hoses or performing any hydraulic maintenance, purge any air in hydraulic system by operating all hydraulic functions several times. Do this before p ut t i ng i nt o s e r v i c e o r a l l o w i ng a ny o n e t o approach the equipment. TRAINING After connecting hoses, check that all control lever positions function as instructed in the Operator's Manual. Do not put into service until control lever and equipment movements are correct. Safety instructions are important! Read all attachment and power unit manuals; follow all safety rules and safety decal information. (Replacement manuals and safety decals are available from your dealer. To locate your nearest dealer, check the Dealer Locator at www.WoodsEquipment.com, or in the United States and Canada call 1-800-3196637.) Failure to follow instructions or safety rules can result in serious injury or death. Make sure all hydraulic hoses, fittings, and valves are in good condition and not leaking before starting power unit or using equipment. Check and route hoses carefully to prevent damage. Hoses must not be twisted, bent sharply, kinked, frayed, pinched, or come into contact with any moving parts. Operate moveable components through full operational range to check clearances. Replace any damaged hoses immediately. If you do not understand any part of this manual and need assistance, see your dealer. Protective hose sleeves must cover all hydraulic hoses within 20 inches of the operator and be secured onto metal hose fittings. Replace hoses or sleeves if damaged or if protective sleeve cannot be properly positioned or secured. Know your controls and how to stop engine and attachment quickly in an emergency. Operators must be instructed in and be capable of the safe operation of the equipment, its attachments, and all controls. Do not allow anyone to operate this equipment without proper instructions. Keep hands and body away from pressurized lines. Use paper or cardboard, not hands or other body parts to check for leaks. Wear safety goggles. 6 Safety Always wear relatively tight and belted clothing to avoid entanglement in moving parts. Wear sturdy, rough-soled work shoes and protective equipment for eyes, hair, hands, hearing, and head; and respirator or filter mask where appropriate. Make sure attachment is properly secured, adjusted, and in good operating condition. 1020 Loader SR (Rev. 2/16/2007) SAFETY RULES ATTENTION! BECOME ALERT! YOUR SAFETY IS INVOLVED! Power unit must be equipped with ROPS or ROPS cab and seat belt. Keep seat belt securely fastened. Falling off power unit can result in death from being run over or crushed. Keep foldable ROPS system in “locked up” position at all times. Make sure all safety decals are installed. Replace if damaged. (See Safety Decals section for location.) Make sure shields and guards are properly installed and in good condition. Replace if damaged. To provide stability, add tractor manufacturer's recommended wheel ballast or rear weight. Move wheels to tractor manufacturer's widest recommended setting to increase stability. Do not use loader on tractors with single or double centered front wheels. To help prevent tractor/loader instability, never exceed the capacity of the tractor/loader used with the pallet fork. To increase stability, adjust tires to maximum possible width. Your dealer can supply original equipment hydraulic accessories and repair parts. Substitute parts may not meet original equipment specifications and may be dangerous. OPERATION Do not allow bystanders in the area when operating, attaching, removing, assembling, or servicing equipment. Improper use of a loader can cause injury or death. Consult local utilities before working. Know location of all underground cables, pipelines, overhead wires, and other hazards in working area and avoid contact. The bale spear is to be used only for handling bales. Do not use for digging rocks, pulling out fence, or as a craning device with a chain over the spear. Do not attempt to lift loads in excess of the loader capacity. Keep bystanders away from equipment. Do not walk or work under a raised loader, bucket, or attachment. Never allow anyone to get under the loader bucket or reach through the lift arms when the bucket is raised. (Rev. 9/17/20107) 1020 Loader SR (Rev. 2/16/2007) Do not operate or transport equipment while under the influence of alcohol or drugs. Operate only in daylight or good artificial light. Always comply with all state and local lighting and marking requirements. Never allow riders. Do not lift or carry anybody on the loader or in the bucket or attachments. Power unit must be equipped with ROPS or ROPS cab and seat belt. Keep seat belt securely fastened. Falling off power unit can result in death from being run over or crushed. Keep foldable ROPS system in “locked up” position at all times. Always sit in power unit seat when operating controls or starting engine. Securely fasten seat belt, place transmission in neutral, engage brake, and ensure all other controls are disengaged before starting power unit engine. Look down and to the rear and make sure area is clear before operating in reverse. Avoid loose fill, rocks, and holes. They can be dangerous for loader operation or movement. Stop the loader arms gradually when lowering or lifting. Use caution when handling loose or shiftable loads. Allow for extra attachment length and width when making turns. The grapple fork is a clamping device and should be used to clamp loose hay, straw, or silage. It is not to be used to dig material loose from a pile. AVOID INJURY OR DEATH FROM POWER LINES: • Stay away from power lines. • Electrocution can occur without direct contact. • Check clearances before raising attachment. • Consult local utilities before digging. Know location of and avoid contacting all underground cables, pipelines, overhead wires, and other hazards in digging area. • Do not leave the operator's seat if any part of the power unit or attachment contacts electric lines or underground cables. (Safety Rules continued on next page) Safety 7 SAFETY RULES ATTENTION! BECOME ALERT! YOUR SAFETY IS INVOLVED! (Safety Rules continued from previous page) AVOID INJURY OR DEATH FROM ROLLOVER ACCIDENTS: • Move and turn tractor at less than 6 mph (10 km/h). • Watch for hidden hazards such as holes, ditches, and other obstructions which may cause tractor and loader to tip over. • Carry loads close to the ground to aid visibility and lower center of gravity for improved stability. • Balance loads so weight is evenly distributed and load is stable. • Be extra careful when operating on a slope. • Do not operate on steep slopes. • Do not stop, start or change directions suddenly on slopes. • If loader is equipped with round bale attachments, always approach bale with tractor facing uphill. • Be sure tractor tire spacing and rear ballast is correct before using loader. • Tractor must be equipped with a Roll-Over Protective Structure (ROPS) and seat belt. Keep seat belt securely fastened and keep foldable ROPS systems in “locked up” position at all times. AVOID INJURY OR DEATH FROM FALLING BALES AND OTHER OBJECTS: • Do not carry hay bales, logs, fence posts, stones, or any other loose objects that can roll, shift, or fall from a raised bucket and crush operator or bystanders. • Do not handle round bales unless loader is equipped with approved bale handling attachment. • Handle raised loads with caution. • Carry loads low and drive slowly. MAINTENANCE Never work under a raised loader. Always lower loader to the ground with bucket or loader attachment in full roll-back position. Shut off tractor, set parking brake, and remove key. Operate valve levers to release any hydraulic pressure. If loader obstructs tractor maintenance, loader must be removed from tractor. Do not modify or alter or permit anyone else to modify or alter the equipment or any of its components in any way. 8 Safety Your dealer can supply original equipment hydraulic accessories and repair parts. Substitute parts may not meet original equipment specifications and may be dangerous. Always wear relatively tight and belted clothing to avoid entanglement in moving parts. Wear sturdy, rough-soled work shoes and protective equipment for eyes, hair, hands, hearing, and head; and respirator or filter mask where appropriate. Keep all persons away from operator control area while performing adjustments, service, or maintenance. Tighten all bolts, nuts and screws to torque chart specifications. Check that all cotter pins are installed securely to ensure equipment is in a safe condition before putting unit into service. Make sure all safety decals are installed. Replace if damaged. (See Safety Decals section for location.) Make sure shields and guards are properly installed and in good condition. Replace if damaged. Do not disconnect hydraulic lines until all system pressure is relieved. Lower unit to ground, stop engine, and operate all hydraulic control levers. When servicing or replacing pins in cylinder ends, buckets, etc., always use a brass drift and hammer. Failure to do so could result in injury from flying metal fragments. STORAGE Block equipment securely for storage. Stored loader can fall and cause serious injury or death. Securely store loader and attachments to prevent falling. To help prevent injury caused by a falling implement, always detach on a hard level surface. Secure equipment parking stand(s) in park position before detaching. To provide necessary balance, loader frame must be equipped with bucket or attachment before attaching or detaching from tractor, or when loader is in stored position. To help prevent personal injury from exposed fork tines, always store bale spear with tines pointed down, or against bale, building or other stable object. (Rev. 9/21/2007) 1020 Loader SR (Rev. 2/16/2007) SAFETY RULES ATTENTION! BECOME ALERT! YOUR SAFETY IS INVOLVED! Do not loosen hydraulic fittings or hoses while loader is in stored position. Do not climb or lean on equipment stored on stand. Do not allow bystanders in the area when operating, attaching, removing, assembling, or servicing equipment. Keep children and bystanders away from storage area. (Rev. 9/21/2007) 1020 Loader SR (Rev. 2/16/2007) Safety 9 SAFETY & INSTRUCTIONAL DECALS ATTENTION! BECOME ALERT! YOUR SAFETY IS INVOLVED! Replace Immediately If Damaged! 1 - SERIAL NUMBER PLATE MODEL NO. SERIAL NO. Woods Equipment Company Oregon, Illinois, U.S.A. 7 - PN 56053 DANGER Serious injury or death can result from contact with electrical lines. DANGER 6 - PN 56051 9 - PN 56052 WARNING WARNING n Read and understand Operator’s ROLLOVERS CAN RESULT IN INJURY OR DEATH n n n n n n Always use ROPS and seat belt. Add rear tractor ballast. Move wheels to widest setting. Avoid slope operation. Operate at low speeds. Carry load low. n n n n Manual before operating. (Replacement manuals are available from dealer or, in the United States and Canada, call 1-800-319-6637.) Keep others away when operating loader. Do not allow children or untrained persons to operate equipment. Lower loader to ground, stop engine, set park brake and remove key before leaving tractor seat. Failure to follow safety rules can result in serious injury or death. 56051-A 56053-A 4 - PN 19924 WARNING HIGH-PRESSURE HYDRAULIC OIL LEAKS CAN PENETRATE SKIN RESULTING IN SERIOUS INJURY, GANGRENE OR DEATH. n Check for leaks with cardboard; never use hand. n Before loosening fittings: lower load, release pressure, and be sure oil is cool. 19924-B n Consult physician immediately if skin penetration occurs. 10 Safety FALLING LOAD HAZARD To avoid injury or death Do not handle round bale or other shiftable load unless loader is equipped with approved attachments. (Read Operators Manual.) n Lift and carry only one bale at a time. n Handle raised load with caution. n Carry load low. 56052-A n MAN0556 (9/21/2007) SAFETY & INSTRUCTIONAL DECALS ATTENTION! BECOME ALERT! YOUR SAFETY IS INVOLVED! Replace Immediately If Damaged! 8 - PN 1025148A 5 - PN 56050 2 - PN 45024 WARNING LOADER ATTACHMENT CAN FALL OFF IF NOT PROPERLY ATTACHED. Only use loader manufacturer approved attachments. Failure to do so can cause serious injury or death. 45024-A BE CAREFUL! 10 - PN 1020371 Use a clean, damp cloth to clean safety decals. Avoid spraying too close to decals when using a pressure washer; high-pressure water can enter through very small scratches or under edges of decals causing them to peel or come off. 3 - PN 1026268 MAN0556 (9/212007) Replacement safety decals can be ordered free from your Woods dealer. To locate your nearest dealer, check the Dealer Locator at www.WoodsEquipment.com, or in the United States and Canada call 1800-319-6637. Safety 11 OPERATION Be familiar with and follow all safety rules and safety decals in the manual, on the loader, and on the tractor. The safe operation of this loader is the responsibility of the operator, who must be properly trained. The operator should be familiar with the equipment and all safety practices before starting operation. Read the safety rules and safety decals on pages 6 through 11. DANGER AVOID INJURY OR DEATH FROM POWER LINES: • Stay away from power lines. • Electrocution can occur without direct contact. • Check clearances before raising attachment. • Consult local utilities before digging. Know location of and avoid contacting all underground cables, pipelines, overhead wires, and other hazards in digging area. • Do not leave the operator's seat if any part of the power unit or attachment contacts electric lines or underground cables. WARNING Power unit must be equipped with ROPS or ROPS cab and seat belt. Keep seat belt securely fastened. Falling off power unit can result in death from being run over or crushed. Keep foldable ROPS system in “locked up” position at all times. Move wheels to tractor manufacturer's widest recommended setting to increase stability. Do not use loader on tractors with single or double centered front wheels. To provide stability, add tractor manufacturer's recommended wheel ballast or rear weight. Never allow children or untrained persons to operate equipment. Keep bystanders away from equipment. Keep all persons away from operator control area while performing adjustments, service, or maintenance. Keep hands and body away from pressurized lines. Use paper or cardboard, not hands or other body parts to check for leaks. Wear safety goggles. Hydraulic fluid under pressure can easily penetrate skin and will cause serious injury or death. 12 Operation WARNING Make sure that all operating and service personnel know that if hydraulic fluid penetrates skin, it must be surgically removed as soon as possible by a doctor familiar with this form of injury or gangrene, serious injury, or death will result. CONTACT A P HYS ICIA N IM ME DIATE LY IF FLU ID ENTERS SKIN OR EYES. DO NOT DELAY. AVOID INJURY OR DEATH FROM FALLING OBJECTS: • Do not carry shiftable items. Hay bales, logs, fence posts, stones, and other objects can roll or fall from a raised attachment and crush operator or bystanders. • This unit is not equipped with any method to prevent objects such as round bales, posts, or logs from rolling back onto operator. • Do not handle round hay bales. • Carry loads low and drive slowly. • Do not carry large objects that can fall out of attachment into operator zone. • Never lift load higher than necessary to clear the ground when moving. CAUTION Always wear relatively tight and belted clothing to avoid getting caught in moving parts. Wear sturdy, rough-soled work shoes and protective equipment for eyes, hair, hands, hearing, and head; and respirator or filter mask where appropriate. TRACTOR PREPARATION Before operating the loader, extra weight should be added to the rear of the tractor with rear wheel weights or liquid ballast for optimum stability. Refer to your tractor operator's manual for weight information. The tractor rear wheels should be moved to the tractor manufacturer's widest recommended settings to increase the stability of the tractor. For safety in preventing injury or death from rollover accidents, the tractor must be equipped with an approved ROPS or ROPS cab and seat belt. Pin-on bucket must be securely attached to the loader using pins and retaining hardware supplied with the bucket. MAN0556 (9/21/2007) CONNECT BUCKET OR ATTACHMENT USING QUICK ATTACH COUPLER Shut off the engine, set brake, remove key, and remove seat belt. Dismount the tractor. Position the hydraulic hoses so they will not be pinched when connecting the attachment. Move the attachment coupler handle to the locked (closed) position. The lockpins must be completely extended and secured into the retaining slots, Figure 3. The quick attach coupler handle should be in the unlocked (open) position with lock pins retracted, Figure 1. Handle WARNING Attachment coupler handles must always be rotated to LOCK POSITION to prevent coupler latch from disengaging and attachment from falling off. Connect hydraulic hoses to loader auxiliary quick couplers (optional). Handle Open DP1 Figure 1. Quick Attach Coupler Handle - Unlocked Closed Move to the operator seat, fasten seat belt, and start engine. Lower loader lift arms to their lowest position. Carefully move and align the quick attach coupler to the bucket or attachment. The top of the quick attach coupler must completely engage the attachment or bucket hook, Figure 2. Roll the attachment coupler into the attachment flange so the coupler handle can be engaged. Figure 3. Attachment Coupler Handle - Locked LOADER OPERATION WARNING Do not allow bystanders in the area when operating, attaching, removing, assembling, or servicing equipment. The loader should be operated with the tractor engine running at a safe RPM. Excessive speeds are dangerous, and may cause bucket spillage and unnecessary strain on the tractor and loader. Figure 2. Connecting Bucket or Attachment to Loader MAN0556 (9/21/2007) Operation 13 Filling Bucket Lifting Load WARNING 1. Approach and enter the pile with a level bucket. Do not attempt to lift loads in excess of the loader capacity. When lifting the load, keep the bucket positioned to avoid spillage, Figure 7. Figure 4. Filling Bucket 2. Loaders with single handle controls: Ease the lever back and toward you to lift and roll back the bucket, Figure 5. Figure 7. Lifting Load Figure 5. Single Handle Control 3. Lift and rollback bucket. Carrying Load Position the bucket just below the level of the tractor hood for maximum stability and visibility, whether the bucket is loaded or empty, Figure 8. . Figure 8. Carrying Load Operating on a Slope WARNING Figure 6. Lift and Rollback Bucket The lift and rollback of the bucket will increase efficiency because maintaining a level bucket throughout the lifting cycle resists bucket lift and increases breakaway effort, Figure 6. NOTE: Do not be concerned if the bucket is not completely filled during each pass. Maximum productivity is determined by the amount of material loaded in a given period of time. Time is lost if two or more attempts are made to fill the bucket on each pass. 14 Operation AVOID INJURY OR DEATH FROM ROLLOVER ACCIDENTS: • Move and turn tractor at less than 6 mph (10 km/h). • Watch for hidden hazards such as holes, ditches, and other obstructions which may cause tractor and loader to tip over. • Carry loads close to the ground to aid visibility and lower center of gravity for improved stability. • Balance loads so weight is evenly distributed MAN0556 (9/21/2007) and load is stable. • Be extra careful when operating on a slope. • Do not operate on steep slopes. • Do not stop, start or change directions suddenly on slopes. • If loader is equipped with round bale attachments, always approach bale with tractor facing uphill. • Be sure tractor tire spacing and rear ballast is correct before using loader. • Tractor must be equipped with a Roll-Over Protective Structure (ROPS) and seat belt. Keep seat belt securely fastened and keep foldable ROPS systems in “locked up” position at all times. Lift the bucket high enough to clear the side of the vehicle. Move the tractor in as close as possible, then dump the bucket. See Figure 10. Lowering Bucket After the bucket is dumped, back away from the vehicle while lowering and rolling back the bucket. Use extreme care when operating the loader on a slope, keeping the bucket as low as possible. This will maintain a low center of gravity for the bucket and tractor and will provide maximum tractor stability. When transporting the load, keep the bucket as low as possible to avoid tipping in case a wheel drops in a rut. Figure 11. Control Handle Function Operating with Float Control During hard surface operation, keep the bucket level and put the lift control in the float position to permit the bucket to float on the working surface. If hydraulic down pressure is exerted on the bucket, it will wear faster than normal. The float will also prevent the mixing of surface material with stockpile material. The float position will reduce the chance of surface gouging when removing snow or other material. Figure 9. Operating on a Slope Dumping Bucket Figure 12. Float Position Loading from a Bank See Figure 13. Exercise caution when undercutting high banks. Dirt slides can be dangerous. Load the bucket from as low a position as possible for maximum efficiency. Loader lift and break-away capacity diminish as loading height is increased. Figure 10. Dumping Bucket MAN0556 (9/21/2007) Keep the bucket level when approaching a bank or pile. This will help prevent gouging in the work area. Operation 15 Loading Low Trucks or Spreaders from a Pile For easier loading, minimize the angle of turn and length of run between pile and spreader, Figure 17. Figure 13. Loading from a Bank Peeling and Scraping Use a slight bucket angle, travel forward, and hold the lift control forward to start the cut. Make a short 5-inch to 8-inch angle cut and break-out cleanly, Figure 14. With the bucket level, start a cut at the notch approximately 2 inches deep. Hold the depth by feathering the bucket control to adjust the cutting lip up or down. When the front tires enter the notch, adjust the lift cylinder to maintain proper depth, Figure 15. Figure 17. Loading Backgrade occasionally with a loaded bucket to keep the working surface free of ruts and holes. Also, hold the lift control forward so the full weight of the bucket is scraping the ground. Use the heel of the bucket. Figure 14. Angle Cut Figure 18. Backgrading Backblading Position the bucket at an angle of less than 45 degrees and back up slowly, Figure 19. Figure 15. Peeling/Scraping Make additional passes until the desired depth is reached. During each pass, only use the bucket control while at working depth. This will allow you to concentrate on controlling the bucket angle to maintain a precise cut, Figure 16. Figure 16. Additional Passes 16 Operation Backgrading with the bucket tilted too far will result in damage to bucket cylinders and void warranty, Figure 20. Figure 19. Backblading MAN0556 (9/21/2007) HANDLING OBJECTS WARNING Figure 20. Bucket Tilted too Far Backfilling 1. Approach the pile with a flat bucket, Figure 21. AVOID INJURY OR DEATH FROM FALLING BALES AND OTHER OBJECTS: • Do not carry hay bales, logs, fence posts, stones, or any other loose objects that can roll, shift, or fall from a raised bucket and crush operator or bystanders. • Do not handle round bales unless loader is equipped with approved bale handling attachment. • Handle raised loads with caution. • Carry loads low and drive slowly. Figure 21. Backfilling Correctly 2. Do not use the bucket in the dump position for bulldozing. This method will impose severe shock loadings on the dump linkage, the bucket cylinder, and the tractor, Figure 22. Figure 23. Avoid Falling Loads FORKLIFT OPERATION WARNING To avoid injury or death from bale rolling back down loader, do not handle round bales with the pallet fork. Figure 22. Incorrect Bucket Position for Backfilling 3. Leave dirt in the bucket because dumping on each pass wastes time. 4. Operate at right angles to the ditch. Take as big a bite as the tractor can handle without lugging down. 5. Leave dirt that drifts over the side of the bucket for final clean-up. 6. Pile dirt on the high side for easier backfilling on a slope. MAN0556 (9/21/2007) CAUTION To help prevent tractor/loader instability, never exceed the capacity of the tractor/loader used with the pallet fork. To increase stability, adjust tires to maximum possible width. Use the pallet fork to move pallets, bulk bins, crates, boxes and hampers. Do not use for shiftable loads such as logs or poles. Do not use for digging rocks or lifting concrete slabs. Operation 17 GRAPPLE OPERATION The grapple fork is a clamping device and should be used to clamp loose hay, straw, or silage. It is not to be used to dig material loose from a pile. WARNING AVOID INJURY OR DEATH FROM ROLLOVER ACCIDENTS: • Move and turn tractor at less than 6 mph (10 km/h). • Watch for hidden hazards such as holes, ditches, and other obstructions which may cause tractor and loader to tip over. • Carry loads close to the ground to aid visibility and lower center of gravity for improved stability. • Balance loads so weight is evenly distributed and load is stable. • Be extra careful when operating on a slope. • Do not operate on steep slopes. • Do not stop, start or change directions suddenly on slopes. • If loader is equipped with round bale attachments, always approach bale with tractor facing uphill. • Be sure tractor tire spacing and rear ballast is correct before using loader. • Tractor must be equipped with a Roll-Over Protective Structure (ROPS) and seat belt. Keep seat belt securely fastened and keep foldable ROPS systems in “locked up” position at all times. Never lift loader higher than necessary to clear the ground. When necessary, ballast the tractor rear to compensate for load. Never lift large objects. Move slowly and carefully. Avoid rough terrain. Stop the loader gradually when lowering or lifting loads. For loose hay or other materials, adjust the mounting arms and the grapple teeth in the position that provides the best performance. Set the rear tractor wheels to the widest recommended setting. Add enough ballast at the rear end so at least 50% of the original rear wheel weight is maintained when the load in the loader is at transport height. Always carry the load on level ground or directly uphill. Never move along a side hill or directly downhill when a load is carried. Make sure the grapple is holding the load securely so it cannot roll backwards or sideways. Never carry a round bale in a bucket without a properly operating and adjusted grapple. Picking Up a Round Bale with Grapple Approach bale with grapple open, bucket level and close to the ground. Work bucket under bale until bale is against grapple frame. Close grapple, raise and roll back just high enough to provide ground clearance for transport. AVOID INJURY OR DEATH FROM FALLING BALES AND OTHER OBJECTS: • Do not carry hay bales, logs, fence posts, stones, or any other loose objects that can roll, shift, or fall from a raised bucket and crush operator or bystanders. • Do not handle round bales unless loader is equipped with approved bale handling attachment. • Handle raised loads with caution. • Carry loads low and drive slowly. WARNING Use caution when handling loose or shiftable loads. Never handle large, heavy objects due to the dangers of rolling the tractor over, upending the tractor, and having the object roll or slide down the loader arms onto the operator. 18 Operation Figure 24. Pick Up Round Bale Picking Up Round Bale on Slope with a Grapple To help prevent injury caused by tractor rollover when handling round bales on a slope, avoid side slope travel whenever possible. Drive up slope to pick up bale and back down in reverse. Transport bale as close to the ground as possible. Approach bale with tractor facing uphill, grapple open, bucket level and close to the ground. Work bucket under bale until bale is against grapple frame. Close grapple. MAN0556 (9/21/2007) Raise and roll bale back just high enough to provide ground clearance for transport. Select low tractor speed before moving or turning on a slope. Figure 25. Picking Up Round Bale on a Slope Figure 27. Removing Hay and Silage from a Pile with a Grapple Fork Transporting a Round Bale with Grapple Dumping into Truck, Wagon & Spreaders Carry bale low and slightly rolled back. Use extreme care when dumping into trucks, wagons, spreaders, etc. when grapple is attached to bucket. Open grapple teeth will swing a wide radius beyond bucket and can damage or puncture the opposite sides of these implements, out of the operator's sight. BALE SPEAR OPERATION WARNING Figure 26. Transporting a Round Bale Removing Hay & Silage from a Pile with Grapple Fork WARNING The grapple fork is a clamping device and should be used to clamp loose hay, straw, or silage. It is not to be used to dig material loose from a pile. NOTICE ■ Using the grapple teeth to dig material out of a pile will damage the grapple or loader. The grapple is designed only to clamp material in a bucket. Use the bucket to break material loose. If possible, remove material from the top of the pile first. Use the loader bucket to break material loose. Equip the bucket with teeth for better loosening action in packed silage. After material is loosened, close grapple, Figure 27. MAN0556 (9/21/2007) Power unit must be equipped with ROPS or ROPS cab and seat belt. Keep seat belt securely fastened. Falling off power unit can result in death from being run over or crushed. Keep foldable ROPS system in “locked up” position at all times. To provide stability, add tractor manufacturer's recommended wheel ballast or rear weight. Move wheels to tractor manufacturer's widest recommended setting to increase stability. Do not use loader on tractors with single or double centered front wheels. Stop the loader arms gradually when lowering or lifting. AVOID INJURY OR DEATH FROM FALLING BALES AND OTHER OBJECTS: • Do not carry hay bales, logs, fence posts, stones, or any other loose objects that can roll, shift, or fall from a raised bucket and crush operator or bystanders. • Do not handle round bales unless loader is equipped with approved bale handling attachment. • Handle raised loads with caution. • Carry loads low and drive slowly. Operation 19 Transporting a Round Bale CAUTION To help prevent personal injury from exposed fork tines, always store bale spear with tines pointed down, or against bale, building or other stable object. To help prevent personal injury or accident caused from a bale falling off the spike, carry the bale low and slightly rolled back. Travel slowly over rough ground. The bale spear is to be used only for handling round bales. Do not use for digging rocks, pulling out fence, or as a craning device with a chain over the spear. Picking Up a Round Bale with Bale Spear Approach bale with spike level and centered on bale. Push spike into bale until bale is against the frame. Raise and roll bale back just high enough to provide ground clearance for transport, Figure 28. Figure 30. Transporting a Round Bale CLEANING After Each Use Figure 28. Picking Up a Round Bale Picking Up Round Bale on a Slope with Bale Spear To help prevent injury caused by tractor rollover when handling round bales on a slope, avoid side slope travel whenever possible. Drive up slope to pick up bale and back down in reverse. Transport bale as close to the ground as possible. ● Remove large debris such as clumps of dirt, grass, crop residue, etc. from machine. ● Inspect machine and replace worn or damaged parts. ● Replace any safety decals that are missing or not readable. Periodically or Before Extended Storage ● Clean large debris such as clumps of dirt, grass, crop residue, etc. from machine. ● Remove the remainder using a low-pressure water spray. 1. Be careful when spraying near scratched or torn safety decals or near edges of decals as water spray can peel decal off surface. Approach bale with tractor facing uphill, spike level and centered on bale. Push spike into bale until bale is against the frame. Raise and roll bale back just high enough to provide ground clearance for transport. Select low tractor speed before moving or turning on a slope, Figure 29. Figure 29. Picking Up Round Bale on a Slope 20 Operation 2. Be careful when spraying near chipped or scratched paint as water spray can lift paint. 3. If a pressure washer is used, follow the advice of the pressure washer manufacturer. ● Inspect machine and replace worn or damaged parts. ● Sand down scratches and the edges of areas of missing paint and coat with Woods spray paint of matching color (purchase from your Woods dealer). ● Replace any safety decals that are missing or not readable (supplied free by your Woods dealer). See Safety Decals section for location drawing. MAN0556 (9/21/2007) PRE-OPERATION CHECK LIST (OWNER'S RESPONSIBILITY) ___ Review and follow all safety rules and safety decal instructions on pages 6 through 11. ___ Check that all safety decals are installed and in good condition. Replace if damaged. ___ Check all lubrication points and grease as instructed in Owner Service, ". Lubrication Points", page 22. ___ Check that all hydraulic hoses and fittings are in good condition and not leaking before starting tractor. Check that hoses are not twisted, bent sharply, kinked, frayed or pulled tight. Replace any damaged hoses immediately. ___ Check that all hardware and cotter pins are properly installed and secured. ___ Make sure tractor ROPS or ROPS cab and seat belt are in good condition. Keep seat belt securely fastened during operation. ___ Check that equipment is properly and securely attached to tractor. ___ Before starting engine, operator must be in tractor seat with seat belt fastened. Place transmission in neutral or park, engage brake, and disengage tractor PTO. ___ Do not allow riders. MAN0556 (9/21/2007) Operation 21 OWNER SERVICE The information in this section is written for operators who possess basic mechanical skills. If you need help, your dealer has trained service technicians available. For your protection, read and follow the safety information in this manual. WARNING Never work under a raised loader. Always lower loader to the ground with bucket or loader attachment in full roll-back position. Shut off tractor, set parking brake, and remove key. Operate valve levers to release any hydraulic pressure. If loader obstructs tractor maintenance, loader must be removed from tractor. Keep all persons away from operator control area while performing adjustments, service, or maintenance. Do not disconnect hydraulic lines until all system pressure is relieved. Lower unit to ground, stop engine, and operate all hydraulic control levers. Keep hands and body away from pressurized lines. Use paper or cardboard, not hands or other body parts to check for leaks. Wear safety goggles. Hydraulic fluid under pressure can easily penetrate skin and will cause serious injury or death. Make sure that all operating and service personnel know that if hydraulic fluid penetrates skin, it must be surgically removed as soon as possible by a doctor familiar with this form of injury or gangrene, serious injury, or death will result. CONTACT A PH YS ICIA N IM ME DIATE LY IF FLU ID ENTERS SKIN OR EYES. DO NOT DELAY. sturdy, rough-soled work shoes and protective equipment for eyes, hair, hands, hearing, and head; and respirator or filter mask where appropriate. Lubrication NOTICE ■ When adding oil to the tractor reservoir, always use hydraulic oil as specified by the tractor manufactures. Daily ___ Check the level of hydraulic oil in tractor before starting each day's operation. If necessary, add oil as recommended in your tractor owner's manual. ___ Lubricate after every eight hours of operation; lubricate grease fittings at each end of each lift boom arm and at rod and base end of each boom and bucket cylinder. ___ After every eight hours of operation, check all hardware and tighten where required. ___ Replace hoses immediately if they are damaged by a cut or scrape, extruded at the fittings, or leaking. Hydraulic oil leaks should be repaired promptly to avoid loss of oil and serious personal injury from escaping oil. Annually ___ Lubricate direct mount control valve joystick linkage with grease. Before dismounting power unit or performing any service or maintenance, follow these steps: disengage power to equipment, lower the 3-point hitch and all raised components to the ground, operate valve levers to release any hydraulic pressure, set parking brake, stop engine, remove key, and unfasten seat belt. CAUTION If you do not understand any part of this manual and need assistance, see your dealer. Figure 30. Lubrication Points Always wear relatively tight and belted clothing to avoid getting caught in moving parts. Wear 22 Owner Service MAN0556 (9/21/2007) TROUBLESHOOTING The following is a list of service problems, possible causes, and solutions. If problems still exist after preforming the solution, contact your nearest Woods dealer for authorized service. PROBLEM Jerky operation Slow operation Oil leaks MAN0556 (9/21/2007) POSSIBLE CAUSE SOLUTION Air in hydraulic system Cycle cylinders several times to purge system of air. Cold hydraulic oil Run engine to warm oil. Low hydraulic oil level Add oil to level specified. Poor oil circulation Change oil filter and clean screen in tractor hydraulic system. Worn or damaged hydraulic pump Repair or replace pump. Air leak in pump inlet line Check, tighten or replace inlet line. Faulty valve Repair or replace valve. Air in hydraulic system Cycle lift cylinders and bucket cylinders several times to free system of air. Hydraulic oil too heavy Change to proper oil. Oil filter plugged Clean and replace filter. Slow engine speed Increase engine speed rate. Cylinder piston seals leaking Install seal repair kit. Remote valve incorrectly adjusted or malfunctioning Adjust, repair, or replace control valve. Tractor hydraulic pump malfunctioning Repair or replace pump. Hydraulic pump too small; hoses or feedlines restricted Check hoses and feed lines for kinks and other restrictions. Hydraulic couplers not completely engaged Connect hydraulic couplers. Loose hose connections Tighten fittings. Use thread sealer on pipe (tapered) threads. Fittings or hoses defective Tighten fittings. Use thread sealer on pipe (tapered) threads. Fittings or hoses defective Replace defective parts. Hydraulic cylinder seals worn or damaged Install seal repair kit. Remote valve components worn or damaged Repair and/or replace. Troubleshooting 23 TROUBLESHOOTING Cannot raise load Low oil supply Check oil level. Bucket overloaded Try lighter load. Hydraulic couplers not fully engaged Reconnect hoses. Cylinder piston seal leakage Install seal repair kit. Control valve incorrectly adjusted or malfunctioning Repair or replace control valve. Tractor valve not open to provide circuit to auxiliary valve Open tractor valve. Be sure pressure is to inlet side of auxiliary valve. Hydraulic pump malfunctioning Repair or replace hydraulic pump. Load is greater than boom lift capacity Check loader specifications. Leaks in hydraulic circuits Tighten loose fittings. Use thread sealer on pipe (tapered) threads. Cylinder piston seals leaking Install seal repair kit. Control valve worn or damaged Repair or replace control valve. Tractor valve worn or damaged Repair or replace tractor valve. Cannot lower boom Hydraulic couplers not fully engaged Recouple hoses. Loss of bucket tilt control when lever is pushed completely forward Tractor lever in “float” position Use float lockout control to prevent lever from being moved to “float” position. Couplers hard to hook up Pressure in circuit Place control levers in “float” when connecting Boom and bucket operation does not correspond to control lever position Improperly connected hydraulic couplers Connect hydraulic couplers correctly. See Hydraulic Kit Manual for proper connections. Hoses improperly connected Connect hoses properly. See Hydraulic Kit Manual for proper connections. Bucket is tilted too far forward and is riding on cutting edge Keep bottom of bucket parallel to ground. Use rod gauge to indicate level bucket position. Excessive down pressure when cleaning feedlots and working on concrete Use “float” position on boom lift control lever. Bucket or boom leaks down from “hold” position Excessive wear on bucket cutting edge and wear pads 24 Troubleshooting MAN0556 (9/21/2007) DEALER CHECK LISTS PRE-DELIVERY CHECK LIST DELIVERY CHECK LIST (Dealer's Responsibility) (Dealer's Responsibility) Inspect the loader thoroughly after assembly to be certain it is set up properly before delivering it to the customer. The check lists are a reminder of points to inspect. Check off each item as it is found satisfactory or after proper adjustments are made. ___ Present Operator's Manual and request that customer and all operators read it before operating equipment. Point out the manual safety rules, explain their meanings and emphasize the increased safety hazards that exist when safety rules are not followed. ___ Check all bolts to be sure they are properly torqued. ___ Show customer how to make adjustments. ___ Check and grease all lubrication points. See “. Lubrication Points” on page 22. ___ Instruct customer how to lubricate and explain importance of lubrication. ___ Check that shields and guards are properly installed and in good condition. Replace if damaged. ___ Explain to customer the potential crushing hazards of going underneath raised equipment. Instruct customer that service work does not require going underneath unit and never to do so. ___ Check that all cotter pins and safety pins are properly installed. Replace if damaged. ___ Properly attach implement to tractor and make all necessary adjustments. ___ Check all hydraulic hoses, fittings, tubing, and cylinders for any leaks or damage. Be sure quick couplers operate properly. Make sure hydraulic valve matches tractor hydraulic system - open system or closed system. ___ Check parking stand for proper operation. ___ Check that all safety decals are installed and in good condition. Replace if damaged. ___ Check that all loader mounting decals are properly installed on left loader mount. ___ Make sure all hydraulic fittings are tight and hoses are properly routed and not twisted, bent sharply, kinked or pulled tight. ___ Show customer the safe, proper procedures to be used when mounting, dismounting, and storing equipment. ___ Point out the correct mounting and routing of hydraulic hoses. Explain that during operation, mounting, dismounting and storage, care must be taken to prevent hose damage from pulling, twisting and kinking. ___ Make customer aware of optional equipment available so that customer can make proper choices as required. A Delivery Report and Registration form must be filled in by dealer and signed by both dealer and purchaser at time of delivery. Be sure Operator's Manual remains with loader. Deliver it to customer with loader. ___ Make sure loader operates as recommended. See operation section. Make necessary changes in hydraulic hook-ups to obtain loader operation. Cycle loader (all functions). Bleed air from hydraulic system. Cycling loader removes air from system. After cycling loader, check hydraulic system oil level. MAN0556 (9/21/2007) Dealer Check Lists 25 DEALER SERVICE The information in this section is written for dealer service personnel. The repair described herein requires special skills and tools. If your shop is not properly equipped or your mechanics are not properly trained in this type of repair, you may be time and money ahead to replace complete assemblies. WARNING Never work under a raised loader. Always lower loader to the ground with bucket or loader attachment in full roll-back position. Shut off tractor, set parking brake, and remove key. Operate valve levers to release any hydraulic pressure. If loader obstructs tractor maintenance, loader must be removed from tractor. Never allow anyone to get under the loader bucket or reach through the lift arms when the bucket is raised. Keep all persons away from operator control area while performing adjustments, service, or maintenance. Do not disconnect hydraulic lines until all system pressure is relieved. Lower unit to ground, stop engine, and operate all hydraulic control levers. Make sure that all operating and service personnel know that if hydraulic fluid penetrates skin, it must be surgically removed as soon as possible by a doctor familiar with this form of injury or gangrene, serious injury, or death will result. CONTACT A PH YS ICIA N IM ME DIATE LY IF FLU ID ENTERS SKIN OR EYES. DO NOT DELAY. Keep hands and body away from pressurized lines. Use paper or cardboard, not hands or other body parts to check for leaks. Wear safety goggles. Hydraulic fluid under pressure can easily penetrate skin and will cause serious injury or death. CAUTION Always wear relatively tight and belted clothing to avoid getting caught in moving parts. Wear sturdy, rough-soled work shoes and protective equipment for eyes, hair, hands, hearing, and head; and respirator or filter mask where appropriate. CYLINDER SERVICE The cylinders are designed to be reliable and easy to service. If a cylinder should malfunction during the warranty period, return the complete cylinder assembly, without disassembling, to your authorized service department or contact your authorized service department for instructions. Unauthorized disassembly of a cylinder in the warranty period will VOID WARRANTY. NOTE: Repair to cylinders is limited to replacing seals, wear rings, and O-rings. Replacing rod, barrel, or pistons is not cost effective. Purchasing a complete cylinder is more economical. CYLINDER REPAIR Threaded Rod Guide Cylinders Threaded guide cylinders for the LF138 and LF156 use two different styles of seals. Disassembly On threaded guide type cylinders, unscrew guide (5) using a spanner wrench, or carefully use a punch and hammer. (Spanner wrench 1021841 is available from Woods to help with these procedures.) Pull on rod (1) to remove parts from barrel. Clamp cross pin end of rod assembly (1) in a vise with protective jaws. Heat threads to break thread locking compound loose. Unscrew piston (6) from end of rod assembly using a spanner wrench, or carefully use a punch and hammer. Remove rod guide (5) from rod. Remove and discard all seals, wear rings and O-rings. Clean all components in solvent and blow dry with low pressure air. Inspect inside diameter of barrel. Replace cylinder if damaged. Assembly For these assembly instructions the front surface of the threaded rod guide with two holes will be referred to as the "rod guide face". Lubricate O-rings and seals with clean hydraulic fluid. Install back-up washer (3D) on rod guide (5), and then install O-ring (3E) in exterior O-ring groove of rod guide. Make sure that the back-up ring is located closest to the rod guide face. Place rod wiper (3B) in outer rod guide groove. Install rod seal (3C) into the second groove from the rod guide face with the open portion of V-groove toward piston. For bucket cylinders (Figure 31) install rings into the third and fourth grooves from the rod guide face. 26 Dealer Service MAN0556 (9/21/2007) With all of the seals installed, slide the rod guide assembly (5) onto rod (1). Install crown piston seal (3J) onto piston (6). Install offset rings (3H) on both sides of the crown piston seal (3J) in the large groove on the piston (6). The profile of the offset ring (3B) should mate with the lip on the crown piston seal (3J). Place the “L” shaped guide ring (3G) on the outside of each offset ring (3H). Boom cylinders require two additional wear rings (3K) to be installed in the two smaller grooves on the piston (6). Bucket cylinders have one wear ring. 1. 3A. 3B. 3C. 3D. 3E. 3F. 3G. 3H. 3J. 3K. 5. 6. 8. Lightly coat rod threads with hydraulic oil and slide Oring (3A) over threads and into groove. Completely clean threads of hydraulic oil, apply Liquid Primer 7649 and Loctite 242 to the rod threads, and thread piston (6) onto rod (1) with the two holes in the piston orientated away from the rod. Torque the piston (6) to 160 lbs-ft. Compress wear rings and piston seals and carefully insert piston and rod assembly into barrel. Use care to prevent damage while installing. Carefully screw rod guide (5) into barrel (8) using a spanner wrench, or carefully use a punch and hammer. Piston rod O-Ring Wiper ring Rod seal Back-up ring O-Ring Rod guide ring Guard ring Offset ring Crown piston seal Wear ring Rod guide assembly Piston Cylinder barrel Figure 31. Bucket Cylinders MAN0556 (9/21/2007) Dealer Service 27 1. 3A. 3B. 3C. 3D. 3E. 3G. 3H. 3J. 5. 6. 8. Piston rod O-Ring Wiper ring Rod seal Back-up ring O-Ring Guard ring Offset ring Crown piston seal Rod guide assembly Piston Cylinder barrel Figure 32. Boom Cylinders 1. 3A. 3B. 3C. 3D. 3E. 3G. 3H. 3J. 3K. 5. 6. 8. Piston rod O-Ring Wiper ring Rod seal Back-up ring O-Ring Guard ring Offset ring Crown piston seal Wear ring Rod guide assembly Piston Cylinder barrel Figure 33. Grapple Cylinder 28 Dealer Service MAN0556 (9/21/2007) PIVOT BEARING REPLACEMENT Two replacable bearings per pivot joint are located in: Bearing Location • Boom pivot (A) Wiper X • Boom cylinder rod end (B) • Bucket cylinder rod end (C) • Loader boom bucket pivot (D) X • Bucket linkage (E) X • Boom guide link pivot (F) X Figure 34. Bearing Locations Bearing repair kits for LF138 and LF156 loaders are: 1018608 24 Bearing repair kit (All pivot points) 1018607 2 Bearing repair kit (For any 1 pivot point) Replace pivot bearing as follows: 1. Remove loader from tractor. Replaceable Bearings 2. Remove pivot pin from pivot location that needs to be replaced. NOTE: Make sure to support upright and/or lift cylinders to prevent them from falling while the loader is being disassembled. 3. Remove both wipers (if present). DP7 4. Remove both bearings from each pivot point. NOTE: Hammer and punch or heat may be required to remove bearings. Figure 35. Replaceable Bearings (Typical) 5. Apply one drop of Loctite (supplied with bearing kit) to each new bearing and install bearing. 6. Allow Loctite to set one hour before reassembling loader. 7. Apply grease to all bearings. Allow grease to fill small cavities in bearing. 8. Install wipers, if required. NOTE: Lip must be installed towards the outside of joint (Figure 36). 9. Reassemble loader. MAN0556 (9/21/2007) Figure 36. Wiper Installation Dealer Service 29 NOTES 30 Dealer Service MAN0556 (9/21/2007) ASSEMBLY DEALER SET-UP INSTRUCTIONS ASSEMBLY INSTRUCTIONS Loader assembly is the responsibility of the Woods dealer. The loader is shipped assembled on a pallet for your convenience. The loader must be properly set up and installed to assure prolonged service life and safe operation. Loader Mounting Kit and Hydraulic Kit Installation WARNING Keep hands and body away from pressurized lines. Use paper or cardboard, not hands or other body parts to check for leaks. Wear safety goggles. Hydraulic fluid under pressure can easily penetrate skin and will cause serious injury or death. Make sure that all operating and service personnel know that if hydraulic fluid penetrates skin, it must be surgically removed as soon as possible by a doctor familiar with this form of injury or gangrene, serious injury, or death will result. CONTACT A P HYS ICIA N IM ME DIATE LY IF FLU ID ENTERS SKIN OR EYES. DO NOT DELAY. Do not disconnect hydraulic lines until all system pressure is relieved. Lower unit to ground, stop engine, and operate all hydraulic control levers. Never work under a raised loader. Always lower loader to the ground with bucket or loader attachment in full roll-back position. Shut off tractor, set parking brake, and remove key. Operate valve levers to release any hydraulic pressure. If loader obstructs tractor maintenance, loader must be removed from tractor. Do not modify or alter or permit anyone else to modify or alter the equipment or any of its components in any way. Install the loader mounting kit on the tractor according to specific mounting instructions included with the mounting kit and hydraulic kits. Loader Set-Up WARNING Make sure all hydraulic hoses, fittings, and valves are in good condition and not leaking before starting power unit or using equipment. Check and route hoses carefully to prevent damage. Hoses must not be twisted, bent sharply, kinked, frayed, pinched, or come into contact with any moving parts. Operate moveable components through full operational range to check clearances. Replace any damaged hoses immediately. ■ Lift and support all loader components safely. ■ Stand clear of the loader while attaching. The loader could fall, causing serious personal injury. Always work safely and think clearly! Remove bucket and attachment coupler from shipping skid. Support loader frame and remove lag screws from plates that hold frame on skid. Lower frame to ground. Using an overhead lifting devise, lift loader frame and position tractor so uprights can be placed onto loader mount. Secure uprights on mounts with pin shipped with frame. Cut shipping straps around boom cylinders and remove spacer angle and protective sleeves. Refer to Hydraulic Hose Installation in the loader mounting kit. Always use hoses that have a minimum working pressure rating of 3000 psi and meet or exceed SAE 100R1 specifications. Refer to Control Valve Manual for optional control valve instructions. CAUTION Always wear relatively tight and belted clothing to avoid getting caught in moving parts. Wear sturdy, rough-soled work shoes and protective equipment for eyes, hair, hands, hearing, and head; and respirator or filter mask where appropriate. MAN0556 (9/21/2007) Connect loader hoses and start tractor. Clear hydraulic system of air by raising and lowering boom frame and actuating bucket cylinders several times. After air has been purged from system, with loader boom on ground, check the tractor hydraulic oil level as shown in tractor owner's manual. When adding oil to hydraulic system, always use the type of oil specified for the tractor. NEVER MIX OIL TYPES. Assembly 31 Pin-On Bucket Installation (LF138 Only) 1. Remove loader pins and bucket pins from the bucket mounting lugs. 2. Attach lower holes on bucket to loader boom using pins and hardware provided. 3. Extend bucket cylinder and attach bucket links to the upper holes on the bucket using pins and hardware provided. See Figure 37. NOTE: To ease installation of bucket link, extend bucket cylinders. Plugs in hydraulic feedlines may need to be removed. Bucket Connection to Quick Attach Coupler See connect bucket or attachment using Quick Attach Coupler, page 13 to connect bucket. Bucket Level Indicator Installation Figure 37. Pin On Bucket Installed (Typical) Quick Attach Coupler Installation (Optional on LF138) Figure 39. Bucket Level Indicator Installation 1. Remove bucket level indicator rod from its shipping position on right loader boom leg. 2. Slide rod through bucket level indicator bracket on left boom frame. 3. Attach other end to hole in inner guide link and with hardware provided. See Figure 39 and Figure 40. Figure 38. Quick Attach Coupler Installed 1. Remove attachment coupler from bucket. 2. Position quick attach coupler on the ground in front of the loader frame. 3. Attach quick attach coupler (lower holes) to end of loader boom using pins and retaining hardware that came with the quick attach coupler, Figure 38. 4. Attach bucket linkage to the upper holes and secure. 32 Assembly Bucket Level Indicator Adjustment With tractor and loader on flat surface, position boom and bucket cylinders as necessary to place bottom surface of bucket level on the ground. Shut off tractor, set park brake, remove key and exit the tractor. Loosen bolts and slide indicator bracket so that bend in indicator rod is centered in the bracket. Tighten bolts. See Figure 40. MAN0556 (9/21/2007) Grapple Installation (Optional) 1. With the bucket attached to the loader, roll bucket forward until the back of it is parallel with the ground. 2. Secure right (2) and left (3) grapple attachment brackets to back of bucket using four (two per bracket) pins (15) and klik pins (23). 3. Place grapple grill (6) between attachment brackets and secure to lug on bucket with cap screws (28) and nuts (29). 4. Secure grapple grill (6) to right and left attachment bracket using cap screws (28) and nuts(29). 5. Attach grapple arm (4) to right attachment bracket using pin (18), cap screw (26) and lock nut (27). 6. Secure base end of cylinder to attaching bracket using pin (17), cap screw (26) and lock nut (27). Figure 40. Bucket Level Indicator Installed Grease Loader 7. Repeat steps to secure second grapple arm (4) and cylinder to left attachment bracket. Lubricate all pivot points shown on page 22 with a high quality SAE multi-purpose grease. 8. Roll bucket back until front pads of grapple arms (4) are level with the ground. 9. Place grapple toothbar (5) under grapple arms and secure using eight (four per arm) cap screws (25), sixteen hardened flat washers (21) and lock nuts (20). 2. 3. 4. 5. 6. 15. 17. 18. 20. 21. 23. 25. 26. 27. 28. 29. Attachment bracket - right Attachment bracket - left Grapple arm Grapple toothbar Grapple grill Hitch pin, 1.25 x 4.63 Pin, 1.25 x 5.50 Pin, 1.25 x 6.68 5/8 NC Lock nut 5/8 Hardened flat washer Klik pin, 7/16 x 2 5/8 NC x 2-1/2 HHCS GR8 5/16 NC x 2-1/4 HHCS GR5 5/16 NC Lock nut 1/2 NC x 1-1/2 HHCS 1/2 NC nut Figure 41. Grapple Assembly (Rev. 1/6/2011) MAN0556 (9/21/2007) Assembly 33 Install Hydraulic Hoses 3. Attach straight end of hose (41) to base end of left grapple cylinder. 4. Route hose along inside of left attachment bracket and attach 90° end of hose (41) to the bottom feedline (43) on the left side of the grapple. 5. Secure hoses to attachment bracket using hose clamp (50) and lock nut (27). 6. Repeat steps to attach hoses (40 & 41) to right side of grapple. 7. Attach adapter (49), dust plug (46) and female quick coupler (48) to straight end of hose (42). 8. Attach this hose to the bottom feedline in the middle of the grapple. 9. Attach adapter (49), dust cap (45) and male quick coupler (47) to straight end of second hose (42). 10. Attach this hose to the top feedline in the middle of the grapple. Bucket Tooth Installation (Optional) 27. 5/16 NC Lock nut 40. Hose, 46” x 9/16 ORBM x 9/16 JICF 90° 41. Hose, 52” x 9/16 ORBM x 9/16 JICF 90° 42. Hose, 28” x 9/16 JICF x 3/4 JICF 90° 43. Feedline 45. Dust cap 46. Dust plug 47. Quick coupler, male ISO B 1/2 48. Quick coupler, female ISO B 1/2 49. Adapter, 1/2 NPTM x 9/16 JICM 50. Feedline clamp 51. Crg bolt 5/16 NC x 1 Figure 42. Hydraulic Hose Installation 1. Attach straight end of hose (40) to rod end of left grapple cylinder. 2. Route hose along inside of left attachment bracket and attach 90° end of hose (40) to the top feedline (43) on the left side of the grapple. Holes for teeth must be drilled in bottom of bucket. Position point of tooth as shown in Figure 43, 5" from leading edge of cutting edge. Equally space teeth along bucket before marking holes. Drill 9/16" holes where marked. Install tooth (3), hardware (10, 12, 13), and stiffener (5) for each tooth. 3. 5. 10. 12. 13. Bucket tooth Stiffener 3/8 NC x 2 Carriage bolt 3/8 Lock washer 3/8 NC Hex nut Figure 43. Bolt on Bucket Tooth (Optional) 34 Assembly (Rev. 1/6/2011) MAN0556 (9/21/2007) INSTALLATION ATTACH LOADER TO TRACTOR REMOVE LOADER FROM TRACTOR Remove mount pins from loader uprights. Bucket or attachment must be installed to remove loader. Align tractor with loader and drive tractor into loader slowly. Park tractor on a level surface and lower bucket so the bucket bottom or attachment is about 1” off the ground. Set brake and shut off tractor. Remove lock-up pin and lower the parking stands. Install pin into hole that most closely aligns (Figure 46). Repeat steps for opposite parking stand. Remove mount pins from loader uprights. Start tractor and retract lift cylinders. Roll bucket back to completely raise loader uprights from mounts. Figure 44. Align Tractor to Loader Shut off tractor. Connect the hydraulic hoses. Shut off tractor. Disconnect hydraulics. Store mount pins in loader uprights. Start tractor and back away from loader. Restart tractor and drive tractor forward, dump bucket to lower upright into mounts. Continue dumping bucket until uprights settle into mounts and mounting pin holes are aligned. Set brake and shut off the tractor. Install mount pins and retaining clips. Remove pins and fold stands into storage position using pins provided (Figure 45). Figure 46. Parking Stands Installed WARNING Stored loader can fall and cause serious injury or death. Securely store loader and attachments to prevent falling. Figure 45. Parking Stand - Storage Position MAN0556 (9/21/2007) Secure equipment parking stand(s) in park position before detaching. Installation 35 WARNING To provide necessary balance, loader frame must be equipped with bucket or attachment before attaching or detaching from tractor, or when loader is in stored position. Do not climb or lean on equipment stored on stand. Once all loader functions are correct, start the tractor and operate the loader to check for leaks. Purge any remaining air from the hydraulic system and check oil level. When hose routing and correct loader operations are verified, identify each circuit by placing a matching colored band around the male and female quick coupler. The color-coded bands will make reinstallation easier when the loader is removed from tractor. CAUTION Keep children and bystanders away from storage area. CONNECT LOADER SUPPLY HOSES TO LOADER Refer to Loader Mounting Kit Manual for hose kit installation. Connect loader supply hoses to loader feedlines at the right side of the loader. Always use hoses that have a minimum working pressure rating of 3000 psi and meet or exceed SAE 100R1 specifications. ● ● ● ● ● Handle forward - Boom down Handle forward to limit - Float position Handle back - Boom up Handle right Dump bucket or attachment (slow) Handle to left - Rollback bucket or attachment Figure 48. Single Lever Control Operation GRAPPLE ASSEMBLY (OPTIONAL) Remove Grapple WARNING Block equipment securely for storage. To help prevent injury caused by a falling implement, always detach on a hard level surface. Figure 47. Loader Supply Hose Connection Keep children and bystanders away from storage area. VERIFY CONTROL MOVEMENTS Check that all tractor hydraulic control lever positions operate the loader movements correctly. See Figure 48. If loader movements do not respond correctly, shut off tractor, relieve pressure, and reconnect properly. Loader control movements must be correct before proceeding. 36 Installation 1. On a hard level surface, raise bucket and roll it completely forward. 2. Place 4x4 blocks underneath the grapple arms near the rod ends of the cylinders. 3. Lower the bucket and set it down so the grapple arms rest on the 4x4's and the toothbar rests on the ground. MAN0556 (9/21/2007) 4. Open the grapple slightly (enough to remove some pressure from the pins). 5. Remove the pins that attach the grapple to the bucket (tools may be required to get the pins out) Install Grapple 1. Raise the grapple grill so that it is out of the way and will not swing down (secure with bungee straps if necessary). 2. Roll the bucket completely forward 6. Uncouple the hydraulics. 7. Remove the cap screws that attach the grapple grill to the bucket. 8. Rotate the grapple grill back over center so that it won't swing down when the bucket is moved (secure with bungee straps if necessary). Grapple Grill Pins Removed Figure 50. Align Bucket with Grapple 3. Drive the tractor forward and align the bottom holes of the grapple with the bottom set of grapple mounts on the bucket and insert the pins. NOTE: this may require two people. 4X4 4. Roll the bucket back and align the front holes and insert pins. Figure 49. Remove grapple 9. Lower the bucket and back the tractor away. 10. Lower the grapple grill so that it won't be able to fall down and cause damage to the cylinder ports. 5. Attach the grapple grill to the bucket using cap screws and nuts. 6. Hook up the hydraulics. 7. Raise the loader and roll the bucket back. (Rev. 1/6/2011) MAN0556 (9/21/2007) Installation 37 LF138 & LF156 LOADER ASSEMBLY 55 35. 36. 37. 38 Parts Complete Decal Set Safety Decal Set French Decal Set MAN0556 (9/21/2007) LF138 & LF156 LOADER ASSEMBLY PARTS LIST REF PART QTY 1 DESCRIPTION 1 1026590 Boom assembly - LF156 1 1026591 1 Boom assembly - LF138 2 1026592 1 Right upright - LF156 2 1026594 1 Right upright - LF138 3 1026593 1 Left upright - LF156 3 1026595 1 Left upright - LF138 4 1024768B 1 Cylinder, 2.95 x 1.97 x 30.87 (right hand) - LF156 4 1024766B 1 Cylinder, 2.76 x 1.77 x 28.93 (right hand) - LF138 5 1024769B 1 Cylinder, 2.95 x 1.97 x 30.87 (left hand) - LF156 5 1024767B 1 Cylinder, 2.76 x 1.77 x 28.93 (left hand) - LF138 6 1024770B 2 Cylinder 2.76 x 1.49 x 20.00 7 1025640B 2 Bucket link (also order 2 of wiper 441517) 8 2 Free link -11.50 1025645 9 1025650B 2 Guide link 11.50 10 1026267 2 Pin - bent .50 x 3.00 11 56075 2 Pull pin 1.25 w/lynch pin 12 1025646 4 Pin - 1.25 x 7.63 13 1025647B 4 Pin - 1.25 x 6.68 14 1025660B 1 Cover - feedline - LF156 14 1026270B 1 Cover - feedline - LF138 15 1025667B 2 Channel - stand support - LF156 15 1026261B 2 Channel - stand support - LF138 16 1025668 2 Pad - parking stand 17 1025669 2 Channel - parking stand - LF156 17 1026262 2 Channel - parking stand - LF138 18 1026258 1 Bracket - level indicator - LF156 18 1026269 1 Bracket - level indicator - LF138 (Rev. 4/25/2008) MAN0556 (9/212007) REF 19 20 21 22 23 25 26 27 28 29 35 36 37 38 39 40 41 42 43 44 45 46 47 48 49 50 51 52 53 54 55 PART QTY DESCRIPTION 1026259 1 Rod - level indicator 1025651 1 Bracket - manual tube 1003828 1 Manual tube 258 8 Feedline clamp - 1/2 56 2 Feedline clamp - 5/8 43439 2 Strap 1018607 12 Bearing 1.25x1.41x1.00 (set of 2) 1018608 1 Bearing 1.25x1.41x1.00 (set of 24) 441517 16 Wiper ring (1-1/4 ID) 88 * 15 Plastic tie 1026596 1 Decal set complete 1018605 1 Decal set safety 1019721 1 Decal set safety French 30515 2 M8 x 1.25P Hex nut 2688 * 2 5/32 Hair pin cotter 64803 * 4 3/16 x 2 Cotter pin 62043 2 1/4 x 1-3/4 klik pin (included with item 10) 307128 1 M8 x 1.25P x 150 mm HHCS 14562 * 2 5/16 NC x 1 HHCS GR5 4378 * 7 Washer, 5/16 Standard flat FA220 14 Nut, 5/16 NC Nylock 300165 * 8 3/8 NC x 2-1/2 HHCS GR5 6698 * 8 Nut, lock 3/8 NC 300300 * 4 1/2 NC x 1 HHCS GR5 3699 * 1 1/2 NC x 2 HHCS GR5 1637 * 2 1/2 NC x 3-1/2 HHCS GR5 29553 4 Washer, 1/2 ID x 1-5/8 OD x 1/4 thick 1093 * 2 Nut, hex 1/2 NC 765 * 2 Nut, lock 1/2 NC 7163 * 4 Washer, 1-1/4 standard flat 1021841 1 Spanner wrench (used for cylinder repairs) HHCS Hex Head cap Screw * Standard hardware, obtain locally Parts 39 QUICK ATTACH BUCKET ASSEMBLY REF PART QTY DESCRIPTION 1 1 1 2 2 3 4 2470084G 2470084 2470096 1014179K 1019482K 38993 46381 7 - 5 6 46388 1022758 7 1 6 1022766 1 84" Bucket w/Grapple lugs 84" Bucket 96" Bucket w/Grapple lugs 84" Cutting edge kit (incl. items 15-16) 96" Cutting edge kit (incl. items 15-16) Bucket tooth Tooth kit (7) for 84" bucket (incl. items 3, 5, 10-13) Bucket tooth stiffener 84" Cutting edge, .75 x 6.0 x 84 (weld in edge) 96" Cutting edge, .75 x 6.0 x 96 (weld in edge) 3/8 NC x 2 Carriage bolt GR5 3/8 Lock washer 3/8 NC Hex nut 5/8 NC x 2 Plow bolt 5/8 NC Lock nut 10 12 13 15 16 301145 * 838 * 835 * 21261 * 6239 * 14 14 14 A/R A/R ** Standard hardware, obtain locally A/R As required NOTE: Bolt-on cutting edge kits and bucket tooth kits are optional and must be ordered separately. PIN-ON BUCKET ASSEMBLY (LF138 ONLY) REF PART QTY DESCRIPTION 1 2460084 2 1014179K 3 38993 4 46381 7 - 5 6 46388 1022758 7 1 7 10 11 12 13 14 15 16 1025646 7164 6778 301145 838 835 21261 6239 84" Bucket (incl. items 7, 10, 11) 84" Cutting edge kit (incl. items 15-16) Bucket tooth Tooth kit (7) for 84" bucket (incl. items 3, 5, 12-14) Bucket tooth stiffener 84" Cutting edge, .75 x 6.0 x 84 (weld in edge) Pin, 1.25 x 7.63 5/16 NC x 2-1/4 HHCS GR5 5/16 NC Lock nut 3/8 NC x 2 Carriage bolt GR5 3/8 Lock washer 3/8 NC Hex nut 5/8 NC x 2 Plow bolt 2/8 NC Lock nut * 4 * 4 * 4 * 12 * 12 * 12 * A/R * A/R Standard hardware, obtain locally NOTE: Bolt-on cutting edge kits and bucket tooth kits are optional and must be ordered separately. 40 Parts MAN0556 (9/21/2007) QUICK ATTACH COUPLER (OPTIONAL FOR LF138) REF A 1 2 3 4 5 6 7 8 15 PART 2450000 --------1025541 1025542 1025545 1025941 1025646 1025543 395036 H019 QTY 1 1 1 1 1 4 2 1 1 DESCRIPTION ISO 23206 Carriage assembly ISO 23206 Carriage (NSS) Handle Handle link - right Handle link - left Latch link Pin, 1.25 x 7.63 Pin, .787 x 7.60 Handle grip Lock pin MAN0556 (9/212007) REF 16 17 18 19 20 21 22 23 PART 12169 * 976 * 300165 * 565 * 302082 * 6100 * 639 * 765 * QTY 1 2 4 4 7 2 1 3 DESCRIPTION 3/8 NC x 1-1/4 HHCS GR5 3/8 NC x 1-1/2 HHCS GR5 3/8 NC x 2-1/2 HHCS GR5 3/8 Flat washer 3/8 NC Lock nut 1/2 NC x 1-1/4 HHCS GR5 1/2 NC x 2-1/2 HHCS GR5 1/2 NC Lock nut NSS Not sold separately HHCS Hex Head Cap Screw * Standard hardware, obtain locally Parts 41 HYDRAULIC HOSE ROUTING & PARTS LIST REF PART QTY DESCRIPTION REF Feedline - Bucket rod upper - LF156 Feedline - Bucket rod upper - LF138 Feedline - Bucket base upper - LF156 Feedline - Bucket base upper - LF138 Feedline - Boom base - LF156 Feedline - Boom base - LF138 Feedline - Boom rod - LF156 Feedline - Boom rod - LF138 Feedline - Bucket rod lower - LF156 Feedline - Bucket rod lower - LF138 Feedline - Bucket base lower - LF156 Feedline - Bucket base lower- LF138 Hose, 36" x 3/4 ORBM x 3/4 JICF LF156 Hose, 28" x 3/4 ORBM x 3/4 JICF LF138 8 1 1 2 2 3 3 4 4 5 5 6 6 7 1025656 1026250 1025653 1026251 1025655 1026252 1025654 1026253 1025658 1026254 1025657 1026255 360174 1 1 1 1 1 1 1 1 1 1 1 1 4 7 1004286 4 42 Parts 8 9 9 15 16 17 18 19 20 PART QTY 360175 DESCRIPTION 4 Hose, 60" x 3/4 ORBM x 3/4 JICF LF156 360178 4 Hose, 50" x 3/4 ORBM x 3/4 JICF LF138 360161 4 Hose, 64" x 3/4 ORBM x 3/4 JICF LF156 360175 4 Hose, 60" x 3/4 ORBM x 3/4 JICF LF138 315019 1 Elbow, 3/4 JICM x 3/4 JICM - LF156 258 8 Feedline clamp - 1/2 56 2 Feedline clamp - 5/8 43439 2 Strap FA220 14 5/16 NC Nylock nut 88 * 15 Plastic tie * Standard hardware, obtain locally MAN0556 (9/21/2007) HYDRAULIC CYLINDER SEAL KITS & ASSEMBLY Length Seal Kit Cylinder Tube ID Rod OD Extended Retracted Spanner Nut Style LF138 Boom 2.76 1.77 67.00 38.07 N.A. 1024771 1024766 RH 1024767 LH LF156 Boom 2.95 1.97 70.75 39.88 N.A. 1024772 1024768 RH 1024769 LH LF138 Bucket 2.76 1.49 48.88 28.88 N.A. 1024773 1024770 LF156 Bucket 2.76 1.49 48.88 28.88 N.A. 1024773 1024770 Grapple 2.76 1.38 33.75 20.20 1023728 1023729 1021502 MAN0556 (9/212007) Threaded Rod Gland Complete Assembly Style Parts 43 2490000 GRAPPLE (OPTIONAL) 7 - PN 1026520 44 Parts (Rev. 1/6/2011) MAN0556 (9/21/2007) 2490000 GRAPPLE PARTS LIST REF PART 1 1021502B 2 1025916 3 1025917 4 1025918 5 1025919 6 1032748 7 1026520 8 9 10 15 16 17 18 20 21 23 QTY 2 1 1 1 1 1 2 DESCRIPTION Hydraulic cylinder Grapple attach right Grapple attach left Grapple arm Grapple tooth Grapple grill Decal, Danger - Overhead Power Lines 56051 1 Decal, Warning - Read Manual 56050 1 Decal, Warning - Crush & Fall Hazard 19924 1 Decal, Warning - Hydraulic Fluid 1002739 4 Hitch pin, 1.25 x 4.63 1018607 4 Bearing, 1.25 x 1.41 x 1.0 (set of 2) 1020348 4 Pin, 1.25 x 5.50 1025647 2 Pin, 1.25 x 6.68 6239 * 8 5/8 NC Lock nut 57817 16 5/8 Hardened flat washer 35124 4 Klik pin, 7/16 x 2 REF 25 26 27 28 29 40 41 42 43 45 46 47 48 49 50 51 PART QTY DESCRIPTION 11854 * 8 5/8 NC x 2-1/2 HHCS GR8 7164 * 6 5/16 NC x 2-1/4 HHCS GR5 6778 * 12 5/16 NC Lock nut 3379 * 4 1/2 NC x 1-1/2 HHCS GR5 1093 * 4 1/2 NC nut 1023474 2 Hose, 46" x 9/16 ORBM x 3/4 JICF 90° 1023477 2 Hose, 52" x 9/16 ORBM x 3/4 JICF 90° 360143 2 Hose, 28" x 9/16 ORBM x 3/4 JICF 90° 216070 2 Feedline 1024763 1 Dust cap, 1/2 ISO B 1024764 1 Dust plug, 1/2 ISO B 1025944 1 Quick coupler, male 1/2 - ISO B 1025945 1 Quick coupler, female 1/2 - ISO B 54315 2 Adapter, 1/2 NPTM x 9/16 JICM 258 6 Feedline clamp 24409 4 Crg. bolt 5/16 NC x 1 * Standard hardware, obtain locally NOTE: For items 8, 9 & 10 see Decal pages 10 and 11. (Rev. 1/6/2011) MAN0556 (9/212007) Parts 45 BOLT TORQUE CHART Always tighten hardware to these values unless a different torque value or tightening procedure is listed for a specific application. Fasteners must always be replaced with the same grade as specified in the manual parts list. Always use the proper tool for tightening hardware: SAE for SAE hardware and Metric for metric hardware. Make sure fastener threads are clean and you start thread engagement properly. All torque values are given to specifications used on hardware defined by SAE J1701 MAR 99 & J1701M JUL 96. SAE Bolt Head Identification SAE SERIES TORQUE CHART A SAE Grade 2 (No Dashes) SAE Grade 8 (6 Radial Dashes) SAE Grade 5 (3 Radial Dashes) MARKING ON HEAD A SAE 2 SAE 5 SAE 8 Diameter (Inches) Wrench Size lbs-ft N-m lbs-ft N-m lbs-ft N-m 1/4" 5/16" 7/16" 1/2" 6 12 8 17 10 19 13 26 14 27 18 37 3/8" 7/16" 9/16" 5/8" 23 36 31 48 35 55 47 75 49 78 67 106 1/2" 9/16" 3/4" 13/16" 55 78 75 106 85 121 115 164 120 171 163 232 5/8" 3/4" 15/16" 1-1/8" 110 192 149 261 170 297 230 403 240 420 325 569 7/8" 1" 1-5/16" 1-1/2" 306 467 416 634 474 722 642 979 669 1020 907 1383 A METRIC SERIES TORQUE CHART A Metric Bolt Head Identification 8.8 Metric Grade 8.8 10.9 Metric Grade 10.9 COARSE THREAD FINE THREAD MARKING ON HEAD MARKING ON HEAD A Diameter & Thread Pitch (Millimeters) Wrench Size N-m lbs-ft N-m lbs-ft N-m lbs-ft N-m lbs-ft Diameter & Thread Pitch (Millimeters) 6 x 1.0 10 mm 8 6 11 8 8 6 11 8 6 x 1.0 8 x 1.25 10 x 1.5 13 mm 16 mm 20 39 15 29 27 54 20 40 21 41 16 30 29 57 22 42 8 x 1.0 10 x 1.25 12 x 1.75 14 x 2.0 18 mm 21 mm 68 109 50 80 94 151 70 111 75 118 55 87 103 163 76 120 12 x 1.25 14 x 1.5 16 x 2.0 18 x 2.5 24 mm 27 mm 169 234 125 172 234 323 173 239 181 263 133 194 250 363 184 268 16 x 1.5 18 x 1.5 20 x 2.5 22 x 2.5 30 mm 34 mm 330 451 244 332 457 623 337 460 367 495 270 365 507 684 374 505 20 x 1.5 22 x 1.5 24 x 3.0 30 x 3.0 36 mm 46 mm 571 1175 421 867 790 1626 583 1199 623 1258 459 928 861 1740 635 1283 24 x 2.0 30 x 2.0 Typical Washer Installations Bolt Metric 8.8 Lock Washer Metric 10.9 Metric 8.8 Metric 10.9 Flat Washer 8/9/00 46 Appendix Bolt Torque & Size Charts (Rev. 3/28/2007) BOLT SIZE CHART NOTE: Chart shows bolt thread sizes and corresponding head (wrench) sizes for standard SAE and metric bolts. SAE Bolt Thread Sizes 5/16 3/8 1/2 IN MM 5/8 3/4 7/8 1 2 3 4 5 6 7 25 50 75 100 125 150 175 Metric Bolt Thread Sizes 8MM 10MM 12MM 14MM 16MM 18MM ABBREVIATIONS AG .............................................................. Agriculture ASABE.................... American Society of Agricultural & Biological Engineers (formerly ASAE) ASAE ....... American Society of Agricultural Engineers ATF ............................... Automatic Transmission Fluid BSPP .............................British Standard Pipe Parallel BSPTM ................ British Standard Pipe Tapered Male CV.....................................................Constant Velocity CCW .............................................. Counter-Clockwise CW............................................................... Clockwise F ...................................................................... Female FT .............................................................. Full Thread GA .................................................................... Gauge GR (5, etc.) ........................................... Grade (5, etc.) HHCS ........................................Hex Head Cap Screw HT ........................................................... Heat-Treated JIC .................Joint Industry Council 37° Degree Flare LH .................................................................Left Hand LT........................................................................... Left m......................................................................... Meter mm................................................................ Millimeter M.......................................................................... Male Bolt Torque & Size Charts (Rev. 3/28/2007) MPa......................................................... Mega Pascal N.......................................................................Newton NC ...................................................... National Coarse NF ...........................................................National Fine NPSM..................... National Pipe Straight Mechanical NPT .......................................... National Pipe Tapered NPT SWF ......... National Pipe Tapered Swivel Female ORBM .......................................... O-Ring Boss - Male P...........................................................................Pitch PBY ...................................................... Power-Beyond psi.......................................... Pounds per Square Inch PTO ..................................................... Power Take Off QD ....................................................Quick Disconnect RH ..............................................................Right Hand ROPS ........................... Roll-Over Protective Structure RPM ........................................Revolutions Per Minute RT ....................................................................... Right SAE ..........................Society of Automotive Engineers UNC ..................................................... Unified Coarse UNF...........................................................Unified Fine UNS...................................................... Unified Special Appendix 47 INDEX Picking Up Round Bale on Slope 20 Transporting Round Bale 20 Cleaning After Each Use 20 Extended Storage 20 Connect Bucket using Quick Attach Coupler Forklift Operation 17 Grapple Operation 18 Dumping Load 19 Removing Hay & Silage 19 Handling Objects 17 Loader Operation 13 Backblading 16 Backfilling 17 Carrying Load 14 Dumping Bucket 15 Filling Bucket 14 Lifting Load 14 Loading from a Bank 15 Loading Low Trucks or Spreading 16 Lowering Bucket 15 Operating on a Slope 14 Operating with Float Control 15 Peeling and Scraping 16 Pre-Operation Check List (Owner’s Responsibility) 21 Tractor Preparation 12 A ASSEMBLY Dealer Set-Up Instructions 31 D DEALER CHECK LISTS Delivery (Dealer’s Responsibility) 25 Pre-Delivery (Dealer’s Responsibility) 25 DEALER SERVICE Cylinder Repair Threaded Rod Guide Cylinder Assembly 26 Disassembly 26 Pivot Bearing Replacement 29 G GENERAL Abbreviations 47 Bolt Size Chart 47 Bolt Torque Chart 46 General Information 3 Introduction 2 Obtaining Replacement Manuals Product Registration 2 Specifications 4 Table of Contents 3 Warranty Product 88 Replacement Parts 73 2 I INSTALLATION Attach Loader to Tractor 35 Connect Loader Supply Hoses 36 Grapple Assembly Install Grapple 37 Remove Grapple 36 Remove Loader from Tractor 35 Verify Control Movements 36 OWNER SERVICE Lubrication Points 22 S SAFETY Delivery (Dealer’s Responsibility) 25 Pre-Delivery (Dealer’s Responsibility) Pre-Operation Check List (Owner’s Responsibility) 21 Safety & Instructional Decals 10 Safety Rules 6 Safety Symbols Explained 2 O T OPERATION Bale Spear Operation 19 Picking Up Round Bale TROUBLESHOOTING Troubleshooting 23 48 Index 13 25 20 MAN0556 (9/21/2007) WARRANTY All Models Except Mow’n MachineTM Zero-Turn Mowers Please Enter Information Below and Save for Future Reference. Date Purchased: ____________________________ From (Dealer): __________________________________________ Model Number: ____________________________ Serial Number: __________________________________________ Woods Equipment Company (“WOODS”) warrants this product to be free from defect in material and workmanship. Except as otherwise set forth below, the duration of this Warranty shall be for TWELVE (12) MONTHS COMMENCING ON THE DATE OF DELIVERY OF THE PRODUCT TO THE ORIGINAL PURCHASER. All current model loaders and backhoes are warranted for two (2) years from the date of delivery to the original purchaser. The warranty periods for specific parts or conditions are listed below: Part or Condition Warranted Gearbox Seals Gearbox components Blade spindles Rust-through Model Number Duration (from date of delivery to the original purchaser) All units listed below 2 years BW1260, BW1620, BW1800, BW2400 8 years BW240HD, BW180HD, BW180HB, BW126HB 7 years BB48X, BB60X, BB72X, BB84X, BB600X, BB720X, BB840X, BB6000X, BB7200X, BB8400X, DS1260, DSO1260, DS1440, TS1680, BW126-3, BW180-3, BW240 6 years PHD25, PHD35, PHD65, PHD95, 2162, 3240, DS96, DS120, RCC42, RM550-2, RM660-2, RD990X, PRD6000, PRD7200, PRD8400, S15CD, S20CD, S22CD, S25CD, S27CD, BW180LH, TC/R74, TC/R68, TC/R60, TBW144, TBW180, TBW204 5 years RDC54, RD60, RD72, TBW150C, TS/R60, TS/R52, TS/R44 3 years (1 year if used in rental or commercial applications) RM550-2, RM660-2, RD990X, PRD6000, PRD7200, PRD8400, 7144RD-2, 9180RD-2, 9204RD-2 3 years BB600, BB720, BB840, BB6000, BB7200, BB8400, BW126-3, BW126HB, BW180-3, BW180HB, BW180HD, BW1260, BW1800, BW240, BW240HD, 2162, 3240, DS1260, DSO1260, DS1440, TS1680 10 years Under no circumstances will this Warranty apply in the event that the product, in the good faith opinion of WOODS, has been subjected to improper operation, improper maintenance, misuse, or an accident. This Warranty does not apply in the event that the product has been materially modified or repaired by someone other than WOODS, a WOODS authorized dealer or distributor, and/or a WOODS authorized service center. This Warranty does not cover normal wear or tear, or normal maintenance items. This Warranty also does not cover repairs made with parts other than those obtainable through WOODS. This Warranty is extended solely to the original purchaser of the product. Should the original purchaser sell or otherwise transfer this product to a third party, this Warranty does not transfer to the third party purchaser in any way. There are no third party beneficiaries of this Warranty. WOODS makes no warranty, express or implied, with respect to engines, batteries, tires or other parts or accessories not manufactured by WOODS. Warranties for these items, if any, are provided separately by their respective manufacturers. WOODS’ obligation under this Warranty is limited to, at WOODS’ option, the repair or replacement, free of charge, of the product if WOODS, in its sole discretion, deems it to be defective or in noncompliance with this Warranty. The product must be returned to WOODS with proof of purchase within thirty (30) days after such defect or noncompliance is discovered or should have been discovered, routed through the dealer and distributor from whom the purchase was made, transportation charges prepaid. WOODS shall complete such repair or replacement within a reasonable time after WOODS receives the product. THERE ARE NO OTHER REMEDIES UNDER THIS WARRANTY. THE REMEDY OF REPAIR OR REPLACEMENT IS THE SOLE AND EXCLUSIVE REMEDY UNDER THIS WARRANTY. THERE ARE NO WARRANTIES WHICH EXTEND BEYOND THE DESCRIPTION ON THE FACE OF THIS WARRANTY. WOODS MAKES NO OTHER WARRANTY, EXPRESS OR IMPLIED, AND WOODS SPECIFICALLY DISCLAIMS ANY IMPLIED WARRANTY OF MERCHANTABILITY AND/OR ANY IMPLIED WARRANTY OF FITNESS FOR A PARTICULAR PURPOSE. WOODS shall not be liable for any incidental or consequential losses, damages or expenses, arising directly or indirectly from the product, whether such claim is based upon breach of contract, breach of warranty, negligence, strict liability in tort or any other legal theory. Without limiting the generality of the foregoing, Woods specifically disclaims any damages relating to (i) lost profits, business, revenues or goodwill; (ii) loss of crops; (iii) loss because of delay in harvesting; (iv) any expense or loss incurred for labor, supplies, substitute machinery or rental; or (v) any other type of damage to property or economic loss. This Warranty is subject to any existing conditions of supply which may directly affect WOODS’ ability to obtain materials or manufacture replacement parts. No agent, representative, dealer, distributor, serviceperson, salesperson, or employee of any company, including without limitation, WOODS, its authorized dealers, distributors, and service centers, is authorized to alter, modify, or enlarge this Warranty. Answers to any questions regarding warranty service and locations may be obtained by contacting: Woods Equipment Company 2606 South Illinois Route 2 Post Office Box 1000 Oregon, Illinois 61061 USA 800-319-6637 tel 800-399-6637 fax www.WoodsEquipment.com F-3079 (Rev. 1/12/2011) WARRANTY (Replacement Parts For All Models Except Mow’n MachineTM Zero-Turn Mowers and Woods BoundaryTM Utility Vehicles) Woods Equipment Company (“WOODS”) warrants this product to be free from defect in material and workmanship for a period of ninety (90) days from the date of delivery of the product to the original purchaser with the exception of V-belts, which will be free of defect in material and workmanship for a period of 12 months. Under no circumstances will this Warranty apply in the event that the product, in the good faith opinion of WOODS, has been subjected to improper operation, improper maintenance, misuse, or an accident. This Warranty does not cover normal wear or tear, or normal maintenance items. This Warranty is extended solely to the original purchaser of the product. Should the original purchaser sell or otherwise transfer this product to a third party, this Warranty does not transfer to the third party purchaser in any way. There are no third party beneficiaries of this Warranty. WOODS’ obligation under this Warranty is limited to, at WOODS’ option, the repair or replacement, free of charge, of the product if WOODS, in its sole discretion, deems it to be defective or in noncompliance with this Warranty. The product must be returned to WOODS with proof of purchase within thirty (30) days after such defect or noncompliance is discovered or should have been discovered, routed through the dealer and distributor from whom the purchase was made, transportation charges prepaid. WOODS shall complete such repair or replacement within a reasonable time after WOODS receives the product. THERE ARE NO OTHER REMEDIES UNDER THIS WARRANTY. THE REMEDY OF REPAIR OR REPLACEMENT IS THE SOLE AND EXCLUSIVE REMEDY UNDER THIS WARRANTY. THERE ARE NO WARRANTIES WHICH EXTEND BEYOND THE DESCRIPTION ON THE FACE OF THIS WARRANTY. WOODS MAKES NO OTHER WARRANTY, EXPRESS OR IMPLIED, AND WOODS SPECIFICALLY DISCLAIMS ANY IMPLIED WARRANTY OF MERCHANTABILITY AND/OR ANY IMPLIED WARRANTY OF FITNESS FOR A PARTICULAR PURPOSE. WOODS shall not be liable for any incidental or consequential losses, damages or expenses, arising directly or indirectly from the product, whether such claim is based upon breach of contract, breach of warranty, negligence, strict liability in tort or any other legal theory. Without limiting the generality of the foregoing, Woods specifically disclaims any damages relating to (i) lost profits, business, revenues or goodwill; (ii) loss of crops; (iii) loss because of delay in harvesting; (iv) any expense or loss incurred for labor, supplies, substitute machinery or rental; or (v) any other type of damage to property or economic loss. This Warranty is subject to any existing conditions of supply which may directly affect WOODS’ ability to obtain materials or manufacture replacement parts. No agent, representative, dealer, distributor, service person, salesperson, or employee of any company, including without limitation, WOODS, its authorized dealers, distributors, and service centers, is authorized to alter, modify, or enlarge this Warranty. Answers to any questions regarding warranty service and locations may be obtained by contacting: ©2007 Woods Equipment Company. All rights reserved. WOODS and the Woods logo are trademarks of Woods Equipment Company. All other trademarks, trade names, or service marks not owned by Woods Equipment Company that appear in this manual are the property of their respective companies or mark holders. Specifications subject to change without notice. F-8494 (Rev. 6/23/2005)