1
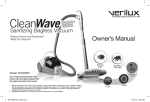
Owner’s Manual
Bed Bugs
& Eggs
Dust Mite &
Flea Eggs
Influenza A
(H1N1)
Sanitizing Bagless Vacuum
E. coli
VH04WW1
MRSA
Table of Contents
Dear Customer,
Thank you for purchasing the Verilux CleanWave® Sanitizing
Bagless Vacuum. You have received an innovative and quality
manufactured product, backed by a five year limited warranty.
Many other healthy lighting products are available through our
catalog and online. Visit us on the web at www.verilux.com
to request a free catalog and learn more about all our quality
Verilux products, or call our toll-free number 1-800-454-4408.
As a Verilux customer, your satisfaction means everything to
us. We look forward to serving you now and in the future.
Have a Bright Day!
Nicholas Harmon
President, Verilux, Inc.
2
1. Important Safety Instructions . . . . . . . . . . . . . . . . . . . . . . . 3
2. CleanWave® Sanitizing Bagless Vacuum. . . . . . . . . . . . . . 10
2.1 Introduction . . . . . . . . . . . . . . . . . . . . . . . . . . . . . . 10
2.2 Special Functions. . . . . . . . . . . . . . . . . . . . . . . . . . 10
3. Carton Contents. . . . . . . . . . . . . . . . . . . . . . . . . . . . . . . . 11
4. Features. . . . . . . . . . . . . . . . . . . . . . . . . . . . . . . . . . . . . . 12
4.1 Vacuum Canister . . . . . . . . . . . . . . . . . . . . . . . . . . 12
4.2 Handle and Hose. . . . . . . . . . . . . . . . . . . . . . . . . . 13
4.3 Sanitizing Power Head. . . . . . . . . . . . . . . . . . . . . . 14
4.4 Telescoping Wand . . . . . . . . . . . . . . . . . . . . . . . . . 15
4.5 Accessories. . . . . . . . . . . . . . . . . . . . . . . . . . . . . . 15
5. Assembly. . . . . . . . . . . . . . . . . . . . . . . . . . . . . . . . . . . . . 16
5.1 Connecting the Hose. . . . . . . . . . . . . . . . . . . . . . . 16
5.2 Connecting the Telescoping Wand. . . . . . . . . . . . . 17
5.3 Connecting the Sanitizing Power Head. . . . . . . . . . 17
6. CleanWave Sanitizing Bagless Vacuum Operation . . . . . . 18
6.1 Handle. . . . . . . . . . . . . . . . . . . . . . . . . . . . . . . . . . 18
6.2 Cord Release / Rewind. . . . . . . . . . . . . . . . . . . . . . 18
6.3 Canister. . . . . . . . . . . . . . . . . . . . . . . . . . . . . . . . . 19
6.4 Handle and Hose. . . . . . . . . . . . . . . . . . . . . . . . . . 19
6.5 Sanitizing Power Head. . . . . . . . . . . . . . . . . . . . . . 19
6.6 Operating Modes. . . . . . . . . . . . . . . . . . . . . . . . . . 20
6.7 Using the Accessories . . . . . . . . . . . . . . . . . . . . . . 22
7. Care and Maintenance. . . . . . . . . . . . . . . . . . . . . . . . . . . 23
7.1 How to Empty . . . . . . . . . . . . . . . . . . . . . . . . . . . . 23
7.2 Cleaning and Replacing Filters. . . . . . . . . . . . . . . . 24
7.3 HEPA-12 Pre-Filter. . . . . . . . . . . . . . . . . . . . . . . . . 24
7.4 Sponge Filter . . . . . . . . . . . . . . . . . . . . . . . . . . . . . 25
7.5 HEPA-12 Exhaust Filter . . . . . . . . . . . . . . . . . . . . . 25
7.6 Replacement Filters . . . . . . . . . . . . . . . . . . . . . . . . 25
7.7 Cleaning and Replacing the Sanitizing Light Bulb. . 26
7.8 Sanitizing Light Bulb Disposal. . . . . . . . . . . . . . . . . 27
7.9 Replacement Part List . . . . . . . . . . . . . . . . . . . . . . 28
8. Troubleshooting . . . . . . . . . . . . . . . . . . . . . . . . . . . . . . . . 29
9. Five Year Limited Warranty. . . . . . . . . . . . . . . . . . . . . . . . 31
1. Important Safety Instructions
SAVE THESE INSTRUCTIONS.
READ ALL INSTRUCTIONS BEFORE USING YOUR CLEANWAVE® SANITIZING BAGLESS VACUUM.
When using an electrical appliance, the following basic safety precautions should always be observed.
WARNING: To reduce the risk of fire, electric shock or injury:
•
•
•
•
•
•
•
•
•
•
•
•
•
•
•
•
•
•
Follow all labels and instructions.
For household use only.
Use only as described in this manual. Use only manufacturer’s recommended attachments.
Keep hair, loose clothing, fingers, and all parts of body away from openings and moving parts.
Never pick up or turn the Sanitizing Power Head over while the Sanitizing Light Bulb is in use.
Never touch the bottom of the Sanitizing Power Head while it is in use. After use, allow to cool before handling.
Turn off all controls before unplugging and storing your CleanWave Sanitizing Bagless Vacuum.
Never run your CleanWave Sanitizing Bagless Vacuum over its own cord.
Hold plug when rewinding onto cord reel. Do not allow plug to whip when rewinding.
Do not put any object into openings. Do not use with any opening blocked; keep free of dust, lint, hair, and anything that may reduce air flow.
Never place — or allow children to place — any objects into any openings of the CleanWave Sanitizing Bagless Vacuum cleaner.
Exercise caution when vacuuming near rug edges and fringe.
Do not vacuum anything that is burning or smoking, such as cigarettes, matches or hot ashes.
Never use the suction to pick up small objects such as coins, screws, paper clips or similar items.
Do not leave appliance when plugged in. Unplug from outlet when not in use and before servicing.
Do not use outdoors or on wet surfaces. Use only on dry, indoor surfaces.
Do not allow to be used as a toy. Close attention is necessary when used by or near children.
Do not use with a damaged cord or plug. If appliance is not working as it should, has been dropped, left outdoors or dropped into water, return it to a service
center per Verilux customer service.
• To reduce the risk of electric shock, this appliance has a polarized plug (one blade is wider than the other). This plug will fit in a polarized outlet only one way. If
the plug does not fit fully in the outlet, reverse the plug. If it still does not fit, contact a qualified electrician to install the proper outlet. Do not change the plug in
any way.
• Do not pull or carry cord, use cord as a handle, close a door on cord or pull cord around sharp edges or corners. Do not run appliance over cord.
Keep cord away from heated surfaces.
3
1. Important Safety Instructions — continued
•
•
•
•
•
•
•
•
•
•
•
•
•
•
•
•
•
•
•
•
•
•
•
4
Do not unplug by pulling on cord. To unplug, grasp the plug, not the cord.
Do not handle plug or appliance with wet hands.
Turn off all controls before unplugging.
Use extra care when cleaning on stairs.
Do not use to pick up flammable or combustible liquids, such as gasoline, or use in areas where they may be present.
Do not use without dirt cup and filters in place.
Store the CleanWave® Sanitizing Bagless Vacuum indoors. Put the CleanWave Sanitizing Bagless Vacuum away after use to prevent tripping accidentally.
Using improper voltage may result in damage to the motor and electronics and possible injury to the user. The correct voltage is listed on the rating label.
This CleanWave Sanitizing Bagless Vacuum is provided with double insulation. Use only identical replacement parts. See instructions for Servicing of DoubleInsulated Appliances.
This CleanWave Sanitizing Bagless Vacuum is not intended for use by persons, including children, who are not mentally able, physically capable, or who do not
understand the product.
Not for use by children. Keep this product away from children and infants.
Do not ride on or drop this product.
Do not set any materials or objects on top of the CleanWave Sanitizing Bagless Vacuum.
If there are abnormal product sounds, smells or fumes, unplug the device immediately and contact customer service.
To prevent fire or shock hazard, do not expose this product to rain or excessive moisture.
All user-serviceable parts are listed in Table 7-1. For servicing non-user-serviceable parts, please refer to qualified service personnel.
Servicing is required when the apparatus is damaged in any way, such as power supply cord or plug is damaged, liquid has been spilled or objects have fallen
into the apparatus, the apparatus has been exposed to rain or moisture, does not operate normally, or has been dropped.
There are a number of floor sensors on the underside of the unit. These floor sensors prevent the Sanitizing Light Bulb from activating when the product is
removed from the cleaning surface. The Sanitizing Light Bulb will re-activate when placed back on a cleaning surface.
For your safety, DO NOT attempt to manually override the floor sensors.
DO NOT point the Sanitizing Power Head directly at your or anyone’s face or skin.
Do not touch the Sanitizing Light Bulb during or directly after use; it may be hot and may burn.
Never use this device on pets.
Allow bulb to cool before replacing.
1. Important Safety Instructions — continued
WARNING: Do not override vacuum safety features — prolonged and direct exposure to UV-C light can cause serious skin
burn and eye inflammation. Direct light radiation from the bulbs used in this vacuum is harmful to the eyes and skin. Do not
attempt to override or defeat safety mechanisms exposing eyes or skin to direct UV-C light.
WARNING: Be careful to not break the bulb. UV-C light bulbs contain a small amount of mercury, which can cause injury if
inhaled or ingested.
WARNING: The UV-C light bulb used in this vacuum contains a small amount of mercury, which is a chemical known to the
state of California to cause birth defects or other reproductive harm.
CAUTION: Overriding of vacuum safety features may result in overexposure of UV-C Light. Overexposure may degrade plastic,
rubber and carpet and may cause colors to fade.
Ultraviolet (UV-C) Radiation Hazard
Overexposure will cause significant eye
damage and may cause skin damage.
Do not look into UV-C light source.
5
1. Instructions de sécurité importantes
CONSERVER CES INSTRUCTIONS
LIRE TOUTES LES INSTRUCTIONS AVANT D’UTILISER L’ASPIRATEUR DÉSINFECTANT CLEANWAVE®
Les précautions élémentaires suivantes doivent toujours être prises lors de l’utilisation d’un appareil électrique.
AVERTISSEMENT : Pour réduire le risque d’incendie, de décharge électrique ou de blessure :
•
•
•
•
•
•
•
•
•
•
•
•
•
•
•
•
•
•
6
Observer tous les avertissements qui figurent sur les étiquettes et toutes les instructions.
À usage domestique uniquement.
Utiliser comme décrit dans ce manuel. Utiliser uniquement les accessoires recommandés par le fabricant.
Garder les cheveux, vêtements lâches, doigts et toute autre partie du corps à l’écart des ouvertures et pièces mobiles de l’appareil.
Ne jamais saisir ou tourner l’électrobrosse désinfectante pendant que l’ampoule UV-C est allumée.
Ne jamais toucher le bas de l’électrobrosse désinfectante pendant qu’elle fonctionne. Après son utilisation, la laisser refroidir avant de la manipuler.
Mettre toutes les commandes hors fonction avant de débrancher et de ranger votre aspirateur désinfectant.
Ne jamais passer l’aspirateur désinfectant sur son cordon d’alimentation.
Tenir la fiche en rembobinant le fil. Ne pas laisser la fiche fouetter l’air en rembobinant le fil.
Ne pas insérer d’objet dans les ouvertures de l’appareil. Ne pas utiliser un appareil dont une ouverture est bloquée; garder l’appareil libre de toute saleté, des
peluches, cheveux ou de tout autre corps pouvant réduire le débit d’air.
Ne jamais placer ou permettre aux enfants de placer des objets dans les ouvertures de l’aspirateur désinfectant. Faire preuve de prudence en passant
l’aspirateur sur le bord des tapis et à proximité de franges.
Ne pas aspirer avec l’appareil tout objet ou toute substance qui brûle ou fume, comme des mégots de cigarette, des allumettes ou des cendres chaudes.
Ne jamais utiliser la succion pour ramasser de petits objets comme des pièces de monnaie, des vis, des trombones ou autres articles similaires.
Ne jamais laisser l’appareil branché sans surveillance. Le débrancher de la prise lorsqu’il n’est pas utilisé ou avant d’effectuer son entretien.
Ne pas utiliser cet appareil à l’extérieur ou sur des surfaces mouillées. Utiliser uniquement sur des surfaces sèches, à l’intérieur.
Ne pas permettre que cet appareil soit utilisé comme un jouet.
Faire preuve de grande prudence lorsque l’appareil est utilisé par des enfants ou à proximité d’enfants.
Ne pas utiliser si le cordon ou la fiche est endommagé. Si l’appareil ne fonctionne pas correctement, qu’il a été échappé, laissé à l’extérieur ou plongé dans
l’eau, le retourner dans un centre de réparation selon les instructions du service à la clientèle de Verilux.
1. Instructions de sécurité importantes — suite
• Pour réduire le risque de décharge électrique, cet appareil est muni d’une fiche polarisée (une broche est plus large que l’autre). La fiche ne s’insère dans une
prise polarisée que dans une seule direction. Si la fiche ne s’insère pas complètement dans la prise, l’essayer dans l’autre sens. Si elle ne s’insère toujours pas,
contacter un électricien qualifié pour qu’il pose une prise adéquate. Ne pas modifier la fiche de quelque façon que ce soit.
• Ne pas tirer ou saisir l’appareil par son cordon, se servir de ce dernier comme d’une poignée, fermer une porte sur le cordon ou tirer celui-ci autour d’un coin et
d’un bord coupant. Ne pas passer l’appareil sur le cordon. Garder le cordon à l’écart des surfaces chauffées.
• Ne pas débrancher l’appareil en tirant sur le cordon. Saisir la fiche pour débrancher l’appareil, et non le cordon.
• Ne pas manipuler la fiche ou l’appareil avec les mains mouillées.
• Mettre toutes les commandes hors fonction avant de débrancher l’appareil.
• Faire preuve de prudence en passant l’aspirateur dans les escaliers.
• Ne pas utiliser l’appareil pour aspirer des liquides inflammables ou combustibles comme de l’essence ou ne pas l’utiliser dans des endroits où de telles
substances pourraient être présentes.
• Ne pas utiliser l’appareil sans le vide-poussière et les filtres.
• Ranger l’aspirateur désinfectant à l’intérieur. Ranger l’aspirateur désinfectant après son usage pour éviter les risques de trébuchement.
• L’utilisation d’une tension inadéquate peut entraîner des dommages au moteur et des blessures possibles à l’utilisateur. La bonne tension est indiquée sur
l’étiquette de tension nominale.
• Cet aspirateur désinfectant est doublement isolé. N’utiliser que des pièces de rechange identiques. Consulter les instructions sur la façon de réparer ou
d’effectuer l’entretien d’appareils doublement isolés.
• Cet aspirateur désinfectant n’a pas été prévu pour être utilisé par des personnes, y compris les enfants, qui ont une incapacité mentale ou physique ou qui ne
comprennent pas comment se servir du produit.
• Usage non prévu par des enfants.
• Garder cet appareil hors de portée des enfants et bébés.
• Ne pas monter sur cet appareil et ne pas l’échapper au sol.
• Ne pas poser d’articles ou d’objets sur le dessus de l’aspirateur désinfectant.
• Si l’appareil produit des odeurs, des vapeurs ou des sons anormaux, le débrancher immédiatement et communiquer avec le service à la clientèle.
• Pour prévenir les risques d’incendie ou de décharge électrique, ne pas exposer l’appareil à la pluie ou à une humidité excessive.
• Toutes les pièces utiles d’utilisateur sont énumérées à la Table 7-1. Pour les pièces utiles de service de non-utilisateur, référez-vous svp au personnel de service
qualifié.
7
1. Instructions de sécurité importantes — suite
• Une réparation est nécessaire si l’appareil est endommagé, par exemple, si le cordon ou la fiche du cordon est endommagé, si un liquide a été renversé ou si
des objets sont tombés dans l’appareil, si ce dernier a été exposé à la pluie ou à l’humidité, s’il ne fonctionne pas normalement ou s’il a été échappé.
• L’appareil est doté d’un certain nombre de commutateurs de sécurité sous l’unité. Trois commutateurs empêchent l’activation de l’ampoule UV-C lorsque
l’appareil est retiré de la surface à nettoyer. L’ampoule UV-C se réactive lorsque l’appareil est de nouveau placé sur la surface à nettoyer.
• Pour votre sécurité, NE PAS tenter de neutraliser manuellement les commutateurs de sécurité.
• NE PAS diriger l’électrobrosse désinfectante vers le visage ou la peau de quelqu’un.
• Ne pas toucher l’ampoule UV-C pendant son utilisation ou immédiatement après, car elle peut être chaude et vous brûler.
• Ne jamais utiliser cet appareil sur un animal de compagnie.
• Laisser l’ampoule refroidir avant de la remplacer.
AVERTISSEMENT : Ne pas remplacer les dispositifs de sécurité à vide - une exposition prolongée et directe à la lumière
UV-C peut causer de graves brûlures de peau et une inflammation oculaire. Direct rayonnement lumineux des ampoules
utilisées dans ce vide est nocif pour les yeux et la peau. Ne pas essayer de remplacer ou de la défaite des mécanismes de
sécurité exposant les yeux ou la peau de diriger la lumière UV-C.
AVERTISSEMENT : Prendre soin de ne pas briser l’ampoule. Les ampoules UV-C contiennent une petite quantité de
mercure qui peut causer des blessures s’il est inhalé ou ingéré.
AVERTISSEMENT : L’ampoule UV-C utilisée dans cet aspirateur contient une petite quantité de mercure, une substance
chimique reconnue par l’État de la Californie comme causant des anomalies congénitales ou étant nocif pour l’appareil
reproducteur.
MISE EN GARDE : Remplacement des dispositifs de sécurité à vide peut entraîner une surexposition de la lumière UV-C. La
surexposition peut se dégrader en plastique, du caoutchouc et de tapis et peut altérer les couleurs.
8
1. Instructions de sécurité importantes — suite
DANGER
Risque de rayonnement ultraviolet (UV-C)
La surexposition causera des lésions
importantes aux yeux et possiblement à la peau.
Ne pas regarder directement une source de
lumière UV-C.
POTENTIELLE DE
AVERTISSEMENT LIBÉRATION
SPORES DE MOISISSURE
L’application d’une lumière UV-C sur des
moisissures existantes peut causer une irritation
respiratoire et des symptômes allergiques. Ne
pas utiliser de lumière UV-C en présence
d’infestation active de moisissure. Éliminer les
moisissures des surfaces avant l’exposition.
9
2. CleanWave® Sanitizing Bagless Vacuum
2.1 Introduction
Your new Verilux® CleanWave Sanitizing Bagless Vacuum is both a convenient and powerful vacuum with Ultraviolet (UV-C) Light
Technology to sanitize, deodorize and eliminate harmful germs while cleaning your carpets, upholstery and floors.
As a vacuum, the combination of powerful suction and sanitizing light quickly removes dust and dirt and kills germs on surfaces. It
also kills bed bugs, dust mite eggs and bed bug eggs on surfaces — a leading cause of asthmatic and allergic* reactions.
2.2 Special Functions
Your new Verilux CleanWave Sanitizing Bagless Vacuum features include:
• A powerful Ultraviolet (UV-C) illumination system that with regular use can eliminate up to 99.9%† of germs, including H1N1 and
MRSA†† on surfaces.
• Specially designed floor sensor safety switches that prevent direct exposure to UV-C light, assuring your vacuum is always safe
to operate. Note: do not override these floor sensor safety switches.
• A sanitizing vacuum that removes germs and mold, and kills bed bug, dust mite and flea eggs.
• Easy-to-empty dirt cup. No messy bags.
• Multi-stage Filtering: The Cone Filter captures long fibers such as pet hair while the Sponge Filter captures large particles. The
HEPA-12 Pre-Filter captures small particles and keeps the canister motor clean while the HEPA-12 Exhaust Filter assures only
clean air is expelled into the room with 99.5% efficiency.
• Deodorizes and removes dangerous allergens*.
• Perfect for use on carpets and hard floors.
* Effective on allergens such as mold, bed bugs, dust mite eggs and bed bug eggs.
†Eliminates 99.9% of germs, viruses and other micro-organisms on non-porous surfaces. Time required to reach 99% on porous
surfaces is dependent upon surface and microbial type.
††Specifically tested on methicillin resistant Staphlococcus aureus ATCC 33592.
10
3. Carton Contents
Remove all parts from the carton and identify each item as shown below.
Make sure all items are removed before recycling the packaging material.
1.
2.
3.
4.
5
6
Sanitizing Power Head
Vacuum Canister
Handle and Hose
Telescoping Wand
Crevice Tool, Dusting Brush and Upholstery Tool
Owner’s Manual, Other Literature
4
3
1
5
2
6
11
4. Features
4.1 Vacuum Canister
1. ON/OFF Switch
2. Suction Control Slider
3. Low Airflow Indicator
4. Canister Handle
5. Retractable Power Cord
6. Cord Rewind Button
7. Dirt Cup
8. Release Latch
9. Canister Inlet
10. Canister Power Receptacle
11. Sponge Filter
12. HEPA-12 Pre-Filter
13. Cone Filter
14. HEPA-12 Exhaust Filter
15. Filter Access Panel
13
16. Access Panel Tabs
4
1
4.1
6
2
3
8
14
2
7
9
11
12
10
6
5
12
1
15
16
4. Features — continued
4.2 Handle and Hose
1.
2.
3.
4.
5.
6.
Power Head ON/OFF Switch
Airflow Selector
Wand Coupler
Hose Power Plug
Canister Coupler
Release Button
4.2
3
1
5
2
4
3
6
4
13
4. Features — continued
4.3 Sanitizing Power Head
1. Mode Selector Switch
2. Mode Indicator
3. Floor Selector
4. Syphon Receptacle
5. Syphon Release
6. Headlight
7. Sanitizing Light Bulb
8. Bulb Cover
9. Floor Sensor (safety switch)
10. Powered Brush Roll
11. Squeegee
12. Bulb Cover
Release Tabs
4.3
3
5
4
2
1
3
2
5
1
10
14
12
9
9
7
11
8
6
4
4. Features — continued
4.4 Telescoping Wand
1.
2.
3.
4.
4.4
Wand Receptacle
Release Button
Release Cuff
Sanitizing Power Head Coupler
1
1
4.5 Accessories
1. Crevice Tool
2. Dusting Brush
3. Upholstery Tool
2
3
2
4
3
4.5
15
5. Assembly
Note: Before assembling or disassembling, always ensure that the
CleanWave® Sanitizing Bagless Vacuum has been unplugged from
the electrical outlet.
5.1
5.1 Connecting the Hose
1. Align the latch of the Canister Coupler (A) with the Canister
Inlet (B) and push until the latch clicks. To disconnect, press
the Release Button (C) on the Canister Coupler (A) and
pull out.
2. Insert the Hose Power Plug (D) into the Canister Power
Receptacle (E) pressing firmly to ensure a good connection.
To disconnect, grasp the Hose Power Plug (D) firmly and
pull out.
C
B
A
E
D
16
5. Assembly — continued
5.2 Connecting the Telescoping Wand
1. Align the Wand Coupler (A) with the Wand
Receptacle (B) and push together until
the latch clicks. To disconnect, press the
Release Button (C) and pull apart.
2. To operate the Telescoping Wand, grab
the Release Cuff (D) and push it forward to
extend the wand and pull it back to contract
the wand.
5.2
C
A
B
D
D
A
5.3
B
C
5.3 Connecting the Sanitizing Power Head
1. Align the Sanitizing Power Head Coupler (A) with
the Syphon Receptacle (B) and push together
firmly until they latch. To disconnect, depress
(step on) the Syphon Release (C) and pull Wand
(D) out of Syphon Receptacle (B).
17
6. CleanWave® Sanitizing Bagless Vacuum Operation
6.1 Handle
1. Grasp the Canister Handle (A) to move
the CleanWave® Sanitizing Bagless
Vacuum from room to room. Before
moving, make sure the Dirt Cup is
secured and the canister is unplugged
from the electrical outlet.
A
6.1
C
6.2 Cord Release / Rewind
1. Pull on the Power Cord (B) to unwind
to desired length and insert the plug
into a convenient electrical outlet. The
yellow mark on the Power Cord (B)
shows the typical cord length. Do not
pull out beyond the red mark.
2. When done vacuuming, retract the
Power Cord by pressing the Cord
Rewind Button (C) and guiding the
Power Cord into the canister with one
hand.
A
C
B
18
6.2
6. CleanWave® Sanitizing Bagless Vacuum Operation — continued
Vacuum Suction Controls
6.3 Canister
1. ON/OFF Button (A)
Press to turn the canister on and off.
2. Suction Control Slider (B)
Slide to the maximum position (closest to
ON/OFF Button) for the maximum suction
power.
6.4 Handle and Hose
1. Power Head ON/OFF Button (C)
Press to turn the Sanitizing Power Head on
and off.
2. Airflow Selector (D)
Slide the Airflow Selector to the open
position to reduce suction when cleaning
delicate fabrics.
6.5 Sanitizing Power Head
1. Floor Selector (E)
The 3-position Floor Selector provides
adjustment for the desired cleaning surface.
Slide Floor Selector to match the floor type:
i)bare floor,
ii)low-pile carpet,
iii)high-pile carpet.
6.4
6.3
A
B
C
D
6.5
E
19
6. CleanWave® Sanitizing Bagless Vacuum Operation — continued
6.6 Operating Modes
The Sanitizing Power Head has three operating modes:
i) Carpet,
ii) Sanitize,
iii) Both.
1. The Mode Indicator (A) will illuminate as one of three colors
depending on the selected operating mode. The Sanitizing Power
Head will be controlled as shown in Table 6-1, with the default
power-up mode being Carpet Mode:
A
B
6.6
Table 6-1. CleanWave® Sanitizing Bagless Vacuum Operating Modes.
Operating Mode
Carpet
Mode Indicator Color
Sanitizing Light
Powered Brush Roll
Suction
Function
On
On
Powered Brush Roll
& Suction
Red
Off
Sanitize
Blue
On
Off
On
Sanitizing & Suction
Both
Purple
On
On
On
Sanitizing, Powered Brush Roll & Suction
Surface Protection
Sanitize Mode (Blue)
Both Mode (Purple)
(slow blinking)
Off
Sanitize Mode (Off)
Both Mode (On)
On
Protects surfaces from overexposure to UV-C light
Low Airflow
Red
(rapid blinking)
Off
Off
On
Notice: Clean all filters and clear any blockages.
See Section 7.
2. Press the Mode Selector Switch (B) repeatedly to select the desired operating mode.
3. Proceed to vacuum your floors and surfaces just as you normally would. You can sanitize your floors and surfaces at the
same time with little or no additional effort.
20
6. CleanWave® Sanitizing Bagless Vacuum Operation — continued
Carpet Mode
Select Carpet Mode for conventional vacuuming with a Powered Brush Roll and Powerful Suction. Use this setting when you
wish to operate the power brush without the sanitizing light. The Mode Indicator will illuminate as RED.
Sanitize Mode
Select the Sanitize Mode when you want to sanitize and vacuum your carpets and floors with Sanitizing Light and Powerful
Suction. The Sanitizing Light Bulb will turn on when the Floor Sensors detect a surface. When the Sanitizing Light Bulb is on, the
Mode Indicator will illuminate as BLUE. Use this setting when you wish to operate the sanitizing light without the roller brush. The
Sanitizing Light Bulb will turn off when the Floor Sensors do not detect a surface, such as when the Sanitizing Power Head is lifted
off the floor. When this occurs, the Mode Indicator will not be illuminated (turns off).
Both Mode (Carpet and Sanitize Modes Simultaneously)
Select the Both Mode when you want to combine Sanitizing Light with a Powered Brush Roll and Powerful Suction. When the
Sanitizing Light Bulb is on, the Mode Indicator will illuminate as PURPLE. The Sanitizing Light Bulb will turn off when the Floor
Sensors do not detect a surface. When this occurs, the Mode Indicator will not be illuminated (turns off).
Surface Protection
When the Sanitizing Power Head is held or left stationary on a surface (i.e., not moving) for more than 5 seconds, the Sanitizing
Light Bulb will automatically turn off. When this occurs, the Mode Indicator will blink slowly (blink BLUE if in Sanitize Mode; blink
PURPLE if in Both Mode). Once movement is re-initiated, the Sanitizing Light Bulb will turn back on and the Mode Indicator
blinking will stop. This happens automatically and is one of the features designed into your canister vacuum to protect your
surfaces.
Deep Pile (Shag) Carpet Operation
For best performance when sanitizing shag-type carpets, move the Sanitizing Power Head back-and-forth at a slightly faster pace
than your normal vacuuming stroke. If the speed on shag-type carpet is too slow, the vacuum will enter the Surface Protection
mode and the Mode Indicator will slowly blink BLUE or PURPLE. The blinking will stop once sufficient speed is achieved.
21
6. CleanWave® Sanitizing Bagless Vacuum Operation — continued
6.7 Using the Accessories
The accessories can be used by
sliding them onto either the Wand
Coupler of the Hose and Handle
or to the Sanitizing Power Head
Coupler of the Telescoping Wand.
Crevice Tool
Use the crevice tool in tight
spaces, corners or along edges
such as baseboards and stairs.
You can use this tool in drawers,
cupboards and upholstery.
22
6.7
Dusting Brush
Select the dusting brush to
clean furniture, lamps, lighting
fixtures, blinds, drapes, shutters,
baseboards and registers.
Upholstery Tool
The upholstery tool can be used
to clean upholstery, carpeted
stairs and mattresses.
7. Care and Maintenance
Note: Always unplug the CleanWave® Sanitizing Bagless Vacuum from
the electrical outlet prior to completing any care and maintenance.
Dirt Cup
Empty the Dirt Cup (A) after each use.
7.1
C
B
A
7.1 How to Empty
1. Disconnect Power Cord from electrical outlet.
2. Remove the Dirt Cup (A) by lifting up on the Cup Release Latch (C).
3. Hold the Dirt Cup (A) over a garbage receptacle and press on the
Lid Release Latch (D) to open and empty the Dirt Cup (A). For bed
bug disposal, see note below.
4. After emptying the Dirt Cup (A), remove and clean the Cone Filter (E)
by rotating counter-clockwise and pulling out. If desired, rinse with
water, dry completely, and replace Cone Filter (E) by inserting and
rotating clock-wise to lock.
5. Close the Lid (F) and slide Dirt Cup (A) into the canister until it
securely latches.
Note: When disposing of bed bugs, tie or seal garbage bag tightly and
immediately remove from home. Do not leave inside home.
D
F
E
Note: When removed, emptied, and with filters removed, the Dirt Cup
(A) may be washed with mild detergent and water.
Note: The Cone Filter (E) is specially designed to trap and capture pet
hair. This filter may require frequent cleaning if exposed to large amounts
of pet hair.
23
7. Care and Maintenance — continued
7.2 Cleaning and Replacing Filters
For best performance, clean filters after each use. Replace filters
periodically depending on frequency of use and the amount of dirt
picked up with each use.
D
7.3
Note: If the Power Head Mode Indicator light begins to rapidly blink
RED, the airflow may be blocked. The Low Airflow Indicator (A) may also
be illuminated. Clean all filters as directed below.
A
C
How to Clean
Before cleaning or replacing any filters, disconnect Power Cord from
electrical outlet.
7.3 HEPA-12 Pre-Filter
The HEPA-12 Pre-Filter (B) is located outside dirt cup (C).
1. Remove the Dirt Cup (C) by lifting up on the Release Latch (D).
2. The HEPA-12 Pre-Filter (B) can be removed by pressing the
Release Tab (E) and rotating away from the Dirt Cup (C).
3. Gently tap the filter on the inside of a garbage receptacle to remove
excess dust and dirt.
4. Replace filter by aligning Hinge Tabs (F) and rotating into place until
latched into the Dirt Cup (C).
24
B
E
F
7. Care and Maintenance — continued
7.4 Sponge Filter
The Sponge Filter is located behind the HEPA-12 Pre-Filter attached to the Dirt Cup.
1. Access the Sponge Filter by first removing the HEPA-12 Pre-Filter.
2. Grasp Sponge Filter and remove.
3. Hold filter under cold running water to remove dirt. Squeeze filter to remove excess
water and allow to dry completely.
4. Replace filter into Dirt Cup with proper orientation.
7.4
Note: Assure the Sponge Filter and the HEPA-12 Pre-Filter are installed properly before replacing the Dirt Cup into the Canister.
7.5 HEPA-12 Exhaust Filter
The HEPA-12 Exhaust Filter (A) is located under the Filter Access
Panel (B) on the back of the canister.
1. Remove the the HEPA-12 Exhaust Filter (A) by lifting up on
the Access Panel Tabs (C).
2. Grasp the filter by the tab (D) and lift away from canister.
3. Gently tap the filter on the inside of a garbage receptacle to
remove excess dust and dirt.
4. Replace filter by first aligning filter’s rear edge inside the lip of
the recess and then rotate filter down flat into recess (E).
5. Replace Filter Access Panel (B) by first aligning capture tabs,
then pressing down on the two Access Panel Tabs (C) to
latch in place.
B
7.5
C
A
D
E
7.6 Replacement Filters
A Replacement Filter Kit is available for purchase. Please refer to the Replacement Part List in Table 7-1 on page 28.
25
7. Care and Maintenance — continued
7.7 Cleaning and Replacing the Sanitizing Light Bulb
The Sanitizing Light Bulb (A) is located on the bottom of the
Sanitizing Power Head (B).
7.7a
B
A
C
Note: Before cleaning or replacing the Sanitizing Light
Bulb (A), disconnect Power Cord from electrical outlet.
Also disconnect the Sanitizing Power Head (B) from the
Telescoping Wand.
F
1. Turn the Sanitizing Power Head (B) over (bottom up)
with the Powered Brush Roll (C) closest to you.
D
2. With one hand, depress one Bulb Cover Release Tab (D)
by pulling it toward the Powered Brush Roll (C).
3. With the other hand, grasp the Squeegee (E) near the
Bulb Cover Release Tab (D) and gently lift the Bulb
Cover (F).
4. Repeat Steps 2 and 3 for the other Bulb Cover Release
Tab (D). The Bulb Cover (F) should now lift freely from the
Sanitizing Power Head (B).
F
E
D
C
E
5. Wipe the Sanitizing Light Bulb (A) clean with a soft,
dry cloth. Be careful not to leave fingerprints on the
Sanitizing Light Bulb (A) or the Reflector.
F
26
7. Care and Maintenance — continued
6. Should additional cleaning be required or if replacing the Sanitizing Light Bulb,
remove the Sanitizing Light Bulb (A) by depressing the Bulb Socket Tab (H)
with your thumb. Grasp the Bulb Cap Tab (I) with your other hand and lift the
Bulb Cap (G) and Sanitizing Light Bulb (A) away from the Power Head (B).
7. Gently grasp the Sanitizing Light Bulb (A) and remove from Bulb Socket.
8. Wipe Sanitizing Light Bulb (A) and Reflector clean with a soft, dry cloth.
9. To re-install the Sanitizing Light Bulb (A), place the Bulb Cap (G) over end of
the Sanitizing Light Bulb (A).
10. With your thumb, depress the Bulb Socket Tab (H).
11. Grasp the Sanitizing Light Bulb (A), align its four pin conductors with the four
holes in the Bulb Socket. Firmly insert the Sanitizing Light Bulb (A) into the
Bulb Socket.
12. Slide the Bulb Cap (G) end down into the Capture Slots (I) of the Sanitizing
Power Head (B) to secure the Sanitizing Light Bulb (A) in place.
13. To replace the Bulb Cover (F) , first assure the Squeegee (E) is slid on
completely. Grasp the Bulb Cover (F) by the Squeegee (E) with both hands,
place opposite edge into recessed slots, rotate down and press firmly until
latched securely.
A
7.7b
G
E
F
H
I
Note: Use only Verilux Sanitizing Light Bulbs. Use of non-Verilux light bulbs can result
in damage to the unit. To order a replacement Verilux Sanitizing Light Bulb, refer to the
Replacement Part List on Table 7-1.
7.8 Sanitizing Light Bulb Disposal
If disposing of a Verilux Sanitizing Light Bulb, follow local regulations for proper
disposal. For more information, see www.lamprecycle.org or call 1-866-666-6850.
B
27
7. Care and Maintenance — continued
7.9 Replacement Part List
For ordering information, see below.
Table 7-1 Replacement Part List
Part Number
Price*
Telescoping Wand
Replacement Part
VH04WD1
$39.95
Hose and Handle
VH04HH1
$39.95
Belt and Brush Roll Kit (Drive Belt, Brush Roll)
VH04BR1
$14.95
UV Bulb Kit (Sanitizing Light Bulb, Bulb Cap)
VH04RB1
$14.95
Bulb Cover Kit (Bulb Cover, Grill, Squeegee)
VH04BC1
$9.95
Attachment Kit (Crevice Tool, Dusting Brush, Upholstery Tool)
VH04AK1
$9.95
Filter Kit (HEPA-12 Pre-Filter, HEPA-12 Exhaust Filter, Sponge Filter)
VH04RF1
$14.95
*Prices do not include Shipping & Handling, and are subject to change without notice.
To order please visit our web site at www.verilux.com
or Call our Order Department at
1-800-454-4408
Monday – Saturday 8 AM – 10 PM; Sunday 9 AM – 8 PM Eastern Time
Canadian Customers Order by Phone Only
1-800-786-6850
28
8. Troubleshooting
8.1 Troubleshooting
To troubleshoot your vacuum, see Table 8-1 below.
Note: Always turn off the vacuum and disconnect the power cord from the electrical outlet before troubleshooting or servicing.
Table 8-1 Troubleshooting Your Vacuum
Problem
Vacuum cleaner
will not run, or
runs intermittently
Poor Suction:
Canister /
Sanitizing Power
Head
Possible Cause
Possible Solution
Reference
Switch not “ON” on Canister.
Toggle switch to “ON” on canister.
6.3
Switch not “ON” on Hose/Handle.
Toggle switch to “ON” on hose handle.
6.4
No voltage at wall electrical outlet.
Try a different electrical outlet or contact a
licensed electrician.
N/A
Power cord not securely plugged in.
Plug power cord securely in wall electrical outlet.
6.2
Filter(s) are dirty or clogged.
Clean or replace filters.
Dirt Cup is full.
Empty Dirt Cup.
7.1—7.6
7.1
Blockage in Sanitizing Power Head
Syphon, Wand or Hose.
Carefully remove blockage.
N/A
Suction power controls open.
Slide Suction Control Slider to maximum position
and Airflow Selector to closed position; set Floor
Selector for bare floors.
6.3—6.5
Loose hose or wand connection.
Check that all hose and wand connections are
secured properly.
5.1—5.3
29
8. Troubleshooting — continued
Problem
Sanitizing Power
Head will not
run, or runs
intermittently
Sanitizing Light
Bulb does not
illuminate
Possible Cause
Possible Solution
Sanitizing Power Head Coupler or Wand
Coupler not securely fastened.
Assure Sanitizing Power Head and Hose/Handle
are firmly connected.
5.3
Hose Power Plug not plugged into
Canister
Firmly insert Hose Power Plug.
5.1
Switch not “ON” on Hose/Handle.
Toggle switch to “ON” on hose handle.
6.4
Floor Sensors may not be properly
activated.
Assure the Floor Sensors actuate properly when
Sanitizing Power Head lies flat on cleaning surface.
NA
Sanitizing Power Head is stationary.
Push Sanitizing Power Head back and forth. If the
Sanitizing Power Head is stationary for 5 or more
seconds, the Sanitizing Light Bulb will turn off.
6.6
Floor
Protection
Sanitizing Light Bulb may be burned out. Replace Sanitizing Light Bulb.
Sanitizing Light
Bulb turns off
unexpectedly
7.7
Sanitizing Power Head is stationary.
Push Sanitizing Power Head back and forth. If the
Sanitizing Power Head is stationary for 5 or more
seconds, the Sanitizing Light Bulb will turn off.
6.6
Floor
Protection
Deep Pile (Shag) Carpet
Move the Sanitizing Power Head back-andforth at a slightly faster pace than your normal
vacuuming stroke.
6.6
Deep Pile
(Shag)
Carpet
Operation
Note: Any other servicing should only be completed by authorized service personnel.
30
Reference
9. Five Year Limited Warranty
ATTENTION! ONCE OPENED, PLEASE DO NOT RETURN THIS PRODUCT TO THE STORE WHERE IT WAS
PURCHASED FOR REPAIR OR REPLACEMENT!
Many questions may be answered by visiting www.verilux.com, or you may call our Customer Service Department at
800-786-6850 during normal business hours.
This limited warranty is provided by: Verilux, Inc., 340 Mad River Park, Waitsfield, VT 05673
Covered By This Warranty
Verilux warrants this product when used and maintained in
normal household use and in accordance with the Owner’s
Manual to be free from original defects in material and
workmanship for a period of five years from the date of
the original retail purchase (the “Limited Warranty Period”)
from Verilux or an authorized Verilux distributor. During the
limited warranty period, Verilux, Inc. will, at its option, repair
or replace defective parts of this product, at no charge to
the customer, to correct any such defects.
Not Covered By This Warranty
This warranty does not cover the brush roll, drive belt,
UV-C bulb, motor brushes, wheels or the filters. This
warranty does not include any postage, freight, handling,
insurance, or delivery fees. This warranty does not cover
damage, defect or failure caused by or resulting from
accident, external destruction, alteration, modification,
abuse, misuse or misapplication of this product. This
warranty does not cover damage to the product resulting
from return shipping or handling. The use of shipping
insurance is recommended to help protect your product.
Additional Warranty Terms
This warranty is non-transferable and may not be
assigned. The Limited Warranty Period will not be
extended by any replacement or repair performed under
this warranty.
THIS WARRANTY IS THE EXCLUSIVE WARRANTY AND
REMEDY, ALL OTHER WARRANTIES, EXPRESSED
OR IMPLIED, INCLUDEING WARRANTIES OF
MERCHANTABILITY OR FITNESS FOR PARTICULAR
PURPOSE, ARE DISCLAIMED, IN NO EVENT WILL
VERILUX BE LIABLE FOR ANY SPECIAL, INDIRECT,
INCIDENTAL OR CONSEQUENTIAL DAMAGES OF
ANY KIND OR NATURE TO OWNER OR ANY PARTY
CLAIMING THROUGH OWNER, WHETHER BASED
IN CONTRACT, NEGLIGENCE, TORT OR STRICT
PRODUCTS LIABILITY OR ARISING FROM ANY CAUSE
WHATSOEVER. Some states do not allow the exclusion of
consequential damages, so the above exclusion may not
apply to you. This warranty gives you specific rights; you
may also have others that very from state to state.
Making A Warranty Claim
Proof of purchase is required for all warranty claims.
Return Authorization is required for all returns. To
obtain a Return Authorization, please contact the Verilux
Customer Service Department at 800-786-6850.
If, during the first five years of ownership, this product fails
to operate properly, it should be returned as specified at
www.verilux.com/warrantyreplacement or as instructed by
a Verilux customer service representative at
800-786-6850.
Due to ongoing improvements, the actual product may
have slight variations from the product described in this
manual.
Please visit our website at www.verilux.com or call our Customer Service Department at
1-800-786-6850
Representatives are available Monday — Friday, 9 AM — 5 PM Eastern Time
Do not return product for warranty claim without a Return Authorization number.
31
Printed in China for Verilux, Inc.
VH04-MAN-Rev14
© Copyright 2010 Verilux, Inc. All rights reserved.