1
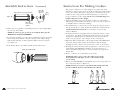
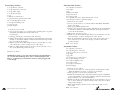
Cordless Cookie Press
USE AND CARE GUIDE
MODEL TMCKM2S
•C
ord
ed/
•P
Co
rep
rdl
a
r
bef
ess
ore es 10
Use
•P
t
o
R
e
res
cha 15 T
s
e
r
u
of
gin
be
a B s out
coo g is n s of c
•A
u
t
t
eed ook
cc
kie
on
sq
ed
ie b
1 F essori
u
atte
ick
i
e
ly, e
r/f
• St ller T s Inc
lud
illin
ip,
ffic
ora
8 D e: 1
ien
ge
g
Box
tly,
2S
eco
at t
rato tain
inc
he
lud
r T less
tou
ips
ed
S
ch
& teel C
2C
o
ann okie
D
oli
For iscs,
ms
?
Questions
Call toll free 1-800-233-9054
Monday – Friday, 8:00 a.m. - 5:30 p.m. CST
www.maxim-toastmaster.com
TMCKM2S
IMPORTANT SAFEGUARDS
When using electrical appliances, basic safety precautions should always
be followed including the following:
◆ Read all instructions.
◆ To protect against risk of electrical shock, do not put cord, plug or
appliance in water or other liquid.
◆ Close supervision is necessary when any appliance is used by or
near children.
◆ Unplug from outlet when not in use, before putting on or taking off
parts and before cleaning.
◆ Avoid contacting moving parts.
◆ Do not operate any appliance with a damaged cord or plug or after
the appliance malfunctions, or is dropped or damaged in any manner.
Contact Consumer Service for examination, repair or electrical or
mechanical adjustment.
◆ The use of attachments not recommended or sold by the
manufacturer may cause fire, electric shock or injury.
◆ Do not use outdoors.
◆ Do not let cord hang over edge of table or counter.
◆ Do not let cord contact hot surface, including the stove.
◆ Do not use an extension cord. Plug Battery Adaptor directly into an
electric outlet.
◆ Use only with the Battery Adaptor provided with the appliance.
Do not attempt to use this Battery Adaptor with any other product.
Likewise, do not attempt to charge this appliance with any other
Battery Adaptor.
◆ Do not incinerate this appliance even if it is severely damaged. The
batteries can explode in a fire.
◆ Keep hands, hair, clothing as well as utensils away from moving parts
and Discs while processing to prevent the risk of severe injury to
persons, or damage to the Cookie Press. Handle Discs and Tips
carefully when removing, inserting or cleaning.
◆ Be certain Tube and Tube Cover is securely locked in place before
operating appliance. Do not attempt to remove the Tube or Cover
while operating.
◆ Before using, check that Tube has no presence of foreign objects.
SAVE THESE INSTRUCTIONS
FOR HOUSEHOLD USE ONLY
1.
ADDITIONAL IMPORTANT
SAFEGUARDS
◆ All users of this appliance must read and understand this Use and
Care Guide before operating or cleaning this appliance.
◆ The cord to this appliance should be plugged into a 120V AC
electrical outlet only.
◆ Do not leave this appliance unattended during use.
◆ If this appliance begins to malfunction during use, immediately
release the ON/OFF Button. The Cookie Press will stop when the
ON/OFF Button is released. Unplug the cord. Do not use or
attempt to repair the malfunctioning appliance.
◆ If this appliance falls or accidentally becomes immersed in water,
unplug it immediately. Do not reach into the water! Do not use this
appliance after it has fallen into or becomes immersed in water.
◆ To reduce the risk of injury to persons or property, never use this
appliance in an unstable position.
Introduction
Congratulations on your purchase of the Toastmaster® Cordless
Cookie Press. Cordless means effortless; ease of operation,
maneuverability and newfound cookie-baking freedom. No more
rolling dough to change shapes! Simply change the disc and the
batter for a dozen new designs and cookies. Push button operation
means each and every cookie will be fashioned to perfection, quickly
and easily.
The Cordless Electric Cookie Press comes packed in its convenient
Storage Box with Handle, complete with a wide selection of
interchangeable Cookie Discs, 1 Filler Tip, 8 Decorator Tips, and
2 Cannoli Shell Forms.
Make bakery style cookies in your own home...change from a Cookie
Disc to a Decorator Tip and you're ready to add the final flourishes to
pastries, cakes and candies. Use the Filler Tip to fill cupcakes and
pastries. Wrap dough around the Cannoli Shell Forms for frying.
Create your own fresh, delicious filling to prepare professional
looking and great-tasting cannoli for family and friends.
◆ Do not use this appliance for other than its intended use.
◆ Do not use an extension cord with this product.
Electric Power
If the electrical circuit is overloaded with other appliances, your
appliance may not operate properly. It should be operated on a
separate electrical circuit from other appliances.
Before Using for the First Time
1. Carefully unpack the Cookie Press in its Storage Box. Slide the box
out to reveal the Cookie Maker and all accessories conveniently
packed inside.
2. After unpacking, wash the Cookie Discs, Filler Tip, Filler Tip/
Decorator Tip Adaptor, Decorator Tips, Cannoli Shell Forms, Tube
Cover, Tube, Cam Disc, Press Disc and Cam Shaft with warm, soapy
water. Rinse and dry thoroughly.
3. Never immerse the Motor Body, Plug, Battery Adaptor or Battery
Adaptor Connector in water or any other liquid.
4. Make sure the Battery Adaptor is unplugged and then wipe all
surfaces with a slightly moistened, soft cloth and dry thoroughly.
5. Thoroughly dry all parts so that no water enters the Motor Body.
2.
Cordless Cookie Press Use and Care Guide
3.
Getting To Know Your Toastmaster®
Cordless Cookie Press
Before using your Cordless Electric Cookie Press for the first time, you
must become familiar with all of the parts. Read all instructions and
safeguards carefully.
Cookie Press Discs & Decorator Tips
12 Cookie Discs
1.
5.
9.
2.
6.
10.
3.
7.
11.
4.
8.
12.
Product may vary slightly from Illustration.
2.
5.
4.
10.
7.
11.
8.
1.
6.
12.
9.
Cookie Disc
Assembly
3.
13.
Figure 2
16.
15.
Figure 1
1. Motor Body
2. ON/OFF Button
3. Cam Disc (P/N 70701B)
4. Connector Inlet
5. Cam Shaft (P/N 70702B)
6. Press Disc (P/N 70703B)
7. Tube (P/N 70704)
8. Cookie Disc
9. Tube Cover (P/N 70706B)
14.
Filler Tip/Decorator Tip
Assembly
10. 2 Cannoli Shell Forms
(P/N 71158, 1 piece)
11. 10mm Filler Tip (P/N 71159)
12. Filler/Decorator Tip Adaptor
(P/N 70705B)
13. Decorator Tip
14. Filler Tip/Decorator Tip
Cover (P/N 70707B)
15. Battery Adaptor Connector
16. Battery Adaptor (P/N 71171)
8 Decorator Tips
Cookie Discs Set (P/N 70708-SET)
Individual Discs:
(P/N 70708-1)
(P/N 70708-2)
(P/N 70708-3)
(P/N 70708-4)
(P/N 70708-5)
(P/N 70708-6)
(P/N 70708-7)
(P/N 70708-8)
(P/N 70708-9)
(P/N 70708-10)
(P/N 70708-11)
(P/N 70708-12)
1.
2.
5.
6.
3.
4.
7.
8.
Figure 3
Decorator Tips Set (P/N 70709-SET)
Individual Tips
(P/N 70709-1, 70709-2,
70709-3, 70709-4,
70709-5, 70709-6,
70709-7, 70709-8)
Storage Box: (P/N 71172 )
4.
Cordless Cookie Press Use and Care Guide
5.
Assembly Instructions
Recharging The Battery
For Cordless Use
IMPORTANT: For the first use you must charge the unit for at least
24 hours to ensure that the batteries are fully charged.
1. The normal recharge time is 6 hours for a full charge. When fully
charged, your Cookie Press can be used to prepare 10 to 15 Tubes
full of cookie batter/filling.
1. Unplug from outlet before assembly or disassembly of parts. Attach Cam
Shaft to the Press Disc by inserting stem of the Shaft into the Press Disc’s
center hole. Press firmly. You will hear a click as the Shaft snaps in place.
(See Figure 4.)
2. Line the Tabs on the Motor Body up with the slots on the
Cam Disc. Insert Cam Disc into the Motor Body. Using
the two Grips on the Cam Disc, turn slightly clockwise
until the Disc clicks into position. (See Figure 5.)
Cam
Shaft
2. To recharge, insert the Battery Adaptor
Connector into the Connector Inlet
located at the top backside of the
Motor Body Handle. (See Figure 3).
Then plug the Adaptor into a standard
120V AC outlet. Unplug Adaptor from
unit and wall before cordless use.
Grips
Slots
Press
Disc
Cam Disc
Figure 4
Figure 3
Direct Drive By Adaptor
For Corded Use
1. The unit can be used as direct-drive with the Adaptor supplied with
the unit when the batteries are not charged. Use only the Adaptor
(P/N 71171) supplied with this unit.
2. Insert the Battery Adaptor Connector into the Connector Inlet
located at the top backside of the Motor Body Handle. (See Figure
3). Then plug the Adaptor into a standard 120V AC outlet for direct
corded use.
Tabs
Figure 5
3. Fit the Shaft all the way inside the unit,
the outside contours of the
2 Discs will line up. (See Figure 6.)
NOTE: Turn Cam Disc one click counterclockwise if Shaft is difficult to insert into
Figure 6
Motor Body.
4. Select a Disc and place it inside the Tube Cover. Then place the Tube
into the Tube Cover, turning clockwise until locked. (See Figure 7.)
5. If a Filler Tip or Decorator Tip is to be used, fit the desired Tip over the
Filler Tip/Decorator Tip Adapter and secure it with the Filler
Tip/Decorator Tip Cover. Place the Filler Tip Assembly inside the Tube
Cover. Then place the Tube into the Tube Cover, turning clockwise until
locked. (See Figures 8A and 8B.)
Tube with Disc Assembly
Cookie Disc
Tube Cover
Figure 7
Tube with Filler Tip Assembly
Tube
Cover
Figure 8A
Filler Tip
Filler Tip/
Decorator Tip
Adapter
6.
Cordless Cookie Press Use and Care Guide
Filler Tip/
Decorator
Tip Cover
7.
Assembly Instructions
(Continued)
Tube with Decorator Tip Assembly
Filler Tip/
Decorator
Tip Cover
Tube
Cover
Figure 8B
Filler Tip/
Decorator Tip
Adaptor
Decorator
Tip
6. With a spoon or spatula, load freshly prepared cookie dough/filling
into the top of the Tube.
NOTE: To ensure proper operation, do not fill the Tube past the
MAX Fill Line. DO NOT OVERFILL!
7. Look inside the Tube to see the ridges extending from top to bottom.
These ridges align with the outside contours of the 2 Discs. Grasp
Tube firmly and turn clockwise until the Tube locks into position.
(See Figure 9.)
8. Your Cookie Press is now fully assembled and ready for use.
Join Body with filled Tube
Figure 9
Instructions For Making Cookies
The proper consistency of cookie dough is very important. If the
dough is too stiff, it won't release from the Cookie Press. If the dough
is too soft or sticky, chill in the refrigerator for 15 minutes. For best
results, use the recipes in this booklet until you get a feel for the
proper consistency of the dough. We do not recommend using storebought refrigerated cookie doughs.
1. Your Cookie Maker may be used either cordless or corded. When
fully charged, your Cordless Cookie Press can be used to prepare 10
to 15 Tubes full of cookie batter/filling.
2. For unlimited use, or if the battery is not charged, you may prefer to
use the Cookie Press corded. Follow the instructions outlined in the
“DIRECT-DRIVE BY ADAPTOR for corded use” section of this
Owner’s Manual.
3. Stand the Cookie Press upright and press against the surface of the
cookie sheet. (See Figure 10.) The Cookie Press has been specially
designed for thumb operation. Thumb operation provides better
balance for placing the cookie shapes on the cookie sheets.
4. When the Tube is filled with cookie dough and the ON/OFF Button
is pressed, the Press Disc pushes downward, forcing the dough
through the Disc or Tip to form an attractive cookie or decoration.
5. Holding the Cookie Press in position against the cookie sheet, press
and hold the ON/OFF Button until the air pockets have been
removed and the dough starts to emerge from the openings in the
Cookie Disc.
6. Press a cookie for 2 seconds and note the result.
NOTE: The time to press each cookie will be based on the
desired thickness and shape of your cookie and the dough
you are using.
7. Release the ON/OFF Button and quickly step to the next position on
the cookie sheet. Refer to Figure 11.
NOTE: It may be necessary to experiment with varying times and
pressures until the desired cookie thickness is achieved.
Figure 10
8.
Cordless Cookie Press Use and Care Guide
Figure 11
9.
Refilling The Cookie Press
1. The see-through Tube allows you to check the remaining
dough/batter. If you are using the Adaptor, direct-drive Cookie Press,
and refilling becomes necessary, first unplug the Adaptor from the
wall outlet and then remove the Battery Adaptor Connector from the
Handle of the Motor Body.
2. Hold the Tube pointing down with one hand and turn the Tube
Cover counter-clockwise. This will unlock the Tube Cover and the
Cookie Disc or Tip. Remove the Disc or Tip Assembly and set all parts
aside.
3. Hold the Handle of the Motor Body with one hand. With the other
hand, turn the Tube counter-clockwise until the Tube is free from the
Motor Body.
4. Remove the Tube from the Motor Body. Pull the Cam Shaft with Press
Disc out of the Motor Body. Rinse and dry thoroughly.
CAUTION: Avoid any contact of any liquid with the inside of
Motor Body.
5. Because of dough build-up, sometimes it may be necessary to clean
the Cam Disc before refilling the Cooking Press. First remove the
Cam Disc from the Motor Body. Using the 2 Grips on the Cam Disc,
firmly turn the Disc counter-clockwise until it lifts out easily.
6. Clean the Cam Disc with soapy water, rinse and dry thoroughly.
NOTE: Clean and thoroughly dry all parts. Avoid any contact with
any liquid and the inside of the Motor Body.
7. Assemble the Cam Disc, Cam Shaft, and Press Disc onto Cookie Press
Motor Body, following the Assembly Instructions.
8. Reattach the Cookie Disc or Tip Assembly and securely lock into
place with the Tube Cover.
9. Fill the Tube with freshly prepared cookie dough up to the MAX
Fill Line.
NOTE: To ensure proper operation, do not fill the Tube past the
MAX Fill Line. DO NOT OVERFILL!
10. Attach the Tube to the Motor Body. Grasp the Tube firmly and turn
clockwise until the Tube is locked into position.
(See Figure 9.)
Hints For Best Results
IMPORTANT: For the first use you must charge the unit for at least
24 hours to ensure that the batteries are fully charged.
◆ Allow 6 hours to fully charge the Cookie Press Battery. When fully
charged, your Cookie Press can be used to prepare 10 to 15 Tubes
full of cookie batter/filling.
◆ We do not recommend using store-bought refrigerated
cookie doughs.
◆ Avoid greased or non-stick cookie sheets, as they will not hold the
shape of the cookie as well.
◆ When a recipe calls for butter and margarine, both must be used.
Do not substitute one with the other.
◆ Dough should be pliable enough to easily emerge from the Disc
and stick on the cookie sheet.
◆ If dough is too soft or sticky, refrigerate for 15 minutes, or beat in
a small amount of flour. If the dough is too stiff, mix in the yolk of
one egg.
◆ Once dough has been loaded, use it immediately.
◆ Cookie dough that has been refrigerated overnight will be too stiff
and will not work properly.
◆ Some doughs and Discs work better when you move faster, and
some when you move slower. After some practice, with rhythm and
timing, the shapes will improve.
◆ Use Discs with cookie dough for the preparation of cookies.
◆ Use Tips with soft dough for decorating canapes, candies, cookies,
desserts, fill pastries, etc.
◆ If dough is not moist enough to hold the decorations, lightly
brush a little water, milk, honey or a little egg white where
decorations are to be placed.
◆ The amount of cookies per batch will vary with each recipe, the
Cookie Disc used, and the thickness of the cookies.
◆ When using a recipe that calls for finely grated ingredients, use a
Cookie Disc with large holes. We recommend using Cookie Discs
3, 4, 5, and 10 to prevent the Disc from becoming clogged with
cookie dough.
11. Your Cookie Press is now fully assembled and ready for use.
10.
Cordless Cookie Press Use and Care Guide
11.
User Maintenance Instructions
This Cordless Cookie Press requires little maintenance. It contains
no user-serviceable parts. Any servicing requiring disassembly other
than cleaning must be performed by a qualified appliance repair
technician.
CAUTION: Do not immerse Motor Body, Adaptor cord or Adaptor
plug in water or any other liquid.
Cleaning
To keep your Cookie Press operating properly, we recommend
cleaning after each recipe.
1. If you are using the Adaptor to drive the Cookie Press, first unplug
the Adaptor from the wall outlet and then remove the Battery
Adaptor Connector from the Handle of the Motor Body.
2. Hold the Tube pointing down with one hand and turn the Tube
Cover counter-clockwise. This will unlock the Tube Cover and the
Cookie Disc or Tip. Remove the Disc or Tip Assembly and set all
parts aside.
3. Hold the Handle of the Motor Body with one hand. With the other
hand, turn the Tube counter-clockwise until the Tube is free from
the Motor Body.
Cleaning
(Continued)
9. Wipe the exterior of the Motor Body with a soft, damp cloth.
Dry thoroughly.
10. Do not use steel wool, scouring pads, or abrasive cleansers as they
will damage the finish.
11. As the Filler/Decorator Tip and Cookie Discs get older, they may
darken in color. This is normal and in no way interferes with the
use of the product.
12. A stiff brush will aid in cleaning the inside of the Tube and
Filler/Decorator Tip.
Storage
1. Clean the Cookie Press as instructed above.
2. When the unit is not in use, be sure to leave the Adaptor
unplugged.
3.Store the Cookie Press and parts in its Storage Box in a clean,
dry location.
4. Remove the Tube from the Motor Body. Pull the Cam Shaft with
Press Disc out of the Motor Body. Rinse and dry thoroughly.
CAUTION: Avoid any contact of any liquid with the inside of
Motor Body.
5. Remove the Cam Disc from the Motor Body. Using the 2 Grips on
the Cam Disc, firmly turn the Disc counter-clockwise until the Disc
lifts out easily.
6. Clean the Cam Disc with soapy water, rinse and dry thoroughly.
7. Wash the Cookie Discs, Filler Tip, Filler Tip/ Decorator Tip
Adaptor, Decorator Tips, Cannoli Shell Forms, Tube Cover, Tube,
Cam Disc, Press Disc and Cam Shaft immediately after each use in
warm soapy water. Rinse and dry thoroughly. DO NOT WASH IN
THE DISHWASHER.
8. The Filler/Decorator Tip and Cookie Discs are made of Stainless
Steel and should be cleaned with a soft cloth or sponge. Dry
immediately after cleaning to avoid spotting. Do not put Discs or
Tips into dishwasher, as they will discolor.
12.
Cordless Cookie Press Use and Care Guide
13.
Recycling NI-CAD Batteries
This product contains nickel cadmium
rechargeable batteries. Batteries must be
recycled or disposed of properly.
This Cordless Cookie Press is equipped with long lasting,
Rechargeable Nickel Cadmium Batteries. To protect the environment,
they should be removed at the end of the batteries' life for safe
disposal in accordance with your local and state requirements.
To recycle your nickel-cadmium batteries, follow the directions
provided below. Please DO NOT put the main unit or batteries in the
trash. Use the collection system provided in your community.
RECIPES
Holiday Butter Cookies
1/2 cup butter, softened
1/2 cup margarine, softened
3/4 cup sugar
1 egg
food coloring
2-1/4 cups all-purpose flour
1/4 teaspoon baking powder
1/8 teaspoon salt
1 teaspoon almond extract
colored sugar crystals
Contact your local battery recycling center.
Batteries should be removed ONLY WHEN UNIT IS TO BE
DISCARDED.
Make sure Cookie Press Adaptor is unplugged before dismantling for
battery removal.
To Remove The Batteries
Remove the 2 screws on the bottom of main unit. Remove the bottom
Cover to expose a protective plate. Remove the 2 screws on the
bottom of exposed plate. Remove plate. The 2 halves of the Cookie
Press Handle should snap apart to expose a mounting bar that holds
the batteries in place. Remove 2 screws of the mounting bar. Remove
2 Ni-Cad batteries. Dispose of batteries according to local regulations.
14.
Cordless Cookie Press Use and Care Guide
1. Preheat oven to 375˚F.
2. Use an electric mixer to cream the butter and margarine together
until fluffy. Gradually beat in the sugar.
3. Add the egg and a few drops of food coloring (red for Valentines
Day, green for Christmas Trees) and mix well.
4. Sift the flour, baking powder and salt together. Add half of the
flour mixture to the butter mixture and blend until smooth.
Repeat with the rest of the flour mixture.
5. Fill the Cookie Press with dough and select any Cookie Disc.
Select Cookie Disc 5 for Valentines Day, or Disc 1 for Christmas
Trees, or any other. Form the cookies on ungreased cookie sheets.
Decorate with colored sugar crystals.
6. Bake for 10-12 minutes. Remove from cookie sheets and cool on
wire racks.
Yield: 6 to 7 dozen
15.
Lemon Drop Cookies
1/2 cup butter, softened
1/2 cup margarine, softened
1/2 cup white sugar
1/2 cup brown sugar
1 egg
1 tablespoon lemon juice
1 teaspoon finely grated lemon rind
2-1/2 cups all-purpose flour
1/4 teaspoon baking soda
1 teaspoon salt
powdered sugar
1. Preheat oven to 375˚F.
2. Use an electric mixer to cream the butter and margarine together
until fluffy. Gradually beat in the white and
brown sugar.
3. Add egg, lemon juice and lemon rind, mix well.
4. Sift the flour, baking soda and salt together. Add half of the flour
mixture to the butter mixture and beat until smooth. Repeat with
the rest of the flour mixture.
5. Fill the Cookie Press with dough and select Cookie Disc 4 or any
other. Form the cookies on ungreased cookie sheets.
6. Bake for 10-12 minutes. Remove from cookie sheets and cool on
wire racks. Dust with powdered sugar.
Yield: 6 to 7 dozen
NOTE: When using a recipe that calls for finely grated ingredients,
use a Cookie Disc with large holes. We recommend using Cookie
Discs 3, 4, and 10 to prevent the Disc from becoming clogged with
cookie dough.
Chocolate Kiss Cookies
1/2 cup butter, softened
1 cup sugar
1 egg
2 tablespoons milk
2 cups cake flour
1/4 teaspoon salt
1/2 cup milk chocolate chips, melted and cooled
colored sugar crystals or powdered sugar
1. Preheat oven to 375˚F.
2. Use an electric mixer to cream the butter until fluffy. Gradually
beat in the sugar.
3. Add egg and milk and mix well.
4. Sift the cake flour and salt together. Add half of the flour mixture
to the butter mixture and blend until smooth. Repeat with the
rest of the flour mixture.
5. Mix in the cooled chocolate.
6. Fill the Cookie Press with dough and select Cookie Disc 9 or any
other. Form the cookies on ungreased cookie sheets.
7. Bake for 8-10 minutes. Remove from cookie sheets and cool on
wire racks. Decorate with colored sugar crystals or dust with
powdered sugar.
Yield: 5 to 6 dozen
Snowflake Cookies
1/2 cup butter, softened
1/2 cup margarine, softened
3 ounces cream cheese, softened
1 cup sugar
1 egg yolk
1-1/2 teaspoon coconut extract
2-1/2 cups all-purpose flour
1/2 teaspoon baking soda
1/2 teaspoon salt
1/4 teaspoon cinnamon
powdered sugar
1. Preheat oven to 375˚F.
2. Use an electric mixer to cream the butter and margarine until
fluffy. Gradually beat in the cream cheese and sugar.
3. Add egg yolk, coconut extract and mix well.
4. Sift the flour, baking soda, salt and cinnamon together. Add half
of the flour mixture to the butter mixture and beat until smooth.
Repeat with the rest of the flour mixture.
5. Fill the Cookie Press with dough and select Cookie Disc 2, 6, 8, or
10, or other. Form the cookies on ungreased cookie sheets. Dust
with powdered sugar.
6. Bake 10-12 minutes. Remove from cookie sheets and cool on
wire racks.
16.
Cordless Cookie Press Use and Care Guide
Yield: 7 to 8 dozen
17.
Orange Crisp Cookies
1/2 cup butter, softened
1/2 cup margarine, softened
1/2 cup white sugar
1/2 cup brown sugar
1 teaspoon orange extract
1 egg
1 teaspoon finely grated orange rind
2-1/2 cups all-purpose flour
1/4 teaspoon salt
1/4 teaspoon baking soda
1. Preheat oven to 375˚F.
2. Use an electric mixer to cream the butter and margarine until
fluffy. Gradually beat in the white sugar, brown sugar and orange
extract.
3. Add egg, orange rind and mix well.
4. Sift the flour, salt and baking soda together. Add half of the flour
mixture to the butter mixture and beat until smooth. Repeat with
the rest of the flour mixture.
5. Fill the Cookie Press with dough and select Cookie Disc 10 or any
other. Form the cookies on ungreased cookie sheets.
6. Bake 10-12 minutes. Remove from cookie sheets and cool on wire
racks.
Yield: 8 to 9 dozen
NOTE: When using a recipe that calls for finely grated ingredients,
use a Cookie Disc with large holes. We recommend using Cookie
Discs 3, 4, and 10 to prevent the Disc from becoming clogged with
cookie dough.
Almond Spritz Cookies
1/2 cup butter, softened
1/2 cup margarine, softened
3/4 cup sugar
1 egg
1 teaspoon almond extract
2-1/4 cups all-purpose flour
1/2 teaspoon baking powder
dash of salt
1. Preheat oven to 375˚F.
2. Use an electric mixer to cream the butter and margarine together
until fluffy. Gradually beat in the sugar.
3. Add the egg and almond extract; mix well.
4. Sift the flour, baking powder and salt together. Add half of the
flour mixture to the butter mixture and blend until smooth.
Repeat with the rest of the flour mixture.
5. Fill the Cookie Press with dough and select Cookie Disc 3, 7, or
any other. Form the cookies on ungreased cookie sheets.
6. Bake for 10-12 minutes. Remove from cookie sheets and cool on
wire racks.
Yield: 4 to 5 dozen
Gingersnap Cookies
1/2 cup butter, softened
1/4 cup margarine, softened
3/4 cup brown sugar
3/4 cup molasses
1 egg
4 cups all-purpose flour
1/4 teaspoon salt
1-1/2 teaspoons baking soda
2-1/2 teaspoons allspice
1. Preheat oven to 375˚F.
2. Use an electric mixer to cream the butter and margarine until
fluffy. Gradually beat in the brown sugar.
3. Add molasses and egg and mix well.
4. Sift the flour, baking soda, salt and allspice together. Add half of
the flour mixture to the butter mixture and beat until smooth.
Repeat with the rest of the flour mixture.
5. Fill the Cookie Press with dough and select Cookie Disc 6 or any
other. Form the cookies on ungreased cookie sheets.
6. Bake 10-12 minutes. Remove from cookie sheets and cool on
wire racks.
Yield: 8 to 9 dozen
18.
Cordless Cookie Press Use and Care Guide
19.
Cheese Crackers
1 cup butter, softened
2 cups all-purpose flour
1 teaspoon garlic powder
2 teaspoons sesame seeds
1/4 teaspoon cayenne pepper
dash salt
dash pepper
1 pound sharp white cheddar cheese, grated
1. Preheat oven to 350˚F.
2. Use an electric mixer to cream the butter until fluffy. Gradually
add the flour, garlic powder, sesame seeds, cayenne pepper, salt
and pepper mixing until well blended.
3. Add the cheese and mix well.
4. Fill the Cookie Maker Tube with the dough and select Cookie Disc
#10. Form the crackers on un-greased cookie sheets.
5. Bake for 12 to 15 minutes or until golden brown.
Yield: 9 to 10 dozen crackers
Strawberries with Cream Cheese Filling
8 oz. cream cheese, softened
1/3 cup granulated sugar
1/4 cup lemon juice
1-1/2 Tablespoons fresh lemon zest
14 to 16 large strawberries
1. Wash strawberries and cut the top open, core center leaving part
of the fruit intact.
2. Use an electric mixer to cream the cream cheese, sugar, and
lemon juice and lemon zest until fluffy.
3. Fill the Cookie Maker with the filling and add the Filler Tip.
4. Squeeze cream cheese filling into each strawberry.
5. Sprinkle with powdered sugar and chill until read to serve.
Yield: 14 to 16 large strawberries
Three Cheese Stuffed Manicotti
Sauce
1 clove garlic, minced
1/4 cup chopped onion
1 Tablespoon olive oil
1 (16-1/2-oz.) can chopped tomatoes
1 (8-oz.) can tomato sauce
1 teaspoon sugar
1-1/2 teaspoons dried Italian seasoning
Filling
8 Manicotti shells
2 eggs, beaten
2 cups shredded mozzarella cheese
1-1/2 cups Ricotta cheese
1/2 cup grated parmesan cheese
1/4 cup snipped fresh parsley
1/2 teaspoon dried Italian seasoning
1/8 teaspoon pepper
1. Cook the Manicotti according to package direction. Drain and
rinse shells in cold water.
2. To make the sauce, cook the onion and garlic in hot olive oil
until tender. Add un-drained tomatoes, tomato sauce, and sugar
and dried Italian seasoning. Bring to a boil, reduce heat.
Simmer uncovered for 20-25 minutes, or until thick. Remove
from heat.
3. For the filling, stir together the eggs, half of the mozzarella
cheese, ricotta cheese, parmesan cheese, parsley, dried Italian
seasoning, and pepper.
4. Fill Cookie Maker Tube with filling. Add the Filler Tip and
fill manicotti.
5. Pour half of the sauce mixture into a 2-quart rectangular baking
dish. Arrange stuffed manicotti in the baking dish. Pour
remaining sauce over shells. Sprinkle remaining mozzarella
cheese on top.
6. Manicotti may be covered and chilled in the refrigerator for up
to 24 hours or bake in a 350°F oven for 35-40 minutes, or until
heated thought.
Yield: 8 stuffed manicotti
20.
Cordless Cookie Press Use and Care Guide
21.
Cheesecake Cups
6 oz. cream cheese
3 Tablespoons granulated sugar
1 teaspoon flour
1 egg
1/2 teaspoon vanilla
2 teaspoons lemon juice
30 Athens® Precooked Mini Fillo Shells
1 (15-oz.) can cherry pie filling
1. Preheat oven to 325°F.
2. Use an electric mixer to beat the cream cheese, sugar and flour
together. Add the egg, vanilla, and lemon juice; mix well. Chill in
refrigerator for 1 hour.
3. Fill the Cookie Maker Tube with chilled filling and add Filler Tip.
4. Place fillo shells on a baking sheet and carefully fill each with
filling. Top with a cherry.
5. Bake for 12-15 minutes.
6. Let cool 10 minutes and serve.
Yield: 15 desserts
Deviled Eggs
12 hard boiled eggs
1/2 cup mayonnaise
1 teaspoon prepared mustard
1 teaspoon vinegar
Salt to taste
Pepper to taste
Paprika (optional) to taste
1. Halve hard boiled eggs lengthwise and remove yolks.
2. Place yolks in a bowl and mash with a fork.
3. Add mayonnaise, mustard and vinegar and mix thoroughly
until smooth.
4. Salt and pepper to taste.
5. Fill Cookie Maker Tube with egg yolk mixture and add Filler Tip.
6. Fill the egg white halves with filling and sprinkle with paprika.
7. Chill until ready to serve.
Butterscotch Meringue Kisses
2 egg whites
1/8 teaspoon cream of tartar
1/8 teaspoon salt
1/2 cup sugar
1/3 cup crushed butterscotch candy pieces
1. Preheat the oven to 225˚F.
2. Beat the egg whites with the cream of tartar and salt in a mixing
bowl until soft peaks form.
3. Add the sugar gradually, beating for 5 minutes or until stiff and
glossy peaks form.
4. Fill Cookie Maker Tube with filling and add filling tube.
5. Dispense in a vertical motion creating small mounds on cookie
sheets covered with parchment paper.
6. Sprinkle with crushed candy pieces.
7. Bake for 1-1/2 hours. Turn off the oven and open the oven door.
8. Let stand in the oven until completely cool. Remove from cookie
sheet and store in an air tight container.
Yield: 18 to 24 meringue kisses
Filled Cupcakes
24 prepared cup cakes
1 (10 or 12-oz. jar) Smuckers® Simply 100% Fruit,
chilled for 2 hours
or
1 (12-oz.) container Betty Crocker® cake frosting
1. Fill Cookie Maker Tube with simply fruit or frosting and attach
Filler Tip.
2. Insert tip of Filler Tip through the top down to the center
of the cupcake.
3. Press the Button and count to 2. The cupcake will expand in size
and the filling is extruded into the center of the cupcake. Leave
the Filler Tip in the cupcake for 15 seconds and then slowly
remove excess filling on top of cupcake as you remove.
4. Sprinkle with powdered sugar before serving.
Yield: 24 halves
22.
Cordless Cookie Press Use and Care Guide
23.
Cannoli Shells with Filling
Cannoli Shells
2-1/2 cups all-purpose flour
2/3 cup shortening
1 large egg
3 oz. white wine
3 Tablespoons sugar
pinch salt
glaze for shells
1 egg white
1. Preheat cooking oil to fry cannolis over medium high heat.
2. With electric mixer, combine flour and shortening.
3. Add egg, wine, sugar and salt mixing until a loose dough ball
is formed.
4. Roll dough flat until 1/4-inch thick.
5. Cut into 3 inch squares.
6. Wrap dough around each Cannoli Shell Form.
7. Brush egg white glaze on outside of cannoli dough.
8. Fry each cannoli shell for 2-3 minutes or until golden brown.
Remove from heat and allow to cool slightly before removing
from form.
9. Repeat for remaining cannoli shells. Allow to cool thoroughly
before filling.
Filling
1 lb. ricotta cheese
1-1/2 teaspoons vanilla
1 cup powdered sugar
1/4 teaspoon lemon juice
10. Place ricotta cheese into a strainer or colander and drain off
excess liquid.
11. Use an electric mixer to cream the Ricotta cheese, vanilla,
powdered sugar and lemon juice together.
12. Fill the Cookie Maker Tube with filling and add the Filler Tip.
Fill the cooled cannoli shells right before serving and dust with
powdered sugar.
NOTE: If shells are filled too far in advance, they will become soggy.
Yield 12 to 14 cannolis
24.
Cordless Cookie Press Use and Care Guide
LIMITED ONE-YEAR WARRANTY
Warranty Coverage: This product is warranted to be free from defects in
materials or workmanship for a period of one (1) year from the original purchase
date. This product warranty is extended only to the original consumer
purchaser of the product and is not transferable. For a period of one (1) year
from the date of original purchase of the product, our Repair Center will,
at its option, either (1) repair the product or (2) replace the product with a
reconditioned comparable model. These remedies are the purchaser's exclusive
remedies under this warranty.
Warranty Service: To obtain warranty service, you must call our warranty
service number at 1-800-233-9054 for return instructions on how to deliver the
product, in either the original packaging or packaging affording an equal degree
of protection to the Repair Center specified below. You must enclose a copy of
your sales receipt or other proof of purchase to demonstrate eligibility for
warranty coverage.
To return the appliance, ship to:
To contact us, please write to, call, or email:
ATTN: Repair Center
708 South Missouri Street
Macon, MO 63552 USA
Consumer Relations Department
PO Box 7366
Columbia MO 65205-7366 USA
1-800-233-9054
E-mail:[email protected]
What Is Not Covered: This warranty does not cover damage resulting from
misuse, accident, commercial use, improper service or any other damage
caused by anything other than defects in material or workmanship during
ordinary consumer use. This warranty is invalid if the serial number has been
altered or removed from the product. This warranty is valid only in the United
States and Canada.
LIMITATION ON DAMAGES: THERE SHALL BE NO LIABILITY FOR ANY
INCIDENTAL OR CONSEQUENTIAL DAMAGES FOR BREACH OF ANY
EXPRESS OR IMPLIED WARRANTY OR CONDITION ON THIS PRODUCT.
DURATION OF IMPLIED WARRANTIES: EXCEPT TO THE EXTENT
PROHIBITED BY APPLICABLE LAW, ALL IMPLIED WARRANTIES AND
CONDITIONS, INCLUDING, WITHOUT LIMITATION, IMPLIED WARRANTIES
AND CONDITIONS OF MERCHANTABILITY AND FITNESS FOR A PARTICULAR
PURPOSE OR USE ON THIS PRODUCT ARE LIMITED IN DURATION TO THE
DURATION OF THIS WARRANTY.
Some jurisdictions do not allow the exclusion or limitation of incidental or
consequential damages, or allow limitations on how long an implied warranty
lasts, so the above limitations or exclusions may not apply to you. This
warranty gives you specific legal rights and you may have other rights under
the laws of your jurisdiction.
For more information on our products, visit our website:
www.maxim-toastmaster.com.
©2005 All rights reserved.
Made in China
P/N 61722
6/05
25.
Keep Dated Sales Receipts for Warranty Service.
Keep this booklet. Record the following for reference:
Date purchased _______________________________________________
Model number _______________________________________________
Date code (stamped on bottom)________________________________
EVERYBODY EATS. It’s a fact of life.
But sometimes preparing
meals can become a chore.
That’s why TOASTMASTER has been invited
into millions of kitchens just like yours
so we can HELP YOU MASTER your
mixing, baking, grilling, toasting,
brewing, heating and serving
tasks WITH EASE AND STYLE.
The TOASTMASTER name stands for a
CELEBRATION of INNOVATION designed
to serve your life and keep you
COOKIN’ IN STYLE.
26.
Cordless Cookie Press Use and Care Guide
Cordless Cookie Press
USE AND CARE GUIDE
MODEL TMCKM2S
•C
ord
ed/
•P
Co
rep
rdl
a
r
bef
ess
ore es 10
Use
•P
t
o
R
e
res
cha 15 T
s
e
r
u
of
gin
be
a B s out
coo g is n s of c
•A
u
t
t
eed ook
cc
kie
on
sq
ed
ie b
1 F essori
u
atte
ick
i
e
ly, e
r/f
• St ller T s Inc
lud
illin
ip,
ffic
ora
8 D e: 1
ien
ge
g
Box
tly,
2S
eco
at t
rato tain
inc
he
lud
r T less
tou
ips
ed
S
ch
& teel C
2C
o
ann okie
D
oli
For iscs,
ms
?
Questions
Call toll free 1-800-233-9054
Monday – Friday, 8:00 a.m. - 5:30 p.m. CST
www.maxim-toastmaster.com
TMCKM2S