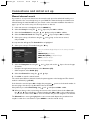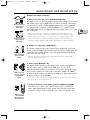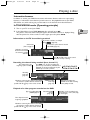
1
DTH7500_en
4/07/03
16:55
Page 1
Important
Precautions and information before connecting
• Ensure that the mains supply in your house complies with that indicated on the identification
sticker located at the back of your device. Install your device horizontally, on a suitable base
(furniture), with enough space around it for ventilation (7-10 cm) • Ensure that the ventilation
slots, and the device itself, are not covered by objects such as a mat, newspapers, curtain, etc. • Do
not stack any other equipment on top of your DMR. Do not place the device on top of an
amplifier or any other equipment that gives off heat • The appliance should not be in contact with
liquids or exposed to the risk of dripping or splashing.Therefore be careful not to place any
object containing a liquid (vase, glass, bottle,...) on or near your appliance • The DMR must not be
near or exposed to a flame. For instance, do not place a candle on or near the device • Protect
the DMR from moisture and excess heat (e.g. fireplace) or equipment creating strong magnetic or
electric fields (i. e. speakers ...). Before moving the device, ensure the disc tray is empty. Switching
off the DMR to the stand-by mode does not disconnect the electricity supply. In order to
separate the device completely from the mains, it has to be disconnected by unplugging the mains
plug.When connecting, ensure that the plugs of the various cables are pushed securely into their
corresponding sockets.Your DMR is not intended for industrial use but for domestic purposes
only. Use of this product is for personal use only. Copying CDs or downloading music files for sale
or other business purposes is or may be a violation of copyright law.
Important notice: Please read the recommendations given on page 56.
Accessories provided
•
A Scart/Peritel cable (21 wired pins) – a remote control handset and 2 x AAA non
rechargeable batteries – a power supply cable – an aerial cable – infra red controller G. LINK
cable.
Inserting the batteries
1
2
3
Important information regarding the batteries
•
Do not mix different types of batteries or new and old batteries. Do not use rechargeable
batteries. In order to avoid any risk of explosion, observe polarities indicated inside the
battery compartment. Replace only with the type of batteries specified above. Do not throw
them into fire, do not recharge them. Remove the batteries from the remote control unit if
you are not going to use it for several weeks. Immediately remove any leaking batteries.Take
care in doing this, as leaking batteries may cause burns to the skin or other physical injury.
• Please respect the environment and prevailing regulations. Before you dispose of
batteries ask your dealer whether they are subject to special recycling and if he
accepts to take them back.
1
EN
DTH7500_en
4/07/03
16:55
Page 2
Contents
Important
Recording functions
Precautions and information before connecting ......1
To watch TV Programmes..........................................22
Accessories provided ..............................................1
Putting the television on pause (Pause Live TV) ....23
Inserting the batteries ..................................................1
Record the current programme ................................23
Important information regarding the batteries..1
Replaying what you missed ..................................23
Recording the current program ..........................23
Connections and initial set up
Stopping the recording ..........................................23
Basic connections ..........................................................4
Programming a TV recording ....................................24
About your device ........................................................5
Recording with the timer......................................24
Placing the DMR in service ..........................................5
Naviclick programmes guide......................................26
Using the remote control unit correctly ............5
Consulting the TV guide with Naviclick ............26
Switch on your DMR and your TV set ................5
Recording through the Naviclick TV guide ......26
Automatic channel search............................................6
Recording from a memory card ................................27
Sorting the channels ................................................7
Recording from a connected device..........................28
Clock setting ..............................................................7
From a satellite receiver or cable receiver ......28
Manual channel search..................................................8
From a Camcorder or other device ..................28
Channel update..........................................................9
Recording from a CD-ROM........................................29
Time set ......................................................................9
Sorting the channels ................................................9
Playing a disc
Satellite or cable receiver ..........................................10
Discs you can play........................................................30
G-LINK CABLE - Adjusting your DMR’s IR
(infrared) controller cell........................................10
Interactive banners ....................................................31
In TELEVISION mode (Operating principle) ..........31
DMR / satellite or cable receiver settings ........11
Information on the TV channel being
watched ....................................................................31
List of satellite receiver codes ............................13
List of cable receiver codes..................................13
Recording the channel being watched ..............31
Sockets and cables (inputs) ..................................14
Playback of a video program recorded
on the DMR ............................................................31
Sockets and cables (outputs)................................15
Front sockets (inputs)............................................16
In DISC PLAYING mode (Operating principle) ....32
The keys on the front..................................................17
The messages on the display......................................18
With a DVD ............................................................32
With an audio CD..................................................32
TV Functions ............................................................18
With a disc ..............................................................18
With a VCD (Video CD) ......................................32
Other indications ....................................................18
Loading and playing a disc..........................................33
Search Options ............................................................33
Remote control
Quick search of an image or a track..................33
Description of keys in DVD mode ....................19
Still picture and frame advance............................33
Using the remote control handset to control your
television and satellite or cable receiver ..................20
Slow motion (in Pause mode on an image)......34
Controlling a TV set ..............................................20
Scene Again™ ..........................................................34
Skipping a chapter or a track ..............................34
Controlling a satellite or cable receiver............20
Advance ....................................................................34
Remote control - Code A-B ................................20
Playback options..........................................................34
Programming the remote control ............................21
Enlarging an image (zoom)....................................34
Automatic code search..........................................21
Titles, chapters, time elapsed, audio
and subtitles ............................................................34
Manual programming..............................................21
2
DTH7500_en
4/07/03
16:55
Page 3
Contents
The disc information banner......................................35
Parental control menu................................................46
Timer (DVD,VCD, CD) ..............................................35
Locking ......................................................................46
Title or Track (DVD,VCD, CD) ..................................35
Ratings limits ............................................................47
Chapter (DVD) ............................................................35
Non categorized titles ..........................................47
Play modes of discs (DVD - VCD - CD) ....................36
Changing the code..................................................47
Repeat playback of a scene between two
points A and B (DVD - VCD - SVCD) ..............36
Options menu ..............................................................48
Digital output (audio) ............................................48
Subtitle and dialogue language (DVD)................36
SRS - TruSurround ..................................................48
Camera angles (DVD)............................................37
Black level ................................................................48
PBC - Playback control menu (VCD) ................37
Display Dimmer ......................................................48
The Audio CD information banner ..........................37
PAL/NTSC output ..................................................48
Playing image (JPEG) or music (mp3) files
on a CD Rom ..........................................................................38
AV1 output ..............................................................49
AV2 Input ..................................................................49
Playing music files (MP3) and / or
images (JPEG) ..........................................................38
Standby mode ..........................................................49
Image Functions ..........................................................39
Pause Time................................................................49
Changing images ......................................................39
Other settings..............................................................49
Rotating an image....................................................39
AV link ......................................................................49
Zooming in on an image (zoom)
and the Pan and Scan function ............................39
Recording menu ..........................................................50
AutoClock ................................................................49
To stop the picture sequence and return to
player menu ..............................................................39
Timer ........................................................................50
Naviclick ....................................................................50
Menus
Recording Quality ..................................................50
Disc menu ....................................................................40
VPS/PDC ..................................................................50
Start............................................................................40
Further information
Screen Format - (DVD / VCD) ............................40
Troubleshooting guide ................................................51
Copy ..........................................................................40
Settings ........................................................................54
Playlist (CD) ............................................................40
NexTView channel downloading time ..............54
Autoplay ....................................................................40
Choice of NexTView channel..............................54
DVD Menu................................................................40
Updating Naviclick (via Teletext) ........................54
DVD Title ..................................................................40
NexTView Channels ..................................................55
Video menu..................................................................41
Channels and Teletext pages (Naviclick) ..................55
Music menu (JUKEBOX function) ............................42
Pictures menu..............................................................42
Caution ........................................................................56
Managing your recordings ..........................................43
Condensation ..........................................................56
Renaming the recordings ......................................43
Discs ..........................................................................56
Deleting recordings ................................................43
Regarding Audio formats ......................................56
Choosing the quality of your recordings ..........43
For your safety ........................................................57
Language Menu............................................................44
DVD copy protection ............................................57
Display (Language of DMR menus) ....................44
Remote control - Code A-B ......................................57
Audio (DVD disc dialogue languages) ................44
Remote control setting on code B ....................57
Subtitles (Language of DVD subtitles) ..............45
DMR setting on code B ........................................57
Disc (DVD disc menu language)..........................45
Technical data ..............................................................57
3
EN
DTH7500_en
4/07/03
16:55
Page 4
Connections and initial set up
Basic connections
Your DMR has many connection possibilities to allow it to fit into a setup comprising several
devices.We recommend that you follow the connection setup on this page, and then carry out
the adjustments shown on the following pages.You will first need to set up the channels as
explained in the following pages before the final interconnection of the devices, described on
pages 10 to 16.
TV
1
DTH 7500 U
DTH 7500 E
220 - 240 V
50 - 60 Hz
Scart cable
Coaxial Cable
3
2
4
DMR - DTH 7500
1. Unplug the antenna cable from your TV set and plug it into the ANTENNA-CABLE IN
socket of your DMR.
2. Using the coaxial cable supplied, connect the ANTENNA-CABLE OUT socket of the
DMR to the g antenna socket of your TV set.
3. Using the Scart cable supplied, connect the DMR’s AV 1 (TV) socket (TV) to the scart
socket of your TV set (labelled AV 1, EXT 1, AUX 1 depending on the brand).
4. Use the mains cable to connect your DMR to a mains socket, by first connecting the cable to
the back of the DMR.
Note: connection to a satellite or cable receiver is detailled on page 10.
4
DTH7500_en
4/07/03
16:55
Page 5
Connections and initial set up
About your device
Your DTH 7500 is classed as a DMR (Digital Media Recorder). In a single unit, it combines a DVD,
Audio CD,VCD, S-VCD and CD-R player, a TV tuner and a 80-gigabyte hard disc. Depending on
the setting you choose, you’ll have close to 120 hours for your video recordings, JPEG images or
MP3 files.With its full range of connectors, your DMR connects to most analog and digital
audio/video devices on the market.
Placing the DMR in service
EN
Using the remote control unit correctly
When you use remote control, point the unit at the appliance you want to control (DMR,TV set
or satellite receiver). Ensure that there is no obstacle between the remote control unit and the
appliance, otherwise the infrared signal carrying the remote control commands will be blocked.To
control your DMR, ensure that the remote control unit is in DVD mode by pressing once on the
DVD key before using any other keys.
Switch on your DMR and your TV set
1. Turn on your TV set.
2. Set your DMR remote control unit in DVD mode by pressing once on the DVD key.
3. Switch on your DMR by pressing the STANDBY/ON key on the front panel of the player.
4. The first time you turn on your DMR, it will ask you
to select a preferred language for the various displays
via the menu which appears on your TV screen. If this
menu is not displayed, on your TV screen select the
AV socket to which you connected your DMR.The
player menus as well as the dialogues and subtitles of
the DVDs will always be presented in the language
you’ve chosen if it is available on the discs played.
5. Choose a language using the
,
keys on the remote control unit, then confirm by
pressing OK.
Continue on the following page.
Note: Displays on your DMR (menus and banners):
Disc menus – Each DVD disc offers a menu, the layout and order of which depend on the editor of the disc.
The main menu of the disc is displayed on the screen when a DVD disc is loaded and play begins.You can
also display or remove the main menu of the disc at any time by pressing the MENU key.
Player banners – While a disc is playing back you can display or remove banners using the INFO key on
the remote control unit.The banners appear in the form of a succession of icons at the top of the screen.
Player menus – Your DMR has menus enabling you to use functions that are not accessible using the remote
control unit keys. The player menu is displayed when the DMR is not playing a disc (in STOP mode).
Settings will only function if the corresponding function has been provided by the editor. For instance, if you
select the subtitle icon in the banner, subtitles will only appear if they actually exist on the disc. Check the
sleeve to see what subtitles are provided. If a menu or icon appears in “grey” it means that the function is
not available
5
DTH7500_en
4/07/03
16:55
Page 6
Connections and initial set up
Automatic channel search
In each region,TV stations are broadcast on different channels.Your DMR cannot be factory-set
to receive the TV channels of your area.You will have to set up the channels by following the
automatic procedure recommended below.
6. Select your country of residence using the
or
keys, and press OK.
Note: The screen only displays 3 countries at one time. The
arrows above and below indicate other possible countries.
Scroll through the list of countries with the
and
keys.
On the screen that is displayed, the Automatic option is
already selected. Press OK.
The screen displayed is a set-up screen for the allocation of
input terminals.
7. If you connected your devices as indicated on page 3,
check that Antenna-Cable has been allocated to
Antenna-Cable, otherwise change the allocation
using the
key on the remote control. For the
other selections (AV2, AV3, AV4) leave them allocated
to Nothing and continue to step 8.
Note: Other terminal settings (set with the
/
keys).
The AV2-SAT-CABL connection is intended for a satellite or
cable receiver.The installation of a satellite or cable receiver is
explained on page 10.
AV3-Front and AV4 correspond to the IN or INPUT inputs
of a device supplying Composite Video signals (CVBS) or S-Video.
The Other option is for connection of another device (video
recorder…).
Nothing: If no device is connected to the socket concerned.
8. Then select the Done line with the
key, and
press OK.
An installation window will appear. A cursor shows the
progress in the set-up of the channels.You will need to
wait a fair amount of time.When all the channels that you
can receive in your area have been stored, 100 % is
indicated.The number of channels found is indicated by
XX channels found.
Press OK.
Note:Your DMR is equipped with the AV Link. function.This function simplifies channel set-up by
downloading them from an AV Link or similar television set (Easy Link, Smart Link, Megalogic, etc.) which is
already set up. The channels downloaded in this way keep the same characteristics as those of your TV set
(same number, name, etc.).Your DMR’s AV Link downloading function is enabled (factory setting). If you wish
to de-activate this function, see page 49.
6
DTH7500_en
4/07/03
16:55
Page 7
Connections and initial set up
Sorting the channels
9. A channel sorting window will appear.The picture of the selected channel is shown in the
background.
The automatic channel search has assigned numbers to the channels is a predefined order.These
numbers may not be the numbers you would have chosen. Should this be the case, you can
change these numbers by following the instructions at the bottom of the screen. For easy channel
identification, we suggest you have a TV magazine at hand.
Note: Channel sorting instructions:
Move: press OK (then the
and
keys until you reach the
desired position (Pr no. on the left of the list then OK: swapping
of the 2 channels).
Delete: CLEAR key.
Rename: INFO keys, then
and
to search for a name on
the list. Validate by pressing OK.
Decoder set-up: AV (key (displays a symbol in the list of channels).
10. When all channels have been sorted to your liking, press the
key.
Your DMR has an automatic time (and date) setting function. In general, no setting is required on
your part.
11. If the time and date information is correct, press twice on OK.The Main Menu of the DMR is
displayed: the installation of the channels is now complete.
Clock setting
AutoClock: If the date and time information is not correct, adjust the clock as described below,
then check in the Installation menu that the automatic time setting is activated.This menu is
reached from the Setup menu (see page 49). Setting the time and date on the DMR is important
for the proper operation when recording programmes and for optimum downloading of the
programmes guide NAVICLICK.
1. Select Year. Enter 4 digits for the year
(2, 0, 0, 3 for 2003).
2. Then enter the 4 digits of the date
(press 1, 2, 0, 5 for 12th May).
3. Enter the 4 digits of the time
(press 1, 5, 5, 9 for 15:59 (03:59 PM).
4. Then press twice on OK. The Main Menu will appear
again. Channel set-up is complete.
Note:You can now use your DMR and take advantage of its numerous functions. If you want to connect a
satellite receiver to your DMR refer to page 10 for the recommended connection.You can also complete your
installation through the settings available in the Options menu (refer to pages 48-49).These adjustments
depend on the other devices that you are likely to connect to your DMR.
If you want to redo the automatic channel set-up, you will have to select Interactive setup in the
Installation menu (in the Setup menu).
7
EN
DTH7500_en
4/07/03
16:55
Page 8
Connections and initial set up
Manual channel search
If you want to set up a new channel, use the manual search procedure which will enable you to
add a channel to the ones already set-up on your DMR.The channels already stored will not be
deleted. During the initial installation, if you carried out the automatic installation described on
page 6, you do not need to carry out the steps shown on 8 and 9.
1. If the main menu is not displayed, press the MENU key.
2. Select the Setup line using the
and
3. Select the Installation line using the
keys, and press OK to validate.
and
4. Select the Manual Search line using the
keys, and press OK to validate.
and
5. Select your country of residence using the
and
keys, and press OK to validate.
keys on the remote control,
and press OK.
A set-up window will appear.The Standard line is highlighted.
6. Select your country’s TV standard using the
key.
Note: the standards displayed depend on the country selected in
step 5.
FRANCE (LL’) for France,
EURO BG (BGH) for Western Europe.
DKK’ for Eastern Europe.
I for the United Kingdom.
7. Select the Reception line using the
•
•
and
keys, and use the
of antenna.
Reception through external antenna: select Antenna (Ch).
Cable reception: select Cable (Ca).
8. Select the Channel line using the
and
key to choose the type
keys.
9. Press PR+ to start the manual search.
The search starts.When a channel is found, the picture appears in the background.The channel
number is indicated (e.g.: Ch 06).
If the channel is encoded, press AV to display the pictogram
this case, plug a decoder into the blue AV2 socket of the DMR.
If the picture is poor, select Fine Tuning using
and
next to the channel number. In
and adjust with PR+ or PR-.
10. When you have got the correct image and sound on the channel, select the line Save with
the
and
keys, and allocate a channel number with PR+ or PR- or the numbered keys
on the remote control. Press OK to store the number that you have assigned to the channel.
The Channel line is once again highlighted to start a new search. Repeat the procedure from
step 9 to search for a new channel or press MENU to exit the manual set-up.
8
DTH7500_en
4/07/03
16:55
Page 9
Connections and initial set up
Channel update
If new channels make their way into the audiovisual scene, you will have to update your DMR’s list
of channels. In such a case, start a new channel search from the installation menu.This set-up
deletes all stored channels and resets all the channels that your DMR can receive. If you only
want to set-up a single channel, refer to the manual search on page 8.
1. If the main menu is not displayed, press the MENU key.
2. Select the Setup line using the
and
3. Select the Installation line using the
keys, and press OK to validate.
and
4. Select the Channel search line using the
keys, and press OK to validate.
and
keys, and press OK to validate.
An installation window will appear. A cursor shows the
progress in the set-up of the channels.When all the
channels that you can receive in your area have been
stored, 100 % is indicated. Press OK to return to the
Channel search line. Press MENU to return to the
Main Menu.
Time set
Your DMR has an automatic time setting system which recognises the time signals put out by
certain channels. If your DMR is not set at the right time, you can reset it by following the
instructions below:
1. If the Main Menu is not displayed, press the MENU key.
2. Select the Setup line using the
and
3. Select the Installation line using the
keys, and press OK to validate.
and
4. Select the Manual Clock line using the
and
keys, and press OK to validate.
keys, and press OK to validate.
5. Year is highlighted. Enter the year’s 4 digits
(press 2, 0, 0, 3 for 2003).
6. Then enter the 4 digits of the date
(press 1, 2, 0, 5 for 12th May).
7. Enter the 4 digits of the time
(press 1, 5, 5, 9 for 15:59 (03:59 PM).
8. Press OK to confirm
Sorting the channels
1. If the Main Menu is not displayed, press the MENU key.
2. Select the Setup line using the
or
3. Select the Installation line using the
keys, and press OK to validate.
or
keys, and press OK to validate.
4. Select the Channel List line using the
or
keys, and press OK to validate.
Refer to the Sorting the channels paragraph on page 7 to check or sort out the channels
stored on your DMR.
9
EN
DTH7500_en
4/07/03
16:55
Page 10
Connections and initial set up
Satellite or cable receiver
Your DMR is intended to control a satellite or cable receiver. In this case, the device must be
connected to the AV2 and IR SAT/CABL connections of the DMR. Connect cables (5) (not
supplied) and cable (6) the G-LINK cable (supplied) as shown below.
Note: In grey: connections already carried out (connections from page 4),
In black: new connections.
Satellite receiver
5
6
TV set
DMR
G-LINK CABLE - Adjusting your DMR’s IR (infrared) controller cell
You need to find the correct positioning of the IR controller cell in relation to the front of the
satellite or cable receiver so that your DMR can transmit the commands as you would do with
the satellite receiver’s remote control.The IR (infrared) controller cell must face the receiver cell
of the satellite receiver.You can locate the receiver cell of the satellite receiver by bringing its
remote control as close as possible to the front of the device and trying to change channels.
Move the remote control one centimetre and try again.When the channel of the satellite receiver
changes, locate the position on the front of the unit.Then install the IR controller cell as shown
on the diagram below, facing the cell of the satellite receiver (1 or 2 cm away). If need be, use the
adhesive supplied to stick the cell in place.
Satellite or cable receiver
IR controller cell
10
DTH7500_en
4/07/03
16:55
Page 11
Connections and initial set up
DMR / satellite or cable receiver settings
1. Switch on your TV set, your DMR, then your satellite or cable receiver.
2. Place the receiver on channel 02.
With your DMR’s remote control, carry out the following settings:
3. If the main menu is not displayed, press the MENU key on the remote control.
4. Select the Setup line using the
and
5. Select the Installation line using the
keys, and press OK to validate.
and
keys, and press OK to validate.
The Interactive setup line is already selected. Press OK.
6. Choose a display language for the following screens.
7. Select your country of residence using the
and
keys, and press OK.
The Automatic line is already highlighted, press OK.
The screen which appears is a set-up screen for the allocation of input terminals.
8. If you connected your devices as indicated on page 10, check that AV2-SAT-CABL has been
allocated to Satellite Receiver, or Cable Receiver otherwise change the allocation using
the
key.
Note: Cable Receiver or Satellite Receiver: to
connect with a satellite or cable receiver terminal on the AV2
socket of your DMR (connection shown on page 10).The
other settings are explained on page 6.
9. Then select the line Done and press OK.
Note: an installation window will appear. A cursor shows the
progress in the set-up of the channels. When all the channels
that you can receive in your area have been stored, 100 % is
indicated.
Press OK.
From now on, follow on-screen instructions appearing in the various windows. If need be,
refer to the additional explanations given below.
11
EN
DTH7500_en
4/07/03
16:55
Page 12
Connections and initial set up
10. Deactivating the programming of the satellite or cable receiver
Yes is selected to deactivate the programmer. In that case,
all your satellite recordings will have to be programmed
from your satellite or cable receiver (this is the
recommended setting).
Leave Yes selected and press OK.
11. IR controller connection
Refer to the diagram on page 10, follow the instructions on the screen and press OK.
12. Enter the receiver code
Now key in your receiver’s satellite code number (refer
to the table on the next page), then press OK to validate.
If the brand or model of your satellite or cable receiver
is not shown, try other numbers in the list displayed. If
unsuccessful, contact your retailer.
Note: your DMR asks you to display channel 2 on the satellite
receiver. However, with some receivers, it is preferable to display
channel 0, 02 or 002.
13. Press OK to start the test
The DMR sends a signal to your satellite receiver via the infrared controller cell.
A configuration menu will appear as the satellite receiver positions itself on channel 12 (check
that channel number 12 appears on the display panel of the satellite receiver, sometimes fleetingly,
and even if no picture is visible on the TV screen).
If the satellite receiver is not on channel 12, select No with the
and
keys and press OK.
Your DMR sends a new command to the satellite
receiver (several tests are possible depending on the
brand of your satellite receiver).
If the satellite receiver goes on to channel 12, select
Yes with the
and
keys and press OK. If
unsuccessful, repeat the settings, starting at step 11, but
with the satellite receiver positioned on channel 0, 02
or 002 instead of 2.
A channel sorting window will appear. The picture of the selected channel is shown in the
background. Refer to page 7 to sort the stored channels or set the time on your DMR if necessary.
Your DMR is now ready to control your satellite receiver to program recordings.
12
DTH7500_en
4/07/03
16:55
Page 13
Connections and initial set up
The list of codes is given as a guide.The codes given are generally those which are recognised by
the receivers of the brands quoted. However, they may not correspond to your device if it is an
older or more recent model. In such a case, contact your retailer.
List of satellite receiver codes
AKAÏ . . . . . . . . . . . . . . . . . . . . . . . . . . . . . . . . 13
ALBA. . . . . . . . . . . . . 01, 13,333, 550, 555, 666
ALDES. . . . . . . . . . . . . . . . . . . . . . . . . . . . . . . 02
ALLSAT . . . . . . . . . . . . . . . . . . . . . . . . . . . . . . 04
AMSTRAD . . . . . . . . . . . . . . . . . . . . . . . . . . . 03
ARMSTRONG. . . . . . . . . . . . . . . . . . . . . . . . . 06
BEST . . . . . . . . . . . . . . . . . . . . . . . . . . . . . . . . 07
B.TELECOM . . . . . . . . . . . . . . . . . . . . . . . 13, 08
BUSH. . . . . . . . . . . . . . . . . . . . . . . . . . 19, 01, 09
CANAL SATELLITE NUMERIQUE (1) . . . . . . 20
CAMBRIDGE . . . . . . . . . . . . . . . . . . . . . . 11, 13
CHANNEL MASTER . . . . . . . . . . . . . . . . . . . . 11
CHAPARRAL . . . . . . . . . . . . . . . . . . . . . . . . . 18
CITIVISION. . . . . . . . . . . . . . . . . . . . . . . . . . . 10
CITYCOM. . . . . . . . . . . . . . . . . . . . . . . . . . . . 26
COLUMBUS . . . . . . . . . . . . . . . . . . . . . . . . . . 35
CONNEXIONS . . . . . . . . . . . . . . . . . . . . . . . 14
DISKEXPRESS . . . . . . . . . . . . . . . . . . . . . . . . . 07
DNT . . . . . . . . . . . . . . . . . . . . . . . . . . . . . . . . 15
DRAKE . . . . . . . . . . . . . . . . . . . . . . . . . . . . . . 16
EXATOR . . . . . . . . . . . . . . . . . . . . . . . . . . . . . 37
FERGUSON . . . . . . . . . . . . . . . . . . . . . . . . . 12
FINLUX. . . . . . . . . . . . . . . . . . . . . . . . . . . . . . 34
FUBA . . . . . . . . . . . . . . . . . . . . . . . . . . . . 35, 37
GOODMANS . . . . . . . . . . . . . . . . . . . . . . . . . 19
GRUNDIG. . . . . . . . . . . . . . . . . . . . . . . . . 19-21
HIRSCHMANN . . . . . . . . . . . . . . . . . . . . . . . . 22
HITACHI . . . . . . . . . . . . . . . . . . . . . . . . . . . . . 19
JOHANSSON . . . . . . . . . . . . . . . . . . . . . . . . . 25
JVC . . . . . . . . . . . . . . . . . . . . . . . . . . . . . . 19, 08
KATHREIN . . . . . . . . . . . . . . . . . . . . . . . . . . . 26
MANHATTAN . . . . . . . . . . . . . . . . . . . . . . . . 25
MASPRO . . . . . . . . . . . . . . . . . . . . . . . . . . . . . 27
MATSUI. . . . . . . . . . . . . . . . . . . . . . . . . . . . . . 21
MIMTECH . . . . . . . . . . . . . . . . . . . . . . . . . . . . 28
MINERVA . . . . . . . . . . . . . . . . . . . . . . . . . . . . 21
MITSUBISHI . . . . . . . . . . . . . . . . . . . . . . . . . . 19
MORGAN. . . . . . . . . . . . . . . . . . . . . . . . . . . . 06
NAGAI . . . . . . . . . . . . . . . . . . . . . . . . . . . . . . 29
NEC . . . . . . . . . . . . . . . . . . . . . . . . . . . . . . . . 30
NETWORK. . . . . . . . . . . . . . . . . . . . . . . . . . . 31
NIKKO . . . . . . . . . . . . . . . . . . . . . . . . . . . . . . 32
NOKIA . . . . . . . . . . . . . . . . . . . . . . . . . . . . . . 23
NORDMENDE . . . . . . . . . . . . . . . . . . . . 19, 33
OXFORD . . . . . . . . . . . . . . . . . . . . . . . . . . . . 08
ORBITECH . . . . . . . . . . . . . . . . . . . . . . . . . . . 47
PACE . . . . . . . . . . . . . . . . . . . . . . . . . . . . . . . . 19
PALADIUM . . . . . . . . . . . . . . . . . . . . . . . . . . . 21
PALCOM. . . . . . . . . . . . . . . . . . . . . . . . . . . . . 35
PALSAT . . . . . . . . . . . . . . . . . . . . . . . . . . . . . . 29
PANASONIC . . . . . . . . . . . . . . . . . . . . . . 19, 36
PHILIPS . . . . . . . . . . . . . . . . . . . . . . . . . . . . . 20
PROSAT . . . . . . . . . . . . . . . . . . . . . . . . . . . . . 19
QUADRAL . . . . . . . . . . . . . . . . . . . . . . . . . . . 38
REDIFFUSION. . . . . . . . . . . . . . . . . . . . . . . . . 39
RFT . . . . . . . . . . . . . . . . . . . . . . . . . . . 20, 21, 26
SABA. . . . . . . . . . . . . . . . . . . . . . 02, 05, 40, 49
SABRE . . . . . . . . . . . . . . . . . . . . . . . . . . . . . . . 58
SAKURA . . . . . . . . . . . . . . . . . . . . . . . . . . . . . 41
SALORA . . . . . . . . . . . . . . . . . . . . . . . . . . . . . 23
SAMSUNG/JUPITER . . . . . . . . . . . . . . . . . . . . 42
SEEMANS . . . . . . . . . . . . . . . . . . . . . . . . . . . . 43
SENTRA . . . . . . . . . . . . . . . . . . . . . . . . . . . . . 44
SONY . . . . . . . . . . . . . . . . . . . . . . . . . . . . . . . 46
SUNSTAR . . . . . . . . . . . . . . . . . . . . . . . . . . . . 06
TATUNG. . . . . . . . . . . . . . . . . . . . . . . . . . . . . 32
TECHNISAT . . . . . . . . . . . . . . . . . . . . . . . . . . 48
TELECIS . . . . . . . . . . . . . . . . . . . . . . . . . . . . . 19
TELEDIREKT. . . . . . . . . . . . . . . . . . . . . . . . . . 43
TELEFUNKEN. . . . . . . . . . . . . . . . . . . . 19, 49
TELEPIU . . . . . . . . . . . . . . . . . . . . . . . . . . . . . 59
TELEVES . . . . . . . . . . . . . . . . . . . . . . . . . . . . . 56
THOMSON . . . . . . . . . . . . . . . . . . . . . . 49, 50
THORN . . . . . . . . . . . . . . . . . . . . . . . . . . . . . 58
TOSHIBA . . . . . . . . . . . . . . . . . . . . . . . . . 19, 51
TPS . . . . . . . . . . . . . . . . . . . . . . . . . . . . . . . . . 67
UNIDEN . . . . . . . . . . . . . . . . . . . . . . . . . . . . . 52
UNIVERSUM . . . . . . . . . . . . . . . . . . . . . . . . . . 21
WINERSAT . . . . . . . . . . . . . . . . . . . . . . . . . . . 25
WISI . . . . . . . . . . . . . . . . . . . . . . . . . . . . . . . . 53
WOSLEY (TANDY) . . . . . . . . . . . . . . . . . . . . . 54
List of cable receiver codes
CABLESTAR .
CABLETIME .
GI . . . . . . . . .
IMPULSE . . . .
JERROLD . . .
MACOM . . . .
.
.
.
.
.
.
.
.
.
.
.
.
.
.
.
.
.
.
.
.
.
.
.
.
.
.
.
.
.
.
.
.
.
.
.
.
.
.
.
.
.
.
.
.
.
.
.
.
.
.
.
.
.
.
.
.
.
.
.
.
.
.
.
.
.
.
.
.
.
.
.
.
.
.
.
.
.
.
.
.
.
.
.
.
.
.
.
.
.
.
.
.
.
.
.
.
.
.
.
.
.
.
.
.
.
.
.
.
.
.
.
.
.
.
.
.
.
.
.
.
.
.
.
.
.
.
.
.
.
.
.
.
.
.
.
.
.
.
.
.
.
.
.
.
. 60
. 60
. 61
. 61
. 61
. 62
NOOS. . . . . . . . . . . . . . . . . . . . . . . . . . . . 20-67
OAK . . . . . . . . . . . . . . . . . . . . . . . . . . . . . . . . 63
SCIENTIFIC ATLANTA . . . . . . . . . . . . . . . . . . 64
VISIOPASS . . . . . . . . . . . . . . . . . . . . . . . . . 20-67
VIDEOTRON . . . . . . . . . . . . . . . . . . . . . . . . . 66
VIDEOWAY . . . . . . . . . . . . . . . . . . . . . . . . . . 66
13
EN
DTH7500_en
4/07/03
16:55
Page 14
Connections and initial set up
The connections proposed on page 4 permit the rapid connection of your DMR and ensure
optimum sound, visual quality (RGB) and standards. Depending on the sockets available on your
other devices or to benefit from the maximum performance of your DMR you may make other
connections.The DMR has other sockets for this purpose.
1 2
3
7
6
4
5
Sockets and cables (inputs)
1 – Video in - Composite (CVBS) (COMPOSITE VIDEO INPUT)
RCA socket and
cable for CVBS
Video signal, also
called Composite.
The yellow video socket also known as composite video (or CVBS): the
image quality provided by this socket is less better than all the other video
sokets. Only use this socket if all the other sockets are already in use.
2 - Audio inputs (INPUT L, R)
RCA sockets and
cables for analogue
L and R audio
signal.
The analogue sound of an operating device (television set or amplifier) can be
input via the 2 Audio sockets L and R of your DMR. If you do not use the
recommended connection, i.e. the Peritel (Scart) socket, you must, as well as
the video connections (CVBS or S-VIDEO) connect the outputs Audio L and
R of the operating device to the Audio L and R inputs of your DMR.
Note: the audio sockets and cables are generally identified by a colour code (red for
the left channel and white for the right).
3 - S-Video input (Y/C) (S-VIDEO IN)
Ushiden socket and
cable for Y/C Video
signal, also called
S-Video.
The S-Video signal is of a lesser quality than that of the RGB signal supplied
by the Peritel (Scart) socket.The S-Video signal however gives a better image
quality than the composite video socket (C) since black and white (Y) is
separated from colour in the video signal.
Note: do not forget to connect the audio cables since the S-Video cable transmits
only images, not sound.
14
DTH7500_en
4/07/03
16:55
Page 15
Connections and initial set up
Sockets and cables (outputs)
4 - Optical and coaxial Out sockets (DIGITAL AUDIO OUT)
Optical socket and
cable for digital
audio signal.
Coaxial socket and
cable for digital
audio signal.
The digital sound of a disc being played is permanently available on the optical
and coaxial sockets of your DMR. Use one of these sockets by connecting it
to a decoder or a DTS or Dolby Digital amplifier. Some of these appliances
are equipped with a coaxial In socket (COAXIAL) or an optical In socket
(OPTICAL), while others are equipped with both sockets. Choose one of the
two connections.
Note: in most cases these two types of connection give similar results; the only
difference lies in the type of cable used and the cost of these cables, the coaxial
cable being the least expensive one to buy. However it sometimes happens that
some coaxial cables are parasitized by high frequency interferences caused by
household electrical appliances, high voltage electric cables or radio transmitters.
5 - S-Video out socket (Y/C) (S-VIDEO OUT)
Ushiden socket and
cable for Y/C Video
signal, also called
S-Video.
The S-Video cable provides a video signal of lower quality than the Peritel
(Scart) socket. An S-Video signal however provides a better quality image than
a composite video socket, because colour (C) is separated from black and
white (Y) in the video signal.
Note: do not forget to also connect the audio cables, because the S-Video cable
transmits images and not sound.
6 - Audio outputs (OUTPUT L, R)
RCA sockets and
cables for analogue
L and R audio
signal.
The digital sound output from a disc being read is permanently available at
the two audio sockets, L and R, of your DMR. If you do not use the
recommended Peritel (Scart) connection to the television (paragraph 3 page
4), you must, as well as one of the video connections (CVBS or S-VIDEO)
connect the Audio outputs, L and R, of your DMR to the Audio inputs, L and
R, of your television set (or amplifier).
Note: audio sockets and cables are usually identified by a colour code (red for the left
channel and white for the right channel).
7 - Composite Video Out socket (CVBS) (OUTPUT COMPOSITE VIDEO)
The yellow video socket is also called composite video, or CVBS.The
image quality delivered by the video socket is the least good of all video
connections. Only use this socket if all other sockets are already in use.
RCA socket and
cable for CVBS
Video signal, also
called Composite.
15
EN
DTH7500_en
4/07/03
16:55
Page 16
Connections and initial set up
The sockets located behind the flap on the front panel allow for easy connection when displaying
or copying images and sound from a Camcorder or a memory card reader.
PULL HERE
to open
flap.
1
2
Front sockets (inputs)
1 - USB socket
The USB socket enables you to read and/or copy from a memory card
reader, JPEG images stored through a digital camera or mp3 files from an mp3
recorder.
Note: recognised players: USB 1.1 MASS STORAGE CLASS.
Select the USB socket in the main menu after connecting a card reader with a card
in the player.
2 - AV sockets (Audio/Video)
The AUDIO-VIDEO sockets facilitate the viewing or copying of your video
sequences from a Camcorder or any other AV device supplying a composite
video signal and analog stereo sound.
Note: select the socket displaying AV3 on the front panel with the AV key.
16
DTH7500_en
4/07/03
16:55
Page 17
Connections and initial set up
The keys on the front
1
2
3
4
5
6
7
8
9
10
PULL HERE
to open
flap.
EN
11
12
13
1 STANDBY/ON - To switch your DMR on
8 STOP - To stop play (press once) or to
or off.
stop recording in progress using the
2 AV - To select the audiovisual sources
Channels menu (press twice).
(channels or devices connected to the AV
sockets):
PR 1,2,3 - Channel 1, 2, 3.
AV 1 - Device connected on AV1 (TV set).
AV 2 (or SAT if an installation with a
satellite or cable receiver has been carried
out)
- Device connected on AV2 (satellite
receiver).
AV 3 - Front AUDIO/VIDEO sockets.
AV 4 - Rear AV sockets (S-VIDEO or
AUDIO/VIDEO).
9 RECORD - To start recording a TV
programme (the red indicator lights up)
and if necessary to adjust recording time
by pressing repeatedly. Each press on the
RECORD key extends recording time by
30 minutes.
è0h30 è 1h00 è 1h30 è 2h00 è 2h30 è 3h00è
3 PR- / PR+ / IG SKIP FI
10 G SEARCH FI
To change channels (page 22).
Skips forward or backward a chapter
(page 35).
Fast forward or reverse (page 33).
11 USB - USB socket to connect a card
4 Disc tray.
5 OPEN/CLOSE - To open and close the
reader (page 16).
disc tray.
12 Audio/Video sockets: to connect a
6 PLAY - To play a disc inserted in the
DMR’s disc tray (4) or resume viewing a
program after a television pause.
camcorder or other AV device.
13 Display panel - Displays your DMR’s
7 PAUSE - Pause during playback (audio CD
modes of operation (page 18).
or mp3) or pause on an image (DVD).
17
DTH7500_en
4/07/03
16:55
Page 18
Connections and initial set up
The messages on the display
Note: the brightness of the light on the display can be adjusted. Refer to page 48 about how to do this.
TV Functions
Main menu displayed on screen (device stopped).
No function selected.
Real-time viewing.
TV mode activated; channel 1 being watched.
Pause of the channel being watched.
Time Shift mode activated: the program is frozen while
the rest of the TV program continues to be recorded.
Delayed viewing of the selected channel.
After a pause, you resume viewing where you left off
while the end of the program continues to be recorded;
the time difference between delayed viewing and realtime broadcast is displayed (-39 seconds in this case).
Return to real-time viewing (key LIVE).
The TV programme on the channel selected starts
recording. Channel 1 is then indicated during recording.
With a disc
Start of disc playback.
DVD playback.
Playback of an Audio CD or VCD.
Pause of Audio CD or still frame (DVD,VCD).
Fast forward (u) or reverse (t).
Slow motion, forward (Ku) or backward (tK).
Other indications
Naviclick programmes guide displayed on the screen.
The source selected is indicated (with the AV key):
• AV 2 or SAT after installation of a satellite receiver
(page 10 and following pages).
• AV 3: AUDIO/VIDEO input sockets on the front.
• AV 4: AV/ S-VIDEO or AUDIO/VIDEO input sockets
at the rear.
• PR 1: Channel 1.
18
DTH7500_en
4/07/03
16:55
Page 19
Remote control
The remote control handset supplied with your DMR is a 3 in 1 type remote control. It allows 3
devices to be controlled: your DMR, a television set and a satellite or cable receiver.Thus you
have remote control of all these devices by using the 3 modes: DVD,TV or SAT•CABLE that are
accessed by 3 corresponding keys.This page describes the keys that control your DMR (in DVD
mode).
For description of the TV and SAT•CABLE functions, see the following page.
Description of keys in DVD mode
Signal lamp - this shows the status of the remote control when it
is being used to program or to control another device. It also
indicates that the batteries level is low by flashing several times
when a key is pressed.
Switches the DMR on or off.
Sets the remote control unit in DVD mode (by
pressing once), enabling you to control your DMR.
PR
Skips forward or backward a chapter (DVD) or
track (CD).
RETURN
Returns to the previous menu.
MENU
Displays the DVD disc menu while a disc is being
played.
CLEAR
Return to the main menu.
OPEN.CLOSE Opens and closes the disc holder of the DMR.
ZOOM
Enlarges the picture during playback, slow motion
or pause mode.
INFO
Displays the DMR information banner on the TV
screen while a disc is being played.
GUIDE
Displays a sub-menu on the disc (where available on
the disc).
ANGLE
To access a choice of angles of an image if available
on the disc.
0 to 9
To enter information (chapter, track number, …).
TV.VIDEO
Transmission of TV images from the DMR to those
on the TV set connected to the AV1.
REV
Fast backward while a disc is being played.
PLAY
Plays a disc.
FWD
Fast forward while a disc is being played.
REC
To record the TV program watched onto the hard
disc.
STOP
Stops disc playing or recording.
PAUSE
For standby when reading a recorded programme
or still picture (DVD).
AGAIN
Skip back – to have another look at the last few
seconds when reading a programme or disc.
LIVE
To view the program being broadcast in real time.
ADVANCE Jumps ahead by approximately 30 seconds.
DVD
19
EN
DTH7500_en
4/07/03
16:55
Page 20
Remote control
Using the remote control handset to control your television
and satellite or cable receiver
The DMR remote control handset is a 3 in 1 device that allows you to control the operation of
3 devices: your DMR, a television set, or satellite receiver.This page describes the keys that
control your television set and your satellite or cable receiver if they have the same functions.
Controlling a TV set
TV
Sets the remote control unit in TV mode (by pressing once) and enables
you then to control your TV set.
Switches the TV set on or off.
Volume control.
Switches sound off or on again.
PR
Switches channel or selects an AV socket.
AV
Selects an AV socket.
0 to 9
Keys enter digital values or change channel.
ZOOM
Enlarges (zooms in on) the picture on some TV sets.
MENU
Displays main TV set menu.
RETURN
Returns to the previous menu.
CLEAR
Removes menu or other information displayed on the screen.
GUIDE
Displays TV programme guide.
INFO
Displays information about the channel.
Note: colour keys enable one to use the teletext function on THOMSON TV sets.
Controlling a satellite or cable receiver
SAT.CABLE Places
the remote control in the SAT•CABLE mode (press once) and
then enables you to control your satellite or cable receiver.
To turn on or off the satellite or cable receiver.
PR
Switches channel.
0 to 9
Keys enter digital values or change channel.
MENU
To display the main menu of the satellite or cable receiver.
RETURN
Returns to the previous menu.
CLEAR
Removes menu or other information displayed on the screen.
GUIDE
Displays the Naviclick page (if available).
INFO
To display the info on the channel or operation of the satellite or cable
receiver.
Remote control - Code A-B
With certain devices (combined TV/DVD or other DVD player) it may
happen that your DMR controls the DVD player of the other device. In this
case you can adjust your remote control and the DMR on another code
known as code B (adjustment shown on page 57).
20
DTH7500_en
4/07/03
16:55
Page 21
Remote control
Programming the remote control
If your remote control does not control your satellite receiver (or cable) or your television set
you will need to configure it using one of the two methods proposed: automatic code search or
manual programming.
Automatic code search
This method can be used to automatically find the most appropriate code for
your appliance.
1. Switch on the appliance you wish to use the remote control with.
2. Press the relevant key for this appliance on the remote control, and while
holding this key down, press the standby key until the remote control
light comes on. Release the two keys.
3. Point the remote control at the appliance and press PLAY.Wait until the
light stops flashing. If the appliance has not gone into standby mode after
five seconds, press the PLAY key again to continue the search for the
next set of codes. Repeat this operation until the appliance goes into
standby mode.There are 20 sets of codes.
4. When the appliance goes into standby mode, press the
key on the
front to switch it on again.Then press the REV key to put it back in
standby mode, and if necessary, keep pressing until the appliance goes into
standby.
5. Press the STOP key and hold it down until the remote control light goes
off.
Manual programming
This method involves carrying out a manual search for the codes to be used
for controlling your other appliances.
1. Switch on the appliance you wish to use the remote control with.
2. Press the corresponding key on the remote control, while holding it
pressed down, enter one of the codes corresponding to the brand of the
device (Thomson Group codes on the bottom left of this page, other
brands can be found in the “Related documents” leaflet).
If the remote control light flashes you have entered the wrong code or it is not
possible to program the remote control.
3. Point the remote control at the appliance and press the relevant key.
Press the
standby key.
If the appliance does not go into standby mode, try another code.
Depending on the year of manufacture and the type of appliance, some functions
may not be available.
Certain codes may cover more functions than others.Test the functions you
can control and, if appropriate, try other codes.
Note here the code(s) which work best.
SAT Codes: 5000, 5001,
5031, 5037, 5043, 5064,
5065, 5066, 5058, 5084.
TV Codes: 1000,
1002, 1016, 1024,
1041, 1051, 1089,
1127, 1128, 1129,
1134, 1135, 1148,
1001,
1033,
1096,
1130,
1151.
TV
SAT•CABLE
Note: when you change the remote control’s batteries, remember to reprogram it.
21
EN
DTH7500_en
4/07/03
16:55
Page 22
Recording functions
To watch TV Programmes
To take full advantage of the TV functions and TV program recording features, your DMR must be
used as if it were at the centre of your TV setup.The connection shown on page 4 will allow you
to do this. Consider your DMR as a television set without a screen and your TV set as a screen
only.The channels will therefore have to be selected from the DMR and its remote control
1. Turn on your television set.
2. Turn on your DMR using the STANDBY/ON key.The time displayed on your DMR is
replaced by the word MENU.
• After a few seconds the main menu of the player appears on the television screen.
• Channels function is already selected.
Note: turn off non used devices to avoid problems of selecting
sockets or other types.
If the main menu of the player is not displayed on the television
screen, check and/or select the Scart socket to which you
connected your DMR (see page 4 - AV1 selection). Generally the
selection is carried out using the AV key on the television set
remote control.
3. Press the OK key of the remote control or one of the PR+/PR-, keys on the front panel.
• The images of the last watched channel appear.
• Encrusted within the image is information on the channel and programme.This disappears
after several seconds.
Note: when the information banner is displayed at the top of
the screen you have the possibility of choosing an audio channel
(if this is provided by the channel) using the
key on the
remote control.
To display information again, press the INFO key of the remote
control.
4. Change the channel with the PR+/PR- key or the remote control number keys.To select a
channel on a device connected to your DMRs use the AV key of the remote control or press
PR+/PR- several times.
22
DTH7500_en
4/07/03
16:55
Page 23
Recording functions
Putting the television on pause (Pause Live TV)
Your DMR allows you to answer the phone without missing a single moment of the TV program
you were watching. All you have to do is press PAUSE.
• The broadcast is frozen.You have 45 to 90 minutes to record the broadcast according to
the setting selected (page 49). After this period the recording continues but the first few
minutes will be deleted for the benefit of the following minutes.
To resume watching the program where you had left off, press PLAY.
• From that moment, the program is watched in delayed viewing.To watch the program in real
time, press LIVE.
Note: Once you have activated the Pause Live TV, mode, you cannot change channels since the recording
of a TV program onto the hard disc does not allow the change of channels.
Record the current programme
Your DMR has the same recording functions as a VCR. Only the recording medium is different (a
hard disc instead of a video cassette).The capacity of your hard disc depends on the quality you
set for your recordings. Refer to page 43.
Replaying what you missed
When you watch a TV program in real time, you can at any time go back a few minutes to replay
a scene.This is made possible because the program you are watching in real time is constantly
being recorded in buffer memory which records up to 90 minutes.
• To select and replay the scenes you want to see again,
use the REV, FWD, PLAY, PAUSE and STOP keys.
Recording the current program
To record the program you are watching, press REC. Recording is confirmed by the message
RECORD which appears for a few seconds on the DMR’s display panel. An information banner
is also displayed along with the picture for a few seconds.To display it again, press the yellow
INFO key.
Note: once you press REC to start a recording, you can no
longer change channels.
To see your program recordings, refer to the VIDEO menu on
page 41.
Stopping the recording
Press STOP to stop the recording.
A confirmation menu appears. Follow the instructions.
Note: To avoid recording images that are of no interest to you,
select the temporary stop using the
/
keys, (this is useful
when copying images from a camcorder). Press ok to resume
the recording. Select the complete stop to fully stop the
recording.
In all cases, follow on-screen instructions.
23
EN
DTH7500_en
4/07/03
16:55
Page 24
Recording functions
Programming a TV recording
You can record a future programme by programming its recording time. For this you have the
choice of manual programming or Naviclick programming, explained on page 26.
Recording with the timer
1. From the main menu (MENU key in stop mode) select the Recording then Timer option
and then
or
keys and OK.
• The Timers screen is displayed. It contains a list of all the deferred recordings that you
have already programmed, whether carried out manually, as explained below, or using the
Naviclick function explained on page 26. If nothing has been programmed the screen
simply displays New.
2. Press the OK key.
• The programming menu is displayed.This menu allows you to define all the parameters
necessary for a deferred recording. Select each parameter with the
and
key and enter
the corresponding information with the number keys or the
key as described below.
Note: your DMR has a programming monitoring system.You can
schedule up to 16 recordings. If the programming of two
recordings overlaps, a warning message will be displayed.
3. Name
Give a Name to your programme. Press the INFO key to access the keyboard table. Use the
keys
, , ,
and OK to compose the title of the recording letter by letter.When
complete, select Keep with
and press OK.
4. Channel
a) Enter the channel number using the digit keys of the remote control (Pr -- must be displayed)
or browse the list of channels in the memory of the DMR using the PR+/PR- key.
b) Or select one of the Audio-Video (AV2,AV3,AV4) sockets to which is connected a device
(satellite receiver or other) using the
key (the socket details are shown on page 17).
5. Day (s)
Using the digit keys on the remote control type in the date, if the recording is not made the
same day, and / or select a period using the
key.
Once: to record the selected programme according to the parameters you have defined.
Every Mon: to record the same programme the same day every week starting from today (supposing
today is Monday).
Mon-Fri: to record the same programme, everyday at the same time from Monday to Friday.
6. Start time and stop time
Enter the recording start time and then the stop time.
24
DTH7500_en
4/07/03
16:55
Page 25
Recording functions
7. Recording quality
Select a recording quality from the 4 proposed using the
*1 : High, *2 : Normal, *3 : Basic, *4 : Low.
key.
Note: choice of quality enables you to adapt the recording time on the hard disc. The higher the quality the
bigger the space used on the hard disc. Select one of the following options: high, Normal, Basic (base)
or Low.
When empty the hard disc of your DMR can contain around 120 hours of recording for a *4: Low quality
adjustment (20 hours in *1: High). The figure 1 to 4 is displayed in the information banner when playing
the recording. The quality choice is only valid for one particular programming session.
8. VPS/PDC
Activate the VPS/PDC function using the
key to trigger recording at the actual time of
the beginning of the broadcast. If the channel broadcasts VPS/PDC signals you can avoid the
consequences of any delays in broadcasting.This adjustment is only valid for this programming
session and for channels received via the aerial (PR - -).
9. Keep
Memorise your programming by selecting Keep with the
key and confirming with the OK
key.
• The Programming screen reappears.Your programming is now displayed in the chronological
list of programming already carried out. On this screen it is only possible to display 5
programming sets from the maximum 16. If you have carried out more than 5
programmings, to see the others press the
and
key.
Note: to check (or delete) programming parameters, select a
name and press OK. The programming parameters menu
appears. Correct the parameters as shown in steps 1 to 9 or
delete the programming by selecting Delete and confirming
with the OK key.
10. Return to the main menu using the MENU key in order to continue to use your DMR or
turn it off using the STANDBY/ON key.
25
EN
DTH7500_en
4/07/03
16:55
Page 26
Recording functions
Naviclick programmes guide
For certain channels your DMR offers a daily and sometimes following day TV programme guide.
The information that it provides come from the Teletext and NexTView services broadcast by
certain channels.The updating of Naviclik information is carried out once every 24 hours.
Naviclick allows you to display on your screen the programmes of those channels and to select
the broadcasts you wish to record simply by clicking on them.
Consulting the TV guide with Naviclick
1. When you are watching a channel, press the GUIDE key to display the Naviclick page.
Note: the downloading of Naviclick data (at 3am or 8am) can be
quite long (up to 2 hours). During this time you should not use
your DMR, nor turn it on or have a programme programmed for
recording during this updating time (from 3am to 5am or 8am to
10am) otherwise the information will be lost. For countries that
provide the NexTView service we recommend that you set the
downloading time to 3am.The full guide of TV programmes can
only be consulted the following day after an initial installation. It is
necessary to allow your DMR to download the guide at the time
set in the Naviclick Setup menu (page 54).
2. Use the
,
keys to go from one page to another (from one channel to another) or to
browse through the current channel’s list of programs ( , ).To consult the programs of
the channels at a given time, choose a program from the list (e.g.: 9 o’clock news) and use the
( , ) keys to move on to the programs of the other channels.
Note: if the Naviclick guide does not give you satisfaction, check the parameters as shown on page 54.
Recording through the Naviclick TV guide
1. Select a channel on your DMR.
2. Press the GUIDE key and wait for the Naviclick page to appear.
3. Use the
,
keys to place yourself on the program you want to record.To go from one
channel to another, use the PR+/PR- keys or ,
keys.
4. Press OK to confirm your selection.
The programming contents appears. It tells you which recordings have already been programmed.
Press the MENU key to return to the Main Menu or for more details on each programming set,
select the one that interests you with the
,
keys and confirm with OK.The Timer menu
appears with all the programming parameters.You can correct this data then select Keep to
validate the programming. Press CLEAR to remove the on-screen informations.
5. You can turn off your DMR or leave it turned on. In this case the DMR will automatically
seek the channel to automatically record at the correct recording time.
Note: for the correct downloading of the programme guide, the clock of your DMR must be set (page 7).
26
DTH7500_en
4/07/03
16:55
Page 27
Recording functions
Recording from a memory card
Your DMR allows you to copy JPEG images or mp3 files to your hard disc from a memory card
read in a player connected to the front USB socket. All the files in the memory card will be
recorded on the hard disc of your DMR.You can then rename them and / or delete them (To
manage your recordings, see page 43). See page 16 for connecting a compatible card reader via
the front USB socket of your DMR.
1. Connect a card reader to the USB socket and insert the card that you wish to display, listen
to, and / or copy the sound and images.
Note: with some players and/or cards, first insert the card into the player before connecting it to the front
USB socket. With other players you should connect it with its card before starting DMR.
2. From the main menu (MENU key or in stop mode) select the Memory Card function with
the
or
key and confirm with OK.
Note: the Memory Card line can only be accesed when you
are using a recognised card.
3. With the
•
•
,
keys and OK select:
Start to see the contents of the card.
Copy to transfer the image files and / or sound files from the memory card to the
recordable disc in your DMR.With the
,
keys and OK select the type of files to copy.
The contents of the card are then recorded on the recordable disc in your DMR.The copy
may take some time depending on the quantity of JPEG or mp3 files to be copied.
Note: this screen confirms that the copying of files is in progress.
To stop the copy operation, press STOP.
4. When the copying is completed, the main screen of the DMR is redisplayed.
27
EN
DTH7500_en
4/07/03
16:55
Page 28
Recording functions
Recording from a connected device
Your DMR allows you to copy TV programmes (satellite or cable) sequences, or video films from
a connected device.
From a satellite receiver or cable receiver
If you haven’t carried out the installation to control the receiver from the DMR (recommended
on page 10), you must select the AV2 socket to which it is connected (check this ).
1. From the Main Menu and with the Channels function selected, press OK.The images of the
last channel watched appear.The information banner is displayed for several seconds.
2. Select the AV2 socket of the DMR using the AV key on the remote control in order to
display AV2 in the information banner and on the display (LIVE AV2).
3. Record by pressing the REC key on the remote control or RECORD on the front panel.
4. Stop the recording by pressing twice on the STOP key.
From a Camcorder or other device
Your DMR has both RCA Audio-Video and Ushiden sockets for the transfer of video to a
recordable disc.
1. From the Main Menu and with the Channels function selected, press OK.The images of the
last channel watched appear.The information banner is displayed for several seconds.
2. Select the AV3 sockets (on the façade) or AV4 (at the rear) to see the images from the
connected device (S-Video or composite).
3. Place the device in its play mode.
4. Record by pressing the REC key on the remote control or RECORD on the front panel.
5. Stop the recording by pressing twice on the STOP key.
28
DTH7500_en
4/07/03
16:55
Page 29
Recording functions
Recording from a CD-ROM
Your DMR allows you to copy JPEG images or mp3 files to your hard disc.You can record these
files from a CD-Rom. All the files on the CD-R will be recorded on the hard disc of your DMR.
You can then rename and/or delete them (manage your recording on page 43).When recording
you will no longer be able to use other functions on your DMR.
1. Insert the CD to be copied (music MP3 or JPEG images) in the DMR.
2. display the Main Menu (press STOP or MENU).
3. In the Disc menu select Copy with the
4. Select Music with the
and
and
key and confirm with OK.
key to copy mp3 or JPEG files and confirm with OK.
Note: recording can take a certain amount of time, depending
on the number of files to be copied.
• A progression window appears. Follow the on-screen instructions.The content of the CDROM is then recorded on the hard disc of your DMR.The copying operation can take a
certain amount of time depending on the number of JPEG or mp3 files to copy.
Note: this screen confirms that the copying of files is in progress.
To stop the copy operation, press STOP.
5. When the copying is completed, the main screen of the DMR is redisplayed.
29
EN
DTH7500_en
4/07/03
16:55
Page 30
Playing a disc
Discs you can play
• Digital video discs - 12 cm and 8 cm, single or double sided, single or dual
layer. DVDs are high density optical discs on which high quality picture and
audio are recorded by means of digital signals.
Region code number - Your DMR responds to the regional management
information recorded on DVDs.The regional code of your DMR is 2. Before
buying a DVD, make sure that it bears the correct logo. ALL means all
regions.
Note: for your information: the other areas are - 1: USA, Canada - 3: Southeast Asia,
Taiwan - 4: Central America, South America, Australia, Mexico, New Zealand - 5: Russian
federation, Africa (except Egypt and Rep. of South Africa), India, Pakistan - 6: China.
DVD+Rewritable
• DVD+/-R, DVD+/-RW - Most DVD-R and DVD+R (one recording only),
and DVD-RW and DVD+RW discs (rewritable). Recordings on DVD-R and
DVD-RW discs must be made in Video DVD mode. Recordings on
DVD+RW discs must be made in accordance with the specifications for the
4.7 Gb capacity DVD+RW disc format. Compatibility is dependent on which
DVD writer, writer software and discs are used.
• Audio CDs - 8 and 12 cm audio CDs
• CD-R, CD-RW - Most CD-R (one recording only) and CD-RW discs
(rewritable). Compatibility is dependent on which DVD writer, writer
software and discs are used.
• Video CD (VCD) - CD on which you can record up to 74 min. of VHSquality video associated with still images, audio tracks and interactive menus.
• Super Video CD (S VCD) - Most S-VCD discs conform to the IEC 62107
standard.They can be used to record up to 70 minutes of digital sound and
video, with MPEG-2 standard video and MPEG-1 standard audio. S-VCD disc
compatibility is dependent on which MPEG coding software, disc design
software and disc writer software are used, and the discs themselves.
Note: Despite considerable progress made in providing compatibility with as many
different discs as possible, reading of discs not conforming to Audio CD, Video CD and
Super Video CD (S-VCD) disc standards cannot be guaranteed).
• MP3 files - Discs containing sound files in MP3 format.
• JPEG files - Discs containing images in JPEG format. Compatibility is
dependent on the disc creation software used and file sizes, stated in
millions of pixels. Certain JPEG files such as Progressive JPEG files cannot be
read by this equipment.
30
DTH7500_en
4/07/03
16:56
Page 31
Playing a disc
Interactive banners
In addition to menus, your DMR has interactive information banners with icons representing
functions or information. Some banners provide access to disc playback functions (for DVDs,
CDs,VCDs, etc.) while others give you information on the channels and related functions.
In TELEVISION mode (Operating principle)
1. Turn on your TV set and your DMR.
2. In the Main Menu of your DMR, (Channels line selected) press OK.
The picture of the last channel selected appears. An information banner is displayed along
with the picture for a few seconds.To view it again, press the yellow INFO.
Information on the TV channel being watched
LIVE function (real-time) or delayed
viewing
(page 23).
Current time
(Time set page 7).
No. and name of the channel selected
on the DMR (page 22).
Indications concerning
the channel sound and
the selection of audio
channels.
Keys
and
on the remote control
unit can be used for selecting.
Recording the channel being watched (here, channel 11)
Time elapsed since the
beginning of the recording.
Press REC once.To select recording time
press the key several times (while banner is
displayed) to extend recording time by 30
minutes up to a total of 3 hours.
è0h30è1h00è1h30
3h00ç2h30ç2h00ç
Recording
under way
(page 23).
Indications concerning the channel sound and
the selection of audio channels. Selection is
possible with the
key on the remote control.
VIDEO recording
under way
(page 23).
Remaining recording time
available on the disc according
to the quality selected.
Playback of a video program recorded on the DMR
Type of recording played
(VIDEO page 41).
Recording quality
chosen
(page 43).
Time elapsed since the
beginning of playback.
Indications concerning the channel sound and
the selection of audio channels. Selection is
possible with the
key on the remote control.
31
Information on the recording being
played (channel or source, time, day,
date and length).
EN
DTH7500_en
4/07/03
16:56
Page 32
Playing a disc
In DISC PLAYING mode (Operating principle)
1. Load a disc and press PLAY to start playback.
2. To display the banner, press the yellow INFO key.
3. Choose an icon using the , keys or enter a number using the number keys to access a
chapter or a title (when the corresponding icon is selected).
4. To remove the banner, press the yellow INFO key or the CLEAR key.
With a DVD
For standard playing, repeating of a title, a scene
between 2 points A an B, or an entire disc (page 36).
Chapter 1 currently being
played (page 35).
Title 3 currently being
played (page 35).
To change the viewing angle
for video DVD discs (page 37).
Time elapsed
(page 35).
Play mode
(page 36).
To choose the dialogue
language and audio format
(page 36).
To select the language
of the subtitles (page 36).
With an audio CD
Track 1 currently being
played (page 35).
To control the repeat reading of a disc, a musical track
or repeating of a music track between 2 points A and B
(page 36).
Introscan - To play the first seconds
of each track.
To select the play mode
(Standard, Random) (page 36).
With a VCD (Video CD)
Title currently being
played (page 35).
Index currently
being played.
To select the Stereo, Mono,
Left or Right audio channel
To select the PBC function where
available on the disc (page 37).
To control the repeat reading of a disc or a track
available on the disc (page 36).
Note: PLAY MODES (PLAY, PAUSE, REV, FWD keys)
u PLAY (Play) Fast forward (u x3, x6…), or reverse (t -x3, -x6…).
K PAUSE (Pause) Slow motion, forward (Kuu 1/2, 1/6 …), or backward (ttK -1/2, -1/6 …).
32
DTH7500_en
4/07/03
16:56
Page 33
Playing a disc
Loading and playing a disc
Switch on your TV set and DMR. It may be necessary to turn off other appliances.
1. If the player menu is not displayed on TV screen, select the TV set Scart Peritel socket to
which you connected your DMR (see page 4).
2. Open the disc tray by pressing OPEN/CLOSE. Place the disc on the tray.
EN
Note: the disc label must face upwards (double sided discs
have a small label on both sides around the centre).
Loading a “single-sided” disc.
3. Close the disc tray by pressing the OPEN/CLOSE or PLAY. According to the type of disc
one of three things may now happen:
• disc playback starts,
• the disc menu is displayed (DVD video disc) and proposes, for example, selection of the
language of dialogues, subtitles, etc, or to begin playing the disc. Select using the 4
, ,
and
keys, then confirm with the OK key,
• in the Main Menu Disc is highlighted. Press once or twice on PLAY to access the disc’s
menu or to begin playing it (depending on the discs).
Note: the Disc heading is shown as transparent when there
is no disc in the device or if the disc is not compatible.
Search Options
Quick search of an image or a track
In Play mode, start the Forward or Reverse fast motion playback using the FWD (forward) or
REV (reverse) keys. Press once or several times for higher speeds.To resume normal playback
press PLAY.
Still picture and frame advance
During playback press PAUSE once to freeze the image. Press PAUSE again to go into “frame”
mode (the PAUSE icon is then replaced by the FRAME icon on the TV screen). Press FWD or
REV to view images one after the other forward or backward.To resume normal playback press
PLAY.
Note: If the DMR is left in pause mode for a long period with a DVD or a VCD, the home screen comes on.
Press any key on the remote control unit to resume display of the image transmitted from the disc.
33
DTH7500_en
4/07/03
16:56
Page 34
Playing a disc
Slow motion (in Pause mode on an image)
During playback press PAUSE once to freeze the image. Press FWD or REV to view images in
slow motion forward or backward. Press once or several times for higher speeds.To resume
normal playback press PLAY.
Skipping a chapter or a track (DVD - VCD - CD)
During playback you can access the following or previous chapter (or track) by pressing PR
and/or PR
on the remote control unit.
Note: Forward or backward skips can also be made by using the PREV and NEXT keys on the DMR.
Scene Again™ (DVD)
During playback press AGAIN on the remote control unit. Each touch of the key steps back 10
seconds (approximately) of play).
Advance (DVD)
During playing of the disc, press the ADVANCE key of the remote control to skip ahead by
approximately 30 seconds.
Playback options
Enlarging an image (zoom)
During playback press the ZOOM. key once or repeatedly. Move the zoomed image around using
, ,
and
to view a particular spot. If this does not work, try again after pressing
PAUSE.To resume normal playback press the key several times to return to the original format.
Titles, chapters, time elapsed, audio and subtitles
From the banner, you can access certain functions directly using the ,
keys. Choose a title or
a chapter (DVD), or a track (CD,VIDEO CD). Change the language of DVD dialogues or subtitles.
For direct access to a specific scene on the disc, select the first icon with the
keys. Enter
the requested place in the scene (expressed in hour, minutes, seconds) with the remote control
number keys. (enter 001205 to access a scene which is 12 minutes and 5 seconds away from the
start of the disc (DVD) or track (Video CD)).
Note: with certain discs, direct access to a scene is not possible even if the time elapsed is shown on the
banner.
A question mark in the counter zone indicates an input error.
This symbol is sometimes displayed. It indicates that the function is not available or that the key used is
incorrect
.
34
DTH7500_en
4/07/03
16:56
Page 35
Playing a disc
The disc information banner
Arrow
up
Arrow
left
Arrow
down
To access the information banner, press INFO on your remote
control unit during playback. Use arrow keys
and
on the
remote control unit to select the various icons.When an icon is
Arrow selected it is highlighted.The line under the banner is an
information and instruction line.When small arrows appear
right
above and below the selected icon these point to other
possible options. Now use the
and
keys to scroll
through the various options.
OK
INFO
Timer (DVD,VCD, CD)
This icon shows the time elapsed since the start of playback.The time
displayed is that of the title of a DVD disc during playback.The timer provides
direct access to a scene or a musical passage by keying in the starting time.
Select the time elapsed icon and use the numbered keys on the remote
control unit to access the place from which you want to play back. Use
two digits for each field. For instance, if you enter 01:35:12, you will
access the sequence beginning 1 hour, 35 minutes and 12 seconds after
the start of the title.
Note: for audio VCDs, the timer refers to the track currently being played.
Title or Track (DVD,VCD, CD)
Most DVD discs only contain one title. However some discs may contain
several titles each of which is itself divided into several chapters.
To choose a title, select icon T then use the
and
keys to scroll
the titles or tracks. Use the numbered keys on the remote control unit
to access a particular title or track.
Chapter (DVD)
Most DVD discs contain several chapters.
To choose a chapter, select icon C then use the
and
keys to scroll
chapters. Use the numbered keys on the remote control unit to access a
particular chapter.
Note: follow your progress below the banner.
35
EN
DTH7500_en
4/07/03
16:56
Page 36
Playing a disc
Play modes of discs (DVD - VCD - CD)
Play modes
The DMR has several play modes that depend on the type of disc being
played: standard play respects the order of the titles and chapters on the disc;
repeat between 2 points or repeat a disc, a title.The icon of the play mode is
accessible via the information banner during playback.
During playing of a disc, press the INFO key (the information banner is
displayed). Use the / and
/
keys.The icon changes depending on
the mode selected as well as the text area in the information banner:
Standard, Repeat title, Repeat A-B, Repeat disc.
Note: the standard play mode is activated every time a new disc is placed in the
DMR.
Repeat playback of a scene between two points A and B
(DVD - VCD - SVCD)
A-B Repeat mode allows you to select exactly the sequence you wish to
repeat.
1. Select the repeat playback function using the
and
keys.
A-B Repeat appears under the banner.
2. Press OK to memorise the beginning of the scene you want to repeat
(point A).
3. Wait a few seconds before pressing OK again to mark the end of the
scene to be repeated (point B). A-B Repeat appears to tell you that the
repeat playback of the sequence is starting.To stop repeat, select another
mode using the
and
keys, or by pressing STOP.
Note: repeat functions remain active until you turn them off, open the disc tray or
turn off the power. Repeat play only works with discs that show the elapsed time on
the display. This may not work correctly with certain discs (Video CDs in PBC mode).
Subtitle and dialogue language (DVD)
1. While reading a disc, press the INFO key: the information banner is
displayed.
Selecting the
language of
subtitles
2. Use the
and
keys to select the icon of the subtitles or dialogues as
well as the sound format.
3. If available on the disc, select the language of the subtitles or dialogues
using the
and
the banner.
Selecting the
language of
dialogues
keys.The selected language name appears beneath
Note: selecting the language of subtitles only involves the disc being played. If you
remove the disc or if you switch off the DMR your selection will be cancelled. In this
case the default language, chosen when your DMR was first installed, will be
reactivated. If the preferred language is not available on the DVD disc the preferred
language of the disc (default language) will be selected automatically. With some
discs you can only access the dialogue or subtitle languages through the menu
provided on the disc.
36
DTH7500_en
4/07/03
16:56
Page 37
Playing a disc
Camera angles (DVD)
Changing camera
angles
A few DVD discs contain scenes shot from various different angles. If a disc
being played back offers different camera angles the icon in the banner will
show the number of the angle on the screen.With the disc in playback, press
ANGLE on the remote control unit and choose the angle using the same key
or the
and
keys.
PBC - Playback control menu (VCD)
Selecting a play
mode
This function enables you to make interactive selections of some scenes or
information through an on-screen menu. Moreover high resolution scenes can
be viewed if they are included on the disc. During playback press INFO (the
information banner appears). Press
or
to select the PBC icon. Uses the
or
key to see other screens or deactivate the functions on offer.
The Audio CD information banner
Standard play
Your DMR has several play modes depending on the type of disc being played:
standard play that respects the order of the tracks; random play that reads
music tracks in a random order; repeat play: Repeat A-B, Repeat track, Repeat
disc, Repeat de-activated.
The IntroScan function enables you to listen to the first few seconds of each
track of an audio CD. Select the icon and press OK.
IntroScan
Note: when the first few seconds of all tracks have been played the player goes into
Stop. To stop IntroScan press STOP to continue play and listen to the whole track, or
press PLAY.
37
EN
DTH7500_en
4/07/03
16:56
Page 38
Playing a disc
Playing image (JPEG) or music (mp3) files on a CD Rom
Your player can play JPEG files with a resolution of up to five million pixels. However beyond
400,000 pixels there is no perceptible improvement in the quality of pictures displayed on your
TV screen.
MP3 is a compressed audio file format that stocks a large quantity of music (files) on a disc. Files
can be grouped in folders (albums) in the same way as files and folders in your computer. A folder
can thus contain other folders.
Playing music files (MP3) and / or images (JPEG)
1. Load a disc in the machine and press the PLAY key.
2. Select a function with the
or
keys and confirm with OK. Depending on your choice
the menu of albums or songs for MP3 files ( ) is displayed. If you selected Pictures ( )
the folders or files are displayed in the same way.
3. Select a folder using the
or
keys of the remote control and press OK.The list of files
contained in the folder are displayed.
4. Select a file using the
or
keys of the remote control. Select Standard Play with the
key and select a play option using the
or
keys and confirm with OK.
Note:
mp3 play options
• Standard Play
• Play All
• Random All
• Random
• Repeat
• Resume
JPEG play options
• Normal
• Slow
• Resume
• Fast
Playback of files begins with the file selected and continues with the following files.Where
there are sub-folders in the folder, these are also played. Playback then moves to the next
folder located at the same level in the tree diagram as the folder containing the first file you
selected.
5. Stop playback using the STOP key.
38
DTH7500_en
4/07/03
16:56
Page 39
Playing a disc
Image Functions
Changing images
During the picture sequence change images using the PR
or PR
keys on the remote
control unit. According to the type of image (Ko or Mo) the change may take several seconds.
EN
Rotating an image
If an image is displayed sideways, you can rotate it through 90° using the
of the remote control.
,
,
and
keys
Zooming in on an image (zoom) and the Pan and Scan function
To see more detail, press once or several times on the ZOOM key to enlarge the image and use
the , ,
and
keys. Return to normal dimensions is carried out by pressing once on the
OK key or the PLAY key in order to continue the tray show.
To stop the picture sequence and return to player menu
Press STOP or press MENU several times.
39
DTH7500_en
4/07/03
16:56
Page 40
Menus
Disc menu
The Disc menu is only accessible if a disc has been loaded into the DMR.This menu enables you
to customise certain settings or actions for disc playback.The options suggested by the Disc
menu depend on the nature of the discs and/or files.
keys, and press OK to validate.
In the Main menu select the Disc line with
DVD
Start
Screen Format
x
x
Audio CD
mp3
JPEG
VCD
x
x
x
x
x
x
x
Copy
Playlist
Autoplay
DVD Menu
DVD Title
x
x
x
x
x
x
x
x
x
x
x
Start
•
To start playing a disc from the beginning, press the OK key.
Screen Format - (DVD / VCD)
Depending on the format of the DVD disc being played, select the image format that corresponds
best to the format of your television screen - cinema screen 16 x 9, classic screen 4 x 3 (Letter
Box or Standard).
• With a letterbox format TV (16x9) select 16x9 Widescreen. Films in 16x9 will be fully
displayed. Films in 4x3 will have vertical black bands on each side of the picture.
• With a 4x3 television, select 4x3 Letterbox to take advantage of the pictures recorded in
that format or 16x9. Select 4 x 3 Standard to take advantage of a 4x3 Letterbox without
distortion. For films in 16x9, the edges of the picture may extend beyond the edges of the
screen.
Note: on certain DVDs, the picture format cannot be changed.
Copy
•
To copy JPEG images or 3 files from a CD to your hard disc (refer to page 29).
Playlist (CD)
Allows customising of the playing of a disc by programming an order of musical sequences or
tracks.
• Select Playlist, and follow the instructions on the screen.
Autoplay
•
Select Autoplay On, if you want the disc to be played automatically once the DMR tray is
closed.
DVD Menu
Display the picture titles disc menu loaded into your DMR.
• Select DVD Menu using the
keys, and press OK. Use the same keys to scroll and
choose a picture (title).
DVD Title
Certain discs have title menus, some DVDs have more than one title and each title has a separate
menu for the film or programme.
• Select DVD Title using the
keys and press OK.
40
DTH7500_en
4/07/03
16:56
Page 41
Menus
Video menu
This menu gives you access to all the recordings you made from TV channels or devices
connected to your DMR’s front or rear AV sockets.
In the Main menu select the Disc line with
keys, and press OK to validate.
Note: In progress shows that a TV programme is being
recorded on the hard disc. The menu also indicates the time left
on the hard disc for other recordings.
The menu that appears displays a list of the last six recordings.These show the programme name
(Pr1, Pr2, etc.) and the time and day of the recording.A window enables you to view the sequence
selected in this list. Other recordings can be accessed by scrolling down the list using the
key.
The last recording is usually shown at the head of the list. If the name appears as In progress …
this means that a recording is in progress.To stop recording return to the Channels menu (using
RETURN,
, OK) and press STOP twice.
If the recording was done using the Naviclick function (page 26) the name of the programme is
clearly displayed
•
To choose a title, use the
keys, then press ok.The function line is selected.
Choose a play mode using the ,
keys.
• Standard Play to start playback of the title.
• Resume to resume playback of the title after a pause.
• Repeat Title to repeat playback of the title.
• Delete Title to delete the title from the hard disc.
• Rename Title to customise the names of the video titles.
To sort recordings in order of title or date, from the most recent to the oldest, or vice-versa,
select Standard Play and press the ANGLE key on the remote control unit.
Press OK to confirm your selection. If you have selected Standard Play, Resume, Repeat
Title, playback starts, the thumbnail picture appears full screen.
When playing the video recording, use the various scroll keys
(PLAY, PAUSE, REV, FWD, and STOP) as you would
on a VCR.
41
EN
DTH7500_en
4/07/03
16:56
Page 42
Menus
Music menu (JUKEBOX function)
This menu gives you access to the mp3 Audio recordings copied from a CD-R or memory card
read in an external reader connected to the USB socket on the front of your DMR.
In the Main Menu select the Music line with
keys, and press OK to confirm.
The menu which appears displays the titles of the recordings or folders in which your mp3
recordings are stored. Use the remote control , ,
and
keys to select a folder or song.
Choose a play mode, or an action such as Rename (to customise the names of the folders and
recordings) (page 43), Delete (to delete a folder or recording) (page 43).
Press OK to start playback.
Play modes:
- Standard Play: to hear the selected song.
- Random All: to listen to the songs on the disc in random
order.
- Random: to listen to the songs in the selected folder (album)
in random order.
- Repeat: to repeat the playback of the selected songs or
folders (albums).
- Resume: to resume playback of the title after a pause
Pictures menu
This menu gives you access to the JPEG images that you copied from a CD-R or memory card
read in an external reader connected to the USB socket on the front of your DMR.
In the Main Menu select the Pictures line with
keys, and press OK to confirm.
The menu which appears displays the images or folders in which your images are stored.The
image selected appears as a thumbnail. Use the remote control , ,
and
keys to select
a folder or image. Choose a play mode, Normal, Slow, Fast, or an action such as Rename (to
customise the names of the folders and images) (page 43), Delete (to delete a folder or image)
(page 43).
Press OK to validate.The slide show starts, the images appear one after the other.
Note: during the display of the images, press the yellow INFO key
if you want to display an information banner.
Play Modes:
- Fast: the image remains on screen for about 10 seconds
before the next image appears,
- Normal: approximately 15 seconds between images,
- Slow: approximately 30 seconds between images,
- Resume: to resume the slide show after a pause.
42
DTH7500_en
4/07/03
16:56
Page 43
Menus
Managing your recordings
You can customise your recordings by giving a name to your video sequences, JPEG images and
mp3 files saved on your DMR’s hard disc.
Renaming the recordings
From the Rename function in the Video, Pictures or Music, menus, press OK to access the
character grid.
With the
,
,
and
keys:
• Enter the name by selecting the letters one by one.
Press OK to validate.
• To erase a letter, press DEL. Press OK to validate.
• To add a space, select SPACE. Press OK to validate.
• When the name suits you, select Done. Press OK to
validate.
To exit the menu, press RETURN, CLEAR or press PLAY to resume playback.
Deleting recordings
From the Delete Title function in the Video, Pictures or Music, menus, press OK to delete a
recording. Confirm in the next window by selecting Yes.The title disappears from the list. Press
MENU to return to the main menu.
Choosing the quality of your recordings
Your DMR can record approximately 120 hours of TV programmes or video sequences from
connected equipment.This capacity depends on the quality setting chosen in the Recording
Quality menu.
In the Main Menu, select the Recording line and press OK to validate. Select Recording
Quality and press OK to validate. Choose a quality using the
,
keys and validate with OK.
Note: Recording Quality
Depending on the recording quality you have chosen, you can record
a total of approximately:
*1 : High - 20 hours.
*2 : Normal - 40 hours.
*3 : Basic - 60 hours.
*4 : Low - 120 hours.
• Times are approximate.They also depend on the other JPEG or mp3
recordings already present on the hard disc. The settings menu
cannot be accessed while a recording is in progress ( displayed)
on your screen.
43
EN
DTH7500_en
4/07/03
16:56
Page 44
Menus
Language Menu
Your DMR gives you a selection of languages to choose from.You can change the language of the
DMR menus, the language of the disc menus, the language of the dialogues and that of the subtitles.
In the menu, choose your preferred language for dialogues and subtitles. If it is available on the
DVD you will be playing, it will be selected automatically.The default language is the one which is
selected in the main menu. During playback, you can display or remove the subtitles and change
the language of the subtitles using the banners.
1. From the main menu select the Setup line with the
keys, then confirm with OK.
2. Select Languages with the
keys, then confirm
with OK.
3. Using the
keys select one of the proposed
options and confirm with OK.
Display (Language of DMR menus)
The language of the DMR menus was determined upon installation (page 5).You can nevertheless
change it by following the procedure given on this page.
When Display is selected press OK to display the choice of language menu.
Select a language with the
keys and confirm with OK. Exit the menu using the RETURN
key.
Audio (DVD disc dialogue languages)
Certain discs offer several different languages for the dialogues.The default language is the one
you selected during installation (page 5) if this language is offered on the disc being played.To
change the language of the dialogues your DMR provides two possibilities:
From the menu of the DMR
With the
keys, select Audio and confirm with OK to access the proposed list of
languages. Select the preferred language with the
keys and confirm with OK.
Note: if the language chosen is also available on the DVD, it will be selected as the dialogue language. If it is
not available, the preferred disc language will be selected.
From the banner
During playback, display the information banner using INFO key and select the
Audio icon with the
keys. Select one of the languages proposed by the disc
(and the best Audio configuration corresponding to your installation) with the
keys.
Note: with DVDs which have a DVD menu, we recommend that you use the disc menus rather than the
DMR menu.
You can also change the language of the dialogues and subtitles (if they are available on the disc). During
playback, display the disc menu using the MENU key. Then use the
,
, ,
keys.
44
DTH7500_en
4/07/03
16:56
Page 45
Menus
Subtitles (Language of DVD subtitles)
Certain discs propose several languages for subtitles.The default language is the the one you
selected during installation (page 5) if this language is also offered on the disc being played.To
change the subtitles language, your DMR provides two possibilities:
From the menu of the DMR
With the
keys, select Subtitles and confirm with OK. Select with the
confirm with OK.
keys and
Note: if there is no English on the disc for menus, dialogues, and / or subtitles, the player selects the default
language of the disc.
Original corresponds to the original soundtrack language of the film on the disc.
If you select the “Automatic” option, the default language of the subtitles will be the one you selected for
the dialogues (see above). Because of this, if the default language for the dialogues is not available, but
subtitles are available in this language, the subtitles will automatically display.
From the banner
During playback, display the information banner using INFO key and select the
subtitles icon with the
keys. Select one of the languages proposed on the disc
with the
keys or de-activate the display of subtitles.
Note: with DVDs which have a DVD menu, we recommend that you use the disc menus rather than the
DMR menu.
If you chose “English” during the initial setting (carried out on page 5): the main menu will appear in
English, the menus of the disc, in English (if available), the language of the dialogues, in English (if available).
Disc (DVD disc menu language)
The preferred language for disc menus is set during installation (page 5). If the DVD disc that you
are watching does not provide this language, you can select another language from the disc
menus.
45
EN
DTH7500_en
4/07/03
16:56
Page 46
Menus
Parental control menu
Your DMR has a child lock function which enables you to restrict access to certain DVDs.The
discs whose content may be deemed unsuitable for your children will therefore not be visible
unless a code that you have previously chosen is entered.
1. From the main menu select the Setup line with the
keys, then confirm with OK.
2. With the Parental Control line highlighted, press
OK on the remote control (Parental Control menu
is displayed).
3. Using the
keys select one of the proposed
options and confirm with OK.
Note: the padlock tells you whether or not the DMR is locked.
Locked: you must enter the secret code to play the discs whose rating limits exceed the limit you
have allocated.
Unlocked: you don’t need the secret code the play the discs, even if you have set a rating limit.
Your DMR is delivered in the unlocked, position without any rating limit. If you want to use the child lock
function, you have to set a rating limit and position the Lock, function on On.
Locking
4. The Lock line is already selected. Press OK to validate.
If no secret code has been chosen, your DMR asks you to choose one.
5. Enter four digits using the remote control number keys, then press OK to validate.
Note: choose a four-digit number that you will be able to
remember easily or note it down.
6. The first time a confirmation of the code is asked for. Enter the code again, then confirm
with OK.
46
DTH7500_en
4/07/03
16:56
Page 47
Menus
Ratings limits
This function makes it possible to restrict viewing of certain DVD discs by programming a
restriction on your DMR.This function can only be used with DVD discs provided with the
function.Your DMR provides ratings limits on a scale of 1 to 8.The Ratings limit function does
not work if the disc being played does not have a rating limit. In Europe ratings limits are as yet
uncommon on DVD discs on sale.
1. From the main menu select the Setup line with the
keys, then confirm with OK.
2. With the Parental Control line highlighted, press OK on the remote control (Parental
Control menu is displayed).
key to highlight Ratings Limits and press OK.
or
keys to set the bar at the level desired.
3. Press the
4. Use the
Note: the DMR is supplied without any ratings limit setting. If you
want to prohibit playback of certain discs you will have to set a
ratings limit.
5. Press OK.
6. To return to the DMR menu, press
until the menu is displayed on the screen.
Non categorized titles
We often feel that some DVD discs ought to have a
ratings limit. Unfortunately few discs in Europe have one.
You can however restrict viewing of such discs by means
of the Unrated Titles function by ticking the Password
Required, option and then locking the DMR as
described on page 46.When this is done the password
will be requested before playing any DVD disc, including
those that would not normally need a restriction.
Changing the code
To change the code, you must de-activate the Lock function to be able to return afterwards.
1. From the Parental Control menu enter the 4 figure code, then confirm with OK.
2. The Lock line is selected. Press OK.
3. With the
keys select Off and confirm with OK.
4. Exit the menu by pressing 3 times on the RETURN key.
5. See steps 1, 2 and 4, 5, 6 to allocate a new password.
6. See the Locking paragraph to enter a new code.
Note: if you forget your secret code, see the Trouble Shooting Guide at the end of this manual (page 53).
47
EN
DTH7500_en
4/07/03
16:56
Page 48
Menus
Options menu
The Options menu in the Setup menu offers you settings to configure certain useful functions
and optimise the performances of your DMR to match those of the devices connected to it.
1. From the main menu select the Setup line with the
keys, then confirm with OK.
2. Select Options with the
keys, then confirm with OK.
3. Select a function with the
keys, confirm with OK, adjust and confirm with the
keys
and OK.
Digital output (audio)
Depending on the amplifier or television (with or without integrated
decoder) connected to your DMR, you will need to set the DIGITAL
AUDIO OUT sockets (coaxial or optical) so that they deliver the Dolby
Digital, DTS or MPEG digital signals supported by the other device.Tick
Dolby Digital or DTS if the amplifier or TV set has a Dolby Digital or DTS
decoder (or both, depending on devices). MPEG must be ticked to play a
DVD disc on which the sound was recorded using MPEG standard.
SRS - TruSurround
This function provides you with virtual reproduction of the multichannel
sound of a Dolby or DTS film onto the two channels of your TV or stereo
amplifier.The sound effects of a 5.1 system are then simulated.
Note:
is a trademark of SRS Labs, Inc. TruSurround® technology is
incorporated under license agreement from SRS Labs, Inc.
Black level
Adjust the contrast (Light / Dark) according to the brightness of the room
in which you are viewing your DMR images
Display Dimmer
Depending on the brightness of the room where you’ve installed your DMR,
select one of the 3 available settings (Automatic / Bright / Dim) to adapt
the brightness of the display panel to suit its environment.
PAL/NTSC output
If the images of the DVD being played appear in black and white on your TV
screen, the standard of the video signals transmitted to your TV is incorrect.
Change the video signal from PAL to NTSC or vice versa.
Note: PAL is the name of the colour coding system used in most European countries.
NTSC is the name of the colour coding system used in the United States and some
other countries.
48
DTH7500_en
4/07/03
16:56
Page 49
Menus
AV1 output
Choose the RGB, S-Video or Video signal, depending on the device
connected to the AV1 Scart socket (usually TV sets). If you don’t know which
type of signal is accepted by your TV set, try each setting to get the best
result.
Note: transmission of DMR images to TV images (with certain TV sets)
If you want to watch one channel while recording programmes on another channel, you
must change the AV1 output connection setting by selecting Video instead of RGB
in the Options menu.
AV2 Input
Choose the RGB, S-Video or Video signal, depending on the device
connected to the AV2 Scart socket (usually a satellite receiver). If you don’t
know which type of signal is accepted by your TV set, try each setting to get
the best result.
Note: format of image signals:
RGB: English signal colour code (Red – Green – Blue).
S-Video: S-VHS (Y/C), signals with separate colour components and brightness.
Video: CVBS, composite video signals.
Standby mode
Your DMR has an Eco Standby to reduce its power consumption when on
stand-by. Select Eco standby to enable this function.
Note: the Eco standby function does not allow the display of programming warning
messages on the display panel. Only the record icon will flash.
Pause Time
To select the memory capacity of the Pause Live TV option (45 minutes
or 1h30).
Other settings
1. From the main menu select the Setup line with the
2. Select Installation with the
3. Select a function with the
keys, then confirm with OK.
keys, then confirm with OK.
keys, confirm with OK, adjust and confirm with the
keys
and OK.
AV link
Permits a television to control your DMR and download the same channels
on the same numbers.
Note: this function is positioned by default on On.
AutoClock
Allows your DMR to always be set at the correct time, date and day.
Note: leave this function activated to avoid any problems when programming recordings
49
EN
DTH7500_en
4/07/03
16:56
Page 50
Menus
Recording menu
Your DMR has practical options to optimise the recording quality/possible recording time
relationship.This menu also enables activation of the VPS/PDC option for all your programmed
recordings.
1. From the main menu select Recording using the
keys, then confirm with OK.
2. Select an option with the
OK, adjust and confirm with the
keys, confirm with
keys and OK.
Timer
To programme a recording refer to pages 24 and 25.
Naviclick
This option offers you the same programming possibilities thanks to the Naviclick programme
guide already detailed on page 26.
Recording Quality
Your DMR can record 120 hours of TV programmes or video sequences on its hard disc.This
capacity depends on adjusting the quality selected on the Recording menu as well as recordings
already present on the hard disc.
Note: all times are approximative. Access to the adjustment
menu is impossible if recording is underway.
Depending on the setting selected the recording time on the
hard disc is as follows:
*1
*2
*3
*4
:
:
:
:
High - 20 hours.
Normal - 40 hours.
Basic - 60 hours.
Low - 120 hours.
VPS/PDC
Triggers all your programming at the actual broadcast times (if the channel broadcasts VPS/PDC
signals).
50
DTH7500_en
4/07/03
16:56
Page 51
Further information
Troubleshooting guide
If you encounter difficulties
Advisors are at your disposal to help you solve your problems at this telephone number.
You can contact THOMSON by dialling: 0845 601 3093
(For Great-Britain, all calls will be charged at local rate)
www.thomson-europe.com
Your DMR doesn’t switch on
• Did you move the DMR? Check the power plug: is it well plugged into the mains socket?
Also check the power cable jack at the rear of the DMR; is it well pushed in.
• Is the mains socket to which you DMR is connected receiving current? Try to plug in a
lamp or other electrical device: do they work? Check the corresponding fuse in your
house’s fuse box.
The remote control doesn’t work
• To control your DMR, you must first press the DVD key of the remote control.
• Point the remote control at the front of your DMR, not at your TV set.
• The operating range of the remote control is 6 to 8 metres. It gradually decreases as the
batteries wear down.This is a good indicator of the state of the batteries.When the
batteries require replacing, the signal lamp on the remote control flashes when you use it.
• Make sure no objects (or animals) are in the path of the infrared beam between the
remote control and your DMR.They may block the beam and thereby cause a malfunction
of your DMR.
The remote control of your DMR also controls another device
• Some DVD players made by the Thomson group (Thomson, Brandt, Ferguson, Saba,
Telefunken) react to the same codes.To avoid this inconvenience, you can program your
DMR and its remote control so they have a different code to those of the other devices.
Refer to page 57.
The remote control and the DMR don’t work anymore: everything seems blocked
• Unplug your DMR from the mains for a few moments and plug it back in.
You don’t see any picture
• Turn on your TV set and your DMR.
• On your TV set, select the socket which receives the signals from your DMR (AV1,TV1,
AUX1, etc., depending on the brand, if connected as shown on page 4 or 10).
• Make sure that all sockets are well pushed into the various sockets.
The colours aren’t natural
• Check that the scart cables are well pushed into the sockets of the various devices.
• Check the settings Output AV1, Input AV2 and Output PAL/NTSC (Options menu, page 48).
The image format doesn’t match the screen format of your TV set
• The image format is adjustable. Refer to page 40.With certain discs, the format is pre-set
and cannot be changed.
51
EN
DTH7500_en
4/07/03
16:56
Page 52
Further information
No sound
• Check that the DTS, Dolby Digital and MPEG settings are suited to the specifications of
the device connected to the digital audio sockets (coaxial or optical) (page 48).
The sound is very low or inaudible
• The sound of the TV set has been cut or set at a very low level. Press the ( ) key on
your TV set’s remote control and/or adjust the volume on your TV set (or amplifier, if such
is the case).
The menus or subtitles do not appear in the language you want
• With a DVD: the DVD menus are not displayed in your language. Check the disc jacket to
see which languages are available. Choose the language of your choice, if available (page 45).
• With a DVD: there are no subtitles. Check the disc jacket to see whether subtitles are
available. Choose the subtitles of your choice, if available (page 46).
• The preferred language for DVD dialogues and subtitles was set upon initial installation of
your DMR.To change it, refer to pages 44 and 45.
• You can also change the language while a disc is playing by pressing the INFO key and
selecting the
icon for dialogues or
for subtitles.This choice is only valid for the disc
if it has not been removed from the disc drawer.
The menus of your DMR do not appear in the language you want
• Check that your language is available in the settings menu (page 44). If not, choose another
language.
You can’t access the selected menu, even when you press OK
• If the name of the menu appears on a transparent background, it means that the corresponding
menu or function is not available.The Disc, Video, Music, Pictures and Memory Card
menus are contextual menus: they depend on operations performed beforehand such as:
• Disc is only accessible if there is a disc in the disc tray of your DMR.
• Video is only accessible once you have recorded a TV program or video sequence (from
an external device).
• Music is only accessible if you have copied an audio file in mp3 format.
• Pictures is only accessible once you have copied an image in JPEG format.
• Memory Card is only accessible once you have connected a card reader to the front USB
socket and inserted a card in it.
Your DMR menu disappears
• As with computers, your DMR has a screen saver which replaces the fixed menu by a
mobile THOMSON logo. Press on a navigation key to bring back the fixed menu.
The Memory Card line on the Main Menu of your DMR is not active
• The drive is not recognised by your DMR. It must correspond to the “USB 1.1 Mass
Storage Class” standard. In certain cases you may need to turn it off, with the card reader
connected to the USB socket, then turn on your DMR so that it recognises the drive. In
other cases you may have to insert the card in the drive before connecting it to the USB
socket.
The DVD doesn’t play, even when you press the PLAY key
• The disc rating is higher than the limit that you have set (page 47).
Fast forward or rewind doesn’t work
• Some discs have scenes which do not allow fast forwarding, rewinding or chapter skips.
When a command is prohibited or is not available for the current section or operating
mode, a prohibition sign ( ) appears on-screen for a few moments
52
DTH7500_en
4/07/03
16:56
Page 53
Further information
You can’t change the camera angle
• Most DVDs do not have multiple viewing angles.When this option is available, it usually
only applies to a few scenes.
Other problems
Re-initialisation of your DMR
• In the event of random or permanent dysfunction and before taking your DMR for aftersales servicing you can try to re-initialise it. Open the DMR tray and make sure there is no
disc in it. Close the tray again. Maintain pressure on the STANDBY/ON and STOP keys in
front for more than 3 seconds.The display then indicates INIT OK.Turn off your DMR then
turn it back on by pressing the STANDBY/ON key at the front of your DMR.The menu
displayed on-screen is the menu which enables you to choose your DMR ’s display
language. It confirms that all settings made since initial installation have been deleted.The
DMR has been reconfigured as it was when purchased (factory settings). Refer to page 4
of this manual to restart the installation of your DMR.
If you forget your password
• Open the player’s disc tray and ensure that there is no disc on it. Close the tray.The player
menu is now displayed on the TV screen. Now press the STOP key on your player and hold
the STOP key on the remote control unit down for 3 seconds.The password that you
chose for parental control is cancelled.To reallocate a code see page 46.
You can’t watch what happened 95 minutes ago
• Your DMR’s buffer memory stores no more than 90 minutes of TV programs. If you want
to save more than 90 minutes of program, you have to record the program you are
watching by pressing the RECORD key. Please note that you have to record the program
right from the start. As soon as you press RECORD the contents of the buffer memory is
deleted, even after a pause.
You can’t switch channels
• During the recording of a TV program (or video sequence from a connected device),
switching channels is impossible.To change channels, you have to stop the recording
completely (page 23).
The TV guide (NAVICLICK) is not displayed
• Downloading may be disabled. Make sure that Off is not ticked (page 54).
• Does the channel broadcast a TV guide? Check in the list on page 55.
In quiet moments, you hear a slight hum coming from your DMR
• Your DMR is equipped with a fan. It releases heat in order to ensure proper cooling. It
switches on as soon as your DMR is turned on and produces a slight hum.
The display or reading of digital images in JPEG format is slow
• Image display can take a fairly long time, depending on the size of the images. If the images
are too “bulky”, your DMR may not be able to display them correctly.
The time occupied by JPEG images or mp3 files copied onto the hard disc is
not indicated on the banners
• The only way to find out how much time is available on your hard disc is by recording a
TV program or a video sequence (from an external device). It is then indicated on the
banner (page 31).
53
EN
DTH7500_en
4/07/03
16:56
Page 54
Further information
Settings
The information relating to the Naviclick TV guide programmes comes from a combination of the
TV programmes guide,Teletext and NexTView service transmitted by certain channels.To
optimise the Naviclick programmes guide of your DMR, you have the possibility of changing
certain settings as shown below.The information from the NexTView service is more reliable
than Teletext.
NexTView channel downloading time
The programs are downloaded either at 3 AM or 8 AM.To choose the downloading time, follow
the instructions below:
1. If the main menu is not displayed, press the MENU key on the remote control.
2. With the
, keys, select Setup then Installation followed by Naviclick Setup. Each
time, press OK to validate.
3. The line Update Time is already selected, press OK.
4. With the
keys and OK, select 3 a.m or 8 a.m.
Note: by selecting Off your DMR will use, where available, the information on TV programmes from the
Teletext service of the channel being viewed. For those countries offering the NexTView service we
recommend that you set the downloading time to 3am. For all other countries set it to 8am.
Choice of NexTView channel
The downloading of programmes, via the NexTView service, is only possible on certain channels.
From step 2 above, select NexTView Channel and choose with the PR+ or PR- keys, a
channel that broadcasts a programme guide. Hold the key down for a rapid selection. See the list
of channels on the following page.
Updating Naviclick (via Teletext)
Sometimes certain channels modify the organisation of their Teletext journal. In this case, unless
there has been a total modification of the structure, you must update the number of the first
page of Teletext allocated to the programmes guide.The list of pages is generally broadcast with
the Teletext journal. Use the Teletext function of your television set to find this information. Look
for the number of the page for the current day programmes and the number of the page for the
following day programmes. See also the limited list on the following page.
From step 2 above, select Channel Page and press OK.The menu that is displayed indicates,
channel by channel, 2 Teletext page numbers (the first for current day programmes, the second
for the following day programmes).
To update this information, place the cursor on the channel to be modified using the
Then enter the 2 numbers for the correct pages using the number keys.
keys.
Note: For correct operation of the Naviclick guide described on
page 26, it is indispensable that a Teletext page number (for
those channels broadcasting it) is indicated for each channel.The
page numbers allocated to channels on this screen were set
during the installation of your DMR. We recommend that you do
not change them.
54
DTH7500_en
4/07/03
16:56
Page 55
Further information
NexTView Channels
The number of channels offering the NexTView service is constantly increasing. At the time of
printing these instructions, the channels diffusing NexTView were as shown below. For your
information, an English Internet site allows you to consult the channels offering the NexTView
service: (http://nxtvepg.sourceforge.net, then click on the link: provider table).
France
: M6, Canal+, EuroNews,TV5
Germany/Austria
: RTL2, KABLE 1, 3 SAT, EuroNews
Switzerland
: SF1,TSR 1,TSI 1, KABLE 1, 3 SAT, EuroNews
Turkey
: TRT 1
Channels and Teletext pages (Naviclick)
For channels that broadcast Teletext, the TV programmes are available on certain pages.The
following list provides some of them. For others see the document supplied seperately.
Countries/
Channels
Todays
Programmes
Tomorrows
Programmes
Countries/
Channels
Todays
Programmes
Tomorrows
Programmes
Austria
Norway
Belgium . . . . . . . . . . .
NRK1
501
NRK2 . . . . . . . . . . . . .503 . . . . . . . . . . . . TV2N . . . . . . . . . . . . .502 . . . . . . . . . . . . -
ORF1 . . . . . . . . . . . . .311 . . . . . . . . . . . 327
ORF2 . . . . . . . . . . . . .321 . . . . . . . . . . . 330
TV1 . . . . . . . . . . . . . . .601 . . . . . . . . . . . . TV2 . . . . . . . . . . . . . . .161 . . . . . . . . . . . . -
Czchec Republic
CT1 . . . . . . . . . . . . . .301
CT2 . . . . . . . . . . . . . .306
NOVA . . . . . . . . . . . .301
PRIM . . . . . . . . . . . . . .301
Poland
TVP1 . . . . . . . . . . . . .301
TVP2 . . . . . . . . . . . . .311
CPP . . . . . . . . . . . . . .301
POLS . . . . . . . . . . . . .301
. . . . . . . . . . .311
. . . . . . . . . . .316
. . . . . . . . . . .311
. . . . . . . . . . .308
. . . . . . . . . . .321
. . . . . . . . . . .321
. . . . . . . . . . . .. . . . . . . . . . .309
Portugal
RTP1 . . . . . . . . . . . . . .301 . . . . . . . . . . . .RTP2 . . . . . . . . . . . . . .335 . . . . . . . . . . . .RTPI . . . . . . . . . . . . . .370 . . . . . . . . . . . .-
Denmark
DR1 . . . . . . . . . . . . . .301 . . . . . . . . . . . . DR2 . . . . . . . . . . . . . .303 . . . . . . . . . . . . TV2D . . . . . . . . . . . . .301 . . . . . . . . . . . . -
United Kingdom
BBC1 . . . . . . . . . . . . .601
BBC2 . . . . . . . . . . . . .602
CH4 . . . . . . . . . . . . . .114
CH5 . . . . . . . . . . . . . .125
ITV . . . . . . . . . . . . . . .113
France
ARTE . . . . . . . . . . . . .401 . . . . . . . . . . . 421
FR2 . . . . . . . . . . . . . . .421 . . . . . . . . . . . . FR3 . . . . . . . . . . . . . . . .- . . . . . . . . . . . . . FR5 . . . . . . . . . . . . . . .502 . . . . . . . . . . . . TF1 . . . . . . . . . . . . . . .110 . . . . . . . . . . . . TV5 . . . . . . . . . . . . . . .302 . . . . . . . . . . . 308
NEWS . . . . . . . . . . . .301 . . . . . . . . . . . . -
. . . . . . . . . . .631
. . . . . . . . . . . .. . . . . . . . . . .125
. . . . . . . . . . .139
. . . . . . . . . . . .-
Sweden
SVT1 . . . . . . . . . . . . . .601 . . . . . . . . . . . .SVT2 . . . . . . . . . . . . . .603 . . . . . . . . . . . .TV4 . . . . . . . . . . . . . . .619 . . . . . . . . . . . .-
Germany . . . . . . . . . .
ARD . . . . . . . . . . . . . .301 . . . . . . . . . . . 305
ZDF . . . . . . . . . . . . . .301 . . . . . . . . . . . 305
RTL . . . . . . . . . . . . . . .301 . . . . . . . . . . . 305
RTL2 . . . . . . . . . . . . . .301 . . . . . . . . . . . 305
Spain
TVE1 . . . . . . . . . . . . . .401 . . . . . . . . . . . 405
TVE2 . . . . . . . . . . . . . .409 . . . . . . . . . . . 413
ETB1 . . . . . . . . . . . . . .413 . . . . . . . . . . . 414
ETB2 . . . . . . . . . . . . . .413 . . . . . . . . . . . 414
Holland
NED1 . . . . . . . . . . . . .201 . . . . . . . . . . . .NED2 . . . . . . . . . . . . .202 . . . . . . . . . . . .NED3 . . . . . . . . . . . . .203 . . . . . . . . . . . .-
Switzerland
SF1 . . . . . . . . . . . . . . .302
SF2 . . . . . . . . . . . . . . .302
TSI1 . . . . . . . . . . . . . .301
TSI2 . . . . . . . . . . . . . .301
Hungary
DUNA . . . . . . . . . . . .301 . . . . . . . . . . . . -
Ireland
RTE1 . . . . . . . . . . . . . .171 . . . . . . . . . . . . NET2 . . . . . . . . . . . . .172 . . . . . . . . . . . . -
. . . . . . . . . . .310
. . . . . . . . . . .310
. . . . . . . . . . .310
. . . . . . . . . . .321
Turkey
TRT1 . . . . . . . . . . . . .301 . . . . . . . . . . . .TRT2 . . . . . . . . . . . . .302 . . . . . . . . . . . .TRT3 . . . . . . . . . . . . .303 . . . . . . . . . . . .-
Italy
RAI1 . . . . . . . . . . . . . .502 . . . . . . . . . . . 507
RAI2 . . . . . . . . . . . . . .502 . . . . . . . . . . . 507
55
EN
DTH7500_en
4/07/03
16:56
Page 56
Further information
Caution
Protect the DMR from moisture and excess heat (e.g. fireplace) or equipment creating strong
magnetic or electric fields (i. e. speakers...). Disconnect the power cable from the mains electricity
supply if the DMR malfunctions.Your DMR is not intended for industrial use but for domestic
purposes only. Use of this product is for personal use only. Copying CDs or downloading music
files for sale or other business purposes is or may be a violation of copyright law.
Disclaimer of warranty: to the extent allowed by applicable law. Representations and warranties of
non-infringement of copyrights or other intellectual property rights resulting from the use of the
product under conditions other than as hereabove specified are hereby excluded.
Condensation
If your DMR or a disc have been stored in a cold atmosphere, as for example during
transportation in the winter, wait for approximately 2 hours until they have reached room
temperature.
Discs
Always handle your discs with care. Hold a disc with fingers on the border or hole. Always place
disc with the label facing upward (in case of a single-sided disc). Always place the disc properly
into the tray using the proper guide area. Always use a soft cloth to clean discs if necessary, wipe
from the centre to the border. Always put discs back into their cases after playing and store in a
vertical position. Never use record cleaning sprays, benzine, static electricity liquids or any other
solvent, if the disc surface is dirty.Wipe gently with a soft damp (water only) cloth, never wipe the
disc in a circular motion, since circular scratches are likely to occur and could cause noise during
playback.
Regarding Audio formats
Dolby Digital is a sound compression technique developed by Dolby for multi-channel digital
audio signals.The Dolby Digital system enables any audio channel configuration, from a stereo
sound (2 channels) up to the digital “surround” sound 5.1.
«Dolby Digital» and the double-D symbol are trademarks of Dolby Laboratories Licensing
Corporation. Copyright 1992 Dolby Laboratories Inc. All rights reserved.
DTS - is a digital sound compression technique developed by Digital Theater Sound Systems for
digital audio multichannel signals.
“DTS” and “DTS Digital Out” are registered trademarks of Digital Theater Systems inc.
PCM - If the device connected to the DIGITAL AUDIO OUT sockets does not support Dolby,
DTS or MPEG signals, your DMR will deliver PCM (Pulse Code Modulation) signals. In this case
Dolby Digital, DTS or MPEG must not be selected.
The linear PCM is a signal recording format used for CDs. CDs are recorded in 44.1kHz /16bits.
DVDs are recorded in 48kHz / 16 bits, or even up to 96kHz / 24 bits.
56
DTH7500_en
4/07/03
16:56
Page 57
Further information
For your safety
Never open the DMR or any of its components. It can be dangerous for you or for certain fragile
components.You could receive an electric shock or touch the laser beam. Do not place your eyes
close to the opening of the disc tray or any other opening to look inside the DMR.
DVD copy protection
In accordance with the DVD standard, your DMR is equipped with a Copy Protection system,
which can be triggered on and off by the DVD disc itself, in order to make any recording of the
concerned DVD disc onto a videotape of very poor picture quality, or even impossible. “This
product incorporates copyright protection technology that is protected by method claims of
certain U.S. patents and other intellectual property rights owned by Macrovision Corporation
and other rights owners. Use of this copyright protection technology must be authorized by
Macrovision Corporation, and is intended for home use only unless otherwise authorized by
Macrovision Corporation. Reverse engineering or disassembly is prohibited.” If the appliance is
opened or its components interfered with (dismantled, replaced etc) the warranty clauses shall be
annulled.
Remote control - Code A-B
Remote control setting on code B
Code A
Code B
No. to key in
On display panel
3000
3001
DVD A
DVD B
Note: the remote control of your DMR is set to code A (3000).
To set it to code B (3001) follow the procedure described below.
1. Press and hold the DVD key.
2. With the number keys, press 3, 0, 0, 1.
3. Release the DVD key.
DMR setting on code B
1. Switch on your DMR.
2. Check that there is no disc in the disc tray.
3. Simultaneously press the PAUSE, PLAY, AV keys at the front of your DMR and release them
when your DMR displays DVD B.
4. Try to control your DMR with the remote control.
Note: in the event of a problem, redo the setting of both components:
the remote control and your DMR.
Technical data
Power requirements 220 to 240 V - 50/60 Hz
Power consumption 36 W when ON (approx.) < 3 W in the eco mode.
Functioning conditions +5°C to + 35°C surrounding humidity: 80 % maximum
Playback system Laser diodes - Wave length: 655 / 780 nm, Laser power CLASSE 2
Reception norms LL’ - BG - I - DKK’
Number of storable channels 99
Remote control Infrared 33 Khz - Batteries 2 x 1.5 V (AAA)
Nominal Specification - THOMSON reserves the right to change the specifications without notice.
57
DMR EN / RST - BEI / 07-2003
EN