1
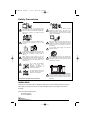
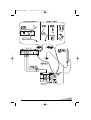
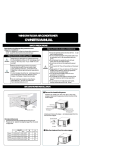
OM BE4P-E (FC8-A)
1/4/10
8:50 AM
Page 1
OWNER’S MANUAL
REMOTE CONTROL
COLOR TV/MONITOR
ST-21XS2S
ST-21YS2S
ST-21YS2BS
ST-21YS22
ST-21YS22B
ST-21KS2
ST-21KS2K
ST-21KS22
ST-21KS22K
ST-21SF1
ST-21SF1K
ST-21VF1S
ST-21VF1KS
ST-21MS22
ST-21MS22T
ST-21MS22B
OM BE4P-E (FC8-A)
1/4/10
8:50 AM
Page 2
Safety Precautions
To prevent electrical shock, do not remove the
back cover. This unit is fully transistorized and
does not contain user-serviceable components.
Report any problems to qualified service
personnel.
Avoid exposing the television receiver to direct
sunlight and other source of the heat. Do not
stand the television receiver directly on other
products which give off heat. E.g. video cassette
players, audio amplifiers.
To reduce the risk of fire or electrical shock, do
not expose this appliance to rain or other
moisture
Even if your TV is turn off and the power cord is
plugged in, there is still connection to the AC
power source (mains). Unplug the TV set before
moving it or if you are not going to use it for
several days.
Do not squash power supply cord under the
television receiver.
No objects filled with liquids such as vases, shall
be placed on this appliance. Do not drop or push
objects into the television cabinet slots or
openings.
When playing TV video games,
intense brightness and/or contrast
an extended period of time. This
permanent image of the playing
picture screen.
do not use
settings over
may leave a
field on the
Do not block the ventilation
holes in the back cover.
Adequate
ventilation
is
essential to prevent failure of
electrical components.
Do not place this product on an unstable cart,
stand, tripod, bracket, or table. The product may
fall, causing serious personal injury and serious
damage to the product.
10cm
10cm
5cm
20cm
No naked flame sources, such
as lighted candles, should be
placed on the apparatus.
Please read and keep these instructions.
If the television is to be built into a compartment
or similarly enclosed, the minimum distances
must be maintained. Heat build-up can reduce
the service life of your television, and can also be
dangerous.
UNPACKING
Treat the TV as a precise piece of equipment that requires careful handling. Keep the shipping
carton until you are sure the TV has not been damaged. Report any damage to the place of
purchase.
Check to find the following items:
♦ Remote Control
♦ Two AA Batteries
2
OM BE4P-E (FC8-A)
1/4/10
8:50 AM
Page 3
CONTENTS
DESCRIPTION
Features . . . . . . . . . . . . . . . . . . . . . . . . . . . . . . . . . . . . . . . . 4
Specifications . . . . . . . . . . . . . . . . . . . . . . . . . . . . . . . . . . . . 5
Front Control Panel . . . . . . . . . . . . . . . . . . . . . . . . . . . . . . 6-7
Operating Control Functions . . . . . . . . . . . . . . . . . . . . . . . . . 7
Remote Control . . . . . . . . . . . . . . . . . . . . . . . . . . . . . . . . . 8-9
SETUP
Connecting the Antenna or Cable . . . . . . . . . . . . . . . . . . 10-11
Plug in the Power Cord . . . . . . . . . . . . . . . . . . . . . . . . . . . . 12
OPERATION
Turn On the TV . . . . . . . . . . . . . . . . . . . . . . . . . . . . . . . . . . 12
Plug & Play . . . . . . . . . . . . . . . . . . . . . . . . . . . . . . . . . . . . . 12
On-Screen Menu System . . . . . . . . . . . . . . . . . . . . . . . . . . . 13
Channel Setup Menu . . . . . . . . . . . . . . . . . . . . . . . . . . . . . . 14
Setting the Antenna Mode . . . . . . . . . . . . . . . . . . . . . . . . 14
Resetting Channel Search. . . . . . . . . . . . . . . . . . . . . . . . 14
Skipping Channel . . . . . . . . . . . . . . . . . . . . . . . . . . . . . . 15
Picture Adjustment Menu . . . . . . . . . . . . . . . . . . . . . . . . . . . 16
Picture Adjustments . . . . . . . . . . . . . . . . . . . . . . . . . . . . 16
Audio Adjustment Menu . . . . . . . . . . . . . . . . . . . . . . . . . . . . 17
Audio Adjustments . . . . . . . . . . . . . . . . . . . . . . . . . . . . . 17
Selecting the Picture Mode . . . . . . . . . . . . . . . . . . . . . . . . . 18
Timer Setting . . . . . . . . . . . . . . . . . . . . . . . . . . . . . . . . . 19-20
Setting of the Private Position . . . . . . . . . . . . . . . . . . . . . 21-22
Checking the Channel Number, Off-Time or On-Timer . . . . . . 22
Selecting the Colour System in AV Mode . . . . . . . . . . . . . . . 23
Resetting the TV . . . . . . . . . . . . . . . . . . . . . . . . . . . . . . . . . 23
Using the Audio/Video Input Jacks . . . . . . . . . . . . . . . . . . . . 24
Using the DVD Inputs Jacks . . . . . . . . . . . . . . . . . . . . . . . . 25
Using the Audio/Video Output Jacks . . . . . . . . . . . . . . . . . . . 26
Helpful Hints – Problems/Solutions . . . . . . . . . . . . . . . . . . 37
Authorized SANYO Service Centers . . . . . . . . . . . . . . . . . . . 28
3
OM BE4P-E (FC8-A)
1/4/10
8:50 AM
Page 4
FEATURES
❏ 181-channel frequency synthesizer tuner
❏ Cable ready
❏ Plug & Play (Automatic Setting Up Channels)
❏ Automatic channel search with manual skip
❏ Digital picture controls with on-screen display
❏ Picture mode (Personal/Dynamic/Natural/Eco/Game) Selection
❏ Audio/Video inputs
❏ Monitor output
❏ On/Off timers
❏ Channel recall
❏ Mute key
❏ Automatic power shut-off
CARE AND CLEANING
The surface of the cabinet can be damaged if not properly maintained. Many common
household aerosol sprays, cleaning agents, solvents and polishes will cause permanent
damage to the fine surface.
1. Unplug the power cord before cleaning the Television.
2. Clean the screen with a soft cloth dampened with glass cleaner or warm water.
3. Clean the cabinet with a soft cloth dampened with a mild household detergent and
warm water. Dry thoroughly.
Note: NEVER spray liquids on the screen because they can run down and drip onto
the chassis. This may cause component failure not covered under Warranty.
4
OM BE4P-E (FC8-A)
1/4/10
8:50 AM
Page 5
SPECIFICATIONS
Picture Tube Size (measured diagonally)
All Models:
(21-inch) – 510 mm viewing screen
Television System: NTSC
181 Channel Tuning System:
VHF Channels 2-13
UHF Channels 14-69
Cable TV (CATV) 1,14 -125
Automatic Fine Tuning on
VHF and Cable Channels
Speakers:
Model ST-21YS2/S/BS, ST-21KS2/K,
ST-21SF1/K, ST-21VF1/S/KS,
ST-21YS22/B, ST-21KS22/K,
ST-21MS22/T/B: 5 x 9 cm, 2 pcs.
Model ST-21XS2S: 5 x 9 cm, 2 pcs.
Sound output:
Model ST-21XS2S: 10 W + 10 W (RMS)
Model ST-21YS2/S/BS, ST-21KS2/K,
ST-21SF1/K, ST-21VF1/S/KS,
ST-21YS22/B, ST-21KS22/K,
ST-21MS22/T/B: 5.0 W + 5.0 W (RMS)
Antenna Input:
VHF/UHF/CATV 75 ohms
Unbalanced
A/V Input Jacks:
Model ST-21XS2S, ST-21YS2/S/BS,
ST-21KS2/K, ST-21VF1/S/KS,
ST-ST-21YS22/B, ST-21KS22/K,
ST-21MS22/T/B:
♦ Video Input (2)
♦ DVD Input (Y, CB, CR) (1)
♦ Audio Input (R/L-2)
... (RCA Connectors)
Model ST-21SF1/K:
♦ Video Input (1)
♦ DVD Input (Y, CB, CR) (1)
♦ Audio Input (R/L-1)
... (RCA Connectors)
Remote Control Transmitter
Numbered Channel Selection,
Channel Scanning Up/Down,
Volume Up/Down, Mute, Power,
Recall, Display, Sleep, Menu,
Image, Surround, TV/AV.
Power Requirement:
127-240 V AC, 50/60 Hz
Dimensions (WxHxD)
Model ST-21XS2S:
654 mm x 467 mm x 335 mm
(25.8 in x 18.4 in x 13.2 in)
Model ST-21YS2/S/BS:
598 mm x 465 mm x 396 mm
(23.5 in x 18.3 in x 15.6 in)
Model ST-21YS22/B:
598 mm x 465 mm x 328 mm
(23.5 in x 18.3 in x 12.9 in)
Model ST-21KS2/K, ST-21KS22/K:
580 mm x 465 mm x 326 mm
(22.8 in x 18.3 in x 12.8 in)
Model ST-21SF1/K:
570 mm x 460 mm x 465 mm
(22.4 in x 18.1 in x 18.3 in)
Model ST-21VF1/S/KS:
580 mm x 460 mm x 468 mm
(22.8 in x 18.1 in x 18.4 in)
Model ST-21MS22/T/B:
580 mm x 465 mm x 328 mm
(22.8 in x 18.3 in x 12.9 in)
Weight (Approximate)
Model ST-21XS2S: 19.6Kg (43.2 Lb)
Model ST-21YS2/S/BS: 20.1Kg (44.3 Lb)
Model ST-21KS2/K: 19.7Kg (43.4 Lb)
Model ST-21SF1/K: 19.8Kg (43.6 Lb)
Model ST-21VF1/S/KS: 20.5Kg (45.2 Lb)
Model ST-21YS22/B: 18.0Kg (39.6 Lb)
Model ST-21MS22/T/B, ST-21KS22/K
: 17.9Kg (39.4 Lb)
Monitor Output Jacks:
Video Output (1)
Audio Output (R/L-1)
... (RCA Connectors)
♦ Designs and specifications are subject to change without notice.
5
OM BE4P-E (FC8-A)
1/4/10
8:50 AM
Page 6
FRONT CONTROL PANEL
Model ST-21XS2S
Press to open
3 2 1
VIDEO L-AUDIO-R
TV/AV MENU
8
7
-
+
CH
5
6
4
Model ST-21YS2S, ST-21YS2BS, ST-21YS22, ST-21YS22B
Press to open
32 1
AV2 IN
VIDEO L-AUDIO-R
8
TV/AV MENU
7 6
-
+
CH
4
5
Model ST-21KS2, ST-21KS2K, ST-21KS22, ST-21KS22K
Pull to open
TV/AV
MENU
-
POWER
+
76 5
VIDEO
CH
4
3 2 1
L-AUDIO-R
8
Model ST-21SF1, ST-21SF1K
TV/AV
MENU
-
76 5
6
+
POWER
CH
4
3 2 1
OM BE4P-E (FC8-A)
1/4/10
8:50 AM
Page 7
FRONT CONTROL PANEL
Model ST-21VF1S, ST-21VF1KS
VIDEO
TV/AV
L-AUDIOR
MENU
-
+
CH
POWER
76 5
8
3 2 1
4
Model ST-21MS22, ST-21MS22T, ST-21MS22B
Press to open
3 2 1
VIDEO L-AUDIO-R
8
TV/AV MENU
7 6
-
+
CH
5
4
OPERATING CONTROL FUNCTIONS
1. MAIN POWER Switch
Press to turn on the TV. Then the
power indicator lights and the TV is
ready for remote operation.
2. Remote Sensor
Receives the infrared control signals
from the hand held remote control
unit. Point the remote control toward
here.
3. POWER Indicator
4. CHANNEL Scanning ▼ / ▲ Keys
Press ▼ (down) or ▲ (up) to scan
through the channels in memory.
5.
VOLUME –/+ Keys
Press to adjust the volume level. The
volume level indicator will appear on
the screen.
BASS EXPANDER
VOLUME
40
ON
6.
MENU Key
Use this key along with the Channel
▼ / ▲ keys and the VOLUME – / +
keys to adjust the features in the onscreen menu.
7. TV/AV Key
Press to select the program mode: TV
or AV1 or AV1(DVD) or AV2.
Note: In model ST-21SF1 / ST21SF1K This button used to select
mode: T V or AV1 or AV1(DVD).
8. Front AUDIO/VIDEO INPUT Jacks
Connect to the audio/video output
jacks of your external video
equipment (such as camcorder or
VCR, etc.) to these jacks.
(See page 24-26.)
Note: Model ST-21SF1 / ST-21SF1K
is not equipped with Front AV2 input
terminal.
7
OM BE4P-E (FC8-A)
1/4/10
8:50 AM
Page 8
REMOTE CONTROL
The remote control uses an invisible (infrared) light beam to operate the TV. Objects
between the TV and the remote can block this light beam. Therefore, for correct
operation the remote control must be pointed directly at the front of the TV with no
obstructions.
Point at the Front of TV
INSTALLING BATTERIES
The remote control requires two “AA”
batteries (supplied).
•
•
•
Remove the battery compartment
cover.
Install batteries to match the “+” and
“ – ” marks inside case. Incorrectly
installed batteries can damage the
remote control.
1
TV/AV
POWER
2
8
RECALL
DISPLAY
IMAGE
9
3
Replace the battery cover.
Remove the batteries if the remote
control will not be used for a month or
more. Weak batteries may leak and
cause damage. (Normal battery life is
roughly six months.)
10
MENU
1-VOL
CH
VOL
4
5
CH
11
V-GUIDE
SLEEP
MUTE
12
6
RESET
SURROUND
13
7
14
JXMRL
Battery Cover
Do not expose batteries (battery pack
or batteries installed) to excessive heat
such as sunshine, fire or the like.
8
OM BE4P-E (FC8-A)
1/4/10
8:50 AM
Page 9
REMOTE CONTROL KEYS OPERATION
1. DISPLAY Key
Press once to display the channel
number, off-time, on-timer or onchannel number by on-timer on the
screen for 5 seconds
Press again to remove the display.
(See page 22.)
This button also used to select the
Colour System in AV Mode (See
page 23.)
2. POWER Key
Press to turn the TV On and Off.
While the power indicator lights, the
remote operation is available.
3. IMAGE Key
Press to select the picture mode:
PERSONAL, DYNAMIC,
NATURAL, ECO or GAME. (See
page 18.)
4. MENU Key
Use this key with the ▲ / ▼ and – / +
keys to adjust the features of the onscreen menu system.
(See pages 13-17.)
5. CHANNEL SCANNING (▲ / ▼) Keys
Press ▲ (up) or ▼ (down) to scan
through the channels in memory.
6. MUTE Key
Press once to turn off volume.
Press again to restore volume.
9. RECALL Key
Use this key to recall the last
selected channel.
10. NUMBER Keys
Press to directly select channels.
Two keys must be pressed.
For channels 1 through 9, press “0”
first, then the number.
For channels 10 through 99, press
the two numbers in sequence.
For channels 100 through 125,
press “1--” key to display C 1 – –,
then press the other two numbers in
sequence.
11. VOLUME – /+ Keys
Press to adjust the volume level. The
volume indicator will appear on the
screen.
BASS EXPANDER
VOLUME
ON
40
12. V-GUIDE Key
This key could not be operated.
13. RESET Key
Press this key to reset the TV to
factory settings. (See page 23.)
14. SLEEP Key
Use this key to set off-timer, on timer,
on-channel number by on-timer. (See
page 19-20.)
7. SURROUND Key
Press this key to get surround sound.
8. TV/AV Key
Press to select the program mode:
TV or AV1 or AV1(DVD) or AV2.
(See pages 24-26.)
Note: In model ST-21SF1, ST-21SF1K
This button used to select mode: T V
or AV1 or AV1(DVD).
9
OM BE4P-E (FC8-A)
1/4/10
8:50 AM
Page 10
CONNECTING THE ANTENNA OR CABLE
To obtain the best possible picture, use a quality antenna system. Inspect your antenna
system for loose connections, broken wires, cracked insulation or other potential
problems. These conditions can cause poor reception.
AUTOMATIC POWER SHUT-OFF
The TV will switch off automatically after 10 minutes if a signal is not being received.
(This feature is not active while the AV mode is selected.)
CONNECT YOUR ANTENNA OR CABLE
Identify the type of antenna and antenna wire you have, then follow the diagram shown
on page 11.
VCR CONNECTION
The antenna signal must be connected to your VCR antenna input. With connect the
VCR output to the television. Refer to the VCR owner’s manual for details.
Note: The VCR can be connected to your TV using the A/V jacks.
(See pages 11, 24-26 for Using the Audio Video Jacks.)
10
OM BE4P-E (FC8-A)
CH3
CH4
OUT
1/4/10
OUTPUT
Page 11
IN
A/V JACKS
INPUT
8:50 AM
CH3
CH4
IN
OUT
MONITOR OUT
INPUT
AV1/DVD
CR
R
R
(MONO)
CB
L
Y
VIDEO
L
V
I
D
E
O
11
OM BE4P-E (FC8-A)
1/4/10
8:50 AM
Page 12
PLUG IN THE POWER CORD
Plug the power cord into a convenient wall outlet that has standard house power of
230 volts ac, 50/60 Hz.
CAUTION: To prevent electric shock,
insert the AC PLUG fully into the outlet.
Note: As a safety precaution, unplug or turn
off the TV with the MAIN POWER
switch on the TV front panel when you
plan to be away for an extended
period of time.
AC PLUG
TURN ON THE TV
Press the POWER key.
Note: The TV will switch off automatically after 10 minutes if a signal is not being
received. (This feature is not active while the AV mode is selected.)
PLUG & PLAY (Automatic setting up channels)
This TV set provides a self-automatic tuning and sorting system function called “Plug &
Play”. It automatically begins searching and storing of all available channels when
switching-on the TV set for the first time.
Let’s start !
1
Connect power cord of the TV set to a wall outlet, and turn on the TV set by
pressing the Mains ON/OFF button. Self-automatic tuning system will be started.
After completing this procedure, the lowest available programme position is selected and
the ending messages on the screen.
Note: The Plug & Play can be cancelled at any time by pressing the MENU button.
2
Press any of the control buttons to make the ending message disappear.
(Or will automatically return to normal TV display after 10 seconds.)
This procedure only appears at the first switch-on time.
■ If no TV stations are found, the display shown below will appear. Please check if
the antenna is connected properly.
NO STATION.
PLEASE CONNECT
ANTENNA PLUG.
12
If it isn’t connected properly, connect
antenna and Automatic Tuning will be reset.
OM BE4P-E (FC8-A)
1/4/10
8:50 AM
Page 13
ON-SCREEN MENU SYSTEM
The On-Screen Menu System allows the viewer to program television features to their
personal preference. Adjustments can be made by using the keys either on the TV front
panel (see pages 6 and 7) or on the remote control (see pages 8 and 9). Read this
page for information on selecting menus.
The system has 3 different modes:
PICTURE — COLOR, BRIGHTNESS,
CONTRAST, TINT, SHARPNESS and
WHITE TONE
AUDIO — BASS, TREBLE, BALANCE,
BASS EXPANDER ON/OFF and
SURROUND ON/OFF.
PICTURE
AUDIO
PRESET
SELECT
ADJUST
PRESET — ANTENNA, SEARCH,
CHANNEL, SKIP and MEMORY
EXIT
Main Menu
GENERAL OPERATION
To open the Main Menu, press MENU on the remote control or on the TV front panel.
You will notice that PICTURE is in yellow and is indicated by the blue background. The
blue background let you know which mode you have selected. To select another mode,
use the CHANNEL ▲ (up) or CHANNEL ▼ (down) key.
After making your selection, press the VOLUME – or VOLUME + key to enter to each
adjustment menu. Now use the VOLUME – or VOLUME + key to make adjustments to
your selection.
If you wait too long to make selection, the menu will disappear (usually after 15
seconds). Just press MENU twice to return to where you were. Now you can finish your
selections.
Once you have completed your selections and you want to clear the menu from the
screen, press MENU or wait for about 15 seconds.
13
OM BE4P-E (FC8-A)
1/4/10
8:50 AM
Page 14
CHANNEL SETUP MENU
Your TV can receive 181 channels: Off-Air VHF 2-13 and UHF 14-69 or Cable 1-125.
The available channels are stored in the channel scanning memory in this TV.
Make sure that your antenna is connected to the TV before setting the Antenna Mode
or resetting the Channel Search.
SETTING THE ANTENNA MODE
1 Press MENU. The Main Menu will
appear. (See page 13.)
2 Press the CHANNEL ▲ (up) or ▼
Select CHANNEL and press VOLUME
+ or -
➧
(down) key to select PRESET;
then press the VOLUME + or – key.
PICTURE
AUDIO
PRESET
3 Press the CHANNEL ▲ (up) or ▼
(down) key to select ANTENNA.
4 Use the VOLUME + or – key to select
VHF/UHF or CABLE.
Select either VHF/UHF (VHF channels
2-13 and UHF channels 14-69), or
CABLE (channels 1-125). The Cable
indicator C appears with the channel
number. (For example: C 34.)
ANTENNA
SEARCH
CHANNEL
SKIP
MEMORY
SELECT
VHF/UHF
START
02
OFF
--
(CABLE)
(C34)
ADJUST
EXIT
Select Antenna mode
RESETTING CHANNEL SEARCH
You can automatically program the tuning system of this TV to scan only the channels
available in your area. Then when you press one of the CHANNEL SCANNING (▲/ ▼)
keys, the TV will select only those channels.
1 Press MENU. The Main Menu will
appear. (See page 13.)
2 Press the CHANNEL ▲ (up) or ▼
(down) key to select CHANNEL;
then press the VOLUME + or – key.
3 Press the CHANNEL ▲ (up) or
▼ (down) key to select SEARCH.
4
Use the VOLUME + or – key to select
START.
ANTENNA
SEARCH
CHANNEL
SKIP
MEMORY
VHF/UHF
START
02
OFF
--
Starting automatic channel search
The TV will begin searching through the
channels. After the search is completed,
the lowest available channel will be
selected.
Note: If additional channels become available (you move to another city or cable is
installed), perform another channel search.
14
OM BE4P-E (FC8-A)
1/4/10
8:50 AM
Page 15
SKIPPING CHANNELS
When there is a channel you do not use,
Channel 4 for example, by setting the
SKIP Channel function it is possible to
jump over this channel, when you are
selecting a channel using the CHANNEL
▲ (up) or ▼ (down) key.
VHF/UHF
START
02
OFF
--
Select CHANNEL that you want to SKIP
➧
For example, to set channel “4” as
Skip channel ;
ANTENNA
SEARCH
CHANNEL
SKIP
MEMORY
1 Press MENU. The Main Menu will
appear. (See page 13.)
2 Press the CHANNEL ▲ (up) or ▼
(down) key to select PRESET,
then press the VOLUME + or – key.
3 Press the CHANNEL ▲ (up) or ▼
(down) key to select CHANNEL.
ANTENNA
SEARCH
CHANNEL
SKIP
MEMORY
Select SKIP by pressing CHANNEL ▲
(up) or ▼ (down) key
5 Select SKIP by pressing the
CHANNEL ▲ (up) or ▼ (down) key.
➧
4 Select channel that you want to skip
with the VOLUME + or - key, (for this
example is channel “4”).
For cable channels above 99, press
and hold the 1 key until C1 – –
appears. Then press the other two
digits.
ANTENNA
SEARCH
CHANNEL
SKIP
MEMORY
8 Press the VOLUME + or - key to
(OFF)
➧
SKIP to ON. To cancel Skip Channel
function, set to OFF.
CHANNEL ▲ (up) or ▼ (down) key.
VHF/UHF
START
04
ON
--
Select MEMORY by pressing
CHANNEL ▲ (up) or ▼ (down) key
6 Press the VOLUME + or - key to set
7 Select MEMORY by pressing the
VHF/UHF
START
04
OFF
--
ANTENNA
SEARCH
CHANNEL
SKIP
MEMORY
VHF/UHF
START
04
ON
--
memorize.
Press Volume + or – key to memorize
➧
9 Press MENU key to exit.
ANTENNA
SEARCH
CHANNEL
SKIP
MEMORY
VHF/UHF
START
04
ON
OK
15
OM BE4P-E (FC8-A)
1/4/10
8:50 AM
Page 16
PICTURE ADJUSTMENT MENU
This feature is used to adjust the color, brightness, contrast, tint, sharpness and white
tone to your personal preferences.
PICTURE ADJUSTMENTS
1 Press MENU. The Main Menu will
appear. (See page 13.)
2 Press the CHANNEL ▲ (up) or ▼
PICTURE
AUDIO
PRESET
(down) key to select PICTURE.
3 Press VOLUME + or – key.
The Manual Adjustment menu will
appear.
SELECT
ADJUST
EXIT
4 Press the CHANNEL ▲ (up) or ▼
(down) key to select the control you
want to adjust.
Select PICTURE and press Menu
➧
5 Use the VOLUME + or – key to
adjust the control.
Use the chart below as a guide when you
make adjustments.
6 Press MENU key to exit.
COLOUR
BRIGHTNESS
CONTRAST
TINT
SHARPNESS
WHITE TONE
25
SELECT
ADJUST
EXIT
Picture adjustment menu
PICTURE ADJUSTMENTS
– KEY
+ KEY
COLOR
Adjusts color intensity
Lighter
Deeper
BRIGHTNESS
Adjusts picture brightness
Darker
Brighter
CONTRAST
Adjusts picture contrast
Lighter
Deeper
TINT
Adjusts color tints
Reddish
Greenish
SHARPNESS
Adjusts picture detail
Softer
Crisper
WHITE TONE
Adjusts white balance
Reddish
Bluish
16
OM BE4P-E (FC8-A)
1/4/10
8:50 AM
Page 17
AUDIO ADJUSTMENT MENU
This feature uses the on-screen menu system to adjust the audio controls: Bass,
Treble, Balance, Bass Expander on or off, Surround on or off and Stereo stereo or
mono (this feature available in AV mode only).
AUDIO ADJUSTMENTS
1 Press MENU. The Main Menu will
appear. (See page 13.)
PICTURE
AUDIO
PRESET
2 Press the CHANNEL ▲ (up) or ▼
(down) key to select AUDIO.
3 Press VOLUME + or – key. The
Audio Adjustment menu will appear.
SELECT
ADJUST
EXIT
4 Press the CHANNEL ▲ (up) or ▼
(down) key to select the control you
want to adjust.
Select AUDIO
➧
5 Use the VOLUME + or – key to make
adjustments.
6 Press MENU key to exit.
BASS
TREBLE
BALANCE
BASS EXPANDER OFF
SURROUND OFF
(ON)
(ON)
27
SELECT
ADJUST
EXIT
Audio adjustment menu in TV mode
STEREO
STEREO
BASS
TREBLE
BALANCE
BASS EXPANDER OFF
SURROUND OFF
SELECT
(ON)
(ON)
ADJUST
EXIT
Audio adjustment menu in AV mode
17
OM BE4P-E (FC8-A)
1/4/10
8:50 AM
Page 18
SELECTING THE PICTURE MODE
●
Press the IMAGE key on the remote
control to select the picture mode:
PERSONAL, DYNAMIC, NATURAL,
ECO or GAME.
Use the chart below as a guide when you
select the picture mode.
● Press the IMAGE key once to check
the picture mode.
PERSONAL
DYNAMIC
N AT U R A L
ECO
GAME
Note: If, while D YNAMIC, N ATURAL,E
E CO or G AME mode is selected, the Color,
Brightness, Contrast, Sharpness, Tint or White tone control is readjusted by using
the Picture Adjustment menu, the picture mode will automatically change to
P ERSONAL.
PICTURE MODE
Picture Adjustment Settings
PERSONAL
for your preference as adjusted with Picture adjustment
menu.
DYNAMIC
for high color, contrast and brightness picture settings
suitable for viewing
an ordinary TV program in a brightly lit room.
NATURAL
for normal viewing with factory settings.
ECO
for low color, contrast and brightness picture settings
suitable for viewing
movies in a dimly lit room.
This mode is economical of the TV power consumption.
GAME
This mode is gentle on the eyes. Perfect for TV game due
to subdued color and soft contrast.
18
OM BE4P-E (FC8-A)
1/4/10
8:50 AM
Page 19
TIMER SETTING
OFF TIMER SETTING
The OFF Timer will switch off the TV automatically. Use your remote control to set the
Off Timer.
1 Press the SLEEP key until the desired
time delay appears.
2 Press the VOLUME + or - key to
select the time period.
OFF : 0:00
0FF : 0:30
0FF : 1:00
CANCELLING THE SLEEP TIMER
●
Press the SLEEP key, then select
OFF:0:00 by pressing VOLUME + or
- key.
0FF : 1:30
OFF : 2:00
Note:
Press the SLEEP key once to check
the remaining time.
●
●
Just one minute before switching off
the TV, O FF 0:01 will be display on
the screen.
●
The OFF TIMER cancels when the TV
set is turned off or if a power failure
occurs.
19
OM BE4P-E (FC8-A)
1/4/10
8:50 AM
Page 20
ON TIMER SETTING
When the ON TIMER is set. TV will automatically be switched on to the selected
Channel number when the specified time has elapsed.
1 Press the SLEEP key twice.
2 Press the VOLUME + or - key to
select the time period. The set time will
be increased or decreased by 10
minutes each time when the VOLUME
+ or - key is pressed ; the maximum
time which can be set is 24 hours.
Channel number for when TV is
switched on by ON TIMER.
ON : 0:00
11
3 Use Number key function to insert
Channel number for when the TV set
is switched on by ON TIMER. (see
page 9.)
Note:
● If no operation is performed after the
TV has been switched on by the ON
TIMER, such as if you are not at
home, the TV will be automatically
switched off after approximately
2 hours
● If the TV is already switched on when
the time set for the ON TIMER has
been reached, only the Channel
number will be changed to the set
Channel number.
● Cancelling ON TIMER. To cancel the
ON TIMER, press the VOLUME + or key to set it to O N 0:00 while the ON
TIMER screen is shown. Switching off
the TV by pressing the Mains Power
Switch will also cancel the ON TIMER
settings.
20
(ON TIMER Setting Mode)
OM BE4P-E (FC8-A)
1/4/10
8:50 AM
Page 21
SETTING OF THE PRIVATE POSITION
Private position is used to restrict of channel positions that you do not want others
to watch. Any position can be set as the Private position.
HOW TO SET PRIVATE
POSITION
1 Select channel “15”.
Press and hold DISPLAY key
➧
For example, to set the channel “15” as
the private position.
15
2 Press and hold the DISPLAY key for
more than 2 seconds.
3 Press MENU key.
15
4 The picture will disappear, and “
15
15” will be display on the screen.
Press MENU key to active it
➧
The private position setting is now
completed.
15
TO VIEW A CHANNEL ON
PRIVATE POSITION
15
1 Select private position (In this case
channel “15”).
Press and hold DISPLAY key
➧
2 Press and hold the DISPLAY key for
more than 2 seconds.
3 Press the DISPLAY key once again
for watching a TV programme.
15
Press DISPLAY key to watch it
➧
Note: The position “15” is still in the private
position.
15
21
OM BE4P-E (FC8-A)
1/4/10
8:50 AM
Page 22
CANCELLING THE PRIVATE
POSITION
15
1 Select private position (In this case
channel “15”).
more than 2 seconds.
➧
Press and hold DISPLAY key
2 Press and hold the DISPLAY key for
3 Press the MENU key once again for
watching a TV programme.
The private position is now cancelled.
15
➧
Press MENU key to watch it
15
CHECKING THE CHANNEL NUMBER, OFF-TIMER
OR ON-TIMER
To check the channel number, time or sleep timer, press the DISPLAY key on the
remote control. Press the DISPLAY key once for about 5 second display. Press the
DISPLAY key again to clear the screen.
Off
5 Second Display
OFF : 0:30
ON : 0:20
#1
11
12
TV Mode
Video Mode
OFF : 0:30
ON : 0:20
**S
STEREO
#1
11
AV1
* A U TO
* The Colour System appear in AV mode only (AUTO, PAL, NTSC, NTSC4.43). Press
the DISPLAY key repeatedly select a suitable colour system in AV Mode (see page 23).
# Channel number for when TV is switched on by ON TIMER.
** Select “STEREO or MONO” channel of the audio channel in the TV set with the
AUDIO menu setting in AV mode.
22
OM BE4P-E (FC8-A)
1/4/10
8:50 AM
Page 23
SELECTING THE COLOUR SYSTEM IN AV MODE
Depending on the type of video tape or
connected AV equipment being used, it
may be necessary to select colour system.
In this case, press the DISPLAY key and
select a suitable colour system.
Each time the DISPLAY key is pressed,
colour system is changed as follow;
AV1
A U TO
PA L
NTSC
NTSC4.43
RESETTING THE TV
This feature automatically resets the television to factory settings. If your adjustments
have been changed or your personal preferences are not satisfactory, just press
RESET key on the remote control twice. This feature will automatically reset:
● Video Mode to TV
● Antenna Mode to VHF/UHF
● Channel Memory (Clear all channels)
● Picture Adjustments in PERSONAL
mode: Color, Contrast, Brightness,
Sharpness and Tint to factory settings
● Clock and On/Off/Sleep Timers (Clear)
PRESS RESET KEY
A G A I N TO R E T U R N
FA C T O RY P R E S E T
● Plug & Play (Returned to the state
where it does not perform.)
If desired, personal settings can be made
again using the menu options.
23
OM BE4P-E (FC8-A)
1/4/10
8:50 AM
Page 24
USING THE AUDIO/VIDEO INPUT JACKS
You can connect your VCR, camcorder, video game, stereo system, etc. directly to the
TV using the Audio and Video jacks. Be sure to switch off TV and external equipment
before connecting cables. Make sure all cable connectors are fully seated on the jacks to
avoid possible signal loss and audio hum. (Cables are not supplied.)
CONNECTING AUDIO VIDEO INPUT JACKS
•
Connect the video output from the external equipment to the TV’s video input jack.
•
Stereo (R/L) audio: Connect the right and left audio output from the external equipment to
the TV’s right and left audio input jacks.Then select “STEREO” channel of the audio
channel in the TV set with the AUDIO menu setting in AV mode.
If the external audio signal is a monaural one in this connection, please use “Mono to
Stereo Adapter” (not supplied) and connect to TV set. Note: AV stereo in AV mode always
fixed on “STEREO” channel
Mono (single jack) audio: Connect the audio output from the external equipment to the
TV’s left (L) audio input jack.
•
BACK OF VCR
CABLE
OUTPUT
CR
Y
CB
S-VIDEO R–AUDIO–L VIDEO
CH3
CH4
IN
OUT
■ To watch video input picture, select AV1
position by pressing the TV/AV key.
AV1
BACK OF TV
FRONT AV JACKS
■ To watch video
input
picture,
select
AV2
position
by
pressing
the
TV/AV key.
AV2
CAMCORDER
24
MONITOR OUT
INPUT
AV1/DVD
CR
R
R
(MONO)
CB
L
Y
VIDEO
A/V JACKS
Note: Model ST-21SF1 / ST-21SF1K is not
equipped with Front AV2 input terminal
L
V
I
D
E
O
ANT. 75Ω
ANTENNA
TERMINAL
OM BE4P-E (FC8-A)
1/4/10
8:50 AM
Page 25
USING THE DVD INPUT JACKS
CONNECTING TO a DVD PLAYER WITH AV1(DVD) VIDEO
COMPONENT INPUT TERMINAL (Y, Cb or Cr)
Connect the component output terminal on your DVD player to the component video
input terminal of this product. (NOTE: When a signal of Y,Cb,Cr/Y,Pb,Pr is received, the
output signal from monitor output terminal will be corresponding but without colour
(black and white image).)
BACK OF DVD
Player
OUTPUT
CABLE
Y
CB CR
S-VIDEO R–AUDIO–L VIDEO
CH3
CH4
IN
OUT
■ To watch video input picture, select
AV1(DVD) position by pressing the
TV/AV key.
AV1(DVD)
BACK OF TV
MONITOR OUT
INPUT
AV1/DVD
CR
R
R
(MONO)
CB
L
Y
VIDEO
A/V JACKS
L
V
I
D
E
O
ANT. 75Ω
ANTENNA
TERMINAL
25
OM BE4P-E (FC8-A)
1/4/10
8:50 AM
Page 26
USING THE AUDIO/VIDEO OUTPUT JACKS
The picture signal being displayed on the TV screen is output through the Monitor
Output Jacks. Use these terminals to record TV broadcasts and for video dubbing from
AV input terminals.
CONNECTING ANOTHER VCR
• Connect the video output from TV to another VCR’s video input jack (refer to the
VCR owner’s manual).
•
Connect the audio output from TV to another VCR’s audio input jack.
Note: The audio left channel and right channel which were inputted from AV Input
Jacks are mixed, and are outputted from Monaural Audio Monitor Output
Jack.
CABLE
BACK OF VCR
INPUT
S-VIDEO R–AUDIO–L VIDEO
OUTPUT
CH3
CH4
IN
OUT
MONITOR OUT
INPUT
AV1/DVD
CR
MONITOR
OUT R
AV1 INPUT
R
(MONO)
R CB
L
L
AUDIO
L
S-VIDEO
Y
VIDEO
(MONO)
V
I
D
E
O
VIDEO
ANT. 75Ω
ANT. 75
ANTENNA
ANTENNA
TERMINAL
A/V JACKS
TERMINAL
A/V JACKS
BACK OF TV
STEREO AMPLIFIER
TV/MONITOR
■ To record TV programme, select TV mode
by pressing the TV/AV key.
15
26
TV mode
■ To dub video from the AV1 Input terminal,
select AV mode by pressing the TV/AV key.
AV1
OM BE4P-E (FC8-A)
1/4/10
8:50 AM
Page 27
HELPFUL HINTS - Problems/Solutions
BEFORE REQUESTING SERVICE CHECK THE FOLLOWING CHART.
Problem:
TV turns off
automatically.
No picture or
poor picture
Poor color or no
color
Check these Conditions:
Try these solutions:
TV will automatically switch off.
(See pages 10, 19 and 20.)
● Power surge protection feature.
●
●
Press POWER key.
Turn off the TV with the
MAIN POWER switch momentarily.
●
●
●
●
Check antenna connections.
May be station trouble.
Possible interference from
household appliance.
Brightness or Contrast misadjusted
Adjust antenna.
Try a different channel.
Press IMAGE key to select
NATURAL picture mode.
(See page 18.)
●
●
●
●
Check if program is in color.
Check antenna connections.
May be station trouble.
Color or Tint misadjusted.
●
●
●
Try a different channel.
Adjust antenna.
Press IMAGE key to select
NATURAL picture mode.
(See page 18.)
●
●
Press TV/AV key.
Switch on external equipment.
●
●
●
●
Blue screen with ● Check A/V connections.
AV1 / AV1(DVD / ● Check external equipment.
AV2
displayed.
Black screen
with
and
Channel number
displayed.
●
Check to see if channel is set
as the Private Position.
●
See Setting of the Private
Position (See pages 21-22.)
No sound or
poor sound.
●
●
●
May be station trouble.
MUTE may be on.
Check A/V connections.
●
●
●
Try a different channel.
Press MUTE key.
Press VOLUME + key.
●
Cable channel Indicator C
should appear next to
channel number.
●
Select CABLE signal and
reset channel search.
(See page 14.)
No UHF
channels,
VHF OK.
Cannot select
or scan some
channels.
●
Cable channel Indicator C
should not appear next to
channel number.
●
Select VHF/UHF signal
and reset channel search.
(See page 14.)
●
●
Skip channel to memory
manually. (See page 15.)
●
Channel may be removed
from memory.
Check antenna connections.
Remote Control
will not work.
●
●
Check batteries.
Check if TV set is plugged in.
●
●
Replace batteries.
Aim remote towards front
of TV.
Cabinet makes
popping sound.
●
This is a normal condition during warm-up and cool down of
the plastic cabinet parts.
●
Keep away your TV set from magnetic source, then turn-off your
TV set and disconnect TV's power cord from AC outlet, keep this
condition about more than 60 minutes and turn-on again your TV
set if time is reach. If colour spot is not disappear after this solution
have done, please contact your local dealer.
No Cable
channels above
number 13.
Colour Spot On
The CRT
27
OM BE4P-E (FC8-A)
1/4/10
8:50 AM
Page 28
Authorized SANYO
Service Centers
AUTHORIZED SERVICE CENTERS
TEL NO.
FAX NO.
(632) 892-1493
(632) 892-1260
SANYO Service Center
Basement, Solid House Building 2285 Don Chino Roces, Avenue, Ext. Makati City
Quezon City Branch
137-A Roosevelt Ave., SFDM, Quezon City
(02) 374-1349
(02) 414-9647
Dagupan Branch
No.3 Pinkies Bldg., Zamora cor. Gomez St., Dagupan City, Pangasinan
(075) 522-0254
(075) 522-0254
(045) 860-4252
(045) 860-4252
(049) 562-0666
(049) 562-0666
(054) 472-3650
(054)811-1601
(032) 346-8048
(032) 346-0471
(033) 336-8698
(033) 337-1313
(053) 321-6212
(053) 321-6212
(082) 300-6586
(082) 300-8381
(088)231-4628
(08822)724-482
San Fernando Branch
Cher-Hil Subd., Mac Arthur Highway San Fernando City, Pampanga
San Pablo Branch
175 C Bgy. San Rafael San pablo City, Laguna
Naga Branch
Door No. 8, Bldg. 1, Puritan Land Devt. Corp. Roxas Ave. Naga City
Cebu Branch
PO 238 Lopez Jaena St. Tipolo, Mandaue City
Iloilo Branch
D’ Appliance Arcade, South Fundidor, Molo, Iloilo City
Tacloban Branch
No. 35 T. Claudio St.Tacloban City
Davao Branch
San Josua Realty Bldg. Km 7, Lanang. Davao City
Cagayan De Oro Branch
Door 1 True Value Bldg., Lapasan St., Cagayan De Oro City
SANYO PHILIPPINES INC.
MAKATI CITY, PHILIPPINES
Part No. 1AA6P1P5575-E BE4P-E (FC8-A)
Printed in Indonesia
Website :
www.sanyo.com.ph