1
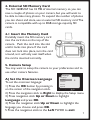
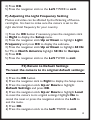
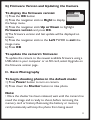
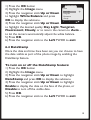
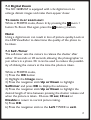
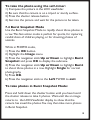
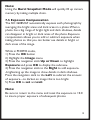
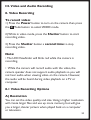
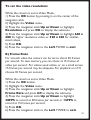
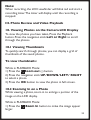
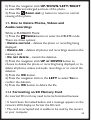
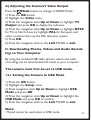
SIC 3608S/G7
Digital camera with swivel lens
User manual
Thank you for purchasing the Philips SIC 3608S/G7 digital
camera where we encourage you to...
“do the swivel!”
Capturing photos your way.
Enjoy the independence of snapping perfect self-portraits the
first time. Simply swivel the lens to the back to preview your
shot in the LCD display to make sure everyone is in the frame,
say cheese and snap away. Or swivel the lens to the front and
side to take photos from different angles. Be creative!
Front swivel
Side swivel
Back swivel
Shooting others
Stealth mode
Self portraits
Contents
I Getting to know your camera
1.
Camera views
1.1 Rear panel view
1.2 Top and front camera view
2.
Monitor display icons
Ii. Before you shoot – camera preparation
& setup
3.
Batteries
3. 1 Insert the batteries
4.
External SD memory card
4.1 Insert the memory card
5.
Camera setup
a)
Set the onscreen language
b)
Set the current date and time
c)
Auto power off
d)
Play logo
E)
“Buzzer” -turn on/off beep sounds
F)
Adjusting the light frequency setting
F2) Return to default settings
G) Firmware version & updating the camera
Ii. Basic photography
6.
Photo image options
6.1 Photo resolution
6.2 Photo quality
6.3 White balance
6.4 Datestamp
6.5 Color effects
7.
Shooting photos
7.1 Flash options
5
5
5
5
6
6
6
6
7
7
7
7
8
8
9
9
10
10
11
11
12
12
13
13
14
15
15
16
xx
7.2 Digital zoom
7.4 Burst snapshot mode
7.5 Exposure compensation
Iii. Video & audio recording
8.
Video recording
8.1 Video recording options
A) Resolution
B) Frame rate
C. White balance
D. Video with or without audio
9.
Audio recording
Iii. Photo review & video playback
10. Viewing photos on the camera lcd display
10.1 Viewing thumbnails
10.2 Zooming in on a photo
11. How to delete photos, videos & audio recordings
11.1 Formatting an sd memory card
12. Video playback
12.2 Watching videos or listening to audio recordings on
your television:
A) Adjusting the camera’s video output
ii. Downloading photos, videos and audio
recordings to your computer
13.1 Setting the camera to usb mode
13.2 Downloading photos, videos & audio recordings
to a PC
13.3 Downloading photos and videos to a mac computer
Iii. Maintenance
15. Camera maintenance
16. Batteries
17. SD memory card
17
18
19
20
20
20
20
21
22
22
22
23
23
23
23
24
24
25
26
27
27
27
28
28
30
30
31
32
17.1 Formatting an sd memory card
18. Camera safe-handling
Iv. Camera specifications & software
minimum requirements:
Camera specifications
Pc-Cam software minimum requirements
32
33
34
34
34
Getting To Know Your Camera
1. Camera Views
1.1 Rear Panel View
1
2
3
4
5
6
7
8
9
10
11
12
13
14
15
16
17
18
19
20
21
Left navigation flash on/off stick
OK button
Photo/video mode button
Up navigation stick
Right navigation/selftimer stick
Down navigation stick
Zoom in rocker button
Zoom out rocker button
Delete button
Playback button
Connection for hand strap
LCD display screen
USB connection
Tripod socket
Power indicator light
Battery cover
Shutter button
Power button
SD memory card card cover
Camera lens
Camera flash
5
LCD Display Icons
Photo/Video Mode
Photo Resolution UL XL L M S
White Balance AWB
Flash Mode A
Photo Quality
Memory Card Inserted
Datestamp On
Photos taken/Photo capacity 50 / 100
Battery Usage
Selftimer
Digital Zoom
10s
20s
T
3.3
W
II. Setting Up Your Camera
3. Batteries
The SIC 3608S/G7 uses three (3) AAA alkaline or rechargeable
batteries.
3.1 Insert the Batteries
Open the battery cover by sliding it
to the outside of the camera. Load
the batteries according to the
polarity illustration (+) and (-) on
the inside of the battery door.
6
4. External SD Memory Card
The SIC 3608S/G7 has 32 MB of internal memory so you can
save a couple of photos on your camera, but you will want to
be able to take many photos. To expand the number of photos
you can shoot and store, use an external SD memory card. The
camera is compatible with up to 8GB storage capacity SD
cards.
4.1 Insert the Memory Card
Carefully insert the SD memory card
into the card slot on the top of the
camera. Push the card into the slot
until it locks into place. If the card
does not lock into place, turn the card
around, as it will only seat itself when
the card is inserted correctly.
5. Camera Setup
You may want to setup the camera to your preferences and to
use other camera features.
Language
Language
Francais
Deutsch
Italiano
Espanol
A) Set the Onscreen Language
To set the onscreen language:
1) Press the OK button by pressing in
LEFT: Exit
on the center of the navigation stick.
2) Press the navigation stick to Right to display the Setup menu.
3) Press navigation stick Up or Down to highlight
Language and press OK.
4) Press the navigation stick Up or Down to highlight the
language you choose and press OK.
5 Press the navigation stick to the Left TWICE to exit.
7
B) Set the Current Date and Time
It is useful to have the correct date and time on
the camera. When you transfer photos to your
computer, the date and time is listed in each
photo’s information data.
Date/Time
2010 / 01 / 06
AM 01 : 48
OK: Exit
1) Press the OK button
2) Press the navigation stick to Right to display the Setup menu
3) Press navigation stick Up or Down to highlight
Date/Time and press OK.
4) The Year will be highlighted. Press the navigation stick Up
or Down to display the current year.
5) Press the navigation stick to the Right to highlight the
month. Press the navigation stick Up or Down to display the
current month.
6) Repeat Steps 5 and 6 to set day, hour and minutes.
7) Press the navigation stick Right to make any corrections.
8) Press OK when done.
9) Press the navigation stick to the Left TWICE to exit.
C) Auto Power Off
To extend the battery life, the camera can be
set to automatically turn off, if no buttons are
pushed for a certain length of time.
Auto Power Off
Disable
60 Sec.
120 Sec.
LEFT: Exit
1) Press the OK button
2) Press the navigation stick to Right to display the Setup menu.
3) Press the navigation stick Up or Down to highlight
Auto Power Off and press OK.
4) Press the navigation stick Up or Down to highlight the
amount of time that the camera is idle before it automatically
8
powers off (after 60 or 120 seconds). Choose Disable to
stop the camera from turning off automatically.
5) Press OK.
6) Press the navigation stick to the Left TWICE to exit.
D) Play Logo
The camera will play a logo when powering on.You can choose
to play the logo or to leave the display blank.
1) Press the OK button.
2) Press the navigation stick to Right to display the Setup menu.
3) Press the navigation stick Up or Down to highlight Play
Logo and press OK.
4) Press the navigation stick Up or Down to highlight
Disable to stop the camera from displaying the logo. Highlight
Enable to turn the feature on and play the logo when
powering on the camera.
5) Press OK.
6) Press the navigation stick to the Left TWICE to exit.
E) “Buzzer” -Turn On/Off Beep Sounds
The camera can be set to “beep” when a button is pushed or
disabled
1) Press the OK button
2) Press the navigation stick to Right to display the Setup menu.
3) Press the navigation stick Up or Down to highlight
Buzzer and press OK.
Press the navigation stick Up or Down to highlight Enable
to turn on audible beep sounds. Highlight Disable to turn off
the audible beeps when pressing
9
4) Press OK.
5) Press the navigation stick to the Left TWICE to exit.
F) Adjusting the Light Frequency Setting
Photos and video can be affected by the flickering of fluorescent lights. It is best to make sure the camera is set to the
right electrical frequency for your country.
1) Press the OK button if necessary, press the navigation stick
to Right to display the Setup menu.
2) Press the navigation stick Up or Down to highlight Light
Frequency and press OK to display the submenu.
3) Press the navigation stick Up or Down to highlight 60 Hz
for TVs in North America; highlight 50 Hz for Europe.
4) Press OK.
5) Press the navigation stick to the Left TWICE to exit.
F2) Return to Default Settings
To reset the camera to its original default settings:
1) Press the OK button
2) Press the navigation stick to Right to display the Setup menu.
3) Press the navigation stick Up or Down to highlight
Default Settings and press OK.
4) Press the navigation stick Up or Down to highlight Load
to reset the camera to its original settings. Highlight No to
cancel the reset or press the navigation stick to the Left to
exit the menu.
5) Press OK.
6) Press the navigation stick to the Left TWICE to exit.
10
G) Firmware Version and Updating the Camera
Video
Setup
To display the firmware version:
Firmware Version
1) Press the OK button
2) Press the navigation stick to Right to display
LEFT: Exit
the Setup menu.
3) Press the navigation stick Up or Down to highlight
Firmware version and press OK.
4) The firmware version and last update will be displayed on
screen.
5) Press the navigation stick to the Left TWICE to exit the
image menu
6) Press OK
To update the camera’s firmware:
To update the camera to the newest available firmware using a
USB cable to your computer or an SD card, select Upgrade on
the firmware version page.
II. Basic Photography
To begin shooting photos in the default mode:
1) Press Power button to turn on camera.
2) Press down the Shutter button to take photo.
Note:
• Once the shutter has been released, wait until the camera has
saved the image and is ready to shoot, before removing the
memory card or battery. Removing the battery or memory
card prematurely will stop the photo from being saved.
11
• If no buttons have been pushed on the camera for more than
30 seconds, the LCD display will turn off in order to prolong
battery life. Press any button to restore the image on the LCD
viewfinder display.
6. Photo Image Options
6.1 Photo Resolution
Photos can be shot at various resolutions up to 5 megapixels
(MP). Full 5 MP resolution is best for large, printed photos.
Lower resolutions –below 2 MP—are best suited to for web
use and viewing on computers.
To choose the resolution for
Resolution
3264 x 2488
a photo:
2592 x 1944
1) Press the OK button
2048 x 1536
2) Highlight the Image menu.
1280 x 960
640 x 480
3) Press the navigation stick Up or
LEFT: Exit
Down to highlight Resolution and
press OK.
4) Press the navigation stick Up or Down to highlight the
desired resolution: 3264X2448(8M)/2592X1944(5M)/
2048X1536(3M)/1600X1200(2M)/1280X960(1.3M)
/640X480 (VGA).
5) Press OK.
6) Press the navigation stick to the Left TWICE to exit.
12
6.2 Photo Quality
Photos can be compressed so that you can save a larger
quantity of photos to a memory card. However, the more the
photo is compressed, the lower the image quality. To conserve
memory, use a lower photo quality to create a smaller file size.
Normal quality photos may also be appropriate for photos
used only for the web, computers or mobile phones. Use the
Super Quality setting for print photos and large print
photos.
1) Press the OK button
2) Highlight the Image menu.
3) Press the navigation stick Up or Down to highlight
Quality and press OK to display the submenu.
4) Press the navigation stick Up or Down to highlight the
desired quality: Super, Fine, or Normal
5) Press OK.
6) Press the navigation stick to the Left TWICE to exit.
6.3 White Balance
Although imperceptible to the human eye, outdoor light and
indoor light take on different hues. A photo taken outdoors can
appear blue: an indoor photo may have a yellow cast. This is
called “white balance.” The camera defaults to automatically set
the white balance. However, if a photo does not display the
colors correctly, or to set the camera manually for a different
white balance, you can manually choose: Day Light for
outdoors; Tungsten or Fluorescent indoor lighting, or
Cloudy for outdoor overcast shooting.
To set the white balance:
13
White Balance
1) Press the OK button
Auto
2) Highlight the Image menu.
Day Light
3) Press the navigation stick Up or Down Tungsten
Fluorecent
to highlight White Balance and press
Cloudy
OK to display the submenu.
LEFT: Exit
4) Press the navigation stick Up or Down
to highlight the desired quality: Day Light, Tungsten,
Fluorescent, Cloudy, or to return the camera to Auto –
to let the camera automatically adjust the white balance.
5) Press OK.
6) Press the navigation stick to the Left TWICE to exit.
6.4 DateStamp
Once the date and time have been set, you can choose to have
the date visible as part of the photo image by enabling the
DateStamp feature.
To turn on or off the DateStamp feature:
1) Press the OK button
2) Highlight the Image menu.
3) Press the navigation stick Up or Down to highlight
DateStamp and press OK to display the submenu.
4) Press the navigation stick Up or Down to highlight
Enable to display the date on the face of the photo, or
Disable to turn off the visible date.
5) Press OK.
6) Press the navigation stick to the Left TWICE to exit.
14
6.5 Color Effects
The Color Effects adjustment allows you to shoot black and
white photos, or antique-looking Sepia toned photos.
1) Press the OK button.
2) Highlight the Image menu.
3) Press the navigation stick Up or Down to highlight Color
Effect and press OK to display the submenu.
4) Press the navigation stick Up or Down to highlight the
desired color effect. Highlight Color for normal photography;
highlight Sepia for old-fashioned style photography, or
highlight Monochrome for black and white photos.
5) Press OK.
6) Press the navigation stick to the Left TWICE to exit.
7. Shooting Photos
7.1 Flash Options
There are three (3) flash options. Automatic Flash, Flash
On and Flash Off.
Use the Auto flash mode, to allow the flash to fire when the
camera senses low light. Use Flash ON outdoors when
shooting a subject that is in the shadows, or if a subject is
backlit, or if it is an otherwise dark scene.
Use Flash OFF to prevent the flash from firing in scenes
where it might wash out a subject that is close to the camera,
for night scenes, or for mood scenes like those lit by candle or
fire light.
15
To change the Flash Mode:
While in PHOTO mode, press the navigation stick to the Left.
Each press left will cycle through the Flash Modes.
The flash mode will be displayed on the LCD viewfinder as
follows:
A
Auto: Automatically turn on/off
Flash on: Force the flash on
Flash off: Force the flash off
Note:
• When the Flash is in Auto or On mode, the LCD viewfinder
screen will be blank after the flash has fired and is charging.
Wait until the charge is complete and an image appears in the
viewfinder before shooting another photo.
• Shooting in bright environments with the flash turned on can
result in incorrect exposure.
• The flash will not function in “Burst snapshot” mode.
• To prolong battery life, the flash will not function when the
battery is low.
16
7.2 Digital Zoom
The SIC 3608S/G7 is equipped with a 4x digital zoom to
enlarge distant images and make them appear closer.
To zoom in or zoom out:
While in PHOTO mode, Zoom In by pressing the zoom +
button. To Zoom Out again, press the zoom (-) button
+
Note:
Using a digital zoom can result in loss of picture quality. Look at
the LCD Viewfinder to determine the quality of the photo to
be taken.
7.3 Self-Timer
The self-timer sets the camera to release the shutter after
either 10 seconds or 20 seconds, allowing the photographer to
join others in a photo. Or it can be used to reduce the possibility of shaking the camera at the time the photo is taken.
While in PHOTO mode,
1) Press the OK button
2) Highlight the Image menu.
3) Press the navigation stick Up or Down to highlight
Selftimer and press OK to display the submenu.
4) Press the navigation stick Up or Down to highlight the
desired length of time between pressing the shutter release and
when the picture is taken. Choose 10 sec, 20 sec or
Disable to return to normal picture taking.
5) Press OK.
6) Press the navigation stick to the Left TWICE to exit.
17
To take the photo using the self-timer:
1) Compose the picture in the LCD viewfinder.
2) Be sure that the camera is on a tripod or sturdy surface.
3) Press the shutter release button.
4) Get into the picture and wait for the picture to be taken.
7.4 Burst Snapshot Mode
Use the Burst Snapshot Mode to rapidly shoot three photos in
a row. This fast-action mode is perfect for sports, for capturing
candid shots of children playing, or for shooting photos of
animals.
While in PHOTO mode,
1) Press the OK button.
2) Highlight the Image menu.
3) Press the navigation stick Up or Down to highlight Burst
Snapshot and press OK to display the submenu.
4) Press the navigation stick Up or Down to highlight Burst
to shoot three photos in a row. Highlight Single for normal
photography.
5) Press OK.
6) Press the navigation stick to the Left TWICE to exit.
To take photos in Burst Snapshot Mode:
Press and hold down the shutter button until you have heard
the shutter release to take 3 photos. Wait until the an image
returns to the LCD Viewfinder display to show that the
camera has saved the photos.You may then take more photos
in Burst Snapshot.
18
Note:
Using the Burst Snapshot Mode will quickly fill up camera
memory by taking multiple shots.
7.5 Exposure Compensation
The SIC 3608S/G7 automatically exposes each photograph by
averaging the bright areas and dark areas in a photo. When a
photo has a big range of bright light and dark shadows, details
can disappear in bright or dark areas of the photo. Exposure
compensation allows you to add or subtract exposure when
taking photos so that you can better see details in bright or
dark areas of the image.
While in PHOTO mode,
1) Press the OK button
2) Highlight the Image menu.
3) Press the navigation stick Up or Down to highlight
Exposure and press OK to display the submenu.
4) Press the navigation stick to the Right to add exposure-brightening up the image to show details in dark shadows.
Press the navigation stick to the Left to subtract the amount
of exposure—to darken an image that is too bright.
5) Press OK to set and exit.
Note:
Be sure to return to the menu and reset the exposure to +0.0
to insure proper exposure of subsequent photos.
19
III. Video and Audio Recording
8. Video Recording
To record video:
1) Press the Power button to turn on the camera then press
the Mode button to select VIDEO mode.
2) While in video mode, press the Shutter button to start
recording video.
3) Press the Shutter button a second time to stop
recording video.
Note:
• The LCD Viewfinder will blink red while the camera is
recording.
• While the camera will record audio with the video, the
camera speaker does not support audio playback so you will
not hear audio when viewing video on the camera. However,
the audio will be heard during video playback on a TV or
computer.
8.1 Video Recording Options
A) Resolution
You can set the video quality and size. Using a higher resolution
will create larger files and use up more memory, but will give
you a larger, clearer picture when played back on a computer
or television.
20
To set the video resolution:
While the camera is set to Video Mode,
1) Press the OK button by pressing in on the center of the
navigation stick.
2) Highlight the Video menu.
3) Press the navigation stick Up or Down to highlight
Resolution and press OK to display the submenu.
4) Press the navigation stick Up or Down to highlight 640 x
480 for higher resolution video, or 320 x 240 for smallersized videos.
5) Press OK.
6) Press the navigation stick to the Left TWICE to exit.
B) Frame Rate
For smooth video the camera can be set to shoot 30 frames
per second. To save memory, you can shoot at 15 frames of
video per second. For videos used online, or on a small screen
15 frames per second may be adequate. For playback on a TV,
choose 30 frames per second.
While the camera is set to Video Mode,
1) Press the OK button.
2) Highlight the Video menu.
3) Press the navigation stick Up or Down to highlight
Frame Rate and press OK to display the submenu.
4) Press the navigation stick Up or Down to highlight
30FPS to record at 30 frames per second, or 15FPS to
record at 15 frames per second.
5) Press OK.
6) Press the navigation stick to the Left TWICE to exit.
21
C. White Balance
See section 6.3 for explanation of White Balance.
To change White Balance in video recordings, be sure the
camera is in VIDEO Mode and make White Balance changes in
the Video menu in the same way that it is changed for still
images.
D. Video With or Without Audio
Video can be recorded with or without audio.
To change the audio setting:
While the camera is in VIDEO Mode,
1) Press the OK button
2) Highlight the Video menu.
3) Press the navigation stick Up or Down to highlight
Audio and press OK to display the submenu.
4) Press the navigation stick Up or Down to highlight
Enable to record audio with the video, or Disable to record
video only.
5) Press OK.
6) Press the navigation stick to the Left TWICE to exit.
9. Audio Recording
The SIC 3608S/G7 can also record audio without video.
1) Press the Power button to turn on the camera.
2) Press the
Mode button to select AUDIO mode.
3) Press the Shutter button to start recording audio.
4) Press the Shutter button a second time to stop
recording audio.
22
Note:
When recording, the LCD viewfinder will blink red and start a
recording timer. The timer will display until the recording is
stopped.
III. Photo Review and Video Playback
10. Viewing Photos on the Camera LCD Display
To view the photos you have taken, Press the Playback
button. Press the navigation stick Left or Right to scroll
through the photos.
10.1 Viewing Thumbnails
To quickly search through photos, you can display a grid of
thumbnails of the saved photos.
To view thumbnails:
While in PLAYBACK Mode:
1) Press the Zoom out (-) button.
2) Press the navigation stick UP/DOWN/LEFT/ RIGHT
to select a photo.
3) Press the OK button to view the photo in full screen.
10.2 Zooming In on a Photo
While viewing a photo, zoom in to enlarge a portion of the
image on the LCD display.
While in PLAYBACK Mode:
1) Press the
Zoom In button to make the image appear
larger.
+
23
2) Press the navigation stick UP/DOWN/LEFT/RIGHT
to view different enlarged portions of the photo.
3) Press the
Zoom out (-) button to return to normal
viewing of the photo.
11. How to Delete Photos, Videos and
Audio recordings
While in PLAYBACK Mode:
1) Press the
Delete button to enter the DELETE mode
There are three options:
• Delete current – deletes the photo or recording being
displayed
• Delete All – deletes all photos and recordings saved on the
memory card
• Do not delete – cancels the deletion.
2) Press the navigation stick UP or DOWN button to
choose to delete the photo or recording being displayed, or to
delete all photos, videos and audio recordings, or to cancel the
deletion.
3) Press the OK button.
4) Press the navigation stick to the LEFT to select Yes to
confirm the deletion.
5) Press the OK button to delete the file.
11.1 Formatting an SD Memory Card
An inserted SD card may need to be be formatted because:
• It hasn’t been formatted before and a message appears on the
camera’s LCD display to format the SD card.
• The card is corrupted and is unable to be read by the camera
or your computer.
24
• To delete all saved photos, videos & audios saved to the SD card.
To format an SD Card:
1) Press the OK button
2) Press the navigation stick to Right to display the Setup
menu
3) Press navigation stick Up or Down to highlight Format
and press OK.
4) Press the navigation stick Up or Down to highlight the
YES and press OK to confirm.
5) Press the navigation stick to the Left TWICE to exit.
Note: ALL saved photos and files will be deleted when an SD
card is formatted.
12. Video Playback
You can view the saved videos without sound on the camera.
12.1 Watching Videos on the Camera’s LCD
Display:
While in PLAYBACK Mode,
1) Press the navigation stick to the LEFT or RIGHT to
select the desired video file for playback.
2) Press the OK button to play video file.
3) While watching the video, hold the navigation stick to the
RIGHT to fast forward; hold the navigation stick to the
LEFT button to rewind.
4) Press the OK button a second time to stop playback.
25
12.2 Watching Videos or Listening to Audio
Recordings on Your Television:
Connect the SIC 3608S/G7 to your television to watch your
videos or listen to your audio recordings so that you can share
your recordings with others.
To watch videos or view photos on your television:
1) Connect the camera to your TV using the AV cable. Be sure
to match the yellow (video) and the red and white (audio)
cables to a connection on your TV.
2) Power on the camera and press the Mode button to enter
the PLAYBACK mode.
3) Power on the television and change its input to that which is
connected to the camera.
4) On the camera, choose the desired video by pressing the
navigation stick to the LEFT or RIGHT.
5) Press the OK button on the camera to start video playback.
6) While watching the video, hold the navigation stick to the
RIGHT to fast forward; hold the navigation stick to the
LEFT button to rewind.
7) Press the OK button a second time to stop video playback.
Note:
• The camera’s LCD display will turn off when the AV cable is
connected to the camera.
• If the video or photo does not appear in the center of the
screen, you will need to adjust your TV.
• If the video does not display properly, adjust the camera to
output the video in the right format for your TV.
26
A) Adjusting the Camera’s Video Output
Press the Mode button to change to VIDEO Mode.
1) Press the OK button
2) Highlight the Video menu.
3) Press the navigation stick Up or Down to highlight TV
Output and press OK to display the submenu.
4) Press the navigation stick Up or Down to highlight NTSC
for TVs in North America; highlight PAL for European and
other countries that use the PAL television system.
5) Press OK.
6) Press the navigation stick to the Left TWICE to exit.
II. Downloading Photos, Videos and Audio Recordings to Your Computer
By using the included USB cable, photos, videos and audio
recordings can be downloaded and saved to your computer.
The camera must first be set to USB mode.
13.1 Setting the Camera to USB Mode
1) Press the OK button.
2) Highlight the Setup menu.
3) Press navigation stick Up or Down to highlight USB
Mode and press OK.
4) Press the navigation stick Up or Down to highlight the
USB Mode and press OK to confirm.
5) Press the navigation stick to the Left TWICE to exit.
Note:
• Tripod cannot be used when in USB mode.
27
13.2 Downloading Photos, Videos and Audio
Recordings to a PC
With the camera set to USB mode (see above):
1) Press the Power button to turn on the camera.
2): Connect the USB cable to the computer THEN to the
camera.
At this point, a dialog box may appear on your screen. Choose
the option “Import Pictures” to download photos and
videos to your default picture file on your computer.
OR to download all saved photos, videos and audio recordings:
3): Double click the “My Computer” icon on the desktop of
your PC.
3): Double click “ ” icon that corresponds to the camera.
d): Double click “DCIM” file folder.
e): Copy all the files to your PC.
13.3 Downloading Photos and Videos to a Mac
Computer
With the camera set to USB mode (see above):
1) Press the Power button to turn on the camera.
2): Connect the USB cable to the computer THEN to the
camera.
At this point, iPhoto may automatically open. When the photos
appear onscreen, you can import all or selected photos and
videos.
OR to download all saved photos, videos and audio recordings:
28
3) Click on the icon for you camera on the desktop.
4) Click on DCIM to open the folder.
5) Click on the files you want to copy and drag them to your
Pictures, Movies and/or Music folders.
Note:
• Removing the SD card or the batteries while copying files to
your computer, may result in lost or corrupted files.
• When downloading files, always connect the USB cable to
computer first, then to the camera. If you connect the USB
cable to camera first, the LCD display will turn off. If this
happens, power the camera off then power on again.
29
III. Maintenance
To prolong the life of the camera and ensure the best camera
performance, keep the camera and accessories well maintained.
15. Camera Maintenance
Use only a dry, soft and clean cloth to clean fingerprints,
smudges and dust from the camera lens and LCD display.
Do not use rough or abrasive cloths or household cleaning
products, as they will scratch the lens and LCD display.
It is recommended to use cloths and lens cleaners manufactured for cleaning cameras and follow the products’ instructions.
Keep the camera out of direct sunlight and high
temperatures. Do not leave your camera in a hot car or glove
compartment.
When bringing the camera from a cold environment into a
warm environment, wait a few minutes for the camera to warm
up before use.
30
16. Batteries
The power status of the battery is displayed on LCD as shown:
Low
Half
Full
Factors that influence the lifetime of the batteries include:
• LCD use—frequency, length of time in use;
• Long periods of playback using the LCD display;
• Frequency of Flash use;
• Number of pictures taken;
• Cold environments will shorten the life of the batteries;
Note:
• DO NOT use Manganese batteries.
• DO NOT REMOVE the battery when the camera power
is on; doing so will affect the internal settings and functions of
the camera.
• Replace batteries when the battery power status indicates the
batteries are low.
• Take out the batteries if you won’t use the camera for a long
period of time.
• DO NOT insert batteries that are corroded, inflated, or
show signs of leakage, into the camera.
• To increase the battery life of rechargeable batteries, fully
charge the battery before use.
31
17. SD Memory Card
The camera uses an SD memory card with up to an 8GB
storage capacity, and may not recognize memory cards with a
larger storage capacity.
It may be necessary to format the memory card in
the following situations:
• The inserted card is unformatted;
• The card is not working properly in the camera even if it has
been previously formatted;
• The card has previously been used in another camera.
17.1 Formatting an SD Memory Card
1) If applicable, be sure the card is switched to the unlocked
position.
2) Insert the SD card into the camera.
Follow the directions in section 11.1 to format the SD memory
card.
Note:
• DO NOT remove the SD card or batteries while formatting to avoid card failure or corruption.
• Some SD cards have a small switch to lock and unlock the
card. To save photos, videos and audio recordings to the SD
card, the switch must be in the unlocked position.
32
• All data will be deleted and unable to be recovered after a
card is formatted. Be sure to backup all pictures and saved data
to your computer before formatting the SD card.
18. Camera Safe-Handling
• To avoid the danger of electric shock, do not open the camera
body or attempt to repair the camera.
• Keep the camera dry. Water or humidity may cause camera
failure.
• Stop using the camera and turn off the power
immediately if the camera gets wet. It is necessary to
dry the camera before reuse.
33
IV. Camera Specifications & Software Minimum
Requirements:
Camera Specifications
File format
Capture
Video quality
Shutter speed range
Self timer
Zoom
White balance
Exposture control
Flash modes
Illumination
Interface
TV output
TFT monitior screen
Power
OSD language
Focal range
Aperture
Auto power off
System required
Weight
Dimensions
JPEG, EXIF 2.2, MJPEG(AVI)
Single/ 3 frames continuous Burst
VGA 640x480/QVGA 320X240
Electronic shutter£?1/2 ~ 1/2000 sec
Disable/10 sec/20 sec
4 x digital zoom
Auto/ Day light/Tungsten/Fluorescent/ Cloudy
Auto
flash off/ flash on/flash Auto
Auto
USB1.1
NTSC/PAL
2.36” TFT LCD monitor screen
3 x AAA alkaline batteries/rechargeable batteries
English/French/German/Italian/Spanish/
Portuguese/Dutch
f=8.25mm
F=3.0
60sec/120sec
Windows 2000 /XP / Vista/ Win7
Approx. 90~95g (without batteries and SD card)
Approx. 105.75 x 63 x 29.55mm
Attention: The product design and the specifications are subject to
change without prior notice.
34
Philips and Philips Shield are used
under license of Koninklijke
Philips Electronics NV
© 2010 GiiNii International
All rights reserved