1
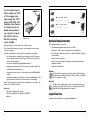
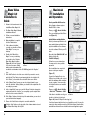
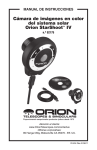
instruction Manual Orion® Video Capture Device #52181 Providing Exceptional Consumer Optical Products Since 1975 OrionTelescopes.com Customer Support (800) 676-1343 E-mail: [email protected] Corporate Offices (831) 763-7000 89 Hangar Way, Watsonville, CA 95076 © 2011 Orion Telescopes & Binoculars IN 433 Rev. A 10/11 The Orion Video Capture Device enables any NTSC or PAL analogue video signal output from CCTV camera, DVD, DVR, VCR, Cablebox, Game Console or Camcorder to be displayed and recorded on any computer or Laptop with XP, Vista, Win7 or Mac OS X operating system installed. Figure 1. USB Device and Software CD. Video input can be from any Composite or SVideo signal. Figure 2. Examples of supported Input devices. System Requirements The following hardware is required: The software CD includes video capture, video editing and movie format conversion software. • Recommended minimum memory size is 512 MB. The Video Capture Device can be used for many purposes including: • Video Display – 800 X 600, 16-bit color or higher. 1024x768 or higher is recommended. • Live Viewing and recording of astronomy subjects via CCTV camera such as the Orion Starshoot Deep Space Video Camera or the Orion Starshoot Video Eyepiece. • Live internet broadcasting via NightSkiesNetwork. • Capturing and editing home movies from tape to digital formats such as DVD, Web and mobile devices. • Capture and convert movies to other formats such as MPEG and AVI formats. • Automated tracking and recording of meteors using HandyAVI or UFO capture software. (windows only software links on CD installer) Please read this instruction manual before attempting to use the video capture device or install the software. Parts List • Orion Video Capture Device (USB) • Dual Format Windows PC / Mac OS X CD-ROM • Manual 2 • Disk Space – 1GB or more recommended for saving Movies. • Mouse (external or built-in) • Internet connection required to display on-line help and download additional software • High Speed USB 2.0 port Windows The Orion Video Capture device, device driver and Orion Capture software requires Windows XP, Vista or Win 7 running on a Pentium III™ or equivalent, or higher. Mac OSX The Orion Video Capture device, device driver and Orion Capture software requires Mac OS X 10.3 or above running on a Power PC G3/G4/G5 or Intel-Based Macintosh computers. Input Devices A wide variety of Input devices are supported (Figure 2). 3 Software and Driver Installation 2. The USB-TV Device Driver Software Installation will start. 3. Follow on screen Installation instructions. Before the video capture device can be used the USB device driver and image capture software must be installed onto your computer. 4. When installation is complete click the Finish button. 5. Restart computer. Note: If you have any antivirus software enabled, please disable it during the installation of the software. Once the driver is installed, the computer will now recognize the Orion Video Capture Device whenever it is plugged in. Note: Do not connect the Video Capture Device to your computer yet. Windows Users Included on CD are the following: Figure 3. The Windows launcher provides an easy menu for software installation. • Orion AmCap – Capture Software • VCR to DVD – Video editing software • Blaze Video magic – Movie format conversion software Please turn to the section titled “Windows installation and operation page”. Macintosh Users Included software: Verify Device Driver Installation You will now need to check that the drivers are installed correctly. Figure 4. Device manager screen. 1. Right Click on My Computer • EasyCap – Capture Software 2. Left Click on properties. • Video Impression – Video Editing and Conversion Software 3. Click on Hardware tab and then Device Manager. • Lynkeos – Astronomical Post processing Software In the Device Manager click on the “Sound, video and game controllers”. You should see the “USB 2861 Device” listed. (Figure 4). Please turn to the section titled “Macintosh installation and operation page”. Windows Installation and Operation Turn on your computer and allow the Windows operating system to load as normal. Insert the included CD-ROM into your computer’s CD-ROM drive, and the Launcher will appear (Figure 3). This allows you to install the included USB Device driver, Orion capture software, VHS to DVD capture and editing software and Blaze video magic conversion software. Video Capture Device Driver Installation 1. Click Install Capture Device Driver. 4 Please connect the Video Capture Device to your computer, you should see a window, select “Yes, this time only”, and then select “Install the software automatically (Recommended)”, select “Continue Anyway”. Wait for a moment until the system displays “Your new hardware is installed and ready to use”. If it has a Yellow mark next to it then this means that the driver is not installed correctly. You will need to remove the driver and disconnect the Orion Video Capture device from the computer and reconnect to install the driver again. Capture Software Installation & Guide Now that the Video Capture Device driver software is installed, the capture software must also be installed. 1. Return to the Launcher and click Install Orion Capture Software. 2. The Orion AmCap Setup Wizard appears. Click Next. 5 10. Select Capture File from the File menu and name your file including the AVI extension name. IE MyMovie.avi. Click Open. 3. Select a destination folder and Click Next. 4. Click Next again to start the installation. 5. When the wizard is complete, click close. This has installed the capture software. 6. Open Orion AmCap from the icon on your desktop. The Live Video Window should appear (Figure 5). The software will recognize many cameras so check that USB 2861 Device Figure 5. The live video window. is selected from the device menu. 7. Under Options menu select Video Capture Filter and select Video Decoder Tab to modify settings such as PAL/NTSC/ SECAM country video standard settings. Select the Video Proc Amp Tab to modify image settings such as Brightness, Contrast, Hue, Saturation and Sharpness (Figure 6). Figure 7. Video Capture Pin. 12. Select Set Frame Rate under the Capture menu. Check the box Use Frame Rate and type 15. Press ok. Figure 6. Video Capture Filter. 8. Under options menu select Video Capture Pin to modify settings such as Output Size (Figure 7). The maximum output size is 720 x 480. 9. Under options menu select Video Crossbar to modify video input settings based upon the video device attached to the Video Capture Device IE (Figure 8). The majority of devices will output standard Video Composite video signal. Higher quality can be achieved using SVideo input. 6 11. Enter the amount of disk space to allocate as a Capture buffer for this data. Movie files need a large amount of disk space. Enter a value such as 50 Megabytes or higher. Press ok. The size of the captured data may be much higher than this value depending upon number and size of frames captured. 13. Select Set Time Limit under the Capture menu. Check the box Use Time Limit and type 20. Press ok. Figure 8. Video Crossbar. 14. Select Start Capture under the Capture menu. 15. Press ok when you are ready to capture Images. An AVI movie sequence of 300 frames (15 frames per second x 20 seconds) will now be recorded. The total number of captured frames is displayed on the bottom bar. If frames are being dropped this will be displayed also. To remedy this, try increasing the capture buffer size. If this does not resolve dropping frames then the frame rate or resolution should be set to a lower value to prevent dropping of frames. 7 Honestech VHS to DVD 2.0 SE Installation & Guide 1. Return to the Launcher and click Install VHS to DVD SE. 2. The VHD to DVD SE Software Installation will start. Figure 9. Product Key Check. Figure 10. Input Device Selection. 3. Follow on screen Installation instructions. 4. When installation is complete click the Finish button. Figure 11. Video Input Selection. 7. Select input device to be “USB 2861 Device” (Figure 10). 8. Click “Video Setting” button located to the right of the input device. Select the correct input source for your device (Figure 11). 14. During the edit phase, you can cut out scenes from your recorded video. You can also cut your movies into multiple scenes and add storybook transition effects between each scene. When you have multiple scenes captured, you can combine them into one continuous clip with transition effects. In order for you trim or cut part of the scene from the captured clips, you will need to create two separate clips, one before the part of the clip to be trimmed and another for the scenes after the part of the clip to be trimmed. You can even combine two separate clips into one scene using the storyboard. 15. Click the “Preview“ button to preview the edited video file before saving it, and click “Merge and Save” button, you can set your video file format to be “MPEG” or “DV-AVI”. Figure 12. Video Standard Settings. 9. Click “Control” button to select video standard under the Video Decoder tab to modify settings such as PAL/NTSC/SECAM country video standard settings. (Figure 12) Select the Video Proc Amp Tab to modify image settings such as Brightness, Contrast, Hue, Saturation and Sharpness. 10. If you have connected your video output device with the Video Capture device and your computer correctly you can now watch video and record it. Before you begin recording video, select the output file format from drop down menu, recording video type, quality and recording duration time. You can also select output folder for the recorded video file. 8 12. If you select “recording and Figure 13. Edit mode. burning” and click red record key, it will start the burning process right after recording for the designated time. 13. If you want to edit the recorded video file, select “Edit” tab to enter edit mode (Figure 13). Double- click the thumbnail image of the recorded file you want to edit or drag the file into the player panel and the file will play. 5. If the software is installed correctly, you should see “honestech VHS to DVD 2.0 SE” icon on your desktop. 6. Double click “honestech VHS to DVD 2.0 SE” icon on your desktop, enter your product key in the window (Figure 9). You can find the product key on the CD-ROM bag, 11. Click the red record button to start recording video. If you select “commercial cutting”, you can cut the part of the video you don’t want to save, when you want to finish, click the white stop icon, you should see the thumbnail image of the recorded file on the top right of the window. 16. Click the “Burn” tab. Now, you can select output video format, and click “Option” button, you can select CD/DVD writing device, and select the disk name, and must select correct input video type, then click “OK” icon. Select your file or click “Add clips” icon to choose the other files, according to your want, you can edit the video files by “Create Menu” function. (Chapter, Select back ground image, Select a navigation button image, Select the number of clip per page, Text.) Notice: VCD, SVCD, Data CD, Data DVD formats do not support “Create Menu” option. 17. Next, insert a blank CD or DVD into your CD/DVD writing device, and click “Start” icon to publish the video files. Click the “Help” button on the top right of the software window to read the “honestech VHS to DVD 2.0” help file. 9 Blaze Video Magic 3.0 Installation & Guide Macintosh Installation and Operation Check your Mac OS X version Orion Capture software requires Mac OS X 10.3 or later. 1. Return to the Launcher and click Install Blaze Video Magic 3.0. 2. The Blaze Video Magic Software Installation will start. 3. Follow on screen Installation instructions. Please go to There you will find your Mac OS version (Figure 16). Figure 14. Registration Window. 4. When installation is complete click the Finish button. 5. If the software is installed correctly, you should see “Blaze Video Magic” icon on your desktop. 6. Double click “Blaze Video Magic” icon on your desktop, you should see the “Register Blaze Video Magic” window (Figure 14), click the “Register” Figure 15. Blaze Video Magic Software. icon, enter user name, E-mail address and serial number, (You can find the serial number on the CD-ROM bag) and click “Register” icon. 7. Click “Add” button to select the source video file you want to convert, and click the ”Play” button to preview and play the selected video file, click “Delete” you can delete the selected file from source file list. 8. In the “Output Format” menu, you can select output format for your video file, and click “Setting “button, you should set the output video file according to your want. 9. In the “output Path” menu, you can click “Browse” button to change the output path, and click “location” you can quickly open the output folder and access the converted video file. 10. Click “Option” button at the right top of the main window, you can select your desired interface language. 11. Please click “Start” button to begin to convert the added file. Click the “Help” button on the top right of the software window to read the “Blaze Video Magic 3.0 help” file. 10 About this Mac. Install Driver and Application Note: If you have any anti-virus software enabled, please disable it during the installation of the software. Figure 16. Mac OS X Version window. Insert the software CD into your CD drive. Open the folder “EzCAP1.0.1R” and double click the file “EzCAP1.0.1R.pkg”. Follow the onscreen instructions. You may need to enter your Mac password. Figure 17. EzCap successful installation. Once installation has completed please restart your computer (Figure 17). Connect the Capture Device to a USB port on your Mac, after a short while, the hardware will be installed in your computer. You now need to check that the drivers are installed correctly. Please go to About this Mac More info Hardware USB. Figure 18. Checking Driver If the driver is installed correctly you installation. should see the device listed as in Figure 18. (Vendor ID: Empia Technology, Inc) If not then it means that the driver is not installed correctly. You need to remove the driver and disconnect the USB Video Capture from the Mac, uninstall them first and then re-install the driver and application again. 11 EzCap Application Guide Video Impression Installation Click Go Applications EzCAP, then double click EzCAP Capture icon. Select “Digitizers” and “EzCAP” to select device. Next Click “Record” and select “Video Settings” on the application window. Click Source and select Composite or S-Video to match your video source (Figure 19). Select “OK”. You should now see the video in the video window. Click Record Sound Settings Source Unknown USB Audio Device”, and set Speaker to “On”, then click “OK” (Figure 20). You should now hear the audio as your inputted audio source. You can also click Record icon, and select “Record Setup” to set items for recording, and select “Record” to record the video programs. To start the Video Impression software installation please insert the software CD into your CD drive. Figure 19. Video Settings. Figure 20. Sound settings. Follow on screen instructions to install “Rosetta”. An internet connection will be required to download “Rosetta”. Figure 21. Uninstall Application. Select your language for the installation and Click Agree Continue Install. Enter your name, company name and license key of software (Figure 24). (License key is on the CD bag) Uninstall the Application Go to Macintosh HD Applications EzCAP, and delete the “EzCAP” folder (Figure 21). Figure 22. Uninstall Component. Now you finished the uninstallation application. 12 Figure 24. Video Impression install. Figure 25. Successful Video Impression install. Once successfully installed a confirmation window will appear (Figure 25). Click “Close” to finish the software installation. Video Impression Settings for Capturing Go to Macintosh HD Library QuickTime EzCAP.component and delete the “EzCAP.component” (Figure 22). Go to Macintosh HD System Library Extensions EzCAP. kext and delete the “EzCAP.kext” (Figure 23). Additional online software “Rosetta” may need to be installed if prompted. Normally, applications intended for Mac computers based on PowerPC processors don’t work on Macs based on Intel processors. But if you install Rosetta, you can use applications intended for PowerPC-based Macs. Figure 23. Uninstall extensions. Click “Go” and select “Applications”, double click “Video Impression. Select “Create a New Video” and “Capture from Device” (Figure 26). Figure 26. Capture from Device. 13 If you get no video or sound you will need to set Video source and Audio source. Video Impression Editing Click “Settings” of VIDEO item. Click Source Composite or S-Video to match your video source. And select “OK” (Figure 27). You should now see the video in the video window. Figure 27. Video input. Click the “DONE” icon to go to editing panel, and edit your video and audio files through the software (Figure 31). Please click “Help” icon for software information. Figure 28. Video Recording formats. Converting Video file to iPod, iPhone Click “PRODUCE” icon in EDIT panel as below. And select the device name or video format that you want, Click “START” to convert video file. (Figure 32) You can set the format of the recording file (Figure 28). Click “Settings” of AUDIO item. Following window will appear, please click Source Unknown USB Audio Device, and select “On” for Speaker. Click OK to finish Audio settings. Now you should get the sound from USB Video Capture device. (Figure 29 and Figure 30) Figure 31. Editing video with Video Impression software. Go Back to Capture Panel If you want to go to capture again, please click “MEDIA” icon, and click “Capture Video” icon (Figure 33). You also can click red “Record” key to record video programs. And click “STOP” icon to finish recording. Figure 29. Audio Settings. Figure 32. Exporting different format movies. Figure 33. Capturing with Video Impression. Figure 30. Audio Settings for Preview. 14 15 Additional Software works well with solar and planetary images. MaximDL (Windows) – Trial/Paid CCD imaging and image processing software MaxIm DL is the fastest and easiest way to image the night sky.Whether you want to produce stunning portraits, collect science data, or hunt for new objects, MaxIm DL has the tools you need. Return to the Launcher and click “Astronomy software links” (Windows) to view additional software compatible with the Orion Video Capture Device (Figure 34). Select desired software to be directed to a website to download the latest software. Mac users need to place CD in CD drive and select each piece of software to install. For detailed information on installation and usage of additional software consult the websites of each software provider. Tutorials and user groups can be found online also. RegiStax (Windows) – Free image processing software A popular free image processing suite of tools includes features such as alignment, stacking, optimizing and wavelet filters, Registax can analyze, align, and stack thousands of images in just minutes. Figure 34. Astronomy Software Links for Windows users. Figure 37. MaximDL. Complete observatory integration. Controls your camera, autoguider, filter wheels, focusers, camera rotator, telescope mount, and dome. ASCOM compliant. Includes a complete image processing toolkit, including a large variety of filters, deblooming, curves, deconvolution, color tools, and much more Figure 38. HandyAVI. HandyAVI (Windows) – Trial/Paid Suite of tools for AVI files. Features include time lapse, motion detection, surveillance, planetary imaging, meteor trail imaging and stop motion animation. Figure 35. Registax. HandyAvi automatically captures a specified number of frames (pre-frames) immediately preceding the “trigger event” so that the (possibly) dim beginning of the meteor trail is captured. HandyAvi continues recording data while additional motion is detected. AVIStack (Windows) – Free image processing software AviStack is a freeware tool that registers, stacks and processes AVI’s and image sequences of astronomical objects.. HandyAvi continues recording an additional number of “post-frames” after the last motion is detected. The AVI file will contain COMPLETE meteor trails, airplane trails or lightning events. Automatically email images of detected motion. AviStack was primarily developed to process lunar images, but, it also Automatically FTP upload captured video to a website. Figure 36. AVIStack. 16 17 UFO Capture (Windows) – Trial/Paid time shifted motion capture software Automated detection, recording and analyzer software for Meteors, Atmospheric phenomena and security. Night Skies Network – Free Astronomy Internet Broadcasting Service (Windows and Macintosh) Share your views of the night sky by broadcasting live over the internet. Includes video, voice and text chat. Automatically email images of detected motion. See members from all parts of the globe broadcasting the night skies from their home built observatories, back yards, and just about any other place where they can set up a telescope. Automatically FTP upload captured video to a website. Lynkeos (Macintosh) – Free image processing software Included on CD is the Lynkeos software which is dedicated to the processing of astronomical (mainly planetary) images and movies. This program can be copied (dragged) into the applications folder or run from the CD itself. Run Lynkeos and select help to access tutorials and other general help features. Lynkeos is free software under the GNU General Public License. Source code is available for developers (http://lynkeos.sourceforge.net) To use AVI or MPEG sequences you will need to run the FFMpeg installer. Figure 42. The Night Skies network Interface. Figure 39. UFO Capture. Tips Figure 40. UFO Analyzer. Loss of Capture Device Connection If the computer connection to the Video Capture Device is interrupted, you will need to re-establish connection. This can happen due to several reasons; if a cable becomes unplugged, the computer “freezes”, or the software/hardware otherwise temporarily loses the data coming from the device. To re-establish camera connection, first close all capture software on your computer. Then, unplug and re-plug the Video Capture Device into the computer’s USB port. Now, re open the capture software and the Live Video Window should appear indicating re-established connection between camera and computer. Figure 41. Lynkeos (Mac OS X). Recommended Reading (Books available through Orion, check the catalog or www.OrionTelescopes.com for more information). To load or save images in FITS format you will need to go to the website http://lynkeos.sourceforge.net.Please go to the download area to select the latest App, Plug Ins and Libraries. Specifications For latest software and documentation please visit: http://lynkeos.sourceforge.net. Interface USB 2.0 TV System PAL, NTSC Resolution NTSC 720 x 480; PAL 720 x 576 Recording Format DVD, VCD, SVCD, AVI, MPEG Frame Rate NTSC 30fps, PAL 25fps Input RCA Composite + Audio L/R or S-Video +Audio L/R 18 19 One-Year Limited Warranty This Orion Video Capture Device is warranted against defects in materials or workmanship for a period of one year from the date of purchase. This warranty is for the benefit of the original retail purchaser only. During this warranty period Orion Telescopes & Binoculars will repair or replace, at Orion’s option, any warranted instrument that proves to be defective, provided it is returned postage paid to: Orion Warranty Repair, 89 Hangar Way, Watsonville, CA 95076. If the product is not registered, proof of purchase (such as a copy of the original invoice) is required. This warranty does not apply if, in Orion’s judgment, the instrument has been abused, mishandled, or modified, nor does it apply to normal wear and tear. This warranty gives you specific legal rights, and you may also have other rights, which vary from state to state. For further warranty service information, contact: Customer Service Department, Orion Telescopes & Binoculars, 89 Hangar Way, Watsonville, CA 95076; (800) 676-1343. OrionTelescopes.com 89 Hangar Way, Watsonville, CA 95076 Customer Support Help Line (800) 676-1343 © 2011 Orion Telescopes & Binoculars