1
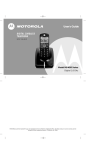
Welcome
Important Safety Instructions
Welcome
Congratulations on your purchase of a Motorola product!
Your Motorola T elephone at a glance:
Model ME7050 Series
For product-related questions, please refer to the Warranty section.
Important Safety Instructions
Please retain your original dated sales receipt for your records. For warranty service
of your Motorola Product, you will need to provide a copy of your dated sales receipt
to condfilm warranty status.
Follow these safety precautions when using your cordless phone to reduce the risk
of fire, electric shock and injury to persons or property:
DIGITAL CORDLESS PHONE
Complies with the essential protective requirements and objectives of the EC's R&TTE
Directive 1999/5/EC; EC Low Voltage Directive 72/23/EEC; EC EMC Directive 89/336/EEC
Model ME7052 Series
DIGITAL CORDLESS PHONE
Copyright © 2007 Motorola, Inc.
All rights reserved. No part of this publication may be reproduced in any form or by
any means or used to make any derivative work (such as translation, transformation
or adaptation) without written permission from Motorola, Inc.
WITH SPEAKERPHONE
Model ME7060 Series
Motorola reserves the right to revise this publication and to make changes to content
from time to time without obligation on the part of Motorola to provide notification
of such revision or change. Motorola provides this guide without warranty of any kind,
either implied or expressed, including but not limited to, the implied warranties of
merchantability and fitness for a particular purpose. Motorola may make improvements
or changes to the product(s) described in this manual at any time.
DIGITAL CORDLESS PHONE
WITH DIGITAL ANSWERING MACHINE
MOTOROLA, the Stylized M Logo, and PhoneWrap are registered in the U.S. Patent
and Trademark Office. All other product or service names are the property of their
respective owners.
Reduce risk of fire and shock by:
1. Keep all slits and openings of the phone unblocked. Do not set the phone on a
hot surface or over a radiator. Ensure that proper ventilation is provided at
the installation site.
2. Do not use while wet or while standing in water. It may result in serious injury.
3. Do not use this product near water (for example, near a bath tub, kitchen sink, or
swimming pool).
4. Do not allow anything to rest on the power cord. Place the power cord so that it
will not be walked on.
5. Never insert objects of any kind into the product slits as that may result in fire or
shock.
6. Unplug this product from the wall outlet before cleaning. Do not use liquid cleaners
or aerosol cleaners. Use a damp cloth for cleaning.
7. Do not disassemble this product. If service or repair work is required, contact the
Warranty Service phone number found in the back of this user's guide.
8. Do not overload wall outlets and extension cords.
9. Avoid using during an electrical storm.
10. Do not use this cordless phone to report a gas leak, especially if you are in the
vicinity of the gas leak.
Unplug this cordless phone immediately from an outlet if:
The power cord or plug is damaged or frayed.
Liquid has been spilled into the product.
If the product becomes submerged in water, Do not retrieve the base
until after you have unplugged the power and phone cords from the wall. Then
retrieve the unit by the unplugged cords.
The product has been dropped or the cabinet has been damaged.
The product exhibits a distinct change in performance.
User's Guide
Digital 1.8 GHz
1
2
Installation Guidelines
Read and understand all instructions and keep them safe for future reference.
Follow all warnings and instructions marked on the product.
Do not install this product near a bath tub, sink or shower.
Do not place this product on an unstable surface. This product may fall, causing
serious damage to the product.
5. Adjust only those controls that are covered by the operating instructions. Improper
adjustment of other controls may result in damage and will often require extensive
work to restore the product back to normal operation.
6. Clean this product with a soft, damp cloth. Do not use chemicals or cleaning agents
to clean this phone.
7. Use only the power supply that came with this unit. Using other power supplies
may damage the unit.
8. Because cordless phones operate on electricity, you should have at least one phone
in your home that isn't cordless, in case the power in your home goes out.
9. To avoid interference to nearby appliances, do not place the base of the cordless
phone on or near aTV, microwave oven, or VCR.
10. It is impossible to make emergency calls when the keypad lock is enabled.
1.
2.
3.
4.
Technical Amendments
These Operating Instructions are issued for information purposes.Their
content is not the subject of a contract.
All indicated data are merely nominal values.The described equipment and
3
Connecting the Base Station and Mains Adaptor
Installation
Insert the plugs in the corresponding socket of the base station. Route the cable
beneath the telephone towards the back. Plug in the telephone plug.Insert the mains
adaptor in the wall socket. The base station is now ready for use.
Package Contents
1
Twin Pack
1
Triple Pack
Base Station
1
Quad Pack
1
Mobile Handset
1
2
3
4
Mains Adaptor
1
2
3
4
Telephone Line Cord
1
1
1
1
Rechargeable Batteries
type micro AAA
2
4
6
8
Charger Unit
0
1
2
3
User's Guide
1
1
1
1
Single Pack
Please check the contents of the package carefully. If s om ething is m is s ing or has
become damaged in transit, you should NOT use the telephone. In such a case you
should return to the dealer with your sales receipt or contact the Motorola's distributor
directly. (For details, please refer to the Warranty section.)
Note: Retain the packaging of your appliance to prevent it from being damaged should
you ever need to return it.
The base station does not have a power switch. Make sure that
there is a mains socket nearby and that the mains adaptor is easily
accessible. Check that the voltage indicated on the mains adaptor
corresponds to that of your mains supply.
Open the battery compartment, by pushing downwards on the cover.
Insert the 2 x AAA (600mAh/1.2V) Ni-MH re-chargeable batteries supplied,
observing the correct polarity.
CAUTION: Please do not use Alkaline or
non-rechareable batteries. It may cause
permanent damage to the unit and void
the warranty.
Non rechargeable batteries can explode and
cause injuries and heavy damage on your
environment.
Setting up the Base Station and Charger Unit
country.
Place the base station and charger unit in an easily accessible location. Make sure
This device is dedicated to be used in the analog public switched telecomunication
network (PSTN).
the location, also make sure that all cables can be routed so as to prevent people
tripping over them. Furthermore, avoid placing the base station and charger unit in
the immediate vicinity of other electronic appliances such as microwaves, PCs or HiFi's, for example.We recommend a clearance distance of 1metre is kept between the
phone and other equipment.
Note: For fully discharged batteries, the handset will power on after a 15-minute
precharge.
Do not expose the base station and charger unit to direct sunlight. Do
not allow the base station and charger unit to become wet. They should
not be set up in rooms which are subject to condensation or corrosive
steam or a high concentration of dust (e.g. cellars, garages or
conservatories). The room temperature must be between 00C and 350C.
MOTOROLA and the Stylized M Logo are registered in the US Patent and
Trademark Office. All other product or service names are the property of
their respective owners, © Motorola, Inc., 2007. All rights reserved.
Features
Features
4
5
6
Controls and Indication
Menu Structure
Using the Telephone
On Handset and Base
Congratulations on your purchase of this high quality, cordless telephone set.
The set offers the following features:
Flash (Recall)key, Access a Call
Waiting Line/Hold and transfer
calls when connected to PABX or
for use with network services.
Adjust the
handset volume
Cancel/Delete
Standards
*
Navigate in the menu structure as follows:
Press the Menu key.
Then use the arrow keys to navigate through the menu or select the required menu
item directly using the digit keys.
Example: Enter MENU > 3 > to access '1-RINGER' > '2-HS NAME', then enter the HS
Name.
Caller ID * on Call Waiting
(dependent on network)
LED : Flashes with incoming calls
Handsfree/Speaker key(for Model ME7052)
Backlight display
Operation with 2 standard AAA
re-chargeable batteries
Handsfree (for Model ME7052)
Digital Answering Machine with 12
minutes recording time , 59 messages
capacity (for Model ME7060)
+
+
* user must subscribe to the network's caller id service.
+ more then one handset required.
Paging key (call handset)
On Answering Machine (for Model ME7060)
Menu key-press to open
the answering machine
menu.
Volume down(-)-Press to
decrease loudspeaker
volume.
Volume up(+)-Increase
loudspeaker volume.
Page(Find Handset)keyPress to locate a missing
handset/page all handsets
registered to the base.
Rec./ Record/Memo key
Memo Use to record your
outgoing message or
memo.
Charging indicator
Illuminates when the handset
is charging in the base station.
Call indicator
Flashes when you have
incoming calls.
Flashes when there has been
a Voice mail received.
Message indicator flashes
with the number of new
messages.
Delete key-Use to delete
messages /memos.
Display icons
Indicates that the keypad lock is on.
Microphone is muted.
Ringer is switched off.
Indicates the handset is registered on
the base.
Flashes if there is no link to the base.
Scroll(UP) or (DOWN) to see further
details of the entry.
Indicates the battey charge status/level.
No bars when battery is empty.
Indicates that the outside line is engaged.
Indicates an external call is in progress.
Indicates an internal call is in progress.
Indicates if you have unanswered calls.
(Details available in the caller list).
7
(For Model ME7052)
Taking Calls
When an external call is received, all the handsets registered and the base station
ring.
on
/charger cradle
1. Take the handset from the base station; a connection is automatically established
(when the AUTO ANS function is active). Otherwise, press the
key.
2. Press the
key to end the call.
on
/charger cradle
1. Press the
key.
2. Press the
key to end the call.
Prefix Dialling
1. Press the 0 key for two seconds.
2. Then dial the rest of the digits and press the
key to establish a connection.
Note: The prefix number (e.g. an access code) must have been programmed before hand.
Refer to "Handset Settings".
11
ENTER NAME
1-RINGER
1-VOLUME
2-EXT RINGER
3-INT RINGER
NORMAL RING
VIP RING 1-10
Selecting the Language
Ten different languages are available for selection for each handset.
Proceed as follows to select a language:
1. Press the
key repeatedly until menu item LANGUAGE appears.
2. Press the
3. Press
or
as often as necessary to select the required language.
4. Press the
CONFIRM?
2-HS NAME
3-PREFIX MEM
4-KEY TONE
5-AUTO ANS
6-CALL TIMER
7-DEF AULT
8-REGISTER
[-----]
MELODY 1-10
MELODY 1-10
Making Internal Calls
ON / OFF
ON / OFF
ON / OFF
CONFIRM?
SEARCHING
4-BASE
1-BARRING
ENTER PIN
HANDSET 1-4
2-EMERGENCY
ENTER PIN
12-
3-RINGER
(-----)
DISABLE
EXTERNAL
NUMBER
MELODY 1--MELODY 10 (for Model ME7050/ME7052)
100/250/600
5-DIAL MODE
TONE
PULSE
ENTER PIN
ENTER PIN
NEW PIN
CONFIRM?
REPEAT
ENTER PIN
HANDSET 1-4
CONFIRM?
5-LANGUAGE
ENGLISH,DEUTSCH,ITALIANO,FRANCAIS,ESPANOL,
PORTUGUES,NEDERLANDS,POLSKI,SVENSKA,TURKCE
Access a CallWaiting Line / Holding and transferring calls (PABX)
When on an external call, press
key to access a Call Waiting Line when you hear
the call waiting prompt signal. Press
key again to toggle between the two calls.
When on an external call (PABX line)
1. Press
key to put the call on hold.
2. Dial the number of the extension.
3. Press
key again if you would like to take back the call, or
to transfer the call.
Note:you may have to subscribe to a call waiting service. contact your telephone
provider for more information.
Teleconference and Intercom Call Transfer
Intercom Call Transfer
It is possible to put an external call on hold and call
another handset registered to the base or to forward calls.
1. Press
key to hold the external call and initiate an internal call.
2. Input the desired handset number (e.g. 2).
3. The target handset will ring. After the internal connection is made, press
key to
transfer the external call.
4. If
key is pressed before another handset is answered, the call transfer
procedure will be cancelled and the external call connection is regained.
5. If
key is pressed before another handset is answered, both the external and
internal call will be disconnected.
Voice mail service
Teleconference
Voice mail is an automatic answering service offered by your service provider /
telephone company.If you subscribe to this service,your service provider/telephone
company’s voice mail system will answer calls for you when you are unavailable to
answer the phone or when your line is busy.Messages are recorded by your service
provider /telephone company,not your telephone.Please consult your service
provider/telephone company for details of this service.
After having received an external call, it is possible to include
a second handset in the conversation (three-way conference).
VOL+
VOL-
1. Press the
key and enter the number of the
corresponding handset (e.g. 2) which should be included in the call.
2. The external caller is put on hold. As soon as handset 2 takes the call, press
key to transfer the call to handset 2.
Or
3. The external caller is put on hold. as soon as handset 2 takes the call, press and
hold
key to activate the teleconference.
4. By pressing the
key, any of the handsets can be disconnected from the
teleconference and the other handset continues with the external call.
Muting the Microphone
Entering a Dialling Pause (P)
1. Press the
key to switch the microphone on
or off during a call.
If the MOTOROLA telephone is connected to a PBX system, it may be
necessary to insert a dialling pause. To do this, press the
key after entering the
relevant digit, e.g. 0, for an outside line (0P....). A 'P' appears in the display indicating
a pause. The pause can also be entered when programming numbers in the phone
book.
Redial Function
Press the
Press the
key as offen as necessary to view the last 5 Redialled numbers and
key to dial the Chosen number.
12
There are two ways to dial a number, namely direct dialling or on-hook dialling.
Directt dialling
1. Press the
key and wait for the dialling tone.
2. Dial the telephone number and complete the call.
3. Press the
key to end the call.
On-hook dialling
1. Dial the telephone number.
2. Delete any incorrect entries by pressing the
key.
3. Press the
key.The number entered is dialled and a
connection established.
4. Press the
key to end the call.
9
IMPORTANT: To use the CALL LOG function, you must subscribe to your network
operator’s Caller Line Identification (CLI) service.
If you have subscribed to the Network Caller Display service, the calls list will record
details of any call that arrives. To view the calls list:
key as often as necessary until the CALL LOG menu appears.
1. Press the
2. Press the
key. Alternatively, press and hold the
key.
3. Press the
or
keys to browse through the CALL LOG memory.
4. Press the
key to return the call. Or
5. Press and hold the
key two seconds to delete one or all the entries. Or
6. Press the
key to enter the caller's details in the phone book.
7. Press the
key
8. Enter the name.
9. Press the
key.
10. Press the
or
key to select the normal ring or VIP ring 1-10.
You must subscribe to the network Caller Display service to use the VIP ring feature.
If a VIP ring is assigned for that entry, a digit “ ” will be shown in front of the
name during the incoming call or browsing.
11.Press the
key to save the entry.
Note: 1. The CALL LOG symbol and display indicator only disappear after browsing
through all the entries. 2. It is only possible to enter caller's details in the phone
book who are not already entered.
If more than one handset is registered on the base station,
internal calls can be made free of charge.
1. Press the
key.
2. Press the number of the required handset (1..4) and wait for the called party to answer.
3. Press the
key to end the call.
Note: If an external call is received during an internal
call, a beep will be heard.
Making External Calls
4-FLASH TIME
6-CHANGE PIN
7-DEF AULT
8-DEREGISTER
ENTER NO
Call Log Operations
Dialling from the Phone Book
If you cannot locate a handset you can use the
key on the base to help find it.
1. Press the
key on the base.
All handsets registered to the base will ring and the display on each handset will
show Paging.
2. To stop the paging ring,press the
key on the base again,or press any key on the
handset.
Note: All paged handsets will stop ringing if any key on the handset or page key on
the base is pressed.
ENTER NO
8
1. Press the
key; the first entry in the phone book appears.
2. Press the
or
key to select the required entry from the phone book.
Alternatively, enter the first letter of the name required.
3. Press the
key. The number is dialled.
Paging Handsets
backlight
1-NEW ENTRY
2-LIST ENTRY
3-EDIT ENTRY
4-DELETE
5-DELETE ALL
3-HANDSET
Replay/previous key
During message playback,
press to replay the current
message or press twice to
play the previous message.
Stop-Stops message playback.
Ends recording.
Next key-During message
playback,press to skip forward
to the next message.
Play
On/Off switch.
2-PHONE BOOK
LED : Battery charging indicator
Programmable call barring
When the handset is placed on the base station or charging unit, it switches on
automatically and starts to charge up. Allow the batteries to be charged for 14 hours
Backlight
1-CALL LOG
Key Lock
Switching the Handset On/Off
13
10
Phone Book
When the function is supported by the telephone provider service and the
caller, the handset displays the name of the caller (when stored in the phone book).
The display will show 1 - NEW ENTRY
Press the
or
key to select the normal ring or VIP ring 1-10.
1. If a VIP ring is assigned for that entry, a digit “
name during the incoming call or browsing.
2.
” will be shown in front of the
Alternatively, enter the
first letter of the name required.
14
repeatedly
repeatedly
Alternatively, enter the
first letter of the name required.
person
Vol.+
Vol.-
Edit the number.
Edit the name.
Delete Entries
1. Press the
key as often as necessary until the PHONE BOOK menu appears.
2. Press the
or
key to select DELETE / DELETE ALL.
3. Press the
or
key to select the phone book entry. Alternatively, enter the
/charger cradle.
Note: you only need to do this to replace a faulty handset
first letter of the name required.
4. Press the
key to confirm the input.
Note: The delete process can be stopped at any time prior to confirmation of it by
pressing the
key several times. if all the entries should be deleted, select DELETE
ALL instead of DELETE at Pt. 2.
Kitchen
Use the
key to delete
Page
existing characters.
Note: Even with the call timer off, the total call duration is shown at the end of the
call.
15
17
16
18
Answering Machine Operation
FLASH
(for Model ME7060)
600ms
General
1. In the idle (standby) mode, press
Turn Answering Machine On / Off
Set the Day and Time
Record your outgoing Announcement
Set your Remote Access code
Set 'Announce Only' On / Off
Turn audible Message Alert On / Off
Set Base ringer On / Off
Set number of Rings to answer
Flash
FLASH
flash
Note: The default time for Flash in SINGAPORE is 600ms.
PIN
DISABLE or EXTERNAL .
Note: You only need to do this to replace a faulty handset.
Barring Numbers
11. Use the (up) or (down) key to select NUMBER.
12. Press the INT/OK key.
Clock Setting
Follow the steps above to program the current
, then the
and then the
:
First, program the D a y . As you program, the display shows ' d ' and a number, 1 to 7,
representing the day of the week 1 represents Monday; 2 represents Tuesday, and so
on. Press
when done.
Next, program the H o u r . Be careful that you program pm if the current time is
in the afternoon or evening, or an am if the current time is after midnight or in
the morning. Press
when done.
Next, program the M inu te. You'll be programming the 'tens' column first. Your choices
are 0 through 5 , as the minutes range from 00 to 59. Press
. Now, you are
programming the 'ones' column, where your choices are 0 through 9 . Press
to confirm.
Note: If the mains power to the base is lost, your answer machine will display
"St." (Set time) to remind you adjust the clock when it is switch on.
Two emergency number
112 and 999 are already stored for you.
19
Outgoing Announcement A 2 is played when Announce Only mode is O N . Callers
c a n n o t leave a message in this mode.
If you do not record your own announcements, your answering system will play a
pre-programmed message to your callers:
A1:
A2:
"Please leave your message after the beep."
"I am sorry that I am not available. Please call back later."
20
Set remote access code
Your Remote Access code allows you to retrieve messages, and record memos and
announcements when you're away from your Answering Machine.
The remote access code helps prevent unauthorised people from ringing up your
answering machine and listening to your messages. The code can be any 4-digit
number, from 0 0 0 0 to 9 9 9 9 . The pre-set code is 0000 .
1. Press
until you hear "Remote access code is 0000 " and the display shows Ac.
2. Press
or
to set the first digit between 0-9. Press
to confirm.
3. Repeat Step 2 until all 4 digits have been set. The machine announces the new code.
Remote Operation
1. Call your answering machine from any touch-tone phone.
2. When you hear your outgoing announcement, enter your 4-digit Remote Access
code.
3. You can now perform the following functions:
How to Record Your Announcement
Recording Announcement A1 (Announce Only set to OFF)
1. Press
until you hear 'Announcement One '
2. Press
. You will hear 'Now Recording' followed by a beep. Speak
toward the Base Unit. You have up to 60 seconds for your announcement. Your
announcement must be at least 3 seconds in length.
when finished. Your recording will be played automatically. If you're
3. Press
not satisfied, record your announcement again.
IF YOU WANT TO
Play messages in a mailbox
Repeat / Play Previous Message
Stop playback or recording
Play Next Message
Delete current message
Record a Memo
Record Announcement
Recording Announcement A2 (Announce Only set to ON)
Follow the same steps as recording Announcement A1. However, this time you will
hear 'Announcement Two' since you have set Announce Only to ON.
Turn System On /Off
Play Help Menu
To Review/Delete You Announcement A1/A2
1. Press
until you hear ' Announcement One' (Announce Only set to
OFF) or'Announcement Two' (Announce Only set to ON).
2. Press Play, you will hear the announcement of A1 or A2 (you can only review
the latest recorded announcement).
3. During playing the announcement of A1 or A2, press DEL to delete the current
announcement and the answering machine will use the default announcement.
Note: The default announcement cannot be deleted.
Repeatedly press the
key to step through the answer machine options.
The current setting of each is announced.
2. Once the desired option is reached and the current setting of each is announced,
press
or
to change the setting.
Note: It is not possible to change the A1 or A2 setting at this time
to confirm your setting.
3. Press
to exit setup mode.
4. At any time, press
Switch Answering Machine ON/OFF (preset to ON)
When you first switch on your phone, the answering machine is in the O N mode.
. Until you hear 'answer on' or 'answer off' and the dispaly shows 'An',
1. Press
press
or
to switch between the On/Off setting.
13. Enter barring number (max 5 digits).
14. Press the INT/OK key.
Note: All numbers which start with the barring number will be barred,
e.g. if 07 is stored as the barring number then all numbers starting with
07 will be barred.
Outgoing Announcement
You can record 2 different outgoing announcements: A 1 inviting your caller to leave
a message (Announce Only O F F ), and A 2 asking your caller to call back later (Announce
Only O N ).
Outgoing Announcement A 1 is played when Announce Only mode is O F F . Callers
can leave a message in this mode. Your answering machine is preset with Announce
Only set to OFF, allowing callers to leave a message.
to program each of the following options:
PRESS
1
4 / Press 4 Twice
5
6
7
8, then 5 to Stop
9, then 5 to Stop press 7 to delete the
announcement and return to the prerecorded announcement
0
*
Set 'Announce Only' On / Off (preset to OFF)
Press MENU untill you hear “Announce Only is ON” or “Announce Only is OFF”and
the diaplay shows “Ao” .
Press
or
to swith between the ON/OFF setting.
If you want callers to leave messages, Announce Only must be set to OFF.
If you do not want callers to leave messages, set Announce Only to ON .
Follow the steps in the beginning of the Setup section.
Turn Audible Message Alert On / Off
Press MENU untill you hear “Message Alert is ON” or “OFF” and the display show
“AL”.
Press
or
to swith between the ON/OFF setting.
With Message Alert programmed ON,the Base unit will beep approximately every 10
seconds,alerting you to new , unplayed messages and memos. Follow the steps in the
beginning of the Setup section to program this feature.
23
24
21
Turn Base Ringer On / Off (preset to ON)
Press MENU untill you hear “Base Ringer is ON ” or “ OFF” and the display shows
“Br”.
Press
or
to swith between the ON/OFF setting.
Your Base Ringer is independent of the Handset ringer.To program this feature, follow
the steps in the beginning of the Answering Machine section.
Set Number of Rings to Answer
Press MENU untill you hear “Number of ring selected is Two” or “Number of ring
selected is Toll Saver ” and the display shows “Nr” .
Press
or
to swith between the Number/Toll Saver” setting.
Your Answering System can answer after 2-6 rings or you can choose the Toll Saver
option. The Toll saver option instructs the Answering System to answer after 4 rings
only if there are new, unplayed messages; otherwise, it will answer after 6 rings. The
benefit to you is if you are making a long distance call to retrieve messages,if the
Answering System does not answer after 4 rings, you can hang up. There are no new
messages, and you will save the expense of a long distance call.To set the number of
rings to answer,follow the steps in the beginning of the Setup section.
22
Message Playback
1. Press the Play key. The prompt will tell you
how many new and old messages are stored in that Mailbox. If there are one
or more new messages, only the new messages will be played. After new
message playback is completed, you can press the Play key again to hear
all old messages.
Note: If you short press the Play key, the order of playback is oldest messages
first, newest last. If you long press the Play key, the order of playback is newest
messages first, oldest last.
Before each message is played, the day and time it was recorded is announced.
2. Press
Press
to replay the current message from the beginning.
twice to play the previously recorded message.
3. Press
to skip to the next message.
4. Press STOP at any time to end playback.
Recording a Memo
You can record a memo, either at the Base Unit or from a remote location. To record
a Memo at the Base:
1. Press and hold
.
2. You will hear ' Now Recording ' , followed by a beep.
3. Speak towards the Base Unit. Press
when finished. Your memo is stored
like a message from an outside caller.
To record a memo from a remote location, follow instructions in the Remote Operation
section.
Note: If memory is full while recording, the answering machine will announce
"memory is full" and a beep is heard, at the same time the 7-segments LED will display
"Fu" and the message count alternatively.
Deleting Messages
Listening to Your Messages
Important information
When you have new messages, the message counter will flash, showing the number
of unplayed messages.
The unit will flash with the number of new messages. also the play key LED will flash.
For old messages this can only be seen by the play key led being on steady.
The display will show 00 with either no messages at all or old messages, so cannot
be used as an indicator.
Recorded messages and memos are retained until you delete them.
If its capacity is full, the system will answer after 10 rings, and the caller will
hear “Memory is full”.
25
To delete the message or memo currently playing, press
To delete all old messages stored :
1. In the idle mode, press and hold
. You will hear"All old Messages are Deleted"
2. All old messages will be deleted.
NOTE: New,unplayed messages cannot be deleted until you play them.
Once you have deleted the message/s, it cannot be recovered.
There is a total of 12 minutes of record time. This includes messages, memos, and
announcements.
The maximum number of messages that can be stored is 59 .
A message, memo, or announcement can be a maximum of 60 seconds.
If a call comes in while you are listening to messages, playback automatically stops.
26
Alcom Electronics Pte Ltd.
For details, please contact :
Alcom Electronics Pte Ltd
37 Kallang Pudding Road, #05-08, BLK-B Tong Lee Building, SINGAPORE 349315,
PH : (65) - 68412668 F AX : (65) - 68412628 E-MAIL : [email protected]
www.alcomonline.com
27
28
29
30