1
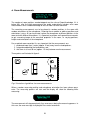
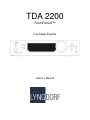
TDA 2200
RoomPerfect™
True Digital Amplifier
Owner’s Manual
1
Table of Contents
1.
WARNINGS .............................................................................................................................................. 5
a.
i.
ii.
b.
2.
Explanation of graphical symbols ......................................................................................................... 5
Exclamation symbol ......................................................................................................................... 5
Lightning symbol .............................................................................................................................. 5
Important safety instructions................................................................................................................. 6
Unpacking the TDA 2200........................................................................................................................ 7
a.
Accessories .......................................................................................................................................... 7
b.
Operating Voltage................................................................................................................................. 8
3.
Product Registration .............................................................................................................................. 8
4.
Introduction ............................................................................................................................................. 9
5.
Front Panel ............................................................................................................................................ 10
a.
Controls .............................................................................................................................................. 10
b.
Display Indicators ............................................................................................................................... 11
6.
Rear Panel.............................................................................................................................................. 12
7.
Remote Control ..................................................................................................................................... 13
8.
Menu System ......................................................................................................................................... 14
a.
RoomPerfect™ ................................................................................................................................... 15
b.
Voicing ................................................................................................................................................ 15
c.
Crossover ........................................................................................................................................... 15
d.
Delay................................................................................................................................................... 16
e.
ADC Level - Otional ............................................................................................................................ 17
f.
Communication................................................................................................................................... 17
g.
Trigger Set-up..................................................................................................................................... 18
h.
Remote Control................................................................................................................................... 18
i.
Display ................................................................................................................................................ 18
j.
Volume................................................................................................................................................ 19
k.
Advanced set-up................................................................................................................................. 20
9.
RoomPerfect™ ...................................................................................................................................... 21
a.
The Guided Set-up – a Quick Guide .................................................................................................. 22
b.
Setting the measurement volume level .............................................................................................. 23
c.
Focus Measurement ........................................................................................................................... 25
d.
Room Measurements ......................................................................................................................... 26
e.
Adding more room measurements ..................................................................................................... 27
f.
Calculation of Focus 1 and Global Filters........................................................................................... 28
3
10.
RoomPerfect™ Advanced Menu ..................................................................................................... 29
a.
Selected Position ................................................................................................................................ 29
b.
Adding a New Focus Position............................................................................................................. 29
c.
Adding a New Room Position............................................................................................................. 31
d.
RoomKnowledge Index ...................................................................................................................... 32
e.
RoomCorrection Index........................................................................................................................ 32
11.
Daily Use of RoomPerfect™ ............................................................................................................ 33
a.
Global Listening .................................................................................................................................. 33
b.
Focus Listening................................................................................................................................... 33
12.
RoomPerfect™ Troubleshooting .................................................................................................... 34
a.
No microphone connected.................................................................................................................. 34
b.
Fault - No signal.................................................................................................................................. 34
c.
Fault - Signal clipping ......................................................................................................................... 35
d.
Fault - Low signal................................................................................................................................ 35
13.
Software............................................................................................................................................. 36
14.
Connectors........................................................................................................................................ 37
a.
Mains Connector................................................................................................................................. 37
b.
Loudspeaker Connectors ................................................................................................................... 37
15.
Optional AD Converter Board ......................................................................................................... 38
a.
Balanced inputs .................................................................................................................................. 38
b.
Unbalanced inputs .............................................................................................................................. 38
c.
Trigger connector................................................................................................................................ 38
16.
Cleaning and Maintenance .............................................................................................................. 38
17.
Technical Specifications.................................................................................................................. 39
a.
Audio................................................................................................................................................... 39
b.
Protection............................................................................................................................................ 40
c.
Mains .................................................................................................................................................. 40
d.
Trigger ................................................................................................................................................ 40
e.
Mechanical.......................................................................................................................................... 40
18.
a.
19.
Technical Assistance ....................................................................................................................... 41
Support ............................................................................................................................................... 41
Appendix ........................................................................................................................................... 42
a.
Menu Tree .......................................................................................................................................... 42
b.
Voicing Curves.................................................................................................................................... 43
4
1. WARNINGS
CAUTION
RISK OF ELECTRICAL
SHOCK. DO NOT OPEN
CAUTION: TO REDUCE THE RISK OF ELECTRICAL SHOCK,
DO NOT REMOVE COVER. NO USER-SERVICEABLE PARTS
INSIDE. REFER SERVICING TO QUALIFIED PERSONNEL.
TO REDUCE RISK OF FIRE OR ELECTRIC SHOCK, DO NOT EXPOSE THIS APPLIANCE TO RAIN OR MOISTURE.
a. Explanation of graphical symbols
i. Exclamation symbol
The exclamation point within an equilateral triangle is intended to alert the user
to the presence of important operating and maintenance (servicing) instructions
in the literature accompanying the product.
ii. Lightning symbol
The lightning with arrowhead symbol within an equilateral triangle is intended to
alert the user to the presence of uninsulated “Dangerous Voltage” within the
products’ enclosure that may be of sufficient magnitude to constitute a risk of
electrical shock to a person.
5
b. Important safety instructions
1:
2:
3:
4:
5:
6:
7:
8:
9:
10:
11:
12:
13:
14:
15:
16:
17:
18:
19:
Read these instructions carefully before installing or operating this apparatus.
Keep these instructions.
Heed all warnings.
Follow all instructions.
Do not use this apparatus near water.
Clean only with a dry cloth.
Do not block any ventilation openings. Install in accordance with the manufacturer’s
instructions.
Do not install near any heat sources such as radiators, heat registers, stoves, or other
apparatus that produce heat.
Do not defeat the safety purpose of the grounding-type plug. A grounding-type plug has
two pins and a third grounding prong. The third prong is provided for your safety. If the
provided plug does not fit into your outlet, consult an electrician for replacement of the
obsolete outlet.
Protect the power cord from being walked on or pinched, particularly at plugs,
convenience receptacles, and the point where they exit from the apparatus. Do not use
this unit with a damaged cord or plug.
Only use attachments and accessories specified by the manufacturer.
Use only with cart, stand, bracket, or table specified by the manufacturer, or sold with the
apparatus. When a cart is used, use caution when moving the cart/apparatus
combination to avoid injury from tipping over.
Unplug this apparatus during lightning storms or when unused for long periods of time.
Connect only to the proper mains voltage.
To completely disconnect this apparatus from the AC Mains, disconnect the power
supply cord plug from the AC receptacle.
Do not connect any output from the amplifier to any other amplifier's output or any other
voltage source.
Do not expose this apparatus to dripping or splashing and ensure that no objects filled
with liquids, such as vases, are placed on the apparatus.
To avoid electrical shock, make sure that no conductive part of the loudspeaker wiring is
exposed while the amplifier is operating. Do not connect loudspeakers with uninsulated
terminals to the amplifier.
Refer all servicing to qualified service personnel. Servicing is required when the
apparatus has been damaged in any way, such as when the power-supply cord or plug
are damaged, liquid has been spilled or objects have fallen into the apparatus, the
apparatus has been exposed to rain or moisture, does not operate normally or has been
dropped.
6
2. Unpacking the TDA 2200
Carefully remove the unit and accessory kit from the carton, visually check for shipping
damage. Contact both the shipper and Lyngdorf Audio immediately if the unit bears any
sign of damage from mishandling. All Lyngdorf Audio equipment is carefully inspected
before leaving our factory.
KEEP SHIPPING CARTON AND PACKING MATERIALS for future use or in the
unlikely event that the unit needs servicing. If this unit is shipped without the
original packing, damage could occur and void the warranty.
a. Accessories
You should find the following in the accessory kit:
1. One mains cord
2. Customer registration form
3. Remote control
4. Programming cable
5. Microphone
6. Microphone stand with Mic clamp
7. 200 mm (7.9 in) Mic cable
8. 8 m (26.25 feet) XLR – XLR cable
7
b. Operating Voltage
The TDA 2200 is available in two versions: one for 115V mains voltage and another for
230V mains voltage.
Check the label on the TDA 2200 rear panel and verify you have the version with the
proper voltage for your area.
The 115V version requires a mains voltage of 100V-120V at 50-60Hz with a current rating
of 8A.
The 230V version requires a mains voltage of 200V-240V at 50-60Hz with a current rating
of 4A.
The mains voltage setting for your TDA 2200 can be changed ONLY BY A QUALIFIED
ENGINEER.
WARNING: Connect the power input only to the AC source printed on the
label. The warranty will not cover any damage caused by connecting to the
wrong type of AC mains.
The TDA 2200 has three power modes:
1. OFF – No circuitry is powered.
2. STANDBY – The mains transformer and amplifier section are powered off - only the
remote control input and the microprocessor is powered, so the unit can be
powered up using the remote control “STANDBY” button
3. ON – All circuits active
3. Product Registration
Please record the serial number of your amplifier here for future reference. The serial
number is printed on the label on the TDA 2200 rear panel. You will need this serial
number, should you ever require service for your TDA 2200 amplifier.
TDA 2200 serial number: _____________________
8
4. Introduction
Congratulations on your investment in the Lyngdorf Audio TDA 2200 with RoomPerfect™
The TDA 2200 is more than just a very good high-end amplifier, one that’s exceptionally
pure and natural sounding with even the most ‘demanding’ speaker loads. It also happens
to be a completely unique Digital Control Centre.
In fact we believe it to be the most versatile amplifier on the market today, a true state-ofthe-art device that sets new standards for what’s sonically possible to achieve in a real life
environment.
9
5. Front Panel
Fig 1: TDA 2200 front panel.
a. Controls
The buttons/controls on the front panel of the TDA 2200 can all be operated either with
direct presses or by operating the corresponding keys on the supplied remote control. All
the keys on the front panel [except the Mains switch (1)] are duplicated on the remote
control as well.
Mains switch (1)
Powers the TDA 2200 on/off.
Stand-by mode is selected by pressing the mute button (2) for 3 seconds or with the standby button on the remote control.
Mute (2)
Toggles Mute mode on/off. The Volume level indicator will change to “---“ when the outputs
are muted. If the volume control is changed while muted the present volume control setting
will be shown before reverting to “---”, but the outputs remain muted.
Pressing the Mute button for 3 seconds will set the TDA 2200 in stand-by mode.
Analog Input selector (3)
Changes to Analog input, or if already selected, cycles to the next Analog input.
Digital Input selector (4)
Changes to Digital input, or if already selected, cycles to the next Digital input.
Display (5)
Display with all information on menu system, status, active input selection and volume
control.
Volume wheel (6)
Optical encoded volume control wheel
Navigation keys (7)
Keys for operating the menu system: Up/Down, Left/Right & Enter
Menu button (8)
Toggles Menu mode on/off
10
b. Display Indicators
POWER
Power on is indicated with display showing all information on status and volume control,
Standby mode is indicated with the decimal dot from the volume control being lit only.
MENU
The Alphanumeric Display (2*20 Characters) is used for navigating the Menu system
1-5
Illuminates the active input
A-D
Illuminates to show whether the active input is Analog or Digital
VOLUME
3 digits indicating Volume control setting from 00.0 to 99.9 – in dB’s
MUTE
Mute is indicated by the Volume control setting “---”
11
6. Rear Panel
Fig 2: TDA 2200 rear panel.
DIGITAL INPUT 1-3 (1)
RCA Connectors for SPDIF input
DIGITAL OUTPUT (2)
Selected digital input is sent – full range or filtered via the DSP - to the Digital Output
connector for daisy-chaining more than one TDA-2200. The sample rate is fixed at 96 kHz.
This output is also active when Analog input is selected.
DIGITAL INPUT 4 (3)
XLR Connector for AES input
OPTICAL DIGITAL INPUT 5 (4)
Connector for Toslink input
ANALOG OUTPUT (5)
DAC output from DSP Section
NOTE! The connectors from 6-10 are only available if the optional AD-Converter card is
mounted
INPUT (6-8)
Single-ended Analog input L/R pairs 1-3
INPUT (9-10)
Balanced Analog input L/R number 4
LOUDSPEAKER TERMINALS (11)
Loudspeaker output, NOTE! All Outputs are bridged and must never be connected to
ground because of the DC offset to Chassis
12
MIC IN(left) / TRIGGER OUT(right) (12)
DC Trigger out for remote start of SDA 2175 power amplifiers or similar equipment.
Mic. in for connection of RoomPerfect™ microphone.
RS232 INPUT/AUX (13)
RS232 communication connectors for communication with a PC, remote control from
Lyngdorf equipment with broadcast commands or linked control between amplifiers. Input
is looped to Aux out for daisy-chaining of amplifiers. The “INPUT” is used for connection to
a PC for software update, or as a control input from a Lyngdorf Master Amplifier. The
“AUX” connection is output in Master mode for controlling slave amplifiers, or bypasses
input from other master amplifiers to the next amplifier.
MAINS INPUT (14)
7. Remote Control
The remote control is used to access the menu system and replicate the buttons directly
accessible on the front panel. The buttons are as follows:The four buttons used for selecting which device to control are described below. To control
the TDA 2200 the AMP key should be pressed [please note the amplifier’s volume and
mute buttons still work when in CD mode].
•
•
•
•
•
•
•
•
•
•
•
•
•
•
•
•
•
•
AMP – Selects the remote for operation with a Lyngdorf
Amplifier.
RCS – No function.
CD - Selects the remote for operation with a Lyngdorf CD
Player.
Tuner – No function.
Standby – The standby button toggles the TDA 2200 between
active and stand-by mode
Digital – Changes to Digital input, or if already selected, cycles
to the next Digital input.
Analog – Changes to Analog input, or if already selected,
cycles to the next Analog input.
The numerical button 0 selects bypass listening mode (no
room correction filter selected)
The numerical buttons 1-8 select focus listening mode (up to 8
different listening positions can be stored in RoomPerfect™)
The numerical button 9 selects global listening mode.
Info – shows the firmware version of TDA 2200
Menu – activates or de-activates the Menu system on the
Main display
Up / Down / Left / Right arrows – Navigation in the menu
system.
Left / Right arrows – Toggles between voicing filters.
Enter – Selection in menu system
Channel -/+ - toggles down/up between inputs
Volume Up/down – changes volume in the chosen direction
Mute – Toggles Mute function on/off
13
8. Menu System
The Main Display on the front panel of the TDA 2200 shows all functionality and current
status of the TDA 2200. An overview of the menu tree can be seen in the appendix.
When the amplifier is powered up the Main screen shows the current Software revision in
the Startup picture as:
After showing the initial screen, which can be used to identify the software version, the
main screen is shown.
Furthermore the Volume Control is set according to the standard settings which can be
altered in the menu system
In the display the current setting of RoomPerfect™, the voicing setting and the sample
frequency of the input are displayed. If a digital input is active the source sample rate is
detected and displayed. If the Analog option is mounted and selected the ADC sample rate
96 kHz will be displayed
Pressing the Menu button on the remote or the front panel access the top level of the
Menu system
Using the Left/right keys the Menu system settings can now be scrolled through. To
access a sub menu setting just scroll to it press the Enter button. The Sub menus
accessible in version 2.1 are:• RoomPerfect™
• Voicing
• Cross-over
• Delay
• ADC Level (Optional)
• Communication
• Trigger Set-up
• Remote Control
• Display
• Volume
• Advanced Set-up
The above options are described in detail as follows.
14
a. RoomPerfect™
The sub menus accessible in the RoomPerfect™ menu are:
•
•
Guided set-up
Advanced options (available when Guided set-up has been performed)
RoomPerfect™ and the sub menus are described in-depth in the RoomPerfect section,
page 19.
b. Voicing
The Voicing setting is an EQ filter that can be used to gently amplify or attenuate certain
frequencies according to your personal preferences and/or to compensate if a given
recording sounds too ‘bright’ or too ‘dark’. There are 7 settings in all: Neutral, Soft 1, Soft
2, Open 1, Open2, Desharp1 and Desharp2. The frequency curves of the different voicing
settings can be viewed in the appendix. Neutral is a bypass setting.
When using RoomPerfect™ you will experience a much more precise and detailed sound
reproduction – which could also be described as more analytical. This means that it’s easy
to distinguish poor quality recordings. In this case the voicing feature can also be used
with great benefit to e.g. attenuate a “harsh” midrange with the Desharp1 or Desharp2
filters.
c. Crossover
The sub menus accessible in the Crossover menu are:
•
•
Select Crossover
Crossover Frequency (available when crossover has been selected)
The crossover filter is chosen when you wish to use a subwoofer – or the Lyngdorf corner
woofer configuration – together with your main loudspeakers.
If NO is selected the full frequency range will be directed to your main loudspeakers. If
YES is selected only frequencies above the selected crossover frequency will be directed
to the main loudspeakers. Frequencies below the selected crossover point will be directed
to your subwoofer(s) through the analog line-out and will also be available on the digital
output terminals.
15
The crossover frequency can be selected anywhere between 40 – 400Hz.
Due to the limited frequency response of most conventional subwoofers we do not
recommend that you select a crossover frequency higher than 80 – 160Hz.
However, with a Lyngdorf Audio 2+2 system you can go as high as 400Hz! Please study
our literature on 2+2 systems or visit our website, see the Support section in this manual.
d. Delay
If you are using a set-up with two main loudspeakers located at an identical distance to the
listening position you don’t need to set a delay. However, if the distance isn’t identical
and/or you are using a subwoofer or a Lyngdorf Audio 2+2 system, you can set a delay in
order to ensure that the sound from each loudspeaker reaches the listening position
simultaneously. This must be done for main left (ML) and right (MR) and, if subwoofers
(sub) are used, also for the line left (LL) and right (LR).
To set the delay all you need do is to measure the distance from each loudspeaker to the
listening position and enter these values in the menu. The necessary delays are then
automatically calculated and applied to each channel.
The above error message is displayed when the entered distances for either channel
(Left/Right) exceed the maximum possible delay in the TDA 2200.
Solutions:
(Can be used individually or together to achieve a valid set-up with respect to the delay
lengths):
•
•
Shorten the distances between your Main and Line channels resulting in a more
compact loudspeaker set-up.
Arrange your loudspeaker set-up and/or your listening position in a more
symmetrical set-up.
16
e. ADC Level - Otional
The ADC Level menu is accessible when the optional analog input module (A/D converter)
is installed. Here it is possible to choose between the inputs on the analog input module
and assign each input a LOW and HIGH level. When the LOW level is selected no
amplification of the analog inputs is performed, whereas when the HIGH level is selected
an amplification of +6 dB is performed.
f. Communication
The sub menus accessible in the Communication menu are:
•
•
Comm Speed
Comm Address
The Communication setting signals the TDA 2200’s identity to the PC interface or other
Lyngdorf products. In master mode the amplifier setting is normally 1, and the addresses
2-99 can be used for individual slave amplifiers, but nothing is restricted. In the menu the
current address and the new address is shown, The Up/Down keys can be used for
changing the new setting, and a new selection is stored with Enter which also exits the
menu again. Pressing Menu again exits the menu without changing the current settings.
The PC software must know the address of the TDA 2200 in order to communicate with it.
The Comm Speed setting is the RS232 Link interface speed. The default setting is 57600
baud. With different PC’s and different lengths of cables the settings can be changed for
faster communication to 9600 or 115200 baud. If a multi-amplifier set-up is installed with
Master/Slave communication, a smaller delay can be observed when using higher speeds.
17
g. Trigger Set-up
Trigger set-up sets the usage of the trigger output option. If e.g. an SDA2175 is connected
to drive a subwoofer from the Line out, the trigger can be activated and used for controlling
the power of the SDA2175.
h. Remote Control
Remote Control set-up makes it possible to activate or de-activate the remote control. This
is useful in set-ups with more than one TDA 2200 amplifier in the room. The master
amplifier then becomes the only one receiving signals from the remote, processes them
and controls the rest of the TDA 2200’s over the Lyngdorf RS232 link.
i. Display
The sub menus accessible in the Display menu are:
•
•
Display Timeout
Display Brightness
Display timeout set-up is used for enabling/disabling the 10 sec. display fade-out feature. If
enabled the Main Display reading will fade out after 10 sec of inactivity from the remote
control or front panel buttons.
Display brightness is used to control the brightness of the display. The brightness can be
set to 25%, 50%, 75% and 100%.
18
j. Volume
The sub menus accessible in the Volume menu are:
•
•
Def. Volume
Max. Volume
The Default Volume setting controls the default volume at start-up and can be set from 0 to
99 dB. However, a setting over 88 is not recommended as this corresponds to max output
with full scale digital input.
The Maximum Volume setting is a safety precaution used for limiting the maximum volume
which can be achieved by spinning the wheel or increasing volume via the remote. This
can be set to avoid excessively loud sound pressure levels and/or to protect your
loudspeakers against overload.
19
k. Advanced set-up
The sub menus accessible in the Display menu are:
•
•
•
•
Master/Slave
Line Out Volume
Software version
Default
As default a TDA 2200 is set as a Slave. The Master setting should be used if you are
using two TDA 2200, e.g. for bi-amping or if using one to drive the main loudspeakers and
one to drive the (sub)woofer(s). When set as a Master the first TDA will control the second
TDA (the Slave) e.g. when adjusting the volume control and when switching on and off.
The Line Out level can be set as Full Scale (fixed) or regulated.
Fixed means there’s a constant full scale output – also often referred to as “tape out” since
this is most often used for this purpose.
Regulated means that the output level will follow the level of the volume control. This
setting is chosen if you have, for instance, a power amplifier or an active subwoofer
connected. If Full Scale is used in this scenario you will constantly have full output – with
huge potential for overloading and damaging the connected power amplifier and/or
loudspeakers.
The Software version menu is used to check the current software version of your TDA2200
and the RoomPerfect™ module as well as the RoomPerfect™ serial number.
The Default setting is used to restore all settings in the TDA2200 to the factory settings.
If you return to the factory settings all your personal settings will be erased.
20
9. RoomPerfect™
The actual performance of a loudspeaker is known to be highly dependent on the
acoustics of your listening room and your listening and loudspeaker positions. Extensive
measurements in different rooms with high-end systems have shown that peaks and dips
between +10 and -20 dB in the frequency response are more often the rule than the
exception! This makes the room the weakest link in the audio chain, a weakness that we
have made our ambition to strengthen.
Our goal is not to make every audio system sound the same… far from it. Our goal is to
preserve the tonal balance of your loudspeakers and match them to your room by
compensating for your room’s influence. And therein lies a great challenge, to create a
generic room correction system that would maintain the tonality of your system and only
compensate for problems that could be solved. Nevertheless, it’s a challenge that has
been met in the Lyngdorf Audio-developed and patented RoomPerfect™ system.
The main task of RoomPerfect™ is to learn the 3-dimensional acoustical properties of a
room, by combining room measurements with measurements at the listening positions
(Focus). The 3-dimensional acoustical properties are obtained through an easy-to-use
guided set-up. When the guided set-up is completed, the acoustical properties are used
intelligently to shape the sound that is played, resulting in the Global and Focus 1 room
correction filters, which are calculated at the end of the guided set-up.
The following sections describe the guided set-up, the advanced menu, the daily use and
troubleshooting of RoomPerfect™.
21
a. The Guided Set-up – a Quick Guide
The RoomPerfect™ menu is found under the TDA 2200 main menu. If you have just
turned on your TDA 2200, press MENU to enter the TDA 2200 main menu.
Thereafter press enter to enter the RoomPerfect™ menu.
When you enter the RoomPerfect™ Main Menu for the first time, only the Guided set-up
is available. Press enter to initiate the guided set-up.
The main steps in the guided set-up procedure are:
1.
2.
3.
4.
5.
Setting the measurement volume level
Taking one Focus (listening position) measurement
Taking at least three room position measurements
Adding more room measurements in the guided set-up (optional)
Finally, automatic calculation of Focus and Global filters
If you wish to leave the guided set-up at any time during the set-up, simply press the
MENU button and the following message appears.
Choose Yes to exit the guided set-up without saving any data, or choose No to cancel and
continue with the guided set-up.
A more in-depth manual can be downloaded from the our website, see
Support.
22
b. Setting the measurement volume level
The measurement volume – also called the calibration volume – is a recommended
maximum volume. It is important that you always judge whether the measurement volume
is too loud. The calibration volume should not be so loud that it causes:1. uncomfortably loud sounds that are inconvenient to you and your environment, or
2. damage to your loudspeakers.
Connect the microphone to the microphone input found on the right side of the back panel.
Thereafter, place the microphone, using the microphone stand, in an appropriate
focus/listening position. This location should be at your main listening position, typically
more or less centered between the loudspeakers.
Make sure that the height and the orientation of the microphone corresponds to your
typical listening height and direction as illustrated in figure 3.
Fig 3: Measurement of main listening position
When the microphone has been correctly connected and placed in the focus position, you
are ready to set the calibration volume. The calibration signal is a combination of the high
and low frequency measuring signals and is only presented in your left loudspeaker. The
signals sound very artificial and disharmonic due to the fact that they are made up of pure
tones at different frequencies. Press enter to confirm and to commence the calibration
process.
23
The test signal will start and shortly thereafter the TDA2200 will suggest an initial estimate
of the desired maximum calibration volume (in dB).
Please raise or lower the volume towards the desired maximum volume shown on the
display but ensure you avoid clipping, uncomfortably loud levels and damage to the
loudspeakers. Continue choosing Retry for a re-estimation of the desired maximum
calibration volume, until an appropriate calibration volume is reached. If you find the
suggested calibration volume too loud simply turn down the volume to an appropriate level
and choose Save current.
When the message below is displayed, the calibration volume has successfully been set
and saved.
•
When performing the required measurements in the guided set-up, the
environments should reflect your normal listening situation.
•
Do not block the line of sight between the microphone and the
loudspeakers.
•
The calibration volume found by RoomPerfect™ is a recommended
maximum volume. Lower volumes can be used if you consider the
measuring signal too loud for you, your environment and loudspeakers.
•
The orientation and height of the microphone in the focus/listening
position should reflect your main listening situation.
•
The measuring volume can be changed at any time between
measurements simply by adjusting the volume.
The next step is to perform the first measurement, which is a focus/listening position
measurement, with the microphone placed in the same position as for the calibration
procedure.
24
c. Focus Measurement
When the calibration is OK, press enter to start the measuring process and the following
message will be displayed. Each measurement comprises four steps: a low and a high
frequency measuring signal first in the left and then in the right channel. The length of
each measurement depends on a combination of the measurement volume, set in the
calibration process, and the background noise in your local environment. Typical
measuring times for the low and high frequency measuring signals are 25 and 5 seconds,
respectively. As mentioned, the measuring signals sound artificial and disharmonic due to
the fact that they are made up of pure tones at different frequencies. It is advised that you
do not to sit in the listening position during this measurement.
The measurement will stop prematurely if an error occurs during the measuring process. In
this case, the error message is displayed. Press enter to continue and the following is
displayed.
If the error needs correcting this should be done at this point (see RoomPerfect™
troubleshooting), thereafter press enter to retry the measurement. The measurement
procedure will start again.
A measurement has ended successfully when the last measuring signal stops and the
display shows a RoomKnowledge rating, as in the following.
Press enter to continue.
Do not sit in the listening position during focus measurements.
25
d. Room Measurements
The number of room positions needed depends on the value of RoomKnowledge, if it is
below 90% after the third measurement the guide automatically includes extra room
measurements until a RoomKnowledge of 90% or more has been achieved.
The remaining measurements are to be placed in random positions in the room with
random orientations of the microphone. Choosing these random or arbitrary positions and
orientations is easy. All you have to do is place the microphone at different positions in the
room and with different orientations. It is important to perform well spaced measurements
to get a covering image of the acoustical properties in the room, i.e. varying positions,
heights and orientations of the microphone.
For an optimal room correction it is very important that the measurements are:
1. performed more than 1 meter (approx. 3 feet) away from the loudspeakers,
2. not performed behind the loudspeaker, and
3. that there is at least 50 cm (approx. 1.5 feet) between each measurement.
These points are illustrated in figure 4.
Fig 4: Illustration of guidelines for room measurements
When a random measuring position and microphone orientation has been chosen press
enter. The measuring process will start and the display will show the following while
measuring.
The measurement will stop prematurely if an error occurs during the measuring process. In
this case, the error message is displayed. Press enter to continue.
26
If it is an error that needs correcting, then correct the error (see RoomPerfect™ troubleshooting) and proceed with the room position measurement by pressing enter. The
measurement has ended successfully when the last measuring signal stops and the
display shows the following.
This process is repeated at least three times and until the RoomKnowledge reaches 90%.
•
For each room measurement the microphone should be randomly
placed in the room and have a random orientation
•
Perform well-spaced measurements to allow the system to get an
accurate image of the acoustical properties in the room, i.e. varying
positions, heights and orientations of the microphone.
•
For optimal room correction it is very important that the measurements
are: performed more than 1 meter (approx. 3 feet) away from the
loudspeakers, not performed behind the loudspeaker, and that there is
at least 50 cm (approx. 1.5 feet) between each measurement, see
figure 4.
e. Adding more room measurements
If you have performed 4 successful measurements and RoomKnowledge has reached
90%, then the following message is displayed.
At this point you can decide whether the acquired room measurements are sufficient or
whether you wish to add further room measurements to learn more about the room’s
acoustical information. Adding more room measurements results in a higher
RoomKnowledge, this in turn improves the room correction filters.
Choose Yes to add more room measurements. The room measuring process is now
repeated as described in the previous section. In short, place the microphone in a random
position with random orientation and press enter to commence the measurement.
Choose No when no additional measurements are required. The volume will now return to
default volume or lower, depending on the volume you have entered the guided set-up
with.
27
The above will be displayed when exiting a successfully completed guided set-up.
Choose No if you wish to exit the guided set-up without calculating any room correction
filters, without saving the performed measurements and without setting the calibration
volume.
Choose Yes to save the results of the guided set-up and calculate the focus and the global
room correction filters.
•
You can, at any time, add more room measurements
•
Adding room measurements increases the accuracy of the room
correction filters
f. Calculation of Focus 1 and Global Filters
When RoomPerfect™ calculates the filters the display shows the following.
The filter calculation process can be expected to take anywhere between 5 seconds and a
minute depending on the specific task.
When RoomPerfect™ has calculated the room correction filters, they are automatically
saved. The Focus filter is saved as setting 1 and Global is saved as setting 9 out of the
possible 9 filter settings.
You have now successfully completed a guided set-up and the RoomPerfect™ Advanced
Menu is now available.
28
10. RoomPerfect™ Advanced Menu
This section describes the options in the advanced menu. Here you can select position,
add new listening positions and room measurements, check the RoomKnowledge of your
current set-up, and check the RoomCorrection for the different filters.
a. Selected Position
In this menu it is possible to select a desired RoomPerfect™ filter, i.e. Global and the
Focus position(s). The current position is shown in the display and a new position can be
selected simply by pressing the left/right buttons.
b. Adding a New Focus Position
As mentioned, after the guided set-up it is possible to add 7 new listening/focus positions.
As previously described, place the microphone correctly in a new listening position and the
measurement process can commence. This could, for example, be in a lounge chair or a
position by a window with a good view.
29
The saved calibration volume from the guided set-up is used as a default when adding
extra focus/listening and room positions though, as mentioned, the volume can be
changed at any time between measurements to suit a particular situation.
After a successful measurement the following message is displayed. The value of
Roomknowledge can be different.
Press enter to continue.
Choose Yes to save the measurement or choose No to exit without saving the current
measurement.
Choose between focus/listening position presets 2 - 8 and press enter. If you wish to
overwrite an existing focus filter (2 to 8 can be overwritten) or you are trying to save a new
filter on an existing preset then the following will be displayed.
When the preset number has been chosen, the volume turns down to default or lower and
the new focus filter is calculated and saved.
30
c. Adding a New Room Position
It is always possible to add more room measurements, which can increase
RoomKnowledge and thereby fine tune all the room correction filters.
Press enter to start a new room measurement.
As previously described, place the microphone correctly in a random room position and
the measurement can commence.
The saved calibration volume from the guided set-up is used as default when adding extra
focus/listening and room positions, though as mentioned, the volume can be changed at
any time between measurements to suit a particular measurement situation.
After a successful room measurement the RoomKnowledge is re-calculated and displayed.
Press enter to continue.
Choose Yes to add another room measurement or choose No to stop adding more room
measurements. If No is chosen the volume is returned to the default or lower.
31
Choose Yes to save the performed room measurement and No to exit without saving any
of the performed measurements.
Adding one or more room measurements leads to a re-calculation of all filters (i.e. Global
and all Focus filters) due to the fact that more of room’s acoustic properties have been
learned, something that affects all filters.
d. RoomKnowledge Index
Here the current RoomKnowledge index is displayed
Press enter to check the RoomKnowledge index.
The RoomKnowledge index is a parameter that tells how much of the room’s acoustical
properties have been learned. A high RoomKnowledge ( ≥ 90%) means that most of the
room’s acoustical properties have been learned. The more room measurements you add,
the higher the RoomKnowledge will become. The more that the acoustical properties of
the room are learned, the greater the accuracy of the room correction.
e. RoomCorrection Index
Here the RoomCorrection index for each filter can be viewed.
Press enter to check the RoomCorrection index.
The RoomCorrection index is a measure of how much processing is being employed in the
room correction filters. To some extent the RoomCorrection index reflects how audible the
correction is. However, the same amount of processing can sound very different due to
32
placement in frequency of the processing. For low values (below 10%) of the room
correction index, only subtle correction is needed to the original sound in the room. With
high room correction index values more extensive processing is employed.
The RoomCorrection index for a specific RoomPerfect™ filter shown above can be viewed
by pressing the numerical button of the corresponding filter.
11. Daily Use of RoomPerfect™
Once the guided set-up has been successfully completed you now have the option to
listen to music through two listening settings; Focus 1 and Global room correction filters.
The RoomPerfect™ filters are stored on the numerical buttons from 1 to 9 on the remote
control. To change from one filter to the other you simply press the numerical button
corresponding to the desired filter. This can also be selected in ‘Select Position’ under the
RoomPerfect™ advanced menu when using the front panel interface.
Global is stored on numerical button 9 and the Focus 1 is stored on numerical button 1. As
mentioned, you can have more than one Focus/listening position (8 in all). The additional
focus/listening positions can be stored on numerical buttons from 2 to 8. To bypass the
room correction filters, press numerical button 0.
a. Global Listening
The Global filter improves the sound quality across the whole room. When you are
listening to music in a room but are not sat in any particular listening position, the global
filter gives the best result.
b. Focus Listening
The Focus filter improves the sound quality at a listening position by exploiting the 3dimensional acoustic properties gained through the room measurements. This makes the
Focus filter the best solution for optimal sound quality at a specific listening position.
33
12. RoomPerfect™ Troubleshooting
a. No microphone connected
This is displayed when no microphone is connected to the TDA2200.
Solution:
Connect the microphone on the right-hand side of the back panel.
b. Fault - No signal
The error message shown above is displayed when the incoming signal is classified as
pure noise.
The Fault No signal message is displayed if the measuring signal is too low compared
with the noise from the local environment. This could be due to there being too much noise
in your measuring environment.
Solution:
Raise the measuring signal volume before continuing with the measurement.
The above error message is also displayed when the loudspeakers are not connected
and/or Mute is activated.
Solution:
Connect your loudspeakers and/or de-activate Mute.
34
c. Fault - Signal clipping
The above error message is displayed when the incoming signal is classified as too loud
resulting in clipping (distortion).
An overly loud measuring signal results in this error message.
Solution:
Lower the measuring signal volume before continuing with the measurement.
A loud noise from the local environment that has corrupted the measurement results in this
error message.
Solution:
Repeat the measurement with no changes; however refrain from making excessive
noise when measuring.
Useful hint: You can exit a commenced measurement by clapping close to the
microphone. This results in the above error message.
d. Fault - Low signal
The above error message is displayed when the measurement has taken more than 5
minutes for the low frequency signal or 2 minutes for the high frequency signal. This
happens most often when using a low measuring signal compared to the background
noise of your environment, something that results in prolonged measuring times.
Solution:
Raise the measuring signal volume before continuing with the measurement, or
reduce the noisy elements in your environment.
35
13. Software
The TDA 2200 firmware can be upgraded using the ‘Lyngdorf Serial Load, software
upgrade tool’. This is in the PC package available from www.Lyngdorf.com.
Follow the upgrade steps shown below to bring the product into upgrade mode.
Fig 5: Software Upgrade Tool.
36
14. Connectors
a. Mains Connector
Mains voltage to the TDA 2200 is applied via an IEC320 type connector. The supplied
cable with safety ground should be used to connect the TDA 2200 to a mains outlet.
WARNING: Connect the power input only to the AC source printed on the
label. The warranty will not cover any damage caused by connecting to the
wrong type of AC mains.
WARNING: Always disconnect the TDA 2200 from the mains before
changing any connections to its inputs or outputs.
b. Loudspeaker Connectors
The TDA 2200´s loudspeaker connectors accept bare wire ends up to 5 mm in diameter.
Connect the wires from each loudspeaker to each channel's + and – terminals. Do not
make any other connections to the output terminals. Ensure the loudspeaker cable is
inserted into the slot in the loudspeaker terminal, and the terminal is tightened firmly.
WARNING: Always disconnect the TDA 2200 from the mains before
changing any connections to its inputs or outputs.
WARNING: Make sure that no conductive part of the loudspeaker wiring is
accessible. Do not connect loudspeakers with uninsulated terminals.
When the TDA 2200 is operating, there is up to 35V DC on its output terminals with
reference to ground.
Do not connect the output from the amplifier to any other amplifier's output
or any other voltage source. Do not attempt to operate the amplifier in
bridged mono mode.
37
15. Optional AD Converter Board
The Optional AD Converter card for the TDA 2200 has input connectors for both balanced
(XLR) and unbalanced (RCA) signals. The input impedance of the inputs are 10 kOhm.
a. Balanced inputs
The balanced XLR inputs are wired in accordance with IEC268:
Pin 1: Chassis and ground.
Pin 2: Hot (+).
Pin 3: Cold (-).
Shell: Chassis and ground.
b. Unbalanced inputs
The unbalanced RCA inputs are wired in accordance with normal practice:
Shell: Chassis and ground.
Pin: Hot (+).
c. Trigger connector
The TDA 2200 is equipped with a TRIGGER OUT 3.5mm mono jack connector. The
Trigger signal is a 12V short circuit-protected output signal for powering up external
equipment when the TDA 2200 is on, e.g. remotely connected SDA 2175 power amplifiers
or active subwoofers.
16. Cleaning and Maintenance
Always unplug the unit from the electrical outlet before cleaning.
This unit does not require any regular maintenance except to keep its exterior clean.
Simply wipe its exterior with a clean soft cloth. A small amount of non-abrasive cleaner
may be used on the cloth to remove any excessive dirt or fingerprints. Do not use abrasive
cleaners or cleaners containing liquid solvents.
38
17. Technical Specifications
a. Audio
Parameter
Balanced input connectors
Value
3 pin XLR, gold-plated.
Note
Case=Gnd, Pin1=Gnd,
Pin2=Hot(+), Pin3=Cold(-)
Balanced input impedance
10kOhm
AC-coupled.
Unbalanced input connectors RCA (phono) jack, gold-plated. Case=Gnd, Tip=Hot(+)
Unbalanced input impedance 10kOhm
AC-coupled
DAC Out impedance
75 Ohm
Gain According to volume
control setting. 89 dB = 0 dB
with sensitivity normal and rel.
volume 0 dB
Input sensitivity
4.4V (2.2V with high sens.)
200W/8ohms/89 dB Volume
Power Supply Variation
26dB
65V to 3.3V dep. On Volume
Output connectors
4 insulated binding posts, gold- Will accept bare wire ends of
plated.
up to 5 mm diameter.
Output power, 8ohms
2*200W
1KHz, 0.1% THD+N
Output power, 4ohms
2*375W
1KHz, 0.1% THD+N
Nominal load impedance
4 Ohms-8 Ohms
It is safe to operate the
amplifier with no load.
Frequency response
0.3Hz-33KHz
-3dB points, 8ohms load.
Frequency response
-0dB/+0.2dB
20Hz-20KHz, 8ohms load
Frequency response
-0.2dB/+0dB
20Hz-20KHz, 4ohms load
Output impedance
0.035 Ohms
20Hz-1KHz
Output impedance
0.4 Ohms
20KHz
THD+N, 1W/8ohms
0.015%
A-wgt.
THD+N, 1W/4ohms
0.02%
A-wgt.
THD+N, 100W/8ohms
0.008%
A-wgt.
THD+N, 180W/8ohms
0.01%
A-wgt.
THD+N, 375W/4ohms
0.07%
A-wgt.
S/N ratio
107dB
A-wgt. Ref. 200W/8ohms.
Dynamic range
133 dB
A-wgt. Ref. 200W/8ohms.
Channel separation
90dB
1KHz, 200W/8ohms.
Peak output current
±40A
Output common mode voltage Max 33V DC
Ref. Ground. The amplifier can
not be used in bridged mono
mode.
Output DC voltage
±5 mV
All audio measurements, except frequency response, are measured with a 20KHz lowpass filter in accordance with AES-17.
39
b. Protection
Parameter
Grounding
Output short circuit current
Output DC voltage
Over temperature
Value
Note
Mains earth, chassis and audio
ground are connected
internally.
±40A
±5V @ <0.1Hz
All heat sinks and mainsAuto resetting thermal fuse in
transformer.
mains transformer.
c. Mains
Parameter
Mains input connector
Mains voltage range
Mains voltage range
Internal mains fuse
Internal mains fuse
Power consumption
Power consumption
Power consumption
Power consumption
Value
IEC 320 cold type
100-120V AC, 50–60Hz
200-240V AC, 50-60Hz
8 Amp / 0.25A
4 Amp / 0.1A
1.5 W
35 W
116 W
820 W
Note
Mains lead supplied.
115V version
230V version
115V version
230V version
STANDBY mode.
OPERATE mode, no output.
2*37.5W/4ohms.
2*300W/4ohms.
Value
3.5mm (1/8") mono jack
12V DC
Note
Case=Gnd, Tip=Input
Short circuit protected
Parameter
Width
Depth
Value
450mm (17.72")
435mm (13.39")
Note
Depth
455mm (14.21")
Height
Height
Net weight
Shipping weight
88.8mm (3.5")
100.6mm (3.96")
18.0Kg (37lb.)
20.0Kg (41lb.)
d. Trigger
Parameter
TRIGGER OUT connector
TRIGGER OUT Voltage
e. Mechanical
40
Excluding loudspeaker
connectors (over wheel)
Including loudspeaker
connectors (over wheel.
Excluding feet.
Including feet.
18. Technical Assistance
If you have any problems with or questions regarding your Lyngdorf Audio product, please
contact Lyngdorf Audio or your nearest representative.
a. Support
Please check the Lyngdorf Audio website under “Support” for latest version of control
software, newest version of this document and “Questions and Answers”.
Lyngdorf Audio
Væselvej 114
DK7800 Skive
Denmark
E-mail:
Web:
[email protected]
http://www.lyngdorf.com
41
19. Appendix
a. Menu Tree
42
b. Voicing Curves
Soft 1
Soft 2
Magnitude Response: Soft 1
6
Magnitude Response: Soft 2
6
4
Magnitude (dB)
Magnitude (dB)
4
2
0
-2
2
0
-2
-4
-4
-6
10 Hz
100 Hz
1kHz
Frequency (Hz)
10kHz
-6
Open 1
10 Hz
Magnitude Response: Open 2
6
4
4
2
2
Magnitude (dB)
Magnitude (dB)
Magnitude Response: Open 1
0
-2
10 Hz
100 Hz
1kHz
Frequency (Hz)
-2
-6
10kHz
Desharp1
10 Hz
100 Hz
1kHz
Frequency (Hz)
10kHz
Desharp 2
Magnitude Response: Desharp 2
Magnitude Response: Desharp 1
6
6
4
Magnitude (dB)
4
Magnitude (dB)
0
-4
-4
2
0
-2
2
0
-2
-4
-4
-6
10kHz
Open 2
6
-6
100 Hz
1kHz
Frequency (Hz)
-6
10 Hz
100 Hz
1kHz
Frequency (Hz)
10kHz
43
10 Hz
100 Hz
1kHz
Frequency (Hz)
10kHz
www.lyngdorf.com
44