1
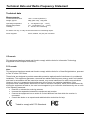
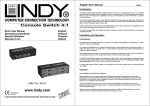
CAT5 KVM Extender LITE User Manual Kurzhandbuch Manuel Court ENGLISH DEUTSCH FRANCAIS LINDY No. 32389 www.lindy.com Tested to comply with FCC Standards © LINDY ELECTRONICS LIMITED & LINDY-ELEKTRONIK GMBH - 2nd EDITION (November 2003) User Manual English Package Contents 1. 2. 3. 4. CAT5 KVM Extender LITE Local Unit CAT5 KVM Extender LITE Remote Unit 2 Power Adaptors User Manual If anything is damaged or missing, please contact your supplier. Features Local and remote units connect (up to 150m apart) over standard CAT 5 or higher cable Signal amplification and compensation PS/2 keyboard/mouse ports Dual console operation - Control your system from both the local and remote consoles High resolution video - Up to 1280 x 1024 for distances of up to 75m Supports VGA, SVGA and Multisync Monitors Adjustable GAIN control to improve video quality at longer distances GREEN CALIBRATION button to reduce green colouration on the remote monitor RESET button to resynchronize an unresponsive keyboard or mouse at either module No software or driver installation required – compatible with most commonly used operating systems Note: You can control numerous remote systems from a single console by combining the KVM EXTENDER LITE with a KVM switch. An extensive range is available from LINDY, including desktop or professional server solutions. System Requirements VGA, SVGA or Multisync monitor capable of the highest resolution that you will be using on any computer in the installation PS/2 keyboard and mouse Note: You must use the same brand and model of mouse on both the local and remote units. Requirements for Cables For optimum signal integrity and to simplify the layout, we strongly recommend that you use high quality PS/2 and VGA cables such as LINDY Combined 3-in-1 KVM cables. Category 5 cable is the minimum required to connect the local and remote KVM EXTENDER LITE units. Using lower quality cable will result in a degraded video signal. UTP, STP, FTP or PIMF, CAT5 or higher cable may be used. © LINDY ELECTRONICS LIMITED & LINDY-ELEKTRONIK GMBH - 2nd EDITION (November 2003) User Manual English Installation Setting up the KVM Extender Lite system is simply a matter of plugging in the cables. 1) Switch OFF all monitors and the PC / KVM Switch 2) First connect the local unit The local unit is placed near the PC or KVM Switch. Connect your local console to the 3 ports not labelled with the PC symbol. Plug in the power adaptor and power up the local unit. Then connect the 3 ports labelled with the PC symbol, to your PC or KVM Switch. Please note that you have to use the same mouse model in both places, local and remote! 3) Connect the remote unit to your console The remote unit is placed near the remote monitor, keyboard and mouse. Connect your local console to the 3 ports as shown by the small icons. Plug in the power adaptor and power up the remote unit. Connect the local and remote unit with up to 150m of CAT5 cable. Operation The KVM Extender LITE has some options to adjust the quality of the VGA signal for the remote location. Due to the fact that different types and lengths of CAT5, 5e or 6 STP/UTP/FTP/PIMF cable have different effects on the picture quality, you may need to adjust the settings for the VGA GAIN (on the top of the Local Unit) and switch on the GREEN CALIBRATION (on top of the Remote Unit) to obtain the best picture quality for your setup. Please note: 1) The quality of the graphics card has a certain influence on obtaining the best picture quality 2) The KVM Extender LITE does not support the maximum resolution at the maximum distance of 150m The supported resolutions and distances are - 800 x 600 @60Hz up to 150m 1024 x 768 @60Hz up to 100m 1280 x 1024 @60Hz up to 75m Troubleshooting If no video picture is shown make sure that all cables are securely plugged into their sockets. If you still can’t see a picture then try connecting with a short CAT5 patch cable to make sure it is not due to a faulty CAT5 UTP, STP or FTP cable. If the video picture is not good enough try to adjust the GAIN settings as mentioned above. If this does solve your problem, try a higher spec or different CAT5, 5e or 6 cable or reduce the display resolution. If your mouse or keyboard does not function or operates erratically: make sure you use the same mouse models for the local and remote console check the correct driver is installed and selected in your PC check you have followed the installation process step by step and not changed the order The KVM Extender LITE only supports standard PS/2 mice. Special functions of mice with scroll wheels or more than 3 buttons are not supported. These special mice use proprietary PS/2 bus protocols which can not be supported Note that keyboards with special functions like Multimedia buttons, RF keyboards, etc are NOT supported © LINDY ELECTRONICS LIMITED & LINDY-ELEKTRONIK GMBH - 2nd EDITION (November 2003) Kurzhandbuch Deutsch Eigenschaften Verwenden Sie günstiges Cat.5 Ethernet Kabel zum Verbinden von Remote und Local Unit bis 150m Unterstützt ausschließlich PS/2 Tastatur und PS/2 Mausanschlüsse Dual Console Operation – ermöglicht gleichzeitiges Arbeiten Lokal und Remote Auflösungen bis 1280x1024@60Hz bis 75m, bzw. 800x600@60Hz bis 150m Keinerlei Treiberinstallation notwendig, kompatibel zu allen weitverbreiteten Betriebssystemen Installation Sie müssen Lokal und Remote die gleichen Mausmodelle verwenden! Gehen Sie bitte in folgender Reihendfolge vor: 1) Schalten Sie alle Geräte aus 2) Schließen Sie zuerst Monitor, Maus und Tastatur am LOKAL Unit und dann das Netzteil an. 3) Schließen Sie dann den Rechner an den LOCAL Unit an. 4) Schließen Sie die Remote Monitor, Maus und Tastatur an den REMOTE Unit an und dann das Netzteil. 5) Schließen Sie das Cat.5 Verbindungskabel zwischen Remote und Local Unit an 6) Schalten Sie die Monitore und den Rechner ein. 7) Versuchen Sie mit den Einstellungen VGA Gain und Green Calibration Ihr Remote-Monitorsignal zu optimieren, beachten Sie aber die Maximalwerte für Auflösung und Distanz. Problemlösung Anmerkung: Sie müssen Lokal und Remote die gleichen Mausmodelle verwenden! Falls Sie Remote kein Signal erhalten, prüfen Sie bitte das Cat.5 Verbindungskabel bzw. versuchen Sie es mit einem anderen bzw. kurzen Kabelstück. Falls das Bild zu schlecht, versuchen Sie die Einstellungen für VGA Gain und Green Calibration zu optimieren. Wenn dies keine Besserung bringt versuchen Sie es wenn möglich mit einem anderen Cat.5 Kabel. Kabel verschiedener Hersteller bzw. nur wenige Meter Längenunterschied können sich sehr stark auf die Bildqualität auswirken. Versuchen Sie eine niedrifgere Bildauflösung und andere Bildwiederholraten. Bei Maus- und Tastaturproblemen: KVM Extender LITE unterstützt Standard-PS/2-Mäuse. Sonderfunktionen von Rädchenmäusen und Funkmäusen werden prinzipiell nicht, in vielen Fällen aber doch unterstützt. Dies ist abhängig vom PS/2 Busprotokoll, und wie nah es sich an den Standard hält. Unterstützt werden z.B. die LINDY 3D Rädchenmaus 20583, die LINDY Funkmaus 20617 und verschiedene andere. Tastaturen mit Sondertasten (Multimediatasten) werden prinzipiell nicht unterstützt, in manchen Fällen funktionieren deren Funktionen aber doch. © LINDY ELECTRONICS LIMITED & LINDY-ELEKTRONIK GMBH - 2nd EDITION (November 2003) Manuel Court Francais Caractéristiques Utilisation d’un câble de connexion Cat.5 Ethernet pour la liaison du boîtier local et distant jusqu’à 150m Supporte les connexion claviers et souris PS/2 Utilisation de deux consoles – permet le travail en local ou à distance Résolutions jusqu’à 1280x1024@60Hz à 75m, ou 800x600@60Hz jusqu’à 150m Pas d’installation de pilote nécessaire, compatible avec tous les systèmes d’exploitation Installation Vous devez posséder les mêmes modèles de boîtiers local et distant ! Veuillez respecter les étapes d’installation ci-dessous: 1) Eteignez tous les périphériques 2) Connectez d’abord le moniteur, la souris et le clavier à l’unité LOCALE et ensuite l’alimentation. 3) Connectez l’ordinateur à l’unité LOCALE. 4) Connectez le moniteur, clavier et souris distants à l’unité DISTANTE et ensuite l’alimentation. 5) Connectez le câble Cat.5 entre les boîtiers local et distant 6) Allumez les moniteurs et les ordinateurs. 7) Si vous le souhaitez, vous pourrez modifier le Gain VGA et la Calibration du Vert de l’unité distante, veillez tout de même à la résolution maximale et la distance. Résolution des problèmes Remarque: Vous devez connecter sur les unités locales et distantes le même modèle de souris! Si vous n’obtenez pas de signal du côté distant, veuillez vérifier le câble Cat.5 ou installez un câble plus court. Si l’image est trop mauvaise, essayez de paramétrer le réglage du Gain VGA et Calibration du Vert pour l’optimisation. Si cela n’améliore pas l’image, vous aurez certainement besoin d’un autre câble Cat.5. Il est possible d’installer un amplificateur ou un câble plus court pour améliorer la qualité de l’image. Essayez également de diminuer la résolution d’affichage. Problèmes souris et claviers: Le KVM Extender LITE supporte des souris PS/2 standards. Les souris à molettes ou sans fil sont en général prises en charge pour la plupart des modèles. Cela dépend du protocole PS/2 utilisé par le constructeur. Les souris certifiées sont la souris LINDY 3D 20583, la souris LINDY sans fil 20617 et d’autres modèles. Les claviers avec touches de fonctions multimédia sont reconnus en général, et leurs touches spéciales sont également prises en charge. © LINDY ELECTRONICS LIMITED & LINDY-ELEKTRONIK GMBH - 2nd EDITION (November 2003) Technical Data and Radio Frequency Statement Technical data Measurements: Local and Remote Unit: Weight, approx: 16.5 x 9 x 2.6cm (WxDxH ) 380g (each unit), 1.5kg total Operating temperature: Storage temperature: Humidity: 0 … 40 degrees C (32 … 104 F) -20 … 60 degrees C (-4 … 140 F) 0 … 80 RH, non condensing For indoor use only, in a dry environment with non-condensing vapour. Power supplies: 9V AC, 500mA, 2.5 (5.5) mm connector CE remark This equipment has been tested and found to comply with the limits for Information Technology Equipment of the European Community. FCC remark Note: This equipment has been tested and found to comply with the limits for a Class B digital device, pursuant to Part 15 of the FCC Rules. These limits are designed to provide reasonable protection against harmful interference in a residential installation. This equipment generates, uses and can radiate radio frequency energy, and if not installed and used in accordance with the instruction manual, may cause interference to radio communications. However, there is no guarantee that interference will not occur in a particular installation. If this equipment does cause harmful interference to radio or television reception, which can be determined by turning the equipment off and on, the user is encouraged to try to correct the interference by one or more of the following measures: Reorient or relocate the receiving antenna Increase the separation between the equipment and receiver Connect the equipment into an outlet on a circuit different from that which the receiver is connected Consult the dealer or an experienced radio/television technician for help. Tested to comply with FCC Standards © LINDY ELECTRONICS LIMITED & LINDY-ELEKTRONIK GMBH - 2nd EDITION (November 2003)