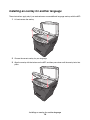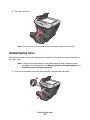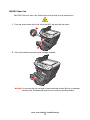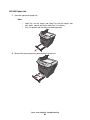
1
X340, X340n, X342n MFP
User’s Guide
January 2006
www.lexmark.com
Edition: January 2006
The following paragraph does not apply to any country where such provisions are inconsistent with local law: LEXMARK INTERNATIONAL, INC.,
PROVIDES THIS PUBLICATION “AS IS” WITHOUT WARRANTY OF ANY KIND, EITHER EXPRESS OR IMPLIED, INCLUDING, BUT NOT LIMITED TO,
THE IMPLIED WARRANTIES OF MERCHANTABILITY OR FITNESS FOR A PARTICULAR PURPOSE. Some states do not allow disclaimer of express
or implied warranties in certain transactions; therefore, this statement may not apply to you.
This publication could include technical inaccuracies or typographical errors. Changes are periodically made to the information herein; these changes will
be incorporated in later editions. Improvements or changes in the products or the programs described may be made at any time.
Comments about this publication may be addressed to Lexmark International, Inc., Department F95/032-2, 740 West New Circle Road, Lexington, Kentucky
40550, U.S.A. In the United Kingdom and Eire, send to Lexmark International Ltd., Marketing and Services Department, Westhorpe House, Westhorpe,
Marlow Bucks SL7 3RQ. Lexmark may use or distribute any of the information you supply in any way it believes appropriate without incurring any obligation
to you. To obtain additional copies of publications related to this product, visit the Lexmark Web site at www.lexmark.com.
References in this publication to products, programs, or services do not imply that the manufacturer intends to make these available in all countries in which
it operates. Any reference to a product, program, or service is not intended to state or imply that only that product, program, or service may be used. Any
functionally equivalent product, program, or service that does not infringe any existing intellectual property right may be used instead. Evaluation and
verification of operation in conjunction with other products, programs, or services, except those expressly designated by the manufacturer, are the user’s
responsibility.
© 2006 Lexmark International, Inc.
All rights reserved.
UNITED STATES GOVERNMENT RIGHTS
This software and any accompanying documentation provided under this agreement are commercial computer software and documentation developed
exclusively at private expense.
Safety information
• Connect the power cord to a properly grounded electrical outlet that is near the product and easily accessible.
CAUTION: Do not use the fax feature during a lightning storm. Do not set up this product or make any electrical or cabling connections, such as the power
cord or telephone, during a lightning storm.
• Use only a 26 AWG or larger telecommunications (RJ–11) cord when connecting this product to the public switched telephone network.
• Refer service or repairs, other than those described in the operating instructions, to a professional service person.
• This product is designed, tested, and approved to meet strict global safety standards with the use of specific Lexmark components. The safety
features of some parts may not always be obvious. Lexmark is not responsible for the use of other replacement parts.
CAUTION: Make sure that all external connections (such as Ethernet and telephone system connections) are properly installed in their marked plug–in
ports.
• Your product uses a laser.
CAUTION: Use of controls or adjustments or performance of procedures other than those specified herein may result in hazardous radiation exposure.
• Your product uses a printing process that heats the print media, and the heat may cause the media to release emissions. You must understand the
section in your operating instructions that discusses the guidelines for selecting print media to avoid the possibility of harmful emissions.
This symbol indicates the presence of a hot surface or component.
CAUTION: To reduce the risk of injury from a hot component, allow the surface to cool before
touching.
Conventions
Note: A note identifies something that could help you.
CAUTION: A caution identifies something that could cause you harm.
Warning: A warning identifies something that could damage your product hardware or software.
2
Contents
Chapter 1: Finding information about the MFP.......................................... 7
Chapter 2: Setting up the MFP..................................................................... 9
Installing an overlay for another language ..................................................................... 10
Installing an additional paper tray .................................................................................. 11
Getting the MFP ready to print and scan ....................................................................... 12
Installing the software for USB attach ...................................................................... 12
Installing the software for network attach (X342n only) ........................................... 13
Getting the MFP ready to fax ......................................................................................... 14
Connecting directly to a telephone wall jack ............................................................ 14
Connecting to a telephone ....................................................................................... 15
Getting the MFP ready to copy ...................................................................................... 16
Chapter 3: Learning about the MFP .......................................................... 17
Understanding the parts of the MFP .............................................................................. 17
Using the control panel buttons ..................................................................................... 20
Using the control panel menus....................................................................................... 22
Navigating the control panel menus ......................................................................... 22
Printing a list of menu items ..................................................................................... 22
Printing a network setup page (X342n only) ............................................................ 22
Changing the default mode ...................................................................................... 24
Setting the Timeout option ....................................................................................... 24
Setting the network options (X342n only) ................................................................ 25
Using the MFP software................................................................................................. 26
Using Print Properties .............................................................................................. 26
Using Presto! PageManager (USB attach only) ....................................................... 27
Using QLINK (USB attach only) ............................................................................... 27
Chapter 4: Loading paper and original documents ................................. 28
Loading paper in the paper tray ..................................................................................... 28
Loading paper in the manual feeder .............................................................................. 32
Contents
3
Loading various paper types .......................................................................................... 33
Setting the paper type and size ..................................................................................... 35
Using the control panel ............................................................................................ 35
Using the computer .................................................................................................. 35
Loading original documents into the ADF ...................................................................... 36
Loading original documents on the scanner glass ......................................................... 37
Selecting an output location ........................................................................................... 38
Chapter 5: Printing...................................................................................... 39
Printing a document ....................................................................................................... 39
Printing an envelope ...................................................................................................... 39
Printing transparencies .................................................................................................. 40
Printing collated copies .................................................................................................. 40
Printing multiple pages on one sheet ............................................................................. 40
Printing the last page first (reverse order)...................................................................... 41
Chapter 6: Faxing........................................................................................ 42
Sending a fax ................................................................................................................. 43
Sending a fax automatically ..................................................................................... 43
Sending a fax manually ............................................................................................ 43
Sending a fax to a group (broadcast fax) ................................................................. 44
Sending a fax at a scheduled time (delay send) ...................................................... 44
Adding a prefix before dialing ................................................................................... 45
Adding a pause while dialing .................................................................................... 45
Receiving a fax .............................................................................................................. 45
Receiving a fax automatically ................................................................................... 45
Receiving a fax manually ......................................................................................... 46
Forwarding faxes ........................................................................................................... 46
Printing fax activity reports ............................................................................................. 47
Customizing fax settings ................................................................................................ 47
Setting up shortcuts ................................................................................................. 47
Using the Speed Dial buttons ................................................................................... 48
Using the Phone Book ............................................................................................. 48
Setting the distinctive ring ........................................................................................ 49
Setting the Station ID ............................................................................................... 49
Entering characters .................................................................................................. 50
Canceling a fax job ........................................................................................................ 50
Chapter 7: Copying ..................................................................................... 51
Contents
4
Making a copy ................................................................................................................ 51
Collating copies.............................................................................................................. 52
Copying multiple pages onto a single sheet (Paper Saver) ........................................... 52
Enlarging or reducing an image ..................................................................................... 53
Chapter 8: Scanning ................................................................................... 54
Scanning documents using the control panel (USB attach only) ................................... 55
Scanning documents using the computer (USB attach only)......................................... 55
Configuring additional applications for scanning ...................................................... 56
Scanning documents directly from an application (USB attach only)............................. 56
Scanning text for editing (OCR) ..................................................................................... 57
Customizing scan settings ....................................................................................... 58
Scanning over a network ............................................................................................... 58
Understanding Scan options .......................................................................................... 59
Chapter 9: Maintaining the MFP ................................................................ 61
Removing a toner cartridge............................................................................................ 61
Installing a toner cartridge.............................................................................................. 62
Redistributing toner ........................................................................................................ 63
Replacing the photoconductor ....................................................................................... 65
Cleaning the MFP .......................................................................................................... 67
Cleaning the scanner glass ...................................................................................... 67
Cleaning the outside of the MFP .............................................................................. 67
Cleaning the inside of the MFP ................................................................................ 68
Ordering supplies ........................................................................................................... 70
Recycling Lexmark products .......................................................................................... 70
Chapter 10: Troubleshooting ..................................................................... 71
Setup troubleshooting .................................................................................................... 72
Removing and reinstalling the drivers software ....................................................... 74
Jams and misfeeds troubleshooting............................................................................... 75
Clearing a paper jam ................................................................................................ 76
Print and copy troubleshooting ...................................................................................... 84
Print quality troubleshooting........................................................................................... 85
Scan troubleshooting ..................................................................................................... 88
Fax troubleshooting ....................................................................................................... 89
Error messages troubleshooting .................................................................................... 91
Contents
5
Notices .......................................................................................................... 94
Index............................................................................................................ 102
Contents
6
1
Finding information about the MFP
The Lexmark™ X340/X340n/X342n Multifunction Printer (MFP) comes with the following resources:
Setup sheet
Description
Where to find
The Setup sheet gives you instructions for setting
up hardware and software.
You can find this document in the MFP box or on the
Lexmark Web site.
User’s Guide
Description
Where to find
The User’s Guide gives you instructions for using
the MFP and other information such as:
You can find this document on the Lexmark Web site or
on the software CD that came with the MFP.
• Maintenance
• Troubleshooting
• Safety
CD
Description
Where to find
The CD contains drivers, software, and
publications files.
You can find this CD in the MFP box. See the Setup
sheet for installation instructions.
Finding information about the MFP
7
Readme file
Description
Where to find
This file contains late-breaking information about
the MFP and software that does not appear in
other documentation, as well as information
specific to your operating system.
To access the Readme file:
1 Click Start Æ Programs or All Programs Æ
Lexmark Æ Lexmark X34x Series.
2 Select Readme.
Web site
Description
Where to find
Our Web site contains a variety of information.
Visit our Web site at www.lexmark.com.
Note: All paths for the Web site are subject to
change.
1 Go to the Web site.
2 Select a country or region from the drop-down list in
the upper-left corner of the page.
3 Select the link for the information you need.
Record the following information (located on the store receipt and the back of the MFP), and have it
ready when you contact us so that we may serve you faster:
Machine Type number:
Serial number:
Date purchased:
Store where purchased:
Finding information about the MFP
8
2
Setting up the MFP
Before unpacking your MFP, select a level, stable surface on which to set it. Allow adequate space for
air circulation and opening covers and trays.
Clearance space
Front
400 mm (16 in.)
Back
175 mm (8 in.)
Right
127 mm (3 in.)
Left
50 mm (2 in.)
Top
175 mm (7 in.)
Setting up the MFP
9
Installing an overlay for another language
These instructions apply only if you received one or more additional language overlays with the MFP.
1 Lift and remove the overlay.
2 Choose the correct overlay for your language.
3 Align the overlay with the buttons on the MFP, and then press down until the overlay locks into
place.
Installing an overlay for another language
10
Installing an additional paper tray
Your MFP supports one optional paper tray that lets you load up to 550 sheets of paper.
CAUTION: If you are installing a 550-sheet paper tray after setting up the MFP, turn the MFP
off, and unplug the power cord from the wall outlet before continuing.
1 Unpack the 550-sheet paper tray, and remove any packing material.
2 Place the paper tray in the location you have chosen for your MFP.
3 Align the holes in the MFP with the positioning posts on the 550–sheet paper tray, and lower
the MFP into place.
4 Click Start Æ Settings Æ Printers or Printers and Faxes.
or
Click Start Æ Control Panel Æ Printers and Other Hardware Æ Printers and Faxes.
5 Select the MFP icon.
6 Click File Æ Properties.
7 Click the Device Settings tab.
8 Select Tray2 from the Installable Options list.
9 Select 550-Sheet Tray from the drop-down menu.
10 Click Apply.
11 Click OK.
Installing an additional paper tray
11
12 Connect the power cord to a wall outlet.
13 Press the Power switch.
Getting the MFP ready to print and scan
Installing the software for USB attach
You can install printer drivers and scan software for the following operating systems using the
Software and Documentation CD:
•
•
•
•
•
Windows 2003
Windows 2003 x64
Windows XP
Windows XP x64
Windows 2000
Note: Drivers for Windows XP x64 bit Edition are available at www.lexmark.com.
1 Insert the Software and Documentation CD.
2 Follow the instructions on the screen.
3 Connect the USB cable, and turn on the printer.
2
1
The Plug and Play screen appears, and a printer object is created in the printers folder of the
computer.
If the software installation screen does not appear:
1 From the desktop, double-click My Computer.
For Windows XP, click Start to access the My Computer icon.
2 Double-click the CD-ROM drive icon. If necessary, double-click setup.exe.
Getting the MFP ready to print and scan
12
3 When the software installation screen appears, click Install or Install Now.
4 Follow the instructions on the computer screen to complete the installation.
Installing the software for network attach (X342n only)
You can install printer drivers and scan software for the following operating systems using the
Software and Documentation CD:
•
•
•
•
•
Windows 2003
Windows 2003 x64
Windows XP
Windows XP x64
Windows 2000
Note: Drivers for Windows XP x64 bit Edition are available at www.lexmark.com.
1 Connect the ethernet cable, and turn on the printer.
1
2
2 Insert the Software and Documentation CD.
3 Follow the instructions on the screen.
The Plug and Play screen appears, and a printer object is created in the printers folder of the
computer.
Note: The ethernet connection will not work if the USB connection is being used. Only
one connection port can be used at a time.
If the software installation screen does not appear:
1 From the desktop, double-click My Computer.
For Windows XP, click Start to access the My Computer icon.
2 Double-click the CD-ROM drive icon. If necessary, double-click setup.exe.
Getting the MFP ready to print and scan
13
3 When the software installation screen appears, click Install or Install Now.
Follow the instructions on the computer screen to complete the installation.
Getting the MFP ready to fax
You can connect the printer to equipment such as a telephone, an answering machine, or a computer
modem. If problems occur, see Setup troubleshooting on page 72.
Note: The printer is an analog device that works best when directly connected to the wall
jack. Other devices (such as a telephone or answering machine) can be
successfully attached to pass through the printer, as described in the setup steps.
If you want a digital connection such as ISDN, DSL, or ADSL, a third-party device
(such as a DSL filter) is required.
You do not need to attach the printer to a computer, but you do need to connect it to a telephone line
to send and receive faxes.
You can connect the printer to other equipment. See the following table to determine the best way to
set up the printer.
Connecting directly to a telephone wall jack
CAUTION: Use only a 26 AWG or larger telecommunications (RJ-11) cord when connecting
this product to the public switched telephone network.
Connect the MFP directly to a telephone wall jack to make copies or send and receive faxes without
using a computer.
1 Make sure you have a telephone cord and a telephone wall jack.
2 Connect one end of the telephone cord into the LINE port
Getting the MFP ready to fax
14
of the MFP.
3 Connect the other en of the telephone cord into an active telephone wall jack.
Note: For more information on connecting the MFP to telecommunications equipment,
see the additional setup instructions that came with the MFP. Setup steps may vary
depending on your country or region.
Connecting to a telephone
Connect a telephone to the MFP to use the fax line as a normal telephone line. Then set up the
printer wherever your telephone is located to make copies or send and receive faxes without using a
computer.
1 Make sure you have the following:
•
•
•
A telephone
Two telephone cords
A telephone wall jack
2 Connect one telephone cord to the LINE port
of the MFP, and then plug it into an active
telephone wall jack.
Getting the MFP ready to fax
15
3 Remove the protective plug from the EXT port
of the MFP.
4 Connect the other telephone cord to a telephone, and then plug it into the EXT port
of the
MFP.
Note: For more information on connecting the MFP to telecommunications equipment,
see the additional setup instructions that came with the MFP. Setup steps may vary
depending on your country or region.
Getting the MFP ready to copy
The X340/X340n/X342n can be used as a stand-alone copier and does not require additional setup
or connection to a computer or a network.
Getting the MFP ready to copy
16
3
Learning about the MFP
Understanding the parts of the MFP
1
2
3
4
5
14
13
6
12
11
10
7
9
8
Use the
To
1
ADF paper support
Extend to support longer media.
2
Paper guides
Make sure paper feeds correctly.
3
Automatic Document
Feeder (ADF)
Copy, scan, or fax multiple–page documents.
4
Top cover
Access the scanner glass.
5
Control panel
Operate the MFP. For more information, see Using the control
panel buttons on page 20.
6
Output paper support
Hold longer paper in the front output tray.
Learning about the MFP
17
Use the
To
7
Front output tray
Hold paper as it exits the MFP.
8
Front cover
Access the toner cartridge.
9
Paper tray
Load paper automatically.
10
Manual feeder
Load paper manually.
11
Paper level indicator
Verify the level of paper in the paper tray.
12
Access button
Release the front cover.
13
Scanner glass
Scan, copy, or fax a single–page document.
14
Scanner lock
Lock the scanner unit during transport.
Understanding the parts of the MFP
18
16
24
17
18
23
20
22
19
21
Use the
To
15
Rear hinges
Lift the top cover to fit thicker documents, such as books.
16
Power switch
Turn the MFP on or off.
17
Power supply port
Connect the MFP to a power source.
18
Dust cover
Protect longer sizes of paper that may extend beyond the edge of
the MFP.
19
Rear cover
Remove heavier paper from the printer as it exits.
20
Ethernet port
Connect the MFP to a network using an ethernet cable.
Note: This port is only available on the X342n. The ethernet port
and the USB port cannot be used at the same time.
21
USB port
Connect the MFP to a computer using a USB cable.
22
LINE port
Connect the MFP to an active telephone line to send and receive
faxes.
23
EXT port
Connect the MFP to a telephone or answering machine.
24
Handles
Lift the MFP.
Understanding the parts of the MFP
19
Using the control panel buttons
The display shows:
•
•
•
MFP status
Messages
Menus
1
2
3
4
12 11
1
5 6
7
10 9 8
Press
To
Copy
Access the Copy mode to make copies.
Note: The mode is selected when the button light is on.
2
Fax
Access the Fax mode to fax.
Note: The mode is selected when the button light is on.
3
Scan
Access the Scan mode to scan.
Note: The mode is selected when the button light is on.
4
Scale
Control the size of a copied document as compared to its original size.
5
Collate
Control the sequence in which multiple-page jobs are completed.
6
Options (Copy)
• Adjust the paper source.
• Adjust the paper saver settings.
7
Speed Dial buttons
Access any of the first five programmed shortcuts.
8
Shift
Access shortcuts 6–10.
Note: Press Shift, and then press the first speed dial button to dial shortcut
6. Press Shift, and then press the second speed dial button to dial shortcut
7, and so on.
9
10
Options (Fax)
(On/Off Hook)
• Access the Broadcast function.
• Delay sending a fax.
• Cancel a fax.
Manually send or receive a fax.
Using the control panel buttons
20
Press
To
11
Redial/Pause
• In Fax mode, redial the last number entered.
• Insert a three–second pause in the number to be dialed to wait for an
outside line or get through an automated answering system. Enter a
pause only when you have already begun programming the number.
12
Phone Book
Access any of the programmed shortcuts. For more information on
programming a shortcut, see Setting up shortcuts on page 47.
13
14
15
22 21
Use this
16 17
20
18
19
To
13
• Scroll through menu options.
• Decrease a number.
14
• Scroll through menu options.
• Increase a number.
15
• Choose the option that appears on the display.
• Save settings.
16
Numeric keypad
In Copy mode: Select the number of copies you want to make.
In Fax mode:
• Enter fax numbers.
• Select letters when creating a Phone Book entry.
• Type numbers to enter or edit the time or date on the display.
17
Content
Select the type of material being copied or faxed. Select one of
the following choices:
• Text
• Mixed–text and photo
• Photo
18
Start
Start a copy, scan, or fax job, depending on which mode is
selected.
Using the control panel buttons
21
Use this
To
19
Stop
• Return settings to their default values, depending on which
mode is selected.
• Cancel a copy, scan, or fax job.
• Exit a menu.
20
Darkness
Select one of five darkness settings.
21
Menu
Display a control panel menu or submenu.
22
Back
Return to the previous menu without saving any changes.
Note: Press
before pressing Back to save your settings.
Using the control panel menus
Navigating the control panel menus
1 Press Menu.
2 Press
or
repeatedly until the menu you want appears, and then press
3 Press
or
repeatedly until the menu option you want appears, and then press
4 Press
or
repeatedly until the setting you want appears.
5 Press
.
to save the setting.
Printing a list of menu items
1 From the control panel, press Menu.
2 Press
or
repeatedly until REPORTS appears, and then press
3 Press
or
repeatedly until Print Menus appears, and then press
.
.
The MFP prints a list of all available menus and default settings.
Printing a network setup page (X342n only)
You can print a network setup page to review the network settings.
Note: This menu item is only available when the USB cable is unplugged.
1 From the control panel, press Menu.
2 Press
or
repeatedly until REPORTS appears, and then press
3 Press
or
repeatedly until Network Setup appears, and then press
Using the control panel menus
22
.
.
.
4 The MFP prints the network setup page.
Copy Defaults menu
Use this
To
Darkness
Improve the readability of a copy by darkening a light document or lightening a
dark document.
Content
Specify the type of document being copied: Text, Mixed, or Photo.
Number
Specify how many copies to print.
Scale
Specify the percentage for enlarging or reducing an image copy.
Collate
Collate copies as they exit.
Paper Source
Select the paper source you want to use.
Paper Saver
Choose how many page images to print on a page.
Fax Advanced menu
Use this
To
Auto Answer
Modify answer settings.
Behind PABX
Indicate if there is a telephone switching device.
Dial Method
Select where the dialing method should be pulse or tone for a fax job.
Fax Forwarding
Forward a fax to another fax machine.
Fax Footer
Add a footer to a fax.
Auto Reduce
Automatically reduce the size of a document for faxing.
Confirmation
Print a confirmation page each time a fax is sent or if there is an error while
faxing.
Using the control panel menus
23
Fax Defaults menu
Use this
To
Content
Choose the quality of the image being sent.
Note: Changing the content may also increase the time necessary to send the
fax.
Original Size
Specify the default size of original documents to be faxed.
Darkness
Improve the readability of a fax by darkening a light document or lightening a
dark document.
Rings
Specify the number of rings before the MFP automatically answers an
incoming fax.
Distinct Ring
Choose the type of ring that indicates an incoming fax, if the fax number has a
distinct ring.
Redials
Choose the number of redial attempts after a failed fax transmission.
Redial Wait
Choose the number of minutes to wait before an automatic redial.
Paper Source
Select the paper source you want to use.
Speaker
Turn the speaker on or off to monitor the fax tone.
Volume
Specify the volume of the telephone ring for incoming faxes or specify the
volume of the speaker to monitor the fax tone.
Prefix
Set an extension to dial before dialing any autodial number. For example,
enter a prefix if you must dial an extension to reach an outside line.
ECM
Ensure accurate, error–free transmission with another ECM–equipped fax
machine.
Station ID
Set the fax machine number or ID name that appears on the fax header.
Changing the default mode
The MFP settings default to copy mode. To select another mode as default:
1 Press Menu.
2 Press
or
repeatedly until MACHINE SETUP appears, and then press
3 Press
or
repeatedly until Mode appears, and then press
4 Press
or
repeatedly until the mode you want appears.
5 Press
.
.
to save the setting.
Setting the Timeout option
If you change the copy or fax settings using the control panel buttons for a specific job, the MFP will
restore the default settings after a set period of time.
Using the control panel menus
24
To set the length of time the MFP waits before restoring default settings:
1 Press Menu.
2 Press
or
repeatedly until MACHINE SETUP appears, and then press
3 Press
or
repeatedly until Timeout appears, and then press
4 Press
or
repeatedly until the length of time you want appears, and then press
.
.
.
5 Press Back repeatedly to return to the Ready prompt.
Setting the network options (X342n only)
Note: These menu items are only available when the USB cable is unplugged.
1 Press Menu.
2 Press
or
repeatedly until NETWORK SETUP appears, and then press
3 Press
or
repeatedly until one of the following appears:
•
•
•
•
.
Enable DHCP
IP Address
Netmask
Gateway
4 Press
to make adjustments to any of the above items. After making the necessary
adjustments, press and the printer will save your settings and return to the Ready prompt.
If no adjustments are made, press Back repeatedly to return to the Ready prompt.
Using the control panel menus
25
Using the MFP software
Use this
To
Print Properties
Select the best print settings for the document you are
printing.
Presto! PageManager
• Scan, share, and organize photos and documents.
• View, edit, send, and back up files in many formats.
QLINK
• Scan to various applications.
• Configure additional applications for scanning. For more
information, see page 56.
• Customize scan settings. For more information, see
page 58.
Using Print Properties
Print Properties is the software that controls the printing function when the printer is connected to a
computer. You can change the settings in Print Properties based on the type of project you want to
create.
Opening Print Properties
You can open Print Properties from almost any program:
1 With a document open, click File Æ Print.
2 From the Print dialog, click Properties, Preferences, Options, or Setup.
Using the Print Properties tabs
Tab
Options
Layout
• Select the orientation of the document on the printed page:
portrait or landscape.
• Choose the order to print the pages.
• Choose the number of pages to print per sheet.
Paper/Quality
• Choose the paper source.
• Specify the type of paper loaded.
Watermark
Add, edit, or remove a watermark.
Profiles
Add personal profiles.
About
Lists copyright and file versions.
Using the MFP software
26
Using Presto! PageManager (USB attach only)
Use Presto! PageManager to scan, share, and organize photos and documents.
To open Presto! PageManager, click Start Æ Programs or All Programs Æ
Lexmark Applications Æ Presto! PageManager.
To access the Presto! PageManager Help:
1 Open Presto! PageManager.
2 Click Help Æ Help.
Using QLINK (USB attach only)
With QLINK, you can:
•
Scan to various applications.
•
Configure additional applications for scanning. For more information, see page 56.
•
Customize scan settings. For more information, see page 58.
To open QLINK, use one of the following methods:
•
From the MFP control panel, press Scan.
•
Double-click the QLINK icon on the desktop.
•
Click Start Æ Programs or All Programs Æ Lexmark Æ Lexmark X34x Series Æ QLINK.
Using the MFP software
27
4
Loading paper and original documents
Loading paper in the paper tray
1 Make sure:
•
•
•
•
•
You use paper designed for laser printers.
The paper is not used or damaged.
If you are using specialty paper, you follow the instructions that came with the paper.
You do not force paper into the MFP.
Set the correct paper type in the control panel, or using the computer. For more
information, see Setting the paper type and size.
2 Remove the paper tray.
Loading paper and original documents
28
3 Holding the tray on a stable surface, press the guide lock, and slide the rear guide until it
locks at the paper length you want.
Note: To load longer paper, such as legal size paper:
•
Press the button at the back of the paper tray, and extend the tray until it locks
into place.
2
1
•
Attach the dust cover to the rear of the MFP to protect the paper that extends
beyond the edge of the MFP.
4 Prepare a stack of paper for loading by flexing or fanning it back and forth. Straighten the
edges on a level surface.
Loading paper in the paper tray
29
5 Load the paper with the print side facing down.
Note: Load letterhead paper with the design side facing down. The top edge of the sheet
should be placed at the front of the tray.
6 Make sure the paper is below the maximum fill lines on the left inside wall of the tray.
Note: Overloading paper may cause paper jams.
Loading paper in the paper tray
30
7 Squeeze and adjust the paper guides until they lightly touch the side of the stack of paper.
Note: Do not push the paper guides far enough to cause the materials to warp. Incorrect
adjustments may cause paper jams.
8 Close the paper tray.
Note: The paper level indicator, on the front of the paper tray, shows the amount of paper
currently in the tray.
Note: If you experience problems with the paper feed, use the manual feeder. For more
information, see Loading paper in the manual feeder on page 32.
Loading paper in the paper tray
31
Loading paper in the manual feeder
Use the manual feeder to print transparencies, labels, envelopes, or card stock. You may also use
the manual feeder to make short runs of paper types or sizes that are not currently loaded in the
paper tray.
For information on acceptable print media to use in the manual feeder, see Loading various paper
types on page 33.
1 Make sure:
•
•
•
•
•
You use paper designed for laser printers.
The paper is not used or damaged.
If you are using specialty paper, you follow the instructions that came with it.
You do not force paper into the MFP.
Set the correct paper type and size in the control panel, or using the computer. For
more information, see Setting the paper type and size.
2 Place a single sheet of paper face-up with the leading edge first into the center of the manual
feeder, and adjust the paper guides to the paper width.
The MFP automatically engages the print media.
Loading paper in the manual feeder
32
Loading various paper types
Input source/capacity1
250–sheet paper
tray
Size (mm/in.)
Plain paper
Manual feeder
550–sheet paper
tray (optional)
Yes/250
Yes/1
Yes/550
No/0
Yes/1
No/0
No/0
Yes/1
No/0
Yes/50
Yes/1
Yes/50
Letter (215.9 x 279/8.5 x 11)
A4 (210 x 297/8.27 x 11.69)
Folio (215.9 x 330.2/8.5 x 13)
Legal (215.9 x 355.6/8.5 x 14)
Executive (184.2 x 266.7/7.25 x 10.5)
JISB5 (182 x 257/7.2 x 10)
Statement (140 x 216/5.5 x 8.5)
A5 (148 x 210/5.83 x 8.27)
Envelopes2
No. 9 (98.4 x 225.4/3.88 x 8.88)
No. 10 (104.8 x 241.3/4.12 x 9.5)
DL (110 x 220/4.33 x 8.66)
C5 (162 x 229/6.38 x 9.02)
B5 (176 x 250/6.93 x 9.84)
No. 7 3/4 (98.4 x 190.4/3.88 x 7.5)
Paper labels3
Letter (215.9 x 279/8.5 x 11)
A4 (210 x 297/8.27 x 11.69)
Transparency films
Letter (215.9 x 279/8.5 x 11)
A4 (210 x 297/8.27 x 11.69)
Loading various paper types
33
Input source/capacity1
250–sheet paper
tray
Size (mm/in.)
Card stock4
No/0
Manual feeder
Yes/1
550–sheet paper
tray (optional)
No/0
Letter (215.9 x 279/8.5 x 11)
A4 (210 x 297/8.27 x 11.69)
Folio (215.9 x 330.2/8.5 x 13)
Legal (215.9 x 355.6/8.5 x 14)
Executive (184.2 x 266.7/7.25 x 10.5)
JISB5 (182 x 257/7.2 x 10)
Statement (140 x 216/5.5 x 8.5)
A5 (148 x 210/5.83 x 8.27)
1
Maximum capacity may be reduced depending on paper thickness.
2
Feed envelopes one sheet at a time through the manual feeder.
3 The
MFP is intended for occasional paper label printing only. Feed one sheet at a time through the manual
feeder. Do not use vinyl labels with the MFP.
4 Feed
card stock one sheet at a time through the manual feeder. It must exit through the rear output slot.
Individual postcard sizes, such as 4 x 6, are not supported. Lexmark recommends full-sized sheets of
postcard stock designed for laser printers.
Warning: Using unsupported media sizes may damage the MFP.
Loading various paper types
34
Setting the paper type and size
Using the control panel
1 Press Menu.
2 Press
or
repeatedly until PAPER SETUP appears on the top line of the display, and
then press .
3 Press
or
repeatedly until Size/Type appears on the top line of the display, and then
or
repeatedly until the paper source you want to use appears.
6 Press
or
repeatedly until the paper size you want to use is selected, and then press
7 Press
or
repeatedly until the paper type you want to use is selected.
press
.
4 Press
5 Press
8 Press
.
.
9 To return to the Ready prompt, press Stop.
Note: If you are printing from the computer, continue with Using the control panel.
Using the computer
1 With a document open, click File Æ Print.
2 Click Properties, Options, Setup, or Preferences.
3 From the Paper/Quality tab, select the paper type from the Media drop–down list.
4 Click the Advanced button.
5 Select the paper size.
6 Click OK.
7 Click OK.
8 Click OK.
Setting the paper type and size
35
.
Loading original documents into the ADF
You can load up to 50 sheets of an original document into the ADF for scanning, copying, and faxing.
•
•
Remove staples and paper clips from the original documents before loading
into the ADF.
The ADF may not properly feed documents that are damaged or folded. If this
occurs, use the scanner glass. For more information, see Loading original
documents on the scanner glass on page 37.
1 Load an original document face-up into the ADF.
Note: Do not load postcards, 4 x 6 cards, small items, or thin media (such as magazine
clippings or carbonless paper) into the ADF. Place these items on the scanner
glass.
2 Adjust the paper guides on the ADF against the edges of the paper.
Note: If longer paper is used, extend the ADF paper support.
Loading original documents into the ADF
36
Loading original documents on the scanner glass
You can scan, copy, and fax photos, text documents, magazine articles, newspapers, and other
publications.
Note: Place postcards, 4 x 6 cards, small items, or thin media (such as magazine
clippings or carbonless paper) on the scanner glass.
1 Open the top cover.
2 Place the document face-down on the scanner glass in the upper left corner.
Loading original documents on the scanner glass
37
3 Close the top cover to avoid dark edges on the scanned image.
Selecting an output location
The MFP has two output locations: the front output tray and the rear paper exit.
Front output
tray
Rear paper exit
Front output tray
The front output tray should be used to output plain paper only. Use the rear paper exit for envelopes,
labels, card stock, and transparencies. To use the front output tray, make sure the rear cover is
closed.
This tray should be used for most jobs and is recommended for jobs requiring over 50 sheets of plain
paper continuously.
Note: If problems, such as excessive curl, occur when using the front output tray, try using
the rear output slot.
Rear paper exit
You can use the rear paper exit for all paper types; however, for envelopes, labels, card stock, and
transparencies, using this slot is recommended. To use the rear paper exit, open the rear cover.
Paper is output face-up through the rear paper exit, with the last page on the top. To avoid paper
jams, do not open or close the rear cover while printing.
Selecting an output location
38
5
Printing
Printing a document
1 Load paper.
2 With a document open, click File Æ Print.
3 Click Properties, Options, Setup, or Preferences.
4 Adjust the settings.
5 Click OK.
6 Click OK or Print.
Printing an envelope
1 Load an envelope face-up in the manual feeder.
Note: Make sure the envelope flap is face-down.
2 With a document open, click File Æ Print.
3 Click Properties, Options, Setup, or Preferences.
4 From the Layout tab, select Landscape.
Note:
•
•
Most envelopes use landscape orientation.
Make sure the same orientation is also selected in the software application.
5 From the Paper/Quality tab, select the paper source.
6 Select Envelope from the Media drop-down list.
7 Click the Advanced button.
8 Select the envelope size loaded, and click OK.
9 Click OK.
Printing
39
10 Click OK or Print.
Printing transparencies
1 Load transparencies.
Note:
•
•
If you are using the manual feeder, load one transparency at a time.
Make sure you use a transparency designed for laser printers.
2 With a document open, click File Æ Print.
3 Click Properties, Options, Setup, or Preferences.
4 From the Paper/Quality tab, select the paper source.
5 Select Transparency from the Media drop-down list.
6 Click the Advanced button.
7 Select the transparency size loaded, and click OK.
8 Click OK.
9 Click OK or Print.
Printing collated copies
If you print multiple copies of a document, you can choose to print each copy as a set (collated) or to
print the copies as groups of pages (not collated).
1 Load paper.
2 With a document open, click File Æ Print.
3 From Copies, select the Collate check box.
4 Click OK or Print.
Printing multiple pages on one sheet
1 Load paper.
2 With a document open, click File Æ Print.
3 Click Properties, Options, Setup, or Preferences.
Printing transparencies
40
4 From the Layout tab, select the number of pages per sheet from the Pages Per Sheet drop–
down list.
5 Click OK.
6 Click OK or Print.
Printing the last page first (reverse order)
1 Load paper.
2 With a document open, click File Æ Print.
3 Click Properties, Options, Setup, or Preferences.
4 From the Layout tab, select the Back to Front check box.
5 Click OK.
6 Click OK or Print.
Printing the last page first (reverse order)
41
6
Faxing
You can load an original document into the ADF or on the scanner glass.
ADF
Scanner glass
Use the ADF for multiple–page documents.
Use the scanner glass for single-page
documents, postcards, 4 x 6 cards, small
items, or thin media (such as magazine
clippings or carbonless paper).
Note: Do not load postcards, 4 x 6 cards, small items, or
thin media (such as magazine clippings or carbonless
paper) into the ADF. Place these items on the scanner
glass.
Faxing
42
Sending a fax
Note: Make sure the MFP is connected to an active, analog telephone line.
Sending a fax automatically
1 Make sure the MFP is on.
2 Load an original document face-up into the ADF or face-down on the scanner glass.
Note: Do not load postcards, 4 x 6 cards, small items, or thin media (such as magazine
clippings) into the ADF. Place these items on the scanner glass.
3 From the control panel, press Fax.
4 Enter a fax number, press Speed Dial 1, 2, 3, 4, or 5, or press Phone Book to select a
number.
Note:
•
•
If you do not have a Speed Dial list but want to create one, see Setting up
shortcuts on page 47.
If you do not have a Phone Book list but want to create one, see Using the
Phone Book on page 48.
5 Press Start.
6 If prompted, press 1 (for yes) if you have more pages, or 2 (for no) if you have finished
scanning the entire document.
Sending a fax manually
1 Make sure the MFP is on.
2 Load an original document face-up into the ADF or face-down on the scanner glass.
3 From the control panel, press Fax.
4 Press
to get a dial tone.
Sending a fax
43
5 Enter a fax number, press Speed Dial 1, 2, 3, 4, or 5, or press Phone Book to select a
number.
Note:
•
•
If you do not have a Speed Dial list but want to create one, see Setting up
shortcuts on page 47.
If you do not have a Phone Book list but want to create one, see Using the
Phone Book on page 48.
6 When you hear the fax tone, press Start.
The control panel prompts you for another page.
7 If prompted, press 1 (for yes) if you have more pages, or 2 (for no) if you have finished
scanning the entire document.
Sending a fax to a group (broadcast fax)
You can send a fax to as many as 8 people at once.
Note: You cannot save this group in the Phone Book.
1 Load an original document into the ADF or on the scanner glass.
2 From the control panel, press Fax.
3 Under Fax, press Options.
4 Press
5 Press
or
repeatedly until Broadcast appears, and then press
.
.
6 Enter a fax number, and then press
.
7 Using the numeric keypad, press 1 (for Yes) if you have another number, or 2 (for No) if you
have entered the last number.
Sending a fax at a scheduled time (delay send)
Using the delay send feature, you can scan a document now and fax it at a later time.
1 Load an original document into the ADF or on the scanner glass.
2 From the control panel, press Fax.
3 Under Fax, press Options.
4 Press
5 Press
or
repeatedly until Delay send appears, and then press
.
Sending a fax
44
.
6 Enter a fax number, and then press
.
7 Using the numeric keypad, press 1 (for Yes) if you have another number, or 2 (for No) if you
have entered the last number.
8 Enter the time you want to send the fax, and then press
.
Note: At the designated time, the fax numbers are dialed and the fax is sent to all of the
designated fax numbers. If the fax transmission is unsuccessful to any of the
numbers on the broadcast list, the unsuccessful numbers will be dialed again.
Adding a prefix before dialing
Using the prefix feature, you can dial an extension to reach an outside line or turn off call-waiting
before sending a fax.
1 From the control panel, press Menu.
2 Press
or
repeatedly until Fax Defaults appears, and then press
3 Press
or
repeatedly until Prefix appears, and then press
.
.
4 Enter the prefix you want to dial before sending a fax, and then press
.
5 Press Stop to return to the Ready prompt.
Adding a pause while dialing
Using the pause feature, you can add a pause during dialing to wait for an outside line or navigate an
automated telephone system.
While dialing the fax number, press Redial/Pause to insert a pause. A pause is represented by a
comma (,) on the display.
Receiving a fax
Receiving a fax automatically
When the MFP is set to Auto Answer, it answers an incoming fax on a specified number of rings.
Once the connection is established, the MFP automatically receives the fax.
Receiving a fax
45
Receiving a fax manually
We recommend using this feature when the fax and the telephone share a telephone line. Choose
which incoming faxes to accept by setting the MFP to manual answering mode.
1 Deselect Auto Answer:
a
From the control panel, press Fax.
b
Press Menu.
c
Press
or
repeatedly until FAX ADVANCED appears, and then press
.
Auto Answer appears.
d
Press
.
e
Press
press
.
f
or
repeatedly until No appears on the bottom line of the display, and then
To return to the Ready prompt, press Stop.
2 When the telephone rings, press
.
3 If you hear a fax tone, press Start.
The MFP receives the fax.
Forwarding faxes
Use the fax forwarding feature if you are going to be away but still want to receive faxes. There are
three fax forwarding settings:
•
•
•
Off—(Default)
Forward—The MFP sends the fax to the designated fax number.
Forward and Print—The MFP prints the fax and then sends it to the designated fax number.
Setting up fax forwarding
1 From the control panel, press Fax.
2 Press Menu.
3 Press
4 Press
7 Press
repeatedly until FAX ADVANCED is selected.
or
repeatedly until Fax Forwarding is selected.
or
repeatedly until Forward or Fwd. and Print is selected.
.
5 Press
6 Press
or
.
Forwarding faxes
46
8 Press
.
9 Enter the number to which you want to forward the fax.
10 Press
.
Printing fax activity reports
1 From the control panel, press Fax.
2 Press Menu.
3 Press
4 Press
repeatedly until REPORTS is selected.
or
repeatedly until Fax Call log or Fax Job log is selected.
.
5 Press
6 Press
or
.
Customizing fax settings
Setting up shortcuts
To make sending faxes easier, you can enter up to 99 shortcuts.
1 From the control panel, press Fax.
2 Press Phone Book.
3 Press
4 Press
or
repeatedly until Edit is selected.
.
Add appears on the display.
5 Press
.
6 Enter the shortcut number (1–99), and then press
.
Note:
•
•
Shortcuts do not have to be entered in order.
Shortcuts 1–10 can be accessed through the Speed Dial buttons. For more
information, see Using the Speed Dial buttons on page 48.
Printing fax activity reports
47
7 Enter the shortcut name using the keypad, and then press
. For more information, see
Entering characters on page 50.
Note: The MFP does not support double–byte characters for names, such as Chinese,
Japanese, or Korean. You cannot enter a name using these languages.
8 Enter a fax number, and then press
.
9 Using the numeric keypad, press 1 (for Yes) if you have another number, or 2 (for No) if you
are finished.
Using the Speed Dial buttons
You can access shortcuts 1–5 and 6–10 with the Speed Dial buttons. These buttons are
automatically programmed when you program shortcuts 1–10. For instructions on how to add
shortcuts to the Phone Book, see Setting up shortcuts on page 47.
1 Load an original document into the ADF or on the scanner glass.
2 From the control panel, press Fax.
3 Press a Speed Dial button.
a
Press Speed Dial 1, 2, 3, 4, or 5 for the first five shortcuts.
b
Press Shift, and then press Speed Dial 1, 2, 3, 4, or 5 for shortcuts 6–10.
Note: Shift + Speed Dial 1 is shortcut 6. Shift + Speed Dial 2 is shortcut 7, and so on.
4 Press
.
5 Press Start.
Using the Phone Book
To access the Phone Book menu, press Phone Book.
Use this
To
Edit
Edit an individual shortcut, create a new shortcut, or delete a shortcut.
Search
Search for shortcuts by number or by name.
• To search by shortcut number, press # followed by the two–digit shortcut,
and then press .
• To search by name, press the number that contains the first letter of the
desired shortcut name, and then press
or
to scroll through the
shortcuts. When the name you want is selected, press .
Print
Print all shortcuts (1–99) listed in the Phone Book.
Customizing fax settings
48
Setting the distinctive ring
1 From the control panel, press Fax.
2 Press Menu.
3 Press
or
repeatedly until FAX DEFAULTS is selected.
or
repeatedly until Distinct Ring is selected.
7 Press
or
repeatedly until the setting you want is selected.
8 Press
or
to turn the setting on or off.
4 Press
.
5 Press
6 Press
9 Press
.
to save the setting.
Setting the Station ID
1 From the control panel, press Fax.
2 Press Menu.
3 Press
4 Press
repeatedly until FAX DEFAULTS is selected.
or
repeatedly until Station ID is selected.
.
5 Press
6 Press
or
.
7 Enter the fax machine number, and press
to save.
8 Enter a name for the fax machine using the keypad, and then press
to save. For more
information, see Entering characters on page 50.
Note:
•
•
The name for the fax machine should not exceed 20 characters.
The MFP does not support double–byte characters for names, such as
Chinese, Japanese, or Korean. You cannot enter a name using these
languages.
9 Press Stop to return to the Ready prompt.
Customizing fax settings
49
Entering characters
To enter a name for a fax job or the station ID, use the alphanumeric keypad. Press the appropriate
key repeatedly until the character you want to use appears on the display.
Note:
•
•
To add a space, press
.
To go back a space, press
Key
Characters
1
1@
2
ABCabc2
3
DEFdef3
4
GHIghi4
5
JKLjkl5
6
MNOmno6
7
PQRSpqrs7
8
TUVtuv8
9
WXYZwxyz9
0
0./+-+:;?!<>()[]
.
Canceling a fax job
1 Under Fax, press Options.
2 Press
3 Press
4 Press
or
repeatedly until Cancel appears on the top line of the display.
or
repeatedly until you see the job that you want to cancel, and then press
.
5 Press 1 to verify that you want to cancel the job or 2 to return to the menu.
Canceling a fax job
50
.
7
Copying
You can load an original document into the ADF or on the scanner glass.
ADF
Scanner glass
Use the ADF for multiple–page documents.
Use the scanner glass for single-page
documents, postcards, 4 x 6 cards, small
items, or thin media (such as magazine
clippings or carbonless paper).
Note: Do not load postcards, 4 x 6 cards, small items, or
thin media (such as magazine clippings or carbonless
paper) into the ADF. Place these items on the scanner
glass.
Making a copy
1 Load paper.
Note: If you are using a paper size other than letter or A4, select the paper type and size
using the control panel. For more information, see Setting the paper type and
size on page 35.
Copying
51
2 Load the original document face-up into the ADF or face-down on the scanner glass.
3 From the control panel, press Copy.
4 Enter the number of copies you want to print.
5 Press Start.
Collating copies
If you make multiple copies of a document, you can choose to print each copy as a set (collated) or to
print the copies as groups of pages (not collated).
1 Load the original document face-up into the ADF or face-down on the scanner glass.
2 From the control panel, make sure Copy mode is selected.
3 Using the numeric keypad, enter the number of copies you want to print.
4 Under Copy, press Collate repeatedly until On appears.
5 Press
.
6 Press Start.
Copying multiple pages onto a single sheet (Paper
Saver)
The Paper Saver feature lets you copy consecutive pages of a multiple-page document on a single
sheet of paper.
1 Load paper.
2 Load the original document face-up into the ADF or face-down on the scanner glass.
3 From the control panel, make sure Copy mode is selected.
4 Under Copy, press Options.
5 Press
or
repeatedly until Paper Saver is selected, and then press
6 Press
or
repeatedly until the setting you want to use is selected.
Note:
•
•
•
7 Press
2-Up—Prints two copied documents on a page.
4-Up—Prints four copied documents on a page.
Off—Prints one copied document on a page.
.
Collating copies
52
.
8 Press Start.
9 If prompted, press 1 (for yes) if you have more pages, or 2 (for no) if you have finished
copying the number of pages you want to print in Paper Saver mode.
Enlarging or reducing an image
1 Load paper.
2 Load an original document face-up into the ADF or face-down on the scanner glass.
Note: Do not load postcards, index cards, small items, or thin media (such as magazine
clippings) into the ADF. Place these items on the scanner glass.
3 From the control panel, make sure Copy mode is selected.
4 Press Scale repeatedly until the option you want appears.
Note: Choose Custom to enter a specific percentage to enlarge or reduce.
5 Press
.
6 Press Start.
Enlarging or reducing an image
53
8
Scanning
Using the X340, X340n, or X342n, you can send scanned images through the USB connection to
your computer. In addition, using the X342n you can scan the document back to your computer over
the network.
You can load an original document into the ADF or on the scanner glass.
ADF
Scanner glass
Use the ADF for multiple–page documents.
Use the scanner glass for single-page
documents, postcards, 4 x 6 cards, small
items, or thin media (such as magazine
clippings or carbonless paper).
Note: Do not load postcards, 4 x 6 cards, small items, or
thin media (such as magazine clippings or carbonless
paper) into the ADF. Place these items on the scanner
glass.
Scanning
54
Scanning documents using the control panel (USB
attach only)
1 Make sure:
•
•
•
The computer is on.
The computer is attached to the MFP.
The software has been loaded onto the computer.
2 Load an original document face-up into the ADF or face-down on the scanner glass.
Note: Do not load postcards, index cards, small items, or thin media (such as magazine
clippings) into the ADF. Place these items on the scanner glass.
3 From the control panel, press Scan.
4 Press
or
repeatedly until the application you want to use appears.
Note:
•
•
If you do not see the application you want to use, configure additional
applications for scanning. For more information, see Configuring additional
applications for scanning on page 56.
Adjust the scan settings using the computer. For more information, see
Customizing scan settings on page 58.
5 Press Start.
The MFP scans the document.
6 If prompted, press 1 (for yes) if you have more pages, or 2 (for no) if you have finished
scanning the entire document.
Scanning documents using the computer (USB attach
only)
1 Make sure:
•
•
•
The computer is on.
The computer is attached to the MFP.
The software has been loaded onto the computer.
2 Load an original document face-up into the ADF or face-down on the scanner glass.
3 Open QLINK:
•
Double-click the QLINK icon on the desktop.
Scanning documents using the control panel (USB attach only)
55
•
Click Start Æ All Programs Æ Lexmark Æ Lexmark X34x Series Æ QLINK.
4 Select the application you want to use.
Note: If you do not see the application you want to use, configure additional applications
for scanning. For more information, see Configuring additional applications for
scanning on page 56.
5 If you want to adjust the scan settings, see Customizing scan settings on page 58.
6 Press Scan Now.
The MFP scans the document.
Configuring additional applications for scanning
Note: When QLINK is installed, it automatically selects available applications for
scanning.
1 Open QLINK:
•
•
Double-click the QLINK icon on the desktop.
Click Start Æ All Programs Æ Lexmark Æ Lexmark X34x Series Æ QLINK
2 Click New Application.
3 Click Browse, and browse to the folder where the application is stored.
4 Select the application you want to use, and click Open.
5 Enter the program name.
6 Enter the program name to appear on the display.
Note: You can also change your scan default settings for this application.
7 Click OK.
Scanning documents directly from an application (USB
attach only)
You can scan documents directly from applications that are TWAIN and WIA compliant. See the
application Help for more information.
Scanning documents directly from an application (USB attach only)
56
Scanning text for editing (OCR)
Use the Optical Character Recognition (OCR) software feature to turn scanned images into text that
you can edit with a word-processing or spreadsheet application.
1 Make sure ABBYY FineReader is installed.
Note: ABBYY FineReader installs as part of the MFP software during initial setup. To
verify that it has been installed correctly, click Start Æ Programs or All
Programs Æ ABBYY FineReader 6.0 Sprint, and make sure that ABBYY
FineReader is listed.
2 Load an original document face-up into the ADF or face-down on the scanner glass.
3 Click Start Æ Programs or All Programs Æ Lexmark Applications Æ
Presto! PageManager.
PageManager appears with the Scan Buttons dialog.
4 From the Scan Buttons dialog, click
.
Note: If the Scan Buttons dialog does not appear, press F9.
5 From the Scan Manager dialog, click Preview.
6 Adjust the scan settings as desired.
Note: For best results, select Black and White instead of color.
7 Click Scan.
ABBYY FineReader appears.
8 From the toolbar, click Read.
9 Click Save.
10 Select a destination you want to send to, and click OK.
11 Edit and save the document.
Scanning text for editing (OCR)
57
Customizing scan settings
1 Open QLINK:
•
•
Double-click the QLINK icon on the desktop.
Click Start Æ All Programs Æ Lexmark Æ Lexmark X34x Series Æ QLINK.
2 Select the destination you want to scan to.
3 Click Edit.
4 Adjust the scan settings.
5 Click OK.
Scanning over a network
Note: Only available on the X342n connected to a network
1 Type the IP address of the MFP in the address line of your browser, and then press Enter.
If the Java applet screen appears, click Yes.
Note: The IP address can be found on the network setup page. For more information, see
Printing a network setup page (X342n only)
2 Click Scan Profile.
3 Click Create Scan Profile.
4 Select your scan settings, and then click Next.
5 Select a location for saving the scanned output file somewhere on your computer.
6 Enter a profile name.
The profile name is the name that will appear on the Scan Profile list on the MFP control
panel when the scan button is pressed.
7 Click Submit.
8 Review the instructions on the Scan to PC screen.
A shortcut number was automatically assigned when you clicked Submit. You can use this
shortcut number when you are ready to scan your documents.
a
Go to the MFP, and place your original document in the ADF face up, long edge first.
b
Press # followed by the shortcut number on the keypad, or touch Profiles on the home
screen.
Scanning over a network
58
c
After you enter the shortcut number, the scanner will scan and send the document to the
directory or application you specified. If you touch Profiles on the home screen, locate
your shortcut on the list.
9 Return to your computer to view your file.
Your output file is saved in the location you specified or launched in the application you
specified.
Understanding Scan options
To change the options for the scan to PC Profile, you must click the Quick Setup box, and select
Custom. Quick Setup lets you select preset formats or customize your scan job settings. You can
select:
Custom
Photo - Color JPEG
Text - BW PDF
Photo - Color TIFF
Text - BW TIFF
Text/Photo - BW PDF
Text/Photo - Color PDF
Format Type—Sets the output (PDF, TIFF, or JPEG) for the scanned image.
PDF output is a single file.
TIFF output is a single file. If Multi-page TIFF is turned off in the Configuration menu, then
TIFF saves one page each in a series of files.
JPEG saves one page in each file. When multiple pages are scanned, the output will be a
series of files.
Compression—Sets the compression format used to compress the scanned output file.
Default Content—Tells the MFP the original document type. Choose from Text, Text/Photo, or
Photo. Content affects the quality and size of your scanned file.
Text—Emphasizes sharp, black, high-resolution text against a clean, white background.
Text/Photo—Used when the original documents are a mixture of text and graphics or
pictures.
Photo—Tells the scanner to pay extra attention to graphics and pictures. This setting
emphasizes a reproduction of the full dynamic range of tones in the original document. This
increases the amount of information saved.
Color—Tells the MFP the color of the original documents. You can select Gray, BW (Black and
White), or Color.
Original Size—Opens a field where you can select the size of the document you are going to scan.
Understanding Scan options
59
Orientation—Tells the MFP whether the original document is portrait or landscape and then
changes the Sides and Binding settings to match the original document orientation.
Darkness—Adjusts how light or dark your scanned documents will turn out.
Resolution—Adjusts the output quality of your file. Increasing the image resolution increases the file
size and the time needed to scan your original document. Image resolution can be decreased to
reduce the file size.
Understanding Scan options
60
9
Maintaining the MFP
Removing a toner cartridge
1 Press the access button on the left side of the MFP, and open the front cover.
1
2
2 To remove the toner cartridge:
a
Press the button on the print cartridge assembly.
b
Remove the toner cartridge using the handle.
1
2
To return the empty toner cartridge, see Recycling Lexmark products on page 70 for more
information.
Maintaining the MFP
61
Installing a toner cartridge
1 If you are installing a new toner cartridge, remove the toner cartridge from the packaging, and
gently shake four or five times to distribute the toner.
2 Gently slide the toner cartridge in until it locks into place.
Installing a toner cartridge
62
3 Close the front cover.
Note: The front cover must be closed to start a new print, copy, scan, or fax job.
Redistributing toner
Redistribute the toner if you are dissatisfied with print quality or if the error message on the display is
88 Toner Low.
Note: If the error message reappears after redistributing the toner, replace the toner
cartridge. For more information, see Removing a toner cartridge on page 61 and
Installing a toner cartridge on page 62.
1 Press the access button on the left side of the MFP, and open the front cover.
1
2
Redistributing toner
63
2 To remove the toner cartridge:
a
Press the button on the print cartridge assembly.
b
Remove the toner cartridge using the handle.
1
2
3 Firmly shake the cartridge in all directions to distribute the toner.
4 Reinstall the cartridge, and close the front cover.
Note: If print quality does not improve, replace the toner cartridge.
Redistributing toner
64
Replacing the photoconductor
1 Press the access button on the left side of the MFP, and open the front cover.
1
2
2 Pull on the handle to remove the print cartridge assembly.
3 Place the print cartridge assembly on a flat, clean surface.
Replacing the photoconductor
65
4 To remove the toner cartridge:
a
Press the button on the print cartridge assembly.
b
Remove the toner cartridge using the handle.
5 Unpack the photoconductor kit.
6 Install the toner cartridge into the new photoconductor.
Note: The toner cartridge snaps into place when correctly installed.
7 Reinstall the print cartridge assembly.
8 Press and hold Stop for three seconds to reset photoconductor recount.
9 Close the front cover.
Replacing the photoconductor
66
Cleaning the MFP
To maintain print quality, follow these cleaning procedures each time the toner cartridge is replaced
or if print quality problems occur.
Warning: Do not put water directly on the MFP or use ammonia–based cleaners or volatile
solvents, such as paint thinner, on the MFP.
Cleaning the scanner glass
1 Slightly dampen a soft, lint–free cloth or paper towel with water.
2 Open the top cover.
3 Wipe the surfaces of the scanner glass and ADF until they are clean and dry.
4 Wipe the underside of the white top cover and white sheet until it is clean and dry.
5 Close the top cover.
Cleaning the outside of the MFP
Wipe the outside surface of the MFP with a soft, clean, lint–free cloth. If you dampen the cloth slightly
with water, be careful not to let any water drip onto or inside the MFP.
Cleaning the MFP
67
Cleaning the inside of the MFP
CAUTION: The fuser area is hot. Avoid contact with the fuser area to prevent burns.
Warning: While cleaning the inside of the MFP, be careful not to touch the transfer roller
located under the toner cartridge. Oil from your fingers can affect print quality.
1 Turn the MFP off, unplug the power cord, and then wait for the MFP to cool down.
2 Open the front cover, and pull on the handle to remove the print cartridge assembly.
Warning: Do not touch the green photoconductor drum.
3 Place the print cartridge assembly on a clean, dry surface.
Cleaning the MFP
68
4 With a dry, lint–free cloth, wipe away any dust and spilled toner from the print cartridge area.
Warning:
•
•
To prevent damage to the print cartridge assembly, do not expose it to light for
more than a few minutes. Cover it with a piece of paper, if necessary.
Do not touch the black transfer roller.
5 Reinsert the print cartridge assembly, and close the front cover.
6 Plug in the power cord and turn the MFP on.
Cleaning the MFP
69
Ordering supplies
To order supplies or to locate a dealer near you, visit our Web site: www.lexmark.com.
Part number
Item
Average yield
X340A11G
Return program toner cartridge
(X340/X340n/X342n)
2500 standard pages1
X340H11G
High yield return program toner cartridge (X342n) 6000 standard pages1
X340H22G
Photoconductor kit
Up to 30,000 pages2
X340A21G
Toner Cartridge (X340/X340n/X342n)
2500 standard pages1
X340H21G
High yield toner cartridge (X342n)
6000 standard pages1
1
2
Declared yield value in accordance with ISO/IEC 19752.
Based on approximately 5% coverage.
Recycling Lexmark products
To return Lexmark products to Lexmark for recycling:
1 Visit our Web site: www.lexmark.com/recycle.
2 Follow the instructions on the computer screen.
Ordering supplies
70
10
Troubleshooting
•
Setup troubleshooting on page 72
•
Jams and misfeeds troubleshooting on page 75
•
Print and copy troubleshooting on page 84
•
Print quality troubleshooting on page 85
•
Scan troubleshooting on page 88
•
Fax troubleshooting on page 89
•
Error messages troubleshooting on page 91
Troubleshooting
71
Setup troubleshooting
Symptom
Solution
Incorrect language appears on
the display.
1 Press Menu.
2 Press
3 Press
repeatedly until MACHINE SETUP appears on the display.
or
repeatedly until Language appears on the display.
or
repeatedly until the language you want appears on the
.
4 Press
5 Press
.
6 Press
display.
7 Press
or
.
8 Press Back repeatedly to return to the Ready prompt.
Display is not lit.
1 Turn off the MFP.
2 Disconnect the power supply cord from the wall outlet, and then from the
MFP.
3 Plug the cord all the way into the MFP.
4 Plug the cord into an electrical outlet that other electrical devices have
been using.
5 Turn on the MFP.
Software will not install.
If the software does not launch automatically when you insert the CD:
1 Close all open software applications.
2 Temporarily disable any anti–virus programs.
3 Double–click the My Computer icon.
For Windows XP, click Start to access the My Computer icon.
4 Double–click the CD–ROM drive icon.
5 If necessary, double–click setup.exe.
6 Follow the instructions on the computer screen to install the software.
Note: After installing the software, be sure to re–enable your anti–virus
software.
1 Remove the software CD.
2 Turn off the computer.
3 Restart the computer.
4 When the desktop appears, reinsert the software CD.
5 Follow the instructions on the computer screen.
If the MFP is connected to the computer through another device:
1 Disconnect the USB cable from any other device such as a USB hub or
switch box.
2 Directly connect the cable to the MFP and the computer.
Setup troubleshooting
72
Symptom
Solution
Unable to connect over a
network
Make sure you are using the correct cable, that it is securely connected, and
the network options are properly configured.
For more information, see Setting the network options (X342n only).
Note: Connecting over a network is only available on the X342n.
Setup troubleshooting
73
Removing and reinstalling the drivers software
If the software is not functioning properly or a communications error message appears, you may
need to remove and then reinstall the drivers software. If the problems persist, follow these steps:
Note: Before reinstalling, shut down and restart the computer.
1 Disconnect the USB cable from the computer.
2 From the desktop, click Start Æ Programs Æ Lexmark Æ Lexmark Software Uninstall.
3 Follow the instructions on the computer screen to remove the software.
4 Restart the computer.
5 If any Add New Hardware screens appear, click Cancel.
6 Eject and reinsert the software CD.
7 Reconnect the USB cable to the computer.
If the software installation screen does not appear:
1 From the desktop, double-click My Computer.
For Windows XP, click Start to access the My Computer icon.
2 Double-click the CD–ROM drive icon. If necessary, double-click setup.exe.
3 When the MFP software installation screen appears, click Install or Install Now.
4 Follow the instructions on the computer screen to complete the installation.
Setup troubleshooting
74
Jams and misfeeds troubleshooting
Follow these tips to help prevent document and paper jams.
•
Use only recommended print materials.
•
Do not mix paper types in the paper tray.
•
Do not use creased, damp, or curled paper.
•
Flex, fan, and straighten the paper before loading.
•
Make sure the adjustable paper guides are positioned correctly.
•
Make sure the recommended print side has the correct orientation when loading paper in the
paper tray and the manual feeder.
•
Do not overload the paper tray. The paper should be below the max fill line on the inside wall
of the paper tray.
•
Do not remove the paper from the tray while printing.
Symptom
Solution
Paper jam
Clear the paper jam. See Clearing a paper jam on page 76.
Paper or specialty media
Load a smaller amount of paper into the MFP. See Loading various paper
types on page 33 for more information about maximum loading amounts for
each paper type.
• Misfeeds or skews
• Multiple sheets stick
together.
Use only new, unwrinkled paper.
Prepare the stack of paper for loading by flexing or fanning it back and forth.
Straighten the edges on a level surface
Paper does not feed.
Make sure paper is loaded correctly. For more information, see Loading
paper and original documents on page 28.
Load a smaller amount of paper into the MFP. See Loading various paper
types on page 33 for more information about maximum loading amounts for
each paper type.
Paper stacks poorly in the
front output slot.
Extend the paper stop.
Envelopes skew or fail to feed
correctly.
Insert a single envelope in the manual feeder, and make sure the guides are
against both sides of the envelope.
Do not let too much paper stack up in the front output slot.
Jams and misfeeds troubleshooting
75
Clearing a paper jam
Use the following table to locate and clear the paper jam.
Note: To avoid tearing the paper, pull the paper out gently and slowly.
Message
Location of jam
Go to...
200.xx Paper Jam
MFP input sensor
200/201 Paper Jam on page 77
201.xx Paper Jam
Between MFP input and
exit sensors
202.xx Paper Jam
Paper exit sensor
202 Paper Jam on page 80
241.xx Paper Jam
Tray 1
241/242 Paper Jam on page 81
242.xx Paper Jam
Tray 2
251.xx Paper Jam
Manual Feeder
251 Paper Jam on page 82
290 Scanner Jam
ADF
290/291/292 Scanner Jam on
page 83
291 Scanner Jam
292 Scanner Jam
Note: xx represents numbers specific to the jam.
Jams and misfeeds troubleshooting
76
200/201 Paper Jam
CAUTION: The fuser area is hot. Avoid contact with the fuser area to prevent burns.
1 Press the access button on the left side of the MFP, and open the front cover.
1
2
2 Pull on the handle to remove the print cartridge assembly.
Warning: Do not leave the print cartridge assembly exposed to direct light for an extended
period of time. Extended light exposure can cause print quality problems.
Jams and misfeeds troubleshooting
77
3 Remove the jammed paper by gently pulling it straight out.
4 Reinsert the print cartridge assembly.
Jams and misfeeds troubleshooting
78
5 Close the front cover.
6 Press Start to resume printing.
Note: If you receive a 200.20 paper jam at the start of a print job, verify that the media
settings match the acutal media size.
Jams and misfeeds troubleshooting
79
202 Paper Jam
CAUTION: The fuser area is hot. Avoid contact with the fuser area to prevent burns.
1 Open the rear cover.
2 Remove the jammed paper by gently pulling it straight out.
3 Close the rear cover.
4 Press Start to resume printing.
Jams and misfeeds troubleshooting
80
241/242 Paper Jam
1 Open the appropriate paper tray.
Note:
•
•
•
Open Tray 1 for 241 Paper Jam. Open Tray 2 for 242 Paper Jam.
242 Paper Jam will only occur when Tray 2 is installed.
Tray 2 is optional and may be purchased separately.
2 Remove the jammed paper by gently pulling it straight out.
Jams and misfeeds troubleshooting
81
3 Insert the paper tray.
4 Press Start to resume printing.
Note: If you receive a 241.18 paper jam at the start of a print job, verify that the media
settings match the acutal media size.
251 Paper Jam
1 Remove the jammed paper by gently pulling it straight out of the MFP.
2 Press Start to resume printing.
Jams and misfeeds troubleshooting
82
290/291/292 Scanner Jam
1 Open the ADF top cover.
2 Remove the jammed paper by gently pulling it straight out.
3 Close the ADF top cover, and then load the documents back into the ADF.
Note: To prevent document jams, use the scanner glass rather than the ADF for thick,
thin, or a mixed set of documents.
4 Press Start to resume.
Jams and misfeeds troubleshooting
83
Print and copy troubleshooting
Problem
Solution
MFP does not print or
respond
See Display is not lit. on page 72.
Remove and reinstall the software. For more information, see on page 73.
If you are scanning a document, wait until scanning is complete before
using the MFP.
Restart the computer.
Make sure the MFP is set as the default printer.
1 Click Start Æ Settings Æ Printers and Faxes or Printers.
or
Click Start Æ Control Panel Æ Printers and Other Hardware Æ
Printers and Faxes.
2 Double–click the Lexmark X340/X340n/X342n icon.
3 Click Printer, and make sure no check mark appears next to Pause
Printing.
4 Make sure a check mark appears next to Set As Default.
Make sure the front cover is closed.
Make sure the toner cartridge is installed correctly. For more information,
see Installing a toner cartridge on page 62.
Disconnect the USB cable, and then reconnect it.
Print speed is slow.
Close all applications not in use.
Minimize the number and size of graphics and images in the document.
If you are using the manual feeder, this is normal.
Print and copy troubleshooting
84
Print quality troubleshooting
Problem
Solution
Light or faded print
AaBbCc
AaBbCc
AaBbCc
AaBbCc
AaBbCc
You may be able to temporarily extend the toner cartridge life by
redistributing the toner. For more information, see Redistributing toner on
page 63.
Install a new toner cartridge. For more information, see Installing a toner
cartridge on page 62.
Only use new, dry paper.
Make sure the front door is securely latched on both sides.
For copies, adjust the darkness settings by pressing Darkness from the
control panel.
For prints, adjust the darkness settings from the control panel menu:
1 From the control panel, press Menu.
2 Press
3 Press
6 Press
7 Press
repeatedly until MACHINE SETUP appears.
or
repeatedly until Toner Dark appears.
or
repeatedly to adjust the darkness settings.
.
4 Press
5 Press
or
.
to save the settings.
8 Press Back repeatedly to return to the Ready prompt.
Toner specs
AaBbCc
AaBbCc
AaBbCc
AaBbCc
AaBbCc
Print irregularities
Replace the toner cartridge. For more information, see Installing a toner
cartridge on page 62.
Clean the inside of the MFP. For more information, see Cleaning the
inside of the MFP on page 68.
Use only new, dry paper.
AaBbCc
AaBbCc
AaBbCc
AaBbCc
AaBbCc
You may be able to temporarily extend the toner cartridge life by
redistributing the toner. For more information, see Redistributing toner on
page 63. if this does not work, install a new print cartridge. For more
information, see Installing a toner cartridge on page 62.
Vertical lines
Replace the photoconductor. For more information, see Replacing the
photoconductor on page 65.
AaBbCc
AaBbCc
AaBbCc
AaBbCc
AaBbCc
You may be able to temporarily extend the toner cartridge life by
redistributing the toner. For more information, see Redistributing toner on
page 63. if this does not work, install a new toner cartridge. For more
information, see Installing a toner cartridge on page 62.
Print quality troubleshooting
85
Problem
Solution
Horizontal stripes
AaBbCc
AaBbCc
AaBbCc
AaBbCc
AaBbCc
Gray background
AaBbCc
AaBbCc
AaBbCc
AaBbCc
AaBbCc
Replace the toner cartridge. For more information, see Installing a toner
cartridge on page 62.
For copies, adjust the darkness settings by pressing Darkness from the
control panel.
For prints, adjust the darkness settings from the control panel menu:
1 From the control panel, press Menu.
2 Press
3 Press
6 Press
7 Press
repeatedly until MACHINE SETUP appears.
or
repeatedly until Toner Dark appears.
or
repeatedly to adjust the darkness settings.
.
4 Press
5 Press
or
.
to save the settings.
8 Press Back repeatedly to return to the Ready prompt.
Replace the toner cartridge. For more information, see Installing a toner
cartridge on page 62.
Toner smear
Clean the inside of the MFP. For more information, see Cleaning the
inside of the MFP on page 68.
Make sure that the paper type settings match the paper in the tray. For
more information, see Setting the paper type and size on page 35.
Replace the toner cartridge. For more information, see Installing a toner
cartridge on page 62.
Page skew
AaBbCc
AaBbC
AaBbCcc
AaBbCc
AaBbCc
Make sure the paper guides in the tray are aligned with the edges of the
paper. For more information, see Loading paper in the paper tray on
page 28.
Make sure the paper guides for the manual feeder are aligned with the
edges of the paper. For more information, see Loading paper in the
manual feeder on page 32.
Print quality troubleshooting
86
Problem
Solution
Wrinkles or creases
Make sure paper is loaded correctly. For more information, see Loading
paper and original documents on page 28.
Make sure the paper is not too wet. Keep paper in its original wrapper and
out of high humidity areas until needed. Try paper from a freshly opened
pack.
Black pages
Replace the toner cartridge. For more information, see Installing a toner
cartridge on page 62.
If replacing the toner cartridge does not correct the problem, replace the
photoconductor. For more information, see Replacing the
photoconductor on page 65.
The MFP may need to be serviced. Call a service representative.
Print quality troubleshooting
87
Scan troubleshooting
Problem
Solution
Scanner does not respond
Check the display. If there is an error message, see Error messages
troubleshooting on page 91.
Make sure the MFP is set as the default printer and is not on hold or paused.
1 Click Start Æ Settings Æ Printers and Faxes or Printers.
or
Click Start Æ Control Panel Æ Printers and Other Hardware Æ
Printers and Faxes.
2 Double–click the Lexmark X340/X340n/X342n icon.
3 Click Printer, and make sure no check mark appears next to Pause
Printing.
4 Make sure a check mark appears next to Set As Default.
If you are printing a document, wait until printing is done before sending the
scan job.
Scans very slowly
Close all applications not in use.
If you are printing a document, wait until printing is done before sending the
scan job.
To change the scanning resolution to a lower value:
1 From the control panel, press Scan.
2 From the QLINK dialog on the computer screen, select the location you
want to use.
3 Click Edit.
4 Under Resolution, select a lower number.
5 Click OK.
6 Click Scan Now.
Scan was unsuccessful.
Restart the computer.
Remove and reinstall the software. For more information, see Removing
and reinstalling the drivers software on page 74.
Partial document scans
Make sure the document is loaded correctly into the ADF or on the scanner
glass. For more information, see Scanning on page 54.
Make sure that the paper size settings match the paper in the tray. For more
information, see Setting the paper type and size on page 35.
Scan troubleshooting
88
Fax troubleshooting
Problem
Solution
Cannot send or receive a fax
Check the display. If there is an error message, see Error messages
troubleshooting on page 91.
Make sure cable connections for the following hardware are secure, if
applicable:
•
•
•
•
Power supply
Telephone
Handset
Answering machine
Check the telephone wall jack.
1 Plug a telephone into the wall jack.
2 Listen for a dial tone.
3 If you do not hear a dial tone, plug a different telephone into the jack.
4 If you still do not hear a dial tone, connect the printer to a different
telephone jack.
Place a test call to the telephone number to which you want to send a fax to
make sure that it is working correctly.
If the telephone line is being used by another device, wait until the other
device is finished before sending a fax.
To ensure the printer is working correctly, connect it directly to the telephone
line. Disconnect any answering machines, computers with modems, or
telephone line splitters.
Check for and clear any paper jams.
Call Waiting can disrupt fax transmissions. Disable this feature before
sending or receiving a fax. Call your telephone company to obtain the
keypad sequence for temporarily disabling Call Waiting.
Can send but not receive faxes Load paper to print any faxes that have been stored in the printer.
Check to see whether Fax Forwarding is selected.
1 From the control panel, press Fax.
2 Press Menu.
3 Press
4 Press
or
repeatedly until Fax Forwarding appears.
or
repeatedly until Off appears.
.
7 Press
8 Press
repeatedly until FAX ADVANCED appears.
.
5 Press
6 Press
or
.
Fax troubleshooting
89
Problem
Solution
Can receive but not send faxes Make sure the document is loaded correctly into the ADF or on the scanner
glass. For more information, see Faxing on page 42.
Check the Prefix setting.
1 From the control panel, press Fax.
2 Press Menu.
3 Press
4 Press
repeatedly until FAX DEFAULTS appears.
or
repeatedly until Prefix appears.
.
5 Press
6 Press
or
.
7 Enter the numbers you would like to have dialed before each telephone
number.
8 Press
.
9 Press Stop to return to the Ready prompt.
If you used a Speed Dial button:
• Check to make sure it has been programmed for the number that you
wish to dial. For more information, see Setting up shortcuts on
page 47.
• As an alternative, dial the telephone number manually.
MFP receives a blank fax
Ask the sender to verify the original document was loaded correctly.
Check the toner cartridge, and replace it if necessary.
Received fax has poor quality
Ask that the sender:
• Check that the quality of the original document is satisfactory.
• Resend the fax. There may have been a problem with the quality of the
telephone line connection.
• Increase the fax scan resolution.
Fax troubleshooting
90
Error messages troubleshooting
Problem
Solution
Change Media
Press 1 to change the size and/or type of media, or press 2 to ignore the
error message.
Note: To continue the job, press Start. To cancel the job, press Stop.
Close Front Door
Close the front cover until it locks.
Load Manual
Load print media into the manual feeder. For more information, see
Loading paper in the manual feeder on page 32.
Load Media
Load paper in the paper tray. For more information, see Loading paper
in the paper tray on page 28.
USB Not Connected
Check the USB connection at the MFP and at the computer.
QLINK Not Found
Restart the computer.
If the error message still appears after restarting the computer:
1 Insert the Software and Documentation CD.
2 Install the QLINK software.
Digital Line Detected
Make sure the MFP is connected to an analog telephone line.
No dial tone
Make sure cable connections for the following hardware are secure, if
applicable:
•
•
•
•
Power supply
Telephone
Handset
Answering machine
Check the telephone wall jack.
1 Plug a telephone into the wall jack.
2 Listen for a dial tone.
3 If you do not hear a dial tone, plug a different telephone into the jack.
4 If you still do not hear a dial tone,connect the printer to a different
telephone jack.
Line Busy
No answer
Place a test call to the telephone number to which you want to send a
fax to make sure that it is working correctly.
Fax failed
Resend the fax. If the fax still fails, see Cannot send or receive a fax
on page 89.
Scanner Locked, Unlock
Scanner
1 Open the top cover.
31 Defective Print
Cartridge
Remove the defective toner cartridge, and install a new Lexmark toner
cartridge. For supplies information, see on page 69.
2 Move the switch to the left of the scanner glass to the unlock position.
32 Unsupported Print
Cartridge
33 Change Cartridge
Error messages troubleshooting
91
Problem
Solution
34 Short paper
Make sure the correct media type and size have been selected for the
existing print job. For more information, see Setting the paper type
and size on page 35.
• Press Start to resume printing
Note: Pressing Start may truncate the print job.
or
• Press Stop to cancel the job.
Note: You cannot cancel an incoming fax.
37 Insufficient Collation
Area
38 Memory Full
The MFP does not have enough memory to process the job.
• Press Start to resume printing
or
• Press Stop to cancel the job.
Note:
• Clearing the error message in this way may cause some of the job
to be lost.
• You cannot cancel an incoming fax.
If possible, break larger jobs into smaller jobs.
Turn Collate off. For more information, see Printing collated copies on
page 40.
84 Photoconductor Near
Life
Press Start to clear the message and return to the previous status.
Press Stop to cancel the job.
Note: You cannot cancel an incoming fax.
Replace the photoconductor. For more information, see Replacing the
photoconductor on page 65.
84 Replace Photoconductor
Replace the photoconductor. For more information, see Replacing the
photoconductor on page 65.
Note: Normal printing will not resume until the photoconductor has
been replaced.
88 Toner Low
Press Start to resume printing.
Press Stop to cancel the job.
Extend the life of the toner cartridge by redistributing the toner. For more
information, see Redistributing toner on page 63.
If the error message reappears after redistributing the toner, replace the
toner cartridge. For more information, see Installing a toner cartridge
on page 62.
200.xx Paper Jam
See 200/201 Paper Jam on page 77.
201.xx Paper Jam
202.xx Paper Jam
See 202 Paper Jam on page 80.
Error messages troubleshooting
92
Problem
Solution
241.xx Paper Jam
See 241/242 Paper Jam on page 81.
242.xx Paper Jam
251.xx Paper Jam
See 251 Paper Jam on page 82.
290 Scanner Jam
See 290/291/292 Scanner Jam on page 83.
291 Scanner Jam
292 Scanner Jam
9**.xx Service
1 Turn the power off for one minute.
2 Turn the power on.
If the error message reappears, call a Lexmark service representative.
For authorized service representatives in your area, visit
www.lexmark.com.
Error messages troubleshooting
93
Notices
Electronic emission notices
Federal Communications Commission (FCC) compliance information statement
Part 15
The Lexmark X340 (7003-100), X340n (7003-x050), and X342n (7003-110) have been tested and found to
comply with the limits for a Class B digital device, pursuant to Part 15 of the FCC Rules. Operation is subject to
the following two conditions: (1) this device may not cause harmful interference, and (2) this device must
accept any interference received, including interference that may cause undesired operation.
The FCC Class B limits are designed to provide reasonable protection against harmful interference in a
residential installation. This equipment generates, uses, and can radiate radio frequency energy and, if not
installed and used in accordance with the instructions, may cause harmful interference to radio
communications. However, there is no guarantee that interference will not occur in a particular installation. If
this equipment does cause harmful interference to radio or television reception, which can be determined by
turning the equipment off and on, the user is encouraged to try to correct the interference by one or more of the
following measures:
•
•
•
•
Reorient or relocate the receiving antenna.
Increase the separation between the equipment and receiver.
Connect the equipment into an outlet on a circuit different from that to which the receiver is connected.
Consult your point of purchase or service representative for additional suggestions.
The manufacturer is not responsible for any radio or television interference caused by using other than
recommended cables or by unauthorized changes or modifications to this equipment. Unauthorized changes
or modifications could void the user's authority to operate this equipment.
Note: To assure compliance with FCC regulations on electromagnetic interference for a Class B computing
device, use a properly shielded and grounded cable such as Lexmark part number 12A2405 for USB attach.
Use of a substitute cable not properly shielded and grounded may result in a violation of FCC regulations.
Any questions regarding this compliance information statement should be directed to:
Director of Lexmark Technology & Services
Lexmark International, Inc.
740 West New Circle Road
Lexington, KY 40550
(859) 232–3000
Part 68
This equipment complies with Part 68 of the FCC rules and the requirements adopted by the Administrative
Council for Terminal Attachments (ACTA). On the back of this equipment is a label that contains, among other
information, a product identifier in the format US:AAAEQ##TXXXX. If requested, this number must be provided
to your telephone company.
This equipment uses the RJ–11C Universal Service Order Code (USOC) jack.
A plug and jack used to connect this equipment to the premises’ wiring and telephone network must comply
with the applicable FCC Part 68 rules and requirements adopted by the ACTA. A compliant telephone cord and
Notices
94
Notices
modular plug is provided with this product. It is designed to be connected to a compatible modular jack that is
also compliant.
The Ringer Equivalence Number (REN) is used to determine the number of devices that may be connected to
a telephone line. Excessive RENs on a telephone line may result in the devices not ringing in response to an
incoming call. In most but not all areas, the sum of RENs should not exceed five (5.0). To be certain of the
number of devices that may be connected to a line, as determined by the total RENs, contact your local
telephone company. For products approved after July 23, 2001, the REN for this product is part of the product
identifier that has the format US:AAAEQ##TXXXX. The digits represented by ## are the REN without a
decimal point (for example, 03 is a REN of 0.3). For earlier products, the REN is shown separately on the label.
If this equipment causes harm to the telephone network, the telephone company will notify you in advance that
temporary discontinuance of service may be required. If advance notice is not practical, the telephone
company will notify the customer as soon as possible. You will also be advised of your right to file a complaint
with the FCC.
The telephone company may make changes in its facilities, equipment, operations or procedures that could
affect the operation of this equipment. If this happens, the telephone company will provide advance notice in
order for you to make necessary modifications to maintain uninterrupted service.
If you experience trouble with this equipment, for repair or warranty information, contact Lexmark International,
Inc. at www.Lexmark.com or your Lexmark representative. If the equipment is causing harm to the telephone
network, the telephone company may request that you disconnect the equipment until the problem is
resolved.This equipment contains no user serviceable parts. For repair and warranty information, contact
Lexmark International, Inc. See the previous paragraph for contact information.
Connection to party line service is subject to state tariffs. Contact the state public utility commission, public
service commission, or corporation commission for information.
If your home has specially wired alarm equipment connected to the telephone line, ensure the installation of
this equipment does not disable your alarm equipment. If you have questions about what will disable alarm
equipment, consult your telephone company or a qualified installer.
Telephone companies report that electrical surges, typically lightning transients, are very destructive to
customer terminal equipment connected to AC power sources. This has been identified as a major nationwide
problem. It is recommended that the customer install an appropriate AC surge arrestor in the AC outlet to which
this device is connected. An appropriate AC surge arrestor is defined as one that is suitably rated, and certified
by UL (Underwriter's Laboratories), another NRTL (Nationally Recognized Testing Laboratory), or a recognized
safety certification body in the country/region of use. This is to avoid damage to the equipment caused by local
lightning strikes and other electrical surges.
The Telephone Consumer Protection Act of 1991 makes it unlawful for any person to use a computer or other
electronic device, including fax machines, to send any message unless said message clearly contains in a
margin at the top or bottom of each transmitted page or on the first page of the transmission, the date and time
it is sent and an identification of the business or other entity, or other individual sending the message, and the
telephone number of the sending machine or such business, other entity, or individual. (The telephone number
provided may not be a 900 number or any other number for which charges exceed local or long–distance
transmission charges.)
See the section in this publication entitled Setting the Station ID on page 49 in order to program this
information into your fax machine.
Industry Canada compliance statement
This Class B digital apparatus meets all requirements of the Canadian Interference–Causing Equipment
Regulations.
Avis de conformité aux normes de l’industrie du Canada
Cet appareil numérique de la classe B respecte toutes les exigences du Règlement sur le matériel brouilleur
du Canada.
Notices
95
Notices
European Community (EC) directives conformity
Declaration of Conformity with Regard to the EU Directive 1999/5/EC (R&TTE Directive) in languages of the
European Community.
English
Hereby, Lexmark International Inc., declares that this product is in compliance with the
essential requirements and other relevant provisions of Directive 1999/5/EC.
Suomi
Valmistaja Lexmark International Inc. vakuuttaa täten, että tämän tuotteen tyyppinen
laite on direktiivin 1999/5/EY oleellisten vaatimusten ja sitä koskevien direktiivin
muiden ehtojen mukainen.
Nederlands
Hierbij verklaart Lexmark International Inc. dat dit product in overeenstemming is met
de essentiële eisen en de andere relevante bepalingen van richtlijn 1999/5/EG.
Bij deze verklaart Lexmark International Inc. dat dit product voldoet aan de essentiële
eisen en aan de overige relevante bepalingen van richtlijn 1999/5/EG.
Français
Par la présente Lexmark International Inc. déclare que le produit est conforme aux
exigences essentielles et aux autres dispositions pertinentes de la directive 1999/5/
CE
Par la présente, Lexmark International Inc. déclare que ce produit est conforme aux
exigences essentielles et aux autres dispositions de la directive 1999/5/CE qui lui sont
applicables
Svenska
Härmed intygar Lexmark International Inc. att denna produkt står i överensstämmelse
med de väsentliga egenskapskrav och övriga relevanta bestämmelser som framgår av
direktiv 1999/5/EG.
Dansk
Undertegnede Lexmark International Inc. erklærer herved, at følgende produkt
overholder de væsentlige krav og øvrige relevante krav i direktiv 1999/5/EF
Deutsch
Hiermit erklärt Lexmark International Inc., dass sich dieses Produkt in
Übereinstimmung mit den grundlegenden Anforderungen und den anderen relevanten
Vorschriften der Richtlinie 1999/5/EG befindet. (BMWi)
Hiermit erklärt Lexmark International Inc. die Übereinstimmung des Produkts mit den
grundlegenden Anforderungen und den anderen relevanten Festlegungen der
Richtlinie 1999/5/EG. (Wien)
Ελληνικά
Με την παρούσα Lexmark International Inc. δηλώνει ότι το παρόν προϊόν
συµµορφώνεται προς τις ουσιώδεις απαιτήσεις και τις λοιπές σχετικές διατάξεις της
οδηγίας 1999/5/EK.
Italiano
Con la presente Lexmark International Inc. dichiara che questo prodotto è conforme ai
requisiti essenziali e alle altre disposizioni pertinenti stabilite dalla direttiva 1999/5/CE.
Español
Por medio de la presente Lexmark International Inc. declara que este producto
cumple con los requisitos esenciales y cualesquiera otras disposiciones aplicables o
exigibles de la Directiva 1999/5/CE
Português
A Lexmark International Inc. declara que este produto está em conformidade com os
requisitos essenciais e outras provisões da Directiva 1999/5/CE.
Èesky
Spoleènost Lexmark International Inc. tímto prohlašuje, že tento výrobek vyhovuje
základním požadavkùm a dalším ustanovením smìrnice 1999/5/EC, které se na tento
výrobek vztahují.
Notices
96
Notices
Malti
Magyar
A Lexmark International Inc. ezennel kijelenti, hogy ez a termék megfelel az 1999/5/
EC direktíva alapvetõ követelményeinek és más vonatkozó rendelkezéseinek.
Eesti
Käesolevaga kinnitab Lexmark International Inc. selle seadme vastavust direktiivi
1999/5/EÜ põhinõuetele ja nimetatud direktiivist tulenevatele teistele asjakohastele
sätetele.
Latviski
Ar ðo Lexmark International Inc. deklarç, ka ðis produkts atbilst Direktîvas 1999/5/EK
bûtiskajâm prasîbâm un citiem ar to saistîtajiem noteikumiem.
Lithuanian
Lexmark International Inc. deklaruoja, kad šis gaminys tenkina 1999/5/EB Direktyvos
esminius reikalavimus ir kitas šios direktyvos nuostatas.
Polski
Firma Lexmark International Inc. deklaruje z pe³n¹ odpowiedzialnoœci¹, ¿e ten
produkt spe³nia podstawowe wymagania i odpowiada warunkom zawartym w
dyrektywie 1999/5/WE.
Slovak
Lexmark International Inc. týmto vyhlasuje, že tento výrobok vyhovuje technickým
požiadavkám a ïalším ustanoveniam smernice 1999/5/ES, ktoré sa na tento výrobok
vzt’ahujú.
Slovenšèina
Družba Lexmark International Inc. s tem izjavlja, da je ta naprava skladna z bistvenimi
zahtevami in drugimi ustreznimi doloèili direktive 1999/5/EC.
This product is in conformity with the protection requirements of EC Council directives 89/336/EEC, 73/23/
EEC, and 1999/5/EC on the approximation and harmonization of the laws of the Member States relating to
electromagnetic compatibilityand safety of electrical equipment designed for use within certain voltage limits
and on radio equipment andtelecommunications terminal equipment. The Official Declaration of Conformity
may be viewed at www.lexmark.com/rtte.
Compliance is indicated by the following CE marking:
This product satisfies the Class B limits of EN 55022 and safety requirements of EN 60950.
Japanese VCCI notice
Notices
97
Notices
Korean MIC statement
If this symbol appears on your product, the accompanying statement is applicable.
Mercury statement
This product contains mercury in the lamp (<5mg Hg). Disposal of mercury may be regulated due to
environmental considerations. For disposal or recycling information, contact your local authorities or the
Electronic Industries Alliance: www.eiae.org.
Other telecommunications notices
Notice to users of the Canadian telephone network
This product meets the applicable Industry Canada technical specifications.
The Ringer Equivalence Number (REN) is an indication of the maximum number of terminals allowed to be
connected to a telephone interface. The terminus of an interface may consist of any combination of devices,
subject only to the requirement that the sum of the RENs of all the devices does not exceed five. The modem
REN is located on the rear of the equipment on the product labeling.
Telephone companies report that electrical surges, typically lightning transients, are very destructive to
customer terminal equipment connected to AC power sources. This has been identified as a major nationwide
problem. It is recommended that the customer install an appropriate AC surge arrestor in the AC outlet to which
this device is connected. An appropriate AC surge arrestor is defined as one that is suitably rated, and certified
by UL (Underwriter’s Laboratories), another NRTL (Nationally Recognized Testing Laboratory), or a recognized
safety certification body in the country/region of use. This is to avoid damage to the equipment caused by local
lightning strikes and other electrical surges.
This equipment uses CA11A telephone jacks.
Notice to users of the New Zealand telephone network
The following are special conditions for the Facsimile User Instructions.
The grant of a telepermit for any item of terminal equipment indicates only that Telecom has accepted that the
item complies with minimum conditions for connection to its network. It indicates no endorsement of the
product by Telecom, nor does it provide any sort of warranty. Above all, it provides no assurance that any item
will work correctly in all respects with another item of telepermitted equipment of a different make or model, nor
does it imply that any product is compatible with all of Telecom's network services.
This equipment shall not be set up to make automatic calls to the Telecom's 111 Emergency Service.
This equipment may not provide for the effective hand-over of a call to another device connected to the same
line.
This equipment should not be used under any circumstances that may constitute a nuisance to other Telecom
customers.
Some parameters required for compliance with Telecom's telepermit requirements are dependent on the
equipment (PC) associated with this device. The associated equipment shall be set to operate within the
following limits for compliance to Telecom's specifications:
• There shall be no more than 10 call attempts to the same number within any 30 minute period for any
single manual call initiation, and
• The equipment shall go on-hook for a period of not less than 30 seconds between the end of one attempt
and the beginning of the next call attempt.
Notices
98
Notices
• The equipment shall be set to ensure that automatic calls to different numbers are spaced such that there
is not less than 5 seconds between the end of one call attempt and the beginning of another.
South Africa telecommunications notice
This modem must be used in conjunction with an approved surge protection device when connected to the
PSTN.
Using this product in Germany
This product requires a German billing tone filter (Lexmark part number 14B5123) to be installed on any line
which receives metering pulses in Germany. Metering pulses may or may not be present on analog lines in
Germany. The subscriber may request that metering pulses be placed on the line, or can have them removed
by calling the German network provider. Normally, metering pulses are not provided unless specifically
requested by the subscriber at the time of installation.
Using this product in Switzerland
This product requires a Swiss billing tone filter (Lexmark part number 80D1877) to be installed on any line
which receives metering pulses in Switzerland. The Lexmark filter must be used, as metering pulses are
present on all analog telephone lines in Switzerland.
German GS mark notice
Model: Lexmark X34x Series
Machine type: 7003-xxx
Mailing address
Lexmark Deutschland GmbH
Postfach 1560
63115 Dietzenbach
Physical address
Lexmark Deutschland GmbH
Max-Planck-Straße 12
63128 Dietzenbach
Phone: 0180 - 564 56 44 (Product Information)
Phone: 01805 - 00 01 15 (Technical Support)
E-mail: [email protected]
Notices
99
Notices
Noise emission levels
The following measurements were made in accordance with ISO 7779 and reported in conformance with ISO
9296.
1–meter average sound pressure, dBA
Printing
52
Scanning
48
Copying
52
Idling
30
Printer energy consumption
The following table documents the power consumption characteristics of the printer.
Mode
Description
Power consumption
Printing
Printer is generating hard copy output
420 W
Ready
Printer is waiting for a print job
70 W
Power Saver
Printer is in energy saving mode
13 W
Off
Printer is plugged into a wall outlet, but
switch is turned off
0W
The power consumption levels listed in the previous table represent time–averaged measurements.
Instantaneous power draws may be substantially higher than the average.
Power Saver
This printer is designed with an energy–saving mode called Power Saver. The Power Saver Mode is equivalent
to the EPA Sleep Mode. The Power Saver Mode saves energy by lowering power consumption during extended
periods of inactivity. The Power Saver Mode is automatically engaged after this printer is not used for a
specified period of time, called the Power Saver Timeout. The factory default Power Saver Timeout is 30
minutes for the Lexmark X340.
By using the printer configuration menus, the Power Saver Timeout can be modified between 1 minute and 240
minutes. Setting the Power Saver Timeout to a low value reduces energy consumption, but may increase the
response time of the printer. Setting the Power Saver Timeout to a high value maintains a fast response, but
uses more energy.
Total energy usage
It is sometimes helpful to calculate the total printer energy usage. Since power consumption claims are
provided in power units of Watts, the power consumption should be multiplied by the time the printer spends in
each mode in order to calculate energy usage. The total printer energy usage is the sum of each mode's
energy usage.
Notices
100
Notices
ENERGY STAR
Waste from Electrical and Electronic Equipment (WEEE) directive
The WEEE logo signifies specific recycling programs and procedures for electronic products in countries of the
European Union. We encourage the recycling of our products. If you have further questions about recycling
options, visit the Lexmark Web site at www.lexmark.com for your local sales office phone number.
Laser advisory label
A laser notice label may be affixed to this MFP.
LUOKAN 1 LASERLAITE
VAROITUS! Laitteen käyttäminen muulla kuin tässä käyttoohjeessa mainitulla tavalla saattaa altistaa käyttäjän
turvallisuusluokan 1 ylittävälle näkymättömälle lasersäteilylle.
KLASS 1 LASER APPARAT
VARNING! Om apparaten används på annat sätt än i denna bruksanvisning specificerats, kan avnändaren
utsättas för osynlig laserstrålning, som överskrider gränsen för laserklass 1.
Laser notice
This MFP is certified in the U.S. to conform to the requirements of DHHS 21 CFR Subchapter J for Class I (1)
laser products, and elsewhere is certified as a Class I laser product conforming to the requirements of IEC
60825-1.
Class I laser products are not considered to be hazardous. The MFP contains internally a Class IIIb (3b) laser
that is nominally a 5 milliwatt gallium arsenide laser operating in the wavelength region of 770-795 nanometers.
The laser system and MFP are designed so there is never any human access to laser radiation above a Class
I level during normal operation, user maintenance, or prescribed service condition.
Hot surface notice
Notices
101
Index
A
Copy Defaults menu 23
copy troubleshooting 84
copying
collated copies 52
documents 51
enlarging an image 53
reducing an image 53
ADF
loading original documents 36
paper capacity 36
B
broadcast fax 44
buttons, control panel 20
D
delay send 44
distinctive ring patterns 49
documents
faxing 43
loading into ADF 36
loading on scanner glass 37
printing 39
scanning 55
C
canceling
fax job 50
using Stop button 22
card stock 34
cartridge error 91
cartridge, toner
installing 62
ordering 70
recycling 70
redistributing toner 63
removing 61
characters, entering 50
Cleaning
outside of MFP 67
cleaning
inside of MFP 68
scanner glass 67
collating copies 40, 52
connecting the MFP
to a telephone 15
to a telephone wall jack 14
control panel
installing another language overlay 10
using 20
control panel buttons 20
control panel menus
Copy Defaults 23
Fax Advanced 23
Fax Defaults 24
navigating 22
E
electronic emission statement 94
emission statement 94
enlarging an image 53
entering characters 50
envelopes
loading 33
printing 39
error messages
200 Paper Jam 92
201 Paper Jam 92
202 Paper Jam 92
241 Paper Jam 93
242 Paper Jam 93
251 Paper Jam 93
Change Cartridge 91
Change Media 91
close front door 91
Defective Toner Cartridge 91
Digital Line Detected 91
Fax failed 91
Insufficient Collation Area 92
Load Manual 91
102
Index
K
Load Media 91
Memory Full 92
No Answer 91
No Dial Tone 91
Photoconductor Near Life 92
Qlink Not Found 91
Replace Photoconductor 92
Short Paper 92
Toner Low 92
Unsupported Toner Cartridge 91
USB Not Connected 91
error messages troubleshooting 91
keypad, using 50
L
labels 33
loading
card stock 33
documents into the ADF 36
documents on the scanner glass 37
envelopes 33
labels 33
manual feeder 32
paper 28, 32
paper tray 28
transparencies 33
F
fax activity reports 47
Fax Advanced menu 23
Fax Call log 47
Fax Defaults menu 24
Fax Job log 47
fax troubleshooting 89
faxing
adding a pause 45
adding a prefix 45
at a scheduled time 44
canceling a fax job 50
delay send 44
forwarding 46
receiving a fax automatically 45
receiving a fax manually 46
sending automatically 43
sending manually 43
to a group (broadcast) 44
FCC statement 94
forwarding faxes 46
front cover 18
front output slot 18
M
menus, control panel
Copy Defaults 23
Fax Advanced 23
Fax Defaults 24
MFP 84
mode, changing 24
N
network setup 25
noise emission levels 100
O
output location
front output tray 38
rear paper exit 38
selecting 38
overlay, installing 10
P
I
paper
loading 28, 32
paper jam 76
paper saver 40, 52
paper size, setting 35
paper tray,installing 11
paper type, setting 35
pause 45
Phone Book
adding shortcuts 47
deleting shortcuts 48
installing
additional paper tray 11
control panel overlay 10
software 12, 13
J
jams and misfeeds troubleshooting 75
103
Index
editing 48
printing 48
searching 48
photoconductor, replacing 65
power supply port 19
prefix 45
Presto! PageManager 27
print cartridge assembly 65
print properties
opening 26
tabs 26
using 26
print troubleshooting 84
printing
collated copies 40
documents 39
envelopes 39
last page first 41
menu report 22
multiple pages on a sheet 40
transparencies 40
scan troubleshooting 88
scanner glass
cleaning 67
loading documents 37
scanning
configuring additional applications 56
documents 55
from an application 56
options 59
using the computer 55
sending a fax
at a scheduled time 44
automatically 43
manually 43
to a group (broadcast) 44
setting
distinctive ring 49
paper size 35
paper type 35
Speed Dial 47
shortcuts
setting up 47
using 48
software
installing 12, 13
Presto! PageManager 27
print properties 26
QLINK 27
reinstalling 74
removing 74
Speed Dial buttons 48
station ID 49
Q
QLINK, using 27
R
rear cover 19
rear output slot 38
rear paper exit 38
receiving a fax
automatically 45
manually 46
recycling Lexmark products 70
redistributing toner 63
reducing an image 53
removing
software 74
toner cartridge 61
reports
fax activity 47
Fax Call log 47
Fax Job log 47
menu 22
Phone Book 48
T
timeout option 24
toner
low 92
redistributing 63
toner cartridge
installing 62
ordering 70
recycling 70
redistributing toner 63
removing 61
transparencies
printing 40
troubleshooting
copy 84
S
safety information 2
104
Index
error messages 91
fax 89
jams and misfeeds 75
print 84
scan 88
setup 72
U
USB port 19
W
Web site 8
105