1
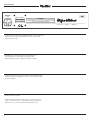
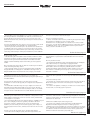
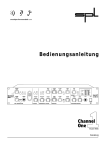
BEDIENUNGSANLEITUNG
BASSKICK 101
GAIN
BASS
MID
TREBLE
MASTER
5
0
INPUT
4 0
5
10
-5
+5
-5
+5
-5
+5
0
WAT T
B A S S A M P L I F I E R
FX LOOP
10
CLIP
SEND
MAINS
RETURN LINE OUT PHONES
ENGLISH
4 0 WA T T B A S S A M P L I F I E R
ITALIANO
M A N UA L
FRANÇAIS
DEUTSCH
®
BASSKICK-MANUAL
Congratulations and thank you for purchasing the
HUGHES & KETTNER BassKick!
The team of bass players and techs that developed the BassKick amps had
three key design goals in mind: they should deliver high quality bass
sounds, be very easy to use, and include all the key features working
musicians need.
The BassKick 101, with its compact dimensions and solid sound
foundation, is designed primarily for studio and home-recording sessions.
A key role in the generation of this amp’s tone is played by the 12-inch
PowerPro dual-cone loudspeaker. The larger cone, which is engineered not
to be stiff but responsive, articulates the low end with precision and punch;
the middle cone rounds out the mids and highs with presence and
transparency.
Whether you use it just with headphones for practice, or combined with
effect units, or beefed up with an extra power amp in live use, the BassKick
101 makes a strong impression in all applications due to its tone and
technology.
We wish you much enjoyment and success with your new
BassKick amp!
Herzlichen Glückwunsch zur Wahl Deines BassKick!
wobei der Mittenkonus für ein “rundes” und transparentes
Wiedergabeverhalten sorgt.
Ein Team aus Bassisten und Technikern hat die BassKick Amps mit dem Ziel
entwickelt, anspruchsvolle Bassounds mit einfachster Bedienung und
praxisgerechter Ausstattung zu kombinieren.
Ob mit Kopfhörer im Übungseinsatz, im Zusammenspiel mit Effektgeräten
oder ergänzt durch eine Zusatzendstufe im Liveeinsatz - der BassKick 101
überzeugt in allen Situationen durch seinen Sound und sein klares Konzept.
Der BassKick 101 ist dabei für den Einsatz im Studio und bei (Home-)
Recordingsessions konzipiert. Gerade hier sind seine kompakte Bauweise in
Kombination mit gesundem Soundfundament gefragt. Eine zentrale Rolle
spielt dabei der 12” Power Pro dual cone Lautsprecher, seine weich
aufgehängte, großflächige Membran reproduziert authentisch die Bässe,
Viel Erfolg und Spaß am ”tone” mit Deinem BassKick Amp!
FELICITATIONS POUR LE CHOIX DE TON BASSKICK !
fidèlement les basses, tandis que le cone veille à une reproduction des sons
arrondie et transparente.
Au casque, en répétition, en jouant avec des effets ou sur scène avec un
ampli supplémentaire, le BassKick 101 fait ses preuves dans toutes les
situations grâce à ses sonorités et sa facilité d’utilisation.
Une équipe de bassistes et de techniciens a développé les amplis BassKick
101 pour allier des sons de basse de très grande qualité à une utilisation
simple et un matériel pratique.
Le BassKick a été conçu pour être utilisé en studio ou lors d’enregistrements
privés. C’est pourquoi, de bonnes sonorités et une construction
irréprochable sont nécessaires. Le haut-parleur 12“ Power Pro Dual Cone
est très important . La membrane du HP fixée délicatement reproduit
Grazie e congratulazioni per l’acquisto del BassKick 101
Hughes & Kettner.
Il team di bassisti e tecnici incaricati dello sviluppo degli amp BassKick ha
tre obiettivi in mente: la qualità del suono, la semplicità di utilizzo e la
presenza di tutte quelle funzioni oggi considerate indispensabili da ogni
bassista.
Il BassKick 101, con le sue dimensioni compatte e la sua “solidità” sonora,
è stato progettato principalmente per un utilizzo in studio o per homerecording. Un ruolo fondamentale nella generazione del suono di questo
amplificatore è giocato dallo speaker a 12” Power Pro di tipo a doppia
2
Nous te souhaitons beaucoup de plaisir et de succès avec le
son de ton ampli BassKick !
membrana. Il cono più grande permette una riproduzione delle frequenze
più basse estremamente precisa e ricca di punch, mentre il cono più
piccolo assicura una riproduzione delle medie e degli alti ricca di presenza
e trasparenza.
Sia che lo utilizziate anche solo in cuffia per studio, abbinato ad un
processore di segnale esterno, oppure dotato di un finale aggiuntivo per un
utilizzo dal vivo, il BassKick 101 vi darà sempre moltissime soddisfazioni,
grazie alla sua risposta timbrica e alla sua tecnologia.
Vi auguriamo tante ore di divertimento e successo con il
vostro nuovo BassKick 101.
BASSKICK-MANUAL
BASSKICK 101
4 0 WA T T B A S S A M P L I F I E R
TABLE OF CONTENTS:
2
4
7
3.2 POWER AMP CLIPPING LED
4.0 SERVICE AND PREVENTIVE MAINTENANCE
5.0 TROUBLESHOOTING
6.0 TECHNICAL SPECIFICATIONS.
IMPORTANT SAFETY INSTRUCTIONS
8
9
10
13
ENGLISH
Page
INTRODUCTION
1.0 CONNECTIONS AND CONTROL FEATURES
2.0 STANDARD SETUP / CABLE CONNECTIONS
3.0 OPERATING THE BASSKICK 101
3.1 INPUT AND EQ SECTIONS
12,13
INHALT:
Page
INTRODUCTION
2
1.0 BRANCHEMENTS ET COMMANDES
4
2.0 REGLAGES STANDARDS / RACCORDEMENT 7
3.0 UTILISATION DU BASSKICK 101
3.1 SECTION D’ENTRÉE ET REGLEMENT DU SON
8
9
10
13
WICHTIGE SICHERHEITSHINWEISE
12
3.2 CONTROLE DE L’AMPLI
4.0 MAINTENANCE ET ENTRETIEN
5.0 PROBLEMES ET REMEDES
6.0 DONNEES TECHNIQUES
8
CONSEILS DE SECURITE IMPORTANTS
9
10
15
14
FRANÇAIS
SOMMAIRE:
3.2 DIE ENDSTUFENKONTROLLE
4.0 WARTUNG UND PFLEGE
5.0 MÖGLICHE FEHLERQUELLEN
6.0 TECHNISCHE DATEN
DEUTSCH
Seite
EINFÜHRUNG
2
1.0 ANSCHLÜSSE UND BEDIENELEMENTE
4
2.0 STANDARD SETUP / VERKABELUNG
7
3.0 BEDIENUNG DES BASSKICK 101
3.1 EINGANGSSEKTION UND KLANGREGELUNG
INTRODUZIONE
1.0 COLLEGAMENTI E CONTROLLI
2.0 SETUP STANDARD E CONNESSIONI
3.0 UTILIZZO DEL BASSKICK 101
3.1 INGRESSO E EQUALIZZAZIONE
P.
2
4
7
3.2 AMPLIFICATORE DI POTENZA E LED CLIP
4.0 ASSISTENZA E MANUTENZIONE
5.0 MALFUNZIONAMENTI
6.0 DATI TECNICI
IMPORTANTI AVVERTIMENTI DI SICUREZZA
8
9
10
15
15
3
ITALIANO
INDICE
BASSKICK-MANUAL
GAIN
BASS
MID
TREBLE
MASTER
5
0
4 0
5
10
-5
+5
-5
+5
-5
+5
INPUT
1.0 CONNECTIONS AND CONTROLS
INPUT: Connect basses featuring passive and active pickups to this
input.
GAIN: Controls the input sensitivity of the BassKick’s preamp. Adjust
it to match your instrument’s output level. Higher gain settings
produce punchy rock sounds.
0
WAT T
B A S S A M P L I F I E R
FX LOOP
10
CLIP
SEND
RETURN LINE OUT PHONES
MAINS
In center position (12 o’clock) the signal remains unaffected.
MID: Determines to what extent the midrange frequency range is
boosted or cut.
TREBLE: Controls the upper frequencies and subsequently the
crispness and overtone content in your bass sound. For a warmer
sound, this control is situated right after the input stage in the signal
chain. In other words, it also influences preamp saturation.
BASS: This voicing control is used to define the bottom end.
1.0 ANSCHLÜSSE UND BEDIENELEMENTE
INPUT: Anschlußbuchse für aktive oder passive Bässe.
GAIN: Bestimmt die Eingangsempfindlichkeit der BassKick Vorstufe
und dient damit zur Pegelanpassung des verwendeten Basses. Bei
höheren Gaineinstellungen lassen sich drückende Rockbassounds
realisieren.
BASS: Kontrolliert den tiefen Frequenzbereich aktiv. In der
Mittelstellung bleibt das Signal unbeeinflußt.
1.0 BRANCHEMENTS ET COMMANDES
INPUT: entrée pour les basses actives ou passives.
GAIN: détermine le niveau d’entrée du préampli du BassKick et sert
donc à régler le niveau de la basse utilisée. En faisant un réglage du
GAIN plus haut, on peut obtenir un son rugueux de basse rock.
BASS: contrôle de manière active les fréquences graves. La position
du milieu n’influence pas le signal sonore.
1.0 COLLEGAMENTI E CONTROLLI
INPUT: Per il collegamento di bassi sia attivi che passivi.
GAIN: Controlla la sensibilità del preamp del BassKick 101.
Regolatelo in modo adeguato rispetto al livello di uscita del vostro
strumento. Valori più alti determinano una timbrica più rock e ricca
di punch.
BASS: Controlla la risposta timbrica sulle frequenze più basse.
In posizione centrale, il segnale non viene modificato.
4
MID: Bestimmt, wie stark der Mittenfrequenzbereich betont oder
abgedämpft wird.
TREBLE: Kontrolliert die hohen Frequenzen des Bassounds und damit
den ”Biß” und Obertongehalt. Für wärmeren Sound arbeitet dieser
Regler direkt hinter der Eingangsstufe, beeinflußt also auch die
Preamp Übersteuerung.
MASTER: Regelt die Bühnenlautstärke des BassKick. Der
Ausgangspegel der LINE OUT Buchse bleibt davon unbeeinflußt.
Bei großer Aussteuerung bitte die POWERAMP CLIP LED beachten!
MID: détermine à quel point les fréquences moyennes sont soutenues
ou assourdies.
TREBLE: contrôle les fréquences aigües du son de la basse et donc
aussi le „mordant“ ainsi que l’harmonie des sons. Pour obtenir des
sons plus chaleureux, ce régulateur est branché directement derrière
l’étage d’entrée et l’influence aussi la surmodulation du préampli.
MASTER: règle le volume du son sur scène du BassKick. Il n’influence
pas le niveau de la prise LINE OUT. Lors de réglages accentués, il faut
faire attention à la POWERAMP CLIP LED.
MID: Controlla il tipo di intervento (taglio o enfasi) sulle frequenze
medie.
TREBLE: Controlla la risposta timbrica sulle frequenze superiori e
conseguentemente la brillantezza e la quantità di armonici superiori
nel suono. Per una timbrica sempre e comunque calda, questo
controllo è situato immediatamente dopo lo stadio di ingresso del
segnale. In altre parole, influenza anche la saturazione del preamp.
MASTER: Determines the BassKick’s stage volume; the LINE OUT jack
signal level is not affected by this control. At higher volume levels,
keep on eye on the POWER AMP CLIP LED.
LINE OUT: Use this balanced output to send signals to a mixing
console or additional power amp. The signal routed to this jack is
affected by the EQ section but not the MASTER control.
POWERAMP CLIP LED: Indicates the BassKick power amp is being
overdriven. Turn the MASTER control down when this LED
illuminates.
PHONES: Plug your headphones into this jack. Whenever this jack is
occupied, the BassKick speaker output is automatically muted.
FX SEND: Connect this jack to your FX processor’s INPUT jack.
MAINS: AC power switch.
ENGLISH
BASSKICK-MANUAL
FX RETURN: Connect this jack to your FX processor’s OUTPUT jack.
POWERAMP CLIP LED: indique une surmodulation de l’ampli du
BassKick. Si cette LED s’allume, il faut baisser le niveau du MASTER.
DEUTSCH
FX- RETURN: Verbinde den Output Deines Effektgerätes mit dieser
Buchse.
PHONES: Buchse zum Anschluß eines Kopfhörers, - schaltet bei
Anschluß den Lautsprecherausgang des BassKick ab.
MAINS: Netzschalter.
FX-SEND: cette sortie doit être reliée à l’entrée de ton pédalier à effets
LINE OUT: sortie ligne du préampli BassKick qui sert à le relier à une
table de mixage ou à un ampli. Cette sortie est branchée après le
réglage de la tonalité des amplis, mais n’est pas influencée par le
MASTER.
FX-RETURN: cette prise est à relier avec la sortie de ton pédalier à
effets.
PHONES: prise pour brancher un casque. Quand un casque est
branché, les HP du BassKick sont coupés.
MAINS: interrupteur secteur
MASTER: Controlla il volume generale di uscita del BassKick 101; il
segnale alla presa LINE OUT non ne è influenzato. Ad alti livelli
d’uso, verificate lo stato del led POZER AMP CLIP.
POWERAMP CLIP LED: Segnala che il finale del BassKick 101 è
sovralimentato. Quando ciò si verifica, abbassate il controllo
MASTER.
FX SEND: Per collegarsi alla presa INPUT di un eventuale processore
effetti.
FX RETURN: Per collegarsi alla presa OUTPUT di un eventuale
processore effetti.
LINE OUT: Utilizzate questa uscita bilanciata per inviare il segnale al
banco di mixaggio o ad un finale di potenza aggiuntivo. Il segnale in
uscita da questa presa risente degli interventi della sezione EQ, ma
non del controllo MASTER.
PHONES: Per il collegamento di una cuffia. Inserendo un jack in
questa presa, l’altoparlante del BassKick 101 viene automaticamente
escluso.
5
FRANÇAIS
FX- SEND: Verbinde diesen Ausgang mit dem Input Deines
Effektgerätes.
LINE OUT: Ausgang der BassKick Vorstufe zum Anschluß an ein
Mischpult bzw. an eine Endstufe. Dieser Ausgang ist der
Klangregelung des Amps nachgeschaltet, bleibt jedoch vom Master
unbeeinflußt.
ITALIANO
POWERAMP CLIP LED: Indiziert eine Übersteuerung der BassKick
Endstufe. Bei Aufleuchten dieser LED bitte die MASTER Einstellung
etwas zurücknehmen.
BASSKICK-MANUAL
Max. power
consumption
65 VA
Ser. No.
230 V~
T 0,25 A
100 V~
SB 630 mA
117 V~
SB 500 mA
CAUTION!
TO PREVENT THE RISK OF FIRE AND SHOCK HAZARD DON´T EXPOSE THIS APPLIANCE
TO MOISTURE OR RAIN.DO NOT OPEN CASE; NO USER SERVICEABLE PARTS INSIDE.
REFER SERVICING TO QUALIFIED SERVICE PERSONNEL.
FUSE
MADE IN ST. WENDEL / GERMANY
50 - 60 Hz
MAINS SOCKET: Connect the included Euro-norm mains cable to this
socket. The fuse holder is integrated in the socket; use specified
replacement fuses only!
NETZBUCHSE: Anschlußbuchse für Euronetzkabel. Der
Sicherungshalter ist in die Netzbuchse integriert. Nur
Netzsicherungen mit dem angegebenen Wert verwenden!
PRISE SUR SECTEUR: prise pour brancher le cordon d’alimentation,
fixation des fusibles est intégrée à la prise. N’utiliser que des fusibles
de secteur adaptés.
MAINS: Tasto d’accensione.
MAINS SOCKET: Collegate a questa presa il cavo rete a norme EU
fornito con il BassKick 101. Il portafusibile è integrato nella presa:
utilizzate, nel caso, esclusivamente fusibili dello stesso tipo.
6
BASSKICK-MANUAL
Mixing Console
MASTER
0
4 0
5
10
-5
+5
-5
+5
-5
+5
0
INPUT
WAT T
B A S S A M P L I F I E R
FX LOOP
LINE OUT
10
CLIP
SEND
RETURN LINE OUT PHONES
MAINS
RETURN
SEND
FX Devices
Phones
2.0 STANDARD SETUP / CABLE
CONNECTIONS
to adjust the sensitivity of the preamp. Dial in a setting just under the
overdrive threshold, i.e. where the signal remains undistorted when you are
playing with a normal attack. Note that at high TREBLE settings, the
BassKick preamp will distort at a lower threshold.
3.0 OPERATING THE BASSKICK 101
2. The midrange setting:
A bass guitar’s basic sound depends primarily on the midrange!
The midrange pot lets you drastically alter the tone, from bright slap sounds
(mids cut) to distinct, aggressive rock sounds (mids boosted).This is why
many players start with the midrange when they are dialing in the desired
sound. The next step is to select a suitable bass or bottom end setting to
support the mids and adjust for the acoustic properties of a given venue, for
3.1 THE INPUT AND EQ SECTIONS
1. The gain setting:
The BassKick preamp’s response depends largely on the type of instrument
you are using, its pickups, and its output signal level. Use the gain control
2.0 STANDARD SETUP / VERKABELUNG
3.0 BEDIENUNG DES BASSKICK 101
3.1 EINGANGSSEKTION UND KLANGREGELUNG
1. Die Gaineinstellung:
Das Verhalten der BassKick Vorstufe hängt entscheidend vom verwendeten
Instrument, dessen Tonabnehmer und Ausgangspegel ab. Die Anpassung
erfolgt mit dem Gainregler.: Der Regler wird bei durchschnittlicher
2.0 REGLAGES STANDARDS/
RACCORDEMENT
3.0 UTILISATION DU BASSKICK 101
3.1 SECTION D’ENTREE ET REGLAGE DU SON
a) Le réglage du gain :
Les réactions du préampli du BassKick dépendent beaucoup de l’instrument
utilisé, des micros et du réglage de sortie. Le réglage s’opère avec le bouton
2.0 SETUP STANDARD E CONNESSIONI.
3.0 UTILIZZO DEL BASSKICK 101
3.1 INGRESSO E EQUALIZZAZIONE
1. Il controllo Gain:
La risposta del preamp del BassKick 101 dipende in larga misura dal tipo di
strumento che andrete a utilizzare, dai suoi pick-up e dal livello del segnale
in uscita. Utilizzate il controllo Gain per regolare la sensibilità del preamp.
Impostatelo in modo da ottenere un suono indistorto suonando con un
Spieldynamik so weit aufgedreht, daß gerade keine Verzerrung mehr hörbar
ist. Es ist dabei zu beachten, daß die Poweramp Clip LED nicht aufleuchtet.
Beachte, daß auch starkes Anheben des TREBLE die Übersteuerung der
BassKick Vorstufe erhöht.
2. Die Abstimmung der Klangregelung:
Grundsound für Instrumentalbass entsteht in den Mitten! Der Mittenregler
ermöglicht drastische Verschiebungen im Spektrum von knalligen
Slapsounds (bei Absenkung) bis zu knurrigen Rocksounds (Anhebung). Oft
steht deshalb die Mittenbearbeitung am Anfang der Soundabstimmung hier wird die “grobe Richtung” vorgegeben. Im nächsten Schritt kann dann
mit der Einstellung des Bassbereiches dieser Sound unterstützt oder ggf.
GAIN. Lors d’un jeu normal, le bouton doit être tourné de telle manière
qu’on entende plus de distorsion. Il faut faire attention à ce que la
POWERAMP CLIP LED ne s’allume pas. Il faut remarquer que si on tourne
trop le bouton TREBLE, on augmente la surmodulation du préampli du
BassKick.
b) Réglage de la tonalité :
Les sons de base d’une basse se trouve dans les médiums ! Le régulateur
des médiums permet de varier de manière importante un registre allant du
slapping claquant (en réglant vers le bas) au son rugueux du rock (en
réglant vers le haut). C’est pourquoi, le réglage des médiums est souvent
opéré au début, car ils indiquent la tendance générale. Ensuite, on améliore
ENGLISH
TREBLE
DEUTSCH
MID
FRANÇAIS
BASS
5
attacco normale. Notate che, con valori alti del controllo HIGH, il preamp
del BassKick 101 può andare in distorsione a livelli inferiori del controllo
GAIN.
2. I controlli EQ:
Il suono di un basso è determinato in larga misura dalle sue frequenze
medie!
Il potenziometro dei medi consente di modificare in modo sensibile il
vostro suono, passando da un timbro brillante adatto allo slap (medi tagliati)
sino a un suono rock aggressivo (medi enfatizzati). Questa è la ragione per
cui molti bassisti iniziano proprio da questo controllo per ricercare la
timbrica desiderata. Il passo successivo diventa quindi aggiustare le
7
ITALIANO
GAIN
BASSKICK-MANUAL
instance to eliminate muddy tone caused by stage or room resonance.
Once the mids and bottom end sound the way you want them to, the upper
end is relatively simple to define. The TREBLE control acts very directly on
the frequencies that the dual-cone reproduces; basically you just decide if
you want a bright, metallic sound or a throaty amp tone.
3.2 POWER AMP CLIPPING LED
sounds fairly alarming, it won’t harm the speaker or power amp. The EQ
controls also affect the overall level, so you can also try turning down these
controls rather than the MASTER knob to clean up a clipped signal.
NOTE: The POWER AMP CLIP LED indicates power amp distortion only. It
will not indicate distortion caused by an FX processor, active circuitry or the
BassKick preamp.
The POWER CLIP LED is there to alert you to power amp distortion. If the
LED illuminates briefly at transient peaks, for instance when you are
slapping the strings, then in most cases you won’t hear distortion. If the LED
illuminates for longer periods, distortion will become audible. Although it
nötige Raumanpassungen, wie das Eleminieren von “Dröhnfrequenzen”
vorgenommen werden. Die Abstimmung der Höhen ist danach recht
einfach - der Regler wirkt insbesondere auf die vom Mittenkonus
wiedergegebenen Frequenzen und entscheidet somit über einen “seidigknackigen” oder “vollen” Ampsound.
3.2 DIE ENDSTUFENKONTROLLE
Um Endstufenverzerrungen leichter wahrnehmbar zu machen, werden
diese beim BassKick 101 durch die POWERAMP CLIP LED
optisch angezeigt. Ein kurzzeitiges Aufleuchten (z.B. im Anschlag beim
Slappen) ist dabei im Regelfall akustisch nicht wahrnehmbar. Erst bei
längerem Aufleuchten des LED´s treten hörbare Verzerrungen auf. Eine
Gefährdung der Endstufe oder des Lautsprechers durch Übersteuerung ist
dabei jedoch absolut ausgeschlossen. Auch Anhebung der Klangregelung
verstärkt den Pegel vor der Endstufe, alternativ zum MASTER Regler kann
also auch an der Klangregelung Pegel zurückgenommen werden.
HINWEIS: Die POWERAMP CLIP LED zeigt ausschließlich
Endstufenübersteuerung an. Verzerrungen, die in Effektgeräten, Aktivbässen
oder der BassKick Vorstufe auftreten können, werden nicht angezeigt.
ce son en réglant les graves, ou le cas échéant, en adaptant le son à la salle
grâce à l’élimination des interférences. Après quoi le réglage des aigüs est
assez simple. Le régulateur agit principalement sur les fréquences émises
par le cône du milieu et décide ainsi entre le son de l’ampli profond et
chaleureux ou saturé.
distorsions se font entendre, mais un risque par surmodulation de l’ampli ou
du haut-parleur est tout à fait exclu. En augmentant le niveau du son, on
peut augmenter le niveau de l’ampli, c’est à dire qu’outre le réglage du
MASTER, on peut changer le réglage de la tonalité.
3.1 CONTROLE DE L’AMPLI
N.B. : la POWERAMP CLIP LED indique seulement une surmodulation de
l’ampli. Les distorsions produites par des effets, des basses actives ou le
préampli du BassKick ne sont pas signalées.
On peut facilement visualiser les distorsions de l’ampli, ces dernières sont
indiquées grâce à la POWERAMP CLIP LED du BassKick 101. Si elle devait
s’allumer brièvement, par exemple lors du slapping, on ne devrait rien
remarquer acoustiquement. Si elle reste allumée plus longtemps, des
frequenze più basse relativamente alle medie e alle caratteristiche acustiche
del locale, ad esempio per eliminare fastidiose risonanze del palco o
ambientali. Una volta che medie e bassi lavorano nel modo desiderato, le
frequenze superiori sono facilmente regolabili. Il controllo TREBLE agisce in
modo diretto sulle frequenze riprodotte dal tweeter: regolatelo in funzione
della brillantezza che volete dare al vostro suono.
distorsione. Ma se il led rimane acceso più a lungo, questa distorsione
diventa avvertibile. Anche se la cosa può sembrare allarmante, non esiste
comunque il rischio di danneggiare l’amplificatore o l’altoparlante. Anche i
controlli di EQ influenzano il livello generale, per cui, oltre ad agire sul
controllo MASTER, potete modificarne la posizione per risolvere una
situazione di clipping.
3.2 AMPLIFICATORE DI POTENZA E LED CLIP
ATTENZIONE: il led POWER AMP CLIP indica una distorsione del finale di
potenza. Non potrà pertanto segnalare problemi di saturazione derivanti da
processori effetti esterni, circuitazione attiva o dallo stesso preamp del
BassKick 101.
Il led POWER CLIP è fatto per indicare una distorsione che avviene a livello
del finale di potenza. Se il led si illumina brevemente in occasione dei
picchi di segnale (ad esempio “slappando”) ciò non significa che avrete una
8
BASSKICK-MANUAL
- Avoid mechanical shocks and exposure to extreme heat, dust and moisture.
- When connecting peripheral devices, always heed the proper safety
4.0 WARTUNG UND PFLEGE
Die BassKick Amps sind wartungsfrei. Dennoch gibt es einige Grundregeln,
deren Einhaltung die hohe Lebensdauer Deines Amps sichern:
- Refrain from do-it-yourself repairs! Even internal fuses should be replaced
by a qualified technician.
Use a brush to clean the flock covering and a soft damp cloth for all metal
parts.
- Beachte peinlich genau die Spezifikationen von Zusatzgeräten. Schließe
nie Ausgänge mit zu großem Pegel (z.B. Endstufen) an Deinen Amp an.
- Prüfe vor Anschluß des Gerätes immer die vorhandene Netzspannung.
Kontaktiere im Zweifelsfall den Bühnentechniker, Hausmeister o.ä. .
- Sorge immer für eine technisch einwandfreie Geräteperipherie!
- Sorge stets für freie Luftzirkulation an die Kühlflächen Deines Amps.
- Versuche keine ”do it yourself” Reparaturen! Auch der Tausch interner
Sicherungen sollte von einem erfahrenen Techniker vorgenommen werden.
- Vermeide in jedem Fall starke mechanische Erschütterungen, extreme
Hitze und das Eindringen von Staub und Nässe.
Flockoberflächen lassen sich am besten mit einer Bürste reinigen. Für
Metallflächen verwendest Du bitte ein weiches Tuch.
4.0 MAINTENANCE ET ENTRETIEN
Les amplis BassKick ne nécessitent pas d’entretien. Mais il existe certaine
règles de base à respecter pour que ton ampli dure plus longtemps :
- Respecte scrupuleusement les données techniques des appareils
complémentaires. Ne branche jamais des sorties qui ont un niveau de
réglage trop important, par exemple des sorties d’autres amplis sur ton
ampli.
- Fais attention à ce que les autres appareils et instruments soient dans un
état impeccable.
- Vérifie toujours avant de brancher tes appareils le voltage du secteur. En
cas de doutes, demande au technicien.
- Veille à ce que l’air circule librement près des ventilateurs de ton ampli
- N’entreprend jamais de réparations toi-même ! Même le changement des
fusibles internes doit être fait par un spécialiste.
Les surfaces Durafloc TM se nettoient avec une brosse . Les surfaces en
métal sont à nettoyer avec un chiffon doux.
- Evite à tout prix les chocs, une chaleur trop importante, la poussière et
l’humidité.
4.0 ASSISTENZA E MANUTENZIONE
Gli amplificatori BassKick non richiedono manutenzione di alcun tipo.
Tuttavia, esistono alcuni accorgimenti che vi permetteranno di allungarne
sensibilmente l’esistenza.
- Assicuratevi che tutto ciò che andrete a collegarvi (cavi, apparecchiature) sia in
perfette condizioni.
ENGLISH
- Ensure air can circulate around your amp’s ventilation ducts.
- Quando utilizzate apparecchiature ausiliarie, seguite sempre le relative
istruzioni di sicurezza. Non collegate mai al BASSKICK 101 altoparlanti con
impedenza (ohm) insufficiente, e non collegate mai all’ingresso del ampli segnali
già amplificati o di eccessivo livello.
- Assicuratevi che la tensione elettrica locale corrisponda a quanto riportato sul
retro dell’amplificatore. In caso di dubbio, verificate prima di procedere al
collegamento.
- Assicuratevi che circoli sufficiente aria di ventilazione attorno all’ampli.
- Evitate riparazioni “fai-da-te”! Anche i fusibili interni devono essere sostituiti
esclusivamente da personale qualificato.
- Evitate shock meccanici violenti, nonché l’esposizione a caldo, polvere o
umidità eccessive.
- Utilizzate una spazzola per pulire il rivestimento esterno e un panno morbido
per tutte le parti in metallo.
9
DEUTSCH
- Ensure all peripheral devices, cords and cables are in a state of good repair.
- Ensure the local AC power is at the right rating before plugging in the
amp. If in doubt, ask the venue’s sound technician or stage hand.
FRANÇAIS
The BassKick amps do not require service of any type. However, there are a
few precautions you should heed to ensure your amp lasts for many years.
precautions. Never connect speakers with insufficient impedance (ohms),
and never connect devices with high output signal levels (e.g. power amps)
to the amp’s input.
ITALIANO
4.0 SERVICE AND PREVENTIVE MAINTENANCE
BASSKICK-MANUAL
5.0 TROUBLESHOOTING
The BassKick is not getting any power:
- Check the mains cable to see if it is connected properly.
- The mains fuse is defective. Replace the fuse with another identical fuse. If
this fuse also blows, consult your Hughes & Kettner dealer.
The BassKick is connected properly, but no sound is audible.
- The GAIN and/or MASTER controls are turned all the
way down. Dial in a higher setting.
- You have patched in an effects processor and you either connected the
5.0 MÖGLICHE FEHLERQUELLEN /
TROUBLESHOOTING
Der BassKick läßt sich nicht einschalten.:
• Es liegt keine Netzspannung an. Überprüfe den korrekten Anschluß der
Netzverbindungen.
• Die Netzsicherung ist defekt. Bitte ersetze die Netzsicherung durch eine
neue Sicherung mit entsprechendem Wert. Wende Dich bei erneutem
Defekt an Deinen Hughes & Kettner Fachhändler.
5.0 PROBLEMES ET REMEDES
Le BassKick ne s’allume pas :
• Le secteur n’est pas branché. Vérifie tous les branchements sur le secteur.
• Le fusible de secteur est défectueux. Remplace le avec un fusible de
même valeur. Si le cas se représente adresse-toi à ton revendeur Hughes &
Kettner.
Le BassKick est correctement branché, mais il n’en sort aucun son
• GAIN ou MASTER ne sont pas en bonne position. Procède à un nouveau
réglage.
5.0 MALFUNZIONAMENTI
Il BassKick 101 non si accende:
• Verificate che il cavo di alimentazione sia collegato correttamente
• Il fusibile di alimentazione è interrotto. Sostituitelo con un altro di uguale
tipo.
• Nel caso in cui dovesse saltare nuovamente, rivolgetevi ad un Centro
Assistenza autorizzato Hughes & Kettner.
10
cords incorrectly or the device is off. Check out the FX signal chain.
- You have plugged into the headphones jack, which automatically switches
the internal speaker off. Disconnect the headphones.
When the LINE OUT jack is in use, there is an annoying hum.
- The input circuit of the device connected to the LINE OUT jack is
unbalanced and an electrical or magnetic field is causing interference. Use
a balanced input or rearrange the cables to reduce interference to a
minimum. Do not run signal cables and power cables parallel to each
other; if they must both run near each other, try to have them cross at right
angles if possible.
Der BassKick ist korrekt verkabelt, aber es ist nichts zu hören.:
• GAIN oder MASTER sind nicht aufgezogen. Ziehe die Regler auf.
• Ein eingeschleiftes Effektgerät ist nicht eingeschaltet bzw. nicht korrekt
verkabelt.
Überprüfe den Effektweg.
• Ein Kopfhörer ist eingesteckt, so daß der Lautsprecher abgeschaltet wird.
Ziehe den Kopfhörer zur Wiedergabe über den internen Speaker ab.
Beim Benutzen der LINE OUT Buchse entsteht ein Brummgeräusch.
• Ein elektrisches / magnetisches Wechselfeld streut auf die Leitung ein.
Benutze ein besseres Kabel und versuche durch geschicktes Verlegen der
Leitung die Einstreuung zu minimieren. Hilft dies nicht, empfiehlt sich die
• Un effet n’est pas allumé ou correctement branché.Vérifie les
branchements des effets.
• Un casque a été branché et donc le son du haut-parleur a été coupé.
Retire la prise du casque pour que le son sorte par le haut-parleur.
En utilisant la prise LINE OUT, il y a un ronflement.
• Un champ alternatif électrique ou magnétique produit des interférences
dans les câbles. Utilise un câble de meilleure qualité et essaie de minimiser
les interférences en déplaçant les câbles. Si cela ne fonctionne pas, il est
conseillé d’utiliser un boîtier de direct.
• La mise à la masse des différents appareils produit des interférences. Il ne
faut en aucun cas séparer les protections des appareils.
Il BassKick 101 è collegato correttamente, ma non si sente alcun suono:
• I controlli GAIN e/o MASTER sono in posizione “0”. Regolateli su valori
più alti.
• Avete collegato un processore effetti esterno, ma i collegamenti con
questo non sono corretti o il processore stesso è spento. Verificate il
percorso del segnale.
• Avete collegato una cuffia all’apposita presa: così facendo, l’altoparlante
interno viene automaticamente escluso. Scollegate la cuffia.
Utilizzando la presa LINE OUT, si sente un fastidioso ronzio.
• Il circuito elettrico dell’apparecchio collegato alla presa LINE OUT è
sbilanciato, e un campo magnetico o elettrico causa un’interferenza.
BASSKICK-MANUAL
Benutzung einer DI- Box.
• Über die Erdung der verbundenen Geräte entsteht eine Brummschleife.
Unterbreche in keinem Fall die Schutzleiter der Geräte! Betreibe beide
Geräte an einem gemeinsamen Netzverteiler! Schafft dies noch keine
Abhilfe, muß die Verbindung mittels einer DI-Box galvanisch getrennt
werden.
Beim Anschluß eines Mischpultes am LINE OUT ist das Signal auf der PA /
für das Aufnahmegerät völlig verzerrt.
• Der Eingang des Pultes ist nicht auf Linepegel geschaltet. Schalte den
Eingang des Pultes auf Linepegel um. Sollte dies nicht möglich sein, so
belege entweder einen unsymmetrischen (Line-) Eingang am Pult oder
• Branche les appareils sur une multiprise. Si tu ne constates pas
d’amélioration, les branchements doivent être séparés galvaniquement par
un boîtier de direct.
En branchant une table de mixage sur le LINE OUT, le signal de
l’installation sur scène ou de l’appareil pour enregistrer est complètement
distordu.
• Les entrées de la table de mixage ne sont pas réglées sur le niveau du
LINE. Rebranche l’entrée de la table de mixage sur le niveau du LINE. Si
cela est impossible, branche une entrée asymétrique (LINE) sur ta table de
mixage ou utilise un câble de liaison avec boîtier de direct qu’on trouve
ENGLISH
The amp’s output level is too low.
- A device connected to the effects loop is reducing the signal level. Adjust
the signal level via the device’s input or output control.
The BassKick 101 was designed for use in studios. If you want to use the
amp for gigs, you will need an additional power amp and speaker cabinet.
For additional volume, you can also feed the BassKick signal to the PA
mixing console via the LINE OUT jack.
Technical Data: page 13
benutze ein Verbindungskabel mit integriertem symmetrischen
Spannungsteiler (im gutsortierten Fachhandel oder bei PA Servicefirmen
erhältlich).
Der Amp erscheint zu leise.
• Ein im Effektweg betriebenes Gerät schafft Pegelverluste. Das Effektgerät
muß mittels seiner Input / Output Regler ausgepegelt werden.
• Der BassKick 101 ist als Studioamp konzipiert. Für den Livebetrieb
(Bühne oder Ü-Raum mit Schlagzeug) sollte der BassKick mit einer
zusätzlichen Endstufe und Box betrieben werden. Nützlich ist hier auch
eine LINEOUT - Verbindung zum Mischpult, um via PA System mehr
Lautstärke zu erhalten.
DEUTSCH
You have patched the LINE OUT signal to a mixing console, but the sound
coming through the PA or recording device is totally distorted.
- The mixing console’s balanced input is not set to line level. Set the level
accordingly at the mixing console. If for some reason this is not possible,
patch the signal to an unbalanced line input at the mixing console or use a
connecting cable featuring an inline pad (available from your local dealer
or PA service company) to attenuate the signal.
Technische Daten: Seite 13
chez tous les bons spécialistes ou au service après-vente de l’installation de
scène.
L’ampli te semble trop faible.
• Un appareil qui se trouve entre les effets et l’ampli baisse le niveau de ce
dernier. Il faut régler à nouveau le ou les effets grâce au régulateur du
input/output.
• Sur scène ou en répétition, n’hésite pas à l’utiliser avec un autre ampli et
un autre baffle, ceci afin de gagner en puissance.
FRANÇAIS
- The grounding of the connected devices is causing a ground loop. Do not
sever the ground of the connected devices under any circumstances! Try
plugging all devices into the same socket via an AC power strip. If this
doesn’t eliminate the noise, route the signal through a DI box that offers an
isolated output.
Données techniques: page 15
Il suono in uscita alla presa LINE OUT è completamente distorto:
• Assicuratevi di aver collegato questa presa ad un ingresso linea (non
microfonico) bilanciato sulla console di mixaggio. Regolate la sensibilità di
ingresso in modo corretto. Se non disponete di un ingresso linea bilanciato,
utilizzatene uno sbilanciato.
Il livello di uscita dell’amplificatore è troppo basso:
• Un apparecchio collegato al loop effetti riduce il livello del segnale.
Regolatene il livello di ingresso e d’uscita in modo appropriato.
• Il BassKick 101 è stato progettato per un utilizzo in studio. Per un utilizzo
“live”, potrebbe essere necessario utilizzare un finale di potenza aggiuntivo
e un ulteriore cabinet. Per incrementare il vostro volume, potete anche
utilizzare il sistema PA attraverso la presa LINE OUT.
Dati tecnici: pagina 15
11
ITALIANO
Utilizzate apparecchiature bilanciate o modificate i collegamenti in modo
tale da ridurre le interferenze al minimo. Non fate correre parallelamente
cavi di segnale e cavi potenza.
• Il circuito di terra dell’apparecchio collegato genera il cosiddetto “loop di
terra”. Non scollegate per nessuna ragione le prese di terra di nessun
apparecchio. Provate a collegare tutti gli apparecchi interessati alla
medesima presa di corrente per mezzo di un’apposita presa multipla. Se
neanche questo elimina il ronzio, utilizzate una DI box che offra un’uscita
isolata.
IMPORTANT SAFETY INSTRUCTIONS
WICHTIGE SICHERHEITSHINWEISE!
BEFORE CONNECTING, READ INSTRUCTIONS
BITTE VOR GEBRAUCH LESEN UND FÜR SPÄTEREN GEBRAUCH
AUFBEWAHREN!
!!
• Read all of these instructions!
• Save these instructions for later use!
• Follow all warnings and instructions marked on the product!
• Do not use this product near water, i.e. bathtub, sink, swimming pool, wet
basement, etc.
• Do not place this product on an unstable cart, stand or table. The product may fall,
causing serious damage to the product or to persons!
• Slots and openings in the cabinet and the back or bottom are provided for
ventilation; to ensure reliable operation of the product and to protect it from
overheating, these openings must not be blocked or covered. This product should
not be placed in a built-in installation unless proper ventilation is provided.
• This product should not be placed near a source of heat such as a stove, radiator, or
another heat producing amplifier.
• Use only the supplied power supply or power cord. If you are not sure of the type of
power available, consult your dealer or local power company.
• Do not allow anything to rest on the power cord. Do not locate this product where
persons will walk on the cord.
• Never break off the ground pin on the power supply cord.
• Power supply cords should always be handled carefully. Periodically check cords for
cuts or sign of stress, especially at the plug and the point where the cord exits the
unit.
• The power supply cord should be unplugged when the unit is to be unused for long
periods of time.
• If this product is to be mounted in an equipment rack, rear support should be
provided.
• This product should be used only with a cart or stand that is recommended by
Hughes & Kettner.
• Never push objects of any kind into this product through cabinet slots as they may
touch dangerous voltage points or short out parts that could result in risk of fire or
electric shock. Never spill liquid of any kind on the product.
• Do not attempt to service this product yourself, as opening or removing covers may
expose you to dangerous voltage points or other risks. Refer all servicing to qualified
service personnel.
• Unplug this product from the wall outlet and refer servicing to qualified service
personnel under the following conditions:
• When the power cord or plug is damaged or frayed.
• If liquid has been spilled into the product.
• If the product has been exposed to rain or water.
• If the product does not operate normally when the operating instructions are
followed.
• If the product has been dropped or the cabinet has been damaged.
• If the product exhibits a distinct change in performance, indicating a need of service!
• Adjust only these controls that are covered by the operating instructions since
improper adjustment of other controls may result in damage and will often require
extensive work by a qualified technician to restore the product to normal operation.
• Exposure to extremely high noise levels may cause a permanent hearing loss.
• Individuals vary considerably in susceptibility to noise induced hearig loss, but
nearly everyone will lose some hearing if exposed to sufficiently intense noise for a
sufficient time. The U.S. Government´s Occupational Safety and Health
Administration (OSHA) has specified the following permissible noise level exposures:
Duration Per Day In Hours
8
6
4
3
2
11/2
1
1
/2
1
/4 or less
Sound LeveldBA, Slow Response
90
92
95
97
100
102
105
110
115
• According to OSHA, any exposure in excess of the above permissible limits could
result in some hearing loss.
• Ear plug protectors in the ear canals or over the ears must be worn when operating
this amplification system in order to prevent a permanent hearing loss if exposure is
in excess of the limits as set forth above. To ensure against potentially dangerous
exposure to high sound pressure levels, it is recommended that all persons exposed
to equipment capable of producing high sound pressure levels such as this
amplification system be protected by hearing protectors while this unit is in
operation.
• Fuses: For continued protection against risk of fire, replace fuses only with the same
type and ratings.
TO PREVENT THE RISK OF FIRE AND SHOCK HAZARD, DO NOT EXPOSE
THIS APPLIANCE TO MOISTURE OR RAIN. DO NOT OPEN CASE; NO USER
SERVICE-ABLE PARTS INSIDE.
REFER SERVICING TO QUALIFIED SERVICE PERSONNEL.
• Das Gerät wurde von Hughes & Kettner gemäß IEC 65 gebaut und hat das Werk in
sicherheitstechnisch einwandfreiem Zustand verlassen. Um diesen Zustand zu erhalten und
einen gefahrlosen Betrieb sicherzustellen, muß der Anwender die Hinweise und die
Warnvermerke beachten, die in der Bedienungsanleitung enthalten sind. Das Gerät
entspricht der Schutzklasse I (schutzgeerdet).
• DIE SICHERHEIT, ZUVERLÄSSIGKEIT UND LEISTUNG DES GERÄTES WIRD VON
HUGHES & KETTNER NUR DANN GEWÄHRLEISTET, WENN:
• Montage, Erweiterung, Neueinstellung, Änderungen oder Reparaturen von Hughes & Kettner
oder von dazu ermächtigten Personen ausgeführt werden.
• die elektrische Installation des betreffenden Raumes den Anforderungen von IEC (ANSI)Festlegungen entspricht.
• das Gerät in Übereinstimmung mit der Gebrauchsanweisung verwendet wird.
WARNUNG:
• Wenn Abdeckungen geöffnet oder Gehäuseteile entfernt werden, außer wenn dies von
Hand möglich ist, können Teile freigelegt werden, die Spannung führen.
• Wenn ein Öffnen des Gerätes erforderlich ist, muß das Gerät von allen Spannungsquellen
getrennt sein. Berücksichtigen Sie dies vor dem Abgleich, vor einer Wartung, vor einer
Instandsetzung und vor einem Austausch von Teilen.
• Ein Abgleich, eine Wartung oder eine Reparatur am geöffneten Gerät unter Spannung darf
nur durch eine vom Hersteller autorisierte Fachkraft (nach VBG 4) geschehen, die mit den
verbundenen Gefahren vertraut ist.
• Lautsprecher-Ausgänge, die mit dem IC 417/5036-Zeichen (Abb.1, s.unten) versehen sind
können berührungsgefährliche Spannungen führen. Deshalb vor dem Einschalten des
Gerätes Verbindung nur mit dem vom Hersteller empfohlenen Anschlußkabel zum
Lautsprecher herstellen.
• Alle Stecker an Verbindungskabeln müssen mit dem Gehäuse verschraubt oder verriegelt
sein, sofern möglich.
• Es dürfen nur Sicherungen vom angegebenen Typ und der angegebenen Nennstromstärke als
Ersatz verwendet werden.
• Eine Verwendung von geflickten Sicherungen oder Kurzschließen des Halters ist unzulässig.
• Niemals die Schutzleiterverbindung unterbrechen.
• Oberflächen, die mit dem „HOT“-Zeichen (Abb.2, s.unten) versehen sind, Rückwände oder
Abdeckungen mit Kühlschlitzen, Kühlkörper und deren Abdeckungen, sowie Röhren und
deren Abdeckungen können im Betrieb erhöhte Temperaturen annehmen und sollten
deshalb nicht berührt werden.
• Hohe Lautstärkepegel können dauernde Gehörschäden verursachen. Vermeiden Sie deshalb
die direkte Nähe von Lautsprechern, die mit hohen Pegeln betrieben werden. Verwenden
Sie einen Gehörschutz bei dauernder Einwirkung hoher Pegel.
NETZANSCHLUSS:
• Das Gerät ist für Dauerbetrieb ausgelegt.
• Die eingestellte Betriebsspannung muß mit der örtlichen Netzspannung übereinstimmen.
• Achtung: Der Netzschalter des Gerätes muß in 0 - Position stehen, wenn das Netzkabel
angeschlossen wird.
• Der Anschluß an das Stromnetz erfolgt mit dem mitgelieferten Netzteil oder Netzkabel.
• Netzteil: Eine beschädigte Anschlußleitung kann nicht ersetzt werden. Das Netzteil darf
nicht mehr betrieben werden.
• Vermeiden Sie einen Anschluß an das Stromnetz in Verteilerdosen zusammen mit vielen
anderen Stromverbrauchern.
• Die Steckdose für die Stromversorgung muß nahe am Gerät angebracht und leicht
zugänglich sein.
AUFSTELLUNGSORT:
• Das Gerät sollte nur auf einer sauberen, waagerechten Arbeitsfläche stehen.
• Das Gerät darf während des Betriebs keinen Erschütterungen ausgesetzt sein.
• Feuchtigkeit und Staub sind nach Möglichkeit fernzuhalten.
• Das Gerät darf nicht in der Nähe von Wasser, Badewanne, Waschbecken, Küchenspüle,
Naßraum, Swimmingpool oder feuchten Räumen betrieben werden. Keine mit Flüssigkeit
gefüllten Gegenstände -Vase, Gläser, Flaschen etc. auf das Gerät stellen.
• Sorgen Sie für ausreichende Belüftung der Geräte.
• Eventuelle Ventilationsöffnungen dürfen niemals blockiert oder abgedeckt werden. Das
Gerät muß mindestens 20 cm von Wänden entfernt aufgestellt werden. Das Gerät darf nur
dann in ein Rack eingebaut werden, wenn für ausreichende Ventilation gesorgt ist und die
Einbauanweisungen des Herstellers eingehalten werden.
• Vermeiden Sie direkte Sonneneinstrahlung sowie die unmittelbare Nähe von Heizkörpern
und Heizstrahlern oder ähnlicher Geräte.
• Wenn das Gerät plötzlich von einem kalten an einen warmen Ort gebracht wird, kann sich im
Geräteinnern Kondensfeuchtigkeit bilden. Dies ist insbesondere bei Röhrengeräten zu beachten.
Vor dem Einschalten solange warten bis das Gerät Raumtemperatur angenommen hat.
• Zubehör: Das Gerät nicht auf einen instabilen Wagen, Ständer, Dreifuß, Untersatz oder
Tisch stellen. Wenn das Gerät herunterfällt, kann es Personenschäden verursachen und
selbst beschädigt werden. Verwenden Sie das Gerät nur mit einem vom Hersteller
empfohlenen oder zusammen mit dem Gerät verkauften Wagen, Rack, Ständer, Dreifuß oder
Untersatz. Bei der Aufstellung des Gerätes müssen die Anweisungen des Herstellers befolgt
und muß das vom Hersteller empfohlene Aufstellzubehör verwendet werden. Eine
Kombination aus Gerät und Gestell muß vorsichtigt bewegt werden. Plötzliches Anhalten,
übermäßige Kraftanwendung und ungleichmäßige Böden können das Umkippen der
Kombination aus Gerät und Gestell bewirken.
• Zusatzvorrichtungen: Verwenden Sie niemals Zusatzvorrichtungen, die nicht vom Hersteller
empfohlen wurden, weil dadurch Unfälle verursacht werden können
• Zum Schutz des Gerätes bei Gewitter oder wenn es längere Zeit nicht beaufsichtigt oder
benutzt wird, sollte der Netzstecker gezogen werden. Dies verhindert Schäden am Gerät
aufgrund von Blitzschlag und Spannungsstößen im Wechselstromnetz.
Abb.1
Abb.2
IMPORTANT ADVICE ON SAFETY!
Technical Data
• The unit has been built by Hughes & Kettner in accordance with IEC 65 and left the
factory in safe working order. To maintain this condition and ensure non-risk operation,
the user must follow the advice and warning comments found in the operating
instructions. The unit conforms to Protection Class 1 (protectively earthed).
• HUGHES & KETTNER ONLY GUARANTEE THE SAFETY, RELIABILITY AND
EFFICIENCY OF THE UNIT IF:
• Assembly, extension, re-adjustment, modifications or repairs are carried out by Hughes
& Kettner or by persons authorized to do so.
• The electrical installation of the relevant area complies with the requirements of IEC
(ANSI) specifications.
•The unit is used in accordance with the operating instructions.
• The unit is regularly checked and tested for electrical safety by a competent technician.
WARNING:
• If covers are opened or sections of casing are removed, except where this can be done
manually, live parts can become exposed.
• If it is necessary to open the unit this must be isolated from all power sources. Please
take this into account before carrying out adjustments, maintenance, repairs and before
replacing parts.
• Adjustment, maintenance and repairs carried out when the unit has been opened and is
still live may only be performed by specialist personnel who are authorized by the
manufacturer (in accordance with VBG 4) and who are aware of the associated
hazards.
• Loudspeaker outputs which have the IEC 417/5036 symbol (Diagram 1, below) can
carry voltages which are hazardous if they are made contact with. Before the unit is
switched on, the loudspeaker should therefore only be connected using the lead
recommended by the manufacturer.
• Where possible, all plugs on connection cables must be screwed or locked onto the
casing.
• Replace fuses using only those of the specified type and current rating.
• It is not permitted to use repaired fuses or to short-circuit the fuse holder.
• Never interrupt the protective conductor connection.
• Surfaces which are equipped with the „HOT“ mark (Diagram 2, below), rear panels or
covers with cooling slits, cooling bodies and their covers, as well as tubes and their
covers are purposely designed to dissipate high temperatures and should therefore not
be touched.
• High loudspeaker levels can cause permanent hearing damage. You should therefore
avoid the direct vicinity of loudspeakers operating at high levels. Wear hearing
protection if continuously exposed to high levels.
MAINS CONNECTION:
• The unit is designed for continuous operation.
• The set operating voltage must match the local mains supply voltage.
• Caution: The unit mains switch must be in position ‘0’ before the mains cable is
connected.
• The unit is connected to the mains via the supplied power unit or power cable.
• Power unit: Never use a damaged connection lead. Any damage must be rectified by a
competent technician.
• Avoid connection to the mains supply in distributor boxes together with several other
power consumers.
• The plug socket for the power supply must be positioned near the unit and must be
easily accessible.
PLACE OF INSTALLATION:
• The unit should stand only on a clean, horizontal working surface.
• The unit must not be exposed to vibrations during operation.
• Keep away from moisture and dust where possible.
• Do not place the unit near water, baths, wash basins, kitchen sinks, wet areas,
swimming pools or damp rooms. Do not place objects containing liquid on the unit vases, glasses, bottles etc.
• Ensure that the unit is well ventilated.
• Any ventilation openings must never be blocked or covered. The unit must be
positioned at least 20 cm away from walls. The unit may only be fitted in a rack if
adequate ventilation is ensured and if the manufacturer’s installation instructions are
followed.
• Keep away from direct sunlight and the immediate vicinity of heating elements and
radiant heaters or similar devices.
• If the unit is suddenly moved from a cold to a warm location, condensation can form
inside it. This must be taken into account particularly in the case of tube units. Before
switching on, wait until the unit has reached room temperature.
• Accessories: Do not place the unit on an unsteady trolley, stand, tripod, base or table. If
the unit falls down, it can cause personal injury and itself become damaged. Use the
unit only with the trolley, rack stand, tripod or base recommended by the manufacturer
or purchased together with the unit. When setting the unit up, all the manufacturer’s
instructions must be followed and the setup accessories recommended by the
manufacturer must be used. Any combination of unit and stand must be moved
carefully. A sudden stop, excessive use of force and uneven floors can cause the
combination of unit and stand to tip over.
• Additional equipment: Never use additional equipment which has not been
recommended by the manufacturer as this can cause accidents.
• To protect the unit during bad weather or when left unattended for prolonged periods,
the mains plug should be disconnected. This prevents the unit being damaged by
lightning and power surges in the AC mains supply.
Preamp section:
bass, frequency:
mid, frequency:
treble, frequency:
Inputs
input
FX Return
Diagram 1
Diagram 2
Internal Speaker
General features
Voltage:
max. Powerconsumption:
Mains fuse:
Dimensions, L x H x D:
Weight:
- 10 dB; 1 M ohm
- 10 dB; 47 k ohms
- 10 dB; 220 ohms
0 dB; 220 ohms
8 ohms
10 V/µ s
10 Hz - 90 kHz (-3dB/+ 0 dB)
4-600 ohms
100 watts, 8 ohms,
12” Power Pro dual cone
230 V (for Europe)
117 V (for North America)
100 V (for Eastern Asia)
80 VA (8 ohms)
sb 250 mA (230 V-model)
sb 500 mA (117 V-model)
sb 630 mA (100 V-model)
475 mms x 570 mms x 305 mms
22 kgs.
Technische Daten
Vorstufensektion:
Bass, Frequenz:
Mitten, Frequenz:
Höhen, Frequenz:
70 Hz, +10/-10 dB,
400/1000 Hz, + 6 / - 10 dB
15 kHz, +14/-10 dB
Eingänge
passiv
FX Return
- 10 dB; 1 M Ohm
- 10 dB; 47 kOhm
Ausgänge
FXSend:
Line Out:
Endstufe
bipolare Transistor Endstufe:
40 Watt (RMS) an
Slew rate:
Frequenzgang
8 Ohm
10 V/µ s
10 Hz - 90 kHz
Kopfhörer
500 mW an
4-600 Ohm
Lautsprecher
Grundsätzliches
Spannung:
max. Leistungsaufnahme:
Hauptsicherung:
Abmessungen, B x H x T:
Gewicht:
DEUTSCH
!
Outputs
FX Send:
Line Out:
Poweramp
bipolar solid state power amp:
40 watts (RMS) into
Slew rate
Frequency response
Headphones
500 mW into
70 Hz, +10/-10 dB, active
400/1000 Hz, + 6 / - 10 dB, passive
15 kHz, +14/-10 dB, passive
ENGLISH
PLEASE READ BEFORE USE AND KEEP FOR LATER USE!
- 10 dB; 220 Ohm
0 dB; 220 Ohm
100 Watt, 8 Ohm, 12”
Power Pro Doppelkonus
230 V (fürEuropa)
117 V (für Nordamerika)
100 V (für Ostasien)
80 VA (8 Ohm)
T 0,25 A (230 V-Modell)
T 0,5 A (117 V-Modell)
T 0,63 A (100 V-Modell)
475 mm x 570 mm x 305 mm
22 kg
Änderungen, die dem technischen Fortschritt dienen sind vorbehalten.
13
CONSEILS DE SECURITE IMPORTANTS!
PRIERE DE LIRE AVANT L’EMPLOI ET A CONSERVER POUR UTILISATION
ULTERIEURE!
EG-Konformitätserklärung
Für das folgend bezeichnete Erzeugnis
HUGHES & KETTNER „BassKick 101“
wird hiermit bestätigt, daß es den wesentlichen
Schutzanforderungen entspricht, die in der Richtlinie des Rates
zur Angleichung der Rechtvorschriften der Mitgliedstaaten über
die elektromagnetische Verträglichkeit (89/336/EWG) festgelegt
sind.
Diese Erklärung gilt für alle Exemplare, die nach den
anhängenden Fertigungszeichnungen - die Bestandteil dieser
Erklärung sind - hergestellt werden.
Zur Beurteilung des Erzeugnisses hinsichtlich
elektromagnetischer Verträglichkeit wurden folgende Normen
herangezogen:
EN 50081-1
EN 50082-1
Diese Erklärung wird verantwortlich für den Hersteller
Stamer Musikanlagen GmbH*
Magdeburger Str. 8
66606 St.Wendel
abgegeben durch
Lothar Stamer Dipl.Ing.
Geschäftsführer
St.Wendel, den 10/10/95
* Stamer Musikanlagen stellt exklusiv für Hughes & Kettner her
!
• L’appareil a été conçu par Hughes & Kettner selon la norme IEC 65 et a quitté
l’entreprise dans un état irréprochable. Afin de conserver cet état et d’assurer un
fonctionnement sans danger de l’appareil nous conseillons à l’utilisateur la lecture des
indications de sécurité contenues dans le mode d’emploi. L’appareil est conforme à la
classification I (mise à terre de protection).
• SURETE, FIABILITE ET EFFICACITE DE L’APPAREIL NE SONT GARANTIS PAR
HUGHES & KETTNER QUE SI:
• Montage, extension, nouveau réglage, modification ou réparation sont effectués par
Hughes & Kettner ou par toute personne autorisée par Hughes & Kettner.
• L’installation électrique de la pièce concernée correspond aux normes IEC (ANSI).
• L’utilisation de l’appareil suit le mode d’emploi.
AVERTISSEMENT:
• A moins que cela ne soit manuellement possible, tout enlèvement ou ouverture du
boîtier peut entrainer la mise au jour de pieces sous tension.
• Si l’ouverture de l’appareil est nécessaire, celui-ci doit être coupé de chaque source de
courant. Ceci est à prendre en considération avant tout ajustement, entretien,
réparation ou changement de pieces.
• Ajustement, entretien ou réparation sur l’appareil ouvert et sous tension ne peuvent être
éffectués que par un spécialiste autorisé par le fabricant (selon VBG4). Le spécialiste
étant conscient des dangers liés à ce genre de réparation.
• Les sorties de baffles qui portent le signe IEC 417/5036 (fig. 1, voir en bas) peuvent être
sous tension dangereuse. Avant de brancher l’appareil utiliser uniquement le câble de
raccordement conseillé par le fabricant pour raccorder les baffles.
• Toutes les prises des câbles de raccordement doivent être, si possible, vissées ou
verrouillées sur le boîtier.
• Utilisez subsidiairement uniquement des fusibles de type et de puissance de courant
nominale donnés.
• L’utilisation de fusibles rafistolés ou court-circuites est inadmissible.
• Ne jamais interrompre la connexion du circuit protecteur.
• Il est conseillé de ne pas toucher aux surfaces pourvues du signe „HOT“ (fig. 2, voir en
bas), aux parois arrières ou caches munis de fentes d’aération, éléments d’aération et
leurs caches ansi qu’aux tubes et leurs caches. Ces éléments pouvant atteindre des
températures élévées pendant l’utilisation de l’appareil.
• Les Niveaux de puissance élévés peuvent entrainer des lésions auditives durables.
Evitez donc la proximité de haut-parleurs utilisés à haute puissance. Lors de haute
puissance continue utilisez une protection auditive.
BRANCHEMENT SUR LE SECTEUR:
• L’appareil est conçu pour une utilisation continue.
• La tension de fonctionnement doit concorder avec la tension secteur locale.
• Attention: L’interrupteur de secteur de l’appareil doit être sur la position „0“, lorsque le
câble de réseau est raccordé.
• Le raccordement au réseau éléctrique s’effectue avec l’adaptateur ou le cordon
d´alimentation livré avec l’appareil.
• Adaptateur: Un câble de raccordement abimé ne peut être remplacé. L’adaptateur est
inutilisable.
• Evitez un raccordement au réseau par des boîtes de distribution surchargées.
• La prise de courant doit être placée à proximité de l’appareil et facile à atteindre.
LIEU D’INSTALLATION:
• L’appareil doit être placé sur une surface de travail propre et horizontale.
• L’appareil en marche ne doit en aucun cas subir des vibrations.
• Evitez dans la mesure du possible poussière et humidité.
• L’appareil ne doit pas être placé à proximité d’eau, de baignoire, lavabo, évier, pièce
d’eau, piscine ou dans une pièce humide. Ne placez aucun vase, verre, bouteille ou
tout objet rempli de liquide sur l’appareil.
• L’appareil doit être suffisamment aéré.
• Ne jamais recouvrir les ouvertures d’aération. L’appareil doit être placé à 20 cm du
mur au minimum. L’appareil peut être monté dans un Rack si une ventilation suffisante
est possible et si les conseils de montage du fabricant sont suivis.
• Evitez les rayons de soleil et la proximité de radiateurs, chauffages etc.
• Une condensation d’eau peut se former dans l’appareil si celui-ci est transporté
brusquement d’un endroit froid à un endroit chaud. Ceci est particulièrement important
pour des appareils à tubes. Avant de brancher l’appareil attendre qu’il ait la
température ambiante.
• Accessoires: L’appareil ne doit être placé sur un chariot, support, trépied, bâti ou table
instable. Une chute de l’appareil peut entrainer aussi bien des dommages corporels
que techniques. Utilisez l’appareil uniquement avec un chariot, Rack, support, trépied
ou bâti conseillé par le fabricant ou vendu en combinaison avec l’appareil. Les
indications du fabricant pour l’installation de l’appareil sont à suivre, et les accessoires
d’installation conseillés par le fabricant sont à utiliser. Un ensemble support et appareil
doit être déplacé avec précaution. Des mouvements brusques et des revêtements de sol
irreguliers peuvent entrainer la chute de l´ensemble.
• Equipements supplémentaires: Ne jamais utiliser un équipement supplémentaire
n’ayant pas été conseillé par le fabricant, ceci pouvant entrainer des accidents.
• Afin de protéger l’appareil pendant un orage ou s’il ne doit pas être utilisé pendant un
certain temps, il est conseillé d’enlever la prise au secteur. Ceci évite des dommages
dûs à la foudre ou à des coups de tension dans le réseau à courant alternatif.
Fig. 1
Fig. 2
IMPORTANTI AVVERTIMENTI DI SICUREZZA!
Leggere attentamente prima dell’uso e conservare per un
utilizzo successivo:
Données techniques
• L’apparecchio è stato costruito dalla Hughes & Kettner secondo la normativa europea IEC 65
ed ha lasciato il nostro stabilimento in stato ineccepibile. Per garantire il mantenimento di tale
stato e un utilizzo assolutamente privo di rischi l’utente è tenuto ad osservare le indicazioni e
gli avvertimenti di sicurezza contenuti nelle istruzioni per l’uso. L’apparecchio rispecchia il
livello di sicurezza I (collegato a terra).
• Sicurezza, affidabilità e prestazioni dell’apparecchio vengono garantiti dalla Hughes &
Kettner solo ed esclusivamente se:
• Montaggio, ampliamento, rimessa a punto, modifiche e riparazioni vengono eseguite dalla
Hughes & Kettner stessa o da personale da essa autorizzato.
• Gli impianti elettrici nei locali prescelti per l’uso dell’apparecchio rispondono alle normative
stabilite dall’ANSI.
• L’apparecchio viene utilizzato come indicato nel libretto delle istruzioni per l’uso.
Avvertimenti:
• In caso di apertura di parti di rivestimento o rimozione di parti dell’involucro, a meno che
non si tratti di pezzi rimovibili semplicemente a mano, possono venire alla luce parti
dell’apparecchio conduttrici di tensione.
• Se l’apertura dell’apparecchio dovesse risultare necessaria è indispensabile staccare
precedentemente quest’ultimo da tutte le fonti di tensione. Rispettare tale misura di
prevenzione anche prima di un allineamento, di operazioni di manutenzione, della messa in
esercizio o della sostituzione di componenti all’interno dell’apparecchio.
• Allineamento, operazioni di manutenzione o eventuali riparazioni dell’apparecchio in
presenza di tensione vanno eseguite esclusivamente da personale specializzato ed
autorizzato, in grado di eseguire tali operazioni evitandone i rischi connessi.
• Le uscite degli altoparlanti contrassegnate dai caratteri IEC 417/5036 (vedi illustrazione 1 a
fondo pag.) possono essere conduttrici di tensione pericolosa con cui evitare il contatto. Per
questo motivo, prima di accendere l’apparecchio, collegare quest’ultimo agli altoparlanti
servendosi esclusivamente del cavetto d’allacciamento indicato dal produttore.
• Tutte le spine e i cavi di collegamento devono essere avvitati o fissati all’involucro
dell’apparecchio per quanto possibile.
• Tutti i fusibili di sicurezza vanno sostituiti esclusivamente con fusibili del tipo prescritto e
valore della corrente nominale indicato.
• L’utilizzo di fusibili di sicurezza non integri e la messa in corto circuito del sostegno di
metallo sono proibite.
• Non interrompere mai il collegamento con il circuito di protezione.
• Superfici contrassegnate dalla parola „HOT“ (vedi illustrazione 2 a fondo pag.), cosi come
griglie di aerazione, dispositivi di raffreddamento e i loro rivestimenti di protezione, oppure
valvole e i relativi rivestimenti protettivi possono surriscaldarsi notevolmente durante l’uso e
per questo motivo non vanno toccate.
• L’ascolto di suoni ad alto volume può provocare danni permanenti all’udito. Evitate perciò la
diretta vicinanza con altoparlanti ad alta emissione di suono e utilizzate cuffie protettive in
caso ciò non sia possibile.
Alimentazione:
• L’apparecchio è concepito per il funzionamento continuo.
• La tensione di esercizio deve corrispondere alla tensione di rete a cui ci si allaccia.
• Attenzione: l’interruttore di alimentazione dell’apparecchio deve essere in posizione 0
quando viene allacciato il cavetto d’alimentazione.
• L’allacciamento alla rete elettrica avviene tramite alimentatore o cavetto d’alimentazione
consegnato insieme all’apparecchio.
• Alimentatore: un cavo di connessione danneggiato non può essere sostituito. L’alimentatore
non può più essere utilizzato.
• Evitate un allacciamento alla rete di corrente utilizzando cassette di distribuzione
sovraccariche.
• La spina di corrente deve essere situata nelle vicinanze dell’apparecchio e facilmente
raggiungibile in qualsiasi momento.
Locali di collocamento:
• Opportuno collocare l’apparecchio su una superficie pulita e orizzontale.
• Non sottoporre l’apparecchio in funzione a scosse e vibrazioni.
• Proteggere l’apparecchio per quanto possibile da umidità e polvere.
• Non collocare l’apparecchio vicino ad acqua, vasche da bagno, lavandini, lavelli da cucina,
locali umidi o piscine. Non appoggiare recipienti contenenti liquidi - vasi, bicchieri, bottiglie,
ecc. - sull’apparecchio.
• Provvedere ad una buone aerazione dell’apparecchio.
• Eventuali aperture previste per la ventilazione dell’apparecchio non vanno ne bloccate, ne
mai coperte. L’apparecchio va collocato ad almeno 20 cm di distanza dalle pareti circostanti
e può essere inserito tra altre componenti di un impianto solo in caso di sufficiente
ventilazione e qualora le direttive di montaggio del produttore vengano rispettate.
• Evitare di esporre l’apparecchio ai raggi del sole e di collocarlo direttamente nelle vicinanze
di fonti di calore come caloriferi, stufette, ecc.
• Se l’apparecchio viene trasportato rapidamente da un locale freddo ad uno riscaldato può
succedere che al suo interno si crei della condensa. Ciò va tenuto in considerazione
soprattutto in caso di apparecchi a valvole. Attendere che l’apparecchio abbia assunto la
temperatura ambiente prima di accenderlo.
• Accessori: non collocare l’apparecchio su carrelli, supporti, treppiedi, superfici o tavoli
instabili. Se l’apparecchio dovesse cadere a terra potrebbe causare danni a terzi o
danneggiarsi irreparabilmente. Utilizzate per il collocamento dell’apparecchio supporti,
treppiedi e superfici che siano consigliate dal produttore o direttamente comprese nell’offerta
di vendita. Per il collocamento dell’apparecchio attenetevi strettamente alle istruzioni del
produttore, utilizzando esclusivamente accessori da esso consigliati. L’apparecchio in
combinazione ad un supporto va spostato con molta attenzione. Movimenti bruschi o il
collocamento su pavimenti non piani possono provocare la caduta dell’apparecchio e del suo
supporto.
• Accessori supplementari: non utilizzate mai accessori supplementari che non siano consigliati
dal produttore, potendo essere ciò causa di incidenti.
• Per proteggere l’apparecchio in caso di temporali o nel caso questo non venisse utilizzato per
diverso tempo si consiglia di staccarne la spina di corrente. In questo modo si evitano danni
all’apparecchio dovuti a colpi di fulmine o ad improvvisi aumenti di tensione nel circuito di
corrente alternata.
Section Préampli:
Fréquence basse:
Fréquence médium:
Fréquence aiguë:
Entrées:
Entrée:
Return effets:
Illustrazione 1
Illustrazione 2
HP Interne:
Caractéristiques Générales:
Voltage:
Consommation:
Fusible:
Dimensions, L x H x D:
Poids:
- 10 dB; 1 M ohm
- 10 dB; 47 k ohms
- 10 dB; 220 ohms
0 dB; 220 ohms
8 ohms
10 V/µ s
10 Hz - 90 kHz (-3dB/+ 0 dB)
4-600 ohms
100 watts, 8 ohms,
12” Power Pro dual cone
230 V (pour l’Europe)
117 V (pour l’Amérique du Nord)
100 V (pour l’Asie)
80 VA (8 ohms)
sb 250 mA (230 V-model)
sb 500 mA (117 V-model)
sb 630 mA (100 V-model)
475 mms x 570 mms x 305 mms
22 kgs.
Dati tecnici
Altoparlante
Caratteristiche generali
Voltaggio:
Max. assorbimento
Fusibile:
Dimensioni, L x A x P:
Peso:
FRANÇAIS
Sezione Preamp:
bassi, frequenza:
70 Hz, +10/-10 dB, attivi
medi, frequenza:
400/1000 Hz, + 6 / - 10 dB, passivi
acuti, frequenza:
15 kHz, +14/-10 dB, passivi
Ingressi
Strumento
- 10 dB; 1 M ohm
Ritorno Effetto
- 10 dB; 47 k ohms
Uscite
Mandata Effetto:
- 10 dB; 220 ohms
Uscita Linea:
0 dB; 220 ohms
Finale di potenza
Finale di potenza a transistor bipolare:
40 watts (RMS) su
8 ohms
Frequenza
10 V/µ s
Risposta in frequenza
10 Hz - 90 kHz (-3dB/+ 0 dB)
Cuffie
500 mW su
4-600 ohms
100 watts, 8 ohms,
12” Power Pro a doppio cono
230 V (Europa)
117 V (Nord America)
100 V (Asia)
80 VA (8 ohms)
sb 250 mA (230 V-model)
sb 500 mA (117 V-model)
sb 630 mA (100 V-model)
475 mm x 570 mm x 305 mm
22 kgs.
ITALIANO
!
Sorties:
Départ effets:
Sortie ligne:
Etage de puissance:
Ampli à transistors:
40 watts (RMS) sous
Temps de montée:
Bande passante:
Casque:
500 mW sous
70 Hz, +10/-10 dB, active
400/1000 Hz, + 6 / - 10 dB, passive
15 kHz, +14/-10 dB, passive
15
BASSKICK-MANUAL
ANDORRA
MUSICAL ANDORRA, San Julia de Loria
JAPAN
NANYO BOEKI Co. Ltd, Nagoya 460
ARGENTINA
INTERMUSICA SRL., 1870 Buenos Aires
KOREA
MUSE INC., Namdong Ind. Estate, Inchon
AUSTRIA
‘HUGHES & KETTNER’ Vertriebs GmbH, 8010 Graz
MALAYSIA
ROM Custom Guitars, 50100 Kuala Lumpur
BENELUX
WILS MUZIEKIMPORT, 4631 NH Hoogerheide
MAURITIUS
ROBERT YIP TONG ENTERPRISES, Port Louis
BRASIL
HABRO Ltda. Sao Paulo
E
D
I
W
D
L
CANADA
B & J Music, Mississauga / Ontario L5A 3V3
R
O
W
CHILE
SONITEL, Conception
CZECH REPUBLIC
GEORGE DENNIS s.r.o., 100 00 Praha
MEXICO
HERMES AUDIO S.A., México D.F. 06400
NORWAY
BELCO A/S, 3915 Porsgrunn
POLAND
AMTEC, 51-663 Wroclaw
PORTUGAL
ALRICA, 1100 Lisboa
CHINA (PEOPLE’S REPUBLIC)
SUNJOY Electronic Audio & Video Co., Shanghai
SINGAPORE
MUSIC PLAZA Pte Ltd., Singapore 1334
DENMARK
REHOLM MUSIK, 7000 Fredericia
SLOVENIA
NOVA d.o.o., 61111- Ljubljana
FINLAND
FAZER MUSIC INC., 00100 Helsinki
SPAIN
3 KW S.L., 29014 Malaga
FRANCE
CAMAC, 44470 Thouaré
SWEDEN
ILT AB, 84100 Ånge
GERMANY
‘HUGHES & KETTNER’ GmbH, 66606 St. Wendel
SWITZERLAND
SDS Music Factory AG, 8048 Zürich
GREECE
STELIOS TRIMIS & Co. OE, 10678 Athen
TAIWAN (R.O.C.)
TEAM INTERNATIONAL Music Co. Ltd.,Taipei
HUNGARY
LAHA K.F.T., 9400 Sopron
TURKEY
YAPALI GROUP, Istanbul
INDONESIA
WIJAYA MUSIC, Jakarta 10710
UKRAINE
HUGHES & KETTNER, 25200 Kiev
ISRAEL
MAROM, 63568 Tel Aviv
UNITED KINGDOM & EIRE
JOHN HORNBY SKEWES & Co Ltd., Leeds LS 25 2 HR
ITALY
BMG RICORDI Spa, 20138 Milano
USA
HUGHES & KETTNER Inc., Mt Prospect, IL 60056
'HUGHES & KETTNER' MI GmbH • Postfach 1320 • 66593 St. Wendel • TEL. 0 68 51 - 90 50 • FAX 0 68 51 - 905 100
INTERNATIONAL INQUIRIES: FAX +49 - 68 51 - 905 200 • E-Mail: [email protected]
© 1995 by 'HUGHES & KETTNER' MI GmbH
Printed in Germany, Oct. 95