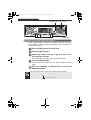
1
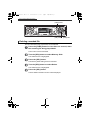
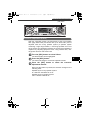
OWNER'S MANUAL
CD8455
ESN E8 High-Power "Pro Customize" CD/MS Receiver with
MP3/WMA Decoder and Remote
We appreciate your purchase of this receiver.
Please read through this manual for correct operation.
We suggest that after reading it you keep this manual
in a safe place for future reference.
CD8455.book 2 ページ
2004年12月11日 土曜日 午後7時24分
For your safety in using the
CD8455
Warnings and caution signs, illustrated below, are posted throughout this manual as
well as on the CD8455. They show safe and correct ways to handle the product so
as to prevent personal injury to you, others and to avoid property damage.
Before reading through the manual, take time to read through and learn the
important information listed in this section.
Warning
This sign indicates a situation in which incorrect
handling or disregard of this sign might result in
death or serious personal injury.
Caution
This sign indicates a situation in which incorrect
handling or disregard of this sign might result in
personal injury or may result solely in damage to
property.
2
CD8455.book 3 ページ
2004年12月11日 土曜日 午後7時24分
Warning
● Do not modify this system for use other than that specified
herein. Also, do not deviate from the installation procedures
described herein; Eclipse will not be held liable for damages
including, but not limited to serious injury, death or property
damage resulting from installations that enable unintended
operation.
● This equipment requires 12V DC and should only be installed in a
vehicle with a 12V negative ground electrical system. Any other
installation may cause a fire or other severe damage to the
equipment and the vehicle.
● Never install this equipment where it will interfere with safe
operation of the vehicle. Never block the drivers’ view. Do not
install equipment where it may interfere with operation of the
brakes, the steering or any safety equipment, including seat belts
and air bags.
● Before drilling holes in a vehicle for installation, you must confirm
the locations of pipes, tanks, electrical wiring, and other vehicle
systems and components to ensure that there will be no
interference or contact. In addition, you must also apply rust
prevention and leak prevention measures at the drilling area.
Otherwise, fire or electric shock could occur.
● When installing equipment do not remove or alter existing vehicle
fasteners, including nuts, bolts, screws, clips, and fittings. Never
detach, move or alter existing vehicle wiring, including electrical
grounds and straps. Alteration of existing vehicle components
may make vehicle unsafe to operate.
● Before installation, remove the negative (-) battery terminal to
prevent shocks, electrical arcing, fires, and damage to vehicle
wiring and the equipment you are installing.
● Secure wiring with tape or plastic ties so that wires do not
interfere with vehicle operation, including brake pedal, gear
shifter and steering. Position wires so that they will not be
rubbed, abraded, or damaged by moving vehicle components,
including power seats.
3
CD8455.book 4 ページ
2004年12月11日 土曜日 午後7時24分
Warning
● To avoid equipment and vehicle damage, including fire, never
supply power to installed equipment in a way which will overload
the capacity of an existing vehicle circuit. Never leave a power
supply wire or connection uninsulated. Always install supplied
fuses, circuit breakers, and relays.
● Air bags are vital safety equipment. Never install equipment in a way
which will alter air bag wiring or interfere with air bag deployment.
Air bags must function properly in the event of an accident.
● When installation is complete, test all vehicle electrical systems
for proper operation, including lights, horn, brake lights, and
emergency flashers.
● For your protection, never use a power drill without safety
glasses or goggles. Debris or broken drill bits may cause severe
eye injuries, including blindness.
● Use electrical tape to insulate the ends of all wires, even if not
used. Proper insulation prevents arcs, shocks and fires.
● Some equipment uses batteries. Never install equipment where
young children can get access to batteries. If a battery is
swallowed, seek medical attention immediately.
● When vehicle is moving, never take your eyes off the road to
make adjustments to the equipment. You must pay attention to
the road to avoid accidents, do not let the operation or adjustment
of the equipment distract you from proper vehicle operation.
● The driver should not look at the screen while driving. Accidents
may result if you are not paying attention to the forward direction.
● Do not put foreign objects in the loading slot of Memory Stick or
disc. Fires or shocks may result.
● Do not disassemble or alter this equipment. Accidents, fires or
shocks may result.
● Do not let water or foreign objects enter the internal parts of this
equipment. Smoke, fires or shocks may result.
● Pay attention to where the remote control is left. Traffic accidents
or problems with driving may result if the remote control makes
its way under the foot pedals etc. when the vehicle is stopped or
when it goes around a corner.
4
CD8455_00_E.fm
5 ページ
2004年12月16日 木曜日 午後5時48分
Warning
● Do not use when it is broken (the screen is not lit or no sound
comes out). Accidents, fires or shocks may result.
● Always replace fuses with fuses of identical capacity and
characteristics. Never use a higher capacity fuse than the original.
Using the wrong type of fuse may cause a fire or severe damage.
● If foreign objects or water enters the equipment, smoke comes
out, or there is a strange odor, stop using it immediately, and
contact your dealer. Accidents, fires, or shocks may result if you
continue to use it in these conditions.
● The driver should not change the Memory Stick or CD while driving.
As accidents may result if you are not paying attention to the forward
direction, first stop the car at a safe location and then proceed.
● Plastic bags and wrappings may cause suffocation and death.
Keep away from babies and children. Never put bag over your
head or mouth.
5
CD8455.book 6 ページ
2004年12月11日 土曜日 午後7時24分
Caution
● Wiring and installing this equipment requires expertise and
experience. Professional installation is recommended. Consult
with your dealer or a professional installer. Incorrect wiring may
damage the equipment or interfere with safe vehicle operation.
● Use only the accessory parts as specified. Using other parts may
cause damage to the equipment or cause parts to fall or fly off the
equipment.
● Do not install the unit in places where it may get dew
condensation on (around the air conditioning hose, etc.), come in
contact with water, or in condition of high moisture, dust or oily
smoke. If water, moisture, dust or oily smoke enters this unit,
smoke, fires or malfunctions may result.
● Avoid installing in places where it cannot be fastened securely or
where there are strong vibrations. Also, if you installed the unit
with double-sided tape, first wipe away dirt and wax from the
installation area. Otherwise, the unit may come loose due to
vibration while driving, causing problems for driving and
resulting in traffic accidents or injuries.
● Do not install in places with direct sunlight or where it will be hit
directly by hot air from the heater. This may increase the
temperature of the interior of this equipment, resulting in fires
and malfunctions.
● Do not block the fan, heat sink or vents of this unit. When fan,
heat sink or vent is blocked, the interior overheats, and fires may
result.
● Connect as specified in the installation manual. If not connected
normally, fires or accidents may result.
● When installing in vehicles equipped with air bags, check the
manufacturer's cautions regarding operation before operating.
Airbags may not operate properly.
● Carry out the wiring such that cords are not pinched by movable
parts such as seat rails, and screw parts of the vehicle body.
Accidents, fires and shocks may result from disconnection and
electrical shorts.
● Carry out the wiring such that the cord does not make contact
with metal parts. The cord maybe be damaged by contact with
metal parts, resulting in fire and shocks.
6
CD8455.book 7 ページ
2004年12月11日 土曜日 午後7時24分
Caution
● Avoid hot surfaces when wiring equipment. High temperatures
may damage wiring, causing shorts, arcing and fires.
● When changing the installation location for this equipment,
please consult the dealer where you bought it for safety reasons.
Expertise is necessary for removal and installation.
● Keep volume to a reasonable level so that you can hear sounds
from outside the vehicle, including warning sounds, voices, and
sirens. Failure to do so may cause an accident.
● Be careful that hands and fingers are not pinched when adjusting
the tilting angle or closing display. Injuries may result.
● Do not put your hands or fingers into the loading slot of Memory
Stick or disc. Injuries may result.
● Do not touch the heat dissipating part of the amp. Burns may
result from the heat of this part.
● Do not recharge dry batteries. Dry batteries may rupture,
resulting in injuries.
● Do not use batteries other than those specified. Also, do not mix
old and new batteries. Injuries or pollution to the surroundings
may result from battery ruptures and leakage.
● When inserting batteries into the equipment, be careful with the
polarity (positive/negative), and insert them as indicated. If the
battery polarities are incorrect, injuries and pollution to the
surroundings may result from battery ruptures and leakage.
● Replace used batteries as soon as possible; they may leak and
damage equipment. Battery leakage can burn your skin or your
eyes. Wash hands after handling.
● If alkaline solution from alkaline dry batteries makes contact with
your skin or clothes, flush with clean water. If any of the solution
gets in your eyes, also flush clean with water and then seek
medical attention.
● When disposing of lithium dry batteries, affix insulating tape to
the positive and negative terminals, and after they are insulated,
dispose of them according to the "Local municipal ordinances".
Shorts, fires and ruptures may result from disposal when coming
contact with other electrically conductive objects such as metal
parts, etc.
7
CD8455.book 8 ページ
2004年12月11日 土曜日 午後7時24分
Caution
● Do not short, disassemble or heat the batteries, or place them in
fire or water. Fire and injuries may result from battery rupture and
leakage.
● Store the remote control in a place away from direct sunlight, high
temperatures, and high moisture levels. The case may change
shape, and the batteries may rupture and leak.
● Do not use this equipment except for in-vehicle use. Shocks or
injuries may result.
● Be careful of the position of the volume when turning the power
source ON. Hearing damage may result if very loud noise is
emitted when the power is turned ON.
● Do not operate under abnormal conditions such as when the
sound is broken or distorted. Fires may result.
● This equipment uses invisible laser light. Do not disassemble or
alter this equipment. If trouble occurs, contact the dealer where
you bought the equipment.
Altering this equipment may cause exposure to laser emissions
(worsening eyesight), or result in accidents, fires or shocks.
● If the equipment is dropped or the cosmetics appear broken, turn
off the power to the main unit and contact your dealer. If used in
this condition, fires or shocks may result.
8
CD8455.book 9 ページ
2004年12月11日 土曜日 午後7時24分
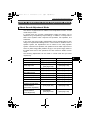
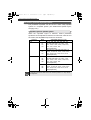
Table of Contents
Operating precautions.............................................................................. 16
I
Names of controls and parts.................................................................... 23
II
ESN security operating precedure .......................................................... 24
III
Basic operation ......................................................................................... 41
IV
How to operate the CD player .................................................................. 72
V
How to operate the MP3/WMA player...................................................... 84
VI
How to operate the Memory Stick player................................................ 93
VII
How to operate the tuner........................................................................ 106
VIII
How to operate the Sound Adjustment Mode ...................................... 119
IX
How to operate the AREA SHOT function (U.S.A. only) ...................... 173
X
How to use the remote control .............................................................. 184
XI
How to operate the receiver with an optional CD changer connected .... 192
XII
How to operate the tuner with an optional HD RADIO tuner
connected (U.S.A. only) ... 196
How to operate the tuner with an optional SIRIUS satellite radio tuner
connected (U.S.A. only) ... 203
XIII
XIV
Others....................................................................................................... 209
XV
If you have a question: ........................................................................... 213
XVI
Specifications.......................................................................................... 218
XVII
Before installlation.................................................................................. 220
XVIII
Mounting instruction .............................................................................. 221
XIX
How to contact customer service.......................................................... 234
XX
9
CD8455.book 10 ページ
2004年12月11日 土曜日 午後7時24分
Table of Contents
Operating precautions......................................................................... 16
Notes on operation........................................................................................................ 16
About compact discs ..................................................................................................... 17
About cleaning a CD ..................................................................................................... 19
About Memory Sticks .................................................................................................... 20
About cleaning the Memory Sticks................................................................................ 22
Names of controls and parts .............................................................. 23
ESN security operating procedure..................................................... 24
About ESN .................................................................................................................... 24
How to switch the security type (Key CD security/Memory Stick security) ................... 25
How to operate the ESN (Key CD) security .................................................................. 26
How to program the Key CD................................................................................... 26
How to cancel the Key CD...................................................................................... 27
How to change the Key CD .................................................................................... 28
How to resume normal operation (ESN security lock out) ...................................... 28
What happens if an incorrect CD is inserted? ........................................................ 29
How to operate the ESN (Memory Stick) security......................................................... 30
How to record a security code ................................................................................ 30
How to cancel the Memory Stick security ............................................................... 32
How to change the Memory Stick ........................................................................... 34
How to resume normal operation (ESN security lock out) ...................................... 35
What happens if a Memory Stick or security code is incorrect? ............................. 37
How to operate the ACC security.................................................................................. 38
How to turn the security indicator on/off........................................................................ 39
How to read the Electronic Serial Number .................................................................... 40
Basic operation .................................................................................... 41
Turning the power on and off ........................................................................................ 41
Listening to CD ............................................................................................................. 42
Listening to MG Memory Stick ...................................................................................... 43
Listening to the tuner .................................................................................................... 44
Adjusting audio volume ................................................................................................. 45
Switching audio control modes ..................................................................................... 46
VOL (VOLUME) Mode ............................................................................................ 46
BASS Mode ............................................................................................................ 46
MID (MIDDLE) Mode .............................................................................................. 47
TREB (TREBLE) Mode........................................................................................... 47
BAL (BALANCE) Mode........................................................................................... 47
FAD (FADER) Mode ............................................................................................... 47
NON-F (NON-FADER) Mode.................................................................................. 47
SVC (Source Volume Control) Mode...................................................................... 48
10
CD8455.book 11 ページ
2004年12月11日 土曜日 午後7時24分
Enabling the loudness control ....................................................................................... 49
Making changes with Display Adjustment Mode........................................................... 50
Switching the motion picture................................................................................... 51
Switching the brightness......................................................................................... 52
Changing illumination color..................................................................................... 53
Disabling the display............................................................................................... 54
Importing DISP screens.......................................................................................... 55
Displaying Amplifier Status (E-AMP DISP)............................................................. 58
Making changes with Function Mode............................................................................ 59
Disabling the guide tone feature (for button operation) .......................................... 61
Clock display on/off................................................................................................. 62
Setting the time....................................................................................................... 63
Switching demonstration screen display................................................................. 64
Setting the steering switch function (U.S.A. only)................................................... 65
Others ........................................................................................................................... 69
Operation assist function ........................................................................................ 69
Displaying a memo ................................................................................................. 70
Setting a memo....................................................................................................... 70
Deleting a memo..................................................................................................... 71
How to operate the CD player............................................................. 72
Listening to CDs............................................................................................................ 72
Advancing to the next track or returning to the beginning of the track being played .... 73
Fast Forward/Rewind .................................................................................................... 73
Playing the beginning of tracks (SCAN)........................................................................ 73
Repeating the same track (REPEAT) ........................................................................... 74
Playing tracks in random order (RANDOM) .................................................................. 74
Switching a CD to pause / play ..................................................................................... 75
Ejecting the disc ............................................................................................................ 75
Creating a title for a CD ................................................................................................ 76
Changing a previously set title ...................................................................................... 78
Deleting a previously created title ................................................................................. 80
Changing the number of CD titles ................................................................................. 81
Displaying CD text ........................................................................................................ 83
How to operate the MP3/WMA player................................................. 84
About MP3/WMA .......................................................................................................... 84
What is MP3/WMA?................................................................................................ 84
Playable MP3 file standards ................................................................................... 84
Playable WMA file standards.................................................................................. 84
ID3/WMA tags......................................................................................................... 85
Media ...................................................................................................................... 85
Format of discs ....................................................................................................... 86
File names .............................................................................................................. 87
Multi-sessions ......................................................................................................... 87
Playing MP3/WMA.................................................................................................. 87
11
CD8455.book 12 ページ
2004年12月11日 土曜日 午後7時24分
MP3/WMA playing time display .............................................................................. 87
Display order of MP3/WMA file/folder names ......................................................... 87
Listening to MP3/WMA file ............................................................................................ 88
Advancing to the next track (file) or returning to the beginning of the track (file)
being played.................................................................................................................. 89
Skipping to the next or previous folder.......................................................................... 89
Fast Forward/Rewind .................................................................................................... 89
Return to the root directory of the CD ........................................................................... 89
Playing the beginning of files (SCAN) ........................................................................... 90
Repeating the same file (REPEAT) .............................................................................. 90
Playing files in random order (RANDOM) ..................................................................... 91
Displaying title ............................................................................................................... 92
How to operate the Memory Stick player........................................... 93
Listening to MG Memory Stick ...................................................................................... 93
Advancing to the next track or returning to the beginning of the track being played .... 94
Fast Forward/Rewind .................................................................................................... 94
Playing the beginning of tracks (SCAN)........................................................................ 94
Repeating the same track (REPEAT) ........................................................................... 95
Playing tracks in random order (RANDOM) .................................................................. 95
Ejecting the Memory Stick ............................................................................................ 96
Recording on Memory Stick .......................................................................................... 97
Selecting tracks to be recorded .................................................................................... 99
Setting sound quality................................................................................................... 100
Deleting recorded file .................................................................................................. 102
Formatting MG Memory Stick (quick format) .............................................................. 104
How to operate the tuner................................................................... 106
Tuning to a station ...................................................................................................... 106
Entering stations into memory automatically
(The automatic preset mode: ASM) ............................................................................ 107
Manually setting stations into memory ........................................................................ 108
Preset station scan ..................................................................................................... 109
Setting a station name ................................................................................................ 110
Deleting a station name .............................................................................................. 112
Changing the number of bands................................................................................... 113
Changing the reception sensitivity for automatic scanning ......................................... 115
Changing the radio band location ............................................................................... 116
FM reception characteristics ....................................................................................... 117
FM reception differs from AM ............................................................................... 117
Fading out............................................................................................................. 117
Reception area of FM broadcasts......................................................................... 118
Multipath ............................................................................................................... 118
12
CD8455.book 13 ページ
2004年12月11日 土曜日 午後7時24分
How to operate the Sound Adjustment Mode ................................. 119
About Sound Adjustment Mode .................................................................................. 119
SRS Circle Surround II (CS II) .............................................................................. 120
Parametric equalizer............................................................................................. 120
Time Alignment..................................................................................................... 122
Crossover ............................................................................................................. 123
Multi-harmonizer ................................................................................................... 125
Non-fader phase ................................................................................................... 125
Non-Fader output.................................................................................................. 125
Speaker layout...................................................................................................... 125
E-iSERV sound effect customizations .................................................................. 125
Operations during Normal Mode ................................................................................. 128
SRS Circle Surround II (CS II) .............................................................................. 129
Parametric equalizer adjustment (PEQ) ............................................................... 130
Selecting an equalizer mode from memory .......................................................... 132
Measuring/display frequency characteristic.......................................................... 133
Simplified time alignment settings (Time Alignment) ............................................ 136
Crossover adjustment (X-Over) ............................................................................ 142
Multi-harmonizer settings (Harmonizer)................................................................ 143
Non-fader phase selection (NON-F Phase).......................................................... 144
Non-Fader Output................................................................................................. 145
Importing Sound Data........................................................................................... 146
Operations during Pro Mode ....................................................................................... 148
Parametric equalizer adjustment (PEQ) ............................................................... 150
Selecting an equalizer mode from memory .......................................................... 157
Measuring/display frequency characteristic.......................................................... 158
Time alignment adjustment (Time Alignment) ...................................................... 161
Crossover adjustment (X-Over) ............................................................................ 163
Multi-harmonizer settings (Harmonizer)................................................................ 166
Non-fader phase selection (NON-F Phase).......................................................... 167
Non-Fader Output................................................................................................. 168
Speaker layout...................................................................................................... 169
Importing Sound Data........................................................................................... 170
Custom Mode ....................................................................................................... 172
How to operate the AREA SHOT function (U.S.A. only) ................. 173
About the AREA SHOT ............................................................................................... 173
To use the AREA SHOT function ......................................................................... 174
Map data............................................................................................................... 175
GPS (Global Positioning System)......................................................................... 175
Reading the AREA SHOT data ................................................................................... 176
Changing the AREA SHOT mode ............................................................................... 178
Using the AREA SHOT mode ..................................................................................... 179
AREA SHOT Screen Configuration ...................................................................... 179
Switching between guidance points...................................................................... 180
Re-scrolling through text information .................................................................... 181
13
CD8455.book 14 ページ
2004年12月11日 土曜日 午後7時24分
Changing AREA SHOT screens ........................................................................... 182
Display Arrows...................................................................................................... 183
How to use the remote control ......................................................... 184
Precautions in use of the remote control .................................................................... 184
Cleaning the remote control ........................................................................................ 184
Turning the power on/off ............................................................................................. 185
Adjusting the audio volume ......................................................................................... 185
Muting the volume ................................................................................................ 185
Switching playback modes.......................................................................................... 186
How to play the tuner .................................................................................................. 186
Selecting the FM/AM band ................................................................................... 186
Selecting a station (manually or automatically) .................................................... 187
Selecting preset stations....................................................................................... 187
How to play CDs ......................................................................................................... 187
Switching disc modes ........................................................................................... 187
Advancing to the next track or returning to the beginning of the track being
played ................................................................................................................... 188
Skipping to the next or previous disc .................................................................... 188
How to play MP3/WMA ............................................................................................... 189
Switching disc modes ........................................................................................... 189
Advancing to the next file or returning to the beginning of the file being played... 189
Skipping to the next or previous folder ................................................................. 189
Replacing the battery .................................................................................................. 190
How to operate the receiver with an optional CD changer
connected ........................................................................................... 192
Switching the input channel ........................................................................................ 192
Listening to a CD ........................................................................................................ 192
Advancing to the next track or returning to the beginning of the track being played .. 192
Fast Forward/Rewind .................................................................................................. 193
Playing the beginning of tracks (SCAN)...................................................................... 193
Repeating the same track (REPEAT) ......................................................................... 194
Playing tracks in random order (RANDOM) ................................................................ 194
Skipping to the next or previous CD ........................................................................... 195
Specifying a CD to play............................................................................................... 195
How to operate the tuner with an optional HD Radio tuner
connected (U.S.A. only)..................................................................... 196
About HD Radio .......................................................................................................... 196
Tuning to a station ...................................................................................................... 197
Entering stations into memory automatically
(The automatic preset mode: ASM) ............................................................................ 198
Manually setting stations into memory ........................................................................ 199
Preset station scan ..................................................................................................... 200
14
CD8455TOC.fm
15 ページ
2004年12月16日 木曜日 午後5時48分
Switching between displays when receiving HD Radio............................................... 201
HD Radio reception settings ....................................................................................... 201
How to operate the tuner with an optional SIRIUS satellite
radio tuner connected (U.S.A. only) ................................................. 203
About SIRIUS satellite radio ....................................................................................... 203
Selecting the radio mode ............................................................................................ 204
Selecting a channel..................................................................................................... 204
Category selection ...................................................................................................... 205
Direct Channel selection ............................................................................................. 205
Manually setting channels into memory ...................................................................... 207
Preset channel scan ................................................................................................... 208
Switching displays when using the SIRIUS satellite radio .......................................... 208
Others ................................................................................................. 209
Connecting portable audio players to the AUX jack.................................................... 209
Switching the external input method (analog/digital) ............................................ 210
Changing auxiliary input sensitivity....................................................................... 211
User Registration Key display ..................................................................................... 212
If you have a question: ...................................................................... 213
Displayed information (for troubleshooting) ................................................................ 214
Specifications..................................................................................... 218
Before installation.............................................................................. 220
Components................................................................................................................ 220
Installation angle ......................................................................................................... 220
Mounting instruction ......................................................................... 221
Mounting the main unit................................................................................................ 221
Names of lead wires and destinations ....................................................................... 224
Measuring the frequency characteristics inside the passenger compartment ............ 226
System ........................................................................................................................ 227
How to contact customer service..................................................... 234
15
CD8455.book 16 ページ
2004年12月11日 土曜日 午後7時24分
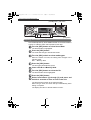
Operating precautions
Operating precautions
<Your CD8455 will perform well over a long period of time through correct handling
and care.>
Notes on operation
● For your safety, play only at volume levels that allow outside sounds to be heard.
TEXT
MEMORYSTICK
MAGICGATE
● We recommend using with this player a disc with the
logo shown to the left.
● You can play music CDs(CD-R/CD-RW) on this player.
Be sure to use discs that have been properly processed.
Depending on the editing equipment used, some discs
may not play properly.
● Do not insert anything other than a CD and a Memory
Stick into the head unit.
Do not insert any foreign objects, such as coins or credit
cards, into the disc slot. Be especially watchful of
children’s mischief in this regard.
● Avoid severe mechanical shock.
When the player is subjected to severe vibration while
traveling over a rough surface, playback may be
intermittent. When a situation like this occurs, resume
playback after returning to a smoother road.
● About dew condensation.
In cold or rainy weather, just as the interior glass surface
gets fogged, dew (water condensation) may also settle
on the deck. When this occurs, disc playback may
become intermittent or impossible. Dehumidify the air in
the vehicle for a while before resuming playback.
16
CD8455.book 17 ページ
2004年12月11日 土曜日 午後7時24分
Operating precautions
MEMORYSTICK
MAGICGATE
● Cleaning the disc slot.
The disc slot tends to get dusty. Clean it occasionally to
prevent accumulated dust from scratching the discs.
● With the front panel open, many functions will not
operate, therefore, the front panel will need to be closed
during operation.
About compact discs
● The signal recorded on a compact disc is read by a laser beam, so nothing
touches the disc surface. A scratch on the recorded surface or a badly warped
disc may cause deteriorated sound quality or intermittent playback. Observe the
following precautions to ensure high quality sound performance:
MEMORYSTICK
MAGICGATE
● Do not leave an ejected disc in the disc slot for very long;
the disc may warp. Discs should be stored in their cases
and kept away from high temperature and humidity.
● Do not stick a piece of paper or tape. Do not write on or
scratch either side of a disc.
● Discs spin at a high speed inside the deck. Keep
cracked or warped discs out of the player to avoid
damage it.
● Avoid touching the recorded surface when handling a
disc; handle discs by their edges.
17
I
CD8455.book 18 ページ
2004年12月11日 土曜日 午後7時24分
Operating precautions
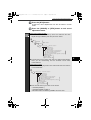
About brand new CDs
About CD accessories
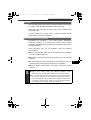
● You may notice that some brand new
discs are rough around the center
hole or outside edge. Remove the
rough edges with the side of a
ballpoint pen, etc. Rough edges may
prevent proper loading in the deck.
Flakes from the rough edges may
also stick to the recorded surface and
interfere with playback.
● Do not use accessories
(stabilizers, protective seals, laser
lens cleaners, etc.) sold for
"improving sound performance" or
"protecting CDs." The changes in CD
thickness or outside dimensions
made by these accessories may
cause problems in the player.
Rough Edges
Ballpoint
pen
Rough
Edges
Flakes
● Please be sure NOT to attach any ringshape protector (or other accessory) to
your discs. Those protectors are
commercially available and said to
protect disc and to improve sound
quality (and antivibration effect), but
they can do more harm than good in
regular uses. The most common
problems are disc insertion, disc
ejections, and won't play problems due
to the protector ring that came off in the
disc mechanism.
Recorded surface
18
CD8455.book 19 ページ
2004年12月11日 土曜日 午後7時24分
Operating precautions
About borrowed CDs
About irregularly-shaped CDs
● Do not use a CD with glue or remnants
of adhesive tape or labels. They may
cause the CD to get stuck inside or
damage the deck.
● Specially-shaped CDs, like heartshaped or octagonal CDs, cannot be
played. Do not attempt to play them,
even with an adapter, since they may
damage the player.
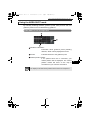
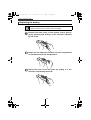
How to remove CDs
● When removing the ejected disc, pull
it straight out along the slot. Pressing
downward in the process may scratch
the recorded surface of the disc.
OKAY
N
O
G
O
O
D
About cleaning a CD
● Use a commercially available compact disc cleaner to
clean a CD, wiping gently from the center to the edge.
XXXX
XXXX
XXXX
● Do not use benzine, thinner, LP record spray or other
cleaners on CDs. They may damage a CD’s finish.
19
I
CD8455.book 20 ページ
2004年12月11日 土曜日 午後7時24分
Operating precautions
About Memory Sticks
● Do not store Memory Sticks in places that are subject to
static electricity and electrical interference, otherwise the
data they contain may become corrupted.
● In order to protect the player, the player's functions will
be stopped automatically if a problem occurs. If the
player cannot be operated even after following the
instructions that appear on the screen, the unit is
malfunctioning, and you should ask the place of
purchase for further advice.
● If using a Memory Stick Duo, you will need to use it with
a Memory Stick Duo adapter.
● Only Memory Sticks with a capacity of up to 128 MB can
be used in the unit.
● Memory Stick PRO types of Memory Stick cannot be
used.
● If MG Memory Stick is not being used for prolonged time,
remove it from the unit.
● MG Memory Sticks bearing one of the marks at the left
can be used.
● Memory Sticks bearing one of the marks at left can be
used for writing and reading data other than music data.
MagicGate Memory Stick
trademarks of Sony Corporation.
and Memory Stick
are
● If the write protection switch on a MG Memory Stick or
Memory Stick is at the lock position, audio recordings
and other data cannot be saved onto it.
● Do not remove a MG Memory Stick while it is being
accessed for playback or recording, otherwise the data
on the MG Memory Stick may become corrupted. If the
data becomes corrupted, it can no longer be retrieved.
● Please format the MG Memory Stick on this deck. A MG
Memory Stick formatted by another deck may not be
playback or record data.
● When a Memory Stick is formatted, all data on that
Memory Stick will be erased. (Includes Memory Stick
security recorded data and sound quality data)
20
CD8455.book 21 ページ
2004年12月11日 土曜日 午後7時24分
Operating precautions
● MG Memory Stick supplied is not formatted. MG Memory
Stick must be formatted prior to use. Refer to
"Formatting MG Memory Stick (quick format)" on page
104 for instructions on formatting MG Memory Sticks.
● It may not be possible to use MG Memory Sticks that
have just been purchased. If this happens, use the unit
to format the MG Memory Stick. Refer to "Formatting MG
Memory Stick (quick format)" on page 104 for
instructions on formatting MG Memory Sticks.
● Some recordings and other data may not be played back
or written/read, depending on the device that was used
to save the data.
● Do not use Memory Sticks with labels that are peeling off
or that have name tags (labels) attached.
● Store Memory Sticks in places away from direct sunlight
and high humidity, otherwise the Memory Sticks may
become unusable.
● Place Memory Sticks in their protective cases during
transportation and storage.
● Do not touch the terminals with your hands or with
metallic objects.
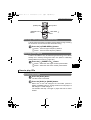
● When removing the ejected Memory Stick, pull it straight
out along the slot. Pressing downward in the process
may scratch the recorded surface of the Memory Stick.
OKAY
NO
GO
OD
21
I
CD8455.book 22 ページ
2004年12月11日 土曜日 午後7時24分
Operating precautions
About cleaning the Memory Sticks
● In order to maintain good audio performance from
Memory Sticks, periodically wipe the cartridge clean of
any dust and other contamination with a dry cloth.
22
CD8455.book 23 ページ
2004年12月11日 土曜日 午後7時24分
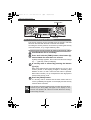
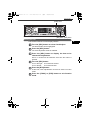
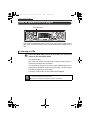
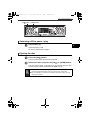
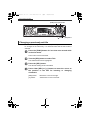
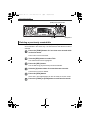
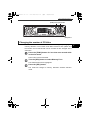
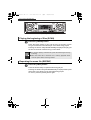
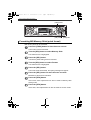
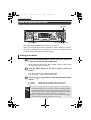
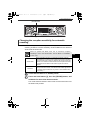
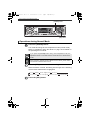
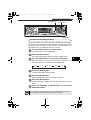
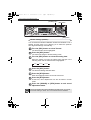
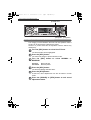
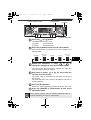
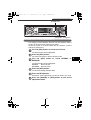
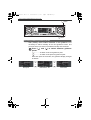
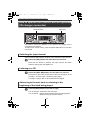
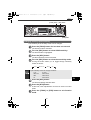
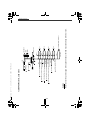
Names of controls and parts
Names of controls and parts
Front view
II
With the front open
MEMORYSTICK
MAGICGATE
Never place an object or rest your hands or the like on the front panel.
[CD
] button
Opens/closes front panel and ejects CD.
[AUDIO CONTROL] button Adjusts volume and performs other functions.
[DISC MS] button
Switches disc modes, Memory Stick mode and switches to AUX mode.
[OPEN] button
Opens/closes front panel.
[SOUND] button
Turns the sound adjustment mode ON/OFF.
[FUNC] button
Turns function mode ON/OFF.
[SEL] button
Selects radio stations and CD tracks.
[
Automatically finds radio reception or to fast forward/rewind.
/
] button
[RTN] button
Returns to previous screen.
[RESET] button
Reset deck functions to default settings.
Turns the display adjustment mode ON/OFF and switches screen
display. Displays User Registration Key.
Selects radio preset channels and performs disc mode functions.
[DISP] button
Buttons [1] to [6]
[FM AM] button
Switches to radio mode and switches radio bands.
[PWR] button
Turns deck power ON/OFF.
[MUTE] button*
Activates and deactivates mute.
Disc slot
Inserts compact discs.
Memory Stick slot
Inserts and ejects Memory Stick.
*: Double function button ➞ "MUTE" & "AREA SHOT" functions
23
CD8455.book 24 ページ
2004年12月11日 土曜日 午後7時24分
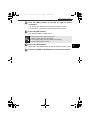
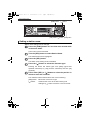
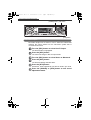
ESN security operating procedure
ESN security operating procedure
About ESN
This deck is equipped with ESN (ECLIPSE Security Network). A preregistered music CD (Key CD), four-digit security code, or a Memory Stick
on which all unit functions will not operate, even by turning the ignition
switch to the ACC or ON position or reconnecting the battery after turning
the ignition switch off or disconnecting the battery during maintenance.
ESN can be set or cancelled using any of the following methods:
• Key CD security (See page 26)
You can record a specific CD that you have as a "key CD" with the deck,
and this CD can then be used to set and cancel the security settings.
• Memory Stick security (See page 30)
You can record a Memory Stick and a secret code (security code) with the
deck, and this Memory Stick or secret code (security code) can then be
matched with the deck to set and cancel the security settings.
• ACC security (See page 38)
This method can only be used when Memory Stick security has already
been set. When ACC security is set, button operations are disabled when
the ignition switch is turned to OFF and then back to ACC.
24
CD8455.book 25 ページ
2004年12月11日 土曜日 午後7時24分
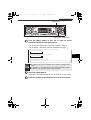
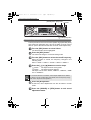
ESN security operating procedure
[FUNC] button
Button [3]
III
How to switch the security type (Key CD security/
Memory Stick security)
You can switch the type of security being used (Key CD security or
Memory Stick security). The initial setting is for Key CD security to be
used.
Check that the unit is in standby.
Press and hold the [FUNC] button, then button [3], and
hold both for the more than two seconds.
Security type will switch from Key CD security (DISC SEC) ↔
Memory Stick security (MS SEC) in order each time the button is
pressed.
If a security is activated, switching the security type is not available.
25
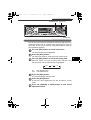
CD8455.book 26 ページ
2004年12月11日 土曜日 午後7時24分
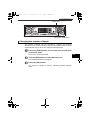
ESN security operating procedure
[CD
] button
[OPEN] button
[FUNC] button
Button [6]
How to operate the ESN (Key CD) security
How to program the Key CD
Check that the unit is in standby.
Press and hold the [FUNC] button, then button [6],
and hold both for more than one second.
A [SEC] message appears, in two seconds it will change to
[DISC].
● If a CD has already been inserted, a [SEC] message appears,
and then the front panel opens and the CD is ejected.
● If a security is activated, programming the Key CD is not
available.
Press the [OPEN] or [CD
] button.
The front panel opens; The CD8455 is now ready for your Key
CD in the CD slot.
Insert the CD into the slot.
A [SEC] message appears, then the Key CD is ejected.
Press the [OPEN] or [CD
The front panel closes.
26
] button.
CD8455.book 27 ページ
2004年12月11日 土曜日 午後7時24分
ESN security operating procedure
● If there is a problem with the inserted CD, an [ERR] message
will appear for two seconds and the CD will be ejected. Reinsert
the ejected CD.
● If a CD causes the [ERR] message to appear twice in a row, a
[CHANGE] message will appear for two seconds. Try another
CD.
● Copy Protected CD and MP3/WMA CD-ROM cannot be programmed
for Key CD security.
● The Security indicator will flash whenever the vehicle's ignition
is switched off.
How to cancel the Key CD
Check that the unit is in standby.
Press and hold the [FUNC] button, then button [6],
and hold both for more than one second.
A [SEC] message appears, then in two seconds it will change
to [DISC].
Press the [OPEN] or [CD
] button.
The front panel opens; The CD8455 is now ready for your Key
CD in the CD slot.
If a CD has already been inserted, a [SEC] message appears, and
then the front panel opens and the CD is ejected.
Insert your Key CD into the slot.
A [CANCEL] message appears, then the Key CD is ejected.
The Key CD is cancelled.
● This process cancels the protection for ESN deck.
● If power to the ESN deck is disconnected, then reconnected, a
Key CD will not need to be inserted in order to return the unit to
normal operation.
● Inserting a CD other than the Key CD will not cancel the
protection. Instead, the display [ERR] for two seconds, then the
normal CD playback mode will activate.
Press the [OPEN] or [CD
The front panel closes.
27
] button.
III
CD8455.book 28 ページ
2004年12月11日 土曜日 午後7時24分
ESN security operating procedure
[CD
] button
[OPEN] button
[FUNC] button
Button [6]
How to change the Key CD
First, cancel the existing Key CD.
Refer to "How to cancel the key CD".
Next, program a new Key CD.
Refer to "How to program the Key CD".
How to resume normal operation (ESN security lock out)
If power is disconnected while ESN security is active (a Key CD was
programmed), operation is disabled until power is restored and the
unit unlocked. Follow this procedure to resume normal operation.
When the power is turned on after disconnecting the
battery power, a [SEC] message will appear for two
seconds. Thereafter, message changes to [DISC]
and the press the [OPEN] or [CD ] button, then the
CD8455 is ready to accept your Key CD into the slot.
Insert your Key CD.
If the correct CD is inserted, an [OK] message will appear for
two seconds and the CD will begin playing.
● If the incorrect CD is inserted, an [ERR_] ("ERR" and error
number) message will appear for two seconds, after which the
CD will be ejected.
● If [ERR5] (the 5th time an error has occurred) appears, [HELP] will
appear, after which the CD will be ejected. When [HELP] appears,
carry out the operations for an ESN security lock out by following
the procedure in "What happens if an incorrect CD is inserted?" on
page 29.
● You must be use the same CD used for Key CD programming; a
duplicate CD may not work properly.
28
CD8455.book 29 ページ
2004年12月11日 土曜日 午後7時24分
ESN security operating procedure
What happens if an incorrect CD is inserted?
After the 5th incorrect attempt, the display reads
[HELP] for five seconds.
After the [HELP] message will appear for five seconds, serial
number will appear.
Press the [OPEN] or [CD
panel.
] button to close the front
Press the [FUNC] button, then button [6], and hold
them for five seconds.
After the [SEC] message will appear for two seconds, rolling
code (six digit) will appear.
Press the [FUNC] button.
A [DISC] message appears.
You will have five more attempts the to insert correct disc.
Insert the key CD into the slot.
If the correct CD is inserted, an [OK] message will appear for
two seconds and the CD will be ejected.
● If an incorrect CD is inserted, an [ERR_] ("ERR" and error
number) message will appear for two seconds, after which the
CD will be ejected.
● This process cancels the protection for ESN deck.
● Note ●
If after 5 tries the correct Key CD is not inserted, the display reads
[CALL800]; the unit must be returned to Eclipse to be reset. In this
case, please contact your Eclipse dealer for assistance. For
country-specific customer service information, refer to "How to
contact customer service" on page 234.
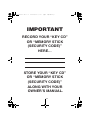
Your Key CD can be easily forgotten. Write the album name in a
reminder note (See page 237).
29
III
CD8455_03_E.fm
30 ページ
2004年12月16日 木曜日 午後5時52分
ESN security operating procedure
[FUNC] button
Buttons [1] to [4]
Button [6]
How to operate the ESN (Memory Stick) security
How to record a security code
Check that the unit is in standby.
Press and hold the [FUNC] button, then button [6],
and hold both for more than one second.
A [SEC] message appears, in two seconds it will change to
[MS].
● If a Memory Stick has already been inserted, a [MS EJECT]
message appears. In this case, eject the Memory Stick and insert
again. (Refer to "Ejecting the Memory Stick" on page 96 for details
on ejection of the Memory Stick.)
● If the security is already activated, recording the security code
function is not available.
Insert the Memory Stick into the slot.
A [- - - -] (security code input display) appears.
(Refer to "Listening to MG Memory Stick" on page 43 for
details on insertion of the Memory Stick.)
Input a security code by pressing buttons [1] to [4].
Enter a four-digit security code using digits 0 to 9, A to F. The
number (shown on the display) changes in ascending order
between 0 and 9, A and F each time the button is pressed.
Each button number (1 to 4) corresponds to each digit (first to
fourth) of the security code.
30
CD8455.book 31 ページ
2004年12月11日 土曜日 午後7時24分
ESN security operating procedure
Press the [FUNC] button for more than one second.
The security code is registered in the deck and security is set.
The registered security code is encrypted and then written to
Memory Stick.
When the security code is registered using a Memory Stick that
contains several kinds of data, such as music, etc., be careful not to
clear the recorded data by formatting the Memory Stick.
Eject the Memory Stick.
Refer to "Ejecting the Memory Stick" on page 96.
31
III
CD8455.book 32 ページ
2004年12月11日 土曜日 午後7時24分
ESN security operating procedure
[FUNC] button
Buttons [1] to [4]
Button [6]
How to cancel the Memory Stick security
The security function can be canceled when the security code that
has been recorded with the deck is entered and verified.
Canceling the security function can be done by entering the security
code into the deck, or by using the Memory Stick.
Canceling the security function by entering the security code
Check that the unit is in standby.
Press and hold the [FUNC] button, then button [6],
and hold both for more than one second.
A [SEC] message appears, then in two seconds it will change
to [- - - -] (Security code input display).
A security code is entered by pressing the buttons
[1] to [4].
Enter a four-digit security code using digits 0 to 9, A to F. The
number (shown on the display) changes in ascending order
between 0 and 9, A and F each time the button is pressed.
Each button number (1 to 4) corresponds to each digit (first to
fourth) of the security code.
Press the [FUNC] button.
If a security code is entered and the deck verifies that it is
correct, [CANCEL] will appear on the display and the security
function will be canceled.
If the security code that is entered does not match the code that is
recorded by the deck, [ERR] will appear on the display for two
seconds and operation will continue as normal without the security
function being canceled.
32
CD8455.book 33 ページ
2004年12月11日 土曜日 午後7時24分
ESN security operating procedure
[DISC] button
[FUNC] button
Button [6]
Canceling the security function using a Memory Stick
Check that the unit is in standby.
Press and hold the [FUNC] button, then button [6],
and hold both for more than one second.
A [SEC] message appears, then in two seconds it will change
to [- - - -] (Security code input display).
Press the [DISC] button.
A [MS] message will appear.
If a Memory Stick has already been inserted, a [MS EJECT] message
appears. In this case, eject the Memory Stick and insert again. (Refer
to "Ejecting the Memory Stick" on page 96 for details on ejection of the
Memory Stick.)
Insert the Memory Stick and close the front panel.
The recorded data will be read from the Memory Stick.
If the contents recorded in the Memory Stick match
the information recorded by the deck, [CANCEL] will
appear on the display.
The security function will be canceled and the deck will return
to normal operation.
● If a reading error occurs or if an incorrect Memory Stick is inserted,
[ERR] will appear on the display for two seconds, and then the
display will change to [EJECT]. If this happens, eject the Memory
Stick and try again.
● Security setting cannot be canceled by this procedure if the
Memory Stick containing the security code is formatted.
Eject the Memory Stick.
Refer to "Ejecting the Memory Stick" on page 96.
33
III
CD8455.book 34 ページ
2004年12月11日 土曜日 午後7時24分
ESN security operating procedure
How to change the Memory Stick
You can change the Memory Stick and security code that have been
recorded by the deck to a different Memory Stick and security code.
Cancel the security code that has been recorded
with the deck.
Refer to "How to cancel the Memory Stick security" on page
32.
Re-record the new Memory Stick and security code
that you would like to use.
Refer to "How to record a security code" on page 30.
34
CD8455.book 35 ページ
2004年12月11日 土曜日 午後7時24分
ESN security operating procedure
[FUNC] button
Buttons [1] to [4]
How to resume normal operation (ESN security lock out)
If power is disconnected while ESN security is active (a security
code was recorded), operation is disabled until power is restored
and the unit unlocked. Follow this procedure to resume normal
operation.
ESN security lock can be canceled by directly entering the security
code into the deck, or by using the Memory Stick that was being
used when the security code was recorded.
Canceling ESN security lock out using security code entry
When the power is turned on after disconnecting the
battery power, a [SEC] message will appear for two
seconds. Thereafter, message changes to [- - - -]
(Security code input display).
A security code is entered by pressing the buttons
[1] to [4].
Enter a four-digit security code using digits 0 to 9, A to F. The
number (shown on the display) changes in ascending order
between 0 and 9, A and F each time the button is pressed.
Each button number (1 to 4) corresponds to each digit (first to
fourth) of the security code.
35
III
CD8455.book 36 ページ
2004年12月11日 土曜日 午後7時24分
ESN security operating procedure
[DISC] button
[FUNC] button
Press the [FUNC] button for more than one second.
If the security code matches the code recorded by the deck,
[OK] will appear on the display and the security function will be
canceled.
● If the security code does not match the information recorded by
the deck, [ERR_] (ERR and the error number) will appear on the
display for two seconds, and then [- - - -] (security code entry
display) will appear. If this happens, check the security code and
repeat the procedure from step 2.
● If [ERR5] (the 5th time an error has occurred) appears, [HELP] will
appear. When [HELP] appears, carry out the operations for an
ESN security lock out by following the procedure in " What
happens if a Memory Stick or security code is incorrect?" on page
37.
Canceling ESN security lock using Memory Stick
After the battery is connected and the deck's power
is turned on, [SEC] will appear on the display for two
seconds. After this, [- - - -] (security code entry
display) will appear.
Press the [DISC] button.
[MS] will appear on the display. If you press the [DISC] button
once more, the display will return to [----] (security code entry
display).
If a Memory Stick has already been inserted, a [MS EJECT] message
appears. In this case, eject the Memory Stick and insert again. (Refer
to "Ejecting the Memory Stick" on page 96 for details on ejection of
the Memory Stick.)
Insert the Memory Stick that has been recorded, and
then close the front panel.
The recorded data will be read from the Memory Stick.
36
CD8455.book 37 ページ
2004年12月11日 土曜日 午後7時24分
ESN security operating procedure
If the contents recorded in the Memory Stick match
the information recorded by the deck, [OK] will
appear on the display for two seconds, and then the
deck will return to normal operation.
● If the contents recorded in the Memory Stick do not match the
information recorded by the deck, [ERR_] (ERR and the error
number) will appear on the display for two seconds, and then [- - -] (security code entry display) will appear. If this happens, check
the Memory Stick and repeat the procedure from step 2.
● If [ERR5] (the 5th time an error has occurred) appears, [HELP] will
appear. When [HELP] appears, carry out the operations for an
ESN security lock out by following the procedure in " What
happens if a Memory Stick or security code is incorrect?" on page
37.
● ESN security lock cannot be canceled by this procedure if the
Memory Stick containing the security code was formatted.
What happens if a Memory Stick or security code is incorrect?
After the 5th incorrect attempt, the display reads
[HELP] for five seconds.
After the [HELP] message was displayed for five seconds,
serial number will appear.
You will only get 5 unsuccessful unlock code entries. After the
5th attempt, you will be asked to insert the DISC (Key CD). At
this point, please contact your local Eclipse dealer or Eclipse
Customer Service for procedure on unlocking the unit.
● Note ●
For country-specific customer service information, refer to "How to
contact customer service" on page 234.
Your security code and Memory Stick can be easily forgotten.
Write the security code and Memory Stick title in a reminder note
(See page 237).
37
III
CD8455.book 38 ページ
2004年12月11日 土曜日 午後7時24分
ESN security operating procedure
[FUNC] button
Button [5]
How to operate the ACC security
ACC security involves using Memory Stick security to record a security
code, and then when the ignition switch is turned to OFF and back to
ACC, the operation of all buttons is disabled.
Check that the unit is in standby.
Once a security code has been recorded, press the
[FUNC] button and button [5] simultaneously for more
than two seconds.
The ACC security function will be activated. Press the [FUNC]
button and button [5] simultaneously for two seconds or more again
to cancel the ACC security function.
● If the vehicle's battery is disconnected at times such as during
servicing, ACC security will be canceled.
● When ignition switch is turned OFF and back to ACC, the
operation all button is disabled. If this happen, resume normal
operation. (Refer to "How to resume normal operation (ESN
security lock out)" on page 35.)
38
CD8455.book 39 ページ
2004年12月11日 土曜日 午後7時24分
ESN security operating procedure
[FUNC] button
Button [2]
III
How to turn the security indicator on/off
Once ESN security is activated, the indicator flashes whenever the
vehicle's ignition switch is turned off, warning potential thieves that the unit
is protected. However, if do not want this visible deterrent, it may be
turned off.
With the unit in standby, press the [FUNC] button, then
button [2] and hold both for more than one second.
[IND. FLASH] or [IND.-----] appears on the display.
[IND. FLASH] means the security indicator will flash when the
vehicle's ignition switch is off, and [IND.-----] means it will not.
Repeat the above steps to reactivate the flash mode.
39
CD8455.book 40 ページ
2004年12月11日 土曜日 午後7時24分
ESN security operating procedure
[FUNC] button
Button [4]
How to read the Electronic Serial Number
Check that the unit is in standby.
Press and hold the [FUNC] button, then button [4], and
hold both for more than one second.
[ESN] appears on the display, followed by an eight-digit number;
this number is your electronic serial number (ESN). You may use
this number to identify your Eclipse CD8455 in the event of theft
recovery.
40
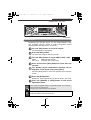
CD8455.book 41 ページ
2004年12月11日 土曜日 午後7時24分
Basic operation
Basic operation
[PWR] button
This section covers basic operating procedures. For additional details,
please refer to the sections on specific functions.
Turning the power on and off
When the power is turned on, the state used when the power was turned
off such as CD and tuner playback is restored.
When the vehicle has no ACC position on the ignition switch, care is needed
when turning off the deck. Follow Step 2 or Step 3 when turning off the power.
When power is OFF, press the [PWR] button.
The power will come ON.
When the deck's power is turned on for the first time or if the battery
terminals have been disconnected because of a reason such as
vehicle maintenance and the power is then turned back on, the deck
will start up in FM1 mode. After this, the broadcast stations will be
searched for automatically and stored in buttons [1] to [6].
When power is ON, press the [PWR] button for less than
two seconds.
The power will go OFF and the deck will be in Standby.
If you press the [PWR] button again for more than one second, the
power will go completely off.
When power is ON, press the [PWR] button for more than
two seconds.
The power will go completely OFF.
If a car is not equipped with an ACC position (for example, a European
car), press the [PWR] button for more than two seconds.
41
IV
CD8455.book 42 ページ
2004年12月11日 土曜日 午後7時24分
Basic operation
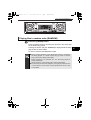
[CD
] button
[OPEN] button
[DISC MS] button
Listening to CD
Press the [OPEN] or [CD
] button.
The front panel opens.
Insert a CD into the disc slot, label side up.
The CD will immediately start playing.
When a CD is already loaded, press the [DISC MS] button to switch to
the CD mode.
Do not press the [OPEN] or [CD ] button while CD is being inserted.
This could cause an injury and damage to the front panel.
Press the [OPEN] or [CD
The front panel closes.
42
] button.
CD8455.book 43 ページ
2004年12月11日 土曜日 午後7時24分
Basic operation
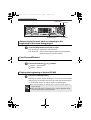
[CD
] button
[OPEN] button
[DISC MS] button
Listening to MG Memory Stick
Press the [OPEN] or [CD
IV
] button.
The front panel opens.
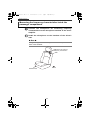
Insert a MG Memory Stick into the Memory Stick slot.
● Insert the MG Memory Stick with the mark facing inwards and
press MG Memory Stick into place until a clicking sound is
heard. Do not press forcefully when the MG Memory Stick
makes contact with the internal stopper because it cannot be
inserted any further. (The MG Memory Stick should be
protruding a few millimeters from the Memory Stick slot.)
● Use a Memory Stick Duo adapter when inserting the Memory
Stick Duo. (If the Memory Stick Duo is inserted without the
adapter, it will not be ejected from the unit.)
● When the MG Memory Stick is already loaded, press the [DISC]
button to switch to the Memory Stick mode.
Do not press the [OPEN] or [ CD ] button while the MG Memory Stick
is being inserted. This could cause an injury and damage to the front
panel.
Press the [OPEN] or [CD
] button.
The front panel closes.
Press the [DISC MS] button to switch to the Memory
Stick mode.
MG Memory Stick will start playing.
43
CD8455.book 44 ページ
2004年12月11日 土曜日 午後7時24分
Basic operation
[FM AM] button
Buttons [1] to [6]
[
] button
[SEL] button [
] button
Listening to the tuner
Press the [FM AM] button.
This will turn the tuner on.
Press the [FM AM] button for less than one second to
switch to the desired FM or AM bands.
For example, radio bands will switch from FM1 ➔ FM2 ➔ FM3 ➔
AM with each press of the button. (Depends on memory function
setting, described on page 113.)
Turn the [SEL] button to the left or right to tune to a
station.
Turn to the right: Tunes to higher frequencies.
Turn to the left: Tunes to lower frequencies.
Press the [
search.
] or [
] button to start the automatic station
[ ] button: Starts searching toward higher frequencies.
[ ] button: Starts searching toward lower frequencies.
● If stations have been stored in memory, pressing a button from
[1] to [6] will directly select a station. (Refer to the section
" Manually setting stations into memory" on page 108)
● When an optional HD Radio tuner unit is connected, digital
broadcasts have reception priority. (U.S.A. only)
44
CD8455_04_E.fm
45 ページ
2004年12月16日 木曜日 午後5時53分
Basic operation
[MUTE] button
[AUDIO CONTROL] button
Adjusting audio volume
IV
Turn the [AUDIO CONTROL] button to the left or right.
Turn to the right: Increases the volume.
Turn to the left: Decreases the volume.
Press the [MUTE] button for less than one second to cut the volume or
restore it instantly.
Do not adjust the volume or other controls while driving the vehicle. Do
so only while parked in a safe location.
45
CD8455.book 46 ページ
2004年12月11日 土曜日 午後7時24分
Basic operation
[AUDIO CONTROL] button
Switching audio control modes
Various audio control modes may be fine-tuned using this procedure.
Press the [AUDIO CONTROL] button for less than one
second to select the item to be adjusted.
Modes will switch in the order shown below each time the button is
pressed.
When the audio control is set to the Pro mode:
VOL
MID
BASS
SVC*2
TREB
When the audio control is set to the Normal mode:
VOL
BAL*1
SVC*2
FAD*1
NON-F
*1: Adjustments cannot be made when the position selector or CS II
is ON.
*2: Setting cannot be made in FM mode.
VOL (VOLUME) Mode
Adjusts volume.
Turn the [AUDIO CONTROL] button to the left or right.
Turn to the right: Increases the volume.
Turn to the left: Decreases the volume.
BASS Mode
Adjusts bass level. Bass mode can be adjusted for each source
(CDP/CDC, FM and AM and Memory stick player).
Turn the [AUDIO CONTROL] button to the left or right.
Turn to the right: Emphasizes low sounds.
Turn to the left: Softens low sounds.
46
CD8455.book 47 ページ
2004年12月11日 土曜日 午後7時24分
Basic operation
[AUDIO CONTROL] button
MID (MIDDLE) Mode
Adjusts middle level. Mid mode can be adjusted for each source
(CDP/CDC, FM and AM and Memory stick player).
Turn the [AUDIO CONTROL] button to the left or right.
Turn to the right: Emphasizes medium sounds.
Turn to the left: Softens medium sounds.
TREB (TREBLE) Mode
Adjusts treble level. Treble mode can be adjusted for each source
(CDP/CDC, FM and AM and Memory stick player).
Turn the [AUDIO CONTROL] button to the left or right.
Turn to the right: Emphasizes high sounds.
Turn to the left: Softens high sounds.
BAL (BALANCE) Mode
Adjusts left/right speaker balance.
Turn the [AUDIO CONTROL] button to the left or right.
Turn to the right: Emphasizes right speakers.
Turn to the left: Emphasizes left speakers.
FAD (FADER) Mode
Adjusts front/rear speaker balance.
Turn the [AUDIO CONTROL] button to the left or right.
Turn to the right: Emphasizes front speakers.
Turn to the left: Emphasizes rear speakers.
NON-F (NON-FADER) Mode
Adjusts non-fader level (for connected sub-woofers, etc.).
Turn the [AUDIO CONTROL] button to the left or right.
Turn to the right: Increases level.
Turn to the left: Decreases level.
47
IV
CD8455.book 48 ページ
2004年12月11日 土曜日 午後7時24分
Basic operation
[AUDIO CONTROL] button
SVC (Source Volume Control) Mode
You can set different volume levels for each audio mode. The
volume for the initial FM mode (default value: 40) is used as a
reference for storing the differences in volume that have been set
for each audio mode. When SVC is set, the volume level can
change as shown in the example settings in the table below.
Setting examples:
Audio mode
FM
AM
CD
Memory Stick
Default value
(Volume level)
Reference
(40)
0
(40)
0
(40)
0
(40)
SVC setting
(Volume level)
Reference
(40)
When volume level in
FM mode is adjusted
from 40 to 45
45
SVC
SVC
setting
setting
value
value
+15 (55) -10 (30)
55 ➔ 60 30 ➔ 35 45 ➔ 50
When volume level in
CD mode is adjusted 45 ➔ 70 60 ➔ 80*
from 35 to 60
When volume level in
AM mode is adjusted
from 80 to 20
70 ➔ 5
SVC
setting
value
+5 (45)
20
60
50 ➔ 75
60 ➔ 0*
75 ➔ 10
When volume level in
35
Memory Stick mode is 5 ➔ 30 20 ➔ 45 0 ➔ 20
adjusted from 10 to 35
*: The volume levels can be set to a maximum of 80 and a
minimum of 0. If you try to go past the maximum or minimum
volume level, the level will not change. For the CD changer, SVC
adjusts the volume using the setting value for the CD player.
48
CD8455.book 49 ページ
2004年12月11日 土曜日 午後7時24分
Basic operation
[AUDIO CONTROL] button
Turn the [AUDIO CONTROL] button to the left or right.
Turn to the right: Increases the SVC setting level.
Turn to the left: Decreases the SVC setting level.
The volume difference can be set within a range of -10 to +20.
If the battery terminals have been disconnected because of a reason
such as vehicle maintenance, the SVC settings will return to their
default values. If this happens, you will need to make the settings
again.
Enabling the loudness control
The loudness control may be turned on to emphasize low and high
frequencies at low volume levels.
Loudness compensates for the apparent weakness of low and high
frequencies at low volume by boosting the bass and treble levels.
Press and hold the [AUDIO CONTROL] button until the
[LOUD ON] display appears on the screen.
● To disable the loudness feature, repeat the above procedure to
display the [LOUD OFF] indication.
● Loudness control is not available when CSII is ON. In order to
enable loudness control, turn OFF CSII. (For details on turning
CSII ON/OFF, see page 129.)
49
IV
CD8455.book 50 ページ
2004年12月11日 土曜日 午後7時24分
Basic operation
[SEL] button
[DISP] button
Making changes with Display Adjustment Mode
This mode lets you adjust the display brightness, change the button
illumination color and turn the display on and off.
Press the [DISP] button for less than one second.
Enters display adjustment mode.
If you press the [DISP] button during display adjustment mode, the
display adjustment mode is canceled and the mode returns to normal
music mode.
Turn the [SEL] button in either direction to display
setting items for selection.
When the button is turned, the setting item changes in the following
order and the selected item is highlighted.
Motion Picture
Bright
ILL
Disp ON/OFF
Disp Data
E-AMP DISP*
*: Only when the DSP amp is connected.
50
CD8455.book 51 ページ
2004年12月11日 土曜日 午後7時24分
Basic operation
[SEL] button
[DISP] button
[RTN] button
Switching the motion picture
You can select a moving picture screen that is already available in
the deck and show it on the display. The deck has three types of
motion picture available.
In addition, moving picture screens provided by the ECLIPSE
website (E-iSERV) can be downloaded, imported into the deck and
displayed. Applications can also be downloaded and your own
images can be converted into moving pictures. (For details, see
page 55.)
Turn the [SEL] button to select the Motion Picture.
The selection item will be highlighted.
Press the [SEL] button.
The Motion picture selection mode is activated.
Turn the [SEL] button to select the Motion Picture
Type A, B, C and OFF.
The selection item will be highlighted.
Press the [SEL] button.
The selected settings will take effect.
Press the [RTN] button.
At this time, other adjustments can also be made in display
adjustment mode.
Press the [DISP] or [RTN] button to exit display
adjustment mode.
51
IV
CD8455.book 52 ページ
2004年12月11日 土曜日 午後7時24分
Basic operation
[SEL] button
[DISP] button
[RTN] button
Switching the brightness
Adjust the display brightness to the best level.
Turn the [SEL] button to select Bright.
The selected item will be highlighted.
Press the [SEL] button.
The mode will change to luminance adjustment mode.
Turn the [SEL] button to adjust brightness.
When the button is turned, the brightness level changes in the
following order.
(Level) 1↔2↔3↔4↔5
Press the [SEL] button.
The selected settings will take effect.
Press the [RTN] button.
At this time, other adjustments can also be made in display
adjustment mode.
Press the [DISP] or [RTN] button to exit display
adjustment mode.
52
CD8455.book 53 ページ
2004年12月11日 土曜日 午後7時24分
Basic operation
[SEL] button
[DISP] button
[RTN] button
Changing illumination color
You can change the button illumination color in the following way.
Turn the [SEL] button to select ILL.
The selected item will be highlighted.
Press the [SEL] button.
The screen for changing the illumination color will appear.
Turn the [SEL] button to adjust the illumination
color.
When the button is turned, the illumination color changes in
the following order.
Blue/Red
Blue/Green
All Green
Blue/Amber
All Red
Press the [SEL] button.
The selected settings will take effect.
Press the [RTN] button.
At this time, other adjustments can also be made in display
adjustment mode.
Press the [DISP] or [RTN] button to exit display
adjustment mode.
53
IV
CD8455.book 54 ページ
2004年12月11日 土曜日 午後7時24分
Basic operation
[SEL] button
[DISP] button
[RTN] button
Disabling the display
You can turn the display on and off in the following way.
Turn the [SEL] button to select Disp ON/OFF.
The selected item will be highlighted.
Press the [SEL] button.
The screen for turning the screen display on and off will
appear.
Turn the [SEL] button to select ON or OFF.
The selected item will be highlighted.
Press the [SEL] button.
The selected settings will take effect.
Press the [RTN] button.
At this time, other adjustments can also be made in display
adjustment mode.
Press the [DISP] or [RTN] button to exit display
adjustment mode.
● When the display is OFF, when one of the buttons is activated,
the screen display will come on within 6 seconds.
● When the OFF function is selected, the screen display will turn
off. However, it is possible to adjust the display adjustment
mode.
54
CD8455.book 55 ページ
2004年12月11日 土曜日 午後7時24分
Basic operation
Importing DISP screens
Moving picture screens provided by the ECLIPSE website (EiSERV) can be downloaded and used instead of pre-set moving
pictures. To download moving picture screens follow the ECLIPSE
website (E-iSERV).
After downloading the data to your PC, copy the data to a Memory
Stick or CD-R and import the data into the deck.
(URL: http://www.e-iserv.jp)
Applications for creating moving picture screens can be
downloaded, allowing you to create your own original moving
picture screens. Screens can be created by following the steps
shown below:
Select several images to use in your moving picture.
Access The ECLIPSE Website. (URL: http://www.e-iserv.jp)
Download ECLIPSE’s original image editing software (VF Animation)
following the instructions provided by the website.
Using the image editing software (VF Animation), adjust image size to
fit the display. To edit images follow the instructions provided with the
editing software.
Convert your edited images into moving pictures following the
instructions provided by the image editing software (VF Animation).
Copy the moving pictures to a Memory Stick or a CD-R.
Import into the deck.
55
IV
CD8455.book 56 ページ
2004年12月11日 土曜日 午後7時24分
Basic operation
[OPEN] button
[SEL] button
[DISP] button
[RTN] button
Turn the [SEL] button to select Disp Data.
The selected item will be highlighted.
Press the [SEL] button.
The Disp Data mode is activated.
Turn the [SEL] button to select media types.
Press the [SEL] button.
● When using a CD-R:
The front panel opens automatically and, if a CD has already
been loaded into the deck, it will automatically eject.
● When using a Memory Stick:
If the Memory Stick containing the images is not inserted,
the front panel opens automatically.
Load your selected media.
Press the [OPEN] button to close the front panel.
Turn the [SEL] button to select files.
The selected item will be highlighted.
Press the [SEL] button.
The moving picture screen will be displayed.
Turn the [SEL] switch to select from the locations to
which you want to import the data: [Type A] – [Type C].
When the button is turned, the setting item changes in the
following order and the selected item is highlighted.
Type A
Type B
Type C
Press the [SEL] button.
[OK?] appears on the display.
56
CD8455_04_E.fm
57 ページ
2004年12月16日 木曜日 午後5時53分
Basic operation
Press the [SEL] button.
This begins importing the data into the deck. If the data has
already been imported, the data will be overwritten. When
importing has completed, [Completed] will appear and the
front panel opens automatically, and CD-Rs will automatically
eject. Press the [OPEN] button to close the panel.
When using a Memory Stick:
● Data downloaded from the ECLIPSE website (E-iSERV) can be
saved in folders on the Memory Stick as follows:
IV
MSFTEN
User creation
DISP
XXXXXXXX.vfd
Automatic creation
File extension
● Files that can be imported into the deck are created
automatically when downloaded from the E-iSERV website.
● The file name can be changed using 8 alphameric characters
(space cannot be used).
When using a CD-R:
● The deck can only import files from CD-R that have been written
in root directories.
XXXXXXXX.vfd
Automatic creation
File extension
● Disc formats that may be used are as follows:
• CD-ROM (MODE 1)
• CD-ROM (MODE2_FORM 1)
*CD-ROMs written in MODE2_FORM2 cannot be read.
● The file name can be changed using 8 alphameric characters
(space cannot be used).
● Do not turn ON/OFF the power is this deck or ignition switch
while the importing. The importing will be interrupted and the
data may be damaged.
● When data is imported from a CD-R, the importing process will
take a long time if a lot of data other than the import data has
also been saved to the CD-R.
Press the [RTN] button.
At this time, other adjustments can also be made in display
adjustment mode.
Press the [DISP] or [RTN] button to exit display
adjustment mode.
57
CD8455.book 58 ページ
2004年12月11日 土曜日 午後7時24分
Basic operation
[SEL] button
[DISP] button
[RTN] button
Displaying Amplifier Status (E-AMP DISP)
If a DSP Amp is connected, the status of the DSP amp will be
displayed.
Turn the [SEL] button to select E-AMP DISP.
The selected item will be highlighted.
Press the [SEL] button.
The E-AMP DISP mode is activated.
Turn the [SEL] button to select which amplifier
status you wish to display.
When the button is turned, the setting item changes in the
following order and the selected item is highlighted.
E-AMP1
E-AMP2
E-AMP3
E-AMP4
E-AMP8
E-AMP7
E-AMP6
E-AMP5
The deck will display all connected amps.
Press the [SEL] button.
The status of the selected amp will be displayed.
Turn the [SEL] button to change display content.
Each turn of the button allows you to toggle through status
categories as follows:
TMP(˚F)
TMP(˚C)
CURRENT
VOLTAGE
Press the [RTN] button.
At this time, other adjustments can also be made in display
adjustment mode.
Press the [DISP] or [RTN] button to exit display
adjustment mode.
58
CD8455.book 59 ページ
2004年12月11日 土曜日 午後7時24分
Basic operation
[FUNC] button
[SEL] button
Making changes with Function Mode
IV
A variety of settings can be changed.
Press the [FUNC] button for less than one second.
The function mode is activated.
If you press the [FUNC] button during function mode, the adjustment
mode is canceled and the mode returns to normal music mode.
Turn the [SEL] button in either direction to display
setting items for selection.
When the button is turned, the setting item changes in the following
order and the selected item is highlighted.
Area Shot*1, 9
Title*2
Station Name*3
Memory Stick*4
Steering SW*8, 9
AUX Sensitivity*7
Guide Tone
Clock ON/OFF
HD Radio*6, 9
Memory Func*5
Demo
Clock Adjust
*1
: Cannot make settings other than for AREA SHOT operation.
(Refer to page 176 for details on AREA SHOT operation.)
*2
: Cannot make settings other than for CD or CD changer
operation.
(Refer to page 76 for details on CD operation.)
*3
: Cannot make settings other than for tuner operation.
(Refer to page 110 for details on tuner operation.)
*4
: Settings cannot be adjusted during recording.
59
CD8455.book 60 ページ
2004年12月11日 土曜日 午後7時24分
Basic operation
*5:
Refer to page 81 for details on CD operation, and to page 113 for
details on tuner operation.
*6:
This setting can only be chosen when HD radio reception is
available.
(Refer to page 201 for details on HD Radio operation.)
*7
: Refer to page 211 for details on AUX Sensitivity.
*8
: Refer to page 65 for details on Steering switch.
*9
: U.S.A. only.
60
CD8455.book 61 ページ
2004年12月11日 土曜日 午後7時24分
Basic operation
[FUNC] button
[SEL] button
[RTN] button
Disabling the guide tone feature (for button operation)
The receiver is set at the factory to emit a beep tone in response to
button operation. The guide tone feature may be disabled in the
following procedure:
Turn the [SEL] button to select Guide Tone.
The selected item will be highlighted.
Press the [SEL] button.
The guide tone mode will be switched ON/OFF.
Turn the [SEL] button to select ON or OFF.
The selected item will be highlighted.
Press the [SEL] button.
The selected settings will take effect.
Press the [RTN] button.
At this time, other adjustments can also be made in function
mode.
Press the [FUNC] or [RTN] button to exit function
mode.
61
IV
CD8455.book 62 ページ
2004年12月11日 土曜日 午後7時24分
Basic operation
[FUNC] button
Button [6] [SEL] button
[RTN] button
Clock display on/off
Switches the clock display to ON/OFF.
Turn the [SEL] button to select Clock.
The selected item will be highlighted.
Press the [SEL] button.
The clock display ON/OFF mode is activated.
Turn the [SEL] button to select ON or OFF.
The selected item will be highlighted.
Press the [SEL] button.
The selected settings will take effect.
Press the [RTN] button.
At this time, other adjustments can also be made in function
mode.
Press the [FUNC] or [RTN] button to exit function
mode.
The clock display can also be turned on and off by pressing the [6]
button while the power is turned off.
62
CD8455.book 63 ページ
2004年12月11日 土曜日 午後7時24分
Basic operation
[FUNC] button
[SEL] button [RTN] button
Setting the time
This receiver uses the 12-hour display notation.
Turn the [SEL] button to select Clock Adjust.
The selected item will be highlighted.
Press the [SEL] button.
The clock adjustment mode is activated.
Press the [SEL] button to display the item to be
selected for adjustment.
Hours or minutes will be switched each time the button is
pressed.
Turn the [SEL] button.
Turn to the right:
Turn to the left:
Turns the time forward.
Turns the time back.
Press the [RTN] button.
At this time, other adjustments can also be made in function
mode.
Press the [FUNC] or [RTN] button to exit function
mode.
63
IV
CD8455.book 64 ページ
2004年12月11日 土曜日 午後7時24分
Basic operation
[FUNC] button
[SEL] button
[RTN] button
Switching demonstration screen display
You can set the demonstration screen display to appear or not
appear when the power is turned on.
When the power turns on, the various demonstration screens such
as the audio operation screens and motion picture screens will
appear repeatedly in the following order.
Opening screen ➔ FM operation screen ➔ CD operation screen ➔
MP3/WMA operation screen ➔ Memory Stick operation screen ➔
CD Changer operation screen ➔
Sound Adjustment Mode operation screen ➔ Motion Picture A ➔
Motion Picture B ➔ Motion Picture C ➔ Ending screen ➔
Opening screen ➔ · · · · ·
If you press a button while the demonstration screens are being
displayed, the demonstration screens will be canceled and the
audio operation screen will be displayed. If you do not operate the
status display function within 15 seconds, the display will return
automatically to the demo screen.
Turn the [SEL] button to select the Demo.
The selected item will be highlighted.
Press the [SEL] button.
The Demo ON/OFF mode is activated.
Turn the [SEL] button to select ON or OFF.
The selected item will be highlighted.
Press the [SEL] button.
The selected settings will take effect.
Press the [RTN] button.
At this time, other adjustments can also be made in function mode.
Press the [FUNC] or [RTN] button to exit function
mode.
64
CD8455.book 65 ページ
2004年12月11日 土曜日 午後7時24分
Basic operation
Setting the steering switch function (U.S.A. only)
The vehicle’s factory loaded steering switch becomes inoperable
when the CD8455 is installed. The ECLIPSE website (E-iSERV)
provides software that enables steering switch operation even with
the installation of the deck. Import this software into your CD8455.
For details, contact the store from which you purchased your deck.
Depending on your vehicle’s make and model, material downloaded
from the website may not be compatible with your steering switch.
Software for the steering switch can be downloaded and imported
into the deck as follows:
Access The ECLIPSE Website. (URL : http/www.e-iserv.jp)
Download the steering switch software following instructions provided
on the ECLIPSE website (E-iSERV). (Because material available on
the website may not be compatible with the steering switches found on
some automobiles, make sure to check the website for details about
compatibility.)
Copy the downloaded software to CD-R or a Memory Stick.
Import the data into the deck from the CD-R or Memory Stick.
(For details about importing into the deck, see page 66.)
The steering switch can be operated.
Consult the store from which you purchased your CD8455 about
compatibility and set-up procedures.
65
IV
CD8455.book 66 ページ
2004年12月11日 土曜日 午後7時24分
Basic operation
[OPEN] button
[FUNC] button
[SEL] button
[RTN] button
Reading steering switch data
The steering switch data that has been downloaded from E-iSERV
(website) to a Memory Stick or CD-R can be loaded into the deck
and saved there.
Press the [FUNC] button for less than one second.
The function mode is activated.
Turn the [SEL] button to select Steering SW.
Press the [SEL] button.
Select media by turning the [SEL] button.
Press the [SEL] button.
“INSERT DISC” or “INSERT MS” will be displayed and the
panel will open automatically.
Insert the Memory Stick or CD-R to be used for
saving the steering switch data.
Press the [OPEN] button to close the front panel.
Turn the [SEL] button to select the file to be saved.
The selected file name is highlighted.
Press the [SEL] button.
The CD-R or Memory Stick data is read. While it is reading,
[READING] is displayed.
If the data can be read successfully, [Completed] will appear
on the display. When using CD-R data, the CD-R will
automatically eject when reading is complete.
Do not turn off power or ignition switch during reading precess. This will
corrupt the data.
66
CD8455_04_E.fm
67 ページ
2004年12月16日 木曜日 午後5時54分
Basic operation
When using a Memory Stick:
Data downloaded from the ECLIPSE website (E-iSERV) can be saved
in folders on the Memory Stick as follows:
MSFTEN
User creation
DATA
Automatic creation
XXXXXXXX.ssw
File extension
● Files that can be imported into the deck are created
automatically when downloaded from the E-iSERV website.
● The file name can be changed using 8 alphameric characters
(space cannot be used).
When using a CD-R:
● The deck can only import files from CD-R that have been written
to root directories.
XXXXXXXX.ssw
Automatic creation
File extension
● Disc formats that may be used are as follows:
• CD-ROM (MODE 1)
• CD-ROM (MODE2_FORM 1)
*CD-ROMs written in MODE2_FORM2 cannot be read.
● The file name can be changed using 8 alphameric characters
(space cannot be used).
Press the [RTN] button.
At this time, other adjustments can also be made in function mode.
Press the [FUNC] or [RTN] button to exit function
mode.
During Step
, the function mode can also be cancelled by
pressing the [FUNC] button.
67
IV
CD8455_04_E.fm
68 ページ
2004年12月16日 木曜日 午後5時54分
Basic operation
Compatibility with various switches
The compatibility of the deck's various modes and the steering
switches installed on your vehicle are as follows:
Mode
Switch Name*1
SEEK+
SEEK-
Button operation
Tuner
Disc mode
AUX
Short tap
TUNE UP
TRACK UP
–
Hold
SEEK UP*2
FAST UP
–
Short tap
TUNE DOWN
TRACK DOWN
–
Hold
SEEK DOWN*2
FAST DOWN
–
Short tap
Volume UP
Volume UP
Volume UP
Hold
Gradually
increases volume
Gradually
increases volume
Gradually
increases volume
Short tap
Volume DOWN
Volume DOWN
Volume DOWN
Hold
Gradually
decreases volume
MODE
–
Change to the
disc mode
Switch Name*1
Button operation
VOL+
VOL-
Gradually
Gradually
decreases volume decreases volume
Change to the
AUX mode
Change to the
tuner mode
Mode
Others
SEEK+
–
–
–
SEEK-
–
–
–
Short tap
Volume UP
–
Hold
Gradually
increases volume
–
Short tap
Volume DOWN
–
Hold
Gradually
decreases volume
–
–
Change to the
various audio
modes
Power ON in the
tuner mode
VOL+
VOL-
MODE
*1:
*2
Power OFF
Switch names change depending on vehicle make and model.
: If a SIRIUS satellite radio tuner (purchased separately) is connected, categories can be switched when
in the satellite mode.
68
CD8455.book 69 ページ
2004年12月11日 土曜日 午後7時24分
Basic operation
Others
Operation assist function
In display adjustment mode, function mode and sound adjustment
mode, the screen displays help to guide you in carrying out
operations.
The buttons that are used for
adjustment operation flash.
The function button selected for
adjustment is displayed.
69
IV
CD8455.book 70 ページ
2004年12月11日 土曜日 午後7時24分
Basic operation
Buttons [1] to [5]
[
] button
[SEL] button [
] button
Displaying a memo
If memos have been set, a memo recorded corresponding to a
number button [1] to [5] appears on the screen when the number
button is pressed briefly while the power of the main unit is turned
off.
Setting a memo
Press and hold any number button for more than
two seconds while in the Standby mode.
The state shifts to the MEMO setting mode.
Press the [
] button to select the character type.
Pressing the button will switch types from [ABC] (alphabet
characters) to [123] (numeric characters) and then [!&?]
(symbols).
Press either [SEL] or [ ] button to select the
position in which to enter the character.
The character will be inserted where the cursor is flashing:
[SEL] button: Moves the cursor to the right.
[ ] button:
Advances the cursor to the left. Pressing and
holding the [ ] button moves the cursor to the
left.
70
CD8455.book 71 ページ
2004年12月11日 土曜日 午後7時24分
Basic operation
[SEL] button
Button [6]
[RTN] button
Turn the [SEL] button to the left or right to select
IV
characters.
Turn to the right: Advances the character forward in its type.
Turn to the left: Moves the character backward in its type.
[Upper-case alphabet characters] Initial value [A]
A¡B¡C¡...X¡Y¡Z
[Numeric characters] Initial value [1]
1¡2¡3¡...8¡9¡0
[Right direction]
[Right direction]
[Symbol] Initial value [!]
[Right direction]
!¡"¡#¡$¡%¡&¡’¡(¡)¡*¡+¡,¡–¡.¡/¡:¡;¡<¡=¡>¡?¡@¡´¡_
Press the [SEL] button to select characters.
● To change the type of character to be entered, repeat steps 2
and 3.
● A maximum of 10 characters may be entered per memo.
● A maximum of 5 memos may be stored.
Press the [RTN] button.
Memo settings are now completed.
Deleting a memo
Press the number button corresponding to the
memo to be deleted for more than two seconds
while the power is turned off.
Press the [6] button for more than two seconds.
The memo will be deleted.
71
CD8455.book 72 ページ
2004年12月11日 土曜日 午後7時24分
How to operate the CD player
How to operate the CD player
[DISC MS] button
First press the [DISC MS] button for less than one second to switch to the
disc mode. It is assumed here that a CD has already been loaded into the
unit.
Listening to CDs
Press the [DISC MS] button for less than one second to
switch to the CD player mode.
This starts CD play.
Disc mode will switch from CD player ➔ Memory Stick player in
order each time the button is pressed.
If an external CD changer is connected, each additional press of the
[DISC] button will switch modes from CD changer 1 ➔ CD changer
2 ➔ Memory Stick player ➔ CD player.
A changer or player with no discs loaded will be skipped.
● Playback may be intermittent when there is a scratch on a CD
or when the recorded side is dirty.
● Only two external CD changers may be connected.
72
CD8455.book 73 ページ
2004年12月11日 土曜日 午後7時24分
How to operate the CD player
[4 SCAN] button
[
] button
[SEL] button [
] button
Advancing to the next track or returning to the
beginning of the track being played
Turn the [SEL] button to the left or right.
Turn to the right: Advances to the next track.
Turn to the left: Returns to the beginning of the track being played.
(Repeat turning for previous tracks.)
Fast Forward/Rewind
Fast forward or rewind the song currently being played.
Press and hold the [
] or [
] button.
[ ] button: Fast forward.
[ ] button: Rewind.
Playing the beginning of tracks (SCAN)
Press the [4 SCAN] button.
Pressing the button causes the player to move up to the next track
and play it for 10 seconds, then move up to the next track and play it
for 10 seconds, and so on until the button is pressed again.
● To continue playing a desired track, press the button again to
stop scanning.
● After the entire disc is scanned once, ordinary playback starts
from the point where scanning started.
73
V
CD8455.book 74 ページ
2004年12月11日 土曜日 午後7時24分
How to operate the CD player
[5 RPT] button [6 RAND] button
Repeating the same track (REPEAT)
Press the [5 RPT] button to repeat the track being
played.
To cancel, press the [5 RPT] button again.
Playing tracks in random order (RANDOM)
Press the [6 RAND] button to play the tracks in random
order.
To cancel, press the [6 RAND] button again.
● During random playback, press the [5 RPT] button to repeat the
track being played. To cancel repeat play (go back to random
play), press the [5 RPT] button again.
During playback of a particular track: The track being played is
played repeatedly.
While searching: The following track is played repeatedly.
● Occasionally the same track happens to be played (selected)
two or more times in a row; this is normal operation and is not a
sign of a problem.
● When any of the functions - "Playing the beginning of
tracks,"Repeating the same track"and "Playing tracks in random
order"- is selected, a message such as [SCAN], [REPEAT] or
[RANDOM] appears on the display to verify the current function.
74
CD8455.book 75 ページ
2004年12月11日 土曜日 午後7時24分
How to operate the CD player
[CD
] button [OPEN] button
Button [3]
Switching a CD to pause / play
Press button [3].
V
It pauses playing a CD.
To cancel, press button [3] again.
Ejecting the disc
Press the [CD
] button.
The front panel opens and the disc is ejected.
Remove the disc and press the [CD
] or [OPEN] button.
The front panel closes. If left alone for 15 seconds after the disc
ejection, the front panel closes after the BEEP sound.
● Do not drive with the front panel open. The panel may cause
unexpected personal injury during a panic stop, or the like.
● Do not attempt to close the front panel by hand. Doing so may
damage the panel.
75
CD8455.book 76 ページ
2004年12月11日 土曜日 午後7時24分
How to operate the CD player
[FUNC] button
[SEL] button [
[
] button
] button [RTN] button
Creating a title for a CD
A CD title may be created, attached and displayed for your discs. If
external CD changers are connected, a title for a CD will be created in the
same way. It is assumed here that the CD to be titled is playing.
No CD text disc can be set.
Press the [FUNC] button for less than one second while
in the disc mode.
The function mode is adtivated.
Turn the [SEL] button to select Title.
The selected item will be highlighted.
Press the [SEL] button.
The disc title setting mode is activated.
Press the [
] button to select the character type.
Pressing the button will switch types from [ABC] (Upper-case
alphabet characters) to, [123] (numeric characters) and then [!&?]
(symbols).
Press either [SEL] or [ ] button to select the position in
which to enter the character.
The character will be inserted where the cursor is flashing:
[SEL] button:
Moves the cursor to the right.
[ ] button:
Advances the cursor to the left. Pressing and
holding the [ ] button moves the cursor to the left.
76
CD8455.book 77 ページ
2004年12月11日 土曜日 午後7時24分
How to operate the CD player
Turn the [SEL] button to the left or right to select
characters.
Turn to the right: Advances the character forward in its type.
Turn to the left: Moves the character backward in its type.
[Upper-case alphabet characters] Initial value [A]
A¡B¡C¡...X¡Y¡Z
[Numeric characters] Initial value [1]
1¡2¡3¡...8¡9¡0
[Right direction]
[Right direction]
[Symbol] Initial value [!]
[Right direction]
!¡"¡#¡$¡%¡&¡’¡(¡)¡*¡+¡,¡–¡.¡/¡:¡;¡<¡=¡>¡?¡@¡´¡_
Press the [SEL] button to select characters.
● To change the type of character to be entered, repeat steps 3
and 4.
● A maximum of 14 characters may be entered per title.
● 30 to 100 titles (changeable) can be stored (Use store).
● If the number of discs that can be memorized is exceeded, the
information about the disc whose playing time is oldest is
deleted.
Press the [RTN] button.
At this time, other adjustments can also be made in function mode.
Press the [FUNC] or [RTN] button to exit function mode.
77
V
CD8455.book 78 ページ
2004年12月11日 土曜日 午後7時24分
How to operate the CD player
[FUNC] button [SEL] button
[
] button
[RTN] button
Changing a previously set title
If external CD changers are connected, a previously set title for a CD will
be changed in the same way. It is assumed here that the disc mode is
selected.
Press the [FUNC] button for less than one second while
in the disc mode.
The function mode is activated.
Turn the [SEL] button to select Title.
The selected item will be highlighted.
Press the [SEL] button.
The disc title setting mode is activated.
Press either [SEL] or [ ] button to move the cursor to
the position in the title for inserting or changing
characters.
[SEL] button:
[ ] button:
Moves the cursor to the right.
Advances the cursor to the left.
78
CD8455.book 79 ページ
2004年12月11日 土曜日 午後7時24分
How to operate the CD player
Turn the [SEL] button to the left or right to select
characters.
Turn to the right: Advances the character forward in its type.
Turn to the left: Moves the character backward in its type.
Press the [SEL] button.
The selected settings will take effect.
To leave a space blank, follow these steps.
1.Select and flash the space to be blank.
2.Turn the [SEL] button to make a blank space flashing.
3.Press the [SEL] button to move.
Press the [RTN] button.
At this time, other adjustments can also be made in function mode.
Press the [FUNC] or [RTN] button to exit function mode.
79
V
CD8455.book 80 ページ
2004年12月11日 土曜日 午後7時24分
How to operate the CD player
[FUNC] button [SEL] button
[6] button
[RTN] button
Deleting a previously created title
If external CD changers are connected, a previously created title for a CD
will be deleted in the same way. It is assumed here that the disc mode is
selected.
Press the [FUNC] button for less than one second while
in the disc mode.
The function mode is activated.
Turn the [SEL] button to select Title.
The selected item will be highlighted.
Press the [SEL] button.
The CD title being played at this point will be deleted.
Hold the [6] button down for more than two seconds.
The title has now been deleted.
Press the [RTN] button.
At this time, other adjustments can also be made in function mode.
Press the [FUNC] or [RTN] button to exit function mode.
80
CD8455.book 81 ページ
2004年12月11日 土曜日 午後7時24分
How to operate the CD player
[FUNC] button [SEL] button
[RTN] button
Changing the number of CD titles
The number of CD titles that can be set can be changed by changing the
memory allocation. The number of CD titles is fixed for each pattern and
the number of tuner bands that can be recorded is also changed at the
same time.
Press the [FUNC] button for less than one second while
in the disc mode.
The function mode is activated.
Turn the [SEL] button to select Memory Func.
The selected item will be highlighted.
Press the [SEL] button.
The mode will change to memory allocation address selection
mode.
81
V
CD8455.book 82 ページ
2004年12月11日 土曜日 午後7時24分
How to operate the CD player
Turn the [SEL] button to select an address from A to E.
The patterns switches between the following. The characters for the
selected item are highlighted and the memory allocation address
changes.
MEMORY A (standard)
AM/FM: 1/3,
CD title memory: 30 titles
MEMORY B
AM/FM: 2/5,
CD title memory: 40 titles
MEMORY C
AM/FM: 1/3,
CD title memory: 60 titles
MEMORY D
AM/FM: 2/5,
CD title memory: 80 titles
MEMORY E
AM/FM: 3/8,
CD title memory: 100 titles
If an optional HD radio tuner unit is connected, the number of AM/FM
bands is 1/3.
Press the [SEL] button.
The selected settings will take effect.
Press the [RTN] button.
At this time, other adjustments can also be made in function mode.
Press the [FUNC] or [RTN] button to exit function mode.
82
CD8455.book 83 ページ
2004年12月11日 土曜日 午後7時24分
How to operate the CD player
[DISP] button
Displaying CD text
Only the built-in CD player supports CD TEXT. It can not be displayed with
the optional CD changer. If the CD came with a logo shown below, it is
recorded with a disc title and track titles. These information will be
displayed during playback.
Press the [DISP] button for more than one second.
Pressing the [DISP] button while text is displayed scrolls the display
in the order DISC title ➔ TRACK title, and then the display stops
with the TRACK title.
CD TEXT recorded with characters other than alphanumeric and
symbols cannot be displayed.
83
V
CD8455.book 84 ページ
2004年12月11日 土曜日 午後7時24分
How to operate the MP3/WMA player
How to operate the MP3/WMA player
About MP3/WMA
The making of MP3/WMA files by recording from sources such as broadcasts,
records, recordings, videos and live performances without permission from the
copyright holder for uses other than personal enjoyment is prohibited.
What is MP3/WMA?
MP3 (MPEG Audio Layer III) is a standard format for audio
compression technology. By using MP3 a file can be compressed to
one-tenth the size of the original.
WMA (Windows MediaTM Audio) is format for audio compression
technology. WMA files can be compressed to a size smaller than
MP3 files.
This deck has limitations on MP3/WMA file standards and recorded
media and formats that can be used.
Playable MP3 file standards
● Supported standards: MPEG-1 Audio Layer III
● Supported sampling frequencies: 44.1, 48 (kHz)
● Supported bit rate: 64, 80, 96, 112, 128, 160, 192, 224, 256, 288, 320 (kbps)
* Supports VBR. (64~320kbps)
* Does not support free format.
● Supported channel modes: stereo
Playable WMA file standards
● Supported standards: WMA Ver. 7
WMA Ver. 8
WMA Ver. 9
● Supported sampling frequencies: 32, 44.1, 48 (kHz)
● Supported bit rate: 48, 64, 80, 96, 128, 160, 192, 256, 320 (kbps)
* Supports VBR (48~192 kbps).
* Does not support lossless compression.
* Does not support WMA files recorded at a
frequency of 48kHz with a bit rate of 48kbps.
84
CD8455.book 85 ページ
2004年12月11日 土曜日 午後7時24分
How to operate the MP3/WMA player
ID3/WMA tags
MP3/WMA files have an "ID3/WMA Tag" that allows input of
information so that data such as song title and artist can be saved.
This deck supports ID3v. 1.0, 1.1 and WMA tags.
Media
Media capable of playing MP3/WMA includes CD-R and CD-RW
discs. Compared to CD-ROM media commonly used for music
discs, CD-R and CD-RW discs are fragile in high temperature/high
humidity environments and one section of the CD-R and CD-RW
may become incapable of playback. Fingerprints or scratches on
the disc may prevent playback or cause skipping during playback.
Sections of a CD-R and CD-RW may deteriorate if left inside a
vehicle for long periods of time. It is also recommended that CD-R
and CD-RW discs be kept in a light-blocking case because the discs
are vulnerable to ultra-violet light.
85
VI
CD8455.book 86 ページ
2004年12月11日 土曜日 午後7時24分
How to operate the MP3/WMA player
Format of discs
The format of discs to be used must be ISO9660 Level 1 or Level 2.
Control items for this standard are as follows:
● Maximum directory layers:
8 layers
● Maximum characters for folder names/file names: 32 (including "." and 3
letter file extension)
● Allowable characters for folder names/file names: A~Z, 0~9, _ (underscore)
● Number of files/folders possible on a single disc: 999
[Configuration example for CD supporting MP3/WMA]
Root directory (F1)
F2
Folder 2
001.mp3
002.mp3
003.mp3
004.txt
005.mp3
F158
Folder 158
F159
Folder 159
Number of files/folders possible on a single
disc is 999.
Files aside from MP3/WMA files (Example:
004.txt) also count as single files.
001.mp3
002.mp3
F255
Folder 255
● Total number of folders possible on a single disc:
255
● Maximum folders this deck can recognize:
256*
*: A root directory is counted as one folder.
86
CD8455.book 87 ページ
2004年12月11日 土曜日 午後7時24分
How to operate the MP3/WMA player
File names
Only files with the MP3/WMA file extension ".mp3", ".wma" can be
recognized as MP3/WMA and played. Be sure to save MP3 files with
the ".mp3" file extension. Be sure to WMA files with the ".wma" file
extension. The "MP" or "WMA" letters of the file extension will be
recognized whether entered as uppercase letters or lowercase letters.
If the ".mp3", ".wma" file extension is attached to a file other than an
MP3/WMA file, that file will be mistakenly recognized by the deck as
an MP3/WMA file and played, resulting in loud noise output that can
damage the speakers. Be sure to avoid attaching the ".mp3", ".wma"
file extension to files that are not MP3/WMA files.
Multi-sessions
Multi-sessions are supported, and playing of CD-R and CD-RW
discs with annotated MP3/WMA files is possible. However, when
"Track at once" has been written, close the session or process the
warning message. Standardize the format of each session without
changing the format.
Playing MP3/WMA
When a disc with recorded MP3/WMA files is inserted, the deck first checks
all the files on the disc. No sound is output while the deck is checking the
files on the disc. It is recommended that the disc be recorded without files
other than MP3/WMA files and without unnecessary folders in order to
speed up the checking of disc files by the deck.
MP3/WMA playing time display
It is possible that playing time will not be correct, depending on the
writing condition of the MP3/WMA file.
* It is possible that playing time will not be correct when VBR Fast
Up/Down is operated.
Display order of MP3/WMA file/folder names
Names of MP3/WMA folders and files within the same level are
displayed in the following order.
1. MP3/WMA folders displayed first, by ascending order of
numbers, letters.
2. Files displayed next, by ascending order of numbers, letters.
87
VI
CD8455_06_E.fm
88 ページ
2004年12月16日 木曜日 午後7時40分
How to operate the MP3/WMA player
[DISC MS] button
Button [3]
Listening to MP3/WMA file
Press the [DISC MS] button for less than one second to
switch to the CD player mode.
This starts MP3/WMA file play.
Disc mode from CD player ➔ Memory Stick player in order each
time the button is pressed.
If an external CD changer is connected, each additional press of the
[DISC MS] button will switch modes from CD changer 1 ➔ CD
changer 2 ➔ Memory Stick player ➔ CD player.
A changer or player with no discs loaded will be skipped.
● Playback may be intermittent when there is a scratch on a CD
or when the recorded side is dirty.
● Only two external CD changers may be connected.
● Note ●
● When music data recorded in the normal way (CD-DA) is
present on the same disc with MP3/WMA music files, the
normally recorded music data will be played. To listen to
the MP3/WMA music files, press button [3] for more than
one second.
● When a non-MP3/WMA file is played, "NO SUPPORT" will
appear.
● The optional CD changer cannot be used to play MP3/
WMA files.
● WMA files protected by license control are skipped.
Playback continues after the skipped file. In the event that
all files are protected by license control the CD-R will not
playback and ìPROTECTî will be displayed.
88
CD8455.book 89 ページ
2004年12月11日 土曜日 午後7時24分
How to operate the MP3/WMA player
[SEL] button
Buttons [1
] and [2
[
]
[ ] button
] button
[RTN] button
Advancing to the next track (file) or returning to the
beginning of the track (file) being played
Turn the [SEL] button to the left or right.
Turn to the right: Advances to the next track (file).
Turn to the left: Returns to the beginning of the track (file) being
played.
Repeat turning for previous tracks (files).
Skipping to the next or previous folder
Press button [1
Button [1
Button [2
] or [2
].
]:Selects the next lower folder.
]:Selects the next folder.
Fast Forward/Rewind
Fast forward or rewind the song currently being played.
Press and hold the [
] or [
] button.
[ ] button: Fast forward.
[ ] button: Rewind.
Return to the root directory of the CD
In the root directory, when a file cannot replay, the system will return to the
first file that can perform a replay. (In the configuration example, the file is
returning to 001.mp3. See page 86.)
Press the [RTN] button.
89
VI
CD8455.book 90 ページ
2004年12月11日 土曜日 午後7時24分
How to operate the MP3/WMA player
[4 SCAN] button [5 RPT] button
Playing the beginning of files (SCAN)
Press the [4 SCAN] button.
Press the button briefly to play just the first 10 seconds of each
song for all the files in the same layer of the folder being played.
Pressing the button until [FOLDER SCAN] is displayed will play just
the first 10 seconds of the first song in each folder.
● To continue playing a desired file, press the button again to stop
scanning.
● After the entire disc is scanned once, ordinary playback starts
from the point where scanning started.
Repeating the same file (REPEAT)
Press the [5 RPT] button.
Press the button briefly to repeat the file being played.
Pressing the button until [FOLDER REPEAT] is displayed will repeat
all the files in the same layer as the folder being played.
To cancel, press the [5 RPT] button again.
90
CD8455.book 91 ページ
2004年12月11日 土曜日 午後7時24分
How to operate the MP3/WMA player
[5 RPT] button [6 RAND] button
Playing files in random order (RANDOM)
Press the [6 RAND] button.
Press the button briefly to randomly play the files in the same layer
as the folder being played.
Pressing the button until [ALL RANDOM] is displayed will randomly
play the files in all the folders.
To cancel, press the [6 RAND] button again.
● During random playback, press the [5 RPT] button to repeat the
file being played. To cancel repeat play (go back to random
play), press the [5 RPT] button again.
During playback of a particular file: The file being played is
played repeatedly.
While searching: The following file is played repeatedly.
● Occasionally the same file happens to be played (selected) two
or more times in a row; this is normal operation and is not a sign
of a problem.
91
VI
CD8455.book 92 ページ
2004年12月11日 土曜日 午後7時24分
How to operate the MP3/WMA player
[DISP] button
Displaying title
Press the [DISP] button for more than one second.
Each time the button is pressed, the following will be displayed in
order.
Folder Name/File Name* ➔ Tag
*: The display area shows a maximum of 14 characters and then
scrolls to display the remaining characters.
After the folder name is displayed, the file name will be displayed
by scrolling. After the file name is scrolled, the display will be
fixed.
Folder name/file name or tag recorded with characters other than alphanumeric and symbols cannot be displayed.
92
CD8455_07_E.fm
93 ページ
2004年12月16日 木曜日 午後5時57分
How to operate the Memory Stick player
How to operate the Memory Stick player
Music data recorded on "MG Memory Stick" with ATRAC3 (an audio compression
technology) can be played on this deck. Recording from music CD to the MG
Memory Stick is also possible. The following explanation for the operation is made
assuming that the MG Memory Stick has already been inserted.
First press the [DISC MS] button for less than one second to switch to the disc
mode. It is assumed here that a MG Memory Stick has already been loaded into the
deck.
● Artist name and music title (track titles) can be displayed when
they are recorded on the MG Memory Stick. A maximum of 10
characters (1 byte alphabets, numeric or symbols) can be
displayed.
● Music data recorded with MP3/WMA and ATRAC3 Plus cannot
be played.
[DISC MS] button
VII
Listening to MG Memory Stick
Press the [DISC MS] button for less than one second to
switch to the Memory Stick player mode.
Disc mode will switch from CD player ➔ Memory Stick player in
order each time the button is pressed.
If an external CD changer is connected, each additional press of the
[MS] button will switch modes from CD changer 1 ➔ CD changer 2 ➔
Memory Stick player ➔ CD player.
A changer or player with no discs loaded will be skipped.
93
CD8455.book 94 ページ
2004年12月11日 土曜日 午後7時24分
How to operate the Memory Stick player
[SEL] button [ ] button
[4 SCAN] button
[
] button
Advancing to the next track or returning to the
beginning of the track being played
Turn the [SEL] button to the left or right.
Turn to the right: Advances to the next track.
Turn to the left: Returns to the beginning of the track being played.
(Repeat turning for previous tracks.)
Fast Forward/Rewind
Fast forward or rewind the song currently being played.
Press and hold the [
] or [
]button.
[ ] button: Fast forward.
[ ] button: Rewind.
Playing the beginning of tracks (SCAN)
Press the [4 SCAN] button.
Pressing the button causes the player to move up to the next track
and play it for 10 seconds, then move up to the next track and play it
for 10 seconds, and so on until the button is pressed again.
● To continue playing a desired track, press the button again to
stop scanning.
● After the entire disc is scanned once, ordinary playback starts
from the point where scanning started.
94
CD8455.book 95 ページ
2004年12月11日 土曜日 午後7時24分
How to operate the Memory Stick player
[5 RPT] button [6 RAND] button
Repeating the same track (REPEAT)
Press the [5 RPT] button to repeat the track being
played.
To cancel, press the [5 RPT] button again.
Playing tracks in random order (RANDOM)
Press the [6 RAND] button to play the tracks in random
order.
To cancel, press the [6 RAND] button again.
● During random playback, press the [5 RPT] button to repeat the
track being played. To cancel repeat play (go back to random
play), press the [5 RPT] button again.
During playback of a particular track: The track being played is
played repeatedly.
While searching: The following track is played repeatedly.
● Occasionally the same track happens to be played (selected)
two or more times in a row; this is normal operation and is not a
sign of a problem.
● When any of the functions - "Playing the beginning of tracks",
"Repeating the same track" and "Playing tracks in random
order"- is selected, a message such as [SCAN], [REPEAT] or
[RANDOM] appears on the display to verify the current function.
95
VII
CD8455.book 96 ページ
2004年12月11日 土曜日 午後7時24分
How to operate the Memory Stick player
[OPEN] button
Ejecting the Memory Stick
Press the [OPEN] button.
The front panel opens.
Eject the Memory Stick.
Lightly press the Memory Stick once.
Memory Stick will not eject by itself. Lightly press the Memory Stick to
eject.
● Do not drive with the front panel open. The panel may cause
unexpected personal injury during a panic stop, or the like.
● Do not attempt to close the front panel by hand. Doing so may
damage the panel.
● Do not eject the Memory Stick while the Memory Stick access
indicator is illuminated.
Press the [OPEN] button.
The front panel closes.
96
CD8455.book 97 ページ
2004年12月11日 土曜日 午後7時24分
How to operate the Memory Stick player
Recording on Memory Stick
Using ATRAC3 audio compression technology, this deck compresses the
music data played on the built-in CD player, radio, external CD changer
and other external inputs (such as portable players), and records the data
on the MG Memory Stick.
CDs being played on the deck can be recorded to a memory stick as
digital data. Music from the radio, CD changers, external inputs (such as
portable players) is to a memory stick in analog. MP3/WMA files cannot
be recorded.
As this deck supports SCMS (Serial Copy Management System), MG
Memory Stick recording from media (such as CD-R and CD-RW) digitally
recorded from music CDs is not possible. Recording data of copy-proof
music CDs is not possible either.
● Unrecorded contents, deleted music and vocal data caused by
problems, malfunctions and defects of this deck will not be
warranted.
● Use of your recordings other than for the personal entertainment is
strictly prohibited by the copyright law without permission from the
copyright holder.
● Unreprodusable recordings should be test recorded first in
order to ensure all music and vocal data are recorded properly.
● Do not turn ON/OFF the power this deck or ignition switch while
recording. The recording will be interrupted and the data may
be damaged.
97
VII
CD8455.book 98 ページ
2004年12月11日 土曜日 午後7時24分
How to operate the Memory Stick player
[FUNC] button
Insert the MG Memory Stick.
When attempting to record from a CD, make sure to insert the CD.
When attempting to record from the radio, etc., make sure to turn
ON the desired sound source.
Press the [FUNC] button for more than one second.
Recording begins.
When recording a music CD, the CD plays simultaneously.
Press the [FUNC] button for more than one second.
Recording stops.
● A track is not recorded if recording is stopped in the middle of
the track.
● In case 1 Track was selected at the "Selecting tracks to be
recorded" on page 99, select tracks using the [SEL] button and
start recording.
● A MG Memory Stick formatted by another this deck may not be
able to record data.
98
CD8455.book 99 ページ
2004年12月11日 土曜日 午後7時24分
How to operate the Memory Stick player
[FUNC] button
[SEL] button
[RTN] button
Selecting tracks to be recorded
The track to be recorded can be selected.
Press the [FUNC] button for less than one second.
The function mode is activated.
Turn the [SEL] button to select Memory Stick.
The selection item is highlighted.
Press the [SEL] button.
The Memory Stick setting mode is activated.
Turn the [SEL] button to select REC Mode.
The selection item is highlighted.
Press the [SEL] button.
The REC mode selection mode is activated.
Turn the [SEL] button to select All or 1 Track.
The selection item is highlighted.
ALL:
Records all tracks in the disc.
1 Track: Records only the selected track.
Press the [SEL] button.
The selected settings will take effect.
Press the [RTN] button.
At this time, other adjustments can also be made in Memory Stick setting mode.
Press the [RTN] button.
At this time, other adjustments can also be made in function mode.
Press the [FUNC] or [RTN] button to exit function mode.
99
VII
CD8455.book 100 ページ
2004年12月11日 土曜日 午後7時24分
How to operate the Memory Stick player
[FUNC] button
[SEL] button
[RTN] button
Setting sound quality
The recording sound quality (the recording bit rate) can be set. The
recording bit rate may be selected from 66k, 105k and 132k. Sound
quality and data size increases as the bit rate increases.
Press the [FUNC] button for less than one second.
The function mode is activated.
Turn the [SEL] button to select Memory Stick.
The selection item is highlighted.
Press the [SEL] button.
The Memory Stick setting mode is activated.
Turn the [SEL] button to select REC Quality.
The selection item is highlighted.
Press the [SEL] button.
The REC quality selection mode is activated.
100
CD8455.book 101 ページ
2004年12月11日 土曜日 午後7時24分
How to operate the Memory Stick player
[FUNC] button
[SEL] button
[RTN] button
Turn the [SEL] button to select 66kbps, 105kbps or
132kbps.
The selection item is highlighted.
Press the [SEL] button.
The selected settings will take effect.
Press the [RTN] button.
At this time, other adjustments can also be made in Memory Stick
setting mode.
Press the [RTN] button.
At this time, other adjustments can also be made in function mode.
Press the [FUNC] or [RTN] button to exit function mode.
101
VII
CD8455.book 102 ページ
2004年12月11日 土曜日 午後7時24分
How to operate the Memory Stick player
[FUNC] button
[SEL] button
[RTN] button
Deleting recorded file
The recorded files being played back can be deleted.
Press the [FUNC] button for less than one second, when
the recording file being played back.
The function mode is activated.
Turn the [SEL] button to select Memory Stick.
The selection item is highlighted.
Press the [SEL] button.
The Memory Stick setting mode is activated.
Turn the [SEL] button to select Delete.
The selection item is highlighted.
Press the [SEL] button.
The file deletion selection screen will be displayed.
102
CD8455.book 103 ページ
2004年12月11日 土曜日 午後7時24分
How to operate the Memory Stick player
[FUNC] button
[SEL] button
[RTN] button
Turn the [SEL] button to select the file to be deleted.
Press the [SEL] button.
A message confirming file deletion will be displayed.
Press the [SEL] button for more than two seconds.
The selected file will be deleted.
Press the [RTN] button.
At this time, other adjustments can also be made in Memory Stick
setting mode.
Press the [RTN] button.
At this time, other adjustments can also be made in function mode.
Press the [FUNC] or [RTN] button to exit function mode.
103
VII
CD8455.book 104 ページ
2004年12月11日 土曜日 午後7時24分
How to operate the Memory Stick player
[FUNC] button
[SEL] button
[RTN] button
Formatting MG Memory Stick (quick format)
MG memory stick can be formatted.
Press the [FUNC] button for less than one second.
The function mode is activated.
Turn the [SEL] button to select Memory Stick.
The selection item is highlighted.
Press the [SEL] button.
The Memory Stick setting mode is activated.
Turn the [SEL] button to select Format.
The selection item is highlighted.
Press the [SEL] button.
The format mode is activated, then [OK?] message will appear.
Press the [SEL] button for more than two seconds.
MG Memory Stick will be formatted.
Press the [RTN] button.
At this time, other adjustments can also be made in Memory Stick
setting mode.
Press the [RTN] button.
At this time, other adjustments can also be made in function mode.
104
CD8455.book 105 ページ
2004年12月11日 土曜日 午後7時24分
How to operate the Memory Stick player
Press the [FUNC] or [RTN] button to exit function mode.
● Do not turn off the power or the ignition switch while formatting.
The formatting process will be interrupted and the data may be
corrupted.
● When a Memory Stick is formatted, all data on that Memory
Stick will be erased. (Includes Memory Stick security recorded
data and sound quality data)
● New MG Memory Stick may not be used without formatting. In
that case, format (quick format) the stick on this deck so music
can be recorded (Hi-Fi directory format). The Memory Stick
formatted on a deck other than exclusive MG Memory Stick
deck may not be usable on this deck.
VII
105
CD8455.book 106 ページ
2004年12月11日 土曜日 午後7時24分
How to operate the tuner
How to operate the tuner
[
[FM AM] button
] button
[SEL] button [
] button
First, press the [FM AM] button to start tuner operation.
There are automatic and manual methods for setting stations in memory.
The receiver will accept up to 24 stations in memory: 6 in AM and 18 in FM
(6 each for FM1, FM2 and FM3.) (Initial setting)
Tuning to a station
Press the [FM AM] button for less than one second to
switch to the desired FM or AM bands.
Radio bands will switch from FM1 ➔ FM2 ➔ FM3 ➔ AM in order
each time the button is pressed.
Turn the [SEL] button to the left or right to tune to a
station.
Turn to the right: Tunes to higher frequencies.
Turn to the left: Tunes to lower frequencies.
Press the [
search.
] or [
] button to start the automatic station
[ ] button:
[ ] button:
Starts searching toward higher frequencies.
Starts searching toward lower frequencies.
● At times, it may be difficult to maintain optimum reception because
the antenna affixed to your vehicle is in motion constantly (relative
to the broadcast antenna), encountering continuous variation in the
received radio signals’ strength. Other factors affecting reception
include interference from natural obstacles, sign posts, etc.
● When an optional HD Radio tuner unit is connected, digital
broadcasts have reception priority. (U.S.A. only)
106
CD8455.book 107 ページ
2004年12月11日 土曜日 午後7時24分
How to operate the tuner
[FM AM] button
Buttons [1] to [6]
[SEL] button
Entering stations into memory automatically
(The automatic preset mode: ASM)
Press the [FM AM] button for less than one second to
switch to the desired FM or AM bands.
Radio bands will switch from FM1 ➔ FM2 ➔ FM3 ➔ AM in order
each time the button is pressed.
Press the [SEL] button for more than two second until a
beep is heard.
The automatic preset mode starts.
The [ASM ON] indicator on the screen flashes, and stations are
automatically entered in memory under buttons [1] to [6].
These buttons are called preset buttons.
● Pressing the preset buttons ([1] to [6]) allows you to make onetouch station selections. The frequency of selected station is
indicated on.
● When a new station is set in memory, the station previously set
in memory will be deleted.
● If there are fewer than six receivable stations, the stations set in
the remaining buttons will be retained.
If the vehicle’s battery is disconnected (for repairs to the vehicle or for
removing the receiver), all stations in memory will be lost. In such a
case, set stations in the memory again.
107
VIII
CD8455.book 108 ページ
2004年12月11日 土曜日 午後7時24分
How to operate the tuner
[FM AM] button
Buttons [1] to [6]
[SEL] button
Manually setting stations into memory
This section covers the setting of stations in memory under the numbered
buttons.
Press the [FM AM] button for less than one second to
switch between FM and AM.
Turn the [SEL] button to the right or left to tune to the
station to be entered in memory.
Select any button, from [1] to [6], and press it for more
than two seconds.
The tuned station is now memorized and set in the button selected.
Repeat the procedure to set additional manually tuned stations in
memory, in turn, for buttons [1] to [6]. These buttons are called the
preset buttons.
If the vehicle’s battery is disconnected (for repairs to the vehicle or for
removing the receiver), all stations in memory will be lost. In such a
case, set stations in memory again.
108
CD8455.book 109 ページ
2004年12月11日 土曜日 午後7時24分
How to operate the tuner
Buttons [1] to [6]
[SEL] button
Preset station scan
This function enables reception of all the stations in the preset buttons for
five seconds each.
Press the [SEL] button for less than two seconds.
[P SCAN] will appear on the display, and stations stored under
preset buttons [1] through [6] will be played for five seconds each.
To stop the preset scan mode at a desired station, press
the [SEL] button again.
The receiver will stay tuned to the desired station.
109
VIII
CD8455.book 110 ページ
2004年12月11日 土曜日 午後7時24分
How to operate the tuner
[FUNC] button
[ ] button
[SEL] button [ ] button [RTN] button
Setting a station name
Station name settings can be changed.
Press the [FUNC] button for less than one second while
in the tuner mode.
The function mode is activated.
Turn the [SEL] button to select Station Name.
The selected item will be highlighted.
Press the [SEL] button.
The station name setting mode is activated.
Press the [
] button to select the character type.
Pressing the button will switch types from [ABC] (upper-case
alphabet characters) to, [123] (numeric characters) and then [!"#]
(symbols).
Press either [SEL] or [ ] button to select the position in
which to enter the character.
The character will be inserted where the cursor is flashing:
[SEL] button:
[ ] button:
Moves the cursor to the right.
Advances the cursor to the left. Pressing and
holding the [ ] button moves the cursor to the left.
110
CD8455.book 111 ページ
2004年12月11日 土曜日 午後7時24分
How to operate the tuner
[FUNC] button
[SEL] button [RTN] button
Turn the [SEL] button to the left or right to select
characters and press the [SEL] button.
Turn to the right: Advances the character forward in its type.
Turn to the left: Moves the character backward in its type.
[Upper-case alphabet characters] Initial value [A]
A¡B¡C¡...X¡Y¡Z
[Numeric characters] Initial value [1]
1¡2¡3¡...8¡9¡0
[Right direction]
[Right direction]
[Symbol] Initial value [!] [Right direction]
!¡"¡#¡$¡%¡&¡’¡(¡)¡*¡+¡,¡–¡.¡/¡:¡;¡<¡=¡>¡?¡@¡´¡_
● To change the type of character to be entered, repeat steps 3
and 4.
● A maximum of 10 characters may be entered per station name.
● A maximum of 50 station names may be stored.
Press the [RTN] button.
At this time, other adjustments can also be made in function mode.
Press the [FUNC] or [RTN] button to exit function mode.
111
VIII
CD8455.book 112 ページ
2004年12月11日 土曜日 午後7時24分
How to operate the tuner
[FUNC] button
Button [6]
[RTN] button
Deleting a station name
Press the [FUNC] button for less than one second while
in the tuner mode.
The function mode is activated.
Turn the [SEL] button to select Station Name.
The selected item will be highlighted.
Press the [SEL] button.
The station name that is displayed at this point will be deleted.
Hold the [6] button down for more than two seconds.
The station name has now been deleted.
Press the [RTN] button.
At this time, other adjustments can also be made in function mode.
Press the [FUNC] or [RTN] button to exit function mode.
112
CD8455.book 113 ページ
2004年12月11日 土曜日 午後7時24分
How to operate the tuner
[FUNC] button
[SEL] button [RTN] button
Changing the number of bands
The number of bands can be changed by changing the memory
allocations. The number of bands is fixed for each pattern and the number
of CD titles that can be set is also changed at the same time.
Press the [FUNC] button for less than one second while
in the tuner mode.
The function mode is activated.
Turn the [SEL] button to select Memory Func.
The selected item will be highlighted.
Press the [SEL] button.
The mode will change to memory allocation address selection
mode.
113
VIII
CD8455.book 114 ページ
2004年12月11日 土曜日 午後7時24分
How to operate the tuner
Turn the [SEL] button to select an address from A to E.
The patterns switch between the following. The characters for the
selected item are highlighted.
MEMORY A (standard)
AM/FM: 1/3,
CD title memory:
AM/FM: 2/5,
CD title memory:
AM/FM: 1/3,
CD title memory:
AM/FM: 2/5,
CD title memory:
AM/FM: 3/8,
CD title memory:
MEMORY B
MEMORY C
MEMORY D
MEMORY E
30 titles
40 titles
60 titles
80 titles
100 titles
If an optional HD radio tuner unit is connected, the number of AM/FM
bands is 1/3.
Press the [SEL] button.
The memory allocation address changes.
Press the [RTN] button.
At this time, other adjustments can also be made in function mode.
Press the [FUNC] or [RTN] button to exit function mode.
114
CD8455.book 115 ページ
2004年12月11日 土曜日 午後7時24分
How to operate the tuner
[FM AM] button
Button [1]
Changing the reception sensitivity for automatic
scanning
The deck lets you select the reception sensitivity to be used for automatic
scanning of stations. The two sensitivity modes available for this deck are
AUTO mode and DX mode.
When an optional HD Radio tuner unit is connected, reception
sensitivity is set to the AUTO Mode. The DX Mode is unavailable.
(U.S.A. only)
AUTO Mode
During automatic scanning, the reception sensitivity switches
automatically to one of two levels. Initially the reception sensitivity
is set to the low level so that only stations with strong signals are
received. If no stations could be received, the reception sensitivity
is increased so that stations with weaker signals can also be
received.
DX Mode
Because the reception sensitivity for automatic scanning is set to
the high level from the start, even stations with weaker signals can
be received. (Signal crossover may result in some stations being
hard to hear.)
Check that the deck is in standby mode.
Press and hold button [1], then the [FM AM] button, and
hold both for more than three seconds.
The mode switches between AUTO mode and DX mode each time
the buttons are pressed.
115
VIII
CD8455.book 116 ページ
2004年12月11日 土曜日 午後7時24分
How to operate the tuner
[FM AM] button
Button [3]
Changing the radio band location
The location for the radio bands used between the North American region
and the Asia/Australia/Latin region can be switched. The default setting is
USA (North America).
When an optional HD Radio tuner unit is connected, radio band
location is set to USA. Other radio band locations are unavailable.
(U.S.A. only)
Check that the deck is in standby mode.
Press and hold button [3], then the [FM AM] button, and
hold both for more than three seconds.
The radio band switches in the order shown below each time the
buttons are pressed.
USA
ASIA
AUS
LATIN
After this, the broadcast stations will be searched for automatically
and stored in buttons [1] to [6].
116
CD8455.book 117 ページ
2004年12月11日 土曜日 午後7時24分
How to operate the tuner
FM reception characteristics
In general, FM has much better tonal quality than AM. However, FM and FM
stereo reception encounter several characteristic problems not encountered
with AM. FM is more difficult to receive than AM in a moving vehicle. The
following are explanatory notes on what to expect from FM reception and on
how to get satisfactory performance.
FM reception differs from AM
A characteristic of transmitted signals is that lower frequencies
travel further. FM frequencies are much higher than AM's (similar to
a ray of light): they won’t bend but they will reflect. Often, they will
be interrupted by tall buildings, mountains, etc., taking direct and
indirect paths to your vehicle’s antenna. The distance at which FM
stations can be received satisfactorily is usually not nearly as far as
that which AM stations can be received.
AM Radio Waves
Ionosphere
FM Radio Waves
Ionosphere
VIII
Fading out
In weak signal or "fringe" reception areas, FM stations may fade out
completely, or fade in and out. When driving in weak signal areas,
such as near hills, through valleys or tunnels, among tall buildings,
etc., you may encounter unusual noise interference. THIS IS NOT A
TUNER PROBLEM. In this case, you can only wait until you are in a
better reception area, tune to a stronger station, or reduce the treble
level.
117
CD8455.book 118 ページ
2004年12月11日 土曜日 午後7時24分
How to operate the tuner
Reception area of FM broadcasts
A home receiver can catch weak FM stereo signals through the use
of a tall, directional or ultra-sensitive antenna. In a moving vehicle,
the area for good reception is limited because of varying conditions
encountered while driving, including the types and heights of
broadcast antenna structures, signal strength, engine noise, etc.
For best reception with manual antenna, extend the antenna mast
as far as possible.
Transmitting Antenna 100 Meters High
Effective Radiation Power 1kW
FM Stereo Car Radio 12.4 miles
FM Monaural Car Radio 31 miles
Home FM Stereo Receiver 62 miles
Reception quality varies depending on the power of the FM
station, natural and artificial barriers,weather conditions, etc.
Multipath
The reflection characteristics of FM waves cause another problem
called multipath–FM wave signals reflecting off of buildings,
mountains, etc. When the antenna receives direct and reflected
waves at the same time, distortion of sound in the treble range often
occurs, such as static or harsh-sounding voices. THIS IS NOT A
TUNER PROBLEM. Only moving to another area with a clearer
signal path can remedy the situation.
DIRECT
WAVE
RE
FL
EC
W TED
AV
E
118
ED
T
EC
FL E
E
R AV
W
CD8455.book 119 ページ
2004年12月11日 土曜日 午後7時24分
How to operate the Sound Adjustment Mode
How to operate the Sound Adjustment Mode
About Sound Adjustment Mode
This deck is equipped with two different sound adjustment modes: normal
mode and pro mode.
In normal mode, the acoustic characteristics inside the vehicle can be
adjusted using comparatively simple settings. In addition, it corresponds to
basic sound systems which comprise front speakers, rear speakers, and
subwoofer.
In pro mode, the sound quality characteristics can be adjusted item by item
using more sophisticated settings than in normal mode. In addition to the 4
speaker system, the adjustments can be made to suit 3-way speaker
system where the front speaker, rear speaker and non-fader output can be
set to Hi (treble range) Mid (medium range) or Low (bass range). Refer to
the table below and to the operations for each mode for details of each
mode.
The following adjustments can be made in normal mode and pro mode
respectively.
Normal mode
Pro mode
SRS Circle Surround II
○(See page 129)
×
Parametric equalizer
○(See page 130)
○(See page 150)
Time alignment
○(Simplified)
(See page 136)
○(See page 161)
Crossover
○(See page 142)
○(See page 163)
Multi-harmonizer
○(See page 143)
○(See page 166)
Non-fader phase
○(See page 144)
○(See page 167)
Non-fader output
○(See page 145)
○(See page 168)
Speaker layout
×
○(See page 169)
Custom mode
×
○(See page 146)
○(See page 172)
○(See page 170)
○(See page 125)
○(See page 125)
○(Simplified)
(See page 125)
○(See page 125)
Sound data
E-iSERV sound effect
customizations
(Parametric equalizer)
E-iSERV sound effect
customizations
(Time alignment)
119
IX
CD8455_09_E.fm
120 ページ
2004年12月16日 木曜日 午後6時1分
How to operate the Sound Adjustment Mode
Normal mode
E-iSERV sound effect
customizations
(Crossover)
○(See page 125)
Pro mode
○(See page 125)
SRS Circle Surround II (CS II)
Surround sound is produced by combining The CS II (SRS Circle
Surround II) mode enables 4-speaker surround sound. The system
achieves surround sound by combining SRS TruBass, which uses
the difference between two different frequencies to boost bass
tones, and SRS Circle Surround, which uses 2ch (L/R) correlation
to expand the sound.
is a trademark of SRS Labs, Inc.
Circle Surround II technology is incorporated under license from
SRS Labs, Inc.
Circle Surround II, CSII TruBass, SRS and
trademarks of SRS Labs, Inc.
symbol are
Parametric equalizer
A variety of materials are used inside a vehicle to manufacture the
seats and windows, and because these materials absorb and reflect
sound in different ways, the parametric equalizer lets you adjust the
peaks and dips of the frequency characteristics inside the vehicle to
compensate for this.
Peak
High
[Sound pressure]
Dip
Low
Low
[Frequency]
High
An "equalizer" is a function that corrects these peaks and dips in
order to flatten the frequency characteristics. However with a
normal graphic equalizer, the median frequency and the Q
(sharpness and band width) are fixed, so that when neighboring
bands are corrected, there is a limit to the amount by which
distortion in the peak and dip characteristics can be corrected.
A "parametric equalizer" lets you adjust the median frequency, Q
(sharpness and band width) and gain to variable levels, so that you
can make fine adjustments to spot areas of the frequency band.
120
CD8455.book 121 ページ
2004年12月11日 土曜日 午後7時24分
How to operate the Sound Adjustment Mode
[Parametric equalizer characteristics]
Median frequency can be varied.
High
[Sound pressure]
Low
Low
[Frequency]
High
[Frequency]
High
Gain can be varied.
High
[Sound pressure]
Low
Low
Q (sharpness/band width) can be varied.
IX
High
[Sound pressure]
Low
Low
[Frequency]
High
In the deck’s normal mode, 7-bands can be adjusted with a
parametric equalizer. In the pro mode, 5 bands in the high
frequency range and 5 bands in the mid to low-frequency
ranges can be adjusted with a parametric equalizer, when
using 3-way speakers. When using a four-speaker system, 5
bands for the front and 5 bands for the rear can be adjusted
separately.
121
CD8455.book 122 ページ
2004年12月11日 土曜日 午後7時24分
How to operate the Sound Adjustment Mode
Time Alignment
With vehicle audio systems, the installation position of the speakers
and the position of the listener mean that the distances from the
listener to the left and right speakers are almost always different.
These differences in the distance from the listener to each speaker
in turn means that the time taken for the sound to reach the listener
is different for each speaker. The result of this is that the phases of
each speaker (biases) become mismatched and the sound
becomes unnatural, as though the sound stage is not wide enough.
The "time alignment" function corrects the time taken for the sound
waves to reach the listener in order to set the optimum phase for the
listening position so that the sound becomes more expansive as
though it is being listened to on a sound stage.
The basic adjustment method involves measuring the actual
distances to each speaker and calculating the differences in
distance relative to the most distant speaker in order to derive the
delay time for the sound from each speaker.
When this deck is in normal mode, a simplified time alignment
function is available. You can use this function to adjust only four
parameters (position selector, vehicle type, tweeter settings and
rear speaker position settings), and so you can make basic time
alignment settings without measuring the actual distances to each
speaker. In addition, in pro mode you can adjust the time delays and
levels for each individual speaker based on the actual speaker
layout.
122
CD8455.book 123 ページ
2004年12月11日 土曜日 午後7時24分
How to operate the Sound Adjustment Mode
Crossover
The frequency band that is stored by audio media such as CDs is a
fairly wide range from 20 Hz to 20 kHz, and it is difficult for a single
speaker to be able to play back all frequencies in such a wide
range.
Because of this, several speakers can be used, with different
frequency bands (such as treble, medium and bass) allotted to each
speaker so that wide frequency ranges can be played back.
The "Crossover" function is used to allot the frequency ranges that
are to be played back by each speaker in accordance to the
installed speaker units and the layout of the speakers, in order to
obtain the maximum level of performance from the speakers and to
provide the most stable frequency characteristics.
The crossover function includes a high-pass filter (HPF) for playing
back treble sounds, and a low-pass filter (LPF) for playing back
bass sounds. In addition, the HPF and LPF are used in combination
in order to play back sounds in the mid range.
-3dB
Bass range
20Hz
fc1(LPF)
Mid range
fc2(HPF)
Treble range
fc3(LPF)
fc4(HPF)
20kHz
fc*: Cutoff frequency
For example, when adjusting the HPF, frequencies that are lower
than the specified frequency are progressively dampened, rather
than simply not being played back at all. The "slope" adjustment
function is the function that is used to adjust these dampening
characteristics.
The slope characteristics of a filter are such that with larger slope
values (for example 12 dB/oct), the slope becomes steeper, and so
the amount of sound mixing in with neighboring bands becomes
less so that only the target band is played back. However, it also
causes the merging of sound between speakers to become poorer
and can result in greater distortion.
● The crossover function is a filter that allocates specified frequency
bands.
● A high-pass filter (HPF) is a filter that cuts out frequencies that are
lower than the specified frequency (bass range) and allows higher
frequencies (treble range) to pass through.
123
IX
CD8455.book 124 ページ
2004年12月11日 土曜日 午後7時24分
How to operate the Sound Adjustment Mode
● A low-pass filter (LPF) is a filter that cuts out frequencies that are
higher than the specified frequency (treble range) and allows
lower frequencies (bass range) to pass through.
● The slope is the signal level at which frequencies that are one
octave higher or one octave lower are dampened.
The larger the slope value, the greater the slope. In addition,
when "PASS" is selected, the slope is eliminated (sound does not
pass through the filters), so that the crossover function has no
effect.
When this deck is in normal mode, it corresponds to basic speaker
systems which comprise front speakers, rear speakers, and
subwoofer. In such cases, the crossover can be used to apply the
HPF to the front and rear speakers and the LPF to the sub-woofer
so that the sound from all speakers merges properly.
In addition to the 4 speaker system, in pro mode, the adjustments
can be made to suit speaker system where the front speaker, rear
speaker and non-fader output can be switched between Hi, Mid or
Low output and the speakers can be combined according to each
range (treble range: tweeter, mid range: mid, bass range: woofer) to
provide 3-way playback. In this case, the crossover function can be
used to adjust the playback ranges so that the HPF is applied to the
treble-range speakers, the HPF and LPF is applied to the Mid-range
speakers, and the LPF is applied to the bass-range speakers so
that the sound from all speakers merges properly.
Bass range
(woofers)
20Hz
Mid range (Front and rear speakers)
20kHz
fc(LPF/HPF)
63-200Hz
124
CD8455.book 125 ページ
2004年12月11日 土曜日 午後7時24分
How to operate the Sound Adjustment Mode
Multi-harmonizer
When original sounds are converted to MP3/WMA and Memory
Stick (ATRAC3) format, frequency ranges that are not normally
audible to the human ear are compressed. The multi-harmonizer
can be used to play back these compressed sounds at as close to
their original form as possible so that clear and powerful sound can
be enjoyed.
Non-fader phase
The sounds that are output from woofers include sounds that are in
the same frequency ranges that are output from the front and rear
speakers, and under the various conditions that can occur inside
vehicle compartments, some of these sounds may cancel each
other out. This phenomenon can be eliminated by changing the
phase of the woofer.
The phase of the woofer can be set to normal timing (in which the
output timing between the front and rear speakers and the woofer is
the same) or reverse timing (in which the output timing between the
front and rear speakers and the woofer is different), depending on
the vehicle compartment conditions.
Non-Fader output
Depending on your external amplifier, non-fader output may be
stereo or mono.
Speaker layout
The speaker layout can be configured as a 3-way or 4-speaker
system.
E-iSERV sound effect customizations
The parametric equalizer, time alignment, and crossover setting can
be adjusted using this deck, or through the Eclipse web site.
(Settings can be stored on CD-R or Memory Stick.)
125
IX
CD8455.book 126 ページ
2004年12月11日 土曜日 午後7時24分
How to operate the Sound Adjustment Mode
● Automatic parametric equalizer correction
This can be used to automatically correct distortion in frequency
characteristics (peaks and dips) based on the results of
measuring the frequency characteristics inside the vehicle.
Automatic parametric equalizer correction is carried out in the
following steps.
Time alignment and crossover adjustment
(Refer to "Time alignment adjustment" on pages 136 and 161
and "Crossover adjustment" on pages 142 and 163 for details.
In addition, adjustment and settings can be carried out using
the ECLIPSE web site.)
Frequency characteristic measurement
(Refer to "Measuring/display frequency characteristics" on
pages 133 and 158 for details.)
Saving sound quality data
(The folders and files that are required for E-iSERV sound
effect customizations are created automatically when the data
is written to the Memory Stick. Refer to "Measuring/display
frequency characteristics" on pages 133 and 158 for details.)
ECLIPSE web site accessing
(Access the following URL: http://www.e-iserv.jp)
Automatic parametric equalizer adjustment
(Follow the instructions given on the web site.)
Correction data downloading
(Follow the instructions given on the web site.)
Correction data reading
(Refer to "Importing Sound Data" on page 146 and 170 for details.)
126
CD8455.book 127 ページ
2004年12月11日 土曜日 午後7時24分
How to operate the Sound Adjustment Mode
● Time alignment and crossover adjustment
Other adjustments besides adjustment of this deck can be carried
out using the ECLIPSE web site. The procedure for doing this is
displayed on the screen, and adjustment is comparatively easy
using this method. Access the ECLIPSE website and follow the
instructions that appear on the screen. After doing this, download
the adjusted data for the CD-R or Memory Stick and load it into
the deck. (Refer to "Importing Sound Data" on page 146 for
details on reading the adjustment data.)
URL: http://www.e-iserv.jp
● E-iSERV Custom mode (Pro Mode only)
Using custom modes, E-iSERV sound effect customizations allow
you to make adjustments even more precise than those available
with the deck alone. Download data adjusted using the custom
mode and copy it to a Memory Stick. Next, the adjusted values
can be read in the deck’s custom mode.
(Refer to "Custom Mode" on page 172)
IX
127
CD8455.book 128 ページ
2004年12月11日 土曜日 午後7時24分
How to operate the Sound Adjustment Mode
[SOUND] button
[SEL] button
Operations during Normal Mode
Press the [SOUND] button.
The mode will change to sound adjustment mode (normal mode).
Refer to "Operations during Pro Mode" on page 148 for details on
the operating the Pro Mode.
If you press the [SOUND] button during sound adjustment mode, the
adjustment mode is canceled and the mode returns to normal music
mode.
When switching between Normal Mode and Pro Mode, please make
sure that the volume level is set to 0.
Turn the [SEL] button to select a setting item.
When the button is turned, the setting item changes in the following
order and the selected item is highlighted.
CS II
PEQ
Time Alignment
X-Over
Sound Data
Non-F Output
Non-F Phase
Press the [SEL] button.
128
Harmonizer
CD8455.book 129 ページ
2004年12月11日 土曜日 午後7時24分
How to operate the Sound Adjustment Mode
[SEL] button
[ ] button
[SOUND] button
SRS Circle Surround II (CS II)
The system achieves surround sound by combining SRS TruBass,
which uses the difference between two different frequencies to
boost bass tones, and SRS Circle Surround, which uses 2ch (L/R)
correlation to expand the sound.
Setting CSII modes
Turn the [SEL] button to select CSII.
The selected item is highlighted.
Press the [SEL] button.
The mode will change to CSII mode.
Turn the [SEL] button.
Turn the [SEL] button to set CSII modes as follows:
Low
OFF
HI
In the Hi and Low settings, Loud and Position can not be
changed.
Press the [SEL] button.
The selected settings will take effect.
Press the [
] button.
When CSII is HI or Low, TruBass can be turned ON/OFF.
Press the [RTN] button.
At this time, other adjustments can also be made in normal mode.
Press the [SOUND] or [RTN] button to exit sound
adjustment mode.
If the CS II mode has been set (to a setting other than OFF), the BAL
(balance) and FAD (fader) settings will be canceled.
129
IX
CD8455.book 130 ページ
2004年12月11日 土曜日 午後7時24分
How to operate the Sound Adjustment Mode
[SEL] button [
] button
[
] button
Parametric equalizer adjustment (PEQ)
The parametric equalizer adjusts 7 frequency bands.
Turn the [SEL] button to select PEQ.
The selected item is highlighted.
Press the [SEL] button.
The mode will change to parametric equalizer adjustment
mode.
Press the [SEL] button to select the band to be
adjusted.
Each time the button is pressed, the selection changes in the
following order.
1
2
3
4
5
6
7
Turn the [SEL] button to select the frequency to be
adjusted.
When the button is turned, the frequency changes in the
following order.
1: 63Hz↔80Hz↔100Hz
2: 125Hz↔160Hz↔200Hz
3: 250Hz↔315Hz↔400Hz↔500Hz
4: 630Hz↔800Hz↔1kHz↔1.25kHz
5: 1.6kHz↔2kHz↔2.5kHz↔3.15kHz
6: 4kHz↔5kHz↔6.3kHz↔8kHz
7: 10kHz↔12.5kHz↔16kHz
Press the [
] or [
] button.
This adjusts the frequency level.
[ ] button:
Increases level.
[ ] button:
Decreases level.
130
CD8455.book 131 ページ
2004年12月11日 土曜日 午後7時24分
How to operate the Sound Adjustment Mode
[SOUND] button
Buttons [1] to [6]
[RTN] button
Press the [6] button to select the Q curve pattern.
Each time the button is pressed, the Q curve changes in the
following order.
NORMAL
SHARP
SLOW
Repeat the operations in steps
change the settings for each band.
to
to
Hold down a button, [1] to [5], for more than two
seconds to preset a value.
The preset value is overwritten by the value set using the
above steps.
The time alignment and crossover adjustments will also be
stored at this time.
Press the [RTN] button.
At this time, other adjustments can also be made in normal
mode.
Press the [SOUND] button to exit sound adjustment
mode.
131
IX
CD8455.book 132 ページ
2004年12月11日 土曜日 午後7時24分
How to operate the Sound Adjustment Mode
[SOUND] button [SEL] button
Buttons [1] to [5]
[RTN] button
Selecting an equalizer mode from memory
Press a preset button to select the equalizer mode set in memory
for the button. The buttons that set equalizer modes in memory are
called preset buttons.
Turn the [SEL] button to select PEQ.
Press the [SEL] button.
Select any button, from [1] to [5], and press it for
less than two seconds.
The preset pattern stored in memory will be retrieved.
Press the [RTN] button.
At this time, other adjustments can also be made in normal
mode.
Press the [SOUND] or [RTN] button to exit sound
adjustment mode.
When the preset value is changed, the display shows as follows:
P
1~5 (Preset ch No.)
132
CD8455.book 133 ページ
2004年12月11日 土曜日 午後7時24分
How to operate the Sound Adjustment Mode
[SEL] button
Measuring/display frequency characteristic
Frequency characteristics inside the vehicle can be measured and
displayed on the display. The measurement result can be referred
to when adjusting parametric equalizer. This result is also
necessary to automatically correct parametric equalizer setting
using E-iSERV sound effect customizations.
● Adjust time alignment (see page 136) and crossover (see page
142) before measuring frequency characteristics.
● When measuring frequency characteristics, CSII and Loudness
settings are automatically cancelled.
Connect the accessory microphone with a RCA IX
connector to the L-CH of the AUX jack of the deck.
The selection item will be highlighted.
Turn the [SEL] button to select the PEQ.
Align the microphone with the actual ear position and attach it
to the headrest or other appropriate fixture. (Attach the
microphone using tape or string.)
Press the [SEL] button.
The mode will be change to parametric equalizer adjustment
mode.
133
CD8455.book 134 ページ
2004年12月11日 土曜日 午後7時24分
How to operate the Sound Adjustment Mode
[SOUND] button
[OPEN] button
[RTN] button
[AUDIO CONTROL] button
Press the [AUDIO CONTROL] button for less than
two seconds.
After pushing the button, a 10-second countdown begins.
Leave the vehicle during that time.
Pink noise will be output from the speakers and measurement
of the frequency characteristics will start. [Measuring] will
appear on the display while measurement is in progress.
When measurement is complete, the measurement results will
appear on the display. You can adjust the volume (by turning
the [AUDIO CONTROL] button) and restart measurement
while measurement is in progress.
Press the [AUDIO CONTROL] button once more to cancel
measurement.
Press the [OPEN] button.
Insert a Memory Stick.
Press the [AUDIO CONTROL] button for more than
two seconds.
Measurements can be written to a memory stick and corrected
automatically using the E-iSERV website.
Close all doors and windows while measurement is in progress.
In order to make measurement of frequency characteristics easier,
slight errors may occur in the measurement data under some
circumstances when this function is used. In addition, it is not
equivalent to the precise measurements that can be made by
professional measuring devices.
134
CD8455_09_E.fm
135 ページ
2004年12月13日 月曜日 午前11時47分
How to operate the Sound Adjustment Mode
Press the [RTN] button.
At this time, other adjustments can also be made in normal
mode.
Press the [SOUND] or [RTN] button to exit sound
adjustment mode.
● Sound quality data is written to Memory Stick as follows.
MSFTEN
SOUND
205000.ftn
File extension
Three digit number
Adjustment mode
a:Pro Mode (3WAY)
c:Normal Mode
d:Pro Mode (4SP+SW)
● The folders and files that are required for E-iSERV sound effect
customizations are created automatically when the data is
written to the Memory Stick.
● Select a file in MSFTEN SOUND when uploading sound quality data
to E-iSERV (web site).
135
IX
CD8455.book 136 ページ
2004年12月11日 土曜日 午後7時24分
How to operate the Sound Adjustment Mode
[SEL] button
Simplified time alignment settings (Time Alignment)
This function corrects the position characteristics and frequency
characteristics in order to delay the signals being output from the
various speakers so that the signals from each speaker reach the
listening position at the same time.
● Time Alignment cannot be operated when the CSII is ON.
● Before selecting a position, make sure that CSII is OFF. (For
details about turning CSII ON/OFF, see page 129.)
Turn the [SEL] button to select Time Alignment.
The selected item will be highlighted.
Press the [SEL] button.
The mode will change to time alignment setting mode.
Turn the [SEL] button to select a setting item.
When the button is turned, the setting item changes in the
following order and the selected item is highlighted.
Position
Car Type
Press the [SEL] button.
136
Tweeter
Rear SP
CD8455.book 137 ページ
2004年12月11日 土曜日 午後7時24分
How to operate the Sound Adjustment Mode
[SOUND] button
[SEL] button
[RTN] button
Position selector setting (Position)
When the position of the listener's seat is selected, the time taken
for the sound to travel from the speakers to the listener can then be
adjusted in order to obtain a more natural sound orientation. This
deck allows up to four different positions to be set.
Turn the [SEL] button to select Position.
The selected item will be highlighted.
Press the [SEL] button.
The mode will change to position selector setting mode.
Turn the [SEL] button to select the setting item.
When the button is turned, the setting item changes in the
following order and the selected item is highlighted.
OFF
Front L
Front R
Front
Rear
Press the [SEL] button.
The selected settings will take effect.
Press the [RTN] button.
Other time alignment items can be set at this time.
Press the [RTN] button.
At this time, other adjustments can also be made in normal
mode.
Press the [SOUND] or [RTN] button to exit sound
adjustment mode.
If the position selector has been set (to a setting other than OFF), the
BAL (balance) and FAD (fader) settings will be canceled.
137
IX
CD8455.book 138 ページ
2004年12月11日 土曜日 午後7時24分
How to operate the Sound Adjustment Mode
[SOUND] button
[SEL] button
[RTN] button
Selecting the type of vehicle (Car Type)
You can select the time alignment settings to match your vehicle
from a range of preset settings for different types of vehicle,
allowing you to select the optimum time alignment settings
automatically.
Turn the [SEL] button to select Car Type.
The selected item will be highlighted.
Press the [SEL] button.
The mode will change to car type selection mode.
138
CD8455.book 139 ページ
2004年12月11日 土曜日 午後7時24分
How to operate the Sound Adjustment Mode
Turn the [SEL] button to select the setting item.
When the button is turned, the setting item changes in the
following order and the selected item is highlighted.
Compact
Sedan
Wagon
Mini Van
SUV
Truck
Press the [SEL] button.
The selected settings will take effect.
Press the [RTN] button.
Other time alignment items can be set at this time.
Press the [RTN] button.
At this time, other adjustments can also be made in normal
mode.
Press the [SOUND] or [RTN] button to exit sound
adjustment mode.
139
IX
CD8455.book 140 ページ
2004年12月11日 土曜日 午後7時24分
How to operate the Sound Adjustment Mode
[SOUND] button
[SEL] button
[RTN] button
Tweeter settings (Tweeter)
You can select the tweeter installation location and whether or not a
tweeter is being used or not, allowing you to select the optimum
time alignment settings automatically.
Turn the [SEL] button to select Tweeter.
The selected item will be highlighted.
Press the [SEL] button.
The mode will change to tweeter setting mode.
Turn the [SEL] button to select the setting item.
When the button is turned, the setting item changes in the
following order and the selected item is highlighted.
NO
Dash
Door
Press the [SEL] button.
The selected settings will take effect.
Press the [RTN] button.
Other time alignment items can be set at this time.
Press the [RTN] button.
At this time, other adjustments can also be made in normal
mode.
Press the [SOUND] or [RTN] button to exit sound
adjustment mode.
If the front speakers have been installed to the dash panel, you can set
the tweeter setting to "Dash" even if no tweeter has been installed.
140
CD8455.book 141 ページ
2004年12月11日 土曜日 午後7時24分
How to operate the Sound Adjustment Mode
[SOUND] button
[SEL] button
[RTN] button
Rear speaker position selection (Rear SP)
You can select the rear speaker installation location, allowing you to
select the optimum time alignment settings automatically.
Turn the [SEL] button to select Rear SP.
The selected item will be highlighted.
Press the [SEL] button.
The mode will change to rear speaker position setting mode.
Turn the [SEL] button to select the setting item.
When the button is turned, the setting item changes in the
following order and the selected item is highlighted.
Door
Others
Press the [SEL] button.
The selected settings will take effect.
Press the [RTN] button.
Other time alignment items can be set at this time.
Press the [RTN] button.
At this time, other adjustments can also be made in normal
mode.
Press the [SOUND] or [RTN] button to exit sound
adjustment mode.
141
IX
CD8455.book 142 ページ
2004年12月11日 土曜日 午後7時24分
How to operate the Sound Adjustment Mode
[SOUND] button [SEL] button [
[
] button
] button [RTN] button
Crossover adjustment (X-Over)
The frequencies for the front and rear speaker high-pass filter (HPF)
and woofer low-pass filter (LPF) can be set within a range of 63 to
200 Hz. (This is the same as the HPF and LPF cutoff frequencies.)
Turn the [SEL] button to select X-Over.
The selected item will be highlighted.
Press the [SEL] button.
The mode will change to crossover setting mode.
Turn the [SEL] button to select the cut-off frequency.
When the button is turned, the frequency changes in the
following order.
63Hz ↔ 80Hz ↔ 100Hz ↔ 125Hz ↔ 160Hz ↔ 200Hz ↔
Press the [
] or [
] buttons to set the slope.
[ ] button : The slope becomes more gentle.
[ ] button : The slope becomes steeper.
The slope can be set to "PASS", "6dB/oct", "12dB/oct", "18dB/
oct" or "24dB/oct".
If no woofer has been connected, set the slope adjustment to "PASS".
(If slope is set to a setting other than PASS, the low frequency range
will not be output from the speakers.)
Press the [RTN] button.
At this time, other adjustments can also be made in normal
mode.
Press the [SOUND] or [RTN] button to exit sound
adjustment mode.
142
CD8455.book 143 ページ
2004年12月11日 土曜日 午後7時24分
How to operate the Sound Adjustment Mode
[SOUND] button [SEL] button
[RTN] button
Multi-harmonizer settings (Harmonizer)
This function uses harmonic synthesis to restore the high-frequency
component that is lost as a result of the compression process so
that better sound can be obtained during MP3 /WMA or Memory
Stick (ATRAC3) playback.
Turn the [SEL] button to select Harmonizer.
The selected item will be highlighted.
Press the [SEL] button.
The mode will change to multi-harmonizer setting mode.
Turn the [SEL] button to select the setting item.
When the button is turned, the setting item changes in the
following order and the selected item is highlighted.
OFF
Hi:
Low:
Hi
Low
High effectiveness
Low effectiveness
Press the [SEL] button.
The selected settings will take effect.
Press the [RTN] button.
At this time, other adjustments can also be made in normal
mode.
Press the [SOUND] or [RTN] button to exit sound
adjustment mode.
143
IX
CD8455.book 144 ページ
2004年12月11日 土曜日 午後7時24分
How to operate the Sound Adjustment Mode
[SOUND] button
[SEL] button
[RTN] button
Non-fader phase selection (NON-F Phase)
The merging of sound between the front and rear speakers and the
woofer can be improved by selecting the phase.
Switch to a phase which lets the speakers combine without any
disharmony.
Turn the [SEL] button to select Non-F Phase.
The selected item will be highlighted.
Press the [SEL] button.
The mode will change to phase selection mode.
Turn the [SEL] button to select NORMAL or
REVERSE.
NORMAL:
REVERSE:
Normal phase
Reverse phase
Press the [SEL] button.
The selected settings will take effect.
Press the [RTN] button.
At this time, other adjustments can also be made in normal
mode.
Press the [SOUND] or [RTN] button to exit sound
adjustment mode.
144
CD8455.book 145 ページ
2004年12月11日 土曜日 午後7時24分
How to operate the Sound Adjustment Mode
[SOUND] button [SEL] button
[RTN] button
Non-Fader Output
Non-Fader Output can be stereo or mono. Select the method that
matches the output method for the sub-woofer system that is
connected to the deck.
Turn the [SEL] button to select Non-F Output.
The selected item is highlighted.
Press the [SEL] button.
The mode will change to Non-F Output.
Turn the [SEL] button to select Stereo or Monaural.
Press the [SEL] button.
The selected settings will take effect.
Press the [RTN] button.
At this time, other adjustments can also be made in normal
mode.
Press the [SOUND] or [RTN] button to exit sound
adjustment mode.
145
IX
CD8455_09_E.fm
146 ページ
2004年12月16日 木曜日 午後6時2分
How to operate the Sound Adjustment Mode
[SOUND] button [SEL] button
Buttons [1] to [5]
[RTN] button
Importing Sound Data
Sound data adjusted by the E-iSERV website can be downloaded to
a CD-R or a Memory Stick and imported into the deck.
Turn the [SEL] button to select Sound Data.
The selected item is highlighted.
Press the [SEL] button.
The mode will change to Sound Data mode.
Turn the [SEL] switch to select media types.
When the button is turned, the setting item changes in the
following order.
Disc → Memory Stick
Press the [SEL] button.
The front panel automatically opens.
Insert a CD-R or a Memory Stick.
Turn the [SEL] button to select the file.
The selected item will be highlighted.
Press the [SEL] button.
Select from buttons [1] through [5], and press and
hold for 2 seconds or more to save to the unit.
The selected file is written to the selected button.
When using a CD-R, the CD-R will eject automatically when
writing is complete.
The display will return to the file selection screen.
146
CD8455_09_E.fm
147 ページ 2004年12月13日 月曜日 午後1時17分
How to operate the Sound Adjustment Mode
Press the [RTN] button.
At this time, other adjustments can also be made in normal
mode.
Press the [SOUND] or [RTN] button to exit sound
adjustment mode.
When using a Memory Stick:
● Make a folders in the Memory Stick and download the data
adjust through E-iSERV (web site) as shown below.
MSFTEN
User creation
DATA
204㧖 X 00 .eis
Automatic creation
File extension
Two digit number
Adjustment pattern
a: Flat tuning B: Bass range emphasis
c: Bass and Treble range emphasis
d: Midium range emphasis
0: No automatic parametric equalizer correction
Adjustment mode
a:Pro Mode (3WAY)
c:Normal Mode
d:Pro Mode (4SP+SW)
● The files that can be read by this deck are created automatically
when you are downloading from the E-iSERV sound effect
customizations.
When using a CD-R:
● The deck can only import files from CD-R that have been written
in root directories.
204㧖 X 00 .eis
Automatic creation
File extension
Two digit number
Adjustment pattern
a: Flat tuning B: Bass range emphasis
c: Bass and Treble range emphasis
d: Midium range emphasis
0: No automatic parametric equalizer correction
Adjustment mode
a:Pro Mode (3WAY)
c:Normal Mode
d:Pro Mode (4SP+SW)
● Disc formats that may be used are as follows:
• CD-ROM (MODE 1)
• CD-ROM (MODE2_FORM 1)
*CD-ROMs written in MODE2_FORM2 cannot be read.
147
IX
CD8455.book 148 ページ
2004年12月11日 土曜日 午後7時24分
How to operate the Sound Adjustment Mode
[SOUND] button
[SEL] button
Operations during Pro Mode
Press the [SOUND] button for more than five seconds.
The mode switches between normal mode and pro mode each time
the button is pressed. During pro mode, "PRO MODE ON" and the
scroll display appear in the display.
Press the [SOUND] button.
The mode will switch to sound adjustment mode (Pro mode).
● If the vehicle is equipped with a 3-way speaker system, do not
change from pro mode to normal mode. Doing so may cause
damage to the speakers.
● If you press the [SOUND] button during sound adjustment
mode, the adjustment mode is canceled and the mode returns
to audio playback mode.
When switching between Normal Mode and Pro Mode, please make
sure that the volume level is set to 0.
148
CD8455.book 149 ページ
2004年12月11日 土曜日 午後7時24分
How to operate the Sound Adjustment Mode
Turn the [SEL] button to select a setting item.
When the button is turned, the setting item changes in the following
order and the selected item is highlighted.
PEQ
Time Alignment
X-Over
Harmonizer
Non-F Phase
Non-F Output
SP Layout
Custom Mode
Sound Data
IX
Press the [SEL] button.
149
CD8455.book 150 ページ
2004年12月11日 土曜日 午後7時24分
How to operate the Sound Adjustment Mode
Parametric equalizer adjustment (PEQ)
The parametric equalizer can be set for a both 3-way speaker
system or a 4-speaker system. (For details about speaker layout,
see page 169.)
Speaker layout: 4-speaker system
When the 4-speaker layout is selected, 5-band parametric
equalizers can be adjusted for both the front and rear channels. For
each band, the adjustable frequencies are as follows:
Channel
Front
Band
F1
F2
F3
F4
F5
Rear
R1
R2
R3
R4
R5
Adjustable frequency (Hz)
63, 80, 100, 125, 160, 200, 250, 315,
400, 500, 630, 800, 1k, 1.25 k, 1.6 k,
2.0 k, 2.5 k, 3.15 k, 4.0 k, 5.0 k, 6.3 k,
8.0 k, 10 k, 12.5 k, 16 k
(25 Frequencies)
200, 250, 315, 400, 500, 630, 800, 1k,
1.25 k, 1.6 k, 2.0 k, 2.5 k, 3.15 k, 4.0 k,
5.0 k, 6.3 k, 8.0 k, 10 k, 12.5 k, 16 k
(20 Frequencies)
Identical frequencies within the front channel (bands F1 to F5) cannot
be adjusted.
150
CD8455_09_E.fm
151 ページ
2004年12月16日 木曜日 午後6時2分
How to operate the Sound Adjustment Mode
There are 10 Rear & Front-Frequency locations (5 + 5) available for
the parametric equalizer. The Parametric Equalizer is divided into
two channels Front & Rear.
Any frequency assigned is highlighted in White, and is unavailable
for use elsewhere.
Bands selected are grayed out in the diagram to show how they are
in use and otherwise unavailable for reuse.
Bands in black are unused (available) and can be assigned to within
their respective bands (Rear or Front parametric locations).
Rear Group
R
1
R
2
R
3
F
1
F
2
F
3
63
Hz
63
Hz
63
Hz
63
Hz
63
Hz
63
Hz
80
Hz
80
Hz
80
Hz
80
Hz
80
Hz
80
Hz
100
Hz
100
Hz
100
Hz
100
Hz
100
Hz
100
Hz
125
Hz
125
Hz
125
Hz
125
Hz
125
Hz
125
Hz
160
Hz
160
Hz
160
Hz
R
4
R
5
200
Hz
200
Hz
200
Hz
200
Hz
200
Hz
250
Hz
250
Hz
250
Hz
250
Hz
250
Hz
315
Hz
315
Hz
315
Hz
315
Hz
315
Hz
400
Hz
400
Hz
400
Hz
400
Hz
400
Hz
500
Hz
500
Hz
500
Hz
500
Hz
500
Hz
630
Hz
630
Hz
630
Hz
630
Hz
630
Hz
800
Hz
800
Hz
800
Hz
800
Hz
800
Hz
1.0k 1.25k 1.6k 2.0k 2.5k 3.15k 4.0k 5.0k 6.3k 8.0k 10k 12.5k 16k
160
Hz
160
Hz
160
Hz
F
4
F
5
200
Hz
200
Hz
200
Hz
200
Hz
200
Hz
250
Hz
250
Hz
250
Hz
250
Hz
250
Hz
315
Hz
315
Hz
315
Hz
315
Hz
315
Hz
400
Hz
400
Hz
400
Hz
400
Hz
400
Hz
500
Hz
500
Hz
500
Hz
500
Hz
500
Hz
630
Hz
630
Hz
630
Hz
630
Hz
630
Hz
800
Hz
800
Hz
800
Hz
800
Hz
800
Hz
1.0k 1.25k 1.6k 2.0k 2.5k 3.15k 4.0k 5.0k 6.3k 8.0k 10k 12.5k 16k
1.0k 1.25k 1.6k 2.0k 2.5k 3.15k 4.0k 5.0k 6.3k 8.0k 10k 12.5k 16k
1.0k 1.25k 1.6k 2.0k 2.5k 3.15k 4.0k 5.0k 6.3k 8.0k 10k 12.5k 16k
1.0k 1.25k 1.6k 2.0k 2.5k 3.15k 4.0k 5.0k 6.3k 8.0k 10k 12.5k 16k
1.0k 1.25k 1.6k 2.0k 2.5k 3.15k 4.0k 5.0k 6.3k 8.0k 10k 12.5k 16k
1.0k 1.25k 1.6k 2.0k 2.5k 3.15k 4.0k 5.0k 6.3k 8.0k 10k 12.5k 16k
1.0k 1.25k 1.6k 2.0k 2.5k 3.15k 4.0k 5.0k 6.3k 8.0k 10k 12.5k 16k
1.0k 1.25k 1.6k 2.0k 2.5k 3.15k 4.0k 5.0k 6.3k 8.0k 10k 12.5k 16k
1.0k 1.25k 1.6k 2.0k 2.5k 3.15k 4.0k 5.0k 6.3k 8.0k 10k 12.5k 16k
Front Group
Example:
If you want the Front channel F1 location to have a parametric
frequency of 3.15 kHz.
Because this frequency is in use by F2 you must first assign F2 a
new frequency, this will release the band for use in the Front Group
F1 at 3.15 kHz.
151
IX
CD8455.book 152 ページ
2004年12月11日 土曜日 午後7時24分
How to operate the Sound Adjustment Mode
[SEL] button
Turn the [SEL] button to select PEQ.
The selected item will be highlighted.
Press the [SEL] button.
The mode will change to parametric equalizer adjustment
mode.
Press the [SEL] button to select the channel and
band to be adjusted.
Each time the button is pressed, the selection changes in the
following order.
F1 ➔ F2 ➔ F3 ➔ F4 ➔ F5 ➔ R1 ➔ R2 ➔ R3 ➔ R4 ➔ R5 ➔
Turn the [SEL] button to select the frequency to be
adjusted.
When the button is turned, the frequency changes in the
following order.
63Hz ↔ 80Hz ↔ 100Hz ↔ 125Hz ↔ 160Hz ↔ 200Hz ↔
250Hz ↔ 315Hz ↔ 400Hz ↔ 500Hz ↔ 630Hz ↔ 800Hz ↔
1kHz ↔ 1.25kHz ↔ 1.6kHz ↔ 2kHz ↔ 2.5kHz ↔ 3.15kHz ↔
4kHz ↔ 5kHz ↔ 6.3kHz ↔ 8kHz ↔ 10kHz ↔ 12.5kHz ↔
16kHz
152
CD8455.book 153 ページ
2004年12月11日 土曜日 午後7時24分
How to operate the Sound Adjustment Mode
[SOUND] button
[AUDIO CONTROL] button
Buttons [1] to [6]
Press the [
] or [
[
[ ] button
] button [RTN] button
] button.
This adjusts the frequency level.
[ ] button:
Increases level.
[ ] button:
Decreases level.
Press the [6] button to select the Q curve pattern.
Each time the button is pressed, the Q curve changes in the
following order.
NORMAL
MIDDLE
SHARP
SHARP
SLOW
MIDDLE
SLOW
IX
Repeat the operations in steps
to
change the settings for each channel and band.
to
The frequencies that have been adjusted for either the
channel or band cannot be selected.
Hold down a button, [1] to [5], for more than two
seconds to preset a value.
The preset value is overwritten by the value set using the
above steps.
The time alignment and crossover adjustments will also be
stored at this time.
Press the [RTN] button.
At this time, other adjustments can also be made in pro mode.
Press the [SOUND] or [RTN] button to exit sound
adjustment mode.
When updating software, press the [AUDIO CONTROL] button to
measure and display the frequency characteristics.
153
CD8455.book 154 ページ
2004年12月11日 土曜日 午後7時24分
How to operate the Sound Adjustment Mode
Speaker layout: 3-way speaker system
Mid-Band (Group-1) Parametric adjustment in 5-Bands of 25
Frequencies.
Hi-Band
(Group-2) Parametric adjustment in 5-Bands of 20
Frequencies.
Eclipse has by default assigned arbitrary frequencies for each of the
5-Bands (Hi/Mid for 10 parametric bands total).
Identical frequencies within the Hi group (bands H1 to H5) cannot be
adjusted.
Release a frequency from its location, before it can be reassigned
(available again for use in another band).
Example: If you want the Hi-Group H1 location to have a parametric
frequency of 3.15kHz.
Because this frequency is in use by H2 you must first assign H2 a
new frequency, this will release the band for use in the Hi-Group H1
at 3.15kHz.
Mid Group
M
1
M
2
M
3
M
4
M
5
63
Hz
63
Hz
63
Hz
63
Hz
63
Hz
80
Hz
80
Hz
80
Hz
80
Hz
80
Hz
100
Hz
100
Hz
100
Hz
100
Hz
100
Hz
125
Hz
125
Hz
125
Hz
125
Hz
125
Hz
160
Hz
160
Hz
160
Hz
160
Hz
160
Hz
200
Hz
200
Hz
200
Hz
200
Hz
200
Hz
250
Hz
250
Hz
250
Hz
250
Hz
250
Hz
315
Hz
315
Hz
315
Hz
315
Hz
315
Hz
400
Hz
400
Hz
400
Hz
400
Hz
400
Hz
500
Hz
500
Hz
500
Hz
500
Hz
500
Hz
630
Hz
630
Hz
630
Hz
630
Hz
630
Hz
800
Hz
800
Hz
800
Hz
800
Hz
800
Hz
1.0k 1.25k 1.6k 2.0k 2.5k 3.15k 4.0k 5.0k 6.3k 8.0k 10k 12.5k 16k
H
1
H
2
H
3
H
4
H
5
200
Hz
200
Hz
200
Hz
200
Hz
200
Hz
250
Hz
250
Hz
250
Hz
250
Hz
250
Hz
315
Hz
315
Hz
315
Hz
315
Hz
315
Hz
400
Hz
400
Hz
400
Hz
400
Hz
400
Hz
500
Hz
500
Hz
500
Hz
500
Hz
500
Hz
630
Hz
630
Hz
630
Hz
630
Hz
630
Hz
800
Hz
800
Hz
800
Hz
800
Hz
800
Hz
1.0k 1.25k 1.6k 2.0k 2.5k 3.15k 4.0k 5.0k 6.3k 8.0k 10k 12.5k 16k
1.0k 1.25k 1.6k 2.0k 2.5k 3.15k 4.0k 5.0k 6.3k 8.0k 10k 12.5k 16k
1.0k 1.25k 1.6k 2.0k 2.5k 3.15k 4.0k 5.0k 6.3k 8.0k 10k 12.5k 16k
1.0k 1.25k 1.6k 2.0k 2.5k 3.15k 4.0k 5.0k 6.3k 8.0k 10k 12.5k 16k
1.0k 1.25k 1.6k 2.0k 2.5k 3.15k 4.0k 5.0k 6.3k 8.0k 10k 12.5k 16k
1.0k 1.25k 1.6k 2.0k 2.5k 3.15k 4.0k 5.0k 6.3k 8.0k 10k 12.5k 16k
1.0k 1.25k 1.6k 2.0k 2.5k 3.15k 4.0k 5.0k 6.3k 8.0k 10k 12.5k 16k
1.0k 1.25k 1.6k 2.0k 2.5k 3.15k 4.0k 5.0k 6.3k 8.0k 10k 12.5k 16k
1.0k 1.25k 1.6k 2.0k 2.5k 3.15k 4.0k 5.0k 6.3k 8.0k 10k 12.5k 16k
Hi-Group
There are 10 Mid & Hi-Frequency locations (5 + 5) available for the
parametric equalizer.
The Parametric Equalizer is divided into two groups Mid & Hi.
Any frequency assigned is highlighted in White, and is unavailable
for use elsewhere.
Bands selected are grayed out in the diagram to show how they are
in use and otherwise unavailable for reuse.
Bands in black are unused (available) and can be assigned to within
their respective bands (Mid or Hi parametric locations).
154
CD8455.book 155 ページ
2004年12月11日 土曜日 午後7時24分
How to operate the Sound Adjustment Mode
[SEL] button
Turn the [SEL] button to select PEQ.
The selected item will be highlighted.
Press the [SEL] button.
The mode will change to parametric equalizer adjustment
mode.
Press the [SEL] button to select the channel and
band to be adjusted.
Each time the button is pressed, the selection changes in the
following order.
Hi1 ➔ Hi2 ➔ Hi3 ➔ Hi4 ➔ Hi5 ➔ Mid1 ➔ Mid2 ➔ Mid3 ➔
Mid4 ➔ Mid5 ➔
Turn the [SEL] button to select the frequency to be
adjusted.
When the button is turned, the frequency changes in the
following order.
Hi: 200Hz ↔ 250Hz ↔ 315Hz ↔ 400Hz ↔ 500Hz ↔
630Hz ↔ 800Hz ↔ 1kHz ↔ 1.25kHz ↔ 1.6kHz ↔
2kHz ↔ 2.5kHz ↔ 3.15kHz ↔ 4kHz ↔ 5kHz ↔
6.3kHz ↔ 8kHz ↔ 10kHz ↔ 12.5kHz ↔ 16kHz
Mid: 63Hz ↔ 80Hz ↔ 100Hz ↔ 125Hz ↔ 160Hz ↔
200Hz ↔ 250Hz ↔ 315Hz ↔ 400Hz ↔ 500Hz ↔
630Hz ↔ 800Hz ↔ 1kHz ↔ 1.25kHz ↔ 1.6kHz ↔
2kHz ↔ 2.5kHz ↔ 3.15kHz ↔ 4kHz ↔ 5kHz ↔
6.3kHz ↔ 8kHz ↔ 10kHz ↔ 12.5kHz ↔ 16kHz
155
IX
CD8455.book 156 ページ
2004年12月11日 土曜日 午後7時24分
How to operate the Sound Adjustment Mode
[SOUND] button
[AUDIO CONTROL] button
Buttons [1] to [6]
Press the [
] or [
[
[ ] button
] button [RTN] button
] button.
This adjusts the frequency level.
[ ] button:
Increases level.
[ ] button:
Decreases level.
Press the [6] button to select the Q curve pattern.
Each time the button is pressed, the Q curve changes in the
following order.
NORMAL
MIDDLE
SHARP
SHARP
SLOW
MIDDLE
SLOW
Repeat the operations in steps
to
change the settings for each channel and band.
to
The frequencies that have been adjusted for either the
channel or band cannot be selected.
Hold down a button, [1] to [5], for more than two
seconds to preset a value.
The preset value is overwritten by the value set using the
above steps.
The time alignment and crossover adjustments will also be
stored at this time.
Press the [RTN] button.
At this time, other adjustments can also be made in pro mode.
Press the [SOUND] or [RTN] button to exit sound
adjustment mode.
When updating software, press and hold the [AUDIO CONTROL]
button to measure and display the frequency characteristics.
156
CD8455.book 157 ページ
2004年12月11日 土曜日 午後7時24分
How to operate the Sound Adjustment Mode
[SOUND] button
Buttons [1] to [5]
[SEL] button
[RTN] button
Selecting an equalizer mode from memory
Press a preset button to select the equalizer mode set in memory
for the button. The buttons that stores equalizer modes in memory
are called preset buttons.
Turn the [SEL] button to select PEQ.
Press the [SEL] button.
Select any button, from [1] to [5], and press it for
less than two seconds.
The preset pattern stored in memory will be retrieved.
Press the [RTN] button.
At this time, other adjustments can also be made in pro mode.
Press the [SOUND] or [RTN] button to exit sound
adjustment mode.
When the preset value is changed, the display shows as follows:
P
1~5 (Preset ch No.)
157
IX
CD8455.book 158 ページ
2004年12月11日 土曜日 午後7時24分
How to operate the Sound Adjustment Mode
[SEL] button
Measuring/display frequency characteristic
Frequency characteristics inside the vehicle can be measured and
displayed on the display. The measurement result can be referred
to when adjusting parametric equalizer. This result is also
necessary to automatically correct parametric equalizer setting
using E-iSERV sound effect customizations.
● Adjust time alignment (see page 161) and crossover (see page
163) before measuring frequency characteristics.
● When measuring frequency characteristics, CSII and Loudness
settings are automatically cancelled.
Connect the accessory microphone with a RCA
connector to the L-CH of the AUX jack of the deck.
The selection item will be highlighted.
Turn the [SEL] button to select the PEQ.
Align the microphone with the actual ear position and attach it
to the headrest or other appropriate fixture. (Attach the
microphone using tape or string.)
Press the [SEL] button.
The mode will be change to parametric equalizer adjustment
mode.
158
CD8455.book 159 ページ
2004年12月11日 土曜日 午後7時24分
How to operate the Sound Adjustment Mode
[SOUND] button
[OPEN] button
[RTN] button
[AUDIO CONTROL] button
Press the [AUDIO CONTROL] button for less than
two seconds.
After pushing the button, a 10-second countdown begins.
Leave the vehicle during that time.
Pink noise will be output from the speakers and measurement
of the frequency characteristics will start. [Measuring] will
appear on the display while measurement is in progress.
When measurement is complete, the measurement results will
appear on the display. You can adjust the volume (by turning
the [AUDIO CONTROL] button) and restart measurement
while measurement is in progress.
Press the [AUDIO CONTROL] button once more to cancel
measurement.
Press the [OPEN] button.
Insert a Memory Stick.
Press the [AUDIO CONTROL] button for more than
two seconds.
Measurements can be written to a memory stick and corrected
automatically using the E-iSERV website.
Close all doors and windows while measurement is in progress.
In order to make measurement of frequency characteristics easier,
slight errors may occur in the measurement data under some
circumstances when this function is used. In addition, it is not
equivalent to the precise measurements that can be made by
pofessional measuring devices.
159
IX
CD8455_09_E.fm
160 ページ
2004年12月13日 月曜日 午後12時43分
How to operate the Sound Adjustment Mode
Press the [RTN] button.
At this time, other adjustments can also be made in Pro mode.
Press the [SOUND] or [RTN] button to exit sound
adjustment mode.
● Sound quality data is written to Memory Stick as follows.
MSFTEN
SOUND
205000.ftn
File extension
Three digit number
Adjustment mode
a:Pro Mode (3WAY)
c:Normal Mode
d:Pro Mode (4SP+SW)
● The folders and files that are required for E-iSERV sound effect
customizations are created automatically when the data is
written to the Memory Stick.
● Select a file in MSFTEN SOUND when uploading sound quality data
to E-iSERV (web site).
160
CD8455.book 161 ページ
2004年12月11日 土曜日 午後7時24分
How to operate the Sound Adjustment Mode
[SEL] button
Time alignment adjustment (Time Alignment)
The delay time and level of the sound from each speaker can be
adjusted in order to correct any phase mismatches in the sound
resulting from the listening position. (For details about speaker
layout selection, see page 169.)
Turn the [SEL] button to select Time Alignment.
The selected item will be highlighted.
Press the [SEL] button.
The mode will change to time alignment adjustment mode.
Press the [SEL] button to select the speaker band to
IX
be adjusted.
Each time the button is pressed, the selection changes in the
following order.
Speaker layout: 3-way speaker system
Hi-L ➔ Hi-R ➔ Mid-L ➔ Mid-R ➔ Low-L ➔ Low-R ➔
Speaker layout: 4-speaker system
FL ➔ FR ➔ RL ➔ RR ➔ SW ➔
Turn the [SEL] button to select the speaker that is
furthest away, and then adjust the delay time for the
sound to arrive.
The delay time can be adjusted within 0.0 to 10.0 ms (in units
of 0.1 ms).
Turn to the right: Increases the time.
Turn to the left: Decreases the time.
161
CD8455.book 162 ページ
2004年12月11日 土曜日 午後7時24分
How to operate the Sound Adjustment Mode
[SOUND] button
[
] button
[ ] button [RTN] button
Refer to the following for the method of calculating the delay
time.
A = (B-C) / 34
A: Delay time (ms)
B: Distance from listening position to furthest speaker (cm)
C: Distance from listening position to the speaker to be
adjusted (cm)
C
B
(Example) Listening position: Driver's seat (left)
B: 200 (cm)
C: 50 (cm)
Delay time = [200 (cm) - 50 (cm)] / 34 = Approx. 4.4(ms)
Press the [ ] or [ ] button.
Adjust the level for each speaker.
[ ] button: Increases level.
[ ] button: Decreases level.
Repeat the operations in steps
change the settings for each speaker.
to
to
Press the [RTN] button.
At this time, other adjustments can also be made in pro mode.
Press the [SOUND] or [RTN] button to exit sound
adjustment mode.
162
CD8455.book 163 ページ
2004年12月11日 土曜日 午後7時24分
How to operate the Sound Adjustment Mode
[SEL] button
Crossover adjustment (X-Over)
With the 4-speaker system, the frequencies of the front speaker
HPF (High Pass Filter) and woofer LPF (Low Pass Filter) can be
adjusted. With the 3-way speaker system (a speaker system
combining a high range tweeter, a mid range speaker and a low
range woofer), the integration between the sound of the speakers is
improved by adjusting playback zones using tweeter HPF, midrange HPF and LPF and woofer LPF.
Turn the [SEL] button to select X-Over.
The selected item will be highlighted.
Press the [SEL] button.
The mode will change to crossover adjustment mode.
Press the [SEL] button to select the crossover
adjustment channel.
Each time the button is pressed, the selection changes in the
following order.
Speaker layout: 3-way speaker system
Hi ➔ M-LPF ➔ M-HPF ➔ Low ➔
Speaker layout: 4-speaker system
Front ➔ Rear ➔ Woofer ➔
163
IX
CD8455.book 164 ページ
2004年12月11日 土曜日 午後7時24分
How to operate the Sound Adjustment Mode
[SEL] button
Turn the [SEL] button to select the cut-off frequency.
When the button is turned, the frequency changes in the
following order.
Speaker layout: 3-way speaker system
Hi / M-LPF:
200Hz ↔ 250Hz ↔ 315Hz ↔ 400Hz ↔ 500Hz ↔ 630Hz ↔
800Hz ↔ 1kHz ↔ 1.25kHz ↔ 1.6kHz ↔ 2kHz ↔ 2.5kHz ↔
3.15kHz ↔ 4kHz ↔ 5kHz ↔ 6.3kHz ↔ 8kHz ↔ 10kHz
M-HPF / Low:
63Hz ↔ 80Hz ↔ 100Hz ↔ 125Hz ↔ 160Hz ↔ 200Hz
Speaker layout: 4-speaker system
Front/Rear:
63Hz ↔ 80Hz ↔ 100Hz ↔ 125Hz ↔ 160Hz ↔ 200Hz ↔
250Hz ↔ 315Hz ↔ 400Hz ↔ 500Hz ↔ 630Hz ↔ 800Hz ↔
1kHz ↔ 1.25kHz ↔ 1.6kHz ↔ 2kHz ↔ 2.5kHz ↔ 3.15kHz ↔
4kHz ↔ 5kHz ↔ 6.3kHz ↔ 8kHz ↔ 10kHz
Woofer:
63Hz ↔ 80Hz ↔ 100Hz ↔ 125Hz ↔ 160Hz ↔ 200Hz
164
CD8455.book 165 ページ
2004年12月11日 土曜日 午後7時24分
How to operate the Sound Adjustment Mode
[SOUND] button
[ ] button
[ ] button [RTN] button
Press the [
] or [
] buttons to set the slope.
[ ] button : The slope becomes more gentle.
[ ] button : The slope becomes steeper.
The slope can be set to "PASS", "6dB/oct", "12dB/oct", "18dB/
oct" or "24dB/oct".
If no woofer has been connected, set the slope adjustment to "PASS".
(If slope is set to a setting other than PASS, the low frequency range
will not be output from the speakers.)
Repeat the operations in steps
change the settings for each channel.
to
to
Press the [RTN] button.
At this time, other adjustments can also be made in pro mode.
Press the [SOUND] or [RTN] button to exit sound
adjustment mode.
165
IX
CD8455.book 166 ページ
2004年12月11日 土曜日 午後7時24分
How to operate the Sound Adjustment Mode
[SOUND] button
[SEL] button
[RTN] button
Multi-harmonizer settings (Harmonizer)
This function uses harmonic synthesis to restore the high-frequency
component that is lost as a result of the compression process so
that better sound can be obtained during MP3 /WMA or Memory
Stick (ATRAC3) playback.
Turn the [SEL] button to select Harmonizer.
The selected item will be highlighted.
Press the [SEL] button.
The mode will change to multi-harmonizer setting mode.
Turn the [SEL] button to select the setting item.
When the button is turned, the setting item changes in the
following order and the selected item is highlighted.
OFF
Hi:
Low:
Hi
Low
High effectiveness
Low effectiveness
Press the [SEL] button.
The selected settings will take effect.
Press the [RTN] button.
At this time, other adjustments can also be made in pro mode.
Press the [SOUND] or [RTN] button to exit sound
adjustment mode.
166
CD8455.book 167 ページ
2004年12月11日 土曜日 午後7時24分
How to operate the Sound Adjustment Mode
[SOUND] button
[SEL] button
[RTN] button
Non-fader phase selection (NON-F Phase)
The merging of sound between the front and rear speakers and the
woofer can be improved by selecting the phase.
Switch the phase to a phase which lets the speakers combine
without any disharmony.
Turn the [SEL] button to select Non-F Phase.
The selected item will be highlighted.
Press the [SEL] button.
The mode will change to phase selection mode.
Turn the [SEL] button to select NORMAL or IX
REVERSE.
The selected item will be highlighted.
NORMAL:
Normal phase
REVERSE: Reverse phase
Press the [SEL] button.
The selected settings will take effect.
Press the [RTN] button.
At this time, other adjustments can also be made in pro mode.
Press the [SOUND] or [RTN] button to exit sound
adjustment mode.
167
CD8455.book 168 ページ
2004年12月11日 土曜日 午後7時24分
How to operate the Sound Adjustment Mode
[SOUND] button [SEL] button
[RTN] button
Non-Fader Output
Non-Fader Output can be stereo or mono. Select the method that
matches the output method for the sub-woofer system that is
connected to the deck.
Turn the [SEL] button to select Non-F Output.
The selected item is highlighted.
Press the [SEL] button.
The mode will change to Non-F Output mode.
Turn the [SEL] button to select Stereo or Monaural.
Press the [SEL] button.
The selected settings will take effect.
Press the [RTN] button.
At this time, other adjustments can also be made in pro mode.
Press the [SOUND] or [RTN] button to exit sound
adjustment mode.
168
CD8455.book 169 ページ
2004年12月11日 土曜日 午後7時24分
How to operate the Sound Adjustment Mode
[SOUND] button [SEL] button
[RTN] button
Speaker layout
Depending upon speaker layout, you can switch between 3-way
and 4-speaker systems. (Select a system configuration before
adjusting PEQ, time alignment or cross over.)
Turn the [SEL] button to select SP Layout.
The selected item is highlighted.
Press the [SEL] button.
The mode will change to SP Layout mode.
Turn the [SEL] button to select 3WAY or 4SP + SW
3WAY:
4SP + SW:
3WAY speaker system
4 speaker and a sub-woofer
Press and hold the [SEL] button for more than five
seconds.
The speaker layout confirmation message will be
displayed. If the layout is OK, press [SEL].
Press the [RTN] button to return the speaker layout selection
screen.
Press the [RTN] button.
At this time, other adjustments can also be made in pro mode.
Press the [SOUND] or [RTN] button to exit sound
adjustment mode.
If the vehicle is equipped withe 3-way speaker system, do not change
from pro mode to normal mode.
Doing so may cause damage to the speakers.
When switching between 3WAY mode and 4SP + SW mode, please
make sure that the volume level is set to 0.
169
IX
CD8455_09_E.fm
170 ページ
2004年12月16日 木曜日 午後6時3分
How to operate the Sound Adjustment Mode
[SOUND] button [SEL] button
Buttons [1] to [5]
[RTN] button
Importing Sound Data
Sound data adjusted by the E-iSERV website can be downloaded to
a CD-R or a memory stick and imported into the deck.
Turn the [SEL] button to select Sound Data.
The selected item is highlighted.
Press the [SEL] button.
The mode will change to Sound Data mode.
Turn the [SEL] switch to select media types.
When the button is turned, the setting item changes in the
following order.
Disc → Memory Stick
Press the [SEL] button.
The front panel automatically opens.
Insert a CD-R or a Memory Stick.
Turn the [SEL] button to select the file.
When the button is turned, the setting item changes and the
selected item is highlighted.
Press the [SEL] button.
Select from buttons [1] through [5], and press and
hold for 2 seconds or more.
The selected file is written to the selected button.
When using a CD-R, the CD-R will eject automatically when
writing is complete.
The display will return to the file selection screen.
170
CD8455_09_E.fm
171 ページ 2004年12月13日 月曜日 午後1時25分
How to operate the Sound Adjustment Mode
Press the [RTN] button.
At this time, other adjustments can also be made in pro mode.
Press the [SOUND] or [RTN] button to exit sound
adjustment mode.
When using a Memory Stick:
● Make a folders in the Memory Stick and download the data
adjust through E-iSERV (web site) as shown below.
MSFTEN
User creation
DATA
204㧖 X 00 .eis
Automatic creation
File extension
Two digit number
Adjustment pattern
a: Flat tuning B: Bass range emphasis
c: Bass and Treble range emphasis
d: Midium range emphasis
0: No automatic parametric equalizer correction
Adjustment mode
a:Pro Mode (3WAY)
c:Normal Mode
d:Pro Mode (4SP+SW)
● The files that can be read by this deck are created automatically
when you are downloading from the E-iSERV sound effect
customizations.
When using a CD-R:
● The deck can only import files from CD-R that have been written
with root directories.
204㧖 X 00 .eis
Automatic creation
File extension
Two digit number
Adjustment pattern
a: Flat tuning B: Bass range emphasis
c: Bass and Treble range emphasis
d: Midium range emphasis
0: No automatic parametric equalizer correction
Adjustment mode
a:Pro Mode (3WAY)
c:Normal Mode
d:Pro Mode (4SP+SW)
● Disc formats that may be used are as follows:
• CD-ROM (MODE 1)
• CD-ROM (MODE2_FORM 1)
*CD-ROMs written in MODE2_FORM2 cannot be read.
171
IX
CD8455.book 172 ページ
2004年12月11日 土曜日 午後7時24分
How to operate the Sound Adjustment Mode
[SOUND] button [SEL] button
[RTN] button
Custom Mode
Values (PEQ, time alignment, cross over value) can be adjusted
using the custom mode on the web site. Adjust values following the
instructions provided on the E-iSERV operation procedure screen,
and download the data to a Memory Stick.
Turn the [SEL] button to select Custom Mode.
The selected item is highlighted.
Press the [SEL] button.
The mode will change to Custom mode.
Insert a memory stick containing data.
Turn the [SEL] button to select ON or OFF.
If a Memory Stick is not inserted, a caution appears instead of
ON/OFF.
Press the [SEL] button.
Press the [RTN] button.
At this time, other adjustments can also be made in pro mode.
Press the [SOUND] or [RTN] button to exit sound
adjustment mode.
PEQ, time alignment, and cross over values cannot be adjusted while
the custom mode is on. To adjust values, turn the custom mode off.
172
CD8455.book 173 ページ
2004年12月11日 土曜日 午後7時24分
How to operate the AREA SHOT function (U.S.A. only)
How to operate the AREA SHOT function
(U.S.A. only)
About the AREA SHOT
Using AREA SHOT function, maps to destinations and guidance information can be displayed
on your deck if you have set route on the ECLIPSE web site (E-iSERV). Current vehicle
position can also be displayed on the map if an optional GPS unit is connected.
The display in this manual may differ from that of the accrual product.
X
173
CD8455.book 174 ページ
2004年12月11日 土曜日 午後7時24分
How to operate the AREA SHOT function (U.S.A. only)
To use the AREA SHOT function
In order to use AREA SHOT, driving instructions such as the direction of
travel and the street names of turn intersections must be downloaded
from the ECLIPSE website (E-iSERV) and imported into the CD8455.
The process is as follows:
Access The ECLIPSE Website. (URL: http/www.e-iserv.jp)
Register as a user. A User Registration Key is required when
registering. For details about User Registration Key, see page 212.
(To register, follow the instructions provided by the website. Once you
have registered, there is no need to repeat the procedure.)
Login.
Set your start point and destination on the AREA SHOT page. Address
or intersection, city, state/prov and zip/postal code can be used to
search for start points, routes and destinations. Your home can be
registered as a memory point. (Follow the instructions provided on the
website.)
Download information.
Write the downloaded information to a CD-R or Memory Stick.
Import the data written to the CD-R or Memory Stick into the CD8455.
(For details, see 176.)
AREA SHOT is ready for use.
174
CD8455_10_E.fm
175 ページ
2004年12月16日 木曜日 午後6時4分
How to operate the AREA SHOT function (U.S.A. only)
Map data
The map data used by the deck was created based on information
provided by Tele Atlas and Geographic Data Technology.
When using the map data, be aware actual road conditions and
obey traffic rules.
Copying, publishing or using maps in electronic media without
express written consent is forbidden.
GPS (Global Positioning System)
Developed and operated in the United States, GPS(Global
Positioning System), is a system that locates current position
(longitude and latitude) using radio waves beamed to earth from 3
or 4 GPS satellites.
GPS information may not be available under the following
circumstances:
● When GPS satellite radio waves are interrupted by buildings,
tunnels, elevated roads, etc.
● When radio waves are interrupted by objects on or near the GPS
antenna.
● In some instances, wave transmission is interrupted by the U.S.
tracking control center during maintenance or upgrades.
● When a digital cellular phone (1.5 GHz) is used near a GPS
antenna.
● Make sure to follow the actual traffic regulations when driving.
● Driving your vehicle while only following guidance point
instructions may lead to traffic violations and cause accidents.
● Do not modify this system for use other than that specified herein.
Also, do not deviate from the installation procedures described
herein, ECLIPSE will not be held liable for damages including, but
not limited to serious injury, death or property damage resulting
from installations that enable unintended operation.
175
X
CD8455.book 176 ページ
2004年12月11日 土曜日 午後7時24分
How to operate the AREA SHOT function (U.S.A. only)
[OPEN] button
[FUNC] button
[SEL] button
Reading the AREA SHOT data
The AREA SHOT data that has been downloaded from E-iSERV (web
site) to a Memory Stick or CD-R can be loaded into the deck and saved
there.
Press the [FUNC] button for less than one second.
The function mode is activated.
Turn the [SEL] button to select AreaShot.
Press the [SEL] button.
The media selection screen appears.
Turn the [SEL] button to select Disc or Memory Stick.
The selected item will be highlighted.
Press the [SEL] button.
The panel opens automatically.
Insert the Memory Stick or CD-R to be used for read the
Area Shot data.
Press the [OPEN] button to close the front panel.
If a CD-R has been inserted, the panel closes automatically.
After the panel is closed, files in the CD-R or Memory Stick are read.
While files are being read, the [READING...] message appears. If
there are no correct files on the CD-R or Memory Stick, "No DATA"
is displayed.
176
CD8455_10_E.fm
177 ページ
2004年12月16日 木曜日 午後6時4分
How to operate the AREA SHOT function (U.S.A. only)
Turn the [SEL] button to select the saved file.
The selection file name is highlighted.
Press the [SEL] button.
The selected file will be saved. "READING" is displayed while data
is being imported. When reading has finished, [Completed] will
appear on the display and then it will return to the display for
selecting the function mode.
When using a Memory Stick:
Data downloaded from the ECLIPSE web site (E-iSERV) is saved to
folders created in the CD-R or Memory Stick as shown below.
MSFTEN
User creation
AREA
XXXXXXXX.ast
Automatic creation
File extension
● Files that can be imported into your deck are created
automatically when downloaded from E-iSERV.
● All of searched route maps and guidance information are stored
in these automatically created files.
● The file name can be changed using 8 alphameric characters
(space cannot be used).
When using a CD-R:
● The deck can only import files from CD-R that have been written
in root directories.
XXXXXXXX.ast
Automatic creation
File extension
● Disc formats that may be used are as follows:
• CD-ROM (MODE 1)
• CD-ROM (MODE2_FORM 1)
*CD-ROMs written in MODE2_FORM2 cannot be read.
● The file name can be changed using 8 alphameric characters
(space cannot be used).
Do not turn the power or ignition switch off while reading. Interrupting
reading process might corrupt the data.
177
X
CD8455.book 178 ページ
2004年12月11日 土曜日 午後7時24分
How to operate the AREA SHOT function (U.S.A. only)
[MUTE] button
[
] button
[RTN]
button
[DISP] button
[
] button
Changing the AREA SHOT mode
Press the [MUTE] button for more than one second.
Intersection street names and turning directions are displayed on
the screen. Pressing and holding the MUTE button (for 1 second or
more) a second time closes the Area Shot mode.
● Pressing any button other than [ ], [ ], [DISP] and [RTN]
displays the audio control screen enabling audio system
operation. If no button is pressed within 6 seconds, the
guidance point screen returns.
● If the audio control screen is displayed while the Area Shot
mode is ON, pressing the [RTN], [ ], [ ] or [DISP] buttons
displays the guidance point screen.
● Modes may not be changed if guidance data has not been
imported properly.
● Do not look at the screen while driving.
178
CD8455.book 179 ページ
2004年12月11日 土曜日 午後7時24分
How to operate the AREA SHOT function (U.S.A. only)
Using the AREA SHOT mode
By manually switching between guidance points, both previous and next
guidance points can be confirmed during guidance.
AREA SHOT Screen Configuration
Guidance information:
Information about guidance points (traveling
direction, street names) displayed as a text.
Arrows:
Indicates direction to the guidance point.
Vehicle position marker:
If an optional GPS unit is connected, your
vehicle position will be displayed. The vehicle
position marker will move on the map in
accordance to your vehicle's movement.
The display in this manual may differ from that of the accrual product.
179
X
CD8455.book 180 ページ
2004年12月11日 土曜日 午後7時24分
How to operate the AREA SHOT function (U.S.A. only)
[
[
] button
] button
Switching between guidance points
After passing each location described in the guidance, it is
necessary to switch manually to the next guidance screen. The
previous screen can also be accessed manually and confirmed.
Press [
points.
] and [
] to switch between guidance
[ ]............. To switch to the next guidance point.
[ ]............. To switch to the previous guidance point.
With each press of the button, the guidance display changes
as follows:
[
]
[
→
←
[
Start point
]
→
←
]
[
Intersections, etc.
180
]
Destination
CD8455.book 181 ページ
2004年12月11日 土曜日 午後7時24分
How to operate the AREA SHOT function (U.S.A. only)
[DISP] button [RTN] button
Re-scrolling through text information
Text information including intersection street names and turn
directions can be scrolled across the screen by switching through
guidance points. A maximum of 11 characters can be displayed on
a single screen. Excess characters are scrolled on the display.
When scrolling is complete, the first eleven characters are once
more displayed on the screen. To re-scroll perform the following
operation:
Press the [DISP] button.
Guidance information can be re-scrolled.
X
181
CD8455_10_E.fm
182 ページ
2004年12月16日 木曜日 午後6時4分
How to operate the AREA SHOT function (U.S.A. only)
Changing AREA SHOT screens
Press the [RTN] button.
In the AREA SHOT mode, the audio screen can be accessed.
Pressing the button repeatedly allows you to switch back and
for the between the AREA SHOT screen and the Audio
screen.
When a GPS unit is connected, the following operations are available.
● When your vehicle enters the display/map range of the
guidance point, a blinking marker will appear to indicate the
position of your vehicle.
Vehicle position marker
When vehicle position marker leaves the map range while
traveling along the guidance route, the vehicle position marker
disappears. Push [ ] to display the next guidance point. In
order to display vehicle position marker, your vehicle must be
within the map display area.
● When vehicle enters the map range of a guidance point while
the audio operation screen is displayed, [Map coverage area]
will be appear on the display. Press [RTN] to return to the AREA
SHOT screen. Pressing the audio operation button turns off
[Map coverage area] message and allows operation of the
audio system.
182
CD8455.book 183 ページ
2004年12月11日 土曜日 午後7時24分
How to operate the AREA SHOT function (U.S.A. only)
Display Arrows
Arrows for indicating turn directions are displayed as follows.
Straight
ahead
Reverse
direction
Diagonally
forward right
Diagonally
left rear
Right
Left
Diagonally
rear right
Diagonally
forward left
Depending on driving conditions, arrows indicate the following:
U-turn
Expressway
Intersection
U-turn to
the right
Traffic
merges to
the right
Right at
the
junction
U-turn to
the left
Traffic
merges to
the left
Left at the
junction
Right
hand
entrance
Straight
through
the
junction
Left hand
entrance
A right
hand exit
A left
hand exit
183
X
CD8455.book 184 ページ
2004年12月11日 土曜日 午後7時24分
How to use the remote control
How to use the remote control
Precautions in use of the remote control
● Be careful when handling the remote control, especially because it is
small and light. Dropping or striking it hard may damage it, wear out the
battery or cause a malfunction.
● Keep the remote control free of moisture, dust and water. Do not subject it
to shock.
● Do not place the remote control unit where it will get hot, such as on the
dashboard or near a heater vent. Allowing the remote control unit to
overheat may warp its case or cause other problems.
● Do not operate the remote control unit while driving because doing so
could cause an accident.
● When using the remote control, point it toward at the remote control light
receptor.
● The light receptor may not operate correctly if it is exposed to bright light
such as direct sunlight.
● Be sure to press the [PWR] button on the main unit for more than two
seconds to shut it down before leaving the car, or the car battery may be
run down. When the main unit is shut down, the remote control will not
work.
● Remove the batteries from the remote control unit whenever it is not to be
used for a long time.
Cleaning the remote control
● Use a dry cloth to keep the unit clean. If the remote control unit gets
extremely dirty, clean it with a cloth moistened with diluted liquid
detergent. Do not use alcohol or thinner; these compounds may damage
the finish.
● In no event should benzine or thinner be used. These substances will
damage the case or finish.
184
CD8455.book 185 ページ
2004年12月11日 土曜日 午後7時24分
How to use the remote control
[PWR] button
Remote-control
light receptor
[ ] button
[MUTE] button
[
] button
Turning the power on/off
When the power is turned on, the state used when the power was turned
off such as CD and tuner playing is restored.
Press the [PWR] button.
The power turns on or off each time the button is pressed.
When the main unit is shut down, the remote control will not work.
Adjusting the audio volume
Press the [ ] or [ ] button.
[
[
] button:Increases the volume.
] button:Decreases the volume.
Muting the volume
Press the [MUTE] button for more than one second to cut the
volume or restore it instantly.
185
XI
CD8455.book 186 ページ
2004年12月11日 土曜日 午後7時24分
How to use the remote control
[MODE] button
[DISC] button
[AUX] button
[TU] button
[BAND] button
Switching playback modes
Press the [MODE] button.
Press the button to switch modes in the following sequence:
Tuner
Disc
Memory Stick
AUX
Modes can be switched by pressing the following buttons:
[TU] button: The tuner mode is activated.
[DISC] button: The disc mode is activated.
[AUX] button: The AUX mode is activated.
How to play the tuner
Select the tuner mode first
Selecting the FM/AM band
Press the [BAND] or [TU]button.
Each press will switch tuner modes from FM1 ➔ FM2 ➔ FM3 ➔
AM.
● It is not possible to switch between FM/AM modes and SIRIUS
with the remote control.
● If the optional SIRIUS tuner is connected, the selections will
switch the mode from SR1 ➔ SR2 ➔ SR3 ➔ SR4 in order.
186
CD8455.book 187 ページ
2004年12月11日 土曜日 午後7時24分
How to use the remote control
[BAND] button
[ PRESET CH
buttons
[DISC] buttons
]
[ TUNE SEEK
buttons
]
Selecting a station (manually or automatically)
A short press of the button will allow manual station tuning. Pressing
for more than one second will start automatic tuning.
Press the [
TUNE•SEEK
] button.
[ ] button: Tunes to higher frequency stations.
[ ] button: Tunes to lower frequency stations.
Selecting preset stations
A total of six stations may be selected (preset tuning) out of those
already set in memory through the main unit. (Refer to "Manually
setting stations into memory," page 108.)
Press the [
PRESET CH
] button.
[ ] button: Select the next higher number preset button.
[ ] button: Select the next lower number preset button.
How to play CDs
Switching disc modes
Press the [DISC] buton.
The disc mode is activated.
Press the [DISC] or [BAND] button.
When one or two CD changers are connected, press the
[DISC] or [BAND] button to change modes from CD player ➔
CD changer 1 ➔ CD changer 2.
The indicator will skip a changer or player that has no discs
loaded.
187
XI
CD8455.book 188 ページ
2004年12月11日 土曜日 午後7時24分
How to use the remote control
[BAND] button
[MUTE] button
[ DISC
] buttons
[ TRACK
buttons
]
Advancing to the next track or returning to the beginning of the track being played
Press the [
[
[
TRACK
] button.
] button: Advances to the next track.
] button: Returns to the beginning of the track being played.
(Press repeatedly to move to previous tracks.)
Hold the [ ] button down to fast forward, or the [
through the track being played.
] button to rewind
Skipping to the next or previous disc
Press the [
DISC
] button.
[ ] button: Selects the next higher number disc.
[ ] button: Selects the next lower number disc.
188
CD8455.book 189 ページ
2004年12月11日 土曜日 午後7時24分
How to use the remote control
[BAND] button
[MUTE] button
[ DISC
] buttons
[ TRACK
buttons
]
How to play MP3/WMA
Switching disc modes
Press the [DISC] buton.
The disc mode is activated.
Press the [DISC] or [BAND] button.
When one or two CD changers are connected, press the
[DISC] or [BAND] button to change modes from CD player ➔
CD changer 1 ➔ CD changer 2.
The indicator will skip a changer or player that has no discs
loaded.
● The optional CD changer cannot be used to play MP3 files.
● If normally recorded music data (CDDA) and MP3 music files
are mixed, the normally recorded music data will be played.
Advancing to the next file or returning to the beginning of the file being played
Press the [
[
[
TRACK
] button.
] button: Advances to the next track (file).
] button: Returns to the beginning of the track (file) being
played. (Press repeatedly to move to previous
tracks (files).)
Hold the [ ] button down to fast forward, or the [
through the track being played.
Skipping to the next or previous folder
Press the [
DISC
] button.
[ ] button: Selects the next folder.
[ ] button: Selects the next lower folder.
189
] button to rewind
XI
CD8455_11_E.fm
190 ページ
2004年12月16日 木曜日 午後6時5分
How to use the remote control
Replacing the battery
To prevent accidents, store batteries out of the reach of children. If a
child has swallowed one, consult a doctor immediately.
Use two AAA size batteries.
Remove the back cover of the remote control unit by
gently pressing and sliding it in the direction indicated
by the arrow.
Install the two batteries provided into the compartment
as illustrated inside the compartment.
Return the back cover into place by sliding it in the
direction indicated by the arrow.
190
CD8455.book 191 ページ
2004年12月11日 土曜日 午後7時24分
How to use the remote control
● Be extremely careful not to swallow the battery.
● The battery life is approximately one year. If the remote control
unit does not operate correctly or if the button lamp gets dim,
replace the batteries.
● Be sure to orient the batteries correctly so that the positive and
negative poles match the diagram.
● Do not use one new battery and one old one; use two new
batteries.
● Use only two of the same kind of battery.
● If any liquid is seen leaking from the batteries, remove both
batteries and dispose of them properly. Thoroughly clean the
battery compartment with a dry cloth. Then install new batteries.
XI
191
CD8455.book 192 ページ
2004年12月11日 土曜日 午後7時24分
How to operate the receiver with an optional CD changer connected
How to operate the receiver with an optional
CD changer connected
[DISC MS] button
[SEL] button
This section covers the operation of an optional CD changer that is
connected to the receiver.
To switch from another mode, press the [DISC MS] button for less than
one second.
Switching the input channel
Some connected CD changers will allow you to switch the input channel.
Press the [SEL] button for more than one second.
Each time the button is pressed, the input channel will switch
between analog input and digital input.
Listening to a CD
Press the [DISC MS] button for less than one second.
Each press of the button switches the mode from CD player ➔ CD
Changer 1 ➔ CD Changer 2 ➔ Memory Stick player.
A changer or player with no discs loaded will be skipped.
Advancing to the next track or returning to the
beginning of the track being played
Turn the [SEL] button to the left or right.
Turn to the right: Advances to the next track.
Turn to the left: Returns to the beginning of the track being played.
(Repeat turning for previous tracks.)
192
CD8455.book 193 ページ
2004年12月11日 土曜日 午後7時24分
How to operate the receiver with an optional CD changer connected
[4 SCAN] button
[
] button
[
] button
Fast Forward/Rewind
Fast forward or rewind the song currently being played.
Press and hold the [
[ ] button:
[ ] button:
] or [
] button.
Fast forward.
Rewind.
Playing the beginning of tracks (SCAN)
Press the [4 SCAN] button.
Pressing the button for less than one second causes the changer to
move up to the next track and play it for 10 seconds, then move up
to the next track and play it for 10 seconds, and so on, on one CD,
until the button is pressed again.
Hold the button until the [ALL SCAN] display appears to play the
first 10 seconds of the first track of every CD loaded.
● To continue playing a desired track, press the button again to
stop scanning.
● After the entire disc is scanned once, ordinary playback starts
from the point where scanning started.
193
XII
CD8455.book 194 ページ
2004年12月11日 土曜日 午後7時24分
How to operate the receiver with an optional CD changer connected
[5 RPT] button [6 RAND] button
Repeating the same track (REPEAT)
Press the [5 RPT] button.
Pressing on the button for less than one second causes the
changer to repeat the track currently being played, until the button is
pressed again.
Hold the button until the [ALL REPEAT] display appears to repeat all
tracks on the CD being played.
Playing tracks in random order (RANDOM)
Press the [6 RAND] button.
Pressing on the button for less than one second causes the
changer to play the tracks on the currently playing CD in random
order, until the button is pressed again.
Hold the button until the [ALL RANDOM] display appears to play
tracks from all of CDs loaded in the currently selected changer, in
random order.
● During random playback, press the [5 RPT] button to repeat the
track being played. To cancel repeat play (go back to random
play), press the [5 RPT] button again.
During playback of a particular track: The track being played is
played repeatedly.
While searching: The following track is played repeatedly.
● Occasionally the same track happens to be played (selected)
two or more times in a row, but it is not a sign of a problem.
● When any of the functions - "Playing the beginning of tracks,"
"Repeating the same track " and "Playing tracks in random
order " - is selected, a message such as [SCAN], [ALL SCAN],
[REPEAT], [ALL REPEAT], [RANDOM] or [ALL RANDOM]
appears on the display to verify the current function.
● Random play is not canceled even if a magazine is ejected.
194
CD8455.book 195 ページ
2004年12月11日 土曜日 午後7時24分
How to operate the receiver with an optional CD changer connected
[SEL] button
Buttons [1
] and [2
Buttons [1] to [6]
]
Skipping to the next or previous CD
Press button [1
Button [1
Button [2
] or [2
].
]: Selects the next lower number disc.
]: Selects the next higher number disc.
Specifying a CD to play
A CD of your choice is directly selectable out of the loaded discs.
Press the [SEL] button for less than one second.
Press a button from [1] to [6].
Buttons
1
2
3
4
5
6
CD
1
2
3
4
5
6
7
8
9
10
11
12
To select a CD from nos. 7 to 12, press the desired button
considerably longer.
195
XII
CD8455.book 196 ページ
2004年12月11日 土曜日 午後7時24分
How to operate the tuner with an optional HD Radio tuner connected (U.S.A. only)
How to operate the tuner with an optional
HD Radio tuner connected (U.S.A. only)
About HD Radio
If the optional HD Radio (High Definition Radio) tuner unit is connected,
terrestrial digital broadcasts can be received. When terrestrial digital
broadcasts are received, FM reception has the same quality as a CD, and
AM reception has the same quality as conventional FM sound. Depending
on the reception status, HD Radio can also receive analog broadcasts,
which means reception is still possible in regions with no digital coverage.
196
CD8455.book 197 ページ
2004年12月11日 土曜日 午後7時24分
How to operate the tuner with an optional HD Radio tuner connected (U.S.A. only)
[ ] button
[FM AM] button
[SEL] button [ ] button
First, press the [FM AM] button to start tuner operation.
There are automatic and manual methods for setting stations in memory.
The receiver will accept up to 24 stations in memory: 6 in AM and 18 in FM
(6 each for FM1, FM2 and FM3.) (Initial setting)
Tuning to a station
Press the [FM AM] button for less than one second to
switch to the desired FM or AM bands.
Radio bands will switch from FM1 ➔ FM2 ➔ FM3 ➔ AM in order
each time the button is pressed.
If the optional SIRIUS satellite radio tuner unit is connected, radio
mode will be switched between the satellite radio mode and FM AM
radio mode by pressing the [FM AM] button for more than one second.
Turn the [SEL] button to the left or right to tune to a
station.
Turn to the right: Tunes to higher frequencies.
Turn to the left: Tunes to lower frequencies.
Press the [
search.
] or [
] button to start the automatic station
[ ] button: Starts searching toward higher frequencies.
[ ] button: Starts searching toward lower frequencies.
At times, it may be difficult to maintain optimum reception because the
antenna affixed to your vehicle is in motion constantly (relative to the
broadcast antenna), encountering continuous variation in the received
radio signals’ strength. Other factors affecting reception include
interference from natural obstacles, sign posts, etc.
197
XIII
CD8455.book 198 ページ
2004年12月11日 土曜日 午後7時24分
How to operate the tuner with an optional HD Radio tuner connected (U.S.A. only)
[FM AM] button
Buttons [1] to [6]
[SEL] button
Entering stations into memory automatically
(The automatic preset mode: ASM)
Press the [FM AM] button for less than one second to
switch to the desired FM or AM bands.
Radio bands will switch from FM1 ➔ FM2 ➔ FM3 ➔ AM in order
each time the button is pressed.
If the optional SIRIUS satellite radio tuner unit is connected, radio
mode will be switched between the satellite radio mode and FM AM
radio mode by pressing the [FM AM] button for more than one second.
Press the [SEL] button for more than two seconds until a
beep is heard.
The automatic preset mode starts.
The [ASM ON] indicator on the screen flashes, and stations are
automatically entered in memory under buttons [1] to [6].
These buttons are called preset buttons.
● When a new station is set in memory, the station previously set
in memory will be deleted.
● If there are fewer than six receivable stations, the stations set in
the remaining buttons will be retained.
198
CD8455.book 199 ページ
2004年12月11日 土曜日 午後7時24分
How to operate the tuner with an optional HD Radio tuner connected (U.S.A. only)
[FM AM] button
Buttons [1] to [6]
[SEL] button
Manually setting stations into memory
This section covers the setting of stations in memory under the numbered
buttons.
Press the [FM AM] button for less than one second to
switch between FM and AM.
If the optional SIRIUS satellite radio tuner unit is connected, radio
mode will be switched between the satellite radio mode and FM AM
radio mode by pressing the [FM AM] button for more than one second.
Turn the [SEL] button to the right or left to tune to the
station to be entered in memory.
Select any button, from [1] to [6], and press it for more
than two seconds.
The tuned station is now memorized and set in the button selected.
Repeat the procedure to set additional manually tuned stations in
memory, in turn, for buttons [1] to [6]. These buttons are called the
preset buttons.
If the vehicle’s battery is disconnected (for repairs to the vehicle or for
removing the receiver), all stations in memory will be lost. In such a
case, set stations in memory again.
199
XIII
CD8455.book 200 ページ
2004年12月11日 土曜日 午後7時24分
How to operate the tuner with an optional HD Radio tuner connected (U.S.A. only)
Buttons [1] to [6]
[SEL] button
Preset station scan
This function enables reception of all the stations in the preset buttons for
five seconds each.
Press the [SEL] button for less than two seconds.
[P SCAN] will appear on the display, and stations stored under
preset buttons [1] through [6] will be played for five seconds each.
To stop the preset scan mode at a desired station, press
the [SEL] button again.
The receiver will stay tuned to the desired station.
200
CD8455_13_E.fm
201 ページ
2004年12月13日 月曜日 午後8時37分
How to operate the tuner with an optional HD Radio tuner connected (U.S.A. only)
[FUNC] button
[SEL] button
[DISP] button
[RTN] button
Switching between displays when receiving HD Radio
During digital reception, the name of the station being received and other
information can be displayed.
Press the [DISP] button for more than one second.
Each time the button is pressed the display item changes in the
following order:
station name ➔ title* ➔ artist* ➔ album* ➔ genre.
*: Depending on the nature of the broadcast, no information may be shown.
The maximum number of characters that can be displayed for each
item is as follows:
Long name: 48 characters
Short name: 7 characters
Song title: 32 characters
Album: 32 characters
Genre: 32 characters
XIII
HD Radio reception settings
The HD Radio reception method can be selected. When the HD Radio
tuner is connected to this deck for the first time, it will be set at [AUTO]
(automatic digital/analog selection).
Press the [FUNC] button for less than one second.
The function mode is activated.
Turn the [SEL] button to select HD Radio.
The selected item will be high lighted.
Press the [SEL] button.
The mode will change to reception setting mode.
201
CD8455.book 202 ページ
2004年12月11日 土曜日 午後7時24分
How to operate the tuner with an optional HD Radio tuner connected (U.S.A. only)
[FUNC] button
[SEL] button
[DISP] button
[RTN] button
Turn the [SEL] button to select AUTO or OFF.
The selected item will be highlighted.
In the [AUTO] setting, the selection is switched between digital and
analog reception automatically. In areas where digital reception is
not possible, reception is automatically switched to analog to avoid
loss of reception. During digital reception, [DIGITAL] is shown on
the display. This is cleared during analog reception.
In the [OFF] setting, reception is always analog.
Press the [SEL] button.
Press the [RTN] button.
At this time, other adjustments can also be made in function mode.
Press the [FUNC] or [RTN] button to exit function mode.
202
CD8455.book 203 ページ
2004年12月11日 土曜日 午後7時24分
How to operate the tuner with an optional SIRIUS satellite radio tuner connected (U.S.A. only)
How to operate the tuner with an optional SIRIUS
satellite radio tuner connected (U.S.A. only)
About SIRIUS satellite radio
If the optional SIRIUS satellite radio tuner unit is connected, satellite radio
broadcast can be received.
With SIRIUS satellite radio, over 100 channels are available including
music, sports, news, and entertainment programs.
The channel can be selected from categories such as POP and ROCK, or
by selecting individual channel manually.
Reception of SIRIUS satellite radio is fee based; you have to subscribe to
it.
It is possible to subscribe through the SIRIUS radio website.
URL: http://cdn.sirius.com
For information about the operation and set-up of the SIRIUS satellite
radio tuner unit, see the SIRIUS satellite radio unit's owner's manual.
XIV
203
CD8455.book 204 ページ
2004年12月11日 土曜日 午後7時24分
How to operate the tuner with an optional SIRIUS satellite radio tuner connected (U.S.A. only)
[ ] button
[FM AM] button
[SEL] button [ ] button
The receiver will accept up to 24 stations in memory.
Selecting the radio mode
Press the [FM AM] button for more than one second.
The mode switches between satellite radio mode and FM/AM radio
mode each time the button is pressed.
Selecting a channel
Press the [FM AM] button for less than one second to
switch to the desired SR bands.
Radio bands will switch from SR1 ➔ SR2 ➔ SR3 ➔ SR4 in order
each time the button is pressed.
Turn the [SEL] button to the left or right to tune to a
channel.
Turn to the right: Selects the higher channel.
Turn to the left: Selects the lower channel.
Press the [ ] or [ ] button for less than one second to
start the automatic channel search.
Reception is enabled for all channels within the currently selected
category.
(Refer to page 205 for details on "Category selection".)
[ ] button: Starts searching toward higher channels.
[ ] button: Starts searching toward lower channels.
204
CD8455.book 205 ページ
2004年12月11日 土曜日 午後7時24分
How to operate the tuner with an optional SIRIUS satellite radio tuner connected (U.S.A. only)
[SEL] button [
] button
[
] button
Category selection
The channel can be selected from among categories such as POP and
ROCK.
Consult the SIRIUS website for details of categories.
Press the [
] or [
] button for more than one second.
Categories will switch in order shown below each time button is
pressed.
[ ] button .............. Advance to next category.
[ ] button .............. Return to previous category.
Direct Channel selection
The channel can be selected by inputting the channel directly.
Press and hold the [SEL] button for more than two
seconds.
The mode will change to direct channel selection mode.
205
XIV
CD8455.book 206 ページ
2004年12月11日 土曜日 午後7時24分
How to operate the tuner with an optional SIRIUS satellite radio tuner connected (U.S.A. only)
Buttons [1] to [3]
Button [5]
Press the buttons [1], [2] and [3] to select the channel
number to be input.
[1] button. . . . . Hundreds
[2] button. . . . . Tens
[3] button. . . . . Units
Each time the buttons are pressed, the numerals change in the
following order.
0➔1➔2➔3➔4➔5➔6➔7➔8➔9
Pressing the [6] button clears the numeral at the previous digit.
Press the button [5].
Starts reception.
206
CD8455.book 207 ページ
2004年12月11日 土曜日 午後7時24分
How to operate the tuner with an optional SIRIUS satellite radio tuner connected (U.S.A. only)
[FM AM] button
Buttons [1] to [6]
[SEL] button
Manually setting channels into memory
This section covers the setting of channels in memory under the
numbered buttons.
Turn the [SEL] button to the right or left to tune to the
channel to be entered in memory.
Select any button, from [1] to [6], and press it for more
than two seconds.
The tuned channel is now memorized and set in the button
selected. Repeat the procedure to set additional manually tuned
channels in memory, in turn, for buttons [1] to [6]. These buttons are
called the preset buttons.
If the vehicle’s battery is disconnected (for repairs to the vehicle or for
removing the receiver), all channels in memory will be lost. In such a
case, set channels in memory again.
XIV
207
CD8455.book 208 ページ
2004年12月11日 土曜日 午後7時24分
How to operate the tuner with an optional SIRIUS satellite radio tuner connected (U.S.A. only)
Buttons [1] to [6]
[DISP] button [SEL] button
Preset channel scan
This function enables reception of all the channels in the preset buttons
for five seconds each.
Press the [SEL] button for less than two seconds.
[P SCAN] will appear at the display, and channels stored under
preset buttons [1] through [6] will be played for five seconds each.
To stop the preset scan mode at a desired channel, press
the [SEL] button again.
The receiver will stay tuned to the desired channel.
Switching displays when using the SIRIUS satellite
radio
Press the [DISP] button for more than one second.
Each time the button is pressed the display item changes in the
following order:
channel name ➔ category name ➔ title ➔ artist ➔ SIRIUS unit ID.
● The maximum number of characters that can be displayed for
each item is as follows:
Title: 38 characters
Artist: 38 characters
Channel: 20 characters
Category: 16 characters
● If there is no name, NO_ DATA will appear.
208
CD8455.book 209 ページ
2004年12月11日 土曜日 午後7時24分
Others
Others
[DISC] button
Connecting portable audio players to the AUX jack
Use a commonly available accessory cord with the RCA connector to
connect a portable audio player to the AUX (auxiliary) jack of this system.
The deck is compatible with portable audio players with both analog
output and digital output (44.1 kHz and 48 kHz).
Turn on the portable audio player and start its play
function.
Switch to AUX mode by pressing the [DISC] button for
more than one second.
Activation of the AUX mode will light the "AUX" indicator and
channel audio player output to the system speakers.
● While the AUX mode is activated, actions such as turning off the
audio player or pulling out the connection cord may cause noise
spikes that can damage the system speakers. Be sure to avoid
this possibility by turning off system power or switching from
AUX mode to another mode before shutting off or disconnecting
the portable audio player.
● Audio output levels will differ for the various devices that can be
connected by this method. Carefully adjust volume until the
output level of the connected player is known.
● Before using a portable audio player in a vehicle, read the
player's operation manual carefully and confirm problem-free
operation in the vehicle before proceeding.
209
XV
CD8455.book 210 ページ
2004年12月11日 土曜日 午後7時24分
Others
Button [1]
Button [4]
Switching the external input method (analog/digital)
You can switch the external input method for the deck. Select the
method that matches the output method for the portable audio
player that is connected to the deck.
In AUX mode, press button [1] or button [4].
Button [1]: Switches to digital input.
Button [4]: Switches to analog input.
210
CD8455.book 211 ページ
2004年12月11日 土曜日 午後7時24分
Others
[FUNC] button [SEL] button
[RTN] button
Changing auxiliary input sensitivity
The sensitivity of the auxiliary mode can be changed.
Press the [FUNC] button for less than one second.
The function mode is activated.
Turn the [SEL] button to select AUX Sensitivity.
The selected item is highlighted.
Press the [SEL] button.
The AUX sensitivity mode is activated.
Turn the [SEL] button to select the sensitivity mode.
Turning the button allows you to toggle through sensitivity
modes as follows:
Low
Mid-Low
Mid
Hi
Input sensitivity modes are roughly as follows:
Low
2 Vrms
Mid-Low
960 mVrms
Mid
480 mVrms
Hi
240 mVrms
Press the [SEL] button.
The selected settings will take effect.
Press the [RTN] button.
At this time, other adjustments can also be mode in function
mode.
Press the [FUNC] or [RTN] button to exit function
mode.
211
XV
CD8455.book 212 ページ
2004年12月11日 土曜日 午後7時24分
Others
[DISP] button
User Registration Key display
User Registration Key is your CD8455's unique ID. In order to use the
ECLIPSE website (E-iSERV), a 16-digit User Registration Key is necessary.
Check that the deck is in standby mode.
Press the [DISP] button for more than one second.
The first 8 digits of your User Registration Key will be displayed.
Press and hold [DISP] once more (for a second or more) and the
remaining 8 digits will be displayed.
Your User Registration Key is a 16-digit ID composed of numbers 0-9
and letters A-F.
212
CD8455.book 213 ページ
2004年12月11日 土曜日 午後7時24分
If you have a question:
If you have a question:
[RESET] button
First check the item mentioned below before attempting to troubleshoot
problems.
If a problem occurs, for instance when the unit does not respond to
any button presses, or the display doesn't work correctly, press the
[RESET] button using a paper clip or similar item.
Pressing the [RESET] button will delete all the entries from memory.
The settings will return to those made at the factory prior to shipment.
XVI
213
CD8455.book 214 ページ
2004年12月11日 土曜日 午後7時24分
If you have a question:
Displayed information (for troubleshooting)
The information listed in the chart below is displayed to show the status of
the CD, Memory Stick player, Area Shot function, Sirius Radio and CD
changer. Refer to the chart for the appropriate action.
Information Contents
Explanation and remedial action to take
INFO 2
NO DISC LOADED IN
THE MAGAZINE
There is no disc in the magazine or player.
Load a disc in the magazine. (Load a
music disc.)
INFO 3
DISCS ARE DIRTY OR
DAMAGED
The loaded disc is dirty or upside down.
Check it for proper orientation and verify it
is clean.
INFO 5
CD PLAYER AND CD
CHANGER FAILS
MECHANICALLY
• The CD player and CD changer is
inoperative for some reason. Go through
the magazine removal procedure.
• If a magazine fails to eject, have your
dealer fix problem.
INFO 6
INFO 7
WHEN THE CD PLAYER
AND CD CHANGER
INTERNAL
TEMPERATURE IS HIGH
(TO PROTECT PICKUP
UNIT)
• The temperature in the CD player and
CD changer is too high for operation.
Wait till it cools down.
AN INTERNAL POWER
SUPPLY FAILURE IS
OCCURRING
• Turn the ACC off once before turning it
on once again to resume the operation.
• Resume playing after the "High
temperature sensed and CD stopped"
display disappears. If the CD still cannot
play, have your dealer repair it.
• If this condition persists, please contact
your dealer.
LOAD
CD changer is in the process of verifying
the presence of CDs after a magazine has
been inserted into the CD changer.
MSINFO 1
YOU TRIED TO
PLAYBACK,
RECORDING AND
READING DATA WHEN
NO MG MEMORY
STICK OR MEMORY
STICK WAS INSERTED
Insert MG Memory Stick or Memory Stick.
MSINFO 2
YOU TRIED TO
PLAYBACK AN
INCORRECTLY
FORMATTED MEMORY
STICK
Use the deck to format the Memory Stick.
MSINFO 3
THE WRITE
PROTECTION SWITCH
IS LOCKED.
Unlock the write protection switch.
MSINFO 4
THE MEMORY STICK
FULL
Delete some of the data from the Memory
Stick before saving.
214
CD8455_16_E.fm
215 ページ
2004年12月16日 木曜日 午後6時6分
If you have a question:
MSINFO 5
YOU TRIED TO
RECORD MORE THAN
THE MAXIMUM
NUMBER OF TRACKS
(400) ONTO A MG
MEMORY STICK
Delete some of the MG Memory Stick data
or use a different MG Memory Stick for
recording.
MSINFO 6
AN INCOMPATIBLE
MEMORY STICK HAS
BEEN INSERTED
Check that the Memory Stick can be used
with this deck.
MSINFO 7
MG MEMORY STICK
CONTAINING NO
MUSIC DATA HAS
BEEN INSERTED
Insert a MG Memory Stick containing music
data.
MSINFO 8
YOU TRIED TO
PLAYBACK DATA THAT
INCLUDES A
PLAYBACK GUARD
Data that includes a playback guard can
not be played back.
MSINFO 9
MG MEMORY STICK
YOU TRIED TO PLAY
BACK HAS PLAYBACK
LIMITATIONS
Data that includes a playback guard can
not be played back.
FILE ERR
A MG MEMORY STICK
CONTAINING
INCOMPATIBLE FILES
HAS BEEN INSERTED
Insert a MG Memory Stick containing
compatible files.
REC ERR
YOU TRIED TO RECORD
MUSIC FROM AN AUDIO
CD SUCH AS A CD-R OR
CD-RW TO THE MG
MEMORY STICK
This deck is compatible with SCMS/SDMI
standards, and so it can not record music
from audio CDs such as CD-Rs and CDRWs.
LOAD_MAP_ DAMAGE TO MEMORY
DATA
STICK DATA
Memory stick data is damaged because
the ignition switch has been turned ON/
OFF during the data import process.
AUTH_ERR
AREA SHOT DATA
CANNOT BE
IMPORTED PROPERLY
Confirm the Memory Stick data.
SIZE_ERR
THE VOLUME OF
IMPORT DATA IS
LARGE
Confirm the Memory Stick data.
ANTENNA
Sirius ANTENNA IS
DISCONNECTED
Connect the Sirius antenna.
CALL 888539-SIRIUS
NO SUBSCRIPTION TO
THE SELECTED
CHANNEL
Subscribe to Sirius to receive the service
by Sirius Satellite radio.
ACQUIRING
Sirius Satellite RADIO
SIGNAL RECEVING
FAILS
Select another channel.
215
XVI
CD8455.book 216 ページ
2004年12月11日 土曜日 午後7時24分
If you have a question:
Mode
Problem
Dead or
weak sound
Power does
not turn on.
Common
to all
Frequencies
or titles set in
memory are
deleted.
No guide
tone sounds.
The remote
control does
not work.
Remedial action
to take
Causes
Refer
to page
Is the volume control up sufficiently?
Turn up the volume
control.
45
Is the muting function in effect
(MUTE)?
Cancel the muting
(MUTE) function.
45
Is the fader or balance control set far
to one side?
Readjust the fader and
balance controls to more
normal positions.
47
Other probable causes include
broken audio-signal wiring or a faulty
speaker.
Have your dealer check
the problem.
—
Are there too electrical items
installed, causing a lack of power?
Have your dealer check
the problem.
—
Other probable causes include a runHave your dealer check
down car battery, broken power or
the problem.
interconnection wiring.
—
Has the car battery been
disconnected for repair or checked
out?
Reenter them into
memory.
Are there too electrical items
installed and causing lack of
available power?
Have your dealer check
the problem.
—
Other probable causes include rundown car battery, broken power or
interconnection wiring.
Have your dealer check
the problem.
—
Is the guide tone disabled?
Enable the guide tone.
61
Is the battery low?
Replace battery.
190
Is the battery installed in reverse
polarity?
Reinstall the battery in
the correct polarity.
190
Is direct sunlight hitting the remote
control light receptor?
Use the remote control
close to the receptor.
—
Other probable causes include a
malfunctioning remote control.
Have your dealer check
the problem.
—
216
107,
108
CD8455.book 217 ページ
2004年12月11日 土曜日 午後7時24分
If you have a question:
Mode
Problem
The disc cannot be inserted.
The disc is ejected as
soon as it is inserted.
Or, the disc cannot be ejected.
The disc cannot be
changed.
Causes
Is an extra label or seal
applied to the disc?
Are there rough edges,
deformations or damaged
areas on the disc?
Is the disc damaged?
CD
Sound skips around.
Sound is intermittent.
Sound is bad in quality.
The disc cannot be
ejected.
Mode
Problem
Receives
no
stations,
Tuner or
receives
static
noise.
Remedial action
to take
Refer
to page
Do not apply labels or
seals to the disc.
17
Try inserting another disc.
Remove any burrs.
Do not use a deformed or
damaged disc.
18
(scratched, warped, etc.)
Try another disc. Do not
play a damaged disc.
17
Is the disc clean?
Clean the disc.
19
Is the player mounted at a
proper angle?
Have your dealer check it
out.
Is the player mounted
loosely?
—
Are you driving over a
rough surface?
Avoid playback while
driving over rough
surfaces.
16
If unknown
Press the [DISC] button a
bit longer and then press
the [OPEN] button (forced
Eject).
—
Remedial action
to take
Causes
Refer
to page
Is the antenna retracted?
Extend the antenna.
Is the tuner correctly tuned to a station?
Tune to a station.
106
Are you driving outside the service area
of your preset stations?
Tune to a local station.
(Please note, there may be
no local stations servicing
the area where you are
currently driving.)
106
Are you operating other equipment such
as computer, or a mobile phone, in your
vehicle at the same time as your
receiver?
Avoid operating such
equipment while using the
receiver.
—
Other problems may include a loose or
disconnected antenna cable, a bad
antenna cable or a bad
Have your authorized
Eclipse retailer check the
problem.
—
217
—
XVI
CD8455_17_E.fm
218 ページ 2004年12月13日 月曜日 午後12時53分
Specifications
Specifications
<GENERAL>
Power Supply
Current Drain
Dimensions (W x H x D)
In-Dash Unit
Mass (weight)
Usage temperature range
Storage temperature range
14.4V DC (11-16V)
3A
7" x 2" x 6-1/8" (178 x 50 x 155mm)
Approx. 1.7kg
-20°C to +65°C (-4°F to +149°F )
-40°C to +85°C (-20°F to +185°F )
<FM TUNER>
Frequency Range
USA:
Asia:
Australia:
Latin America:
Usable Sensitivity
50dB Quieting Sensitivity
Frequency Response
Stereo Separation
87.75~107.9MHz (0.2MHz step)
87.5~108MHz (0.05MHz step)
87.5~108MHz (0.1MHz step)
87.75~107.9MHz (0.1MHz step)
13dBf
14dBf
30~15,000Hz, ±3dB
38dB (1kHz)
<AM TUNER>
Frequency Range
USA:
Asia:
Australia:
Latin America:
Usable Sensitivity
530~1,710kHz (10kHz step)
522~1,629kHz (9kHz step)
522~1,710kHz (9kHz step)
530~1,710kHz (10kHz step)
20µV
<CD SECTION>
Frequency Response
Wow & Flutter
Stereo Separation
S/N Ratio (A-weighted)
Dynamic Range
Total Harmonic Distortion
20Hz~20kHz, ±3dB
Below measurable limits
85dB
100dB
98dB
0.008%
218
CD8455_17_E.fm
219 ページ 2004年12月13日 月曜日 午後12時53分
Specifications
<MEMORY STICK SECTION>
Frequency Response
S/N Ratio (A-weighted)
Total Harmonic Distortion
20Hz~20kHz ±3dB
100dB
0.008 %
<AUDIO AMPLIFIER>
Power Output
Output Level/Impedance
Tone Control
Bass:
Middle:
Treble:
Loudness
14W x 4 (20Hz~20kHz, 1% THD, 4Ω,
Vcc=14.4V)
Max. 50W x 4
8V/55Ω line-out impedance
±12dB at 80Hz
±12dB at 630Hz
±12dB at 10kHz
+10dB at 100Hz/+6.5dB at 10kHz
XVII
219
CD8455.book 220 ページ
2004年12月11日 土曜日 午後7時24分
Before installation
Before installation
● Note ●
Be sure to disconnect the vehicle battery's negative terminal
before installing the receiver.
Components
No.
Item
Q'ty
1
2
3
4
5
6
7
8
9
10
11
12
13
14
15
16
17
Main unit
Mounting sleeve
Side bracket
Rear bracket
Bezel
Bushing
Self-tapping screw (6 x 16 mm)
Stud bolt
Flat head screw (red: 5 x 8 mm)
Hex-head bolt (red: 5 x 8 mm)
Hex-head bolt (6 x 20 mm)
Hex nut (5 mm)
Hex nut (6 mm)
Interconnecting cable
Remote control
Memory Stick
Microphone for measuring frequency characteristics
1
1
2
1
1
1
1
1
4
4
1
1
1
1
1
1
1
Installation angle
In order to maintain proper functioning, install the unit within an angle of 30
degrees from horizontal (standard). If this is not done, sound skipping or
ejection of the CD may occur.
FRONT
WITHIN AN ANGLE
OF 30 DEGREES
STANDARD
220
CD8455.book 221 ページ
2004年12月11日 土曜日 午後7時24分
Mounting instruction
Mounting instruction
Mounting the main unit
–If installing the main unit by the mounting sleeve–
Insert the mounting sleeve into the opening in the
vehicle dash board or console box.
Use a screwdriver or the like to bend the tabs in the
mounting sleeve to secure the mounting sleeve.
BEND THE MOUNTING
TABS.
DASH BOARD
OR CONSOLE BOX
2
MOUNTING
SLEEVE
Attach the side brackets to the main unit using flathead
screws.
1
MAIN UNIT
9
3
FLAT HEAD
SCREWS [ x 2 ]
(red: 5 x 8mm)
SIDE BRACKETS [ x 2 ]
XIX
221
CD8455.book 222 ページ
2004年12月11日 土曜日 午後7時24分
Mounting instruction
Mount the stud bolt to the main unit.
Insert the main unit into the mounting sleeve until it
locks in place.
Fasten the rear of the main unit using either method [A]
or [B].
Some automobiles may be equipped to secure the back of the main
unit using the stud bolt and supplied rubber support.
Select method [A] or [B] to suit the interior configuration of the
vehicle.
Install the bezel on the main unit.
[A]
METAL OF
VEHICLE
DASH BOARD
OR CONSOLE BOX
6
BUSHING
P
TO
STUD BOLT
8
2
5
MOUNTING SLEEVE
BEZEL
[B]
7
SELF TAPPING
SCREW (6 x 16mm)
13
11 HEX-HEAD
DASH BOARD
OR CONSOLE BOX BOLT
(6 x 20mm)
METAL OF
VEHICLE
12
P
TO
4
8
2
5
BEZEL
222
NUT (6mm)
NUT (5mm)
REAR BRACKET
STUD BOLT
MOUNTING SLEEVE
CD8455.book 223 ページ
2004年12月11日 土曜日 午後7時24分
Mounting instruction
–If installing the main unit by the side brackets of the vehicle–
Remove the pockets and any other accessories from the
center cluster to make room for the main unit.
Remove the mounting side brackets for the pocket.
CENTER CLUSTER
POCKET
SCREWS
Attach the side brackets to the main unit.
Install the main unit in the vehicle.
1 MAIN UNIT
POCKET
10 HEX-HEAD BOLT
(red : 5 x 8 mm)
SCREWS [x 4]
SIDE BRACKETS
XIX
223
CD8455.book 224 ページ
2004年12月11日 土曜日 午後7時24分
Mounting instruction
Names of lead wires and destinations
(refer to Page 227)
● Caution ●
Never connect the power supply to the speaker leads, otherwise it
causes damage to the main unit.
● Note ●
To prevent unconnected leads from shorting out, insulate them by
wrapping their tips with electrical tape. Similarly, insulate the ends
of connected leads.
If an external amplifier is to be connected to the receiver, be sure
to ground its outside housing to the vehicle body (a metal part).
No.
Name
Wire color
Destination
1
ACC
Red
Connect where the power comes
on when the ignition is in the
ACC position.
2
B+
Yellow
Connect where the power is
constantly available, regardless
of the ignition switch's position.
3
Ground
Black
Connect where good body
grounding is available.
4
Antenna power supply
Blue
Connect to the automaticantenna control terminal of the
vehicle.
5
Illumination power
supply
Orange/white Connect to where power comes
on when the headlights are
turned on.
6
Control power supply
Blue/white
7
E-LAN terminal
Connect to the E-LAN terminal of
the CD changer, etc.
8
Line-out terminals (Front/Hi)
9
Line-out terminals (Rear/Mid)
Connect to the RCA input
connectors of an external
amplifier.
10
Line-out terminals (Nonfader/Low)
Connect to the RCA input
connectors of a EQ, or the RCA
input connectors of a woofer
amplifier.
11
Speaker leads
Connect them to their respective
leads.
224
Connect to the control terminal
for the external amplifier, etc.
CD8455.book 225 ページ
2004年12月11日 土曜日 午後7時24分
Mounting instruction
No.
Name
12
AUX in terminals
Wire color
Destination
Connect to an external voice
output terminal.
If the microphone for measuring
frequency characteristics is
used, connect microphone to the
L side of the RCA terminal.
13
Digital in terminal
Connect to digital output terminal
of the CD changer.
14
LAN terminal
Connect to the LAN terminal of
the GPS unit.
15
Genuine steering remote
control terminal
Connect to the vehicle steering
remote control.
* Compatible vehicle models
for installation : Vehicle with
voltage detection-type
steering remote control. Ask
your dealer for details.
XIX
225
CD8455.book 226 ページ
2004年12月11日 土曜日 午後7時24分
Mounting instruction
Measuring the frequency characteristics inside the
passenger compartment
Connect the microphone for measuring frequency
characteristics to the microphone terminal of the tuneramplifier.
Install the microphone to the headrest of the driver's
seat.
● Note ●
Using the supplied velcro strap, secure the microphone to the
base of the headrest.
17 Microphone for measuring
frequency characteristics
WIRE
FRONT
DRIVER'S SEAT
226
CD8455.book 227 ページ
2004年12月11日 土曜日 午後7時24分
Mounting instruction
System
Note:
Adjust the external amplifier’s
input level.
CD8455
CD8455
GPS105
GPS UNIT
CD8455
CD8455
HDR105
HD RADIO TUNER
CD8455
21010
CD8455
XIX
227
228
White(+)
Brown/Black
Brown
Purple/Black(-)
Purple(+)
Green/Black(-)
Green(+)
Gray/Black(-)
Gray(+)
15 TO STEERING REMOTE CONTROL
RR
RL
FR
FL
ANTENNA PLUG
White/Black(-)
16P
8 FRONT
9 REAR
10 NON-FADER
Never connect the power supply to the speaker leads, otherwise it causes damage to the main unit.
Caution
Black
Blue/White
Orange/White
Blue
Yellow
14
R SIDE
L SIDE
INTERCONNECTING CABLE
3 TO GROUND
6 TO TURN ON LEAD OF EACH UNIT (supply)
5 TO HEAD LIGHT SWITCH (supply)
4 TO POWER ANTENNA RELAY (supply)
2 TO BATTERY+12V (Permanent supply)
1 TO ACC (Power supply)
Red
CD8455
13 DIGITAL IN
MICROPHONE
7
2004年12月11日 土曜日 午後7時24分
1) CD8455 Receiver, used alone
CD8455.book 228 ページ
Mounting instruction
8P
1 TO ACC (Power supply)
229
White(+)
Brown/Black
Brown
Purple/Black(-)
Purple(+)
Green/Black(-)
Green(+)
Gray/Black(-)
Gray(+)
White/Black(-)
16P
15 TO STEERING REMOTE CONTROL
RR
RL
FR
FL
ANTENNA PLUG
8 FRONT
9 REAR
10 NON-FADER
Never connect the power supply to the speaker leads, otherwise it causes damage to the main unit.
Caution
Black
Blue/White
Orange/White
Blue
Yellow
R SIDE
INTERCONNECTING CABLE
3 TO GROUND
6 TO TURN ON LEAD OF EACH UNIT (supply)
5 TO HEAD LIGHT SWITCH (supply)
4 TO POWER ANTENNA RELAY (supply)
7
Red
CD8455
13 DIGITAL IN
MICROPHONE
2 TO BATTERY+12V (Permanent supply)
GPS105
GPS ANTENNA
L SIDE
2004年12月11日 土曜日 午後7時24分
2) CD8455 + GPS105
CD8455.book 229 ページ
Mounting instruction
XIX
2004年12月11日 土曜日 午後7時24分
230
(B)
(A)
3 TO GROUND
6 TO TURN ON LEAD OF EACH UNIT (supply)
5 TO HEAD LIGHT SWITCH (supply)
4 TO POWER ANTENNA RELAY (supply)
1 TO ACC (Power supply)
2 TO BATTERY+12V (Permanent supply)
Blue
Red
14
Black
Blue/White
Orange/White
Yellow
13P
R SIDE
L SIDE
White(+)
15 TO STEERING REMOTE CONTROL
WIRE WITH TAPE
11 INSULATE EACH
WIRE WITH TAPE
11 INSULATE EACH
ANTENNA PLUG
INTERCONNECTING CABLE
Brown/Black
Brown
Purple/Black(-)
Purple(+)
Green/Black(-)
Green(+)
Gray/Black(-)
Gray(+)
White/Black(-)
16P
TO SIGNAL INPUT
OF AUXILIARY
POWER AMPLIFIER
10 NON-FADER
Note
1.The switch on the back side of CD changer (A) must be set the "L" position.
2.The switch on the back side of CD changer (B) must be set the "H" position.
3.CD changer (B) uses analog output.
Caution
Never connect the power supply to the speaker leads, otherwise it causes damage to the main unit.
CH3083
2P
13P
CH3083
2P
13P
CD8455
13 DIGITAL IN
MICROPHONE
3) CD8455 + CH3083 + CH3083 + Power Amplifier
CD8455.book 230 ページ
Mounting instruction
2004年12月11日 土曜日 午後7時24分
13P
231
2P
13P
CH3083
1 TO ACC (Power supply)
2 TO BATTERY+12V (Permanent supply)
3 TO GROUND
6 TO TURN ON LEAD OF EACH UNIT (supply)
5 TO HEAD LIGHT SWITCH (supply)
Black
Blue/White
Orange/White
Blue
Red
Yellow
13P
CD8455
14
R SIDE
13 DIGITAL IN
4 TO POWER ANTENNA RELAY (supply)
ANTENNA
EXTENSION CABLE
ANTENNA PLUG
MICROPHONE
L SIDE
15 TO STEERING REMOTE CONTROL
WIRE WITH TAPE
11 INSULATE EACH
WIRE WITH TAPE
11 INSULATE EACH
INTERCONNECTING CABLE
Brown/Black
Brown
Purple/Black(-)
Purple(+)
Green/Black(-)
Green(+)
Gray/Black(-)
Gray(+)
White/Black(-)
White(+)
16P
TO SIGNAL INPUT
OF AUXILIARY
POWER AMPLIFIER
10 NON-FADER
Never connect power supply to the speaker leads, otherwise it causes damage to the main unit.
Caution
13P
HDR105
2P
TO BATTERY+12V (Permanent supply)
4) CD8455+HDR105+CH3083+Power Amplifier
CD8455.book 231 ページ
Mounting instruction
XIX
2004年12月11日 土曜日 午後7時24分
232
1 TO ACC (Power supply)
3 TO GROUND
6 TO TURN ON LEAD OF EACH UNIT (supply)
5 TO HEAD LIGHT SWITCH (supply)
4 TO POWER ANTENNA RELAY (supply)
CH3083
(Permanent supply)
2 TO BATTERY +12V
Blue
Red
14
Black
Blue/White
Orange/White
Yellow
13P
13 DIGITAL IN
8 FRONT
9 REAR
10 NON-FADER
MICROPHONE
INTERCONNECTING CABLE
15 TO STEERING REMOTE CONTROL
WIRE WITH TAPE
11 INSULATE EACH
WIRE WITH TAPE
11 INSULATE EACH
ANTENNA PLUG
Brown/Black
Brown
Purple/Black(-)
Purple(+)
Green/Black(-)
Green(+)
Gray/Black(-)
Gray(+)
White/Black(-)
White(+)
16P
CD8455
R SIDE
L SIDE
Never connect the power supply to the speaker leads, otherwise it causes damage to the main unit.
2P
13P
Caution
21010
TO SIGNAL INPUT
OF AUXILIARY
POWER AMPLIFIER
5) CD8455 + CH3083 + 21010 + Power Amplifier
CD8455.book 232 ページ
Mounting instruction
2004年12月11日 土曜日 午後7時24分
233
1 TO ACC (Power supply)
Blue
Red
Black
Blue/White
Orange/White
3 TO GROUND
6 TO TURN ON LEAD OF EACH UNIT (supply)
5 TO HEAD LIGHT SWITCH (supply)
4 TO POWER ANTENNA RELAY (supply)
CH3083
(Permanent supply)
2 TO BATTERY +12V
15 TO STEERING REMOTE CONTROL
WIRE WITH TAPE
11 INSULATE EACH
WIRE WITH TAPE
11 INSULATE EACH
ANTENNA PLUG
TO SIGNAL INPUT
OF AUXILIARY
POWER AMPLIFIER
INTERCONNECTING CABLE
Brown/Black
Brown
Purple/Black(-)
Purple(+)
Green/Black(-)
Green(+)
Gray/Black(-)
Gray(+)
White/Black(-)
White(+)
16P
8 HI
9 MID
10 LOW
Never connect the power supply to the speaker leads, otherwise it causes damage to the main unit.
Caution
2P
13P
14
R SIDE
L SIDE
Yellow
13P
CD8455
13 DIGITAL IN
MICROPHONE
6) CD8455 + CH3083 + Power Amplifier (for Pro-Mode)
CD8455.book 233 ページ
Mounting instruction
XIX
CD8455.book 234 ページ
2004年12月11日 土曜日 午後7時24分
How to contact customer service
How to contact customer service
Should the product require service, please contact your nearest Eclipse dealer.
<U.S.A/CANADA>
DIVISION OF FUJITSU TEN CORP. OF AMERICA
19600 SOUTH VERMONT AVENUE, TORRANCE, CA 90502
Phone: (310) 327-2151
<AUSTRALIA>
FUJITSU TEN (AUSTRALIA) PTY LTD.
ECLIPSE AUSTRALIA
Phone: 1800-211-411
<MALAYSIA>
Cobra Malaysia. Sdn, bhd.
Level 5, Axis Plaza, Jalan U1/44, Glenmarie, 40150 Shah Alam,
Selangor D.E., Malaysia.
Phone: 03-5569-4200
Fax: 03-5569-4201
<SINGAPORE>
Cobra Singapore Pte Ltd
Trademart
60, Martin Road, # 05-20, Singapore 239065
Phone: 6737 2568
Fax : 6737 9538
234
CD8455.book 235 ページ
2004年12月11日 土曜日 午後7時24分
How to contact customer service
<KOREA>
Transpectra Co., LTD.
115-16 nonhyun dong kangnam ku Seoul, Korea.
Phone: 02-540-4595
Fax: 02-2-540-4666
HYUNDAI AUTONET Co., Ltd.
1st FL. Namhyoung Bldg, 746-23 Yeoksam-Dong, Kangnam-Ku,
Seoul, Korea 135-080
Phone: 02-508-6001
Fax: 02-2-508-6067
<TAIWAN>
Sentrek Taiwan, LTD.
1, 9F, Lane 155, Section 3, Peishen RD., Shenkeng, Taipei Hsien,
222
Taiwan, R.O.C.
Phone: 02-2662-8110
Fax: 02-2662-8117
<THAILAND>
Sho-Ten Co., Ltd.
114/9 Soi Suwansawadi, Thungmahamek, Rama 4 Rd., Sathorn,
Bangkok 10120, Thailand.
Phone: 02-671-9610-12
Fax: 02-671-9614
XX
235
CD8455.book 236 ページ
2004年12月11日 土曜日 午後7時24分
Memo
••••••••••••••••••••••••••••••••••••••••••••••••••••
236
CD8455.book 237 ページ
2004年12月11日 土曜日 午後7時24分
Memo
••••••••••••••••••••••••••••••••••••••••••••••••••••
237
CD8455.book 238 ページ
2004年12月11日 土曜日 午後7時24分
Memo
••••••••••••••••••••••••••••••••••••••••••••••••••••
238
CD8455.book 239 ページ
2004年12月11日 土曜日 午後7時24分
IMPORTANT
RECORD YOUR “KEY CD”
OR “MEMORY STICK
(SECURITY CODE)”
HERE…
STORE YOUR “KEY CD”
OR “MEMORY STICK
(SECURITY CODE)”
ALONG WITH YOUR
OWNER’S MANUAL.
239
CUSTOMER NOTICE
Please retain this booklet and write in the serial number
of your CD8455 for identification.
The serial number is labeled or stamped on the chassis.
Serial No.
FUJITSU TEN LIMITED
Contact:FUJITSU TEN CORP. OF AMERICA
19600 So. Vermont Avenue, Torrance, CA 90502
Call:800-233-ECLIPSE
www.eclipse-web.com
"ECLIPSE" is a registered trademark of
FUJITSU TEN LIMITED in 48 countries
including the U.S. and Japan.
090001-14670700 0412 (F.O)