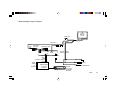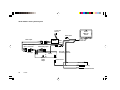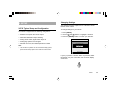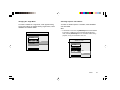
1
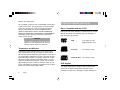
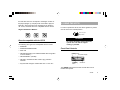
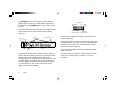
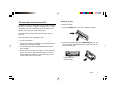
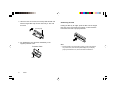
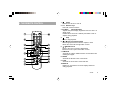
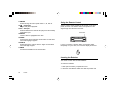
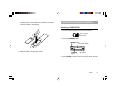
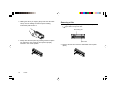
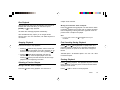
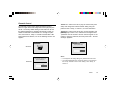
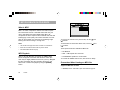
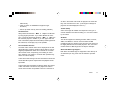
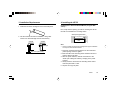
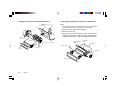
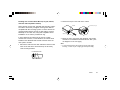
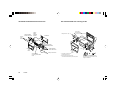
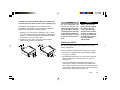
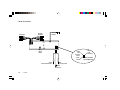
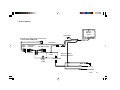
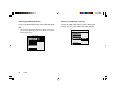
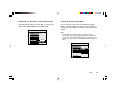
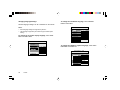
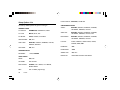
Warning!
Table of Contents
THE CLARION VS735 DIGITAL MEDIA PLAYER IS DESIGNED TO ENABLE VIEWING OF DVD OR CD-VIDEO
RECORDINGS ONLY FOR REAR-SEAT OCCUPANTS.
1. Introduction .................................................................... 2
DIGITAL VIDEO PRODUCTS ARE NOT INTENDED FOR
VIEWING BY THE DRIVER WHILE THE VEHICLE IS IN
MOTION. SUCH USE MAY DISTRACT THE DRIVER OR
INTERFERE WITH THE DRIVER’S SAFE OPERATION OF
THE VEHICLE, AND THUS RESULT IN SERIOUS INJURY
OR DEATH. SUCH USE MAY ALSO VIOLATE STATE LAW.
3. Discs Played by the VS735 ........................................... 4
CLARION DISCLAIMS ANY LIABILITY FOR ANY BODILY
INJURY, INCLUDING FATALITIES, OR PROPERTY DAMAGE
THAT MAY RESULT FROM ANY IMPROPER OR UNINTENDED USES OF THIS PRODUCT.
6. DVD/VCD/CD-Audio Playback .................................... 11
2. Care and Maintenance .................................................. 3
4. Using the VS735 ............................................................. 5
5. The Remote Control ....................................................... 9
7. MP3 Playback on CD-R Discs ..................................... 15
8. Installation and Wiring ................................................ 17
About Installation
Installation of mobile audio and video components requires
experience with a variety of mechanical and electrical procedures. Even though this manual provides general installation
and operation instructions for your new Clarion VS735 Digital
Media Player, it does not show the exact installation methods
for your particular vehicle.
If you do not have the required knowledge and experience to
successfully complete the installation, we strongly recommend
consulting an authorized Clarion dealer about professional
installation options.
9. Setup ............................................................................. 29
10. Troubleshooting ......................................................... 37
11. Specifications .............................................................. 38
12. Limited Warranty Information ................................... 39
1. INTRODUCTION
The Clarion VS735 is a full-featured Digital Media Player
designed specifically for the mobile environment. It is intended
for use with other Clarion multimedia products, and can also
be integrated with many other products as part of a complete
mobile video solution. With a set of auxiliary audio and video
inputs and a digital audio output, the VS735 can also support
use of optional audio/video components such as
camcorders, videogames, or digital audio processors. The
VS735 incorporates many different video output settings to
allow the best possible viewing experience, regardless of
what type of video monitor you may be using.
The VS735 plays DVD discs in NTSC or PAL formats (NTSC
is the standard North American video format), CD-Audio
discs, and CD-recordable discs with MP3 files. For more
details on disc types supported, please see “Discs Played by
the VS735.”
The remote control (included) provides access to the full set
of standard DVD functions, such as subtitle control, digital
freeze-frame viewing, viewing from multiple camera angles,
selection of various language audio soundtracks, and digital
playback at fast or slow speeds. The VS735 also supports
direct access to defined points on a DVD or CD.
Note:
•
The VS735 is designed to be a component in a full audio/video
system. If you have any questions about compatible components,
such as system controllers, monitors, FM modulators, or other audio/
video products, please contact your authorized Clarion dealer.
Accessories Supplied with the VS735
• Detachable Control Panel (DCP) case
• Infrared (IR) remote control and two AAA alkaline batteries
• External IR Receiver for optional applications
• Power-supply harness and RCA audio and video cables
• Assorted mounting hardware
• Owner’s Manual / Installation Guide
About the Registered Marks
This product incorporates copyright protection technology that
is protected by method claims of certain U.S. patents and
other intellectual property rights owned by Macrovision
Corporation and other rights owners. Use of this copyright
protection technology must be authorized by Macrovision
Corporation, and is intended for limited viewing uses only
unless otherwise authorized by Macrovision Corporation.
Reverse engineering or disassembly is prohibited.
Manufactured under license from Dolby Laboratories. Dolby
2
VS735
and the double-D symbol are trademarks of Dolby Laboratories.
FCC Approval
This equipment has been tested and found to comply with the
limits for a Class B digital device, pursuant to Part 15 of the
FCC Rules. These limits are designed to provide reasonable
protection against harmful interference in a residential
installation. This equipment generates, uses, and can radiate
radio frequency energy and, if not installed and used in
accordance with the instructions, may cause harmful interference to radio communications. However, there is no guarantee
that interference will not occur in a particular installation. If this
equipment does cause harmful interference to radio or
television reception, which can be determined by turning the
equipment off and on, the user is encouraged to consult the
dealer or an experienced radio/TV technician for help.
2. CARE AND MAINTENANCE
Handling Discs
Always handle a disc by its edges. Never touch the surface of
the disc directly. To remove inadvertent fingerprints and dust,
use a soft cloth and wipe in a straight line from the center of
the disc to the outside edge. Never use liquid or aerosol
cleaners, anti-static spray, or thinner to clean the disc surface.
Do not place discs in the following places: direct sunlight; dirty,
dusty and damp areas; near car heaters; on the seats or
dashboard. Avoid using adhesive labels on discs.
Liquids and the VS735
Keep all liquids, including beverages and cleaning liquids,
away from the VS735. Liquids inside the player can damage
the electronics, and result in electrical shock or fire. If the unit,
the detachable control panel, or the remote control should
become wet, turn off all power and contact an authorized
Clarion dealer to have the system inspected.
Servicing the VS735
This unit uses a precision mechanism. In the event that
trouble arises, never open the case, disassemble the unit, or
VS735
3
lubricate the rotating parts.
Do not attempt to open the unit, the detachable control panel,
or the remote control. The internal parts are not serviceable
by the user. Opening any of the components will void the
warranty. THE VS735 IS A CLASS I LASER PRODUCT,
USING A LASER WHICH COULD CAUSE HAZARDOUS
RADIATION EXPOSURE IF IMPROPERLY DISASSEMBLED.
All warranty service should be performed by authorized
Clarion service centers.
3. DISCS PLAYED BY THE VS735
Discs Compatible with the VS735
DVD, Video CD (VCD), CD/CD-R, and MP3 discs are compatible with the VS735. The identifying logo and description of
each disc type is given below.
CAUTION!
DVD
Changes or modifications to this product not
approved by the manufacturer will void the
warranty and will violate FCC approval.
(single-sided disc only)
Temperature and Moisture
If the player is used while the interior of the vehicle is very
cold, condensation may form on the disc or on the internal
optical pickup system and prevent proper playing of the disc. If
you suspect that condensation is an issue, eject the disc and
inspect the playing surface. If necessary, remove the condensation with a clean soft cloth as described above. If you still
experience problems with playback, you will need to wait for
approximately one hour to allow the VS735 to warm up, and
for the condensation to evaporate. If playback issues continue,
please see your authorized Clarion dealer.
4
VS735
12 cm disc/8 cm disc
Video CD
12 cm disc/8 cm disc
CD/CD-R, MP3
12 cm disc/8 cm disc
DVD Regions
This digital media player is designed and manufactured to
respond to the Region Management Information that is
recorded on a DVD disc. If the Region number described on
the DVD disc does not correspond to the Region number of
this player (Region 1), this player will not be able to play the
DVD disc. Some DVD discs are manufactured to operate in
“all” zones, and those discs are compatible with the VS735.
Region Identification Markers:
ALL
1
1
4
4. USING THE VS735
In order to operate the VS735, the vehicle ignition key switch
must be in the ACC or RUN position.
ACC or engine
ON position
6
WARNING!
Discs Incompatible with the VS735
The following disc types are incompatible with the VS735:
To prevent the battery from going dead,
operate this unit with the engine
running, if possible.
• DVD-ROM
• DVD-R/DVD-RW/DVD-RAM
Front-Panel Controls
• Photo CD
• CD-ROM (Excluding most CD-Recordable discs using MP3
or CD-A formats)
[OPEN] button
front-panel display
• CD-ReWriteable (CD-RW)
• CD-Audio manufactured with certain copy protection
methods
• Any DVD with a Region number other than “1” and “ALL”
[POWER]
button
IR receiver
The [OPEN] button lowers the face so that discs can be
inserted and ejected.
VS735
5
The [POWER] button turns the VS735 on and off. When the
ignition switch is in the ACC or RUN positions, this button is
illuminated red. The [POWER] button on the remote can also
be used.
The IR Receiver detects the signals from the included infrared
remote control. Aim the remote control at the IR receiver
during use.
Function
status indicators
Media Type
Playback Control Status
Reset button
Security
Disc loading
LED
slot
DCP release button
Eject button
(on back of DCP)
(on back of DCP)
Once the face is lowered, insert discs by placing them into
the disc loading slot.
Play/Pause
SCN
RDM
DVD
REPEAT 1
TITLE
B
A CHP TRK
REMAIN
ANGLE
DOLBY
DIGITAL
VCD
PBC
CD
MP3
Disc
Status
L / R
Disc Loaded
Mono Audio
Indicator
Alphanumeric display
The front-panel display provides basic information about the
status of the VS735. Please note that much information about
using the VS735 will be displayed on the video screen
connected to the unit, and initial setup of the VS735 cannot be
completed without an operating video monitor providing this
on-screen display of menus and settings. Whenever the term
“on-screen display” is used, it refers to the video monitor
display, not the front panel display.
6
VS735
The [ ] eject button is located on the back of the detachable
control panel (DCP), not on the front panel. It is backlit green
whenever the key is in the ACC or RUN positions. It ejects
discs from the disc loading slot.
The Security LED flashes red when the Detachable Control
Panel is removed.
The Reset button can be used to reset the internal microprocessor. See “Troubleshooting”, in Section 10, for more
information.
The Detachable Control Panel (DCP)
The DCP can easily be damaged by shocks. After removing it,
be careful not to drop it or subject it to strong shocks - store it
immediately in the included storage case. Be careful not to
damage it by pressing on it with hard objects.
Detaching the DCP
To detach the DCP:
1 Press the [OPEN] button. The DCP will deploy outward.
If the DCP becomes dirty, wipe off the dirt with a soft, dry
cloth only.
Other precautions when handling the DCP:
• Do not drop the DCP.
• Do not put pressure on the display or control buttons when
detaching or re-installing the DCP.
• Do not expose the DCP to high temperatures or leave in
direct sunlight.
2 Remove the DCP by pressing the [RELEASE] button on the
rear of the DCP, and pulling the DCP up and away from its
hinged mounting tray.
• Do not touch the contacts on the DCP or on the main unit
body. It may result in poor electrical contact. If any dirt or
foreign substances adhered on the contacts, they can be
removed with a clean and dry cloth.
DCP release button
(on back of DCP)
VS735
7
3
When the DCP is removed, the security LED will flash red.
Fold the hinged DCP tray into the main body. A ‘click’ will
be heard.
Security LED
4 For safekeeping, store the DCP immediately in the
supplied protective case.
Protective Case
DCP
8
VS735
Reattaching the DCP
Holding the DCP by its edges, press the DCP into the hinged
DCP tray on the front panel of the VS735. A 'click' should be
heard when the DCP is properly attached.
Note:
•
If the DCP fails to lock into position properly, some control buttons
may not function, and/or the front-panel display may not display
properly. Should this occur, remove the DCP and reattach it .
5. THE REMOTE CONTROL
1
Power
Switches the VS735 on and off.
2 0-9 Numeric keys
Used with various functions.
3 ILL/GOTO
Illumination/Goto
Adjusts front-panel display brightness when the disc is in
STOP mode.
Enables direct access to a defined point within a track or
chapter during playback.
4
Stop
Press to stop playback.
5
/
Fast reverse/fast forward
Use for high-speed search within a chapter or track.
Moves the cursor left and right within a menu.
/ Next/Previous
6
Steps to the next or previous chapter/track.
Moves the cursor up and down within a menu.
7 SUBTITLE
Accesses the various subtitle functions on DVD discs with
multilingual support.
8 SETUP
Accesses the SETUP menu of the VS735.
9 TITLE
Accesses the TITLE menu of the DVD disc.
10 DISPLAY
Displays or conceals the on-screen display status line
during playback.
VS735
9
11 REPEAT
Selects among the three repeat modes: 1, all, and off.
12
Play/Pause
Begins and pauses playback.
13 A/V A/V Input
Switches between the internal disc player and the auxiliary
audio/video input.
14 ENTER
Used to select a highlighted menu item.
15 AUDIO
Accesses the various language audio tracks on DVD discs
with multi-language support.
16 ANGLE
Selects among the various camera angles on DVD discs
with multi-angle support.
17 MENU
Accesses the MAIN menu of the DVD disc.
Using the Remote Control
Aim the remote control towards the IR receiver on the front
panel, as shown. The remote control can operate at a 30degree angle from the front of the unit.
IR Receiver
If you try to perform a function that’s not permitted, either
temporarily or by the disc, the on-screen display shows this:
Inserting the Batteries
The remote control uses two AAA batteries.
To insert the batteries:
1 Slide open the battery compartment cover.
2 Insert the new batteries. Make sure that the positive and
10
VS735
negative poles of the batteries are positioned as shown
inside the battery compartment.
+
-+
-
6. DVD/VCD/CD-AUDIO PLAYBACK
Inserting a DVD/VCD/CD
1 Turn the vehicle’s ignition key to the ACC position.
ACC or engine
ON position
+-
2 Press the [POWER] button .
[OPEN] button
front-panel display
-
+
3 Slide the battery compartment closed .
[POWER]
button
IR receiver
2 Press [OPEN] so that the front cover opens slowly forward.
VS735
11
3 Holding the disc by its edges, gently insert the disc labelside up into the loading slot until the power-loading
mechanism pulls the disc in.
Removing a Disc
1 Press [OPEN]. Let the panel fully fold down, then press the
[ ] eject button to eject the disc.
Disc loading slot
4 Gently close the front panel by pressing it back into place.
You will hear a “click” when the front panel is properly
secured in the closed position.
12
VS735
Eject button
2 Remove the disc and close the detachable control panel
(DCP).
Disc Playback
chapter will be selected.
DVD playback will often begin automatically when the disc is
inserted. With some DVD discs, you will need to press
[ENTER] or [ ] to begin playback.
Moving to the Previous Track or Chapter
CD-Audio discs will begin playback automatically.
CDs with MP3 files may require you to navigate the file
structure menu. For more information, see “MP3 Playback on
CD-R Discs.”
Press the [ ] button during playback. The first time this button
is pressed, playback of the current track or chapter will restart
from the beginning. Pressing this button again will cause the
previous track or chapter to be played.
Note:
•
For some VCD 2.0 discs, the [ ] and [ ] functions may be
unavailable.
Stopping Playback
Fast Searching During Playback
There are two ways to stop playback:
Press [ ] and [ ] during playback to rapidly search for a
particular section of a DVD or CD. Each time a fast-search
button is pressed, the speed of the fast search changes as
follows:
• Pressing [ ] once will stop playback, and the VS735 will
store the location last played on the disc. Playback can be
resumed at the same point on the disc by pressing [ ].
• Pressing [ ] twice will stop playback and clear the
VS735’s memory of the last point played on the disc.
Pressing [ ] at this point will cause the VS735 to begin
playback from the beginning of the disc.
Selecting a Track or Chapter
Standard Speed – 2X Standard Speed – 4X – 6X – 8X – Back
to Standard Speed.
Pausing Playback
Moving to the Next Track or Chapter
Press [ ] during playback. Disc playback will pause, and the
frame displayed at the point pause mode was entered will be
displayed on the screen.
Press the [ ] button during playback. The next track or
Press [
] again to return to normal playback.
VS735
13
Repeat Mode
GOTO Mode
Press the [REPEAT] button to select from the following repeat
modes:
During DVD playback, pressing the [ILL/GOTO] button once
allows direct input of the chapter you wish to directly access.
Pressing it twice allows you to enter the elapsed time of the
scene that you wish to directly access (within the current
chapter).
Repeat 1 - Repeat - Repeat Off.
With DVD playback, pressing the [REPEAT] button once
causes the current chapter to be replayed. Pressing it twice
enables the DVD disc to be continuously replayed.
With CD playback, pressing the [REPEAT] button once
causes the current track to be replayed. Pressing it twice
enables the disc to be continuously replayed.
Viewing Angles
The Angle Mark appears during scenes that offer multiple
viewing angles. (Not all DVD discs support this function.) Use
the [ANGLE] button to select from the various angles available. To conceal the Angle Mark, please see section 9 “Setup.”
14
VS735
During CD playback, pressing the [ILL/GOTO] button allows
you to enter the elapsed time of the passage that you wish to
directly access within the current track.
Parental Control
The Parental Control feature allows authorized users to
select an upper limit to film ratings that can be played by the
VS735. The factory default setting for this feature is off, and
the default password for managing this feature is 3308. To
enable the Parental Control feature or to change the password, see section 9, “Setup.” If a DVD is inserted with a film
rating higher than selected, one of the following screens will
appear:
Screen A: In order for the film to play, the viewer must press
Setup and change the Parental Control setting using the
password. See “Setup”, in section 9, for more information.
Screen B: In order for the film to play, use the navigation and
[ENTER] keys to select “Yes,” and then the four-digit numeric
“password” must be entered. Use the numeric keypad on the
remote to enter the password, and then press enter - the disc
will begin playback.
INPUT PASSWD:
PARENTAL VIOLATION
Screen A
The parental setting of this
player prohibits play.
Welcome
Would you like this disc to play?
YES
NO
Notes:
The parental setting of this
player prohibits play.
Screen B
Would you like this disc to play?
YES
•
To change the film rating setting, the password must be used.
•
The VS735 determines the correct film ratings to use based on
the country selected in the “Locale” setting —see “Setup”, in
section 9.
NO
VS735
15
7. MP3 PLAYBACK ON CD-R DISCS
- - SMART NAVI - ROOT
What is MP3?
MP3 is an audio compression method. This audio compression method has become a standard format with many PC
users. MP3 allows the original digital audio data to be
compressed to about 10 percent of its initial file size while still
retaining high sound quality. This means that about 10 music
CDs can be recorded on a CD-R disc, thus allowing longer
listening time without having to change CDs.
Notes:
•
The VS735 cannot play back a disc recorded on a CD-RW unit.
•
Some CDs recorded in CD-R mode may not be usable.
•
Files without MP3 data will not play.
MP3 Playback
When a disc with MP3 files is inserted, the SMART NAVI
screen will appear. Each folder and file will be shown (the
order may be slightly different than that on your PC). Navigate
the files and folders using the navigation arrow keys, and
select a file or folder to be played by using the [ENTER]
button.
ROOT
MP3 (ARTIST NAME)
MP3 (ARTIST NAME)
MP3 (ARTIST NAME)
0
1
2
3
ARTIST NAME - SONG TITLE
To move to the next file or the previous file, use the [ ] and
[ ] buttons.
To fast-forward or fast-reverse within a file, use the [
[ ] buttons.
] and
Three repeat modes are available for MP3 use:
• NO REPEAT
• REP – ONE repeats the current file
• FOLDER REP repeats the current folder
To conceal the SMART NAVI screen, see section 9 “Setup.”
Precautions When Creating an MP3 Disc
Supported MP3 File Formats
• ISO9660, level 1 and level 2 (the most common type of
16
VS735
MP3 format)
• Joliet (a version of ISO9660 that supports longer
filenames)
31 files in each folder. File tracks are played in the order that
they were recorded onto a disc. (Files might not always be
played in the order displayed on the PC.)
• Romeo (a format used by some CD-creating software)
Sound Quality
File Extensions
Some noise might be audible—this depends on the type of
encoder software used while recording. It is not noise created
by the VS735.
Always add a file extension “ .MP3” or “.mp3” to an MP3 file
by using single-byte letters. If you add a different file extension, or forget to add the file extension “ .MP3” or “.mp3,” the
file cannot be played. In addition, if you use upper case and
lower case letters (capital and small letters) mixed together for
file extensions, normal play may not be possible.
File and Folder Structure
The folder name and file name can be displayed as the title
during MP3 play. However, the title must be within 31 and 27
single-byte alphabetical letters and numerals for the folder
name and file name, respectively (not including an extension). Entering more letters or numerals than specified may
cause an incorrect display.
Bit Rates
The VS735 supports the following bit rates: 32kHz, 44.1kHz,
48kHz, and 96kHz. In case of a track recorded at VBR
(variable bit rate), the display for the play time of the track may
be slightly different from the actual play time. Also, the recommended value for VBR ranges from 32 kbps to 320 kbps.
ID3V1 and ID3V2 Tags Support
Both ID3V1 and ID3V2 tags are supported. These allow up to
30 characters per song name and 30 characters per artist
name.
A disc with a folder having more than 8 hierarchical levels will
conflict with MP3 system requirements and playback will be
impossible.
A total of 255 files and folders are allowed. When the number
of files and folders is more than 255, playback of tracks in
excess of that number is impossible. There is a maximum of
VS735
17
8. INSTALLATION AND WIRING
1. Before Starting
Read these instructions and the following precautions carefully.
WARNING!
Be sure to disconnect the battery (-)
terminal before starting. This is to
prevent short circuits during installation.
Precautions
• This unit is exclusively for cars with a negative ground, 12V
power supply.
• Do not open the case. There are no user-serviceable parts
inside. If you drop anything into the unit during installation,
consult your dealer or an authorized Clarion service center.
18
VS735
• Use a soft, dry cloth to clean the case. Never use a rough
cloth, thinner, benzene, alcohol, or other solvent. For tough
dirt, apply a small amount of cold or warm water to a soft
cloth and gently wipe.
2. Package Contents
1 VS735R disc unit
2 DCP Case
3 IR Remote control
4 (2) AAA Alkaline Batteries (for remote control)
5 Trim Bezel
6 DIN Mounting Sleeve and release tools
7 (4) M4x6 Truss-head machine screws
8 (4) M5x5 Truss-head machine screws
9 (4) M5x5 Flat-head machine screws
10 (4) M5×18 Hexagon washer-head tapping screws
11 (2) M5 Hexagon nuts
12 (1) Plain washer
13 (1) Spring washer
14 5-meter 4-pin Power Supply harness
15 5-meter RCA Audio Cable
16 5-meter RCA Video Cable
17 Additional IR Receiver (with 5-meter cable)
18 Installation Brackets
19 Backstrap
20 Owner’s Manual / Installation Guide
3. Installation Requirements
4. Installing the VS735
1 Install the unit within 30 degrees of the horizontal plane.
Installing into a Universal In-Dash Mount (using the DIN
sleeve)
First, verify that the opening you will be mounting the VS735
into will accommodate the mounting sleeve.
Max. 30˚
7-3/16" (182 mm)
2 Use the enclosed screws for installation. Using other
screws can cause damage and void the warranty.
Hole
Chassis
Chassis
Damage
Max. 8 mm (M5 screw)
2-1/16" (53 mm)
Sleeve opening dimensions
Note:
•
Some car models require special mounting kits for proper installation.
Consult your Clarion dealer for details.
1 Place the universal mounting sleeve into the instrument
panel opening. Ensure a tight fit.
2 Bend the tabs of the mounting sleeve inward as shown to
lock the sleeve into place.
3 Wire the power harness, make all connections to the
VS735 (see “Wiring the VS735”), and plug in the power
harness.
4 Gently insert the VS735 into the mounting sleeve until it
locks into place with a ‘click’.
5 Clip the trim ring into place.
VS735
19
Installing into the Universal In-Dash Mount Sleeve
Removing the VS735 from the Universal In-Dash Mount
Rear fastening hole of vehicle,
or backstrap
Note:
•
Instrument panel
Hole
Tabs
Nut and washer
Screwdriver
or other tool
This requires you to have the original release tools provided with the
VS735. Keep these tools in a safe place, not in the vehicle.
1 Remove the rear nut from the backstrap.
2 Remove the trim ring.
3 Insert the removal tools as shown, until a ‘click’ is heard.
Pull gently and evenly on both the left and right side tools,
and the unit will slide out of the mounting bracket sleeve.
VS735 unit
Mounting bracket
sleeve
Universal mounting bracket sleeve
Instrument
panel
Rear nut
Removal tools
Sleeve clip
Tabs
VS735
Trim ring
Sleeve clip
Trim ring
20
VS735
Installing into a Fixed In-Dash Mount (in Toyota, Nissan,
and other ISO-compatible vehicles)
2 Remove the clips on the sides of the VS735.
2-Screw
Some vehicles use the “ISO” standard radio-mounting system.
The Clarion VS735 has pre-tapped mounting holes that are
compatible with ISO mounting systems. In these vehicles the
mounting bracket sleeve, the rear nut and washers, and the
backstrap are not used. Also, many ISO-compatible vehicle
installations do not use the provided trim ring.
In some instances the VS735 may be the only in-dash
mounted unit. However, in most situations, the VS735 will be
installed in the dashboard with another head unit that is the
main system controller.
1 Remove the radio from the dash. Determine that the screw
holes on the side of the VS735 match up to the factory
radio mounting brackets.
DIN sleeve spring clip
Spring clip
Screwdriver
3 Mount the unit to the factory radio brackets, and bolt the
brackets to the dashboard. Reassemble the dash. (See
the diagrams on the next page.)
Note:
•
In some cases the factory trim panel may require some slight
trimming, or there may be a slight gap that requires filling.
Pre-threaded holes
Pre-threaded holes
VS735
21
The VS735 installed with another head unit
Factory
Trim
Screws
Clarion Supplied
Screws into VS735
Factory
Radio
Mounting
Bracket
The VS735 Installed with a factory pocket
4-Hexagonal screw ∗ (M5 × 8)
Factory Radio
Mounting Bracket
(1 pair for the left and right sides)
Dashboard
VS735
Factory Radio
Mounting Bracket
Clarion Supplied
Screws into VS735
Factory
trim
bezel
Factory Trim Screws
VS735 in place
of factory pocket, below
radio
22
VS735
Pocket
Factory
Trim
Bezel
∗: The screws with this mark are
enclosed with the VS 735
★: The parts and screws with this mark
were used to install the factory radio and/or pocket
If a hook on the installation bracket interferes with the unit, bend and flatten it with
a nipper or similar tool.
Installing into a Universal Bracket Mount in an Alternative
Location (to the floor under a seat or below a package tray)
If installation of the DVD player in an in-dash location is
impossible or undesirable, it can be installed in alternative
locations with the supplied mounting brackets.
1 Determine if you will be floor mounting the unit, or mounting it under a panel. Attach the brackets in the appropriate
direction. Use flat-head machine screws (M5x5) to attach
the brackets to the unit on both sides.
2 Position the unit in place, and secure it with hexagon
washer-head tapping screws (M5x18).
CAUTION!
Do not overtighten the
screws on uneven surfaces! This can cause damage to the VS735. If an even
mounting surface cannot be
found, fabricate a flat panel,
mount the VS735 to it, and
mount that panel to the vehicle.
WARNING!
Always use great care
when attaching anything
to a vehicle! Visually
inspect all sides of any
potential screw location,
to insure no damage will
occur. If you have questions about this process,
see your authorized
Clarion dealer.
5. Wiring the VS735
The following pages display wiring diagrams for various
VS735 configurations.
Read the following precautions before wiring your system.
• Disconnect the negative battery terminal before making
any wiring connections.
• Be particularly careful where you route wires. Keep them
away from the engine, exhaust system, etc. Heat may
damage wires.
• If the fuse should blow, make sure all connections are
correct and no wires are damaged before replacing the
fuse. Always use fuses that are the same amperage value
as the original. When replacing a fuse, never let the battery
side touch any metal part or any other wire.
VS735
23
VS735 Connections
A/V Output
Auxiliary
A/V Input
External
IR input
Digital
optical
output
Yellow
+12V
Constant
Power
Black
- Ground
Yellow
+12V Constant Power
Red
+12V Accessory
Black
- Ground
24
VS735
Red
+12V
Accessory
Power connector
pin assignments
VS735 with Monitor
Clarion
VMA 7191
monitor
Video input 2
Audio output - to head unit with volume control
or Clarion FM200 FM Modulator
Video input 1
Video
input 1
Video output to monitor
A/V Auxiliary inputs
IR input
A/V Output
VS 735
Optical
digital
output
Red +12V
Accessory
Black Ground
Power Harness
Black - Ground
Red +12V Accessory
Yellow +12V Constant Power
VS735
25
VS735 with TV Tuner
Clarion
VMA 7191
monitor
Video input 2
3-conductor
"Y"-cable
(not supplied)
Audio output - to head unit with volume control
or Clarion FM200 FM Modulator
Video input 1
Video
input 1
Video output to monitor
Red +12V ACC
Black - Ground
IR input
A/V Auxiliary inputs
TTX 001
TV Tuner
A/V Output
Power
Harness
VS 735
Optical
digital
output
Antenna
ZCB 001
Power Harness
Black - Ground
Red +12V Accessory
Yellow +12V Constant Power
26
VS735
VS735 in Dolby Pro Logic 5.1 System
Video input 2
Clarion
VMA 7191
monitor
Video input 1
Video
input 1
Video output to monitor
A/V Auxiliary inputs
IR input
A/V Output
Red +12V
Accessory
VS 735
Optical
digital
cable
DCA 008 or DCA 005
Analog
outputs
to
amplifiers
Black Ground
Power Harness
Black - Ground
Optical input
Red +12V Accessory
DVH 920 CeNET
5.1 Channel
Processor
Yellow +12V Constant Power
SOURCE
A-MODE
ADJUST
DSF
POWER
DVC 920
Control Unit
for DVH 920
Processor
VS735
27
VS735 Added to Factory Audio System
To radio and
antenna
Video input 2
Audio output
Video Video output input 1 to monitor
FM200
A/V Auxiliary inputs
A/V output
VS735
Optical
digital
output
Clarion
VMA 7191
monitor
Video
input 1
IR input
Red +12V
Accessory
Black Ground
Power harness
Black - Ground
Red +12V Accessory
Yellow +12V Constant Power
28
VS735
9. SETUP
Changing Settings
The following sections explain how to customize various
features of the VS735.
VS735 Typical Setup and Configuration
The VS735 is shipped with the following configuration:
• Standard 4:3 aspect ratio format output
• Automatic NTSC/PAL output switching
• Analog stereo audio, digital audio output off
• All language options set to English
• Parental control off, and default password of 3308.
Note:
•
To change settings for your VS735:
1 Press [SETUP].
2 Use the [ ] and [ ] buttons to highlight a selection.
3 Press the [ENTER] button to confirm your selection.
SETUP MENU -- MAIN PAGE
GENERAL SETUP
SPEAKER SETUP
AUDIO SETUP
PREFERENCES
The VS735 is very flexible. For more advanced setting options,
please see the “Setup Options List” at the end of this section.
EXIT SETUP
If you try to perform a function that’s not permitted, either
temporarily or by the current disc, the on-screen display
shows this:
VS735
29
Changing the Aspect Ratio Mode
Changing the Video Output Mode
To change the aspect ratio mode, select GENERAL, and then
select TV DISPLAY. For widescreen (16:9) monitors, select
WIDE. For standard monitors and letterbox viewing (black
bars on the top and bottom of the screen, but the entire image
preserved), select NORMAL/LB. For standard 4:3 monitors
and a full-screen image, but with the edges variably cropped
to fit (“pan-and-scan” mode), select NORMAL/PS.
To change the video output mode, select GENERAL, and then
select TV TYPE. The default is MULTI. If you experience
problems playing a PAL disc on your NTSC monitors, select
NTSC. If you are using European-spec PAL monitors exclusively, select PAL.
- - GENERAL PAGE - TV DISPLAY
TV TYPE
PIC MODE
ANGLE MARK
- - GENERAL PAGE - TV DISPLAY
TV TYPE
PIC MODE
ANGLE MARK
NORMAL/PS
NORMAL/LB
WIDE
OSD LANG
OSD LANG
CAPTIONS
MAIN PAGE
Note:
MAIN PAGE
•
4:3
Standard TV screen format
“Normal” TV screen
(Ofter referred to as "fullscreen)
(Often called “fullscreen”)
30
VS735
MULTI
NTSC
PAL
16:9
Widescreen
format
Wide TV screen
(used
HDTV)
(Used
bywith
many
DVDs)
The default “MULTI” will automatically output NTSC video from NTSC
discs, and PAL video from PAL discs. Many video monitors can
automatically handle either type of video signal. NTSC is the North
American standard, and the only type of disc many North American
users will encounter.
Changing the “Angle Mark”
Activating Captions and Subtitles
To enable or disable the “angle mark,” which appears during
scenes that support the multiple-viewing-angle feature, select
GENERAL and ANGLE MARK.
To enable or disable captions or subtitles, select GENERAL
and CAPTIONS.
Note:
•
- - GENERAL PAGE - TV DISPLAY
TV TYPE
PIC MODE
ANGLE MARK
OSD LANG
CAPTIONS
MAIN PAGE
ON
OFF
If CAPTIONS is set to OFF, the [SUBTITLE] button will be defeated
from working. If SUBTITLE OFF is selected under Preferences –
Audio, then the [SUBTITLE] button can still enable subtitles during
playback, as long as CAPTIONS is set to ON.
- - GENERAL PAGE - TV DISPLAY
TV TYPE
PIC MODE
ANGLE MARK
OSD LANG
CAPTIONS
ON
OFF
MAIN PAGE
VS735
31
Activating the SPDIF Digital Output
Selecting an LPCM Output Frequency
To turn on the SPDIF digital output, select AUDIO and SPDIF.
To select an LPCM output frequency (when a digital audio
processor is in use), select AUDIO and LPCM OUTPUT.
Note:
•
Only enable the SPDIF digital output when a digital audio processor
is in use. Some digital audio processors will require you to select an
LPCM output frequency.
-- AUDIO SETUP -SPDIF
OP MODE
DUAL MONO
DRC
LPCM OUTPUT
MAIN PAGE
32
VS735
OFF
ON
-- AUDIO SETUP -SPDIF
OP MODE
DUAL MONO
DRC
LPCM OUTPUT
MAIN PAGE
LPCM 48K
LPCM 96K
Deactivating the “Smart Nav” On-Screen Menu Display
Selecting Mono Audio Output Mode
To play MP3 discs without the “Smart Nav” on-screen menu
display, select PREFERENCES, then SMART NAV.
For a mono audio output mode, select AUDIO and DUAL
MONO. The three settings are: Channel 1 on both outputs,
Channel 2 on both outputs, and both channels mixed on both
outputs.
- - PREFERENCES PAGE - -
Note:
AUDIO
SUBTITLE
DISC MENU
LOCALE
PARENTAL
PASSWORD
SMART NAV
DEFAULTS
MAIN PAGE
•
NO MENU
Use this setting in installations that lack true stereo imaging
opportunities, such as single-speaker installations, or public areas
such as buses. If a stereo headphone system is connected, do not
select a mono output mode — this will defeat the stereo headphone
effect.
WITH MENU
-- AUDIO SETUP -SPDIF
OP MODE
DUAL MONO
DRC
LPCM OUTPUT
STEREO
CH 1 MONO
CH 2 MONO
MIX MONO
MAIN PAGE
VS735
33
Changing Language Settings
Several language settings can be customized on the VS735.
Notes:
To change the soundtrack language, select PREFERENCES and AUDIO.
- - PREFERENCES PAGE - -
•
Not all language settings are supported by all discs.
•
The languages supported by the VS735 vary by individual option
setting.
To change the on-screen display language, select GENERAL and OSD LANG.
AUDIO
SUBTITLE
DISC MENU
LOCALE
PARENTAL
PASSWORD
SMART NAV
DEFAULTS
MAIN PAGE
ENGLISH
FRENCH
SPANISH
CHINESE
JAPANESE
GERMAN
ITALIAN
- - GENERAL PAGE - TV DISPLAY
TV TYPE
PIC MODE
ANGLE MARK
OSD LANG
CAPTIONS
MAIN PAGE
ENGLISH
FRENCH
GERMAN
ITALIAN
DANISH
SPANISH
To change the subtitle or caption language, select PREFERENCES and SUBTITLE.
- - PREFERENCES PAGE - AUDIO
SUBTITLE
DISC MENU
LOCALE
PARENTAL
PASSWORD
SMART NAV
DEFAULTS
MAIN PAGE
34
VS735
ENGLISH
FRENCH
SPANISH
CHINESE
JAPANESE
GERMAN
ITALIAN
OFF
To change the disc menu language, select PREFERENCES
and DISC MENU.
- - PREFERENCES PAGE - AUDIO
SUBTITLE
DISC MENU
LOCALE
PARENTAL
PASSWORD
SMART NAV
DEFAULTS
MAIN PAGE
ENGLISH
FRENCH
SPANISH
CHINESE
JAPANESE
GERMAN
ITALIAN
To access these adjustments:
1 Insert a DVD, Video CD, or audio CD (these adjustments
are not accessible with MP3 discs loaded).
2 After the disc loads and begins playing, press the [ ]
button.
3 Press the [ANGLE] button. The color setting (COL) will
appear. Press the [ANGLE] button again to step to CON
(contrast), BRI (brightness), and audio output level (VOL).
Each of the settings is adjustable in steps from 0 to 16.
Use the [ ] and [ ] buttons to change the value of these
settings.
Note:
Special Installer Output Adjustments
The VS735 also has four output adjustments not contained in
the standard menus. These settings are for color, contrast,
brightness, and audio output level. Since these functions are
usually built into the video monitors and system control units
used elsewhere in the system, the installer output adjustments
are only intended to assist the installer in properly matching
various components.
•
In order to keep the video output levels within acceptable limits, the
contrast setting value and the brightness setting value can be set to a
combined total of 29. For example, if contrast is set to 16 and
brightness is set 13, the total is then 29, and you have reached the
system maximum. You will be unable to increase the brightness
above 13 until the contrast value is lowered by a corresponding
amount.
Note:
•
Although the audio output level is labeled “VOL” on the on-screen
display, it is important to remember that this adjustment is not a true
volume control, since it is not accessible to the user unless the disc
is in STOP mode. Do not use the VS735 in systems where this
adjustment is the sole system volume control.
VS735
35
Setup Options List
LPCM OUTPUT: LPCM 48K, LPCM 96K
The factory default options are given in bold type.
PREFERENCES PAGE
GENERAL PAGE
TV DISPLAY:
NORMAL/PS, NORMAL/LB, WIDE.
TV TYPE:
MULTI, NTSC, PAL
PIC MODE:
AUTO, HI-RES, N-FLICKER
ANGLE MARK:
ON, OFF
OSD LANG:
ENGLISH, FRENCH, GERMAN, ITALIAN,
DANISH, SPANISH
CAPTIONS:
ON, OFF
AUDIO:
ENGLISH, FRENCH, SPANISH, CHINESE,
JAPANESE, GERMAN, ITALIAN
SUBTITLE:
ENGLISH, FRENCH, SPANISH, CHINESE,
JAPANESE, GERMAN, ITALIAN, OFF
DISC MENU:
ENGLISH, FRENCH, SPANISH, CHINESE,
JAPANESE, GERMAN, ITALIAN
LOCALE:
CHINA, FRANCE, HONG KONG, JAPAN,
TAIWAN, GBR, USA
PARENTAL:
OFF
PASSWORD:
3308
SMART NAV:
ON, OFF
DEFAULTS:
RESTORE FACTORY SETTINGS
SPEAKER SETUP
DOWNMIX:
LT/RT, STEREO
AUDIO SETUP
SPDIF:
OFF, ON
OP MODE:
NO OPTION
DUAL MONO:
STEREO, CH 1 MONO, CH 2 MONO,
MIXED MONO
DRC:
OFF to FULL (eight steps)
36
VS735
10. TROUBLESHOOTING
No sound, low-level sound.
With a widescreen 16:9 monitor, I have black bars on the
screen.
Change the TV Display mode to “Wide.”
Check the audio output level setting (see section 9 “Setup”).
Note:
•
DVDs often seem quieter than CDs due to their high dynamic range.
No sound or picture.
Press the [A/V] button to make sure you are not in A/V input
mode.
“Tinny” sound.
Check the “Downmix” setting in the SETUP menus and ensure
that it is set to “Stereo,” not “LT/RT.”
Loud, distorted sound
Check the setting of the Audio Output Level - it may be too
high. (See “Special Installer Output Adjustments”, under
Setup.)
Picture “rolls.”
Unit does not eject.
Make sure the VS735 is powered on, and that the “Disc
Loaded” icon in the front-panel display is illuminated.
Press the Reset button with a bent paper clip and try again
(note that the Reset button will clear the memory settings).
VS735 does not operate.
Verify the DCP is completely and correctly attached.
Press the Reset button with a bent paper clip.
Reset button
Security
LED
Have your Clarion authorized dealer check all connections.
Check that the TV Type setting is correct for the monitors and
DVDs being used (see “Changing the Video Output Mode”).
PAL video often “rolls” on NTSC monitors.
VS735
37
Note:
11. SPECIFICATIONS
Supply voltage: 12V DC (11V-16V)
Test voltage: 12V, negative ground
Current consumption: Less than 2.0A
Signal system: Composite video 1.0Vp-p 75W RCA pin jack
Discs played:
DVD video discs—
5“ (12 cm) single-sided, single-layer
5“ (12 cm) single-sided, double-layer
3“ (8 cm) single-sided, single-layer
3“ (8 cm) single-sided, double-layer
Compact discs (CD-DA, VIDEO-CD, CD-R)—
5“ (12 cm) disc
3“ (8 cm) disc
Audio output level: 10KW (2ch 1.8 Vrms)
Audio signal output characteristics:
Frequency response: 20 Hz - 20 kHz
S/N ratio: 90 dB (JIS)
Wow and Flutter: Below measurable limits
38
VS735
•
The technical data and the design of the equipment may change
for the sake of technical improvements without prior notice.
LIMITED WARRANTY INFORMATION
For USA and Canada only
This product is warranted against all defects in material workmanship
for a period of one year from the date of original purchase. Clarion
ProAudio products, except for speakers, are covered by a two year
limited warranty when installed by an authorized Clarion dealer. The
conditions of this limited warranty and the extent of responsibility of
Clarion Corporation of America (“Clarion”) under this limited warranty
are as follows:
1. PROOF OF DATE OF PURCHASE WILL BE REQUIRED FOR
WARRANTY SERVICE OF THIS PRODUCT. IN THE CASE OF THE
TWO (2) YEAR LIMITED WARRANTY FOR CLARION PROAUDIO
PRODUCT, PROOF OF INSTALLATION BY AN AUTHORIZED
DEALER IS REQUIRED. INFORMATION ABOUT CLARION
AUTHORIZED WARRANTY SERVICE CENTERS MAY BE OBTAINED
BY CONTACTING CLARION AT THE ADDRESS BELOW.
2. This limited warranty will become void if service performed by
anyone other than an approved Clarion Warranty Service Center
results in damage to the product.
3. This limited warranty does not apply to any product which has
been subject to misuse, neglect or accident, or which has had the
serial number altered, defaced or removed, or which has been
connected, installed, adjusted or repaired, other than in
accordance with the instructions furnished by Clarion.
4. This limited warranty does not cover car static or other electrical
interferences, tape head or laser pick-up cleaning or adjustments,
or labor costs for the removal or reinstallation of the unit for repair.
5. The sole responsibility of Clarion under this limited warranty shall
be limited to the repair of the product or replacement of the
product, at the sole discretion of Clarion.
6. Product must be shipped in its original carton or equivalent carton,
fully insured, with shipping charges prepaid. Clarion will not
assume any responsibility for any loss or damage incurred in
shipping.
7. ALL IMPLIED WARRANTIES EXCEPT TO THE EXTENT PROHIBITED
BY APPLICABLE LAW SHALL HAVE NO GREATER DURATION
THAN THE WARRANTY PERIOD SET FORTH ABOVE. UNDER NO
CIRCUMSTANCES SHALL CLARION BE LIABLE FOR ANY LOSS OR
DAMAGE, DIRECT OR CONSEQUENTIAL, ARISING OUT OF THE
USE OR INABILITY TO USE THE PRODUCT. BECAUSE SOME
STATES DO NOT ALLOW LIMITATIONS ON HOW LONG AN IMPLIED
WARRANTY LASTS OR EXCLUSIONS OR LIMITATIONS OF
INCIDENTAL OR CONSEQUENTIAL DAMAGES, THE ABOVE
LIMITATIONS OR EXCLUSIONS MAY NOT APPLY TO YOU.
8. THIS LIMITED WARRANTY GIVES YOU SPECIFIC LEGAL RIGHTS,
AND YOU MAY ALSO HAVE OTHER RIGHTS WHICH VARY FROM
STATE TO STATE.
9. Should you have any difficulties with the performance of this
product during the warranty period, please call or visit our web
site (www.clarion.com) for a listing of Authorized Warranty
Service Centers in your area. You may also contact Clarion at the
address listed below.
In USA:
Clarion Corporation of America
Attn: Customer Service Manager
661 W. Redondo Beach Blvd
Gardena, CA. 90247-4201
1-800-GO-CLARION
(310)327-9100
www.clarion.com
In Canada:
Clarion Canada, Inc.
Warranty Service Center
2239 Winston Park Drive
Oakville, Ontario L6H 5R1
(905)829-4600
www.clarioncanada.com
VS735
39