1
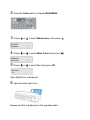
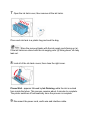
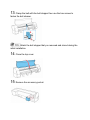
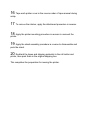
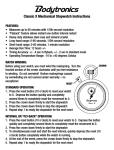
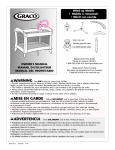
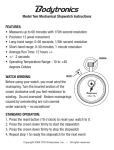
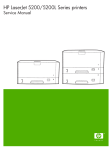
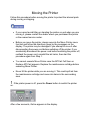
Moving the Printer
Follow this procedure before moving the printer to protect the internal parts
during moving or shipping.
• If you cannot avoid tilting or standing the printer on end when you are
moving it, please contact the dealer where you purchased the printer
or the nearest service center.
• Before you move the printer, always execute the Move Printer menu
function and follow the directions given by the messages on the
display. The printer may be damaged if you attempt to move it after
disconnecting the power cord before switching off the printer. If you
accidentally disconnect the power cord before switching the printer off,
reattach the power cord, reinstall the ink tanks, then start the
procedure again from Step 1.
• You cannot execute Move Printer once the MTCart Full Soon or
Replace MT-Cart appears. Replace the maintenance cartridge before
executing Move Printer.
• Never tilt the printer while you are moving it. This could spill ink from
the maintenance cartridge and cause ink stains in the surrounding
area.
1 If the printer power is off, press the Power button to switch the printer
on.
After a few moments, Online appears in the display.
2 Press the Online button to display MAIN MENU.
3 Press [
] or [ ] to select Maintenance, then press [
].
4 Press [
] or [ ] to select Move Printer then press [
].
5 Press [
] or [ ] to select Yes, then press OK.
Open RightCover is displayed.
6 Open the back right cover.
Remove Ink Tank is displayed on the operation panel.
7 Open the ink tank cover, then remove all the ink tanks.
Place each ink tank in a plastic bag and seal the bag.
Store the removed tanks with the ink supply ports facing up (a).
If the ink tanks are stored with the ink supply ports (a) facing down, ink may
leak out.
8 Lock all of the ink tank covers, then close the right cover.
Please Wait.. appears followed by Ink Draining..while the ink is sucked
from inside the tubes. This process requires about 4 minutes to complete.
The printer switches off automatically once the process is complete.
9 Disconnect the power cord, earth wire and interface cable.
10 Open the top cover, and then open the paper tray.
Do not touch any areas other than as indicated. Doing so
may damage the printer.
11Rewind the roll media back onto the roll and remove the roll holder and
the four overwind prevention stays, and then remove the paper tray.
12 Lower the holder stopper lever, remove the stopper, remove the roll
from the roll holder, then store the roll holder and the holder stopper.
13 Clamp the belt with the belt stopper then use the hex screws to
fasten the belt stopper.
Attach the belt stopper that you removed and stored during the
initial installation.
14 Close the top cover.
15 Remove the accessory pocket.
16 Tape each printer cover in the reverse order of tape removal during
setup.
17 To remove the stacker, apply the attachment procedure in reverse.
18 Apply the printer mounting procedure in reverse to unmount the
printer.
19 Apply the stand assembly procedure in reverse to disassemble and
pack the stand.
20 Reattach the tapes and shipping materials to the roll holder and
printer, then pack them in the original shipping box.
This completes the preparation for moving the printer.