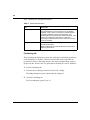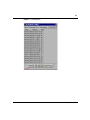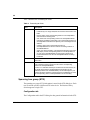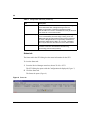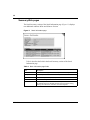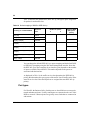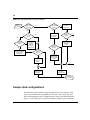
1
Part No. 209320-A
August 2000
4401 Great America Parkway
Santa Clara, CA 95054
Release Notes for the
Business Policy Switch 2000
*209320-A*
2
Copyright © 2000 Nortel Networks
All rights reserved. August 2000.
The information in this document is subject to change without notice. The statements, configurations, technical
data, and recommendations in this document are believed to be accurate and reliable, but are presented without
express or implied warranty. Users must take full responsibility for their applications of any products specified in
this document. The information in this document is proprietary to Nortel Networks NA Inc.
The software described in this document is furnished under a license agreement and may be used only in
accordance with the terms of that license. The software license agreement is included in this document.
Trademarks
NORTEL NETWORKS is a trademark of Nortel Networks.
Business Policy Switch 2000 and BayStack are trademarks of Nortel Networks.
All other trademarks and registered trademarks are the property of their respective owners.
Statement of Conditions
In the interest of improving internal design, operational function, and/or reliability, Nortel Networks NA Inc. reserves
the right to make changes to the products described in this document without notice.
Nortel Networks NA Inc. does not assume any liability that may occur due to the use or application of the product(s)
or circuit layout(s) described herein.
USA Requirements Only
Note: This equipment has been tested and found to comply with the limits for a Class A digital device, pursuant to
Part 15 of the FCC rules. These limits are designed to provide reasonable protection against harmful interference
when the equipment is operated in a commercial environment. This equipment generates, uses, and can radiate radio
frequency energy. If it is not installed and used in accordance with the instruction manual, it may cause harmful
interference to radio communications. Operation of this equipment in a residential area is likely to cause harmful
interference, in which case users will be required to take whatever measures may be necessary to correct the
interference at their own expense.
European Requirements Only
EN 55 022 Statement
This is to certify that the Nortel Networks Business Policy Switch 2000 is shielded against the generation of radio
interference in accordance with the application of Council Directive 89/336/EEC, Article 4a. Conformity is declared
by the application of EN 55 022 Class A (CISPR 22).
Warning: This is a Class A product. In a domestic environment, this product may cause radio interference, in which
case, the user may be required to take appropriate measures.
Achtung: Dieses ist ein Gerät der Funkstörgrenzwertklasse A. In Wohnbereichen können bei Betrieb dieses Gerätes
Rundfunkstörungen auftreten, in welchen Fällen der Benutzer für entsprechende Gegenmaßnahmen verantwortlich
ist.
Attention: Ceci est un produit de Classe A. Dans un environnement domestique, ce produit risque de créer des
interférences radioélectriques, il appartiendra alors à l’utilisateur de prendre les mesures spécifiques appropriées.
EC Declaration of Conformity
This product conforms to the provisions of Council Directive 89/336/EEC and 73/23/EEC. The Declaration of
Conformity is available on the Nortel Networks World Wide Web site at the http://libra2.corpwest.baynetworks.com/
cgi-bin/ndCGI.exe/DocView/ address.
209320-A
3
Japan/Nippon Requirements Only
Voluntary Control Council for Interference (VCCI) Statement
Taiwan Requirements
Bureau of Standards, Metrology and Inspection (BSMI) Statement
Canada Requirements Only
Canadian Department of Communications Radio Interference Regulations
This digital apparatus (Business Policy Switch 2000) does not exceed the Class A limits for radio-noise emissions
from digital apparatus as set out in the Radio Interference Regulations of the Canadian Department of
Communications.
Règlement sur le brouillage radioélectrique du ministère des Communications
Cet appareil numérique (Business Policy Switch 2000) respecte les limites de bruits radioélectriques visant les
appareils numériques de classe A prescrites dans le Règlement sur le brouillage radioélectrique du ministère des
Communications du Canada.
Release Notes for the Business Policy Switch 2000
4
Nortel Networks NA Inc. Software License Agreement
NOTICE: Please carefully read this license agreement before copying or using the accompanying software or
installing the hardware unit with pre-enabled software (each of which is referred to as “Software” in this Agreement).
BY COPYING OR USING THE SOFTWARE, YOU ACCEPT ALL OF THE TERMS AND CONDITIONS OF
THIS LICENSE AGREEMENT. THE TERMS EXPRESSED IN THIS AGREEMENT ARE THE ONLY TERMS
UNDER WHICH NORTEL NETWORKS WILL PERMIT YOU TO USE THE SOFTWARE. If you do not accept
these terms and conditions, return the product, unused and in the original shipping container, within 30 days of
purchase to obtain a credit for the full purchase price.
1. License Grant. Nortel Networks NA Inc. (“Nortel Networks”) grants the end user of the Software (“Licensee”) a
personal, nonexclusive, nontransferable license: a) to use the Software either on a single computer or, if applicable, on
a single authorized device identified by host ID, for which it was originally acquired; b) to copy the Software solely
for backup purposes in support of authorized use of the Software; and c) to use and copy the associated user manual
solely in support of authorized use of the Software by Licensee. This license applies to the Software only and does not
extend to Nortel Networks Agent software or other Nortel Networks software products. Nortel Networks Agent
software or other Nortel Networks software products are licensed for use under the terms of the applicable Nortel
Networks NA Inc. Software License Agreement that accompanies such software and upon payment by the end user of
the applicable license fees for such software.
2. Restrictions on use; reservation of rights. The Software and user manuals are protected under copyright laws.
Nortel Networks and/or its licensors retain all title and ownership in both the Software and user manuals, including
any revisions made by Nortel Networks or its licensors. The copyright notice must be reproduced and included with
any copy of any portion of the Software or user manuals. Licensee may not modify, translate, decompile, disassemble,
use for any competitive analysis, reverse engineer, distribute, or create derivative works from the Software or user
manuals or any copy, in whole or in part. Except as expressly provided in this Agreement, Licensee may not copy or
transfer the Software or user manuals, in whole or in part. The Software and user manuals embody Nortel Networks’
and its licensors’ confidential and proprietary intellectual property. Licensee shall not sublicense, assign, or otherwise
disclose to any third party the Software, or any information about the operation, design, performance, or
implementation of the Software and user manuals that is confidential to Nortel Networks and its licensors; however,
Licensee may grant permission to its consultants, subcontractors, and agents to use the Software at Licensee’s facility,
provided they have agreed to use the Software only in accordance with the terms of this license.
3. Limited warranty. Nortel Networks warrants each item of Software, as delivered by Nortel Networks and properly
installed and operated on Nortel Networks hardware or other equipment it is originally licensed for, to function
substantially as described in its accompanying user manual during its warranty period, which begins on the date
Software is first shipped to Licensee. If any item of Software fails to so function during its warranty period, as the sole
remedy Nortel Networks will at its discretion provide a suitable fix, patch, or workaround for the problem that may be
included in a future Software release. Nortel Networks further warrants to Licensee that the media on which the
Software is provided will be free from defects in materials and workmanship under normal use for a period of 90 days
from the date Software is first shipped to Licensee. Nortel Networks will replace defective media at no charge if it is
returned to Nortel Networks during the warranty period along with proof of the date of shipment. This warranty does
not apply if the media has been damaged as a result of accident, misuse, or abuse. The Licensee assumes all
responsibility for selection of the Software to achieve Licensee’s intended results and for the installation, use, and
results obtained from the Software. Nortel Networks does not warrant a) that the functions contained in the software
will meet the Licensee’s requirements, b) that the Software will operate in the hardware or software combinations that
the Licensee may select, c) that the operation of the Software will be uninterrupted or error free, or d) that all defects
in the operation of the Software will be corrected. Nortel Networks is not obligated to remedy any Software defect
that cannot be reproduced with the latest Software release. These warranties do not apply to the Software if it has been
(i) altered, except by Nortel Networks or in accordance with its instructions; (ii) used in conjunction with another
vendor’s product, resulting in the defect; or (iii) damaged by improper environment, abuse, misuse, accident, or
negligence. THE FOREGOING WARRANTIES AND LIMITATIONS ARE EXCLUSIVE REMEDIES AND ARE
IN LIEU OF ALL OTHER WARRANTIES EXPRESS OR IMPLIED, INCLUDING WITHOUT LIMITATION
ANY WARRANTY OF MERCHANTABILITY OR FITNESS FOR A PARTICULAR PURPOSE. Licensee is
209320-A
5
responsible for the security of its own data and information and for maintaining adequate procedures apart from the
Software to reconstruct lost or altered files, data, or programs.
4. Limitation of liability. IN NO EVENT WILL NORTEL NETWORKS OR ITS LICENSORS BE LIABLE FOR
ANY COST OF SUBSTITUTE PROCUREMENT; SPECIAL, INDIRECT, INCIDENTAL, OR CONSEQUENTIAL
DAMAGES; OR ANY DAMAGES RESULTING FROM INACCURATE OR LOST DATA OR LOSS OF USE OR
PROFITS ARISING OUT OF OR IN CONNECTION WITH THE PERFORMANCE OF THE SOFTWARE, EVEN
IF NORTEL NETWORKS HAS BEEN ADVISED OF THE POSSIBILITY OF SUCH DAMAGES. IN NO EVENT
SHALL THE LIABILITY OF NORTEL NETWORKS RELATING TO THE SOFTWARE OR THIS AGREEMENT
EXCEED THE PRICE PAID TO NORTEL NETWORKS FOR THE SOFTWARE LICENSE.
5. Government Licensees. This provision applies to all Software and documentation acquired directly or indirectly
by or on behalf of the United States Government. The Software and documentation are commercial products, licensed
on the open market at market prices, and were developed entirely at private expense and without the use of any U.S.
Government funds. The license to the U.S. Government is granted only with restricted rights, and use, duplication, or
disclosure by the U.S. Government is subject to the restrictions set forth in subparagraph (c)(1) of the Commercial
Computer Software––Restricted Rights clause of FAR 52.227-19 and the limitations set out in this license for civilian
agencies, and subparagraph (c)(1)(ii) of the Rights in Technical Data and Computer Software clause of DFARS
252.227-7013, for agencies of the Department of Defense or their successors, whichever is applicable.
6. Use of Software in the European Community. This provision applies to all Software acquired for use within the
European Community. If Licensee uses the Software within a country in the European Community, the Software
Directive enacted by the Council of European Communities Directive dated 14 May, 1991, will apply to the
examination of the Software to facilitate interoperability. Licensee agrees to notify Nortel Networks of any such
intended examination of the Software and may procure support and assistance from Nortel Networks.
7. Term and termination. This license is effective until terminated; however, all of the restrictions with respect to
Nortel Networks’ copyright in the Software and user manuals will cease being effective at the date of expiration of the
Nortel Networks copyright; those restrictions relating to use and disclosure of Nortel Networks’ confidential
information shall continue in effect. Licensee may terminate this license at any time. The license will automatically
terminate if Licensee fails to comply with any of the terms and conditions of the license. Upon termination for any
reason, Licensee will immediately destroy or return to Nortel Networks the Software, user manuals, and all copies.
Nortel Networks is not liable to Licensee for damages in any form solely by reason of the termination of this license.
8. Export and Re-export. Licensee agrees not to export, directly or indirectly, the Software or related technical data
or information without first obtaining any required export licenses or other governmental approvals. Without limiting
the foregoing, Licensee, on behalf of itself and its subsidiaries and affiliates, agrees that it will not, without first
obtaining all export licenses and approvals required by the U.S. Government: (i) export, re-export, transfer, or divert
any such Software or technical data, or any direct product thereof, to any country to which such exports or re-exports
are restricted or embargoed under United States export control laws and regulations, or to any national or resident of
such restricted or embargoed countries; or (ii) provide the Software or related technical data or information to any
military end user or for any military end use, including the design, development, or production of any chemical,
nuclear, or biological weapons.
9. General. If any provision of this Agreement is held to be invalid or unenforceable by a court of competent
jurisdiction, the remainder of the provisions of this Agreement shall remain in full force and effect. This Agreement
will be governed by the laws of the state of California.
Should you have any questions concerning this Agreement, contact Nortel Networks, 4401 Great America Parkway,
P.O. Box 58185, Santa Clara, California 95054-8185.
LICENSEE ACKNOWLEDGES THAT LICENSEE HAS READ THIS AGREEMENT, UNDERSTANDS IT, AND
AGREES TO BE BOUND BY ITS TERMS AND CONDITIONS. LICENSEE FURTHER AGREES THAT THIS
AGREEMENT IS THE ENTIRE AND EXCLUSIVE AGREEMENT BETWEEN NORTEL NETWORKS AND
LICENSEE, WHICH SUPERSEDES ALL PRIOR ORAL AND WRITTEN AGREEMENTS AND
COMMUNICATIONS BETWEEN THE PARTIES PERTAINING TO THE SUBJECT MATTER OF THIS
AGREEMENT. NO DIFFERENT OR ADDITIONAL TERMS WILL BE ENFORCEABLE AGAINST NORTEL
NETWORKS UNLESS NORTEL NETWORKS GIVES ITS EXPRESS WRITTEN CONSENT, INCLUDING AN
EXPRESS WAIVER OF THE TERMS OF THIS AGREEMENT.
Release Notes for the Business Policy Switch 2000
6
209320-A
7
Contents
Introduction . . . . . . . . . . . . . . . . . . . . . . . . . . . . . . . . . . . . . . . . . . . . . . . . . . . . . . . . . 11
IGMP Fast JOIN and LEAVE . . . . . . . . . . . . . . . . . . . . . . . . . . . . . . . . . . . . . . . . . 12
Configuring with the console interface (CI) . . . . . . . . . . . . . . . . . . . . . . . . . . . . . . 12
Configuring with the Web-based management system . . . . . . . . . . . . . . . . . . . . . 14
Device Manager bridging information . . . . . . . . . . . . . . . . . . . . . . . . . . . . . . . . . . . . . 17
Setting up bridging . . . . . . . . . . . . . . . . . . . . . . . . . . . . . . . . . . . . . . . . . . . . . . . . . 17
Base tab . . . . . . . . . . . . . . . . . . . . . . . . . . . . . . . . . . . . . . . . . . . . . . . . . . . . . 17
Spanning Tree tab . . . . . . . . . . . . . . . . . . . . . . . . . . . . . . . . . . . . . . . . . . . . . . 18
Transparent tab . . . . . . . . . . . . . . . . . . . . . . . . . . . . . . . . . . . . . . . . . . . . . . . . 21
Forwarding tab . . . . . . . . . . . . . . . . . . . . . . . . . . . . . . . . . . . . . . . . . . . . . . . . 22
Spanning tree group (STG) . . . . . . . . . . . . . . . . . . . . . . . . . . . . . . . . . . . . . . . . . . 24
Configuration tab . . . . . . . . . . . . . . . . . . . . . . . . . . . . . . . . . . . . . . . . . . . . . . . 24
Status tab . . . . . . . . . . . . . . . . . . . . . . . . . . . . . . . . . . . . . . . . . . . . . . . . . . . . 26
Ports tab . . . . . . . . . . . . . . . . . . . . . . . . . . . . . . . . . . . . . . . . . . . . . . . . . . . . . 28
Modifications to Web pages . . . . . . . . . . . . . . . . . . . . . . . . . . . . . . . . . . . . . . . . . . . . . 31
Web page layout . . . . . . . . . . . . . . . . . . . . . . . . . . . . . . . . . . . . . . . . . . . . . . . . . . 31
Summary Web pages . . . . . . . . . . . . . . . . . . . . . . . . . . . . . . . . . . . . . . . . . . . . . . 32
Application > IGMP Web page menu paths . . . . . . . . . . . . . . . . . . . . . . . . . . . . . . 33
IGMP configuration . . . . . . . . . . . . . . . . . . . . . . . . . . . . . . . . . . . . . . . . . . . . . 33
IGMP multicast group membership . . . . . . . . . . . . . . . . . . . . . . . . . . . . . . . . . 33
Application > QoS Advanced > Devices Web pages . . . . . . . . . . . . . . . . . . . . . . . 34
Interface Group Configuration page . . . . . . . . . . . . . . . . . . . . . . . . . . . . . . . . 34
Interface Group Assignment page . . . . . . . . . . . . . . . . . . . . . . . . . . . . . . 35
User Priority Assignment page . . . . . . . . . . . . . . . . . . . . . . . . . . . . . . . . . . . . 36
User Priority Mapping page . . . . . . . . . . . . . . . . . . . . . . . . . . . . . . . . . . . . . . . 37
DSCP Queue Assignment page . . . . . . . . . . . . . . . . . . . . . . . . . . . . . . . . . . . 37
DSCP Mapping page . . . . . . . . . . . . . . . . . . . . . . . . . . . . . . . . . . . . . . . . . . . 37
DSCP Mapping modification page . . . . . . . . . . . . . . . . . . . . . . . . . . . . . . 38
Application > QoS Advanced > Rules Web pages . . . . . . . . . . . . . . . . . . . . . . . . 39
Release Notes for the Business Policy Switch 2000
8 Contents
IP Classification page . . . . . . . . . . . . . . . . . . . . . . . . . . . . . . . . . . . . . . . . . . . 39
IP Classification Group page . . . . . . . . . . . . . . . . . . . . . . . . . . . . . . . . . . . . . . 40
IP Group Modification page . . . . . . . . . . . . . . . . . . . . . . . . . . . . . . . . . . . . . . . 40
Layer2 Classification page . . . . . . . . . . . . . . . . . . . . . . . . . . . . . . . . . . . . . . . 41
Layer2 Group page . . . . . . . . . . . . . . . . . . . . . . . . . . . . . . . . . . . . . . . . . . . . . 42
Layer 2 Group Modification page . . . . . . . . . . . . . . . . . . . . . . . . . . . . . . . . . . 43
Application > QoS Advanced > Action Web page . . . . . . . . . . . . . . . . . . . . . . . . . 43
Application > QoS Advanced > Policies Web pages . . . . . . . . . . . . . . . . . . . . . . . 44
Policy Statistics page . . . . . . . . . . . . . . . . . . . . . . . . . . . . . . . . . . . . . . . . . . . 45
Application > QoS Advanced > Agent Web page . . . . . . . . . . . . . . . . . . . . . . . . . 45
Web-based management known issues . . . . . . . . . . . . . . . . . . . . . . . . . . . . . . . . 46
DiffServ IP Quality of Service (QoS) architecture . . . . . . . . . . . . . . . . . . . . . . . . . . . . 47
DiffServ components . . . . . . . . . . . . . . . . . . . . . . . . . . . . . . . . . . . . . . . . . . . . . . . 49
IP service classes . . . . . . . . . . . . . . . . . . . . . . . . . . . . . . . . . . . . . . . . . . . . . . . . . 50
Port types . . . . . . . . . . . . . . . . . . . . . . . . . . . . . . . . . . . . . . . . . . . . . . . . . . . . . . . 52
Packet classifiers . . . . . . . . . . . . . . . . . . . . . . . . . . . . . . . . . . . . . . . . . . . . . . . . . . 55
Layer 2 filters . . . . . . . . . . . . . . . . . . . . . . . . . . . . . . . . . . . . . . . . . . . . . . . . . . 56
IP filters . . . . . . . . . . . . . . . . . . . . . . . . . . . . . . . . . . . . . . . . . . . . . . . . . . . . . . 56
Changing IEEE 802.1p priority and drop precedence . . . . . . . . . . . . . . . . . . . . . . 57
Packet flow . . . . . . . . . . . . . . . . . . . . . . . . . . . . . . . . . . . . . . . . . . . . . . . . . . . 58
Sample QoS configurations . . . . . . . . . . . . . . . . . . . . . . . . . . . . . . . . . . . . . . . . . . . . . 60
Using the Web-based QoS Wizard . . . . . . . . . . . . . . . . . . . . . . . . . . . . . . . . . . . . 61
Best Effort only network traffic . . . . . . . . . . . . . . . . . . . . . . . . . . . . . . . . . . . . . 61
Prioritizing network traffic . . . . . . . . . . . . . . . . . . . . . . . . . . . . . . . . . . . . . . . . 63
Prioritizing additional traffic flows . . . . . . . . . . . . . . . . . . . . . . . . . . . . . . . . . . 67
Configuring VLAN priority . . . . . . . . . . . . . . . . . . . . . . . . . . . . . . . . . . . . . . . . 70
Using the QoS Advanced configuration . . . . . . . . . . . . . . . . . . . . . . . . . . . . . . . . . 73
Setting up IP and layer 2 filters . . . . . . . . . . . . . . . . . . . . . . . . . . . . . . . . . . . . 74
Creating an interface group . . . . . . . . . . . . . . . . . . . . . . . . . . . . . . . . . . . 74
Setting up filter matching conditions . . . . . . . . . . . . . . . . . . . . . . . . . . . . . . . . 77
Defining your IP filter . . . . . . . . . . . . . . . . . . . . . . . . . . . . . . . . . . . . . . . . 78
Creating an IP Filter Group Table entry . . . . . . . . . . . . . . . . . . . . . . . . . . 79
Configuring actions . . . . . . . . . . . . . . . . . . . . . . . . . . . . . . . . . . . . . . . . . . . . . 81
Configuring policies . . . . . . . . . . . . . . . . . . . . . . . . . . . . . . . . . . . . . . . . . . . . . 82
Defining your layer 2 filter . . . . . . . . . . . . . . . . . . . . . . . . . . . . . . . . . . . . . 84
209320-A
Contents 9
Creating a Layer2 Filter Group Table entry . . . . . . . . . . . . . . . . . . . . . . . . 86
Assigning user priority queue assignments . . . . . . . . . . . . . . . . . . . . . . . . . . . . . . 88
Verifying DSCP mapping . . . . . . . . . . . . . . . . . . . . . . . . . . . . . . . . . . . . . . . . . . . . 89
Assigning user priority mapping . . . . . . . . . . . . . . . . . . . . . . . . . . . . . . . . . . . . . . 90
Known limitations . . . . . . . . . . . . . . . . . . . . . . . . . . . . . . . . . . . . . . . . . . . . . . . . . . . . . 92
Release Notes for the Business Policy Switch 2000
10 Contents
209320-A
11
Introduction
These release notes contain important information about Nortel Networks
Business Policy Switch 2000™ software and operational issues that may not be
included in the related guides Using the Business Policy Switch 2000 (part number
208700-A ) and Using Web-Based Management for the Business Policy Switch
2000 (part number 209570-A). The information in these release notes supersedes
the applicable information in the guides.
Note: Go to the support.baynetworks.com/library/tpubs/ URL and
locate the Business Policy Switch 2000 section for the most recent
product information. Use Adobe Acrobat Reader to open the manuals
and release notes, search for the sections you need, and print them on
most standard printers. Go to Adobe Systems at www.adobe.com to
download a free copy of Acrobat Reader.
These release notes contain the following sections:
•
•
•
•
•
•
IGMP Fast JOIN and LEAVE (page 12)
Device Manager bridging information (page 17)
Modifications to Web pages (page 31)
DiffServ IP Quality of Service (QoS) architecture (page 47)
Sample QoS configurations (page 60)
— Using the Web-based QoS Wizard (page 61)
— Using the QoS Advanced configuration (page 73)
(page 95)
Release Notes for the Business Policy Switch 2000
12
IGMP Fast JOIN and LEAVE
Note: The Fast JOIN and LEAVE feature for IGMP is available only
when the operational mode for the Business Policy Switch 2000 is set to
BPS 2000. If the operational mode is set to hybrid (or mixed) mode, the
Fast JOIN and LEAVE feature is not available. To set the operational
mode, refer to Using the Business Policy Switch 2000 and Using
Web-based Management for the Business Policy Switch 2000.
When enabled, the Fast JOIN and LEAVE feature adds the following functionality
to IGMP:
•
•
When the Business Policy Switch 2000 receives the first report of a multicast
IP group, the switch does not flood the traffic addressed to that group for the
first 10 seconds. The switch begins pruning traffic within 100 milliseconds.
When the switch receives the LEAVE message, the switch prunes that port,
sending the LEAVE message within 100 milliseconds.
When Fast JOIN and LEAVE is enabled, the user can have only one host per
Business Policy Switch 2000 port for the uninterrupted multicast stream. If you
have more than one host connected to a single port (for example, another switch),
receiving the same multicast stream and one host sends a LEAVE message, the
multicast stream will stop flowing to all of the hosts associated with that port.
Other hosts must send a new IGMP report to begin receiving the multicast stream
again.
Configuring with the console interface (CI)
Note: You cannot enable both features: Fast JOIN and LEAVE and
Robust Value.
When you enable the Fast JOIN and LEAVE value, the Robust Value
always remains at the default value of 2, although the displayed value
is 0.
209320-A
13
To enable Fast JOIN and LEAVE using the CI menus:
1
2
Check that the operational mode is BPS 2000.
a
Choose Switch Configuration Menu from the Main Menu.
b
Choose Stack Operational Mode.
c
Ensure that the Current Operational Mode reads Pure BPS 2000 (not
Hybrid).
Choose IGMP Configuration (or press g) from the Switch Configuration
Menu screen.
The IGMP Configuration screen opens (Figure 1).
Figure 1 IGMP Configuration screen
IGMP Configuration
VLAN:
Snooping:
Proxy:
Robust Value:
Query Time:
Set Router Ports:
Unit #1
Unit #2
1-6
-----------X---X
Static
7-12
------X---------
[
[
[
[
[
[
1 ]
Enabled ]
Enabled ]
2 ]
125 seconds ]
Version 1 ]
Router Ports
13-18
19-24
-----------X-------------------
KEY: X = IGMP Port Member (and VLAN Member), - = Not an IGMP Member
Use space bar to display choices, press <Return> or <Enter> to select
choice. Press Ctrl-R to return to previous menu. Press Ctrl-C to return to
Main Menu.
3
In the Robust Value field, enter 0.
4
Press Ctrl-C to return to the Main Menu.
To disable Fast JOIN and LEAVE using the console menus:
Release Notes for the Business Policy Switch 2000
14
1
Choose Switch Configuration from the Main Menu, and choose IGMP
Configuration (or press g) from the Switch Configuration Menu screen.
2
In the Robust Value field, enter 2 (default value) or the number you want to
specify in the field.
3
Press Ctrl-C to return to the Main Menu.
Configuring with the Web-based management system
To enable Fast JOIN and LEAVE using the Web-based management interface:
1
Check that the operational mode is BPS 2000.
a
Choose Configuration > Stack Operational Mode from the Main Menu.
b
Ensure that the Current Stack Operational Mode displays Pure BPS 2000
Stack (not Hybrid).
2
Choose Application > IGMP > IGMP Multicast Group from the Main Menu.
3
Click the Action tab.
The IGMP Multicast Group Membership page opens (Figure 2).
Figure 2 IGMP Multicast Group Membership page
4
209320-A
In the Robust Value field, enter 0.
15
5
Click Submit.
To disable Fast JOIN and LEAVE using the Web-based management system:
1
Choose Application > IGMP > IGMP Multicast Group from the Main Menu.
2
In the Robust Value field, enter 2 (default value) or the number you want to
specify.
3
Click Submit.
Release Notes for the Business Policy Switch 2000
16
209320-A
17
Device Manager bridging information
This section contains information about Device Manager bridging features
described in the Reference for the Business Policy Switch 2000 management
software operations (part number 209322-A).
Setting up bridging
The Bridge parameters allow you to configure the global Spanning Tree Protocol
and to the view MAC address table for a Business Policy Switch. Bridge
information also includes spanning tree group (STG) information.
This chapter describes the bridge information available in Device Manager on the
following tabs:
•
•
•
•
Base tab (next)
Spanning Tree tab (page 18)
Transparent tab (page 21)
Forwarding (page 22)
The chapter also describes the spanning tree group information on the following
tabs:
•
•
•
Configuration tab (page 24)
Status tab (page 26)
Port tab (page 28)
Base tab
The MAC address used by the bridge must be referred to in a unique fashion;
moreover, it should be the smallest MAC address (numerically) of all ports that
belong to the bridge. However, it is only required to be unique when integrated
with dot1dStpPriority. A unique BridgeIdentifier is formed that is used
in the Spanning Tree Protocol.
To view the Base tab:
➨ From the menu bar, select Edit > Bridge.
Release Notes for the Business Policy Switch 2000
18
The Bridge dialog box opens with the Base tab displayed (Figure 3).
Figure 3 Base tab
Table 1 describes the Base tab items.
Table 1 Base tab items
Item
Description
BridgeAddress MAC address of the bridge when it is referred to in a unique fashion.
This address should be the smallest MAC address of all ports that
belong to the bridge. However, it is has to be unique. When
concatenated with dot1dStpPriority, a unique bridge ID is formed that is
then used in the Spanning Tree Protocol.
NumPorts
Number of ports controlled by the bridging entity.
Type
Indicates the type of bridging this bridge can perform. If the bridge is
actually performing a certain type of bridging, this fact will be indicated
by entries in the port table for the given type.
Spanning Tree tab
The Spanning Tree tab displays the version of the Spanning Tree Protocol
currently running. If future versions of the IEEE Spanning Tree Protocol are
released that are incompatible with the current version, a new value will be
defined.
To view the Spanning Tree tab:
1
From the Device Manager menu bar, choose Edit > Bridge.
The Bridge dialog box opens with the Base tab displayed.
209320-A
19
2
Click the Spanning Tree tab.
The Spanning Tree tab opens (Figure 4).
Figure 4 Spanning Tree tab
Table 2 describes the Spanning Tree tab fields.
Table 2 Spanning Tree tab fields
Field
Description
ProtocolSpecification
Version of the Spanning Tree Protocol being run. Values
include:
• decLb100: Indicates the DEC LANbridge 100
Spanning Tree Protocol.
• ieee8021d: IEEE 802.1d implementations will return
this entry. When future versions of the IEEE
Spanning Tree Protocol are released that are
incompatible with the current version, a new value
will be defined.
Priority
Value of the writable portion of the bridge ID. That is, the
first two octets of the (8-octet long) bridge ID. The last
six octets of the bridge ID are given by the value of
BridgeAddress.
TimeSinceTopologyChange
Time (in hundredths of a second) since the last time a
topology change was detected by the bridge entity.
TopChanges
Number of topology changes detected by this bridge
since the management entity was reset or initialized.
Release Notes for the Business Policy Switch 2000
20
Table 2 Spanning Tree tab fields (continued)
209320-A
Field
Description
DesignatedRoot
Bridge ID of the root of the spanning tree as determined
by the Spanning Tree Protocol executed by the node.
This value is used as the Root ID parameter in all
configuration bridge PDUs originated by the node.
RootCost
Cost of the path to the root as seen from this bridge.
RootPort
Port number of the port that offers the lowest cost path
from this bridge to the root bridge.
MaxAge
Maximum age of Spanning Tree Protocol information
learned from the network on any port before it is
discarded, in units of hundredths of a second. It is the
actual value that this bridge is currently using.
HelloTime
Time between the transmission of Configuration bridge
PDUs by the node on any port when it is the root of the
spanning tree (in units of hundredths of a second). It is
the actual value that the bridge is currently using.
ForwardDelay
Value (in hundredths of a second) that controls how fast
a port changes its spanning state when moving toward
the Forwarding state. The value determines how long
the port stays in each of the Listening and Learning
states that precede the Forwarding state. The value is
also used when a topology change has been detected
and is under way. This value ages all dynamic entries in
the Forwarding Database.
Note: This value is the one that this bridge is currently
using, in contrast to dot1dStpBridge ForwardDelay
which is the value that this bridge and all others would
start using if/when this bridge were to become the root.
BridgeMaxAge
Value that all bridges use for the maximum age of a
bridge when it is acting as the root.
Note: IEEE 802.1D-1990 specifies that the range is
related to the value of BridgeHelloTime. The granularity
of this timer is specified by IEEE 802.1D-1990 to be 1
second. A badValue error may be returned if the value
set is not a whole number.
21
Table 2 Spanning Tree tab fields (continued)
Field
Description
BridgeHelloTime
Value that the bridge uses for HelloTime when the bridge
is acting as the root. The granularity of this timer is
specified by IEEE 802.1D- 1990 to be one second. An
agent may return a badValue error if a set is attempted to
a value that is not a whole number of seconds.
BridgeForwardDelay
Value that all bridges use for ForwardDelay when this
bridge is acting as the root.
Note: IEEE 802.1D-1990 specifies that the range for this
parameter is related to the value of
dot1dStpBridgeMaxAge. The granularity of this timer is
specified by IEEE 802.1D-1990 to be one second. An
agent may return a badValue error if a set is attempted to
a value that is not a whole number of seconds.
Transparent tab
The Transparent tab contains information about a specific unicast MAC address,
which has some forwarding information for the bridge.
To view the Transparent tab:
1
From the Device Manager menu bar, choose Edit > Bridge.
The Bridge dialog box opens with the Base tab displayed.
2
Click the Transparent tab.
The Transparent tab opens (Figure 5).
Figure 5 Transparent tab
Release Notes for the Business Policy Switch 2000
22
Table 3 describes the Transparent tab items.
Table 3 Transparent tab items
Item
Description
LearnedEntryDiscard
Number of Forwarding Database entries learned that have
been discarded due to a lack of space in the Forwarding
Database. If this counter is increasing, it indicates that the
Forwarding Database is becoming full regularly. This
condition will affect the performance of the subnetwork. If the
counter has a significant value and is not presently
increasing, it indicates that the problem has been occurring
but is not persistent.
AgingTime
Time-out period in seconds for aging out dynamically learned
forwarding information.
Note: The IEEE 802.1D-1990 specification recommends a
default of 300 seconds.
Forwarding tab
The Forwarding tab displays the current state of the port, as defined by application
of the Spanning Tree Protocol. This state controls what action a port takes on
reception of a frame. If the bridge detects a port that is malfunctioning, it places
the port into the “broken” state. For ports that are disabled, the value is “disabled.”
To view the Forwarding tab:
1
From the Device Manager menu bar, choose Edit > Bridge.
The Bridge dialog box opens with the Base tab displayed.
2
Click the Forwarding tab.
The Forwarding tab opens (Figure 6).
209320-A
23
Figure 6 Forwarding tab
Release Notes for the Business Policy Switch 2000
24
Table 4 describes the Forwarding tab fields.
Table 4 Forwarding tab fields
Field
Description
Status
The values of this field include:
• invalid: Entry is no longer valid, but has not been removed from the
table.
• learned: Value of the corresponding instance of dot1dTpFdbPort
was learned and is being used.
• self: Value of the corresponding instance of dot1dTpFdbAddress
represents an address of the bridge. The corresponding instance of
dot1dTpFdbPort indicates that a specific port on the bridge has this
address.
• mgmt(5): Value of the corresponding instance of
dot1dTpFdbAddress is also the value of an existing instance of
dot1dStaticAddress.
• other: none of the preceding. This would include where some other
MIB object (not the corresponding instance of dot1dTpFdbPort or
an entry in the dot1dStaticTable) is being used to determine if
frames addressed to the value of dot1dTpFdbAddress are being
forwarded.
Address
A unicast MAC address for which the bridge has forwarding or filtering
information.
Port
Either the value “0” or the port number on a frame has been seen. The
source address must be equal to the value of the corresponding
instance of dot1dTpFdbAddress.
A value of “0” indicates that the port number has not been learned, so
the bridge does have the forwarding/filtering information for this
address (located in the dot1dStaticTable). You should assign the port
value to this object whenever it is learned even for addresses for which
the corresponding value of dot1dTpFdbStatus is not learned(3).
Spanning tree group (STG)
The spanning tree group (STG) information is stored in the STG dialog box. Each
row in each tab specifies a different STG in the device. The Business Policy
Switch supports a single STG.
Configuration tab
The Configuration tab in the STG dialog box has general information for the STG.
209320-A
25
To view the Configuration tab:
➨ From the Device Manager menu bar, choose VLANs > STG.
The STG dialog box opens with the Configuration tab displayed (Figure 7).
Figure 7 Configuration tab
Table 5 describes the Configuration tab items.
Table 5 Configuration tab items
Item
Description
ID
An identifier used to identify an STG in the device.
BridgeAddress
MAC address used by a bridge when it is referred to in a unique
fashion. It is recommended that the number be the smallest
MAC address of all ports belonging to the bridge. However, it is
only required to be unique. When concatenated with Priority, a
unique bridge identifier is formed that is used in the Spanning
Tree Protocol.
NumPorts
Number of ports controlled by this bridging entity.
ProtocolSpecification
Version of the Spanning Tree Protocol being run. Values include:
• decLb100: Indicates the DEC LANbridge 100 Spanning Tree
Protocol.
• ieee8021d: IEEE 802.1d implementations will return this
entry. When future versions of the IEEE Spanning Tree
Protocol are released that are incompatible with the current
version, a new value will be defined.
Priority
Value of the writable portion of the bridge ID. That is, the first two
octets of the (8-octet long) bridge ID. The last six octets of the
bridge ID are given by the value of BridgeAddress.
BridgeMaxAge
Value (in hundredths of a seconds) that all bridges use for the
maximum age of a bridge when it is acting as the root.
Note: IEEE 802.1D-1990 specifies that the range is related to
the value of BridgeHelloTime. The granularity of this timer is
specified by IEEE 802.1D-1990 to be 1 second. A badValue
error may be returned if the value set is not a whole number.
Release Notes for the Business Policy Switch 2000
26
Table 5 Configuration tab items (continued)
Item
Description
BridgeHelloTime
This is the value (in hundredths of a seconds) that all bridges
use for HelloTime when a bridge is acting as the root.
Note: The granularity of this timer is specified by IEEE
802.1D-1990 to be 1 second. A badValue error may be returned
if the value set is not a whole number.
BridgeForwardDelay
This is the value (in hundredths of a seconds) that all bridges
use for ForwardDelay when this bridge is acting as the root.
Note: IEEE 802.1D-1990 specifies that the range is related to
the value of BridgeHelloTime. The granularity of this timer is
specified by IEEE 802.1D-1990 to be 1 second. A badValue
error may be returned if the value set is not a whole number.
PortMembers
Bit-field used to identify the ports in the system that are
members of this STG. The bit-field is 32 octets long,
representing ports 0 to 255 (inclusive).
Status tab
The Status tab in the STG dialog box has status information for the STG.
To view the Status tab:
1
From the Device Manager menu bar, choose VLANs > STG.
The STG dialog box opens with the Configuration tab displayed (Figure 7).
2
Click the Status tab.
The Status tab opens (Figure 8).
Figure 8 Status tab
209320-A
27
Table 6 describes the Status tab items.
Table 6 Status tab items
Items
Description
ID
An identifier used to identify a STG in the device.
BridgeAddress
MAC address used by a bridge when it is referred to in a
unique fashion. It is recommended that the number be the
smallest MAC address of all ports belonging to the bridge.
However, it is only required to be unique. When
concatenated with Priority, a unique bridge identifier is
formed that is used in the Spanning Tree Protocol.
NumPorts
Number of ports controlled by this bridging entity.
ProtocolSpecification
Version of the Spanning Tree Protocol being run. Values
include:
• decLb100: Indicates the DEC LANbridge 100 Spanning
Tree Protocol.
• ieee8021d: IEEE 802.1d implementations will return
this entry. When future versions of the IEEE Spanning
Tree Protocol are released that are incompatible with
the current version, a new value will be defined.
TimeSinceTopologyChange
Time (in hundredths of seconds) since the last topology
change was detected by the bridge entity.
TopChange
Number of topology changes detected by the bridge since
the management entity was last reset or initialized.
DesignatedRoot
Bridge identifier of the root of the spanning tree as
determined by the Spanning Tree Protocol. The value is
used as the root identifier parameter in all configuration
bridge PDUs originated by this node.
RootCost
Cost of the path to the root as seen from the bridge.
RootPort
Port that has the lowest cost path from the bridge to the
root bridge.
MaxAge
Maximum age of Spanning Tree Protocol information
learned from the network on any port before it is discarded,
in units of hundredths of a second. This is the actual value
that this bridge is currently using.
HelloTime
Amount of time between the transmission of configuration
bridge PDUs by this node on any port when it is the root of
the spanning tree (in hundredths of a seconds). This is the
actual value that this bridge is currently using.
Release Notes for the Business Policy Switch 2000
28
Table 6 Status tab items (continued)
Items
Description
HoldTime
Value of the interval length during which no more than two
configuration bridge PDUs shall be transmitted by this
node (in hundredths of a second).
ForwardDelay
The time value (in hundredths of a second) that controls
how fast a port changes its spanning state when moving
toward the Forwarding state.
Value determines how long the port stays in each of the
Listening and Learning states that precede the Forwarding
state. This value is also used when a topology change has
been detected and is under way, to age all dynamic entries
in the Forwarding Database.
Note: This value is the one that this bridge is currently
using, in contrast to BridgeForwardDelay which is the value
that this bridge and all others would start using if/when this
bridge were to become the root.
Ports tab
The Ports tab in the STG dialog box has port information for the STG.
To view the Ports tab:
1
From the Device Manager menu bar, choose VLANs > STG.
The STG dialog box opens with the Configuration tab displayed.
2
Click the Ports tab.
The Ports tab opens (Figure 9).
209320-A
29
Figure 9 Ports tab
Table 7 describes the Ports tab fields.
Table 7 Ports tab fields
Field
Description
Stgld
STG identifier assigned to this port.
Priority
Value of the priority field contained in the first octet of the port ID.
The other octet is given by the value of the “rcStgPort.”
State
The current state of the port as defined by application of the
“Spanning Tree Protocol.” These are the instructions the port
takes on a frame when it is received. If the bridge detects that a
port is malfunctioning, it will list it as “broken(6).” For ports that
are disabled, the value is “disabled(1).”
EnableStp
Enables (True) or disables (False) the spanning tree of the port.
FastStart
When this field is set to True (enabled), the port is moved to
Forwarding or Blocking state in 4 seconds.
Release Notes for the Business Policy Switch 2000
30
Table 7 Ports tab fields (continued)
209320-A
Field
Description
PathCost
Contribution of the port to the path cost of paths toward the
spanning tree root, including the current port. IEEE 802.1D-1990
specification recommends that the default of this parameter be in
inverse proportion to the speed of the attached LAN.
DesignatedRoot
The unique “Bridge Identifier.” It is recorded as Root in the
configuration bridge PDUs transmitted by the Designated Bridge
for the segment to which the port is attached.
DesignatedCost
Path cost of the Designated Port of the segment connected to the
port. The value is compared to the Root Path Cost field in
received bridge PDUs.
DesignatedBridge
Bridge identifier of the bridge that this port considers to be the
Designated Bridge for this port's segment.
DesignatedPort
Port identifier of the port on the Designated Bridge for this port's
segment.
ForwardTransitions
Number of times this port has transitioned from the Learning state
to the Forwarding state.
31
Modifications to Web pages
This section describes modifications made to selected illustrations and Web pages,
and new paths to open Web pages in the management interface in the Using
Web-Based Management for the Business Policy Switch 2000.
Note: Sample Web-based management interface configurations of QoS
features are detailed in “Using the Web-based QoS Wizard” on page 61
and “Using the QoS Advanced configuration” on page 73.
Web page layout
Figure 10 illustrates changes to the general appearance of the management
interface.
Figure 10 Web page layout
Web browser toolbar
Administration > System Information
Menu
Summary
Configuration
Fault
Statistics
Application
Administration
System Information
Security
Logout
Reset
Reset to Default
Support
Business Policy Switch 2000
Business Policy Switch 2000
sysDescription HW:AB3 FW:V0.2E
SW:v1.0.0.75
sysUpTime
35 Minutes, 29 Seconds
sysName
sysLocation
sysContact
Help button
Content
area
Number of
switches in
configuration
9919EA
Release Notes for the Business Policy Switch 2000
32
Summary Web pages
The Stack Inventory section of the Stack Information page (Figure 11) displays
two additional columns: MDA and Software Version.
Figure 11 Stack Information page
Table 8 describes the fields in the Stack Inventory section of the Stack
Information page.
Table 8 Stack Information page fields
209320-A
Field
Description
Unit
The unit number assigned to the device by the network manager.
Description
The description of the device or its subcomponent.
MDA
The media dependent adapter (MDA) connected to the switch.
Software Version
The current running software version.
Operational State
The current operational state of the stack. The operational states are: Other,
Not Available, Removed, Disabled, Normal, Reset in Progress, Testing,
Warning, Non Fatal Errors, Fatal Error, and Not Configured.
33
Application > IGMP Web page menu paths
This section describes new menu paths to the IGMP Web pages.
IGMP configuration
The menu path to the IGMP configuration page is no longer
Application > IGMP Configuration.
To open the IGMP Configuration page:
➨ Choose Application > IGMP > IGMP Configuration.
The IGMP Configuration page opens (Figure 12).
Figure 12 IGMP Configuration page
IGMP multicast group membership
The menu path to the IGMP Multicast Group Membership page is no longer
Application > IGMP Multicast Group.
To open the IGMP Multicast Group Membership page:
➨ Choose Application > IGMP > IGMP Multicast Group.
The IGMP Multicast Group Membership page opens (Figure 13).
Release Notes for the Business Policy Switch 2000
34
Figure 13 IGMP Multicast Group Membership page
Application > QoS Advanced > Devices Web pages
This section provides new screen shots to coincide with the menu path directions
for the Application > QoS Advanced > Devices Web pages described in Using
Web-based Management for the Business Policy Switch 2000.
Note: Sample Web-based management interface configurations of QoS
features are detailed in “Using the QoS Advanced configuration” on
page 73.
Interface Group Configuration page
The menu path Application > QoS > QoS Advanced > Devices > Interface
Configuration opens the Interface Configuration page (Figure 14).
209320-A
35
Figure 14 Interface Configuration page
Interface Group Assignment page
To open the Interface Group Assignment page:
➨ Click the Modify icon associated with the row you want to edit on the
Interface Configuration page (Figure 15).
Release Notes for the Business Policy Switch 2000
36
Figure 15 Interface Group Assignment page
User Priority Assignment page
The menu path Application > QoS > QoS Advanced > Devices > Priority
Q Assign opens the User Priority Queue Assignment page (Figure 16).
Figure 16 User Priority Queue Assignment page
209320-A
37
User Priority Mapping page
The menu path Application > QoS > QoS Advanced > Devices > Priority
Mapping opens the User Priority Mapping page (Figure 17).
Figure 17 User Priority Mapping page
DSCP Queue Assignment page
The menu path Application > QoS > QoS Advanced > Devices > DSCP Q Assign
opens the DSCP Queue Assignment page (Figure 18).
Figure 18 DSCP Queue Assignment page
DSCP Mapping page
The menu path Application > QoS > QoS Advanced > Devices > DSCP Mapping
opens the DSCP Mapping page (Figure 19).
Release Notes for the Business Policy Switch 2000
38
Figure 19 DSCP Mapping page
DSCP Mapping modification page
To open the DSCP Mapping page:
➨ Click the Modify icon in the row of your choice on the DSCP Mapping
modification page (Figure 20).
Figure 20 DSCP Mapping modification page
209320-A
39
Application > QoS Advanced > Rules Web pages
This section provides new screen shots to coincide with the menu path directions
for the Application > QoS Advanced > Rules Web pages described in Using
Web-based Management for the Business Policy Switch 2000.
IP Classification page
To open the IP Classification page:
➨ Select the menu path Application > QoS > QoS Advanced > Rules > IP
Classification(Figure 21).
Figure 21 IP Classification page
Release Notes for the Business Policy Switch 2000
40
IP Classification Group page
The menu path Application > QoS > QoS Advanced > Rules > IP Classification
opens the IP Classification page (Figure 21).
To open the IP Classification Group page:
➨ Click Create Filter Group in the IP Filter Group Table section (Figure 22).
Figure 22 IP Classification Group page
IP Group Modification page
The menu path Application > QoS > QoS Advanced > Rules > IP Classification
opens the IP Classification page (Figure 21).
To open the IP Group Modification page:
➨ Click the Modify icon in the IP filter group configuration of your choice
(Figure 23).
209320-A
41
Figure 23 IP Group Modification page
Layer2 Classification page
To open the Layer2 Classification page (Figure 24):
➨ Select the menu path Application > QoS > QoS Advanced > Rules > Layer2
Classification.
Release Notes for the Business Policy Switch 2000
42
Figure 24 Layer2 Classification page
Layer2 Group page
The menu path Application > QoS > QoS Advanced > Rules > Layer2
Classification opens the Layer2 Classification page (Figure 24).
To open the Layer2 Group page:
➨ Click Create Filter Group in the Layer2 Filter Group Table section
(Figure 22).
Figure 25 Layer2 Group page
209320-A
43
Layer 2 Group Modification page
The menu path Application > QoS > QoS Advanced > Rules > Layer2
Classification opens the Layer2 Classification page (Figure 24).
To display the Layer2 Group Modification page (Figure 26):
➨ Click the Modify icon in the Layer2 Filter Group Table section that is
associated with the configuration row you want to edit to display the Layer2
Group Modification page.
Figure 26 Layer2 Group Modification page
Application > QoS Advanced > Action Web page
This section provides new screen shots to coincide with the menu path directions
for the Application > QoS Advanced > Action Web page described in Using
Web-based Management for the Business Policy Switch 2000.
To open the Action page (Figure 27):
➨ Select the menu path Application > QoS > QoS Advanced > Action.
Release Notes for the Business Policy Switch 2000
44
Figure 27 Action page
Application > QoS Advanced > Policies Web pages
This section provides new screen shots to coincide with the menu path directions
for the Application > QoS Advanced > Policies Web pages described in Using
Web-based Management for the Business Policy Switch 2000.
To open the Policies page (Figure 28):
➨ Select the menu path Application > QoS > QoS Advanced > Policies.
209320-A
45
Figure 28 Policies page
Policy Statistics page
The menu path Application > QoS > QoS Advanced > Policies opens the Policies
page (Figure 28).
In the Policy Table section, clicking the View icon in the configuration of your
choice opens the Policy Statistics page (Figure 29).
Figure 29 Policy Statistics page
Application > QoS Advanced > Agent Web page
This section provides new screen shots to coincide with the menu path directions
for the Application > QoS Advanced > Agent Web page described in Using
Web-based Management for the Business Policy Switch 2000.
The menu path Application > QoS > QoS Advanced > Agent opens the Agent
page (Figure 30).
Release Notes for the Business Policy Switch 2000
46
Figure 30 Agent page
Web-based management known issues
This section describes the following known issues in operating the Web-based
management interface:
•
•
•
209320-A
In order to use all of the Business Policy Switch 2000 management features
(for example, downloading software), you must connect your console
terminal into a Business Policy Switch port within your stack.
The Web-based management interface is not fully compatible with Internet
Explorer on UNIX/Solaris.
Interrupting a software download results in a loss of communication with the
Web.
47
DiffServ IP Quality of Service (QoS) architecture
DiffServ is an IP QoS architecture developed by the Internet Engineering Task
Force (IETF). DiffServ does not use the IETF Integrated Service (IntServ)
signaling protocol Resource Reservation Protocol (RSVP). RSVP is used to
reserve the resources needed by every flow requiring QoS at every router hop in
the path between the receiver and the transmitter. These signaling protocols are
used to provide a connection-oriented service model that uses connectionless
IP-based networks. The scalability of the connection-oriented service model is
limited because it requires that a per-flow soft state is maintained at every router
hop along the path.
Because DiffServ neither uses a signaling protocol nor requires a per flow state at
each router along the path between the receiver and transmitter, its architecture is
simpler and more scalable than IntServ.
Instead of using a per flow state to determine how traffic will be treated at every
router hop, DiffServ uses a simple mechanism that relies on a special encoding of
the first 6 bits of the DS byte in the IP header. This byte is the IPv4 Type of
Service (ToS) byte; for IPv6, is the Traffic Class byte. The first 6 bits of this byte
are called the DiffServ Code Point (DSCP).
In the packet forwarding path, differentiated services are processed by mapping
the packet DSCP to a particular forwarding treatment, or per hop behavior (PHB),
at each network node along its path. The code points may be chosen from a set of
32 mandatory values defined by IETF, from a set of 16 recommended values to be
defined in future IETF drafts or from a set of 16 values reserved for
experimentation and local use. Of the 32 standardized values, there are 8 Class
Selector code points that are used primarily (but not exclusively) for backward
compatibility with existing definitions of the ToS byte.
The Business Policy Switch 2000, a DS node, can support DiffServ functions and
behavior. DiffServ architecture defines a DS-capable domain as a contiguous set
of DS-compliant nodes that operate with a common set of service provisioning
policies and PHB definitions. The DiffServ domain is an autonomous system or
network such as an internet service provider (ISP) network or campus LAN.
Release Notes for the Business Policy Switch 2000
48
DiffServ assumes the existence of a service level agreement (SLA) between DS
domains that share a border. The SLA defines the profile for the aggregate traffic
flowing from one network to the other based on policy criteria. In a given traffic
direction, the traffic is expected to be shaped at the egress point of the upstream
network and policed at the ingress point of the downstream network.
End-to-end QoS is enabled, typically through bilateral agreements (an agreement
between two DiffServ domains), between all the domains from the sender to the
receiver. These agreements aid in consistent PHB and QoS performance across all
domains.
It is possible that both IntServ and DiffServ are used to provide end-to-end QoS.
End stations may use RSVP to signal their QoS requirements. Boarder routers and
switches at the ingress point of the network core map RVSP flow reservations to
the proper DS byte. This encoding ensures that the QoS flow requirements are met
as it traverses the core. The egress point of the core maps the DS byte encoding to
the proper RSVP signaling parameters.
Typically, there are three types of edge devices in a DS domain:
•
•
•
Edge node (EN) — the switch or router connected directly to the desktop end
station (ES) (the Business Policy Switch is an edge node in the DS domain)
Ingress border node (IBN) — the ingress router at the boundary between two
DS domains
Egress border node (EBN) — the egress router at the boundary between two
DS domains
Figure 31 shows the bandwidth broker and various DS nodes in two DS domains.
209320-A
49
Figure 31 DiffServ bandwidth brokers and nodes
DiffServ domain
BB
EN
Interior
Node
BB
EBN
IBN
Boundary
Link
Interior
Node
EN
ES
ES
End-to-End QoS
9927EA
DiffServ components
The DiffServ architecture is comprised of the following components:
•
•
Traffic conditioners — These components include classifiers, DS-byte
markers, shapers, policers and profilers. Marking is performed at network
boundaries, including the edges of the network (first hop router or switch or
source host) and administrative boundaries between networks or autonomous
systems. Traffic conditions should exist at DS ingress and egress nodes. The
Business Policy Switch is an edge switch that supports packet classification
based on header information in layer 2, layer 3, and layer 4 of the Open
System Interconnection (OSI) layering model. The Business Policy Switch
can mark and re-mark IP traffic based on the policies you define.
Packet schedulers and queue managers — PHBs are expected to be
implemented by employing a range of queue service and/or queue
management disciplines on a network node’s output interface queue (for
example, weighted round robin (WRR) queue servicing or drop preference
queue management). DiffServ does not require a particular discipline for
queue management or servicing to realize a particular service. All DS nodes
should support the packet scheduling and queue management algorithms that
are necessary to implement the required PHB.
Release Notes for the Business Policy Switch 2000
50
In the Business Policy Switch, packets are assigned to the appropriate queue
based on IEEE 802.1p user priority. The Business Policy Switch supports
queue service discipline that allows packets to be serviced in an absolute
priority fashion or using a WRR scheduler. This service discipline ensures
that packets in the highest-priority queue are serviced quickly without
starving lower-priority queues. The Business Policy Switch supports two
levels of drop precedence where the lower level is assigned to loss sensitive
traffic.
•
Bandwidth brokers — Bandwidth brokering is responsible for bandwidth
allocation, QoS policy management, and flow admission control in a given
DiffServ domain. The Business Policy Switch does not support bandwidth
brokering or traffic admission control.
IP service classes
The Business Policy Switch supports the following services classes:
•
•
•
•
209320-A
Critical and Network classes have the highest priority over all other traffic.
Premium class is an end-to-end service functioning similarly to a virtual
leased line. Traffic in this service class is guaranteed an agreed upon peak
bandwidth. Traffic requiring this service should be shaped at the network
boundary in order to undergo a negligible delay and delay variance. This
service class is suitable for real time applications like video and voice over IP.
The recommended PHB for this service is the Expedited Forwarding (EF)
PHB.
Platinum, Gold, Silver, and Bronze classes use the Assured Forwarding PHB.
These classes are used for real time, delay tolerant traffic and non real time,
mission critical traffic.
Best Effort (standard) class is the standard Internet packet service with an
additional, optional use of traffic profiling that is used at the network
boundary to request a better effort treatment for packets that are in-profile
(packets that do not break the service agreements between the user and the
service provider).
51
Table 9 describes the service classes and the required treatment.
Table 9 Service classes
Traffic category
Service class
Application type
Required treatment
Critical Network Control
Critical
Critical network control
traffic
Highest priority over all other
traffic. Guaranteed minimum
bandwidth.
Standard Network
Control
Network
Standard network control
traffic
Priority over user traffic.
Guaranteed minimum
bandwidth
Real time, delay
intolerant, fixed
bandwidth
Premium
Interhuman
communications requiring
interaction (such as VoIP).
Absolute bounded priority over
user traffic. No packet loss for
in-profile traffic. Virtual leased
line with lowest amount of
latency. Provisioned for peak
rate.
Real time, delay tolerant, Platinum
low variable bandwidth
Interhuman
communications requiring
interaction with additional
minimal delay (such as low
cost VoIP).
Higher-priority scheduling
providing guaranteed minimum
provisioned bandwidth.
Competes for additional
bandwidth.
Real time, delay tolerant, Gold
high variable bandwidth
Single human
communication with no
interaction (such as Web
site streaming video).
High-priority scheduling
providing guaranteed minimum
provisioned bandwidth.
Competes for additional
bandwidth.
Non-real time, mission
critical, interactive
Silver
Transaction processing
(such as Telnet, Web
browsing).
Medium priority scheduling
providing guaranteed minimum
provisioned bandwidth.
Competes for additional
bandwidth.
Non-real time, mission
critical, non-interactive
Bronze
For example, E-mail, FTP,
SNMP.
Lower-priority scheduling
providing guaranteed minimum
provisioned bandwidth.
Competes for additional
bandwidth.
Non-real time,
non-mission critical
Standard
Bulk transfer (such as large Best effort delivery. Uses
FTP transfers, after-hours remaining available bandwidth.
tape backup).
Release Notes for the Business Policy Switch 2000
52
Table 10 describes the default DSCP, IEEE 802.1p, and egress queue assignment
for packets in each traffic class.
Table 10 Default mapping of DSCP to IEEE 802.1p
Incoming or re-marked DSCP
IP service
class
CS7 (38)
Critical
CS6 (30)
Network
EF(2E), CS5(28)
Premium
AF41(22), AF42(24), AF43(26),
CS4(20)
Platinum
AF31(1A), AF32(1C), AF33(1E),
CS3(18)
Gold
AF21(12), AF22(14), AF23(16),
CS2(10)
Silver
AF11(A), AF12(C), AF13(E),
CS1(8)
Bronze
DE(0), CS0(0)
Standard
Number of queues
2
4
1
1
Outgoing IEEE
802.1p user
priority
7
6
2
2
5
4
3
3
2
4
0
You can change the default IEEE 802.1p to queue mapping and the default DSCP
to IEEE 802.1p mapping using the Web-based management interface. Note that
the IEEE 802.1p to queue mapping for an interface (port) depends on the number
of queues available at that interface. This number depends on the queue set
associated with the interface.
As displayed in Table 10, the traffic service class determines the IEEE 802.1p
priority that determines the egress queue of the traffic. Non-IP traffic can be in the
same IP service class if the non-IP packets are assigned the same IEEE 802.1p
priority.
Port types
For IP traffic, the Business Policy Switch ports are classified into two categories,
trusted and untrusted ports. Usually, trusted ports are connected to the core of the
DiffServ network. Untrusted ports are typically access links that are connected to
end stations.
209320-A
53
The Business Policy Switch does not trust the DSCP of IP traffic received from an
untrusted port, but it does trust the DSCP of IP traffic received from a trusted port.
Filters installed on trusted ports must not change the DSCP of the IP packets
received on these ports. These filters must change the IEEE 802.1p and drop
precedence of the matching packets based on the incoming DSCP using a table
that matches each one of the 64 DSCP values to the corresponding IEEE 802.1p
priority. The values can be modified by a policy server or by the user. Refer to
“Verifying DSCP mapping” on page 89.
If a packet is received from a trusted port and it does not match any one of the
filters installed by the user on this port, the Business Policy Switch uses a default
layer 2 filter to change the packet IEEE 802.1p and drop precedence based on the
DSCP of the packet. Refer to “Packet classifiers” on page 55.
Filters that you install on untrusted ports must change the DSCP, IEEE 802.1p
priority, and drop precedence of IP traffic received from these ports.
If a packet is received from an untrusted port and it does not match any one of the
filters installed by the user on the port, the Business Policy Switch uses default
layer 2 filters to change the packet DSCP, IEEE 802.1p priority, and drop
precedence as follows:
•
•
If the packet is tagged, the Business Policy Switch uses a layer 2 filter to
change the DSCP, IEEE 802.1p to 0, and drop precedence to 1 so that the
packet can get best effort treatment.
If the packet is untagged, the Business Policy Switch uses eight default layer 2
filters to change the DSCP based on the default IEEE 802.1p priority of the
ingress untrusted port. The Business Policy Switch changes the packet DSCP
using a table that matches each one of the eight IEEE 802.1p priorities to the
corresponding DSCP. The values can be modified by a policy server or by the
user. Refer to “Assigning user priority mapping” on page 90.
As stated above, the Business Policy Switch default filers utilize 10 of the
available 24 layer 2 filters. Each Business Policy Switch unit has a maximum of
28 external front panel ports. In a stack scenario, there is an additional maximum
of seven cascade ports that are connect to other units in the stack. The Business
Policy Switch can have up to eight units in a stack.
Release Notes for the Business Policy Switch 2000
54
There are two sets of external ports. The first set contains 24 10/100 Mb/s ports.
Each port in this set has a set of four queues. The first queue holds the highest
priority and is serviced in an absolute priority fashion, meaning that this queue is
serviced first until all the queued packets are transmitted. The other three queues
are serviced using a WRR scheduler.
The second set contains the MDA front panel ports. There are two types of
MDAs. The Gigabit MDA has one uplink with two queues that are serviced in an
absolute priority fashion. Each port on the BPS2000-4TX MDA, BSP2000-4FX
MDA, and BPS2000-2FX MDA has a set of 4 queues. The first queue holds the
highest priority and is serviced in an absolute priority fashion, meaning that this
queue is serviced first until all the queued packets are transmitted. The other three
queues are serviced using a WRR scheduler.
The cascade port has a set of two queues that are serviced using an absolute
priority discipline. Filters are installed only on cascade ports that are connected to
BayStack 450 units in the stack. Because no filters are installed on cascade ports
that are connected to other Business Policy Switch units in the stack, these
cascade ports are not classified as trusted or untrusted. Business Policy Switch
ports are associated with two types of queue sets:
•
•
Queue set 1 has four queues. The first queue is serviced in an absolute priority
fashion. The other three queues are serviced in a WRR fashion.
Queue set 2 has two queues that are serviced in an absolute priority fashion.
You cannot change the characteristics of these queue sets (such as the service
discipline, packet or buffer thresholds, and queue weights for WRR scheduler).
When the power is turned on, all ports are considered untrusted, except for
cascade ports connected to other Business Policy Switch units in the stack. You
can change the power-up defaults using the Web-based management interface.
See Using Web-Based Management for the Business Policy Switch 2000.
Every port should be assigned a role or a combination of roles that designates the
type of policies applied to traffic received by this port. All ports that have the
same role or combination of roles have the same set of filters (policies) installed
on them. When a port changes roles, the policies associated with the old role are
removed and policies associated with the new roles are installed on the port.
209320-A
55
When the power is turned on, ports are assigned to the following three default role
combinations:
•
•
•
BPS Hybrid Ext Ifcs — this role combination is assigned to the 24 external
ports.
BPS Priority Ext Ifcs — this role combination is assigned to the Gigabit MDA
port.
BPS Cascade Int Ifcs — this role combination is assigned to the cascade ports.
Each role combination is associated with a queue set. BPS Hybrid Ext Ifcs is
associated with queue set 1. BPS Priority Ext Ifcs and BPS Cascade Int Ifcs are
associated with queue set 2. Whenever you create a new role combination, you
should assign it to one of these two queue sets. The ability so assign ports to a role
combination depends solely on the queue set associated with the role
combination. You must remove all ports from a role combination in order to delete
it.
Packet classifiers
You can create the following two types of filters:
•
•
Layer 2 filters
IP filters
Filters are organized in groups. Layer 2 and IP filters cannot coexist in the same
group. A filter group is an ordered list of filters. Each group of filters is associated
with actions that are executed when the packet matches the first filter in the group.
The filter group and the associated actions constitute a policy. A classifier is an
ordered list of policies. Filters can be added or deleted from an existing group.
Filters groups can be added to or deleted from an existing classifier.
The order of a filter group in a classifier is called the group precedence. The lower
the order of a group in a classifier the higher the precedence. Layer 2 filter groups
must have lower precedence than IP filter groups in the same classifier. The order
in which filters in a given classifier are evaluated depends on the precedence of
the filter group in which the filter resides and, on the order of the filter in the
group. Filters in the higher-precedence groups are evaluated before filters in the
lower-precedence groups.
Release Notes for the Business Policy Switch 2000
56
A classifier is associated with a role combination. Packets received from any port
that has the same role combination are classified with the same classifier. The
Policy Table in the Web-based management interface defines the policies of the
classifier associated with a given role combination. Refer to Using Web-Based
Management for the Business Policy Switch 2000.
Layer 2 filters
There are 14 available layer 2 filters in the Business Policy Switch. The layer 2
filters are used to classify traffic based on the following criteria:
•
•
•
Layer 2 information, including VLAN ID, IEEE 802.1p priority, and
etherType
Layer 3 information, including DSCP and IP protocol such as TCP/UDP
Layer 4 information, including TCP/UDP port ranges
If a layer 2 filter specifies layer 3 or layer 4 information, you can assume that it
should match IP traffic only.
Layer 2 filters can have the following actions:
•
•
•
Drop matching packets.
Change DSCP of matching IP packets. If you request to change the DSCP for
non-IP traffic, the request will be ignored.
Change IEEE 802.1p and drop precedence of matching packets.
If a layer 2 filter is installed on a trusted port, then it should not change the DSCP
of the match IP traffic. If a layer 2 filter is installed on an untrusted port, then it
should change the DSCP, IEEE 802.1p, and drop precedence of the matching IP
traffic.
IP filters
IP filters are used to classify IP traffic based on the following criteria:
•
•
209320-A
Layer 3 information, including IP source and subnet addresses, IP destination
and subnet addresses, DSCP, and IP protocols such as TCP/UDP
Layer 4 information, including TCP/UDP port numbers (port ranges are not
supported by layer 3 filters)
57
IP filters have the same actions as layer 2 filters. If an IP filter is installed on a
trusted port, then it should not change the DSCP of the matching IP traffic. If an
IP filter is installed on an untrusted port, then it should change the DSCP, IEEE
802.1p, and drop precedence of the match IP traffic.
Although the Business Policy Switch can use 1000 IP filters, only 24 IP filters can
match the same IP source address and subnet address in all role combinations.
Changing IEEE 802.1p priority and drop precedence
You can change the IEEE 802.1p priority and drop precedence for IP traffic by
using either IP or layer 2 filters. On a trusted port, the IEEE 802.1p and drop
precedence should be changed for IP traffic to match the incoming DSCP. To
change IEEE 802.1p priority and drop precedence for non-IP traffic, you must use
layer 2 files.
For example, to configure a policy that changes the IEEE 802.1p priority and drop
precedence of non-IP traffic belonging to VLAN 100 received on untrusted ports
that are associated with a specific role or role combination, you would need the
following two filters:
•
•
A layer 2 filter that changes the DSCP, IEEE 802.1p priority, and drop
precedence of IP traffic in VLAN 100
A layer 2 filter that changes IEEE 802.1p priority and drop precedence of all
types of traffic (both IP and non-IP) in VLAN 100
The layer 2 filter is able to match against specific layer 3 protocols. Otherwise,
numerous layer 2 filters would be necessary to match against all non-IP traffic.
The first filter excludes IP traffic. Because the first filter is installed on an
untrusted port, it must change the DSCP, IEEE 802.1p priority, and drop
precedence of the matching IP traffic. Note that the new IEEE 802.1p priority and
drop precedence in the first filter can be the same as the second filter.
If you want to apply the same policy to trusted ports, you also need two layer 2
filters. The second filter remains the same, but the first filter should not change the
DSCP of the matching IP traffic. Instead, it should match the IEEE 802.1p priority
and drop precedence of the IP traffic to match the incoming DSCP.
Layer 2 filters should be created in the order indicated above to ensure that IP
traffic will be treated properly.
Release Notes for the Business Policy Switch 2000
58
Packet flow
A packet is processed as follows:
1
The packet enters the Business Policy Switch.
2
Filters are applied.
3
Filter actions are taken, and the packet can be modified (IEEE 802.1p,
DSCP).
4
The packet is assigned a QoS class (Premium, Platinum, Gold, Silver, Bronze,
Best Effort). A QoS class is designated using the DSCP and/or IEEE 802.1p
user priority values.
5
The packet is placed in the appropriate egress queue according to its priority
marking as described above.
6
The queues are serviced (strict priority or weighted round robin).
The following illustrations depict the treatment of a packet as it enters an ingress
port and exits through an egress port. Use the following process flow chart as a
configuration guide for QoS configuration rules appropriate for IP (Figure 32) and
layer 2 (Figure 33) packets. Figure 32 displays an IP packet flow without layer 2
filters. Figure 33 displays a packet flow assuming that there are no IP filters.
209320-A
59
Figure 32 QoS packet flow for an IP packet
Packet
arrives at
ingress port.
Is the
ingress port
trusted?
Yes
Maintain
DSCP.
No
Is there an
IP target filter
match?
Incoming
packet
tagged?
No
No
Re-mark the
DSCP based on
802.1p port
priority.
Is the
egress port
tagged?
No
Yes
Yes
Yes
Re-mark DSCP based
on the Update DSCP
field in the QoS Action
screen.
Is the
egress port
tagged?
Reset DSCP
to 0x00 and
802.1p priority
to 0.
Yes
Yes
802.1p
priority and drop
precedence set to use
default in action
setting?
No
Mark 802.1p
priority based
ingress VLAN
port priority.
Is the
egress port
tagged?
Yes
Mark 802.1p priority
and drop precedence
based on the DSCP
to 802.1p mapping
table.
No
Re-mark the
802.1p priority and
drop precedence
based on the QoS
DSCP mapping
screen.
Mark 802.1p
priority and drop
precedence
based on
action settings.
Yes
No
Set 802.1p
priority to 0.
Yes
Egress port
Tagged?
Mark packet
using new
802.1p priority.
No
Assign to
queue based on
802.1p user priority.
Packet is queued
according to
its priority.
Assign to queue
based on 802.1p
priority.
Egress port
(trusted or
untrusted).
9924EA
Release Notes for the Business Policy Switch 2000
60
Figure 33 QoS packet flow for a layer 2 packet
Packet
arrives at
ingress port.
Does the
packet match a
layer 2 filter
?
Is the
incoming packet
tagged?
No
Yes
Yes
Is the
egress port
tagged?
Maintain
802.1p priority
of packet.
No
Is traffic
type IP?
Yes
Use 802.1p port
priority of
ingress port.
No
No
Yes
Is the
ingress port
trusted?
Yes
No
Change DSCP, 802.1p,
and drop precedence
based on target
table actions.
Change 802.1p
and drop
precedence
based on
QoS DSCP
mapping table.
Mark 802.1p
priority based on
ingress port
priority.
Is the
egress port
tagged?
Is the
egress port
tagged?
Yes
Yes
Change packet
802.1p user
priority.
Assign to queue
based on priority
assignment.
No
No
Set 802.1p
priority with the
incoming tagged
priority.
Queue packet
based on
assigned priority.
Egress
port (trusted
or untrusted).
9923EA
Sample QoS configurations
The following section contains sample configurations of QoS features. Field
values are presented with an explanation of why the value is used. The QoS
Web-based management tool is shipped from the factory with default interface
groups. Use the QoS tools to create and customize interface groups and filters.
209320-A
61
This section provides you with configuration samples using the QoS Wizard (this
page) and the QoS Advanced tools (“Using the QoS Advanced configuration” on
page 73).
Using the Web-based QoS Wizard
Warning: Nortel Networks recommends that you use the QoS Wizard
for your initial configuration only. Each time the QoS Wizard is
initiated, all existing configurations are reset to the default values. After
you complete the initial QoS Wizard configuration method, you can then
customize traffic treatment using the QoS Advanced configuration
process.
The following sections illustrate the process when you select the Wizard
configuration method. For information about accessing the Web-based
management application, refer to Using Web-based Management for the Business
Policy Switch 2000.
The embedded Wizard in the Web-based management interface allows you to
configure simplified policies and common filters to control the behavior of
network traffic in your standalone or stack switch configuration. In addition, you
can prioritize a VLAN to receive better service than others.
After you configure your standalone or stack switch configuration, specified
packets that enter the switch are marked according to their priority. You can
specify that all packets be marked to receive equal treatment (Best Effort), or you
can specify that different packets have different priority levels. The levels are
Premium, Platinum, Gold, Silver, Bronze, and Best Effort.
Note: A VLAN is prioritized by the same levels as packets: Premium,
Platinum, Gold, Silver, Bronze, and Best Effort.
Best Effort only network traffic
You can specify that all traffic in your network be marked only to receive equal
treatment (Best Effort).
Release Notes for the Business Policy Switch 2000
62
To configure Best Effort only traffic in your network:
1
From the main menu, choose Application > QoS > QoS Wizard.
The QoS Wizard opens (Figure 34).
Figure 34 QoS Wizard opening page
2
To continue the configuration process, click Next.
A packet prioritization selection page opens (Figure 35).
Figure 35 Packet prioritization selection page
3
209320-A
Select No.
63
4
Click Next.
A Best Effort prioritization page opens (Figure 36).
Note: If you want to prioritize traffic, skip this step and continue the
steps outlined in “Prioritizing network traffic” on page 63.
T
Figure 36 Best Effort prioritization page
5
To complete the configuration process, click Next.
The session confirmation page appears (Figure 37).
Figure 37 Session confirmation page
Prioritizing network traffic
You can specify that different types of traffic in your network configuration be
marked with different priority levels.
There are many possible reasons that network traffic should be prioritized. You
may have voice or video packets that need to arrive as quickly as possible. Or
some applications, such as, customer order transactions or accounting tasks, may
need better service than e-mail or Web browsing.
Release Notes for the Business Policy Switch 2000
64
To assign priority levels to different types of network traffic:
1
From the main menu, choose Application > QoS > QoS Wizard.
The QoS Wizard opens (Figure 34 on page 62).
2
To continue the configuration process, click Next.
A packet prioritization selection page opens (Figure 35 on page 62).
3
Select Yes.
4
Click Next.
A packet prioritization explanation page opens (Figure 38).
Figure 38 Packet prioritization explanation page
5
To continue the configuration process, click Next.
An application prioritization selection page opens (Figure 39).
209320-A
65
Figure 39 Application prioritization selection page
6
To choose an application for traffic prioritization, select the check box in the
row of the application(s) you want.
7
From the list in each application row, choose the type of traffic prioritization
you want.
8
Click Next.
An additional traffic flow prioritization page opens (Figure 40).
Figure 40 Additional traffic flow prioritization page
9
To complete the traffic prioritization session, select No.
Release Notes for the Business Policy Switch 2000
66
10 Click Next. For more information about defining additional traffic flows, refer
to “Prioritizing additional traffic flows” on page 67.
A VLAN prioritization page opens (Figure 41).
Figure 41 VLAN prioritization page
11 Select No.
12 Click Next. For information about configuring VLAN priority, refer to
“Configuring VLAN priority” on page 70.
A session verification page opens (Figure 42).
Figure 42 Session verification page
13 After verifying the information, click Next (or click Back to make changes to
the appropriate pages).
A session confirmation page opens (Figure 37 on page 63).
209320-A
67
Prioritizing additional traffic flows
You can configure additional traffic flows in your network.
To configure additional traffic flows:
1
To define additional traffic flows, on the additional traffic flow priority page
(Figure 40 on page 65), select Yes.
2
Click Next.
A traffic flow label page opens (Figure 43).
Figure 43 Traffic flow label page
3
Type a character string to identify the traffic flow.
4
Click Next.
A classification rules page opens (Figure 44).
Release Notes for the Business Policy Switch 2000
68
Figure 44 Classification rules page
Table 11 describes the items on the classification rules page.
Table 11 Classification rules page items
209320-A
Item
Range
Description
IP Address
XXX.XXX.XXX.XXX
Select the check box to activate the
classification rule, and then type the IP
address to match against the packet’s
source or destination IP address.
Mask Bits
Integer
Select the check box to activate the
classification rule.
Enter the number of left-justified mask bits
for matching the source IP or destination
address.
IP Protocol
TCP
UDP
Select the check box to activate the
classification rule, and then choose the IP
protocol to match against the packet’s IP
protocol field.
L4 Port Dst (min)
Integer (0.65535)
Select the check box to activate the
classification rule, and then type the
minimum value that the packet’s layer 4
destination port number must have and
match this filter.
69
Table 11 Classification rules page items (continued)
Item
Range
Description
L4 Port Dst (max)
Integer (0.65535)
Select the check box to activate the
classification rule, and then type the
maximum value that the packet’s layer 4
destination port number must have and
match this filter.
L4 Port Src (min)
Integer (0.65535)
Select the check box to activate the
classification rule, and then type the
minimum value that the packet’s layer 4
source port number must have and match
this filter.
L4 Port Src (max)
Integer (0.65535)
Select the check box to activate the
classification rule, and then type the
maximum value that the packet’s layer 4
source port number must have and match
this filter.
5
Select the check box to activate the classification rule, and then type the
appropriate information in the text boxes, or select from a list.
6
Click Next.
A service class assignment page opens (Figure 45).
Figure 45 Service class assignment page
7
Select the check box of the priority level (service class) to assign to
the traffic flow.
Release Notes for the Business Policy Switch 2000
70
8
Click Next.
An additional traffic prioritization page opens (Figure 40 on page 65).
9
To define additional traffic flows, select Yes and repeat steps 7 through 13;
or select No.
10 Click Next.
A VLAN prioritization page opens.
11 Select No.
12 Click Next. For information about configuring VLAN priority, refer to
“Configuring VLAN priority” on page 70.
A session verification page opens (Figure 42 on page 66).
13 After verifying the information, click Next (or click Back to make changes to
the appropriate pages).
A session confirmation page opens (Figure 37 on page 63).
Configuring VLAN priority
You can configure one VLAN to receive better service than others.
To configure a VLAN’s priority:
1
On the VLAN prioritization page (Figure 41 on page 66), select Yes.
2
Click Next.
A VLAN selection page opens (Figure 46).
209320-A
71
Figure 46 VLAN selection page
3
From the list, select the VLAN to receive better service.
4
Click Next.
A VLAN service class selection page opens (Figure 47).
Figure 47 VLAN service class selection page
5
Select the check box of the priority level (service class) to assign
to the VLAN.
6
Click Next.
A session verification page opens (Figure 42 on page 66).
Release Notes for the Business Policy Switch 2000
72
7
After verifying the information, click Next (or click Back to make changes to
the appropriate pages).
A session confirmation page opens (Figure 37 on page 63).
The number of applications you can select and the number of traffic flows you can
define are dependent on the Business Policy Switch configuration environment.
Refer to Table 12 for a list of filter limitations.
Table 12 QoS Wizard filter limitations
Predefined
applications
(5 maximum)
User-defined
flows
(3 maximum)
VLAN
(1 maximum)
No Gigabit MDAs/Business
Policy Switch only
5
4
3
2
1
0
2
3
3
3
3
3
1
1
1
1
1
1
No Gigabit MDAs/mixed stack
5
4
3
2
1
0
0
0
0
1
2
3
1
1
1
1
1
1
Gigabit/Business Policy Switch
only
5
4
3
2
1
0
0
0
0
1
2
3
1
1
1
1
1
1
Gigabit/mixed stack
3
2
1
0
0
0
0
2
1
1
1
1
MDA/Configuration
209320-A
73
Using the QoS Advanced configuration
The following sections illustrate QoS > QoS Advanced configuration examples
using the Web-based management interface.
It is important that you refer to Using Web-based Management for the Business
Policy Switch 2000 for details to access the Web-based management interface,
directory and page navigation information, and field descriptions.
Note: Nortel Networks recommends that you configure filter and interface
parameters in the order in which the screens are presented in this example.
To configure IP filters, use the following Web-based management pages:
•
•
•
•
Devices > Interface Config (Figure 49 on page 76)
Rules > IP Classification (Figure 50 on page 79)
Actions (Figure 53 on page 82)
Policies (Figure 54 on page 83)
To configure layer 2 filters, use the following Web-based management pages:
•
•
•
•
Devices > Interface Config (Figure 49 on page 76)
Rules > Layer2 Classification (Figure 55 on page 85)
Actions (Figure 53 on page 82)
Policies (Figure 54 on page 83)
When you have your filters configured, use the following Web-based management
pages to assign user priority values, priority and DSCP mapping, and DSCP queue
assignments for both IP and layer 2 interfaces. To keep the QoS configurations
synchronized, the Business Policy Switch dynamically updates changes made to
the Priority Q Assignment, DSCP Mapping, or User Priority Mapping pages.
•
•
•
•
Devices > Priority Q Assignment (Figure 57 on page 88)
Devices > DSCP Mapping (Figure 58 on page 89)
Devices > DSCP Queue Assignment (read-only)
Devices > User Priority Mapping (Figure 60 on page 91)
Release Notes for the Business Policy Switch 2000
74
Setting up IP and layer 2 filters
You create new interface groups only if you want to have a port (or ports)
associated with a new Role Combination (set of ports) other than the default Role
Combinations.
Use the Advanced Interface Configuration page of the Web-based management
tool to create your interface group (Figure 49).
Creating an interface group
To create an interface group:
1
In the Web-based management interface, click the Application > QoS > QoS
Advanced menu option.
The Advanced menu option expands (Figure 48) to display:
•
•
•
•
•
2
Devices
Rules
Actions
Policies
Agent
Click Devices.
The Devices menu option expands to display:
•
•
•
•
•
209320-A
Interface Config
Priority Q Assign
Priority Mapping
DSCP Q Assign
DSCP Mapping
75
Figure 48
3
Web-based management menu page
Click Interface Config.
The Interface Configuration page opens (Figure 49).
Release Notes for the Business Policy Switch 2000
76
Figure 49 Interface Configuration page
The Interface Group Creation section of this page allows you to define groups
of interfaces that are classified using the same policies. You can view your
interface configurations in the read-only Interface Queue Table and the
Interface Group Table.
4
In the Interface Group Creation section, create a new Role Combination.
In the Role Combination field, enter Web Browsing. (Remember, this is an
example. You can enter any string in this field.)
5
In the Set ID field, select 1.
This value specifies that this Interface Group will belong to a 4-port queue set.
Set ID 2 refers to the 2-port queue set of your Business Policy Switch.
209320-A
77
6
In the Interface Class field, choose untrusted.
By selecting untrusted, incoming DSCP values will be changed. Data will not
pass through “as is.” The DSCP value will be used to update IEEE 802.1p
user priority and drop precedence based on values in the DSCP mapping table
if you choose “Use Defaults” in the Set Drop Precedence and Update Priority
fields in the QoS Advanced > Action page (Figure 53 on page 82).
7
Click Submit.
The new entry appears in the Interface Group Table.
Click the modify icon of the new role combination to assign interfaces.
Note: If you delete a role combination, you must remove all ports in the
“Interface Group Assignment page” on page 35.
Refer to Using Web-Based Management for the Business Policy Switch 2000 for
information about adding or deleting interface group members.
To continue the filter creation process with IP filters, proceed to “Defining your IP
filter” on page 78.
To continue the filter creation process with layer 2 filters, proceed to “Defining
your layer 2 filter” on page 84.
Setting up filter matching conditions
Filters are combined into filter groups. Filter groups are then associated with an
interface group. Actions are assigned when you apply a filter group to an interface
group. The actions associated with individual filters can overwrite the default
actions of the port in an interface group.
You create IP filters for IP packets that are to be forwarded through the Business
Policy Switch on specific ingress ports. In each IP packet, there is a differentiated
services (DiffServ) field in the packet header that you can mark for specific
treatment. This field is called the DiffServ code point (DSCP). The DSCP has a
specific value that determines how the packet is treated as it travels through the
network. As each packet is examined it will be forwarded or dropped, depending
on whether or not the filter criteria is matched.
Release Notes for the Business Policy Switch 2000
78
Next you configure filter specifications. The QoS Advanced > Rules > IP
Classification page (Figure 50) or the QoS Advanced > Rules > Layer 2
Classification page (Figure 55 on page 85) allows you to enter matching
conditions for an individual filter. You set up special conditions for packet
processing. In order for packets to be processed, a packet has to match all the
fields you specify.
Defining your IP filter
You use the IP Filter Creation (Figure 50) section of the Rules > IP Classification
page when defining your IP filters.
To define an IP filter:
1
In the Destination Address field, enter 134.177.69.0.
This address is used to match the destination IP address in the packet’s IP
header.
2
In the Destination Address Mask field, enter 255.255.255.0.
This address is the destination subnet mask. A subnet mask includes or
excludes certain values. Subnetworks (or subnets) extend the IP addressing
scheme, allowing you to further divide a network into multiple segments.
3
In the Source Address field, enter 134.177.0.0.
This is the IP address to match against the packet’s source IP address.
4
In the Source Address Mask field, enter 255.255.0.0.
This address is the source subnet mask. A subnet mask includes or excludes
certain values. Subnetworks (or subnets) extend the IP addressing scheme,
allowing you to further divide a network into multiple segments.
5
In the DSCP field, enter 0x20.
This value will match packets with a DSCP of 0x20 (32 decimal value). You
can enter any hexadecimal value from 0x00 (0 decimal value) to 0x3F (63
decimal value). If you choose the default (-1), the DSCP value in the packet
will be ignored. The packet’s DSCP value must be re-marked on untrusted
interfaces.
209320-A
79
6
In the Protocol field, choose TCP from the list.
When you select TCP, you specify that only TCP tagged packets be matched.
If you select Match All, all IP protocols are matched.
7
In the Destination Layer 4 Port field, accept the default (0).
8
In the Source Layer 4 Port field, accept the default (0).
Figure 50 IP Classification page
9
Click Submit.
The new entry appears in the IP Filter Table.
Creating an IP Filter Group Table entry
Now you can create an IP filter group in the IP Filter Group Table section of the IP
Classification page.
Release Notes for the Business Policy Switch 2000
80
To create an IP filter group entry:
1
Click Create Filter Group in the IP Filter Group Table section.
The QoS Advanced IP Classification Group page opens (Figure 51).
Figure 51 IP Classification Group page
2
In the Filter Group Name field, enter IP packet.
This unique identification label distinguishes this filter group from other filter
groups.
3
Click the Group check box in the Filter Group Table to include the entry in the
filter group.
4
Enter the Order number 1.
This step establishes the evaluation order of filters in the group.
5
Click Submit.
The new entry is displayed in the IP Filter Group Table (Figure 52).
Figure 52 IP Filter Group Table page
209320-A
81
Configuring actions
When you assign actions to filters, you specify the type of behavior you want a
policy to apply to a flow of IP and IEEE 802 packets. Actions applied to filters
establish packet-specific criteria that determine how a packet is to be processed.
You specify the actions associated with specific IP, IEEE 802, and other filter
groups. When filters match incoming packets, the actions are performed on those
packets. Filters can be configured to re-mark packets, to change priorities and loss
sensitivity (drop precedence), or to drop packets.
To configure an action:
1
In the Name field of the Advanced > Action Creation section (Figure 53),
enter Generic.
2
In the Drop field, select False.
Packets are not dropped when you select False.
If you select True, packets will be dropped.
3
In the Update DSCP field, enter 0x2f.
This entry changes the DSCP value to the decimal value 47 in the match
packet.
4
In the Set Drop Precedence field, select 8.
Selecting 1 specifies a low packet drop precedence.
5
In the Update Priority field, select Priority 1.
Priority 1 specifies a low priority.
6
Click Submit.
The new entry is displayed in the Action Table.
In summary, you have configured a new action named Generic (Figure 53). This
action specifies a high drop precedence, a low user priority, and a DSCP value of
0x2f for packets that match a filter associated with this action.
Release Notes for the Business Policy Switch 2000
82
Figure 53 Action page
Configuring policies
Now you are ready to configure a policy. A policy is a group of filters and the
associated actions. Policies are applied according to the precedence order that you
assign in the QoS Advanced > Policies page.
Policies are not modifiable. If you want to change a policy, you must delete the
entry in the Policy Table (refer to “Policies page” on page 83) and reenter the
information.
To configure a policy:
1
In the Target Name field of the Policies page (Figure 54), enter IP policy.
This entry is a unique name to identify this target.
209320-A
83
Figure 54 Policies page
2
In the Filter Group Type, choose IP Filter Group.
This entry is the filter group that this policy will be associated with.
3
In the Filter Group field, select IP packet.
This entry is the filter group you created in the IP Classification Group page,
IP Filter Group Table (Figure 52 on page 80).
4
In the Role Combination field, select Web Browsing.
This entry is the unique Role Combination that you created in “Setting up IP
and layer 2 filters” on page 74.
5
In the Order field, enter 1.
Nortel Networks recommends that you consider an order numbering strategy
(for the values in the Order field) as you configure policies. The policies in the
Policy Table are arranged in ascending order according to value in the Order
column. By establishing a policy ordering scheme in multiples of, for
example, 10 (Order 10, Order 20, Order 30, Order 40, and so on), you are able
to insert policies in the appropriate filter precedence location and still retain
the precedence of the remaining policies.
Release Notes for the Business Policy Switch 2000
84
6
In the Action field, select Generic.
7
Click Submit.
The new entry is displayed in the Policy Table.
In summary, you configured a QoS policy called IP policy. This policy applies a
combination of packet filtering (matching) criteria and actions to individual
interfaces (ports) in the hardware. You specified that this policy will use the IP
packet filter group with the elements that you specified in the “IP Classification
Group page” on page 80. IP policy will use the Role Combination Web Browsing
(a 4-port queue set on trusted ports) that you specified in the “Interface
Configuration page” on page 76 and Generic actions that you defined in “Action
page” on page 82. IP policy specifies the type of behavior you want to apply to a
flow of packets.
Defining your layer 2 filter
You can configure layer 2 filters by defining IEEE 802-based parameters and
selective layer 3 and layer 4 parameters. Layer 2 filter groups are defined by
specifying the layer 2 filter to be included in the given filter group.
To configure a layer 2 filter:
1
Follow the procedure to configure your filter as outlined in the Devices >
Interface Configuration page (Figure 49 on page 76). Use the same values.
2
Select Rules > Layer2 Classification.
The Layer2 Classification page opens (Figure 55).
209320-A
85
Figure 55 Layer 2 Classification page
3
In the VLAN ID field, specify VLAN ID 1.
This filter will match packets in VLAN 1.
4
In the VLAN Tag Required field, select Tagged Only.
Only packets that have an IEEE 802.1p tag will match this layer 2 filter.
5
In the EtherType field, select Ignore.
All EtherTypes will be ignored.
6
In the User Priority field, select 0, 1, 2.
Only packets that have IEEE 802.1p user priority 0, 1, 2 will match this filter.
7
In the DSCP field, accept the default (-1).
Any values that are in the DSCP field will be ignored.
8
In the Protocol field, select Match All.
All IP protocols will be matched against the packet’s IP protocol field.
Release Notes for the Business Policy Switch 2000
86
9
In the Destination Layer 4 Port Min field, accept the default (0).
This value is the minimum that the packet’s layer 4 destination port number
can have.
10 In the Destination Layer 4 Port Max field, accept the default (65535).
This value is the maximum that the packet’s layer 4 destination port number
can have.
11 In the Source Layer 4 Port Min field, accept the default (0).
This value is the minimum that the packet’s layer 4 source port number can
have.
12 In the Source Layer 4 Port Max field, accept the default (65535).
This value is the maximum that the packet’s layer 4 source port number can
have.
13 Click Submit.
The new entry is displayed in the Layer2 Filter Table.
Creating a Layer2 Filter Group Table entry
Now you can create a layer 2 filter group in the Layer2 Filter Group Table section
of the Layer2 Classification page.
To create a layer 2 filter group entry:
1
Click Create Filter Group in the Layer2 Filter Group Table section.
The Layer2 Group page opens (Figure 56).
209320-A
87
Figure 56 Layer2 Group page
2
In the Filter Group Name field, enter layer2 filter.
This entry is a unique identification label to distinguish this filter group from
other filter groups.
3
Click the Group check box in the Filter Group Table to include the entry in the
filter group.
4
Enter the Order number 1.
This entry establishes the evaluation order of filters in the group.
5
Click Submit.
The new entry is displayed in the Layer2 Filter Group Table (Figure 52).
Follow the procedure to configure your filter as outlined in the Actions and
Policies pages (Figure 53 on page 82 and Figure 54 on page 83). Use the same
values as the IP examples.
Release Notes for the Business Policy Switch 2000
88
Assigning user priority queue assignments
Your next step is to assign user priority values to a queue for each interface with a
specific queue set. This information is used for assigning egress traffic to
outbound queues. To configure user priority:
1
Choose Devices > Priority Q Assign.
The User Priority Assignment page opens (Figure 57).
Figure 57 User Priority Queue Assignment page
2
In the Queue Set field in the User Priority Assignment (View By) section,
select 1.
This value is the queue set you want to modify.
3
Click Submit.
The User Priority Assignment Table is updated with the queue set you
requested.
209320-A
89
4
Change the value of Priority 5 from 2 to 1.
Note: If you want to change the traffic class prioritization on a BayStack
450 switch in a mixed stack configuration, use the User Priority Queue
Assignment page for queue set 2.
Note: Clicking Submit in the User Priority Assignment Table section
results in a system reset for queue set 2.
Verifying DSCP mapping
Next map the DSCP to an IEEE 802.1p user priority and drop precedence.
To map the DSCP to a user priority:
1
Click the Modify icon of DSCP 0x1.
The DSCP Mapping page opens (Figure 58) for DSCP 0x1.
Figure 58 DSCP Mapping page
2
In the IEEE 802.1 User Priority field, choose 1.
3
In the Drop Precedence field, choose 3.
4
In the Service Class field, choose Standard.
Release Notes for the Business Policy Switch 2000
90
5
Click Submit.
The DSCP Mapping page opens with the updated information (Figure 59).
Figure 59 DSCP Mapping page
Assigning user priority mapping
This page allows you to map user priority to a specific DSCP.
To configure IEEE 802.1p user priority to DSCP mapping:
1
Select Devices > Priority Mapping.
The User Priority Mapping page opens (Figure 60).
209320-A
91
Figure 60 User Priority Mapping page
2
Change the DSCP value for IEEE 802.1 User Priority 2 to 0x0.
3
Click Submit.
Note: Clicking Submit in the Priority Mapping Table results in a system
reset.
Release Notes for the Business Policy Switch 2000
92
Known limitations
The following limitations are known to exist:
•
•
•
209320-A
BPS2000-4TX MDA — If a BPS2000-4TX MDA port and link partner are
both in autonegotiation mode, then the BPS2000-4TX MDA port will be
unable to negotiate to full-duplex operation. To get full-duplex connection,
use a fixed full-duplex configuration for the BPS2000-4TX MDA ports. Refer
to Using the Business Policy Switch 2000 for information about MDAs.
Gigabit MDA — When viewing Active Phy information from the console
interface, the console must be connected to the unit containing the Gigabit
MDA (the BayStack 450-1SR and the BayStack 450-1LR) to display the
appropriate Phy information. Incorrect information maybe displayed if you
connect to a unit not containing a Gigabit MDA.
Mixed stacks (hybrid stacks) — In order to upgrade BayStack 410 and
BayStack 450 software in a hybrid stack, the stack must be fully redundant.
All cables in the stack must be installed and operating properly. If the cables
are not installed properly, the BayStack units will fail to upgrade. A message
is displayed on consoles connected to BayStack 410 and BayStack 450
switches: “Primload Error - 2009 Switch will reset in 5 seconds. . .”