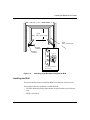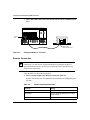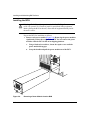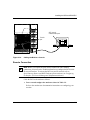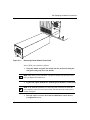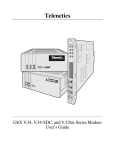
1
Installing and Maintaining
BN Platforms
Part No. 109352-E Rev. A
December 1996
4401 Great America Parkway
Santa Clara, CA 95054
8 Federal Street
Billerica, MA 01821
Copyright © 1988–1996 Bay Networks, Inc.
All rights reserved. Printed in the USA. December 1996.
The information in this document is subject to change without notice. The statements, configurations, technical data, and
recommendations in this document are believed to be accurate and reliable, but are presented without express or implied
warranty. Users must take full responsibility for their applications of any products specified in this document. The
information in this document is proprietary to Bay Networks, Inc.
The software described in this document is furnished under a license agreement and may only be used in accordance with the
terms of that license. A summary of the Software License is included in this document.
Restricted Rights Legend
Use, duplication, or disclosure by the United States Government is subject to restrictions as set forth in subparagraph
(c)(1)(ii) of the Rights in Technical Data and Computer Software clause at DFARS 252.227-7013.
Notice for All Other Executive Agencies
Notwithstanding any other license agreement that may pertain to, or accompany the delivery of, this computer software, the
rights of the United States Government regarding its use, reproduction, and disclosure are as set forth in the Commercial
Computer Software-Restricted Rights clause at FAR 52.227-19.
Trademarks of Bay Networks, Inc.
ACE, AFN, BCN, BLN, BN, CN, FRE, LN, Optivity, SynOptics, SynOptics Communications, Wellfleet and the Wellfleet
logo are registered trademarks and AN, ANH, ASN, BaySIS, BayStack, BCNX, BLNX, BNX, EZ Internetwork, EZ LAN,
FN, PathMan, PhonePlus, PPX, Quick2Config, RouterMan, SPEX, Bay Networks, Bay Networks Press, the Bay Networks
logo and the SynOptics logo are trademarks of Bay Networks, Inc.
Third-Party Trademarks
All other trademarks and registered trademarks are the property of their respective owners.
Statement of Conditions
In the interest of improving internal design, operational function, and/or reliability, Bay Networks, Inc. reserves the right to
make changes to the products described in this document without notice.
Bay Networks, Inc. does not assume any liability that may occur due to the use or application of the product(s) or circuit
layout(s) described herein.
Portions of the code in this software product are Copyright © 1988, Regents of the University of California. All rights
reserved. Redistribution and use in source and binary forms of such portions are permitted, provided that the above copyright
notice and this paragraph are duplicated in all such forms and that any documentation, advertising materials, and other
materials related to such distribution and use acknowledge that such portions of the software were developed by the
University of California, Berkeley. The name of the University may not be used to endorse or promote products derived from
such portions of the software without specific prior written permission.
SUCH PORTIONS OF THE SOFTWARE ARE PROVIDED “AS IS” AND WITHOUT ANY EXPRESS OR IMPLIED
WARRANTIES, INCLUDING, WITHOUT LIMITATION, THE IMPLIED WARRANTIES OF MERCHANTABILITY
AND FITNESS FOR A PARTICULAR PURPOSE.
In addition, the program and information contained herein are licensed only pursuant to a license agreement that contains
restrictions on use and disclosure (that may incorporate by reference certain limitations and notices imposed by third parties).
USA Requirements Only
Federal Communications Commission (FCC) Compliance Notice: Radio Frequency Notice
This equipment generates, uses, and can radiate radio-frequency energy. If you do not install and use this equipment
according to the instruction manual, this product may interfere with radio communications. This product has been
tested and found to comply with the limits for a Class A computing device, pursuant to Subpart J of Part 15 of FCC
Rules. Operation is subject to the following two conditions: (1) this device may not cause harmful interference, and
(2) this device must accept any interference received, including interference that may cause undesired operation.
Operating this equipment in a residential area is likely to interfere with radio communications; in which case, the user,
at his/her own expense, must correct the interference.
Shielded-compliant cables must be used with this unit to ensure compliance with the Class A limits.
EN 55 022 Declaration of Conformance
This is to certify that the Bay Networks products in this book are shielded against the generation of radio interference
in accordance with the application of Council Directive 89/336/EEC, Article 4a. Conformity is declared by the
application of EN 55 022:1987 Class A (CISPR 22:1985/BS 6527:1988).
EN 55 022 Declaration of Conformance
This is to certify that the Bay Networks products in this book are shielded against the generation of radio interference
in accordance with the application of Council Directive 89/336/EEC, Article 4a. Conformity is declared by the
application of EN 55 022:1987 Class B (CISPR 22:1985/BS 6527:1988).
Bay Networks, Inc.
4401 Great America Parkway, Santa Clara, CA 95054
8 Federal Street, Billerica, MA 01821
Japan/Nippon Requirements Only
Voluntary Control Council for Interference (VCCI) Statement
Voluntary Control Council for Interference (VCCI) Statement
This equipment is in the 1st category (information equipment to be used in commercial and/or industrial areas) and
conforms to the standards set by the Voluntary Control Council for Interference by Data Processing Equipment and
Electronic Office Machines that are aimed at preventing radio interference in commercial and/or industrial areas.
Consequently, when this equipment is used in a residential area or in an adjacent area thereto, radio interference may
be caused to equipment such as radios and TV receivers.
Compliance with the applicable regulations is dependent upon the use of shielded cables. The user is responsible for
procuring the appropriate cables. Read instructions for correct handling.
Bay Networks, Inc.
4401 Great America Parkway, Santa Clara, CA 95054
8 Federal Street, Billerica, MA 01821
Canada Requirements Only
Canada CS-03 Rules and Regulations
Note: The Canadian Department of Communications label identifies certified equipment. The certification means that
the equipment meets certain telecommunications network protective operations and safety requirements. The
Department does not guarantee the equipment will operate to the user's satisfaction.
Before installing this equipment, users should ensure that it is permissible to be connected to the facilities of the local
telecommunications company. The equipment must also be installed using an acceptable method of connection. In
some cases, the company's inside wiring associated with a single line individual service may be extended by means of
a certified connector assembly (telephone extension cord). The customer should be aware that compliance with the
above conditions may not prevent the degradation of service in some situations.
Repairs to certified equipment should be made by an authorized Canadian maintenance facility designated by the
supplier. Any repairs or alterations made by the user to this equipment orequipment malfunctions, may give the
telecommunications company cause to request the user to disconnect the equipment.
Users should ensure for their own protection that the electrical ground connections of the power utility, telephone lines
and internal metallic water pipe system, if present, are connected together. This precaution may be particularly
important in rural areas.
Caution: Users should not attempt to make such connections themselves, but should contact the appropriate electric
inspection authority, or electrician, as appropriate.
Canada CS-03 — Règles et règlements
Note: L’étiquette du ministère des Communications du Canada indique que l’appareillage est certifié, c’est-à-dire
qu’il respecte certaines exigences de sécurité et de fonctionnement visant les réseaux de télécommunications.Le
ministère ne garantit pas que l’appareillage fonctionnera à la satisfaction de l’utilisateur.
Avant d’installer l’appareillage, s’assurer qu’il peut être branché aux installations du service de télécommunications
local. L’appareillage doit aussi être raccordé selon des méthodes acceptées. Dans certains cas, le câblage interne du
service de télécommunications utilisé pour une ligne individuelle peut être allongé au moyen d’un connecteur certifié
(prolongateur téléphonique). Le client doit toutefois prendre note qu’une telle installation n’assure pas un service
parfait en tout temps.
Les réparations de l’appareillage certifié devraient être confiées à un service d’entretien canadien désigné par le
fournisseur. En cas de réparation ou de modification effectuées par l’utilisateur ou de mauvais fonctionnement de
l’appareillage, le service de télécommunications peut demander le débranchment de l’appareillage.
Pour leur propre sécurité, les utilisateurs devraient s’assurer que les mises à la terre des lignes de distribution
d’électricité, des lignes téléphoniques et de la tuyauterie métallique interne sont raccordées ensemble. Cette mesure de
sécurité est particulièrement importante en milieu rural.
Attention: Les utilisateurs ne doivent pas procéder à ces raccordements eux-mêmes mais doivent plutôt faire appel
aux pouvoirs de réglementation en cause ou à un électricien, selon le cas.
Bay Networks, Inc.
4401 Great America Parkway, Santa Clara, CA 95054
8 Federal Street, Billerica, MA 01821
Canada Requirements Only (continued)
D. O. C. Explanatory Notes: Equipment Attachment Limitations
The Canadian Department of Communications label identifies certified equipment. This certification meets certain
telecommunication network protective, operational and safety requirements. The department does not guarantee the
equipment will operate to the users satisfaction.
Before installing the equipment, users should ensure that it is permissible to be connected to the facilities of the local
telecommunications company. The equipment must also be installed using an acceptable method of connection. In
some cases, the company’s inside wiring associated with a single line individual service may be extended by means of
a certified connector assembly (telephone extension cord). The customer should be aware that compliance with the
above condition may not prevent degradation of service in some situations.
Repairs to certified equipment should be made by an authorized Canadian maintenance facility designated by the
supplier. Any repairs or alterations made by the user to this equipment, or equipment malfunctions, may give the
telecommunications company cause to request the user to disconnect the equipment.
Users should ensure for their own protection that the electrical ground connections of the power utility, telephone lines
and internal metallic water pipe system, if present, are connected together. This precaution may be particularly
important in rural areas.
Caution: Users should not attempt to make such connections themselves, but should contact the appropriate electrical
inspection authority, or electrician, as appropriate.
Notes explicatives du ministère des Communications: limites visant les accessoires
L’étiquette du ministère des Communications du Canada indique que l’appareillage est certifié, c’est-à-dire qu’il
respecte certaines exigences de sécurité et de fonctionnement visant les réseaux de télécommunications. Le ministère
ne garantit pas que l’appareillage fonctionnera à la satisfaction de l’utilisateur.
Avant d’installer l’appareillage, s’assurer qu’il peut être branché aux installations du service de télécommunications
local. L’appareillage doit aussi être raccordé selon des méthodes acceptées. Dans certains cas, le câblage interne du
service de télécommunications utilisé pour une ligne individuelle peut être allongé au moyen d’un connecteur certifié
(prolongateur téléphonique). Le client doit toutefois prendre note qu’une telle installation n’assure pas un service
parfait en tout temps.
Les réparations de l’appareillage certifié devraient être confiées à un service d’entretien canadien désigné par le
fournisseur. En cas de réparation ou de modification effectuées par l’utilisateur ou de mauvais fonctionnement de
l’appareillage, le service de télécommunications peut demander le débranchment de l’appareillage.
Pour leur propre sécurité, les utilisateurs devraient s’assurer que les mises à la terre des lignes de distribution
d’électricité, des lignes téléphoniques et de la tuyauterie métallique interne sont raccordées ensemble. Cette mesure de
sécurité est particulièrement importante en milieu rural.
Attention: Les utilisateurs ne doivent pas procéder à ces raccordements eux-mêmes mais doivent plutôt faire appel
aux pouvoirs de réglementation en cause ou à un électricien, selon le cas.
Bay Networks, Inc.
4401 Great America Parkway, Santa Clara, CA 95054
8 Federal Street, Billerica, MA 01821
Canada Requirements Only (continued)
Canadian Department of Communications Radio Interference Regulations
This digital apparatus (Access Feeder Node, Access Link Node, Access Node, Access Stack Node, Backbone
Concentrator Node, Backbone Concentrator Node Switch, Backbone Link Node, Backbone Link Node Switch,
Concentrator Node, Feeder Node, Link Node) does not exceed the Class A limits for radio-noise emissions from
digital apparatus as set out in the Radio Interference Regulations of the Canadian Department of Communications.
Réglement sur le brouillage radioélectrique du ministère des Communications
Cet appareil numérique (Access Feeder Node, Access Link Node, Access Node, Access Stack Node, Backbone
Concentrator Node, Backbone Concentrator Node Switch, Backbone Link Node, Backbone Link Node Switch,
Concentrator Node, Feeder Node, Link Node) respecte les limites de bruits radioélectriques visant les appareils
numériques de classe A prescrites dans le Réglement sur le brouillage radioélectrique du ministère des
Communications du Canada.
Bay Networks, Inc.
4401 Great America Parkway, Santa Clara, CA 95054
8 Federal Street, Billerica, MA 01821
T1 Service Compliance Statements
T1 Service
NOTE:
This T1 Service notice applies to you only if you have received a single or dual port Multi-Channel T1
(MCT1) Link Module (which provides an internal CSU).
This equipment complies with Part 68 of FCC Rules. Please note the following:
1.
You are required to request T1 service from the telephone company before you connect the CSU to a T1 network.
When you request T1 service, you must provide the telephone company with the following data:
•
The Facility Interface Code
Provide the telephone company with both codes below:
—
—
04DU9-B (1.544 MB D4 framing format)
04DU9-C (1.544 MB ESF format)
The telephone company will select the code it has available.
•
•
•
The Service Order Code: 6.0F
The required USOC jack: RJ48C
The make, model number, and FCC Registration number of the CSU.
2.
Your telephone company may make changes to its facilities, equipment, operations, or procedures that could
affect the proper functioning of your equipment. The telephone company will notify you in advance of such
changes to give you an opportunity to maintain uninterrupted telephone service.
3.
If your CSU causes harm to the telephone network, the telephone company may temporarily discontinue your
service. If possible, they will notify you in advance, but if advance notice is not practical, you will be notified as
soon as possible and will be informed of your right to file a complaint with the FCC.
4.
If you experience trouble with the CSU, please contact Bay Networks Technical Response Center in your area for
service or repairs. Repairs should be performed only by service personnel authorized by Bay Networks, Inc.
United States
Valbonne, France
Sydney, Australia
Tokyo, Japan
5.
1-800-2LAN-WAN
(33) 92-966-968
(61) 2-903-5800
(81) 3-328-005
You are required to notify the telephone company when you disconnect the CSU from the network and when you
disconnect the BCNX or BLNX from the network.
Bay Networks, Inc.
4401 Great America Parkway, Santa Clara, CA 95054
8 Federal Street, Billerica, MA 01821
Bay Networks Software License
Note: This is Bay Networks basic license document. In the absence of a
software license agreement specifying varying terms, this license — or the
license included with the particular product — shall govern licensee’s use of
Bay Networks software.
This Software License shall govern the licensing of all software provided to licensee by Bay Networks (“Software”).
Bay Networks will provide licensee with Software in machine-readable form and related documentation
(“Documentation”). The Software provided under this license is proprietary to Bay Networks and to third parties from
whom Bay Networks has acquired license rights. Bay Networks will not grant any Software license whatsoever, either
explicitly or implicitly, except by acceptance of an order for either Software or for a Bay Networks product
(“Equipment”) that is packaged with Software. Each such license is subject to the following restrictions:
1.
Upon delivery of the Software, Bay Networks grants to licensee a personal, nontransferable, nonexclusive license
to use the Software with the Equipment with which or for which it was originally acquired, including use at any
of licensee’s facilities to which the Equipment may be transferred, for the useful life of the Equipment unless
earlier terminated by default or cancellation. Use of the Software shall be limited to such Equipment and to such
facility. Software which is licensed for use on hardware not offered by Bay Networks is not subject to restricted
use on any Equipment, however, unless otherwise specified on the Documentation, each licensed copy of such
Software may only be installed on one hardware item at any time.
2.
Licensee may use the Software with backup Equipment only if the Equipment with which or for which it was
acquired is inoperative.
3.
Licensee may make a single copy of the Software (but not firmware) for safekeeping (archives) or backup
purposes.
4.
Licensee may modify Software (but not firmware), or combine it with other software, subject to the provision
that those portions of the resulting software which incorporate Software are subject to the restrictions of this
license. Licensee shall not make the resulting software available for use by any third party.
5.
Neither title nor ownership to Software passes to licensee.
6.
Licensee shall not provide, or otherwise make available, any Software, in whole or in part, in any form, to any
third party. Third parties do not include consultants, subcontractors, or agents of licensee who have licensee’s
permission to use the Software at licensee’s facility, and who have agreed in writing to use the Software only in
accordance with the restrictions of this license.
7.
Third-party owners from whom Bay Networks has acquired license rights to software that is incorporated into
Bay Networks products shall have the right to enforce the provisions of this license against licensee.
8.
Licensee shall not remove or obscure any copyright, patent, trademark, trade secret, or similar intellectual
property or restricted rights notice within or affixed to any Software and shall reproduce and affix such notice on
any backup copy of Software or copies of software resulting from modification or combination performed by
licensee as permitted by this license.
Bay Networks, Inc.
4401 Great America Parkway, Santa Clara, CA 95054
8 Federal Street, Billerica, MA 01821
Bay Networks Software License (continued)
9.
Licensee shall not reverse assemble, reverse compile, or in any way reverse engineer the Software. [Note: For
licensees in the European Community, the Software Directive dated 14 May 1991 (as may be amended from time
to time) shall apply for interoperability purposes. Licensee must notify Bay Networks in writing of any such
intended examination of the Software and Bay Networks may provide review and assistance.]
10. Notwithstanding any foregoing terms to the contrary, if licensee licenses the Bay Networks product “Site
Manager,” licensee may duplicate and install the Site Manager product as specified in the Documentation. This
right is granted solely as necessary for use of Site Manager on hardware installed with licensee’s network.
11. This license will automatically terminate upon improper handling of Software, such as by disclosure, or Bay
Networks may terminate this license by written notice to licensee if licensee fails to comply with any of the
material provisions of this license and fails to cure such failure within thirty (30) days after the receipt of written
notice from Bay Networks. Upon termination of this license, licensee shall discontinue all use of the Software
and return the Software and Documentation, including all copies, to Bay Networks.
12. Licensee’s obligations under this license shall survive expiration or termination of this license.
Bay Networks, Inc.
4401 Great America Parkway, Santa Clara, CA 95054
8 Federal Street, Billerica, MA 01821
Contents
About This Guide
Audience ..........................................................................................................................xix
Conventions ..................................................................................................................... xx
Acronyms .........................................................................................................................xxi
Ordering Bay Networks Publications ..............................................................................xxii
Technical Support and Online Services
Bay Networks Customer Service ...................................................................................xxiv
Bay Networks Information Services ................................................................................xxv
World Wide Web .......................................................................................................xxv
Customer Service FTP .............................................................................................xxv
Support Source CD .................................................................................................xxvi
CompuServe ...........................................................................................................xxvi
InfoFACTS .............................................................................................................. xxvii
How to Get Help ..................................................................................................... xxvii
Chapter 1
Installing the Backbone Link Node
Backbone Link Node Overview .......................................................................................1-2
Preparing for Installation .................................................................................................1-3
Shipment Contents ...................................................................................................1-3
Cables ......................................................................................................................1-4
Additional Equipment ...............................................................................................1-4
Site Requirements ....................................................................................................1-5
Electrical Requirements .....................................................................................1-5
Space Requirements .........................................................................................1-6
Environmental Requirements ............................................................................1-7
Setting Up the Backbone Link Node ...............................................................................1-7
Attaching Angle Brackets .........................................................................................1-7
Installing the BLN .....................................................................................................1-9
109352-E Rev. A
xi
Powering On the BLN ...................................................................................................1-12
LED Activation Sequence ......................................................................................1-13
Establishing a Local or Remote Connection to the BLN ...............................................1-14
Local Connection ...................................................................................................1-14
Remote Connection ...............................................................................................1-15
Chapter 2
Installing the Backbone Link Node-2
Backbone Link Node-2 Overview ...................................................................................2-2
Preparing for Installation .................................................................................................2-3
Shipment Contents ...................................................................................................2-3
Cables ......................................................................................................................2-4
Additional Equipment ...............................................................................................2-4
Site Requirements ....................................................................................................2-5
Electrical Requirements .....................................................................................2-5
Space Requirements .........................................................................................2-6
Environmental Requirements ............................................................................2-7
Setting Up the Backbone Link Node-2 ...........................................................................2-7
Attaching Angle Brackets .........................................................................................2-7
Installing the BLN-2 ................................................................................................2-11
Powering On the BLN-2 ................................................................................................2-13
LED Activation Sequence ......................................................................................2-14
Establishing a Local or Remote Connection to the BLN-2 ...........................................2-15
Local Connection ...................................................................................................2-15
Remote Connection ...............................................................................................2-16
Chapter 3
Installing the BCN and BCN RLC
Backbone Concentrator Node Overview ........................................................................3-2
Preparing for Installation .................................................................................................3-3
Shipment Contents ...................................................................................................3-4
Cables ......................................................................................................................3-4
Additional Equipment ...............................................................................................3-5
Site Requirements ....................................................................................................3-5
Electrical Requirements .....................................................................................3-6
Space Requirements .........................................................................................3-7
xii
109352-E Rev. A
Environmental Requirements ............................................................................3-8
Setting Up the Backbone Concentrator Node ................................................................3-8
Attaching Angle Brackets .........................................................................................3-8
Installing the BCN ..................................................................................................3-12
Powering On the BCN or BCN RLC .............................................................................3-15
LED Activation Sequence ......................................................................................3-17
Establishing a Local or Remote Connection to the BCN ..............................................3-20
Local Connection ...................................................................................................3-20
Remote Connection ...............................................................................................3-21
Chapter 4
Accessing the Interior
Removing and Replacing the Front Bezel ......................................................................4-2
Attaching the Antistatic Wrist Strap ................................................................................4-5
Removing and Replacing the EMC Shield .....................................................................4-6
Removing and Installing an Air Flow Module .................................................................4-9
Chapter 5
Hot-Swapping Hardware Components
Replacing Flash and PCMCIA SRAM Memory Cards ....................................................5-2
Protecting Memory Card Files ........................................................................................5-5
Replacing PCMCIA SRAM Memory Card Batteries .......................................................5-6
Replacing a Link Module or SRM-L ................................................................................5-7
Replacing a Routing Engine Module or SRM-F ............................................................5-12
Replacing a Power Module ...........................................................................................5-18
Replacing the BLN-2 Power Module ......................................................................5-20
Replacing the BCN Power Module .........................................................................5-21
Replacing a Fan Tray in a BLN-2 ..................................................................................5-23
Chapter 6
Switches and LEDs
Front Panel .....................................................................................................................6-1
Reset Switch ............................................................................................................6-2
Front-Panel LEDs .....................................................................................................6-2
620-Watt Power Module LED .........................................................................................6-3
109352-E Rev. A
xiii
Appendix A
Dial-Up Services Modems
Adtran DSU III AR ......................................................................................................... A-2
Codex 3260 ................................................................................................................... A-3
Codex 3261 Fast ........................................................................................................... A-4
Multi-Tech Multi-Modem ................................................................................................ A-5
NEC N6450 Data Service Unit ...................................................................................... A-6
NEC N963E Plus (RS232) ............................................................................................. A-7
Telebit T3000 ................................................................................................................. A-8
Telebit T3000 (continued) .............................................................................................. A-9
Tylink SNS 4000 (V.35 ISDN PRI DSU) ....................................................................... A-10
Index
xiv
109352-E Rev. A
Figures
Figure 1-1.
Figure 1-2.
Figure 1-3.
Figure 1-4.
Figure 1-5.
Figure 1-6.
Figure 2-1.
Backbone Link Node (BLN) .....................................................................1-2
Attaching Angle Brackets to Support the BLN .........................................1-9
Removing the Front Bezel from the BLN ...............................................1-10
Mounting the BLN to the Rack ...............................................................1-11
BLN Front-Panel LEDs ...........................................................................1-13
Cabling the BLN to a Console ................................................................1-15
Backbone Link Node-2 (BLN-2) ...............................................................2-2
Figure 2-2.
Figure 2-3.
Figure 2-4.
Figure 2-5.
Figure 2-6.
Figure 2-7.
Figure 3-1.
Figure 3-2.
Figure 3-3.
Figure 3-4.
Figure 3-5.
Figure 3-6.
Figure 3-7.
Figure 3-8.
Figure 3-9.
Figure 3-10.
Figure 4-1.
Figure 4-2.
Figure 4-3.
Figure 4-4.
Figure 4-5.
Figure 4-6.
Locating the Mounting Holes ...................................................................2-9
Attaching Angle Brackets to Support the BLN-2 ....................................2-10
Removing the Front Bezel from the BLN-2 ............................................2-11
Mounting the BLN-2 to the Rack ............................................................2-12
BLN-2 Front-Panel LEDs .......................................................................2-14
Cabling the BLN-2 to a Console ............................................................2-16
Backbone Concentrator Node (BCN) .......................................................3-3
Locating the Mounting Holes ...................................................................3-9
Attaching Brackets to Support the BCN .................................................3-11
Removing a Power Module from the BCN .............................................3-12
Removing the Front Bezel from the BCN ...............................................3-13
Mounting the BCN to the Rack ..............................................................3-14
BCN and BCN RLC Power Systems ......................................................3-16
BCN RLC Power Source and Switches .................................................3-17
BCN Front-Panel LEDs ..........................................................................3-18
Cabling the BCN to a Console ...............................................................3-21
Removing the BLN Front Bezel ................................................................4-2
Removing the BLN-2 Front Bezel ............................................................4-3
Removing the Front Bezel from the BCN .................................................4-4
Connecting the Wrist Strap Jack to the Antistatic Receptacle .................4-6
BLN and BCN EMC Shields .....................................................................4-8
Air Flow Module Installed in a Hardware Platform ...................................4-9
109352-E Rev. A
xv
Figure 4-7.
Figure 4-8.
Figure 5-1.
Figure 5-2.
Figure 5-3.
Figure 5-4.
Figure 5-5.
Figure 5-6.
Figure 5-7.
Figure 5-8.
Figure 5-9.
Figure 5-10.
Figure 5-11.
Figure 5-12.
Figure 5-13.
Figure 6-1.
Figure 6-2.
xvi
Inserting or Removing an Air Flow Module ............................................4-10
Grasping the Air Flow Module ................................................................4-11
Removing a Flash or PCMCIA SRAM Memory Card ..............................5-4
Memory Card Read-Write Protect Switch ................................................5-6
Link Modules and the SRM-L in a BLN ....................................................5-9
Link Modules and the SRM-L in a BLN-2 ...............................................5-10
Link Modules and the SRM-L in a BCN .................................................5-11
Routing Engine Modules and the SRM-F in a BLN ................................5-13
Routing Engine Modules and the SRM-F in a BLN-2 ............................5-14
Routing Engine Modules and the SRM-F in a BCN ...............................5-15
Location of Power Switch on FRE/FRE-2 Module and SRM-F ..............5-16
Removing a Power Module from a BLN-2 ..............................................5-20
Removing a Power Module from a BCN ................................................5-22
Double-Fan Tray in the BLN-2 ................................................................5-24
Single-Fan Trays in the BLN-2 ...............................................................5-25
Front-Panel LEDs .....................................................................................6-1
620-Watt Power Module Power OK LED ..................................................6-4
109352-E Rev. A
Tables
Table 1-1.
Table 1-2.
Table 1-3.
Table 1-4.
Table 1-5.
Table 1-6.
Table 1-7.
BLN Shipment Contents ..........................................................................1-3
Tools and Equipment You Supply .............................................................1-4
Wall Receptacle Requirements ................................................................1-5
BLN Dimensions ......................................................................................1-6
BLN Thermal Output and Air Plenum Requirements ...............................1-6
Total Space Required for BLN .................................................................1-6
Environmental Requirements ...................................................................1-7
Table 1-8.
Table 1-9.
Table 2-1.
Table 2-2.
Table 2-3.
Table 2-4.
Table 2-5.
Table 2-6.
Table 2-7.
Table 2-8.
Table 2-9.
Table 3-1.
Table 3-2.
Table 3-3.
Table 3-4.
Table 3-5.
Table 3-6.
Table 3-7.
Table 3-8.
Table 3-9.
Table 5-1.
Table 5-2.
Console Operating Parameters ..............................................................1-14
Modem Operating Parameters ...............................................................1-15
BLN-2 Shipment Contents .......................................................................2-3
Tools and Equipment You Supply .............................................................2-4
Wall Receptacle Requirements ................................................................2-5
BLN-2 Dimensions ...................................................................................2-6
BLN-2 Thermal Output and Air Plenum Requirements ............................2-6
Total Space Required for BLN-2 ..............................................................2-6
Environmental Requirements ...................................................................2-7
Console Operating Parameters ..............................................................2-15
Modem Operating Parameters ...............................................................2-16
BCN Shipment Contents ..........................................................................3-4
Tools and Equipment You Supply .............................................................3-5
Wall Receptacle Requirements ................................................................3-6
BCN Dimensions ......................................................................................3-7
BCN Thermal Output and Air Plenum Requirements ..............................3-7
Total Space Required for BCN .................................................................3-7
Environmental Requirements ...................................................................3-8
Console Operating Parameters ..............................................................3-20
Modem Operating Parameters ...............................................................3-22
User-Serviceable Components ................................................................5-1
PCMCIA SRAM Battery ...........................................................................5-6
109352-E Rev. A
xvii
Table 6-1.
xviii
Front-Panel LEDs .....................................................................................6-2
109352-E Rev. A
About This Guide
If you are responsible for installing and configuring Bay Networks Backbone
Node hardware platforms, read this guide for installation instructions and
user-serviceable hardware procedures for the Backbone Node family of
high-speed hardware platforms (BLN®, BLN-2, BCN,®, and BCN RLC).
This guide describes how to
•
•
•
•
•
•
•
Prepare for hardware platforms installation
Install the hardware platforms
Access the hardware platforms locally and remotely
Power up the hardware platforms
Accessing the hardware platforms interior
Hot-swap certain user-serviceable hardware components
Interpret LEDs
Audience
Written for system and network managers, this guide describes how to install and
configure Bay Networks BLN, BLN-2, BCN, and BCN RLC hardware.
xix
Installing and Maintaining BN Platforms
Conventions
angle brackets (< >)
Indicate that you choose the text to enter based on the
description inside the brackets. Do not type the
brackets when entering the command.
Example: if command syntax is ping <ip_address>,
you enter ping 192.32.10.12
bold text
Indicates text that you need to enter and command
names in text.
Example: Use the dinfo command.
brackets ([ ])
Indicate optional elements. You can choose none, one,
or all of the options.
italic text
Indicates variable values in command syntax
descriptions, new terms, file and directory names, and
book titles.
quotation marks (“ ”)
Indicate the title of a chapter or section within a book.
separator ( > )
Separates menu and option names in instructions and
internal pin-to-pin wire connections.
Example: Protocols > AppleTalk identifies the
AppleTalk option in the Protocols menu.
Example: Pin 7 > 19 > 20
screen text
Indicates data that appears on the screen.
Example: Set Bay Networks Trap Monitor Filters
vertical line (|)
Indicates that you enter only one of the parts of the
command. The vertical line separates choices. Do not
type the vertical line when entering the command.
Example: If the command syntax is
show at routes | nets, you enter either
show at routes or show at nets, but not both.
xx
-
Acronyms
ANSI
American National Standards Institute
ARE
ATM Routing Engine
ATM
Asynchronous Transfer Mode
BN
Backbone Node
BCN
Backbone Concentrator Node
BCN RLC
Backbone Concentrator Node with Redundant Line Cord
BLN
Backbone Link Node
BLN-2
Backbone Link Node-2
Btu
British thermal unit
DRAM
dynamic random-access memory
EMC
electromagnetic compatibility
EIA
Electronic Industry Association
FDDI
Fiber Distributed Data Interface
FRE
Fast Routing Engine
FRE-2
Fast Routing Engine-2
GAME
Gate Access Management Entity
HDMC
Harpoon Diagnostic Console Monitor
HSSI
high speed serial interface
ILI
intelligent link interface
MAC
Media Access Control
MOP
Maintenance Operations Protocol
NEMA
National Electrical Manufacturers Association
NVFS
nonvolatile file system
OSI
Open Systems Interconnection
PPX
Parallel Packet Express
QENET
Quad Ethernet Link Module
SNA
Systems Network Architecture
SNMP
Simple Network Management Protocol
SRM-F
System Resource Module-Front
SRM-L
System Resources Module-Link
xxi
Installing and Maintaining BN Platforms
Ordering Bay Networks Publications
To purchase additional copies of this document or other Bay Networks
publications, order by part number from the Bay Networks Press™ at the
following telephone or fax numbers:
• Telephone - U.S./Canada
• Telephone - International
• Fax
1-888-4BAYPRESS
1-510-490-4752
1-510-498-2609
You can also use these numbers to request a free catalog of Bay Networks Press
product publications.
xxii
Technical Support and Online Services
To ensure comprehensive network support to our customers and partners
worldwide, Bay Networks Customer Service has Technical Response Centers
in key locations around the globe:
•
•
•
•
•
Billerica, Massachusetts
Santa Clara, California
Sydney, Australia
Tokyo, Japan
Valbonne, France
The Technical Response Centers are connected via a redundant Frame Relay
Network to a Common Problem Resolution system, enabling them to transmit and
share information, and to provide live, around-the-clock support 365 days a year.
Bay Networks Information Services complement the Bay Networks Service
program portfolio by giving customers and partners access to the most current
technical and support information through a choice of access/retrieval means.
These include the World Wide Web, CompuServe, Support Source CD, Customer
Support FTP, and InfoFACTS document fax service.
109352-E Rev. A
xxiii
Installing and Maintaining BN Platforms
Bay Networks Customer Service
If you purchased your Bay Networks product from a distributor or authorized
reseller, contact that distributor’s or reseller’s technical support staff for assistance
with installation, configuration, troubleshooting, or integration issues.
Customers can also purchase direct support from Bay Networks through a variety
of service programs. As part of our PhonePlus™ program, Bay Networks Service
sets the industry standard, with 24-hour, 7-days-a-week telephone support
available worldwide at no extra cost. Our complete range of contract and
noncontract services also includes equipment staging and integration, installation
support, on-site services, and replacement parts delivery -- within approximately
4 hours.
To purchase any of the Bay Networks support programs, or if you have questions
on program features, use the following numbers:
Region
Telephone Number
Fax Number
United States and
Canada
1-800-2LANWAN; enter Express Routing
Code (ERC) 290 when prompted
(508) 670-8766
(508) 436-8880 (direct)
Europe
(33) 92-968-300
(33) 92-968-301
Asia/Pacific Region
(612) 9927-8800
(612) 9927-8811
Latin America
(407) 997-1713
(407) 997-1714
In addition, you can receive information on support programs from your local
Bay Networks field sales office, or purchase Bay Networks support directly
from your authorized partner.
xxiv
109352-E Rev. A
Technical Support and Online Services
Bay Networks Information Services
Bay Networks Information Services provide up-to-date support information as a
first-line resource for network administration, expansion, and maintenance. This
information is available from a variety of sources.
World Wide Web
The Bay Networks Customer Support Web Server offers a diverse library of
technical documents, software agents, and other important technical information
to Bay Networks customers and partners.
A special benefit for contracted customers and resellers is the ability to access the
Web Server to perform Case Management. This feature enables your support staff
to interact directly with the network experts in our worldwide Technical Response
Centers. A registered contact with a valid Site ID can
•
View a listing of support cases and determine the current status of any open
case. Case history data includes severity designation, and telephone, e-mail,
or other logs associated with the case.
•
Customize the listing of cases according to a variety of criteria, including
date, severity, status, and case ID.
•
Log notes to existing open cases.
•
Create new cases for rapid, efficient handling of noncritical network
situations.
•
Communicate directly via e-mail with the specific technical resources
assigned to your case.
The Bay Networks URL is http://www.baynetworks.com. Customer Service is a
menu item on that home page.
Customer Service FTP
Accessible via URL ftp://support.baynetworks.com (134.177.3.26), this site
combines and organizes support files and documentation from across the
Bay Networks product suite, including switching products from our Centillion™
and Xylogics® business units. Central management and sponsorship of this FTP
site lets you quickly locate information on any of your Bay Networks products.
109352-E Rev. A
xxv
Installing and Maintaining BN Platforms
Support Source CD
This CD-ROM -- sent quarterly to all contracted customers -- is a complete Bay
Networks Service troubleshooting knowledge database with an intelligent text
search engine.
The Support Source CD contains extracts from our problem-tracking database;
information from the Bay Networks Forum on CompuServe; comprehensive
technical documentation, such as Customer Support Bulletins, Release Notes,
software patches and fixes; and complete information on all Bay Networks
Service programs.
You can run a single version on Macintosh Windows 3.1, Windows 95,
Windows NT, DOS, or UNIX computing platforms. A Web links feature enables
you to go directly from the CD to various Bay Networks Web pages.
CompuServe
For assistance with noncritical network support issues, Bay Networks Information
Services maintain an active forum on CompuServe, a global bulletin-board
system. This forum provides file services, technology conferences, and a message
section to get assistance from other users.
The message section is monitored by Bay Networks engineers, who provide
assistance wherever possible. Customers and resellers holding Bay Networks
service contracts also have access to special libraries for advanced levels of
support documentation and software. To take advantage of CompuServe’s recently
enhanced menu options, the Bay Networks Forum has been re-engineered to allow
links to our Web sites and FTP sites.
We recommend the use of CompuServe Information Manager software to access
these Bay Networks Information Services resources. To open an account and
receive a local dial-up number in the United States, call CompuServe at
1-800-524-3388. Outside of the United States, call 1-614-529-1349, or your
nearest CompuServe office. Ask for Representative No. 591. When you’re on line
with your CompuServe account, you can reach us with the command GO
BAYNET.
xxvi
109352-E Rev. A
Technical Support and Online Services
InfoFACTS
InfoFACTS is the Bay Networks free 24-hour fax-on-demand service. This
automated system has libraries of technical and product documents designed to
help you manage and troubleshoot your Bay Networks products. The system
responds to a fax from the caller or to a third party within minutes of being
accessed.
To use InfoFACTS in the United States or Canada, call toll-free 1-800-786-3228.
Outside of North America, toll calls can be made to 1-408-764-1002. In Europe,
toll-free numbers are also available for contacting both InfoFACTS and
CompuServe. Please check our Web page for the listing in your country.
How to Get Help
Use the following numbers to reach your Bay Networks Technical Response
Center:
109352-E Rev. A
Technical Response Center Telephone Number
Fax Number
Billerica, MA
1-800-2LANWAN
(508) 670-8765
Santa Clara, CA
1-800-2LANWAN
(408) 764-1188
Valbonne, France
(33) 92-968-968
(33) 92-966-998
Sydney, Australia
(612) 9927-8800
(612) 9927-8811
Tokyo, Japan
(81) 3-5402-0180
(81) 3-5402-0173
xxvii
Chapter 1
Installing the Backbone Link Node
You install the Backbone Link Node (BLN) hardware platform by
•
Preparing for installation
•
Setting up the BLN
•
Powering up the BLN and observing the hardware platform initialization
sequence
•
Cabling a console or modem to the BLN to establish a Bay Networks
Technician Interface session
Danger: Due to high-energy hazards, only qualified service personnel with
written authorization from Bay Networks are permitted to repair a BLN.
Chapter 5, “Hot-Swapping Hardware Components,” describes user-serviceable
procedures.
The BLN is not designed for use with an I.T. power system (a power
distribution system that has no direct connection to earth); the exposed
conductive parts of the BLN are grounded.
Caution: Inspect all items for any shipping damage. In particular, ensure that
the ports on the rear panel are not damaged. If you detect any damaged or
missing items, do not attempt to install the BLN. Contact the Bay Networks
Technical Response Center.
109352-E Rev. A
1-1
Installing and Maintaining BN Platforms
Backbone Link Node Overview
The Backbone Link Node is a multiprotocol hardware platform/bridge designed
to satisfy the high-performance availability requirements of mission-critical
backbone internetworks. These networks transport information using
communications subsystems and protocols such as:
•
•
•
Fiber Distributed Data Interface (FDDI)
Point-to-Point Protocol (PPP)
Systems Network Architecture (SNA)
The BLN (Figure 1-1) uses a symmetric multiprocessor architecture with Fast
Routing Engine (FRE® and FRE-2) processor modules, or ATM Routing Engine
(ARE) processor modules, along with the Bay Networks 1-Gb/s Parallel Packet
Express (PPX®) processor interconnect. The BLN supports four routing engine
modules and up to 16 LAN/WAN interfaces (up to four FDDI).
POWER
B A C K B O N E
Figure 1-1.
1-2
N O D E
RESET
RUN
BOOT
DIAG
Backbone Link Node (BLN)
109352-E Rev. A
Installing the Backbone Link Node
Preparing for Installation
To prepare for the BLN installation, verify the following:
•
•
•
•
Your BLN shipment arrived complete and undamaged
You have the proper tools and equipment
Your installation site meets all BLN site requirements
These requirements are described in detail in the next sections.
Shipment Contents
Verify that the items in the BLN shipment match the items on the packing list
affixed to the shipping container (Table 1-1).
Table 1-1.
BLN Shipment Contents
Item
Quantity
Backbone Link Node
1
The documentation set, including Read Me First documents, release
notes for the system software and Site Manager, Installing and
Maintaining BN Hardware platforms (this book), Cable Guide for
Hardware platforms and BayStream hardware platforms Platforms, and
Quick-Starting Hardware platforms and BayStream hardware platforms
Platforms
1
Site Manager Application Software (diskettes or CD-ROM)
1
System software memory card (installed in unit)
1
Hardware package for mounting BLN in an electronic enclosure rack:
– 10-32 x 0.5-in. panel-mount screws
– 10-32 cage nuts
4
4
Optional: Hardware package for attaching angle brackets to electronic
enclosure rack:
109352-E Rev. A
– Rack-mount brackets
– 10-32 x 0.5-in. panel-mount screws
– 10-32 cage nuts
2
4
4
Power cord
1
Optional: Shielded console cable
1
1-3
Installing and Maintaining BN Platforms
Cables
Make sure that you received the correct cables with your shipment. If you plan to
build your own cables, or if you want to order additional cables, refer to Cable
Guide for Routers and BNX Platforms (router software) or Cable Guide
(BayStream software).
Additional Equipment
You need to supply the additional equipment listed in Table 1-2.
Table 1-2.
Tools and Equipment You Supply
Item
Quantity
ANSI console or PC (to establish a Bay Networks Technician Interface
session)
1
Optional: 25-pin male to 9-pin female cable adaptor (needed only if you 1
want to cable a PC directly to BLN to establish a local connection)
SPARCstation, PC, IBM RS/6000, or HP 9000 (for the Site Manager
interface application, if not already installed)
1
A shielded console cable (only if you did not order one from Bay
Networks)
1
Optional: An electronic enclosure rack in which to mount the BLN; rack 1
must meet these requirements:
– Heavy-duty steel construction
– Electronic Industries Association (EIA)
– Standard hole spacing
– Width: 19 in. (48.26 cm)
– Depth: 24 in. (61 cm)
Any electronic enclosure rack panels or doors must contain louvers or
screens to prevent overheating.
1-4
Tape measure (if mounting in a rack)
1
Phillips screwdriver (if mounting in a rack)
1
109352-E Rev. A
Installing the Backbone Link Node
Site Requirements
To obtain satisfactory BLN performance, your site must meet all of the following
electrical, space, and environmental requirements.
Caution: Failure to adhere to these requirements may result in poor
equipment performance.
Electrical Requirements
Your installation site must provide a power source that meets the electrical
requirements listed below:
•
10 A @ 110 VAC
•
5 A @ 230 VAC
Locate the BLN within 6 ft (1.83 m) of a wall receptacle. Table 1-3 lists the type
of wall receptacle a BLN requires.
Table 1-3.
Country
109352-E Rev. A
Wall Receptacle Requirements
Receptacle
Voltage
Branch
Current
United States National Electrical Manufacturers
or
Association (NEMA) 5-15R standard
Canada
receptacle.
100 to 120
volts
15 A
Other
countries
200 to 240
volts
10 A
Your BLN distributor supplies the proper
cord. It is shipped with the unit from the
factory.
1-5
Installing and Maintaining BN Platforms
Space Requirements
Make sure the installation site is large enough for the BLN and provides sufficient
air plenum (a volume of free space surrounding the hardware platform for heat
exhaust). Table 1-4 lists the dimensions of the BLN.
Table 1-4.
BLN Dimensions
Height
Depth
Width
14 in. (35.6 cm)
29.9 in. (58.2 cm)
17.3 in. (44 cm)
Table 1-5 lists the number of British thermal units (Btus) generated by the BLN
and its air plenum requirements.
Table 1-5.
BLN Thermal Output and Air Plenum Requirements
Thermal Output
(Maximum Btu/hr)
Location of Air Plenum
Minimum Required Air
Plenum
2600
Right
2 in. (5.1 cm)
Left
2 in. (5.1 cm)
Front
1 in. (2.5 cm)
Table 1-6 lists the total space needed (dimensions plus air plenum requirements)
for the BLN.
Table 1-6.
1-6
Total Space Required for BLN
Height
Depth
Width
8.75 in. (22.2 cm)
19.5 in. (49.5 cm)
21.3 in. (54.1 cm)
109352-E Rev. A
Installing the Backbone Link Node
Environmental Requirements
The installation site must meet the environmental requirements listed in Table 1-7.
Table 1-7.
Environmental Requirements
Altitude
Humidity
Temperature
0 to 8000 ft
(0 to 2400 m)
10% to 90%
noncondensing
0°C to 40°C
(32° F to 104° F)
Setting Up the Backbone Link Node
We recommend that you install your BLN in an electronic enclosure rack and use
angle brackets for added support. If you choose not to use angle brackets when
installing the BLN, proceed to “Installing the BLN,” later in this chapter.
Caution: Before you set up your BLN, refer to “Space Requirements” earlier
in this chapter to verify that adequate space exists for heat exhaust.
Attaching Angle Brackets
Before you can attach the optional angle brackets, you need the following
equipment:
•
The optional hardware package containing the angle brackets, rack screws,
and cage nuts
•
Tape measure
•
Phillips screwdriver
•
Pen or pencil
Attach the angle brackets to the rack as follows (Figure 1-2):
109352-E Rev. A
1.
Measure at least 8.75 in. (22.2 cm) of free vertical space inside the rack
and mark the spot.
2.
Attach each angle bracket to the inside of the rack, below the marked
spot, as shown in Figure 1-2.
1-7
Installing and Maintaining BN Platforms
a.
If your rack does not have threaded holes, place cage nuts over the
holes before you attach the angle brackets.
b.
Align the edge of the brackets to the rack as follows:
-- If the interior of the rack contains horizontal bracket supports, align
the angle bracket with the horizontal bracket support.
-- If the interior of the rack does not contain horizontal bracket supports,
brace the angle bracket between the side rails.
You must orient the brackets that support the hardware platform as shown
in Figure 1-2. Ensure that you can adjust the bracket vertically along its
slots before you secure it.
c.
Insert two 10-32 screws through each bracket’s slotted holes, and into
the holes in the supports of the rack. Do not tighten the screws.
d. Adjust each bracket vertically along the bracket slots until the
bracket is 1.2 in. (3.1 cm) below the center of one hole in the front
vertical support of the rack.
e.
1-8
Tighten the screws with a screwdriver until secure.
109352-E Rev. A
Installing the Backbone Link Node
Height
BLN
8.75 in. (22.2 cm) Min.
BLN
Screw
(2 Places)
Bracket
(2 Places)
Depth
19.5 in. (49.5 cm) Min.
Rail
Cage nut
If rack rail is not threaded,
attach cage nut.
Figure 1-2.
Attaching Angle Brackets to Support the BLN
Installing the BLN
This section describes how to install the BLN in an electronic enclosure rack.
You need the following equipment to install the BLN:
109352-E Rev. A
•
The BLN hardware package that contains the panel-mount screws and cage
nuts
•
Phillips screwdriver
1-9
Installing and Maintaining BN Platforms
Install the BLN in the rack as follows:
Note: Before you place the BLN in the rack, ensure that the rack holes are
threaded. If they are not threaded, place cage nuts over the front vertical
support holes.
1.
Using both hands, pull the bottom of the front bezel toward you and
remove it from the chassis (Figure 1-3).
POWER
B A C K B O N E
N O D E
RESET
RUN
BOOT
DIAG
Pull Bottom
Figure 1-3.
2.
Removing the Front Bezel from the BLN
Insert the BLN in the rack as shown in Figure 1-4.
When using angle brackets for added support, place the BLN squarely on the
angle brackets.
3.
1-10
Insert and tighten the screws with a screwdriver until secure.
109352-E Rev. A
Installing the Backbone Link Node
Rail
Cage nut
Screw
(4 Places)
If rack rail is not threaded,
attach cage nut.
Figure 1-4.
Mounting the BLN to the Rack
Replace the front bezel as follows:
109352-E Rev. A
1.
Align the mounting retainers on the inside of the bezel with the holes on
the front of the electromagnetic compatibility (EMC) shield.
2.
Push the sides of the bezel into place.
1-11
Installing and Maintaining BN Platforms
Powering On the BLN
Power on the BLN as follows:
1.
Ensure that the power switch on the rear panel is in the OFF position.
2.
Connect the power cable to the power switch assembly on the BLN rear
panel.
3.
Insert the power plug into the appropriate wall receptacle (refer to
“Electrical Requirements” earlier in this chapter).
4.
Turn the power switch to the ON position.
The fans in the BLN start to spin.
5.
Verify that air is flowing from the cooling fans by passing your hand
along the left side of the BLN to feel the air movement.
Note: If you cannot feel air flow from the vents, if the POWER and DIAG
LEDs remain off, or if the DIAG LED does not turn on, turn the BLN power
switch to the OFF position. Wait 1 minute and then turn the power switch to
the ON position. If the problem persists, contact the Bay Networks Technical
Response Center.
After you power on the BLN, each routing engine automatically initiates a
diagnostic test to verify proper board function.
1-12
109352-E Rev. A
Installing the Backbone Link Node
LED Activation Sequence
The LEDs on the front panel of the BLN (Figure 1-5) activate while the BLN
initializes and runs through its diagnostic test.
Indicates power OK
Indicates router software is executing
Indicates one or more slots are booting
POWER
RUN
BOOT
DIAG
RESET
Indicates diagnostic test
execution or node failure
Initializes (boots) the system
Figure 1-5.
BLN Front-Panel LEDs
The LEDs typically activate in the following order (the sequence may vary
slightly or overlap):
1.
2.
109352-E Rev. A
The POWER and DIAG LEDs turn on.
•
When on, the POWER LED indicates that the power supply voltages are
all within normal limits.
•
When on, the DIAG LED indicates diagnostic testing on one or more
modules. After a successful test, the DIAG LED turns off. The DIAG
LED remains on if a diagnostic test does not end successfully for any
given slot.
The BOOT and RUN LEDs turn on.
•
When on, the BOOT LED indicates the initialization and loading of
software by one or more modules.
•
When on, the RUN LED indicates that system software is running on one
or more modules. The RUN LED remains on while the BLN is operating
normally.
1-13
Installing and Maintaining BN Platforms
The BLN indicates a successful start-up by turning off the BOOT LED. The
POWER and RUN LEDs remain on. Refer to Chapter 6, “Switches and LEDs,”
for a complete explanation of all Backbone Node LEDs. To activate the BLN on
your IP network, refer to Quick-Starting Routers and BNX Platforms (router
software), or to Configuring an Interface for Network Management (BayStream
software).
Establishing a Local or Remote Connection to the BLN
You can cable a BLN to an ANSI console or a PC to establish a local Technician
Interface session, or to a modem to establish a remote session.
Local Connection
Cable the BLN to an ANSI console as follows:
1.
Power on the console and set its operating parameters as shown in
Table 1-8.
Refer to your console user manual for instructions on how to set these
operating parameters.
Table 1-8.
Console Operating Parameters
Parameter
Value
Baud rate
9600
Data bits
8
Stop bits
1
Parity
None
2.
Insert the male end of the cable (Order No. 7525) into the CONSOLE
port of the System Resources Module-Link (SRM-L) Module
(Figure 1-6).
The SRM-L resides in Slot 1 of the rear panel.
3.
1-14
Insert the female end of the cable into the ANSI console communications
port.
109352-E Rev. A
Installing the Backbone Link Node
T
DS
IL
FA
T
DS
AIL
IL
FA
WF
RT
NS
2
DS
2
DS
1
VR
XC
VR
RC
AIL
RL
WF
RT
NS
RL
M
CO
VR
XC
VR
RC
EL
RY
2
DS
RL
2
DS
RL
1
EL
RY
M
CO
4
T
DS
IL
FA
T
DS
AIL
IL
FA
WF
RT
NS
2
DS
2
DS
1
3
VR
XC
VR
RC
AIL
RL
WF
RT
NS
RL
M
CO
VR
XC
VR
RC
EL
RY
2
DS
RL
2
DS
RL
1
EL
RY
M
CO
2
SR
??
??
M
E
OL
?
??
??
??
??
??
??
NS
CO
L
Console
port
100 - 240V~
10.0A
50/60Hz
5
1
0
I
Link
Modules
SRM-L
ANSI console
communications port
Figure 1-6.
Cabling the BLN to a Console
Remote Connection
This section describes how to cable your BLN to a modem for remote dial-in
access.
Note: Before you replace the local console connection with a modem
connection, you must use the Technician Interface to configure the BLN initial
IP network interface. To activate the BLN on your IP network refer to
Quick-Starting Routers and BNX Platforms (router software), or to
Configuring an Interface for Network Management (BayStream software).
Cable the BLN to the modem as follows:
1.
Power on and configure the modem as shown in Table 1-9.
Refer to the modem user documentation for instructions on configuring your
modem.
Table 1-9.
Modem Operating Parameters
Parameter
Setting
Baud rate
9600 or less
Auto answer
Set on n rings with DTR active
(n must be greater than 0)
Clear to Send (CTS) signal
Always ON
(continued)
109352-E Rev. A
1-15
Installing and Maintaining BN Platforms
Table 1-9.
Modem Operating Parameters (continued)
Parameter
Setting
Data Terminal Ready (DTR) signal
DTR signal fail-disconnect enabled (return
to command mode, auto-answer off)
Data Carrier Detect (DCD) signal
DCD signal on while carrier present (the
node uses DCD to detect modem
disconnect)
Local character echo
OFF
Supervisory functions
OFF
Data Set Ready (DSR) signal
ON
2.
Remove the cable connector from the CONSOLE port of the System
Resource Module-Link (SRM-L).
The SRM-L is in Slot 1 of the BLN’s rear panel (Figure 1-6).
3.
Insert one end of the cable (Order No. 77850) into the SRM-L
CONSOLE port.
Note: The console cable and the modem cable both connect to the BLN using
the CONSOLE port.
4.
Insert the other end of the cable into the RS-232 communications port at
the back of the modem.
To configure the BLN CONSOLE port for modem operation, refer to Configuring
Routers (router software) or Getting Started with Site Manager (BayStream
software).
1-16
109352-E Rev. A
Chapter 2
Installing the Backbone Link Node-2
You install the Backbone Link Node-2 (BLN-2) hardware platform by
•
•
•
•
Preparing for installation
Setting up the BLN-2
Powering up the BLN-2 and observing the hardware platform as it initializes
Cabling a console or modem to the BLN-2 to establish a Bay Networks
Technician Interface session
Note: This chapter describes how to install the AC version of the BLN-2. Only
qualified service personnel are permitted to connect the DC version of the
BLN-2 to a power source.
Danger: Due to high-energy hazards, only qualified service personnel with
written authorization from Bay Networks are permitted to repair a BLN-2.
Chapter 5, “Hot -Swapping Hardware Components,” describes
user-serviceable procedures.
The BLN-2 is not designed for use with an I.T. power system (a power
distribution system that has no direct connection to earth); the exposed
conductive parts of the BLN-2 are grounded.
Caution: Inspect all items for any shipping damage. In particular, ensure that
the ports on the rear panel are not damaged. If you detect any damaged or
missing items, do not attempt to install the BLN-2. Contact the Bay Networks
Technical Response Center.
109352-E Rev. A
2-1
Installing and Maintaining BN Platforms
Backbone Link Node-2 Overview
The BLN-2 is a multiprotocol hardware platform and bridge designed to satisfy
the high-performance availability requirements of mission-critical backbone
internetworks. These networks transport information using communications
subsystems and protocols such as:
•
•
•
Fiber Distributed Data Interface (FDDI)
Point-to-Point Protocol (PPP)
Systems Network Architecture (SNA)
The BLN-2 (Figure 2-1) uses a symmetric multiprocessor architecture with Fast
Routing Engine (FRE and FRE-2) processor modules, or ATM Routing Engine
(ARE) processor modules, along with the Bay Networks 1-Gb/s Parallel Packet
Express (PPX) processor interconnect. The BLN-2 supports four routing engine
modules and up to 16 LAN/WAN interfaces (up to four FDDI).
The BLN-2 hardware platform features redundant power supplies and cooling
fans.
POWER
B A C K B O N E
Figure 2-1.
2-2
N O D E
RUN
BOOT
DIAG
RESET
Backbone Link Node-2 (BLN-2)
109352-E Rev. A
Installing the Backbone Link Node-2
Preparing for Installation
To prepare for the BLN-2 installation, verify the following:
•
•
•
Your BLN-2 shipment arrived complete and undamaged
You have the proper tools and equipment
Your installation site meets all BLN-2 site requirements
These requirements are described in detail in the next sections.
Shipment Contents
Verify that the items in the BLN-2 shipment match the items on the packing list
affixed to the shipping container (Table 2-1).
Table 2-1.
BLN-2 Shipment Contents
Item
Quantity
Backbone Link Node-2
1
Site Manager Application Software (diskettes or CD-ROM)
1
System software memory card (installed in unit)
1
Hardware package for attaching angle brackets to the electronic
enclosure rack (required):
– Rack-mount brackets
– 10-32 x 0.5-in. panel-mount screws
– 10-32 cage nuts
2
4
4
Hardware package for mounting BLN-2 in an electronic enclosure rack:
109352-E Rev. A
– 10-32 x 0.5-in. panel-mount screws
– 10-32 cage nuts
8
8
Power cords
2
Optional: Shielded console cable
1
2-3
Installing and Maintaining BN Platforms
Cables
Make sure that you received the correct cables with your shipment. If you plan to
build your own cables, or if you want to order additional cables, refer to Cable
Guide for Routers and BNX Platforms (router software) or Cable Guide
(BayStream software).
Additional Equipment
You need to supply the additional equipment listed in Table 2-2.
Table 2-2.
Tools and Equipment You Supply
Item
Quantity
ANSI console or PC (for establishing a Bay Networks Technician Interface
session)
1
Optional: 25-pin male to 9-pin female cable adaptor (needed only if you
want to cable a PC directly to BLN-2 to establish a local connection)
1
SPARCstation, PC, IBM RS/6000, or HP 9000 (for the Site Manager
interface application, if not already installed)
1
A shielded console cable (only if you did not order one separately from Bay 1
Networks)
An electronic enclosure rack to mount the BLN-2; rack must meet these
requirements:
1
– Heavy-duty steel construction
– Electronic Industries Association (EIA) standards
– Standard hole spacing
– Width: 19 in. (48.3 cm)
– Depth: 24 in. (61.0 cm)
Any electronic enclosure rack panels or doors must contain louvers or
screens to prevent overheating.
2-4
Tape measure
1
Phillips screwdriver
1
109352-E Rev. A
Installing the Backbone Link Node-2
Site Requirements
To obtain satisfactory BLN-2 performance, your site must meet all of the
following electrical, space, and environmental requirements.
Caution: Failure to adhere to these requirements may result in poor
equipment performance.
Electrical Requirements
Your installation site must provide a power source that meets the electrical
requirements listed below:
•
•
12 A @ 110 V
6 A @ 230 V
Locate the BLN-2 within 6 ft (1.83 m) of a wall receptacle. Table 2-3 lists the type
of wall receptacle a BLN-2 requires.
Table 2-3.
109352-E Rev. A
Wall Receptacle Requirements
Country
Receptacle
Voltage
Branch
Current
United
States or
Canada
National Electrical Manufacturers
Association (NEMA) 5-15R standard
receptacle.
100 to 120 volts
15 A
Other
countries
Your BLN-2 distributor supplies the proper
cord. It is shipped with the unit from the
factory.
200 to 240 volts
10 A
2-5
Installing and Maintaining BN Platforms
Space Requirements
Make sure the installation site is large enough for the BLN-2 and provides
sufficient air plenum (a volume of free space surrounding the BN for heat
exhaust). Table 2-4 lists the dimensions of the BLN-2.
Table 2-4.
BLN-2 Dimensions
Height
Depth
Width
14 in. (35.6 cm)
22.9 in. (58.2 cm)
17.3 in. (44.0 cm)
Table 2-5 lists the number of British thermal units (Btus) generated by the BLN-2
and the air plenum requirements.
Table 2-5.
BLN-2 Thermal Output and Air Plenum Requirements
Thermal Output
(Maximum Btu/hr)
Location of Air
Plenum
Minimum Required
Air Plenum
2600
Right
2 in. (5.1 cm)
Left
2 in. (5.1 cm)
Front
1 in. (2.5 cm)
Table 2-6 lists the total space needed (dimensions plus air plenum requirements)
for the BLN-2.
Table 2-6.
2-6
Total Space Required for BLN-2
Height
Depth
Width
15.8 in. (40.0 cm)
22.9 in. (58.2 cm)
21.3 in. (54.1 cm)
109352-E Rev. A
Installing the Backbone Link Node-2
Environmental Requirements
The installation site must meet the environmental requirements listed in Table 2-7.
Table 2-7.
Environmental Requirements
Altitude
Humidity
Temperature
0 to 8000 ft
(0 to 2400 m)
10% to 90%
noncondensing
0°C to 40°C
(32∞F to 104∞F)
Setting Up the Backbone Link Node-2
You must install your BLN-2 in an electronic enclosure rack.
Caution: Before you set up your BLN-2, refer to “Space Requirements”
earlier in this chapter to verify that adequate space exists for heat exhaust.
Attaching Angle Brackets
We highly recommend that you place your hardware platform on angle brackets
for added support when installing your BLN-2 in a rack. You need the following
equipment to attach the angle brackets:
•
The hardware package containing the angle brackets, panel-mount screws,
and cage nuts
•
Tape measure
•
Phillips screwdriver
•
Pen or pencil
Attach the angle brackets to the rack as follows:
1.
To ensure that the slots in the BLN-2 flanges align with the holes in the
rack:
a.
109352-E Rev. A
Measure at least 15.75 in. (40 cm) of free vertical space inside the
rack and mark the spot.
2-7
Installing and Maintaining BN Platforms
b.
Locate the next two holes below this spot that have a 0.625-in. space
between them.
Note: The hole pattern shown in Figure 2-2 repeats on the rail.
2.
Mount the angle brackets in the area indicated by Figure 2-3.
a.
If your rack does not have threaded holes, place cage nuts over the
holes before you attach the angle brackets.
b.
Align the edge of the brackets to the rack as follows:
-- If the interior of the rack contains horizontal bracket supports, align
the angle bracket with the horizontal bracket support.
-- If the interior of the rack does not contain horizontal bracket supports,
brace the angle bracket between the side rails.
You must orient the brackets that support the hardware platform as shown
in Figure 2-3. Ensure that you can adjust the bracket vertically along its
slots before you secure it.
c.
Insert two 10-32 screws through each bracket’s slotted holes and into
the holes in the supports of the rack. Do not tighten the screws.
d. Adjust each bracket vertically along the bracket slots until the
bracket is 1.4 in. (3.6 cm) below the center of one hole in the front
vertical support of the rack.
e.
2-8
Tighten the screws with a screwdriver until secure.
109352-E Rev. A
Installing the Backbone Link Node-2
Router
Flange
Rack Post
1.4"
2.375"
1.750"
1.125"
0.625"
Angle Bracket
Supporting Router
Mounted on Back of
Rack Post
Mounting Hole Locations
Figure 2-2.
109352-E Rev. A
Locating the Mounting Holes
2-9
Installing and Maintaining BN Platforms
Height
BLN-2 15.75 in. (40.0 cm)
Minimum
Depth
BLN-2 23.9 in. (60.7 cm)
Minimum
Screw
(2 Places)
Bracket
(2 Places)
Rail
Cage nut
If rack rail is not threaded,
attach cage nut.
Figure 2-3.
2-10
Attaching Angle Brackets to Support the BLN-2
109352-E Rev. A
Installing the Backbone Link Node-2
Installing the BLN-2
Warning: The BLN-2 weighs approximately 125 lb. Do not attempt to lift it
by yourself. Use a team of people or specialized lifting equipment. Before
inserting the BLN-2 in the rack, ensure that all equipment already inside the
rack is secure.
Install the BLN-2 in the electronic enclosure rack as follows:
1.
Using both hands, pull the bottom of the front bezel toward you and
remove it from the chassis (Figure 2-4).
POWER
B A C K B O N E
N O D E
RUN
BOOT
DIAG
RESET
Pull Bottom
Figure 2-4.
Removing the Front Bezel from the BLN-2
Note: Before you place the BLN-2 in the rack, ensure that the rack holes are
threaded. If they are not threaded, place cage nuts over the front vertical
support holes.
109352-E Rev. A
2-11
Installing and Maintaining BN Platforms
2.
Insert the BLN-2 in the rack as shown in Figure 2-5. Make sure the
BLN-2 rests squarely on the angle brackets.
3.
Insert and tighten the screws with a screwdriver until secure.
Replace the front bezel as follows:
1.
Align the mounting retainers on the inside of the bezel with the holes on
the front of the electromagnetic compatibility (EMC) shield.
2.
Push the sides of the bezel into place.
Rail
Cage nut
Screw
(4 Places)
If rack rail is not threaded,
attach cage nut.
Figure 2-5.
2-12
Mounting the BLN-2 to the Rack
109352-E Rev. A
Installing the Backbone Link Node-2
Powering On the BLN-2
Power on the BLN-2 as follows:
1.
Ensure that the power switches on the rear panel are in the OFF position.
2.
Connect the power cables to the power switch assembly on the BLN-2
rear panel.
Note: The BLN-2 has two power supplies, so remember to plug in the cables
and turn on the switches on both.
Inserting the BLN-2 power cables into separate branch circuits allows for
redundant AC power. For additional information about BLN-2 power
supplies, refer to Chapter 5, “Hot-Swapping Hardware Components.”
3.
Insert the power plugs into their appropriate wall receptacles (refer to
“Electrical Requirements” earlier in this chapter).
4.
Turn the power switches to the ON position.
5.
Verify that air is flowing from the cooling fans and out through the vents
on either side of the BLN-2.
Note: If you cannot feel air flow from the BLN-2 vents, if the POWER and
DIAG LEDs remain off, or if the DIAG LED remains on, turn the power
switch at the rear of the BLN-2 to the OFF position. Wait 1 minute and then
turn the power switch to the ON position. If the problem persists, contact the
Bay Networks Technical Response Center.
After you power on the BLN-2, each routing engine automatically initiates a
diagnostic test to verify proper board function.
109352-E Rev. A
2-13
Installing and Maintaining BN Platforms
LED Activation Sequence
The LEDs on the front panel of the BLN-2 (Figure 2-6) activate while the BLN-2
initializes and runs through its diagnostic tests.
Indicates power OK
Indicates router software is executing
Indicates one or more slots are booting
POWER
RUN
BOOT
DIAG
RESET
Indicates diagnostic test
execution or node failure
Initializes (boots) the system
Figure 2-6.
BLN-2 Front-Panel LEDs
The LEDs typically activate in the following order (the sequence may vary
slightly or overlap):
1.
2.
2-14
The POWER and DIAG LEDs turn on.
•
When on, the POWER LED indicates that the power supply voltages are
all within normal limits.
•
When on, the DIAG LED indicates diagnostic testing on one or more
modules. After a successful test, the DIAG LED turns off. The DIAG
LED remains on if a diagnostic test does not end successfully for any
given slot.
The BOOT and RUN LEDs turn on.
•
When on, the BOOT LED indicates the initialization and loading of
software by one or more modules.
•
When on, the RUN LED indicates that system software is running on one
or more modules. The RUN LED remains on while the BLN-2 is
operating normally.
109352-E Rev. A
Installing the Backbone Link Node-2
The BLN-2 indicates a successful start-up by turning off the BOOT LED. The
POWER and RUN LEDs remain on. Refer to Chapter 6, “Switches and LEDs,”
for a complete explanation of all LEDs. To activate the BLN-2 on your IP network
refer to Quick-Starting Routers and BNX Platforms, or to Configuring an
Interface for Network Management (BayStream software).
Establishing a Local or Remote Connection to the BLN-2
You can cable a BLN-2 to an ANSI console or a PC to establish a local Technician
Interface session, or to a modem to establish a remote session.
Note: Bay Networks offers the cables for console connection. To activate the
BLN on your IP network refer to Quick-Starting Routers and BNX Platforms
(router software), or to Configuring an Interface for Network Management
(BayStream software).
Local Connection
Cable the BLN-2 to an ANSI console as follows:
1.
Power on the console and set its operating parameters as shown in
Table 2-8.
Refer to your console user manual for instructions on how to set these
operating parameters.
Table 2-8.
Console Operating Parameters
Parameter
Value
Baud rate
9600
Data bits
8
Stop bits
1
Parity
None
2.
Insert the male end of the cable (Order No. 7525) into the CONSOLE
port of the System Resources Module-Link (SRM-L) (Figure 2-7).
The SRM-L resides in Slot 1 of the rear panel.
109352-E Rev. A
2-15
Installing and Maintaining BN Platforms
Insert the female end of the cable into the ANSI console communications
port.
3.
IL
FA
VR
XC
IL
FA
VR
XC
IL
FA
T
IL
FA
VR
XC
DS
VR
XC
DS
T
DS
T
DS
T
AIL
VR
RC
RT
NS
2
DS
RL
WF
2
DS
RL
AIL
VR
RC
EL
RY
1
RT
NS
2
DS
RL
M
CO
WF
2
DS
RL
AIL
VR
RC
EL
RY
1
RT
NS
2
DS
RL
M
CO
WF
2
DS
RL
AIL
VR
RC
EL
RY
1
RT
NS
2
DS
RL
M
CO
WF
2
DS
RL
1
EL
RY
M
CO
??
??
??
??
?
E
M
OL
SR
??
??
??
??
NS
CO
L
Console
port
5
4
3
2
1
SRM-L
Power OK
Power OK
ANSI console
communications port
Figure 2-7.
Cabling the BLN-2 to a Console
Remote Connection
Note: Before you replace the local console connection with a modem
connection, you must use the Technician Interface to configure the BLN-2
initial IP network interface. Refer to Quick-Starting Routers and BayStream
Platforms for instructions.
Cable the BLN-2 to the modem as follows:
1.
Power on and configure the modem as shown in Table 2-9.
Refer to the modem user documentation for instructions on configuring your
modem.
2-16
Table 2-9.
Modem Operating Parameters
Parameter
Setting
Baud rate
9600 or less
Auto answer
Set on n rings with DTR active (n must be
greater than 0)
Clear to Send (CTS) signal
Always ON
109352-E Rev. A
Installing the Backbone Link Node-2
Table 2-9.
Modem Operating Parameters (continued)
Parameter
Setting
Data Terminal Ready (DTR) signal
DTR signal fail-disconnect enabled (return
to command mode, auto-answer off)
Data Carrier Detect (DCD) signal
DCD signal on while carrier present (the
node uses DCD to detect modem
disconnect)
Local character echo
OFF
Supervisory functions
OFF
Data Set Ready (DSR) signal
ON
2.
Remove the cable connector from the CONSOLE port of the System
Resource Module-Link (SRM-L).
The SRM-L resides in Slot 1 of the BLN-2 rear panel (Figure 2-7).
3.
Insert one end of the modem cable (Order No. 77850) into the
SRM-L CONSOLE port.
Note: The console cable and the modem cable both connect to the BLN-2
using the CONSOLE port.
4.
Insert the other end of the cable into the RS-232 communications port on
the back of the modem.
To configure the BLN CONSOLE port for modem operation, refer to Configuring
Routers (router software) or Getting Started with Site Manager (BayStream
software).
109352-E Rev. A
2-17
Chapter 3
Installing the BCN and BCN RLC
You install the Backbone Concentrator Node (BCN) by
•
•
•
•
Preparing for installation
Setting up the BCN
Powering up the BCN and observing the hardware platform as it initializes
Cabling a console or modem to the hardware platform for access to the Bay
Networks Technician Interface
Note: This chapter describes how to install the Single AC Source (BCN) and
Dual AC Source (BCN RLC) versions. The BCN and the BCN RLC are both
referred to as BCN except where a differentiation is necessary. Only qualified
service personnel are permitted to connect the DC version of the BCN to a
power source. See Installing the DC Version of the BCN and BLN-2.
Danger: Due to high-energy hazards, only qualified service personnel are
permitted to repair a Backbone Concentrator Node. Chapter 5, “Hot-Swapping
Hardware Components,” describes user-serviceable procedures.
The BCN is not designed for use with an I.T. power system (a power
distribution system that has no direct connection to earth); the exposed
conductive parts of the BCN are grounded.
Warning: The BCN weighs approximately 214 lb (97.07 kg). Do not attempt
to lift it by yourself. Use a team of people or specialized lifting equipment.
109352-E Rev. A
3-1
Installing and Maintaining BN Platforms
Caution: Inspect all items for any shipping damage. In particular, ensure that
the ports on the rear panel are not damaged. If you detect any damaged or
missing items, do not attempt to install the BCN. Contact the Bay Networks
Technical Response Center.
Backbone Concentrator Node Overview
The BCN is a multiprotocol router/bridge designed to satisfy the
high-performance availability requirements of the most demanding,
mission-critical backbone internetworks. These networks transport information
using communications subsystems and protocols such as:
•
•
•
•
Fiber Distributed Data Interface (FDDI)
T1/T3 synchronous lines
Asynchronous Transfer Mode (ATM)
Systems Network Architecture
The BCN (Figure 3-1) uses a symmetric multiprocessor architecture with Fast
Routing Engine (FRE or FRE-2) processor modules, or ATM Routing Engine
(ARE) processor modules, along with the Bay Networks 1 Gb/s Parallel Packet
Express (PPX) processor interconnect. This combination delivers industry-leading
performance.
The BCN supports up to 13 ILI sets. The BCN RLC supports up to 10 ILI sets.
3-2
109352-E Rev. A
Installing the BCN and BCN RLC
POWER
B A C K B O N E
Figure 3-1.
N O D E
RUN
BOOT
DIAG
RESET
Backbone Concentrator Node (BCN)
Preparing for Installation
To prepare for the BCN installation, verify the following:
•
•
•
Your BCN shipment arrived complete and undamaged
You have the proper tools and equipment
Your installation site meets all BCN site requirements
These requirements are described in detail in the next sections.
109352-E Rev. A
3-3
Installing and Maintaining BN Platforms
Shipment Contents
Verify that the items in the BCN shipment match the items on the packing list
affixed to the shipping container (Table 3-1).
Table 3-1.
BCN Shipment Contents
Item
Quantity
Backbone Concentrator Node
1
Site Manager Application Software (diskettes or CD-ROM)
1
System software memory card (installed in unit)
1
Hardware package for attaching angle brackets to the electronic
enclosure rack:
– Rack-mount brackets
– 10-32 x 0.5-in. panel-mount screws
– 10-32 cage nuts
2
4
4
Hardware package for mounting the BCN in an electronic enclosure rack:
– 10-32 x 0.5-in. panel-mount screws
– 10-32 cage nuts
8
8
Antistatic wrist strap (located inside the front bezel)
1
BCN power cord, or
BCN RLC power cords
1
2
Optional: Shielded console cable
1
Cables
Make sure that you received the correct cables with your shipment. If you plan to
build your own cables, or if you want to order additional cables, refer to Cable
Guide for Routers and BNX Platforms (router software) or Cable Guide
(BayStream software).
3-4
109352-E Rev. A
Installing the BCN and BCN RLC
Additional Equipment
You need to supply the additional equipment listed in Table 3-2.
Table 3-2.
Tools and Equipment You Supply
Item
Quantity
ANSI console or PC (to establish a Bay Networks Technician Interface
session)
1
Optional: 25-pin male to 9-pin female cable adaptor (needed only if you
want to cable a PC directly to the BCN to establish a local connection)
1
SPARCstation, PC, IBM RS/6000, or HP 9000 (for Site Manager)
1
A shielded console cable (only if you did not order one separately from Bay 1
Networks)
An electronic enclosure rack in which to mount the BCN. The rack must
meet the following requirements:
1
– Heavy-duty steel construction
– Electronic Industries Association (EIA) standard hole spacing
– Width: 19 in. (48.3 cm)
– Depth: 24 in. (61 cm)
Any electronic enclosure rack panels or doors must contain louvers or
screens to prevent overheating
Tape measure
1
5/32-in. hex wrench
1
Phillips screwdriver
1
Standard screwdriver
1
Site Requirements
To obtain satisfactory BCN performance, your site must meet all of the following
electrical, space, and environmental requirements.
Caution: Failure to adhere to these requirements may result in poor
equipment performance.
109352-E Rev. A
3-5
Installing and Maintaining BN Platforms
Electrical Requirements
The installation site must provide a power source that meets the following
electrical requirement: 200 to 240 VAC at a maximum of 13 A @ 230 VAC.
The power required for the BCN RLC is 100 VAC to 240 VAC at a maximum of
8a @ 230 VAC and 16a @ 100 VAC.
Locate the BCN within 8 ft (2.5 m) of the wall receptacle. Table 3-3 lists the types
of wall receptacles the BCN uses.
Table 3-3.
3-6
Wall Receptacle Requirements
Branch
Current
Country
Receptacle
Voltage
United
States or
Canada
National Electrical Manufacturers
Association (NEMA) L6-20R standard
receptacle
208 to 220
volts
20 A
European
countries
IEC 309 standard receptacle
240 volts
16 A
Other
countries
Your BCN distributor supplies the proper
cord. It is shipped with the unit from the
factory.
200 to 240
volts
20 A
109352-E Rev. A
Installing the BCN and BCN RLC
Space Requirements
Make sure the installation site is large enough for the BCN and provides sufficient
air plenum (a volume of free space surrounding the hardware platform for heat
exhaust). Table 3-4 lists the dimensions of the BCN.
Table 3-4.
BCN Dimensions
Height
Depth
Width
24.4 in. (62.0 cm)
22.9 in. (58.2 cm)
19 in. (48.3 cm)
Table 3-5 lists the number of British thermal units (Btus) generated by the BCN
and its air plenum requirements.
Table 3-5.
BCN Thermal Output and Air Plenum Requirements
Thermal Output
(Maximum Btu/hr.)
Location of Air
Plenum
Required
Air Plenum
Recommended
Air Plenum
7700
Front of BCN
2.5 in. (6.4 cm)
4 in. (10.2 cm)
Rear of BCN
2.5 in. (6.4 cm)
4 in. (10.2 cm)
Top of BCN
3.5 in. (9 cm)
5.25 in. (13.3 cm)
Right of BCN
2 in. (5.1 cm)
3 in. (7.6 cm)
Table 3-6 shows the total space needed (dimensions plus air plenum requirements)
for the BCN. You must ensure that the rear of the rack has at least 20 inches of
additional clearance available for inserting and removing the power modules.
Table 3-6.
109352-E Rev. A
Total Space Required for BCN
Height
Depth
Width
27.9 in. (70.9 cm)
27.9 in. (70.9 cm)
21 in. (53.3 cm)
3-7
Installing and Maintaining BN Platforms
Environmental Requirements
The installation site must meet the environmental requirements listed in Table 3-7.
Table 3-7.
Environmental Requirements
Altitude
Humidity
Temperature
0 to 8000 ft
(0 to 2400 m)
10% to 90%
noncondensing
0°C to 40°C
(32°F to 104°F)
Setting Up the Backbone Concentrator Node
You must install your BCN in an electronic enclosure rack.
Caution: Before you set up your BCN, refer to “Space Requirements” earlier
in this chapter to verify that adequate space exists for heat exhaust.
Attaching Angle Brackets
We highly recommend that you place your hardware platform on angle brackets
for added support when installing your BCN in a rack.
Before you begin, locate the hardware package that contains the brackets,
panel-mount screws, and cage nuts. You also need a tape measure and a Phillips
screwdriver.
Attach angle brackets as follows:
1.
To ensure that the slots in the BCN flanges align with the holes in the
rack:
a.
Measure at least 28 in. (71 cm) of free vertical space inside the rack
and mark the spot.
b.
Locate the next two holes below this spot that have a 0.625-in. space
between them.
Note: The hole pattern shown in Figure 3-2 repeats on the rail.
3-8
109352-E Rev. A
Installing the BCN and BCN RLC
Router
Flange
Rack Post
4"
2.375"
1.750"
1.125"
0.625"
Angle Bracket
Supporting Router
Mounted on Back of
Rack Post
Mounting Hole Locations
Figure 3-2.
Locating the Mounting Holes
2.
Mount the angle brackets in the area indicated by Figure 3-3.
a.
109352-E Rev. A
If your rack does not have threaded holes, place cage nuts over the
holes before you attach the angle brackets.
3-9
Installing and Maintaining BN Platforms
b.
Align the edge of the brackets to the rack:
-- If the interior of the rack contains horizontal bracket supports, align
the angle bracket with the horizontal bracket support.
-- If the interior of the rack does not contain horizontal bracket supports,
brace the angle bracket between the side rails.
You must orient the brackets that support the hardware platform as shown
in Figure 3-3. Ensure that you can adjust the bracket vertically along its
slots before you secure it.
c.
Insert two 10-32 screws through each bracket’s slotted holes and into
the holes in the supports of the rack. Do not tighten the screws.
d. Adjust each bracket vertically along the bracket slots until the
bracket is 1.4 in. (3.6 cm) below the center of one hole in the front
vertical support of the rack.
e.
3-10
Tighten the screws with a screwdriver until secure.
109352-E Rev. A
Installing the BCN and BCN RLC
Height 28 in. (71 cm)
Minimum
Depth 28 in. (71 cm)
Minimum
Screw
(2 Places)
Bracket
(2 Places)
Rail
Cage nut
If rack rail is not threaded,
attach cage nut
Figure 3-3.
109352-E Rev. A
Attaching Brackets to Support the BCN
3-11
Installing and Maintaining BN Platforms
Installing the BCN
Warning: The BCN weighs approximately 214 lb (97.07 kg). Do not attempt
to lift it by yourself. Use a team of people or specialized lifting equipment.
Before placing the BCN in the rack, ensure that all equipment already inside
the rack is secure.
Prepare the BCN for installation as follows:
1.
Remove each power module (Figure 3-4). Removing the power modules
significantly reduces the weight of the BCN. You can remove the power
modules while the BCN is still on its shipping platform.
a.
Using a flat-head screwdriver, loosen the captive screw until the
power module disengages.
b.
Grasp the handle and pull the power module out of the BCN.
Powe
r OK
Screw
Figure 3-4.
3-12
Removing a Power Module from the BCN
109352-E Rev. A
Installing the BCN and BCN RLC
2.
Lift and remove the BCN from its shipping platform and place it gently
on the floor.
Caution: You can damage the front bezel if you attempt to remove it while the
BCN is positioned on its shipping platform.
3.
Using both hands, pull on the top of the front bezel and remove it from
the chassis (Figure 3-5).
Pull Top
POWER
B A C K B O N E
Figure 3-5.
109352-E Rev. A
N O D E
RUN
BOOT
DIAG
RESET
Removing the Front Bezel from the BCN
3-13
Installing and Maintaining BN Platforms
Install the BCN in the electronic enclosure rack as follows:
Note: Before putting the BCN in the rack, ensure that the rack holes are
threaded. If they are not threaded, place cage nuts over the front vertical
support holes.
1.
Insert the BCN in the rack as shown in Figure 3-6. Make sure the BCN
rests squarely on the angle brackets.
Rail
Cage nut
Screw
(4 Places)
If rack rail is not threaded,
attach cage nut.
Figure 3-6.
3-14
Mounting the BCN to the Rack
109352-E Rev. A
Installing the BCN and BCN RLC
2.
Insert and tighten the screws with a screwdriver until secure.
Replace the front bezel as follows:
1.
Align the mounting retainers on the inside of the bezel with the holes on
the front of the electromagnetic compatibility (EMC) shield.
2.
Push the sides of the bezel into place.
Insert each power module as follows:
1.
Grasp the handle and guide the module into the desired slot along the
side guides and gently insert the module until the power supply connector
comes into contact with the connector on the power supply backplane.
Note: Stop when you feel resistance. The power module does not fully insert
until you tighten the thumbscrew.
2.
Using a flat-head screwdriver, turn the captive screw until the power
module seats firmly.
The Power OK LED lights when the BCN powers on and the power module
fully engages.
3.
Turn the captive screw an additional 1/4 turn. Do not overtighten the
screw.
Powering On the BCN or BCN RLC
Power on the BCN or BCN RLC as follows:
109352-E Rev. A
1.
Ensure that the power switch(s) on the rear panel is in the OFF (down or
0) position.
2.
Connect the power plug(s) to the AC inlet(s) on the BCN rear panel.
3.
Insert the power plug(s) into the appropriate wall receptacle.
Refer to “Electrical Requirements” earlier in this chapter.
4.
Turn the power switch(s) to the ON (up or 1) position.
3-15
Installing and Maintaining BN Platforms
BCN
BCN RLC
Power OK
Power OK
Power supply
#1 049 8 S R M L 7 6 5 4 3 2 1
SRML 7 6 5 4 3 2 1
Power supply
#4
Power OK
Source
B
Power OK
Power supply
#3
Power supply
#3
Power OK
Power OK
Power supply
#2
Power supply
#2
Power OK
Power OK
Power supply
#1
AC
Input
AC
Source A
Source
A
Power supply
#1
Source
A
Source
B
AC
Source B
BN00084A
Figure 3-7.
BCN and BCN RLC Power Systems
Note: For the BCN RLC, only the two bottom power supplies are powered by the
Source A power cord, and only the two top power supplies are powered by the
Source B power cord.
5.
3-16
Verify that the POWER OK LED on each power module is on.
109352-E Rev. A
Installing the BCN and BCN RLC
If an LED is not on, replace the power module. (Refer to Chapter 5,
“Hot-Swapping Hardware Components,” for hot-swap procedures.)
6.
Verify that air is flowing from the cooling fans and out through the top of
the BCN.
1
Source
A
0
Source
B
BN0083A
Figure 3-8.
BCN RLC Power Source and Switches
Note: If you cannot feel air flow from the BCN vents, if the POWER and
DIAG LEDs remain off, or if the DIAG LED remains on, turn the power
switch(es) at the rear of the BCN to the OFF position. Wait 1 minute and then
turn the power switch(es) to the ON position. If the problem persists, contact
the Bay Networks Technical Response Center.
After you power on the BCN, each routing engine automatically initiates a
diagnostic test to verify proper board function.
LED Activation Sequence
The LEDs on the front panel of the BCN (Figure 3-9) activate while the BCN
initializes and runs through its diagnostic tests.
109352-E Rev. A
3-17
Installing and Maintaining BN Platforms
Indicates power OK
Indicates router software is executing
Indicates one or more slots are booting
POWER
RUN
BOOT
DIAG
RESET
Indicates diagnostic test
execution or node failure
Initializes (boots) the system
Figure 3-9.
BCN Front-Panel LEDs
The LEDs typically activate in the following order (the sequence may vary
slightly or overlap):
1.
2.
3-18
The POWER and DIAG LEDs turn on.
•
When on, the POWER LED indicates that the power supply voltages are
all within normal limits. If a power module is not operational, the
POWER LED remains off. Check the power modules on the rear panel of
the BCN to determine which is not operational. The Power OK LED on
each power module remains on under normal operation. Ensure that the
power module is firmly seated within its slot. If it is, refer to Chapter 5,
“Hot-Swapping Hardware Components,” for instructions on how to
replace a power module.
•
For the BCN RLC, both AC Sources (A + B) must be present before the
POWER LED will be on.
•
When on, the DIAG LED indicates diagnostic testing on one or more
modules. After a successful test, the DIAG LED turns off. The DIAG
LED remains on if a diagnostic test does not end successfully for any
given slot.
The BOOT and RUN LEDs turn on.
•
When on, the BOOT LED indicates the initialization and loading of
software by one or more modules.
•
When on, the RUN LED indicates that system software is running on one
or more modules. The RUN LED remains on while the BCN is operating
normally.
109352-E Rev. A
Installing the BCN and BCN RLC
The BCN indicates a successful start-up by turning off the BOOT LED. The
POWER and RUN LEDs remain on. Refer to Chapter 6, “Switches and LEDs,”
for a complete explanation of all Backbone Node LEDs.
To activate the BCN on your IP network, refer to Quick-Starting Routers and BNX
Platforms (router software), or Configuring an Interface for Network
Management (BayStream software).
109352-E Rev. A
3-19
Installing and Maintaining BN Platforms
Establishing a Local or Remote Connection to the BCN
You can cable a BCN to an ANSI console or a PC to establish a local Technician
Interface session, or to a modem to establish a remote session.
Note: Bay Networks offers the cables for console connection. If you plan to
build your own cables, or if you want to order additional cables, refer to Cable
Guide for Routers and BNX Platforms (router software) or Cable Guide
(BayStream software).
Local Connection
Cable the BCN to an ANSI console as follows:
1.
Power on the console and set its operating parameters as shown in
Table 3-8.
See your console user manual for instructions on how to set these operating
parameters.
Table 3-8.
Console Operating Parameters
Parameter
Value
Baud rate
9600
Data bits
8
Stop bits
1
Parity
None
2.
Insert the male end of the cable (Order No. 7525) into the CONSOLE
port of the System Resources Module-Link (SRM-L) Module
(Figure 3-10).
The SRM-L resides in Slot 7 of the BCN rear panel.
3.
3-20
Insert the female end of the cable into the ANSI console communications
port (Figure 3-8).
109352-E Rev. A
Installing the BCN and BCN RLC
SRM-L (Slot 7)
Power OK
ANSI console
communications port
14 13 12 11 10 9 8 SRML 6 5 4 3 2 1
Power OK
E1
PT-
CE
E1
PT-
CE
NC
SY 80
52
L
L
FAI
L
NC
SY 80
52
NC
SY 80
52
L
FAI
SI
HS
L
FAI
FAI
T
NE
QE
L
T
NE
QE
L
C
FAI
T
NE
DI
QE
L
FAI
VC
L
FAI
ML
SR
DI
FD
L
FAI
DI
FD
L
FAI
DI
FD
FD
L
FAI
L
FAI
FAI
FAI
ND
ND
SE
SE
G
M4
M4
CO
RL
V
RG
IG
1
CO
4
SD
RL
RT
JTA
1
VR
VR
XC
4
SD
XC
1
VR
XC
RL
RT
NS
IG
RS
M4
CO
4
SD
V
RG
YA
M1
NS
YA
PH
CO
RT
NS
YA
PH
YA
PH
PH
RS
Power OK
1
TA
OS
OS
RL
RL
CA
A
RR
C
VC
2
M
3
M
CO
3
M
CO
2
3
VR
CO
XC
2
2
VR
XC
12V
2
VR
XC
YB
1
YB
PH
IG
3
VR
3
VR
M
CO
M
CO
M
CO
4
VR
XC
4
VR
XC
Figure 3-10.
A
SD L1 L2 L3 TX
B
NS
CO
1
SD L1 L2 L3 TX
1
A
E
OL
1
A
75
M
OH
SD L1 L2 L3 TX
V
RC
B
M
SD L1 L2 L3 TX
A
XC
SD L1 L2 L3 TX
XC
SD L1 L2 L3 TX
3
VR
XC
B
2
SD
RL
SE
OH
SS
PA
BY
M2
CO
2
SD
RL
B
M2
CO
2
SD
RL
ND
SE
SD L1 L2 L3 TX
M2
CO
A
RR
ND
S
OS
RL
A
RR
SD L1 L2 L3 TX
OS
RL
SS
PA
BY
S
SS
PA
BY
S
SS
BY
S
RS
PA
75
PH
E1-
IG
V
YB
PH
1
E1RS
RC
YB
PH
P
12V
1
Console
port
P
E1-
P
E1-
0
2
P
A
RR
Power OK
4
VR
XC
Cabling the BCN to a Console
Remote Connection
Note: Before you replace the local console connection with a modem
connection, you must use the Technician Interface to configure the BCN initial
IP network interface. To activate the BCN on your IP network, refer to
Quick-Starting Routers and BNX Platforms (router software), or Configuring
an Interface for Network Management (BayStream software).
Cable the BCN to the modem as follows:
1.
Power on and configure the modem as shown in Table 3-9.
Refer to the modem user documentation instructions on configuring your
modem.
109352-E Rev. A
3-21
Installing and Maintaining BN Platforms
Table 3-9.
Modem Operating Parameters
Parameter
Setting
Baud rate
9600 or less
Auto answer
Set on n rings with DTR active
(n must be greater than 0)
Clear to Send (CTS) signal
Always ON
Data Terminal Ready (DTR) signal
DTR signal fail-disconnect enabled (return
to command mode, auto-answer off)
Data Carrier Detect (DCD) signal
DCD signal on while carrier present (the
node uses DCD to detect modem
disconnect)
Local character echo
OFF
Supervisory functions
OFF
Data Set Ready (DSR) signal
ON
2.
If you have not already done so, remove the cable connector from the
CONSOLE port of the System Resource Module-Link (SRM-L).
The SRM-L resides in Slot 7 of the BCN rear panel.
3.
Insert one end of the modem cable (Order No. 77850) into the
SRM-L CONSOLE port.
Note: The console cable and the modem cable both connect to the BCN using
the CONSOLE port.
4.
Insert the other end of the cable into the communications port on the
modem.
To configure the BCN CONSOLE port for modem operation, refer to Configuring
Routers (router software) or Getting Started with Site Manager (BayStream
software).
3-22
109352-E Rev. A
Chapter 4
Accessing the Interior
Experienced network operators can safely perform the user-serviceable
procedures that are described in Chapter 5. Only authorized Bay Networks service
technicians can perform other procedures, not described in this book.
Before you can perform user-serviceable procedures, you must access the interior
of your Backbone Node hardware platform, as follows:
•
Remove the front bezel.
•
Connect the antistatic wrist strap to the hardware platform.
Caution: Always use the wrist strap to avoid damage to electronic
components when handling hardware modules.
•
Remove the electromagnetic compatibility (EMC) shield from the front panel
to access the interior.
•
Remove and install an air flow module. (Refer to the BLN and BCN Fuse
Service Manual for instructions.)
Depending on your hardware platform model, you need a Phillips screwdriver,
standard screwdriver, or both to replace hardware components.
109352-E Rev. A
4-1
Installing and Maintaining BN Platforms
Removing and Replacing the Front Bezel
You must remove the front bezel (front cover) of BLN, BLN-2, and BCN routers
to access their interiors.
Note: Keep the front bezel on during normal operation to comply with air flow
requirements.
Remove the front bezel from the BLN (Figure 4-1) and BLN-2 (Figure 4-2) as
follows:
1.
Using both hands, pull the bottom of the front bezel forward.
2.
Remove the bezel from the chassis.
Replace the BLN and BLN-2 front bezel as follows:
1.
Align the mounting retainers on the inside of the bezel with the holes on
the front of the EMC shield.
2.
Push the sides of the bezel into place.
POWER
B A C K B O N E
N O D E
RESET
RUN
BOOT
DIAG
Pull Bottom
Figure 4-1.
4-2
Removing the BLN Front Bezel
109352-E Rev. A
Accessing the Interior
POWER
B A C K B O N E
N O D E
RUN
BOOT
DIAG
RESET
Pull Bottom
Figure 4-2.
Removing the BLN-2 Front Bezel
Remove the front bezel from the BCN (Figure 4-3) as follows:
1.
Using both hands, pull the top of the front bezel forward.
2.
Remove the bezel from the chassis.
Replace the BCN front bezel as follows:
109352-E Rev. A
1.
Align the mounting retainers on the inside of the bezel with the holes on
the front of the EMC shield.
2.
Push the sides of the bezel into place.
4-3
Installing and Maintaining BN Platforms
Pull Top
POWER
B A C K B O N E
Figure 4-3.
4-4
N O D E
RUN
BOOT
DIAG
RESET
Removing the Front Bezel from the BCN
109352-E Rev. A
Accessing the Interior
Attaching the Antistatic Wrist Strap
Each BLN, BLN-2, BCN, and BCN RLC ships with an antistatic wrist strap. You
must wear an antistatic strap whenever you
•
Remove, install, and handle memory cards
•
Remove, install, configure, and handle hardware modules, including Fast
Routing Engine (FRE or FRE-2) modules, the SRM-F (System Resource
Module-Front), or any link modules
•
Remove and replace module fuses
The antistatic wrist strap directs the discharge of static electricity from your body
to the chassis of the hardware platform, thereby avoiding discharge to, and
possible damage of, sensitive electronic components.
Caution: Electrostatic discharge can damage hardware. Follow the procedure
in this section to protect your equipment from damage.
For BLN, BLN-2, BCN, and BCN RLC routers, locate the antistatic wrist strap on
the inside of the front bezel (front panel). Refer to “Removing and Replacing the
Front Bezel” earlier in this chapter for instructions.
Attach the antistatic wrist strap as follows:
109352-E Rev. A
1.
Remove the front bezel.
2.
Remove the antistatic wrist strap from the package attached to the back
of the front bezel.
3.
Verify that the cable attaches to the wrist strap.
4.
Place the strap around your wrist.
5.
Adjust the strap to ensure that the metal buckle inside the strap contacts
your skin.
6.
Insert the jack into the antistatic receptacle (Figure 4-4).
4-5
Installing and Maintaining BN Platforms
Figure 4-4.
Connecting the Wrist Strap Jack to the Antistatic Receptacle
Removing and Replacing the EMC Shield
You must remove the electromagnetic compatibility (EMC) shield to access the
memory cards and FRE or FRE-2 modules in the Backbone Node routers.
Caution: Do not operate a hardware platform with the EMC shield removed
for more than 5 minutes. Without the EMC shield, the hardware platform may
overheat. In addition, the BCN contains temperature sensors that may not
detect an overheating condition without the shield in place.
4-6
109352-E Rev. A
Accessing the Interior
Remove the EMC shield (Figure 4-5) as follows:
1.
Remove the front bezel. (Refer to “Removing and Replacing the Front
Bezel” earlier in this chapter for instructions.)
2.
Loosen the captive thumbscrews that fasten the EMC shield to the
chassis.
3.
Remove the EMC shield from the chassis.
Replace the EMC shield as follows:
1.
Position the EMC shield in front of the chassis.
2.
Tighten the captive thumbscrews that fasten the EMC shield to the
chassis.
To replace the front bezel, the EMC shield must be in place. Refer to “Removing
and Replacing the Front Bezel” earlier in this chapter for instructions.
109352-E Rev. A
4-7
Installing and Maintaining BN Platforms
!
POWER
B A C K B O N E
RUN
BOOT
DIAG
N O D E
RESET
WARNING
HIGH ENERGY PRESENT
Power unit OFF and disconnect power cord
BEFORE accessing this product.
Refer to your installation/service manual for instructions
VORSICHT!
HOCHSPANNUNG!
VOR jeglicher Intervention Gerat
ABSTELLEN und Netzstecker herauszuziehen!
Anleitungen in Installations-/Instandhaltungshandbuch beachten!
ATTENTION
PELIGRO
EQUIPEMENT SOUS HAUTE TENSION
Debrancher le cordon d’alimentation avant
d’enlever le couvercle.
Voir les instructions du fabricant
ALTO TENSION
APAGUESE la unidad y desconectese del tomacrriente
ANTES de abrir la unidad.
Veanse las instrucciones del fabricante en el manual de instalacion/servicio
EMC Shield
Thumbscrews
(7 Places)
POWER
B A C K B O N E
N O D E
RUN
BOOT
DIAG
RESET
EMC Shield
Thumbscrews
(10 Places)
Figure 4-5.
4-8
BLN and BCN EMC Shields
109352-E Rev. A
Accessing the Interior
Removing and Installing an Air Flow Module
Bay Networks ships an air flow module in each empty FRE/FRE-2 slot in the front
of all Backbone Node routers. Each air flow module redirects cool air to the
adjacent FRE or FRE-2 module.
Figure 4-6 illustrates the location of an air flow module. You must remove air flow
modules when replacing them with FRE or FRE-2 modules. (Refer to Chapter 5
for instructions on replacing FRE or FRE-2 modules.)
!
POWER
B A C K B O N E
N O D E
RUN
BOOT
DIAG
WARNING
RESET
VORSICHT!
HIGH ENERGY PRESENT
Power unit OFF and disconnect power cord
BEFORE accessing this product.
Refer to your installation/service manual for instructions
HOCHSPANNUNG!
VOR jeglicher Intervention Gerat
ABSTELLEN und Netzstecker herauszuziehen!
Anleitungen in Installations-/Instandhaltungshandbuch beachten!
ATTENTION
PELIGRO
EQUIPEMENT SOUS HAUTE TENSION
Debrancher le cordon d’alimentation avant
d’enlever le couvercle.
Voir les instructions du fabricant
ALTO TENSION
APAGUESE la unidad y desconectese del tomacrriente
ANTES de abrir la unidad.
Veanse las instrucciones del fabricante en el manual de instalacion/servicio
Air Flow
Module
Board Retainer Bracket
(1 Screw)
Figure 4-6.
Air Flow Module Installed in a Hardware Platform
Remove an air flow module as follows:
1.
Remove the front bezel.
(Refer to “Removing and Replacing the Front Bezel” earlier in this chapter.)
2.
Remove the EMC shield.
(Refer to “Removing and Replacing the EMC Shield” earlier in this chapter.)
3.
Remove the board retainer bracket (BLN and BLN-2 only).
Refer to Figure 4-6.
a.
Remove the screw at the bottom of the bracket.
A single screw fastens the bottom of the board retainer bracket to the
chassis.
109352-E Rev. A
4-9
Installing and Maintaining BN Platforms
b.
4.
Remove the bracket.
Pull the front of the air flow module forward to remove it (Figure 4-7.)
Insert an air flow module as follows:
1.
Grasp the sides of the air flow module (Figure 4-8).
2.
Correctly position the back edge of the air flow module to accommodate
the slot power connector and locating pin.
(For BCNs, hold the air module vertically, with the top edge up as noted in
Figure 4-8.)
3.
Insert the air flow module as shown in Figure 4-6.
(For BCNs, insert the air module vertically, with the top edge up as noted in
Figure 4-8.)
4.
Replace the board retainer bracket (BLN and BLN-2 only), EMC shield,
and front bezel.
BACK
BON
E NO
DE
POWE
RUN R
BOOT
DIAG
RESE
T
Figure 4-7.
4-10
Inserting or Removing an Air Flow Module
109352-E Rev. A
Accessing the Interior
This Edge Up for BLN
Front Edge
This Edge Up
for BCN
Space for Power Connector
Space for Locating Pin
Back Edge of Air Flow Module
Figure 4-8.
109352-E Rev. A
Grasping the Air Flow Module
4-11
Chapter 5
Hot-Swapping Hardware Components
Depending on your hardware platform, you can replace the following
user-serviceable hardware components:
•
Memory cards
•
Hardware modules
-- Link modules
-- Routing Engine (FRE/FRE-2/ARE) modules
-- System Resource Module-Link (SRM-L)
-- System Resource Module-Front (SRM-F)
•
Power supply modules
•
Fan trays
Hot-swap capability allows experienced users to replace these components while
the power is on. Refer to Table 5-1 for a list of the components that are
user-serviceable for your hardware platform.
Table 5-1.
User-Serviceable Components
Component
BLN
(Backbone
Link Node)
BLN-2
(Backbone
Link Node-2)
BCN
(Backbone
Concentrator Node)
Memory Cards
Y
Y
Y
Link Modules
Y
Y
Y
Routing Engine Modules
Y
Y
Y
SRM-L Modules
Y
Y
Y
(continued)
109352-E Rev. A
5-1
Installing and Maintaining BN Platforms
Table 5-1.
Component
User-Serviceable Components (continued)
BLN
(Backbone
Link Node)
BLN-2
(Backbone
Link Node-2)
BCN
(Backbone
Concentrator Node)
SRM-F Modules
Y
Y
Y
Power Supplies
N
Y
Y
Fans
N
Y
N
Depending on your model, you will need a Phillips screwdriver, a standard
screwdriver, or both to replace hardware components.
Replacing Flash and PCMCIA SRAM Memory Cards
This section describes how to remove and replace a Flash memory card or a
PCMCIA SRAM memory card (Order No. 75049 or 77014). Each BN must be
equipped with a minimum of one 4-MB Flash memory card or one PCMCIA
SRAM memory card. Each BN supports a maximum configuration of one Flash
card or PCMCIA SRAM card per FRE module. You install additional PCMCIA
SRAM cards to provide redundancy, add storage capacity, and/or collect Frame
Relay Switch and SMDS Switch billing data.
Note: Frame Relay Switch and SMDS Switch billing data must be collected
on a dedicated PCMCIA SRAM memory card. Consequently, simultaneous
support for both Frame Relay Switch and SMDS Switch billing requires a
minimum of two SRAMs: one for Frame Relay billing and a second for
SMDS billing. The software image, other executable files, and configuration
files are stored on the Flash memory card.
When you remove a Flash card or PCMCIA SRAM card, the non-volatile file
system (NVFS) disables access to the card. When you insert and format a Flash
card or PCMCIA SRAM card or insert a formatted Flash card or PCMCIA SRAM
card, the NVFS automatically provides access to the card.
5-2
109352-E Rev. A
Hot-Swapping Hardware Components
Memory Card Read-Write Protect Switch
Memory cards are read-write protected. To change the protection on a memory
card, you must physically remove the card from the BayStream hardware, change
the protection, and reinsert the card. Failure to adhere to this sequence can cause
unpredictable and undesirable consequences.
Use the following procedures to remove and replace a Flash memory card or a
PCMCIA SRAM memory card from a BN.
Caution: Electrostatic discharge can damage hardware. Attach the antistatic
strap to your wrist and connect it as described in Chapter 4 before you remove
or install a memory card.
To remove a Flash or PCMCIA SRAM memory card:
109352-E Rev. A
1.
Remove the front bezel.
2.
Remove the EMC shield.
3.
Release the memory card by pressing the ejector button on the FRE or
FRE-2 module (Figure 5-1).
4.
Pull the memory card toward you.
5-3
Installing and Maintaining BN Platforms
FRE/FRE-2/ARE Processor
Module or Memory Card
Daughterboard
Card Receptacle
Ejector Button
Memory Card
Read-Write
Protect Switch
Figure 5-1.
Removing a Flash or PCMCIA SRAM Memory Card
To install a Flash or PCMCIA SRAM memory card:
1.
Position the card with the label facing up and the INSERT arrow
pointing toward the card receptacle.
2.
Insert the card into the card receptacle.
3.
Gently push the card until it fits snugly into place.
4.
Replace the EMC shield.
5.
Replace the front bezel.
If the memory card is new, and you did not obtain it from Bay Networks, you must
format the card before attempting to write to it. Use Site Manager or the
Technician Interface to format the memory card.
5-4
109352-E Rev. A
Hot-Swapping Hardware Components
Protecting Memory Card Files
Bay Networks ships each memory card with its Read-Write Protect switch in the
unprotected position (Figure 5-2). After successfully loading the configuration file
and saving your configuration, you may want to write-protect the memory card for
backup purposes.
Note: You typically do not operate a hardware platform with a write-protected
memory card. We recommend making a copy of your configuration on another
memory card, write-protecting the card, and storing it in a safe place.
To change memory card protection, complete the following steps:
1.
Remove the memory card from the hardware platform.
a.
Press the rectangular ejector button adjacent to the memory card
receptacle. (Refer to Figure 5-2.)
b.
Pull the card toward you.
Caution: You must remove the card from the hardware platform before
changing the read-write protection. Failure to remove the card may result in
improper write-protection.
109352-E Rev. A
2.
Locate the Read-Write Protect Switch on the edge opposite the arrow on
the memory card (Figure 5-3).
3.
Adjust the Read-Write Protect Switch.
5-5
Installing and Maintaining BN Platforms
Unprotected
Protected
Figure 5-2.
4.
Memory Card Read-Write Protect Switch
Reinsert the memory card into the card receptacle.
a.
Position the card with the label facing up and the INSERT arrow
pointing toward the card receptacle.
b.
Insert the card into the card receptacle.
c.
Gently push the card in until it fits snugly into place.
d. Close the hardware platform (refer to Chapter 4, “Accessing the
Interior”).
Replacing PCMCIA SRAM Memory Card Batteries
A 3-V lithium “coin-type” battery, described in Table 5-2, provides backup power
to the PCMCIA SRAM memory card, allowing it to be removed from the
BayStream hardware for approximately 30 minutes without loss of stored data.
Table 5-2.
PCMCIA SRAM Battery
Specification
5-6
Diameter
23.0 mm
Thickness
2.5 mm
Weight
3.2 g
Type
CR235 (or equivalent)
109352-E Rev. A
Hot-Swapping Hardware Components
Caution: While the PCMCIA SRAM card is installed in a BayStream
hardware platform, there is no drain on the 3-V lithium battery. Battery drain
occurs only when the PCMCIA SRAM card is removed from the BayStream
platform. To ensure data integrity, we recommend that the battery be
replaced yearly.
To replace the 3-V lithium battery:
1.
Insert a slender pointed object, such as the end of a paper clip, into the
hole on the upper side of the SRAM card (near the battery holder).
2.
Release the battery holder by pressing the paper clip inward and pulling
the battery holder straight out of the card.
Note: When the battery holder is free of the card, the battery will fall out.
3.
Replace the old battery with a new one, making certain to match the
polarity as shown on the battery holder.
4.
Squeeze the holder containing the new battery tightly, and reinsert it into
the battery cavity until it snaps into place.
Caution: The battery must be replaced within 30 minutes, or data will be
lost.
Replacing a Link Module or SRM-L
The Backbone Node hot-swap feature allows you to remove and replace a link
module or SRM-L with the power on or off.
Danger: A potential energy hazard exists during hot-swap service of link
modules. Do not remove more than two adjacent modules without turning
off the BN.
109352-E Rev. A
5-7
Installing and Maintaining BN Platforms
When removing or installing a link module, keep the following in mind:
•
If you replace a link module with another of a different type (that is, you
replace an Ethernet link module with an FDDI link module), you must first
undo the configuration of all circuits on the old slot before the hardware
platform software can properly configure the new module. Refer to
Configuring Routers (router software) or Getting Started with Site Manager
(BayStream Software) for instructions on deleting and editing a configuration
file.
•
When you remove a link module, connectivity to the slot in question and the
services that slot provides become disrupted. The other routing engine
processor modules resynchronize their routing tables after the slot fails to
receive packets.
•
Insert ARE link modules only in slots opposite ARE processor modules. Do
not install an ARE link module in a slot opposite a FRE or FRE-2 processor
module.
•
The SRM-L and SRM-F (see next section) each supply two backbones. This
means that two backbones become inactive if you remove one of these
modules, and four backbones become inactive if you remove both. When you
insert a module, its associated backbones become active.
•
Before removing or installing a link module, first access the interior of your
hardware platform. (Refer to Chapter 4, “Accessing the Interior,” for
instructions.)
Caution: Electrostatic discharge can damage hardware. Use the antistatic
wrist strap when handling any hardware platform components.
The procedures for replacing the link modules and SRM-Ls are the same for the
BLN, BLN-2, and BCN. (Refer to Figure 5-3 for the BLN, Figure 5-4 for the
BLN-2, and Figure 5-5 for the BCN.)
5-8
109352-E Rev. A
Hot-Swapping Hardware Components
To Antistatic
Receptacle
In Front ( )
100 - 240V~
10.0A
50/60Hz
RT
NS
VR
XC
IL
FA
W
IL
FA
T
DS
2
DS
RL
2
DS
RL
RC
RT
NS
VR
XC
IL
FA
W
IL
FA
T
DS
4
VR
RC
EL
RY
VR
1
2
DS
RL
M
CO
2
DS
RL
1
EL
RY
M
CO
5
0
I
VR
XC
IL
FA
W
IL
FA
T
DS
RC
RT
NS
VR
XC
IL
FA
W
IL
FA
T
DS
VR
VR
2
DS
RL
RT
NS
2
DS
RL
RC
EL
RY
1
2
DS
RL
M
CO
2
DS
RL
1
EL
RY
M
CO
Link
3 Modules
2
??
SR
??
L
LE
M
?
??
??
??
??
??
??
O
NS
CO
1 SRM-L
Captive Screws
Figure 5-3.
Link Modules and the SRM-L in a BLN
Remove a link module or SRM-L as follows:
109352-E Rev. A
1.
Disconnect any exterior cables from the module.
2.
Loosen the two captive screws on each end of the module.
3.
Grasp the sides of the module and pull it out of the node.
4.
Place the module in an antistatic protective bag.
5-9
Installing and Maintaining BN Platforms
Captive Screws
IL
DS
FA
T
IL
DS
FA
VR
T
T
NSR
IL
WFA
R
RCV
XC
T
NSR
S2
RLD
IL
WFA
R
RCV
S2
RLD
L
RYE
L
M
CO
1
S2
RLD
1
S2
RLD
XC
VR
4
RYE
M
CO
IL
DS
FA
T
IL
DS
FA
VR
T
IL
WFA
T
NSR
XC
VR
R
RCV
IL
WFA
T
NSR
S2
RLD
XC
R
RCV
S2
RLD
L
RYE
L
S2
RLD
M
CO
1
S2
RLD
1
RYE
M
CO
SRM-L
CO
LE
M
NSO
??
??
??
??
?
??
??
??
??
SR
L
1
Power OK
Power OK
109352-E Rev. A
5-10
Link Modules and the SRM-L in a BLN-2
Figure 5-4.
Link
3 Modules
2
To Antistatic
Receptacle
In Front ( )
5
Hot-Swapping Hardware Components
To Antistatic
Receptacle
In Front ( )
SRM-L (Slot 7)
Power OK
Link Modules
Link Modules
14 13 12 11 10 9 8 SRML 6 5 4 3 2 1
Power OK
1
1
-E
PT
-E
PT
CE
CE
NC
SY 80
52
IL
IL
FA
IL
NC
SY 80
52
IL
FA
SI
HS
IL
FA
FA
T
NE
QE
IL
FA
ML
SR
T
NE
QE
IL
IL
FA
C
VC
T
NE
QE
DI
DI
FD
IL
FA
IL
FA
DI
FD
FD
IL
FA
IL
FA
FA
FA
ND
ND
SE
M4
CO
D4
RLS
V
RT
NS
IG
S
M4
CO
D4
RLS
RT
NS
RT
NS
JT
1
VR
XC
Y
RR
Y
A
3
M
3
M
CO
2
3
M
CO
VR
XC
V
2
VR
2
XC
12
V
2
VR
XC
1
Y
B
Y
PH
B
Y
B
Y
PH
P
PH
B
PH
-1
E1
3
VR
OLE
M
CO
1
M
CO
1
M
CO
NS
1
4
VR
XC
CO
4
VR
XC
S
A
M
OH
SD L1 L2 L3 TX
75
B
V
RC
BY
SD L1 L2 L3 TX
M
SS
PA
A
SE
OH
SS
PA
BY
SD L1 L2 L3 TX
ND
SE
SS
PA
BY
3
VR
XC
B
XC
SD L1 L2 L3 TX
3
VR
XC
A
D2
RLS
S
M2
CO
SD L1 L2 L3 TX
D2
RLS
A
M2
CO
SD L1 L2 L3 TX
D2
RLS
B
ND
M2
CO
SD L1 L2 L3 TX
A
RR
S
SS
PA
BY
S
RLO
S
IG
RS
S
A
RR
B
IG
RLO
SD L1 L2 L3 TX
E1
RS
V
A
Power OK
12
75
Y
PH
C
CO
RC
A
PH
VC
-2
E1
-1
Y
PH
0
-2
E1
A
PH
CA
A
RR
1
VR
XC
M1
CO
TA
RLO
A
1
VR
XC
D4
RLS
S
RLO
AG
M4
CO
P
RS
P
RG
IG
RS
P
V
RG
1
SE
Figure 5-5.
DI
FD
IL
FA
Captive
Screws
NC
SY 80
52
Power OK
4
VR
XC
Link Modules and the SRM-L in a BCN
Install a link module or SRM-L as follows:
109352-E Rev. A
1.
Slide the module into the desired slot using the slot card guides.
2.
Insert the board until its connector panel touches the hardware platform
rear panel.
3.
Secure the two captive screws on both sides of the module.
5-11
Installing and Maintaining BN Platforms
4.
Connect the desired cables to the module.
Note: We recommend that you issue the diags command to the associated
slot, using the Bay Networks Technician Interface, immediately after you
insert a link module. (Refer to Using Technician Interface Software.)
Otherwise, the link module FAIL LED will remain lit, indicating diagnostics
have not run on the ILI.
Even if you do not issue the diags command, the link module initializes and
becomes operational as long as the board functions properly and contains the
correct interface configurations.
Replacing a Routing Engine Module or SRM-F
The Backbone Node hot-swap feature allows you to remove and replace
FRE/FRE-2/ARE modules or SRM-Fs with the power on or off.
Danger: A potential energy hazard exists during hot-swap service of
processor modules. Do not remove more than two adjacent modules without
powering off the hardware platform.
When removing or installing a routing engine processor module or an SRM-F,
keep the following in mind:
•
When you remove a FRE module, connections to the slot in question and the
services that slot provides become disrupted. The other FRE modules
resynchronize their routing tables after the slot fails to receive packets.
•
The SRM-F and SRM-L (see previous section) each supply two backbones.
This means two backbones become inactive if you remove one of these
modules, and four backbones become inactive if you remove both. When you
insert one module, its associated backbones become active.
•
When you insert a routing engine processor module in a slot, and the module
determines that slot power is stable, the module automatically resets as
follows:
-- The module executes the diagnostics image on its memory card
-- The module completes the boot process
•
5-12
Insert ARE processor modules only in slots opposite ARE link modules.
109352-E Rev. A
Hot-Swapping Hardware Components
•
Before removing or installing a module, you must first access the interior of
your hardware platform. (Refer to Chapter 4, “Accessing the Interior,” for
instructions.)
Caution: Electrostatic discharge can damage hardware. Use the antistatic
wrist strap when handling any hardware platform components.
The procedures for replacing a routing engine processor module or an SRM-F are
the same for the BLN, BLN-2, and BCN with one exception: you must first
remove a board retainer bracket from the BLN or BLN-2 in order to gain access to
the front modules.
Remove the board retainer bracket from a BLN or BLN-2 (Figure 5-6 or
Figure 5-7) as follows:
1.
Use a screwdriver to release the screw connecting the board retainer
bracket to the chassis.
2.
Gently pull the bottom of the board retainer bracket to remove it.
!
POWER
B A C K B O N E
N O D E
RUN
BOOT
DIAG
WARNING
RESET
VORSICHT!
HIGH ENERGY PRESENT
Power unit OFF and disconnect power cord
BEFORE accessing this product.
Refer to your installation/service manual for instructions
HOCHSPANNUNG!
VOR jeglicher Intervention Gerat
ABSTELLEN und Netzstecker herauszuziehen!
Anleitungen in Installations-/Instandhaltungshandbuch beachten!
ATTENTION
PELIGRO
EQUIPEMENT SOUS HAUTE TENSION
Debrancher le cordon d’alimentation avant
d’enlever le couvercle.
Voir les instructions du fabricant
ALTO TENSION
APAGUESE la unidad y desconectese del tomacrriente
ANTES de abrir la unidad.
Veanse las instrucciones del fabricante en el manual de instalacion/servicio
FRE/FRE-2/ARE
Processor Modules
(Slots 2-5)
SRM-F
(Slot 1)
Extractor
Figure 5-6.
109352-E Rev. A
Board Retainer Bracket
(1 Screw)
Routing Engine Modules and the SRM-F in a BLN
5-13
Installing and Maintaining BN Platforms
FRE/FRE-2/ARE
Processor Modules
(Slots 2-5)
POWER
B A C K B O N E
N O D E
RUN
BOOT
DIAG
RESET
To Antistatic
Receptacle
In Front ( )
Extractor
Figure 5-7.
Board Retainer Bracket
(1 Screw)
SRM-F (Slot 1)
Routing Engine Modules and the SRM-F in a BLN-2
Note: Only Slot 1 (the bottom slot) in the BLN and BLN-2 can contain an
SRM-F. Only Slot 7 in the BCN (Figure 5-8) can contain an SRM-F. The
remaining slots can contain routing engine processor modules.
5-14
109352-E Rev. A
Hot-Swapping Hardware Components
FRE/FRE-2/ARE
Processor Modules
SRM-F
FRE/FRE-2/ARE
Processor Modules
POWER
B A C K B O N E
N O D E
RUN
BOOT
DIAG
RESET
Extractor
1
Figure 5-8.
109352-E Rev. A
2
3
4
5
6
7
8
9 10 11 12 13 14
Routing Engine Modules and the SRM-F in a BCN
5-15
Installing and Maintaining BN Platforms
Remove a routing engine module or SRM-F as follows:
1.
Gently pull the inside of the board extractors at the end of the module
toward you.
The extractors swing open, pushing the module out of the backplane
connectors.
2.
Place the routing engine module or SRM-F module in an antistatic
protective bag.
Insert a routing engine module or SRM-F module as follows:
1.
Off
If the routing engine module or SRM-F contains a power switch, ensure
that the switch remains pushed to the right in the on position
(Figure 5-9).
On
Power Switch
Figure 5-9.
Location of Power Switch on FRE/FRE-2 Module and SRM-F
Note: If your FRE/FRE-2 or SRM-F is not equipped with a power switch, it
powers on automatically when you connect it.
2.
Holding the board extractors open, slide the module into the card guides
of the desired slot.
Note: When inserting a module into a BLN or BLN-2, lift the middle of the
board slightly and push it gently to ensure that the connector in the middle of
the board engages.
5-16
109352-E Rev. A
Hot-Swapping Hardware Components
3.
Swing the extractors forward to lock the board in place.
Note: Remove the module and repeat Steps 1 and 2 if the extractors do not
lock into place easily.
4.
Observe the module and front-panel LEDs to determine whether the
FRE/FRE-2 module or SRM-F is functioning properly.
Following is a brief description of the LED activation sequence after you
insert a new FRE/FRE-2 or SRM-F module. (See the installation guide for the
module for a complete description of the LEDs.)
•
When you insert a FRE/FRE-2 module, the DIAG LED turns on during
diagnostics and then turns off if diagnostics determine that the
FRE/FRE-2 is functional.
Note: Contact the Bay Networks Technical Response Center if the DIAG LED
does not turn off.
•
If diagnostics determine that the FRE/FRE-2 is not functional, the DIAG
LED on the front panel and LED 8 on the FRE/FRE-2 module remain on.
If this occurs, ensure that the modules seat properly in the hardware
platform and issue the diags command using the Bay Networks
Technician Interface.
•
If diagnostics determine that the FRE/FRE-2 is functional and a link
module connects to the FRE/FRE-2, the hardware platform also performs
diagnostics on the link module.
Regardless of the results of the link module diagnostics, the BOOT LED
turns on, indicating that the FRE/FRE-2 is booting. If the link module or
any of its ports do not function, the link module Fail LED turns on.
5.
109352-E Rev. A
Replace the board retainer bracket in a BLN or BLN-2 as follows:
a.
Slide the top of the board retainer bracket into its designated ridge
and align the bottom of the bracket with the screw hole at the bottom
of the chassis (Figure 5-6 or Figure 5-7).
b.
Using a screwdriver, secure the bracket to the chassis.
5-17
Installing and Maintaining BN Platforms
6.
Replace the EMC shield and front bezel. (Refer to Chapter 4, “Accessing
the Interior,” for instructions.)
Replacing a Power Module
The BLN-2 supports two and the BCN supports four 620-watt power modules that
are hot-swappable. You can easily access these power modules from the back of
the hardware platform.
Each power module provides up to
•
•
•
•
90 amperes (A) @ +5 volts (V)
10 A @ +12 V
1 A @ -12 V
4 A @ +12 V (fans)
The Gate Access Management Entity (GAME) operating system generates an
event message in response to any change in the status of each power module.
These messages identify the power module by its slot. When looking at the rear of
the BLN-2, the power module slots number 1 and 2 from left to right. The BCN
power module slots number 1 through 4 from bottom to top.
Each power module has a green Power OK LED. When on, this LED indicates the
power module is operational and receiving current.
When you insert an operational power module into the BLN-2 or BCN, the Power
OK LED turns on. At the same time, the hardware platform automatically
redistributes the load among all power modules.
When you power on either the BLN-2 or BCN, and the hardware platform
provides sufficient power for redundancy, you can remove an operational power
module without affecting the operation of the hardware platform. When you
remove a power module, the Power OK LED on the front panel turns off, and the
hardware platform automatically redistributes the load among the remaining
power modules.
5-18
109352-E Rev. A
Hot-Swapping Hardware Components
Note: For the BCN RLC, note that only the two bottom power supplies are
powered by Source A, and only the two top power supplies are powered by
Source B.
To keep the BCN RLC powered up while you turn off a power switch or remove a
power cord for a power source, ensure that the other power source has two
working power supplies.
If you power up the BLN-2 or BCN with an insufficient number of power modules
to supply its configuration, or if you remove a power module necessary to supply
sufficient power, the power modules go into overcurrent mode, and the hardware
platform powers off.
The maximum number of ILIs for the BCN RLC is 10.
Before removing a power module, verify that the remaining power modules can
provide sufficient power for your hardware platform. The total ampere draw for all
hardware platform modules must not exceed the total ampere supply of the
hardware platform power modules.
To determine if your hardware platform has enough power to support your ILI
configuration:
1.
Add the ampere draw at +5 volts for each link module and routing engine
processor module together to obtain the total current draw for your ILI
configuration.
Refer to the data sheets provided with each link module and routing engine
processor module to determine the ampere draw at +5 volts.
2.
Add the current supply at +5 volts for each power module in the
hardware platform.
Each power module provides up to 90 amperes @ +5 volts.
3.
109352-E Rev. A
Subtract the total current draw (Step 1) from the total current supply
(Step 2).
5-19
Installing and Maintaining BN Platforms
If you end up with a negative number, the power supplies cannot support the
ILI configuration.
Note: BCN Power - 3 power supplies support up to 13 ILIs. The fourth power
supply will provide power supply redundancy (3+1).
BCN RLC Power - 4 power supplies support up to 10 ILIs
(maximum loading = output of 2 power supplies). This system has power
source redundancy (A+B) as well as power supply redundancy (2+2).
If you remove one power module and the remaining power modules cannot
support your ILI configuration, you can remove cables, link modules, and routing
engine modules until the ILI configuration draws less power than what the power
modules can provide.
Replacing the BLN-2 Power Module
You can remove and replace a power module in a BLN-2 with the power on or off.
Warning: The sides of the power module are hot when removed from a
BLN-2 that has been operating recently. Hold the power module by the
bottom.
Remove a BLN-2 power module as follows:
5-20
1.
Loosen the captive thumbscrew until the power module disengages.
2.
Grasp the handle and gently pull it out of the BLN-2 (Figure 5-10).
109352-E Rev. A
Hot-Swapping Hardware Components
Figure 5-10.
109352-E Rev. A
Removing a Power Module from a BLN-2
5-21
Installing and Maintaining BN Platforms
Insert a BLN-2 power module as follows:
1.
Grasp the handle and guide the module into the desired slot along the
side guides and gently insert the module.
Note: Stop when you feel resistance. The power module does not fully insert
until you tighten the thumbscrew.
2.
Tighten the captive thumbscrew until the power module is seated firmly.
Note: If the BN is on, the Power OK LED turns on when the power module
connects to the power module backplane.
3.
Turn the captive screw no more than an additional 1/4 turn. Do not
overtighten the screw.
If the Power OK LED does not turn on, contact the Bay Networks Technical
Response Center.
Replacing the BCN Power Module
You can remove and replace a power module in a BCN with the power on or off.
Warning: The sides of the power module are hot when removed from a BCN
that has been operating recently. Hold the power module by the bottom.
Note: On the BCN RLC, the top two power supplies are powered by AC
Source B and the bottom two power supplies are powered by AC Source A.
Remove a BCN power module as follows (Figure 5-11):
5-22
1.
Loosen the captive thumbscrew until the power module disengages.
2.
Grasp the handle and pull it out of the BCN.
109352-E Rev. A
Hot-Swapping Hardware Components
Powe
r OK
Screw
Figure 5-11.
Removing a Power Module from a BCN
Insert a BCN power module as follows:
1.
Grasp the handle and guide the module into the desired slot along the
side guides and gently insert the module.
Note: Stop when you feel resistance. The power module does not fully insert
until you tighten the thumbscrew.
2.
Tighten the captive thumbscrew until the power module is seated firmly.
Note: If the hardware platform is on, the Power OK LED turns on when the
power module connector comes into contact with the connector on the power
module backplane.
3.
109352-E Rev. A
Turn the captive screw no more than an additional 1/4 turn. Do not
overtighten the screw.
5-23
Installing and Maintaining BN Platforms
If the Power OK LED does not turn on, contact the Bay Networks Technical
response Center.
Replacing a Fan Tray in a BLN-2
The BLN-2 contains three fan trays — one double-fan tray under the front bezel
and two single-fan trays in the rear of the unit. You can remove and replace fan
trays in a BLN-2 with the power on or off.
Caution: The BLN-2 overheats if you remove the fan tray for more than 2
minutes.
Remove a double-fan tray from the front of a BLN-2 as follows (Figure 5-12):
Caution: Electrostatic discharge can damage hardware. Use the antistatic
wrist strap when handling any hardware platform components.
1.
Remove the front bezel.
(Refer to Chapter 4, “Accessing the Interior,” for additional information.)
5-24
2.
Remove the screw that fastens the fan tray to the chassis.
3.
Grasp the bottom of the fan tray and pull it out of the BLN-2.
109352-E Rev. A
Hot-Swapping Hardware Components
BLN-2 Fan Unit
POWER
B A C K B O N E
N O D E
RUN
BOOT
DIAG
RESET
Fan Screw
Figure 5-12.
Double-Fan Tray in the BLN-2
Remove a single-fan tray from the rear of the BLN-2 as follows (Figure 5-13):
Caution: Electrostatic discharge can damage hardware. Use the antistatic
wrist strap when handling any hardware platform components.
109352-E Rev. A
1.
Remove the screw that fastens the fan tray to the chassis.
2.
Grasp the bottom of the fan tray and pull it out of the BLN-2.
5-25
Installing and Maintaining BN Platforms
BLN-2 Fan Unit
VR
IL
DS
FA
XC
T
IL
RT
WFA
NS
2
2
VR
EL
DS
1
DS
RC
RL
RL
M
RY
CO
VR
IL
DS
FA
XC
T
IL
RT
WFA
NS
2
2
VR
EL
DS
1
DS
RC
RL
RL
M
RY
CO
VR
IL
DS
FA
XC
T
IL
RT
WFA
NS
2
2
VR
EL
DS
1
DS
RC
RL
RL
M
RY
CO
VR
IL
DS
FA
XC
T
IL
RT
WFA
NS
2
2
VR
EL
DS
1
DS
RC
RL
RL
M
RY
CO
??
M
SR
??
?
??
??
??
E
OL
NS
??
??
??
CO
L
Power OK
Power
Fan Screws (2 Places)
Figure 5-13.
Single-Fan Trays in the BLN-2
Insert a fan tray as follows:
5-26
1.
Grasp the bottom of the fan tray and guide it into the slot until the
connectors at the rear of the fan tray engage.
2.
If the BLN-2 is on, the fans start up when the fan tray connectors fully
engage.
3.
Secure the screw that fastens the fan tray to the chassis.
109352-E Rev. A
Installing and Maintaining BN Platforms
5-28
109352-E Rev. A
Chapter 6
Switches and LEDs
Read this chapter for a description of the switches and LEDs on the front-panel of
each Backbone Node hardware platform. This chapter also describes the LED on
the 620-watt BLN-2, BCN, and BCN RLC power module. For a description of the
LEDs on a link or processor module, refer to the installation guide for that
module.
Front Panel
You can find the Reset switch and the LEDs on the front panel of the BLN,
BLN-2, BCN, and BCN RLC. Figure 6-1 shows the front-panel LEDs.
Indicates power OK
Indicates router software is executing
Indicates one or more slots are booting
POWER
RUN
BOOT
DIAG
RESET
Indicates diagnostic test
execution or node failure
Initializes (boots) the system
Figure 6-1.
109352-E Rev. A
Front-Panel LEDs
6-1
Installing and Maintaining BN Platforms
Reset Switch
The Reset switch warm-starts the hardware platform. A warm-start is equivalent
to issuing the boot command from Site Manager or the Technician Interface.
Refer to Using Technician Interface Software (router software) or Administration
Guide (BayStream software) for a description of the warm-start procedure.
Front-Panel LEDs
Table 6-1 describes the front-panel LED functions.
Table 6-1.
6-2
Front-Panel LEDs
LED
Function
Power
Indicates power supply voltages are within normal limits. The
POWER LED remains on when the hardware platform is operating
normally.
RUN
System software is running on one or more modules. The RUN LED
remains on while the hardware platform is operating normally.
109352-E Rev. A
Switches and LEDs
Table 6-1.
Front-Panel LEDs
LED
Function
BOOT
Indicates software initialization and loading are taking place on one
or more modules. The hardware platform indicates a successful
startup by turning off the BOOT LED.
DIAG
Indicates diagnostic testing is taking place on one or more modules.
Diagnostic testing occurs when you cold-start the hardware platform.
Cold-starting occurs after a power cycle or when you issue the diags
command from the Technician Interface.
Diagnostic testing can take 1-to-4 minutes, depending on the
configuration of each slot. The Diag LED turns off after successfully
completing the diagnostic tests.
The DIAG LED may also indicate a fan failure. Verify whether the
problem is a fan failure by performing one of the following tasks:
•
View the event messages generated by the hardware platform
Gate Access Management Entity (GAME) operating system.
When reporting a fan failure, the GAME operating system
generates the following event messages:
System fan module failure...
System temperature has risen into cautionary range.
•
Remove the EMC shield to view the FRE or FRE-2 module LEDs.
If the DIAG LED on the front panel of the BN is on, and if LEDs F
and 8 on all FRE modules, or LEDs E and F on all FRE-2
modules are not on, a fan failure has occurred. (Refer to the next
section for more information about these LEDs.)
620-Watt Power Module LED
This section describes the function of the green Power OK LED on each of the
620-watt BLN-2 and BCN power modules (Figure 6-2).
109352-E Rev. A
6-3
Installing and Maintaining BN Platforms
Power OK
Figure 6-2.
620-Watt Power Module Power OK LED
The Power OK LED indicates that the hardware platform is powered on and that
the power module is fully engaged and operational.
6-4
109352-E Rev. A
Appendix A
Dial-Up Services Modems
This appendix lists some modems that support Version 7 Dial-Up Services and
provides configuration guidelines for specific setups. For additional information
on configuring a specific modem, refer to the modem user documentation.
109352-E Rev. A
A-1
Installing and Maintaining BN Platforms
Adtran DSU III AR
V.35 connection and V.25bis setup:
# from front panel to get menu
3 Config
1 Local
Network Options
Network Type = US Sprint SW56
Clock Source = Master
DTE Options
Connector Type = V.35
Data Format = Synchronous
DTE Command Option = V.25 Sync
CS Options = Follow RS
CD Options = Normal
TR Options = Idle when off
SR Options = Off test+OOS
A-2
109352-E Rev. A
Dial-Up Services Modems
Codex 3260
RS-232 connection using Raise DTR setup:
ACU Options
AT Form: DTR Dial (originating side), Sync Data (answering side)
Default Dial #3 (originating side) = Off (answering side)
Answer = Ring #1 (answering side)
Select Options
Originating side = 3
Answering side = 2
Dial From #3
View #3
Enter Phone #3
109352-E Rev. A
A-3
Installing and Maintaining BN Platforms
Codex 3261 Fast
V.25bis setup:
ACU Options
Terminal Options
ACU Select = v25b
DTE Rate = 9600
AT form = ASYNC
Flow = Tx Clk
V25 form = Bitsync
TPDly Min = Rx Clk
NoAcuForm = Sync
Speed Cover = On
DefaultDial = 1
DTR = 108.2
Answer = Manual
RTS = Normal
Async Echo = On
CTS = Normal
CharLength = 10
RtsCtsDelay = 0
v25Char = ASCII
DCD = Normal
SyncIdle = Char
Rem Rts/Dcd = Codex
V.25Resp = V25bis
DCD loss Dis = s10
Parity = V.25bis
DSR = Normal
AT msg = Before CD
Overspeed = 1%
R1stCode = Enable
DTR Delay = s25
R1stForm = Verbose
dte ct 140 = Off
ConMsg = DTE Rate
dte ct 141 = Off
RelMsg = Off
dtr pin 25 = test
LPDA2 Addr = FF
ext select = Off
LPDA2 ID = 326X
Ext cntrl = pin 14
LPDA2 Det = Enable
Inactivity = s30
Call Progress = 4
A-4
109352-E Rev. A
Dial-Up Services Modems
Multi-Tech Multi-Modem
V.25bis setup:
DIP Switches
1 : up
2 : up
3 : down
4 : up
5 : up
6 : down
7 : up
8 : down
9 : down
10 : up
11 : down
12 : up
109352-E Rev. A
A-5
Installing and Maintaining BN Platforms
NEC N6450 Data Service Unit
V.25bis setup:
DTE
DTE Command Set = V.25 Sync
V.35
TX Clock = Norm
DTR = Go Idle with DTR
DCD = Off when RX idle
CTS = On with RTS only, CTS Delay short
DSR = Off when Out of Service (OOS) only
Sync or Async = Sync
Auto Ans: Answer all the time
Raise DTR setup:
Change above settings to
DTE
DTR = Dial 1 with DTR (originating side)
DTR = Go Idle with DTR (answering side)
Edit
Dial 1 = enter phone number
A-6
109352-E Rev. A
Dial-Up Services Modems
NEC N963E Plus (RS232)
V.25bis setup:
Jumpers
1 : OFF
2 : ON V.25bis
3 : ON hdlc
4 : OFF speed
5 : OFF speed
6 : OFF ascii
7 : OFF
8 : OFF
Raise DTR setup:
Jumpers
1 : ON
2 : OFF sync
3 : OFF
4 : OFF speed
5 : OFF speed
6 : OFF ascii
7 : OFF
8 : OFF
109352-E Rev. A
A-7
Installing and Maintaining BN Platforms
Telebit T3000
When configuring the modem, place the A/B switch in the A position.
Configuration A is the default terminal emulation.
V.25bis setup:
at&f16 – preset configuration
att – enables dial tone
at&w1 – save config to configuration B
If the hardware platform is reporting AB errors, set ats64 = 1
Raise DTR setup:
Originating Side
at&f16 – preset configuration
att – enables dial tone
ats104 = 1 – Raise DTR
at~N1 = 5411 (telephone number) – B config uses phone #2
at~L – list phone numbers
ats100 = 0
ats253 = 0
at&w1 - save config to configuration B
A-8
109352-E Rev. A
Dial-Up Services Modems
Telebit T3000 (continued)
Raise DTR setup (continued):
Answering Side
at&f16 – preset configuration
att – enables dial tone
ats104 = 4 – Raise DTR
at~N1 = 5411 (telephone number) – B config uses phone #2
at~L – list phone numbers
ats100 = 0
ats253 = 0
at&w1 - save config to configuration B
For Telebit Firmware Version 7.05 or higher, also set the following:
ats119 = 1
at~d1
s321 = 1
at&w1
at~d0
109352-E Rev. A
A-9
Installing and Maintaining BN Platforms
Tylink SNS 4000 (V.35 ISDN PRI DSU)
- Tested in back-to-back IMUX mode
- Tested with V.25bis only
A-10
109352-E Rev. A
Index
A
air flow module
removal and installation, 4-9 to 4-11
air plenum
BCN, 3-7
BLN, 1-6
BLN-2, 2-6
altitude specifications
BCN, 3-8
BLN, 1-7
BLN-2, 2-7
angle brackets, attaching to rack
BCN, 3-8 to 3-11
BLN, 1-7 to 1-9
BLN-2, 2-7 to 2-10
antistatic wrist strap, 4-5 to 4-6
auto answer
BCN, 3-22
BLN, 1-15
BLN-2, 2-16
BCN, 3-22
BLN, 1-15
BLN-2, 2-16
Bay Networks
CompuServe forum, xxvi
Customer Service FTP, xxv
home page on World Wide Web, xxv
InfoFACTS service, xxvii
publications, ordering, xxii
support programs, xxiv
Support Source CD, xxvi
Technical Response Center, xxiii, xxvii
technical support, xxiii
BOOT LED
BCN, 3-18
BLN, 1-13
BLN-2, 2-14
defined, 6-3
B
clear to send
BCN, 3-22
BLN, 1-15
BLN-2, 2-16
closing the router, 4-2 to 4-8
CompuServe, Bay Networks forum on, xxvi
console
baud rate
BCN, 3-20
BLN, 1-14
BLN-2, 2-15
connecting to
BCN, 3-20
Backbone Concentrator Node (BCN) overview,
3-1 to 3-3
Backbone Link Node (BLN) overview, 1-1 to 1-2
Backbone Link Node 2 (BLN-2) overview, 2-1 to
2-2
baud rate
console
BCN, 3-20
BLN, 1-14
BLN-2, 2-15
modem
109352-E Rev. A
C
Index-1
Installing and Maintaining BN Platforms
BLN, 1-14
BLN-2, 2-15
operating parameters
BCN, 3-20
BLN, 1-14
BLN-2, 2-15
Customer Service FTP, xxv
customer support. See getting help
D
data carrier detect
BCN, 3-22
BLN, 1-16
BLN-2, 2-17
data set ready
BCN, 3-22
BLN, 1-16
BLN-2, 2-17
data terminal ready
BCN, 3-22
BLN, 1-16
BLN-2, 2-16
DIAG LED
BCN, 3-18
BLN, 1-13
BLN-2, 2-14
defined, 6-3
diag LED
BCN, 3-18
diagnostic test
BCN, 3-17
BLN, 1-12
BLN-2, 2-13
dial-up services modem
Adtran DSU III AR, A-2
Codex 3260, A-3
Multi-Tech Multi-Modem, A-5
NEC N6450 DSU, A-6
NEC N963E Plus, A-7
Telebit T3000, A-8
Tylink SNS 4000, A-10
Index-2
dimensions
BCN, 3-7
BLN, 1-6
BLN-2, 2-6
E
electrical requirements
BCN, 3-6
BLN, 1-5
BLN-2, 2-5
electronic enclosure rack
installing in
BCN, 3-14
BLN, 1-9
BLN-2, 2-11
specifications
BCN, 3-5
BLN, 1-4
BLN-2, 2-4
EMC shield removal and replacement, 4-6 to 4-8
environmental requirements
BCN, 3-8
BLN, 1-7
BLN-2, 2-7
equipment required
for BCN installation, 3-5
for BLN installation, 1-4
for BLN-2 installation, 2-4
event messages, 6-3
F
fan tray, replacing (BLN-2), 5-23
Fast Routing Engine
DIAG LED, 5-17
power switch, 5-17
Flash memory cards
description, 5-2
removing and replacing, 5-3
system response to removal and replacement,
5-2
109352-E Rev. A
Index
front bezel, removal and replacement of, 4-2 to
4-3
front-panel
See also front bezel
switches and LEDs, 6-1
BCN, 3-5
BLN, 1-5
BLN-2, 2-5
L
humidity specifications
BCN, 3-8
BLN, 1-7
BLN-2, 2-7
LEDs
BOOT, 6-3
DIAG, 6-3
front-panel, 6-1
lighting sequence
BCN, 3-18
BLN, 1-13
BLN-2, 2-14
POWER, 6-2
Power OK, 6-3
RUN, 6-2
link module
hot swapping, 5-7 to 5-12
removal and replacement, 5-7 to 5-11
local character echo
BCN, 3-22
BLN, 1-16
BLN-2, 2-17
I
M
I.T. power system
BCN, 3-1
BLN, 1-1
BLN-2, 2-1
InfoFACTS service, xxvii
inserting the air flow module, 4-11
installation
equipment you provide
BCN, 3-5
BLN, 1-4
BLN-2, 2-4
rack requirements
BCN, 3-5
BLN, 1-4
BLN-2, 2-4
site requirements
modem
baud rate
BCN, 3-22
BLN, 1-15
BLN-2, 2-16
connection to
BCN, 3-21
BLN, 1-15
BLN-2, 2-16
dial-up services
Adtran DSU III AR, A-2
Codex 3260, A-3
Multi-Tech Multi-Modem, A-5
NEC N6450 DSU, A-6
NEC N963E Plus, A-7
Telebit T3000, A-8
Tylink SNS 4000, A-10
G
GAME operating system, 6-3
getting help
from a Bay Networks Technical Response
Center, xxvii
from the Support Source CD, xxvi
through CompuServe, xxvi
through Customer Service FTP, xxv
through InfoFACTS service, xxvii
through World Wide Web, xxv
H
109352-E Rev. A
Index-3
Installing and Maintaining BN Platforms
operating parameters
BCN, 3-22
BLN, 1-15
BLN-2, 2-16
O
opening the router, 4-2 to 4-8
operating parameters
console
BCN, 3-20
BLN, 1-14
BLN-2, 2-15
modem
BCN, 3-22
BLN, 1-15
BLN-2, 2-16
overview
BCN, 3-1 to 3-3
BLN, 1-1 to 1-2
BLN-2, 2-1 to 2-2
P
PCMCIA SRAM memory cards
description, 5-2
removing and replacing, 5-3
replacing batteries, 5-6
system response to removal and replacement,
5-2
POWER LED
BCN, 3-18
BLN, 1-13
BLN-2, 2-14
defined, 6-2
power LED
BCN, 3-18
BLN, 1-13
BLN-2, 2-14
power module
hot swapping, 5-18
LED, 6-3
power supplied, 5-18
Index-4
removal and replacement, 5-20
Power OK LED. See power LED
power supply. See power module
powering on
BCN, 3-15
BLN, 1-12
BLN-2, 2-13
failure and resetting
BCN, 3-17
BLN, 1-12
BLN-2, 2-13
precautions
BCN, 3-2, 3-12
BLN-2, 2-11
R
rack
attaching angle brackets to
BCN, 3-8 to 3-11
BLN, 1-7 to 1-9
BLN-2, 2-7 to 2-10
installing in
BCN, 3-14
BLN, 1-9
BLN-2, 2-11
remote connection
BCN, 3-21
BLN, 1-15
BLN-2, 2-16
removal and replacement procedures
antistatic wrist strap, 4-5 to 4-6
EMC shield, 4-6 to 4-8
FRE module, 5-12 to 5-18
front bezel, 4-2 to 4-4
link modules , 5-7 to 5-12
power module, 5-18 to 5-23
SRM-L module , 5-7 to 5-11
removing and replacing
Flash memory cards, 5-3
PCMCIA SRAM memory card batteries, 5-6
PCMCIA SRAM memory cards, 5-3
109352-E Rev. A
Index
requirements
air plenum
BCN, 3-7
BLN, 1-6
BLN-2, 2-6
altitude
BCN, 3-8
BLN, 1-7
BLN-2, 2-7
electrical
BCN, 3-6
BLN, 1-5
BLN-2, 2-5
environmental
BCN, 3-8
BLN, 1-7
BLN-2, 2-7
humidity
BCN, 3-8
BLN, 1-7
BLN-2, 2-7
installation rack
BCN, 3-5
BLN, 1-4
BLN-2, 2-4
site
BCN, 3-5
BLN, 1-5
BLN-2, 2-5
temperature
BCN, 3-8
BLN, 1-7
BLN-2, 2-7
wall receptacle
BCN, 3-6
BLN, 1-5
BLN-2, 2-5
reset switch, description of, 6-2
routing engine
BCN, 3-17
BLN, 1-2, 1-12
BLN-2, 2-2, 2-13
diags command, 5-17
109352-E Rev. A
hot swapping, 5-12 to 5-18
removal and replacement, 5-12 to 5-18
RUN LED
BCN, 3-18
BLN, 1-13
BLN-2, 2-14
defined, 6-2
S
safety messages
BCN, 3-12
BLN-2, 2-11
setting up
BCN, 3-8
BLN, 1-7
BLN-2, 2-7
shipment contents
BCN, 3-3
BLN, 1-3
BLN-2, 2-3
site requirements
BCN, 3-5
BLN, 1-5
BLN-2, 2-5
space requirements
BCN, 3-7
BLN, 1-6
BLN-2, 2-6
SRM-F module
hot swapping, 5-12 to 5-18
power switch, 5-16
starting up. See powering on
supervisory functions
BCN, 3-22
BLN, 1-16
BLN-2, 2-17
Support Source CD, xxvi
system response to removal and replacement
Flash memory cards, 5-2
PCMCIA SRAM memory cards, 5-2
Index-5
Installing and Maintaining BN Platforms
T
Technician Interface
accessing from BLN, 1-14
Technician Interface, accessing from
BCN, 3-20
BLN, 1-14
BLN-2, 2-15
temperature specifications
BCN, 3-8
BLN, 1-7
BLN-2, 2-7
tools required
for BCN installation, 3-5
for BLN installation, 1-4
for BLN-2 installation, 2-4
turning on. See powering on
U
user-serviceable components
hot swapping, 5-1
listing of, 5-1
tools required for, 5-2
V
voltage requirements
BCN, 3-6
BLN, 1-5
BLN-2, 2-5
W
wall receptacle
BCN, 3-6
BLN, 1-5
BLN-2, 2-5
weight
BCN, 3-12
BLN-2, 2-11
World Wide Web, Bay Networks home page on,
xxv
Index-6
109352-E Rev. A