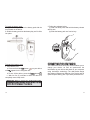
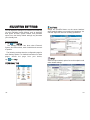
1
PPC4100 Users Guide 3/25/04 1:47 PM Page 1
PPC4100
USER’S GUIDE
PPC4100 POCKET PC
Audiovox Communications Corporation • 555 Wireless Boulevard • Hauppauge, New York 11788 • 800.229.1235
©2004 Audiovox Communications Corporation • www.audiovox.com • LTCLOM288
AUDIOVOX PPC4100
Tri-band GSM (850/1800/1900)
Pocket PC with Built-in Phone
In today’s fast paced world, it has become a necessity to
have access to real time information. Your communications
tools must provide you with this access from anywhere
at anytime. With that in mind, Audiovox developed the
PPC4100, a tri-band GSM Pocket PC device with built-in
phone functionality.
Operating on the 850, 1800 and 1900 MHz GSM frequencies,
the PPC4100 allows for seamless nationwide coverage
as well as offering state-of-the-art, user-friendly features.
The PPC4100 has Intel® Mobile Media Technology at
400 MHz with 64 MB RAM and 64 MB ROM. It also offers
a 3.5” TFT LCD with QVGA resolution, speed
dialing, two-way speakerphone, and GPRS functionality
for wireless internet connection.
Your new PPC4100 Pocket PC provides you with
something only an Audiovox phone can: the proven
reliability that has made us a leading wireless handset
provider. Read through this User’s Guide to help make
the
most
efficient
use
of
this
valuable
communications tool.
1
TABLE OF CONTENTS
CHAPTER 1 FIRST THINGS FIRST . . . . . . . . . .
Package Contents . . . . . . . . . . . . . . . . . . . . . .
Handset Setup . . . . . . . . . . . . . . . . . . . . . . . . .
Installing the Battery Pack . . . . . . . . . . . . . . . . .
Connecting the USB Cradle . . . . . . . . . . . . . . . .
Charging the Handset . . . . . . . . . . . . . . . . . . . . .
Starting Up the Handset . . . . . . . . . . . . . . . . . . .
System Procedures . . . . . . . . . . . . . . . . . . . . .
Recalibrating the Screen . . . . . . . . . . . . . . . . . .
Creating Backup Files . . . . . . . . . . . . . . . . . . . . .
Resetting the Handset . . . . . . . . . . . . . . . . . . .
Locking the Handset . . . . . . . . . . . . . . . . . . . . .
CHAPTER 2 GETTING STARTED . . . . . . . . . . .
Handset Features . . . . . . . . . . . . . . . . . . . . . . .
Handset Tour . . . . . . . . . . . . . . . . . . . . . . . . . .
Front View . . . . . . . . . . . . . . . . . . . . . . . . . . . . . .
Rear View . . . . . . . . . . . . . . . . . . . . . . . . . . . . . .
Left View . . . . . . . . . . . . . . . . . . . . . . . . . . . . . . .
Using the Backlight . . . . . . . . . . . . . . . . . . . . . . .
Using the SD/MMC Slot . . . . . . . . . . . . . . . . . . .
Peripherals Tour . . . . . . . . . . . . . . . . . . . . . . . .
USB Cradle . . . . . . . . . . . . . . . . . . . . . . . . . . . . .
Stereo Headset and Single Earbud Headset . .
Charging an Optional Spare Battery Pack . . . .
Send/End Button Operation . . . . . . . . . . . . . . . .
Command Interface . . . . . . . . . . . . . . . . . . . . . .
Hardware Buttons and the Stylus . . . . . .. . . . . .
Today Screen . . . . . .. . . . . . . . . . . . . . . . . . . . . . .
Status Icons . . . . . . . . . . . . . . . . . . . . . . . . . . . . .
Navigation Bar . . . . . . . . . . . . . . . . . . . . . . . . . . .
Command Bar . . . . .. . . . . . . . . . . . . . . . . . . . . . .
Pop-up Menus . . . . .. . . . . . . . . . . . . . . . . . . . . . .
Notifications . . . . . . . . . . . . . . . . . . . . . . . . . . . . .
2
9
10
11
11
13
14
18
19
19
20
21
23
25
26
29
29
32
33
35
36
38
38
39
41
42
43
43
43
44
45
46
46
47
3
TABLE OF CONTENTS
CHAPTER 3 MANAGING PROGRAMS . . . . . . . .
Accessing Programs . . . . . . . . . . . . . . . . . . . . .
Opening a Program . . . . . . . . . . . . . . . . . . . . . . .
Switching Between Programs . . . . . . . . . . . . . . .
Program List . . . . . . . . . . . . . . . . . . . . . . . . . . . . .
Using Find . . . . . . . . . . . . . . . . . . . . . . . . . . . .
Using File Explorer . . . . . . . . . . . . . . . . . . . . . .
Using ActiveSync . . . . . . . . . . . . . . . . . . . . . . .
Installing Microsoft ActiveSync . . . . . . . . . . . . .
Creating a Partnership . . . . . . . . . . . . . . . . . . . .
Synchronizing With Your Computer . . . . . . . . . .
Synchronizing With a Server . . . . . . . . . . . . . . .
Synchronizing Information . . . . . . . . . . . . . . . . .
Synchronizing Using Infrared . . . . . . . . . . . . . . .
Using ActiveSync to Exchange Files . . . . . . . . .
ActiveSync Errors . . . . . . . . . . . . . . . . . . . . . . .
CHAPTER 4 ENTERING DATA . . . . . . . . . . . . . .
Using the Input Panel . . . . . . . . . . . . . . . . . . . . .
Using the Soft Keyboard . . . . . . . . . . . . . . . . . .
Using Letter Recognizer . . . . . . . . . . . . . . . . . .
Using Block Recognizer . . . . . . . . . . . . . . . . . . .
Using Transcriber . . . . . . . . . . . . . . . . . . . . . . .
Selecting and Editing Typed Text . . . . . . . . . . . .
Writing on the Screen . . . . . . . . . . . . . . . . . . . .
Drawing on the Screen . . . . . . . . . . . . . . . . . . .
Recording a Message . . . . . . . . . . . . . . . . . . . .
Using My Text . . . . . . . . . . . . . . . . . . . . . . . . . .
CHAPTER 5 USING THE PHONE FUNCTION . .
Phone Setup . . . . . . . . . . . . . . . . . . . . . . . . . . .
Installing the SIM Card . . . . . . . . . . . . . . . . . . .
Entering Your PIN . . . . . . . . . . . . . . . . . . . . . . . .
Dialer Screen . . . . . . . . . . . . . . . . . . . . . . . . . . .
4
TABLE OF CONTENTS
49
50
50
50
50
53
54
55
56
57
60
62
64
66
67
68
69
70
71
72
73
74
76
77
81
83
85
87
88
88
89
91
Phone Operation . . . . . . . . . . . . . . . . . . . . . . . . 93
Turning the Phone On and Off . . . . . . . . . . . . . . 93
Erasing Number Input . . . . . . . . . . . . . . . . . . . . . 94
Answering a Call . . . . . . . . . . . . . . . . . . . . . . . . . 95
Ignoring a Call . . . . . . . . . . . . . . . . . . . . . . . . . . 95
Ending a Call . . . . . . . . . . . . . . . . . . . . . . . . . . . 95
Adjusting the Phone Volume . . . . . . . . . . . . . . . 95
Using the Speakerphone . . . . . . . . . . . . . . . . . . 96
Muting A Call . . . . . . . . . . . . . . . . . . . . . . . . . . . . 97
Making Phone Calls . . . . . . . . . . . . . . . . . . . . . . 98
Phone Features . . . . . . . . . . . . . . . . . . . . . . . . 106
Call Notification and Identification . . . . . . . . . . . 107
Call Hold . . . . . . . . . . . . . . . . . . . . . . . . . . . . . . . 108
Conference Call . . . . . . . . . . . . . . . . . . . . . . . . . 109
Call Notes . . . . . . . . . . . . . . . . . . . . . . . . . . . . . 110
SMS Service . . . . . . . . . . . . . . . . . . . . . . . . . . . . 112
Voice Mail . . . . . . . . . . . . . . . . . . . . . . . . . . . . . . 116
Contacts Integration . . . . . . . . . . . . . . . . . . . . . . 117
Call History . . . . . . . . . . . . . . . . . . . . . . . . . . . . . . 122
Phone Preferences . . . . . . . . . . . . . . . . . . . . . . 125
Phone Tab . . . . . . . . . . . . . . . . . . . . . . . . . . . . . . 125
Services Tab . . . . . . . . . . . . . . . . . . . . . . . . . . . . 129
Network Tab . . . . . . . . . . . . . . . . . . . . . . . . . . . . 134
Special Tab. . . . . . . . . . . . . . . . . . . . . . . . . . . . . . 136
CHAPTER 6 CUSTOMIZING YOUR HANDSET . . 137
Adjusting Settings . . . . . . . . . . . . . . . . . . . . . . . 138
Personal Tab . . . . . . . . . . . . . . . . . . . . . . . . . . . .. 138
System Tab. . . . . . . . . . . . . . . . . . . . . . . . . . . . . . 143
Connections Tab . . . . . . . . . . . . . . . . . . . . . . . . . 150
Adding Programs . . . . . . . . . . . . . . . . . . . . . . . . 152
Adding Programs to Your Device . . . . . . . . . . . . 152
Adding Programs to the Start Menu . . . . . . . . . 154
Removing Programs . . . . . . . . . . . . . . . . . . . . . 156
5
TABLE OF CONTENTS
CHAPTER 7 GETTING CONNECTED . . . . . . . . .
Infrared Connection . . . . . . . . . . . . . . . . . . . . . .
Internet Connection . . . . . . . . . . . . . . . . . . . . . .
Network Connection . . . . . . . . . . . . . . . . . . . . . .
Email Server Connection . . . . . . . . . . . . . . . . . .
CHAPTER 8 MICROSOFT POCKET OUTLOOK .
Pocket Outlook Overview . . . . . . . . . . . . . . . . . .
Calendar . . . . . . . . . . . . . . . . . . . . . . . . . . . . . .
Contacts . . . . . . . . . . . . . . . . . . . . . . . . . . . . . . .
Tasks . . . . . . . . . . . . . . . . . . . . . . . . . . . . . . . . .
Notes . . . . . . . . . . . . . . . . . . . . . . . . . . . . . . . . .
Office Online . . . . . . . . . . . . . . . . . . . . . . . . . . .
CHAPTER 9 COMPANION PROGRAMS . . . . . . .
Pocket Word . . . . . . . . . . . . . . . . . . . . . . . . . . .
Pocket Excel . . . . . . . . . . . . . . . . . . . . . . . . . . .
Windows Media Player . . . . . . . . . . . . . . . . . . . .
Program Enhancements . . . . . . . . . . . . . . . . . . .
Copying Files to Your Device . . . . . . . . . . . . . . .
The Playlist . . . . . . . . . . . . . . . . . . . . . . . . . . . . . .
File Playback . . . . . . . . . . . . . . . . . . . . . . . . . . . .
Customizing the Player . . . . . . . . . . . . . . . . . . . .
Microsoft Reader . . . . . . . . . . . . . . . . . . . . . . . .
CHAPTER 10 WIRELESS DATA PROGRAMS . . .
Pocket Internet Explorer . . . . . . . . . . . . . . . . . . .
Mobile Favorites . . . . . . . . . . . . . . . . . . . . . . . . . .
Inbox . . . . . . . . . . . . . . . . . . . . . . . . . . . . . . . . .
MSN Messenger . . . . . . . . . . . . . . . . . . . . . . . .
Terminal Services Client . . . . . . . . . . . . . . . . . .
6
TABLE OF CONTENTS
157
158
160
161
163
165
166
167
171
178
181
184
185
186
191
194
194
196
197
203
205
210
217
218
220
224
232
236
CHAPTER 11 ACCESSORY PROGRAMS . . . . . .
SIM Manager . . . . . . . . . . . . . . . . . . . . . . . . . .
Pictures . . . . . . . . . . . . . . . . . . . . . . . . . . . . . .
Copying JPEG Files to Your Device . . . . . . . . .
Using Pictures . . . . . . . . . . . . . . . . . . . . . . . . . . .
Customizing Pictures . . . . . . . . . . . . . . . . . . . . .
WiBackup . . . . . . . . . . . . . . . . . . . . . . . . . . . . .
Using WiBackup . . . . . . . . . . . . . . . . . . . . . . . . . .
Customizing WiBackup . . . . . . . . . . . . . . . . . . . .
CHAPTER 12 USER SUPPORT . . . . . . . . . . . . . .
Customer Support . . . . . . . . . . . . . . . . . . . . . . .
Troubleshooting . . . . . . . . . . . . . . . . . . . . . . . . .
Troubleshooting Reminders . . . . . . . . . . . . . . . . .
Troubleshooting Procedures . . . . . . . . . . . . . . . .
CHAPTER 13 SAFETY INFORMATION . . . . . . . .
Safety Information . . . . . . . . . . . . . . . . . . . . . . .
Radiofrequency (RF) Energy Emission . . . . . .
Usage Precautions . . . . . . . . . . . . . . . . . . . . . . .
Storage Precautions . . . . . . . . . . . . . . . . . . . . . .
Usage Instructions . . . . . . . . . . . . . . . . . . . . . . .
Device Damage and/or Data Loss Prevention .
Antenna Information . . . . . . . . . . . . . . . . . . . . . .
Battery Pack Information . . . . . . . . . . . . . . . . . .
AC Adapter Precautions . . . . . . . . . . . . . . . . . . .
Phone Operation . . . . . . . . . . . . . . . . . . . . . . . . .
Phone Usage Regulations . . . . . . . . . . . . . . . . .
SAR Information . . . . . . . . . . . . . . . . . . . . . . . . .
FDA Consumer Update . . . . . . . . . . . . . . . . . . .
CHAPTER 14 WARRANTY INFORMATION . . . . .
Warranty Protection . . . . . . . . . . . . . . . . . . . . . .
12 M onth Limited Warranty . . . . . . . . . . . . . . . .
239
240
241
242
243
252
254
255
260
261
262
263
263
263
273
274
274
277
279
280
281
284
285
286
289
290
291
293
303
304
305
7
CHAPTER 1
FIRST THINGS FIRST
Please read this User’s Guide before using your
PPC4100 Pocket PC.
This chapter describes the procedures you need to follow
to prepare your handset for operation.
1. Package Contents
2. Handset Setup
3. System Procedures
8
9
PACKAGE CONTENTS
Thank you for purchasing the PPC4100 Pocket PC
wireless handset. The PPC4100's giftbox contains all of
the items listed below.
PPC4100 Pocket PC with Built-in Phone
AT&T Wireless SIM card
Stylus
Lithium Ion Battery Pack
USB Cradle
AC Adapter
Stereo Headset
Single Earbud Headset
Leather Pouch
PPC4100 Companion CD
PPC4100 User’s Guide with Warranty
Validation Card
PPC4100 Quick Reference Guide
PPC4100 Features and Service Guide
PPC4100 Activations Instructions Guide
!
!
HANDSET SETUP
Perform the following tasks before using your device:
1. Install the battery pack.
2. Connect the USB cradle.
3. Charge the handset.
4. Start up the handset.
!
!
!
!
INSTALLING THE BATTERY PACK
Your PPC4100 uses a high-density removable and
rechargeable 1480 mAh Lithium Ion battery pack.
!
!
!
!
!
WARNING: There is a risk of fire and burns if the battery pack
is handled improperly. DO NOT disassemble, crush,
puncture, short external contacts, or dispose the battery pack
in fire or water. DO NOT attempt to open or service the
battery pack. Dispose of used batteries according to local
recycling guidelines in your area.
!
!
!
NOTE: Report any product defects to the place of purchase
immediately.
A backup battery cell is embedded into your device to
prevent data loss in instances when the battery pack is
removed or completely discharged. This backup battery
cell will support the system for a maximum of
30 minutes.
NOTE: To enable the internal battery cell to provide backup
power supply, charge your device with the main battery pack,
for at least eight (8) hours.
For information on conserving power to make your
battery pack last longer, see page 264.
10
11
To install the battery pack:
1. Align the battery marker on the battery pack with the
one located on the device.
2. Slide the battery pack into the battery bay until it clicks
into place.
To detach the battery pack:
1. If the device is on:
a. Press and hold the End button
until
2. Follow the substeps below:
(1) With one hand, press and hold the battery release
switch, then
(2) Slide the battery pack out from its bay.
CONNECTING THE USB CRADLE
on your device
appears in the navigation bar.
b. To turn off the device, press the Power button
.
c. Wait for five (5) seconds to allow the device to
completely enter sleep mode.
The cradle that comes with your device enables you to
charge your device, as well as synchronize the
information on your device with those on your computer
using ActiveSync technology. The dual-pocket design
also allows simultaneous charging of the device and an
optional spare battery pack if you have purchased one.
IMPORTANT: Failure to properly turn off the device before
uninstalling the battery pack may result in the loss of all data
stored in the internal memory of your device.
12
13
To connect the cradle to a power source:
1. Connect the AC adapter cord to the power socket at
the back of the cradle.
2. Press and hold the connector button on the AC
adapter cord.
3. Plug it into the power socket at the back of the
cradle.
4. Plug the AC adapter into any AC current outlet.
To charge your PPC4100:
1. Plug the AC adapter into any AC current outlet.
2. Connect the AC adapter cord to the power socket at
the back of the cradle.
3. Slide the device into the front pocket of the cradle until
it clicks into place.
The connection is secure when the bottom edge of the
device is aligned smoothly with the cradle, and the LED
indicator on the device’s power button
lights up
green.
IMPORTANT: To avoid damaging the AC adapter, make sure
to press and hold the connector button before connecting or
disconnecting the cord from the power socket of the
cradle/device.
CHARGING THE HANDSET
For initial use, you need to charge your device for about
eight (8) hours. After that, you can charge it everyday to
recharge the battery to full capacity.
IMPORTANT : Make sure that the SIM card holder is closed
before charging the device.
14
LED status during charging:
Flashing green: Charging
Solid green: Charging complete
!
!
4. Remove the device from the cradle after charging.
Go to the next page for instructions.
15
If the battery level becomes low in the course of normal
use, a status icon appears on the device screen
indicating low or very low battery status (see “Status
icons” on page 44). In both cases, perform an
ActiveSync operation to back up your data, then
recharge your device as soon as possible.
To remove your PPC4100 from the cradle:
1. Gently tilt the device forward.
2. Pull the device up to detach it from the cradle.
If the battery level reaches low status, the device will
enter sleep mode; if the battery level reaches very low
status, the device will enter deep sleep mode. In this
case, you have about 72 hours to recharge your device
after which you risk losing all data on your device’s
internal memory.
For information on how to wake up your device from
sleep mode, refer to page 265.
The battery pack is removable. Refer to page 12 for
instructions on how to remove it from the battery bay.
You have the option to purchase a spare battery pack for
your device. You can charge this spare battery pack in
the back pocket of the cradle. Refer to page 41 for
instructions.
To recharge the device using the AC adapter cord:
When traveling, you can still recharge your device and
avoid the bulk of carrying the cradle by using the AC
adapter cord to directly connect to a power outlet.
1. Plug the AC adapter into any AC current outlet.
2. Connect the AC adapter cord to the universal
connector of your device.
NOTE:
It is more efficient to charge the device when it is turned
off.
! If
the power LED flickers while charging, the metal
contacts on the battery pack may need cleaning.
!
Battery operating time gradually decreases over time.
!
If the battery fails to perform normally, you may need to
replace the battery.
!
16
17
SYSTEM PROCEDURES
STARTING UP THE HANDSET
After initially charging your device for about eight (8)
hours it is ready to be used. You can now start up your
device where you’ll calibrate the display, learn some
basic stylus usage, and set up the system date and time.
To start up your PPC4100:
1. Turn on your device by pressing the Power button
on the front panel.
The following sections describe various system
procedures that will help you use the device more
efficiently.
RECALIBRATING THE SCREEN
When you first startup your PPC4100, you will be asked
to calibrate the screen by tapping the center of a cross
with your stylus as it moves around the screen. This
process ensures that when you tap the screen with your
stylus the item tapped is activated. If, however, while
using your device, you discover tapping an item doesn’t
bring up the appropriate response, it means your device
has lost its calibration.
To recalibrate the screen:
1. Launch the Align Screen window by doing either of the
following:
Software launching
!
2. Follow the onscreen instructions on the Welcome
Screen Wizard.
a. Tap
!
, then Settings.
b. On the System tab, tap Screen .
c. On the Screen window, tap Align Screen.
Hardware launching
Simultaneously press the Power button
and the
jog dial.
2. Tap the center of the cross with your stylus as it moves
around the screen.
18
19
Back up individual Word, Excel or Notes files using
the Rename/Move command. Follow the steps below.
1. Insert an SD or MMC card into the SD/MMC slot
on the top edge of your device.
2. Open the file you want to back up.
3. Tap Tools, then Rename/Move.
4. On the Rename/Move screen, enter a file name
in the Name field.
5. Tap the Location pick list, then select Storage Card.
6. Tap the Folder pick list, then select the folder where
you want to save the file.
7. Tap OK.
8. After the backup process, remove the card from the
slot.
!
CREATING BACKUP FILES
Any additional programs or new data on your device are
stored in RAM (random access memory). These items
will be lost if you have to perform a hard reset or your
device loses all power for any other reason. Because of
this it is imperative that you regularly back up files to
your computer via ActiveSync or to a storage card using
the device’s built-in SD/MMC slot.
If have access to your computer, use ActiveSync to
synchronize files to create backup files of information
stored on your device. Refer to page 55 for more
information on using ActiveSync.
In instances where you are unable to access your
computer, you can back up files to an SD or MMC card.
You have the following options:
Back up individual files using the Cut and Paste
commands in File Explorer.
Back up all stored data files or all PIM data using
WiBackup - For instructions on using WiBackup, go to
page 254.
RESETTING THE HANDSET
You may have to perform a reset if the device freezes
(i.e., device no longer responds to the buttons on the
screen).
To perform a soft reset:
A soft reset allows your device to get a fresh start,
similar to rebooting a computer. This will restart your
device and adjust memory allocation. All records and
entries are retained after a soft reset. Unsaved data in
open programs may in some cases be lost.
1. Remove the stylus from its holder.
2. Lightly press the tip of the stylus to the reset button
located on the rear panel of the device.
!
!
20
21
LOCKING THE HANDSET
Your device is not just a financial investment but a
wealthy source of personal information, some of which
may be confidential so it is only logical to protect it from
any unauthorized access. The Security setting gives you
the option of assigning a lock password that will be
required to access your device after a set period of
inactivity.
To assign a lock password:
1. Tap
, then Settings.
2. On the Personal tab, tap Password
.
The Password Settings window appears.
To perform a hard reset:
A hard reset will cut off power to your device. This will
erase all records and entries, delete all programs you
have added, and restore the device default factory
settings. Never perform a hard reset unless a soft reset
does not correct your problem. When you perform your
next ActiveSync operation, you can restore any data that
you previously synchronized to your computer or you
can restore data that you backed up to a storage card.
NOTE : When you perform a hard reset, the current date and
time are not be retained. Formats, preferences, and other
settings are restored to their factory default settings.
3. On the Password tab, select the check box to enable
the password function.
4. Tap the pick list to select the period of inactivity before
the lock password will be required for access.
5. Tap a radio button corresponding to the password
mode you want to apply. You have two options.
Simple 4 digit password
This password mode requires a 4-digit password.
Strong alphanumeric password
This password mode requires an alphanumeric
password (i.e., a combination of upper- and lower case
letters, numbers, and symbols) consisting of at least
seven characters.
6. If you want to set a keyword to serve as a password
reminder in case you forget it, tap the Hint tab.
7. Tap OK.
!
1. Hold down the Power button
your device.
on the front panel of
2. While holding down the power button , gently press
the tip of the stylus to the reset button.
The Confirmation message box appears.
3. Press the volume rocker key
22
up.
!
23
CHAPTER 2
GETTING STARTED
After completing the setup procedures, you can now
familiarize yourself with the hardware and software
functions of your handset to better understand the
basics on how to use your device.
This chapter explains the handset features. It also gives
you a tour of the hardware and software interface of your
device.
1. Handset Features
2. Handset Tour
3. Peripherals Tour
4. Command Interface
24
25
HANDSET FEATURES
Listed below are the system features of your new
PPC4100 Pocket PC.
PERFORMANCE
Intel Mobile Media Technology of up to 400 MHz
Integrated Intel XScaleTM Technology
System memory:
- 64 MB SDRAM for application storage
- 64 MB Flash ROM for operating system
Windows Mobile™ 2003 software for Pocket PC
Phone Edition
DISPLAY
3.5" Transreflective TFT LCD (Thin Film Transistor
Liquid Crystal Display) with QVGA resolution
240 x 320 resolution
16-bit color depth support
Software-configurable backlight settings
Microsoft ClearType technology for clearer, crisper
font display
AUDIO
Embedded AC '97 CODEC with CD-quality stereo
output
Built-in industry-standard 2.5-mm earphone jack
Built-in speaker and microphone
Separate volume control for system sounds and
phone function volume
Playback support for both Windows Media and MIDI
sound files for personalizing ring tones and sound
notifications
26
PHONE FEATURES
Tri-band GSM broadband function (900/1800/1900)
Contacts migration service using SIM Manager
Integration with Microsoft Contacts
Features include Speed Dial, Caller ID, Conference
Call, Call Waiting, Call Barring, Call History,
speakerphone mode, note taking, voice mail, and
emergency number setting
SMS mailbox/Inbox integration
Seamless transition between voice and data
connections
Hardware and software launch function
Operation time:
- Talk Time: up to 3 hours
- Standby Time: up to 100 hours
- Typical Time: up to 12 hours of PDA usage only
- Data Time: up to 5 hours
CONNECTIVITY
19-pin universal connector
Built-in SD/MMC (Standard Digital/MultiMedia Card)
expansion slot
IrDA-standard Infrared wireless function
Wireless Internet access via AT&T’s GPRS
One-touch ability to toggle on and off all
wireless functions using Connection Manager
BATTERY PACK
Removable and rechargeable 1480 mAh Lithium Ion
battery pack
Embedded backup battery cell
Charging time from empty to full capacity: 8 hours
27
Operation time
- MP3 Playback Time (LCD off): up to 12 hours
- WMV Playback Time (LCD on, average level
backlight, phone function off): up to 7 hours
- Internet Browsing Time: up to 4 hours
NOTE: Length of battery operation will depend on power
consumption which in turn is based on system resources
use. For example, constantly using the backlight or using
power-demanding applications will shorten the length of
battery operation.
HANDSET TOUR
The following sections gives you a tour of the hardware
interface.
FRONT VIEW
The illustration below show the front panel of your device
as well as the top and bottom edges.
DESIGN AND ERGONOMICS
Stylish and sleek design
Dimensions
- Length: 4.29 in.
- Width: 2.69 in.
- Depth: .85 in. (battery pack attached)
- Weight: 5.6 oz. (battery pack attached)
User-friendly navigation features
- 3-way jog dial for one-hand operation
- Rocker key for volume control
- Hold switch lets you lock all buttons from being
accidentally pressed when device is placed in pocket
or in a bag.
28
29
NO.
COMPONENT
DESCRIPTION
NO.
COMPONENT
DESCRIPTION
1
Earphone jack
cap
Earphone jack
A non-detachable protective covering
for the earphone jack.
Connects to audio line-out devices
(earphones/headphones).
Uses infrared technology to transmit
and receive data from other IR-enabled
devices.
Accepts SD, MMC, and SDIO (Secure
Digital Input Output) cards, allowing
you to add more memory. Install add-on
applications or use audio or text files
stored in it for use with internal
applications. You can also use it to
back up data from your device.
The antenna includes a neatly hidden
slot for holding the stylus. To use the
stylus, remove it from its holder and
hold it the same way you hold a pen or
pencil.
Lights up solid amber for alarm
reminders and email receipt.
Lights up green to indicate phone
function status.
If the device is off, press the button to
10
End button
When there’s an incoming call, press
to reject the call.
2
3
4
Infrared (IR)
port
SD/MMC
expansion slot
5
Antenna/stylus
holder
6
Notification
indicator
Phone
indicator
Power button
7
8
11
Microphone
12
Universal
connector
13
Send button
Displays the applications and data
stored on your device. It is
touch-sensitive and responds to the
stylus or your finger.
14
30
! When there’s an incoming call, press
to accept the call.
During an ongoing call, press and
hold to toggle on/off the speakerphone
mode.
! From Speed Dial, press to call the
currently selected number.
! From Call History, press to call the
currently selected log item.
! In mailbox, press to send a
composed email/SMS message or
display options for a received
email/SMS.
! From a PDA application, press to
display the Dialer screen or press twice
to redial the last called number.
Emits system sounds.
!
The status of the power LED indicates
the charging status.
! Flashing green - Charging device
! Solid green - Charging complete
As a backlight control, press and hold
to toggle the backlight on/off.
LCD
touchscreen
! During an ongoing call, press to end
the call.
! When manually dialing a number,
press to delete the number input.
Inputs audio into your device when
receiving/making a call or recording
voice notes.
Connects your device to the cradle,
which in turn connects to the back of
your computer and through the AC
adapter to an external power source.
This allows you to recharge your device
and perform an ActiveSync operation.
You can also use the universal
connector to connect peripheral
hardware devices, such as an external
keyboard, to your device.
NOTE: You need to install an
appropriate driver to your device before
using a peripheral device.
turn it on (LED lights up green).
If the device is on, press to turn it off.
9
!
Speaker
31
REAR VIEW
LEFT VIEW
NO.
COMPONENT
DESCRIPTION
1
2
Main battery
release latch
Reset button
3
Main battery
Press to release the main battery from
its bay.
Press the end of the stylus into the
hole to reset your device.
Removable and rechargeable
1480 mAh Lithium Ion battery pack.
NO.
COMPONENT
DESCRIPTION
1
Jog dial
Pressing the jog dial results in an
action similar to pressing the Enter key
on a regular keyboard. For example, to
open any of the applications in the Start
menu simply select that application
then press the jog dial; or in using a
Help menu, simply select a hyperlink
then press the jog dial to display the
linked information.
In pop-up menus:
! Rotate up/down to go through menu
options.
!
Press to select a highlighted option.
32
33
NO.
2
3
COMPONENT
DESCRIPTION
Jog dial
In Dialer:
! Rotate up to access Call History.
! Rotate down to access Speed Dial.
From Speed Dial:
! Rotate up/down to scroll through the
list.
! Press to call the currently selected
number.
From Call History:
! Rotate up/down to scroll through the
log items.
! Press to call the currently selected
log item.
! Press and hold to display the pop-up
menu for the currently selected log
item.
From SIM Manager:
! Rotate up/down to scroll through the
numbers stored in your SIM card.
! Press and hold to display the pop-up
menu for the currently selected entry.
Press the key up to increase volume,
press down to decrease volume.
Volume
rocker key
Hold switch
Slide up to lock all buttons from being
accidentally pressed when the device
is placed in pocket or in a bag.
When the hold switch is enabled:
Backlight is turned off and all
hardware buttons are disabled
! Auto power off function is still active
! Sound notification for alarms,
reminders and SD/MMC/SDIO card
movement are enabled
NO.
COMPONENT
DESCRIPTION
Hold switch
When there’s an incoming call and the
hold switch is enabled:
! Backlight is turned on with the caller
ID displayed
! All hardware keys except for the
Send
or End
buttons are
disabled
! Backlight turns off after ending call
NOTE: Enabling the hold switch does
not lock the reset button; you can still
reset your device even if the hold
switch is turned on.
USING THE BACKLIGHT
If lighting conditions make it difficult for you to see the
information on your device, use the backlight to
illuminate your screen. You can change the backlight
settings. Refer to “Brightness” on page 145.
To activate the backlight:
Press and hold the Power button
until the
backlight turns on.
- or If the hold switch
is enabled, disable it.
!
!
34
To turn off the backlight:
Press and hold the Power button
until the
backlight turns off.
- or If the hold switch
is disabled, enable it.
!
35
USING THE SD/MMC SLOT
Your device has an expansion slot compatible with a
range of SD, MMC, and SDIO storage cards that you can
use to back up or transfer files and data.
To insert a storage card:
Hold your device securely, then push the card into the
slot until you hear an audible system sound; this will
signal that the card is already properly seated within the
slot. The card is secure when it is not protruding from the
base.
To remove a storage card:
1. Hold your device securely, then push against the top
of the card, as if you were pushing it further into the slot,
letting the card spring out. An audible system sound will
signal that the card has been released.
2. Gently remove the card from the slot.
!
NOTE : This device comes with a protective piece in the card
slot. Remove the plastic card from the slot before trying to
insert an SD or MMC card.
36
37
PERIPHERALS TOUR
NO.
COMPONENT
DESCRIPTION
4
5
Front pocket
Spare battery
indicator
Recharges your device.
Lights up to indicate charging status
for the spare battery pack.
Rear pocket
LED status description:
! Flashing green - Charging battery
pack
! Solid green - Charging complete
Recharges a spare battery pack.
This sections provides an overview of the peripheral
devices bundled with your handset. This include the USB
cradle, stereo headset, and the single earbud headset.
6
USB CRADLE
The USB cradle that comes with your device enables
you to charge your device, as well as synchronize the
information on your device with those on your computer
using ActiveSync technology. The dual-pocket design
allows simultaneous charging of the device and an
optional spare battery pack.
NOTE : When your device is docked in the USB cradle while
the GPRS function is on, you will not be able to browse web
pages.
STEREO HEADSET AND SINGLE EARBUD
HEADSET
The ergonomically designed stereo headset and single
earbud headset that come with your device provide
quality sound output and maximum comfort fit.
Use the stereo headset to play your favorite audio and
video files, and to attend to phone calls during
non-driving sessions. For safety reasons, DO NOT use
the stereo headset while driving.
Use the single earbud headset to enjoy hands-free
phone operation while driving.
NOTE: When using the microphone on the stereo headset/
single earbud headset d u r i n g a n o n g o i n g c a l l , t h e b u i l t - i n
device microphone is disabled.
NO.
COMPONENT
DESCRIPTION
1
USB
port
Power
connector
Support
bracket
Connects the cradle to a USB
connector on your computer.
Connects the cradle to a power outlet.
2
3
38
You can configure the operation of these two peripherals
under the Phone Settings - Special tab. Go to page 136
for more information.
Holds the device in place during
charging.
39
CHARGING AN OPTIONAL SPARE
BATTERY PACK
The dual-pocket design of the USB cradle that comes
with your device allows you to simultaneously charge the
the device and an optional spare battery pack.
Stereo Headset
To charge an optional spare battery pack:
1. Plug the AC adapter into any AC current outlet.
2. Press and hold the connector button on the AC
adapter cord, then plug it into the power socket at the
back of the cradle.
3. Slide the spare battery pack into the rear pocket of the
cradle until it clicks into place.
Single Earbud Headset
NO.
COMPONENT
1
2
3
4
5
6-pole, 2.5 mm headset plug
Remote Send/End button
Microphone
Clip
Stereo headset: Dual earpiece
Single earbud headset: Single earpiece
40
The spare battery indicator
on the cradle will light up
green to indicate that the battery pack is properly
inserted into the cradle pocket.
41
COMMAND INTERFACE
SEND/END BUTTON OPERATION
This section describes the action of the Send/End button
on the stereo headset/single earbud headset when
there’s an active call. When there’s no active call or when
the phone function is turned off, the headset's Send/End
button is disabled.
During an incoming call:
Quick Press - Accept the call
Press and hold for more than 2 seconds - Accept the
call
!
!
HARDWARE BUTTONS AND THE STYLUS
Your device has hardware buttons that control actions
and scroll functions, and a stylus for selecting items and
entering information.
On your device, the stylus replaces the mouse.
Tap - Touch the screen once with the stylus to open
items and select options.
Drag - Hold the stylus on the screen and drag across
the screen to select text and images. Drag in a list to
select multiple items.
Tap and hold - Tap and hold the stylus on an item to
see a list of actions available for that item. In the
pop-up menu that appears, tap the action you want to
perform.
!
!
During an ongoing call:
Quick Press - Terminate the call
Press and hold for more than 2 seconds - Record the
ongoing call
!
!
!
TODAY SCREEN
When you turn on your device for the first time each day
(or after a preset period of inactivity), you'll see the
Today screen. You can also display it by tapping
and
then Today
.
To define a preset period of inactivity after which the
Today screen is displayed:
1. Tap
, Settings, then Personal tab.
2. Tap Today
.
3. On the Items tab, select the “Display Today screen... “
check box.
4. Tap the pick list below the check box to set the period
of inactivity.
5. Tap OK.
42
43
The Today screen provides an at-a-glance view of
important reminders and details for the day.
Tap to view
the Start menu
Indicates the mobile
connection status.
Tap to change
date and time.
Tap to adjust
volume or mute all
sounds.
NOTE : For status icons related to the phone function, refer to
page 92.
The navigation bar is located at the top of the screen. It
displays the active program and current time, as well as
the Start menu
, which allows you to switch to other
programs.
Tap to view the
connection status.
STATUS ICONS
The table below describes some of the status icons you
may see on your device.
ICON
icon to view all notification icons.
NAVIGATION BAR
Your day at
a glance.
Tap to create a
new item (e.g. new
appointment).
If more notification icons need to be displayed than there
is room for, the Notification icon
appears. Tap the
DESCRIPTION
Turns all sounds on and off
Tap to quickly select a
recently used program.
Tap a program
icon to open it.
Tap to see more programs.
Tap to customize your device.
Backup battery is low
Main battery is low
Main battery is very low
Data connection is active
Synchronization is beginning or ending
Synchronization is occurring
Notification that one or more instant messages were
received
Notification that one or more email/SMS/voice mail
messages were received
44
45
COMMAND BAR
Use the command bar at the bottom of the screen to
perform tasks in programs. The command bar includes
menu names, buttons, and the Input Panel button
.
To create a new item in the current program, tap New.
To see the name of a button, tap and hold the stylus
on the button. Drag the stylus off the button so that the
command is not carried out.
Tap and hold a selected item
to display a pop-up menu.
!
!
Menus
New button
Tap outside the menu to
close it without performing
an action.
Record button
Pen button
Input
Panel
button
POP-UP MENUS
With pop-up menus, you can quickly choose an action
for an item. For example, you can use the pop-up menu
in the contact list to quickly delete a contact, make a
copy of a contact, or send an email message to a
contact. The actions in the pop-up menus vary from
program to program.
To access a pop-up menu:
1. Tap and hold the stylus on the item that you want to
perform the action on.
2. When the menu appears, lift the stylus, then do any of
the following:
Tap the action you want to perform.
Tap anywhere outside the menu to close the menu
without performing an action.
!
!
46
Lift the stylus and tap
the action you want.
NOTIFICATIONS
Your device reminds you in a variety of ways when you
have something to do or when you receive a message.
For example, if you've set up an appointment in
Calendar, a task with a due date in Tasks, or an alarm in
Clock, you'll be notified in any of the following ways:
A message box appears on the screen.
A sound, which you can specify, is played.
The notification indicator on the front panel of your
device lights up amber.
!
!
!
To choose reminder types and sounds for your device:
1. Tap
, Settings, then Personal tab.
2. Tap Sounds & Notifications
.
3. On the Notifications tab, select the kind of events you
want to be notified of and the manner of
notification you prefer. The options you choose here are
applied globally on your device.
4. Tap OK.
47
CHAPTER 3
MANAGING PROGRAMS
Your handset has several preinstalled programs that you
can use to organize your daily activities. These include
programs that will help you search, organize, and
synchronize information.
This chapter describes the procedures for launching
programs. It also shows how to use Find and File
Explorer, as well as procedures for performing an
ActiveSync operation.
1. Accessing Programs
2. Using Find
2. Using File Explorer
4. Using ActiveSync
48
49
ACCESSING PROGRAMS
PROGRAM
USAGE
Inbox
Send and receive email and SMS
messages.
Games
Play your favorite computer games,
including Jawbreaker and Solitaire,
for on-the-road entertainment.
Microsoft Reader
for Pocket PC
Download and read eBooks on your
device.
MSN® Messenger
Send and receive instant messages
from your MSN Messenger contacts.
Notes
Create handwritten or typed notes,
drawings, and recordings.
Pictures
Access and edit JPEG files on your
device.
Phone
Make and receive calls and SMS messages;
swap between calls and set up a
conference call.
PROGRAM LIST
Pocket Excel
The following is a partial list of programs that are
available on your device. Refer to the PPC4100
Companion CD for additional programs that you can
install on your device.
Create new workbooks or view and edit
Excel workbooks created on your computer.
Pocket Internet
Explorer
Browse Web and WAP sites, and
download new programs and files from
the Internet.
Pocket MSN
Subscribe to popular MSN services.
Pocket Word
Create new documents or view and edit
Word documents created on your computer.
SIM Manager
Export the contents of your SIM card to
your Microsoft Contacts list.
Tasks
Keep track of your tasks.
OPENING A PROGRAM
ICON
You can open programs in the following ways:
Tap a program name from the
menu.
You can select which programs are displayed on the
menu. For instructions, see page 154.
!
Tap
!
, then Programs to see more programs.
SWITCHING BETWEEN PROGRAMS
Select another program from the
!
menu.
N O T E : Some programs have abbreviated labels for check
boxes and drop-down menus. To see the full spelling of an
abbreviated label, tap and hold the stylus on the label. Drag the
stylus off the label so that the command is not carried out.
ICON
50
PROGRAM
USAGE
ActiveSync
Synchronize information between your
device and your computer.
Calculator
Perform basic arithmetic calculations.
Calendar
Keep track of your appointments and
create meeting requests.
Contacts
Keep track of your friends and
colleagues.
51
ICON
PROGRAM
USAGE
Terminal Services
Client
Log onto a Windows NT server type
PC that is running Terminal Services
software and use all of the programs
that are available on that PC from your
device.
Windows MediaTM
Player
Play digital audio and video files that
are stored on your device or on a
network.
WiBackup
Create backup files of data and
applications stored on your device.
USING FIND
The Find function helps you quickly locate specific files.
1. Tap
, then Find
.
2. Enter the text you want to find, then select a data type.
3. To quickly find information that is taking up storage
space on your device, select the “Larger than 64 KB”
option from the Type drop-down box.
4. Tap the Go button to start the search.
NOTE: To get detailed information on using any of the applications
listed in this section (except SIM Manager), open the program, tap
Start , then Help .
Tap to start the
search.
Type the text you
want to find.
52
53
USING FILE EXPLORER
USING ACTIVESYNC
Use File Explorer to locate files on your device and to
organize these files into folders.
Use Microsoft® ActiveSync® technology to synchronize
information between your Pocket PC and your computer
and/or a server so you always have the most up-to-date
information wherever you are.
!
Tap
, Programs, then File Explorer
.
Tap here to select a
sort order for the list.
Tap and hold a blank
area to display the New
Folder command.
Tap to view the
files stored on
your device.
Tap to open a file in
the network you’re
connected to.
Tap to view the files
stored in your storage card.
N O T E : You can only synchronize information with a server if your
company is running Microsoft Exchange Server with Exchange
ActiveSync.
Each time you synchronize, ActiveSync compares the
information on your device with the information on your
computer and/or the server and updates all locations.
This means you’ll always have the most recent
information at all times. Use ActiveSync to:
Keep Pocket Outlook data up-to-date by
synchronizing your device with the Microsoft Outlook
data on your computer.
Synchronize Inbox, Calendar, and Contacts with a
server so that you have the latest information, even
when you don’t have access to your computer.
Open and edit your Microsoft Word and Microsoft
Excel files in your device and synchronize it back to your
computer. Files are automatically converted to the
correct format.
Copy (rather than synchronize) files between your
device and your computer.
Control when synchronization occurs by selecting a
synchronization schedule. For example, you can
synchronize continually while connected to your
computer or only when you select the synchronize
command.
!
!
!
!
!
54
55
If you choose continuous synchronization, changes
made on the computer or device are duplicated
immediately. To recover a sudden loss of data, you can
configure ActiveSync to back up data on your device.
Choose whether to copy all information in the
internal storage on your device, or just the information
that has changed since the last backup.
Select which information types are synchronized and
control how much information is synchronized. To
illustrate, when synchronizing Calendar, you can set
ActiveSync to synchronize appointments within a certain
date range and for specific categories only. For example
business appointments from the past two weeks only.
!
INSTALLING MICROSOFT ACTIVESYNC
ActiveSync is already installed on your PPC4100 Pocket
PC; you only need to install it on your computer.
MINIMUM PC COMPUTER REQUIREMENTS
Microsoft Windows® XP, 2000, ME, NT Workstation
4.0 with Service Pack 6 or later, or 98
Microsoft Outlook® 98 or later required for
synchronization
Microsoft Internet Explorer 4.01 with Service Pack 1
or later
Hard disk drive with 12 to 65 MB of available hard disk
space (actual requirements will vary based on selection
of features and user’s current system configuration)
Available infrared port or USB port
CD-ROM drive
VGA graphics card or compatible video graphics
adapter at 256 color or higher
Keyboard and mouse
To install Microsoft ActiveSync on your computer:
1. Exit any open programs, including those that run at
startup, and disable any virus-scanning software.
2. Insert the PPC4100 Companion CD into the
computer’s CD-ROM drive.
The CD's welcome page appears.
3. To go to the next screen, click the animated forward
icon .
4. Click the Start Here tab on the right side of the screen.
5. Read the instructions and installation notes indicated
on the Start Here screen.
6. Click the buttons on the left pane to install each of the
individual applications.
After installation, the ActiveSync icon
will appear on
your computer’s system tray (on the lower right-hand
corner of the screen).
NOTE : If the wizard does not automatically appear, launch
ActiveSync on your computer by clicking on its icon from
Start , then Programs .
!
!
!
For detailed information about using ActiveSync on your
computer, start ActiveSync on your computer, click Help,
then Microsoft ActiveSync Help.
!
!
!
!
!
CREATING A PARTNERSHIP
After completing the installation procedures you can now
set up a partnership between your PPC4100 Pocket PC
and your computer and/or a server with the help of the
New Partnership setup wizard. This wizard will help you:
Set up a partnership so you can synchronize
information between your device and your computer
Customize your synchronization settings
!
!
56
57
To create a partnership:
1. Dock your device in the front pocket of the cradle.
2. Plug the cradle’s USB connector into a USB port on
your computer.
To prevent synchronization problems, select the
“Synchronize with Microsoft Mobile Information
Server and/or this desktop computer” option in the
New Partnership setup wizard only if you are
certain that your company is running Microsoft
Exchange Server with Exchange ActiveSync and you
know the server name. Otherwise, select the
“Synchronize with this desktop computer” option.
For more information, contact your corporate
network administrator or service provider.
The initial synchronization process will automatically
begin when you finish using the wizard. During the
synchronization process this icon
device’s navigation bar.
appears on your
The New Partnership setup wizard will automatically
start on your computer screen.
3. Follow the onscreen instructions.
58
59
After the initial synchronization, take a look at Calendar,
Contacts, and Tasks on your device. You'll notice that
information you've stored in Microsoft Outlook on your
computer has been copied to your device, and you
didn't have to type a word. Disconnect your device from
your computer and you're ready to go!
4. Select one or both of the following options:
Use mobile schedule to sync with this PC - to set
synchronization at scheduled intervals
Sync with this PC during manual sync - to set
your device to sync with the selected computer
every time you sync manually
5. Tap OK.
!
!
Once you have completed the first synchronization
process, you can initiate synchronization from your
device anytime, using either the USB cradle or via
infrared.
To start and stop synchronization:
1. Connect your device and computer via:
USB cradle - Follow steps 1-2 under the “To create
a partnership” section on page 57.
Infrared - See page 66 for more information.
!
!
2. On your device tap
, then ActiveSync.
3. To start synchronization, tap Sync
.
To stop synchronization, tap Stop
.
SYNCHRONIZING WITH YOUR COMPUTER
You can define settings for remote synchronization with
your computer, and set a mobile schedule during
wireless synchronization.
To set remote synchronization with your computer:
1. On your device tap
, then ActiveSync.
2. Tap Tools, Options, then PC tab.
3. Tap the pick list and select the appropriate computer
name.
60
N O T E : To synchronize remotely with a your computer, it must be
turned on.
To set mobile schedule during wireless synchronization
with your computer:
You can set two separate mobile schedules when
wirelessly synchronizing your device with your
computer.
Peak time schedule - to synchronize during work hours
or other times you receive higher mail volumes
Off-peak schedule - to synchronize during times when
you receive lower mail volumes
!
!
N O T E : When you are in roaming mode, you can synchronize
manually to reduce roaming charges, or you can use the mobile
schedule you’ve set.
1. On your device tap
, then ActiveSync.
T
o
o
l
s
O
p
t
i
o
n
s
2. Tap
,
, then Mobile Schedule tab.
3. Select the frequency of synchronization for the three
conditions—during peak times, off-peak times, and
when roaming.
4. Tap Peak Times to set the days and hours of your
peak time schedule.
5. Tap OK.
61
SYNCHRONIZING WITH A SERVER
The option to synchronize your device with a server is
available when you first create a partnership. Before you
can begin to synchronize information with a server, you
need to request the following server configuration
information, either from your service provider or from
your corporate network administrator:
Your user name and password in your corporate
network
The name of the Microsoft Exchange server
9. Define the synchronization settings for each
information type by tapping the type of information, then
Settings.
N O T E : There are no synchronization settings for Contacts.
10. Tap OK
!
!
To set up synchronization with a Microsoft Exchange
server:
1. On your device tap
, then ActiveSync.
2. Tap Tools, Options, then Server tab.
3. In the “Use this server” box, enter the name of the
Microsoft Exchange server to which you want to
connect.
Select the “This server uses an SSL connection”
check box if it’s applicable to your corporate network.
4. Tap Options.
5. On the Connection tab, enter your user name,
password, and domain name under “Logon credentials”.
If you intend to enable automatic synchronization,
select the “Save password” check box.
6. On the Rules tab:
a. Select the frequency of synchronization with the
server when you are connected to your computer.
b. Define the rules for resolving conflicts if items
change on both your device and on the server.
7. Tap OK.
8. Under “Sync these items”, select the check box
opposite the types of information that you want to
synchronize with the server.
62
To set up automatic synchronization with a Microsoft
Exchange server:
Enabling automatic synchronization between your
device and Microsoft Exchange server ensures that you
always get real-time information from the server
every time an item arrives or is changed on the server.
1. On your device tap
, then ActiveSync.
2. Tap Tools, Options, then Mobile Schedule tab.
3. Tap As items arrive for the peak time and/or off-peak
time mobile schedule.
4. Tap the Server tab.
5. Tap Options.
6. Tap Device Address.
7. Tap one of the option below:
Corporate Service Provider - If your company has
instructed you to use a predefined service provider
profile.
a. Enter the profile name under Service Provider
Name.
b. Enter your device’s phone number under Device
Phone number (optional)
Device SMS Address
- Enter the address that identifies your device on
the network. This is the same address that other Internet
users use to send SMS messages to your device.
8. Tap OK
!
!
63
To stop synchronizing with a server:
You can stop synchronizing an information type with a
server, and instead synchronize it with your computer.
1. On your device tap
, then ActiveSync.
T
o
o
l
s
O
p
t
i
o
n
s
2. Tap
,
, then Server tab.
3. Under “Sync these items”, deselect the check box
opposite the types of information that you no longer want
to synchronize with the server.
4. Tap OK.
Messages in subfolders in other email folders in
Outlook are synchronized only if the folders have been
selected for synchronization in Inbox on your device.
!
N O T E : SMS messages are not received in Inbox through
synchronization. Instead, they are sent to your device by way of
your mobile service provider.
SYNCHRONIZING CALENDAR
Calendar items created on your device are copied to
your computer and/or on a Microsoft Exchange server
during synchronization, and vice versa. By default,
Calendar items from the last two weeks will be
synchronized.
Similarly, Calendar items that are deleted from your
device are deleted from your computer and/or server
during synchronization, and vice versa.
!
SYNCHRONIZING INFORMATION
By default, ActiveSync does not enable automatic
synchronization of all types of information. To select the
types of information you want synchronized, on either
your device or your computer, go to Tools, then Options.
This section gives you an overview of the types of
Outlook information you can synchronize.
SYNCHRONIZING INBOX
When you select Inbox for synchronization in
ActiveSync, email messages are synchronized as part
of the general synchronization process. During
synchronization, the following events occur:
Messages are copied from the Outlook Inbox folder on
your computer, or from a Microsoft Exchange server, to
the Inbox folder (under the ActiveSync account) on your
device.
By default, when synchronizing Inbox information with
your computer, you will receive only messages from the
last three days and the first .5 KB of each new message.
You can also choose to download file attachments.
The messages on your device and on your computer
are linked. When you delete a message on your device,
it is also deleted from your computer the next time you
synchronize, and vice versa.
!
!
!
64
!
SYNCHRONIZING CONTACTS
Contacts created on your device are copied to your
computer or on a Microsoft Exchange server during
synchronization, and vice versa. By default, all of your
contacts will be synchronized.
Similarly, contacts that are deleted from your device
are deleted from your computer and/or server during
synchronization, and vice versa.
!
!
SYNCHRONIZING TASKS
Task synchronization is, by default, automatically
selected in ActiveSync.
Tasks can only be synchronized with your computer;
they cannot be synchronized with a server.
!
!
65
Tasks created on your device are copied to your
computer during synchronization, and vice versa. By
default, only incomplete tasks will be synchronized.
Similarly, tasks that are deleted from your device are
deleted from your computer during synchronization, and
vice versa.
!
!
USING ACTIVESYNC TO EXCHANGE FILES
You can use ActiveSync to exchange information from
your device your computer and vice versa. Changes you
make to the information on one location will not affect
the information on the other one. If you want to
automatically update information on both your device
and computer, synchronize the information instead.
SYNCHRONIZING USING INFRARED
Your device is equipped with an IrDA-standard infrared
port that you can use to synchronize information with
your computer. Simply align the infrared port of your
device with that on your computer. This method is ideal
for quickly switching between multiple devices since
there are no cables or adapters to change.
You can copy two types of information to your device:
files and Pocket Access Windows CE Store information.
The procedure below only applies to copying files. Refer
to the ActiveSync Help on your computer for instructions
on how to copy Pocket Access Windows CE Store
information.
To synchronize information via infrared connection:
1. Perform the steps below on your computer:
a. Install and configure an infrared port on your
computer following the manufacturer’s instructions.
b. Once your computer’s IR port is ready, open
ActiveSync.
c. Click File, then Connection Settings.
d. Under the “In the Allow serial cable or infrared
connection to this COM port” list, select Infrared Port
(IR).
2. Perform the steps below on your device:
a. Align the IR port
of your device with that on
your computer so that they are unobstructed and within
a close range.
N O T E : Files created on your computer may need to be converted
by ActiveSync so that they can be viewed and edited on your
device, and vice versa.
b. Initiate connection by tapping
Tools, then Connect via IR.
66
, ActiveSync,
To copy files:
1. Connect your device to your computer.
2. In ActiveSync on your computer, click Explore
.
Windows Explorer will open the Mobile Device
window for your device.
3. Locate the file that you want to copy on your device or
computer.
4. Do one of the following:
To copy the file to your device, right-click the file and
click Copy. Place the cursor in the desired folder for your
device, right-click, then click Paste.
To copy the file to your computer, right-click the file
and click Copy. Place the cursor in the desired folder for
your computer, right-click, then click Paste.
!
!
67
ACTIVESYNC ERRORS
Whenever ActiveSync cannot successfully synchronize
information, it displays an Error link on the ActiveSync
window on your device. Tap the link to display more
information about the error that occurred.
Some types of errors can interfere with automatic
synchronization. If you suspect that a scheduled
automatic synchronization has not occurred, you should
try to manually synchronize your information.
Successfully completing manual synchronization will
reset automatic synchronization.
CHAPTER 4
ENTERING DATA
This chapter describes how to use the different text entry
methods on your device.
1. Using the Input Panel
2. Writing on the Screen
3. Drawing on the Screen
4. Recording a Message
5. Using My Text
Tap to learn more about the
error and how to resolve it.
68
69
USING THE INPUT PANEL
Use the input panel to enter information in any program
on your device. You can either type using the soft
keyboard or write using Letter Recognizer, Block
Recognizer, or Transcriber. In either case, the characters
appear as typed text on the screen.
Tap here if this is
the correct word.
To show or hide the input panel:
1. Tap the Input Panel button
.
2. Tap the arrow next to the Input Panel button to see
your choices.
To change word suggestion options:
To set word suggestion options such as the number of
words suggested at one time:
1. Tap
Select an input method.
Tap to see your choices.
, then Settings, then Personal tab.
2. Tap Input
.
3. On the Word Completion tab, define the word
suggestion settings.
4. Tap OK.
Input Panel button
When you use the input panel, your device anticipates
the word you are typing or writing and displays it above
the input panel. When you tap the displayed word, it is
inserted into your text at the insertion point. The more
you use your device, the more words it learns to anticipate.
70
USING THE SOFT KEYBOARD
The soft keyboard allows you to “type” information just
like in a regular keyboard, by tapping the onscreen keys.
To use the soft keyboard:
1. Tap the arrow next to the Input Panel button, then tap
Keyboard.
2. On the soft keyboard that is displayed, tap the keys
with your stylus.
71
Write lower case
letters here.
Tap the onscreen keys
with your stylus.
USING LETTER RECOGNIZER
With Letter Recognizer you can write letters using the
stylus just as you would on paper.
To use the Letter Recognizer:
1. Tap the arrow next to the Input Panel button, then tap
Letter Recognizer.
2. Write a letter in the box.
When you write a letter, it is converted to typed text
that appears on the screen.
For specific instructions on using Letter Recognizer, with
Letter Recognizer open, tap the question mark next to
the writing area.
72
Write numbers here.
Write all caps
letters here.
USING BLOCK RECOGNIZER
With Block Recognizer you can input character strokes
using the stylus that are similar to those used on other
devices.
To use the Block Recognizer:
1. Tap the arrow next to the Input Panel button, then tap
Block Recognizer.
2. Write a letter in the box.
When you write a letter, it is converted to typed text
that appears on the screen.
For specific instructions on using Block Recognizer, with
Block Recognizer open, tap the question mark next to
the writing area.
73
Write numbers here.
Write letters here.
Using Transcriber
To learn how to write a letter in Transcriber:
Transcriber allows you to write anywhere on the screen
using the stylus just as you would on paper.
1. Tap
on the toolbar.
2. In the screen that appears, select the letter you want
to learn about, then tap one of the examples.
To use the Transcriber:
1. Tap the arrow next to the Input Panel button, then tap
Transcriber.
2. Write anywhere on the screen.
Pause and let Transcriber change the written
characters to typed characters.
For specific instructions on using Transcriber, with
Transcriber open, tap the question mark in the toolbar.
Click a character for
a demonstration.
74
75
WRITING ON THE SCREEN
To punctuate in Transcriber:
1. Tap
on the toolbar.
2. Tap the punctuation mark you need.
3. Tap OK to hide the toolbar.
In any program that accepts writing, such as Notes, and
in the Notes tab of Calendar, Contacts, and Tasks, you
can use your stylus to write directly on the screen. Write
the way you do on paper. You can edit and format what
you've written and convert the information to text at a
later time.
To write on the screen:
Tap the Pen button
to switch to writing mode.
This action displays lines on the screen to help you
write.
!
SELECTING AND EDITING TYPED TEXT
N O T E : Some programs that accept writing may not have the Pen
button. See the documentation for that program to find out how to
switch to writing mode.
If you want to edit or format typed text, you must select
it first.
1. Drag the stylus across the text to select it.
2. To cut, copy, and paste typed text:
a. Tap and hold the selected words
b. Tap an editing command on the pop-up menu, or
tap Edit on the command bar, then tap an editing
command.
Tap the Pen button to use
your stylus like a pen
76
77
To select and edit written text:
If you want to edit or format written text, you must select
it first.
1. Tap and hold the stylus next to the text you want to
select until the insertion point appears.
2. Without lifting, drag the stylus across the text you want
to select.
If you accidentally write on the screen, tap Edit, then
Undo, and try again.
-or-
To convert writing to text:
Tap Tools, then Recognize.
If you want to convert only certain words, select them
before tapping Recognize on the Tools menu (or tap and
hold the selected words and then tap Recognize on the
pop-up menu). If a word is not recognized, it is left as
writing.
!
Tap the Pen button
to deselect it and then drag the
stylus across the screen.
3. You cut, copy, and paste written text in the same way
you work with typed text:
a. Tap and hold the selected words.
b. Tap an editing command on the pop-up menu, or
tap Edit on the command bar, then tap an editing
command.
Select the text you want to
convert and tap Recognize
on the pop-up menu.
The writing is
turned into text.
If the conversion is incorrect, you can select different
words from a list of alternates or return to the original
writing. To do so:
1. Tap and hold the incorrect word (tap one word at a
time).
2. In the pop-up menu, tap Alternates.
A menu with a list of alternate words appears.
3. Do either of the following:
Tap the word you want to use.
Tap the writing at the top of the menu to return to
the original writing.
!
!
78
79
DRAWING ON THE SCREEN
You can draw on the screen in the same way that you
write on the screen. The difference between writing and
drawing on the screen is how you select items and how
they can be edited. For example, selected drawings can
be resized, while writing cannot.
CONVERSION REMINDERS
Hyphenated and foreign words that use special
characters such as accents and some punctuation
cannot be converted.
If you add writing to a word to change it (such as
changing a "3" to an "8") after you attempt to recognize
the word, the writing you add will not be included if you
attempt to recognize the writing again.
!
To create a drawing:
1. Cross three ruled lines on your first stroke.
A drawing box appears.
2. Subsequent strokes in or touching the drawing box
become part of the drawing. Drawings that do not cross
three ruled lines will be treated as writing.
!
TIPS FOR GETTING GOOD RECOGNITION
Write neatly.
Write on the lines. Write the cross of the "t" and
apostrophes below the top line so that they are not
confused with the word above. Write periods and
commas above the line.
For better recognition, try increasing the zoom level to
300% using the Tools menu.
Write the letters of a word closely and leave big gaps
between words so that your device can easily tell where
words begin and end.
The drawing box indicates the
boundaries of the drawing
!
!
!
!
80
You may want to change the zoom level so that it is
easier to work on or view your drawing. Tap Tools and
then select a zoom level.
81
To select a drawing:
If you want to edit or format a drawing, you must select
it first.
Tap and hold the stylus on the drawing until the
selection handle appears.
To select multiple drawings, deselect the Pen button
RECORDING A MESSAGE
!
!
and then drag to select the drawings you want.
In any program where you can write or draw on the
screen, you can also quickly capture thoughts,
reminders, and phone numbers by recording a
message.
In Calendar, Tasks, and Contacts, you can include a
recording in an item.
In Notes, you can either create a stand-alone
recording or include a recording in a written note.
In Phone, you can create a recording during a call.
In Inbox, you can add a recording to an email
message.
!
To edit a drawing:
1. Tap and hold the selected drawing.
2. Tap an editing command on the pop-up menu, or tap
Edit on the command bar, then tap an editing command.
!
!
!
To resize a drawing:
1. Make sure the Pen button
is not selected.
2. Drag a selection handle until the desired size is
attained.
To create a recording in Notes:
1. Tap
, then Notes
.
If you want to include the recording in a note, open the
note first.
2. Tap
on the command bar.
3. Position your device's built-in microphone near your
mouth or other source of sound.
You can also use the microphone in the stereo
headset/single earbud headset bundled with your device
to create a recording.
4. On the Recording toolbar, tap
.
5. Tap
to stop recording.
The new recording appears in the note list or as an
embedded icon.
82
83
To play a recording:
Tap it in the list or tap its icon in the note.
!
Indicates an embedded recording
USING MY TEXT
When using Inbox or MSN Messenger, use My Text to
quickly insert preset messages into the text entry area.
To insert a My Text message:
1. Tap My Text on the screen’s command bar.
2. Tap a message.
3. Tap OK.
Tap to begin recording.
Tap to show or hide the Recording toolbar.
You can add text after inserting a My Text message
before sending it.
To edit a My Text message:
1. In the Tools menu, tap Edit and then tap Edit My Text
Messages.
2. Select the message you wish to edit and make the
desired changes.
84
85
CHAPTER 5
USING THE PHONE FUNCTION
The phone function of your PPC4100 Pocket PC boasts
of standard cell phone features—such as mailbox and
SMS—as well as several handy call features including
Speed Dial, Caller ID, Conference Call, Call Waiting,
Call Barring, Call History, speakerphone mode, note
taking, voice mail, and emergency number setting.
The Phone program is integrated with both Microsoft
Contacts and Inbox. This means you can make a call
and send email/SMS messages from any of these three
programs. This fully integrated functionality of Phone
also makes sharing contact information between
programs an easier task.
This chapter shows you how to install a SIM card on
your device. It also describes basic phone operations
and features, as well as ways of customizing the phone
function based on your preferences.
1. Phone Setup
2. Dialer Screen
3. Phone Operation
4. Making Phone Calls
5. Phone Features
6. Phone Preferences
86
87
PHONE SETUP
(4) Press the SIM card holder down.
(5) Slide the SIM card holder to the left to lock it into
place.
INSTALLING THE SIM CARD
If you wish to use the phone function, you need to first
install a valid SIM (Subscriber Identity Module) card.
A SIM card is a small printed circuit board that must be
installed when signing on as a subscriber in a
GSM-based mobile phone like your PPC4100. It
contains subscriber details, security information and
memory for a personal directory of numbers. An AT&T
Wireless SIM card is included in your PPC4100 gitftbox.
To install the SIM card:
1. If the device is switched on:
(1) Press and hold the End button
until
on your device
appears in the navigation bar.
(2) Press the Power button
to turn off the device.
(3) Wait five (5) seconds to allow the device to
completely enter sleep mode.
2. Remove the battery pack. See page 12 for instructions.
3. Perform the following steps with the open rear panel
facing you:
(1) Slide the SIM card holder to the right.
(2) Lift the holder halfway from the recess area.
(3) Insert the SIM card into SIM card holder.
Note the proper position of the SIM card—the card
connector (i.e., gold area) should be facing downward
with the bevelled corner fitting the lower-left corner of the
recess area.
88
4. Reinstall the battery pack. See page 12 for instructions.
The default settings for your device are programmed on
the assumption that you’ll be using the phone
function so once you’ve properly installed a SIM card
(and in some cases, entered a PIN), you can then
proceed to establishing a connection to your mobile
service provider’s network.
N O T E : If you’re not going to install a SIM card on your device,
keep the Phone program closed to minimize power consumption.
ENTERING YOUR PIN
After you have installed the SIM card you’ll be able to
activate your mobile service connection. In most cases,
SIM cards are preset with a PIN (Personal Identity
Number), provided by your mobile service provider,
which you need to enter to establish mobile service
connection.
89
DIALER SCREEN
To enter your PIN:
1. Tap
, then Phone .
2. On the Dialer screen, enter the preset PIN from your
mobile phone service provider.
Launching Phone opens the Dialer screen. To do this
you can do either of the following:
Tap
, then Phone .
On your device’s front
Send button
.
!
!
panel,
press
the
This icon indicates the status of
the mobile service connection.
The last number
called is displayed
here.
3. Tap
Tap to back space
over individual
numbers
Tap to view the
Call History entries
.
If you consecutively enter a wrong PIN for three times,
the SIM card will be blocked. If that happens, you can
unblock it with the PIN Unblocking Key also provided by
your mobile phone service provider.
Tap to view the
Speed Dial list.
Soft keypad
for inputting
Tap to call the
currently displayed
number.
Tap Tools, then Options to
view phone settings.
Tap to view the contact list.
Tap to create a call note.
DIALER BUTTONS
The list below shows the actions of the Dialer screen
buttons.
BUTTON
ACTION
Tap to erase the number you entered.
Tap to see all received, made, and missed calls.
Tap to view the Speed Dial list.
90
91
BUTTON
PHONE OPERATION
ACTION
Tap to call the displayed number.
Tap to end a call.
Tap during a call to create a note for that
particular call.
Phone Status Icons
The list below shows the Phone-related status icons.
ICON
92
NAME
DESCRIPTION
Network
search
Indicates that the device is attempting
to establish mobile service connection.
No network
Indicates that the device is not able to
establish mobile service connection.
Phone off
Tap to display the Connectivity callout.
In network
service
Tap to turn off the phone function.
Signal status
The number of bars indicates the
strength of the connection signal. As
the strength of the signal diminishes,
so will the number of bars in the icon,
with no bars indicating no signal.
Active call
Notifies you that a call is being made or
there is an incoming call.
Speakerphone
Indicates that the speakerphone mode
is enabled.
Missed call
Tap to view missed calls.
Unread message
Tap to view unread SMS or email
message(s), as well as voice mail
notification(s).
TURNING THE PHONE FUNCTION ON AND OFF
If you have turned the phone function off, removed and
then reinstalled the SIM card, the connection to your
mobile service provider’s network is not automatically
enabled. You have the option to just use the device’s
PDA features or you can reestablish the mobile service
connection.
I M P O R T A N T : In many countries it is required by law to turn off
cell phones when boarding commercial flights. Turning off your
PPC4100 does not turn off the device’s phone function; you must
disconnect the mobile service connection by enabling flight mode.
To turn on the phone function:
Press and hold the End button
!
on your device
until
appears.
- or Tap
on the navigation bar, then from the
Connectivity callout, tap Turn off flight mode.
This icon
will change indicating your device is
getting ready to search for a mobile connection. This
may take a few seconds. During connection, the icon
changes to
established.
then to
once a mobile connection is
93
To turn off the phone function:
Press and hold the End button
ANSWERING A CALL
on your device
!
until
!
Tap Answer or press the Send button
.
appears in the navigation bar.
REJECTING A CALL
- or -
ERASING NUMBER INPUT
If you entered a wrong phone number when dialing, you
can either backspace to erase individual digits or you
can delete the entire phone number
!
Tap
Tap Ignore or press the End button
.
Depending on your mobile service subscription, either
a busy tone will be sent out, or the call will be forwarded
to your voice mailbox.
!
Tap
on the navigation bar, then from the
Connectivity callout, tap Turn on flight mode.
to backspace over digits.
ENDING A CALL
!
Tap
or press the End button
.
ADJUSTING THE PHONE VOLUME
To adjust the phone volume, you must do it during a call.
If you adjust the volume at another time it will only affect
the level of the system sounds (i.e., ring and notification
alerts, .wmv/MP3 playback).
Tap to backspace and
erase individual numbers.
!
From the command bar, tap Edit, then Clear or tap
and hold
.
To adjust the phone conversation volume:
Tap to delete the entire
phone number entry.
94
1. Tap
on the navigation bar or press the volume
rocker key down to bring up the In Call callout.
2. Drag the slider to adjust the phone volume.
95
USING THE SPEAKERPHONE
MUTING A CALL
To attend to phone calls, attach the single earbud
headset or activate the speakerphone mode. The
speakerphone function allows you to talk hands-free
and/or let other people listen to the caller.
During a call you can mute the microphone so that the
person with whom you are speaking cannot hear you,
but you can still hear him or her. This is useful if, for
example, you do not want the other person to hear a
conversation or background noise on your side of the
call.
To enable speakerphone mode:
Press and hold the Send button
until the
speakerphone turns on as indicated by the appearance
of the Speakerphone icon
on the navigation bar.
To disable speakerphone mode:
Press and hold the Send button
again until the
Speakerphone icon
disappears from the navigation
To mute a call:
During a call, tap
and off.
to toggle the mute function on
The mute icon
is displayed on the Dialer screen’s
entry area to indicate that the mute function is enabled.
bar.
96
97
MAKING PHONE CALLS
The integrated nature of your device’s phone function
lets you make calls in a variety of ways across different
applications. You can make a call by:
Manually entering a phone number using the Dialer
keypad.
Accessing numbers using Speed Dial, Call History,
Microsoft Contacts or SIM Manager.
!
!
Once a call has been initiated this icon
MAKING A CALL USING MICROSOFT CONTACTS
There are several ways to make a call in Contacts. In this
section, only the method using the hardware buttons will be
described. For instructions on other methods, see page 174.
1. Tap
, then Contacts
.
Contacts will open to the contact list.
2. Rotate the jog dial up/down to scroll through the
contact list and select the contact you want to call.
3. Press the Send button
twice—once to launch
changes to
indicating an active call.
MAKING A CALL USING DIALER
1. On the Dialer keypad, tap the phone number you want
to call.
2. Tap
or press the Send button
.
This icon indicates a call is being
made and the strength of the signal.
Phone and another to make the call. The call will be
made to that contact’s priority number.
The number
being called is
displayed here.
Tap to terminate
the call.
98
99
MAKING A CALL USING SPEED DIAL
Speed Dial is a list you create for numbers you call
regularly. Only numbers stored in Microsoft Contacts can
be added to this list.
To make a call using Speed Dial:
You can make a call in two ways:
By memorizing a phone number’s position in the
Speed Dial list, you can dial the number by entering its
location number.
!
Alternatively, if you don’t remember the position of a
number in the Speed Dial list follow the steps below:
!
1. Tap
or rotate the jog dial down .
2. On the Speed Dial window, scroll the jog dial to go
through the list to find the number you want to call.
3. Once the number is selected, you can either press
the jog dial or the Send button
to initiate the call.
Tap to adjust voice
mail settings.
Tap a Speed Dial
number to call
that contact.
Tap to edit
contact details.
Tap to add a
contact to the
Speed Dial list.
In the picture above, Kyla Devon is at position 3. To dial
her number, tap and hold 3 on the Dialer keypad until
you hear a beep.
If a number holds a position of 10 or higher tap the first
number, and then tap and hold the second to dial. For
instance, to call the number in position 12, tap 1 then tap
and hold 2.
100
MAKING A CALL USING CALL HISTORY
Call History is a record of all incoming, outgoing, and
missed calls.
1. Tap
or rotate the jog dial up.
2. Find the number you want to call. You can select a call
category—All Calls, Missed, Outgoing, Incoming, and
By Caller—by tapping the pick list in the top-left corner
of the screen.
101
3. Once the number has been selected, make the call by
doing any of the following:
Press the jog dial.
Press the Send button
.
Tap the category icon on the left of the selected
number.
!
!
!
Tap here to select
a call category.
Tap a category icon
to call the number
opposite it.
3. Once the number has been selected, make the call by
doing any of the following:
Press the jog dial.
Press the Send button
.
Tap and hold the selected number, then select Call
from the pop-up menu.
!
!
!
MAKING A CALL USING SIM MANAGER
SIM Manager is a program you can use to view and
manage the contents of your SIM card.
1. Tap
, Programs, then SIM Manager
Wait for the SIM card contents to load.
2. Select the number you want to call.
.
MAKING AN INTERNATIONAL CALL
For making a call to an overseas number that is not
stored either in your SIM card or on your device, follow
the steps below.
1. Tap and hold the 0 key until the ‘+’ sign appears.
‘+’ replaces the international number prefix ‘00’.
2. Enter the full phone number you want to dial.
It includes the country code, area code (without the
leading zero), and phone number.
3. Tap
102
or press the Send button
.
103
To make an emergency call:
1. Dial the emergency number by using Dialer.
For international emergency calls, dial 112.
For US/Canada emergency calls, dial 911.
!
!
2. Tap
or press the Send button
.
MAKING AN EMERGENCY CALL
Your handset supports the international emergency
number 112, and for US/Canada residents, the
emergency number 911 as well. You can call these
numbers for emergency police, fire, and medical
assistance.
N O T E : In some cases, additional local emergency numbers may
be provided by your mobile phone service provider.
Generally, you can make a call to these emergency
numbers, with or without a SIM card installed on your
device, as long as a mobile phone service network is
available in your area. However, some mobile phone
service providers may require that a SIM card is
inserted, and in some cases that the PIN has been
entered as well, before an emergency call can be made.
Contact your mobile service provider for the
requirements applicable to your mobile subscription.
104
105
PHONE FEATURES
Flexibility is a hallmark of your device’s phone function.
This is best exemplified in such features as Call
Notification, Call Hold and Conference Call, which
allows you to attend to more than one call
simultaneously—all with a simple tap of your stylus.
CALL NOTIFICATION AND IDENTIFICATION
The Call Notification feature lets you know if another
person is trying to call you when you are talking on the
phone. When this happens the following callout appears.
Variety is another hallmark of your device’s phone
function. This is implemented in such range of features
as Call Notes, SMS/email Messaging, Voice Mail, and
Contacts Integration.
N O T E : The availability of some of the phone features described in
this section may depend on your mobile service subscription.
Contact your mobile service provider for information.
The Caller Identification feature matches the incoming
call number with those stored in Contacts so you know
who is calling you.
106
107
CALL HOLD
CONFERENCE CALL
After being notified of an incoming call while already on
the phone, you can choose to reject a call by tapping the
Ignore button on the Call Notification callout, or you can
use the Call Hold feature to attend to both calls.
With the Conference Call feature you can create a
conversation line between several callers.You can either,
put a call on hold, then dial another number and wait for
it to be picked up; or accept an incoming call when you
already have one in progress.
To put a call on hold:
On the Call Notification callout, tap Answer to take the
incoming call and put the original one on hold.
!
To swap between calls:
!
To shift between two callers tap
.
To set up a conference call:
During a call with two active numbers, tap
.
If the conference connection is successful the word
Conference will appear in the input area of the Dialer
screen.
!
Indicates which number is on hold.
Tap to swap between calls.
To add additional people to a conference call:
You can connect up to six (6) callers at a time in a
conference call.
1. During an active conference call, tap
2. Key in the new number.
.
3. Tap
to return and continue with the conference
call.
4. Repeat steps 1-3 to add more people in the
conference call.
108
109
CALL NOTES
The Call Notes feature allows you to create a written or
recorded note during a call. The call note will be saved
as an attachment to your call as viewed in Call History.
To create a call note:
1. During an active call, tap Note
on the command
bar.
2. In the Notes window, use any of the input methods to
compose your call note.
From Notes:
In the Notes window, tap the call note from the list.
A call note’s label corresponds to the name or phone
number of the related contact.
!
3. After you finished your call note, tap OK.
To view a call note:
You can view call notes either from the Call History
window or from the Notes program.
From the Call History window:
!
1. Tap
or rotate the jog dial up .
2. Select a log item marked with this icon
.
3. Tap and hold the selected log item, then tap View
Note from the pop-up menu.
110
111
SMS SERVICE
Just like a regular mobile phone, you can send and
receive SMS messages using your device. Your SMS
account is automatically setup in Inbox when you
activated your mobile service subscription.
To view an SMS message:
You can view an SMS message whether the phone
function is on or off.
When the phone function is on, you can view an SMS
message from its notification callout:
Tap the SMS notification icon
on the navigation
bar to display the message.
When the phone function is off, you can still view
received SMS message in Inbox:
!
1. Tap
, then Inbox
.
2. Tap the pick list on the top-left corner to display
the navigator panel.
3. Tap Inbox under the SMS account.
4. In the message list, tap an SMS message.
!
The SMS Caller Identification feature matches incoming
SMS numbers with those stored in Contacts so you
know who is sending you a message. Furthermore, the
“New SMS message” callout gives you the option to call
the SMS sender back, reply, or delete the message.
Tap to reply, call the
sender, or forward
the message.
Tap to delete
the message.
Tap to view the
previous message
in the list.
Tap to view the
next message in
the list.
N O T E : If the phone function is turned off and you tried to call the
sender, send a reply, or forward the message, you will be
prompted to turn the phone function on.
112
113
To send an SMS message:
1. On the Dialer screen’s navigation bar, tap Tools, then
Send SMS.
Character counter
To enter preset or frequently used messages, tap
My Text, then select a message.
Inbox will be launched displaying a new message
window.
2. Tap the double arrows next to the Subject field.
3. Tap the Account field, then SMS.
4. In the To field, enter the SMS number of one or more
recipients, separating them with a semicolon. You can do
this in two ways:
Manually enter the SMS number using any of the
input panel options.
!
Tap the To field or Address Book
to display the
contact list, then tap a contact from the list.
!
Tap the To field or Address Book
again to hide
the contact list.
5. Compose your message.
The auto-correct feature automatically fixes common
spelling errors as you type so your messages are more
accurate.
The character counter lets you see and control the
size of the message as you compose.
114
To attach a voice recording, tap
, then proceed
with creating the recording. Refer to page 83 for detailed
instructions.
If you want to know if your SMS message was
received, tap the Edit, Options, then select the “Request
SMS text message delivery notification” check box.
6. Tap
when you've finished the message.
If the phone function is turned on, your SMS
message will be immediately sent out. If it’s off, you will
be prompted to turn on the phone function. If you do so,
the message will sent out; otherwise when you tap OK,
the message will be saved in the Drafts folder and you
can send it out later.
115
VOICE MAIL
CONTACTS INTEGRATION
With the voice mail service you need not miss a
message when you miss a call. Unattended calls (i.e., no
answer, phone function is turned off or is out of network
service) or a busy line will automatically forward callers
to your voice mailbox where they can leave their
messages.
Your device’s phone function is integrated with other
applications making it easy for you to share
contacts—phone numbers—between programs. Listed
below are the places where contacts can be stored on
your device:
Microsoft Contacts
Your contacts list contains phone numbers that you
can use in Phone.
Your SIM card
You interchange your SIM card between
your PPC4100 and another device; while using the other
device you can create new contacts on the SIM card.
Call History
New contact numbers can be found in incoming or
missed calls.
When you insert your SIM card into your device, it will
automatically detect and set as default the voice mailbox
number provided by your mobile service provider. By
default, the first Speed Dial location is assigned to your
voice mailbox.
!
!
!
To retrieve your voice mails:
Tap and hold
on the Dialer keypad.
Your voice mail retrieval number is automatically
dialed.
Tap the SMS Notification icon
informing you of the
new voice mail, then tap Call from the “New SMS
message” callout
!
!
SHARING CONTACTS IN MICROSOFT CONTACTS
Below are several advantages for exporting contact
information to Microsoft Contacts:
As a backup in case you lose your SIM card while
using it with another device.
If you are using your SIM with another device, you
may need the numbers stored in Microsoft Contacts.
Exporting phone numbers to Microsoft Contacts
allows you to create a more detailed record.
!
!
!
To add contacts to Microsoft Contacts:
You can choose to create new contacts or add contacts
from SIM Manager or from Call History.
For instructions on creating new contacts, see
page 171.
For instructions on adding Call History items, see
page 121.
For instruction on adding SIM Manager contacts, see
page 120.
!
!
!
116
117
To export contacts from Microsoft Contacts:
1. Do either of the following:
Tap and hold a contact to display the pop-up menu.
Tap a contact to select it, then tap the Tools menu.
If you do not select a contact, the first entry on the list
will be exported.
2. Select the location where to export the contact.
To export a contact to a SIM card:
a. Tap Save To SIM.
!
!
!
c. Select a location. You can either:
- Accept the default location which is the first
available position in the Speed Dial list.
- Use the up and down arrows in the Location field
to scroll and select the desired location. If you want to
put a number in a position that is already occupied, the
new number will overwrite the number already there.
d. Tap OK.
SHARING CONTACTS IN SIM MANAGER
SIM Manager enable you to manage all contacts stored
in your SIM card with the option to export this
information to Microsoft Contacts.
To add contacts to SIM Manager:
1. Tap New on the command bar.
!
A screen appears to display the export status.
b. After exporting, tap OK.
To export a contact to Speed Dial:
a. Tap Add to Speed Dial....
A screen appears to display the export status.
b. In the next screen add the contact details.
2. In the Add Entry box, fill out the Name and Phone
fields.
3. Tap Add.
118
119
To export SIM Manager contacts:
You can choose to export individual or all SIM Manager
contacts to Microsoft Contacts.
To export individual SIM Manager contact:
1. Tap and hold a contact, then from the pop-up menu,
select Save to Contacts.
A pop-out message will confirm export to Microsoft
Contacts.
!
A screen appears to display the transfer status.
2. After completing the export, tap OK.
SHARING CONTACTS IN CALL HISTORY
Call History is a record of all incoming, outgoing, and
missed calls. You have the option to export new numbers
under the Incoming and Missed categories to Microsoft
Contacts.
To export Call History entries to Microsoft Contacts:
1. Display the Incoming or Missed categories.
2. Tap and hold the number you want to export.
In the pop-up menu that appears select Save to
Contacts.
3. On the Contact screen add additional contact details.
2. Tap OK to close the box.
To export all SIM Manager contacts:
1. Tap Tools from the command bar, then select Save
All To Contacts.
!
4. Tap OK or press the jog dial.
The call details in the Call History for the transferred
number will change to display the contact name
specified.
120
121
CALL HISTORY
All calls made on your device are recorded in Call
History. You can refer to it to check call details as well as
access any notes taken during a call. You can set a limit
on the number of entries or delete them as necessary to
save memory space.
CALL DETAILS
Call History allows you to check the date and time a call
was made, as well as the duration.
To view call details:
Find the call you are interested in, then tap it once.
!
CALL HISTORY CATEGORIES
Entries in the Call History are grouped into the five
categories listed below. Tap the pick list on the top-left
corner to select a call category.
Tap to select a
call category.
CALL HISTORY LIMIT
To minimize the memory space occupied by the Call
History items, you can set a limit for the number of
entries retained after a specific period of time. You can
also delete items that you no longer need.
ICON
122
CATEGORY
DESCRIPTION
All Calls
Shows all calls made to and from your
device in a chronological order
Missed
Shows calls made to your device that
were not answered
Outgoing
Shows all calls made from your device
Incoming
Shows all calls made to your device
By Caller...
Shows all calls made to and from your
device in an alphabetical order based
on caller ID
To set the Call History limit:
1. From the command bar, tap Tools, then Call Timers.
2. On the Call Timers window, tap the ”Delete call
history items older than” pick list, then, tap a time period
option.
123
PHONE PREFERENCES
You can configure most features of the phone function to
suit your preferences. You do this by accessing the
Phone option under Settings.
Tap to select a basis for
the call history limit.
To access Phone settings:
From the Dialer screen’s command bar, tap Tools,
then Options.
- or !
3. Tap OK.
To delete individual Call History entries:
Tap and hold the entry you want to delete, then from
the pop-up menu, select Delete.
!
To delete all Call History entries:
From the command bar, tap Tools, then Delete
all calls.
From any other screen, tap
tab, then tap Phone
, Settings, Personal
.
The Phone Settings window has four tabs—Phone,
Services, Network, and Special. Refer to the following
sections for the configuration options available for each
tab.
!
PHONE TAB
Configure sound and security settings in this tab. The
SIM card number is indicated on the first line of the
window.
124
125
VIEWING THE RING TONE LIST
1. Tap
, Settings, then Personal tab.
2. Tap My Ring Tone
.
2.Tap the Ring tab to display the My Ring Tone window.
CONFIGURING RING TYPE, RING TONE, AND
KEYPAD SOUNDS
Under the Sounds option, tap the pick list for each
field, then select your choice from the drop-down menu.
!
Keypad Sounds
Ring Type
Ring Tone
To download ring tones:
For a more personalized ring tone, you can choose to
download additional sound files to your device. File formats
supported include .wav and mono .midi formats. You can
download sound files in several ways, including:
Via synchronization using ActiveSync
Via Internet access using Pocket Internet Explorer
Via IR transfer
!
!
!
126
3. Tap the file format pick list on the lower-right corner of
the screen to display the type of ring tone files you wish
to display.
A marked check box beside a file indicates that it is
included under the “Ring tone” options of Phone
Settings.
To listen to a ring tone:
Check the box next to the ring tone file you want to
!
play, then tap
. To stop ring tone playback, tap
.
To add a ring tone to Phone Settings:
Select the box next to the ring tone file you want to
add, then tap Apply.
!
127
To remove a ring tone from Phone Settings:
Deselect the box next to the ring tone file you want to
remove, then tap Apply.
!
2. Enter the old PIN, input a new one, then retype it for
confirmation.
To adjust the ring tone volume:
1. Tap the Volume tab.
2. To adjust the ring tone volume drag the slider.
SERVICES TAB
Configure the different phone services in this tab—Call
Barring, Caller ID, Call Forwarding, Call Waiting; and
Voice Mail and SMS.
CONFIGURING YOUR PIN
Under the Security options, you can change your PIN
and have it enabled or disabled.
To enable your PIN:
Select the “Require PIN when phone is used” check
box.
!
To disable your PIN:
Deselect the “Require PIN when phone is used” check
box.
N O T E : The availability of some of the phone services described in
this section may depend on your mobile service subscription.
Contact your mobile service provider for information.
!
To change your PIN:
1. Tap the Change Pin button. The Dialer screen will be
displayed.
128
129
CALL BARRING
You have the option to block calls in specific situations.
To enable or disable call barring:
1. Tap Call Barring from the services list.
2. Tap the Get Settings button (retrieving settings may
take a few minutes).
3. In the next screen, define the call barring settings.
Block incoming calls
- All calls - to prevent any calls from coming through
- When roaming - to block incoming calls when in
phone service is in roaming status
- Off - to accept all incoming calls
Block outgoing calls
- All calls - to prevent any calls from being made
from your device
- International - to block outgoing international
calls
- International except to home country - to block all
outgoing international calls other than those being made
to the set home country
- Off - to disable call barring for all outgoing calls
!
CALLER ID
When this service is enabled and you make a call, your
phone number will be displayed on the phone screen of
the person you’re calling.
To enable or disable Caller ID:
1. Tap Caller ID from the services list.
2. Tap the Get Settings button (retrieving settings may
take a few minutes).
3. In the next screen, define the caller ID settings.
Everyone - to enable Caller ID, or
No one - to disable Caller ID
!
!
!
4. Tap OK.
CALL FORWARDING
This service allows you to forward incoming calls to
another phone number. You can choose to forward all
calls to the same number or specify a number based on
the following conditions:
Unavailable - the phone function is turned off or is out
of network service
Busy - when you are attending to a phone call
No answer - when you are not answering your phone
calls
!
!
4. Tap OK.
130
!
131
To enable or disable call forwarding:
1. Tap Call Forwarding from the services list.
2. Tap the Get Settings button (retrieving settings may
take a few minutes).
3. In the next screen, follow these steps to enable or
disable call forwarding:
To enable call forwarding:
– Tap the “Forward all incoming calls” check box,
then specify the call forward phone number on the
To field.
- or – Tap the check box for one or all particular conditions,
then specify the call forward phone number on the box
opposite it.
To disable call forwarding, deselect all the check
boxes.
!
CALL WAITING
This service allows you to receive another call during an
active call.
To enable or disable call waiting:
1. Tap Call Waiting from the services list.
2. Tap the Get Settings button (retrieving settings may
take a few minutes).
3. In the next screen, define the call waiting settings.
Notify me - to enable call waiting, or
Do not notify me - to disable call waiting
!
!
!
4. Tap OK.
4. Tap OK.
VOICE MAIL AND SMS
By default your device will automatically detect and set
the voice mail and SMS access numbers provided by
your mobile service provider. You can view these numbers
for your reference.
To view voice mail and SMS access numbers:
1. Tap Voice Mail and SMS from the services list.
2. Tap the Get Settings button (retrieving settings may
take a few minutes).
132
133
To select a network:
Set the mode for conducting a network search.
Under “Network selection”, tap either Automatic or
Manual. Retrieving network settings may take a few
minutes if you select Manual.
!
To set preferred networks:
If there are many mobile phone service providers available
in your area, you can configure this function to select
your preferred ones and set its priority level.
1. Under Network selection, tap the Set Networks button.
NETWORK TAB
This tab allows you to configure settings related to mobile
service networks. The currently activated network is
indicated on the first line of this tab.
2. To include a listed network as a preferred network, tap
the check box opposite it.
3. To set the priority level, tap a preferred network, then
tap the Move Up/Move Down buttons.
To find a network:
Do this when the network status is currently out of network
service and you want to conduct a search.
Tap the Find Network button (search process may take
a few minutes).
!
134
135
SPECIAL TAB
In this tab you can enable the auto-pickup function as
well as set the ringing mode for incoming calls when the
stereo headset or the single earbud headset is plugged
into the device.
CHAPTER 6
CUSTOMIZING YOUR HANDSET
You can customize your PPC4100 Pocket PC based on
your personal requirements and preferences as well as
depending on your usual work modes. Customize your
device by either adjusting the device settings or by
adding/removing programs.
1. Adjusting Settings
2. Adding Programs
3. Removing Programs
Select the Auto Pickup check box to accept an
incoming call after a specified number of rings without
pressing any hardware or software button.
Select the Headset Mode check box to set ringing for
incoming calls to emit from both the device speaker and
from the stereo headset/single earbud headset.
!
!
136
137
ADJUSTING SETTINGS
You can adjust the settings of your device to suit the way
you work. Adjusting certain settings, such as backlight,
auto power off timer, system volume, and processor
speed, from the factory default settings may decrease
your standby time.
BUTTONS
Assign the Send/End button on the stereo headset/
single earbud headset to commonly-used programs. You
can also adjust the onscreen scrolling speed here.
To access Settings:
Tap
, then Settings.
The Settings window has three tabs—Personal,
System, and Connections, each of which has its own set
of options.
!
The following sections show the configuration page for
each Settings option. For detailed instructions on these
pages, access the page from your device,
tap
, then Help.
PERSONAL TAB
138
INPUT
Select an input method, options for word completion and
other related settings.
139
MENUS
Customize what appears on the
New button menu.
menu, and on the
MY RING TONE
Manage and listen to all ring tones stored on your
device, as well as adjust the phone volume.
140
OWNER INFORMATION
Enter personal information and customize text display
when device is turned on.
PASSWORD
Set a password to prevent unauthorized access to your
device. You also have the option to set a password hint
to serve as a reminder in case you forget your password
141
PHONE
Set up the phone function of your device. For more
information on this Settings option, see page 125.
TODAY
Customize the look and the information that is displayed
on the Today screen.
SOUNDS & NOTIFICATIONS
Set the volume level for system sounds and select the
types of action you want to hear sounds for. You can also
define how you want to be notified about different
events. Options for personalizing sound notifications are
also available.
SYSTEM TAB
142
143
ABOUT
Displays your device’s version and copyright
information; includes an option to define a device ID.
ABOUT MY DEVICE
Displays your device’s hardware, version, and model
information. Also displays a log showing the duration of
all calls received and made on your device.
144
BRIGHTNESS
Define settings for the display brightness and backlight
control.
145
CERTIFICATES
View and manage the public key certificates available on
your device.
CLOCK
Change the settings for time zone, time and date; and
set alarms.
146
MEMORY
Adjust allocation of storage and main memory.
POWER
View the power level for both the main and backup
battery. To minimize power consumption, you can define
settings for the auto-off function and CPU operation
mode.
147
REGIONAL SETTINGS
Set default number and time display formats and other
related options.
REMOVE PROGRAMS
Removes programs from storage memory.
SCREEN
Recalibrate screen and enable the ClearType feature.
148
149
CONNECTIONS TAB
CONNECTIONS
Adjust settings for connecting to your ISP or to a local
network.
BEAM
Define settings for the beam function.
150
151
ADDING PROGRAMS
ADDING PROGRAMS TO YOUR DEVICE
Programs bundled with your device at the factory are
stored in ROM (read-only memory). You cannot remove
these programs, and you'll never accidentally lose ROM
contents. ROM programs can be updated using special
installation programs with a *.xip extension. All other programs
and data files installed to your device after factory
installation are stored in RAM (random access memory).
You can install any program created for your device, as
long as it has enough memory. The most popular place to
find software for your device is on the Pocket PC Web site
(http://www.microsoft.com/mobile/pocketpc/). You can
add programs to your device either by using ActiveSync
or by downloading the program from the Internet.
NOTE: Read any installation instructions, Read Me files, or
documentation that come with the program. M a n y p r o g r a m s
p r o v i d e s p e c i a l i n s t a l l a t i o n instructions.
To add a program using ActiveSync:
Before installing a program on your device, you must first
install the appropriate software for your device on your
computer.
1. Determine your device and processor type so that you
know which version of the software to install.
a. Tap
2. Download the program to your computer (or insert the
CD or disk that contains the program into your computer).
You may see a single *.xip, *.exe, or *.zip file, a
Setup.exe file, or several versions of files for different
device types and processors. Be sure to select the program
designed for a Pocket PC and your device’s processor
type.
3. Connect your device to your computer.
4. Double-click the *.exe file.
If the file is an installer, the installation wizard will
begin. Follow the directions on the screen. Once the
software has been installed on your computer, the
installer will automatically transfer the software to your
device.
If the file is not an installer, you will see an error
message stating that the program is valid but it is
designed for a different type of computer. You will need
to move this file to your device. If you cannot find any
installation instructions for the program in the Read Me
file or documentation, use the ActiveSync Explore button
to copy the program file to the Program Files folder on
your device. For more information on copying files using
ActiveSync, see page 67.
!
!
5. Once installation is complete, tap
the program icon to launch it.
, Programs, then
, Settings, then System tab.
b. Tap About .
c. In the Version tab, make a note of the processor
information.
152
153
To add a program directly from the Internet:
1. Determine your device and processor type so that you
know which version of the software to install.
a. Tap
, Settings, then System tab.
b. Tap About .
c. In the Version tab, make a note of the processor
information.
2. Download the program to your device straight from the
Internet using Pocket Internet Explorer.
You may see a single *.xip, *.exe or *.zip file, a
Setup.exe file, or several versions of files for different
device types and processors. Be sure to select the
program designed for a Pocket PC and your device’s
processor type.
3. Tap the file, such as a *.xip or *.exe file. The
installation wizard will begin.
4. Follow the onscreen instructions.
ADDING PROGRAMS TO THE
START MENU
You can choose what program icons should appear on
the
menu based on which ones you use most often.
To add a program to the Start Menu program
using Settings:
1. Tap
, then Settings, then Personal tab.
2. Tap Menus
.
3. In the Start Menu tab, select the check box for the
programs you wish to add.
154
If you do not see the program you want, you can either
use File Explorer on your device to move the program to
the Start Menu folder, or use ActiveSync on your
computer to create a shortcut to the program and place
the shortcut in the Start Menu folder.
To add a program to the Start Menu using File Explorer
on your device:
1. Tap
, Programs, then File Explorer
.
2. Tap the My Device icon
on the command bar.
3. Open the path: Windows | Start | Programs.
4. Tap and hold the program you want to add to the
menu, then tap Cut on the pop-up menu.
5. Open the path: Windows | Start Menu.
6. Tap and hold a blank area of the window, then tap
Paste on the pop-up menu.
The program will now appear on the
menu.
To add a program to the Start Menu using ActiveSync on
your computer:
1. In ActiveSync on your computer, click Explore
to
explore your device’s files and locate the program.
2. Right-click the program, then click Create Shortcut.
3. Move the shortcut to the Start Menu folder in the
Windows folder.
The shortcut now appears on the
menu. For more
information on using ActiveSync, see ActiveSync Help
on your computer.
155
REMOVING PROGRAMS
CHAPTER 7
To save storage space on your device, you may want to
remove programs that are rarely or never used. You can
choose to reinstall them later as long as you keep the
installation file for the removed program.
GETTING CONNECTED
1. Tap
, Settings, then System tab.
2. Tap Remove Programs
.
You can use your PPC4100 Pocket PC to exchange
information with other mobile devices and connect to
your computer, a network, or the Internet. You have the
following connection options:
Use the infrared (IR) port on your device to send and
receive files from another IR-enabled device.
Connect to your mobile Internet service provider
(ISP). Once connected, you can send and receive email
messages by using Inbox and view Web or WAP pages
by using Pocket Internet Explorer.
The communication software for creating an ISP
connection is already installed on your device. Your
service provider will provide software needed to install
other services, such as paging and fax services.
Connect to the virtual private network (VPN) at the
company or organization where you work. Once
connected, the added security of a VPN means that you
can access the full resources of your company’s
network. For example, you can use File Explorer to
access the files of computers on that network.
!
!
!
3. Tap the program you wish to remove.
4. Tap the Remove button.
If the program does not appear in the list of installed
programs, use File Explorer on your device to locate the
program:
1. Tap and hold the program.
2. Tap Delete on the pop-up menu.
156
1. Infrared Connection
2. Internet Connection
3. Network Connection
4. Email Server Connection
157
INFRARED CONNECTION
Using infrared, you can send and receive information,
such as contacts and appointments from another
IR-enabled device.
RECEIVING INFORMATION
1. Align the IR port of your device with that of the
IR-enabled device so they are unobstructed and within a
close range.
2. Have the owner of the other device send the information
to you. Your device will automatically receive it.
3. On the Receiving Data callout, tap Yes.
SENDING INFORMATION
1. Switch to the program where you created the item
you want to send and locate the item in the list.
2. Align the IR port
of your device with that of the
IR-enabled device so that they are unobstructed and
within a close range.
3. Tap and hold the item, then tap the Beam option on the
pop-up menu.
-orSend items (but not folders) using File Explorer.
Tap and hold the item you want to send, then tap
Beam File on the pop-up menu.
!
158
159
INTERNET CONNECTION
NETWORK CONNECTION
Your PPC4100 Pocket PC allows you to connect to the
Internet via GPRS (General Packet Radio Service).
Once connected you can:
Use Inbox to send and receive email messages
Use Pocket Internet Explorer to access Web or WAP
pages
Use Windows Media Player 9 Series for Pocket PC to
listen to streaming media
If you have access to a network at work, you can send
email messages, view Intranet pages, synchronize your
device, and possibly access the Internet. You can
connect to a network by creating a modem connection
via a RAS account. Before you can create this modem
connection, your network administrator will need to set
up a RAS account for you. Your network administrator
may also give you VPN settings.
For more information on configuring your device’s GPRS
setting, contact your mobile ISP.
CREATING A MODEM CONNECTION
TO A NETWORK
1. Ask your network administrator for the following
information:
Dial-up access telephone number
User name and password
Domain name
TCP/IP settings
!
!
!
!
!
!
!
2. Tap
, Settings, then the Connections tab.
3. Tap Connections
.
4. In the Connections window, tap the Add a new modem
connection link, either in the mMode MMS or My Work
Network list.
5. In the Make New Connection window, enter a name
for the connection.
160
161
6. In the Select a modem list, select your modem type.
If your modem type does not appear, try re-inserting
the modem card. If you are using an external modem
that is connected to your device with a cable, select
Hayes Compatible on COM1.
7. Tap Next to continue configuring your modem connection
depending on the modem type you selected.
You need not change any settings in the Advanced
window. Most ISPs now use a dynamically assigned
address. If the ISP you are connecting to does not use a
dynamically-assigned address, tap Advanced, then the
TCP/IP tab, and enter the address. When finished, tap OK.
8. Tap Finish to create the new modem connection.
EMAIL SERVER CONNECTION
You need to set up a connection to an email server so
that you can send and receive email messages by using
a modem or network connection and Inbox on your
device. You can use multiple email accounts to receive
your messages. For each email account you intend to
use, first set up and name the email service. If you use
the same service to connect to different mailboxes, set
up and name each mailbox connection.
There are two types of email account that that can be
managed using your device.
Microsoft Outlook
Using Microsoft Outlook, your Inbox is updated each
time you sync with your computer or corporate email
server. And if you’ve sign up for the Office Online
service, you could also access your office emails
wirelessly. See page 184 for more information on how to
sign up for this service.
!
POP3/IMAP4
This includes email service from providers such as
Quest, Earthlink and attbi/Comcast. These email
accounts can be managed remotely using a wireless
connection.
!
162
163
SETTING UP AN POP3/IMAP4 ACCOUNT
For an explanation on any of the setup screens, tap
, then Help.
1. In Inbox, tap Accounts on the command bar.
2. Tap New Account.
3. Fill out the email address field, then tap Next.
This will initiate auto-configuration which attempts to
connect your device to your email server and
automatically download the necessary email connection
settings. If auto-configuration is successful you can begin
sending/receiving emails straight away. If unsuccessful
you will need to manually enter the settings.
4. Fill out the following fields: Your Name, User name,
Password.
5. Select the Save Password check box unless you want
to be prompted when you get your mail.
6. Tap Next.
7. From the Account type drop-down menu, select the
service type that your email provider supports (POP3 or
IMAP4).
8. Fill out the Name field for your email account, then
tap Next.
9. Enter your email provider’s server name information
for incoming and outgoing mail.
CHAPTER 8
MICROSOFT POCKET OUTLOOK
This chapter describes the Microsoft Pocket Outlook
programs, as well as an overview of AT&T’s Office
Online service.
1. Pocket Outlook Overview
2. Calendar
3. Contacts
4. Tasks
5. Notes
6. Office Online
NOTE: If your mail service provider does not provide an
outbound/SMTP server, AT&T Wireless customers can enter
"smtp.attwireless.net" for the outgoing mail server setting.
8. Tap Finish.
164
165
POCKET OUTLOOK OVERVIEW
CALENDAR
Microsoft Pocket Outlook includes Calendar, Contacts,
Inbox, Notes and Tasks. You can use these programs
individually or in tandem with each other. For example,
email addresses stored in Contacts can be used to
address email messages in Inbox.
Calendar enables you to conveniently manage your
schedules and appointments or any other activities
associated with a time and date. You can schedule
appointments, including meetings and other events.
Checking your appointments is easy using one of
several views—Agenda, Day, Week, Month, and Year.
Switch display views by tapping any of the view icons on
the command bar.
Using ActiveSync, you can synchronize information from
Microsoft Outlook or Microsoft Exchange on your PC
with your device. You can also synchronize this
information directly with a Microsoft Exchange server.
Each time you synchronize, ActiveSync compares the
changes you made on your device and PC or server and
updates both locations with the latest information. For
information on using ActiveSync, see ActiveSync Help on
your computer.
To open Calendar:
!
Tap
, then Calendar
.
Calendar will open to today’s schedule.
Tap to go to
current date.
Tap to display or edit
the appointment details.
Agenda view
Day view
Week view
Month view
Tap to set
display options.
Year view
Tap to create a
new appointment.
You can customize the Calendar display, such as
changing the first day of the week, by tapping Tools,
then Options.
166
167
SCHEDULING AN APPOINTMENT
You can use Calendar to create an appointment schedule.
To create an appointment:
1. If you are in Day or Week view, tap the desired date
and time for the appointment.
2. Tap New.
3. Using the soft keyboard, enter a description and a
location.
To select a field, tap it.
4. If needed, tap the date and time to change them.
5. Enter other desired information.
You will need to hide the input panel to see all
available fields.
6. To add notes, tap the Notes tab.
You can enter text, draw, or create a recording.
7. After completing the details, tap OK.
If you select “Remind me” in an appointment, your
device will remind you according to the options set in
, Settings, Personal tab, Sounds & Notifications
.
Tap to return to the calendar main window
(the appointment is saved automatically).
Tap to choose from
predefined text.
Tap to choose
from previously
entered location.
Tap to select a time.
Tap to select a date.
Notes is a good
place for maps
directions, or
meeting
reminders
168
VIEWING AN APPOINTMENT
You can view an appointment schedule in all views except
for Year view.
To see the details of an appointment, tap the
appointment.
To see a pop-up menu of available actions for an
appointment, tap and hold the appointment.
In Agenda view, upcoming appointments are displayed in
bold text.
In Month view, the time of appointments are indicated by
symbols. An upward triangle means a morning
appointment; a downward triangle means an afternoon
appointment. A solid square indicates an appointment that
overlaps the noon day border.
!
!
!
!
FINDING AN APPOINTMENT
There are two ways to find an appointment:
Tap
, Find
, enter the appointment name, select
Calendar for the type, then tap the Go button.
In Calendar, tap Tools, Categories, then select the check
box opposite the type of appointment you want displayed.
To show all appointments again, tap Tools, Categories,
then clear all check boxes.
!
!
BEAMING AN APPOINTMENT
You can send an appointment to another IR-enabled device
by beaming it.
1. In Agenda, Day or Month view, tap and hold the
appointment.
2. Tap Beam Appointment on the pop-up menu.
3. Align the IR port
of your device with that of the
other IR-enabled device so that they are unobstructed
and within a close range.
169
USING THE CALENDAR SUMMARY SCREEN
When you tap an appointment in Agenda or Day view, a
summary screen is displayed. To change the appointment,
tap Edit.
View appointment details.
CONTACTS
KEEPING TRACK OF FRIENDS AND COLLEAGUES
Contacts maintains a list of your friends’ and colleagues’
contact information. Using your device’s infrared (IR)
port, you can quickly share this list with other
Windows-based, IR-enabled device users.
View appointment notes.
To open Contacts:
Tap
, then Contacts
.
Contacts will open to the contact list. To change
the way information is displayed in the list, tap Tools,
then Options.
!
Tap to change appointment.
CREATING A MEETING REQUEST
You can use Calendar to set up meetings with users of
Outlook or Pocket Outlook. The meeting request will be
created automatically and sent when you synchronize
Inbox or when you connect to your email server. Indicate
how you want meeting requests sent by tapping Tools,
then Options.
To schedule a meeting:
1. Create an appointment.
2. In the appointment details, hide the input panel, then
tap Attendees.
3. Select the check box before the email address of the
contacts you want to send a meeting request to.
4. Tap OK twice—once to return to the appointment
details page and another to save the appointment.
The meeting request is created automatically and
placed in the Outbox folder.
170
Tap one of the
letter blocks to
display only
contact names
starting with
such letters.
Tap to create a
new contact.
Enter the name of
the contact you’re
searching for.
Tap to select a
category display.
CREATING A CONTACT
1. Tap New.
2.Using the soft keyboard, enter a name and other
contact information.
You will need to scroll down to see all available fields.
3. To assign the contact to a category, scroll down, tap
Categories, then select a category from the list.
171
In the contact list, you can display contacts by
category by tapping the pick list on the top-left corner of
the screen.
4. To add notes, tap the Notes tab.
5. After completing the details, tap OK.
Tap to return to the contacts list (the
new contact is saved automatically).
!
!
Tap
, then Find
, enter the contact name, select
Contacts for the type, then tap the Go button.
Tap a field to
enter contact
information.
Notes is a good
place for additional
contact information.
Tap the category pick list on the top-left corner of the
screen and select the type of contact that you want
displayed.
To show all contacts, tap All Contacts.
To view a contact that is not assigned to a category,
tap No Categories.
To view the names of companies your contacts work
for, in the command bar, tap View, then By Company.
The number of contacts that work for that company will
be displayed to the right of the company name.
!
Scroll to see
more fields.
FINDING A CONTACT
There are several ways to find a contact. You can do any
of the following. In the contact list:
Rotate up and hold the jog dial until large type letters
appear on the screen. Release the jog dial once the
letter for the contact you’re looking for is displayed. The
first contact name starting with that letter will
automatically be selected.
Tap one of the letter blocks displayed across the top of
the screen.
Use the Smart Lookup function by entering the first
few letters of the contact you’re looking for in the search
box under the navigation bar. To show all contacts again,
clear text from the box or tap the button to the right of the
box.
USING THE CONTACTS SUMMARY SCREEN
When you tap a contact in the contact list (or select it
using the jog dial), a summary screen is displayed. This
is referred to as a contact card. To change the contact
information, tap Edit.
View contact details.
!
View contact notes.
!
!
172
Tap to change
contact information.
173
CALLING A CONTACT
You can make a call to a contact using either the contact
list or the contact card.
To make a call from the contact list:
There are several ways to make a call from the contact
list.
Using commands in the pop-up menu
1. Tap and hold a contact to display a pop-up menu of
actions.
!
Tap any of the Call
options to make a call.
2. Tap any of the Call options to make a call.
Using the contact list abbreviation
1. Tap the letter in the right column next to the contact
you want to call. On the pop-up menu, phone numbers
for this contact are displayed, with a dot next to the
priority number.
2. Tap which number to call.
!
174
The letter that appears opposite a contact entry
corresponds to a particular contact information. These
are as follows:
- w
Work phone number
- w2
Second work phone number
- h
Home phone number
- h2
Second home phone number
- m
Mobile phone number
- pgr
Pager phone number
- e
Email address
- e2
Second email address
- e3
Third email address
- sms
SMS address
- web
Web page
Using the hardware buttons
1.Rotate the jog dial up/down to scroll through the
contact list and select the contact you want to call.
2. Press the Send button
twice—once to launch
Phone and another to make the call. The call will be
made to that contact’s priority number.
!
175
To make a call from a contact card:
Tap any of the listed phone numbers.
Rotate the jog dial up/down to scroll through the
listed numbers and select one, then press the jog dial to
make the call.
!
!
SENDING A MESSAGE TO A CONTACT
You can send an email or SMS message to a contact
either from the contact list or from a contact card
window.
To send a message from the contact list:
1. Tap and hold a contact to display a pop-up menu of
actions.
- or Rotate the jog dial up/down to scroll through the list
and select a contact, then press the jog dial to display a
pop-up menu of actions.
2. Tap Send Email or Send SMS.
- or Rotate the jog dial up/down to select either Send
option, then press the jog dial to enable it.
Inbox will open to a new message window with the To
field automatically filled out with the selected
contact’s email/SMS address.
3. Proceed to composing the message.
To send a message from a contact card:
1. Tap any of the listed email/SMS addresses.
- or Rotate the jog dial up/down to scroll through the
listed email/SMS addresses and select one, then press
the jog dial.
176
Inbox will open to a new message window with the To
field automatically filled out with the selected
contact’s email/SMS address.
3. Proceed to composing the message.
BEAMING A CONTACT CARD
You can send a contact card to another IR-enabled
device either from the contact list or from a contact card
window.
To beam a contact card from the contact list:
1. Tap and hold a contact to display a pop-up menu of
actions.
- or Rotate the jog dial up/down to scroll through the list
and select a contact, then press the jog dial to display a
pop-up menu of actions.
2. Tap Beam Contact.
- or From the pop-up menu, select Beam Contact, then
press the jog dial.
2. Align the IR port
of your device with that of the
other IR-enabled device so that they are unobstructed
and within a close range.
To beam an open contact card:
1. Tap Tools, then Beam Contact.
2. Align the IR port
of your device with that of the
other IR-enabled device so that they are unobstructed
and within a close range.
177
TASKS
KEEPING A TO DO LIST
Use Tasks to keep track of what you have to do and
prioritize them based on their importance and urgency.
4. To assign the task to a category, tap Categories and
select a category from the list.
In the task list, you can display tasks by category by
tapping the pick list on the top-left corner of the screen.
5. To add notes, tap the Notes tab.
You can enter text, draw, or create a recording.
6. After completing the details, tap OK.
Tap to return to the tasks list (the
new task is saved automatically).
To open Tasks:
Tap
, then Tasks .
Tasks will open to the tasks list. To change the way
information is displayed in the list, tap Tools, then
Options.
!
Select the category of tasks
you want displayed in the list.
Select the sort
order of the list.
Indicates high priority.
Tap to choose
from predefined
subjects.
Tap a field to
enter task
information.
Notes is a good
place for additional
task information.
Tap to display or edit
the task details.
Tap and hold to
display a pop-up
menu of actions.
Tap to create
a new task.
CREATING A TASK
1. Tap New.
2. Using the input panel, enter a description.
3. You can enter a start date and due date or enter other
information by first tapping the field.
If the soft keyboard is open, you will need to hide it to
see all available fields.
178
TIP: To quickly create a task with only a subject, tap Entry Bar on
the Tools menu. Then, tap Tap Here to add a new task and enter
your task information.
BEAMING A TASK
You can send a task to another IR-enabled device by
beaming it.
1. Tap and hold the task item.
2. Tap Beam Task on the pop-up menu.
3. Align the IR port
of your device with that of the
other IR-enabled device so that they are unobstructed
and within a close range.
179
NOTES
USING THE TASKS SUMMARY SCREEN
When you tap a task in the task list, a summary screen
is displayed. To change the task, tap Edit.
View task details.
Tap to show and hide
additional summary
information
View task notes.
CAPTURING THOUGHTS AND IDEAS
Quickly capture thoughts, reminders, ideas, drawings,
and phone numbers with Notes. You can create a written
note or a recording. You can also include a recording in
a note. If a note is open when you create the recording,
it will be included in the note as an icon. If the note list is
displayed, it will be created as a stand-alone recording.
To open Notes:
!
Tap to change
task information.
Tap
, then Notes
.
Notes will open to the note list.
Tap to change the sort
order of the list.
Tap to open a note
or play a recording.
Tap and hold to display a
pop-up menu of actions.
Tap to start recording.
Tap to show or hide
the Recording toolbar.
Tap to create a new item.
180
181
CREATING A NOTE
1. Tap New.
2. Create the note by writing, drawing, typing, or
recording.
For more information about using the input panel,
writing and drawing on the screen, and creating a
recording, go to Chapter 4 on page 69.
Tap to return to the note list (the
note is saved automatically).
To send a note by beaming:
1. In the task list, tap and hold the note.
2. Tap Beam File on the pop-up menu.
3. Align the IR port
of your device with that of the
other IR-enabled device so that they are unobstructed
and within a close range.
To send a note by email:
1. In the task list, tap and hold the note.
2. Tap Send via E-mail on the pop-up menu.
A new message window in Inbox will be displayed with
the selected note shown as an attachment (*.pwi).
3. Proceed to completing the email message.
Tap to show or hide
the input panel.
Tap to write on the screen.
Tap to add a recording to the note.
SENDING A NOTE
You can send a note to another person either by email or
by beaming it to that person’s IR-enabled device.
NOTE: You must first set up an email account on your device
before you can send a note by email. Go to page 163 for
instructions on setting up an email account.
182
183
OFFICE ONLINE
CHAPTER 9
Office Online software allows you to wirelessly access
your Microsoft Outlook or Lotus Notes office email,
calendar and contacts when you're on the go. This
convenient service comes in two versions: Pro and
Premier. Everything you do with Office Online while you
are mobile is reflected back on your PC, so there's no
need to sync up when you return to the office.
COMPANION PROGRAMS
This chapter describes the companion programs available
on your device—Pocket Word, Pocket Excel, Windows
Media Player 9 Series for Pocket PC and Microsoft
Reader.
Office Online is easy to install and use—set-up takes
just minutes. Once the software is on your office PC,
accessing information on your PPC4100 is easy and
intuitive.
1. Pocket Word
2. Pocket Excel
3. Windows Media Player 9 Series for Pocket PC
4. Microsoft Reader
To add Office Online Pro or Office Online Premier
service to your data plan, call AT&T Wireless Customer
Care at 866-293-4634. If you are already an AT&T
Wireless customer, simply go to this site,
http://attwireless.com/officeonline, to add Office Online
to your existing account.
184
185
POCKET WORD
With Pocket Word you can:
Create new documents on your device or you can
copy documents from your PC to your device.
Synchronize documents between your PC and your
device so that you have the most up-to-date content in
both locations.
!
!
To open Word:
!
Tap
, Programs, then Pocket Word
.
Word will open to the Pocket Word file list.
CREATING A NEW DOCUMENT
In the document list window, tap New.
A blank document appears. Or, if you've selected a
template for new documents in the Options dialog box,
that template appears with appropriate text and
formatting already provided.
USING THE POCKET WORD FILE LIST
Pocket Word contains a list of the files stored on your
device. The file list is the default window when you open
Pocket Word. Every time you tap OK in an open
document, the file list will again be displayed.
Tap a file in the list to open it. You can open only one
document at a time; when you open a second document,
you'll be asked to save the first.
To delete, make copies of, and send files, tap and
hold a file in the list, then select the appropriate action
on the pop-up menu.
!
!
Select the type of folder you
want displayed in the list.
Tap to change the
sort order of the list.
!
You can save a document you create or edit in a variety
of formats, including:
Word (.doc)
Pocket Word (.psw)
Rich Text Format (.rtf)
Plain Text (.txt)
Tap to open a document.
Tap and hold an item
to see a pop-up menu
of actions.
Tap to create a
new document.
!
!
!
!
Pocket Word provides basic formatting options, such as
font style, paragraph alignment, and bullet options, in its
toolbar. You can show and hide this toolbar by tapping
the Show/Hide Toolbar icon
on the command bar.
186
ENTERING INFORMATION
You can enter information in Pocket Word in one of four
modes—typing, writing, drawing, and recording—which
are displayed on the View menu.
If you're opening a Word document created on a computer,
select Wrap to Window on the View menu so that you
can see the entire document.
187
You can change the zoom magnification by tapping
View, Zoom, then select the percentage you want.
Select a higher percentage to enter text and a lower one
to see more of your document.
Typing Mode
Using the input panel, enter typed text into the
document.
To format existing text and to edit text, first select the
text. You can select text as you do in a Word document,
using your stylus instead of the mouse to drag through
the text you want to select.
To find text in a document, tap Edit, then Find/Replace.
!
!
Writing Mode
In writing mode, use your stylus to write directly on the
screen. Ruled lines are displayed as a guide, and the
zoom magnification is greater than in typing mode to
allow you to write more easily.
If you cross three ruled lines in a single stylus stroke, the
writing becomes a drawing, and can be edited and
manipulated as described in the following section.
Written words are converted to graphics (metafiles)
when a Pocket Word document is converted to a Word
document on your computer.
!
Tap and hold to see a
pop-up menu of actions.
Tap to return to the document list
(changes are saved automatically).
With the Space button selected,
drag to insert space. An arrow
appears showing the space
direction and size.
Tap to select formatting
options, such as pen
weight and line color.
Tap to select
formatting
options.
Tap to highlight selected text.
Tap a formatting
command.
Space button
Pen button
Tap to show or
hide the toolbar.
188
189
Drawing Mode
In drawing mode, use your stylus to draw on the screen.
Gridlines appear as a guide. When you lift your stylus off
the screen after the first stroke, you'll see a drawing box
indicating the boundaries of the drawing. Every
subsequent stroke within or touching the drawing box
becomes part of the drawing.
POCKET EXCEL
With Pocket Excel you can:
Create new spreadsheets on your device or you can
copy spreadsheets from your PC to your device.
Synchronize spreadsheets between your PC and your
device so that you have the most up-to-date content in
both locations.
!
!
Select Shape on the
pop-up menu to
convert objects to
their proper shapes.
Resize an object
by dragging the
selection handles.
To open Excel:
!
Tap
, Programs, then Pocket Excel
.
Excel will open to the Pocket Excel file list.
CREATING A NEW SPREADSHEET
In the Pocket Excel file list, tap New.
A blank spreadsheet appears. Or, if you've selected a
template for new spreadsheets in the Options dialog
box, that template appears with appropriate text and
formatting already provided.
!
Pen button
Tap an arrow to see more choices.
Recording Mode
In recording mode, you can embed a recording into your
document. Recordings are saved as .wav files. For more
information on recording, see page 83.
You can save a workbook you create or edit it in a
variety of formats, including:
Pocket Excel (.pxl)
Excel (.xls)
!
!
Pocket Excel provides fundamental spreadsheet tools,
such as formulas, functions, sorting, and filtering, in its
toolbar. You can show and hide this toolbar by tapping
the Show/Hide Toolbar icon
on the command bar.
190
191
Tap to return to the spreadsheet list
(changes are saved automatically).
Cell contents appear
here as you enter them.
AutoSum button
Zoom button
4. Tap OK.
Every time you open the workbook, you will need to
enter the password, so choose one that is easy for you
to remember but hard for others to guess.
TIPS FOR WORKING IN POCKET EXCEL
Note the following when working in large worksheets in
Pocket Excel:
View in full-screen mode to see as much of your
worksheet as possible.
- Tap View, then Full Screen.
- To exit full screen mode, tap Restore.
Show and hide window elements.
- Tap View, then tap the elements you want to show
or hide.
You might want to freeze the top and left-most panes
in a worksheet to keep row and column labels visible as
you scroll through a sheet.
1. Select the cell where you want to freeze panes.
2. Tap View, then Freeze Panes.
Split panes to view different areas of a large
worksheet.
1. Tap View, then Split.
2. Drag the split bar to where you want it.
To remove the split, tap View, then Remove Split.
Show and hide rows and columns.
- To hide a row or column:
1. Select a cell in the row or column you want to
hide.
2. Tap Format, Row or Column, then Hide.
- To show a hidden row or column:
1. Tap Tools, then Go To.
2. Type a reference that is in the hidden row or
column.
3. Tap Format, Row or Column, and then Unhide.
!
!
USING THE POCKET EXCEL FILE LIST
Pocket Excel contains a list of the files stored on your
device. The file list is the default window when you open
Pocket Excel. Every time you tap OK in an open
workbook, the file list will again be displayed.
Tap a file in the list to open it. You can open only one
workbook at a time; when you open a second workbook,
you'll be asked to save the first.
To delete, make copies of, and send files, tap and hold
a file in the list, then select the appropriate action from
the pop-up menu.
!
!
PROTECTING YOUR WORKBOOKS
If your workbook contains sensitive information, you can
protect it with a password. Follow the steps below:
1. Open the workbook.
2. Tap Edit, then Password.
3. Enter a password, then verify it.
192
!
!
!
193
WINDOWS MEDIA PLAYER
Enjoy your favorite music and movies on the road, online
or offline, with the new Windows Media Player 9 Series
for Pocket PC. The Player provides you with the highest
quality audio and video experience for your mobile
entertainment.
PROGRAM ENHANCEMENTS
A lot of new features are added to the new Windows
Media Player 9 Series for Pocket PC.
IMPROVED PLAYBACK SUPPORT
Supports Windows Media Audio and Video 9 Series
codecs, which gives 20 percent improvements in audio
compression and as much as 50 percent for video
compared with previous versions.
Better MP3 playback support lets your enjoy MP3
music files more.
Smoother video playback improves playback of
broadband content from the Web as well as local video
content that is processor-intensive.
Multiple bit-rate (MBR) support enhanced your music
experience with automatic sensing and selection of the
bit rate that is best suited for your device and
connection.
Variable Bit Rate (VBR) support lets you play content
that has been optimized for quality to give you optimum
playback experience.
!
!
ENHANCED BROADBAND PLAYBACK SUPPORT
Significant improvements in performance now allows
you to play back nearly any content from the web.
Supports up to 300 Kbps content played back directly
from the Web over either a wired or Wi-Fi connection.
Improved networking support for new IPv6 protocols
lets you enjoy easier Internet connection for enhanced
Web streaming, providing you with a seamless browsing
and media playback experience.
!
!
FRIENDLIER PLAYBACK CONTROLS
The button mapping function allows you to assign
hardware buttons on your device to perform standard
playback functions such as Play, Pause, Stop or Fast
Forward. You can also assign a button to toggle off the
screen to help minimize power consumption while
continuing to listen to music.
The Player volume control is now separate from the
system sounds control allowing you to adjust the level of
your media playback while retaining the volume level set
for system sounds.
!
!
!
!
!
194
BETTER MEDIA MANAGEMENT
Supports auto-discovery of supported media content
means that the Player now automatically scans your
device‘s main memory and storage cards for all
supported digital media types including WMA, MP3,
WAV, and ASF.
Direct support in Windows Media Player 9 Series on
your computer lets you chose your playlists and easily
transfer them to your device.
!
!
195
CUSTOMIZED ENTERTAINMENT EXPERIENCE
Match the Player’s look with your style and mood by
downloading a variety of custom skins ranging from
cute rubber duckies to retro Elvis themes.
Use your favorite WMA music to create and apply
your own custom WMA ring tones.
NOTE: To facilitate faster copying of audio files to your device, it is
recommended that you configure Windows Media Player on your
computer to automatically determine the quality level settings
applicable to your PPC4100 Pocket PC.
!
!
COPYING FILES TO YOUR DEVICE
Use the Windows Media Player on your computer to
copy your digital media files to your PPC4100 Pocket
PC. Doing this, instead of simply copying files using the
Explore button in ActiveSync, ensures that licences are
copied with protected files.
1. In Windows Media Player on your computer, click
Copy to CD or Device.
-orOn the File menu, point to Copy, and then click Copy
to Portable Device (you must first connect your device to
your computer).
2. In the Items to Copy pane, in the drop-down list,
click the playlist, category, or other item that you want to
copy.
3. Clear the check boxes next to any files you do not
want to copy.
4. In the Items on Device pane, in the drop-down list,
click the name of your device.
5. Click the Copy button.
The device Player verifies that there is sufficient
storage space on your device to copy the selected files.
If there is sufficient space, the files are converted (if
necessary) and copied.
6. Repeat steps 2-5 for any other items that you want to
copy to your device.
To open Windows Media Player 9 Series for Pocket PC:
Tap
, then Windows Media
.
The Player displays the last open window from your
previous session.
!
THE PLAYLIST
A playlist is a customized list of digital media files that
you want to watch or listen to. Using a playlist lets your
group various digital media files together and specify the
order you want the files to play in. You can also use
playlists to copy files to your computer.
You can create a playlist based on:
Source - For example, tracks from various CDs of your
favorite artist or streaming media from an online music
site.
Personal preferences - For example, a playlist of
tracks belonging to your favored music genre or video
clips from your funny movie collection.
Mood or activities - For example, a playlist of tracks
you want to listen while travelling or during your R&R
periods.
!
!
!
The Player has two default playlists:
Local Content - Consists of all compatible audio and
video files stored on your device and/or storage card.
Web Favorites - Consists of your favorite streaming
media files. This playlist is empty until you add items to
it.
!
!
196
197
CREATING A PLAYLIST
1. Tap Playlist in the Player window.
2. Tap the pick list, then Organize Playlists.
3. Tap New, and then enter a playlist name.
7. Tap the check box opposite each item you want to
include in the playlist.
To control which files are displayed, tap the pick list.
8. Tap OK.
NOTE: You can not use the following characters in a playlist name:
\[]:;|,+“&
4. If you want, specify the folder where you want to save
the playlist.
5. Specify the location—internal device memory or in a
storage card—where you want to save the playlist.
6. Tap the OK button.
Screen displays the new playlist.
NOTE: You can only create playlist in the Windows Media format;
no other playlist type is supported.
Tap and hold a track to display a pop-up menu of
available actions.
198
199
EDITING THE PLAYLIST
1. Tap Playlist in the Player window.
2. Tap the pick list, then the playlist you want to edit.
2. Do any of the following:
Tap
to add items to the playlist.
Tap
Tap
to delete the selected item from the playlist.
to move the selected item up in the playlist.
Tap
playlist.
to move the selected item down in the
!
!
!
!
VIEWING TRACK PROPERTIES
You can check the file properties of a track for your
reference. You can do this either in a playlist window or
in the Player window.
To view track properties from a playlist window:
1. Tap Playlist in the Player window.
2. Tap the pick list, then the playlist/location where the
track is assigned/located.
2. Tap a track.
3. Tap
.
To rename a playlist:
1. Tap Playlist in the Player window.
2. Tap the pick list, then Organize Playlists.
3. Tap and hold the playlist name, then tap Rename
from the pop-up menu.
4. Enter a new playlist name.
Tap to rename the
selected playlist.
Tap the scroll bar to view more fields.
200
201
To view track properties from the Player window:
Tap Tools, then Properties.
!
FILE PLAYBACK
The Player supports playback of the following file
formats:
Windows Media - Including .asf, .asx, .wax, .wm,
.wma, .wmv, .wmx, and .wvx files.
MPEG - .mp3 files
You can play files stored in your device, a storage card,
or a network.
!
!
Tap the scroll bar to view more fields.
DELETING A PLAYLIST
1. Tap Playlist in the Player window.
2. Tap the pick list, then Organize Playlists.
3. Tap and hold the playlist name, then tap Delete from
the pop-up menu.
4. Tap Yes on the Windows Media confirmation box.
PLAYING A FILE STORED IN YOUR DEVICE OR IN
A STORAGE CARD
If you want to use files stored in a storage card, install
the card to your device. Go to page __ for instructions.
1. Tap Playlist in the Player window.
2. Tap the pick list, then the playlist/location where the
file you want to play is assigned/located.
3. Tap .
Screen shifts to the Player window. Unless you
selected the last listed track in a playlist or location, the
rest of the tracks will automatically be played.
PLAYING A STREAMING MEDIA FILE
You can play files located on a network.Your device must
first be connected to the network before you can do this.
1. Tap Tools, then Open URL in the Player window.
2. Enter a URL.
3. Tap the OK button.
Screen shifts to the Player window.
To add items to Web Favorites:
You can add a currently playing streaming media file to
the Web Favorites playlist.
1. During playback, tap Tools, then Add Web Favorite.
2. Enter a name in the Favorite Name field.
202
203
PLAYBACK CONTROLS
The user interface of the Player window lets you easily
manage all aspects of the track playback. The
screenshot below shows the functions of the Player
control buttons, as well as all available menus.
Displays the track title
and/or artist name.
Tap to go to http://
windowsmedia.com.
Tap to shift to
full screen mode.
Tap to stop
playback.
Adjust the
progress of the
current track.
Tap to play
or pause.
Tap to adjust
volume.
Tap to display the
playlist window.
Tap to select
playback mode
and program
settings.
Tap to toggle the sound on/off.
Tap to skip to the next track.
CUSTOMIZING THE PLAYER
You can change the appearance and functionality of the
Player to suit your personal style and preferences.
USING SKINS TO CHANGE THE PLAYER LOOK
Change the appearance of the Player by using skins.
To download skins and learn related information, go to
http://www.microsoft.com/windows/windowsmedia/.
To download skins from your computer to your device,
follow the procedures described in the “Using
ActiveSync to Exchange Files” section on page 67.
NOTE: To make sure that downloaded skins appear in the Skin
Chooser panel, do not store the skin files in the Windows folder of
your device.
To apply a skin:
1. Tap Tools, Settings, then Skin Chooser.
2. Tap
4. Tap OK.
or
to locate a skin.
Tap to skip to the previous track.
To play a playlist in random order:
Tap Tools, then Shuffle.
!
To repeat playback of a playlist:
Tap Tools, then Repeat.
!
The Player switches to skin mode.
204
205
CHANGING YOUR AUDIO AND VIDEO SETTINGS
You can change the audio and video settings of the
Player to suit your listening preferences.
CHANGING YOUR NETWORK SETTINGS
You can define Player settings for connecting to a
network to optimized playback of streaming media.
To set audio and video preferences:
1. Tap Tools, Settings, then Audio & Video.
2. Do any of the following:
In the “While using another program” pick list, select
whether to pause or continue playback when another
program window is displayed.
In the “Play video in full screen” pick list, select a
screen size for video playback.
Tap the “Shrink to fit in window” check box to scale
down oversized video files (typically over 240 x 176
pixels).
Tap the “Rotate 180 degrees in full screen” check
box to view video in a wider scale when in full screen
mode.
To set network settings:
1. Tap Tools, Settings, then Network Settings.
2. Select the speed of your network connection.
3. Select the check box opposite each network protocol
you want to enable.
You must select at least one protocol.
4. Tap OK.
!
!
!
!
NOTE: Some networks use a firewall that prevents users from
receiving streams. Contact your network administrator for more
information.
206
207
SETTING HARDWARE PLAYBACK CONTROLS
The button mapping function allows you to assign
hardware buttons on your device to perform standard
playback functions. You can also assign a button to
toggle off the screen to help minimize power
consumption while continuing to listen to music.
LICENSES AND PROTECTED FILES
Some digital media content from the Internet, CD tracks,
and videos have associated licenses that protect them
from being unlawfully distributed or shared.
Licenses are managed and created using digital rights
management (DRM), which is the technology for
securing content and managing the rights for its access.
Some licenses may prevent you from playing files that
are copied to your device. Files that have licenses
associated with them are called protected files.
Use the Windows Media Player on your computer to
copy your digital media files to your device. Doing this,
button in ActiveSync, ensures that licences are copied
with protected files.
To map a button:
1. Tap Tools, Settings, then Buttons.
2. Tap the function you want to assign in the Select
Function pick list.
3. Press a hardware button on your device.
4. If you want, tap the “Un-map buttons during
background play” check box to disable the hardware
button settings when using another program.
5. Tap OK.
To un-map a button:
1. Tap Tools, Settings, then Buttons.
2. In the Button Mapping box, tap and hold a button
name, then tap Un-map this button.
208
209
MICROSOFT READER
Use Microsoft Reader for Pocket PC to read eBooks on
your device. You can also download books from your
favorite eBook Web site to your computer. Then, use
ActiveSync to copy the book files to your device. The
books appear in the Reader Library, where you can tap
them in the list to open them.
To open Microsoft Reader:
!
Tap
, Programs, then Microsoft Reader
.
USING GUIDEBOOK
Guidebook contains all the information you'll need to use
the Microsoft Reader.
To open Guidebook:
Tap Help on the Reader command bar.
-orOn a book page, tap and hold on the book title, then
tap Help on the pop-up menu.
!
GETTING BOOKS ON YOUR DEVICE
You can purchase and download book files from the Web
to your computer and then synchronize them with your
device. To do so, you need to activate your device (you
only need to activate it once), secure an activated copy
of MSReader for your computer, and then set up
synchronization for files in ActiveSync.
210
To get books on your device:
1. Open ActiveSync on your computer then check that
you have selected Synchronize Files - if you have done
so it will appear under the Information Type column; if
you have not, click Options
, Sync Options, select the
Files check box, then OK from the pop-up menu. Finally
click the OK button to close the Options window.
2. To activate your device, open a web browser, then go
to http://das.microsoft.com/activate/ and follow the
instructions.
3. Go to one of the Microsoft Reader ebook sites
(www.microsoft.com/reader/shop.asp) and follow the
instructions in the site for choosing, purchasing and
downloading an ebook to your computer.
NOTE: If you do not have a copy of MSReader on you r
computer , go to one of the retailers listed above and download
a free copy. Y o u c a n a l s o d o w n l o a d e b o o k f i l e s f r o m y o u r
favorite eBook retailer and follow the instructions to download the
ebook files.
4. Use Windows Explorer on your computer to locate the
MSReader My Library folder and the Pocket_PC My
Documents folder.
5. Find the book title in the My Library folder, and then
copy it to the Pocket_PC My Documents folder.
6. Use ActiveSync to download the files from your
computer to your device as described in the Read Me
file in the MSReader folder. Some sample books and a
dictionary are included in the MSReader folder. This
folder is located in the Extras folder on the PPC4100
Companion CD.
211
USING LIBRARY
The Library is your Reader home page; it displays a list
of all eBooks stored on your device or storage card.
To open Library:
On the Reader command bar, tap Library.
-orOn a book page, tap the book title, and then tap
Library on the pop-up menu.
!
Tap to select
a sort order.
Tap to scroll
through the
Library list.
In addition to the text, each book page includes a page
number and book title. Navigation options are listed in the
bottom portion of the cover page. Page through the
book by:
Using the jog dial
Tapping the page number on each page
!
!
The first time you open a book, the table of contents, if
there is one, will be displayed. Subsequently, whenever
you open the book, you'll be automatically taken to the
last page read.
Tap to select a
navigation option.
Tap to search for
a specific book file.
Tap a title to
open a book.
Drag to select
text and then tap
an option.
Tap here to navigate
to other parts of
the Reader.
Tap to return to the
previous page.
To open a book:
Tap a book title in the Library list.
!
READING A BOOK
Each book consists of a cover page, an optional table of
contents, and the pages of the book. You can:
Annotate the book with highlighting, bookmarks,
notes, and drawings.
Search for text and look up definitions for words.
!
Tap arrows to turn
the page, or tap
and hold page #
to bring up page
riffle.
USING THE READER FEATURES
Reading a book electronically gives you several options
not available with printed books. These options are
available from any book page. Select text by dragging
across the text on the page. Then, tap an option on the
pop-up menu, as described in the following sections.
!
212
213
To copy text:
You can copy text from books that support this feature
into any program that accepts text.
1. On a book page, select the text you want to copy.
2. Tap Copy Text on the pop-up menu.
The text can be pasted into the program of your
choice.
To search for text:
1. Tap Find on the pop-up menu.
2. Enter the word you want to search for.
3. Tap the desired Find option.
Reader highlights matching text on the page.
To close Find, tap outside the box.
To return to your original page, tap the title, then tap
Return on the pop-up menu.
n
n
To view book annotations:
To see a list of a book's annotations, including bookmarks,
highlights, text notes, and drawings:
1. Tap Annotations Index on the book's cover page.
2. Tap an entry in the list to go to the annotated page.
Notes
When you attach a note to text, you enter the text in a
note pad that appears on top of the book page. A Note
icon will appear in the left margin. To show or hide the
note, tap the icon.
Drawings
When you add a drawing, a Drawing icon appears in the
bottom-left corner of the page, and drawing tools appear
across the bottom of the page. Draw by dragging your
stylus.
REMOVING A BOOK
When you finish reading a book, you can delete it to save
space on your device. If a copy of the book is stored on
your computer, you can download it again at any time.
1. Tap and hold the title in the Library list.
2. Tap Delete on the pop-up menu.
Bookmarks
When you add a bookmark to a book, a color-coded
bookmark icon appears in the right margin. From anywhere
in the book, tap the bookmark icon to go to the bookmarked
page. You can add multiple bookmarks to a book.
Highlights
When you highlight text, it appears with a colored background.
214
215
CHAPTER 10
WIRELESS DATA PROGRAMS
Your PPC4100 Pocket PC has built-in support for a
range of wireless data communication programs:
Use Pocket Internet Explorer to browse the Web and
view WAP-enabled sites.
Use Inbox to send and receive email/SMS messages.
Use MSN Messenger to send and receive instant
messages.
Use Terminal Services Client to wirelessly log onto a
Windows NT server type PC that is running Terminal
Services software
Use ActiveSync to remotely synchronize with
your computer.
!
!
!
!
!
This chapter describes how to use Microsoft Pocket
Internet Explorer, Inbox, MSN Messenger, and Terminal
Services Client.
1. Pocket Internet Explorer
2. Inbox
3. MSN Messenger
4. Terminal Services Client
216
217
POCKET INTERNET EXPLORER
BROWSING THE INTERNET
To connect and start browsing, do one of the following:
Tap Favorites
, then tap the favorite you want to
view.
Tap View, then Address Bar. In the address bar that
appears at the top of the screen, enter the Web address
you want to visit and then tap Go .
Tap the Address Bar pick list to choose from
previously entered addresses.
!
Use Pocket Internet Explorer to view Internet or intranet
sites from your device. You can download files and
programs when browsing these sites. During
synchronization with your computer, you can choose to
download your favorite links and mobile favorites that are
stored in the Mobile Favorites subfolder of Internet
Explorer on your computer.
Pocket Internet Explorer includes support for:
XHTML Basic
Cascading Style Sheets
WML 2.0
JScript 5.5
IPv6
!
!
VIEWING THE HISTORY LIST
Tap View, then History.
!
!
!
!
Tap to select an
information category.
!
!
Go button
Tap to select
a previously
visited site.
Enter the Web address
you want to visit.
Refresh button
Back button
Home button
Favorites button
To open Pocket Internet Explorer:
!
Tap
218
, then Internet Explorer
Tap a listed page to view it.
.
To change the number of days of links stored in the
History list and clear the History list:
1. In the Pocket Internet Explorer main window, tap
Tools, Options, then General tab.
2. Tap the pick list under History to set the number of
days of links.
Tap Clear History to delete the stored links.
4. Tap OK.
219
MOBILE FAVORITES
1. To display the Mobile Favorites navigation window tap
Favorites
.
2. Tap the page you want to view.
You'll see the page that was downloaded the last time
you synchronized with your computer. If the page is not
on your device, the favorite will be dimmed. You will need
to synchronize with your computer again to download
the page to your device, or connect to the Internet to
view the page.
To add a favorite link:
1. While on the page you want to add, tap and hold on
the page.
2. Tap Add to Favorites from the pop-up menu.
3. Make the changes you want on the Name and
Address fields
4. In the “Create in” box, select the folder where you want
the link to be stored.
5. Tap Add.
220
MOBILE FAVORITES FOLDER
Only items stored in the Mobile Favorites subfolder of
the Favorites folder of Internet Explorer on your
computer will be synchronized with your device. This
folder was created when you selected the Favorites
information type for ActiveSync synchronization with
your computer.
Favorite Links
During synchronization, the list of favorite links in the
Mobile Favorites folder on your computer is synchronized
with Pocket Internet Explorer on your device. Both locations
are updated with changes made to either list each time
you synchronize. Unless you mark the favorite link as a
mobile favorite, only the link will be downloaded to your
device, and you will need to connect to your ISP or network
to view the content.
Mobile Favorites
If you are using Microsoft Internet Explorer 5.0 or later
on your computer, you can download mobile favorites to
your device. Synchronizing mobile favorites downloads
Web content to your device and enables you to view
pages while you are disconnected from your ISP and
computer. To quickly create mobile favorites, use the
Internet Explorer plug-in installed with ActiveSync.
221
To create a mobile favorite:
1. In Internet Explorer on your computer, click Tools,
then Create Mobile Favorite.
2. To change the link name, enter a new name in the
Name box.
3. Optionally, in Update, select a desired update schedule.
If you did not specify an update schedule, you will need
to manually download content to keep the information
updated on both your computer and device. Before
synchronizing with your device, in Internet Explorer on
your computer, click Tools , then Synchronize. You will
see the last time content was downloaded to the
computer, and you can manually download content if
needed.
4. Click OK.
Internet Explorer downloads the latest version of the
page to your computer.
To save device memory in downloading mobile favorites:
Mobile favorites take up storage memory on your device.
To minimize the amount of memory used, observe the
following:
In the settings for the Favorites information type in
ActiveSync options, turn off pictures and sounds, or stop
some mobile favorites from being downloaded to your
device.
Limit the number of downloaded linked pages. In
Internet Explorer on the computer, right-click the mobile
favorite you want to change and then click Properties. In
the Download tab, specify 0 or 1 for the number of linked
pages you want to download.
!
!
TIP: You can add a button to the Internet Explorer toolbar for
creating mobile favorites. In Internet Explorer on your computer,
click View, Toolbars, then Customize .
To download a mobile favorite:
1. Right-click the mobile favorite, then click Properties.
2. In the Download tab, specify the number of links deep
you want to download.
To conserve device memory, go only one level deep.
3. Synchronize your device and computer.
Mobile favorites that are stored in the Mobile Favorites
folder in Internet Explorer are downloaded to your
device.
222
223
INBOX
Use Inbox to:
Send and receive email messages by connecting
directly to an email server through an Internet service
provider (ISP) or a network.
Synchronize email messages with Microsoft
Exchange or Microsoft Outlook on your computer.
Send and receive SMS messages through your
mobile service subscription. Inbox supports 8 bits data
with class 0, 1, 2, 3, as well as USDD (Unstructured
Supplementary Service Data).
!
!
!
SYNCHRONIZING EMAIL MESSAGES
Email messages can be synchronized as part of the
general synchronization process. You will need to enable
Inbox synchronization in ActiveSync.
To enable Inbox synchronization in ActiveSync:
1. Open ActiveSync on your computer.
2. Click Options
.
3. In the Mobile Device list under the Desktop area,
select the check box before Inbox.
4. Click OK.
During synchronization:
Messages are copied from the Outlook Inbox folder on
your computer, or from a Microsoft Exchange server, to
the Inbox folder (under the ActiveSync account) on your
device.
By default, when synchronizing Inbox information with
your computer, you will receive only messages from the
last three days and the first .5 KB of each new message.
You can also choose to download file attachments.
The messages on your device and on your computer
are linked. When you delete a message on your device,
it is also deleted from your computer the next time you
synchronize, and vice versa.
Messages in subfolders in other email folders in
Outlook are synchronized only if the folders have been
selected for synchronization in Inbox on your device.
!
To open Inbox:
!
Tap
, then Inbox
.
!
Tap to select which
account and/or
folder to display.
Tap to select a
sort order for
the messages.
!
!
Tap to create a
new email or
SMS message.
Tap to select
which account
to use.
To send and receive email:
Tap the Send/Receive icon
Connect.
!
224
or tap Accounts, then
USING THE MESSAGE LIST
The messages you receive are displayed in the
message list. By default, the most recently received
messages are displayed first in the list.
225
Tap to select the sort
order for messages.
Tap and hold a message
to display a pop-up menu
of actions.
Tap to connect to
the selected service.
Tap to connect and to
send and receive e-mail.
When you receive a message, tap it to open it. Unread
messages are displayed in bold.
Tap to return to
the message list.
Tap to reply to
or forward this
message.
Tap to delete
this message.
226
Tap to view the
previous or next
message.
You can mark the messages that you want to retrieve in
full during your next synchronization or email server
connection. Follow the steps below:
1. In the message list, tap and hold the message you
want to retrieve.
2. On the pop-up menu, tap Mark for Download.
The icons in the Inbox message list give you visual
indications of message status.
3. Specify your downloading preferences when you set
up the service or select your synchronization options.
You can change them at any time:
Change options for Inbox synchronization using
ActiveSync options.
To change options for direct email server
connections. In Inbox on your device:
1. Tap Tools, then tap Options.
2. On the Accounts tab, tap the service you want
to change.
3. To remove a service, tap and hold the service,
then select Delete.
!
!
CREATING AN EMAIL/SMS MESSAGE
Whether you want to send an email or SMS message,
you do so by changing the Account option. To do so, tap
the double arrows next to the Subject field, then tap the
Account field to choose what service you want.
The procedure on the next page applies to creating an
email message. For procedures on how to create an
SMS message, see page 114.
227
To create an email message:
1. In the command bar, tap New.
2. Tap the double arrows next to the Subject field.
3. Tap the Account field, then ActiveSync.
4. Enter the email address of your intended recipients in
the To, Cc, and/or Bcc fields. You can do this in different
ways.
Manually enter the address using any of the input
panel options.
Type the first few letters of an email address that is
stored in Contacts. The auto-suggest feature suggests
email addresses as you type so that you find them more
quickly.
!
!
Tap the To field or Address Book
to display the
contact list, then tap a contact from the list.
!
Tap the To field or Address Book
again to hide
the contact list.
Make sure multiple email address within the same
field are separated with a semicolon.
5. Compose your message.
The auto-correct feature automatically fixes common
spelling errors as you type so your messages are more
accurate.
To enter preset or frequently used messages, tap
My Text, then select a message.
To attach a voice recording, tap
on the command
bar, then proceed with creating the recording. See
page 83 for detailed instructions.
7. Tap
when you've finished the message.
If you are working offline, the message will be moved
to the Outbox folder and will be sent the next time you’re
online.
228
Tap to send
message.
Tap to enter recipient's
email/ SMS address.
Tap to view the Cc, Bcc
and Account fields.
Enter your
message here.
Tap to enter message’s
subject matter.
Tap to enter
predefined text.
Tap to display your
contact list.
Tap to attach a recording
to the message.
CREATING A MESSAGE SIGNATURE
You can personalized your email and SMS messages
by appending a signature to it. The signature support
of your device allows you to create different
signatures for your email and SMS account. This
feature also eliminates the need to re-type a closing for
every message.
To create a signature:
1. In the message list, tap Tools, Options, then the
Message tab.
2. Tap Signatures.
3. Tap the pick list to select which account to create a
signature for.
4. Select the “Use signature with this account” check
box. The soft keyboard will automatically be displayed.
5. Enter a signature in the box.
You can use the signature for new messages only, or
you can select the “Use signature when replying and
forwarding” check box to append it to all outgoing
messages.
6. Tap OK.
229
Tap to select an account.
Tap to append signature
to all outgoing messages.
Enter your signature here.
MANAGING EMAIL MESSAGES AND FOLDERS
By default, messages are displayed in one of five folders
for each service you have created—Inbox, Deleted
Items, Drafts, Outbox, and Sent Items.
The behavior of the Deleted and Sent Items folders
depends on the options you have chosen. To set these
options, in the message list:
1. Tap Tools, then Options.
2. On the Message tab, select your options.
If you want to organize messages into additional
folders, tap Tools, then Manage Folders to create new
folders.
To move a message to another folder, in the message
list, tap and hold the message and then tap Move on the
pop-up menu.
!
!
!
Folder behavior with a direct connection to an
email server:
The behavior of the folders you create depends on
whether you are using ActiveSync, SMS, POP3, or
IMAP4 account.
If you use ActiveSync, email messages in the Inbox
folder in Outlook will automatically be synchronized with
your device. You can select to synchronize additional
folders by designating them for ActiveSync. The folders
you create and the messages you move will then be
mirrored on the server. For example, if you move two
messages from the Inbox folder to a folder named
Family, and you have designated Family for
synchronization, the server creates a copy of the Family
folder and copies the messages into that folder. You can
then read the messages while away from your computer.
If you use SMS, messages are stored in the Inbox
folder.
If you use POP3 and you move email messages to a
folder you created, the link is broken between the
messages on your device and their copies on the email
server. The next time you connect, the email server will
see that the messages are missing from the device’s
Inbox and delete them from the server. This prevents you
from having duplicate copies of a message, but it also
means that you will no longer have access to messages
that you move to folders created from anywhere except
your device.
If you use IMAP4, the folders you create and the email
messages you move are mirrored on the server.
Therefore, messages are available to you anytime you
connect to your email server, whether it is from your
device or from your computer. This synchronization of
folders occurs whenever you connect to your mail server,
create new folders, or rename/delete folders when
connected.
!
!
!
!
230
231
MSN M E S S E N G E R
MSN Messenger on your device is an instant messaging
program that lets you:
See who is online
Send and receive instant messages
Conduct instant message conversations with groups
of contacts
Tap anywhere
on the screen
to sign in.
!
!
!
REQUIREMENTS TO USE MSN MESSENGER
For MSN Messenger Service, a Passport. If you have
a Hotmail® or MSN account, you already have a
Passport.
Sign up for a Microsoft Passport account at
(http://www.passport.com/). Get a free Microsoft Hotmail
email address at (http://www.hotmail.com/).
For Exchange Instant Messaging Service, an
Exchange account.
To set up an Exchange account, see your network
administrator.
Tap to access
program options.
!
!
To open MSN Messenger:
!
Tap
, Programs, then MSN Messenger
.
The MSN Messenger main window appears.
SETTING UP AN ACCOUNT
Before you can use MSN Messenger, you must set up
the instant messaging accounts.
To set up an account and sign in:
1. In the MSN Messenger main window, tap Tools, then
Options.
2. Tap the Accounts tab.
3. Select the Enable MSN Messenger Service and/or the
Enable Exchange Instant Messaging check box.
4. Enter your your sign-in name and password for the
selected account(s).
5. If you selected both accounts, under the “Sign in using
this account first” line, select which account to sign in to
first.
4. Tap OK.
SIGNING IN TO YOUR ACCOUNT
1. Tap anywhere on the MSN Messenger main window
2. Enter your sign-in name and password.
232
233
Select the “Save password” check box so you need
not enter these information again the next time you sign
in.
3. Tap Sign in.
If you already use MSN Messenger on your
computer, your contacts will show up on your device
without being added again.
CHATTING WITH CONTACTS
1. To open a chat window, tap a contact name.
2. Enter your message in the text entry area at the
bottom of the screen, or tap My Text to enter a preset
message.
3. Tap Send.
WORKING WITH CONTACTS
The MSN Messenger window shows all of your
messenger contacts at a glance, divided into Online and
Not Online categories. From this view, while connected,
you can chat, send an email, block the contact from
chatting with you, or delete contacts from your list using
the pop-up menu.
Enter message.
Tap to send message.
Tap to enter a
preset message
Tap a contact to start a chat.
TIPS WHEN CHATTING WITH CONTACTS
To invite another contact to a multi-user chat, in the
Tools menu, tap Invite and tap the contact you want to
invite.
To switch back to the main window without closing a
chat, tap the Contacts button.
To return back to your chat window, tap Chats and
select the person with whom you were chatting.
To see if the contact you are chatting with is
responding, look for the message under the text entry
area.
!
Tap and hold to display a
pop-up menu of actions.
!
!
!
To see others online without being seen, in the Tools
menu, tap My Status and select Appear Offline.
If you block a contact, you will appear offline but will
remain on the blocked contact list.
To unblock a contact, tap and hold the contact, then
tap Unblock on the pop-up menu.
!
!
!
234
SIGNING OUT OF YOUR ACCOUNT
Tap Tools, then Sign Out.
!
235
TERMINAL SERVICES CLIENT
You can use Terminal Services Client to log onto a
Windows NT server type PC that is running Terminal
Services software and use all of the programs that are
available on that PC from your device. For example,
instead of running Microsoft Pocket Word, you can run
the PC version of Microsoft Word and access all of the
.doc files on that PC from your device.
NOTE: You cannot use Transcriber when entering information in
T e r m i n a l S e r v i c e s . Y o u m u s t u s e K e y b o a r d , Block Recognizer,
or Letter Recognizer.
CONNECTING TO A TERMINAL SERVER
1. Start a remote connection to the server via your
wireless modem connection.
2. Tap
, Programs , then Terminal Services
Client
.
The Terminal Services Client main window appears.
3. To connect to a server you have previously connected
to, tap a server in the Recent Servers box.
To connect to a new server, enter the server’s name
in the Server box.
Select the “Limit size of desktop to fit on the screen”
check box only when using applications that have been
specifically sized for use with Pocket PC.
NOTE: I f t h e n e t w o r k a d m i n i s t r a t o r h a s c o n f i g u r e d Terminal
Services Client to reconnect to disconnected sessions, and you
previously disconnected from a Terminal Server without ending
the session, the Terminal Services Client reconnects to that session.
4. Tap Connect.
To disconnect without ending a session:
The following commands must be accessed from the
Start menu in the Terminal Services window used to
access the PC’s commands. Do not use the Start menu
on your mobile device.
1. In the Terminal Services Client window, tap
Shutdown.
2. Tap Disconnect.
, then
NOTE: I f t h e n e t w o r k a d m i n i s t r a t o r h a s c o n f i g u r e d Terminal
Services Client to reconnect to disconnected sessions, you will be
reconnected to this session the next time you connect to
this server.
To disconnect and end a session:
1. In the Terminal Services Client window, tap
Shutdown.
2. Tap Log Off.
236
, then
237
NAVIGATING INSIDE TERMINAL SERVICES CLIENT
Once connected to the server, the PC’s screen may
more than fill your device’s screen.
If scroll bars are displayed on the server’s screen, you
will see more than one set of scroll bars on your
device—one to scroll information on the PC, and the
other one to scroll the PC display through the Terminal
Services window in Terminal Services Client.
To ensure you are scrolling the PC display through
Terminal Services Client, use the four directional buttons
at the bottom of the Terminal Services Client screen.
To better fit information on your mobile device’s
screen, select the “Limit size of server desktop to fit on
this screen” option. For best effect, programs on the PC
should be maximized.
CHAPTER 11
!
!
!
TIPS WHEN USING TERMINAL SERVICES CLIENT
To improve display performance:
Display performance is improved by decreasing the time
it takes for the screen to be refreshed on the PC.
ACCESSORY PROGRAMS
Your PPC4100 Pocket PC has bundled several
accessory programs that both extend and complement
your device’s computing and phone functions.
Use SIM Manager to manage contacts stored in your
SIM card.
Use Pictures to manage, view, and edit JPEG files.
Use WiBackup to create and restore backup files.
!
!
!
This chapter describes how to use SIM Manager,
Pictures, and WiBackup.
1. SIM Manager
2. Pictures
3. WiBackup
1. On your PC, select
, Settings, then Control Panel.
2. Click Display.
3. Deselect the “Clear the Transition effects for menus
and tool tips” check box.
To improve browser performance:
The level of Internet Explorer's performance on your PC
is improved by decreasing the time it takes for Web
pages to be refreshed.
1. In Internet Explorer on your PC, select Tools, then
Internet Options, then Advanced.
2. Deselect the “Use smooth scrolling” check box.
238
239
SIM MANAGER
PICTURES
SIM Manager enables you to manage all contacts stored
on your SIM card. This program complements your
device’s phone function by enabling not just the addition
of new phone numbers on your SIM card, but more
importantly, exporting such contact information to
Microsoft Contacts. This eliminates the need to
manually enter these new contact information in your
device.
Pictures extends your device’s function to the visual
scene with its image management, viewer and editing
functions. It supports the standard image format JPEG—
the file format used by most digital cameras. Now you
can keep those images of your favorite moments as
mobile as you are.
To open SIM Manager:
Tap
, Programs, then SIM Manager
.
Wait for the SIM card contents to load. This may take
a few seconds.
!
To open Pictures:
Tap
, Programs, then Pictures
.
Pictures opens to a thumbnail view of all JPEG files
stored on the My Pictures folder on your device and/or
on a storage card attached to your device.
!
You can use Pictures to do any of the following:
View JPEG images in thumbnail, full screen or slide
show mode
Edit JPEG images
Set a JPEG image as the background of the Today
screen, similar to using a wallpaper on your computer’s
desktop screen.
Send a JPEG file via infrared or using Inbox
Set the JPEG images in the My Pictures folder as a
screensaver whenever your device is docked in the USB
cradle and is idle for a specified number of minutes.
!
!
!
!
!
Procedures on how to perform the various SIM Manager
operations is integrated in “Chapter 5 - Using the Phone
Function”.
240
241
COPYING JPEG FILES TO YOUR DEVICE
USING PICTURES
To view your JPEG files in Pictures, copy the files to the
My Pictures folder of your device or on a storage card
folder.
You can use Pictures to view and edit your JPEG files.
Pictures display images in any of the three view
modes—thumbnail (default), full screen, and slide
show.
To copy JPEG files from your computer to your device:
1. Connect your device to your computer.
2. In ActiveSync on your computer, click Explore
.
Windows Explorer will open the Mobile Device
window for your device.
3. Locate then select the JPEG file(s) that you want to
copy on your device.
4. Right-click the selected file(s) and click Copy.
5. Place the cursor on the Pictures folder of the Mobile
Device window, right-click, then click Paste.
In Pictures, tap
My Pictures folder.
to view JPEG files stored in the
To copy JPEG files from a storage card to your device:
1. Install the storage card to your device’s SD/MMC slot.
2. Perform steps 1-4 of the procedure above.
3. Locate the Storage Card folder under the My Pocket
PC directory.
4. Open the folder under the Storage Card folder where
you want to save your JPEG file(s).
5. Place the cursor on the selected folder, right-click,
then click Paste.
In Pictures, tap
to view JPEG files stored in an
attached storage card.
242
THUMBNAIL MODE
Thumbnail mode is the default view mode every time
you open Pictures.
You can do the following while in thumbnail mode:
Tap and hold a thumbnail to display a pop-up menu of
available actions.
Place your stylus within the edge at the far left or far
right of the screen and then drag the stylus over the
images to perform multiple selection useful in deleting
images by batch rather than by thumbnail.
Rotate the jog dial up/down to select the previous/next
thumbnail.
!
!
!
243
To perform image management tasks:
It is only in thumbnail mode can you perform most of the
image management tasks.
1. Tap and hold a thumbnail to display a pop-up menu
of available actions.
2. Do any of the following:
Tap Create Copy to create a duplicate image file.
This is useful when you want to edit an image but still
want to retain an original copy of the image.
Tap Delete to remove the selected thumbnail from
its location. You will be prompted to confirm the
deletion.
!
!
Tap Yes to delete the selected thumbnail.
Tap Select All to select all thumbnails in the
selected location, then tap either Create Copy or Delete
to apply the action by batch.
Tap Send via E-mail to send the thumbnail as an
email attachment. A new message window in Inbox will
be displayed. Proceed to completing the email message.
See page 237 for instructions.
Tap Beam Picture to send the thumbnail to
another IR-enabled device.
Tap Rename to change the thumbnail file name.
The soft keyboard will automatically appear.
FULL SCREEN MODE
It is only in full screen mode can you perform any editing
action on an image.
To view image in full screen mode:
Tap a thumbnail or press the jog dial while a
thumbnail is selected.
In this view, the selected image is maximized so that
it fits the entire screen (with the navigator and command
bars still visible) used to display it.
!
Tap OK or press the jog dial to return to thumbnail
mode.
!
!
To change the image orientation:
You can change the display orientation of an image.
Tap
to rotate the image 90° counter-clockwise.
!
!
!
244
245
4. Tap OK.
5. Tap Yes.
6. Fill out the fields in the Save As window.
To crop part of an image:
You have the option to specify a portion of an image and
then save that portion as a new JPEG file.
1. Tap
to enable the Crop tool.
2. Drag your stylus across part of the image you want to
crop.
3. Tap inside the selection.
7. Tap the OK button.
To zoom in/zoom out the image:
To view images in a larger or smaller scale use the Zoom
tool.
1. Tap
to enable the Zoom tool.
A zoom selection panel appears on the lower right
corner of the screen.
2. Tap
to enable the zoom selection tools.
The full screen image will zoom in and a red
selection border will automatically appear on the image
inside the zoom selection panel.
246
247
3. Do any of the following:
!
Tap
to magnify the size of the image.
!
Tap
to reduce the size of the image.
Tap
to return the image to its original view size.
Drag the red border to pan the image in
any direction you want.
!
!
3. Tap
again to hide the zoom selection panel.
To adjust the brightness and contrast settings of an
image
You can modify the brightness and contrast settings of
an image to suit your preferences.
1. Tap Edit, then Brightness and Contrast.
The Brightness and Contrast toolbar appears.
248
2. Do any of the following:
Tap
to increase image contrast.
Tap
to decrease image contrast.
!
!
!
Tap
to increase image brightness.
Tap
to decrease image brightness.
3. Tap Done after making the adjustments you want.
This will hide the Brightness and Contrast toolbar
4. Tap OK or press the jog dial to save the settings you
made and return to thumbnail mode.
!
To set an image as a Today wallpaper:
To add a custom look to the Today screen of your device,
apply a wallpaper of your choice using any JPEG image.
1. Tap Tools, then Set as Today Wallpaper.
2. Tap a radio button corresponding to the image size
your prefer.
3. Tap the up/down arrows to set the transparency level.
4. Tap the OK button.
249
To view the Slide Show toolbar:
During the slide show, tap anywhere on the screen or
press the jog dial.
!
SLIDE SHOW MODE
You can view images in a slide show much like viewing
a PowerPoint presentation in your computer. Images are
adjusted to fit the entire display area and are shown in a
5-seconds interval (default).
To view image in slide show mode:
In thumbnail mode, tap .
During the slide show, you can use hardware buttons
to control the image display. Rotate the jog dial up to
display the previous image; rotate down to display the
next image.
!
The icons in the Slide Show toolbar lets you control
the pace of the slide show, as well as change the
orientation of the images.
!
Tap
to rotate the images 90° clockwise.
!
Tap
to continue the slide show after pausing it.
!
Tap
to pause the slide show.
!
Tap
to display the previous image.
!
Tap
to display the next image.
Tap
to stop the slide show. Screen returns to
thumbnail mode.
!
250
251
CUSTOMIZING PICTURES
Using the Options command you can set preference
settings on how to use Pictures.
3. In the Slide Show tab, set the following options:
Select the “Delay between slide” pick list to set the
interval period between images during a slide show.
Select the “Play a screensaver when docked”
check box to set the JPEG files in the My Pictures
folder act as a screensaver whenever your device is
docked in the USB cradle and is idle for a specified
number of minutes.
!
!
To customize Pictures:
1. In either thumbnail or full screen mode, tap Tools,
then Options.
2. In the General tab, set the following options:
Enable Dithering - Select the check box to allow
your device to enable color optimization in the event that
an image contains a color that is not supported by your
display screen.
Detect digital camera storage cards - Select the
check box to automatically launch Pictures every time
you install a digital camera storage card in your device’s
SD/MMC slot.
!
!
4. Tap OK.
252
253
WIBACKUP
USING WiBackup
WiBackup has two major functions—to create backup
files and to restore such backup files.
WiBackup is a powerful backup tool that enables you to
create backup files of data files and applications stored
in your PPC4100 Pocket PC to a storage card.
Encryption and compression options are available when
creating a backup file. You can also use the program to
restore back files to your device’s internal memory.
To open WiBackup:
!
Tap
, Programs, then WiBackup
WiBackup opens to its main page.
.
BACKUP FUNCTION
There are three backup options:
Back up all data - all data files and applications stored
in your device are included in the backup data.
Back up PIM data - only information contained in PIM
(Personal Information Manager) applications are
included in the backup data. These include data files for
Calendar, Contacts, Tasks, Notes, and Inbox.
Back up a specific file/folder - only selected files/
folders are included in the backup data.
!
!
!
To perform manual backup:
1. Tap any of the Backup options on the main window.
2. If you performing an all data backup, proceed to
step 3.
If you are performing a PIM data backup, select the
check box opposite the type of PIM data you want to
back up.
Backup function
buttons
Restore function
button
Tap to view
program version.
Before initiating any of the WiBackup functions make
sure that:
The device is running on external power to ensure the
integrity of the backup file
A storage card with enough available space is
properly inserted into your device’s SD/MMC slot
The phone function is turned off (flight mode is on)
All open programs are closed
!
!
!
!
254
255
If you are performing a specific file backup, select the
check box opposite the file or folder you want to back up.
Backup Buttons
The Backup windows share similar command buttons,
including:
Main - Tap to display the WiBackup main page.
The Main button is also available in a Restore window.
Scheduled - Tap to set a scheduled backup.
Backup - Tap to perform the backup process.
When your device is running on battery power, you
need at least 30% battery charge to be able to perform
data backup.
Save as - Tap to specify the file name, folder, and location of the backup data.
!
!
!
!
3. Tap Save as to set a file name and location for the
backup file.
Select Storage Card for the location.
To set a scheduled backup:
Only one scheduled backup can occur at one time. Do
not set scheduled backup of different types on the same
date and time.
1. Tap any of the Backup options on the main window.
2. Tap Scheduled.
3. Select the “Enable scheduled backup” check box.
4. Set the date, time, and frequency for the backup.
5. Set what the device’s power source will be during the
scheduled backup.
AC adapter - The device will be running on external
power. The scheduled backup will not proceed if the
device is not connected to an external power source.
Battery power - The device will be running on
battery power. The scheduled backup will not proceed if
the battery power level is below the set threshold level.
6. Tap OK.
!
!
4. Tap Backup.
The backup status is shown in a progress bar. Once
data backup is completed, a message window appears.
5. Tap OK.
256
257
To delete the scheduled backup log entries:
1. In the “Scheduled backup log” window, tap Clear log.
You will be prompted to confirm the deletion.
2. Tap the OK button.
3. Tap Close.
RESTORE FUNCTION
Based on the size of the available internal storage space
in your device, you can restore backup files. During data
restore, information on the backup data is displayed,
including the date when the backup file was created, file
size, and data type.
Scheduled Backup Log
WiBackup keeps a record of all scheduled backup
performed on your device.
To view the scheduled backup log:
1. Tap any function buttons on the WiBackup’s main
window.
2. Tap Tools, then View Log.
258
To perform data restore:
1. Tap Restore data on the WiBackup’s main window.
2. Tap the pick list to select the backup file you want to
restore.
3. Tap Restore.
You will be prompted to confirm the restore process.
259
4. Tap the OK button.
The restore status is shown in a progress bar. Once
data restore is completed, a message window appears
prompting you to reset your device to complete the
restore process.
5. Tap OK.
6. Perform a soft reset.
See page 21 for instructions.
CUSTOMIZING WiBackup
Using the Options command, you can set preference
settings on how WiBackup perform data backup and
restore procedures.
CHAPTER 12
USER SUPPORT
This chapter contains contact information for any
technical question or update inquiry you may have in
using your PPC4100 Pocket PC, as well as
troubleshooting instructions for simple problems.
1. Customer Support
2. Troubleshooting
To customize WiBackup functions:
1. Tap any function buttons on the WiBackup’s main
window.
2. Tap Tools, then Options.
3. Select the check box opposite the features you want to
enable.
4. Tap the OK button.
260
261
CUSTOMER SUPPORT
If you encounter a problem with your device, do not call
for technical assistance until you have reviewed the
following troubleshooting section. If the problem still
persists, contact your local dealer or distributor. For
information on how and where to contact the service
centers available in your area, go to the Audiovox web
site at http://www.audiovox.com.
TROUBLESHOOTING
TROUBLESHOOTING REMINDERS
When a troubleshooting procedure requires uninstalling
the battery pack or resetting the device, note the
following:
If the procedure requires uninstalling the battery pack,
first turn the device off. Once it is off, wait for five (5)
seconds to allow the device to completely enter sleep
mode before removing the battery pack from its bay.
If the procedure requires resetting the device, be
reminded that the hold switch does not lock the reset
button; you can still reset your device even if the hold
switch is enabled.
!
!
TROUBLESHOOTING PROCEDURES
The following sections described a list of possible
situations that may arise during the use of your handset.
Easy answers and solutions are provided for each one.
BATTERY PROBLEM
Memory on your PPC4100 Pocket PC is shared
between storage memory and program memory.
Storage memory is used to store the information you
create and programs you install. Program memory is
used to run programs on your device. Your device
automatically manages the allocation between storage
and program memory.
To view memory allocation and availability:
1. Tap
, Settings, then System tab.
2. Tap Memory
262
.
263
Battery loses power
When the main battery is low, you will see a low battery
icon (see “Status Icons” on page 44) in the navigation
bar and a callout that tells you to recharge the battery as
soon as possible. Your device uses both a detachable
main battery pack and an embedded backup battery
cell. When the main battery pack is removed or is
completely drained out, your device will shutdown. The
backup battery cell will then have 30 minutes to retain
data after which you risk losing all data on the internal
memory of your device.
Tips on how to make battery charge last longer
To make your battery charge last as long as possible,
observe the guidelines listed below.
Use external power whenever possible.
Use the AC adapter to plug your device into external
power whenever possible, especially when:
- Establishing a remote connection
- Using the backlight
- Watching/listening to audio and video files
- Connecting to a computer and/or server
Shorten auto suspend time.
While on battery power, your device automatically
suspends operation if you haven’t touched the hardware
buttons or used the stylus for a specified period of time.
Maximize battery life by shortening this time.
!
!
1. Tap
, Settings, then System tab.
2. Tap Power
.
3. On the Control tab, adjust the setting on the
“On battery power” pick list.
264
If the device lapses into sleep mode, allow ample time
before turning it back on to allow for a smoother power
mode transition. The device wakes up from sleep mode
when any of the following events occur:
- The Power button
or the volume rocker key is
pressed.
- The Send
or End
buttons are pressed.
- The device is docked into the cradle.
- A storage card is inserted into the SD/MMC slot.
- A call is received by your device.
- A preset alarm event is activated.
Turn off sounds you don’t need.
Your device emits sounds in response to a number of
events, such as warnings, reminders, and screen taps or
hardware button actions. Optimize battery life, by turning
off any sounds you don’t need.
!
1. Tap
, Settings, then Personal tab.
2. Tap Sounds & Notifications
.
3. Clear the check boxes on both the Volume and
Notifications tabs.
Disable the phone function when no SIM card is
installed on your device.
!
PASSWORD PROBLEM
Forgotten password
If you forget your password, you’ll need to clear your
device’s memory by hard resetting it. For instructions,
see page 22.
265
MEMORY PROBLEM
Device memory run out
If you receive a message stating that storage or program
memory is unavailable, try the following solutions.
To find space in storage memory:
Move data to an SD or MMC storage card.
1. Insert a storage card to your device’s SD/MMC slot.
Set programs such as Notes, Pocket Word, and
Pocket Excel to automatically save new items on the
storage card. In the program’s file list, tap Tools, then
Options.
If you are copying files from your computer or
another device to your handset, try adjusting the slider in
the Memory setting.
!
!
!
2. Tap
, Programs, then File Explorer
.
3. Locate the file you want to move.
4. Tap and hold the file, then tap Cut from the pop-up
menu.
5. Tap the Storage Card icon
on the command bar.
6. Open the My Documents folder, tap Edit, then
Paste.
NOTE: Files stored in folders other than My Documents or stored
in folders within subfolders in My Documents may not show up in
the list view of some programs.
TIP: When using Notes, Pocket Word, or Pocket Excel, you can
also move files by opening the item and tapping Tools, then
Rename/Move.
Move email attachments.
1. Insert a storage card to your device’s SD/MMC slot.
2. In Inbox, tap Tools, then Options.
3. On the Storage tab, select the “Store attachments
on storage card” check box.
All attachments are moved to the storage card, and
new attachments are automatically stored on the
storage card.
!
266
1. Tap
, Settings, then System tab.
2. Tap Memory
.
3. On the Main tab, check whether the slider can be
adjusted manually before copying files.
Delete unnecessary files.
!
1. Tap
, Programs, then File Explorer
.
2. Locate the file for deletion.
3. Tap and hold the file, then tap Delete on the
pop-up menu.
To find space in program memory:
Stop programs you are not currently using.
In most cases, programs automatically stop to free
needed memory. However, in some situations, such as
when confirmation dialog boxes are waiting for a user
response, the program may not be able to automatically
stop. To check the state of your active programs:
!
1. Tap
, Settings, then System tab.
2. Tap Memory
.
3. On the Running Programs tab, tap the program you
want to view, then tap Activate.
4. Close any open windows or messages and return
the program to list view.
267
If this doesn’t work, you can stop the program
manually.
1. Close all open confirmation dialog boxes and return
the program to list view.
2. Stop the program by tapping Stop or Stop All on the
Running Programs tab.
Clear storage memory as described in the preceding
section.
This will free some storage memory so that it can be
allocated to program memory.
Soft reset your device. For instructions, see page 21.
!
!
Screen is hard to read
If you’re having a hard time viewing a document in:
Notes - try changing the size of the view. To do this,
tap a zoom percentage on the Tools menu.
Pocket Word and Pocket Excel - try changing the size
of the view. Tap View, Zoom, then select a zoom
percentage.
Pocket Internet Explorer - try changing the font size.
Tap View, Text Size, then select a size.
Pocket Outlook - try changing the font size. To do this
within Calendar, Tasks, or Contacts, tap Tools, Options,
then select the “Use large font” check box.
!
!
!
!
SCREEN PROBLEMS
TAPPING AND WRITING PROBLEMS
Screen freezes or responds slowly
Perform a soft reset on your device. For instructions, see
page 21.
Screen is blank
Press and hold the Power button
for a full second. If
that doesn’t work:
Make sure that the SIM card holder is closed.
If you are using the device on battery power, shift the
device to AC power.
Soft reset the device. For instructions, see page 21.
Inaccurate response to stylus taps
Recalibrate the screen. For instructions, see page 19.
Slow or no response
Perform a soft reset on your device. For instructions, see
page 21.
!
!
!
Screen is dark
Prolonged exposure to direct sunlight may cause your
device screen to temporarily darken. This is normal for
LCD screens and is not permanent.
IR CONNECTION PROBLEM
Failure to beam information
If you’re having difficulty transferring information via IR,
try the following:
Transfer only one file or no more than 25 contact
cards at a time.
Align your device’s IR port with that of the receiving
device so that they are unobstructed and within a close
range.
Adjust the room lighting. Some types of light interfere
with IR connections. Try moving to a different location or
turning off some lights.
!
!
!
268
269
PHONE CONNECTION PROBLEM
If you have a problem using the phone function, try the
following:
Check if your device’s wireless connection to your
mobile service provider is switched on and the signal
unobstructed.
Contact your mobile phone service provider for
assistance.
!
!
INTERNET CONNECTION PROBLEM
If you’re having difficulty establishing Internet
connection, try the following:
Make sure you have properly set up a connection to
your device’s ISP.
Check if your device’s wireless connection to your
mobile service provider is switched on and the signal
unobstructed.
!
!
NOTE: When your device is docked in the USB cradle while the
GPRS function is on, you will not be able to browse web pages.
Verify your user name and password with your
device’s ISP.
Verify with your device’s ISP that the network you are
trying to connect to is available, or try to connect to it
using another device or from a computer.
!
Verify that you have provided the necessary server
information.
!
1.Tap
, Settings, then Connections tab.
2.Tap Connections
.
Most networks use DHCP, so you need not change
these settings unless your network administrator
instructs you to do so.
If the option Network Connection is not listed as a
connection method in the ActiveSync dialog box when
starting synchronization, wait for a few minutes and try
again. Also, if synchronization does not start right away,
the network is probably busy, and it may take a minute
for your device to connect to the network.
Verify your user name and password with your
network administrator.
Verify with your network administrator that the
network you are trying to connect is available, or try to
connect to it using another device or from a computer.
You may need to change your device name if you are
trying to connect to a network and cannot because
another Pocket PC device with the same name is
already connected. To change your device’s name:
!
!
!
!
1. Tap
, Settings, then System tab.
!
NETWORK CONNECTION PROBLEM
If you’re having network connection problems, try the
following:
Check if your device’s wireless connection to your
mobile service provider is switched on and the signal
unobstructed.
!
270
2. Tap About .
3. On the Device ID tab, enter a new name on the
“Device name” field.
4. Tap OK.
Additional troubleshooting information is available in
Connections Help of your device and on the ActiveSync
Help on your computer.
271
CABLE AND CRADLE PROBLEM
The following solutions may help if you encounter
problems when connecting to your computer.
Make sure that your device is turned on.
Check that you do not have any other active
connections.
CHAPTER 13
!
!
1. Tap
, then Today
.
2. Tap
or
on the command bar.
3. On the pop up menu, tap Disconnect.
Plug the other end of the cable securely into the
universal connector on the base of your device. If you
are using the USB cradle, check that your device is
properly attached to the cradle.
!
SAFETY INFORMATION
This chapter contains information on safety instructions
as well as related safety notices.
1. Safety Information
2. SAR Information
3. FDA Consumer Update
Additional troubleshooting information is available in
Connections Help of your device and on the ActiveSync
Help on your computer.
272
273
SAFETY INFORMATION
Read The Information In This Chapter Before Using
Your PPC4100 Pocket PC Phone
RADIOFREQUENCY (RF) ENERGY EMISSION
All portable computers produce low levels of RF energy
due to the generation of digital timing pulses by its clock
oscillator circuits. Your wireless handheld portable
PPC4100 Pocket PC phone is a low power radio
transmitter and receiver. When it is ON, it receives and
sends out RF signals.
In August 1996, the Federal Communications
Commissions (FCC) adopted RF exposure guidelines
with safety levels for handheld wireless phones. Those
guidelines are consistent with the safety standards
previously set by both U.S. and international standards
bodies:
ANSI C95.1 (1992)
NCRP Report 86 (1986)
ICNIRP (1996)
Those standards were based on comprehensive and
periodic evaluations of the relevant scientific literature.
For example, over 120 scientists, engineers, and
physicians from universities, government health
agencies, and industry reviewed the available body of
research to develop the ANSI Standard (C951).
When boarding aircraft
Most airline regulations prohibit the on-board use of
portable PCs (and all other portable electronic devices
that could potentially emit stray RF energy), particularly
during take-offs and landings, to prevent any possible
interference with the reception of signals by airborne
electronic navigational devices.
FCC regulations prohibit using your device while in
the air. Turn your device OFF before boarding an aircraft.
Always request and obtain prior consent and approval
of an authorized airline representative before using your
device aboard an aircraft.
Always follow the instructions of the airline
representative whenever using your device aboard an
aircraft, to prevent any possible interference with
airborne electronic equipment.
When inside hospitals and other health care
facilities
Turn your device OFF in health care facilities when
any regulations posted in these areas instruct you to do
so. Hospitals or health care facilities may be using
equipment that could be sensitive to external RF energy.
“device OFF” means to turn the radio standby switch
“OFF”, then turn the power off by pressing the Power
button .
Always comply with posted prohibitions of the use of
RF-emitting devices in hospitals and other medical
facilities. Failure to follow such directives could result in
the interference with medical equipment and/or devices.
Your device has been equipped with internal shielding to
minimize stray emissions of RF energy. However, using
your device can still be limited in the some instances.
274
275
Posted facilities
Turn your device OFF in any facility where posted
notices require so.
Blasting areas
To avoid interfering with blasting operations, turn your
device OFF when in a “blasting area” or in areas posted
“Turn off two-way radio”. Obey all signs and instructions.
Within certain radius from some electronic equipment
Most modern electronic equipment is shielded from RF
signals. However, certain electronic equipment may not
be shielded against the RF signals from your device
including:
Pacemakers
The Health Industry Manufacturers Association
recommends that a minimum separation of six (6")
inches must be maintained between your device and a
pacemaker to avoid potential interference with the
pacemaker. These recommendations are consistent with
the independent research and recommendations of
Wireless Technology Research.
Never come closer than six (6) inches to a person with
a heart pacemaker implant when using this device.
Failure to do so could result in interference with the
function of the pacemaker.
!
Persons with pacemakers
- You should ALWAYS keep the device more than six
inches from their pacemaker when the device is
turned ON.
- You should not carry the device in a breast pocket.
- If you have any reason to suspect that interference is
taking place, turn your device OFF immediately.
276
Hearing aids
Some digital wireless phones may interfere with some
hearing aids. In the event of such interference, you may
want to consult your service provider (or call the
customer service line to discuss alternatives).
!
Other medical devices
If you use any other personal medical device, consult
the manufacturer of your device to determine if they are
adequately shielded from external RF energy. Your
physician may be able to assist you in obtaining this
information.
!
Motor vehicles
RF signals may affect improperly installed or
inadequately shielded electronic systems in motor
vehicles. Check with the manufacturer or its
representative regarding your vehicle. You should also
consult the manufacturer of any equipment that has
been added to your vehicle.
!
USAGE PRECAUTIONS
Failure to follow the directions below could result in
death or catastrophic bodily injury.
Never use your device while driving an automobile or
any other moving vehicle. Always pull out of traffic and
come to a stop in a legally permissible and safe location
before using your device. Failure to do so could result in
serious bodily injury in a traffic accident.
!
277
Driving Safety
When driving:
- Always secure your device in its leather pouch.
- Never place your device on the passenger seat or any
place else in the car where it can become a projectile
during a collision or stop.
- An air bag inflates with great force. DO NOT place
objects, including both installed or portable wireless
equipment, in the area over the air bag or in the air bag
deployment area. If in-vehicle wireless equipment is
improperly installed and the air bag inflates, serious
injury could result.
Areas with a potentially explosive atmosphere are
often, but not always marked clearly. Potential areas may
include:
- Fueling areas (such as gasoline stations)
- Below deck on boats
- Fuel or chemical transfer or storage facilities
- Vehicles using liquefied petroleum gas (such as
propane or butane)
- Areas where the air contains chemicals or particles
(such as grain, dust, or metal powders)
- Any other area where you would normally be
advised to turn off your vehicle engine
Talking on your Pocket PC phone while driving is
extremely dangerous and is illegal in some states.
Remember, safety comes first. Check the laws and
regulations on the use of phones in the areas where you
drive. Always obey them.
STORAGE PRECAUTIONS
If you must use the phone function while driving, please:
- Give full attention to driving. Driving safely is your first
responsibility.
- Use hands-free features by attaching the single
earbud headset and enabling the speed dial and
auto-pick up functions.
- Pull off the road and park before making or
answering a call, if driving conditions so require.
Never use your device while walking. Usage while
walking could result in bodily injury caused by inattention
to automobile traffic or other pedestrian hazards.
Never use your device in any area with a potentially
explosive atmosphere and obey all signs and
instructions. Sparks in such areas could cause an
explosion or fire resulting in bodily injury or even death.
!
!
278
Failure to follow the directions below could result in
serious bodily injury and/or property damage due to
battery liquid leakage, fire or rupture:
Never store or transport flammable liquids, gases or
explosive materials in the same compartment of your
automobile as the device or any of its accessories, as
possible sparking in the device could cause ignition or
explosion.
Never drop your device or subject it to severe shock.
Dropping your device or subjecting it to severe shock
could cause the built-in battery to leak, ignite and/or
rupture.
Always immediately remove your device and its
battery from the vicinity of any source of heat, such as
an open flame, in the event the built-in battery leaks
liquid or emits an unusual odor. Continued use of your
device under either of these conditions could cause
ignition (i.e., fire) of the leaked battery liquid, or rupture.
!
!
!
279
Never touch any fluid that might leak from the built-in
battery. Such liquid when in contact with the eyes or
skin, could cause injury to the skin or eyes. Should the
liquid come into contact with the eyes, irrigate the eyes
thoroughly with clean water and immediately seek
medical attention. In the event the liquid comes into
contact with the skin or clothing, wash it away
immediately with clean water.
Never allow metallic objects, such as staples and
paper clips, to get into the inside of your device. Metallic
objects, such as staples and paper clips, if allowed to
enter your device, could cause the generation of excess
heat or fire.
Never connect terminals (metal parts) to metallic
objects (such as wires). Connecting terminals to metal
objects could cause excessive heat or fire.
Always immediately disconnect the AC adapter from
the power outlet, then detach the battery in the event the
device emits an unusual odor or sound or generates
smoke.
!
!
!
!
USAGE INSTRUCTIONS
Always use authorized Audiovox accessories and
optional devices when operating this device, as the use
of incompatible auxiliary equipment could result in fire,
electric shock or other bodily injury. The use of
unauthorized accessories will also void your warranty.
Never attempt to disassemble, repair or make any
modification to your device. Disassembly, modification or
any attempt at repair could cause bodily injury or
property damage, as well as damage to the device itself.
Your device is not a toy. Never allow children to play
with your device. Misuse, rough or improper handling of
your device by children could result in serious bodily
injury related to any of the enumerated safety warnings
in this User’s Guide. In addition, always keep all
accessories and components out of the reach of small
children as small parts might present a choking hazard.
Seek immediate medical attention if choking occurs or if
any small part has been swallowed.
Never raise the sound volume level too high when
using your device with earphones. An excessive sound
volume level could cause damage to your hearing.
Never touch the liquid that might leak from a broken
liquid crystal display. Contact with this liquid could cause
a skin rash. If the crystal display liquid should come into
contact with the skin or clothing, wash it immediately
with clean water.
!
!
!
DEVICE DAMAGE
PREVENTION
AND/OR
DATA
LOSS
Observe the following reminders to avoid damage to the
device and/or to prevent data loss.
!
!
Do not use or store your device:
Anywhere it may be exposed to water, such as a
bathroom or sauna
In conditions of high humidity, such as in the rain or
fog
Where your device will be exposed to extremely high
temperatures, such as near a fire or equipment that
emits high temperatures
In direct sunlight or in a sealed automobile left in the
sun
Where your device will be exposed to extremely low
temperatures
Dusty locations and sites subject to strong vibration
!
!
!
!
!
!
280
281
Under certain conditions, data may be lost, including:
Failure to follow all instructions for use and warnings
in this User’s Guide
Misuse of your device
Subjecting the device to static electricity and/or noise
Total loss of electric charge in the backup battery
Servicing of your device
Use of your device in locations where the following
ambient environmental conditions are exceeded:
- Under normal operational use ambient
temperatures not less than 32°F and not in excess of
104°F (0°C and 40°C);
- With humidity of not less than 30% or in excess of
80%; and
- When charging the battery ambient temperatures
not less than 41°F and not to exceed 95°F (5°C and
35°C).
!
!
!
!
!
!
NOTE: It is normal for the AC adapter to become warm when
charging. Disconnect the power plug from the outlet when not in
use.
Failure to follow the safety instructions below can result
in product failure, malfunction or date loss:
Avoid connecting your device to an external device
such as a computer in an environment likely to be
affected by static electricity. For example, during
low-humidity weather, shuffling your shoes upon a rug
can produce static electricity. Before you handle your
computer, you should touch a grounded object to
discharge any static electricity from your body.
!
282
Do not subject your device to sudden and severe
temperature changes. This could result in moisture
condensation in the device that could cause damage to
your device, computer function loss, and/or the loss of
data. In the event of moisture condensation, allow your
device to dry out completely.
Do not use your device in an extreme environment
where high temperature or high humidity exists, such as
near a heater or in a closed car parked in the sun.
Take care not to sit on the device when it is located in
the back pocket of your trousers, skirt, etc.
Do not place objects on top of your device or drop
them on top of your device.
Never paint or apply any foreign substance to this
device as this can clog and damage moving parts.
Clean terminals (metallic parts) on a regular basis
with a dry cotton swab. Dirty terminals could affect
battery charging.
Never use organic solvents such as benzene or paint
thinner to clean your device. Use of these solvents can
cause deformation or discoloration. Wipe dirty parts with
a soft dry cloth.
Do not wipe the display with a damp or wet cloth or
touch the display with damp or wet hands. Wiping or
touching the display under this condition can cause
product failure or malfunction. Always use a soft dry
cloth to wipe the display.
When using a storage card with your device:
- Be sure to read the relevant instruction manual
and ensure that you know the proper procedures for
their use and compatibility with your device.
- Never subject the card to any severe shock while
connected to your device. Such a shock can cause
damage to the card.
!
!
!
!
!
!
!
!
!
283
- Do not carry your device with the card connected
to it. This can result in the damage or loss of the card.
- When the device is operating, do not insert or
remove the storage card into or out of the SD/MMC slot
or connect or disconnect the device from the cradle as
this may cause loss of stored data, or product
failure/malfunction.
- Never connect cradle terminals with metallic
objects, such as wires. Connecting these terminals with
metallic objects may cause the production of excess
heat, burns and damage to the charger, and/or your
device.
BATTERY PACK INFORMATION
Your device uses a removable and rechargeable Lithium
Ion battery pack. When a replacement pack is needed,
please request the dealer from whom your device was
purchased to assist you. Use only manufacturer
approved batteries.
Battery Pack Reminders
Never use a damaged or worn out battery.
Use the battery only for its intended purpose.
Never expose the battery terminals to any other metal
object. This can short circuit the battery.
Avoid exposure to temperature extremes. A device
with a hot or cold battery may temporarily not work (or
charge), even if the battery is fully charged. Always allow
it to cool down or warm up first and keep the battery
between 41°F and 95°F (5°C and 35°C).
When not in use, store the battery uncharged in a
cool, dark, dry place.
The battery is a self-contained unit. Do not attempt to
open its case.
Battery operating time gradually decreases. You may
need to buy a new battery.
Never dispose of the battery with ordinary waste.
Never dispose of a battery in a fire!
Dispose of used batteries in accordance with
local regulations.
Recycle! Lithium ion batteries are recyclable. When
you replace your built-in battery, please request the
repair center to recycle the battery in accordance with
RBRC standards. When disposing of the battery by
yourself, please call RBRC at (800) 822-8837 for proper
disposal tips.
!
!
!
!
ANTENNA INFORMATION
The design of your PPC4100 Pocket PC phone complies
with FCC guidelines and international standards.
Unauthorized antennas modifications, or attachments
could impair call quality, damage the device, or result in
violation of FCC regulations. Do not use the device with
a damaged antenna. If a damaged antenna comes into
contact with the skin, a minor burn may result. Use only
the supplied or an Audiovox approved replacement
antenna. Please contact your local dealer for
replacement antenna.
!
!
!
!
!
Vehicle Mounted External Antenna
When using an optional vehicle mounted external
antenna, a minimum separation distance of 7.9 inches
(20 cm) must be maintained between the user/
bystander and the vehicle mounted external antenna to
satisfy FCC RF exposure requirements.
284
!
!
285
AC ADAPTER PRECAUTIONS
Never attempt to disassemble or repair an AC
adapter, and never alter the power cables or plugs as
exposure to electric shock hazards may result.
Always contact an authorized Audiovox service
center, if repair or replacement is required.
If the plug will not fit into the available outlet, have a
proper outlet installed by a qualified electrician. Improper
connection can result in the risk of electric shock.
Never allow the AC adapter to come into contact with
water or any other liquid. Water or any other liquid in
contact with the AC adapter can create a risk of fire or
electric shock.
Always use an authorized Audiovox AC adapter to
avoid any risk of fire or damage to your device or battery.
Bodily injury or property damage may occur as a result
of the use of an unauthorized and incompatible AC
adapter.
Never use an AC adapter if it has a damaged or worn
power cord or plug. The use of damaged or worn power
cords or plugs could result in electric shock, burns or
fire. Contact an authorized Audiovox service center
immediately to obtain a suitable replacement.
Never attempt to connect or disconnect the power
plug with damp or wet hands. Connecting or
disconnecting the power plug with damp or wet hands
could result in an electric shock.
Always unplug the AC adapter from the power source
before attempting any cleaning in order to avoid the risk
of electric shock. Always use a soft dry cloth to clean the
equipment, after it has been unplugged.
Never attempt to use an unauthorized AC adapter
with your device in order to avoid any risk of bodily injury
or property damage. Since unauthorized accessories
have different specifications, they may be incompatible
with your device.
!
!
!
!
!
!
!
!
!
286
Never place an AC adapter on a wooden surface (or
any other surface that could be marred by exposure to
heat) while it is in use. Since the surface temperature of
the AC adapter increases during normal use, always rest
it on a suitable heat-insulating material.
Never cover the AC adapter with any object while it is
in use, and never place it adjacent to a heat source. An
excessive temperature increase could detrimentally
affect its performance.
Never place the power supply cable near a heat
source, as damage to the cord or to its insulation could
result.
Always use a surge protector when utilizing the AC
adapter during an electrical storm. Otherwise, a power
surge could result in the loss of stored data.
Always use a surge protector when utilizing the AC
adapter near an electrical noise source such as high
voltage line or power source. Otherwise, a power surge
could result in loss of stored data.
In order to avoid any possibility of a fire, always insert
the power plug into household electric outlet supplying
120V AC.
When traveling abroad, never plug the AC adapter into
a power source that does not correspond to both the
voltage and the frequency specified on the rating plate of
the AC adapter, as equipment damage and fire will
result. When you connect to a power supply of more than
125V AC, change the power supply cable with one that
corresponds to the power supply specification. Failure to
do so could cause a fire.
Never drop the AC adapter or subject it to severe
shock. This may cause ignition or electric shock, as well
as damage to the adapter.
!
!
!
!
!
!
!
!
287
Always locate the power supply cable in an area
where it will not be stepped on, tripped over, or
otherwise subjected to damage or stress.
Never place heavy objects on the power supply cable,
as this could result in damage to the cable.
Never bend or twist a power supply cable, and never
pull it in an attempt to remove the AC adapter or
accessory plug from a socket. Always grasp the AC
adapter or the accessory plug directly when unplugging
the power supply cable in order to avoid damaging the
cable.
Always ensure the power plug pins are clean and
free of dust or other foreign material by wiping the pins
with a clean dry cloth. Dust or other foreign material
accumulation on the power plug pins could cause fire.
Be certain to insert the power plug deeply into a
socket. Failure to do so could cause a fire and an
electric shock.
Always disconnect the AC adapter from the power
source when it is not in use.
288
PHONE OPERATION
When speaking into the device microphone or the
headset microphone, a minimum separation distance of
1 inch (2.5 cm) must be maintained between the user's
face and the device, including its antenna, to comply
with the FCC exposure limits.
NOTE: Do not touch the antenna unnecessarily when using the
phone function. Contact with the antenna affects call quality
and may cause the device to operate at a higher power level
than otherwise needed.
Body-worn Operation
Your PPC4100 Pocket PC phone was tested for typical
body-worn operations with the back of the device kept
1.5 cm from the body. To comply with FCC RF exposure
requirements, a minimum separation distance of 1.5 cm
must be maintained between the user's body and the
back of the device, including the antenna. Third-party
belt-clips, holsters and similar accessories containing
metallic components should not be used. Body-worn
accessories that cannot maintain 1.5 cm separation
distance between the user's body and the back of the
device, and have not been tested for typical body-worn
operations may not comply with FCC RF exposure limits
and should be avoided. For more information about RF
exposure, please visit the FCC web site at www.fcc.gov.
289
PHONE USAGE REGULATIONS
Never violate any of the following FCC Rules and
Regulations when using your PPC4100 Pocket PC
phone. The following offenses are punishable by fine,
imprisonment, or both:
Using obscene, indecent, or profane language.
Using the unit to give off false distress calls.
Wiretapping or otherwise intercepting a telephone
call, unless that person has first obtained the consent of
the parties participating in the call.
Making anonymous calls to annoy, harass, or molest
other people.
Charging to an account without authorization to avoid
payment for service.
Refusing to yield a party line when informed that it is
needed for an emergency call (It is also unlawful to take
over a party line by stating falsely that it is needed for an
emergency).
!
!
!
!
!
!
SAR INFORMATION
THE PPC4100 POCKET PC PHONE MEETS THE
GOVERNMENT’S REQUIREMENTS FOR EXPOSURE
TO RADIO WAVES.
Your PPC4100 Pocket PC phone is a radio transmitter
and receiver. It is designed and manufactured not to
exceed the emission limits for exposure to radio
frequency energy set by the FCC. These limits are part
of comprehensive guidelines and establish permitted
levels of RF energy for the general population. The
guidelines are based on standards that were developed
by independent scientific organizations through periodic
and thorough evaluation of scientific studies. The
standards include a substantial safety margin designed
to assure the safety of all persons, regardless of age and
health.
The exposure standard for wireless mobile phones
employs a unit of measurement known as the Specific
Absorption Rate or SAR. The SAR limit set by the FCC
is 1.6 W/kg. Tests for SAR are conducted with the phone
transmitting at its highest certified power level in all
tested frequency bands. Although the SAR is
determined at the highest certified power level, the
actual SAR level of the phone while operating can be
well below the maximum value. This is because a phone
is designed to operate at multiple power levels so as to
use only the power required to reach the network. In
general, the closer you are to a wireless base station
antenna, the lower the power output.
290
291
NOTE: In the United States and Canada, the SAR limit for mobile
phones used by the public is 1.6 watts/kg (W/kg) averaged over
one gram of tissue. The standard incorporates a substantial
margin of safety to give additional protection for the public and to
account for any variations in measurements.
Before a phone model is made available for sale to the
public, it must be tested and certified by the FCC that it does
not exceed the limit established by the government-adopted
requirement for safe exposure. The tests are performed in
positions and locations (e.g., worn on the body) as required
by the FCC for each model. The highest SAR value for this
Pocket PC phone tested when being worn on the body, as
described in this User’s Guide, is 1.32 W/kg. (Body-worn
measurements differ among phone models, depending
upon available accessories and FCC requirements). While
there may be differences between the SAR levels of various
phones and at various positions, they all meet the
government requirement for safe exposure.
The FCC has granted an Equipment Authorization for this
Pocket PC phone with all reported SAR levels evaluated as
in compliance with the FCC RF exposure guidelines. SAR
information on this device is on file with the FCC and can be
found under the Display Grant section of
http://www.fcc.gov/oet/fccid after searching for FCC ID
PU5SP230A.
Additional SAR information can be found on the Cellular
Telecommunications & Internet Association (CTIA) web site
at http://www.phonefacts.net.
292
FDA CONSUMER UPDATE
The following are taken from the U.S. FDA - Center for
Devices and Radiological Health consumer update on
wireless phones.
Do wireless phones pose a health hazard?
The available scientific evidence does not show that any
health problems are associated with using wireless
phones. There is no proof, however, that wireless
phones are absolutely safe. Wireless phones emit low
levels of radiofrequency energy (RF) in the microwave
range while being used. They also emit very low levels of
RF when in the stand-by mode. Whereas high levels of
RF can produce health effects (by heating tissue),
exposure to low level RF that does not produce heating
effects causes no known adverse health effects. Many
studies of low level RF exposures have not found any
biological effects. Some studies have suggested that
some biological effects may occur, but such findings
have not been confirmed by additional research. In some
cases, other researchers have had difficulty in
reproducing those studies, or in determining the reasons
for inconsistent results.
What is FDA's role concerning the safety of wireless
phones?
Under the law, FDA does not review the safety of
radiation-emitting consumer products such as wireless
phones before they can be sold, as it does with new
drugs or medical devices. However, the agency has
authority to take action if wireless phones are shown to
emit RF energy at a level that is hazardous to the user.
293
In such a case, FDA could require the manufacturers of
wireless phones to notify users of the health hazard and
to repair, replace or recall the phones so that the hazard
no longer exists. Although the existing scientific data do
not justify FDA regulatory actions, FDA has urged the
wireless phone industry to take a number of steps,
including the following:
Support needed research into possible biological
effects of RF of the type emitted by wireless phones;
Design wireless phones in a way that minimizes any
RF exposure to the user that is not necessary for device
function; and
Cooperate in providing users of wireless phones with
the best possible information on possible effects of
wireless phone use on human health.
!
FCC also regulates the base stations that the wireless
phone networks rely upon. While these base stations
operate at higher power than do the wireless phones
themselves, the RF exposures that people get from
these base stations are typically thousands of times
lower than those they can get from wireless phones.
Base stations are thus not the subject of the safety
questions discussed in this document.
!
What kinds of phones are the subject of this update?
The term “wireless phone” refers here to hand-held
wireless phones with built-in antennas, often called
“cell,” “mobile,” or “PCS” phones. These types of wireless
phones can expose the user to measurable RF energy
because of the short distance between the phone and
the user's head.
FDA belongs to an interagency working group of the
federal agencies that have responsibility for different
aspects of RF safety to ensure coordinated efforts at the
federal level. The following agencies belong to this
working group:
National Institute for Occupational Safety and Health
Environmental Protection Agency
Federal Communications Commission
Occupational Safety and Health Administration
National Telecommunications and Information
Administration
The National Institutes of Health participates in some
interagency working group activities, as well.
These RF exposures are limited by FCC safety
guidelines that were developed with the advice of FDA
and other federal health and safety agencies. When the
phone is located at greater distances from the user, the
exposure to RF is drastically lower because a person's
RF exposure decreases rapidly with increasing distance
from the source. The so-called “cordless phones”, which
have a base unit connected to the telephone wiring in a
house, typically operate at far lower power levels, and
thus produce RF exposures far below the FCC safety
limits.
!
!
!
!
!
!
FDA shares regulatory responsibilities for wireless
phones with the FCC. All phones that are sold in the
United States must comply with FCC safety guidelines
that limit RF exposure. FCC relies on FDA and other
health agencies for safety questions about wireless
phones.
294
295
What are the results of the research done already?
The research done thus far has produced conflicting
results, and many studies have suffered from flaws in
their research methods.
Animal experiments investigating the effects of RF
energy exposures characteristic of wireless phones
have yielded conflicting results that often cannot be
repeated in other laboratories. A few animal studies,
however, have suggested that low levels of RF could
accelerate the development of cancer in laboratory
animals. However, many of the studies that showed
increased tumor development used animals that had
been genetically engineered or treated with
cancer-causing chemicals so as to be pre-disposed to
develop cancer in the absence of RF exposure. Other
studies exposed the animals to RF for up to 22 hours per
day. These conditions are not similar to the conditions
under which people use wireless phones, so we don't
know with certainty what the results of such studies
mean for human health.
Three large epidemiology studies have been published
since December 2000. Between them, the studies
investigated any possible association between the use
of wireless phones and primary brain cancer, glioma,
meningioma, or acoustic neuroma, tumors of the brain
or salivary gland, leukemia, or other cancers. None of
the studies demonstrated the existence of any harmful
health effects from wireless phone RF exposures.
However, none of the studies can answer questions
about long-term exposures, since the average period of
phone use in these studies was around three years.
296
What research is needed to decide whether RF
exposure from wireless phones poses a health risk?
A combination of laboratory studies and epidemiological
studies of people actually using wireless phones would
provide some of the data that are needed. Lifetime
animal exposure studies could be completed in a few
years. However, very large numbers of animals would be
needed to provide reliable proof of a cancer promoting
effect if one exists. Epidemiological studies can provide
data that is directly applicable to human populations, but
10 or more years' follow-up may be needed to provide
answers about some health effects, such as cancer.
This is because the interval between the time of
exposure to a cancer-causing agent and the time tumors
develop—if they do—may be many, many years. The
interpretation of epidemiological studies is hampered by
difficulties in measuring actual RF exposure during
day-to-day use of wireless phones. Many factors affect
this measurement, such as the angle at which the phone
is held, or which model of phone is used.
What is FDA doing to find out more about the possible
health effects of wireless phone RF?
FDA is working with the U.S. National Toxicology
Program and with groups of investigators around the
world to ensure that high priority animal studies are
conducted to address important questions about the
effects of exposure to RF energy. FDA has been a
leading participant in the World Health Organization’s
International Electromagnetic Fields (EMF) project since
its inception in 1996. An influential result of this work has
been the development of a detailed agenda of research
needs that has driven the establishment of new research
programs around the world. The project has also helped
develop a series of public information documents on
EMF issues.
297
FDA and the Cellular Telecommunications & Internet
Association (CTIA) have a formal Cooperative Research
and Development Agreement (CRADA) to do research
on wireless phone safety. FDA provides the scientific
oversight, obtaining input from experts in government,
industry, and academic organizations. CTIA-funded
research is conducted through contracts to independent
investigators. The initial research will include both
laboratory studies and studies of wireless phone users.
The CRADA will also include a broad assessment of
additional research needs in the context of the latest
research developments around the world.
How can I find out how much radiofrequency energy
exposure I can get by using my Pocket PC phone?
All phones sold in the United States must comply with
FCC guidelines that limit RF energy exposures. FCC
established these guidelines in consultation with FDA
and the other federal health and safety agencies. The
FCC limit for RF exposure from wireless telephones is
set at a SAR of 1.6 watts per kilogram (1.6 W/kg). The
FCC limit is consistent with the safety standards
developed by the Institute of Electrical and Electronic
Engineering (IEEE) and the National Council on
Radiation Protection and Measurement. The exposure
limit takes into consideration the body's ability to remove
heat from the tissues that absorb energy from the
wireless phone and is set well below levels known to
have effects.
Manufacturers of wireless phones must report the RF
exposure level for each model of phone to the FCC. The
FCC web site (http://www.fcc.gov/oet/rfsafety) gives
directions for locating the FCC identification number on
your phone so you can find your phone's RF exposure
level in the online listing.
298
What has FDA done to measure the radiofrequency
energy coming from wireless phones?
The IEEE is developing a technical standard for
measuring the RF energy exposure from wireless
phones and other wireless handsets with the
participation and leadership of FDA scientists and
engineers. The standard, “Recommended Practice for
Determining the Spatial-Peak Specific Absorption Rate
(SAR) in the Human Body Due to Wireless
Communications devices: Experimental Techniques”,
sets forth the first consistent test methodology for
measuring the rate at which RF is deposited in the
heads of wireless phone users. The test method uses a
tissue-simulating model of the human head.
Standardized SAR test methodology is expected to
greatly improve the consistency of measurements made
at different laboratories on the same phone. SAR is the
measurement of the amount of energy absorbed in
tissue, either by the whole body or a small part of the
body. It is measured in watts/kg (or milliwatts/g) of
matter. This measurement is used to determine whether
a wireless phone complies with safety guidelines.
What steps can I take to reduce my exposure to RF
energy from my Pocket PC phone?
If there is a risk from these products—and at this point
we do not know that there is—it is probably very small.
But if you are concerned about avoiding even potential
risks, you can take a few simple steps to minimize your
exposure to RF energy. Since time is a key factor in how
much exposure a person receives, reducing the amount
of time spent using your device’s phone function will
reduce RF exposure.
299
If you must conduct extended conversations using your
Pocket PC phone every day, you could place more
distance between your body and the device, since the
exposure level drops off dramatically with distance. It is
also advisable to carry your Pocket PC phone away from
your body.
Again, the scientific data do not demonstrate that
wireless phones are harmful. But if you are concerned
about the RF exposure from these products, you can
use measures like those described above to reduce your
RF exposure from using your Pocket PC phone.
What about children using wireless phones?
The scientific evidence does not show a danger to users
of wireless phones, including children and teenagers. If
you want to take steps to lower exposure to RF energy,
the measures described above would apply to children
and teenagers using your Pocket PC phone. Reducing
the time of using the phone function and increasing the
distance between the user and the Pocket PC phone. will
reduce RF exposure.
Some groups sponsored by other national governments
have advised that children be discouraged from using
wireless phones at all. For example, the government in
the United Kingdom distributed leaflets containing such
a recommendation in December 2000. They noted that
no evidence exists that using a wireless phone causes
brain tumors or other ill effects. Their recommendation to
limit wireless phone use by children was strictly
precautionary; it was not based on scientific evidence
that any health hazard exists.
300
What about wireless phone interference with medical
equipment?
RF energy from wireless phones can interact with some
electronic devices. For this reason, FDA helped develop
a detailed test method to measure electromagnetic
interference (EMI) of implanted cardiac pacemakers and
defibrillators from wireless telephones.
This test method is now part of a standard sponsored by
the Association for the Advancement of Medical
instrumentation (AAMI). The final draft, a joint effort by
FDA, medical device manufacturers, and many other
groups, was completed in late 2000. This standard will
allow manufacturers to ensure that cardiac pacemakers
and defibrillators are safe from wireless phone EMI. FDA
has tested hearing aids for interference from handheld
wireless phones and helped develop a voluntary
standard sponsored by the IEEE. This standard
specifies test methods and performance requirements
for hearing aids and wireless phones so that no
interference occurs when a person uses a compatible
phone and a compatible hearing aid at the same time.
This standard was approved by the IEEE in 2000.
FDA continues to monitor the use of wireless phones for
possible interactions with other medical devices. Should
harmful interference be found to occur, FDA will conduct
testing to assess the interference and work to resolve
the problem.
301
Where can I find additional information?
For additional information, please refer to the following
online resources:
FDA web page on wireless phones:
http://www.fda.gov/cdrh/phones/index.html
FCC RF Safety Program:
http://www.fcc.gov/oet/rfsafety
International Commission on Non-Ionizing Radiation
Protection:
http://www.icnirp.de
WHO International EMF Project:
http://www.who.int/emf
National Radiological Protection Board (UK):
http://www.nrpb.org.uk
CHAPTER 14
!
WARRANTY INFORMATION
!
!
!
This chapter contains information your device’s product
warranty, detailing it’s coverage and limitations.
1. Warranty Protection
2. 12 Month Limited Warranty
!
302
303
WARRANTY PROTECTION
12 MONTH LIMITED WARRANTY
Read your Warranty carefully, with special consideration to
paragraph seven of the Limited Warranty for your unit.
Audiovox Communications Corp. (“Audiovox”)
warrants to the original retail purchaser (“Purchaser”)
that this Audiovox product will be free from defects in
materials and workmanship under normal consumer
use for one year from the date of original purchase
from Audiovox or an Audiovox authorized reseller.
Your dated sales receipt showing the date of
purchase is your proof of the purchase date.
“Warranty does not apply to... or to any product or part
thereof which has suffered through alteration...
mishandling, misuse, neglect or accident”.
Many companies are making look alike accessories and
in some cases, promoting that their product is equal to
or better than the Audiovox product. Be careful. Some of
these products may not be compatible to use with your
Audiovox product and may damage the unit or cause it
to malfunction. If service is required on your unit and it is
determined that a non-Audiovox accessory has created
the problem with your unit, the Warranty will not apply. In
addition, if the unit has already suffered irreversible
damage by reason of a non-compatible accessory, the
Warranty will be voided. To protect your Warranty, use
only compatible accessories which cannot damage or
interfere with the functioning of your Audiovox product.
AUDIOVOX COMMUNICATIONS CORP.
555 Wireless Blvd., Hauppauge, New York 11788, 800-229-1235
16808 Marquardt Avenue, Cerritos, California 90703, 562-802-5100
Audiovox Communications Canada Co.
5155 Spectrum Way, Unit #5, Mississauga, Ontario
Canada L4W 5A1, 800-465-9672
304
WARRANTY LIMITATIONS
Within the first twelve (12) months from date of
purchase, Audiovox's sole obligation under this
express warranty shall be to repair or replace the
defective product or parts (with new or rebuilt parts).
If neither repair nor replacement is reasonably
available, Audiovox may, in its sole discretion, refund
to Purchaser the purchase price paid for the product.
THE EXTENT OF AUDIOVOX'S LIABILITY UNDER
THIS WARRANTY IS LIMITED TO THE REPAIR OR
REPLACEMENT AS PROVIDED ABOVE AND, IN NO
EVENT, SHALL AUDIOVOX'S LIABILITY EXCEED
THE PURCHASE PRICE PAID BY PURCHASER
FOR THE PRODUCT.
Accessory products, including those listed in the
applicable Audiovox catalogue, are not covered under
this Limited Warranty. Audiovox shall not be
responsible for Purchaser's software, firmware,
information or memory data contained in, stored on,
or integrated with any products returned to Audiovox
for repair, whether under warranty or not.
305
Audiovox is not liable for any damages caused by the
product or the failure of the product to perform,
including lost profits, lost savings, incidental damages
or consequential damages. Audiovox is not liable for
any claim made by a third party or made by you for a
third party.
This Warranty extends only to product purchased in
the United States and Canada and it is not
transferable or assignable.
This limited warranty does not apply to physical
damage to the surface of the product, including
breakage, cracks or scratches on the LCD
touchscreen or outside casing. This limited warranty
also does not extend to any product from which the
electronic or mechanical serial number has been
removed or to any product that has been:
Damaged or rendered defective by misuse, abuse,
accident or other external causes such as fire,
flooding, dirt, sand, weather conditions, battery
leakage, blown fuse, theft or improper usage of an
electrical source;
Subjected to unauthorized modification, alteration
or repair;
Damaged from moisture, humidity or extreme
environmental conditions; or,
Operated in an unsuitable environment or in a
manner for which it is not intended.
!
!
!
!
306
Purchasers will be charged for all product repairs for
damage or failure not covered by this limited
warranty.
Audiovox disclaims liability for geographic coverage,
inadequate signal reception or communications range
or for operation of the cellular system as a whole.
ANY IMPLIED WARRANTIES, INCLUDING ANY
IMPLIED WARRANTY OF MERCHANTABILITY OR
FITNESS FOR A PARTICULAR PURPOSE SHALL BE
LIMITED TO THE DURATION OF THIS WRITTEN
WARRANTY. ANY ACTION FOR BREACH OF ANY
WARRANTY MUST BE BROUGHT WITHIN A PERIOD
OF 18 MONTHS FROM DATE OF ORIGINAL
PURCHASE. IN NO CASE SHALL THE COMPANY BE
LIABLE FOR ANY SPECIAL CONSEQUENTIAL OR
INCIDENTAL DAMAGES FOR BREACH OF THIS OR
ANY OTHER WARRANTY, EXPRESS OR IMPLIED,
WHATSOEVER.
Some states or jurisdictions do not allow limitations on
how long an implied warranty lasts or the exclusion or
limitation of incidental or consequential damages for
consumer products, so the above exclusions or
limitations may not apply to you. This Limited Warranty
gives you specific legal rights, and you may also have
other rights that may vary from state to state or
jurisdiction to jurisdiction. You are advised to consult
applicable laws for a full determination of your rights.
307
SOFTWARE WARRANTY
THIS AUDIOVOX PRODUCT MAY INCLUDE THIRD
PARTY SOFTWARE, THE USE OF WHICH IS
GOVERNED BY THE APPLICABLE SOFTWARE
LICENSE, END-USER LICENSE OR PROGRAM
LICENSE AGREEMENT. THIS LIMITED WARRANTY
DOES NOT APPLY TO SUCH THIRD PARTY
SOFTWARE AND SUCH SOFTWARE IS PROVIDED
“AS IS”.
FOR THE APPLICABLE WARRANTY,
PLEASE REFER TO THE SOFTWARE LICENSE,
END-USER LICENSE OR PROGRAM LICENSE
GOVERNING THE USE OF SUCH SOFTWARE OR
THE DOCUMENTATION ACCOMPANYING SUCH
SOFTWARE.
Audiovox does not warrant that any contained software
products will meet Purchaser's requirements or will work
together with any hardware or software products
supplied by third parties, that the software products will
be error-free or that software defects will be corrected.
WARRANTY SERVICE
Purchaser must contact Audiovox within the applicable
warranty period to obtain warranty service authorization.
Audiovox is not responsible for products or parts
received without a warranty service authorization. BE
SURE TO BACK UP DATA AND REMOVE ANY
CONFIDENTIAL, PROPRIETARY, OR PERSONAL
INFORMATION BEFORE RETURNING PRODUCT
FOR SERVICE. AUDIOVOX IS NOT RESPONSIBLE
FOR DAMAGE TO OR LOSS OF ANY PROGRAMS,
DATA OR REMOVABLE STORAGE MEDIA. Repaired or
replacement products will be shipped to Purchaser at
Audiovox's expense.
308
THE EXTENT OF THE COMPANY’S LIABILITY UNDER
THIS WARRANTY IS LIMITED TO THE REPAIR OR
REPLACEMENT PROVIDED ABOVE AND, IN NO
EVENT, SHALL THE COMPANY'S LIABILITY EXCEED
THE PURCHASE PRICE PAID BY PURCHASER FOR
THE PRODUCT.
ANY IMPLIED WARRANTIES, INCLUDING ANY
IMPLIED WARRANTY OF MERCHANTABILITY OR
FITNESS FOR A PARTICULAR PURPOSE SHALL BE
LIMITED TO THE DURATION OF THIS WRITTEN WARRANTY. ANY ACTION FOR BREACH OF ANY WARRANTY MUST BE BROUGHT WITHIN A PERIOD OF
18 MONTHS FROM DATE OF ORIGINAL
PURCHASE. IN NO CASE SHALL THE COMPANY BE
LIABLE FOR ANY SPECIAL CONSEQUENTIAL OR
INCIDENTAL.
DAMAGES FOR BREACH OF THIS OR ANY OTHER
WARRANTY, EXPRESS OR IMPLIED, WHATSOEVER.
THE COMPANY SHALL NOT BE LIABLE FOR THE
DELAY IN RENDERING SERVICE UNDER THIS
WARRANTY OR LOSS OF USE DURING THE TIME
THE PRODUCT IS BEING REPAIRED OR REPLACED.
No person or representative is authorized to assume for
the Company any liability other than expressed herein in
connection with the sale of this product.
Some states or provinces do not allow limitations on how
long an implied warranty lasts or the exclusion or
limitation of incidental or consequential damage so the
above limitation or exclusions may not apply to you. This
Warranty gives you specific legal rights, and you may
also have other rights which vary from state to state or
province to province.
309
If you need more information, send your inquiries to:
In USA:
AUDIOVOX COMMUNICATIONS CORP.
555 Wireless Blvd.
Hauppauge, NY 11788
(800) 229-1235
In Canada:
AUDIOVOX COMMUNICATIONS CANADA CO.
5155 Spectrum Way, Unit #5
Mississauga, Ontario L4W 5A1
(800) 465-9672
310
311