1
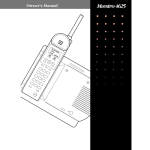
AT&T
Customer Instruction Booklet:
Cord-Free Headset
Model 2U20
Partner ® and Partner II® are registered trademarks of AT&T
Supra®, Mirage®, and StarSet® are registered trademarks of Plantronics, Inc.
Printed in the United States
PKG. 1289
40423-01 (©8-95)
CIB 107 658 957
Cord-Free Headset
IMPORTANT SAFETY INSTRUCTIONS
When using your telephone equipment, basic safety precautions should
always be followed to reduce the risk of fire, electric shock, and injury
to persons, including the following:
1. Read and understand all instructions.
2. Follow all warnings and instructions marked on the product.
The symbol identifies and alerts the user to the presence of
important operating and service instructions.
3. Unplug this product from the wall outlet before cleaning. Do not use
liquid cleaners or aerosol cleaners. Use a damp cloth for cleaning.
4. Do not locate base unit near water, for example, near a bath tub,
wash bowl, kitchen sink, or laundry tub, in a wet basement or
near a swimming pool.
5. Do not place this product on an unstable cart, stand or table.
The product may fall, causing serious damage to the product.
6. Slots and openings in the cabinet and the bottom or back are
provided for ventilation, to protect it from overheating; these
openings must not be blocked or covered. The openings should
never be blocked by placing the product in the bed, sofa, rug or
other similar surface. This product should never be placed near or
over a radiator or heat register. This product should not be placed
in a built-in installation unless proper ventilation is provided.
7. This product should be operated only from the type of power source
indicated on the marking label. If you are not sure of the type of power
supply to your home, consult your dealer or local power company.
8. Do not allow anything to rest on the power cord. Do not locate this
product where the cord will be abused by persons walking on it.
9. Do not overload outlets and extension cords as this can result in
the risk of fire or electric shock.
10. Never push objects of any kind into this product through cabinet slots
as they may touch dangerous voltage points or short out parts that
could result in a risk of fire or electric shock. Never spill liquid of any
kind on the product.
11. To reduce the risk of electric shock, do not disassemble this product,
but take it to qualified servicemen when service or repair work is
required. Opening or removing covers may expose you to dangerous
voltages or other risks. Incorrect reassembly can cause electric shock
when the appliance is subsequently used.
12. Avoid using a telephone (other than a cordless type) during an
electrical storm. There may be a risk of electric shock from lightning.
13. Do not use the telephone to report a gas leak in the vicinity of the leak.
14. Unplug this product from the wall outlet and refer servicing to
qualified service personnel under the following conditions:
A. When the power supply cord or plug is damaged or frayed.
B. If liquid has been spilled into the product.
i
15.
16.
17.
18.
19.
20.
21.
C. If the product has been exposed to rain or water.
D. If the product does not operate normally by following the operating
instructions. Adjust only those controls that are covered by the
operating instructions because improper adjustment of other controls
may result in damage and will often require extensive work by a
qualified technician to restore the product to normal operation.
E. If the product has been dropped or the cabinet has been damaged.
F. If the product exhibits a distinct change in performance.
Never install telephone wiring during a lightning storm.
Never install telephone jacks in wet locations unless the jack is
specifically designed for wet locations.
Never touch uninsulated telephone wires or terminals unless the
telephone line has been disconnected at the network interface.
Use caution when installing or modifying telephone lines.
Use only with Class 2 power source, rated at an input voltage of
110 VAC, 60 HZ and an output voltage of 12 Vdc, 300 mA.
The Cord-Free Headset requires AC power in order to operate. In
order to have phone service during a power outage, have another
telephone available that is powered only by the telephone line.
Keep all product cords and cables away from operating machinery.
SAVE THESE INSTRUCTIONS
CAUTION: To reduce the risk of fire or injury to persons,
read and follow these instructions.
1. Use only the following type and size battery pack:
See page 14 of this manual for a list of battery manufacturers
and models.
2. Do not dispose of the battery pack in a fire. The cell may explode.
Check with local codes for possible special disposal instructions.
See page 14 for information on battery recycling.
3. Do not open or mutilate battery pack. Released electrolyte is corrosive
and may cause damage to the eyes or skin. It may be toxic is swallowed.
4. Exercise care in handling batteries in order not to short the battery with
conducting materials such as rings, bracelets, and keys. The battery
pack or conductor may overheat and cause burns.
5. Charge the battery pack in accordance with instructions supplied
with this unit.
6. Observe proper orientation between battery pack and charger contacts.
TABLE OF CONTENTS
I. Important Safety Instructions
i
II. Welcome
1
III. Cord-Free Headset Feature Benefits
1
IV. Getting Started
A. Portable Unit and Accessories
B. Base Unit and Accessories
C. Universal Headpiece Styles
3
4
5
V. Installation
A. For Standard Telephone Users:
Attaching the Telephone Line Cord and AC Adapter
B. For AT&T Partner® System Users:
Connecting the Cord-Free Headset
to Your Partner System Phone
C. Setting the Ringer Controls
D. Setting the Tone/Pulse Switch
E. Installing and Charging the Battery Pack
F . Attaching a Universal Headpiece
G. Wearing a Universal Headpiece
H. Wearing the Portable Unit
I . Installing the Wall Mount Option
J. Positioning the Base Unit Antenna
6
7
7
7
8
8
9
9
9
VI. Portable Unit Operation
A. Making a Call
B. Answering a Call
C. Adjusting the Headset Volume
D. Using Memory Speed Dial
E . Using Other Function Keys
F . Responding to Low Battery Indicators
G. Operating the Portable Unit From the Cradle
H. Replacing the Battery Pack
I . The RBRC™ Seal and Battery Recycling
10
10
10
11
12
13
13
14
14
VII. Operating Procedures
A. Maintaining Clear Communications
B. Maintaining Secure Communications
C. Using the PAGE Key
15
16
16
VIII. Quick Reference Guide
17
IX. Warranty Information
19
X. Service Information
20
XI. FCC Information
ii
6
21
iii
WELCOME
Welcome to a new business advantage: CORD-FREE headset communications. You’ve taken an important step. By selecting AT&T’s
CORD-FREE headset you have chosen to address an essential factor
in telecommunications – the human factor. And you’ve acknowledged
one of the most important strategies in modern business – achieving
the best possible communication with your customers.
Your new AT&T CORD-FREE headset safeguards your customer
communications as never before. Communications with your customers are maintained as you move around your office or workspace.
Your quick response lets them know you care about them and what
they have to say.
Operation couldn’t be more simple. Follow the installation instructions
for the Base Unit. Charge the battery in the portable unit. Connect your
headpiece and begin your CORD-FREE communications.
Welcome to the high ground of modern business, a place where
productivity is enhanced, customers are reassured and communication
is maintained.
PRODUCT FEATURES
●
●
●
●
●
●
●
●
●
●
1
Guaranteed to work: designed and certified to operate with your
Partner ®, Partner Plus or Partner II ® System
Pocket size portable offers total flexibility: slip in a pocket, clip
on a belt or use neck strap wear
Complete compatibility with AT&T Universal Headsets: gives
you the freedom to choose any available headpiece style
Clear, secure cord-free communications: activate the unit and
automatically select one of 65,000 security codes
Duplicate ON/OFF & Mute Feature controls: ON/OFF & Mute
buttons located on top and front of the portable dial pad help
simplify operation
Speed dialing of frequently called numbers: the portable dial
pad stores up to 10 phone numbers
Repeat dialing: the portable unit includes a last number dialed
feature
One way page: helps locate you or your portable dial pad when
you are away from the base unit
Duplicate in use indicators: an In-Use lamp on the base unit
and ON/OFF lamp on the portable unit illuminate when the headset
is in use
Low battery warning lamp: warns you when your battery
needs recharging
●
●
●
●
Base Unit Operation: allows you to use your headset when batteries
are low
Standard system phone connectivity: connects to all telephone
systems that offer a connection for a standard telephone
Standard home phone connectivity: connects to all standard home
telephones
1 - 2 users: allows up to two simultaneous cord-free telephone line
users at the same time
GETTING STARTED
Your CORD-FREE headset consists of two component packages:
a Base Unit package and a Headpiece package. Figures 1 & 2 list and
illustrate the items included with the Base Unit package. The currently
available headpiece styles are illustrated in Figure 3.
As Figures 1 & 2 illustrate, the Base Unit package includes several
required and convenience accessories. Please locate and familiarize
yourself with all required and convenience components.
Figures 1 & 2 also locate and identify the function of all feature buttons, switches, indicators and connectors. Please familiarize yourself
with the use and characteristics of these items.
Once you feel comfortable with the information provided in this
section, please proceed to the Installation Section.
2
PORTABLE UNIT AND ACCESSORIES
1.
2.
3.
4.
5.
6.
7.
8.
9.
10.
11.
12.
13.
14.
15.
16.
17.
18.
19.
20.
Portable unit cable
ON/OFF keys
Headset jack
Volume control
Belt clip well and battery contacts
RINGER ON/OFF
Battery compartment
ON/OFF & MUTE indicator
LOW BATTERY indicator
MUTE keys
Antenna
REDIAL/PAUSE key
CHANNEL selection key
MEMORY storage and recall key
FLASH key
TONE key
Battery pack
Holster belt clip
2
Neck strap
Memory dial directory
(not shown)
3
BASE UNIT AND ACCESSORIES
FIGURE 1
11
8
9
10
AC adapter (6 feet/1.83 meters)
Telephone line cord (7 feet/2.13 meters)
Bridging Adapter
Cradle and battery contacts
Tone/pulse switch
Ringer control
AC adapter jack
Telephone jack
Antenna
Battery charging indicator
In use indicator
Page key
Wall mount and headpiece holder
1
2
Back Panel of Base Unit
3
12
13
14
4
5
1.
2.
3.
4.
5a.
5b.
5c.
5d.
6.
7.
8.
9.
10.
FIGURE 2
15
5b
5a
5c
5d
5
6
4
6
1
16
7
7
8
9
17
18
10
19
3
4
UNIVERSAL HEADPIECE STYLES
FIGURE 3
INSTALLATION
FOR STANDARD TELEPHONE USERS:
Attaching the Telephone Line Cord and AC Adapter
Wall
Base Unit
Connect the telephone line cord to the telephone jacks
in the base unit and wall.
Line Cord
Connect one end of the AC adapter to the base unit and
plug the other end into a standard electrical outlet
(110 VAC, 60 Hz).
AC Adapter
FOR AT&T PARTNER SYSTEM USERS:
Supra® Monaural
Headpiece
Supra® Monaural
Noise-Cancelling Headpiece
(Refer to the Partner System Installation and User
Guide for installation, features, and use of the Partner
System. Only changes from the standard system
operation will be discussed in this section.)
You can connect the Cord-Free Headset on an
extension by itself (in the same manner as a
standard touch-tone telephone), or you can use
the bridging adapter – included with the base unit
package – to combine the headset unit with a
Partner System phone at one extension jack, as
shown in the figure at right. (The combined REN
of the two devices on an extension must be no
more than 2.0. Refer to the Partner System
Installation and User Guide for more information.)
Supra ® Binaural
Headpiece
Supra ® Binaural
Noise-Cancelling Headpiece
Mirage ® Headpiece
StarSet ® Headpiece
5
Connecting the Cord-Free Headset to Your Partner
System Phone
Wall Jack
Cord-Free
Headset
Bridging Adapter
Partner System Phone
or Standard Phone
The Cord-Free Headset can handle many of the same
functions as a Partner System telephone, either by
using the Dial Code features manually, or by storing
the appropriate codes into the Cord-Free Headset’s
memory speed dial.
6
SELECTING AND ATTACHING A UNIVERSAL HEADPIECE
Setting the Ringer Controls
Each of the Universal
Headpieces has a universal
cable connection.
Adjust the ringer on the base unit to the desired
volume level (i.e.; OFF, LOW, or HIGH).
Adjust the ringer on the portable unit to the desired
setting (i.e.; ON or OFF).
Even with the portable unit ringer turned to OFF, you
are able to make or receive calls. However, in this
mode, you will only be aware of an inbound call if
you are able to hear your base unit ringer.
Setting the Tone/Pulse Switch
Adjust the tone/pulse switch on the base unit to reflect
the service offered by your phone company.
Supra ® Monaural
Headpiece
Supra ® Monaural
Noise-Cancelling
Headpiece
Mirage ® Headpiece
Supra® Binaural
Headpiece
Supra® Binaural
Noise-Cancelling
Headpiece
StarSet ® Headpiece
Join the headpiece connector to the mating
connector of the portable unit cable.
If touch tone dialing is supported, set the switch to T.
If using in a home office environment and rotary
dialing is supported, set the switch to P.
Installing and Charging the Battery Pack
Open the battery compartment of the portable unit
by grasping the portable unit (face down) with both
hands, then pressing down with both thumbs to push
the battery door down and away from the portable
unit. Plug the battery pack lead into the portable unit
connector. Place the battery pack inside the portable
unit and close the battery compartment.
Place the portable unit into the cradle of the base unit
and verify that the charge indicator on the base unit
has turned on. Before using the Cord-Free Headset
for the first time, let the battery pack charge for
12 hours.
During the course of operation, recharge the battery
pack as needed (see the Portable Unit Operating
Procedures section regarding low battery indicators).
7
Insert the portable unit cable plug into the portable unit.
Bottom of
portable unit
WEARING A UNIVERSAL HEADPIECE
For instructions on how to adjust and wear your
universal headpiece, please refer to the user guide
that accompanies your headpiece.
8
PORTABLE UNIT OPERATION
Wearing the Portable Unit
Making a Call
The portable unit may be worn in a shirt
pocket, on a belt, or around the neck.
To make an outgoing call, put on the headpiece and
turn on the portable unit by pressing one of the ON/OFF
keys. The ON/ OFF/MUTE indicator on the portable unit
and the In Use indicator on the base unit will turn on.
To wear the portable unit on a belt,
attach the holster belt clip to your belt.
Snap the portable unit in and out of
holster belt clip without removing the belt clip.
To move the portable unit out of the way (e.g.; before
sitting), rotate the portable unit and belt clip.
To wear the portable unit around your neck, attach
the neck strap to the holster belt clip.
Snap the portable unit into the belt clip and place the
neck strap around your neck. Adjust the length of the
strap as appropriate.
Partner System users: After you hear the intercom
dial tone, dial 9 to get an outside line. Then follow
the procedure described above. (To make a call on a
specific line, refer to the Partner System user guide.)
Listen for a dial tone, then dial a phone number
manually or by memory speed dial.
At the end of your conversation, press one of the ON/OFF
keys to end your call. The ON/OFF/MUTE indicator on
the portable unit and the In Use indicator on the base
unit will turn off.
Installing the Wall Mount Option
Answering a Call
If mounting the base unit on the wall is desired,
snap the tabs of the optional wall mount into the
corresponding slots of the base unit.
To receive an inbound call, make sure that the ringer
control on the portable unit is turned on or that you
can hear the ringer of your base unit.
Mount the base unit and its wall mount onto a
telephone line faceplate or other wall attachment.
When the portable unit and/or the base unit rings, put on
the headpiece and answer the call by pressing one of the
ON/OFF keys. The ON/OFF/MUTE indicator on the
portable unit and the In Use indicator on the base unit will
turn on.
The headpiece holder attached to the wall mount
may be used to store a headband style headpiece
when not in use.
Positioning the Base Unit Antenna
Fully extend the base unit antenna.
Whether the base unit is desk mounted or wall
mounted, adjust the base unit antenna so that it
is positioned vertically.
At the end of your conversation, press one of the
ON/OFF keys to end your call. The ON/OFF/MUTE
indicator on the portable unit and the In Use indicator
on the base unit will turn off.
Portable Unit on
Portable Unit off
Partner System users: To answer a call ringing at another
extension, refer to the Partner System user guide.
Adjusting the Headset Volume
To increase the headset receiver volume, press the
VOLUME + key. To decrease receiver volume,
press the VOLUME – key.
If either key is pressed and released several times in
succession, the volume level will continue to step up
or down until it reaches a maximum or minimum level.
9
10
Using Other Function Keys
Using Memory Speed Dial
To store phone numbers into memory speed dial:
Press the MEM/STORE key while the portable unit
is inactive (i.e.; ON/OFF/MUTE indicator is off).
REDIAL/PAUSE Key
On/Off Low B
Mute
Mute
On/Off
Flash
Redial/Pause
Mem/Store
Manually enter the extension or phone number to
be stored. Each number may be up to 16 digits long
and may include one or more PAUSE or TONE
key sequences
ABC
Chnl
DEF
After entering the last of the key sequence, press the
MEM/STORE key again and enter one of ten memory
locations (i.e.; 0-9).
The portable unit will give a long audio tone if the
above process is completed successfully.
For future reference, enter the memory location and
the phone number on the memory dial directory.
To dial phone numbers using memory speed dial:
Turn on the portable unit by pressing one of the
ON/OFF keys.
Listen for a dial tone, then press the MEM/STORE
key and the memory location of the phone number
to be dialed (i.e.; 0-9).
Low B
On/Off
Mute
Flash
Mem/Store
Redial/Pause
Chnl
To insert a 3 second pause in a memory dialing
sequence, press the Redial/Pause key when entering
a number into memory storage.
Partner System users: Note that the Cord-Free Headset’s
Redial key may not be effective if the last number dialed
was for an outside call. In this case, use the Partner
System’s Last Number Redial feature by pressing # 0 5.
(See section on Using Other Function Keys).
Partner System users: To program an outside number on
the Cord-Free Headset memory speed dial, enter 9, then
press the Pause key twice before keying in the digits of
the phone number you wish to store.
To call the last number dialed, press the Redial/Pause
key while the portable unit is turned on.
On/Off
Mute
MUTE Keys
On/Off Low B
Mute
On/Off
Mute Redial/Pause
Flash Mem/Store
ABC
Chnl
DEF
In the mute mode, a caller will be unable to hear you,
but you will be able to hear the caller.
To mute the headpiece microphone, press and release
one of the MUTE keys. The ON/OFF/MUTE indicator
will flash when the headpiece is in this mode.
To turn the mute mode off, press one of the MUTE keys
again. Once the mute mode is disabled, the caller will
once again be able to hear you and the ON/OFF/MUTE
indicator will cease flashing, but remain lit.
CHNL Key
If you experience interference during your phone
conversation, press the CHNL key to select a new,
clear channel.
If the portable unit is out of range or no other channels
are clear, the portable unit will beep twice and
remain unchanged.
On/Off Low B
Mute
On/Off
Mute
Flash
Mem/Store
Redial/Pause
Chnl
FLASH Key (Home Office Use)
If you subscribe to special services from your phone
company, (e.g.; call waiting), you may use the FLASH
key to access these services.
On/Off Low B
Mute
On/Off
Flash
11
Mute Redial/Pause
Mem/Store
Chnl
12
TONE (*) Key (Home Office Use)
In order to interact with systems such as voice mail
and answering machines, you may need to use tone
dialing. Even if your base unit is normally set to pulse
(P) dialing, you may still switch to tone dialing via
the portable unit.
GHI
JKL
MNO
PRS
TUV
WXY
Tone
Oper
To temporarily switch to tone dialing, press the
TONE (*) key while the portable unit is on. Once
in tone dialing mode, the portable unit will remain
in this mode until the unit is turned off.
Replacing the Battery Pack
The battery pack may need to be replaced when it is
no longer able to maintain a charge. When replacing
the NICAD) battery pack, use only the specified
packs as follow:
●
Sanyo # 3N-270AA, 3.6V, 270mAh
●
GP NT30AAK3BML
●
Varta VIP 105/6
Bottom of
portable unit
Responding to Low Battery Indicators
When using the portable unit, you will be notified of
a low battery condition by both an audible tone and a
flashing LOW BATTERY indicator. These indicators
will be activated approximately four minutes before
the battery pack is completely discharged.
If you try to turn on the portable unit when it is
experiencing a low battery condition, the ON/OFF/MUTE
indicator will flash 3 times and turn off.
Once you notice the low battery indicators, immediately recharge the battery pack by placing the portable
unit in the cradle of the base unit. If the battery pack
is allowed to discharge completely, you may lose the
phone numbers stored in memory speed dial.
Once the battery pack is recharged, the low battery
indicators will turn off.
The headpiece may be used while the battery pack in
the portable unit is being recharged (see section on
Operating the Portable Unit From the Cradle).
On/Off Low B
Mute
On/Off
Flash
Mute Redial/Pause
Mem/Store
Chnl
Before operating the portable unit, follow the instructions outlined
in the section on Installing and Charging the Battery Pack.
Once the new battery pack is fully charged, re-enter any phone
numbers that were previously stored in memory speed dial
(see section on Using Memory Speed Dial).
The RBRC™ Seal and Battery Recycling
The RBRC™ Seal on the nickel-cadmium battery pack contained
in our product indicates that AT&T is voluntarily participating in an
industry program to collect and recycle these battery packs at the end
of their useful life, when taken out of service within the United States.
The RBRC program provides a convenient alternative to placing
spent nickel-cadmium battery packs into the trash or municipal waste
stream, which is illegal in some areas.
AT&T payments to RBRC makes it easy for you to drop off the
spent battery pack at local retailers of replacement nickel-cadmium
batteries. You may also contact your local recycling center or call
1-800-8BATTERY for information on where to return the spent battery
pack. AT&T’s involvement in this program is part of its commitment
to protecting our environment and conserving natural resources.
Operating the Portable Unit From the Cradle
The portable unit and headpiece will operate when
seated in the cradle of the base unit, even when the
battery pack is discharged.
RBRC™ is a trademark of the Rechargeable Battery Recycling Corporation.
13
14
OPERATING PROCEDURES
Maintaining Clear Communications
Maintaining Secure Communications
The performance of the Cord-Free Headset will vary depending upon
where the portable unit is placed on your body and the environment in
which the base and portable unit are used.
Every time the portable unit is placed in the cradle of the base unit,
a unique sccurity code is established between the two units (i.e. one
of 65,000 codes). Once this code is established, other portable units
will be unable to make or receive calls from this same base unit.
When first installing your Cord-Free Headset, try placing the base
unit in different locations to determine which location will provide
optimum performance. In addition, minimize communications interference by limiting the operation of other radio frequency devices
around the Cord-Free Headset. Such devices include other cordless
phones, wireless PBX systems and wireless local area networks.
Using the PAGE Key
When you turn on the Cord-Free Headset it automatically selects
a clear communications channel. If this channel starts to degrade,
press the CHNL key to select a new, clear channel from the 10
channels available.
If you move outside the range of the base unit, communications
between the units will become intermittent. To prevent this from happening, stay within the range of operation (approximately 20 feet).
If you try to turn on the portable unit when it is out of range or no
channels are available, the ON/OFF/MUTE indicator will turn on and
then off. Audible tones will also be heard.
To page a headset user or locate the portable unit,
you may use the PAGE key on the base unit. For Page
to work, the ringer on the portable unit must be set to
the On position.
To send a quick paging signal, press and release
the PAGE key. The portable unit will ring once for
several seconds.
To send a sustained paging signal, press the PAGE
key twice in succession. The portable unit will ring
continuously for 25 seconds or until you press one
of the ON/OFF keys on the portable unit.
Should you lose communications between the portable and base
units, place the portable unit back in the cradle of the base unit.
Once a beep is heard through the headpiece (approximately 2
seconds), a common security code will be established and you
may resume using the product.
15
16
QUICK REFERENCE GUIDE
INDICATION :
Portable unit won’t
turn on or allow
outbound or
inbound calls
ITEMS TO CHECK :
Determine if base and portable unit ringers are
turned on and ON/OFF key has been pressed.
Portable unit
battery pack
won’t charge
properly
Headset is
picking up
interference
Headset
user can’t
hear caller
Portable unit
locks up or
loses communications
X
Remove portable unit from base for at least five minutes,
then replace portable unit in base unit cradle until beep is
heard through headpiece (approximately two seconds)
to ensure a common security code.
X
Unplug AC adapter from base unit and battery pack
from portable unit, reattach power sources and place
portable unit in base unit.
X
Determine if portable unit is outside range of base unit.
X
Determine if low battery condition exists.
X
Move base unit to alternate location.
X
Ensure units are located away from radio
frequency devices.
X
Ensure AC adapter and telephone line cord
are properly installed.
X
Verify that Tone/Pulse switch is set appropriately.
X
X
X
X
X
X
X
X
X
X
X
X
X
X
X
X
X
Ensure headpiece is properly positioned.
X
Adjust volume control as necessary.
X
Determine if MUTE is turned on.
X
X
Ensure that base unit antenna is fully extended and
positioned vertically.
X
Ensure battery pack is installed in portable unit.
X
Clean metal charging contacts on portable unit.
X
17
Caller
can’t hear
headset user
X
X
X
X
X
X
18
LIMITED WARRANTY AND LIMITATION OF LIABILITY
Limited Warranty
AT&T warrants to you, the customer, that your AT&T telecommunications equipment will
be in good working order on the date AT&T or its authorized reseller delivers or installs
the equipment, whichever is later (“Warranty Date”). If you notify AT&T or its authorized
reseller within one year of the Warranty Date that your equipment is not in good working
order, AT&T will without charge to you repair or replace, at its option, the equipment that
is not in good working order. Repair or replacement parts may be new or refurbished and
will be provided on an exchange basis. If AT&T determines that the equipment cannot be
repaired or replaced, AT&T will remove the equipment and, at your option, refund the
purchase price of the equipment, or apply the purchase price towards the purchase of other
comparable AT&T equipment.
CLAIMS, LOSSES, DAMAGES OR EXPENSES FROM ANY CAUSE WHATSOEVER
(INCLUDING ACTS OR OMISSIONS OF THIRD PARTIES) REGARDLESS OF THE
FORM OF ACTION, WHETHER IN CONTRACT, TORT OR OTHERWISE, SHALL
NOT EXCEED AN AMOUNT EQUAL TO THE LESSER OF THE DIRECT DAMAGES PROVEN OR THE PURCHASE PRICE OF THE EQUIPMENT. IN NO EVENT
SHALL AT&T OR ITS AFFILIATES, SUPPLIERS OR AUTHORIZED RESELLERS
BE LIABLE FOR INCIDENTAL, RELIANCE, CONSEQUENTIAL, OR ANY OTHER
INDIRECT LOSS OR DAMAGE (INCLUDING LOST PROFITS OR REVENUES)
INCURRED IN CONNECTION WITH THE EQUIPMENT. THIS LIMITATION OF
LIABILITY SHALL SURVIVE FAILURE OF THE EXCLUSIVE REMEDY SET
FORTH IN THE LIMITED WARRANTY ABOVE.
If you purchased your equipment directly from AT&T, AT&T will perform warranty repair
in accordance with the terms and conditions of the specific AT&T maintenance plan you
selected. A written explanation of AT&T’s maintenance plans may be obtained from
AT&T by calling 1-800-247-7000. If you purchased your equipment from an AT&T
authorized reseller, contact your reseller for the details of the maintenance plan applicable
to your system.
SERVICE INFORMATION
AT&T will not be responsible under this limited warranty for damages resulting from:
If you wish to obtain service under the Warranty specified in your agreement with AT&T.
please contact your AT&T representative or place of purchase.
(1) failure to follow AT&T’s installation, operation, or maintenance instructions;
(2) unauthorized equipment modification, movement or alteration;
(3) unauthorized use of common carrier communication services accessed through
the equipment;
Should you encounter difficulties or be uncertain about proper installation, please refer to
the Quick Reference Guide on page 13. In addition, AT&T provides a toll-free customer
help line 24 hours a day. In the USA, call the AT&T help line at 1-800-628-2888
for assistance.
FCC INFORMATION
FCC Requirements - Part 15
(4) abuse, misuse, or negligent acts or omissions of the customer and persons under
the customer’s control; or
This cordless telephone system complies with Part 15 of the FCC Rules. Operation is
subject to the following two conditions:
(5) acts of third parties and acts of God.
1. This device may not cause harmful interference, and
AT&T’S OBLIGATION TO REPAIR, REPLACE OR REFUND AS SET FORTH
ABOVE IS YOUR EXCLUSIVE REMEDY. THIS WARRANTY IS VOID
UNLESS YOUR SYSTEM WAS PURCHASED DIRECTLY FROM AT&T OR
AN AT&T AUTHORIZED RESELLER FOR INSTALLATION IN THE U.S.A.
OR PUERTO RICO.
2. This device must accept any interference received, including interference that may
cause undesired operation.
CAUTION:
Privacy of operation may not be ensured when using this phone.
Changes or modifications not expressly approved in writing by AT&T
may void the user’s authority to operate this equipment.
●
●
EXCEPT AS SPECIFICALLY SET FORTH ABOVE, AT&T, ITS AFFILIATES, SUPPLIERS AND AUTHORIZED RESELLERS MAKE NO WARRANTIES, EXPRESS
OR IMPLIED, AND SPECIFICALLY DISCLAIM ANY WARRANTIES OF MERCHANTABILITY OR FITNESS FOR A PARTICULAR PURPOSE.
Limitation of Liability
EXCEPT FOR PERSONAL INJURY OR DAMAGE TO TANGIBLE PERSONAL
PROPERTY CAUSED SOLELY BY AT&T’S NEGLIGENCE, THE LIABILITY OF
AT&T, ITS AFFILIATES, SUPPLIERS AND AUTHORIZED RESELLERS FOR ANY
19
NOTE: This equipment has been tested and found to comply with the limits for a Class B
digital device, pursuant to Part 15 of the FCC Rules. These limits are designed to provide
reasonable protection against harmful interference in a residential installation. This
equipment generates, uses and can radiate radio frequency energy and, if not installed
and used in accordance with the instructions, may cause harmful interference to radio
communications.
20
However, there is no guarantee that interference will not occur in a particular installation.
If this equipment does cause harmful interference to radio or television reception, which
can be determined by turning the equipment off and on, the user is encouraged to try to
correct interference by one or more of the following measures:
●
●
●
●
Reorient or relocate the receiving antenna.
Increase the separation between the equipment and receiver.
Connect the equipment into an outlet on a circuit different from that to which
the receiver is needed.
Consult the dealer or an experienced radio/TV technician for help.
FCC Requirements - Part 68
1. The Federal Communications Commission (FCC) has established Rules which permit
this device to be directly connected to the telephone network. Standardized jacks are used
for these connections. This equipment should not be used on party lines or coin phones.
2. If this device is malfunctioning, it may also be causing harm to the telephone network;
this device should be disconnected until the source of the problem can be determined
and until repair has been made. If this is not done, the telephone company may
temporarily disconnect service.
3. The telephone company may make changes in its technical operations and procedures;
if such changes affect the compatibility or use of this device, the telephone company is
required to give adequate notice of the changes. You will be advised of your right to file
a complaint with the FCC.
4. If the telephone company requests information on what equipment is connected to their
lines, inform them of:
a. The telephone number to which this unit is connected.
b. The ringer equivalence number.
c. The USOC jack required (RJ-11C).
d. The FCC Registration Number.
Items (b) and (d) are indicated on the label. The Ringer Equivalence Number (REN) is
used to determine how many devices can be connected to your telephone line. In most
areas, the sum of the RENs of all devices on any one line should not exceed five (5.0).
If too many devices are attached, they may not ring properly.
Service Requirements
In the event of equipment malfunction, all repairs should be performed by AT&T or
an authorized agent. It is the responsibility of users requiring service to report the
need for service to AT&T or to one of its authorized agents. Service can be obtained
as noted in the Warranty Information section.
21
AT&T
Customer Instruction Booklet:
Cord-Free Headset
Model 2U20
Partner ® and Partner II® are registered trademarks of AT&T
Supra®, Mirage®, and StarSet® are registered trademarks of Plantronics, Inc.
Printed in the United States
PKG. 1289
40423-01 (©8-95)
CIB 107 658 957
Cord-Free Headset