Download American Standard Chandler Americast 7182.000 User's Manual
Transcript
™
Installation
Instructions
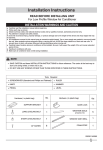
CHANDLER™ AMERICAST™ ISLAND SINK
WITH FAUCET HOLES 7182.001/7182.803
WITHOUT FAUCET HOLES 7182.000
Thank you for selecting American-Standard...the benchmark
of fine quality for over 100 years.
To ensure that your installation proceeds smoothly--please
read these instructions carefully before you begin.
Certified to comply with ANSI A112.19.4.M
U.S. Patent No. 4,664,982
Other patents pending.
CAN/C.S.A. B-45
Observe local plumbing and building codes.
791267-400 Rev. C
BEFORE YOU BEGIN...Unpack new sink and
inspect carefully for damage. Replace the sink
in its original packing carton to protect it until
you are ready to begin installation.
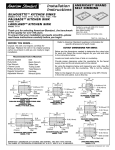
ISLAND SINK MODEL 7182.001/803
CUTOUT FOR NEW INSTALLATION
16-1/2" (419mm)
14" (356mm)
Recommended Tools & Materials
Silicone Sealant
Putty Knife
Pipe Wrench
Channel Locks
Phillips Screwdriver
Regular Screwdriver
Adjustable Wrench
Drill
Mineral Spirits
Basin Wrench
Saber Saw
Tubing Cutter
Tape Measure
Hacksaw
Scissors
8-11/32"
(212mm)
15 "
(381mm)
14"
(356mm)
CUTTING
LINE
1/2"TYP.
SINK
OUTLINE
ISLAND SINK MODEL 7182.000
CUTOUT FOR NEW INSTALLATION
CUTOUT DIMENSIONS FOR SINK
16-1/2" (419mm)
Locate and mark center lines of sink on countertop.
Provide proper clearance under the countertop for
the faucet supply lines and the structural parts of the
cabinet.
15-9/16"(395mm)
7-25/32"
(198mm)
5-21/32"
(144mm)
Cut out correct template and trace the cut line onto
the countertop at the proper location.
NOTE: If replacing an existing sink be certain to shut
off water supplies before removing old sink.
11-9/32"
(287mm)
s
adiu
6-23/32"
/2" R m)
1
4
m
1
(171mm)
( 3 6 8 CENTER LINE
6-23/32" OF BOWL
(171mm)
s
adiu
/2" R m)
1
4
m
1
(368
CUTTING
LINE
12-3/8"
(314mm)
SINK
OUTLINE
1/2"TYP.
15" (381mm)
3/4" (19mm)
MODIFICATION REQUIRED TO FIT ISLAND SINK
WITH FAUCET HOLES INTO A STANDARD
15" X 15" SINK CUTOUT
NOTE: CHANDLER ISLAND SINK WITHOUT
FAUCET HOLES DOES NOT FIT INTO A
STANDARD 15" X 15" SINK CUT OUT
14" (356mm)
6-23/32"
(171mm)
CENTER LINE
Radius
14-1/2" mm)
(368
CUTTING
LINE
Product names listed herein are trademarks of American Standard Inc. unless otherwise noted.
14" (356mm)
s
iu
" Rad
14-1/2 8mm)
(36
6-23/32"
(171mm)
1/2"TYP.
SINK
OUTLINE
© American Standard Inc. 2003
1
AFTER THE CUTOUT IS DRAWN...
Drill a clearance hole
inside the cutout line
as marked on the
countertop.
5
Perimeter
of sink
Apply a masking tape
outline 1/8" outside
traced outline as a
guide for application
of silicone
sealant.
Cutout
Sink
outline
Masking
1/8"
tape
outline
Cutout
2
Cut opening on cut
line inside the perimeter of sink.
6
Perimeter
of sink
Cutout
3
Mount the faucet and
drain assembly on the
sink following the
manufacturer's
instructions.
Masking
Tape
Before applying the
sealant, place the sink
temporarily into the
cutout. Check for
alignment and clearance, then trace
around the outside
edge of the sink as
a guide for installation location and application of
sealant. Remove sink.
8
AMERICAST® LIMITED LIFETIME WARRANTY
If an American-Standard Americast® brand product is found to be defective in materials or
workmanship, after inspection by an authorized American-Standard representative, AmericanStandard will repair or, at its option, exchange the product for a similar model. This warranty
extends for the lifetime of the product, so long as it remains in use in its original place of
installation, except that the warranty applies to a bathing vessel’s slip-resisting surface only for
the first year after the product’s initial installation.
This warranty applies only to the original purchaser and installation of these products.
This warranty does not apply to whirlpool components or to faucets, drains, mounting rims,
grab bars or other accessories. If manufactured or supplied by American-Standard, such
whirlpool components and accessories are covered under separate limited warranties.
This warranty does not apply to local building code compliance. Since local building codes
vary considerably, the purchaser of this product should check with a local building or plumbing
contractor to assure local code compliance before installation.
This warranty shall be void if the Americast® brand product has been moved from its initial
place of installation; if it has been subjected to faulty maintenance, abuse, misuse, accident or
other damage; if it was not installed in accordance with American-Standard’s instructions; or if it
was modified in a manner inconsistent with the product as shipped by American-Standard.
American-Standard's option to repair or exchange the product under this warranty does not
cover any labor or other costs of removal or installation, nor shall American-Standard be
responsible for any other incidental or consequential damages attributable to a product
defect or to the repair or exchange of a defective product, all of which are expressly
excluded from this warranty. (Some states or provinces do not allow the exclusion or limitation
of implied warranties, so this exclusion may not apply to you.)
This warranty gives you specific legal rights. You may have other statutory rights that vary from
state to state or from province to province, in which case this warranty does not affect such
statutory rights.
For service under these warranties, it is suggested that a claim be made through the
contractor or dealer from or through whom the product was purchased, or that a service request
(including a description of the product model and of the defect) be sent to the following address:
In the United States:
American Standard Inc.,
P.O. Box 6820
Piscataway, New Jersey 08855
Attention: Director of Consumer Affairs
In Canada:
American-Standard,
2480 Stanfield Road
Mississauga, Ontario
Canada L4Y 1S2
For residents of the United States,
warranty information may also be
obtained by calling the following
toll free number: (800) 442-1902
Toll Free: (800) 387-0369
791267-400 Rev. C
Silicone
Sealant
Sink
NOTE: Silicone must be removed within 10 minutes
of application or a permanent residue may remain
on the surfaces.
7
4
Apply a generous portion of silicone sealant inside line
traced on countertop. Carefully lower sink into place
and press down firmly. Use guidelines for proper
positioning. Using water to dampen your finger,
remove excess sealant for a smooth even line. Apply
additional sealant if necessary to provide a uniform
bead from the rim of sink to the masking tape line as
shown. Carefully remove tape. Dampen finger and run
it slightly over the sealant to remove any high spots.
Use mineral spirits to remove excess silicone from
countertop and sink.
Connect supply lines to
faucet finger tight, and
carefully bend to engage
with the supply stops.
Tighten connections to
faucet for secure seal.
Connect drain assembly
hand tight to check
alignment. It may be
necessary to cut off part
of the tailpiece (area "A")
or part of the horizontal
leg of the trap (area "B").
A
B
Secure joint for watertight assembly.
Trap
Single Bowl
CARE AND CLEANING...
For all porcelain enamel surfaces, regular, gentle
care is best. The recommended way to preserve the
finish, avoid scratches, and clean porcelain enamel
fixtures is to rinse them with detergent and water.
Generally, any of the light duty liquid dishwashing
detergents, such as Palmolive or Dawn, work well.
In areas where the water is hard, a heavy duty liquid
laundry detergent such as liquid Tide will work better.
Product names listed herein are trademarks of American Standard Inc.unless otherwise noted.
Palmolive® is a registered trademark of Colgate-Palmolive Co.
Tide® and Dawn® are registered trademarks of Procter and Gamble.
2
© American Standard Inc. 2003
™
Installation
Instructions
AMERICAST ® BRAND
SINKS
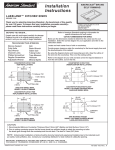
UNDERCOUNTER MOUNTING FOR CHANDLER,
LAKELAND, PALISADE AND SILHOUETTE™
KITCHEN SINKS
MODELS 7145, 7162, 7163 STANDARD, 7103, 7172, 7173, 7179,
7182, 7183, 7185, 7196, 7255
Thank you for selecting American-Standard...the
benchmark of fine quality for over 100 years.
To ensure that your installation proceeds smoothly--please
read these instructions carefully before you begin.
Certified to comply with ANSI A112.19.4.M
U.S. Patent No. 4,664,982
Other patents pending.
CAN/C.S.A. B-45
Observe local plumbing and building codes.
790088-100 REV. H
BEFORE YOU BEGIN...
Unpack new sink and inspect carefully for damage. Notify your American Standard distributor of any damage. Replace the
sink in its original packing carton to protect it until you are ready to begin installation.
NOTE
The kit contains two types of cutouts. One cutout is for mounting the fitting on the countertop. The second is
for mounting the fitting on the sink itself, below the countertop. Use the correct instructions for your application
Recommended Tools & Materials:
Silicone Sealant
Putty Knife
Pipe Wrench
Channel Locks
Phillips Screwdriver
Regular Screwdriver
Adjustable Wrench
Drill
Basin Wrench
Saber Saw
Tubing Cutter
Tape Measure
Hacksaw
Mineral Spirits
INSTALLATION A — FITTINGS MOUNTED ON COUNTERTOP
Refer to American Standard roughing-in information for specific dimensions for each model.
CAUTION
1. Minimum countertop thickness is 19mm (3/4) for wood and 12mm (1/2") for marble and solid
surface material.
2. Prior to cutting countertop be sure that the fitting shank has sufficient length to attach the mounting nut
after the shank goes through both the countertop and sink deck. The deck is 3/8 (10mm) thick.
Below are the dimensions of each sink. Make sure this area is available to mount the sink. Unfold the template and refer
to the instructions below.
SINK CUTOUTS:
Locate and mark center lines of sink on countertop. Provide proper clearance under the countertop for the faucet
supply lines and the structural parts of the cabinet. Do not use permanent markers to indicate the center lines.
Cut the inner portion from the supplied template and discard.
Attach the outer portion of the template to the countertop using masking tape. Be sure that the center lines on
the template are aligned with those on the counter.
1
©AMERICAN STANDARD INC. 2003
IMPORTANT: DIMENSIONS OF FIXTURES ARE NOMINAL AND MAY VARY WITHIN THE RANGE
OF TOLERANCESESTABLISHED BY A.N.S.I. AND C.S.A. STANDARDS.
SUPPORT CLIP LOCATIONS:
1054mm
(41-1/2)
838mm
(33)
SUPPORT
CLIPS
559mm
(22)
559mm
(22)
SUPPORT
CLIPS
MODEL 7183
MODEL 7145, 7163 STANDARD,7179
914mm
(36)
965mm
(38)
559mm
(22)
559mm
(22)
SUPPORT
CLIPS
MODEL 7196
SUPPORT
CLIPS
MODEL 7255
419mm
(16-1/2)
457mm
(18)
SUPPORT
CLIPS
457mm
(18)
SUPPORT
CLIPS
381mm
(15)
MODEL 7185
MODEL 7182.801/803
711mm
(28)
419mm
(16-1/2)
314mm
(12-3/8)
SUPPORT
CLIPS
559mm
(22)
MODEL 7182.000
787mm
(31)
SUPPORT
CLIPS
MODEL 7162
787mm
(31)
SUPPORT
CLIPS
SUPPORT
CLIPS
559mm
(22)
495mm
(19-1/2)
MODEL 7173
MODEL 7103
635mm
(25)
559mm
(22)
SUPPORT
CLIPS
MODEL 7172
790088-100 REV. H
2
NOTE
5
The following instructions are for
countertop mounted fittings only.
(Silhouette single bowl shown)
Apply a bead of sealant to
the edge of the sink. Hold the
sink against the under-side of
the countertop and rotate
the clips to hold the sink in
place. Snug the screws to
hold the sink. Attach all the
additional clips.
1
Countertop
Drill a clearance hole
inside the cutout line.
Template
Countertop
Cutout
Edge
Sealant
41mm
(1-5/8)
Support Clip
Cutout
template
2
Cut opening on cut line
of the template.
Note - Formica countertop installation only is
illustrated. Contact your
countertop distributor for
the best method of cutting other materials such
as marble, hard synthetics, etc.
6
Countertop
Countertop
Mount the faucet and
drain assembly following
the manufacturer's
instructions.
Template
Cutout
7
3
Countertop
Cut fitting holes in the
countertop and remove
the template.
Connect supply lines to
faucet finger tight, and
carefully bend to engage
with the supply stops.
Tighten connections to
faucet for secure seal.
Template
Cutout
CAUTION
Prior to beveling the countertop
edge, be sure that the fitting
escutcheon does not extend
onto the curved portion of the
countertop.
Proper fit
Fitting
Escutcheon
8
Countertop
Connect drain assembly
hand tight to check alignment. It may be necessary
to cut off part of the tailpiece
(area "A") or part of the
horizontal leg of the trap
(area "B").
4
B
Secure joint for watertight
assembly.
Attach at least four of the support clips to the
underside of the countertop as shown below. The
location of the clips should
be as shown in the sink
Cutout
Support
diagram. The wood screws
Clips
are for use in wood, plywood,
or particle board (drill
appropriate pilot hole).
The inserts supplied are
for use in marble or hard
synthetic material.
Trap
Trap
Single Bowl
Double Bowl
END
790088-100 REV. H
A
3
INSTALLATION B — FITTINGS MOUNTED DIRECTLY ON SINK
Refer to American Standard roughing-in information for specific dimensions for each model.
Below are the dimensions of each sink. Make sure this area is available to mount the sink.
Unfold the template and refer to the instructions below.
CAUTION
1. Minimum countertop thickness is 19mm (3/4) for wood and 12mm (1/2")
for marble and solid surface materials.
SINK CUTOUTS:
Locate and mark center lines of sink on countertop. Provide proper clearance under the
countertop for the faucet supply lines and the structural parts of the cabinet. Do not use
permanent markers to indicate the center lines.
Cut the inner portion from the supplied template and discard.
Attach the outer portion of the template to the countertop using masking tape. Be sure
that the center lines on the template are aligned with those on the counter.
IMPORTANT: DIMENSIONS OF FIXTURES ARE NOMINAL AND MAY VARY WITHIN THE RANGE
OF TOLERANCES ESTABLISHED BY A.N.S.I. AND C.S.A. STANDARDS.
SUPPORT CLIP LOCATIONS:
965mm
(38)
1054mm
(41-1/2)
838mm
(33)
SUPPORT
CLIPS
559mm
(22)
559mm
(22)
559mm
(22)
MODEL 7183
MODEL 7145, 7163 STANDARD,7179
457mm
(18)
SUPPORT
CLIPS
457mm
(18)
559mm
(22)
SUPPORT
CLIPS
SUPPORT
CLIPS
SUPPORT
CLIPS
381mm
(15)
711mm
(28)
559mm
(22)
MODEL 7182.000
SUPPORT
CLIPS
SUPPORT
CLIPS
559mm
(22)
MODEL 7173
4
914mm
(36)
559mm
(22)
SUPPORT
CLIPS
MODEL 7255
MODEL 7162
787mm
(31)
790088-100 REV. H
419mm
(16-1/2)
MODEL 7182.801/803
MODEL 7172
419mm
(16-1/2)
SUPPORT
CLIPS
MODEL 7196
635mm
(25)
MODEL 7185
314mm
(12-3/8)
SUPPORT
CLIPS
NOTE
4
The following instructions are for
mounting fittings directly to the sink.
(Silhouette single bowl shown)
1
Countertop
Drill a clearance hole
inside the cutout line.
Template
Apply a bead of sealant to
the edge of the sink. Hold the
sink against the under-side of
the countertop and rotate
the clips to hold the sink in
place. Snug the screws to
hold the sink. Attach all the
additional clips.
Countertop
Cutout
Edge
Sealant
41mm
(1-5/8)
Support Clip
Cutout
template
2
3
Cut opening on cut line
of the template.
Note - Formica countertop installation only is
illustrated. Contact your
countertop distributor for
the best method of cutting other materials such
as marble, hard synthetics, etc.
5
Template
Cutout
Support
Clips
6
Cutout
7
AMERICAST® LIMITED LIFETIME WARRANTY
If an American-Standard Americast® brand product is found to be defective in
materials or workmanship, after inspection by an authorized American-Standard
representative, American-Standard will repair or, at its option, exchange the product for a
similar model. This warranty extends for the lifetime of the product, so long as it remains
in use in its original place of installation, except that the warranty applies to a bathing
vessel’s slip-resisting surface only for the first year after the product’s initial installation.
This warranty applies only to the original purchaser and installation of these products.
This warranty does not apply to whirlpool components or to faucets, drains,
mounting rims, grab bars or other accessories. If manufactured or supplied by AmericanStandard, such whirlpool components and accessories are covered under separate
limited warranties.
This warranty does not apply to local building code compliance. Since local building
codes vary considerably, the purchaser of this product should check with a local building
or plumbing contractor to assure local code compliance before installation.
This warranty shall be void if the Americast® brand product has been moved from its
initial place of installation; if it has been subjected to faulty maintenance, abuse, misuse,
accident or other damage; if it was not installed in accordance with American-Standard’s
instructions; or if it was modified in a manner inconsistent with the product as shipped by
American-Standard.
American-Standard's option to repair or exchange the product under this warranty
does not cover any labor or other costs of removal or installation, nor shall AmericanStandard be responsible for any other incidental or consequential damages
attributable to a product defect or to the repair or exchange of a defective product,
all of which are expressly excluded from this warranty. (Some states or provinces do
not allow the exclusion or limitation of implied warranties, so this exclusion may not apply
to you.)
This warranty gives you specific legal rights. You may have other statutory rights that
vary from state to state or from province to province, in which case this warranty does not
affect such statutory rights.
For service under these warranties, it is suggested that a claim be made through the
contractor or dealer from or through whom the product was purchased, or that a service
request (including a description of the product model and of the defect) be sent to the
following address:
In the United States:
American Standard Inc.,
P.O. Box 6820
Piscataway, New Jersey 08855
Attention: Director of Consumer Affairs
For residents of the United States,
warranty information may also be
obtained by calling the following
toll free number: (800) 442-1902
790088-100 REV. H
Sink
Surface
Mount the faucet and
drain assembly following
the manufacturer's
instructions.
Countertop
Attach at least four of the
support clips to the underside
of the countertop as shown below.
The location of the clips should be
as shown in the sink diagram.
The wood screws are for use in
wood, plywood, or particle board
(drill appropriate pilot hole).The
inserts supplied are for use in
marble or hard synthetic material.
Countertop
Connect supply lines to
faucet finger tight, and
carefully bend to engage
with the supply stops.
Tighten connections to
faucet for secure seal.
Connect drain assembly
hand tight to check alignment. It may be necessary
to cut off part of the tailpiece
(area "A") or part of the
horizontal leg of the trap
(area "B").
A
B
Secure joint for watertight
assembly.
Trap
Trap
Single Bowl
Double Bowl
CARE AND CLEANING...
For all porcelain enamel surfaces, regular, gentle
care is best. The recommended way to preserve the
finish, avoid scratches, and clean porcelain enamel
fixtures is to rinse them with detergent and water.
Generally, any of the light duty liquid dishwashing
detergents, such as Palmolive or Dawn, work well.
In areas where the water is hard, a heavy duty liquid
laundry detergent such as liquid Tide will work better.
In Canada:
American-Standard,
2480 Stanfield Road
Mississauga, Ontario
Canada L4Y 1S2
Product names listed herein are trademarks of American Standard Inc.unless otherwise noted.
Palmolive® is a registered trademark of Colgate-Palmolive Co.
Tide® and Dawn® are registered trademarks of Procter and Gamble.
Toll Free: (800) 387-0369
5
©AMERICAN STANDARD INC. 2003


