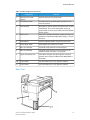
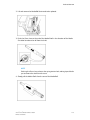
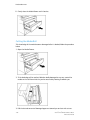
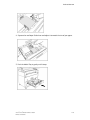
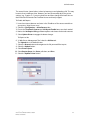
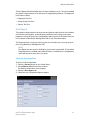
1
FreeFlow® Accxes® Print Server V15.0
August 2010
701P50912
®
®
Xerox 6279 Wide Format Solution
Printer User Guide
®
®
©2010 Xerox Corporation. All rights reserved. XEROX® and XEROX and Design , 6279
Solution, Accxes® and FreeFlow®, are trademarks of Xerox Corporation in the US and/or
other countries.
ENERGY STAR® and ENERGY STAR MARK® are registered United States trademarks.
Microsoft Windows® is a trademark of Microsoft Corporation in the United States and/or
other countries. Adobe®, PostScript®, PostScript®3™, and PostScript Logo® are
trademarks of Adobe Systems Incorporated in the US and/or other countries. AutoCAD®
is a registered trademark of Autodesk, Incorporated. Product status, build status, and/or
specifications are subject to change without notice.
Table of Contents
1 Product Overview.......................................................................................1-1
Printing.....................................................................................................................................1-1
Machine Components........................................................................................................1-2
Rear View...................................................................................................................1-3
Controller Front View.............................................................................................1-4
Controller Rear View..............................................................................................1-5
Controller Back Panel Connectors....................................................................1-5
Controller Cables and Connectors....................................................................1-6
User Interface (UI).................................................................................................1-6
Touch Screen.............................................................................................................1-7
Using the Touch Screen........................................................................................1-8
Touch Screen Features and Functions............................................................1-9
Keyboards...............................................................................................................1-10
Control Panel..........................................................................................................1-11
Language...................................................................................................1-12
Status and Error Messages.................................................................1-12
Powering the System On/Off........................................................................................1-13
Using the Power Saver Feature.......................................................................1-13
System Power On Procedure............................................................................1-14
System Power Off Procedure...........................................................................1-15
Shutdown from the User Interface...............................................................1-16
Shutdown from Web Printer Management Tool......................................1-16
Checking the Circuit Breaker.........................................................................................1-18
About Media and Originals ..........................................................................................1-19
Media Parameters................................................................................................1-19
Media Types and Weights ...............................................................................1-20
Roll Media Specifications..................................................................................1-20
Tray Media Sizes...................................................................................................1-21
Manual Feed-in Shelf (Bypass) Sizes............................................................1-21
Precautions When Handling Media..............................................................1-21
Storing Media........................................................................................................1-22
Loading Roll Media...........................................................................................................1-22
Cutting the Media Roll.......................................................................................1-26
Loading Cut Sheet Media..............................................................................................1-28
®
®
Xerox 6279 Wide Format Solution
Printer User Guide
i
Table of Contents
2 Job Information.........................................................................................2-1
All Tab.......................................................................................................................................2-1
Active Tab..................................................................................................................2-1
Held Tab......................................................................................................................2-2
Administrator Managed Queue........................................................................2-2
Job Reprint..............................................................................................................................2-3
Reprint Jobs with Edits.......................................................................................................2-3
Edit Job Settings...................................................................................................................2-4
Reduce/Enlarge........................................................................................................2-4
Media Types..............................................................................................................2-4
Media Source............................................................................................................2-4
Output Format.........................................................................................................2-4
Output Format (Print Jobs).................................................................................2-5
Output Format (Copy Jobs)................................................................................2-5
Collation...................................................................................................................................2-5
Finishing...................................................................................................................................2-6
Remove Selected Jobs........................................................................................................2-6
Job Reprint from Web Printer Management Tool ..................................................2-6
3 System Administration............................................................................3-1
System Administration Overview...................................................................................3-1
Entering System Administration Mode.......................................................................3-2
Login Options........................................................................................................................3-2
Exiting System Administration Mode..........................................................................3-4
General Administration Settings....................................................................................3-4
Setting the Date and Time.................................................................................3-5
Changing the Administrator Password..........................................................3-5
Job Accounting Overview....................................................................................3-6
Enabling Job Accounting Mode........................................................................3-6
Logging in as a Job Accounting User................................................3-7
Configure Job Reprint...........................................................................................3-8
Shutdown/Restart...................................................................................................3-8
Power Outage Job Status.......................................................................3-9
If Job Reprint is enabled:........................................................................3-9
Shutdown from Web Printer Management Tool...........................3-9
Immediate Image Overwrite..........................................................................3-10
Immediate Image Overwrite Algorithm.......................................3-11
Set Thumbnail Creation....................................................................................3-11
Administrator Managed Queue.....................................................................3-12
ii
®
®
Xerox 6279 Wide Format Solution
Printer User Guide
Table of Contents
Control Panel Settings.....................................................................................................3-12
Sound Settings......................................................................................................3-13
Timers..........................................................................................................3-14
Low Power.....................................................................................3-14
Sleep Timeout...............................................................3-16
Features Timeout.........................................................3-18
File Deletion Timeout.................................................3-19
Print Interrupt Timeout.............................................3-19
Calibrate Touch Screen..............................................3-20
Network Setup............................................................................3-20
Setting up a Static IP Address................................3-21
Setting up IP Gateway...............................................3-22
Setting up Netmask....................................................3-23
Setting up DHCP..........................................................3-23
4 Machine Information .............................................................................4-1
Overview of Machine Information................................................................................4-1
Media Status and Setup .....................................................................................4-2
Accessing Media Settings....................................................................................4-2
Print Reports Tab..................................................................................................................4-4
Print Reports..............................................................................................................4-5
From the User Interface.........................................................................4-5
From Web Printer Management Tool................................................4-6
Configuration Test Sample Report (Printer).................................................4-7
Setup Test Print Sample Report (Printer Settings).....................................4-8
Pen Palette Sample Report.................................................................................4-9
PostScript Test Sample Report........................................................................4-10
Machine Configuration Tab..........................................................................................4-10
Accessing Machine Configuration.................................................................4-11
Administration Tab...........................................................................................................4-12
Accessing Administration.................................................................................4-12
5 Maintenance...............................................................................................5-1
Replacing Consumables.....................................................................................................5-1
Loading Toner........................................................................................................................5-2
Replacing the Waste Toner Bottle.................................................................................5-5
Cleaning the Machine........................................................................................................5-8
6 Problem Solving.........................................................................................6-1
General Problems.................................................................................................................6-1
®
®
Xerox 6279 Wide Format Solution
Printer User Guide
iii
Table of Contents
Problems During Printing..................................................................................................6-2
Error Messages......................................................................................................................6-6
Paper Jams..............................................................................................................................6-6
Paper Jam Display..................................................................................................6-7
Paper Jams in Drawer 1 or Drawer 2...............................................................6-7
Paper Jams in Tray 3 or Tray 4........................................................................6-11
Paper Jams in Manual Feed-in Shelf (Bypass)..........................................6-13
Paper Jams in the Upper Unit......................................................................................6-15
Paper Jams in the Fuser.....................................................................................6-18
7 Appendix.......................................................................................................7-1
Space, Electrical, and Environmental Requirements..............................................7-1
Specifications........................................................................................................................7-3
Options..................................................................................................................................7-10
Client Tools...........................................................................................................................7-10
Cautions and Limitations...............................................................................................7-11
Notes and Restrictions on Use of the Machine.......................................7-11
iv
®
®
Xerox 6279 Wide Format Solution
Printer User Guide
Product Overview
1
The 6279 Wide Format Printer processes print jobs that it receives from a client
workstation. The 6279 Wide Format Printer enables all types of image data to be printed
in the supported formats, including standard and non-standard sized documents. It also
allows the user to view the status of print jobs, cancel print jobs, and change print job
priority.
This chapter describes the overall operation of the 6279 Wide Format Printer and the
functions of its major components. You will see the following information:
• Machine Components
• Language
• Powering the System On/Off
• Using the Power Saver Feature
• Checking the Circuit Breaker
• About Media and Originals
• Loading Roll Media
• Loading Cut Sheet Media
Printing
Instructions for printing are located in the appropriate documentation for the tool that
is being used to send the print job to the printer, such as Windows Driver, Web Printer
Management tool, Accxes Client Tools, etc. Refer to the documentation for the
appropriate tool.
®
®
Xerox 6279 Wide Format Solution
Printer User Guide
1-1
Product Overview
Machine Components
This section describes the main components of the Xerox 6279 Wide Format Solution
with the FreeFlow Accxes Print Server.
See the table on the following page for details describing the numbered call-out items
on the drawings above.
1-2
®
®
Xerox 6279 Wide Format Solution
Printer User Guide
Product Overview
Table 1: Machine Components (Front View)
No.
Component
Function
1
Manual Feed-in Shelf
(Bypass)
Used for printing on cut sheet media.
2
Size Indicator Label
The label used as a guide for aligning originals in the
center for printing.
3
User Interface
Also known as the UI, contains the Touch Screen and the
Control Panel. This is where the operator views and
programs jobs and sets up the features of the 6279 Wide
Format System.
4
Touch screen
Used to set up media information, display messages and
procedures, and provide troubleshooting help, e.g., for jam
clearance.
5
Control Panel
Contains selection buttons and print services access.
6
Printer Power Switch
Used to power the machine on and off.
7
Roll 1 and 2 Drawer
A dual-roll media drawer that feeds roll paper.
8
Roll 3 and 4 Drawer
A dual-roll media drawer that feeds roll paper, if this
additional drawer is ordered as an upgrade.
9
Upper Unit Release Lever
Lift to open the Upper Unit of the printer and access
jammed media or open the Waste Toner Bottle Door or
Fuser Door.
10
Tray 3 Drawer
Cut sheet media tray, if tray upgrade is ordered.
11
Tray 4 Drawer
Cut sheet media tray, if tray upgrade is ordered.
Rear View
®
®
Xerox 6279 Wide Format Solution
Printer User Guide
1-3
Product Overview
Table 2: Machine Components (Rear View)
No.
Component
Function
1
Scanner
The scanner can be ordered as an upgrade. See
the Xerox 6279 Wide Format Copy/Scan User
Guide for scan and copy information.
2
Print Ejection Port
Where your output (print) exits the printer.
3
Circuit Breaker Switch
Used to supply main power to the printer and
remove power during a surge, for safety
purposes.
4
Circuit Breaker Test Button
Used to check that the Circuit Breaker is
functional.
5
Waste Toner Bottle Door
Open this door to access the Waste Toner Bottle
and the Paper Heater Switch.
WARNING
Never touch a labeled area with hot or sharp parts. You may receive a burn or incur
other injuries.
Controller Front View
The Accxes Controller communicates with the Print Engine/machine via the Command
Status Interface. The Command Status Interface software provides status messages
about the operation of the print engine.
1-4
®
®
Xerox 6279 Wide Format Solution
Printer User Guide
Product Overview
Controller Rear View
This design may vary depending on your model.
Table 3: Controller Rear View
No.
Description
1
Card Slide (location may vary depending on Controller model)
2
Cover Release Latch
3
Power Connector
4
Padlock Ring
Controller Back Panel Connectors
This design may vary depending on your model.
®
®
Xerox 6279 Wide Format Solution
Printer User Guide
1-5
Product Overview
Table 4: Back Panel Connectors
No.
Description
1
Parallel Connector (not used)
2
Serial Connector
3
Link Integrity Light
4
Network Adapter Connector
5
Network Activity Light
6
Line-out Connector
(Audio)
7
Line-in/Microphone Connector (not used)
8
USB 2.0 Connectors (6)
9
VGA Video Connector
10
eSATA Connector (not used)
11
DisplayPort Connector (not used)
NOTE
On a system that is working normally and has a good network connection, the Link
Integrity Light illuminates continuously; the Network Activity Light blinks in response
to network activity.
Controller Cables and Connectors
The six communication pathway cables (called out as item 8 on the Back Panel Connector)
are described below.
• USB - Scanner to Controller - provides status and image information.
• USB - Printer to Controller - provides status and image information.
• USB - Power Module to Controller - provides status of the front Power Switch and
enables power to the Printer.
• USB - User Interface to the Controller.
• Audio Cable - UI to Controller for speaker tones, such as key beeps and alert tones.
• Video Cable - UI to Controller for displaying monitor screen contents.
Both Video Data and Command Status information is transmitted via the same USB
Interface. The Accxes Controller downloads Printer software/firmware through the
command status interface on the USB Port.
User Interface (UI)
The Printer User Interface and Web Printer Management Tool, accessed with a Web
Browser, are the two sources that enable users to set up and perform print service
operations.
1-6
®
®
Xerox 6279 Wide Format Solution
Printer User Guide
Product Overview
The Printer User Interface is used to perform a variety of tasks using the Touch Screen
and Control Panel Buttons.
Table 5: User Interface Components
Component
Function
Touch Screen
Displays messages and on-screen buttons for selecting
features. Touch the screen to select features and options.
USB Ports
Connect accessories like keyboards, mouse and USB storage
devices to the Accxes Controller.
Control Panel Buttons
Contains the Services, Machine Info, Log In/Out, Language,
Power Saver, Clear, Stop, and Start buttons.
Touch Screen
Some capabilities of the User Interface are:
• Media setup for roll media and the Manual Feed-in Shelf
• System Parameter Setup
• Printing of test patterns to verify Printer operation
• Job log and error log management
• Display of billing meter information
The Touch Screen displays messages and contains the selection and feature buttons for
setting up copy and scan jobs. Touch the screen to select a feature or option.
NOTE
The features that display may vary, depending on the model, the options installed,
and the machine settings.
®
®
Xerox 6279 Wide Format Solution
Printer User Guide
1-7
Product Overview
Using the Touch Screen
Features on the Services Menu
The Services Menu is the default page for the User Interface. It appears after the machine
is powered on or exits the Power Saver mode, and when the machine exits the System
Administration mode.
The screen below displays the copy/scan features. There is a scanner connected.
The following screen displays the printer only features. There is no scanner connected.
1-8
®
®
Xerox 6279 Wide Format Solution
Printer User Guide
Product Overview
Table 6: Services Menu
Service
Function
Machine Info
Where system settings and configurations are
enabled and changed.
Job Information
Jobs are listed with status. Users can reprint
jobs from the queue list.
Print from Device
Scan to and print from a removable media
device (USB).
Copy
Displays the Basic Copy tab, Image Quality tab,
Advanced Settings tab and Recall tab.
Scan-to-Mailbox
Allows users to store scanned jobs in a mailbox
for later retrieval and printing.
Scan-to-FTP
Allows users to send scan jobs to a networked
file server destination.
Scan-to-Remote Printer
Allows users to send scan jobs to a remote
printer.
Touch Screen Features and Functions
®
®
Xerox 6279 Wide Format Solution
Printer User Guide
1-9
Product Overview
Table 7: Touch Screen
Touch Screen Component
Function
Message Area
Displays status information, user instructions and login
access.
Feature Tabs
Touch tabs to select and display the Menu and
additional features.
Copy Quantity
Enter the number of copies using the numeric keypad.
The number of copies can be set from 1 to 999. Press
the Control Panel Clear button to clear an incorrect
entry.
Selection Buttons
Touch to select an option. When selected, the button
highlights.
Scroll Buttons
Use the arrow buttons to scroll to and select a value.
Keyboards
Entering Text
Screens may display that require you to enter text. This section of the keyboard is used
to enter text.
Table 8: Keyboard layout
Component
Function
Entry Area
Displays the characters entered on the numeric
keypad.
Cursor Buttons
Use the cursor buttons to move to and insert text.
Table 9: Keyboard procedures
Function
Procedure
Entering alphabetic characters and
numbers
Touch the desired characters. Select Shift to switch
between lowercase and uppercase characters.
Deleting a character
Select Backspace to delete one character at a time.
Canceling or saving your input
Select Cancel or Save, as appropriate.
NOTE
You may get an Invalid Entry error message if you select a character that is
unacceptable in the feature. For instance, when naming a mailbox, you may not use
an apostrophe.
1-10
®
®
Xerox 6279 Wide Format Solution
Printer User Guide
Product Overview
Control Panel
Table 10: Control Panel
Num.
Button Name
Function
1
Services
Displays the Services Menu, which has a button for
Machine Information, Job Information, Copying, Scan to
Mailbox, Scan to FTP and Scan to Remote Printer. These
are the primary services.
2
Machine Information
Displays the machine status, media status, billing meter
readings and serial number, system description
(Configuration) and recent faults. Also enables the printing
of configuration and settings information.
3
Login/out
Enables System Administrator and Job Accounting Login
access. Administrator access requires a secured password.
Job Accounting access requires an account name and User
ID. Guest access does not require a login.
4
Language
Screen allows users to change text to an alternative
language, select inches or millimeters for Units and select
an Imperial or International Date Format.
5
Power Saver
The <Power Saver> button illuminates when the system
is in the Low Power or Sleep modes.
6
Clear
Clears incorrect values entered when using the numeric
keypad, and is used to reset scan defaults in any of the
scan modes.
®
®
Xerox 6279 Wide Format Solution
Printer User Guide
1-11
Product Overview
Num.
Button Name
Function
7
Stop
Used to Stop the scanning of an original.
8
Start
Used to Start the scanning of a copy or scan job.
Language
The Language feature enables you to select the default language, units of measurement,
and date format that displays on the Touch Screen, web interface, controller-generated
test prints, banner sheets, configuration pages, and so forth.
1. Press the Language button on the Control Panel.
2. Select the radio button of the desired language.
3. Select the Inches or the Millimeters radio button to set up the default units of
measurement.
4. Select the appropriate radio button from the Date Format choices.
• Imperial: The date displays in the format MM/DD/YYYY.
• International: The date displays in the format DD/MM/YYYY.
5. Select Save to close the Language screen and return to the Services menu.
Status and Error Messages
Machine status messages display on the Touch Screen. For example, when the system
is printing, the Print Status message displays.
In addition, error messages display when a problem occurs. Error messages displayed
will vary depending on your particular situation and the error involved. The error screen
will provide a diagram and a textual description of the problem and any directions to
follow. See the example below.
1-12
®
®
Xerox 6279 Wide Format Solution
Printer User Guide
Product Overview
Refer to Chapter 7, Problem Solving, to learn more about errors and problem solving
information.
Powering the System On/Off
The Printer and Controller are each equipped with a Power Switch. The Circuit Breaker
Switch must be in the ON (up) position to switch the printer power on and off.
Using the Power Saver Feature
The Power Saver feature automatically reduces the power consumption when no print
data is received within a preset period. The Power Saver feature has two modes, Low
Power Mode and Sleep Mode.
The machine enters the Low Power Mode after a preset period elapses. The machine
transitions to the Sleep Mode from the Low Power Mode if the machine remains idle for
an additional period.
NOTE
Refer to the Timers section to learn how to customize the Power Saver mode settings.
Low Power Mode
In this mode, the power to the control panel and the fuser is reduced. As the machine
enters the Low Power Mode, the Touch Screen shuts down and the Power Saver button
on the control panel illuminates.
Sleep Mode
In this mode, the power is reduced more than in the Low Power Mode. During the
transition from the Low Power mode to the Sleep mode, the Touch Screen remains dark
and the Power Saver button remains illuminated.
®
®
Xerox 6279 Wide Format Solution
Printer User Guide
1-13
Product Overview
Entering the Power Saver Mode
The Power Saver Mode may be entered either automatically or manually.
Automatic Method
The machine enters the Low Power Mode after a preset period elapses. The machine
enters the Sleep Mode from the Low Power Mode if the machine remains idle for an
additional, preset period.
Manual Method
Press the Power Saver button on the Control Panel. The button illuminates, the machine
enters the Low Power Mode and the Touch Screen backlight extinguishes.
Exiting the Power Saver Mode
The Power Saver mode may be exited either manually or automatically.
Manual Method
With the machine in the Power Saver mode, press the illuminated Power Saver button.
The button’s indicator light extinguishes, the Touch Screen displays the message Warming
Up, and the machine begins its warm up cycle.
Automatic Method
The machine exits the Power Saver mode when it detects a print job in the active queue.
NOTE
Refer to the System Administration chapter to learn how to customize the Power
Saver mode settings. This is a System Administrator only setting.
System Power On Procedure
The procedure below describes the process for powering up the system from a cold start,
that is, it assumes that both the Printer and Controller are powered down completely.
1. Move the printer Circuit Breaker switch to the On position (up).
1-14
®
®
Xerox 6279 Wide Format Solution
Printer User Guide
Product Overview
2. Move the printer Power switch to the On position (up).
3. Press the Power button on the front of the Controller to turn it on.
The Power button indicator will illuminate. The Control Panel will display the message
“Printer Warming Up”. The machine will be print-ready in about 3 minutes.
System Power Off Procedure
CAUTION
Powering down the system incorrectly may result in data corruption and a service
call.
The system shutdown selection allows the Controller to power down correctly. System
Shutdown is performed through the Web Printer Management Tool or through the
System Administration screen. In some environments, only authorized persons will be
allowed to power down the system, therefore requiring the System Administrator
password.
®
®
Xerox 6279 Wide Format Solution
Printer User Guide
1-15
Product Overview
Shutdown from the User Interface
NOTE
Many of the features within the Administration tab require a password for access.
See your System Administrator for the password prior to getting started unless
the Administrator mode is already active.
NOTE
System Shutdown and Restart is used to reboot the system. This option will
not completely shut down the controller
1. Select Machine Info from either the Services menu, or by pressing the Machine Info
button located on the Control Panel.
2. Select the Administration tab.
3. Select General Administration.
4. If the Enter SA Password screen displays, enter the System Administrator password,
then press Enter.
5. Select Shutdown/Restart. . .from the General Administration screen.
6. Select System Shutdown.
The Controller will completely shut down within 30 seconds from the moment the Printer
shuts down. The Controller’s Power Button Indicator Light will extinguish when the
Controller shuts down.
Shutdown from Web Printer Management Tool
1. Open the Web Printer Management Tool at your workstation.
1-16
®
®
Xerox 6279 Wide Format Solution
Printer User Guide
Product Overview
2. Select Utilities > Shutdown > Shutdown.
NOTE
Do not select Restart Controller. It is used to reboot the system when jobs in
the print queue fail to process correctly. Rather, wait for the system to shut down.
3. Move the printer Power Switch to the Off (down) position.
®
®
Xerox 6279 Wide Format Solution
Printer User Guide
1-17
Product Overview
4. Move the printer Circuit Breaker switch to the Off (down) position.
Checking the Circuit Breaker
The Circuit Breaker opens automatically and removes input power from the machine if
a short circuit or current condition occurs.
When the Circuit Breaker Switch is in the up position, input power is supplied to the
machine. If the machine will not be used for an extended amount of time, the printer
and controller may be powered down.
Check the Circuit Breaker once a month for correct operation. If you notice any unusual
conditions, contact your Xerox Customer Support Center.
The Procedure for checking the Circuit Breaker is as follows:
1. Perform steps 1 and 2 of the System Power Off Procedure.
2. Press the Test button while the Circuit Breaker switch is in the on (up) position. If the
Circuit Breaker turns off, it is operating correctly.
3. Reset the printer Circuit Breaker switch and perform the System Power On Procedure.
1-18
®
®
Xerox 6279 Wide Format Solution
Printer User Guide
Product Overview
About Media and Originals
This section describes the kinds of media which are available for this machine, as well
as the appropriate media handling, loading and storage procedures.
The use of inappropriate media may result in media jams, reduced print quality,
malfunctions and other problems. To make the most effective use of the machine, we
suggest that you use only the media recommended by Xerox.
There are several configurations of the 6279 Wide Format Printer for media input. The
standard is a one Drawer machine with two rolls. You have the option to upgrade to add
a second drawer with two rolls or two cut-sheet media trays.
NOTE
Media may be ordered from Xerox at www.xerox.com in the US. From the home
page, select Supplies > Paper and Media Type > For Wide Format Products.
NOTE
A Load or Change Media Type selection will display on the UI, if the Accxes Controller
detects that the required media is not loaded in the machine when it receives a print
job.
Media Parameters
The media parameters (size series, type, weight) must be set up when new media is
loaded or when the size and type of the media is changed. This information enables the
machine’s Accxes Controller to optimize printing and fusing based on the media which
is selected for a print job.
Refer to the Accxes Client Tools “Overview and Quick Start” sections of the HELP menu
for details on sending jobs to your printer.
Refer to the Specifications chapter for many more details on media specifications.
®
®
Xerox 6279 Wide Format Solution
Printer User Guide
1-19
Product Overview
Media Types and Weights
Table 11: Media Types and Weights
Media Source Type
EO Weight
NACO Weight
Roll
Bond
Tracing Paper
Film
T-Bond
60-110 gsm
90-112 gsm
75- 100 µm
18-20 lb
90-112 gsm
4 mil
18 lb
Tray
Bond
60-110 gsm
18-20 lb
Manual
Feed-in Shelf
Bond
Tracing Paper
Film
T-Bond
60-110 gsm
90-112 gsm
75-100 µm
18-20 lb
90-112 gsm
4 mil
18 lb
NOTE
G.S.M. (g/m2) is a measure of a substance/weight of a paper expressed in grams
per square meter, which does not depend on the number of sheets in the ream.
Roll Media Specifications
Table 12: Roll Media Specifications
Size Series
Roll Media Sizes
ANSI
E (34”), D (22”), C (17”), B (11”)
ARCH 1
E (36”), D (24”), C (18”), B (12”)
ARCH 2
30”, 24”, 15”, 12
ISO A
A3 (297mm wide)
A2 (420mm wide)
A1 (594mm wide)
A0 (841mm wide)
ISO B
B1, B2, B3
JIS B
B1, B2, B3
Special A 1
A3, A2 (440mm), A1 (625mm), A0 (880mm)
Special A 2
A3, A2+ (435mm), A1+ (620mm), A0+ (860mm)
1-20
®
®
Xerox 6279 Wide Format Solution
Printer User Guide
Product Overview
Tray Media Sizes
Table 13: Tray Media Sizes
Size Series
Media Tray Sizes
ANSI
Landscape/Portrait (8.5”x11”)
Landscape/Portrait (11”x17”)
Landscape (17”x22”)
ARCH
Landscape/Portrait (9”x12”)
Landscape/Portrait (12”x18”)
Landscape (18”x24”)
ISO A (JIS)
A4/Landscape/Portrait (210X297mm)
A3/Landscape/Portrait (297x420mm)
A2/Landscape (420x594mm)
ISO B
B3/Landscape/Portrait
B4/Landscape/Portrait
JIS B
B3/Landscape/Portrait
B4/Landscape/Portrait
Manual Feed-in Shelf (Bypass) Sizes
Table 14: Manual Feed-In Shelf (Bypass) Sizes
Size Series
Manual Feed Original Sizes
ANSI
A (8.5”), B (11”), C (17”), D (22”), E (34”)
ARCH 1
A (9”), B (12”), C (18”), D (24”), E (36”)
ARCH 2
A (9”), B (12”), 15”, D (24”), 30”
ISO
B1, B2, B3, B4
JIS
B1, B2, B3, B4
JIS (ISO)
A0, A1, A2, A3, A4
SPECIAL A 1
A0 (880mm), A1 (625mm), A2 (440mm), A3, A4
SPECIAL A 2
A0+ (860mm), A1+ (620mm), A2+ (435mm), A3+
Precautions When Handling Media
Observe the following precautions when handling media:
• Use caution with media that has been folded, wrinkled, torn, or had holes punched
in them. These may result in document jams and tearing.
• Make sure your media is not damp.
TIP
Jams may occur if the media being used differs from the current media setting.
Always select the correct media size, type and thickness to achieve the best results.
®
®
Xerox 6279 Wide Format Solution
Printer User Guide
1-21
Product Overview
Storing Media
The optimum environment in which to store paper media is a humidity of 40 to 45%.
Keep the following in mind when storing paper media:
• Moisture is not good for media. For storage, wrap the media in wrapping paper and
store it in a comparatively dry place. Tracing paper, especially, should be put in a
plastic or moisture-proof bag that contains desiccant.
• When the machine is not used for a long period of time, remove the media and store
it appropriately.
• The printer has a paper heater. This goes on when the system detects humidity. The
switch is located next to the waste toner bottle on the right hand side of the machine.
• Store the media on a flat surface to prevent curl.
Loading Roll Media
A Load or Change Media Type selection will display on the UI, if the Accxes Controller
detects that the required media is not loaded in the machine when it receives a print
job.
When changing the Media Type, Size or Weight, make sure you change the media
settings before printing jobs. This section also shows how to use the Media Advance
button to advance and cut the roll media.
For information about the set up procedure, refer to the Media Status and Setup section
in Chapter 4, Machine Information.
1. Gently pull out the Media Drawer 1 for Rolls 1 and 2 media.
Or pull out Media Drawer 2 (optional) if it is present on your machine and requires
media.
1-22
®
®
Xerox 6279 Wide Format Solution
Printer User Guide
Product Overview
2. Lift and remove the Media Roll that needs to be replaced.
3. Pinch the Green Lever at the end of the Media Shaft in the direction of the Media
Size Label to release the roll from the shaft.
NOTE
Pinching the Green Lever releases the spring tension lock, making it possible for
you to remove the shaft from the core.
4. Slowly pull the Media Shaft from the core of the Media Roll.
®
®
Xerox 6279 Wide Format Solution
Printer User Guide
1-23
Product Overview
5. Pinch the Green Lever again to insert the new Media Shaft into a new media roll. Be
sure the roll ends are aligned according to the Media Size Label.
6. Remove the manufacturer’s piece of tape holding the edge of the roll from unraveling.
NOTE
If you see any remaining glue when removing the tape from a new roll, wipe it
clean. This can cause misfeeds.
If the Media Roll is damaged, trim the damaged edge with scissors before proceeding
to the next step.
WARNING
Be careful not to pinch your fingers when you set the roll media in the Media
Drawer.
7. Return the Media Roll into the Shaft Guide with the paper’s lead edge feeding under
the roll and towards you.
1-24
®
®
Xerox 6279 Wide Format Solution
Printer User Guide
Product Overview
8. Rotate the Media Roll until the lead edge of the paper is gripped in the Feed Roll
Area. The roll will feed and stop automatically.
9. Press the Media Advance button corresponding to the Media Roll and release it to
cut the lead edge and position the media into the feeder.
NOTE
If you wish to cut a longer length of the roll, press and hold the Media Advance
button.
10. Remove the trimmed piece of paper from the Cutter Area.
®
®
Xerox 6279 Wide Format Solution
Printer User Guide
1-25
Product Overview
11. Gently close the Media Drawer until it latches.
Cutting the Media Roll
If the lead edge of the media becomes damaged after it is loaded, follow the procedure
below.
1. Open the Media Drawer.
2. If the lead edge of the media is folded or badly damaged in any way, rewind the
media on the roll from which the jam has occurred by rotating it towards you.
3. Pull the desired amount of damaged paper out toward you and cut with scissors.
1-26
®
®
Xerox 6279 Wide Format Solution
Printer User Guide
Product Overview
4. Feed the paper’s lead edge until it is gripped in the Feed Roll Area. The roll will feed
and stop automatically.
5. Press the Media Advance button corresponding to the media roll and release it to
cut the lead edge and position the media into the feeder.
NOTE
If you wish to cut a longer length of the roll, press and hold the Media Advance
button.
6. Remove the trimmed piece of paper from the Cutter Area.
®
®
Xerox 6279 Wide Format Solution
Printer User Guide
1-27
Product Overview
7. Gently close the Media Drawer until it latches.
Loading Cut Sheet Media
1. Slowly pull out the Media Tray towards you until it stops.
2. Load the paper in the tray. Do not fill above the Max Fill Line on the back of the tray.
3. Squeeze the left and right paper guide levers and adjust the guides to match the size
of your paper.
1-28
®
®
Xerox 6279 Wide Format Solution
Printer User Guide
Product Overview
4. Squeeze the rear Paper Guide Lever and adjust it to match the size of your paper.
5. Push the Media Tray in gently until it stops.
®
®
Xerox 6279 Wide Format Solution
Printer User Guide
1-29
Product Overview
NOTE
When printing on cut sheet media, you may load the media in Media Trays 3 or
4 or in the Manual Feed-in Shelf (Bypass).
TIP
Remember that any time you change the size of the paper in a Media Tray or
Drawer, you have to update the Media Source located at
Machine Info > Media Status and Setup on the Touch Screen. Refer to the
Chapter 4, Machine Information Media Status and Setup section.
1-30
®
®
Xerox 6279 Wide Format Solution
Printer User Guide
Job Information
2
All print and copy jobs are placed in the Job Information queue on the User Interface.
Print jobs are jobs sent to the Xerox Wide Format System from either a remote client
workstation using Web Printer Management Tool or a network Printer Driver.
All Tab
The contents of this tab is a list of all jobs in their various stages of completion. Jobs are
displayed whether sent via Web Printer Management Tool or scanned at the printer.
Active Tab
Jobs that are in progress are shown in the Active queue.
®
®
Xerox 6279 Wide Format Solution
Printer User Guide
2-1
Job Information
Jobs in the Active queue can be placed on hold by selecting them and choosing
Hold Selected.
Jobs can be cancelled from this queue and will remain only on the All tab. This is done
by selecting the job and choosing Cancel Selected. More information can be seen for
any given job by selecting Details.
NOTE
If Immediate Image Overwrite is enabled, there is no Hold function available.
Held Tab
The Hold Queue feature can be used to manage your job workflow by:
• scheduling jobs for printing at a specific time (YYYYMMDDHHDD)
• stopping active jobs to prioritize another
• preventing down-time if a job requires an install of specific media
• retains print jobs that have been fully submitted but not yet finished printing
• retains incomplete copy sets in queue should there be an interruption while in process
The Hold queue feature enables users to release jobs and place them in the Active queue.
The job will then print automatically.
Jobs may be submitted to the printer, viewed and released using either Web Printer
Management Tool or the User Interface. Jobs can also be placed on hold from the same
locations.
Jobs in the Hold Queue consume memory and disk space in Accxes. Therefore, jobs in
the hold queue are intended to be temporarily stored there. This queue needs to be
monitored and managed as jobs accumulate. Jobs should be either cancelled or printed
to free up space.
Administrator Managed Queue
This feature is most often used in a centralized print environment where a System
Administrator sets a secured password for access to manage jobs.
When the Administrator Managed Queue is enabled, all incoming print jobs are placed
on hold.
The ability to release, hold and cancel jobs with the administrator manager queue
enabled is restricted to the System Administrator if there is a secure password set.
Without a secure password set, any user can perform these operations.
Placing all jobs on hold:
1. Select Machine Info from the Services screen.
2. Select General Administration.
3. Select Enable/Disable Administration-Managed Queue.
4. Select Enable.
2-2
®
®
Xerox 6279 Wide Format Solution
Printer User Guide
Job Information
5. Select Save.
6. Submit the print job.
7. Locate the job in the Hold queue from Job Information on the UI or Print Queue on
Web Printer Management Tool.
Job Reprint
Completed copy and print jobs are available for reprint if the Administrator has enabled
the Job Reprint feature. The Job Reprint feature is Disabled as the default.The
enable/disable option is controlled in Machine Info > Administration > General
Administration > Configure Job Reprint.
Reprinting jobs is also available on the Web Printer Management Tool.
If the System Administrator disables Job Reprint, the Reprint tab is no longer available
or present on the Job Information screen.
Whether you are submitting a reprint job with or without edits, it is moved from the
Reprint queue to the Active queue.
Reprint Jobs with Edits
Perform the following to Reprint a Job with Edits:
1. Select Job Information from the Services menu.
2. Select the Reprint tab.
3. Select a single job.
4. Press the Edit Selected button.
The Edit Job Settings screen displays.
5. Select the Override checkbox.
This enables changes from the original job to the job you are preparing to reprint.
6. Edit the job settings as desired. (Details on features are below.)
7. Press the Print button.
NOTE
The edited job moves from the Job Information queue to the Active Queue.
Once it is printed, it returns to the list in the Job Information Reprint Queue.
®
®
Xerox 6279 Wide Format Solution
Printer User Guide
2-3
Job Information
Edit Job Settings
Reduce/Enlarge
The Reduction/Enlarge feature has variable options for scaling the images being copied.
The feature provides the ability to customize the preset reduction/enlargement settings
beyond the basics discussed here. The factory default setting is 100%.
The reduction and enlargement features available are:
• Scale Factor: The Scale Factor from 25% to 400% is set by pressing the increase
and decrease arrows in single increments. The numbers pause at standard reduction
and enlargement settings. You can quickly change the percentage by entering in the
numbers using the numeric entry keypad. Touch the percent field to get a keypad.
Here you type in the number desired.
• Presets and More...: The Presets and More... feature displays a Scale Factor screen
to allow Variable or Preset Percentages. You can customize one percentage value as
desired.
• Auto: The ratio is automatically set up based on the original document size and the
installed media size. The document is copied to fit the currently selected media.
• Media Types: Bond, Vellum and Film
Media Types
• Bond
• Vellum
• Film
Media Source
The Media Source selections enable you to select from where the media for the copy
job is fed. The factory default setting is Auto Select. The definition describing each
selection under Media Source is the media currently loaded.
Output Format
Print jobs default to the best fit for the selected media size.
• Synchronized: The Media Roll is cut the same size as the original.
• Preset:The Media Roll is cut to a standard size that you select. The standard size
options displays when you select the Preset option.
• Manual:The Media Roll is cut to a customized size that you specify (x and y
coordinates). A screen with data entry fields displays when you select Manual.
2-4
®
®
Xerox 6279 Wide Format Solution
Printer User Guide
Job Information
Output Format (Print Jobs)
This feature lists Output Format preset sizes for print jobs.
Output Format (Copy Jobs)
1. Choose from the list of Output Formats.
2. Select the Save button.
3. Ensure that the output format media size is loaded into the drawer.
NOTE
If the output media size selected is not present in the media drawer, a media
mismatch error displays.
The Copy Option feature Machine Information > Administration > Copy Options
provides the ability to Configure Custom Output Format settings beyond the basic for
jobs often run with special output needs. Refer to System Administration, Copy Options,
Configure Custom Output Formats, for more details.
Collation
Collated copies can be produced for jobs that involve multiple originals. When forward
or reverse collation is selected, the machine prints sheets sorted into sets that are
arranged in page order. The originals in the set also can be mixed, that is, of different
types (text, photo, etc.). A maximum of 256 pages may be scanned in each collation
job.
The factory default setting for Collation is None.
NOTE
For uncollated copies, the machine prints the specified quantity of the first page,
then the specified quantity of the next and so on. For collated output, the
machine sorts the copies into sets.
1. Select Copy on the Services menu.
The Copy screen displays.
2. Select from the collation options:
• Reverse Collation: Page (n) is on the top of the output stack.
• Forward Collation: Page 1 is on the top of the output stack
3. Place the originals in 1-(n) order with the image face down.
4. Load the (n) document face down into the Scanner Feed-in Shelf.
5. Continue in this order until your job is complete.
When collation is desired and selected, the Building Sets Insert Documents message
appears on the top right of the screen.
®
®
Xerox 6279 Wide Format Solution
Printer User Guide
2-5
Job Information
Finishing
If a Finisher is attached to the machine:
1. Select the Finishing Override checkbox.
2. Select the Bypass button to override the finishing settings.
The Finishing screen displays.
3. Choose a Select Folder Program from those listed.
4. Select Bin choices.
5. Select the Title Block Location. This selection tells the machine how to fold the
document with the title block showing as indicated. Title blocks are found on
engineering drawings.
Remove Selected Jobs
This feature eliminates the job altogether from the Reprint queue. It is permanently
deleted. You must have System Administrator privileges to perform this task. If you are
not logged in as a System Administrator, the Remove Selected button is not present.
Perform the following:
1. Select Job Information from the Services menu.
2. Select the Reprint tab.
3. Select the job(s) you wish to delete.
4. Select the Remove Selected button.
NOTE
Jobs removed from the list located on the Reprint tab still appear on the
Job Information > All tab which is a job queue list. The removed jobs, however,
are no longer reprintable.
Job Reprint from Web Printer
Management Tool
To access the Web Printer Management Tool, go to your internet browser and enter the
IP address of the access controller or your designated printer.
There are multiple ways to bring jobs through the Web Printer Management Tool to
your remote printer. The first and primary way is done by connecting from a client
workstation or a printer driver. Refer to the Xerox FreeFlow Accxes V15.0 Drivers and
Client Tools Software Install Guide for detailed instructions.
2-6
®
®
Xerox 6279 Wide Format Solution
Printer User Guide
Job Information
The second choice, shown below, is done by browsing to and uploading a file. This may
be easier than installing a driver. However, you have to manually adjust the printer
settings (e.g., 5 copies vs. 1) prior to submission and then change them back. You are
also limited to file formats that FreeFlow Accxes can directly support.
To Enable Job Reprint:
1. Launch an internet browser and enter in the IP address of the access controller or
your printer. (http://xx.xxx.xx.xx)
2. Select the Configuration > Miscellaneous tabs.
3. Ensure the Thumbnail Creation and Job Reprint Enable boxes are check marked.
4. Notice the Job Reprint Policy pull-down options and choose the desired outcome.
5. Select Update Printer to engage the above changes.
To Reprint a Job:
6. In Web Printer Management Tool, select the Utilities tab.
The Upload tab is the default shown.
7. Select the Browse button and navigate to the file you would like to print.
8. Select the Upload button.
9. Select Printer Queue.
10. Select Reprint Queue, the Status pull-down, and Print.
11. Select the Update Printer button.
®
®
Xerox 6279 Wide Format Solution
Printer User Guide
2-7
Job Information
As shown in the above screen, the Web Printer Management Tool Reprint Queue now
has an Edit button where the user can Edit Job Options specific for printing and then
submit the job to the designated remote printer.
The selected jobs disappear from the Reprint Queue and reappear in the Active Queue.
2-8
®
®
Xerox 6279 Wide Format Solution
Printer User Guide
System Administration
3
This chapter describes features available on the Administration tab of the Machine
Information screen. The Administration tab allows the system administrator to manage
the following:
• General Administration
• Control Panel
• Network Setup
System Administration Overview
Most of the features available using the Xerox 6279 Printer are accessible to all users.
Some features, however, are restricted to the System Administrator if the environments
warrants it. Those features are then only accessable by logging in to the system with a
secured password.
NOTE
To prevent unauthorized access to the System Administration features, a system
password should be entered as soon as possible after installation.
®
®
Xerox 6279 Wide Format Solution
Printer User Guide
3-1
System Administration
Entering System Administration Mode
To enter the System Administration mode:
Press the Log In/Out button on the Control Panel to access the System Administrator
screen.
Login Options
The Log In/Out screen, shown below, allows the user or administrator to log in to the
system in one of two ways.
3-2
®
®
Xerox 6279 Wide Format Solution
Printer User Guide
System Administration
System Administrator
The Administrator login tab will allow the administrator to log in to the administrator
account or log out if already logged in. If the user has logged in as the administrator,
the account indicator in the upper right hand corner of the screen displays Administrator.
If not logged in, the indicator displays Guest.
Job Accounting
The Accounting tab will either state that accounting is not enabled or allow the user
to enter a user ID and account ID to log in. If the user is already logged in, he or she
will be allowed to log out. Once the user is logged in, the account indicator at the top
right corner to the User Interface displays the first 16 characters of the user ID and
account ID.
NOTE
You can also get to the Log In/Out menu by pressing the user level box in the
upper right hand corner of the screen.
NOTE
You can be logged on as an administrator and as an accounting user at the
same time. You are prompted to enter your login information as you try to access
the appropriate features.
1. Select System Administrator Log In.
The Enter SA Password screen displays.
2. Enter the System Administration password on the Numeric Keypad.
3. Select Enter.
Once you are logged in as an Administrator, the system displays the Administrator icon
in the upper right hand corner of the screen.
®
®
Xerox 6279 Wide Format Solution
Printer User Guide
3-3
System Administration
If there is no system activity for a period of time specified in the Timers setup, (scanning
documents or screen touches or key presses), a timeout screen will be displayed for four
seconds, and then the user will be logged out automatically.
For more detailed information about Timers setup, see the Configuring Timers section
of this chapter.
Once you are logged in as an Administrator, you are able to view and make changes on
the Administration tab of the Machine Info screen.
NOTE
The buttons on the Administration tab may require an administrator log in. If
you are logged out, the system will prompt for the System Administrator password
if one of these buttons is selected and access is denied.
Exiting System Administration Mode
To exit the System Administration mode:
1. Select the Log In/Out button to access the System Administrator screen.
2. Select System Administrator Log Out.
3. Select Yes to confirm that you wish to log out.
The system will exit System Administration mode and the Guest icon will appear in the
upper right corner of the screen.
General Administration Settings
The General Administration settings enable you to display and set the time on the
machine, change the administrator password, shut down and restart the system, and
perform job accounting tasks. If you are not already logged in, you will be prompted to
enter a System Administrator password to access the General Administration settings.
The General Administration option provides the following functions:
• Setting the date and time
• Changing the administrator password
• Configuring Job Accounting
• Configure Job Reprint
• Shutting down and restarting the system
• Enabling/Disabling Immediate Image Overwrite
• Set Thumbnail Creation
• Enable/Disable Admin Managed Queue
3-4
®
®
Xerox 6279 Wide Format Solution
Printer User Guide
System Administration
Setting the Date and Time
The administrator sets the date and time that displays on the Touch Screen and also
on controller-generated prints (banner sheets, reports, error messages, etc.) The machine
uses a 24 hour clock (0 - 23).
1. Select Machine Information from the Services menu.
2. Select the Administration tab.
Refer to the Machine Information chapter for more details on the feature.
3. Select General Administration from the Administration tab.
NOTE
If you are logged out, the system prompts you to log in as a System
Administrator.
4. Select Set the date and time...
5. Enter the following:
• Year
• Month
• Day
• Hour
• Minute
6. Select Save.
7. Select Close on the General Administration screen to return to the Administration
tab screen.
Changing the Administrator Password
The following describes the procedure for changing the System Administrator password.
This is the same system password that is required when accessing the machine from the
Web Printer Management Tool.
If required, create a new system password immediately after machine installation and
periodically thereafter. Be sure to record the password in a secure location.
NOTE
The password can contain one to five numbers, from 0 to 99999.
1. Select Machine Info from the Services menu.
The Machine Information screen displays.
2. Select the Administration tab.
3. Select General Administration.
The General Administration screen displays.
4. Select Change The Administrator Password....
®
®
Xerox 6279 Wide Format Solution
Printer User Guide
3-5
System Administration
The Enter SA Password menu displays.
5. Using the numeric keypad to enter the digit(s), enter a system password.
6. Select Enter.
7. Select Close to exit the General Administration screen.
Job Accounting Overview
NOTE
The job accounting feature is an option, requiring a Feature Key to activate. If you
obtain this feature, the System Administrator can enable it at any time by sending
a special feature key file to the Printer. Contact your Xerox Sales Representative for
ordering information.
Job Accounting tracks print media usage. Usage is expressed as the area and length of
the media used.
The Account Management Tool (AMT), or another third party accounting tool, is used
to assign a User ID, Account ID, and Printer ID. It then collects and tallies the stored
data from the networked devices. When the management tool is set up, an administrator
sets up and provides the required IDs to the users.
If you are using the Account Management Tool for Job Accounting, see the FreeFlow
Accxes Software Tools Customer Training Guide for more detailed information about
assigning IDs to users. The Xerox FreeFlow Accxes V13.0 Drivers & Client Software
Installation Guide provides instructions for installing the Account Management Tool.
For the Xerox 6279 Wide Format with FreeFlow Accxes Print Server, Job Accounting can
be enabled from both the Control Panel and the Web Printer Management Tool. The
default setting is Disabled.
Enabling Job Accounting Mode
1. Select Machine Infofrom the Services Menu screen.
The Machine Information screen displays.
2. Select the Administration tab.
3. Select General Administration.
3-6
®
®
Xerox 6279 Wide Format Solution
Printer User Guide
System Administration
4. Select Configure Job Accounting....
5. Select the appropriate option:
• Enabled: Job accounting information is required for all users. If a user supplies a
valid user name and account ID, he/she can perform printer, copy and scan
operations. If the user does not supply a valid user name and account ID, only
printer operations can be accessed and copy and scan options do not display on
the screen.
• Disabled: Job accounting is turned off. The user can access the printer, copy, and
scan operations listed on the Services Menu.
• Optional: Users can either enter a valid user name and account ID or enter no
characters when prompted for a user name and account ID to enter a generic
account. When the optional account is accessed with either the valid user name
and account ID or generic account, the user can perform printer, copy, and scan
operations.
6. Select Save.
7. Select Close to exit the General Administration screen.
Logging in as a Job Accounting User
1. Press the Log In/Out button on the Control Panel to access the System Administrator
screen.
The Log In/Out menu displays.
2. Select Job Accounting Log In.
The Enter User Name screen displays.
®
®
Xerox 6279 Wide Format Solution
Printer User Guide
3-7
System Administration
3. Enter the user name and account ID provided when Job Accounting was set up at
your location.
NOTE
Accounting must be set up from a third party job management tool, such as the
Account Management Tool offered by Xerox.
4. Select Enter.
The Accounting icon will display in the upper right hand corner of the screen.
Configure Job Reprint
This feature gives the assigned System Administrator the rights to enable or disable
reprinting jobs. This prevents confidential information from getting into the wrong
hands. It also prevents jobs from being deleted erroneously.
1. Select Machine Information > Administration tab > General Administration.
2. Select Configure Job Reprint....
The Job Reprint Options screen displays.
Shutdown/Restart
System Power Off
CAUTION
Powering down the system incorrectly may result in data corruption and a service
call. The system shutdown procedure below allows the controller to power down
correctly. Shutdown is best performed through the Web Printer Management Tool
or the System Administration menu Shutdown and Restart feature.
CAUTION
Only authorized persons should power down the system fully.
3-8
®
®
Xerox 6279 Wide Format Solution
Printer User Guide
System Administration
Power Outage Job Status
Should the system loose power unexpectedly and reboot, jobs are restored to their
previous state. This is similar to using the Shutdown and Restart button.
• All Copy/Scan jobs in progress will restart from the beginning automatically, when
power is resumed unless job reprint was disabled.
• Completed, cancelled, checkplot and sample copy jobs are discarded since they are
not considered reprintable.
• Jobs that were processing during the power outage are placed in the Job Information
> Hold queue.
• Jobs finished processing and ready to start printing during the power outage are
placed in the Job Information > Active queue.
If Job Reprint is enabled:
Copy/Scan jobs that finished processing are automatically resubmitted for printing.
Copy jobs run before print jobs.
Copy/Scan jobs finished processing are displayed in the Job Information > Reprint
queue.
Copy/Scan jobs that did not finish processing are cancelled.
Shutdown from Web Printer Management Tool
You can also shut down the system from the Web Printer Management Tool.
1. Open the Web Printer Management Tool at your workstation by entering the IP
Address of the machine in the web browser.
2. Select Utilities > Shutdown > Shutdown.
®
®
Xerox 6279 Wide Format Solution
Printer User Guide
3-9
System Administration
3. Move the Printer Power Switch to the Off position (down).
4. Move the Printer Circuit Breaker switch to the Off (down) position.
Immediate Image Overwrite
At most installations, users are able to recall the last copy or scan job and all the
associated settings. The recalled image(s) then can be printed without rescanning the
originals. This is the case when the Image Recall function (discussed above) is enabled.
Security concerns in some work environments might require that the image recall feature
be disabled so that sensitive materials are eliminated from the Accxes controller hard
drive.
NOTE
Immediate Image Overwrite cannot be enabled if either Job Reprint or
Administrator-Managed Queue features are enabled.
Once the Immediate Image Overwrite (IIO) feature is enabled, images that are scanned
in are immediately deleted from the Accxes hard drive. In addition, the administrator
can go a step further to enable On Demand Image Overwrite (ODIO), which restarts the
system and completely eliminates from the hard drive files that are already scanned in
and files that are scanned in the future.
1. Select Machine Info from the Services menu screen.
3-10
®
®
Xerox 6279 Wide Format Solution
Printer User Guide
System Administration
2.
3.
4.
5.
The Machine Information screen displays.
Select the Administration tab.
Select General Administration.
Select the Enable / Disable Immediate Image Overwrite.
The Set Immediate Image Overwrite Mode screen displays.
Select Enabled or Disabled.
See Online Help in Web Printer Management Tool for more details about using the
Immediate Image Overwrite feature.
Immediate Image Overwrite Algorithm
The overwrite algorithm for both IIO and ODIO conforms to the U.S. Department of
Defense Directive 5200.28-M (Section 7, Part 2, paragraph 7-202), and is common to
all WorkCentre/WorkCentre Pros and Accxes controllers.
The algorithm for the Image Overwrite feature is:
• Pattern #1 is written to the sectors containing temporary files (IIO) or to the entire
spooling area of the disk (ODIO). (hex value 0x35 (ASCII “5”)).
• Pattern #2 is written to the sectors containing temporary files (IIO) or to the entire
spooling area of the disk (ODIO). (hex value 0xCA (ASCII compliment of 5)).
• Pattern #3 is written to the sectors containing temporary files (IIO) or to the entire
spooling area of the disk (ODIO). (hex value 0x97 (ASCII “ú”)).
• 10% of the overwritten area is sampled to ensure Pattern #3 was properly written.
The 10% sampling is accomplished by sampling a random 10% of the overwritten
area.
See Online Help in Web Printer Management Tool for more details about using the
Immediate Image Overwrite feature.
Set Thumbnail Creation
Thumbnails are miniature images of the scanned document that display on the Job
Information screen.
Thumbnails are the first page of a multipage job. They are used for job recognition.
Thumbnails only display if the feature has been enabled in the General Administration
screen and can be disabled when the System Administrator sets up a lockout password
to the feature.
This is a security feature that can be set to prevent exposure of confidential information
to any user.
The procedure to Set Thumbnail Creation is listed below:
1. Select Machine Info from the Services menu screen.
The Machine Information screen displays.
2. Select the Administration tab.
®
®
Xerox 6279 Wide Format Solution
Printer User Guide
3-11
System Administration
3. Select General Administration.
4. Select Set Thumbnail Creation...
The Thumbnail Creation screen displays.
5. Select the Enabled or Disabled button.
Administrator Managed Queue
This feature is most often used in a centralized print environment where a System
Administrator sets a secured password for access to manage jobs.
When the Administrator Managed Queue is enabled, all incoming print jobs are placed
on hold.
The ability to release, hold and cancel jobs with the administrator manager queue
enabled is restricted to the System Administrator if there is a secure password set.
Without a secure password set, any user can perform these operations.
Placing all jobs on hold:
1. Select Machine Info from the Services screen.
2. Select General Administration.
3. Select Enable/Disable Administration-Managed Queue.
4. Select Enable.
5. Select Save.
6. Submit the print job.
7. Locate the job in the Hold queue from Job Information on the UI or Print Queue on
Web Printer Management Tool.
Control Panel Settings
The Control Panel settings enable you to control the sound level of the machine, set up
timers for machine time-out features, and calibrate the Touch Screen. If you are not
already logged in, you will be prompted to enter a System Administrator password to
access the Control Panel settings.
The Control Panel options will allow the System Administrator to set the following
features:
• Sound Settings
• Timers
• Calibration of the User Interface Touch Screen
3-12
®
®
Xerox 6279 Wide Format Solution
Printer User Guide
System Administration
Sound Settings
The Sound Settings options determine whether or not tones will sound when the user
presses Control Panel buttons, makes an invalid entry on the Control Panel or Touch
Screen, or when a fault occurs. The factory default setting for sound is On.
1. Select the Services button on the Control Panel.
2. Select the Machine Info button from the Services Menu screen.
The Machine Information Screen displays.
3. Select the Administration tab.
4. Select Control Panel.
The Control Panel screen displays.
5. Select Sound Settings . . . .
The Sound Settings. . . screen displays.
®
®
Xerox 6279 Wide Format Solution
Printer User Guide
3-13
System Administration
6.
7.
8.
9.
Move the slider to the desired sound volume.
Select Test Sound Level to hear a sample of the volume level.
Select Save to return to theControl Panel screen.
Select Close to return to theAdministration tab.
Timers
The Timers selection of the Control Panel screen allows you to set up the values for the
timeout features. The timeout features are defined on the following pages.
• Low Power
• Sleep
• Features
• File Deletion
• Print Interrupt
Low Power
This setting is the amount of time that must elapse since the last user operation, such
as a button press, until the machine enters the Low Power mode. The setting range is 5
to 240 minutes. The default setting for Low Power mode is 15 minutes.
1. Select Control Panelfrom the Administration tab.
2. Select Configure Timers....
The Set Timeout Durations screen displays.
3-14
®
®
Xerox 6279 Wide Format Solution
Printer User Guide
System Administration
3. Select Low Power timeout from the Timers screen.
The Set Timeout Durations Low Power Timeout screen displays.
4. Using either the scroll buttons or the numeric keypad, select the desired setting, and
then select Save.
5. Select Save on the Set Timeout Durations screen to return to the Control Panel screen.
®
®
Xerox 6279 Wide Format Solution
Printer User Guide
3-15
System Administration
Sleep Timeout
The procedure for setting up the Sleep mode is as follows. The setting range is 5 to 240
minutes. The factory default setting for Sleep mode is 55 minutes.
1. Select Control Panel from the Administration Tab.
2. Select Configure Timers...
The Set Timeout Durations screen displays.
3. Select Sleep Timeout from theTimers screen.
The Set Timeout Durations Sleep Timeout screen displays.
3-16
®
®
Xerox 6279 Wide Format Solution
Printer User Guide
System Administration
4. Using either the scroll buttons or the numeric keypad, select the desired setting, and
then select Save.
5. Select Save on the Set Timeout Durations screen to return to the Control Panel screen.
NOTE
The Sleep Mode setting cannot be less than the Low-Power Mode setting.
NOTE
In European Markets, the legally mandated EMC directive is to keep the sleep
timeout setting below 1 hour (60 minutes).
®
®
Xerox 6279 Wide Format Solution
Printer User Guide
3-17
System Administration
Features Timeout
The Feature Timeout option controls how long the current feature parameters will remain
in effect after the user has made a selection. The Feature timer can be set between 0
and 99 minutes. The default value for this feature is 5 minutes.
1. Select Control Panelfrom the Administration tab.
2. Select Configure Timers....
The Set Timeout Durationsscreen displays.
3. Select Features Timeout.
The Set Timeout Durations Feature Timeoutscreen displays.
3-18
®
®
Xerox 6279 Wide Format Solution
Printer User Guide
System Administration
4. Using either the scroll buttons or the numeric keypad, select the desired setting, and
then select Save.
5. Select Save on the Set Timeout Durations screen to return to the Control Panel screen.
File Deletion Timeout
The file deletion timeout feature is enabled when the user wishes to keep a specific file
for a period longer than 24 hours.
1. Select Control Panel from the Administration tab.
2. Select Configure Timers . .
The Set Timeout Durations screen displays.
3. Select File Deletion Timeout
The File Deletion Timeout screen displays.
4. Using either the scroll buttons or the numeric keypad, select the desired setting, and
then select Save.
5. Select Save on the Set Timeout Durations screen to return to the Control Panel screen.
Print Interrupt Timeout
The print interrupt timeout feature is enabled when a user needs to interrupt the printer
for a period longer than one minute.
1. Press the Services button on the Control Panel.
2. Select Machine Info.
3. Select the Administration tab.
4. Select Control Panel from the Administration tab.
5. Select Configure Timers . . .
The Set Timeout Duration screen displays.
®
®
Xerox 6279 Wide Format Solution
Printer User Guide
3-19
System Administration
6. Select Print Interrupt Timeout
The Print Interrupt Timeout screen displays.
7. Using either the scroll buttons or the numeric keypad, select the desired setting, and
then select Save.
8. Select Save to return to the Control Panel screen.
Calibrate Touch Screen
Your User Interface Touch Screen is calibrated when it is installed. Calibration aligns the
cursor to the place on the screen that you touch. The user interface does not typically
need to be recalibrated, unless it is not working correctly or you reinstall the controller.
1. Press the Services button on the Control Panel.
The Services menu screen displays.
2. Select Machine Info from the Services menu screen.
The Machine Info screen displays.
3.
4.
5.
6.
Select the Administration tab.
Select Control Panel.
Select Calibrate Touch Screen.
Press and hold your finger on the calibration symbol in each corner of the screen until
it moves to the next corner. It will touch all four corners.
7. Once the symbol moves to all four corners, the user interface prompts you to touch
anywhere on the screen to save the calibration data.
8. The User Interface saves the calibration data and displays the Control Panel screen.
Network Setup
Prior to being able to communicate with your FreeFlow Accxes scanner and printer, the
FreeFlow Accxes controller needs to be configured to the network.
The Network Setup settings allow the System Administrator to setup the following
TCP/IP settings:
• IP Address
• Gateway
• Submask
• DHCP
If you do not know the above information, perform the following steps to generate a
Configuration Report:
1. Select Machine Info on the Services menu.
2. Select the Print Reports tab.
3. Select Printer Configuration.
Instead of entering the IP Address, Subnet Mask, and Gateway Address, you may
enable Dynamic Host Configuration Protocol (DHCP) on the Network Setup screen.
3-20
®
®
Xerox 6279 Wide Format Solution
Printer User Guide
System Administration
For more information on DHCP, see the Setting Up DHCP section of this chapter for
details.
If you are not already logged in as System Administrator, you are prompted for the
Administrator password when you select Network Setup. Contact your System
Administrator for the password if required.
NOTE
Whether you enter the network settings using the Web Printer Management
Tool or the User Interface, entering them in one place affects the other.
4. Select Machine Info from the Services menu.
5. Select the Administration tab.
6. Select Network Setup.
NOTE
The network settings can also be setup using the Web Printer Management Tool.
Refer to the Xerox FreeFlow Accxes System and Web Printer Management Tool
Setup Guide or Web Printer Management Tool Online Help for network settings
instructions.
Setting up a Static IP Address
1. Select the Services button on the Control Panel, followed by Machine Info
> Administration Tab > Network Setup.
2. Select IP Address from the Network Setup screen.
The IP Address window displays.
®
®
Xerox 6279 Wide Format Solution
Printer User Guide
3-21
System Administration
NOTE
Make sure the DHCP checkbox is not checked. Otherwise the IP Address, Gateway
and Netmask options cannot be selected.
3. Use the numeric touch pad to enter the IP Address in the format nn.nnn.nn.nnn.
4. Select Enter.
Setting up IP Gateway
1. Select the Services button on the Control Panel, followed by Machine Info
> Administration Tab > Network Setup.
2. Select Gateway from the Network Setup screen.
The IP Gateway screen displays.
3. Enter the Gateway in the format XXX.XXX.XXX.XXX.
4. Select Enter.
3-22
®
®
Xerox 6279 Wide Format Solution
Printer User Guide
System Administration
Setting up Netmask
1. Select the Services button on the Control Panel, followed by Machine Info
> Administration Tab > Network Setup.
2. Select Netmask from the Network Setup screen.
The IP Netmask screen displays.
3. Enter the Subnet Mask in the format XXX.XXX.XXX.XXX.
4. Select Enter.
The Network Setup screen displays.
5. Select Save.
Setting up DHCP
If you are unaware of the IP Address, Gateway, or Subnet Mask information, you can
utilize the Dynamic Host Configuration Protocol (DHCP) option. When this box is checked
(enabled), the network interface utilizes the DHCP to acquire a temporary IP Address
for the networked device from a client that is supplying DHCP services on the network.
Since constantly changing IP addressing can cause problems for users in network
communications, the default value for this feature is not checked (disabled).
1. Select the Services button on the Control Panel, followed by Machine Info
> Administration Tab > Network Setup.
®
®
Xerox 6279 Wide Format Solution
Printer User Guide
3-23
System Administration
2. Select the DHCP checkbox.
This will disable the IP Address, Gateway, and Netmask fields.
3. Select Save to return to the Administration tab.
It is recommended that you reboot the controller after changing to the DHCP option.
If you choose to set up the network settings using the Web Printer Management Tool,
refer to the Web Printer Management Tool online Help or the FreeFlow Accxes Print
Server and Web Printer Management Tool Setup Guide for more information.
NOTE
When configuring a network connection via DHCP, the Host Name field on the
network page of Web Printer Management Tool will be enabled. This allows the
administrator to enter the Accxes Server host name he or she would like to
associate with the resulting DHCP address via Dynamic DNS. This feature was
originally designed to work with BIND DNS servers (version 9.0 or greater), but
has been shown to also function with some configurations of Windows DHCP
servers. A delay of several minutes may be required for the new host name to
propagate through the DNS servers once the network page changes are
submitted. Upon successful configuration of Accxes and the DHCP/DDNS
server(s), the Accxes Controller can be referenced by name from that point
forward.
3-24
®
®
Xerox 6279 Wide Format Solution
Printer User Guide
Machine Information
4
This chapter describes the features available within the Machine Information screen. A
quick overview of each of the Machine Information tabs is provided, followed by the
detailed steps to access and modify settings to meet your requirements.
The Machine Info option accessed through the Services Menu contains the following
options:
• Machine Information
• Print Reports
• Machine Configuration
• Job Information
• Administration
The following areas will be defined further:
• Media Status and Setup
• Printing Configuration Reports and Diagnostic Reports
Overview of Machine Information
TheMachine Informationscreen allows the general users to access some information
about the system without requiring a system administration password.
The Machine Information tab is where you will quickly locate the Printer IP Address
required for network connections.
The administrator maintains the control of the functionality of certain features and
options. The administrator will be responsible for customizing the printer for your work
environment.
Refer to Chapter 3, System Administration for all the details of the printer Administration
Tab features.
1. Select the Services button on the Control Panel. The Services menu will display with
Machine Info as an option.
®
®
Xerox 6279 Wide Format Solution
Printer User Guide
4-1
Machine Information
2. Select Machine Infoon the Services Menu.
The screen displays the following fields of information:
Linear Usage
This is the amount of media that has passed through the machine.
Area Usage
This is the media used in square foot measurement.
Control SW (Software Version)
The FreeFlow Accxes Controller Server software version will be displayed here.
IP Address
The IP Address will be displayed with IPv4 first and then the IPv6 addresses. The IPv6
addresses will be listed with their scope (Global or Site).
Printer Status:
Online and offline
Media Status and Setup
The Media Status and Setup feature displays the media status as the amount of media
remaining, the installed media sizes and media types. Changing the setup for different
media is accomplished here.
Refer to the About Media and Originals section in Chapter 2 for details.
• To access the Media Status and Setup, you start with Machine Information. Here
you select the media you load in the trays, which is your desired output.
TIP
If you change the roll tray media type or the media series (such as changing
from ARCH-1 to ANSI), you must specify the new media type and series on the
Media Status and Setup screen.
You do not have to change anything on the Media Status and Setup screen if you put
the same roll, tray, or manual feed media in the machine that is listed on the screen.
Accessing Media Settings
1. Select the Services button on the Control Panel.
The Services Menu displays.
2. Select Machine Info.
The Machine Information screen displays.
4-2
®
®
Xerox 6279 Wide Format Solution
Printer User Guide
Machine Information
3. Select Media Status and Setup.
The Media Status and Setup screen includes the following information:
• Media Source (Roll/Trays/Manual Feed-in Shelf)
• Series (ANSI, ARCH, ISO, etc.)
• Type/Thickness (Type = Bond, Vellum, Film) (Thickness = (Light, Ordinary, Heavy)
• Size Installed (currently loaded in the Roll/Tray)
• Status (Amount Remaining = Full, Low, Empty)
4. Select the Media Series corresponding with the Media Source you intend to use.
The Media Series screen displays.
5. Select the specific installed Media that best defines the contents loaded in the tray.
®
®
Xerox 6279 Wide Format Solution
Printer User Guide
4-3
Machine Information
6. Select Close to return to the Machine Information screen.
NOTE
In order for the 6279 to successfully complete a print job, the print job attributes,
such as the media size and type must be supported by the printer. The printer
must be equipped with the print media in the correct size to print. If the attributes
specified by the print job are not supported by the printer, a media mismatch
occurs and the printer is unable to print the job or will print the job on different
media.
If you get a “Media Mismatch” error screen like the one shown above, follow the
instructions to resolve the media mismatch condition.
Print Reports Tab
The Print Reports selection will allow the user to print one of several reports which show
the hardware and software configurations of your printer.
• Configuration Test Print (a Printer Configuration Report)
• Setup Test Print (a Printer Settings Report)
• Pen Palettes Report (All or One)
• PostScript Test Print (shows the configuration)
• All Test Prints (all four of the above print as a single job)
4-4
®
®
Xerox 6279 Wide Format Solution
Printer User Guide
Machine Information
The Print Reports tab will also allow the user to print diagnostic prints. The use of standard
test patterns helps determine the root cause of image quality problems. The diagnostic
print choices include:
• Diagnostic Test Print
• Image Quality Test Print
• Scanner Test Print
Print Reports
The procedure below explains how to print a configuration report that lists the hardware
and software configuration, communication parameter (port) settings and system
parameter settings of the printer. Configuration reports may be printed from either the
User Interface or Web Printer Management Tool on your client workstation.
The Diagnostic Prints may be printed using the User Interface only. You may not print
them using Web Printer Management Tool.
NOTE
Print Report jobs are stored in the Reprint Queue and are reprintable. If Immediate
Image Overwrite is disabled and the Recall feature is enabled then a configuration
report will become the last job in the queue.
From the User Interface
To access the Print Reportstab:
1. Select the Services button on the Control Panel.
2. Select Machine Info from theServices Menu.
The Machine Information screen displays.
3. Select the Print Reports tab.
4. Select from the Configuration Reports options:
®
®
Xerox 6279 Wide Format Solution
Printer User Guide
4-5
Machine Information
• Printer Configuration - A one page configuration report will print.
• Printer Settings - A one page Printer Settings report will print.
• Pen Palette - A multi-page Pen Palette Settings report will print.
• PostScript - A postscript report prints if postscript is loaded.
• All - All the above listed reports will print as a single job.
5. Select from the Diagnostic Prints options:
• Diagnostic Test Print
• Image Quality Test Print
• Scanner Test Print - Only available for printers with scanner upgrades.
6. Select Print.
The selected item will print.
From Web Printer Management Tool
The Configuration reports can be obtained using the Web Printer Management Tool.
1. Type in your URL using your web browser to access Web Printer Management Tool
(FreeFlow Accxes).
2. Click on the Utilities tab.
3. Select the Test Print sub-task that appears.
4. Depending upon your information requirements, click on the Minimal, Normal, Full,
or PostScript test print buttons.
4-6
®
®
Xerox 6279 Wide Format Solution
Printer User Guide
Machine Information
• Minimal - prints the configuration data of the 6279 Printer.
• Normal - prints the configuration data and settings information.
• Full - prints the configuration data, settings information and pen palettes
information.
• PostScript - requires a license and will print a PostScript test page.
Configuration Test Sample Report (Printer)
NOTE
This report is a sample of what the printout will resemble.
®
®
Xerox 6279 Wide Format Solution
Printer User Guide
4-7
Machine Information
Setup Test Print Sample Report (Printer Settings)
NOTE
This report is a sample of what the printout will resemble.
4-8
®
®
Xerox 6279 Wide Format Solution
Printer User Guide
Machine Information
Pen Palette Sample Report
NOTE
This report is just a sample of what the printout will resemble.
®
®
Xerox 6279 Wide Format Solution
Printer User Guide
4-9
Machine Information
PostScript Test Sample Report
NOTE
This report is a sample of what the printout will resemble.
Machine Configuration Tab
The Machine Configuration tab will display configurations, software versions and the
availability of the component options, as shown below:
4-10
®
®
Xerox 6279 Wide Format Solution
Printer User Guide
Machine Information
Accessing Machine Configuration
1. Select the Services button on the Control Panel.
The Services Menu displays.
2. Select Machine Info on the Services Menu.
3. Select the Machine Configurationtab.
®
®
Xerox 6279 Wide Format Solution
Printer User Guide
4-11
Machine Information
Administration Tab
The Administration tab is accessed and maintained by an assigned System Administrator
if the environment warrants it. Therefore access may be password protected, as indicated
by the lock and key symbol.
See your System Administrator for requests associated with the features below.
This feature provides many behind the scenes advanced settings for the printer, such
as network settings to connect to a remote printer and control panel changes.
• General Administration - Change date and time settings, job accounting, shutdown
and restart, change the password
• Network Setup - Set up connections to a remote printer
• Control Panel - Sound settings, timers, calibrate Touch Screen
Accessing Administration
1. Select the Services button on the Control Panel.
The Services Menu displays.
2. Select Machine Info on the Services Menu.
4-12
®
®
Xerox 6279 Wide Format Solution
Printer User Guide
Machine Information
3. Select the Administration tab.
4. Enter the Administrator password if required when selecting a feature.
For more detailed information about the Administration Tab, refer to Chapter 3, System
Administration.
®
®
Xerox 6279 Wide Format Solution
Printer User Guide
4-13
Machine Information
4-14
®
®
Xerox 6279 Wide Format Solution
Printer User Guide
5
Maintenance
This chapter describes how to replace consumables and clean the machine.
• Replacing Consumables
-
Loading Toner
-
Replacing the Waste Toner Bottle
• Cleaning the Machine
Replacing Consumables
The machine comes with the following consumables. We recommend using these
consumables because they have been made according to standards that match the
specifications of the machine.
TIP
The use of consumables not recommended by Xerox may impair image quality and
machine performance. Use only consumables recommended by Xerox for the
machine.
Table 15: Replacing Consumables
Type of consumable
Part number
Qty/Box
Expected Life
Toner Cartridge
6R01374
1 item/1 box
(800gm)
11.8K LinFt / 3.6 Km / 34.2K
SqFt at 3% area coverage
Waste Toner Bottle
8R13058
1 item/1 box
98.4K LinFt / 30 Km / 285.4K
SqFt
NOTE
We recommend having a spare Toner Cartridge ready.
NOTE
The way you order new toner bottles varies depending on your contract.
®
®
Xerox 6279 Wide Format Solution
Printer User Guide
5-1
Maintenance
Handling Consumables
• Follow the instructions on the packaging when storing consumables.
• When storing Toner Cartridges, it is best to store them horizontally rather than upright.
• Do not unpack consumables until they are needed.
• Avoid storing consumables in:
-
Hot and humid locations
-
Locations close to a fire
-
Locations exposed to direct sunlight
-
Dusty locations
• Before using consumables, carefully read the instructions and precautions on the
packaging.
• Check the part number of the consumables and contact your Xerox Customer Support
Center to place your orders.
• Follow the disposal instructions for used toner and waste toner bottles.
Loading Toner
If only a small amount of toner remains in a toner cartridge, the machine may stop
during printing and display a message. If this happens, load the toner and then you may
continue printing. Make sure the machine has stopped before following the steps below.
TIP
When loading toner, it may spill and dirty the floor. We recommend placing
paper on the floor beforehand. Be careful not to get toner on your hands and
clothes.
1. Open the Toner Supply Port Cover.
5-2
®
®
Xerox 6279 Wide Format Solution
Printer User Guide
Maintenance
2. Locate a replacement Toner Cartridge. Gently shake the Toner Cartridge about 20
times so the toner will load smoothly.
3. Attach the Toner Cartridge to the Toner Supply Port.
4. Align the notch on the Toner Cartridge with the right side of the Toner Supply Port.
5. Lower the left side of the Toner Cartridge, and push the toner cartridge into the Toner
Supply Port until it clicks.
6. Slide the Toner Supply Lever to the left, aligning it with the triangular symbol.
This will open the cover at the bottom of the Toner Cartridge, so the toner can be
released into the machine.
®
®
Xerox 6279 Wide Format Solution
Printer User Guide
5-3
Maintenance
7. Tap the top of the Toner Cartridge repeatedly until all toner in the cartridge is loaded.
8. Slide the lever to the right, aligning it with the triangular symbol.
9. Remove the Toner Cartridge by pulling it up.
10. Close the Toner Supply Port Cover.
Dispose of used Toner Cartridges as instructed in your replacement toner package.
5-4
®
®
Xerox 6279 Wide Format Solution
Printer User Guide
Maintenance
Replacing the Waste Toner Bottle
When the Waste Toner Bottle is full, a message will appear on the Touch Screen. Solve
the problem as instructed below.
WARNING
See the warning and special instructions on waste toner bottles regarding safe
handling and disposal.
TIP
When replacing the Waste Toner Bottle, toner may spill and dirty the floor. We
recommend placing paper on the floor beforehand.
1. Make sure that the machine has stopped, and lift up the Upper Unit Release Latch
to open the Upper Unit.
2. Using both hands, firmly lift the Upper Unit to the up position.
®
®
Xerox 6279 Wide Format Solution
Printer User Guide
5-5
Maintenance
3. Pull open the Waste Toner Bottle Door on the right hand side of the machine to
access the Waste Toner Bottle.
4. Remove the Waste Toner Bottle by gently lifting the bottle up and pulling it out
toward you, then pulling the bottle down.
5. Cover the hole of the removed Waste Toner Bottle with the provided cap.
TIP
Dispose of the used Waste Toner Bottle as instructed in your replacement
package.
5-6
®
®
Xerox 6279 Wide Format Solution
Printer User Guide
Maintenance
6. Install the new Waste Toner Bottle.
NOTE
When you install a new Waste Toner Bottle in the provided area, make sure the
bottle rests behind the small lip at the bottom to hold the bottle firmly in place.
Otherwise the machine may not detect that the bottle is in place.
7. Close the Waste Toner Bottle Door.
8. Move the Upper Unit Release Lever toward you.
TIP
This lever must be pulled toward you before you can close the Upper Unit. To
avoid getting oil from your hands on the metal parts of the machine, touch only
the green parts.
®
®
Xerox 6279 Wide Format Solution
Printer User Guide
5-7
Maintenance
9. Firmly push the Upper Unit down until it latches.
NOTE
If you do not attach the Waste Toner Bottle correctly, a message will appear on
the Touch Screen when you close the Upper Unit, and the machine will not come
to a Ready state.
Cleaning the Machine
This section instructs you on how to clean the machine.
Do not use cleaning agents other than water, a neutral detergent, or Xerox Platen Glass,
Lens and Mirror Cleaner.
WARNING
To reduce the risk of electric shock, power off the machine before cleaning.
CAUTION
Do not use benzene, paint thinner, other volatile liquids on the machine. These
substances may discolor, deform, or crack covers.
CAUTION
Cleaning the machine with an excessive amount of water may cause the machine
to malfunction and/or damage documents during printing.
1. Power off the machine as directed in the System Power Off Procedure section.
2. Gently wipe only the exterior surfaces of the printer with a damp, soft cloth.
NOTE
You may apply a small amount of neutral detergent to the damp cloth to remove
stubborn soiling.
3. Dry the cleaned surfaces with a soft, lint-free cloth.
4. After all cleaned surfaces are dry, power on the machine as directed in the System
Power Procedure section.
5-8
®
®
Xerox 6279 Wide Format Solution
Printer User Guide
Problem Solving
6
This chapter describes problems that may occur with the machine and the recommended
solutions. Chapter topics include:
• General Problems
• Problems during Printing
• Error Messages
• Paper Jams
General Problems
This section describes problems that may occur with the machine and the troubleshooting
procedures to solve the problems.
If the machine does not work properly after you perform the troubleshooting
recommended in the pages below, then contact your Xerox Customer Support Center.
If you think a problem is occurring with the machine, check the machine status and the
following table.
WARNING
The machine contains precision measuring equipment and uses a high-voltage power
supply; never open or remove machine covers that are secured with screws unless
specifically instructed to do so, because high-voltage components can cause electric
shock. Do not attempt to alter the machine or change the parts because it may
result in fire or smoke.
®
®
Xerox 6279 Wide Format Solution
Printer User Guide
6-1
Problem Solving
Table 16: General Problems
Error
The Touch Screen is dark.
Remedy
• Verify that the machine is connected to a correctly rated power
supply, that the power plug is plugged in, and that the power
switches and the circuit breaker switch are in the On positions.
• If the Power Saver button is on the Control panel is lit, the
machine is in Power Saver mode. Select the Power Saver button
to cancel the Power Saver mode.
• Adjust the Touch Screen contrast using the thumbwheel on the
right side of the Touch Screen.
It is not possible to insert
• Check the Touch Screen for error messages and perform any
documents
corrective measures indicated on the Touch Screen.
• Reboot the system to see if that corrects the problem.
• If the condition does not improve, contact your Service
Representative.
Media jams occur
frequently
• Check for and remove loose pieces of media from inside the
machine.
• Verify that the media is not curled, folded, wrinkled, or torn.
Replace the media if any of these conditions apply.
• Verify that the media is loaded correctly. Reload the media if
necessary.
• Verify that suitable media is being used. Use only the paper
recommended by your Service Representative.
A fault or error message
displays on the Touch
Screen.
• Follow the specific instructions on the Touch Screen.
• If the condition does not improve, contact your Service
Representative.
Problems During Printing
The following table will help solve problems encountered during printing.
6-2
®
®
Xerox 6279 Wide Format Solution
Printer User Guide
Problem Solving
Table 17: Problems During Printing
Symptoms
Unable to Print.
Remedy
• Turn on the circuit breaker (main power switch) and the power switch.
• Select the Machine Info button, and confirm that the printer is
online.
• Make sure the network cable is connected.
• Check for an error message, and follow instructions on the Touch
Screen to solve the problem.
• Correctly set up the IP address.
• Check if an interrupt operation is being performed. If so, cancel the
interrupt operation.
Unable to print using
the Manual Feed-in
Shelf (Bypass).
Load the correct size media according to the message that appears,
and then print again.
Media often jams or is
• Make sure the correct type of media is loaded correctly.
wrinkled.
• Make sure the media tray is pushed in until it stops.
• If the media is damp, replace with new media.
• Select the media size series and the media type that match the
media that is loaded in the machine.
• Open the upper unit of the machine or slide out the media drawer
or tray to remove any torn media or foreign objects.
The prints are too
light.
• Check for a Load Toner message, and load toner if the message
appears.
• Adjust the toner density via Web Printer Management Tool. Select
Configuration > Printer > Printer Setup > Toner Density.
Images on the print
are skewed.
• Make sure media is loaded correctly.
• Make sure the media tray is pushed in until it stops.
Part of the image is
missing on the print, or • If the media is damp, some parts of the image may not print, or the
print may be smudged and unclear. Replace the damp media with
is smudged or unclear.
new, dry media.
• If media is folder or wrinkled, remove the defective media and
replace with new media.
• Check the Touch Screen for a Low Toner message.
®
®
Xerox 6279 Wide Format Solution
Printer User Guide
6-3
Problem Solving
Symptoms
Dirt appears at equal
intervals.
Remedy
• Print a few pages to try to remove dirt that could have gotten into
the paper feed path.
• If this does not solve the problem, contact your Xerox Customer
Support Center. Internal parts may have become soiled.
The print has black
dots.
Contact your Xerox Customer Support Center. Internal components
may have become soiled.
The print has black
lines.
Contact your Xerox Customer Support Center. Internal components
may have become soiled.
White dots appear in
black filled areas.
• Adjust the print Density.
• Load the correct media type.
• If the correct media type is loaded and the problem persists, contact
your Xerox Customer Support Center. Internal components may
have become soiled.
6-4
®
®
Xerox 6279 Wide Format Solution
Printer User Guide
Problem Solving
Symptoms
Toner smudges when
rubbed with your
finger.
Toner is not fused to
the paper.
The paper is dirtied
with toner.
Remedy
• Make sure media is not damp. If the media is damp, replace with
new media.
• Switch on the paper heater switch, if it is off. This switch is located
next to the Waste Toner Bottle.
• Load the correct type of media.
• Make sure the correct media settings are selected.
• Change the Sharpness setting.
• Set the Media Thickness and adjust the Media Thickness Lever on
the Scanner, if necessary.
The entire paper area Contact your Xerox Customer Support Center. There may be an internal
is printed black.
machine error.
Nothing is printed.
Part of the image is
lost on the edge of
paper.
Contact your Xerox Customer Support Center. There may be an internal
machine error.
• Make sure the correct media series is used.
• If the image exceeds the machine's printable area, decrease the
original print area.
The print displays
excessive background. • Verify that the image density setting is correct.
• Check the quality of the original.
• Reduce the Density setting.
• Increase the Background Suppression setting.
®
®
Xerox 6279 Wide Format Solution
Printer User Guide
6-5
Problem Solving
Error Messages
This section describes how to solve the problem when an error message appears.
Error messages displayed will vary depending on your particular situation and the error
involved. The messages will display as a pop up screen covering most of the screen below
it. The error screen will provide a diagram and a textual description of the problem and
any directions to follow. See the example below.
NOTE
Most errors will remain on the screen until you fix them, but some will allow you to
close them. The amber-colored error screens will warn that the system will shut down
if the problem is not fixed. The lower priority errors are clay-colored.
Paper Jams
If paper jams occur, the machine stops, an alarm sounds, and an error message displays
on the Touch Screen. Remove the jammed paper according to the message displayed.
Paper jams can be cleared with the machine still on. When the power is turned off, all
information stored to the machine’s memory will be erased.
NOTE
Always check the Touch Screen message to identify the location of a paper jam
before attempting to remedy the problem. Opening a media tray before knowing
the paper jam location may tear the paper, leaving pieces inside the machine. This
condition may cause machine malfunctions.
6-6
®
®
Xerox 6279 Wide Format Solution
Printer User Guide
Problem Solving
NOTE
If a piece of jammed paper remains inside the machine, the paper jam message will
not disappear from the Touch Screen.
If a paper jam message displays again after you have cleared the paper jam, paper is
probably jammed at another location. Clear this by following the message instructions.
When you finish clearing a paper jam, printing automatically resumes from the state
before the paper jam occurred.
WARNING
When removing jammed paper, make sure that no pieces of torn paper are left in
the machine. A piece of paper remaining in the machine potentially could cause a
fire.
WARNING
If a sheet of paper is wrapped around the heat roller, or the jammed paper is difficult
or impossible to see, do not try to remove it yourself. Doing so may cause injuries or
burns. Switch off the machine immediately and contact your Xerox Customer Support
Center.
CAUTION
Do not touch the components inside the machine. Doing so can cause print defects.
Paper Jam Display
The location where a paper jam has occurred will be displayed on a diagram on the
Touch Screen. Clear paper jams by following the instructions on the screen.
Jams can occur in the following areas:
• Drawers (roll paper) - The standard configuration is a one drawer configuration
(Drawer 1), but an additional, second drawer can be purchased (Drawer 2).
• Trays (Cut sheet paper) - Two cut sheet media trays can be purchased instead of a
second drawer (Tray 3 and Tray 4).
• Manual Feed-in Shelf (bypass)
• Upper Unit
• Fuser
WARNING
Do not touch any of the high temperature components in the machine when
removing paper jams. Take care not to get your fingers caught.
Paper Jams in Drawer 1 or Drawer 2
Follow the procedure below to remove paper jams in the roll feeder(s) and reload the
roll paper.
®
®
Xerox 6279 Wide Format Solution
Printer User Guide
6-7
Problem Solving
1. If the paper jam is in Drawer 1, gently pull out the Media Drawer for Rolls 1 and 2
media.
If you have a four-roll configuration and the paper jam is in Drawer 2, gently pull out
the Media Drawer for Rolls 3 and 4 media.
6-8
®
®
Xerox 6279 Wide Format Solution
Printer User Guide
Problem Solving
2. If the paper jam is in the Drawer Cover, locate the Drawer Cover Latch on the right
hand side and pull it forward to open it. Remove the paper and then firmly push the
Drawer Cover back to its closed position.
3. If the lead edge of the media is folded or badly damaged in any way, unload it
manually:
a) Rewind the media on the roll from which the jam has occurred by rotating it toward
you.
b) Pull the desired amount of damaged paper out toward you and cut straight across
with scissors.
®
®
Xerox 6279 Wide Format Solution
Printer User Guide
6-9
Problem Solving
c) Reload the paper by rotating the roll until the lead edge is gripped by the roller.
The machine will then automatically advance the paper.
4. If the paper on the roll is somewhat damaged or wrinkled, press the Media Advance
button:
The machine will advance the paper and cut the lead edge.
NOTE
If you wish you cut a longer amount of paper, press and hold down the Media
Advance button until is cuts the desired amount.
NOTE
The front button advances and cuts roll 1 and the back button advances and
cuts roll 2. If you are using the bottom drawer, the front button advances and
cuts roll 3 and the back button advances and cuts roll 4.
6-10
®
®
Xerox 6279 Wide Format Solution
Printer User Guide
Problem Solving
5. Remove the trimmed piece of paper from the Cutter Area.
6. Gently close the Media Drawer until it latches.
Paper Jams in Tray 3 or Tray 4
If your machine has cut sheet trays installed and a jam occurs, remove the jammed
paper and reload the paper in the cut sheet trays in accordance with the following
procedure.
®
®
Xerox 6279 Wide Format Solution
Printer User Guide
6-11
Problem Solving
1. Gently pull out the top media tray drawer for Tray 3 or the bottom media tray for
Tray 4.
2. Remove the jammed paper.
3. Gently push in the media tray to close it.
6-12
®
®
Xerox 6279 Wide Format Solution
Printer User Guide
Problem Solving
Paper Jams in Manual Feed-in Shelf (Bypass)
Remove paper jams from the Manual Feed-in Shelf by following the procedure below.
1. If the jammed paper is visible in the Manual Feed-in Shelf, pull it out toward you to
remove it.
NOTE
Avoid damaging the paper. Make sure no pieces of paper remain in the machine.
®
®
Xerox 6279 Wide Format Solution
Printer User Guide
6-13
Problem Solving
2. If the jammed paper is not visible in the Manual Feed-in Shelf, lift up the Upper Unit
Release Latch to release the Upper Unit.
3. Use both hands to open the Upper Unit.
4. Pull the jammed media slowly toward you to remove it.
5. Gently remove the paper, taking care not to tear it. If the paper is torn, make sure to
remove all torn paper from the machine.
6-14
®
®
Xerox 6279 Wide Format Solution
Printer User Guide
Problem Solving
6. Pull the Upper Unit Release Lever toward you.
NOTE
Be sure to touch only the green part of the lever.
7. Firmly close the Upper Unit until it latches.
Paper Jams in the Upper Unit
Remove paper jams in the Upper Unit by following the procedure below.
®
®
Xerox 6279 Wide Format Solution
Printer User Guide
6-15
Problem Solving
WARNING
Do not touch any of the high temperature components in the machine when
removing paper jams. Take care not to get your fingers caught.
1. Lift up the Upper Unit Release Latch.
2. Use both hands to lift up the Upper Unit.
6-16
®
®
Xerox 6279 Wide Format Solution
Printer User Guide
Problem Solving
3. Pull the jammed paper slowly towards you to remove it.
NOTE
Check for and remove any torn pieces of media. Remaining fragments can cause
future jams and image quality defects.
4. Pull the green Upper Unit Release Lever forward.
5. Gently lower the Upper Unit firmly into place.
®
®
Xerox 6279 Wide Format Solution
Printer User Guide
6-17
Problem Solving
Paper Jams in the Fuser
Follow the procedure below to remove paper jams in the Fuser.
1. Lift up the Upper Unit Release Latch.
6-18
®
®
Xerox 6279 Wide Format Solution
Printer User Guide
Problem Solving
2. Using both hands, lift the Upper Unit to open it.
3. Using one of the Green Levers on each side of the Fuser Door, lift the Fuser Door to
locate the jammed paper.
WARNING
Do not touch any part of the Fuser Door except the green lever. Components
are hot. Take care not to get your fingers caught.
4. While holding the Fuser Door open, pull the jammed paper out the back.
NOTE
Take care not to tear the paper. If the paper is torn, make sure to remove all
torn paper from the machine. Remaining fragments in the paper path can cause
future jams and image quality defects.
®
®
Xerox 6279 Wide Format Solution
Printer User Guide
6-19
Problem Solving
5. Close the Fuser Door.
6. Pull the green Upper Unit Release Lever forward.
7. Firmly push down the Upper Unit to close it.
6-20
®
®
Xerox 6279 Wide Format Solution
Printer User Guide
Appendix
7
This chapter contains Xerox 6279 Wide Format diagrams, descriptions, and specifications
about the following:
• Space, Electrical and Environmental Requirements
• Specifications
• Options
• Client Tools
• Cautions and Limitations
Space, Electrical, and Environmental
Requirements
The diagram below illustrates the minimum clearances required for normal operation,
consumables replacement, and maintenance of your Xerox 6279 Wide Format Solution
with FreeFlow Access Print Server. Your Xerox representative will provide the necessary
support to install your printer correctly.
If you need to move the machine in the future, contact your Xerox representative, as
releveling will be required.
The printer has a recommended footprint of 128 square feet. The required clearance
from the floor to the nearest overhead obstruction within the floor space requirement
is 84” (2135mm).
®
®
Xerox 6279 Wide Format Solution
Printer User Guide
7-1
Appendix
The tables below provide space requirements and machine dimensions.
Table 18: Space Requirements
Height
84” (2135mm) clearance from floor to nearest overhead
obstruction within the floor space requirement
Width
140” (3550mm) recommended, 109” (2770mm) minimum
Depth
132” (3347mm)
Table 19: Machine Dimensions
Height
55.1” (1400mm) - with UI
Width
61” (1550mm) - with UI
Depth
33.3” (847mm) - with Controller
Table 20: Machine Weight
Weight
Ship Weight
IOT
537 lb (244 kg)
659 lb (299 kg)
UI
13.5 lb (6.1 kg)
15 lb (6.8 kg)
Controller
19.2 lb (8.7 kg)
24.4 lb (11 kg)
IOT installed with UI and
Controller
570 lb (259 kg)
698 lb (317 kg)
2 Roll Option
80.5 lb (36.5 kg)
135 lb (61 kg)
7-2
®
®
Xerox 6279 Wide Format Solution
Printer User Guide
Appendix
2 Tray Option
Weight
Ship Weight
141.1 lb (63 kg)
183 lb (83 kg)
The tables below detail the temperature and humidity requirements, and heat emission
and audible noise details.
Table 21: Environmental Requirements
Temperature Range
50 - 89 degrees Farenheit (10 - 32 degrees Celsius)
Humidity
15 - 85% Relative Humidity
Table 22: Heat Emission and Audible Noise
Printer Base
UI
Heat Emission
7319 BTU/hr Running
1768 BTU/hr Standby
None
Audible Noise
7.5 B (A) Running
6 B (A) Standby
None
Specifications
The following tables list specifications for the Xerox 6279 Wide Format Solution Printer
with FreeFlow Accxes.
Table 23: Xerox 6279 Wide Format Solution Printer Specifications
Process/imaging
Xerographic LED
Development method
Dry development (single component)
Type of photo sensitive
material
OPC
Fusing method
Heat roller and pressure roller
Printer resolution
600 dpi
Prints per minute
7D/minute (A1) / with speed upgrade 9D/minute (A1)
Maximum prints
999
Minimum output size
11” (279 mm)
Maximum output size
36” (914.4 mm)
Grayscale levels
256 simulated monochrome only
Configuration options
2 Roll Model
Roll x 2, Bypass Sheet Feeder
4 Roll Model
Roll x 4, Bypass Sheet Feeder
2 Roll, 2 Cut Sheet Tray Model
Roll x 2, Cut Sheet Tray x 2, Bypass Sheet Feeder
®
®
Xerox 6279 Wide Format Solution
Printer User Guide
7-3
Appendix
Warm up time
3 minutes (when the room temperature is 72 degrees Farenheit/22
degrees Celsius)
First print out time
30 seconds (Roll1, E/A0 size)
Image loss
External diameter of roll paper (remaining roll paper)
100mm or more: 5mm or less
Less than 100mm: 8mm or less
Cut paper (on Bypass Sheet Feeder): 5mm or less (applied to the
image with coverage specified by ROM pattern)
The width of border erase is 3mm or less on both side edges, lead
edge and trail edge (ignoring variation in paper width and length)
Table 24: Print Sizes
Width
Roll - 279.4mm to 914mm
Cut Sheet Tray - 210mm to 610mm
Bypass Sheet Feeder - 210mm to 914mm
Length
Roll - 210mm -15,000mm (49.2 ft.)
Cut Sheet Tray - 210mm to 458mm
Bypass Sheet Feeder - 210mm to 2000mm
Table 25: Media Sizes
Roll media
Outside roll diameter: 185 mm or less
ISO A (JIS): A0, A1, A2, A3 (841, 594, 420, 297mm)
ISO B (JIS): B1, B2, B3 (707, 500, 353mm)
JIS B: B1, B2, B3 (728, 515, 364mm)
Special A 1: A0(880mm), A1(620mm), A2(440mm), A3(297mm)
Special A 2: A0+(860mm), A1+(620mm), A2+(435mm), A3
ANSI: E(34”), D(22”), C(17”), B(11”)
ARCH 1: E(36”), D(24”), C(18”), B(12”)
ARCH 2: (30”, 24”, 15”, 12”)
Tray media
ISO A (JIS): A2 (Landscape - 420 x 594mm), A3 (Landscape/Portrait - 297 x
420mm), A4 (Landscape/Portrait - 210 x 297mm),
ISO B (JIS): B3 (Landscape/Portrait), B4 (Landscape/Portrait)
JIS B: B3 (Landscape/Portrait), B4 (Landscape/Portrait)
ANSI:C 17” x 22” (Landscape), B 11” x 17” (Landscape/Portrait), A 8.5” x 11”
(Landscape/Portrait)
ARCH: C 18” x 24” (Landscape), B 12” x 18” (Landscape/Portrait), A 9” x 12”
(Landscape/Portrait)
Manual
ISO A (JIS): A0, A1, A2, A3, A4 (841, 594, 420, 297mm)
Feed-in Shelf ISO B (JIS): B1, B2, B3, B4 (707, 500, 353mm)
(Bypass)
JIS B: B1, B2, B3, B4 (728, 515, 364mm)
Special A 1: A0(880mm), A1(620mm), A2(440mm), A3, A4
Special A 2: A0+(860mm), A1+(620mm), A2+(435mm), A3, A4
ANSI E(34”), D(22”), C(17”), B(11”), A(8.5”)
ARCH 1: E(36”), D(24”), C(18”), B(12”), A(9”)
ARCH 2: (30”, 24”, 15”, 12”, 9”)
This section lists the media types and acceptable weights.
7-4
®
®
Xerox 6279 Wide Format Solution
Printer User Guide
Appendix
Table 26: Media Types and Weight
Media Source
Type
EO Weight
NACO Weight
Roll
Bond
Tracing Paper
Film
T-Bond
60-110 gsm
90-112 gsm
75- 100 µm
18-20 lb
90-112 gsm
4 mil
18 lb
Tray
Bond
60-110 gsm
18-20 lb
Manual Feed-in Shelf
Bond
Tracing Paper
Film
T-Bond
60-110 gsm
90-112 gsm
75-100 µm
18-20 lb
90-112 gsm
4 mil
18 lb
The table below lists the print speeds for various media, at 7D and 9D/minute.
®
®
Xerox 6279 Wide Format Solution
Printer User Guide
7-5
Appendix
Table 27: Print Speeds
Speed
Size
LEL ppm
SEL ppm
7D/minute
US Media Size
Arch A
Arch B
Arch C
Arch D
Arch E
ANSI A
ANSI B
ANSI C
ANSI D
ANSI E
EO Media Size
ISO Sizes
A4
A3
A2
A1
A0
15.2
12.6
9.6
6.9
NA
15.5
13.3
10.0
7.3
NA
15.6
12.9
10.2
7.0
NA
NA
9.6
6.9
4.7
3.0
NA
10.0
7.3
4.9
3.1
NA
10.2
7.0
5.0
3.0
9D/minute
US Media Size
Arch A
Arch B
Arch C
Arch D
Arch E
ANSI A
ANSI B
ANSI C
ANSI D
ANSI E
EO Media Size
ISO Sizes
A4
A3
A2
A1
A0
19.4
15.8
11.4
9.0
NA
19.8
16.9
12.0
9.6
NA
20.0
16.0
12.2
9.2
NA
NA
11.4
9.0
6.2
4.8
NA
12.0
9.6
6.6
5.2
NA
12.2
9.2
6.7
4.9
The table below lists the Xerox 6279 Wide Format finishing capability.
Table 28: Finishing Information
IOT Output Catch Tray capacity
Up to 100 D / A1 size prints
Optional folder interface
Generic Folder Interface (GFI)
The table below provides detailed specifications for the FreeFlow Accxes Print Server.
7-6
®
®
Xerox 6279 Wide Format Solution
Printer User Guide
Appendix
Table 29: FreeFlow Accxes Print Server
Internal Integrated Print
Server
Memory 2 GB (max 3 GB with optional 1 GB)
Hard Disk Drive 80 GB or better
Ports
USB 2.0 scanner interface
Serial RS232 (service only)
Network protocols
TCP/IP 10/100/1000; LPR
Standard Data Formats
HPGL/2 (HP 750C emulation), HP-RTL (HP 750C emulation),
TIFF 6.0 (including LZW), CALS 1&2, CalComp 906/907/951/PCI,
FileNET, NIRS, CGM, VCGL, VRF, Versatec Data Standards, Xerox
Emulation 150. C4, JPEG
Optional Data Formats
Adobe PostScript 3, PDF (1.7). DWF. BMP, JPEG 2000, PNG, GIF,
DGN
Windows Printer Drivers
XP, Server 2003, XP x64, Server 2003 x64, Vista, Vista x64
Optional Printer Drivers
Adobe PostScript 3 for FreeFlow Accxes, Windows XP x64, Server
2003, Server 2003 x64, Vista, Vista x64, AutoCAD drivers up
through AutoCAD 2009
The following tables list the electrical requirements and power consumption for the
Xerox Wide Format 6279.
®
®
Xerox 6279 Wide Format Solution
Printer User Guide
7-7
Appendix
Table 30: Power
Power
Frequency (applied to IOT)
50Hz ± 5% or 60Hz ± 5% (compatible with both 50Hz and 60Hz)
Rated Voltage
IOT: AC 208-240V, -10% to +10% of the rated voltage
Power Cord Receptacles
The IOT will have an IEC-320-20C (Inlet)
Power Source
One 208-240V 20A circuit with 1 receptacle is required.
One dual 115V, 15A outlet for Accxes Controller and UI Power is
required.
One each additional 115V, 15A outlet will be needed to enable an
optional Wide Format Scanner or an optional Stacker.
Input voltage (controller)
Voltage selection switch with settings for 115V or 220V
Table 31: Power Consumption
Mode
Printer
208-240V 13.2A or less
Controller
115V 15A or less
UI
115V 15A or less
At Warm-up
3.2 KW or less
60 W or less
45 W or less
Standby
Less than 520 W
60 W or less
45 W or less
Running
3 KW or less
60 W or less
45 W or less
Power save
54 W
60 W or less
5 W or less
Sleep
13 W
60 W or less
5 W or less
Table 32: Electrical Requirements
Print engine
208-240V +/- 10%. 50 - 60 Hz, 13.2 amp
FreeFlow Accxes
110/220V, 50-60 Hz, 5/2.5 amp max
UI
100/240V, 50-60 Hz, 1.5A converted to 12 VDC, 5 amp max
7-8
®
®
Xerox 6279 Wide Format Solution
Printer User Guide
Appendix
The following tables provide magnification lists (shown in percentages) for prints and
copies.
Table 33: Magnification (%)
Original Size A4
A3
JIS B3
A2
JIS B2
A1
JIS B1
A0
A4
100
141.4
173.2
200
245
282.8
x
x
A3
70.7
100
122.5
141.4
173.2
200
x
x
JIS B3
61.3
81.6
100
122.5
141.4
163.3
x
x
A2
50
70.7
86.6
100
122.5
141.4
173.2
200
A1
35.3
50
61.3
70.7
86.6
100
122.5
141.4
A0
25
35.3
43.3
50
61.3
70.7
86.6
100
Table 34: Magnification (%)
Original Size
E
D
C
B
A
ANSI E
100
64.7
50
32.4
25
ANSI D
129.4
100
64.7
50
32.4
ANSI C
200
129.5
100
64.7
50
ANSI B
258.8
200
129.4
100
64.7
ANSI A
400
258.8
200
129.4
100
Table 35: Magnification (%)
Original Size
E
D
C
B
A
ARCH E
100
66.7
50
33.3
25
ARCH D
133.3
100
66.7
50
33.3
ARCH C
200
133.3
100
66.7
50
ARCH B
266.7
200
133.3
100
66.7
ARCH A
400
266.7
200
133.3
100
Table 36: Magnification (%)
Original Size
E
D
C
B
A
ISO A0
100
70.7
50
35.4
25
ISO A1
141.4
100
70.7
50
35.4
ISO A2
200
141.4
100
70.7
50
ISO A3
282.8
200
141.4
100
70.7
ISO A4
400
282.8
200
141.4
100
®
®
Xerox 6279 Wide Format Solution
Printer User Guide
7-9
Appendix
Options
The Xerox 6279 Wide Format base printer (product code LXE), at a speed of 7D/minute,
comes equipped with 2 rolls. In addition, the following options are available.
Table 37: Options
Product Name
Product Code
IOT Output Catch Tray
RTX
Printer 9D Speed Key
LXH
Scanner (IIT) Upgrade
LXT
IIT Document Output Tray
RTA
Scan Memory 512 MB Upgrade
LXD
Color Scan Enablement
LXP
6279 Scan Speed
LXN
Scan to Net
LXR
Second Drawer 2 Roll
LXK
2 Cut Sheet Tray (18” - 24” max )
LXM
See Specifications for standard and optional data formats and printer drivers.
Client Tools
The following are the principal client tools available for use with your machine.
Table 38: Client Tools
Product Name
Notes
Xerox Wide Format FreeFlow
A browser-based tool that allows users to access the printer
Accxes Web Printer Management from a client workstation by entering the URL address of
Tool (Web PMT)
the printer’s controller. Some options include viewing printer
status, the print queue and media sizes, and uploading
feature key upgrades.
7-10
®
®
Xerox 6279 Wide Format Solution
Printer User Guide
Appendix
Product Name
Notes
Instant Accxes
A Web Printer Management Tool application that allows
users to define up to 10 folders on the controller’s hard drive
and specify printing options for each one. The folders appear
as shared drives on the network that users can copy to their
desktop. Any file placed (through a drag and drop operation)
in the folder is printed with the assigned printing options.
Xerox Wide Format FreeFlow
Accxes
Client Tools (ACT)
Allows users to send document sets to a FreeFlow Accxes
supported printer and to retrieve scanned images that were
scanned at a FreeFlow Accxes-supported scanner.
Xerox Wide Format FreeFlow
Provides a central point for administration of accounts and
Accxes
users, and for tracking print, copy, and scan usage for several
Account Management Tool (AMT) FreeFlow Accxes-based printers.
See the FreeFlow Accxes Software Tools Customer Training Guide for more detailed
information on these tools.
Cautions and Limitations
This section describes a few additional notes and restrictions on the use of the machine.
Notes and Restrictions on Use of the Machine
Installing and Moving the Machine
• Contact your Xerox Customer Support Center if you are considering relocating the
machine.
• Do not block the ventilation opening of the machine’s exhaust fan.
Operating the Machine
When you open the Upper Unit (for example, to replace the Waste Toner Bottle), you
must pull the Upper Unit Release Lever forward in order to close the unit again.
®
®
Xerox 6279 Wide Format Solution
Printer User Guide
7-11
Appendix
Cautions on Operating the Machine
CAUTION
Always follow the correct procedures for powering the machine on and off.
Failure to power the machine on and off correctly may damage the machine
memory and cause malfunctions.
CAUTION
Do not leave the Upper Unit open for more than ten minutes. Doing so may
result in deterioration of the image quality.
7-12
®
®
Xerox 6279 Wide Format Solution
Printer User Guide