Download Wiley Adobe Photoshop CS3: Top 100 Simplified Tips & Tricks
Transcript
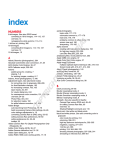
Index
Numbers
32-bit High Dynamic Range (HDR) images, 124–125
RI
TE
MA
D
TE
GH
RI
CO
PY
actions, 14–15, 118–119, 190
Actions palette, 14, 190
active layers, 27
Add Grain slider, 217
Adjustment Layer button, 169, 174
Adjustment layers, 28–29, 102
Adobe Gamma utility, 20
Adobe RGB, 4
Airbrush button, 105
Airbrush thumbnail, 93
AKVIS Coloriage, 210, 220–221
Alien Skin plug-in, 210
BlowUp, 216–217
Snap Art, 218–219
aligning images for group shots, 122–123
Alpha channel, 130
Alpha 1 channel, 131
Amount slider, 90, 117
Andromeda filters, 210, 214–215
Art History Brush, 16
Artistic filters, 187
Artistic layer, 168
artwork, digital, 158–187
colored-pencil illustrations, 168–169
creating with Alien Skin Snap Art, 218–219
oil painting look, 180–183
pen-and-colored-wash drawings, 174–177
pen-and-ink drawings, 164–165
photo collages, 178–179
posterizing, 170–173
signatures, 162–163
sketched look, 160–161
watercolor look, 184–187
woodcut look, 166–167
Auto-Align Layers command, 122
Auto-Blend Layers command, 123
Auto-Enhance option, 37
Automate command, 196
Auto-Select Groups check box, 135
Auto-Select Layer check box, 135
AL
A
B
background, extracting main subject from, 40–41, 222–223
Background Color box, 53
Background copy layer, 71, 92, 96, 151
Background layers, 40, 48, 70, 135
changing, 26–27
dragging, 93
duplicating, 26–27
thumbnail, 155
background/foreground colors, 84
234
Balance slider, 112–113
banner styles, 197
Barrel distortion, 62
Bevel and Emboss, 142, 157
Bicubic Sharper, 66, 197, 216
Bicubic Smoother, 66, 216
bit depth, 125
bitmap layer masks, 24
Black and White adjustment, 110–111, 176
Black and White dialog box, 111, 164, 170, 173, 174
black-and-white images, colorizing, 100–101, 220–221
Blacks slider, 107
Blade Curvature and Rotation settings, 131
blemishes, 70–73
Blend Exact brush, 223
Blend Images Together command, 65
blending
blend modes, 120–121
images for group shots, 122–123
text into images, 152–153
two images with layer masks, 30–31
Blending Options sliders, 152
BlowUp plug-in, 210
blue grids, 136
Blur Focal Distance slider, 130
Blur tool, 16
bounding box, 144, 147
Bridge, 10–11
brightening eyes, 82–83
Brightness slider, 155
Brightness/Contrast dialog box, 155
brush angles, 203
Brush Name dialog box, 17, 163
Brush opacity, 73
Brush options, Diameter slider, 162
Brush Picker, 78, 85, 91, 93, 101, 119, 183
Brush Stroke filters, 198
Brush thumbnail, 186, 203
Brush Tip Shape, 16, 86, 175
Brush tool, 16, 72, 84, 88, 101, 119, 123, 162, 188, 202
designing customized, 16–17
Quick Mask mode, 38–39
brushes
Art History, 16
Blend Exact, 223
eyelash, 85
History, 16, 91
Save, 17
signature, 163
Brushes button, 85
Brushes icon, 31
Brushes palette, 17, 175, 187
buildings, straightening, 62–63
Burn tool, 16
buttons
Adjustment Layer, 169, 174
Airbrush, 105
Brushes, 85
Change Screen Mode, 110
color-coded, 15
Commit, 49, 51–52, 60, 142, 144
Create New Action, 14
Default Colors, 38
Exclude Overlapping Shape Areas, 156
Fill Pixels, 58, 200
Foreground Color, 31
Layer Mask, 29, 31, 119, 179, 198
Layer Style, 140, 142, 151, 199
New Adjustment Layer, 29, 102, 116, 120, 155, 167, 171
New Brush, 17
New Effect Layer, 199
New Fill or Adjustment Layer, 34
New Layer, 26, 58, 70, 84–85, 96, 174, 182, 185, 198
Open Image, 55
Paths, 144
Warp Text, 145, 152
C
calibrating monitors, 20–21
Camera Raw, 94
creating split tones in, 112–113
cropping in, 54–55
Exposure slider, 106
Fill Light slider, 107
improving sky with HSL values in, 108–109
JPEGs, opening, 107
Recovery slider, 106
straightening in, 54–55
TIFFs, opening, 107
using to recover highlights, 106–107
Camera Raw dialog box, 106, 112, 126
canvas size, 52, 137, 202, 206
Cataloging Options dialog box, 231
catalogs, 230–231
catch lights, 88–89
CD/DVD jewel case, contact sheets for, 193
Change Screen Mode button, 110
Channels tab, 128
Character palette, 149, 151, 207
check boxes
Auto-Select Groups, 135
Auto-Select Layer, 135
Crop, 55
Crop check, 55
Palette Locations, 9
Resample Image, 67
Tint, 111
Tool Switch, 7
chromatic aberration, 63
chrominance noise, 224
Clean Up tool, 41
clipping masks, 151
Clone Stamp tool, 16
collages, 178–179
Color Burn, 166
Color Efex Pro plug-in, 210
Color Intensity slider, 99
Color Picker, 19, 33, 77, 100–101, 135, 172, 185, 191
Color Replacement tool, 77
Color slider, 100
Color thumbnail, 18, 191
colorcasts, 98–99
color-coded buttons, 15
colored-pencil illustrations, 168–169
Coloriage dialog box, 220
colors, 94–113
colored shadows, 154–155
colorizing
black-and-white images, 100–101, 220–221
new images, 104–105
converting to grayscale, 102–103, 110–111
editing, 221
improving
overexposed images, 97
sky, 108–109
underexposed images, 96
recovering highlights, 106–107
removing colorcasts, 98–99
settings for, 4–5
split tones, 112–113
ColorVision, 20
combined images, 204–205
commands
Auto-Align Layers, 122
Auto-Blend Layers, 123
Automate, 192, 196
Blend Images Together, 65
Crop and Straighten Photos, 56, 58–59
Flatten All Layers, 193
Free Transform, 212
Levels, 99
Match Color, 98
PDF Presentation, 188, 194
Photomerge, 64
Shadow/Highlight, 97
Straighten Photos, 56
Transformation, 42
Commit button, 49, 51–52, 60, 142, 144
composition
improving with rule-of-thirds grid, 48–49
photo collages, 178–179
Conner-ziser, Jane, 72, 88–89
Contact Sheet II dialog box, 192
contact sheets, 192–193
Content palette, 11
Content tab, 10
Contract/Expand slider, 37
Control Panel, 22
Convert to Smart Object icon, 42
converting to grayscale, 102–103, 110–111
Cool Color Reduction slider, 228
copyrights, 196–197
Create New Action button, 14
Creative Suite applications, 5
Crop and Straighten Photos command, 56, 58–59
Crop check box, 55
cropping, 46–67
Camera Raw format, 54–55
changing perspective, 60–61
235
Index
cropping (continued)
level horizons, 50–51
multiple images to create triptychs, 58–59
panoramas, 64–66
reverse, 52–53
rule-of-thirds grid, 48–49
Curves dialog box, 83
Custom Crop dialog box, 55
Custom Shape layers, 32–33
Custom Shape Picker, 144
Custom Shape tool, 32, 58, 143–144
customizing, 1–23
actions, 14–15
Bridge, 10–11
Brush tools, 16–17
Color Settings, 4–5
gradients, 18–19
keyboard shortcuts, 12–13
monitor calibration, 20–21
pen tablets, 22–23
Preferences, 6–7
workspaces, 8–9
Cylindrical option, 66
D
dark vignette effects, 117
Darken Amount data field, 74
Darker Color blend mode, 120
Default Colors icon, 38, 52
Default Foreground and Background Colors icon, 34
default shortcuts, 12
Default Workspace option, 9
Delete Exact brushes option, 222–223
Delete Local brush option, 222
Density slider, 116
depth of field, 128–131
Dfine dialog box, 224
dialog boxes
Black and White, 111, 164, 170, 173–174
Brightness/Contrast, 155
Brush Name, 17, 163
Camera Raw, 106, 112, 126
Cataloging Options, 231
Coloriage, 220
Contact Sheet II, 192
Curves, 83
Custom Crop, 55
Dfine, 224
Extract, 40
Feather Selection, 80, 154
Fill, 160, 185
Fluid Mask, 222
General Preferences, 6
Gradient, 120
Gradient Fill, 33, 34–35
High Pass, 166
Hue/Saturation, 82, 167
236
Image Size, 67
Layer Style, 152–153, 191, 201, 205
Lens Correction, 63
Load, 213
Make Work Path, 148
Median, 13, 176
New, 162
New Action, 14
New Guide, 48–49
New Layer, 28, 33, 48
Preferences, 6
Quick Mask Options, 39
Rotate Canvas, 50
Save, 194, 230
Save Selection, 129
Save Workspace, 9, 11
Screens, 214–215
Select Shadow Color, 141
Smart Blur, 164, 175, 185
Smart Sharpen, 90
Stroke, 208
Synchronize, 55
Threshold, 166
Vanishing Point, 137
Diameter slider, 36, 71
digital artwork. See artwork, digital
digital negatives, 192
digitizing tablets, 22–23, 31, 36, 86, 181
diptych, 58
Display drop-down menu, 41
Distance sliders, 201
Dodge and Burn tools, 16, 173
double-neon glow, 140–141
drawings
pen-and-colored-wash, 174–177
pen-and-ink, 164–165
Dry Brush filter, 181, 184, 186
Dual Brush, 16
duplicating Background layers, 26–27
dynamic range, 124
E
Edge Highlighter tool, 40
Edge Touchup tool, 41
edges
adjusting edges layer, 213
artistic, 198–199
creating custom, 202–203
softening, 203
Edges Only mode, 164
Edit and Transform menu, 145
effects, 114–137
adjusting depth of field, 128–131
aligning/blending images for group shots, 122–123
blend modes, 120–121
creating silhouettes, 132–135
creating split tones for, 112–113
dark vignette, 117
Filter Effects, 199
Image, 15
merging multiple raw images to 32-bit HDR, 124–125
silhouettes, 132–135
simulated motion blurs, 118–119
smart digital photo filters, 116
soft-focus, 92–93
split tones, 112–113
split-neutral density filters, 126–127
text, 138–157
adding perspective, 146–147
blending text into images, 152–153
colored shadows, 154–155
custom watermarks, 142–143
double-neon glow, 140–141
filling shapes with text, 144
making text follow any path, 148–149
photo-filled titles, 150–151
warping type, 145
weaving text/graphics, 156–157
Vanishing Point filter, 136–137
Elliptical Marquee tool, 191
Enable Color Management In Bridge option, 5
engraving look, 214–215
enhancing
colors, 94–113
colorizing, 100–101, 104–105
converting to grayscale, 102–103, 110–111
creating split tones, 112–113
improving overexposed images, 97
improving sky, 108–109
improving underexposed images, 96
recovering highlights, 106–107
removing colorcasts, 98–99
tones
colorizing, 100–101
converting to grayscale, 102–103, 110–111
creating split tones, 112–113
improving sky, 108–109
enlarging images, 216–217
Eraser tab, 22
Eraser tool, 16, 77, 104–105, 160, 186, 221
Exclude Overlapping Shape Areas button, 156
Exposure slider, 106, 107
ExpressKeys, 23
Extensis Portfolio 8 plug-in, 210, 230–233
Extract dialog box, 40
Extract filter, 40, 45
extracting main subject from background, 40–41, 222–223
Eyedropper tool, 50, 76
eyelash brushes, 85
eyes
adding catch lights to, 88–89
adding depth to, 84–87
brightening by lightening whites, 82–83
changing color, 76–77
removing red eye, 74–75
sharpening to add focus, 90–91
F
Fade slider, 99
feather radius, 82
Feather Selection dialog box, 80, 154
Feather slider, 37
fields
Darken Amount, 74
Opacity data, 84–85, 93
Fill dialog box, 160, 185
fill layer, 32
Fill Light slider, 107
Fill opacity, 142
Fill Pixels button, 58, 200
Fill slider, 28, 96, 143, 169
filling shapes with text, 144
Filter Effects, 199
Filter expand arrow, 12
Filter Gallery, 168–169, 181, 183, 188, 198
filters, 24, 92
adding keyboard shortcuts for, 12–13
Andromeda, 210, 214–215
Artistic, 187
Dry Brush, 181, 184, 186
Extract, 40, 45
High Pass, 167
Lens Blur, 90, 128–131
Lens Correction, 62–63, 117
Liquify, 45
Median, 168, 186
neutral density, 34
Pattern Maker, 45
polarizing, 34
Poster Edges, 170
Reduce Noise, 186
Screens, 214–215
Sharpen, 90
smart, 44–45, 97, 116
Smart Blur, 164, 186
Smart Sharpen, 91
split-neutral density, 126–127
Sunshine, 228–229
Vanishing Point, 45, 114, 136–137
Watercolor, 186
Wind, 119
flat bed scanner, 56
Flatten All Layers command, 193
Flatten Image, 68
Fluid Mask dialog box, 222
focus
direct, adding dark vignette effects to, 117
sharpening eyes to add, 90–91
soft-focus effects, 92–93
Folders tab, 10
Foreground Color box, 33, 76, 103
Foreground Color button, 31
frames, 15
creating, 191
Graphic Authority, 212–213
Free Transform command, 212
Freeform Pen tool, 148
237
Index
G
gallery prints, making images look like, 206–209
Gamma utility, 20
Gaussian Blur, 12, 89, 92, 118, 167
General Preferences dialog box, 6, 7
Go to Bridge icon, 10
Gradient dialog box, 120
Gradient Editor, 18–19, 121, 171
Gradient Fill dialog box, 33–35
gradient fill layers, 34–35, 121
Gradient Map, 102, 110, 170–172
Gradient tool, 29, 127, 129, 135, 141, 179
gradients
customizing, 18–19
Linear, 129
Graphic Authority plug-in, 210, 212–213
Gray Point eyedropper, 99
grayscale, converting to, 102–103, 110–111
grid lines, 117
Grid tool, 136
grids
blue, 136
red, 136
rule-of-thirds, 48–49
yellow, 136
group shots, aligning/blending images for, 122–123
I-J
ICC (International Color Consortium) profile, 20
icons
Brushes, 31
Convert to Smart Object, 42
Default Color, 52
Default Foreground and Background Colors, 34
Go to Bridge, 10
Layer Style, 33, 143, 163
New Tool Preset, 49
Open As Smart Object, 42
Smart Object, 127
Switch Foreground and Background Colors, 39
Tool Preset Picker, 49
Visibility, 26, 28, 70, 73, 91, 212
Image adjustments menu, 102
Image Effects, 15
Image Interpolation, 197
Image Size dialog box, 67
Image Size option, 66
Interactive Layout, 64
International Color Consortium (ICC) profile, 20
interpolation methods, 216
irises, adding contrast, 84
K
H
Hand tool, 178, 190, 202
Hardness slider, 76, 78, 85, 88
HDR (High Dynamic Range) images, 114, 124–125
Healing Brush tool, 78
High Dynamic Range (HDR) images, 114, 124–125
High Pass dialog box, 166
High Pass filter, 167
highlights, recovering, 106–107
Highlights Hue slider, 113
Highlights Saturation slider, 113
Histogram palette, 99
History Brush, 16, 91
History palette, 90–91
horizons, 50–51
Horizontal and Vertical Type Tools, 150
HSB/Grayscale tab, 113
HSL values, 108–109
HSL/Grayscale tab, 108–109, 111
Hue slider, 77, 111
Hue sub tab, 109
Hue/Saturation adjustment layer, 82
Hue/Saturation dialog box, 82, 167
238
Keep-Color Pencil tool, 221
kerning, adjusting, 149
keyboard shortcuts, 9, 12–13
Keywords tab, 10
L
Landscape mode, 65
Lasso tool, 82, 100, 132
Layer blend mode, 29, 103, 116
Layer Mask button, 29, 31, 119, 179, 198
layer mask thumbnail, 83
Layer Opacity slider, 73, 89, 93
Layer Style button, 140, 142, 151, 199
Layer Style dialog box, 152–153, 191, 201, 205
Layer Style drop shadow, 154
Layer Style icon, 33, 143, 163
layers, 24–45
active, 27
Adjustment, 28–29, 102
Artistic, 168
Background, 40, 48, 70, 135
changing, 26–27
dragging, 93
duplicating, 26–27
thumbnail, 155
Background copy, 71, 92, 96, 151
Custom Shape, 32–33
extracting main subject from background, 40–41
fill, 32
gradient fill, 34–35, 121
Hue/Saturation adjustment, 82
layer masks, 30–31
multiple, 35
smart object, 42–43, 44
Layers palette, 26–27, 29, 32, 45, 62, 72, 84, 100,
104, 129, 160, 167, 169
Blend mode, 121
Channels tab, 128
options, 155
slider types, 143
using New Layer button, 182
vector mask thumbnail, 157
Layers tab, 129, 131
Lens Blur filter, 90, 128–131
Lens Correction dialog box, 63
Lens Correction filter, 62–63, 117
Levels command, 99
Light Casting Algorithm thumbnail, 228
Light Intensity slider, 229
lightening whites of eyes, 82–83
Lighter Color blend mode, 120
Lightness slider, 81
Linear gradient, 129
Liquify filter, 45
Load dialog box, 213
luminance noise, 224
Luminance sliders, 108
Luminance tab, 108–109
M
Macintosh System Preferences, 20
Magic Wand tool, 38, 165
Make Work Path dialog box, 148
Manage Settings drop-down, 63
Marquee tools, 38, 198
masks, 24–45
bitmap layer masks, 24
clipping, 151
layer, 30–31
Quick Mask mode, 38–39
resolution-independent vector, 24
Smart Filters effects, 45
vector, 32, 157
Vertus Fluid Mask, 222–223
Master Diameter slider, 76, 78, 85, 160–161, 163
Match Color command, 98
Maximized Screen Mode, 8
Median dialog box, 176
Median filter, 168, 186
menus
Display drop-down, 41
Edit and Transform, 145
Image adjustments, 102
Palette, 13
Menus dialog box, 13
merging to HDR, 114, 124–125
Metadata tab, 10
modes
Darker Color blend, 120
Edges Only, 164
Landscape, 65
Layer blend, 29, 103, 116
Lighter Color blend, 120
Maximized Screen, 8
Overlay, 72, 215
Portrait, 65
Quick Mask, 38–39, 80
monitors, 20–21
More or Less thumbnails, 215
motion blur, 118–119
Move tool, 48, 104, 122, 134, 178, 201
multiple images, 11
multiple layers, 35
N
neutral density filter, 34
Neutralize option, 98
New Action dialog box, 14
New Adjustment Layer button, 29, 102, 116, 120, 155, 167, 171
New Brush button, 17
New dialog box, 162
New Effect Layer button, 199
New Fill or Adjustment Layer button, 34
New Guide dialog box, 48–49
New Layer button, 26, 58, 70, 84–85, 96, 174, 182, 185, 198
New Layer dialog box, 28, 33, 48
New Tool Preset icon, 49
Nik Color Efex, 228–229
Nik Dfine 2, 224–225
Nik Sharpener Pro 2, 226–227
noise, controlling, 224–225
O
oil painting look, 180–183
Opacity data field, 84–85, 93
Opacity option, 160, 185–186
Opacity slider, 28, 71, 96, 98, 101, 141, 143, 161
Open As Smart Object icon, 42
Open Image button, 55
options
Auto-Enhance, 37
Cylindrical, 66
Default Workspace, 9
Delete Exact brushes, 222–223
Delete Local brush, 222
Enable Color Management In Bridge, 5
Image Size, 66
Neutralize, 98
Opacity, 160, 185–186
239
Index
options (continued)
Perspective, 66, 146
Photo Filter, 116, 205
security, 195, 197
Soft Light, 100
Tile Horizontally, 178
Tile Vertically, 178
Options bar, 10, 18, 48, 51, 53, 60
Out-of-Gamut alert, 133
overexposure
improving, 97
working with Background layers to fix, 26–27
Overlay mode, 72, 215
P
painting, appearance of
oil, 180–183
watercolor, 184–187
Palette Locations check box, 9
Palette Menus, 13
palettes, 8
Brushes, 17, 175, 187
Layers, 26–27, 29, 32, 45, 62, 72, 84, 100,
104, 129, 160, 167, 169
Blend mode, 121
Channels tab, 128
options, 155
slider types, 143
using New Layer button, 182
vector mask thumbnail, 157
Pan tool, 224
panoramas, 64–66
Paper Brightness slider, 169
Paper Type slider, 227
Path Selection tool, 149, 156–157
paths, making text follow, 148–149
Paths button, 144
Paths palette, 149
Pattern Maker filter, 45
Pattern Picker, 182
Pattern Stamp tool, 16, 182–183
Pattern thumbnail, 182
PDF Presentation command, 188, 194
PDF slideshows, 194–195
pen tablets, 22–23, 31, 36, 86, 181
pen-and-colored-wash drawings, 174–177
pen-and-ink drawings, 164–165
Pencil tool, 16, 221
Pencil Width slider, 169
perspective
adding to type, 146–147
changing with Crop tool, 60–61
Perspective option, 66, 146
photo collages, 178–179
photo corners, 190
Photo Filter option, 116, 205
Photomerge command, 64
240
Photoshop’s Automate command, 192
Picture Package, 188
pincushion distortion, 62
pixel values, 94
plug-ins, 210–233
AKVIS Coloriage, 220–221
Alien Skin, 210
BlowUp, 216–217
Snap Art, 218–219
Andromeda, 214–215
BlowUp, 210
Color Efex Pro, 210
Extensis Portfolio 8, 210, 230–233
Graphic Authority, 210, 212–213
Nik Color Efex, 228–229
Nik Dfine 2, 224–225
Nik Sharpener Pro 2, 226–227
Portfolio 8, 210, 230–233
Sharpener Pro and Dfine, 210
storing and navigating, 229
Vertus Fluid Mask, 210, 222–223
polarizing filter, 34
Portfolio 8 plug-in, 210, 230–233
Portrait mode, 65
portrait-orientation images, 11
portraits, retouching, 68–93
adding catch lights to eyes, 88–89
adding depth to eyes, 84–87
adding soft-focus effects, 92–93
brightening eyes by lightening whites, 82–83
changing eye color, 76–77
reducing wrinkles, 78–79
removing blemishes, 70–73
removing red eye, 74–75
sharpening eyes to add focus, 90–91
whitening teeth, 80–81
Poster Edges filter, 170
posterizing, 170–173
preferences, setting, 6–7
Preferences dialog box, 6
Prefilter Strength slider, 229
presentation, 188–209
contact sheets, 192–193
edges
artistic, 198–199
custom, 202–203
frames, 191
making images look like gallery prints, 206–209
making one image look like many combined, 204–205
PDF slideshows, 194–195
photo corners, 190
slide templates, 200–201
Web Photo Galleries with copyright, 196–197
Preview Cutout tool, 223
Preview palette, 41
Preview tab, 10
Preview window, 11
profiling monitors, 20–21
Purples Luminance slider, 109
Q
Quick Mask mode, 38–39, 80
Quick Mask Options dialog box, 39
Quick Select tool, 132, 148
Quick Selection tool, 36–38, 80
R
Radius slider, 89–90, 92, 130, 166, 175–176, 185
rasterized type, 138
RAW file, 42
raw images, merging to 32-bit HDR, 124–125
recovering highlights, 106–107
Recovery slider, 106–107
Rectangle tool, 143
Rectangular Marquee tool, 51, 163, 191, 200, 204
red eye, 74–75, 77
red grids, 136
Reduce Noise filter, 186
reducing wrinkles, 78–79
Refine Edge palette, 36–37, 148
removing
background with Vertus Fluid Mask, 222–223
blemishes, 70–73
colorcasts, 98–99
red eye, 74–75
Resample Image check box, 67
resizing, 46–67
with Alien Skin BlowUp, 216–217
creating panoramas, 64–66
maximizing size with minimal loss, 66–67
reverse cropping, 52–53
Resolution box, 67
resolution-independent vector masks, 24
retouching portraits, 68–93
adding catch lights to eyes, 88–89
adding depth to eyes, 84–87
adding soft-focus effects, 92–93
brightening eyes by lightening whites, 82–83
changing eye color, 76–77
reducing wrinkles, 78–79
removing blemishes, 70–73
removing red eye, 74–75
sharpening eyes to add focus, 90–91
whitening teeth, 80–81
reverse cropping, 52–53
Rotate Canvas dialog box, 50
Rounded Rectangle tool, 200
rule-of-thirds grid, 48–49
Ruler tool, 50
S
Saturation Correction slider, 228
Saturation slider, 81–82, 108, 111, 113, 167
Saturation tab, 109
Save Brushes, 17
Save dialog box, 194, 230
Save Selection dialog box, 129
Save Workspace dialog box, 9, 11
Scaling and Relief sliders, 187
scanning images, 56
scans, straightening, 56–57
Screens dialog box, 214–215
Screens filter, 214–215
scrubby sliders, 83, 151, 160
security options, 195, 197
Select Prefilter thumbnail, 229
Select Shadow Color dialog box, 141
selections, 24–45
extracting main subject from background, 40–41
making with Vertus Fluid Mask, 222–223
Quick Mask mode, 38–39
Quick Selection tool, 36–37
Refine Edge palette, 36–37
sepia tone, 103
Set Foreground Color box, 101
Settings drop-down list, 5
shadow sliders, 153
Shadow/Highlight adjustment, 45
Shadow/Highlight command, 97
shadows, colored, 154–155
Shadows Hue slider, 113
Shadows Saturation slider, 113
Shape Dynamics, 31
Shape tool, 148
shapes
Custom Shape layers, 32–33
filling with text, 144
Sharpen Amount slider, 217
Sharpen filters, 90
Sharpen tool, 16
Sharpener Pro and Dfine plug-in, 210
sharpening
eyes to add focus, 90–91
Nik Sharpener Pro 2, 226–227
type, 146–147
shortcuts, keyboard, 9, 12–13
Shortcuts For arrow, 13
Show Transform Controls, 134–135
signature brushes, 163
signatures, 162–163
silhouettes, 132–135
single-column toolbox, 8
Size Jitter Control, 31
Size sliders, 191, 201, 205
sketched look, 160–161
skin, improving, 70–73
sky
accentuating with gradient fill layers, 34–35
improving with HSL values in Camera Raw format, 108–109
slide templates, 200–201
sliders
Add Grain, 217
Amount, 90, 117
Balance, 112–113
241
Index
sliders (continued)
Blacks, 107
Blending Options, 152
Blur Focal Distance, 130
Brightness, 155
Color, 100
Color Intensity, 99
Contract/Expand, 37
Cool Color Reduction, 228
Density, 116
Diameter, 36, 71
Distance, 201
Exposure, 106–107
Fade, 99
Feather, 37
Fill, 28, 96, 143, 169
Fill Light, 107
Hardness, 76, 78, 85, 88
Highlights Hue, 113
Highlights Saturation, 113
Hue, 77, 111
Layer Opacity, 73, 89, 93
Light Intensity, 229
Lightness, 81
Luminance, 108
Master Diameter, 76, 78, 85, 160–161, 163
Opacity, 28, 71, 96, 98, 101, 141, 143, 161
Paper Brightness, 169
Paper Type, 227
Pencil Width, 169
Prefilter Strength, 229
Purples Luminance, 109
Radius, 89–90, 92, 130, 166, 175–176, 185
Recovery, 106–107
Saturation, 81–82, 108, 111, 113, 167
Saturation Correction, 228
Scaling and Relief, 187
scrubby, 83, 151, 160
shadow, 153
Shadows Hue, 113
Shadows Saturation, 113
Sharpen Amount, 217
Size, 191, 201, 205
Smooth, 37
Stroke Length, 168
Stroke Pressure, 169
Threshold, 175, 185, 214–215
Threshold Level, 166
Tilt Sensitivity, 22
Tip Double Click Distance, 22
Tip Feel, 22
Vertical Perspective, 62
slideshows
PDF, 194–195
transition styles, 195
Smart Blur dialog box, 164, 175, 185
Smart Blur filter, 164, 186
smart filters, 44–45, 97, 116
Smart Filters effects mask, 45
Smart Object icon, 127
smart object layers, 42–44
242
smart objects, 126–127
Smart Sharpen dialog box, 90
Smart Sharpen filter, 91
smiles, whitening, 80–81
Smith, Colin, 140
Smooth slider, 37
Smudge tool, 16
Snap Art, 218–219
Soft Light option, 100
soft-focus effects, 92–93
Source Files list, 66
Spatter edge, 199
special effects, 114–137
adjusting depth of field, 128–131
aligning/blending images for group shots, 122–123
blend modes, 120–121
dark vignette effects, 117
merging multiple raw images to 32-bit HDR, 124–125
silhouettes, 132–135
simulated motion blurs, 118–119
smart digital photo filters, 116
split tones, 112–113
split-neutral density filters, 126–127
Vanishing Point filter, 136–137
spectrophotometer, 20
split tones, 112–113
Split Toning tab, 112
split-neutral density filters, 126–127
Sponge tool, 16
Spot Healing Brush tool, 70, 72, 74–75, 78
sRGB default color space, 4
Straighten Photos command, 56
straightening, 46–67
buildings with Lens Correction filter, 62–63
in Camera Raw format, 54–55
changing perspective with Crop tool, 60–61
creating level horizons, 50–51
crooked scans, 56–57
stroke borders, 209
Stroke dialog box, 208
Stroke Length slider, 168
Stroke Pressure slider, 169
Sunshine filter, 228–229
Switch Foreground and Background Colors icon, 39
Synchronize dialog box, 55
System Preferences, 22
T
tablets, 22–23, 31, 36, 86, 181
tabs
Channels, 128
Content, 10
Eraser, 22
Folders, 10
HSB/Grayscale, 108–109, 111, 113
Hue, 109
Keywords, 10
Layers, 129, 131
Luminance, 108–109
Metadata, 10
Preview, 10
Saturation, 109
Split Toning, 112
teeth, whitening, 80–81
text, 138–157
adding perspective to, 146–147
alignment, shortcuts, 155
blending text into images, 152–153
colored shadows, 154–155
custom watermarks, 142–143
double-neon glow, 140–141
filling shapes with text, 144
keeping sharp, 146–147
making text follow any path, 148–149
photo-filled titles, 150–151
warping, 145
weaving, 156–157
Texture filter, 184
Texturizer filter, 187
Threshold adjustment layer, 120–121
Threshold dialog box, 166
Threshold Level slider, 166
Threshold slider, 175, 185, 214–215
thumbnails, 10
Airbrush, 93
Brush, 186, 203
Color, 18, 191
layer mask, 83
Light Casting Algorithm, 228
More or Less, 215
Pattern, 182
Select Prefilter, 229
Type, 143
Viewing Distance, 226
Tile Horizontally option, 178
Tile Vertically option, 178
Tilt Sensitivity slider, 22
Tint box, 176
Tint check box, 111
Tip Double Click Distance slider, 22
Tip Feel slider, 22
titles
photo-filled, 150–151
text for, 207
tones
colorizing old black-and-white images, 100–101
converting to grayscale, 102–103, 110–111
creating split tones, 112–113
improving sky, 108–109
Tool Preset Picker icon, 49
Tool Switch check box, 7
tools, 22, 75. See also brushes
Blur, 16
Brush, 16, 72, 84, 88, 101, 119, 123, 162, 188, 202
designing customized, 16–17
Quick Mask mode, 38–39
Burn, 16
Clean Up, 41
Clone Stamp, 16
Color Replacement, 77
Custom Shape, 32, 58, 143–144
Dodge and Burn, 16, 173
Edge Highlighter, 40
Edge Touchup, 41
Elliptical Marquee, 191
Eraser, 16, 77, 104–105, 160, 186, 221
Eyedropper, 50, 76
Freeform Pen, 148
Gradient, 29, 127, 129, 135, 141, 179
Grid, 136
Hand, 178, 190, 202
Healing Brush, 78
Horizontal and Vertical Type, 150
Keep-Color Pencil, 221
Lasso, 82, 100, 132
Magic Wand, 38, 165
Marquee, 38, 198
Move, 48, 104, 122, 134, 178, 201
Pan, 224
Path Selection, 149, 156–157
Pattern Stamp, 16, 182–183
Pencil, 16, 221
Preview Cutout, 223
Quick Select, 132, 148
Quick Selection, 36–37, 38, 80
Rectangle, 143
Rectangular Marquee, 51, 163, 191, 200, 204
Rounded Rectangle, 200
Ruler, 50
Shape, 148
Sharpen, 16
Smudge, 16
Sponge, 16
Spot Healing Brush, 70, 72, 74–75, 78
Zoom, 38, 70, 74, 88, 137, 223
Touch Strip Preferences, 23
Transform tool, 137
transformation anchor points, 141
Transformation command, 42
Transformation controls, 135
transition styles, 195
tripod, 64
triptychs, 58–59
two-column toolbox, 8
type. See text
Type thumbnail, 143
Type tool, 135, 140–142, 144, 152, 201, 209
Horizontal and Vertical, 150
shortcuts, 147
U
underexposure, 96
utilities, Adobe Gamma, 20
243
Index
V
Vanishing Point dialog box, 137
Vanishing Point filter, 45, 114, 136–137
Variations adjustment, 45
vector masks, 32, 157
vectors, 138
vertical blue guide, 49
Vertical Perspective slider, 62
Vertus Fluid Mask plug-in, 210, 222–223
viewfinder, 48
Viewing Distance thumbnail, 226
vignetting, 63, 117
Visibility box, 128
Visibility icon, 26, 28, 70, 73, 91, 212
W
Wacom digitizing tablet, 22–23, 31, 36, 181
Wacom Intuos3 pen, 79
Warhol-style images, 170–173
warning triangles, 172
Warp Text button, 145, 152
warping type, 145
Watercolor filter, 186
watercolor look, 184–187
watermarks, 142–143
weaving
graphics, 156–157
text, 156–157
244
Web Photo Galleries, 196–197
White Balance setting, 98
white highlights, 153
whitening teeth, 80–81
Wind filter, 119
woodcut look, 166–167
workspaces, customizing, 8–9
wrinkles, reducing, 78–79
X
X key, 73
X-Rite i1 Display LT colorimeter, 20
X-Rite i1 Match software, 20–21
X-Rite i1 Photo LT spectrophotometer, 20
Y-Z
yellow grids, 136
Zoom tool, 38, 70, 74, 88, 137, 223


