1
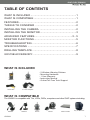
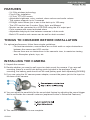
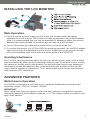
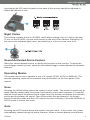
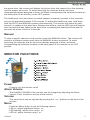
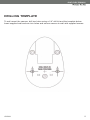
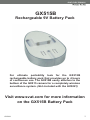
SVAT ELECTRONICS
Now You Can See
WIRELESS INDOOR
COLOR CAMERA SYSTEM
COMPLETE SYSTEM
Instruction Manual
Model #
GX5201
www.svat.com
SVAT ELECTRONICS
Now You Can See
PRODUCT WARRANTY & REGISTRATION
Please visit our website at www.svat.com to apply for your
products warranty registration.
The warranty registration for is located under the support tab on the SVAT website.
We take quality very seriously. This is why all of our products come with a one year warranty from the
original purchase date against defects in workmanship and materials.
If you have warranty or support issues please contact us using any of the following methods:
SVAT Electronics USA
2315 Whirlpool St., Unit 333
NIagara Falls, New York
USA 14305
SVAT Electronics Canada
4080 Montrose Road
Niagara Falls, ON
Canada L2H 1J9
Phone: 866.946.7828
Fax: 888.771.1701
Email: [email protected]
Website: www.svat.com
Warranty Terms
1. SVAT products are guaranteed for a period of one year from the date of purchase against defects in
workmanship and materials. This warranty is limited to the repair, replacement or refund of the purchase price
at SVAT's option.
2. When service is required, the warranty is validated by the submission of a fully completed warranty card.
3. This warranty becomes void if the product shows evidence of having been misused, mishandled or tampered
with contrary to the applicable instruction manual.
4. Routine cleaning, normal cosmetic and mechanical wear and tear are not covered under the terms of this
warranty.
5. The warranty expressly provided for herein is the sole warranty provided in connection with the product itself
and no other warranty, expressed or implied is provided. SVAT assumes no responsibilities for any other
claims not specifically mentioned in this warranty.
6. This warranty does not cover the shipping cost, insurance or any other incidental charges.
7. You MUST call SVAT before sending any product back for repair. You will be given a Return Authorization
number. When returning the product for warranty service, please pack it carefully in the original box with all
supplied accessories, and enclose your original receipt or copy, and a brief explanation of the problem
(include RA #).
8. This warranty is valid only in Canada and the U.S.A.
9. This warranty card cannot be re-issued.
CAUTION
RISK OF ELECTRIC SHOCK, DO NOT OPEN
TO REDUCE THE RISK OF ELECTRIC SHOCK, DO NOT REMOVE THE COVER (BACK).
NO USER SERVICEABLE PARTS INSIDE. REFER SERVICING TO
QUALIFIED SERVICE PERSONNEL.
Graphic Symbol Explanation:
The lightning flash with arrowhead symbol, within an equilateral triangle, is intended to
alert the user to the presence of uninsulated “dangerous voltage” within the product’s
enclosure that may be of sufficient magnitude to constitute a risk of electric shock to
persons.
The exclamation point within an equilateral triangle is intended to alert the user to the
presence of important operating maintenance (servicing) instructions in the literature
accompanying the appliance.
WARNING: TO PREVENT FIRE OR SHOCK HAZARDS, DO NOT EXPOSE THIS UNIT
TO RAIN OR MOISTURE
GX5201
www.svat.com
SVAT ELECTRONICS
Now You Can See
TABLE OF CONTENTS
WHAT IS INCLUDED ............................................................1
WHAT IS COMPATIBLE ........................................................1
FEATURES............................................................................2
THINGS TO CONSIDER ......................................................2
INSTALLING THE CAMERA ................................................2
INSTALLING THE MONITOR................................................3
ADVANCED FEATURES..................................................3 - 5
MONITOR FUNCTIONS........................................................5
TROUBLESHOOTING ..........................................................6
SPECIFICATIONS ................................................................7
DRILLING TEMPLATE ..........................................................8
GX515B ACCESSORY..........................................................9
WHAT IS INCLUDED
1 Monitor
1 Camera
1 RCA Wire
2 Power Adapters
-
2 Window Warning Stickers
Mounting Hardware
1 Year Warranty
Instruction Manual
Online/Toll Free Tech Support
WHAT IS COMPATIBLE
The GX5201 is compatible with TVs, VCRs, DVRs, computers and other SVAT systems including:
WSE201
GX5201
WSE103
GX515
GX522
ClearVu DVRs
Any TV or VCRs
1
SVAT ELECTRONICS
Now You Can See
FEATURES
- 2.4 GHz wireless technology
- Plug & Play installation
- 2.5 inch TFT-LCD screen
- Adjustable brightness, color, contrast, alarm volume and audio volume
- The system supports up to 3 cameras
- IR Night vision allows you to see in the dark up to 10ft away
- The LCD monitor has 3 modes: Scan, Auto, and Manual
- Monitor can be connected to a VCR/DVR using the A/V output port
- Color camera with sound activated alarm
- Adjustable delay/cycle time between cameras in Auto mode
- Both LCD monitor and camera can be wall or desk mounted
THINGS TO CONSIDER BEFORE INSTALLATION
For optimal performance, follow these simple guidelines:
- For best transmission, ensure there are no thick walls or major obstructions
between the camera and LCD monitor.
- Ensure there are no obstructions in the camera's view, to maximize viewing
area. Examples: plants, toys, etc.
INSTALLING THE CAMERA
1. Unpack the camera
2. Decide whether you want to wall mount or desk mount the camera. If you are wall
mounting, there is a useful hole drilling guide included in the package. If wall
mounting, the battery pack should not be used [battery pack sold separately(GX5I5B)].
3. If you are using the 9V camera power adapter, connect the power jack to the input on
the base of the camera.
4. You can adjust the sensitivity for the sound alert feature by adjusting the sound trigger
dial found beside the camera's antenna (explained further in Advanced Features)
5. The camera installation is now complete.
GX5201
2
SVAT ELECTRONICS
Now You Can See
INSTALLING THE LCD MONITOR
Main Operation
1. Plug the monitor's power supply into the power jack located inside the battery
compartment of the monitor. The monitor can also be operated using 4-AAA batteries.
Note: It is recommended that you use the provided AC adapter to power the monitor.
Batteries are recommended for portability and can last up to 200 minutes.
2. Turn on the monitor by pressing the power button on the top of the unit.
3. To connect the monitor to a VCR or DVR for recording purposes, use the RCA adapter
cable and connect the appropriate end to the A/V output port on the monitor, and the
other corresponding ends to the audio and video inputs of the VCR/DVR.
Avoiding Interference
The 2.4 GHz video signals pass easily through your home's interior walls, but the signal
may be reflected by power wires or plumbing inside the wall. If reception is poor, moving
the camera or monitor may fix this problem. Houses with steel frames may experience
interference as well. Microwave ovens, cordless phones and wireless routers are the
most common sources of interference. Try to avoid mounting the monitor near these or
other sources of RF interference.
ADVANCED FEATURES
Multi-Camera Operation
The GX5201 is designed to work with up to 3 cameras. Additional cameras are sold
separately (indoor - GX515 / outdoor - GX522).
IMPORTANT:
When using more than one camera, make sure each camera is assigned to a specific
channel by assigning them different channels (1-3). The channel switch is located on the
back of the camera.
GX5201
3
SVAT ELECTRONICS
Now You Can See
Accordingly the DIP switch located on the back of the monitor should be adjusted to
reflect the channel in use.
Night Vision
The camera includes 8 built-in IR LEDs, which allow viewing of up to 5 feet in the dark.
To turn on the IR LEDs, use the small switch on the side of the camera. Switching it to
the moon icon activates night vision, and switching it to the sun icon turns it off.
Sound-Activated Alarm Feature
When the camera detects sound, an audio alert sounds on the monitor. To adjust the
sound trigger sensitivity level, adjust the dial labeled trigger located beside the camera's
antenna.
Operating Modes
The system can be set to operate in one of 3 modes: SCAN, AUTO or MANUAL. The
desired operating mode can be selected using the buttons on the front panel of the
monitor.
Scan
Pressing the SCAN button places the system in scan mode. The monitor's screen will go
blank (standby mode) while the system continuously scans active cameras. If a camera
detects sound above the preset sound trigger level, the monitor will display the camera's
picture and the beeper will sound. Four minutes after the last detection, the screen
returns to standby mode and the LCD monitor resumes scanning. Press the MANUAL or
AUTO button to cancel this mode.
Auto
Pressing the AUTO button places the system into auto mode. In this mode, the system
automatically rotates through all active cameras. When a camera detects sound above
GX5201
4
SVAT ELECTRONICS
Now You Can See
the preset level, the monitor will display the picture from that camera for a few seconds,
and the beeper will sound. To avoid searching the channels that do not have
cameras/transmitters assigned to them, set those corresponding dip switches (located on
the back panel of the monitor) to the OFF position.
The dwell/cycle time (time taken to switch between cameras) is preset to four seconds
and can be adjusted between 2-30 seconds. To adjust the dwell/cycle time, hold down
both the AUTO and MANUAL buttons simultaneously. The monitor will chime for each
second it is adding to the dwell time. Release the buttons, and the LED light will flash for
each second that was added to the dwell time. Increasing the dwell/cycle time past 30
seconds will revert it back to 2 seconds.
Manual
To view a specific camera on the monitor, press the MANUAL button. The monitor will
switch to a different camera each time the MANUAL button is pressed. To avoid
searching the channels that do not have cameras assigned to them, set those
corresponding dip switches (located on the back panel of the monitor) to the OFF
position.
MONITOR FUNCTIONS
Power
- Press to turn the monitor on/off
Alarm Volume
- The ALARM VOLUME of the monitor can be changed by adjusting the Alarm
- Volume Tuner located on the top of the monitor.
Volume
- The sound level can be adjusted by pressing the + or - buttons on the front of the
monitor.
Menu
-
Press the Menu button to get the following options:
LED on, adjust brightness using + or LED flashing, adjust color using + or LED off, adjust contrast using + or -
GX5201
5
SVAT ELECTRONICS
Now You Can See
TROUBLESHOOTING
If you are having trouble operating this product, please consult the guide below:
Symptom
Remedies
No camera Picture
1. Check all connections and AC adapters. Make
sure camera(s) and monitor are switched ON.
2. Ensure camera(s) and monitor are set to correct
channels.
3. Make sure camera is within range of the monitor.
Blank Monitor
1. Make sure the monitor is switched ON.
2. If using the AC adapter, make sure it is
plugged in.
3. Make sure the rechargeable battery is charged.
4. Make sure the camera's AAA batteries are
charged.
Interference on
Camera Picture
1. Make sure each camera is within range, and that
no obstructions are blocking the signal.
2. Try repositioning the camera, monitor, or both to
improve the reception quality.
3. Reposition other nearby equipment transmitting
on the 2.4 GHz frequency.
Audio problems
1. Ensure the volume is turned up sufficiently on
the monitor.
2. Make sure the sound is within the microphone
range.
3. If the unit emits a loud wailing sound (feedback),
try moving the camera away from the monitor or
angle the Monitor differently.
GX5201
6
SVAT ELECTRONICS
Now You Can See
SPECIFICATIONS
Camera
TV System
Integrated Lens
Resolution
Signal/Noise Ratio
Image Sensor
Min. Illumination
Current Consumption
Frequency Range
Modulation
Channel Selection
Overall Size
NTSC or PAL standard
5.6 mm, fixed focus
360 horizontal TV lines
48dB
1/3" CMOS
0.1 lux
150 mA
2.41~2.47 GHz
FM
Electronic tuning with PLL
4.25" x 3.75" x 2.5"
Monitor
Frequency Range
Current Consumption
Channel Selection
Signal/Noise Ratio
Overall Size
2.41~2.47 GHz
350 mA
Electronic tuning with PLL
38dB
7.25" x 2.75" x 1"
Battery
(for monitor)
Voltage
Alkaline Battery
4 AAA alkaline
approx. 1 hr. continuous
(Optional) > 8 hours standby
General
Operating Temperature
Humidity
14°F to 104°F
Less than 85%
APPROVALS
This device complies with part 15 of the FCC rules. Operation is subject to the following
two conditions:
* This device may not cause harmful interference.
* This device must accept any interference received, including interference that
may cause undesired operation.
CE directive 95/5/EEC, EMC directive 89/336/EEC, LV directive 73/23/EEC.
This class B digital apparatus complies with Canadian ICES-003.
GX5201
7
SVAT ELECTRONICS
Now You Can See
DRILLING TEMPLATE
To wall mount the camera, drill two holes using a 1/4" drill bit and the template below.
Insert supplied wall anchors into holes and secure camera to wall with supplied screws.
GX5201
8
SVAT ELECTRONICS
Now You Can See
GX515B
Rechargeable 9V Battery Pack
For ultimate portability look for the GX515B
rechargeable battery pack that provides up to 4 hours
of continuous use. The GX515B easily attaches to the
bottom of the GX515 camera for a completely wireless
surveillance system. (Not included with the GX5201)
Visit www.svat.com for more information
on the GX515B Battery Pack
GX5201
9
SVAT ELECTRONICS
Now You Can See
w w w. s v a t . c o m
Disclaimer
S VAT d o e s n o t e n d o r s e a n y o f S VAT p r o d u c ts f o r a n y i l l e g a l
a c t i v i t i e s . S VAT i s n o t r e s p o n s i b l e o r l i a b l e i n a n y w a y
s h a p e o r f o r m f o r a n y d a m a g e , v a n d a l i s m , t h e ft o r a n y
o t h e r a c t i o n t h a t m a y o c c u r w h i l e a S VAT p r o d u c t i s i n u s e
b y t h e p u r c h a s e r.
Model #
GX5201
www.svat.com