1
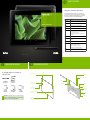
01
SPECIFICATIONs
Thank you for choosing the Tegra NOTE 7.
Your new Tegra NOTE 7 brings together a set of premium
features and innovations that are the foundation of the tablet.
Your tablet is loaded with the Google Android™ 4.2.2 operating
system and will function as any standard Android device.
QUICK START GUIDE
Specifications
Premium
Processor
NVIDIA Tegra 4 - up to 1.8 GHz Quad+1 Cortex A15, 72 core
NVIDIA GeForce GPU, 1080p video decode, encode / record
System Memory
1 GB DDR3L-1600, 12.8 GB/s
Camera
VGA Front webcam, 5 MP AF instant HDR rear
Storage
16 GB e.MMC
Audio
Front facing stereo speakers with unique bass reflex port.
Tegra nVoice audio processing for increased volume, noise
reduction, and echo cancellation.
Enhanced frequency range for more natural voice and
higher highs.
Touchscreen
High-speed 10-point capacitive DirectTouch
Connectivity
802.11 b/g/n Wi-Fi, WiFi Direct, Bluetooth 4.0 LE, GPS/
GLONASS
Sensors
9-axis (gyro, accelerometer, compass)
Interfaces
USB2.0 with host and device support
3.5 mm audio jack with mic support
Front mic for chat and voice commands
HDMI with up to Ultra HD 4K display support
Battery
4100 mAh for up to 8 hours HD video playback
www.evga.com
02
INCLUDED IN THE BOX
The following equipment is included in the
Tegra NOTE 7 box.
03
equipment In-depth
Dual Speakers
Volume
MicroSD Card Slot
Tegra NOTE 7
DirectStylus
Micro USB to
USB Cable
Stylus
Front Camera
Stylus Slot
(located behind the glass)
Camera
Power/Lock
Microphone
(located behind speaker grill)
US/China
AC Adapter
!
Hong Kong/UK
AC Adapter
Europe
AC Adapter
Attention: Only the adapter for your area will be included in
the box. It is recommended that you use the USB cable/AC
adapter that comes with your Tegra NOTE 7.
3.5 mm
Headphone Jack
Bass Reflex Port
(located on bottom edge)
Front
Back
HDMI
Micro USB
Cover Slot
(holds cover stand accessory in
place. Located on bottom edge.)
04
CHARGING THE BATTERY
1 The battery in your new Tegra NOTE™ 7 is partially charged.
It is recommended that you fully charge your device as soon as
possible.
2 To charge your Tegra NOTE 7, use the included AC adapter and
the USB cable. Plug the micro USB end of the cable into the
bottom of the device and the other standard USB end into the AC
adapter. Plug the AC adapter into an AC outlet.
Plug into wall AC outlet.
05
TURNING THE TEGRA NOTE
ON/OFF
1 Turn On: Press and hold the Power button (up to four seconds)
on the top-edge of the tablet.
2 Turn Off: Press and hold the Power button until a power-down
confirmation displays on the tablet screen. Press OK on the
touch screen to power down the Tegra NOTE 7.
3 Sleep Mode: With the tablet is powered on, press the Power
button to put the Tegra NOTE 7 into sleep mode. Press the
Power button again to wake-up the tablet.
4 Reset: To reset or bring your tablet out of an unresponsive state,
press and hold the Power button for at least 12 seconds until the
display turns off. The unit will reset automatically. About one
second later, the Tegra NOTE message displays. If the unit does
not come on it is probably out of power. Charge the tablet for at
least 10 minutes before trying to restart it.
3 Plugging the included AC adapter directly into the wall outlet will
charge your Tegra NOTE 7 the fastest. You can also charge your
Tegra NOTE 7 by plugging the standard end of the USB cable into
any USB Port on your computer. With your tablet connected to
your system, you can transfer files between the tablet and your
system.
1 Your Tegra NOTE 7 has multiple Home screens. You can organize
your apps and widgets across these screens in any way that
works for you. One screen is designated as the home screen and
it will be displayed when you press the Home
icon.
2 Three Navigation buttons are always available at the bottom of
button
the screens. Wherever you are, pressing the Home
takes you to the Home screen. It is a good idea to place your most
used apps and widgets on this screen.
Note: The difference between an App and a Widget is that
a Widget runs continuously (such as a clock, weather, and
so on) and a Widget does not take up the entire screen.
An App is an application that you start and stop, and
while it is running it takes over the entire screen (such as
games, music, photos and so on).
3 Use the Back
button to navigate back to the previous screen
you were in. With each tap of the Back button you are taken back
sequentially through the previous screens/apps until you are at
the Home screen.
4 Use the Task
icon to bring up a list of running applications.
You can swipe through the list to get the application you desire.
Tap the appropriate window and it will fill the screen. If you swipe
an application upwards, Android will kill the task and remove it
from your task carousel.
The first time you power on your Tegra NOTE 7, a Welcome
screen displays. Select the language you want the tablet to
use then press Start on the Welcome screen and follow the
instructions to set-up your device.
Set-up takes you through a series of screens to personalize
your tablet. You will be asked to set-up a Google account, an
email account, and configure your Wi-Fi connections.
1 Do I Need a Google Account?
You are not required to have a Google account associated with
your Tegra NOTE 7. However you do need an account if you want
to use the Google Play service to download and manage apps.
If you already have a Gmail (Google email) account, enter your
information in when asked. If you do not have a Gmail account,
you can create one or enter information on another Email
account you do have.
3 Wi-Fi Connection
Your Tegra NOTE 7 is equipped with a wireless networking
technology that allows you to connect to a wireless accesspoint
or hotspot. If you have a wireless router at home, enter the
information into the Wi-Fi settings. Go to Settings > Wireless &
Networks > Wi-Fi.
When charging your Tegra NOTE using only the USB cable
connected to a computer, be sure that the Tegra NOTE is in
Sleep mode or is turned off (power drain can be more than
the charging power). Charging your Tegra NOTE through
your computer will take longer than charging using the AC
adapter pluged into a wall outlet.
07
Congratulations on your new Tegra NOTE 7. Your tablet is
loaded with the Google Android 4.2.2 operating system and
will function as any standard Android device.
2 Setting-up Email
Note: It is recommended that you only use the USB cable/
AC adapter system that came with your Tegra NOTE 7.
HOME SCREENS
06
GETTING STARTED
08
CUSTOM TEGRA NOTE
APPLICATIONS
Your TEGRA NOTE 7 comes with the standard Android apps and
with the following preloaded software:
1 Camera Awesome
Camera Awesome is a powerful, intuitive camera application
designed to take full advantage of the NVIDIA Tegra 4
computational camera capabilities like HDR, Tap-to-Track, slowmotion video, and a variety of photo editing features that easily
let you apply special effects to pictures right on your tablet.
Camera Awesome allows you to better compose your shots
by including a visual horizontal level as well as various grid
overlays. You can separately set exposure and focus settings
by tapping with two fingers on the screen and there’s also a
pop out menu on the right of the viewfinder that lets you choose
fast and slow burst modes, turn on the image stabilizer or
activate the shot timer. You can even set the app up to take
photos at set intervals ranging from one second to one minute.
For more detailed information on SmugMug’s Camera Awesome,
go to http://www.smugmug.com.
2 Write
Write is a stroke processor for handwriting, designed primarily
for tablets with a stylus like Tegra NOTE 7. In addition to
capturing hand-written notes, Write has the functionality of a
drawing application, plus a set of tools to ease the editing of
handwritten text. This is made possible by grouping pen strokes
into lines, much like typed text in a word processor. Handwritten
text can be reflowed when words are deleted or space is added
for new words. Bookmarks are labeled with handwriting. The
native HTML+SVG document format can be viewed in any web
browser. You can even bring pictures or drawings in from your
gallery to include in your document.
In addition to all the usual features of a vector drawing
application, Write provides a unique set of tools for editing and
navigating handwritten documents. Write is perfect for notetaking, brainstorming.
Refer to Stylus Labs for information on using Write.
3 DirectStylus Launcher
The DirectStylus Launcher automatically starts when the
Tegra NOTE 7 DirectStylus is taken from its slot. You can either
automatically launch an app or display a customizable launcher
with applications and shortcuts.
The DirectStylus is located in a
slot on the side of the Tegra
NOTE 7. It is held in place using a
mechanical snap mechanism so
it won‘t slip out. Both tips of the
DirectStylus are rubber so it won‘t
scratch your screen.
Additional Support
Should you require any assistance with the EVGA Tegra Note, please visit the support section
of our website at www.evga.com/support. There you will be able to check out our extensive
Knowledge Base, and submit technical and customer support inquiries. Be sure to also visit the
EVGA forums at www.evga.com/forums.
Alternatively, we can be reached by phone. Before contacting Customer Service, please review
this manual. If you need to contact Customer Service, please have your model number and
serial number ready. You will need to register your product before a support technician can
assist you. You may register online at www.evga.com/register
United States
• Hours of Operation: 24/7 Technical Phone Support
• Phone Support: 888.881.3842
• Tech Support Web Site: www.evga.com/support
Europe
• Hours of Operation: 9:00AM – 6:00PM CET Technical Phone Support
• Phone Support: 49.89.189.049 11
• Tech Support Web Site: eu.evga.com/support
Warranty Program to Fit your Needs
This product is covered under a 1 Year Warranty.
For more information please visit www.evga.com/support/warranty