1
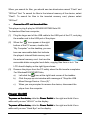
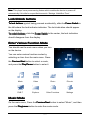
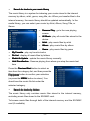
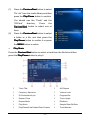
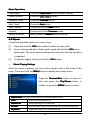
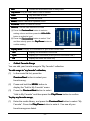
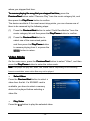
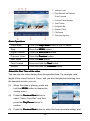
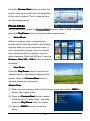
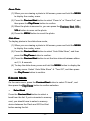
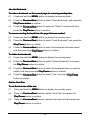
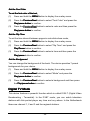
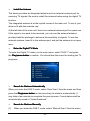
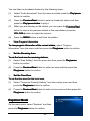
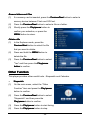
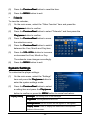
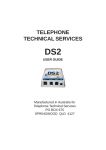
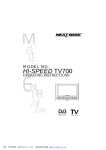
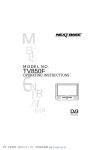
MANUAL MP3500 TABLE OF CONTENT Cautions ...................................................................................................................................................... 1 Key Features ............................................................................................................................................... 2 System Requirements.................................................................................................................................. 2 Package Content ......................................................................................................................................... 2 Buttons & Ports............................................................................................................................................ 3 Before Using................................................................................................................................................ 4 • Powering the device.....................................................................................................................4 • Charge the battery .......................................................................................................................4 • Insert a SD/MMC card..................................................................................................................5 • Connect to a PC and download files.............................................................................................6 Power On/Off............................................................................................................................................... 6 Lock/Unlock buttons..................................................................................................................................... 7 Enter Various Function Mode ....................................................................................................................... 7 Music Mode ................................................................................................................................................. 7 • Search for tracks in your music library ..........................................................................................8 Search for tracks by folders..........................................................................................................8 • • Play Music ...................................................................................................................................9 Music Playing Settings ...............................................................................................................10 • • Collect Favorite Songs ............................................................................................................... 11 • Delete Song...............................................................................................................................12 • Recollect Song...........................................................................................................................12 Video Mode ............................................................................................................................................... 13 • Select Video ..............................................................................................................................13 • Play Video .................................................................................................................................13 Resume from the last-played video ............................................................................................15 • Photo Mode ............................................................................................................................................... 16 • Select Photo ..............................................................................................................................16 View Photo ................................................................................................................................16 • E-book Mode ............................................................................................................................................. 17 • Select Book ...............................................................................................................................17 • Reading Book ............................................................................................................................18 Digital TV Mode ......................................................................................................................................... 20 Install the Antenna .....................................................................................................................21 • • Enter the Digital TV Mode ..........................................................................................................21 • Search for Stations Automatically...............................................................................................21 • Search for Stations Manually......................................................................................................21 • Watch TV stations......................................................................................................................22 • Listen to Audio Broadcasting Stations ........................................................................................22 • View Program Information..........................................................................................................23 • Set the Receiving Area...............................................................................................................23 • Set the Time Zone......................................................................................................................23 Explorer Mode ........................................................................................................................................... 23 Other Function........................................................................................................................................... 24 • Stopwatch..................................................................................................................................24 • Calendar....................................................................................................................................25 System Settings......................................................................................................................................... 25 Output Audio/Video to TV screen ............................................................................................................... 26 Troubleshooting......................................................................................................................................... 27 Technical Specifications............................................................................................................................. 28 Appendix – Supported Audio and Video Format Table................................................................................. 28 Cautions • Do not subject the device to severe impact or drop it from high position. • Do not use the player in extreme hot or cold, dusty or damp field. Do not expose it to direct sunshine. • Excessive sound pressure from earphones and headphones can cause • Avoid using the player in strong magnetic field. hearing loss. • Keep the device away from water or other liquids. In the event that water or other liquids enter the device, power off the product immediately, and clean the device. • Do not use chemical solution to clean the device in order to avoid corrosion. Clean it with a dry cloth. • We are not responsible for the damages or lost data caused by • Do not attempt to disassemble, repair or modify the product. This will malfunction, misusing, repairing the device or battery replacement. invalidate guarantee. • This manual may not reflect the actual device’s operation since it is subject to change without prior notification. Please comply with your actual device’s operations always. -1- Key Features • Digital TV Player • Music Player • Video player • Image viewer • SD/MMC card reader • Folder Navigation • Built-in Speaker • Built-in rechargeable Li-polymer battery • Calendar and time clock System Requirements • Hardware: IBM PC & Compatible PC, Notebook with USB interface • Operating System: Windows Me, Windows2000/XP, Windows Vista Package Content • Main Unit • USB cable • User Manual • Stereo earphones • AC Adaptor • External Antenna -2- Buttons & Ports ① Power Switch: Slide to the left to lock buttons; slide to the center to unlock buttons; slide to the right and then hold for a while to power on or power off the device. ② MENU: Briefly press to return. C. LCD Display D. Previous: Play the previous track. Also select the previous item. E. Play/Pause: Briefly press to play, pause or confirm selection. F. Next: Play the next track. Also select the next item. G. VOL+: Increase the volume H. VOL- : Decrease the volume I. J. Earphone Jack AV Out port – connect to a TV set through AV cable K. USB Port: Connect to computer L. DC-IN Port: Connect to the power supply -3- M. Internal Antenna N. External Antenna Port O. SD/MMC Card Slot P. Reset Q. Stand R. Built-in speaker Before Using • Powering the device The device can be powered by either of its built-in rechargeable battery or a computer. computer When you connect the device to a PC through the USB cable, the computer will supply power to the device, and then you can operate the player. • Charge the battery The device has built-in rechargeable lithium battery. No extra battery installation is required. Just charge the device when it indicates low battery. -4- To charge the battery, battery just connect the device to any standard wall electronic outlet through the AC adaptor. It takes about 3 hours to fully charge the battery. Besides the battery, the device can be powered by the USB cable also. Connect the device to a computer through the provided USB cable, and then the computer will supply power to the device. But please note the computer will never charge the battery. Charging Status: Status: Low battery 25% charge 50% charge Full Charge Note: a. You can operate the device even when it is being charged. But for extending the battery life, you are suggested NOT to use the device when it is in charge. b. You are recommended to charge the battery when you use the device for the first time. c. For maximum performance, lithium-ion batteries need to be used often. If you don’t use the device often, be sure to recharge the battery at least once per month. Tip: The battery will not be charged when you connect the device to a computer. • Insert a SD/MMC card This player features a memory card slot to extend its memory space. It supports SD or MMC memory card which is popular in the market. When you insert a card, you can play files stored in the card or transfer files between the card and a computer. To use a memory card, find the card slot at the bottom of the machine, and then insert a memory card into the slot with the face down. -5- When you search for files, you should see two directories named “Flash” and “SDCard” first. To search for files in the internal memory of the device, select “Flash”. To search for files in the inserted memory card, please select “SDCard”. • Connect to a PC and download files This player is plug & play for WIN2000/XP/ME/Vista OS. To download files from computer, (1) Plug the larger end of the USB cable to the USB port of the PC, and plug (2) When the “ the smaller end to the USB port of the player. ” icon appear at the right bottom of the PC screen, double click “My Computer” on the desktop, you see two new removable disks that indicate the player’s internal flash memory and the external memory card. Just use the removable disks as regular local disks, copying files from or to it. The LCD should display as the right figure shows. (3) Remove the player from the PC safely when the file transfer completes. For Windows2000/XP/ME/Vista, icon at the right hand corner of the taskbar. a) Left-click the b) Click the pop-up mini-window with message of “Stop the USB c) When you are prompted to remove the device, disconnect the Mass Storage Device – Drive (X)”. player from the computer. Power On/Off To power on the device, device, slide the Power Switch to the right and hold it for a while until you see “HELLO” on the display. To power off the device, slide the Power Switch to the right and hold it for a while until you see “Good Bye” on the display. -6- Note: This player has a power-saving feature which enables the device to power off automatically if it is idle for a specified time set in “Settings IdleShut Time”. Lock/Unlock buttons To lock buttons buttons against being pressed accidentally, slide the Power Switch to the left where the lock indicator indicates. The lock indication should appear on the display. To unlock buttons, slide the Power Switch to the center, the lock indication should disappear from the display. Enter Various Function Mode You should see the main menu when you turn on the device. You can enter various function modes by selecting an item from the main menu. Press the Previous/Next button to select a mode, and press the Play/P Play/Pause button to enter it. Music Video Photo E-book DVB-T Explorer Other Functions Settings Music Mode On the main menu, Press the Previous/Next button to select “Music”, and then press the Play/pause button to enter the music mode. -7- • Search for tracks in your music library The music library is a system for indexing your music stored in the internal memory by album, artist, genre, song title, etc. When you transfer files to the internal memory, the music library should be updated automatically. In the media library, you can select your music by Artist, Album, Song Title, or Genre. • Resume Play – go to the now playing • All Music – play all music files stored in the • Artist – play music files by artist • Album - play music files by album • Genre - play music files by genre screen. device. • My Favorite – play my favorite tracks • Dir List – display all music files by folders • MediaLib Update – update the music library manually • Hold Recollection – Resume playing from where you stop the music last time Press the Previous/ revious/Next button to select an item from the category list, and then press the Play/pause button to confirm your selection (or press the MENU button to return). You should see the music file list under the selected category. • Search for tracks by folders folders The music library only contains music files stored in the internal memory, excluding music files stored in the SD/MMC card. To browse music files through both of the internal memory and the SD/MMC card (if available), -8- (1) Press the Previous/Next button to select “Dir List” from the media library and then press the Play/P Play/Pause button to confirm. You should see the “Flash” and the “SDCard” directory. Press the Previous/Next button to select one of them. (2) Press the Previous/Next button to select a folder or a file, and then press the Play/P Play/Pause button to confirm it or press the MENU button to return. • Play Music Press the Previous/Next button to select a track from the file list and then press the Play/P Play/Pause button to play it. ① Track Title ① A-B Repeat ① Frequency Spectrum ① Volume Level ① ID3 Information/Lyric ① Progress Bar ① Elapsed Time ① Track Length ① Repeat Mode ① EQ Mode ① Play Mode ① Sample Rate/ Bit Rate ① Play/Pause/Fast Rewind/Fast Forward ① Track Number -9- Basic Operations Play/Pause Press the Play/P Play/Pause button to play or pause. Adjust Volume Press the VOLVOL-/VOL+ button Previous Track Press the Previous button Next Track Press the Next button Fast Forward Press and hold the Next button Rewind Press and hold the Previous button Return to file list Briefly press the MENU button to return. A-B Repeat To repeat a specified section of current music, (1) Press and hold the VOL+ for a while to select the start point. (2) At your desired end point of the repeat, press and hold the VOL+ for a while again. The music section between the start point and the end point is repeated. (3) To stop the repeat, Press and hold the VOL+ again. • Music Playing Settings When the music is playing, you can set the repeat mode or EQ mode of the music. Press and hold the MENU button to display the overlay menu. Press the Previous/Next button to select an item and press the Play/P Play/Pause button to confirm or press the MENU button to return. Repeat Mode – Play the current play list in various repeat modes. Once Once Play the current track once. Repeat One Keep repeating the current track All Once Play all tracks in the current play list and stop after playing all. Repeat All Repeat all tracks in the current play list - 10 - Intro Preview the first ten seconds of every track Play Mode – Play all music files in order or shuffle. Order Play all tracks in order Shuffle Shuffle all tracks. MSEQ – Select a Microsoft Equalizer mode EQ Mode – Select a Preset EQ mode User EQ – Set the user-defined EQ mode (1) Press the Previous/Next Previous/Next button to select a setting column and then press the VOL+/ VOL+/VOLVOLbutton to adjust its level. (2) Press the Previous/Next button to select “Yes” and then shortly press the Play/P Play/Pause button to confirm setting. Display Mode – Display ID3 information or lyric of the current track ID3 • Display ID3 information of the track Lyric Display lyric of the track (if the lyric file of the track exist ) Off Display the music file name only Collect Favorite Songs You can add your favorite songs to “My Favorite” collection. To add songs to “my favorite” favorite” collection, (1) In the music file list, press the Previous/Next button to select your favorite song. (2) Press and hold the MENU button to (3) Press the Previous/Next button to select display the “Add to My Favorite” menu. “Add to My Favorite” and then press the Play/P Play/Pause button to confirm. To play my favorite songs, (1) Enter the media library, and press the Previous/Next button to select “My Favorite”. Press the Play/P Play/Pause button to enter it. You see all your favorite songs are listed. - 11 - (2) Press the Previous/Next button to select a song and then press the Play/P Play/Pause button to start playing. To delete songs from “My Favorite”, (1) Enter “My Favorite” collection from the category list. (2) Press the Previous/Next button to select (3) Press and hold the MENU button to a song to be deleted from “My favorite”. display the overlay menu. (4) Press the Previous/Next button to select “Delete file” to delete the selected song, or select “Clear Up” to delete all songs from the favorite list. (5) Press the Play/ Play/P ay/Pause button to confirm deletion. Note: You can only add songs stored in the internal flash memory to “My Favorite”. • Delete Song (1) Select “Dir List” from the category list and then press the Play/P Play/Pause button to confirm. (2) Press the Previous/Next button to select the song that you want to delete from the music list. (3) Press and hold the MENU button to show the file deletion dialogue. (4) Press the Previous/Next button to select “Yes” or “No”, and then press the Play/P Play/Pause button to confirm. • Recollect Song The device can memorize the song currently played while you exit from the music mode. When you enter the music player mode again later, you can resume playing the song from - 12 - where you stopped last time. To resume playing the song that you stopped last time, time, press the Previous/Next button select “Resume Play” from the music category list, and then press the Play/P Play/Pause button to confirm. The device recollects 3 the most recent stop points, you can choose one of them to be resumed by the following steps: (1) Press the Previous/Next button to select “Hold Recollection” from the (2) Press the Previous/Next button to music category list and then press the Play/P Play/Pause button to confirm. select one of the memorized points and then press the Play/P Play/Pause button to resume playing from it, or press the MENU button to return. Video Mode On the main menu, press the Previous/Next button to select “Video”, and then press the Play/P Play/Pause button to enter the video mode. Note: This player can play AVI, WMV, RM, RMVB videos. Depending on the encoding format or resolution, some video files may not be played. • Select Video Press the Previous/Next button to select a video from the list. If a SD/MMC card is available, you have to select a memory device to be played before selecting a video file. • Play Video Press the button to play the selected video. - 13 - ① Volume Level ② Play/Pause/Fast Rewind /Fast Forward ③ Current Track Number ④ Total Tracks ⑤ Progress Bar ⑥ Elapsed Time ⑦ File Name ⑧ Total playing time Basic Operations Play/Pause Press the Play/P Play/Pause button to play or pause. Stop Press the MENU button. Adjust Volume Press the VOLVOL-/VOL+ button. Previous Video Press the Previous button. Next Video Press the Next button. Fast Forward Press and hold the Next button. Rewind Press and hold the Previous button. Select the Start Time of the video You can play the video starting from the specified time. For example, total length of the current video is 1 hour, and you want the playback starting from the twentieth minute, you can: (1) When the video is playing, press and hold the MENU button to display the overlay menu. (2) Press the Previous/Next button to select “Select Time Play” and then press the Play/P Play/Pause button to confirm. (3) Press the Previous/Next button to select the hour or minute setting, and - 14 - then press the VOLVOL-/VOL+ button to set the number. (4) Press the Play/P Play/Pause button to confirm setting. The video playback will start from the set time. Set the View Mode When you are watching the video, you can expand the view to full screen or normal size. (1) Press and hold the MENU button to display the overlay menu. (2) Press the Previous/Next button to select “LCD Expand”. (3) Press the Play/P Play/Pause button to switch between the Full and Normal mode. Output the video to TV screen You can switch the screen from the LCD to a TV set and watch the video on a large-size TV screen by the following steps: (1) Connect one end of the AV cable to the AV OUT port of the device, and connect the other end to the audio and video port of the TV set. Switch the TV set to “Video” mode. (2) When the video is playing on the device, press and hold the MENU (3) Press the Previous/Next button to select “TV Switch”, and then press the button to display the overlay menu. Play/P Play/Pause button to confirm. The screen will black out and is switched to the TV set. Just use the buttons on the device to operate it. Additionally, in a shortcut way, you can press and hold the Play/Pause button to switch to the TV screen. (4) To quit the TV mode and switch the screen to the device, go to the system setting mode and set the “TV Switch” as “Turn off TV-OUT”. Or, press and hold the Play/Pause button to switch to the player’s screen. • Resume from the lastlast-played video When you replay a video, you are reminded to resume playing from where you stopped last time. - 15 - Press the Previous/Next button to select “No” to quit resuming and start from the beginning of the video, or select “Yes” to resume from the last-stopped point. Photo Mode On the main menu, press the Previous/Next button to select “Photo”, and then press the Play/P Play/Pause button to enter the photo viewer mode. • Select Photo Without a memory card, you should see thumbnails of all photos stored in the internal memory when you enter the photo mode. If you’ve inserted a memory card, you should see a photo list after you select a memory device between Flash and SDCard. Press the Previous, Next, VOLVOL-, VOL+ button to select a thumbnail. • View Photo Press the Play/P Play/Pause button to confirm the selected photo. The photo is enlarged to full screen. Press the Previous/Next button to view the previous or next photo. Rotate Photo (1) When you are viewing a photo in full screen, press and hold the MENU to display the overlay menu. (2) Press the Previous/Next button to select “Rotate Left” or “Rotate Right”, and then press the Play/P Play/Pause button to confirm. (3) Press the MENU button to revert the photo. - 16 - Zoom Photo (1) When you are viewing a photo in full screen, press and hold the MENU to display the overlay menu. (2) Press the Previous/Next button to select “Zoom In” or “Zoom Out”, and then press the Play/P Play/Pause button to confirm. (3) When the photo is zoomed in, you can press the Previous, Next, VOLVOL-, VOL+ button to roam on the photo. (4) Press the MENU button to revert the photo. Slide Show To display photos in the slide show mode, (1) When you are viewing a photo in full screen, press and hold the MENU to display the overlay menu. (2) Press the Previous/Next button to select “Auto Slide Show”, and then press the Play/P Play/Pause button to confirm. (3) Press the Previous/Next button to set the time interval between slides as 2, 5, 8 seconds. (4) To stop the slide show, press and hold the MENU button to display the overlay menu. Select “Auto Slide Show” “Turn Off”, and then press the Play/P Play/Pause button to confirm. E-book Mode On the main menu, press the Previous/Next button to select “E-book”, and then press the Play/P Play/Pause button to confirm selection. • Select Book Press the Previous/Next Previous/Next button to select a book from the list. If you’ve inserted a memory card, you should have to select a memory device between the Flash and SDCard first before seeing the list. - 17 - • Reading Book Press the Play/P Play/Pause button to confirm the selected book and read it. Page Up/Down To page up and down automatically during reading, press the Play/P Play/Pause button to start the auto slide show mode in which the page is turned over automatically. In this mode, time interval between pages is defined by the “Flip Time” setting (see the latter section “Set the Flip Time” in this chapter). To page up and down manually, press the Previous/Next button to read page by page, or press the VOLVOL-/VOL+ button to read line by line. Jump to a Page To jump to a desired page, (1) Press and hold the MENU button to display the overlay menu. (2) Press the Previous/Next button to select “Page Jump” and press the Play/P Play/Pause button to confirm. (3) Press the Previous/Next button to select a bit and then press the VOLVOL-/VOL+ button increase or decrease the number. (4) Press the Previous/Next button to select “Yes” and then press the Play/P Play/Pause button to confirm the set page number. You will be guided to that page. - 18 - Use the Bookmark To make make a bookmark on the current page for resuming reading later, later, (1) (2) Press and hold the MENU button to display the overlay menu. Press the Previous/Next button to select “Save Bookmark” and press the Play/P Play/Pause button to confirm. (3) Press the Previous/Next button to select an “Empty” location and then press the Play/P Play/Pause button to confirm. To resume reading the book from the page that was marked, (1) (2) Press and hold the MENU button to display the overlay menu. Press the Previous/Next button to select “Load Bookmark” and press the Play/P Play/Pause button to confirm. (3) Press the Previous/Next button to select the bookmark that was saved, and then press the Play/P Play/Pause button to confirm. To delete the bookmark, (1) (2) Press and hold the MENU button to display the overlay menu. Press the Previous/Next button to select “Delete Bookmark” and press the Play/P Play/Pause ause button to confirm. (3) Press the Previous/Next button to select the bookmark that you want to delete, and then press the Play/P Play/Pause button to confirm. (4) Press the Previous/Next button to select “Yes” and press Play/P Play/Pause button to confirm. Set the Font Size To set the font size of the text, text, (1) Press and hold the MENU button to display the overlay menu. (2) Press the Previous/Next button to select “Font Size” and press the Play/P Play/Pause button to confirm. (3) Press the Previous/Next button to select a font size and then press the Play/P Play/Pause button to confirm. - 19 - Set the Font Font Color To set the font color of the text, (1) Press and hold the MENU button to display the overlay menu. (2) Press the Previous/Next button to select “Font Color” and press the (3) Press the Previous/Next button to select a color and then press the Play/pause button to confirm. Play/pause button to confirm. Set the Flip Time To set the time interval between pages in auto slide show mode, (1) Press and hold the MENU button to display the overlay menu. (2) Press the Previous/Next Previous/Next button to select “Flip Time” and press the Play/P Play/Pause button to confirm. (3) Press the Previous/Next button to select a time and then press the Play/pause button to confirm. Set the Background You can change the background of the book. The device provides 7 preset backgrounds for your choice. (1) Press and hold the MENU button to display the overlay menu. (2) Press the Previous/Next button to select “Mode” and press the (3) Press the Previous/Next button to select a background and then press Play/pause button to confirm. the Play/pause button to confirm. Digital TV Mode This device features a powerful function which is called DVB-T (Digital Video Broadcasting – Terrestrial). In the DVBT mode, you can watch television stations with this pocket player any time and any where. In the Netherlands these are channel 1, 2 and 3 and the regional stations. - 20 - • Install the Antenna The device provides an integrated antenna and an external antenna port for receiving TV signals. Be sure to install the antenna before using the digital TV function. The integrated antenna is at the top left corner of the main unit. To use it, just draw out it with the antenna cap. At the left side of the main unit, there is an external antenna port for spare use. If the signal is too weak to be received, you can use the external antenna provided with the package to enhance the sensitivity to signals. To use the external antenna, insert it to the antenna port, and put the antenna in an open area. • Enter the Digital TV Mode To enter the Digital TV mode, on the main menu, select “DVB-T” and press the Play/pause button to confirm. You should see the menu for starting the TV programs. • Search for Stations Automatically When you enter the DVB-T mode, select “Auto Scan” from the menu and then press the Play/pause button to start searching for stations automatically. It may take a few minutes to complete the scan process. Found stations will be automatically saved in “Video Broadcast”. • Search for Stations Manually (1) When you enter the DVB-T mode, select “Manual Scan” from the menu - 21 - and then press the Play/pause button to confirm. (2) Press the Previous/Next button to select a channel from the channel list and press the Play/pause button to search for stations within the selected channel. Found stations will be automatically saved in “Video Broadcast”. • Watch TV stations After searching, received TV stations are saved in the Video Broadcast directory. Select “Video Broadcast” from the menu and then press the Play/pause button to confirm. (1) Press the Previous/Next button to select a TV station and then press the Play/pause button to play it. (2) When you are watching the TV, you can: • Press the Previous/Next button to watch the previous station or the next station • Press the VOLVOL-/VOL+ button to adjust the volume. • Press and hold the MENU button display the overlay menu for selecting stations, viewing program information etc. In the overlay menu, press the Previous/Next button to select Program, Audio, Subtitle or Info, and then press the Previous/Next button to select an item from the list under the category. (3) Briefly press the MENU button to exit from the TV station. • Listen to Audio Broadcasting roadcasting Stations The device can also receive audio broadcasts. Received broadcasting stations are saved in the Audio Broadcast directory. - 22 - You can listen to broadcast stations by the following steps: (1) Select “Audio Broadcast” from the menu and then press the Play/pause button to confirm. (2) Press the Previous/Next button to select a broadcast station and then press the Play/pause button to play it. (3) When you are listening to the station, you can press the Previous/Next Previous/Next button to tune to the previous station or the next station; press the VOLVOL-/VOL+ button to adjust the volume. (4) Press the MENU button to exit from the station. • View Program Information To view program information of the current station, select “Program Information” from the menu and then press the Play/pause button to confirm. • Set the Receiving Area To set the local area for receiving stations, (1) Select “Area Setting” from the menu and then press the Play/pause button to confirm. (2) Press the Previous/Next button to select an area and then press the Play/pause button to confirm. • Set the Time Zone To set the time zone for the local area, (1) Select “Timezone Diversity Setting” from the overlay menu and then press the Play/pause button to confirm. (2) Press the Previous/Next Previous/Next button to select a time zone and then press the Play/pause button to confirm. Explorer Mode On the main menu, select “Explorer” and then press the Play/pause button to confirm. - 23 - Browse folders and Files (1) If a memory card is inserted, press the Previous/Next button to select a memory device between Flash and SDCard. (2) (3) Press the Previous/Next button to select a file or a folder. Shortly press the Play/pause button to confirm your selection, or press the MENU button to return. Delete a file (1) In the Explorer mode, press the Previous/Next button to select the file that you want to delete. (2) Press and hold the MENU button to (3) Press the Previous/Next button to select delete the file. “Yes” and then press the Play/pause button to confirm. Other Function This player provides other useful tools – Stopwatch and Calendar. • Stopwatch (1) On the main menu, select the “Other Function” item and press the Play/pause button to confirm. (2) Press the Previous/Next button to select “Stopwatch” and then press the Play/pause button to confirm. (3) Press the Play/pause button to start timing. (4) Press the Play/pause button to stop. - 24 - (5) Press the Previous/Next button to reset the time. (6) Press the MENU button to exit. • Calendar To view the calendar, (1) On the main menu, select the “Other Function” item and press the Play/pause button to confirm. (2) Press the Previous/Next button to select “Calendar” and then press the Play/pause button to confirm. (3) Press the Previous/Next button to move (4) Press the Previous/Next button to switch (5) Press the VOLVOL-/VOL+ button to increase the selection cursor. between the Year, Month and Day item. or decrease the Year, Month or Day. The calendar view changes accordingly. (6) Press the MENU button to exit. System Settings To customize the player settings: (1) On the main menu, select the “Settings” item and press the Play/pause button to enter the system settings mode. (2) Press the Previous/Next button to select a setting item and press the Play/pause button to confirm or press the MENU button to cancel and return. Display Setting Setting Backlight – set lasting time of the backlight Brightness – set brightness of the LCD Backlight Backlight Mode – set the screen as half-lighted or full-lighted. Display Status – Hide or display the status bar in the top and bottom of the screen. - 25 - System Setting Setting Upgrade – upgrade the firmware Load to default– default restore to default system settings Desktop Set the background the screen Time Setting Press the Previous/Next button to select the Minute, Hour, Day, Month or Year setting. Press the VOLVOL-/VOL+ button to change the selected setting. Press the Previous/Next button to select “Yes” or “No” and then press the Play/P Play/Pause button to confirm. Language – set the language in which the on-screen text is displayed System Information – display the firmware version and memory space information Auto Shut Time - Set the continuous playing time after which the player power off automatically. IdleShut Time – Set the idle time before powering off automatically TV Switch – Switch the display to TV screen Output Audio/Video to TV screen The device comes with an AV OUT port which is used to connect the device to a TV. With this feature, you can play photos, videos or audios on the large-size TV screen. Follow these steps: (1) Connect one end of the AV cable to the AV OUT port of the device, and connect the other end to the audio and video port of the TV set. Switch the TV set to “Video” mode. (2) In the main menu of the device, select “Settings” “TV Switch” “Switch to TV-OUT”, and then press the Play/P Play/Pause button to confirm. The operating window is switched to the TV screen. Just use the buttons of the device to operate it. (3) To quit the TV mode and switch the screen to the device, go to the system setting mode and set the “TV Switch” as “Turn off TV-OUT”. Tip: In a shortcut way, you can switch between the LCD and the TV screen by pressing and - 26 - holding the Play/Pause button. Troubleshooting Problem The LCD displays nothing when the device is started. No sound when playing an audio file. The player cannot be connected to the PC. The displayed time is changing constantly. The PC has error when you plug and unplug the player. Total memory displayed on the player is not in accordance with the marked amount. Some of MP3 files cannot be played properly. The video cannot be played. The photo cannot be displayed The TXT file cannot be Possible Cause Solution Battery is too low. Charge the battery. The volume is too low. Bad audio file. Adjust the volume. Delete or skip the file. The USB interface is not supported by PC’s motherboard. Update or replace the PC’s motherboard. The bit rate of the MP3 file is changing during playback. The player is disconnected from the PC abruptly while transferring files. Try to use fixed bit rate to compress the MP3 file. Do not disconnect the player from the PC when transferring files. Part of memory is used to store programs and display characters. The MP3 file is compressed by a standard that the player does not support. The file format is not supported. 1. Delete the unsupported MP3 files. 2. Use MPEG I Layer 3 standard to compress the unsupported MP3 files. Make sure the video is in AVI, RM, RMVB, WMV or other supported format. The video data is corrupted Skip it or reload another file The file format is not supported Try to use an image editor to convert it or save it as another file. The image resolution is beyond limitation of the device. The file format is not - 27 - Try to decrease the image resolution. Skip it or reload another file. read supported. Technical Specifications Item Built-in Memory Capacity Specification 512MB ~ 8GB Memory Card Type SD/MMC card Memory Card Capacity SD: 128MB ~ 8GB; MMC: 128MB~2GB Battery Type Rechargeable Li-polymer Battery Battery Life 8 Hours for music, 4 hours for videos, 2 hours of TV programs LCD Display 3.5-inch TFT screen Earphone Power 5mW+5Mw Video Format AVI, RM, RMVB, WMV Audio Format MP3, WMA, APE Photo Format JPEG, BMP, GIF E-book Format TXT SNR > 90dB USB Port USB2.0 high speed Operational Temperature 0℃ ~ +50℃ Storage Temperature -20℃ ~ +65℃ Operational Relative Humidity * 20% ~ 90% (40℃ ) Storage Relative Humidity * 20% ~ 93% (40℃ ) Appendix – Supported Audio and Video Format Table This device does not guarantee the compatibility with all audio and video format files. If the video or audio file is not supported by this device, please check whether it is on the following format benchmark. Audio Decoding Benchmark MP3 AUDIO [Codec]: MPEG1/2/2.5 Audio Layer 3 [Bitrate]: 8~320Kbps, CBR and VBR [Sample]: 8-48KHz [Exceptional]: No [Container]: MP3 WMA AUDIO [Codec] : Version 7, 8, 9, [Bitrate]: 8Kbps~320kbps [Sample]: 8-48KHz [Exceptional]: WMA Pro and WMA lossless [Container]: WMA - 28 - Image Benchmark JPEG [Codec]: JPEG [Compressed]: Baseline [Resolution]: 7500 * 5500 [Exceptional]: Progressive jpeg [Container]: JPG BMP [Codec]: BMP [Resolution]: 8000*8000 [Exceptional]: No [Container]: bmp GIF [Codec]: GIF [Resolution]: 1000*1000 [Exceptional]: No [Container]: GIF Video Benchmark REAL MEDIA VIDEO MPEGMPEG-4 VIDEO [Codec]: XviD, DivX 3/4/5 [Codec]: Real Video Codec 8/9/10 [Resolution]: Max. 720x480(pixels) [Resolution]: Max. 720x336(pixels) [Bitrate]: Max.1.5Mbps [Bitrate]: Max.2.0Mbps [Exceptional]: Not Support GMC&QPEL [Exceptional]: Not Support G2 [Container]: MP4/AVI [Container]: RM/RMVB [Audio decode]: MP3, AC3 [Audio Codec]: Real Audio WMV VIDEO MPEGMPEG-I VIDEO [Codec]: WMV 7/8/9 [Codec]: MPEG-I [Resolution]: Max. 640x480(pixels) [Resolution]: Max. 720x480(pixels) [Bitrate]: Max.800Kbps [Bitrate]: Max.1.2Mbps [Exceptional]: Not Support high profile, [Exceptional]: N/A VC-1 [Container]: MPG(MPEG-1)/DAT [Container]: WMV, ASF [Audio Codec]: MP2 [Audio Codec]: WMA NOTE: 1. Generally, video formats mentioned above can be played by this device. Sometimes, Sometimes, you may encounter errors during playback, for instance, video is not synchronized with the audio. That may be caused by the unsupported encoding format. 2. For MPG and WMV video files, buffering time during fast forwarding and rewinding may be longer longer depending on the file size. Please wait for the process to be completed. www.difmce.com Call directly our support 0031(0)348409371 - 29 -