1
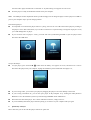
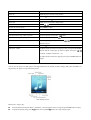
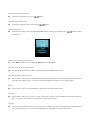
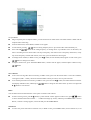
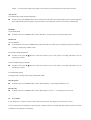
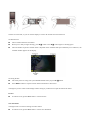
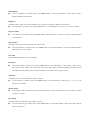
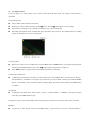
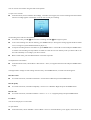
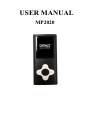
USER MANUAL
MP2020
Get to know the controls on Player
1.
About Player Battery
Player has an internal, non–user-replaceable battery. For best results, the first time you use player, let it charge for about
two to three hours or until the battery icon in the status area of the display shows that the battery is full. If unit isn’t used
for a while, the battery might need to be charged.
Note: Player continues to use battery power after it’s been turned off.
Charging the Battery:
You can charge the player battery in two ways:
Connect player to your computer.
Use the USB power charger, available separately.
If you see this icon messaging, please slide the player’s power switch to ON position to activating the charging function.
If the battery icon on the player’s screen shows the charging screen, the battery is charging. If it shows the full on screen,
the battery is fully charged.
If you don’t see the charging screen, player might not be connected to a high-power USB port. Try another USB port on
your computer.
Note: The charging function will not be activated if the player’s power switch is slide to OFF position
2.
Key’s Function Definition
► ▌▌ Button
Press and hold the player will turn to Off or ON.
(Play / Pause)
While the player on playing, press once is Pause, press once again will
“Play” again.
MENU Button
Press once returns to previous menu. Press and hold directly back to main
(Return):
menu.
Button
Press once back to previous song / file, press and hold fast-rewind.
(Back):
Button
Press once go to next song / file, press and hold fast-forward.
(Next)
Center Button
In main menu or in related application items, press once enter to a sub
(Enter / Select)
menu or enter to a file list.
In file list, press once to choose file to play, and a now playing screen
appear.
In now playing screen; press once enter to another sub menu. Press and
hold, a volume control appear.
Turn On the player and use of key’s control:
The controls are easy to find and use. Slide the player’s power switch to “ON” position, and then press and hold ► ▌▌ to
turn on the Unit, and the main menu appears.
Press
button and Center button to select “up / down” and choose on screen menus or sub menu for play songs,
videos, pictures, change settings, and get information, etc…
Press
button and Center button to select a menu item. To choose the item, press Center button. To go back to
the previous menu, press MENU button. To go back directly to the main menu, press and hold the MENU button.
3.
Use Main Menu
When you turn on, you will see the opening screen and then the main menu appear. Choose menu items to perform
functions or go to other menus. Icons along the top of the screen show the status of the unit.
You might need to set date & time or change some default setting as you desired in main menu before you start to use the
player. To change setting, from main menu, choose Setting, a sub menu appear for chooses.
Date & Time
To set the date & time:
To set date, choose Setting > Date & Time > Adjust Date and than set the month, Day and Years.
To set time, choose Adjust Time and than set the Hour, Minute and AM/PM.
To set time mode, choose Time Mode and then choose 24 Hours Mode / 12 Hours Mode.
Display
You can set the backlight to illuminate the screen for a certain amount of time. And you can adjust the brightness of the
player’s screen.
To set display timer, choose Setting > Display > Backlight and then select the time you want. Choose Off to prevent
the backlight from turning to off (choosing this option decrease battery performance).
To set brightness, choose Backlight Brightness and then choose brightness level you want (when highest brightness
level you choose will decrease battery performance).
Power Saving
Power Saver can extend the time between battery charges by turning off the player’s screen when you aren’t using the
controls. By default, the player will be turned Off in 3 minutes if you aren’t using it.
To set idle time, choose Setting > Power Saving > Idle Time, and then choose the time you want. Choose Off to
prevent the player from turning to off (choosing this option decrease battery performance).
To set sleep time, choose Sleep Time > and then choose the time you want.
Language
This player can use difference languages.
To set the language, choose Setting > Language, and then choose language.
Advanced
You can get the details about the player, such as the amount of space available, firmware version. And you can format the
internal memory. And you can reset all the items on setting menu back to factory default setting.
To view the system information, choose Setting > Advanced > Player Information, the details appear.
To format memory, choose Format Memory, and then a message “Really format memory with Cancel / OK” appear,
choose it to confirm (choose this option all files installed will be erased).
To reset to default, Choose Reset, and then a message “Reset Default Setting with Cancel / OK” appear, choose it to
confirm (choose this option all the above mentioned setting will go back to factory default).
4.
Connecting and Disconnecting Player
You can connect the player to your computer to transfer those media files to the player; also you can export those recorded
voice memos and media files to your computer, and to charge the battery. Disconnect the player when you’re done.
Important: The battery doesn’t charge when your computer is in sleep or the player’s power switch is set to Off position.
Connecting Player:
To connect player to your computer, plug the connector of USB Cable into a USB port on your computer, connect
the other end to player and then the “Connected” or “Synchronizing” icon appear on Unit screen.
Now the player is ready for media files transfer with your computer.
Note: The USB port on most keyboards doesn’t provide enough power to charge the player. Connect player to a USB 2.0
port on your computer only to prevent charge problem.
Disconnecting Player:
It’s important not to disconnect player while it’s syncing. You can see if it’s OK to disconnect player by looking at
the player’s screen. Don’t disconnect, if you see the “Connected” or “Synchronizing” icon appear on player’s screen,
you could damage files on player.
If you see these icons on player’s screen, you must wait until synchronizing finished or eject the player before
disconnect the USB cable.
To Eject the Player:
To eject player, press and hold ► ▌▌ button until the battery icon appear on screen, and then now is safe to
disconnect the player with your computer, unplug the USB mini jack of USB cable from player. Or,
If you’re using a Mac, you can also eject player by dragging the player icon on the desktop to the Trash.
If you’re using a Windows PC, you can also eject player in My Computer or by clicking the Safely Remove
Hardware icon in the Windows system tray and selecting GENERIC Audio USB Device.
Disconnect the cable from player. If it is in the USB mini connector, simply remove it.
If you accidentally disconnect player without ejecting it, reconnect it to your computer and sync again.
5.
Quick Play on Player
Here’s what else you can do with the player controls for quick start
To
Do this
Power On
Slide the power switch to ON position
Turn On the unit
Press ► ▌▌ button
Turn Off the unit
Press and hold ► ▌▌ button for 2-3 seconds
Power Off
Slide the Power switch to Off position
Choose a menu item
Press
Go back to previous menu
Press MENU button
Go directly to the main menu
Press and hold MENU button
Go to sub menu from Now Playing screen
Press Center button, a sub menu will appear.
Play the previous song, video or picture
From now playing screen, press
Play the Next song, video or picture
From now playing screen, press
Fast-forward or Fast-rewind a song or video
From now playing screen, press and hold
button and Center button to choose
button
button
button and Center
button to choose
Play / Pause a song or video
Press ► ▌▌ button
Change the volume
In Music mode, from the now playing screen, press and hold Center
button until the volume pop up menu is appear, then press
to adjust. (Volume level from 0 – 31)
In Video mode, from the now playing screen, press Center Button to
adjust.
6.
Listen Music
You can use the player as audio player with supported music file format of audio coding; WAV, MP3 and WAV are
supported by the player. To open the music player:
Now Playing Screen
Browse for a song to play:
From the main menu choose Music > All Music, a list will appear, choose a song and press Center button to play.
To pause the playing song, press ► ▌▌button. Press again ► ▌▌button, the songs will play again.
Go to previous song or next song:
From the now playing screen, press
button.
Fast-backward or Fast-rewind:
From the now playing screen, press and hold
button.
Adjust volume level:
From the now playing screen, press and hold Center button, volume controls appear, press
button to adjust
volume levels.
Return to previous menu or main menu:
Press MENU button or press and hold the MEUN button to main menu.
Play those songs in Artist / Album / Genre:
In music menu, choose Artist / Album / Genre, and then press Center button to play.
Play selected songs in My Music List:
Choose Music > My music list > My Playlist1 / My Playlist2 / My Playlist3 / My Playlist4 / My Playlist5, and then
press the Center button to play. ( you need to create the My Music List before you can use this option)
Dir list:
Choose music > Dir list > Internal Memory and then press the Center button to play.
Star level:
Choose Music > Star level > one star / two stars / three stars / four stars / 5stars, and then press the Center button to
play. ( you need to set star levels for songs before you can use this option)
Tag List:
From main menu, choose music > Choose Tag List, a list appear, and choose your desired song (bookmark) and
press Center button to play. ( you need to add bookmark for song before you can use this option)
Use Music Sub Menu
You might need to change music as you desired. To change settings in music sub menu, form now playing screen, press
Center button, and a sub menu will appear:
A-B Repeat
From the now playing screen, press Center button, a sub menu appear, choose A-B Repeat, and then use ►
▌▌button
to select A and B distance of track which you want it to repeat.
Repeat
Play songs in Sequence or in Random:
From the now playing screen, press Center button, a sub menu appear, choose Repeat and then select Sequence or
Shuffle as you desired.
Play songs in Repeat one or Repeat all:
In sub menu, choose Repeat and then select Repeat one or Repeat all as you desired.
Play songs in Repeat + Shuffle:
In sub menu, choose Repeat and then select Repeat + Shuffle
EQ
From the now playing screen, press Center button, a sub menu appear, choose Set EQ, and then select Normal /
Pock / Pop / Classic / Soft / Jazz / DBB as you desired sound effect.
Set Sound
From the now playing screen, press Center button, a sub menu appear, choose Set sound > FADEIN / FEADOUT >
Enable / Off as you desired sound effect.
Replay times
From the now playing screen, press Center button, a sub menu appear, choose Replay times and then select 1 – 10
or
∞ as you desired.
Repeat intervals
From the now playing screen, press Center button, a sub menu appear, choose Repeat intervals and then select 1 –
7 seconds as you desired.
Variable speed
From the now Playing screen, press Center button, a sub menu appear, choose Variable speed and then select -4 to
+4 as you desired and press Center button to choose. (the playing speed will be decreased / increased while you
changing this option)
Lyric display
From the now playing screen, press Center button, a sub menu appear, choose Lyric display and then select Enable
/ Off as you desired.
Set star level
Play a song, and then press Center button, a sub menu will appear, choose Set star level, and then select 1 to 5 stars
which will give to song, go back and select next song to star level. Repeat those steps to set another song. The star
level list is ready to use after this.
Add Bookmark
Play a song, and then press Center button, a sub menu appear, choose Add Bookmark, the sound is marked and
stored into player memory.
Add to MyList
Play a song, and then press Center button, a sub menu appear, choose Add to MyList, and then add song into you
desire list; My Playlist1 / My Playlist2 / My Playlist3 / My Playlist4 / My Playlist5, total 5 lists that you can put song
into its, tick mark appear once selected..
Delete the file
Play a song, and then press Center button, a sub menu appear, choose Delete the file, a message “Delete the file”
appear, choose Yes or Cancel and press the Center button.
Information
Play a song, and then press Center button, a sub menu appear, choose Information and the detail of song will list up,
and then you can view those detail by press “
7.
” button, such as Title, Album, Artist, Genre, etc…
Use Video
You can use the player as video / movie viewer. To open the video viewer:
Browse for a Video to Play:
From the main menu, choose Video > Now playing / Dir list > Internal Memory, a list will appear for selection.
Select a video and press Center button to play.
Play Previous or Next Video:
Press
button.
Play Fast-Rewind or Fast-Forward Video:
Press and hold
button.
Pause Playing Video:
Press ► ▌▌button and the playing will pause. Press ► ▌▌button again will play again.
Adjust Volume Level:
From the Now Play screen, press and hold the Center button, volume controls appear, and then adjust volume level
by
button.
Return to Previous Menu or Main Menu:
Press MENU button or press and hold MEUN button to main menu.
8.
Use Pictures
You can use the player as picture viewer and you can list the music when you’re viewing pictures. To open the picture
viewer:
Browse for a Picture to Play:
From the main menu, choose Pictures > Now playing / Dir list > Internal Memory, a list will appear for selection,
choose a file and press Center button to play.
Play Previous or Next Picture:
From the Now Playing screen, press
button.
Play pictures with slide show:
From Now Playing screen, press ► ▌▌ button, the picture will run with slide show. Press ► ▌▌ once again, the slide
show will pause. You can repeating as you like.
Return to Previous Menu or Main Menu:
Press MENU button or press and hold MEUN button to main menu.
You might want to change some setting in Picture Sub Menu. To use picture sub menu, from main menu > choose Pictures
> Setting, a list will appear for choose:
Scan Mode
To set Scan mode, choose Scan mode > List mode / Thumbnail
Slide Gap
To set Slide gap, choose Slide gap, and then choose 1 – 10 seconds which one of time you want.
Slide Effect
To set Slide effect, choose Slide effect, and then choose which effect one you want.
9.
Listen Radio
You need to tune for receiving the radio stations before you listening.
To Open Radio:
Plug in earphone jack of earphone before you tune and search for radio station. The radio antenna is build with the
earphone when connecting
From the main menu, choose Radio, a Radio screen appear.
To tune station, pressing
Press and hold
button to tuning frequency down / up to find a radio station manually. Or,
button till the tuning frequency is running down / up on Radio screen. In the status, the
radio is searching for next station and it will stop on frequency with station. Due to frequency interference, it may
stop on the frequency without radio station, in this case, press the button for search again
To change station channel, in Radio screen, press ► ▌▌ button, Preset channel (CH01) appear in radio screen, press
button to change next station.
To adjust volume level, press and hold Center button, volume controls appear, and then adjust volume level by
button.
Save Channel
To save the receiving radio station in memory, in Radio screen, press once the Center button > chose Save Channel,
a list appear (CH01 – CH30), choose the channel number which you want to store as preset location.
To re-call the preset stations in memory, in Radio screen, press once the ► ▌▌ button, the CH01 and Preset character
will display on Radio screen, and then press
button to change to next station down / up. Press once again the
► ▌▌ button to exit function.
Delete
You can delete those unwanted stations in this option. To delete radio channel:
In radio receiving screen, press ► ▌▌ button, a preset channel “CH01” appear in radio screen, press
button
to chose unwanted radio station CH01 < – > CH02 will change up / down), and then press Center button > choose
Delete, a “Delete” message appear, choose OK and press the Center Button.
Station List
To select the preset radio station in Station List, in Radio screen, press Center button, choose Station list, a list
(CH01 – C30 with preset frequencies) appear, select which you want and press the Center button to listen.
Auto Search
To Automatically Tuning and Storing Stations
In radio screen, press Center button, choose Auto Search. The radio will tuning frequency form low end to high end
until completed the whole frequency range and all the received stations will store into memory automatically.
FM Band
To Set Radio Band
In Radio screen, Press Center button, choose FM band > choose Europe USA band or Japan band.
FM Record
To Record Radio:
From the Radio screen, press Center button and choose FM record. The total recording time and Time available are
counting is displaying on Radio screen.
To Pause Recording Sound File:
In radio screen, press ► ▌▌ button to pause the recorder, press it once again to recording continually. You can
repeating as you like.
To Store the Recording Sound File:
In radio screen, press ► ▌▌ button to pause the recorder, press it once again to recording continually. You can
repeating as you like.
Use FM Record Setting:
You might want to change some setting in Radio Sub Menu.
Record Quality
In Radio screen, Press Center button, choose Record Quality > choose High / Medium / Low..
Record Gain
In Radio screen, Press Center button, choose Record Gain > choose 1 – 7 which gain level you want.
10.
Use Camera
To use the player as a camera, choose Camera from the main menu. The display screen becomes a viewer.
You can shoot pictures in landscape or portrait mode. In either mode, the resolution and total numbers of picture could be
available for shoot appears in the display.
The lens is on the back, so you can use the display as viewer. Be careful not to block the lens.
To Shoot Picture:
Choose Camera from the main menu.
When you’re ready to begin shooting, press ► ▌▌ button. Press ► ▌▌ button again to shooting again.
The total number of picture could be shoot is depends on the available disk space and battery level. However, the
available number appears in the display.
To Saving Picture:
The shoot picture is saving into system defaulted folder after you press ► ▌▌ button.
Press MENU button to stop the Camera function and back to main menu.
You might to preview video or/and change camera setting as you desired. To open the camera sub menu:
Preview
In camera screen, press Center button > choose Preview.
View Parameter
You might want to view those settings of video camera.
In camera screen, press Center button > choose View Parameter.
White Balance
To set white Balance, in camera screen, press Center button > choose white Balance > choose Auto / Indoor /
Outdoor depend on environment.
Brightness
You might need to adjust the viewer backlight if it is too dark or too bright in difference environment.
To set brightness, in camera screen, press Center button > choose Brightness > choose -3 to +3 as you desired.
Exposure Mode
To set exposure, in camera screen, press Center button > choose Exposure > choose Auto / Indoor / Outdoor depend
on environment.
Special Effect
You might want to play some special effect by video camera.
To set special effect, in camera screen, press Center button > choose Special Effect > choose Off / Black & White /
Sepia / Negative as you desired.
Save Path
System defaulted item and can not be changed.
Resolution
To set special effect, in camera screen, press Center button > choose Resolution > choose 2624 x 1968 / 2304 x
1724 / 2048 x 1538 / 1600 x 1200 / 1280 x 960 / 640 x 480 / 320 x 240 as you desired. (Highest resolution selected
will reduce the total number picture of shoot and depend on available memory space in Unit.)
Self-Timer
You might want to set the self-timer for special shooting.
To set self-timer, in camera screen, press Center button > choose Self-Timer > choose Off / 1 / 5 / 10 / 15 / 20
seconds as you desired.
Shutter Sound
To set shutter sound, in camera screen, press the Center button > choose Shutter Sound > choose Sound 1 / Sound 2
/ Sound 3 as you like.
Date Stamp
You might need to put the date & time stamp on picture.
To set the date stamp, in camera screen, press Center button > choose Date Stamp > choose Off / Date / Date &
Time as you desired.
11.
Use Videos Camera
To use the player as a video camera, choose Video Camera from the main menu. The display screen becomes a
viewfinder.
To Recording Video:
Choose Video Camera from the main menu.
When you’re ready to begin recording, press ► ▌▌ button. Press ► ▌▌ button again to stop recording.
When video is recording, a red ● appears in the display, next to the recording time.
Recording time depends on the available disk space and battery level. However, the available time for recording
appears in the display, next to the recording time.
To Saving Video:
When you’re ready to save recording file, press the Center button or MENU button, a saving file message appear
and file will in defaulted folder of Unit. Press ► ▌▌ button again to begin other recording, or,
Press MENU button to stop the Video Camera function and back to main menu.
To Delete Saved Video File:
To delete the saved video file in memory, in video camera screen, press Center button > choose Preview > Dir list >
Internal Memory > CAMERA, a list appear, select which file you want to delete, and then press and hold Center
button > choose Delete, and a “Confirm to Delete” message appear, select OK / Cancel and press the Center button
to confirm.
To Playback:
To playback, from main menu, choose Video > Dir List > Internal Memory > CAMERA, a list appear and then
select file, press Center button to play.
You might to preview video or/and change video camera setting as you desired. To open the video camera sub menu:
Preview;
To preview, in video camera screen, press Center button > choose Preview > Dir list > Internal Memory >
CAMERA, a list appear and then select file, press Center button to play.
View Parameter
You might want to view those settings of video camera.
In video camera screen, press Center button > choose View Parameter.
White Balance
To set white Balance, in video camera screen, press Center button > choose white Balance > choose Auto / Indoor
/ Outdoor depend on environment.
Brightness
You might need to adjust the viewer backlight if it is too dark or too bright in difference environment.
To set brightness, in video camera screen, press Center button > choose Brightness > choose -3 to +3 as you
desired.
Exposure Mode
To set exposure, in video camera screen, press Center button > choose Exposure > choose Auto / Indoor / Outdoor
depend on environment.
Special Effect
You might want to play some special effect by video camera.
To set special effect, in video camera screen, press Center button > choose Special Effect > choose Off / Black &
White / Sepia / Negative as you desired.
Save Path
System defaulted item and can not be changed.
Resolution
System defaulted item and can not be changed.
Record Quality
You might want to adjust the resolution quality of video camera.
To set record quality, in video camera screen, press Center button > choose Record Quality > choose High /
Medium / Low / Auto-adapted as you desired. (Highest quality selected will reduce the total recording time depend
on available memory space in Unit.)
12.
In EXTRA
Recordings
You can record voice memos using the built-in microphone.
To open voice recorder:
From main menu, choose EXTRA > Recordings, a recorder screen appear, the current recording time and available
time for recording appears in the display. Now the Unit is ready for recording.
To Recording Voice and Save Into Memory:
In recorder screen, press ► ▌▌button to starts recording. Press ► ▌▌button again to pause.
To save the recording voice file into memory, press Center button, a “Saving file” message appear and the recorded
voice is saving into system defaulted folder of player. Or,
To stop the recording and save recorded voice, press MEUN button > choose OK or Cancel and press Center button
to confirm. The recording will stop and the recorded voice file will save into memory when you choose OK or the
unit will continually to recording if you choose Cancel.
Back to main menu; press the MEUN button in recorder stop mode.
To Playback the Voice Memo:
From main menu screen, choose Music > Record List > Voice, a list appear and choose file and press Center button
to play.
You might need to change recorder setting when necessary. Press Center button, a recorder sub menu appears.
Record Format
In recorder sub menu, choose Record Format > choose WAV or MP3 and press the Center button.
Record quality
In recorder sub menu, choose Record Quality > choose Low / Medium / High and press the Center button.
Record Gain
In recorder sub menu, choose Record Gain > choose 1 / 2 / 3 / 4 / 5 (highest quality) and press Center button.
Use eBook
You can use the player as a text reader.
To open eBook:
From main menu, choose EXTRA > choose eBook > Dir List > Internal Memory, a list appear, choose book / file
name and press the Center button to read.
To change page, press
To stop and back to previous menu or main menu, press MENU button.
button.
You might need to change settings of eBook reader.
From now reading screen, press Center button, an eBook sub menu appears.
Skip To (jump page)
To jump page, in eBook sub menu, choose Skip To, and then select how many percent of page you want to jump.
Then press Center button to confirm.
Auto Play Gap (auto change page)
To select time for auto change page, in eBook sub menu, choose Auto Play Gap > Choose 3 / 6 / 9 / 12 / 15 which
you want and press Center to set.
To use auto play gap, from now reading screen, press ► ▌▌ button and the page will move to next page one by one
as per your selected time. Press again Center button the page will stop and press it once again the page will move
again.
Front Size
To change font size, in eBook sub menu, choose Font Size > Chose Small / Medium / Large as you want.
Add Bookmark & Use Tag List
To add bookmark on current reading page, from now reading screen, choose > Add Bookmark, the current reading
page is marked in memory.
To use bookmark, form main menu, choose EXTRA > choose eBook > Tag List, a list appear and then choose what
book / file name and page you want to read again.
To delete the save bookmark, in Tag List, choose book / file name and page you to delete, then press and hold
Center button, a “Confirm to Delete” message appear, choose Cancel or OK and press Center button to confirm.
Delete the File
To delete the current reading eBook file in memory, from now reading screen, press Center button, a eBook sub
menu appear, choose Delete the File and a “Confirm to Delete” message appear, choose Cancel or OK and press
Center button to confirm.
Note: It just supports “ANSI” coding “TXT” text, not support other coding file format. Other coding text can be opened
through notepad, then press “save as”. Choose coding “ANSI”, save type of the file as “txt” and save, then copy to the
player to read.
Use Games
Player comes with two games: Snake, Boxman. To play a game:
From main menu > Choose Extras > Games and choose a game.
Use those controls
/ ► ▌▌ / MENU button to play the selected game.
Use Stopwatch
You can use the stopwatch as you exercise to track your overall time and, if you’re running on a track, your lap times. You
can play music while you use the stopwatch. To use stopwatch:
Choose Extras > Stopwatch.
Press ►▌▌button to start the timer.
Press ►▌▌button again to record lap times. Or,
Press
button to record lap times and start the timer for second lap times. Press
button again for third lap
timer. Total 4 logs appear to use for lap’s timer.
Press ►▌▌to stop the overall timer. To start the timer again, press ►▌▌button.
To start a new stopwatch session, stop / pause the timer and press Center button and a message “Clear”, choose OK
and press the Center button
To return to sub menu or main menu, press MENU button in stopwatch screen.
Use Calendar
To use the calendar:
From main menu, choose EXTRA > Calendar.
To view date / month / year information, press Center button to selects, the choose item is highlight in red will show
on top of calendar screen, and then press
to change.
To return to sub menu or main menu, press MENU button in calendar screen.
13.
Trouble Shooting
Unit can’t turn ON
* Check whether Power is slide to ON.
* Check battery is it charged with enough
energy.
No sound is heard from headphone.
* Check whether Volume is set “0” and connect
the headphone plugs firmly.
* Check whether the headphone plug is dirty.
* Corrupted MP3 may make a static noise and
the sound may cut off. Make sure that the music
files are not corrupted.
Characters in LCD are corrupted
* Check whether the right language has been
selected.
Download of music files fails.
* Check whether USB cable is damaged and is
connected properly.
* Check whether driver is installed correctly.
* Check whether the player’s memory is in full.
14.
Specification
Dimension
41mm (L) x 9mm (W) x 95mm (H)
Weight
38g
LCD
2.0 Inches (320x240 QVGA 260,000 colors, TFT)
PC connection
USB 2.0
Earphone Impedance
32 Ohm
Internal Memory
4GB
Li-ion 3.7V, 150mAh
Battery
Max. Play Time: > 6 Hours (music with power saving mode)
Max. Output Power of Earphone
150m Vrms at 32 Ohm
Frequency Responses
20Hz to 20000Hz
SNR
>60dB
Music Format
WMA / MP3 / WAV
8Kbps– 320kbps
Recorder Coding
WAV
32kbps / 64kbps / 192kbps
MP3
64kbps / 128kbps / 256kbps
Audio
Video Format
Up to 320x240 resolution; Xvid / WMV / FLV / RM / RMVB / 3PG
Camera Resolution
320x240 / 640x480 / 1280x960 / 1600x1200 / 2048x1536 /
2304x1728 / 2624x1968 (JPEG)
Video Camera Resolution
320x240 (AVI)
Picture Format
JPEG / BMP / GIF / TIF / PNG
Operating Temperature
0 to 40℃
Operating System
Window 98/SE/ME/2000/XP/Vista