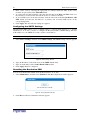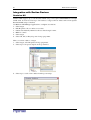
1
Copyright © 2006 Aphel Ltd
User Guide
February 2006
This page intentionally left blank.
This document contains proprietary information that is protected by copyright. All rights reserved.
No part of this document may be photocopied, reproduced, or translated into another language
without express prior written consent of Aphel Limited.
© Copyright 2006 Aphel and the Aphel logo are trademarks of Aphel Limited. Raritan, Paragon,
CommandCenter, Dominion, and the Raritan company logo are trademarks or registered
trademarks of Raritan Computer, Inc. All rights reserved. Java is a registered trademark of Sun
Microsystems, Inc. Internet Explorer is a registered trademark of Microsoft Corporation.
Netscape and Netscape Navigator are registered trademarks of Netscape Communication
Corporation. All other marks are the property of their respective owners.
!
This equipment has been tested and found to comply with the limits for a Class A digital device,
pursuant to Part 15 of the FCC Rules. These limits are designed to provide reasonable protection
against harmful interference in a commercial installation. This equipment generates, uses, and can
radiate radio frequency energy and if not installed and used in accordance with the instructions,
may cause harmful interference to radio communications. Operation of this equipment in a
residential environment may cause harmful interference.
"
#
Aphel is not responsible for damage to this product resulting from accident, disaster, misuse,
abuse, non-Aphel modification of the product, or other events outside of Aphel’s reasonable
control or not arising under normal operating conditions.
C
UL
US
LI STED
1F61
I.T.E.
$
Inspect the product before installation. If product is damaged in any way, please contact the supplier.
The product is intended for integration into an Information Technology equipment rack.
A fixing kit is supplied comprising of a variety of fasteners. The installer may use the fixings supplied, or
others of choice, to mount the product.
When running the supply cable within the rack cabinet, ensure that the cable is adequately supported to
avoid damage to the cable, and excessive strain on the cable gland.
For assistance please contact the Aphel Technical Support Team
by telephone +44 (0)870-7541880, or by e-mail [email protected]
Ask for Technical Support – Monday through Friday, 8:00 a.m. to 5:00 p.m.
For assistance around the world, please see the back cover of this guide for
regional Aphel contact information.
%
To avoid potentially fatal shock hazard and possible damage to Aphel equipment:
• Do not use a 2-wire power cord in any product configuration.
• Test AC outlets at your computer and monitor for proper polarity and grounding.
• Use only with grounded outlets at both the computer and monitor. When using a backup UPS,
power the computer, monitor and appliance off the supply.
• The installation socket outlet used for the power supply to this equipment must be installed
near the equipment and must be easily accessible.
• When installing this product, it is essential that the distribution circuit supplying the product
is protected by a branch circuit protection device with a maximum rating to suit the product
maximum rating..
•
SYSTEMS SHOULD ONLY BE CONFIGURED BY A COMPETENT PERSON.
•
This power distribution unit is intended for power supply provision to equipment only.
Secondary (Satellite) power strips shall not be connected to the receptacles
•
IT IS ESSENTIAL THAT THIS EQUIPMENT IS CONNECTED TO AN ELECTRICAL
SUPPLY THAT HAS A PROTECTIVE GROUND CONDUCTOR
WARNING: TO ISOLATE THIS EQUIPMENT DISCONNECT POWER SUPPLY PLUG.
ATTENTION: AFIN D'ISOLER TOTALEMENT CET APPAREIL DEBRANCHER
FICHE D'ALIMENTATION.
CAUTION: USE ONLY IN DRY LOCATIONS.
ATTENTION: UTILISER UNIQUEMENT DANS DES EMPLACEMENTS SECS.
•
•
•
•
•
This product has been designed to conform to the latest safety requirements. In addition to
compliance with standards for general use, it has been factory configured for use in rack
mounting environments aiding the installer to provide systems compliant with relevant
standards.
$
%
In Aphel products which require Rack Mounting, please follow these precautions:
• Operation temperature in a closed rack environment may be greater than room temperature.
Do not exceed the rated maximum ambient temperature of the appliances (see Appendix A:
Specifications).
• Ensure sufficient airflow through the rack environment.
• Mount equipment in the rack carefully to avoid uneven mechanical loading.
• Connect equipment to the supply circuit carefully to avoid overloading circuits.
• Ground all equipment properly, especially supply connections, such as power strips (other
than direct connections), to the branch circuit.
The zero-U units are provided with high grade engineering
polycarbonate isolation hardware to allow fixing in a variety of
positions within the rack.
For panel/flush mount, pull out fixing brackets are available on
each end cap to allow mounting on suitable rails
Other options are shown below.
Side Fixing
End Fixing.
Blind Fixing
CONTENTS
vii
Chapter 1: Introduction ................................... 1
Product Models ..........................................................Error! Bookmark not defined.
Product Features....................................................................................................... 1
Package Contents ..................................................................................................... 1
Zero-U Products ................................................................................................................................1
1U Products.......................................................................................................................................1
2U Products.......................................................................................................................................2
Product Photos.......................................................................................................... 2
Chapter 2: Installation and Configuration ................. 3
Before You Begin ...................................................................................................... 3
Unpack the Revelation PDU and Components..................................................................................3
Prepare the Installation Site...............................................................................................................3
Fill Out the Equipment Setup Worksheet...........................................................................................3
Connect the Revelation PDU to a Computer.............................................................. 3
Connect the Revelation PDU to Your Network........................................................... 3
Configure the Revelation PDU for Network Connectivity ........................................... 4
Chapter 3: Using the Revelation PDU ....................... 7
Front Panel................................................................................................................ 7
Ethernet Ports....................................................................................................................................7
Blue LED ...........................................................................................................................................7
Back Panel ................................................................................................................ 7
Power Cord........................................................................................................................................7
Outlets ...............................................................................................................................................8
Display Panel.....................................................................................................................................8
Circuit Breaker........................................................................................................... 8
Beeper....................................................................................................................... 9
Chapter 4: Using the Web Interface ....................... 11
Logging into the Web Interface................................................................................ 11
Logging In........................................................................................................................................11
Changing Your Password ................................................................................................................12
Using the Web Interface .......................................................................................... 13
Menus..............................................................................................................................................13
Navigation Path ...............................................................................................................................13
Status Panel ....................................................................................................................................14
Status Messages .............................................................................................................................15
Reset to Defaults .............................................................................................................................15
Refresh ............................................................................................................................................16
Using the Home Window ......................................................................................... 16
Global Status Panel .........................................................................................................................16
Outlets Display.................................................................................................................................16
Setting Up User Profiles .......................................................................................... 18
Creating a User Profile ....................................................................................................................18
Copying a User Profile.....................................................................................................................19
Modifying a User Profile...................................................................................................................19
Deleting a User Profile.....................................................................................................................20
Setting User Permissions Individually..............................................................................................20
Setting Up User Groups .......................................................................................... 20
Creating a User Group.....................................................................................................................20
Setting the System Permissions ......................................................................................................21
Setting the Outlet Permissions ........................................................................................................22
Copying a User Group .....................................................................................................................23
Modifying a User Group...................................................................................................................23
Deleting a User Group .....................................................................................................................23
Setting Up Access Controls ..................................................................................... 23
Forcing HTTPS Encryption ..............................................................................................................23
Configuring the Firewall ...................................................................................................................24
Creating Group Based Access Control Rules..................................................................................26
Setting Up User Login Controls .......................................................................................................28
Setting Up a Digital Certificate................................................................................. 30
viii
DOMINION PX USER GUIDE
Creating a Certificate Signing Request............................................................................................30
Installing a Certificate ......................................................................................................................32
Setting Up External User Authentication.................................................................. 32
Settings Up LDAP Authentication ....................................................................................................32
Setting Up RADIUS Authentication..................................................................................................34
Setting Up Outlets and Power Thresholds ............................................................... 34
Setting the Revelation PDU Thresholds ..........................................................................................35
Naming the Outlets ..........................................................................................................................35
Setting the Outlet Thresholds ..........................................................................................................36
Viewing Outlet Details......................................................................................................................36
Power Cycling an Outlet ..................................................................................................................37
Turning an Outlet On or Off .............................................................................................................38
Setting Up Alerts ..................................................................................................... 38
Configuring Alert Events ..................................................................................................................38
Creating Alert Policies .....................................................................................................................39
Specifying the Alert Destination .......................................................................................................41
Setting Up Event Logging ........................................................................................ 42
Configuring the Local Event Log......................................................................................................42
Viewing the Internal Event Log ........................................................................................................43
Configuring NFS Logging ................................................................................................................43
Configuring SMTP Logging..............................................................................................................44
Configuring SNMP Logging .............................................................................................................45
Managing the Revelation PDU ................................................................................ 46
Displaying Basic Device Information................................................................................................46
Naming the Revelation PDU............................................................................................................46
Modifying the Network Settings .......................................................................................................47
Modifying the Communications, Port and Bandwidth Settings.........................................................47
Modifying the LAN Interface Settings...............................................................................................48
Setting the Date and Time ...............................................................................................................49
Configuring the SMTP Settings .......................................................................................................50
Resetting the Revelation PDU .........................................................................................................50
Updating the Firmware ....................................................................................................................51
Chapter 5: Using the CLP Interface ....................... 53
About the CLP Interface .......................................................................................... 53
Logging into the CLP interface ................................................................................ 53
Using HyperTerminal .......................................................................................................................53
Using SSH or Telnet ........................................................................................................................54
Showing Outlet Information ..................................................................................... 55
Syntax..............................................................................................................................................55
Attributes .........................................................................................................................................55
Examples .........................................................................................................................................56
Turning an Outlet On or Off ..................................................................................... 56
Syntax..............................................................................................................................................56
Querying an Outlet Sensor ...................................................................................... 57
Chapter 6: Integration ................................... 59
Integration with Raritan Devices .............................................................................. 60
Dominion KX....................................................................................................................................60
Paragon II ........................................................................................................................................62
Dominion SX....................................................................................................................................65
Dominion KSX .................................................................................................................................67
CommandCenter .............................................................................................................................67
Appendix A: Revelation PDU Models ........................ 69
Appendix B: Equipment Setup Worksheet .................... 70
Appendix C: IPMI Privilege Levels ........................ 72
Appendix D: Event Types .................................. 74
Appendix E: Device Setup Wizard .......................... 76
Enabling and Disabling the Wizard .......................................................................... 76
Using the Wizard ..................................................................................................... 76
FIGURES
ix
!
Figure 1 Revelation PDU Models................................................................................................................ 2
Figure 2 Connect the Cable to the Revelation PDU.................................................................................... 3
Figure 3 Opening Configuration Prompt ..................................................................................................... 4
Figure 4 IP Configuration Prompt................................................................................................................ 4
Figure 5 Access Control Prompt ................................................................................................................. 5
Figure 6 LAN Interface Speed Prompt ........................................................................................................ 5
Figure 7 Duplex Mode Prompt .................................................................................................................... 5
Figure 8 Confirmation Prompt ..................................................................................................................... 6
Figure 9 Configuration Complete ................................................................................................................ 6
Figure 10 Login Dialog .............................................................................................................................. 11
Figure 11 Home Page............................................................................................................................... 12
Figure 12 Change Password Window....................................................................................................... 12
Figure 13 Menu Options ........................................................................................................................... 13
Figure 14 Navigation Path......................................................................................................................... 14
Figure 15 Status Panel ............................................................................................................................. 14
Figure 16 Status Messages (Operation Successful) ................................................................................. 15
Figure 17 Status Messages (Operation Unsuccessful) ............................................................................. 15
Figure 18 Global Status Panel .................................................................................................................. 16
Figure 19 Outlets Display (8 outlets)......................................................................................................... 16
Figure 20 Outlets Display (20 outlets)....................................................................................................... 17
Figure 21 User/Group Management Window User Management Panel................................................ 18
Figure 22 User Group Management Window Group Management Panel ............................................. 21
Figure 23 User/Group System Permissions Window ................................................................................ 21
Figure 24 User/Group Outlet Permissions Window................................................................................... 22
Figure 25 Security Settings Window –HTTP Encryption Panel ................................................................. 24
Figure 26 IP Access Control Panel (Firewall Enabled) ............................................................................. 24
Figure 27 IP Access Control Panel (Firewall Rules Displayed)................................................................. 26
Figure 28 Group Based System Access Control Panel (Enabled) ............................................................ 27
Figure 29 User Blocking Panel.................................................................................................................. 28
Figure 30 Login Limitations Panel............................................................................................................. 29
Figure 31 Strong Passwords Panel........................................................................................................... 30
Figure 32 SSL Server Certificate Signing Window (First Page) ................................................................ 31
Figure 33 SSL Server Certificate Management Window (Second Page) ................................................. 32
Figure 34 Authentication Window LDAP Parameters ............................................................................ 33
Figure 35 Authentication Window RADIUS Parameters ........................................................................ 34
Figure 37 Outlet Setup Window ................................................................................................................ 36
Figure 38 Outlet Details Window............................................................................................................... 37
Figure 39 Alert Configuration Window ...................................................................................................... 38
Figure 40 Thresholds ................................................................................................................................ 39
Figure 41 Policies ..................................................................................................................................... 39
Figure 42 Alert Policies Window ............................................................................................................... 40
Figure 43 Alert Policy Editor...................................................................................................................... 40
Figure 44 Alert Destinations Window ........................................................................................................ 41
Figure 45 Local Logging Panel ................................................................................................................. 42
Figure 46 Event Log Assignment Panel (List Logging) ............................................................................. 42
Figure 47 Internal Event Log..................................................................................................................... 43
Figure 48 NFS Logging Panel................................................................................................................... 43
Figure 49 Event Log Assignment Panel (List and NFS Logging) .............................................................. 44
Figure 50 SMTP Logging Panel ................................................................................................................ 44
Figure 51 Event Log Assignment Panel (List, NFS, and SMTP Logging) ................................................. 44
Figure 52 SNMP Logging Panel................................................................................................................ 45
x
DOMINION PX USER GUIDE
Figure 53 Event Log Assignment Panel (List, NFS, SMTP, and SNMP Logging)..................................... 45
Figure 54 Device Information Window ...................................................................................................... 46
Figure 55 Basic Network Settings Panel................................................................................................... 47
Figure 56 Miscellaneous Network Settings Panel ..................................................................................... 48
Figure 57 LAN Interface Settings Panel.................................................................................................... 49
Figure 58 Date/Time Settings Window...................................................................................................... 49
Figure 59 SMTP Settings Window ............................................................................................................ 50
Figure 60 Reset Operations Window ........................................................................................................ 50
Figure 61 Reset Confirmation Window ..................................................................................................... 51
Figure 62 Reset Conclusion Window ........................................................................................................ 51
Figure 63 Firmware Upload Window......................................................................................................... 51
Figure 64 Firmware Update Window......................................................................................................... 52
Figure 65 Update Successful ..................................................................................................................... 52
Figure 66 HyperTerminal Command Prompt ............................................................................................ 53
Figure 67 Login Prompt ............................................................................................................................ 54
Figure 68 Password Prompt...................................................................................................................... 54
Figure 69 System Prompt ......................................................................................................................... 54
Figure 70 Login Prompt ............................................................................................................................ 54
Figure 71 Password Prompt...................................................................................................................... 55
Figure 72 System Prompt ......................................................................................................................... 55
Figure 73 Show Command ....................................................................................................................... 56
Figure 74 Show Command with Name Attribute ....................................................................................... 56
Figure 75 Show Command with PowerState Attribute .............................................................................. 56
Figure 76 Opening Wizard Window .......................................................................................................... 76
Figure 77 Device Search and Setup Window............................................................................................ 77
Figure 78 Device Setup Window Appears................................................................................................. 77
Figure 79 Super User Login Window ........................................................................................................ 78
Figure 80 Network Configuration Window................................................................................................. 78
Figure 81 Concluding Wizard Window ...................................................................................................... 79
CHAPTER 1: INTRODUCTION
&
1
$
The Revelation PDU unit is an intelligent power distribution unit that allows you to reboot remote
servers and other network devices, and monitor power in the data center, through Raritan’s KVM
switches and Secure Console Servers. From the office or from anywhere, the Revelation PDU
unit will power on, power off, or reboot remote equipment, as well as monitor current, voltage,
power, and temperature.
The Revelation PDU offers the ability to recover systems remotely in the event of system failure
and/or system lockup. It eliminates the need to perform manual intervention or dispatch field
personnel, reduces downtime and mean time to repair, and increases productivity.
'
$ !
All models and configurations of the Revelation PDU provide the following features:
• The ability to control outlets collectively and individually
• The ability to power on, power off and reboot the devices connected to each outlet
• The ability to monitor the following at the outlet level:
− Average power
− Apparent power
− True RMS voltage
− True RMS current
− Maximum current detected
− Internal temperature
− Outlet circuit breaker status set power threshold
• An audible alarm (beeper) and a visual alarm (blinking LED) to indicate current overload
• Configurable alarm thresholds
• Fully shrouded local Branch Circuit breakers on products rated over 20A to protect connected
equipments against overload and short circuits
• Total integration with Raritan’s Paragon, Reach, and Dominion solutions
' $
The following describes the equipment and other material included in each product package.
(
•
•
•
•
•
•
)
$
Revelation PDU unit including power cord 1,80m (6 feet)
User Manual/Quick Setup Guide CD ROM
CD (FW, manual, OSG, company information)
Registration card (marketing messages, goodies…)
Bracket for 0U + screws
Null modem cable with RJ-45 and DB9F connectors on either end
'
•
•
•
•
•
•
'
$
Revelation PDU unit including power cord 1,80m (6 feet)
User Manual/ Quick Setup Guide CD ROM
CD (FW, manual, OSG, company information)
Registration card (marketing messages, goodies…)
1U bracket pack + screws
Null modem cable with RJ-45 and DB9F connectors on either end
2
*
•
•
•
•
•
•
'
DOMINION PX USER GUIDE
'
$
Revelation PDU unit including power cord 1,80m (6 feet)
User Manual/ Quick Setup Guide CD ROM
CD (FW, manual, OSG, company information)
Registration card (marketing messages, goodies...)
2U bracket pack + screws
Null modem cable with RJ-45 and DB9F connectors on either end
$ '
Figure 1 Revelation PDU Models
CHAPTER 2: INSTALLATION AND CONFIGURATION
3
*&
This chapter explains how to install an Revelation PDU unit and configure it for network
connectivity.
+
,
+
Before beginning the installation, perform the activities listed below:
$
'-
1. Remove the Revelation PDU unit and other equipment from the box in which they were
shipped. Refer to “Package Contents” in Chapter 1 for a complete list of the contents of the
box.
2. Compare the unit and serial number of the equipment with the number on the packing slip
located on the outside of the box and make sure they match.
3. Inspect the equipment carefully. If any of the equipment is damaged or missing, contact
Aphel’s Technical Support Department for assistance.
'
%
1. Make sure the installation area is clean and free of extreme temperatures and humidity.
2. Allow sufficient space around the Revelation PDU for cabling and outlet connections.
3. Review the Safety Instructions listed in the beginning of this manual.
!
.
/0
%
1
An Equipment Setup Worksheet is provided in Appendix B. Use this worksheet to record the
model, serial number, and use of each device connected to the Revelation PDU.
As you add and remove devices, keep the worksheet up to date.
$
'-
You must connect the Revelation PDU to a computer to configure it. This is done by means of a
serial connection between the Revelation PDU and the computer. If you plan to use this
connection to log into the CLP command line interface, leave the cable connected after the
configuration is complete.
The computer must have a communications program such as HyperTerminal or Putty. You will
also need the null modem cable and connectors that were shipped with the Revelation PDU.
1. Take the null modem cable and connect the end with the RJ-45 connector to the port labeled
Serial on the front of the Revelation PDU.
Figure 2 Connect the Cable to the Revelation PDU
2. Plug the other end of the null modem cable (containing the DB9 connector) into the serial
port (COM) of the computer.
$
'-
,
2
To use the Web interface to administer the Revelation PDU, you must connect the Revelation
PDU to your local area network (LAN).
1. Take a standard Category 5e UTP cable and connect one end to the LAN port on the front of
the Revelation PDU.
2. Connect the other end of the cable to your LAN.
4
DOMINION PX USER GUIDE
'-
2
$
Once the Revelation PDU is connected to your network, you must provide it with an IP address
and some additional networking information.
Note: The Device Setup Wizard is an alternative way to configure an Revelation PDU for
network connectivity. Refer to Appendix E for details.
1. Go to the computer that you connected to the Revelation PDU and open a communications
program such as HyperTerminal or Putty. Make sure its port settings are configured as
follows:
− Bits per second = 9600
− Data bits = 8
− Stop bits = 1
− Parity = None
− Flow control = None
2. Point the communications program at the serial port connecting the Revelation PDU and open
a terminal window.
3. Press Enter to display the opening configuration prompt.
Figure 3 Opening Configuration Prompt
4. Type config and press Enter to begin the configuration process. You are prompted to select
an IP configuration method.
Figure 4 IP Configuration Prompt
5. You must assign the Revelation PDU an IP address. There are two ways to do this:
− Auto configuration Select an autoconfiguration method such as dhcp or bootp and let
the DHCP or BOOTP server provide the IP address.
− Static IP address Select None and assign the Revelation PDU a static IP address. You
will be prompted for the address, network mask, and gateway.
Note: The Revelation PDU’s IP address is automatically displayed in the system prompt. The
default IP address is 192.168.1.22. This will be replaced by the address assigned by DHCP or
BOOTP, or the static IP address you entered, as soon as the configuration process is complete.
CHAPTER 2: INSTALLATION AND CONFIGURATION
5
Type your selection and press Enter. You are prompted to enable IP access control.
Figure 5 Access Control Prompt
6. By default, IP access control is NOT enabled. This disables the Revelation PDU firewall.
Leave the firewall disabled for now. Later on, you can enable the firewall from the Web
interface and create firewall rules (refer to “Configuring the Firewall” in Chapter 4 for
details).
Note: If you ever accidentally create a rule that locks you out of the Revelation PDU, you can
rerun the configuration program and reset this parameter to disabled to allow you to access the
Revelation PDU.
For now, press Enter. You are prompted to set the LAN interface speed.
Figure 6 LAN Interface Speed Prompt
7. By default, the LAN interface speed is set to Auto, which allows the system to select the
optimum speed. To keep the default, press Enter. To set the speed to 10 or 100 Mbps, type
the speed you want and press Enter. You are prompted to select the duplex mode for the
LAN interface.
Figure 7 Duplex Mode Prompt
6
DOMINION PX USER GUIDE
8. By default, the LAN interface duplex mode is set to Auto, which allows the system to pick
the optimum mode. Half duplex allows data to be transmitted to and from the Revelation
PDU, but not at the same time. Full duplex allows data to be transmitted in both directions at
the same time.
To keep the default, press Enter. To specify half or full duplex, type half or full and press
Enter. You are prompted to confirm the information you just entered.
Figure 8 Confirmation Prompt
9. All the configuration parameters have now been entered. All the prompts are still displayed,
so you can check the information you entered. Do one of the following:
− If the information is correct, type Y and press Enter. The system completes the
configuration and displays a message when the configuration is done.
− If one or more parameters are not correct, type N and press Enter. You are returned to
the IP configuration prompt shown in Figure 4 and given the opportunity to correct each
piece of information. When the information is correct, type Y and press Enter to
complete the configuration and return to the opening prompt shown in Figure 3.
− If you want to terminate the configuration process, type C and press Enter. The
configuration is cancelled and you are returned to the opening prompt shown in Figure 3.
10. If you entered Y to confirm the configuration, a message is displayed telling you when the
configuration is complete. You are then returned to the opening prompt shown in Figure 3.
You are now ready to begin using your Revelation PDU.
Figure 9 Configuration Complete
CHAPTER 3: USING THE
7
3&
'-
This chapter explains how to use the Revelation PDU unit. It describes the LEDs and ports on the
front and back panels of the Revelation PDU, and explains how to use the display panel. It also
explains how the circuit breaker works and when the beeper goes off.
!
'
The front panel of the Revelation PDU unit consists of three Ethernet (RJ-45) ports to the left and
a blue LED to the right.
/
'
The three RJ-45 Ethernet ports, from left to right, are labeled Serial, Feature, and LAN. The
table below explains what each port is used for.
PORT
Serial
Feature
LAN
+
USED FOR…
Establishing a serial connection between a computer and the Revelation
PDU
Take the null modem cable that was shipped with the Revelation PDU unit,
connect the end with the RJ-45 connector to the port labeled Serial on the
front of the Revelation PDU, and connect the end with the DB9F connector
to the serial (COM) port on the computer.
Reserved for future use, including environmental sensors
Connecting the Revelation PDU to your company’s network
Connect a standard Category 5e UTP cable to this port and connect the other
end to your network. This connection is necessary to administer the
Revelation PDU remotely using the Web interface.
There are two small LEDs under the LAN port. Green indicates a physical
link and activity, and yellow indicates communication at 10/100 BaseT
speeds.
4/-
The blue LED on the right side of the front panel is lit solid when the Revelation PDU is ON.
&
4/-
5
2
2
+ $ '
The back panel of the Revelation PDU consists of, from left to right, a power cord, power outlets
to connect devices to the Revelation PDU, and a display panel.
' 2
The power cord that connects the Revelation PDU to a power source is located on the far left of
the back panel or on the end of the unit if the unit is a zero-U type. All devices are non-rewireable
by the user.
There is no power switch on the Revelation PDU. On products rated at over 20A there are branch
circuit breakers that are fully shrouded to prevent accidental operation. To power cycle the unit,
remove the power cord from the power source and then re-connect it.
8
DOMINION PX USER GUIDE
.
The number of outlets on the back panel depends upon the Revelation PDU model. To the upper
left of each outlet is a small LED. The table below explains how to interpret the different LED
states.
LED STATE
OUTLET STATUS
WHAT IT MEANS
The outlet is not connected to power or the
Not lit
OFF
control circuitry’s power supply is broken.
The outlet is ON (relay closed) and LIVE
Red
ON and LIVE
(voltage present).
The outlet is ON and LIVE, but there is overload
Red flashing
ON and LIVE
and the current has crossed the non-critical
threshold.
Green
OFF and LIVE
The outlet is OFF (relay open) and LIVE.
Green flashing
OFF and NOT LIVE The outlet is OFF but NOT LIVE.
The outlet was shut down because the current
Yellow
OFF and LIVE
crossed the critical threshold.
The outlet is ON but NOT LIVE (circuit breaker
Yellow flashing
ON and NOT LIVE
open or other high voltage rail error).
-
'
The display panel is located on the right of the unit’s back panel. It consists of these components:
• A lower row displaying two digits
• An upper row displaying three digits
• Up and Down buttons
4 2
2
The lower row shows the outlet number.
2
The upper row shows the current, voltage, and power readings for the outlet indicated in the
lower row.
6 2
.
'
1. Use the Up and Down buttons to select an outlet. Pressing the Up button once moves up one
outlet number. Pressing the Down button once moves down one outlet number.
2. When an outlet is selected, the outlet number is displayed in the lower row and the current in
the upper row. Current is displayed in the format: XX.X (A)
3. To display the voltage for the selected outlet, press the Up and Down buttons simultaneously.
The voltage reading will replace the current for about 5 seconds, after which the current will
return.
4. To display the power…
Tip: A quick way to distinguish between voltage, current, and power is the placement of the
decimal point in the display. Voltage has no decimal point, current has a decimal point between
the first and second digits, and power has a decimal point between the second and third digits.
$
+
The Revelation PDU includes branch circuit breakers (units rated over 20A) that automatically
trip when a power overload is detected. If the circuit breaker switches off the voltage rail, the
CHAPTER 3: USING THE
9
lower row of the display panel will jump to the lowest outlet number affected by the circuit
breaker error, and the upper row will display these three letters
CbE
which means circuit breaker error.
You will still be able to switch between outlets on the Revelation PDU’s display panel. Outlets
affected by the error will show CbE. Unaffected outlets will show the current and voltage
readings as described above.
To reset the breakers in the event of an overload: On the 1U and 2U products unclip the front
molding to access the breaker(s). On the zero-U product the breaker(s) can be accessed by lifting
the hinged cover over the breaker element.
+
The Revelation PDU includes a beeper. It will ring if any of the circuit breakers is trips or if the
control board temperature sensor exceeds 80 degrees Celsius.
The beeper will cease ringing when the broken circuit breaker conditions disappear or the control
board temperature sensor drops below 70 degrees Celsius.
10
DOMINION PX USER GUIDE
CHAPTER 4: USING THE W EB INTERFACE
7&
11
1
$
This chapter explains how to use the Web interface to administer an Revelation PDU.
4
1
$
To log into the Web interface, you must enter a user name and password. The first time you log
in, use the default user name (admin) and password (raritan). You will then be prompted to
change the password for security purposes.
Once you have logged in, you can create user profiles for your other users. These profiles define
their login names and passwords. (Refer to “Creating a User Profile” below for instructions on
creating a user profile.)
Note: In future releases of the Revelation PDU, users will be required by default to use HTTPS
to access the Revelation PDU. In this release, you can force users to use HTTPS if you wish.
Refer to “Forcing HTTPS Encryption” below for details.
4
To log into the Web interface:
1. Open a browser such as Microsoft Internet Explorer or Mozilla Firefox and point it at this
URL:
http://<ip address>
where <ip address> is the IP address of the Revelation PDU. A Login dialog appears.
Figure 10 Login Dialog
2. Type your user name and password in the Username and Password fields. Both the user
name and password are case sensitive, so make sure you capitalize the letters correctly.
3. Click Login. The Home window appears.
12
DOMINION PX USER GUIDE
Figure 11 Home Page
Note: The Home window in Figure 11Error! Reference source not found. shows 8 outlets. If
your Revelation PDU has 20 outlets, the Home window will show all 20. Refer to “Outlets
Display” below for a more detailed discussion of the outlets display on the Home window, with
pictures of both 8 and 20 outlet displays.
,
'
2
To change your password:
1. Select User Management, and then select Change Password. The Change Password
window appears.
Figure 12 Change Password Window
2. Type your existing password in the Old Password field.
3. Type your new password in the New Password and Confirm New Password fields.
Passwords are case sensitive, so be sure to capitalize the same letters each time.
4. Click Apply. Your password is changed.
CHAPTER 4: USING THE W EB INTERFACE
1
13
$
Every window in the Web interface provides menus and a navigation path across the top, and a
Status panel to the left.
There are five menus in the Web interface:
• Power Outlets
• Alerts
• User Management
• Device Settings
• Maintenance
.
Figure 13 shows a complete list of the options available from each menu.
Figure 13 Menu Options
6 2
%
$
.
There are two ways to select an option from a menu:
• Click the menu name to display a window listing each option, and then click the option you
want to select it.
• Position the cursor on the menu name. A list of options drops down from the menu. Slide the
cursor to the option you want and click it to select it.
'
When you select an option from a menu and navigate to a specific window, the system displays a
navigation path across the top that shows the menu and option you selected to get there.
For example, if you select User Management
User/Group System Permissions, the
navigation path looks like the one shown in Figure 14.
14
DOMINION PX USER GUIDE
Figure 14 Navigation Path
To return to a previous window, click the window name in the navigation path. Every navigation
path begins at the Home window, so a single click always takes you back to the Home window
from anywhere in the interface.
%
'
The Status panel appears on the left of every window in the interface. It shows:
• Current date and time
• Information about the user, including:
− User name
− User’s current state (active, idle, etc.)
− IP address of the user’s computer
− Date and time of the user’s last login
• Information about the Revelation PDU, including:
− Model name and number
− IP address
− Firmware version
• Information about all the users currently connected, including user name, IP address, and
current state. Your current session is included in this list.
Figure 15 Status Panel
The State field in the user information section considers a user to be “idle” 30 seconds after the
last keyboard or mouse action. It then updates the idle time every 10 seconds until another
keyboard or mouse action is detected.
CHAPTER 4: USING THE W EB INTERFACE
15
If you are logged out because you exceeded the idle time limit, a Relogin link appears in the
Connected Users part of the Status panel. Click the link to display the Login window.
%
When you perform an operation from the Web interface, such as creating a user profile or
changing a network setting, a message appears at the top of the window that indicates whether or
not the operation was successful. Be sure to check this message to confirm that an operation was
successful.
% $$
The following are examples of status messages after an operation has completed successfully:
Figure 16 Status Messages (Operation Successful)
$$
The following are examples of status messages after an operation has completed unsuccessfully:
Figure 17 Status Messages (Operation Unsuccessful)
Many windows provide a Reset to Defaults button that returns all fields to their default values. If
you use this button, you must click the Apply button afterward. This saves the defaults. If you
neglect to do this, the next time you return to the window, you will still see the non-default values.
16
DOMINION PX USER GUIDE
#
If a field has an asterisk after it, as shown below,
then, this field is currently set to its default value. If you change the default, the asterisk
disappears. If you reset to defaults, the asterisk returns.
Many windows provide a Refresh button. If a window is open for a while, the information
displayed may become “stale.” Click this button periodically to reload the window and update the
information displayed.
6
1
2
The Home window is the first window to appear after a successful login. It consists of a Global
Status panel and an Outlets display.
You can return to the Home window from any other window in the Web interface by clicking:
• The Home link in the navigation path
• The Aphel logo in the upper left of the window
• Global Status Panel
The Global Status panel provides an overview of the Revelation PDU’s power consumption and
temperature. It shows:
• Unit voltage
• RMS current (in amps)
• True power (in watts)
• CPU temperature (centigrade scale)
Figure 18 Global Status Panel
.
-
The Outlets display shows each outlet on the Revelation PDU. The following two figures show
an 8-outlets and a 20-outlets display.
Figure 19 Outlets Display (8 outlets)
CHAPTER 4: USING THE W EB INTERFACE
17
Figure 20 Outlets Display (20 outlets)
Each outlet features an icon whose color and flashing status reflect the status of the outlet. The
table below explains:
ICON STATUS
Grey
OUTLET STATUS
No power
Red
ON and LIVE
Red flashing
ON and LIVE
Green
Green flashing
Yellow
OFF and LIVE
OFF and NOT LIVE
OFF and LIVE
Yellow flashing
ON and NOT LIVE
WHAT IT MEANS
The outlet is not connected to power or the
control circuitry’s power supply is broken.
The outlet is ON (relay closed) and LIVE
(voltage present).
The outlet is ON and LIVE, but there is overload
and the current has crossed the non-critical
threshold.
The outlet is OFF (relay open) and LIVE.
The outlet is OFF but NOT LIVE.
The outlet was shut down because the current
crossed the critical threshold.
The outlet is ON but NOT LIVE (circuit breaker
open or other high voltage rail error).
.
.
.
To turn an outlet ON or OFF, click the On or Off buttons under the icon. You can also turn an
outlet on or off from the Outlet Details window (refer to Figure 38 for a picture of the window).
#
To display additional details about an outlet, click the outlet icon. This displays the Outlet Details
window (refer to Figure 38 for a picture of the window). This window gives the name and status
of the outlet, as well as:
• RMS Current
• RMS max Current
• RMS Voltage
18
•
•
•
DOMINION PX USER GUIDE
True RMS Power
RMS Power
Real RMS Power
Note: RMS refers to root mean square, a statistical method for measuring certain types of
variables. In this context, it gives the value of current or voltage that is equivalent to a comparable DC value.
%
'
The Revelation PDU is shipped with one user profile built in. This is the Admin profile, which
was used for the original login. This profile has full system and outlet permissions, and should be
reserved for the system administrator. This profile cannot be modified or deleted.
All users must have a user profile. The profile specifies a login name and password, and contains
additional (optional) information about the user. It also assigns the user to a User Group, and the
User Group determines the user’s system and outlet permissions.
If you choose, you can refrain from assigning some or all users to a User Group, and instead
assign their system and outlets permissions on an individual basis.
Note: By default, multiple users can log in at the same time using the login name from the same
profile. You can change this so only one user at a time can use a specific login. This is done by
selecting Device Settings
Security and checking the check box labeled Enable Single Login
Limitation.
'
To create a user profile:
1. Select User Management, and then select Users & Groups. The User/Group Management
window appears. This window is divided into a User Management panel and a Group
Management panel.
Figure 21 User/Group Management Window
User Management Panel
CHAPTER 4: USING THE W EB INTERFACE
19
2. In the User Management panel, type the following information about the user in the
corresponding fields:
FIELD
New user name
Full Name
Password
Confirm Password
Email address
Mobile Number
TYPE THIS…
The name the user will enter to log into the Web interface
The user’s first and last names
The password the user will enter to log in. Type it first in the
Password field and then again in the Confirm Password field.
The password must be at least four characters long, and spaces
are not permitted. The password is case sensitive, so be sure to
capitalize the same letters each time.
An email address where the user can be reached
A cell phone number where the user can be reached
Note: New user name, Password, and Confirm Password are the only required fields.
3. Select a User Group from the drop-down list in the User Group field. The User Group
determines the system functions and outlets this user can access.
If you select None, the user is not assigned to a User Group. This means you have to set the
user’s permissions individually. Until you do this, the user is effectively blocked from
accessing any system functions and outlets. (For instructions on setting permissions
individually, refer to “Setting User Permissions Individually” below.)
4. If you would like this user to set his or her own password, click the check box labeled
Enforce user to change password on next login. The user logs in the first time using the
password you entered above, and then is forced to change it to one of his or her choice.
5. Click Create. The user profile is created.
'
You can create a new user profile with the exact same settings as an existing profile by using the
copy function. You can then modify the profile so that it differs as necessary from the original.
This is a quick and easy way to create user profiles.
To copy a user profile:
1. Select User Management, and then select Users & Groups. The User/Group Management
window appears.
2. Select the existing user profile from the drop-down list in the Existing Users field.
3. Type the name of the new user profile in the New User Name field.
4. Click Copy. A new user profile is created with the same settings as the existing profile. The
new profile can be seen by clicking the drop-down list in the Existing Users field.
'
Every user with user management permissions can modify a user profile. (Refer to “Setting the
System Permissions” below for information about setting user permissions.)
To modify a user profile:
1. Select User Management, and then select Users & Groups. The User/Group Management
window appears.
2. Select the user profile you want to modify from the drop-down list in the Existing Users field.
All the information in the user profile is displayed except the password.
3. Make all necessary changes to the information shown. To change the password, type a new
password in the Password and Confirm Password fields. If the password field is left blank,
the password is not changed.
4. Click Modify. The user profile is modified.
20
DOMINION PX USER GUIDE
-
'
To delete a user profile:
1. Select User Management, and then select Users & Groups. The User/Group Management
window appears.
2. Select the user profile you want to delete from the drop-down list in the Existing Users field.
3. Click Delete. The user profile is deleted.
%
'
If you selected None for User Group when creating a user profile, you must set the user’s
permissions individually. Until you do this, the user is effectively blocked from all system
functions and outlets.
%
'
To set the system permissions:
1. Select User Management, and then select User/Group System Permissions. The User
Group System Permissions window appears (refer to Figure 23 below for a picture of this
window).
2. Select the user from the drop-down list in the User (not in group) field. The drop-down list
shows all user profiles that have NOT been assigned to a User Group.
3. Set the permissions as necessary. Click this icon
in a field and select either Yes or No.
4. When you are finished, click Apply. The permissions are applied to the user.
.
'
To set the outlet permissions:
1. Select User Management, and then select User/Group Outlet Permissions. The
User/Group Outlet Permissions window appears (refer to Figure 24 below for a picture of this
window).
2. Select the user from the drop-down list in the User field.
in a field and select either Yes or No.
3. Set the permissions as necessary. Click this icon
4. When you are finished, click Apply. The permissions are applied to the user.
%
The Revelation PDU is shipped with one User Group built in. This is the Admin User Group.
This User Group provides full system and outlet permissions. It cannot be modified and it cannot
be deleted.
When creating user profiles, the User Group field defaults to the Admin User Group. This
means that if you do not change the entry in this field, the user will enjoy full system and outlet
permissions. To restrict the user’s permissions, create a User Group with limited system and/or
outlet permissions, and assign the user to that group.
To create a User Group:
1. Select User Management, and then select Users & Groups. The User/Group Management
window appears. This window is divided into a User Management panel and a Group
Management panel.
CHAPTER 4: USING THE W EB INTERFACE
Figure 22 User Group Management Window
21
Group Management Panel
2. In the Group Management panel, type the name of the group in the New group name field.
3. Click Create. The User Group is created.
%
%
'
System permissions include all the major functional areas of the Web interface. When you first
create a User Group, all system permissions are set to NO.
To set the system permissions for a User Group:
1. Select User Management, and then select Users/Group System Permissions. The
User/Group System Permissions window appears.
Figure 23 User/Group System Permissions Window
22
DOMINION PX USER GUIDE
2. Select the User Group from the drop-down list in the Group field. The permissions that apply
to this group are displayed. If this is the first time you are setting the permissions for this
group, all permissions are set to No.
3. Set the permissions as necessary. Click this icon
in a field and select either Yes or No.
4. When you are finished, click Apply. The permissions are applied to the User Group.
Note: The User (not in group) field on this window is used to set individual user permissions. If
you are setting group permissions, you may ignore this field.
%
.
'
Setting outlet permissions allows you to specify which outlets members of a User Group are
permitted to access. When you first create a User Group, all outlet permissions are set to NO.
To set the outlet permissions for a User Group:
1. Select User Management, and then select Users/Group Outlet Permissions. The
User/Group Outlet Permissions window appears.
Figure 24 User/Group Outlet Permissions Window
2. Select the User Group from the drop-down list in the Group field. The permissions that apply
to this group are displayed. If this is the first time you are setting the permissions for this
group, all permissions are set to No.
3. Set the permissions as necessary. Click this icon
in a field and select either Yes or No.
4. When you are finished, click Apply. The permissions are applied to the User Group.
Note: The User field on this window is used to set individual user permissions. If you are setting
group permissions, you may ignore this field.
CHAPTER 4: USING THE W EB INTERFACE
23
You can create a new User Group with the exact same permissions as an existing User Group by
using the copy function. You can then modify the group so that its permissions differ as necessary
from the original. This is a quick and easy way to create User Groups.
To copy a User Group:
1. Select User Management, and then select Users & Groups. The User/Group Management
window appears.
2. Select the existing User Group from the drop-down list in the Existing Groups field.
3. Type the name of the new User Group in the New Group Name field.
4. Click Copy. A new User Group is created with the same permissions as the existing group.
The new User Group can be seen by clicking the drop-down list in the Existing Groups field.
The only attribute of a User Group that can be modified is the group name. To do this:
1. Select User Management, and then select Users & Groups. The User/Group Management
window appears.
2. Select the User Group you want to modify from the drop-down list in the Existing groups
field. The name appears in the New group name field.
3. Make any necessary changes to the name.
4. Click Modify. The User Group is modified.
Note: To modify a User Group’s system or outlet permissions, repeat the procedure for setting
the system or outlet permissions described above and make any necessary changes.
To delete a User Group:
1. Select User Management, and then select Users & Groups. The User/Group Management
window appears.
2. Select the User Group you want to delete from the drop-down list in the Existing groups
field.
3. Click Delete. The User Group is deleted.
%
#$$
The Revelation PDU provides a number of tools to control access to the unit. You can require
HTTPS encryption, enable the internal firewall and create firewall rules, and create login
limitations.
!
$
6
'% / $
HTTPS is a more secure protocol than HTTP because it uses Secure Sockets Layer (SSL)
technology to encrypt all traffic to and from the Revelation PDU. To require users to use HTTPS
instead of HTTP when accessing the Revelation PDU through the Web interface:
1. Select Device Settings, and then select Security. The Security Settings window appears. The
panel at the upper left is labeled HTTP Encryption.
24
DOMINION PX USER GUIDE
Figure 25 Security Settings Window –HTTP Encryption Panel
2. Click the check box labeled Force HHTPS for Web access.
3. Click Apply. HTTPS is now required for browser access.
!
2
The Revelation PDU has a firewall that can be configured to prevent specific IP addresses and
ranges of IP addresses from accessing the Revelation PDU. When the Revelation PDU was
initially configured, you were prompted to enable or disable IP access control. If you selected
Disable (the default), the Revelation PDU firewall was not enabled.
To configure the firewall, you have to enable the firewall, and then you have to set the default
policy and create rules specifying which addresses to accept and which addresses to drop.
Note: The purpose of disabling the firewall by default is to prevent users from accidentally
locking themselves out of the unit. Refer to Chapter 2 for details.
/
! 2
To enable the Revelation PDU firewall:
1. Select Device Settings, and then select Security. The Security Settings window appears. The
panel at the upper right is labeled IP Access Control. This controls the firewall.
Figure 26 IP Access Control Panel (Firewall Enabled)
CHAPTER 4: USING THE W EB INTERFACE
25
2. Click the check box labeled Enable IP Access Control. This enables the firewall.
3. Click Apply. The firewall is enabled.
' $
Once enabled, the firewall has a default policy built in that accepts traffic from all IP addresses.
This means any IP addresses not dropped by a specific rule will be permitted to access the
Revelation PDU. You can change the default policy to DROP, in which case traffic from all IP
addresses will be dropped except traffic allowed by a specific ACCEPT rule.
To change the default policy:
1. Select Device Settings, and then select Security. The Security Settings window appears. The
panel at the upper right is labeled IP Access Control. This controls the firewall.
2. Make sure the check box labeled Enable IP Access Control is checked.
3. The default policy is shown in the Default Policy field (refer to Figure 26). To change it,
select the policy you want from the drop-down list in the field.
4. Click Apply. The new default policy is applied.
! 2
Firewall rules accept or drop traffic intended for the Revelation PDU, based on the IP address of
the host sending the traffic. When creating firewall rules, keep the following in mind:
• Rule order The order of the rules is important. When traffic reaches the Revelation PDU,
the rules are executed in numerical order. The first rule that matches the IP address
determines whether the traffic is accepted or dropped. Any subsequent rules matching the IP
address have no effect on the traffic
• Subnet mask When typing the IP address, you MUST specify both the address and a
subnet mask. For example, to specify a single address in a Class C network, use this format
x.x.x.x/32
where /32 = a subnet mask of 255.255.255.0.To specify an entire subnet or range of addresses,
change the subnet mask accordingly.
To create firewall rules:
1. Select Device Settings, and then select Security. The Security Settings window appears. The
panel at the upper right is labeled IP Access Control. This controls the firewall.
2. Make sure the check box labeled Enable IP Access Control is checked.
3. Create specific rules. The following explains how:
ACTION
Add a rule to the end
of the rules list
Insert a rule between
two existing rules
DO THIS…
1. Type an IP address and subnet mask in the IP/Mask field.
2. Select ACCEPT or DROP in the Policy field.
3. Click Append.
Do NOT enter a rule number. The system automatically
numbers the rule.
1. Type the higher of the two rule numbers in the Rule #
field. For example, to insert a rule between rules #5 and #6,
type 6.
2. Type an IP address and subnet mask in the IP/Mask field.
3. Select ACCEPT or DROP from the drop-down list in the
Policy field.
4. Click Insert.
The system inserts the rule and automatically renumbers the
rules.
26
DOMINION PX USER GUIDE
ACTION
Replace an existing
rule
DO THIS…
1. Type the number of the rule to be replaced in the Rule #
field.
2. Type an IP address and subnet mask in the IP/Mask field.
3. Select ACCEPT or DROP from the drop-down list in the
Policy field.
4. Click Replace.
This system replaces the existing rule with the one you just
created.
5. When you are finished, the rules are displayed in the IP Access Control panel, as shown
below.
Figure 27 IP Access Control Panel (Firewall Rules Displayed)
6. Click Apply. The rules are applied.
! 2
To delete a firewall rule:
1. Select Device Settings, and then select Security. The Security Settings window appears.
2. Make sure the check box labeled Enable IP Access Control is checked.
3. Type the number of the rule to be deleted in the Rule # field.
4. Click Delete. The rule is removed from the IP Access Control panel.
5. Click Apply. The rule is deleted.
+
#$$
Group based access control rules are similar to firewall rules, except they can be applied to
members of specific User Groups. In effect, this enables you to give entire User Groups system
and outlet permissions based on their IP addresses or subnets.
To create group based access control rules, you first have to enable the feature. Then, you have to
set the default action, specify an IP address range, and associate the rule with a specific User
group. Finally, you have to indicate whether the rule will accept or drop traffic.
CHAPTER 4: USING THE W EB INTERFACE
27
/
To enable group based access control rules:
1. Select Device Settings, and then select Security. The Security Settings window appears. The
panel labeled Group based System Access Control controls this feature.
Figure 28 Group Based System Access Control Panel (Enabled)
2. Click the check box labeled Enable Group based System Access Control. This enables the
feature.
3. Click Apply. Group based access control rules are enabled.
#$
The default action is shown in the Group based System Access Control panel on the Security
Settings window. To change the default action:
1. Select Device Settings, and then select Security. The Security Settings window appears. The
panel labeled Group based System Access Control controls this feature.
2. Make sure the check box labeled Enable Group based System Access Control is checked.
3. Select the action you want from the drop-down list in the Default Action field (refer to
Figure 28).
4. Click Apply. The default action is applied.
+
#$$
Group based access control rules accept or drop traffic intended for the Revelation PDU, based on
the user’s group membership. Like firewall rules, the order of the rule is important, since the rules
are executed in numerical order.
To create group based access control rules:
1. Select Device Settings, and then select Security. The Security Settings window appears. The
panel labeled Group based System Access Control controls this feature.
2. Make sure the check box labeled Enable Group based System Access Control is checked.
3. Create or delete specific rules. The following explains how:
ACTION
Add a rule to the end
of the rules list
DO THIS…
1. Type a starting IP address in the Starting IP field.
2. Type an ending IP address in the Ending IP field.
3. Select a User Group from the drop-down list in the Group
field. This rule applies to members of this group only.
4. Select ACCEPT or DROP from the drop-down list in the
Policy field.
5. Click Append.
Do NOT enter a rule number. This system automatically
numbers the rule.
28
DOMINION PX USER GUIDE
ACTION
Insert a rule between
two existing rules
Replace an existing
rule
DO THIS…
1. Type the higher of the two rule numbers in the Rule #
field. For example, to insert a rule between rules #5 and #6,
type 6.
2. Type a starting IP address in the Starting IP field.
3. Type an ending IP address in the Ending IP field.
4. Select ACCEPT or DROP from the drop-down list in the
Action field.
5. Click Insert.
The system inserts the rule and automatically renumbers the
rules.
1. Type the number of the rule to be replaced in the Rule #
field.
2. Type an IP address and subnet mask in the IP/Mask field.
3. Select ACCEPT or DROP from the drop-down list in the
Action field.
4. Click Replace.
This system replaces the existing rule with the one you just
created.
5. When you are finished, click Apply. The rules are applied.
+
#$$
To delete a firewall rule:
1. Select Device Settings, and then select Security. The Security Settings window appears.
2. Make sure the check box labeled Enable Group based System Access Control is checked.
3. Type the number of the rule to be deleted in the Rule # field.
4. Click Delete. The rule is removed from the Group based System Access Control panel.
5. Click Apply. The rule is deleted.
%
4
You can set up login controls to make it more difficult for hackers to access the Revelation PDU
and the devices connected to it. You can arrange to lock persons out after a specified number of
failed logins, limit the number of persons who can log in at the same time using the same login,
and force users to create strong passwords.
/
+ $
User blocking allows you to determine how many times a user can attempt to log into the
Revelation PDU and fail authentication before the user’s login is blocked. To set it up:
1. Select Device Settings, and then select Security. The Security Settings window appears. The
User Blocking panel controls this feature.
Figure 29 User Blocking Panel
CHAPTER 4: USING THE W EB INTERFACE
29
2. Type a number in the Max number of failed logins field. This is the maximum number of
failed logins the user is permitted before the user’s login is blocked from accessing the
Revelation PDU. If no number is entered, there is no limit on failed logins.
3. Type a number in the Block time field. This is the length of time in minutes the login is
blocked.
4. Click Apply. The user blocking limits are applied.
/
4
4
Login limitations allow you to determine whether more than one person can use the same login at
the same time, and whether or not users will be required to change passwords at regularly
scheduled intervals.
To enable login limitations:
1. Select Device Settings, and then select Security. The Security Settings window appears. The
Login Limitations panel controls this feature.
Figure 30 Login Limitations Panel
2. To prevent more than one person from using the same login at the same time, click the check
box labeled Enable Single Login Limitation.
3. To force users to change their passwords regularly, click the check box labeled Enabled
Password Aging, and then enter a number of days in the Password Aging Interval field.
Users will be required to change their password every time that number of days has passed.
4. Click Apply. The controls are applied.
/
%
'
2
Forcing users to create strong passwords makes it more difficult for intruders to crack user
passwords and access the Revelation PDU unit. Strong passwords should be at least eight
characters long and should contain upper and lowercase letters, numbers, and special characters
(such as @ or &).
To force users to create strong passwords:
1. Select Device Settings, and then select Security. The Security Settings window appears. The
Strong Passwords panel appears at the bottom of the window.
30
DOMINION PX USER GUIDE
Figure 31 Strong Passwords Panel
2. Click the check box labeled Enable strong passwords to activate the strong password
feature. The following are the default settings:
= 8 characters
Minimum length
= 16 characters
Maximum length
= Required
At least one lowercase character
= Required
At least one uppercase character
= Required
At least one numeric character
= Required
At least one printable special character
= 5
Number of restricted passwords
3. Make any necessary changes to the default settings.
4. When you are finished, click Apply. The changes are applied.
%
-
$
The purpose of an X.509 digital certificate is to ensure that both parties in an SSL connection are
who they say they are. To obtain a certificate for the Revelation PDU, you must create a
Certificate Signing Request (CSR) and submit it to a certificate authority (CA).
Once the CA has processed the information in the CSR, it will provide you with a certificate,
which you must install on the Revelation PDU.
Note: Refer to “Forcing HTTPS Encryption” for instructions on forcing users to employ SSL
when connecting to the Revelation PDU.
$
%
0
To create a CSR:
1. Select Device Settings, and then select Certificate. The first page of the SSL Server
Certificate Management window appears.
CHAPTER 4: USING THE W EB INTERFACE
31
Figure 32 SSL Server Certificate Signing Window (First Page)
2. Provide the information requested. Type the following in the appropriate fields:
FIELD
Common name
Organization unit
Organization
Locality/City
State/Province
Country (ISO code)
TYPE THIS…
The name of your company
The name of your department
The name of your organization within the department
The city where your company is located
The state or province where your company is located
The country where your company is located. Use the standard
ISO code.
For a list of ISO codes, go to this Web site:
http://www.iso.org/iso/en/prods-services/iso3166ma/
02iso-3166-code-lists/list-en1.ht
Email
Challenge password
Confirm Challenge
Password
An email address where you or another administrative user can
be reached
The password that will be required to access the Revelation
PDU. Type it first in the Challenge Password field and then
again in the Confirm Challenge password field.
The password is case sensitive, so be sure to capitalize the
same letters each time.
3. Select the key length from the drop-down list in the Key length (bits) field. Default is 1024,
but you can also select 2048.
4. Click Create. The CSR is created and the second page of the SSL Server Certificate
Management window appears. This window shows the information you entered when
creating the CSR.
32
DOMINION PX USER GUIDE
Figure 33 SSL Server Certificate Management Window (Second Page)
5. To download the newly-created CSR to your computer, click Download. You will be
prompted to open or save the file. The file is called csr.txt.
6. Once the file is stored on your computer, submit it to a CA to obtain the digital certificate.
$
Once the CA has provided you with a digital certificate, you must install it on the Revelation
PDU. To do this:
1. Select Device Settings, and then select Certificate. The second page of the Server Certificate
Management window appears (Figure 33).
2. Type the path and name of the certificate file in the SSL Certificate File field, or click
Browse and select the file.
3. Click Upload. The certificate is installed on the Revelation PDU.
%
/8
#
$
For security purposes, users attempting to log into the Revelation PDU must be authenticated.
You can use the local database of user profiles in the Revelation PDU, or you can use the
Lightweight Directory Access Protocol (LDAP) or the Remote Access Dial-In User Service
(RADIUS) protocol.
By default, the Revelation PDU is configured for local authentication. If you stay with this
method, you do not have to do anything other than create user profiles for each authorized user. If
you prefer to use an external LDAP or RADIUS server, you have to provide the system with
information about the server.
Keep in mind that you still need to create user profiles for users who are authenticated externally.
This is because the user profile determines the User Group to which the user belongs, and the
User Group determines the user’s system and outlet permissions.
%
4-#' #
$
To set up LDAP authentication:
1. Select Device Settings, and then select Authentication. The Authentication Settings window
appears. The LDAP parameters appear on the left side of the window.
CHAPTER 4: USING THE W EB INTERFACE
Figure 34 Authentication Window
2.
3.
4.
5.
33
LDAP Parameters
Click the radio button labeled LDAP.
Type the IP address of the LDAP server in the User LDAP Server field.
To encrypt traffic to and from the LDAP server, click the check box labeled SSL enabled.
By default, the Revelation PDU uses the standard ports 389 for LDAP and 636 for secure
LDAP (SSL). If you prefer to use non-standard ports, change the ports.
Note: The SSL port is only enabled if you click the check box in Step 3.
6. Type the base DN in the Base DN of User LDAP Server field. The base distinguish name
(DN) is the top level of the LDAP directory tree. It indicates where in the LDAP directory
you want to begin searching for user credentials.
7. Select the type of LDAP server from the drop-down list in the Type of external LDAP
server field. Your choices are:
− Generic LDAP Server
− Novell Directory Service
− Microsoft Active Directory
8. Type the following information in the corresponding fields. LDAP needs this information to
verify user names and passwords.
− Login name attribute
− User entry object class
− User search subfilter
9. If you selected Microsoft Active Directory in Step 6, enter the domain name in the Active
Directory Domain field.
10. Click Apply. LDAP authentication is now in place.
34
%
DOMINION PX USER GUIDE
#-
%#
$
To set up RADIUS authentication:
1. Select Device Settings, and then select Authentication. The Authentication Settings window
appears. The RADIUS parameters appear on the right side of the window.
Figure 35 Authentication Window
RADIUS Parameters
2. Click the radio button labeled RADIUS.
3. Type the IP address of the RADIUS server in the Server field.
4. Type the shared secret in Shared Secret field. The shared secret is necessary to protect
communication with the RADIUS server.
5. By default, the Revelation PDU uses the standard RADIUS ports 1812 and 1813. If you
prefer to use non-standard ports, change the ports.
6. Type the timeout period in seconds in the Timeout field. This sets the maximum amount of
time to establish contact with the RADIUS server before timing out. Default is 1 second.
7. Type the number of retries permitted in the Retries field. Default is 3.
8. If you have additional RADIUS servers, click the More Entries button. Fields for four
additional servers appear. Enter the same information in Steps 2
7 for each additional
server.
9. Select an authentication protocol from the drop-down list in the Global Authentication Type
field. Your choices are:
− PAP (Password Authentication Protocol)
− CHAP (Challenge Handshake Authentication Protocol)
CHAP is generally considered more secure because the user name and password are
encrypted, while in PAP they are transmitted in the clear.
10. Click Apply. RADIUS authentication is now in place.
%
.
' 2
The Revelation PDU is shipped with certain Revelation PDU and outlet power thresholds already
defined. You can change the default Revelation PDU thresholds, and you can give each outlet a
name and change its default thresholds.
When setting the thresholds, keep in mind that you can set up alerts that are triggered whenever
any of these thresholds are crossed. Refer to “Setting Up Alerts” below for details.
CHAPTER 4: USING THE W EB INTERFACE
%
35
'-
To set the Revelation PDU thresholds:
1. Select Power Outlets, and then select Unit Setup. The Unit Setup window appears.
Figure 36 Unit Setup Window
2. Type a number in the field labeled Delay until outlets are switched on again after outlet
reset. When the outlets on the Revelation PDU are power cycled, they are turned off and then
back on. The number you enter here determines the length of time (in seconds) it takes for the
outlets to turn back on after they are shut down during the power cycle. The default is 10
seconds.
Note: The number you enter here applies to all outlets on the Revelation PDU. However, you
can override this number for specific outlets, if you wish. Refer to “Setting the Outlet
Thresholds” below. You can power cycle an outlet from the Outlet Details window. Refer to
“Power Cycling an Outlet” below for instructions.
3. Type a number of seconds in the field labeled Power on delay in ms. The default is 200
milliseconds.
4. Set the voltage, current and temperature thresholds for the unit in the Thresholds panel. For
each setting, enter critical and non-critical thresholds.
5. When you are finished, click Apply. The delays and thresholds are applied.
.
You can give each outlet a name to help you identify the device connected to it. To do this:
1. Select Power Outlets, and then select Outlet Setup. The Outlet Setup window appears.
36
DOMINION PX USER GUIDE
Figure 37 Outlet Setup Window
2. Select the outlet from the drop-down list in the Show setup of outlet field.
3. Type a name for the outlet in the Outlet Name field. It is a good idea to give the outlet an
easily recognizable name that helps you identify the device connected to it. You can always
change names if the device is replaced.
4. Click Apply. The new name is applied.
%
.
To set the current thresholds of an outlet:
1. Select Power Outlets, and then select Outlet Setup. The Outlet Setup window appears
(Figure 37).
2. Select an outlet from the drop-down list in the Show setup of outlet field.
3. Type a number in the field labeled Delay until outlet is switched on again after outlet
reset. When an outlet is power cycled, it is turned off and then back on. The number you
enter here determines the length of time (in seconds) it takes for the outlet to turn back on
after is shut down during the power cycle. The default is 10 seconds.
Note: You can power cycle an outlet from the Outlet Details window. Refer to “Power Cycling an
Outlet” below for instructions.
4. Set the current thresholds for the outlet in the Thresholds panel.
5. When you are finished, click Apply. The setup details are applied.
9
2
.
-
To display details about a particular outlet:
1. Select Power Ports, and then select Outlet Details. The Outlet Details window appears.
CHAPTER 4: USING THE W EB INTERFACE
37
Figure 38 Outlet Details Window
2. Select an outlet from the drop-down list in the Show details of outlet field. The window
shows these details about the outlet:
− Outlet name
− Outlet status
− RMS current, voltage and power readings, including:
RMS current
RMS max current
RMS voltage
True RMS current
RMS power
Real RMS power
Note: To display the Outlet Setup window, click the [Setup] link. Refer to Figure 37 for a picture
of the window.
' 2
$
.
To turn an outlet off and on:
1. Select Power Ports, and then select Outlet Details. The Outlet Details window appears
(Figure 38).
2. Select an outlet from the drop-down list in the Show details of outlet field. The outlet must
be ON.
3. Click Cycle. The outlet turns OFF and then back ON.
Note: The length of time between the off and on states in a power cycle can be set of the
Revelation PDU as a whole, and for individual outlets. Refer to “Setting the Revelation PDU
Thresholds
38
DOMINION PX USER GUIDE
Setting the Revelation PDU Thresholds” and “Setting the Outlet Thresholds” above for details
.
.
.
To turn an outlet on or off:
1. Select Power Ports, and then select Outlet Details. The Outlet Details window appears
(Figure 38).
2. Select an outlet from the drop-down list in the Show details of outlet field.
3. Click On to turn the outlet ON. Click Off to turn the outlet OFF.
Note: You can also turn an outlet on or off from the Home window.
%
#
The Revelation PDU can be configured to issue an alert whenever a threshold is crossed, either
for the Revelation PDU unit as a whole or for a specific outlet. The alert can be programmed to
send an administrator an email message, or it can be programmed to send a Simple Network
Management Protocol (SNMP) trap to a specific IP address.
Note: Refer to “Setting Up Outlets and Power Thresholds” above for instructions on setting
power thresholds.
#
/
Alert events consist of an outlet, an associated threshold, and an associated policy. To configure
an alert event:
1. Select Alerts, and then select Alert Configuration. The Alert Configuration window
appears. It shows all existing policies.
Figure 39 Alert Configuration Window
2. Go to the Event field and select the outlet from the first (left) drop-down list. You can select
the Revelation PDU unit as a whole or you can select a specific outlet.
3. Select the threshold from the second (middle) drop-down list in the Event field. Figure 40
shows the list.
CHAPTER 4: USING THE W EB INTERFACE
39
Figure 40 Thresholds
4. Select a policy from the drop-down list in the Policy field.
5. Click Add. The alert is added to the system.
Note: No policies appear in this drop-down list until you create them. Refer to “Creating Alert
Policies” below for instructions.
#
'
$
Alert policies allow you to associate events with destinations. Policies determine whether specific
events trigger an entry in the event log, an email message to an administrator, an SNMP trap, or a
combination of the three.
#
' $
The diagram below illustrates the way policies associate events with destinations. In this
example, five events and two policies are defined.
• Events 1 and 2 are associated with the Red policy. This means they trigger an email message
to an administrator and an SNMP trap.
• Events 3, 4, and 5 are associated with the Syslog policy. They trigger entries in the event log,
but do not send email messages or traps.
/
'
$
/
*
3
-
%
7
4
/
%
'
:
Figure 41 Policies
/8
' $
To display a list of existing policies:
1. Select Alerts, and then select Alert Policies. The Alert Policies window appears. It lists each
policy and shows their destinations.
40
DOMINION PX USER GUIDE
Figure 42 Alert Policies Window
2. You can modify or delete a policy by clicking the corresponding button next to the policy.
You can add a new policy and configure alerts and destinations by clicking the appropriate
link.
' $
To create a policy:
1. Select Alerts, and then select Alert Policy Editor. The Alert Policy Editor appears.
Figure 43 Alert Policy Editor
2. Type a name for the policy in the New policy name field.
3. Select the destinations associated with the policy in the Destinations panel. Your choices are
System (event log), eMail, and SNMP.
4. Click Create. The policy is created.
CHAPTER 4: USING THE W EB INTERFACE
41
' $
To modify a policy:
1. Select Alerts, and then select Alert Policy Editor. The Alert Policy Editor appears.
2. Select the policy to be modified from the drop-down list in the Existing Policies field.
3. Make any necessary changes to the policy’s name or destinations.
4. Click Modify. The policy is modified.
' $
To delete a policy:
1. Select Alerts, and then select Alert Policy Editor. The Alert Policy Editor appears.
2. Select the policy to be deleted from the drop-down list in the Existing Policies field.
3. Click Delete. The policy is deleted.
%
$
#
-
The alert destination can be an email address or an SNMP trap. To specify the destination:
1. Select Alerts, and then select Alert Destinations. The Alert Destinations window appears.
Figure 44 Alert Destinations Window
Note: If you have not configured the Revelation PDU’s SMTP, a note will appear on this page
prompting you to do so now. You cannot enter an email address until you have configured the
SMTP server. Either click the SMTP server here link that appears this page, or select Devices
Settings SMTP Settings. Refer to “Configuring the SMTP Settings” below for details.
2. Select the destination from the drop-down list in the Destination type field. Your choices are
eMail and SNMP.
3. Do one of the following:
− Email If you selected email, type the receiver’s email address.
− SNMP If you selected SNMP, enter the IP address of the trap and the community
string.
4. Click Add. The destination is added.
Note: To delete an alert destination, click the appropriate Delete button.
42
%
DOMINION PX USER GUIDE
/
4
By default, the Revelation PDU captures certain system events and saves them in a local
(internal) event log. You can expand the scope of the logging to also capture events in the NFS,
SMTP, and SNMP logs.
4 $
/
4
To configure the local event log:
1. Select Device Settings, and then select Event Log. The Event Log Settings window appears.
The Local Logging panel appears first. This panel controls the local event log.
Figure 45 Local Logging Panel
2. The local event log is enabled by default. To turn it off, uncheck the check box labeled Local
Logging Enabled.
3. By default, 20 log entries appear on each page of the local event log when it is displayed on
your screen. To change this, type a different number in the Entries shown per page field.
4. To clear all events from the local event log:
A. Click the Clear button. The button changes to Really Clear and you are prompted to
click it only if you really want to clear the log.
B. Click Really Clear to complete the clear operation, or click Cancel to terminate it.
5. By default, when the local event log is enabled, seven event types appear in the Event Log
Assignments panel to the right. All are enabled by default. To disable any of these event
types, clear the appropriate check boxes.
Figure 46 Event Log Assignments Panel (List Logging)
Note: Refer to Appendix D for a more detailed explanation of these event types.
6. When you are finished, click Apply. Local logging is configured.
CHAPTER 4: USING THE W EB INTERFACE
9
2
/
43
4
To display the internal event log, select Maintenance and then select View Event Log.
Figure 47 Internal Event Log
/
For each entry, the event log shows:
• The date and time of the event
• The type of event (board message, security, host control, or authentication)
• A brief description of the event. For example, for an authentication event, the entry in the log
shows the user’s login name and the IP address of the user’s computer.
Note: By default, the internal event log displays 20 events per page. Refer to “Configuring the
Local Event Log” above for instructions on changing this number.
!% 4
To configure Network File System (NFS) logging:
1. Select Device Settings, and then select Event Log. The Event Log Settings window appears.
The NFS Logging panel controls NFS logging.
Figure 48 NFS Logging Panel
2.
3.
4.
5.
6.
Click the check box labeled NFS Logging Enabled.
Type the IP address of the NFS server in the NFS Server field.
Type the name of the shared NFS directory in the NFS Share field.
Type the name of the NFS log file in the NFS Log File field. Default is evtlog.
By default, when NFS logging is enabled, seven event types appear in the Event Log
Assignments panel to the right. All are disabled by default. To enable any of these event
types, check the corresponding check boxes.
44
DOMINION PX USER GUIDE
Figure 49 Event Log Assignments Panel (List and NFS Logging)
7. Click Apply. NFS logging is configured.
%
'4
To configure Simple Mail Transfer Protocol (SMTP) logging:
1. Select Device Settings, and then select Event Log. The Event Log Settings window appears.
The SMTP Logging panel controls SMTP logging.
Figure 50 SMTP Logging Panel
2. Click the check box labeled SMTP Logging Enabled.
3. Type the receiver’s email address in the Receiver Email Address field.
4. By default, when SMTP logging is enabled, seven event types appear in the Event Log
Assignments panel to the right. All are disabled by default. To enable any of these event
types, check the appropriate check boxes.
Figure 51 Event Log Assignments Panel (List, NFS, and SMTP Logging)
5. Click Apply. SMTP logging is configured.
CHAPTER 4: USING THE W EB INTERFACE
&
$
%
'
2
'- ; %
2
<
>
45
%
$
' %
/
=
'
$
5
$
$
%
'4
To configure Simple Network Management Protocol (SNMP) logging:
1. Select Device Settings, and then select Event Log. The Event Log Settings window appears.
The SNMP Logging panel controls SNMP logging.
Figure 52 SNMP Logging Panel
2. Click the check box labeled SNMP Logging Enabled.
3. Type an IP address in the Destination IP field. This is the address to which traps are sent by
the SNMP system agent.
4. Type the name of the SNMP community in the Community field. The community is the
group representing the Revelation PDU and all SNMP management stations.
5. To take a look at the Management Information Base (MIB), click the link labeled Click here
to view the <device name>) SNMP MIB. It is located under the Community field.
6. By default, when SNMP logging is enabled, seven event types appear in the Event Log
Assignments panel to the right. All are disabled by default. To enable any of these event
types, check the appropriate check boxes.
Figure 53 Event Log Assignments Panel (List, NFS, SMTP, and SNMP Logging)
7. Click Apply. SNMP logging is configured.
46
DOMINION PX USER GUIDE
'You can display basic device information about the Revelation PDU, give the Revelation PDU a
new device name, and modify any of the network settings that were entered during the initial
configuration process. You can also set the unit’s date and time and configure its SMTP settings
so it can send email messages when alerts are issued.
-
+
$-
$
To display basic information about an Revelation PDU unit, select Maintenance and then select
Device Information. The Device Information window appears.
Figure 54 Device Information Window
This window provides the product name, serial number, and IP and MAC addresses of the
Revelation PDU, as well as detailed information about the firmware running in the unit. It also
shows the login name, IP address, and status of all users currently connected to the Revelation
PDU.
To open or save an XML file providing details for Aphel Technical Support, click the link
entitled View the datafile for support.
'By default, the Revelation PDU has a device name of pdu. You may want to give the Revelation
PDU a more easily recognizable name to help identify it. To do this:
1. Select Device Settings, and then select Network. The Network Settings window appears.
The left side of the window consists of the Basic Network Settings panel, which contains the
device name.
CHAPTER 4: USING THE W EB INTERFACE
47
Figure 55 Basic Network Settings Panel
2. Type a new name in the Device Name field.
3. Click Apply. The Revelation PDU is renamed.
2
%
The Revelation PDU was configured for network connectivity during the installation and
configuration process (refer to Chapter 2 for details). If necessary, you can modify any of these
settings. To do this:
1. Select Device Settings, and then select Network. The Network Settings window appears.
The left side of the window consists of the Basic Network Settings panel, which shows the
current network settings. Refer to Figure 55 for a picture of this panel.
2. Do one of the following:
− Auto configuration To auto configure the Revelation PDU, select DHCP or BOOTP
from the drop-down list in the IP Auto Configuration field. If you select DHCP, you
can also enter a preferred host name (this is optional).
− Static IP To enter a static IP address, select none from the drop-down list in the IP
Auto Configuration field, and then enter:
IP address
Subnet mask
Gateway address
Primary and (optional) secondary DNS server addresses
3. When you are finished, click Apply. The network settings are modified.
$
5'
+
2
%
You can use Telnet or SSH to log into the Revelation PDU’s CLP interface. However, by default
SSH is enabled and Telnet is not (because it communicates in the clear and is therefore not
secure). You can change this and enable or disable either application.
You can also set a bandwidth limit, and change any of the default port settings. Finally, you can
enable or disable the Raritan Setup Protocol.
48
DOMINION PX USER GUIDE
To do all this:
1. Select Device Settings, and then select Network. The Network Settings window appears.
The Miscellaneous Network Settings panel on the top right contains the communications,
port, and bandwidth settings.
Figure 56 Miscellaneous Network Settings Panel
2. By default, CLP-Telnet is disabled and CLP-SSH is enabled. To change this, click either
check box.
3. To set an upper limit on the amount of bandwidth Telnet or SSH will be allowed to use, type
the number of kilobits per second in the Bandwidth Limit field.
4. By default, the HTTP, HTTPS, Telnet, and SSH ports are set to the standard ports for these
communications protocols. If you prefer to use different ports, you can change the port
assignments here.
5. By default the Device Setup Wizard is enabled. To disable it, click the check box labeled
Disable Setup Protocol.
Note: The Device Setup Wizard is a utility program that lets you configure an Revelation PDU
for network connectivity. If you disable it, no one will be able to use it to configure this
Revelation PDU. Refer to Appendix E for details.
6. When you are finished, click Apply. The settings are modified.
4#
$ %
The LAN interface speed and duplex mode were set during the installation and configuration
process (refer to Chapter 2 for details). To modify either setting:
1. Select Device Settings, and then select Network. The Network Settings window appears.
The LAN Interface Settings panel on the bottom right shows the interface speed and duplex
mode.
CHAPTER 4: USING THE W EB INTERFACE
49
Figure 57 LAN Interface Settings Panel
2. To change the interface speed, select the speed you want from the drop-down list in the LAN
Interface Speed field. Your choices are:
− Autodetect (system selects optimum speed)
− 10 Mbps
− 100 Mbps
3. To change the duplex mode, select the mode you want from the drop-down list in the LAN
Interface Duplex Mode field. Your choices are:
− Autodetect (system selects optimum mode)
− Half duplex
− Full duplex
Half duplex allows data to be transmitted to and from the Revelation PDU, but not at the
same time. Full duplex allows data to be transmitted in both directions at the same time.
4. When you are finished, click Apply. The settings are modified.
%
-
You can set the internal clock on the Revelation PDU manually, or you can link to a Network
Time Protocol (NTP) server and let it set the date and time.
1. Select Device Settings, and then select Date/Time. The Date/Time Settings window appears.
Figure 58 Date/Time Settings Window
50
DOMINION PX USER GUIDE
2. Enter a time zone by selecting the appropriate Coordinated Universal Time (UTC) offset
from the drop-down list in the UTC Offset field.
3. To set the date and time manually, enter the date and time in the Date and Time fields. Use
the mm/dd/yyyy format for the date and the hh:mm:ss format for the time.
4. To let an NTP server set the date and time, click the radio button labeled Synchronize with
NTP server and enter the IP addresses of primary and secondary NTP servers in the
corresponding fields.
5. Click Apply. The date and time settings are applied.
%
'%
The Revelation PDU allows you to configure alerts to send an email message to a specific
administrator. To do this, you have to configure the Revelation PDU’s SMTP settings and enter
an IP address for your SMTP server and a sender’s email address.
Note: Refer to “Setting Up Alerts” below for instructions on configuring alerts to send emails.
1. Select Device Settings, and then select SMTP Settings. The SMTP Settings window appears.
Figure 59 SMTP Settings Window
2. Type the IP address of the mail server in the SMTP Server field.
3. Type an email address in the Sender Email Address field.
4. Click Apply. Email is configured.
'You can reset the Revelation PDU from the Web interface. To do this:
1. Select Maintenance, and then select Unit Reset. The Reset Operations window appears.
Figure 60 Reset Operations Window
2. Click Reset. A Reset Confirmation window appears.
CHAPTER 4: USING THE W EB INTERFACE
51
Figure 61 Reset Confirmation Window
3. Make sure you really want to reset the Revelation PDU, and then click Really Reset. If you
change your mind, click Cancel to terminate the reset operation. If you choose to proceed
with the reset, the window shown below appears and the reset takes place. The reset takes
about one minute to complete.
Figure 62 Reset Conclusion Window
4. When the reset is complete, the Login window is displayed, and you can log back into the
Revelation PDU.
!
2
Aphel will notify customers when new firmware is available to update the Revelation PDU.
Customers will be given instructions where to go to download the new firmware. Once the
firmware is downloaded onto a PC, you can install it on the Revelation PDU from the Web
interface. To do this:
1. Select Maintenance, and then select Update Firmware. The Firmware Upload window
appears.
Figure 63 Firmware Upload Window
52
DOMINION PX USER GUIDE
2. Type the complete path to the firmware file in the Firmware File field, or click Browse and
select the file.
3. Click Upload. The Firmware Update window appears. It shows the current firmware version
and the new firmware version, and gives you a last chance to terminate the update.
Figure 64 Firmware Update Window
4. To proceed with the update, click Update. To terminate the update, click Discard. The
update may take several minutes. The Status panel on the left tracks the progress of the
upgrade.
&-
.
2
'-
5. When the update is complete, a message appears similar to the one shown below indicating
the update was successful. The Revelation PDU will be reset, and the Login window will reappear. You can now log in and resume managing the Revelation PDU.
Figure 65 Update Successful
CHAPTER 5: USING THE CLP INTERFACE
53
:&
4'
$
This chapter explains how to use the Command Line Protocol (CLP) interface to administer an
Revelation PDU.
#
4'
$
The Revelation PDU provides a command line interface that enables data center administrators to
perform certain basic management tasks. You can access the interface over a serial connection
using a terminal emulation program such as HyperTerminal, or via a Telnet or SSH client such as
Putty.
Note: Telnet access to the Revelation PDU is disabled by default because Telnet transmits in the
clear and is insecure. To enable Telnet, select Device Settings
Network and click the check
box labeled Enable CLP-Telnet Access.
The command line interface is based on the Systems Management Architecture for Server
Hardware (SMASH) Command Line Protocol (CLP). Using this interface, you can do the
following:
• Display the name, power state (on or off), and sensors associated with each Revelation PDU
outlet
• Turn each outlet on or off
• Display the status of the sensors associated with each outlet
4
4'
$
Logging in via HyperTerminal and a serial connection is a little different than logging in using
SSH or Telnet.
6
To log in using HyperTerminal:
1. Launch HyperTerminal and open a console window. When the window first appears, it is
blank.
2. Press Enter to display a Command prompt.
Figure 66 HyperTerminal Command Prompt
3. At the Command prompt, type CLP and press Enter. You are prompted to enter a login
name. The login name is case-sensitive, so make sure you capitalize the correct letters.
54
DOMINION PX USER GUIDE
Figure 67 Login Prompt
4. Type a login name and press Enter. You are prompted to enter a password.
Figure 68 Password Prompt
5. Type a password and press Enter. The password is case-sensitive, so make sure you
capitalize the correct letters. Once the password is accepted, the clp:/-> system prompt
appears.
Figure 69 System Prompt
You are now logged into the CLP interface and can begin using the interface to administer the
Revelation PDU.
%%6
To log in using SSH or Telnet:
1. Launch an SSH or Telnet client such as Putty and open a console window. A Login prompt
appears.
Figure 70 Login Prompt
2. Type a login name and press Enter. You are prompted to enter a password.
CHAPTER 5: USING THE CLP INTERFACE
55
Figure 71 Password Prompt
3. Type a password and press Enter. The password is case-sensitive, so make sure you
capitalize the correct letters. Once the password is accepted, the clp:/-> system prompt
appears.
Figure 72 System Prompt
You are now logged into the CLP interface and can begin using the interface to administer the
Revelation PDU.
%
2
.
The show command displays the name, power state (on or off), and associated sensors for one
outlet or for all outlets.
%
8
The following is the syntax for the show command:
clp:/->
show /system1/outlet<outlet number>
where <outlet number> is the number of the outlet. To display information for all outlets,
type the wildcard asterisk (*) instead of a number.
#
You can use the name and powerState attributes to filter the output of the show command.
The name attribute displays only the name of the outlet, and the powerState attribute displays
only the power state (on or off).
The following shows the syntax for both attributes:
clp:/->
show –d properties=name /system1/outlet<outlet number>
clp:/->
show –d properties=powerState /system1/outlet<outlet number>
where <outlet number> is the number of the outlet. In both cases, the outlet number can also
be a wildcard asterisk (*).
56
DOMINION PX USER GUIDE
/8
The following are examples of the show command.
/8
?
#
The following shows the output of the show command with no attributes entered.
Figure 73 Show Command
/8
*?
#
The following shows the output of the show command with the name attribute.
Figure 74 Show Command with Name Attribute
/8
*?' 2
%
#
The following shows the output of the show command with the powerState attribute.
Figure 75 Show Command with PowerState Attribute
.
.
.
The set command turns an outlet on or off.
%
8
The following is the syntax for the set command:
clp:/->
set /system1/outlet powerState=on|off
where the keyword on turns the outlet on and the keyword off turns the outlet off.
CHAPTER 5: USING THE CLP INTERFACE
@
.
%
The show command with the Antecedent key word queries an outlet’s sensors
clp:/->
Show –d properties=Antecedent system1/<outlet number>=>
AssociatedSensor
where <outlet number> is the number of the outlet.
57
58
DOMINION PX USER GUIDE
CHAPTER 6: INTEGRATION
59
A&
DIRECT ACCESS
INTERFACES
PRODUCT
ACCESS THRU CC
INTERFACES
MAX # OF
CONNECTIVITY
ASSOCIATION CONTROL ASSOCIATION CONTROL
Dominion None
SX
PowerBoard CC GUI
Dominion None
KSX
PowerBoard None
Dominion KX Manager RRC
KX
UST
•
Paragon II
•
USTIP •
•
Paragon OSD
Manager
OSD
Paragon
Manager
OSD
CC GUI
IPR + OSD
• RRC PIISC +
• OSD Paragon
Manager
CC GUI
Max =
number of
serial ports
RRCStraight through 1
PowerBoard cable
(More
supported
thru the
serial ports)
CC GUI
P2CIM-PWR 4
(Increased
to 8 in
KX1.3)
IPR + OSD P2CIM-PWR Max =
number of
channel
ports
CC GUI
P2CIM-PWR Max =
number of
channel
ports
Association: Associate the target with power outlet
Control: Power On/Off, and Power Recycle the device
CSCSPCS-10
POWER
STRIPS
SUPPORTED
60
DOMINION PX USER GUIDE
2
-
-
$
BC
Dominion KX supports up to four Revelation PDU strips, and requires P2CIM-PWR and straight
CAT5 cable. You can associate up to four outlets to a target; all four outlets can be from separate
Revelation PDU strips, if needed.
Use Raritan’s KX Manager Application to configure associations.
1. Select target.
2. Edit Properties; choose outlets to associate.
3. Outlets automatically renamed to the associated target’s name.
4. RRC for control.
5. Select target.
6. Select On, Off, or Recycle power from pop-up menu.
How to associate outlets to a target
7. Select target; select Properties from pop-up menu.
8. Select up to four power strips from drop-down list.
9. Select up to a total of four outlets from the power strips.
CHAPTER 6: INTEGRATION
10. Notice the target icon change to indicate power.
11. Notice the outlet icon change to indicate association.
12. Notice the outlet name automatically changes to the target’s name.
How to control a target’s power
13. Select target associated with outlets
14. Select from Power On, Power Off, or Cycle Power options
61
62
DOMINION PX USER GUIDE
'
Paragon II use requires P2CIM-PWR and straight CAT5 cable. You can associate up to four
outlets to a target; all four outlets can be from separate Revelation PDU strips, if necessary.
Use Raritan’s Paragon Manager Application to configure associations:
15. In Paragon Manager, select the target.
16. Click on the target icon and drag-and-drop it on the desired outlets.
17. The outlets will be renamed to the associated target’s name automatically.
18. To turn on, turn off, or recycle power to the target, click on the target and press the F3 key;
select On, Off, or Recycle power from the drop-down menu.
How to add an Revelation PDU Strip in Paragon II
Add an Revelation PDU strip exactly as you would add any second-tier device. Your Paragon II
unit auto-detects the power strip and changes the device type to PCR8, PCS12, PCS20, or PCR20.
On the Channel Configuration screen, press F5, select the channel and change the channel name
from the default name to an identifying name for the Revelation PDU strip.
CHAPTER 6: INTEGRATION
63
64
DOMINION PX USER GUIDE
How to associate outlets with a target
In the Channel Configuration screen, press F5 and select the channel. Press G to enter the special
second-tier screen.
How to control a target’s power
1. From either “Channel Selection by Name” OR “Channel Selection” menus, press F3 to
control power. The message, “X-Power Off; O-Power On; R-Recycle Power” appears on the
scrolling help line.
2. If no outlets associated with the server, “No power outlets” displayed
3. If no permission to outlets associated with the server, “Permission denied.” displayed
4. Else, Paragon automatically switches to the channel, so that the server is displayed in the
background. If switch fails, “Switch fail.” displays
5. If switch successful, all outlets associated with the server are displayed as shown on the left.
6. User selects Outlet and Presses X, O, or R:
7. If O, execute on command.
8. If X or R, “Are you sure (yes/no)?” displayed. User must type “yes” (case insensitive) in
order for command to execute. Type the full word for command to execute.
How to control an outlet’s power
When in “Channel Selection” Menus (NOT in “Channel Selection by Name”), users
can navigate to individual power strip ports and control power.
User Selects Outlet and Presses X, O, or R:
If no permission to the outlet, “Permission denied.” displayed
If O, executes on command
If X or R, “Are you sure (yes/no)?” displayed. User must type “yes” (case insensitive) in order
for command to execute. Typing “Y” or “y” or “ye”, etc. is not acceptable. The full word, “yes”
must be typed in order for command to execute.
CHAPTER 6: INTEGRATION
65
Pressing <ENTER> does nothing.
The message, “X-Power Off; O-Power On; R-Recycle Power” should appear on the scrolling help
line.
-
%C
Dominion SX supports an unlimited number of Revelation PDU strips; each Revelation PDU
strip uses a PowerBoard Java applet. Outlets can be renamed after the server or appliance
connected. Monitor power usage
How to add an Revelation PDU strip to Dominion SX
Click Configuration.
Click the Ports tab.
Rename the port to the Revelation PDU strip name.
Select PowerBoard from the drop-down Application list.
How to launch PowerBoard
66
Power Status and Button:
Green when On
Red when off
Click on button to toggle power
User is prompted with confirmation when turning off
DOMINION PX USER GUIDE
CHAPTER 6: INTEGRATION
-
67
B%C
KSX has one dedicated power port, and RRC launches PowerBoard Java applet within to access
dedicated power port. More Revelation PDU strips can be connected and managed as serial
targets through KSX serial ports. Uses interactive menu interface. Outlets can be renamed after
the server or appliance connected.
All Revelation PDU units connected through the following Raritan products can be managed
from CC:
Dominion SX
Dominion KSX
Dominion KX
Paragon II
68
DOMINION PX USER GUIDE
APPENDIX A: REVELATION PDU MODELS
#
8 #&
+
MODEL
8
8
69
RACK
'.
V
CURRENT
8
8
# OF
OUTLET
TYPE
OUTLETS
8
8
PLUG
TYPE
8
#
JP US EU
CIRCUIT
8
8
8
8
70
DOMINION PX USER GUIDE
#
8 +&/0
%
1
Revelation PDU Series Unit Model
____________
Revelation PDU Series Unit Serial Number
____________
OUTLET 1
OUTLET 2
OUTLET3
MODEL
MODEL
MODEL
SERIAL NUMBER
SERIAL NUMBER
SERIAL NUMBER
USE
USE
USE
OUTLET 4
OUTLET 5
OUTLET 6
MODEL
MODEL
MODEL
SERIAL NUMBER
SERIAL NUMBER
SERIAL NUMBER
USE
USE
USE
OUTLET 7
OUTLET 8
OUTLET 9
MODEL
MODEL
MODEL
SERIAL NUMBER
SERIAL NUMBER
SERIAL NUMBER
USE
USE
USE
OUTLET 10
OUTLET 11
OUTLET 12
MODEL
MODEL
MODEL
SERIAL NUMBER
SERIAL NUMBER
SERIAL NUMBER
USE
USE
USE
OUTLET 13
OUTLET 14
OUTLET 15
MODEL
MODEL
MODEL
SERIAL NUMBER
SERIAL NUMBER
SERIAL NUMBER
USE
USE
USE
OUTLET 16
OUTLET 17
OUTLET 18
MODEL
MODEL
MODEL
SERIAL NUMBER
SERIAL NUMBER
SERIAL NUMBER
USE
USE
USE
APPENDIX B: EQUIPMENT SETUP WORKSHEET
OUTLET 19
71
OUTLET 20
MODEL
MODEL
SERIAL NUMBER
SERIAL NUMBER
USE
USE
Types of adapters _____________________________________________________________
Types of cables ________________________________________________________________
Name of software program ______________________________________________________
72
#
DOMINION PX USER GUIDE
8
&'
'
The IPMI privilege level that you select determines
4
APPENDIX C: IPMI PRIVILEGE LEVELS
73
74
#
DOMINION PX USER GUIDE
8 -&/
EVENT TYPE
Outlet Control
Outlet/Unit Sensors
User/Group Administration
Security Relevant
User Activity
Device Operation
Device Management
EXAMPLES
Outlet(#) switched on by user
Outlet(#) switched off by user
Outlet(#) cycled by user
User added successfully
User successfully changed
User successfully deleted
User password successfully changed
Group added successfully
Group successfully changed
Group successfully deleted
User login failed
User logged in successfully
User logged out
User session timeout
Note: The user activity entries in the event log always show
the IP address of the computer that logged in or out. Entries
with an IP address of 127.0.0.1 (the loopback IP address)
represent a serial connection and a CLP session.
Device successfully started
APPENDIX D: EVENT TYPES
75
76
#
DOMINION PX USER GUIDE
8 /&-
$ %
1 D
The Device Setup Wizard is a utility program that you can use to configure an Revelation PDU
for network connectivity. In Chapter 2, you were instructed to configure the Revelation PDU by
means of a serial connection and terminal emulator such as HyperTerminal. The Device Security
Wizard is an alternative way to do this.
/
-
1 D
By default, the Device Setup Wizard is enabled when an Revelation PDU unit is shipped from the
factory. However, if you are concerned that the Device Setup Wizard represents a security threat,
you can disable the Wizard so that it cannot be used to configure the Revelation PDU.
To disable the wizard:
1. Access the Revelation PDU via the Web interface.
2. Select Device Settings, and then select Network. The Device Settings window appears.
3. Locate the check box labeled Disable Setup Protocol in the Miscellaneous Network
Settings panel and select it.
4. Click Apply. The Device Setup Wizard is disabled. To enable it, repeat the above three steps.
1 D
To use the Wizard to configure an Revelation PDU:
1. Launch the Device Setup Wizard. The opening Wizard window appears. This window is
primarily informational, and briefly summarizes what the Wizard can do.
Figure 76 Opening Wizard Window
2. Read the text and click Next when finished. The Device Search and Setup window appears.
This window shows the available devices, identified by MAC address. If the device you are
looking for does not immediately appear, click Refresh Devices.
APPENDIX E: DEVICE SETUP W IZARD
77
Figure 77 Device Search and Setup Window
3. Click the device you want to configure to select it, and then click Configure Device. The
Device Setup window appears. This window summarizes the configuration process for you.
Figure 78 Device Setup Window Appears
4. Read the window and click Next when finished. The Super User Login window appears. This
window prompts you to enter the super user login and password.
78
DOMINION PX USER GUIDE
Figure 79 Super User Login Window
5. Do the following:
A. Enter admin and raritan (all lowercase letters) in the Username and Password fields,
respectively.
B. It is strongly recommended that, for security reasons, you set a new password during the
configuration process. To do this, type the new password twice, one in the New
Password field and once in the Confirm Password field. The password is case sensitive,
so be sure to capitalize the same letters each time.
C. When you are finished, click Next. The Network Configuration window appears. This
window lets you configure the Revelation PDU for network access.
Figure 80 Network Configuration Window
APPENDIX E: DEVICE SETUP W IZARD
79
6. Decide whether you want to select an auto configuration protocol or give the Revelation PDU
a static IP address.
− Auto configuration To auto configure the Revelation PDU, select either DHCP or
BOOTP from the drop-down list in the IP auto configuration field.
− Static IP address To set a static IP address, select None from the drop-down list in the
IP auto configuration field, and then type the IP address, subnet mask, and gateway
address in the corresponding fields.
When you are finished, click Next. A concluding Wizard window appears.
Figure 81 Concluding Wizard Window
7. Click Finished. The Revelation PDU is configured and ready for use. You are returned to the
Device Search and Setup window (Figure 77). You can now close the Wizard.
80
DOMINION PX USER GUIDE
World Headquarters
Aphel Limited.
Unit 6, Wayside Busioness Park
Wilsons Lane
Coventry
UK
Tel. +44 (0)8707541880
Fax +44 (0)870 7541880
Email: [email protected]
www.aphel.com