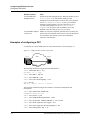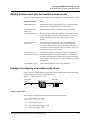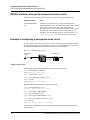
1
APX 8000™/MAX TNT®/DSLTNT™
ATM Configuration Guide
Part Number: 7820-0735-001
For software version 8.0
May 2000
Copyright© 2000 Lucent Technologies. All rights reserved.
This material is protected by the copyright laws of the United States and other countries. It may not be reproduced, distributed, or altered in any fashion by any
entity (either internal or external to Lucent Technologies), except in accordance with applicable agreements, contracts, or licensing, without the express
written consent of Lucent Technologies. For permission to reproduce or distribute, please email your request to [email protected].
Notice
Every effort was made to ensure that the information in this document was complete and accurate at the time of printing, but information is subject to change.
Safety, Compliance, and Warranty Information
Before handling any Lucent Access Networks hardware product, read the Access Networks Safety and Compliance Guide included in your product package.
See that guide also to determine how products comply with the electromagnetic interference (EMI) and network compatibility requirements of your country.
See the warranty card included in your product package for the limited warranty that Lucent Technologies provides for its products.
Security Statement
In rare instances, unauthorized individuals make connections to the telecommunications network through the use of access features.
Trademarks
4ESS, 5ESS, A Network of Expertise, AnyMedia, AqueView, AUDIX, B-STDX 8000, B-STDX 9000, ...Beyond Compare, CaseView, Cajun, CajunDocs,
CAJUNVIEW, Callmaster, CallVisor, CBX 500, CellPipe, ChoiceNet, ClearReach, ComOS, cvMAX, DACScan, Dacsmate, Datakit, DEFINITY,
Definity One, DSLMAX, DSL Terminator, DSLPipe, DSLTNT, Elemedia, Elemedia Enhanced, EMMI, End to End Solutions, EPAC, ESS, EVEREST,
Gigabit-scaled campus networking, Globalview, GRF, GX 250, GX 550, HyperPATH, Inferno, InfernoSpaces, Intragy, IntragyAccess, IntragyCentral, Intuity,
IP Navigator, IPWorX, LineReach, LinkReach, MAX, MAXENT, MAX TNT, Multiband, Multiband PLUS, Multiband RPM, MultiDSL, MultiVoice,
MultiVPN, Navis, NavisAccess, NavisConnect, NavisCore, NavisRadius, NavisXtend, NetCare, NetLight, NetPartner, OneVision,
Open Systems Innovations, OpenTrunk, P550, PacketStar, PathStar, Pinnacle, Pipeline, PMVision, PortMaster, SecureConnect, Selectools, Series56,
SmoothConnect, Stinger, SYSTIMAX, True Access, WaveLAN, WaveMANAGER, WaveMODEM, WebXtend, and Where Network Solutions Never End
are trademarks of Lucent Technologies. Advantage Pak, Advantage Services, AnyMedia, ...Beyond Compare, End to End Solutions, Inter.NetWorking,
MAXENT, and NetWork Knowledge Solutions are service marks of Lucent Technologies. Other trademarks, service marks, and trade names mentioned in
this publication belong to their respective owners.
Copyrights for Third-Party Software Included in Lucent Access Networks Software Products
C++ Standard Template Library software copyright© 1994 Hewlett-Packard Company and copyright© 1997 Silicon Graphics. Permission to use, copy,
modify, distribute, and sell this software and its documentation for any purpose is hereby granted without fee, provided that the above copyright notice appear
in all copies and that both that copyright notice and this permission notice appear in supporting documentation. Neither Hewlet t-Packard nor Silicon Graphics
makes any representations about the suitability of this software for any purpose. It is provided “as is” without express or implied warranty.
Berkeley Software Distribution (BSD) UNIX software copyright© 1982, 1986, 1988, 1993 The Regents of California. All rights reserved. Redistribution and
use in source and binary forms, with or without modification, are permitted provided that the following conditions are met: 1. Redistributions of source code
must retain the above copyright notice, this list of conditions, and the following disclaimer. 2. Redistributions in binary form must reproduce the above copyright notice, this list of conditions, and the following disclaimer in the documentation and/or other materials provided with the distribution. 3. All advertising
materials mentioning features or use of this software must display the following acknowledgement: This product includes software developed by the University of California, Berkeley, and its contributors. 4. Neither the name of the University nor the names of its contributors may be used to endorse or promote
products derived from this software without specific prior written permission.
THIS SOFTWARE IS PROVIDED BY THE REGENTS AND CONTRIBUTORS “AS IS” AND ANY EXPRESS OR IMPLIED WARRANTIES,
INCLUDING, BUT NOT LIMITED TO, THE IMPLIED WARRANTIES OF MERCHANTABILITY AND FITNESS FOR A PARTICULAR PURPOSE
ARE DISCLAIMED. IN NO EVENT SHALL THE REGENTS OR CONTRIBUTORS BE LIABLE FOR ANY DIRECT, INDIRECT, INCIDENTAL,
SPECIAL, EXEMPLARY, OR CONSEQUENTIAL DAMAGES (INCLUDING, BUT NOT LIMITED TO, PROCUREMENT OF SUBSTITUTE GOODS
OR SERVICES; LOSS OF USE, DATA OR PROFITS; OR BUSINESS INTERRUPTION) HOWEVER CAUSED AND ON ANY THEORY OF
LIABILITY, WHETHER IN CONTRACT, STRICT LIABILITY, OR TORT (INCLUDING NEGLIGENCE OR OTHERWISE) ARISING IN ANY WAY
OUT OF THE USE OF THIS SOFTWARE, EVEN IF ADVISED OF THE POSSIBILITY OF SUCH DAMAGE.
Ordering Information
You can order the most up-to-date product information and computer-based training online at http://www.lucent.com/ins/bookstore.
Feedback
Lucent Technologies appreciates your comments, either positive or negative, about this manual. Please send them to [email protected].
Lucent Technologies
Customer Service
Customer Service provides a variety of options for obtaining information about Lucent
products and services, software upgrades, and technical assistance.
Finding information and software on the Internet
Visit the Web site at http://www.lucent.com/ins for technical information, product
information, and descriptions of available services.
Visit the FTP site at ftp://ftp.ascend.com for software upgrades, release notes, and
addenda.
Obtaining technical assistance
You can obtain technical assistance by telephone, email, fax, modem, or regular mail, as well
as over the Internet.
Gathering information you will need
If you need to contact Lucent for help with a problem, make sure that you have the following
information when you call or that you include it in your correspondence:
•
Product name and model
•
Software and hardware options
•
Software version
•
If supplied by your carrier, Service Profile Identifiers (SPIDs) associated with your line
•
Your local telephone company’s switch type and operating mode, such as AT&T 5ESS
Custom or Northern Telecom National ISDN-1
•
Whether you are routing or bridging with your Lucent product
•
Type of computer you are using
•
Description of the problem
Calling Lucent from within the United States
In the U.S., you can take advantage of Priority Technical Assistance or an Advantage service
contract, or you can call to request assistance.
Priority Technical Assistance
If you need to talk to an engineer right away, call (900) 555-2763 to reach the Priority Call
queue. The charge of $2.95 per minute does not begin to accrue until you are connected to an
engineer. Average wait times are less than 3 minutes.
Advantage Services
Advantage Services is a comprehensive selection of services. Installation services help get
your Lucent Wide Area Network (WAN) off to the right start. Ongoing maintenance and
APX 8000/MAX TNT/DSLTNT ATM Configuration Guide
iii
support services provide hardware and software solutions to keep your network operating at
peak performance. For more information, call (800) 272-3634.
Other telephone numbers
For a menu of Lucent’s services, call (800) 272-3634. Or call (510) 769-6001 for an operator.
Calling Lucent from outside the United States
You can contact Lucent by telephone from outside the United States at one of the following
numbers:
Telephone outside the United States
(510) 769-8027
Austria/Germany/Switzerland
(+33) 492 96 5672
Benelux
(+33) 492 96 5674
France
(+33) 492 96 5673
Italy
(+33) 492 96 5676
Japan
(+81) 3 5325 7397
Middle East/Africa
(+33) 492 96 5679
Scandinavia
(+33) 492 96 5677
Spain/Portugal
(+33) 492 96 5675
UK
(+33) 492 96 5671
For the Asia-Pacific region, you can find additional support resources at
http://www.lucent.com/ins/international/apac/.
Obtaining assistance through correspondence
Send your technical support questions to one of the following email addresses, or correspond
by fax, BBS, or regular mail with Customer Service in Lucent’s U.S. offices in Alameda, CA:
•
Email from within the U.S.—[email protected]
•
Email from Europe, the Middle East, or Africa—[email protected]
•
Email from the Asia-Pacific region—[email protected]
•
Fax—(510) 814-2312
•
Customer Support BBS (by modem)—(510) 814-2302
•
Write to Lucent at the following address:
Attn: Customer Service
Lucent Technologies
1701 Harbor Bay Parkway
Alameda, CA 94502-3002
USA
iv
APX 8000/MAX TNT/DSLTNT ATM Configuration Guide
Contents
Customer Service ..................................................................................................................... iii
About This Guide ............................................................................... xi
What is in this guide.......................................................................................................... ........ xi
What you should know ........................................................................................................... .. xi
Documentation conventions...................................................................................................... xi
Documentation set.................................................................................................................. xiii
Chapter 1
Getting Started ................................................................................ 1-1
Overview of ATM operations ................................................................................................
Physical interfaces that support ATM ............................................................................
ATM virtual circuits .......................................................................................................
IP routing over ATM ...............................................................................................
ATM direct ..............................................................................................................
ATM-Frame Relay circuits......................................................................................
Overview of ATM configuration ...........................................................................................
ATM management features....................................................................................................
ATM-related commands .................................................................................................
SNMP support.................................................................................................................
RADIUS support.............................................................................................................
Where to go next ....................................................................................................................
Chapter 2
Physical Interface Considerations ................................................ 2-1
DS3-ATM interfaces..............................................................................................................
OC3-ATM interfaces (MAX TNT/DSLTNT only) ...............................................................
Configurable VPI-VCI ranges ...............................................................................................
Overview of a port’s VPI-VCI range settings ................................................................
Example of setting a VPI-VCI range ..............................................................................
ATM traffic shaping...............................................................................................................
Overview of traffic-shaping settings...............................................................................
Example of configuring traffic shaping ..........................................................................
Chapter 3
1-1
1-1
1-2
1-2
1-2
1-2
1-3
1-3
1-4
1- 4
1-4
1-5
2-1
2-2
2-2
2-2
2-3
2-3
2-3
2-4
Configuring ATM Virtual Circuits .................................................. 3-1
Configuring ATM PVCs........................................................................................................
OAM loopback for DS3-ATM PVC fault management .................................................
Overview of settings for PVC configuration ..................................................................
Connection profile settings for a PVC.....................................................................
RADIUS attribute-value pairs for a PVC ................................................................
Examples of configuring a PVC .....................................................................................
Configuring ATM SVCs........................................................................................................
Current SVC limitations .................................................................................................
APX 8000/MAX TNT/DSLTNT ATM Configuration Guide
3-1
3-1
3-1
3-1
3-3
3-4
3-5
3-6
v
Contents
Address formats for ATM interfaces .............................................................................. 3-7
AESA formats.......................................................................................................... 3-7
Native E.164 address format ................................................................................... 3-8
Overview of configuring a physical ATM port .............................................................. 3-8
Overview of SVC options on a logical ATM interface .................................................. 3-8
Assigning a native E.164 address ............................................................................ 3-9
Assigning an AESA format address ........................................................................ 3-9
Configuring the Q.93B layer ................................................................................. 3-11
Configuring the Q.SAAL layer ............................................................................. 3-12
Overview of Answer-Defaults setting .......................................................................... 3-13
Overview of SVC options in a Connection profile....................................................... 3-13
Configuring a static ATM SVC route........................................................................... 3-14
Example of configuring an ATM SVC......................................................................... 3-15
Configuring the OC3-ATM physical interface...................................................... 3-15
Configuring the SVC logical interface .................................................................. 3-16
Enabling incoming SVC calls................................................................................ 3-16
Configuring a Connection profile to the far-end device........................................ 3-16
Chapter 4
Configuring ATM Direct.................................................................. 4-1
Overview of ATM direct settings ..........................................................................................
Connection profile settings for ATM direct ...................................................................
RADIUS attribute-value pairs for ATM direct...............................................................
Examples of ATM direct connections ...................................................................................
Chapter 5
4-1
4-1
4-2
4-3
Configuring ATM-Frame Relay Circuits ........................................ 5-1
ATM-Frame Relay circuits (translation mode)......................................................................
Connection profile settings for translation-mode circuits...............................................
RADIUS attribute-value pairs for translation-mode circuits ..........................................
Example of configuring a translation-mode circuit ........................................................
Using local profiles..................................................................................................
Using RADIUS profiles...........................................................................................
ATM-Frame Relay transparent-mode circuits (FRF.8) .........................................................
Connection profile setting for transparent-mode circuits ...............................................
RADIUS attribute-value pair for transparent-mode circuits...........................................
Example of configuring a transparent-mode circuit .......................................................
Using local profiles..................................................................................................
Using RADIUS profiles...........................................................................................
ATM-Frame Relay virtual channel trunking .........................................................................
Current limitations of virtual channel trunking ..............................................................
Overview of Connection profile settings for virtual channel trunking ...........................
Example of configuring virtual channel trunking...........................................................
5-1
5-2
5-3
5-3
5-3
5-4
5-5
5-5
5-6
5-6
5-6
5-7
5-8
5-8
5-9
5-9
Index.......................................................................................... Index-1
vi
APX 8000/MAX TNT/DSLTNT ATM Configuration Guide
Figures
Figure 2-1
Figure 2-2
Figure 3-1
Figure 3-2
Figure 3-3
Figure 3-4
Figure 3-5
Figure 4-1
Figure 5-1
Figure 5-2
Figure 5-3
Figure 5-4
16-bit VPI-VCI range ................................................................................... 2-2
Example traffic shaping setup ...................................................................... 2-4
ATM permanent virtual circuit (PVC) ......................................................... 3-4
Terminating SVC.......................................................................................... 3-6
Dial-out SVC ................................................................................................ 3-6
Subfields in the AESA address formats........................................................ 3-7
Example ATM SVC with DCC-AESA addresses ...................................... 3-15
ATM direct concentrating PPP calls to an ATM interface........................... 4-3
ATM-Frame Relay circuit ............................................................................ 5-3
ATM-Frame Relay circuit ............................................................................ 5-6
N:1 circuit between multiple Frame Relay hosts and an ATM trunk........... 5-8
Circuit using virtual channel trunking .......................................................... 5-9
APX 8000/MAX TNT/DSLTNT ATM Configuration Guide
vii
Tables
Table 1-1
Table 1-2
Table 1-3
Table 1-4
Slot cards that support ATM..............................................................................
Slot cards and supported ATM connection features ..........................................
ATM-related commands ....................................................................................
Where to go next................................................................................................
APX 8000/MAX TNT/DSLTNT ATM Configuration Guide
1-1
1-2
1-4
1-5
ix
About This Guide
What is in this guide
This guide describes how to configure Asynchronous Transfer Mode (ATM) operations on any
unit that supports the TAOS Command-Line Interface (CLI) and for which you have obtained
the ATM license. To use this guide, you must have already installed the unit and connected a
workstation to the controller’s serial port. If you have not already finished those tasks, see the
unit’s hardware installation guide.
Note: This manual describes the full set of features for APX 8000™, MAX TNT®, and
DSLTNT™ units running True Access™ Operating System (TAOS) software version 8.0.2 or
later. Some features might not be available with earlier versions or specialty loads of the
software.
This manual hereafter refers to your product as a TAOS unit.
!
Warning: Before installing your TAOS unit, be sure to read the safety instructions in the
Access Networks Safety and Compliance Guide. For information specific to your unit, see the
“Safety-Related Electrical, Physical, and Environmental Information” appendix in your unit’s
hardware installation guide.
What you should know
This guide is for the person who configures and maintains a TAOS unit. To configure a unit,
you need to understand the following:
•
Internet or telecommuting concepts
•
Wide Area Network (WAN) concepts
•
Local Area Network (LAN) concepts, if applicable
Documentation conventions
Following are all the special characters and typographical conventions used in this manual:
Convention
Meaning
Monospace text Represents text that appears on your computer’s screen, or that could
appear on your computer’s screen.
APX 8000/MAX TNT/DSLTNT ATM Configuration Guide
xi
About This Guide
Documentation conventions
Convention
Meaning
Boldface mono- Represents characters that you enter exactly as shown (unless the charspace text
acters are also in italics—see Italics, below). If you could enter
the characters but are not specifically instructed to, they do not appear
in boldface.
Italics
Represent variable information. Do not enter the words themselves in
the command. Enter the information they represent. In ordinary text,
italics are used for titles of publications, for some terms that would
otherwise be in quotation marks, and to show emphasis.
[]
Square brackets indicate an optional argument you might add to a
command. To include such an argument, type only the information
inside the brackets. Do not type the brackets unless they appear in
boldface.
|
Separates command choices that are mutually exclusive.
>
Points to the next level in the path to a parameter or menu item. The
item that follows the angle bracket is one of the options that appears
when you select the item that precedes the angle bracket.
Key1-Key2
Represents a combination keystroke. To enter a combination keystroke, press the first key and hold it down while you press one or
more other keys. Release all the keys at the same time. (For example,
Ctrl-H means hold down the Control key and press the H key.)
Press Enter
Means press the Enter, or Return, key or its equivalent on your computer.
Note:
Introduces important additional information.
!
Caution:
!
Warning:
Warns that a failure to follow the recommended procedure could result
in loss of data or damage to equipment.
Warns that a failure to take appropriate safety precautions could result
in physical injury.
Warns of danger of electric shock.
Warning:
xii
APX 8000/MAX TNT/DSLTNT ATM Configuration Guide
About This Guide
Documentation set
Documentation set
The APX 8000/MAX TNT/DSLTNT documentation set consists of the following manuals.
•
•
•
Read me first:
–
Access Networks Safety and Compliance Guide
Contains important safety instructions and country-specific compliance information
that you must read before installing a TAOS unit.
–
TAOS Command-Line Interface Guide
Introduces the TAOS command-line environment and shows how to use the
command-line interface effectively. This manual describes keyboard shortcuts and
introduces commands, security levels, profile structure, and parameter types.
Installation and basic configuration:
–
APX 8000 Hardware Installation Guide
Shows how to install APX 8000 hardware and includes APX 8000 technical
specifications.
–
MAX TNT/DSLTNT Hardware Installation Guide
Shows how to install MAX TNT and DSLTNT hardware and includes technical
specifications for these units.
–
APX 8000/MAX TNT/DSLTNT Physical Interface Configuration Guide
Shows how to configure the cards installed in a TAOS unit and their line attributes for
such functions as framing, signaling, and channel usage. It also describes how calls
are routed through the system and includes information about configuring the unit in a
Signaling System 7 (SS7) environment. This guide explains shelf controller
redundancy for an APX 8000 unit.
Configuration:
–
APX 8000/MAX TNT/DSLTNT ATM Configuration Guide (this manual)
Describes how to configure Asynchronous Transfer Mode (ATM) operations on a
TAOS unit. This guide explains how to configure physical layer attributes and how to
create permanent virtual circuit (PVC) and switched virtual circuit (SVC) ATM
interfaces. It includes information about ATM direct and ATM-Frame Relay circuits.
–
APX 8000/MAX TNT/DSLTNT Frame Relay Configuration Guide
Describes how to configure Frame Relay operations on a TAOS unit. This guide
explains physical layer configuration and restrictions and how to create permanent
virtual circuit (PVC) and switched virtual circuit (SVC) interfaces. It includes
information about Multilink Frame Relay (MFR) and link management, as well as
Frame Relay and Frame Relay direct circuits.
–
APX 8000/MAX TNT/DSLTNT WAN, Routing, and Tunneling Configuration Guide
Shows how to configure LAN and WAN routing for analog and digital dial-in
connections on a TAOS unit. This guide includes information about IP routing, Open
Shortest Path First (OSPF) routing, Internet Group Management Protocol (IGMP)
routing, multiprotocol routers, Virtual Routers (VRouters), and tunneling protocols.
–
MultiVoice™ for MAX TNT Configuration Guide
Shows how to configure the MultiVoice application to run on a MAX TNT unit in
both Signaling System 7 (SS7) and H.323 Voice over IP (VoIP) configurations.
APX 8000/MAX TNT/DSLTNT ATM Configuration Guide
xiii
About This Guide
Documentation set
xiv
•
RADIUS: TAOS RADIUS Guide and Reference
Describes how to set up a TAOS unit to use the Remote Authentication Dial-In User
Service (RADIUS) server and contains a complete reference to RADIUS attributes.
•
Administration and troubleshooting: APX 8000/MAX TNT/DSLTNT Administration
Guide
Describes how to administer a TAOS unit, including how to monitor the system and cards,
troubleshoot the unit, and configure the unit to use the Simple Network Management
Protocol (SNMP).
•
Reference:
–
APX 8000/MAX TNT/DSLTNT Reference
An alphabetic reference to all commands, profiles, and parameters supported on
TAOS units.
–
TAOS Glossary
Defines terms used in documentation for TAOS units.
APX 8000/MAX TNT/DSLTNT ATM Configuration Guide
1
Getting Started
:
Overview of ATM operations . . . . . . . . . . . . . . . . . . . . . . . . . . . . . . . . . . . . . . . . . . . . 1-1
Overview of ATM configuration . . . . . . . . . . . . . . . . . . . . . . . . . . . . . . . . . . . . . . . . . . 1-3
ATM management features . . . . . . . . . . . . . . . . . . . . . . . . . . . . . . . . . . . . . . . . . . . . . . 1-3
Where to go next . . . . . . . . . . . . . . . . . . . . . . . . . . . . . . . . . . . . . . . . . . . . . . . . . . . . . . 1-5
Overview of ATM operations
To configure ATM, you first configure the physical line used to connect to the ATM network.
You can then define virtual circuits to be fowarded across the interface to another ATM device.
Physical interfaces that support ATM
An interface is a point of ingress (entrance) to or egress (exit) from the system. At the time of
this writing, TAOS units support ATM operations on the physical-interface types shown in
Table 1-1.
Table 1-1. Slot cards that support ATM
Description
APX 8000
MAX TNT DSLTNT
√
√
DS3-ATM
√
√
OC3-ATM
√
√
DS3-ATM2
√
The DS3-ATM and DS3-ATM2 slot cards provide a single unchannelized 44.736-Mbps port.
In this guide, both cards are referred to as DS3-ATM cards unless a difference in functionality
between the cards is being noted.
The OC3-ATM slot card provides a single unchannelized 155-Mbps port.
Note: APX 8000 units do not yet support OC3-ATM.
APX 8000/MAX TNT/DSLTNT ATM Configuration Guide
1-1
Getting Started
Overview of ATM operations
ATM virtual circuits
An ATM virtual circuit is the logical configuration that enables ATM data to be sent and
received on a physical port. TAOS units support both permanent virtual circuits (PVCs) and
switched virtual circuits (SVCs).
A PVC is a leased line connection that is always available.
An SVC is a point-to-point switched connection, which provides a lower-cost, usage-based
alternative to ATM PVCs. Like other types of switched connections, SVCs can be initiated by
a dial-in or a dial-out call, which can be made by the system on the basis of IP routing.
Data can be forwarded onto a virtual circuit on the basis of IP routing, an ATM direct
configuration, or an ATM-Frame Relay circuit configuration. Table 1-2 shows which cards can
be configured for the various ATM features supported in TAOS.
s
Table 1-2. Slot cards and supported ATM connection features
Slot cards
PVC
SVC
AAL5
ATM-direct ATM-Frame Relay
DS3-ATM2
√
√
√
√
Ν/Α
DS3-ATM
√
√
√
√
√
OC3-ATM
√
√
√
√
√
Note: The DS3-ATM2 card does not support ATM-Frame Relay circuit configurations.
Maximum performance with the DS3-ATM2 card is achieved using RFC 1483 ATM-AAL5CPCS-PDU encapsulation.
IP routing over ATM
For IP routing on an ATM interface, the system encapsulates the data as specified in
RFC 1483, Multiprotocol Encapsulation over ATM Adaptation Layer 5 (ATM-AAL5-CPCSPDU encapsulation). With this type of connection, the TAOS unit uses ATM as a transport to
an IP destination.
ATM direct
For ATM direct configurations, the system receives data from Point-to-Point Protocol (PPP)
dial-in connections and redirects the data streams onto a specified ATM interface. For the
system to route packets back from the ATM interface to the proper PPP dial-in interface, it
must use IP routing.
ATM-Frame Relay circuits
Standard ATM-Frame Relay circuits always have two endpoints (1:1 circuits). TAOS units
support both translation-mode and transparent-mode (FRF.8) ATM-Frame Relay circuit
configurations on DS3-ATM or OC3-ATM cards. Note that the DS3-ATM2 card does not
support this type of configuration.
1-2
APX 8000/MAX TNT/DSLTNT ATM Configuration Guide
Getting Started
Overview of ATM configuration
For translation-mode circuits, the system encapsulates the data stream appropriately for each
side of the circuit. It receives Frame Relay (RFC 1490) encapsulated data on one interface, and
replaces it with ATM (RFC 1483) encapsulation before forwarding it on the other side of the
circuit, and vice versa.
For transparent-mode ATM-Frame Relay circuits, the unit performs no conversion, but simply
passes the data stream from one side of the circuit to the other. Transparent mode requires that
the circuit endpoints support compatible upper-layer protocols for applications such as
packetized voice. Transparent-mode ATM-Frame Relay circuits are defined in the FRF.8
Frame Relay ATM/PVC Service Interworking Implementation Agreement.
With virtual channel trunking, TAOS units can also support N:1 circuits, where an ATM-Frame
Relay circuit can have more than two endpoints, as long as multiple endpoints are designated
as host links and only one endpoint is designated as a trunk link.
Overview of ATM configuration
Before you configure a TAOS unit for ATM, Lucent recommends creating a diagram that
illustrates how the ATM access lines will interoperate with your current network configuration.
Creating a comprehensive network diagram helps prevent problems during installation and
configuration, and can help in troubleshooting any problems later.
After you have installed the required slot cards, you must complete the following configuration
tasks:
1
Configure the DS3-ATM or OC3-ATM interfaces on the installed slot cards.
For each installed card, the system creates the appropriate profiles. For example, the
following command opens the configuration profile for a DS3-ATM card in slot 2:
admin> read ds3-atm { 1 2 1 }
DS3-ATM/{ shelf-1 slot-2 1 } read
2
Configure a virtual circuit (VC) to the switch that is reachable via the DS3-ATM or OC3ATM port.
You can configure a permanent or switched virtual circuit. A PVC uses the dedicated
bandwidth of the port. SVCs are brought up by ATM signaling only when the connection
is needed.
3
Configure connections whose data streams will be directed onto the ATM virtual circuit
for transport across the ATM network.
The connections can be directed to the ATM interface via IP routing or ATM direct, or as
part of an ATM-Frame Relay circuit.
Note: TAOS configuration settings are stored in onboard flash memory, and must be backed
up to a TFTP host whenever changes are made. For details about backing up and restoring the
TAOS configuration, see the administration guide for your unit.
ATM management features
To enable you to configure the system and monitor its activity, TAOS units support profiles,
commands, and status windows in the command-line interface. TAOS units also support
SNMP management, RADIUS profiles, and the ability to upload (back up) and download
APX 8000/MAX TNT/DSLTNT ATM Configuration Guide
1-3
Getting Started
ATM management features
software and configuration files via the Trivial File Transfer Protocol (TFTP) or a serial
connection.
For an introduction to the command-line interface and its shortcuts, see the TAOS CommandLine Interface Guide.
ATM-related commands
TAOS units provides the permission levels shown in Table 1-3 to control the management and
configuration functions that are accessible in the command-line interface. For information
about User profiles and other management features, see the administration guide for your unit.
For details about the commands, see the APX 8000/MAX TNT/DSLTNT Reference.
Table 1-3. ATM-related commands
Command
Permission level
Description
atmsvcroute
( system )
Display ATM SVC call-routing table.
AtmLines
( system )
Display DS3 ATM line information.
oamloop
( diagnostic )
Send ATM operation and maintenance
(OAM) cells on an ATM interface.
SNMP support
In addition to configuring and monitoring ATM by means of the command-line interface, you
can configure and manage the unit by using an SNMP management station such as
NavisAccess™ product. For information about using SNMP with TAOS units, see the
APX 8000/MAX TNT/DSLTNT Administration Guide.
RADIUS support
You can use RADIUS to store user profiles for ATM circuits and terminating connections. To
use RADIUS, you must also configure the TAOS unit to communicate with the RADIUS
server. In addition, the RADIUS server must be compliant with the vendor-specific attribute
(VSA), as defined in RFC 2138, and the TAOS unit must be configured in VSA compatibility
mode. Following are the relevant settings:
[in EXTERNAL-AUTH]
auth-type = radius
[in EXTERNAL-AUTH:rad-auth-client]
auth-radius-compat = vendor-specific
For details, see the TAOS RADIUS Guide and Reference.
1-4
APX 8000/MAX TNT/DSLTNT ATM Configuration Guide
Getting Started
Where to go next
Where to go next
When you have planned your network, you are ready to configure the TAOS unit. You can
perform configuration tasks in any order you want. Table 1-4 shows where to look for the
information you need.
Table 1-4. Where to go next
Task:
Where to go for information:
Install required slot cards
The hardware installation guide for your unit
Test lines and ports
APX 8000/MAX TNT/DSLTNT Administration Guide
Configure DS3-ATM ports
Chapter 2, “Physical Interface Considerations”
Configure OC3-ATM ports
Chapter 2, “Physical Interface Considerations”
Configure an ATM PVC
“Configuring ATM PVCs” on page 3-1
Configure an ATM SVC
“Configuring ATM SVCs” on page 3-5
Set up ATM direct
“Configuring ATM Direct” on page 4-1
Configure ATM-Frame Relay
circuits
“ATM-Frame Relay circuits (translation mode)” on
page 5-1
Configure ATM virtual channel
trunking
“ATM-Frame Relay virtual channel trunking” on
page 5-8
Check details about parameters
and commands
APX 8000/MAX TNT/DSLTNT Reference
Use SNMP with the unit
APX 8000/MAX TNT/DSLTNT Administration Guide
Configure login permissions
Back up the system configuration
APX 8000/MAX TNT/DSLTNT ATM Configuration Guide
1-5
Physical Interface Considerations
2
:
DS3-ATM interfaces . . . . . . . . . . . . . . . . . . . . . . . . . . . . . . . . . . . . . . . . . . . . . . . . . . . 2-1
OC3-ATM interfaces (MAX TNT/DSLTNT only) . . . . . . . . . . . . . . . . . . . . . . . . . . . . 2-2
Configurable VPI-VCI ranges . . . . . . . . . . . . . . . . . . . . . . . . . . . . . . . . . . . . . . . . . . . . 2-2
ATM traffic shaping . . . . . . . . . . . . . . . . . . . . . . . . . . . . . . . . . . . . . . . . . . . . . . . . . . . . 2-3
At the physical interface layer, TAOS units support DS3-ATM (and DS3-ATM2) and OC3ATM cards. The type of physical interface you choose determines the maximum speed of a
virtual circuit, as well as the types of connections you can use.
DS3-ATM interfaces
The DS3-ATM cards (DS3-ATM and DS3-ATM2) support one 44.736-Mbps interface for
connecting to an ATM switch. At a minimum, you must enable the line and specify a nailed
group. TAOS units use the nailed group to route traffic to the interface.
You can also specify C-bit Physical Layer Convergence Protocol (PLCP) or C-bit ATM Direct
Mapping (ADM) framing format for a DS3-ATM interface, which must be consistent at both
ends of the DS3-ATM link.
For example, the following set of commands enables a DS3-ATM interface in slot 12 and
assigns the nailed group number 111:
admin> read ds3-atm {1 12 1}
DS3-ATM/{ shelf-1 12 1 } read
admin> set enabled = yes
admin> set line-config nailed-group = 111
admin> write
DS3-ATM/{ shelf-1 12 1 } written
With this configuration, the default PLCP framing is used. For details about physical interface
settings for DS3-ATM interfaces, see the APX 8000/MAX TNT/DSLTNT Physical Interface
Configuration Guide.
APX 8000/MAX TNT/DSLTNT ATM Configuration Guide
2-1
Physical Interface Considerations
OC3-ATM interfaces (MAX TNT/DSLTNT only)
OC3-ATM interfaces (MAX TNT/DSLTNT only)
Each OC3-ATM card supports one 155.52-Mbps interface for connecting to one ATM switch.
At a minimum, you must enable the line and specify a nailed group. TAOS units use the nailed
group to direct traffic to the interface.
For example, the following set of commands enables an OC3-ATM interface in slot 7 and
assigns the nailed group number 222 to the interface:
admin> read oc3-atm {1 7 1}
OC3-ATM/{ shelf-1 slot-7 1 } read
admin> set enabled = yes
admin> set line-config nailed-group = 222
admin> write
OC3-ATM/{ shelf-1 slot-7 1 } written
With this configuration, the default synchronous digital hierarchy (SDH) framing is used. For
details about physical interface settings for OC3-ATM interfaces, see the APX 8000/MAX
TNT/DSLTNT Physical Interface Configuration Guide.
Configurable VPI-VCI ranges
The segmentation and reassembly (SAR) unit on the OC3-ATM and DS3-ATM cards supports
a 16-bit virtual path identifier and virtual channel identifier (VPI-VCI) range. Figure 2-1
shows the 16-bit range configured with 4 bits for the VPI and 12 for the VCI (the default
setting).
Figure 2-1. 16-bit VPI-VCI range
15
14
13
12
11
10
9
8
7
6
5
4
3
2
1
0
+-------------+-----------------------------------------------+
|
LSB VPI
|
LSBits of VCI
|
+-------------+-----------------------------------------------+
You can select the best combination of VPI and VCI bit sizes to fit the list of supported VPIVCI pairs obtained from the network provider. The new values take effect as soon as you write
the OC3-ATM or DS3-ATM profile.
Overview of a port’s VPI-VCI range settings
Following are the relevant parameters, shown with their default values:
[in DS3-ATM/{ shelf-1 slot-3 1 }:line-config]
vpi-vci-range = 0-15/32-4095
[in OC3-ATM/{ shelf-1 slot-1 1 }:line-config]
vpi-vci-range = 0-15/32-4095
2-2
APX 8000/MAX TNT/DSLTNT ATM Configuration Guide
Physical Interface Considerations
ATM traffic shaping
Parameter
Specifies
VPI-VCI-Range
Range of values in the virtual path identifier and virtual channel
identifier (VPI-VCI) pair. The default setting of 0-15/32-4095
is the range of values that can be represented in a 4-bit VPI and
12-bit VCI. This setting is compatible with earlier releases.
Following are the possible ranges and their relevant bit sizes:
Range
0-1/32-32767
0-3/32-16383
0-7/32-8191
0-15/32-4095
0-31/32-2047
0-63/32-1023
0-127/32-511
0-255/32-255
# Of VPI bits
1
2
3
4
5
6
7
8
# Of VCI bits
15
14
13
12
11
10
9
8
Example of setting a VPI-VCI range
The following commands configure an OC3-ATM interface in slot 12 to support VPI and VCI
assignments of 8 bits:
admin> read oc3-atm {1 12 1}
OC3-ATM/{ shelf-1 slot-12 1 } read
admin> set line-config vpi-vci-range = 0-255/32-255
admin> write
OC3-ATM/{ shelf-1 slot-12 1 } written
ATM traffic shaping
Each ATM interface supports up to 15 traffic shapers that define characteristics for different
types of traffic. For example, voice traffic requires a constant amount of bandwidth and cannot
tolerate delays, whereas file transfer can tolerate delay and variable bandwidth. Once you have
specified the traffic shapers you need, you can apply a shaper to any number of connections.
Overview of traffic-shaping settings
Following are the relevant parameters, shown with default values:
[in DS3-ATM/{ any-shelf any-slot 0 }:line-config:traffic-shapers[1]]
enabled = no
bit-rate = 1000
peak-rate = 1000
max-burst-size = 2
aggregate = no
priority = 0
[in OC3-ATM/{ any-shelf any-slot 0 }:line-config:traffic-shapers[1]]
enabled = no
bit-rate = 1000
peak-rate = 1000
max-burst-size = 2
APX 8000/MAX TNT/DSLTNT ATM Configuration Guide
2-3
Physical Interface Considerations
ATM traffic shaping
aggregate = no
priority = 0
[in CONNECTION/"":session-options]
traffic-shaper = 16
Parameter
Specifies
Enabled
Enable/disable the shaper for use.
Bit-Rate
Average bit rate in kilobits per second for transmitting traffic to the
network. The default is 1000 (1 Mbps). For DS3-ATM interfaces,
the valid range is from 0 to 37920. For OC3-ATM, the valid range
is from 0 to 135631.
Peak-Rate
Maximum bit rate in kilobits per second for transmitting traffic to
the network. The default is 1000 (1 Mbps). For DS3-ATM
interfaces, the valid range is from 0 to 37920. For OC3-ATM, the
valid range is from 0 to 135631.
Max-Burst-Size
Maximum burst size (MBS), which is the maximum number of
cells that can be transmitted at Peak-Rate before the TAOS unit
determines that the connection is exceeding the defined
characteristics. The default is 2. The valid range is from 2 to 255.
Aggregate
Enable/disable aggregation of the Bit-Rate values of multiple
virtual circuits using this shaper. If set to no (the default),
aggregation is not used. If set to yes, and N virtual circuits are
using this shaper, the throughput of each virtual circuits is BitRate/N.
Priority
Priority of this shaper relative to other shapers on this interface.
The valid range is from zero (the default) to 15. Zero indicates the
highest priority, and 15 indicates the lowest.
Traffic-Shaper
The traffic shaper assigned to the connection. The default is
shaper 16, which is an internal shaper that is not configurable.
Example of configuring traffic shaping
In the example shown in Figure 2-2, the TAOS unit has a DS3-ATM interface to a
DSL Terminator™ unit, a Frame Relay data link interface to a Pipeline® 220 unit, and an
ATM-Frame Relay circuit between the two interfaces.
Figure 2-2. Example traffic shaping setup
Frame Relay
ATM
Pipeline 220
DSL Terminator
TAOS
T1
DS3-ATM
To show how traffic shaping works to control bit rates, both sides of the circuit configuration
are shown in this example. If you need background information about ATM-Frame Relay
circuit configuration, see Chapter 5, “Configuring ATM-Frame Relay Circuits.”
2-4
APX 8000/MAX TNT/DSLTNT ATM Configuration Guide
Physical Interface Considerations
ATM traffic shaping
The following commands define a data link to the Pipeline 220 on a nailed T1 line (nailed
group 999), which has a bit rate of approximately 1.5 Mbps:
admin> new frame ut1-p220
FRAME-RELAY/ut1-p220 read
admin> set active = yes
admin> set nailed-up-group = 999
admin> set link-type = nni
admin> write
FRAME-RELAY/ut1-p220 written
(For details about Frame Relay configuration, see the APX 8000/MAX TNT/DSLTNT Frame
Relay Configuration Guide.)
The following commands configure the DS3-ATM interface and define a traffic shaper that
limits the bit rate to less than 500 Kbps:
admin> read ds3-atm {1 3 1}
DS3-ATM/{ shelf-1 slot-3 1 } read
admin> set name = atm-switch
admin> set enabled = yes
admin> set line-config nailed-group = 111
admin> set line-config high-tx-output = yes
admin> set line-config traffic-shapers 1 enabled = yes
admin> set line-config traffic-shapers 1 bit-rate = 500
admin> write
ATM-DS3/{ shelf-1 slot-3 1 } written
The following commands specify the circuit between the Frame-Relay and ATM interfaces,
and apply the traffic shaper to the ATM interface:
admin> new conn p220
CONNECTION/p220 read
admin> set active = yes
admin> set encapsulation-protocol = frame-relay-circuit
admin> set ip-options ip-routing-enabled = no
admin> set telco-options call-type = ft1
admin> set fr-options frame-relay-profile = fr-switch
admin> set fr-options dlci = 100
admin> set fr-options circuit-name = atmfr-1
admin> write
CONNECTION/p220 written
admin> new conn terminator
CONNECTION/terminator read
admin> set active = yes
admin> set encapsulation-protocol = atm-frame-relay-circuit
APX 8000/MAX TNT/DSLTNT ATM Configuration Guide
2-5
Physical Interface Considerations
ATM traffic shaping
admin> set ip-options ip-routing-enabled = no
admin> set fr-options circuit-name = atmfr-1
admin> set telco-options call-type = ft1
admin> set telco-options nailed-groups = 111
admin> set session-options traffic-shaper = 1
admin> set atm-options vpi = 100
admin> set atm-options vci = 132
admin> write
CONNECTION/terminator written
Because the traffic shaper in this DS3-ATM profile does not enable aggregation (the default
setting), the actual transfer rate across the connection to the DSL Terminator is approximately
480-Kbps, as the shaper permits.
In contract, if two virtual circuits are configured on the DS3-ATM interface, both using a
shaper that specified a bit rate of 500 with aggregate set to yes, each virtual circuit uses a
transfer rate of about half the specified bit rate, or 240 Kbps.
2-6
APX 8000/MAX TNT/DSLTNT ATM Configuration Guide
Configuring ATM Virtual Circuits
3
Configuring ATM PVCs . . . . . . . . . . . . . . . . . . . . . . . . . . . . . . . . . . . . . . . . . . . . . . . . 3-1
Configuring ATM SVCs . . . . . . . . . . . . . . . . . . . . . . . . . . . . . . . . . . . . . . . . . . . . . . . . 3-5
ATM virtual circuits (VCs) are bidirectional data paths between two endpoints. The connection
between the two endpoints can include a number of hops in between.
A virtual circuit can be a permanent virtual circuit (PVC) or switched virtual circuit (SVC).
A physical interface can support multiple virtual circuits. Each virtual circuit requires a VPIVCI pair. For PVCs, you configure a VPI-VCI pair manually in Connection or RADIUS
profiles. For SVCs, the network assigns a VPI-VCI pair for the duration of the circuit.
Configuring ATM PVCs
A PVC uses nailed bandwidth specified in a DS3-ATM or OC3-ATM profile. Nailed PVCs are
established on the basis of an exchange of signaling and the occurrence of a number of events.
OAM loopback for DS3-ATM PVC fault management
TAOS units can detect the failure of an ATM PVC on a DS3-ATM interface by using
Operation, Administration, and Maintenance (OAM) F5 loopback. When it detects failure, the
system clears the PVC, puts the interface in an inactive state, and attempts to reestablish the
nailed connection.
Overview of settings for PVC configuration
A TAOS unit can forward data traffic onto an ATM PVC on the basis of IP routing, an
ATM-Frame Relay circuit configuration, or an ATM direct configuration. This section
describes the basic PVC setup using only IP routing. For information about ATM direct, see
Chapter 4, “Configuring ATM Direct.” For details about configuring circuits, see Chapter 5,
“Configuring ATM-Frame Relay Circuits.”
Connection profile settings for a PVC
Following are the Connection profile parameters (shown with default settings) relevant to
defining a PVC:
APX 8000/MAX TNT/DSLTNT ATM Configuration Guide
3-1
Configuring ATM Virtual Circuits
Configuring ATM PVCs
[in CONNECTION/""]
station* = ""
encapsulation-protocol = mpp
[in CONNECTION/"":ip-options]
remote-address = 0.0.0.0/0
[in CONNECTION/"":atm-options]
atm1483type = aal5-llc
vpi = 0
vci = 32
vc-fault-management = none
vc-max-loopback-cell-loss = 1
[in CONNECTION/"":telco-options]
call-type = off
Parameter
Specifies
Station
Name of the far-end switch.
Encapsulation-Protocol
Encapsulation protocol to use on the interface. Must be set to atm
for ATM PVCs.
Remote-Address
Destination IP address, which lies at the end of a PVC whose first
hop is known by the specified VPI-VCI pair.
ATM1483type
Method of multiplexing Layer 3 packets into ATM cells. Valid
values are aal5-llc and aal5-vc, which are defined in
RFC 1483, Multiprotocol Encapsulation over ATM Adaptation
Layer 5.
The AAL5-LLC encapsulation method multiplexes multiple
protocols on a single ATM virtual circuit. Each protocol is
identified in the 802.2 Logical Link Control (LLC) header of the
packet. This is the default method for ATM connections and is
recommended for PVCs.
The AAL5-virtual circuits method carries each protocol on a
separate ATM virtual circuit (in effect, it multiplexes the circuits
rather than the individual protocols). This method is sometimes
used in private networks, in which virtual circuit creation is very
economical.
3-2
VPI
VPI for the connection. Be sure to use a VPI that is within the
valid range for the physical interface. A VPI-VCI assignment that
is not compatible with the port’s configuration causes the
connection to fail with an error message.
VCI
VCI for the connection. Be sure to use a VCI that is within the
valid range for the physical interface. A VPI-VCI assignment that
is not compatible with the port’s configuration causes the
connection to fail with an error message.
APX 8000/MAX TNT/DSLTNT ATM Configuration Guide
Configuring ATM Virtual Circuits
Configuring ATM PVCs
Parameter
Specifies
VC-Fault-Management
Virtual circuit fault management type. When the parameter is set
to none (the default), no fault management is performed on the
virtual circuit. If the parameter is set to segment-loopback,
the system sends an OAM F5 segment loopback cell to the remote
device every 5 seconds. If the parameter is set to end-to-endloopback, the system sends an OAM F5 end-to-end loopback
cell to the remote device every 5 seconds.
VC-Max-LoopbackCell-Loss
Number of consecutive loopback cells that can be lost before the
system clears the connection. When a PVC is cleared, the
interface is in an inactive state until the system can reestablish the
connection. The default is 1.
Call-Type
Type of nailed call. Set this parameter to ft1 for PVCs.
RADIUS attribute-value pairs for a PVC
The following attribute-value pairs can be used to define a permconn pseudo-user profile for
an ATM PVC:
RADIUS attribute
Value
User-Name (1)
Name of the far-end device.
Framed-Protocol (7)
Encapsulation protocol to use for the connection. Must be set to
ATM-1483 for terminating ATM connections. This setting
corresponds to ATM Adaptation Layer 5 (AAL5) encapsulation as
defined in RFC 1483.
Ascend-Route-IP (228)
Enable/disable IP routing for the interface.Set the attribute to
Router-IP-Yes (the default) to enable IP routing for PVCs
that do not rely on an ATM-Frame Relay circuit or ATM direct
configuration for data transfer.
Framed-IP-Address (8)
IP address of the far-end device.
Framed-IP-Netmask (9)
Subnet mask of the far-end device address.
Ascend-ATM-Group (64) Nailed-group number of the physical interface used by the
connection.
Ascend-ATM-Vpi (94)
Ascend-ATM-Vci (95)
VPI for the connection. Be sure to use a VPI that is within the
valid range for the physical interface. A VPI-VCI assignment that
is not compatible with the port’s configuration causes the
connection to fail with an error message.
VCI for the connection. Be sure to use a VCI that is within the
valid range for the physical interface. A VPI-VCI assignment that
is not compatible with the port’s configuration causes the
connection to fail with an error message.
APX 8000/MAX TNT/DSLTNT ATM Configuration Guide
3-3
Configuring ATM Virtual Circuits
Configuring ATM PVCs
RADIUS attribute
Value
Ascend-ATM-FaultManagement (14)
Virtual circuit fault management type. When the attribute is set to
VC-No-Loopback (0), which is the default, no fault
management is performed on the virtual circuits. If the parameter
is set to VC-Segment-Loopback (1), the system sends an
OAM F5 segment loopback cell to the remote device every
5 seconds. If the parameter is set to VC-End-To-EndLoopback (2), the system sends an OAM F5 end-to-end
loopback cell to the remote device every 5 seconds.
Ascend-ATM-Loopback- Number of consecutive loopback cells that can be lost before the
Cell-Loss (15
system clears the connection. When a PVC is cleared, the interface
is in an inactive state until the system can reestablish the
connection. The default is 1.
Examples of configuring a PVC
A connection to a remote ATM switch on a DS3-ATM interface is shown in Figure 3-1.
Figure 3-1. ATM permanent virtual circuit (PVC)
1.1.1.1
2.2.2.2
ATM
TAOS
VPI 12 VCI 42
The following commands configure the DS3-ATM interface:
admin> read atm-ds3 {1 2 1}
DS3-ATM/{ 1 2 1 } read
admin> set name = atm-sf
admin> set enabled = yes
admin> set line nailed-group = 101
admin> write
ATM-DS3/{ shelf-1 slot-2 1 } written
The following commands configure the ATM PVC with end-to-end loopback fault
management:
admin> new connection atmswitch
CONNECTION/atmswitch read
admin> set active = yes
admin> set encapsulation-protocol = atm
admin> set ip-options remote-address = 2.2.2.2/24
admin> set telco-options call-type = ft1
admin> set telco-options nailed-up-group = 101
admin> set atm-options vpi = 12
3-4
APX 8000/MAX TNT/DSLTNT ATM Configuration Guide
Configuring ATM Virtual Circuits
Configuring ATM SVCs
admin> set atm-options vci = 42
admin> set atm-options vc-fault-management = end-to-end-loopback
admin> set atm-options vc-max-loopback-cell-loss = 5
admin> write
CONNECTION/atmswitch written
With these fault-management settings, the system establishes the nailed connection and sends
an OAM F5 end-to-end loopback cell every 5 seconds. If it does not receive the loopback cell
back for 5 consecutive intervals (25 seconds), the system clears the PVC, puts the interface in
an inactive state, and begin attempts to reestablish the nailed connection.
Following is a comparable RADIUS profile:
permconn-sys-1 Password = "ascend"
Service-Type = Outbound,
Framed-Protocol = ATM-1483,
User-Name = "atmswitch",
Ascend-Route-IP = Route-IP-Yes,
Framed-IP-Address = 2.2.2.2,
Framed-IP-Netmask = 255.255.255.0,
Ascend-ATM-Group = 101,
Ascend-ATM-Vpi = 12,
Ascend-ATM-Vci = 42,
Ascend-ATM-Fault-Management = VC-End-To-End-Loopback,
Ascend-ATM-Loopback-Cell-Loss = 5
Note: When IP routing is enabled, the unit creates a route for this destination. You can
choose to add static routes to other subnets or to enable RIP updates to or from the router
across ATM. The usual considerations for IP routing connections apply (see the APX
8000/MAX TNT/DSLTNT WAN, Routing, and Tunneling Configuration Guide).
Configuring ATM SVCs
TAOS units support switched virtual circuit (SVC) services on DS3-ATM and OC3-ATM
interfaces. An interface is a point of ingress (entrance) to or egress (exit) from the system. An
ATM interface is the logical configuration that enables ATM data to be sent and received.
An SVC is a point-to-point switched connection, which provides a lower-cost, usage-based
alternative to ATM PVCs. Like other types of switched connections, SVCs can be initiated by
a dial-in or a dial-out call, which can be made by the system on the basis of IP routing.
A dial-in ATM SVC terminates locally. The TAOS unit receives the call on an ATM interface.
To enable the system to authenticate inbound SVCs, you must enable ATM SVCs in the
Answer-Defaults profile. An example of a terminating SVC is shown in Figure 3-2.
APX 8000/MAX TNT/DSLTNT ATM Configuration Guide
3-5
Configuring ATM Virtual Circuits
Configuring ATM SVCs
Figure 3-2. Terminating SVC
ATM switch
TAOS
A dial-out ATM SVC is initiated as an outbound call on an ATM interface, either due to an
explicit dial-out or on the basis of IP routing. Figure 3-3 shows a Pipeline unit dialing into a
TAOS unit using PPP or some other type of encapsulation. The TAOS unit establishes the
inbound call and then dials out on an ATM interface on the basis of IP routing, just as it would
for another type of switched dial-out call.
Figure 3-3. Dial-out SVC
ATM switch
CPE
TAOS
PPP call
Unlike permanent virtual circuits (PVCs), which require nailed connections, SVCs are
on-demand connections and must use ATM endpoint addresses to identify the interface and
route to it. To set up an SVC, you must configure SVC options, including an ATM address, in
these locations:
•
ATM-Interface profile, for a logical ATM interface associated with a physical ATM port
•
Connection profile, used to establish the switched connection on an ATM interface
With the current software version, the system creates a static call route for an ATM address in
each ATM-Interface profile. You can choose to configure the static call route explicitly using
the ATMSVC-Route profile.
Current SVC limitations
With the current software version, the ATM SVC implementation is subject to the following
limitations:
3-6
•
Because the Interim Local Management Interface (ILMI) is not implemented, dynamic
address registration is not supported. Therefore, each ATM interface must be configured
with a full SVC address.
•
Only one ATM logical interface is supported for each ATM physical interface.
APX 8000/MAX TNT/DSLTNT ATM Configuration Guide
Configuring ATM Virtual Circuits
Configuring ATM SVCs
Address formats for ATM interfaces
The ATM endpoint address assigned to an ATM interface can be an ATM End System Address
(AESA) format or native E.164 address. AESA addresses are required for IP over ATM.
AESA formats
AESA addresses are 20-byte, 40-digit hexadecimal numbers. The first 13 bytes are the address
prefix, or network portion of the address. The last 7 bytes are the host portion of the address.
Depending on the AESA format chosen, the contents of each byte of the address varies, as
shown in Figure 3-4. The supported AESA formats divide the address into the initial domain
part (IDP), which defines the type of address and the regulatory authority responsible for
allocating and assigning the domain-specific part, and the domain specific part (DSP).
AESA addresses use one of the following formats:
AESA format
Description
dcc-aesa
Data Country Code (DCC) is specified in the address, identifying
the country in which the address is registered. Country codes are
standardized and defined in ISO Reference 3166.
icd-aesa
International Code Designator (ICD) is specified in the address,
identifying an international organization. The British Standards
Organization administers these values.
e164-aesa
E.164 address is specified using the international format.
custom-aesa
Custom authority and format identifier (AFI) and byte order.
Figure 3-4 shows how each format divides the 20-byte address into subfields. The shaded
portion represents the address prefix, which is always the first 13 bytes.
Figure 3-4. Subfields in the AESA address formats
IDP
AFI
DSP
DCC
HO-DSP
ESI
SEL
ESI
SEL
ESI
SEL
ESI
SEL
dcc-aesa
IDP
AFI
DSP
ICD
HO-DSP
icd-aesa
DSP
IDP
AFI
HO-DSP
E.164
e164-aesa
AFI
HO-DSP
custom-aesa
APX 8000/MAX TNT/DSLTNT ATM Configuration Guide
3-7
Configuring ATM Virtual Circuits
Configuring ATM SVCs
For details about subfields in each format, see “Assigning an AESA format address” on
page 3-9.
Native E.164 address format
Native E.164 addresses are regular ISDN numbers, including telephone numbers. E.164
addresses can contain up to 15 ASCII digits. For example, standard 10-digit United States
telephone numbers, such as 508-555-1234, are native E.164 addresses.
Overview of configuring a physical ATM port
The DS3-ATM and OC3-ATM profiles require no special configuration to support SVCs. For
information about configuring the physical ports, see Chapter 2, “Physical Interface
Considerations.”
Overview of SVC options on a logical ATM interface
Following are the parameters (shown with default settings) for configuring a logical ATM SVC
interface on a DS3-ATM or OC3-ATM port:
[in ATM-INTERFACE/{ { any-shelf any-slot 0 } 0 }]
interface-address* = { { any-shelf any-slot 0 } 0 }
name = ""
[in ATM-INTERFACE/{ { any-shelf any-slot 0 } 0 }:svc-options]
enabled = no
atm-protocol = uni-3.1
atm-address = { undefined "" { undefined { "" "" } { "" "" "" } } }
insert-calling-party-addr = yes
q93b-options = { 2 1 4000 30000 0 4000 4000 120000 4000 }
qsaal-options = { 64 4 25 67 1000 0 0 0 15000 }
3-8
Parameter
Specifies
Interface-Address
Interface address. This parameter includes the physical interface
address (the shelf number, slot number, and item number of a port)
and the logical-item number of the interface. Because only one
ATM interface per physical ATM line is supported with the current
software version, a logical-item value other than zero is not
supported.
Name
Name of the ATM interface. The name can consist of up to
15 characters. The name is optional, and is used for informational
purposes only.
Enabled
Enable/disable SVC signaling. If SVC signaling is enabled, a
signaling PVC is created on the link to carry out SVC signaling
and handle control messages. Signaling layers Q.93B and
Q.SAAL are also initialized and enabled.
ATM-Protocol
ATM signaling protocol. The current implementation supports
User-Network Interface (UNI) 3.0 and UNI 3.1 protocols for
SVCs. UNI 3.1 is selected as the factory default.
ATM-Address
AESA or E.164 address assigned to the interface.
APX 8000/MAX TNT/DSLTNT ATM Configuration Guide
Configuring ATM Virtual Circuits
Configuring ATM SVCs
Parameter
Specifies
Insert-Calling-Party-Addr Enable/disable insertion of the calling-party address in outbound
calls. If set to yes (the default), the system includes the calling
party address on outbound calls. If set to no, the system does not
include the calling party address on outbound calls.
Q93B-Options
Q.93B layer settings. For more information, see “Configuring the
Q.93B layer” on page 3-11.
QSAAL-Options
Q.SAAL layer settings. For more information, see “Configuring
the Q.SAAL layer” on page 3-12.
Assigning a native E.164 address
Following are the relevant parameters for assigning a native E.164 format ATM address,
shown with default settings:
[in ATM-INTERFACE/{{ any-shelf any-slot 0 }0}:svc-options:atm-address]
numbering-plan = undefined
e164-native-address = ""
svc-address-info = ""
Parameter
Specifies
Numbering-Plan
Type of SVC address. The default value is undefined, which
indicates that an address has not been configured on the interface.
To specify an E.164 address, set this parameter to isdn. To
specify an AESA address, set it to aesa. The unknown and
x121 values are currently unsupported and have the same effect
as the default undefined.
E164-Native-Address
SVC address in native E.164 format, up to 30 characters. For
example, enter 5085552600 (a standard 10-digit U.S. telephone
number).
AESA-Address
Does not apply to addresses in native E.164 format. See
“Assigning an AESA format address” next.
SVC-Address-Info
Assigned address in read-only ASCII string format. For
informational purposes only.
Assigning an AESA format address
The 20 bytes of an AESA address contain subfields, the size and contents of which can differ
depending on the AESA format in use. The subfields are organized into an IDP portion and a
DSP portion.
•
The IDP portion specifies the authority and format identifier (AFI) and initial domain
identifier (IDI) subfields.
•
The DSP portion specifies the high-order domain-specific part (HO-DSP), end system
identifier (ESI), and selector (SEL) subfields.
Note: The combination of IDP + HO-DSP + ESI must be unique. To ensure interoperability
and equipment portability, use an ESI that is globally unique. For instance, if the ESI is not
globally unique, and you move the ATM end system from one network to a different network,
address conflicts can result.
APX 8000/MAX TNT/DSLTNT ATM Configuration Guide
3-9
Configuring ATM Virtual Circuits
Configuring ATM SVCs
For background information, see “AESA formats” on page 3-7. Following are the relevant
parameters for assigning an AESA format address, shown with default settings:
[in ATM-INTERFACE/{{ any-shelf any-slot 0 }0}:svc-options:atm-address]
numbering-plan = undefined
aesa-address = { undefined { "" "" } { "" "" "" } }
svc-address-info = ""
[in ATM-INTERFACE/{ { any-shelf any-slot 0 } 0 }:svc-options:atmaddress:aesa-address]
format = undefined
[in ATM-INTERFACE/{ { any-shelf any-slot 0 } 0 }:svc-options:atmaddress:aesa-address:idp-portion]
afi = ""
idi = ""
[in ATM-INTERFACE/{ { any-shelf any-slot 0 } 0 }:svc-options:atmaddress:aesa-address:dsp-portion]
ho-dsp = ""
esi = ""
sel = ""
3-10
Parameter
Specifies
Numbering-Plan
Type of SVC address. The default value is undefined, which
indicates that an ATM address on the interface has not been
configured. To specify an E.164 address, set this parameter to
isdn. To specify an AESA address, set it to aesa. The
unknown and x121 values are currently unsupported and have
the same effect as the default undefined.
SVC-Address-Info
Assigned address in read-only ASCII string format. For
informational purposes only.
AESA-Address Format
AESA format for the interface. The default value is undefined,
which indicates that the address has not been configured. Valid
settings are dcc-aesa, icd-aesa, e164-aesa, and
custom-aesa. For background information, see “AESA
formats” on page 3-7.
IDP-Portion AFI
Hexadecimal code that identifies the kind of AESA address, such
as DCC, ICD, or E.164 part of the AESA address, as well as the
syntax of the rest of the address. The AFI is one byte, which
contains 2 hexidecimal digits. For example, 0x39 (for dccaesa), 0x47 (for icd-aesa), or 0x45 (for e164-aesa).
IDP-Portion IDI
Hexadecimal code that identifies the subauthority that has
allocated the address. For dcc-aesa and icd-aesa, the IDI is
2 bytes long (4-hexidecimal digits). For e164-aesa, the IDI is
8 bytes long, containing 16 digits that specify the E.164 address.
The E.164 address can be up to 15 digits, so the system pads the
number with leading zeros as required.
DSP-Portion HO-DSP
Hexadecimal number that specifies a segment of address space
assigned to a particular device or network. For dcc-aesa and
icd-aesa, the HO-DSP field is 10 bytes long, containing 20 hex
digits. For e164-aesa, it is 4 bytes long (8 hex digits), and for
custom-aesa it is 12 bytes long (24 hex digits)
APX 8000/MAX TNT/DSLTNT ATM Configuration Guide
Configuring ATM Virtual Circuits
Configuring ATM SVCs
Parameter
Specifies
DSP-Portion ESI
Hexadecimal number that uniquely identifies the end system
within the specified subnetwork, typically an IEEE media access
control (MAC) address. This field is always 6 bytes long (12 hex
digits).
DSP-Portion SEL
Hexadecimal number that is not used for ATM routing, but can be
used by the end system. This subfield is always 1 byte long (2 hex
digits).
Configuring the Q.93B layer
Q.93B parameters specify the timers and retry values associated with the functionality of the
Q.93B signaling layer. Q.93B is an International Telecommunication Union (ITU)
recommendation detailing the signaling protocol for establishing, maintaining Switched
Virtual Channels (SVCs) in an Asynchronous Transfer Mode (ATM) configuration.. Following
are the relevant parameters, shown with default settings:
[in ATM-INTERFACE/{ { shelf-1 slot-4 1 } 0 }:svc-options:q93b-options]
max-restart = 2
max-statenq = 1
t303-ms = 4000
t308-ms = 30000
t309-ms = 0
t310-ms = 4000
t313-ms = 4000
t316-ms = 120000
t322-ms = 4000
Parameter
Specifies
Max-Restart
Maximum number of unacknowledged transmit RESTART
messages (from 1 to 32). The default value is 2.
Max-Statenq
Maximum number of unacknowledged transmit STATUS ENQ
messages (from 1 to 32). The default value is 1.
T303-ms
Timer (in milliseconds) for a response after a SETUP message is
sent. The timer is stopped when a CONNECT, CALL
PROCEEDING, or RELEASE COMPLETE message is received.
Valid values are from 500 to 5000. The default value is 4000.
T308-ms
Timer (in milliseconds) for a response after a RELEASE message
is sent. This timer is also called the release indication timer. The
timer is started when the RELEASE message is sent and normally
is stopped when the RELEASE or RELEASE COMPLETE
message is received. Valid values are from 5000 to 50000. The
default value is 30000.
T309-ms
Timer (in milliseconds) for Q.SAAL to reconnect. After this time
has elapsed, calls are dropped. When set to 0 (the default), a
default value based an ATM signaling protocol is used. Valid
values are from 0 to 200000.
T310-ms
Timer (in milliseconds) for a response after a SETUP message is
received. This timer is also called the call proceeding timer. Valid
values are from 5000 to 50000. The default value is 4000.
APX 8000/MAX TNT/DSLTNT ATM Configuration Guide
3-11
Configuring ATM Virtual Circuits
Configuring ATM SVCs
Parameter
Specifies
T313-ms
Timer (in milliseconds) for a response after a CONNECT message
is sent. This timer is also called the connect request timer. The
timer is started when the CONNECT message is sent and is
stopped when the CONNECT ACKNOWLEDGE message is
received. Valid values are from 1000 to 10000. The default
value is 4000.
T316-ms
Timer (in milliseconds) for a response after a RESTART message
is sent. This timer is also called the restart request timer. The timer
is started when the RESTART message is sent and is stopped when
the RESTART ACKNOWLEDGE message is received. Valid
values are from 10000 to 300000. The default value is 120000.
T322-ms
Timer (in milliseconds) for a response after a STATUS ENQ
message is sent. Valid values are from 1000 to 10000. The
default value is 4000.
Configuring the Q.SAAL layer
Q.SAAL parameters specify the timers and retry values associated with the functionality of the
Q.SAAL layer. Q.SAAL is an adaptation layer protocol that defines the reliable transmission
and reception of signaling data between ATM endpoints. Following are the relevant
parameters, shown with default settings:
[in ATM-INTERFACE/{ { shelf-1 slot-4 1 } 0 }:svc-options:qsaaloptions]
window-size = 64
max-cc = 4
max-pd = 25
max-stat = 67
tcc-ms = 1000
tpoll-ms = 0
tkeepalive-ms = 0
tnoresponse-ms = 0
tidle-ms = 15000
3-12
Parameter
Specifies
Window-Size
Q.SAAL window size. Valid values are from 16 to 128. The
default value is 64.
Max-Cc
Maximum number of control protocol data unit (PDU)
retransmissions (BGN, END, RESYNC) allowed. Valid values are
from 0 to 64. The default value is 4.
Max-PD
Maximum number of sequenced data PDUs allowed between poll
intervals. Valid values are from 1 to 64. The default value is 25.
Max-Stat
Maximum length of STAT PDU. Valid values are from 32 to 128.
The default value is 67.
Tcc-ms
Retry time (in milliseconds) for control PDUs (BGN, END,
RESYNC). Valid values are from 0 to 3000. The default value is
1000.
APX 8000/MAX TNT/DSLTNT ATM Configuration Guide
Configuring ATM Virtual Circuits
Configuring ATM SVCs
Parameter
Specifies
Tpoll-ms
Poll interval (in milliseconds) when the Q.SAAL layer is active.
When set to 0 (the default), a default value based on an ATM
signaling protocol is used. Valid values are from 0 to 3000.
Tkeepalive-ms
Poll interval (in milliseconds) when the Q.SAAL layer is active in
a transient state. When set to 0 (the default), a default value based
on an ATM signaling protocol is used. Valid values are from 0 to
3000.
Tnoresponse-ms
Maximum interval (in milliseconds) between receipt of STAT
PDUs. When set to 0 (the default), a default value based an ATM
signaling protocol is used. Valid values are from 0 to 20000.
Tidle-ms
Poll interval (in milliseconds) when the Q.SAAL layer is idle, for
UNI 3.1 only. The default value is 15000. Valid values are from
1000 to 20000
Overview of Answer-Defaults setting
To enable the system to accept inbound SVC calls, you must enable SVCs in the AnswerDefaults profile. Following is the relevant parameter, shown with its default setting:
[in ANSWER-DEFAULTS:atm-answer]
svc-enabled = no
Parameter
Specifies
SVC-Enabled
Enable/disable incoming SVC calls. (Disabled by default.)
Overview of SVC options in a Connection profile
The ATM options in a Connection profile are not specifically related to SVC configuration.
VPI-VCI pairs are assigned by the switch for ATM SVCs. Most of the other settings in the
ATM-Options subprofile operate in a similar manner for SVCs as they do for PVCs, once the
SVC connection has been established.
Following are the parameters (shown with default settings) that are specific to configuring an
ATM SVC connection:
[in CONNECTION/""]
encapsulation-protocol = atm
dial-number = ""
[in CONNECTION/"":ip-options]
ip-routing-enabled = yes
remote-address = 0.0.0.0/0
[in CONNECTION/"":atm-options:svc-options]
enabled = no
[in CONNECTION/"":atm-options:svc-options:incoming-caller-addr]
numbering-plan = undefined
e164-native-address = ""
aesa-address = { undefined { "" "" } { "" "" "" } }
svc-address-info = ""
APX 8000/MAX TNT/DSLTNT ATM Configuration Guide
3-13
Configuring ATM Virtual Circuits
Configuring ATM SVCs
[in CONNECTION/"":atm-options:svc-options:outgoing-called-addr]
numbering-plan = undefined
e164-native-address = ""
aesa-address = { undefined { "" "" } { "" "" "" } }
svc-address-info = ""
Parameter
Specifies
Encapsulation-Protocol
Encapsulation method for the connection. This parameter must be
set to atm for ATM SVC connections. Setting EncapsulationProtocol to atm suggests that IP-over-ATM is used on the virtual
circuit.
Dial-Number
Dial number for outbound calls. For dial-out ATM SVCs, you do
not need to set this value. The system sets it to the same value as
the outgoing-called-addr parameter when you write the
Connection profile.
IP-Options IP-RoutingEnabled
Enable/disable IP routing for the interface. IP routing must be
enabled (as it is by default) for outbound SVCs that are dialed on
the basis of IP routing.
IP-Options RemoteAddress
IP address of the far-end device, which can include a subnet
specification. If it does not include a subnet mask, the router
software in the TAOS unit uses a default subnet mask that is based
on address class.
SVC-Options Enabled
Enable/disable SVC for the connection. SVC is disabled by
default.
SVC-Options Incoming- ATM address of the far end of the dial-in SVC connection, used to
Caller-Addr
authenticate the inbound call. The address subfields operate in
exactly the same way as the subfields of the same name in the
ATM-Interface profile. For details, see “Assigning a native E.164
address” on page 3-9 or “Assigning an AESA format address” on
page 3-9.
SVC-Options OutgoingCalled-Addr
ATM address of the far end of the dial-out SVC connection used to
dial outbound SVC calls. The address subfields operate in exactly
the same way as the subfields of the same name in the
ATM-Interface profile. For details, see “Assigning a native E.164
address” on page 3-9 or “Assigning an AESA format address” on
page 3-9.
Note: An SVC that can be initiated by either a dial-in or dial-out call specifies the same
ATM address in both the incoming caller-addr and outgoing-called-addr
fields.
Configuring a static ATM SVC route
With the current software version, no more than one ATM-Interface profile can be created for
each physical ATM port, and the system creates an internal call route to the logical interface.
As a result, you need not create explicit ATM static routes in this release. However, some sites
specify the route explicitly, to simplify route management. Following are the relevant
parameters, shown with default settings, for creating an ATM static route:
3-14
APX 8000/MAX TNT/DSLTNT ATM Configuration Guide
Configuring ATM Virtual Circuits
Configuring ATM SVCs
[in ATMSVC-ROUTE/"" ]
name* = ""
active = no
address-prefix = ""
interface-address = { { any-shelf any-slot 0 } 0 }
Parameter
Specifies
Name
Name of the route profile, up to 31 characters.
Active
Enable/disable the route for use.
Address-Prefix
The address prefix of the ATM address assigned to the interface in
an ATM-Interface profile. For AESA-format addresses, the
address prefix is the first 26 digits of the 40-digit hexadecimal
number. For E.164 addresses, it is the entire address.
Interface-Address
Interface address of the ATM-Interface profile.
Example of configuring an ATM SVC
In the example shown in Figure 3-5, the system at the left side of the ATM cloud (the unit with
the IP address 1.1.1.1/24) is a TAOS unit to be configured for an ATM SVC that can be
brought up by dial-in or dial-out on an OC3-ATM port. For the purposes of this example, the
remote system (at the right side of the ATM cloud, with the IP address 3.3.3.3/24) is a
DSLTNT unit, which has also been configured for an ATM SVC. The SVC can be brought up
by a call to or from the remote system.
Figure 3-5. Example ATM SVC with DCC-AESA addresses
39abcd0102030405060708090022664469025582
1.1.1.1/24
ATM switch
3.3.3.3/24
OC3-ATM
TAOS
TAOS
39fccf11223344556607788990022664474025528
This example shows how to configure the TAOS unit at the left side of the ATM cloud (the unit
with the IP address 1.1.1.1/24) in Figure 3-5.
Configuring the OC3-ATM physical interface
The following commands configure the OC3-ATM physical interface and enable it for use:
admin> read oc3-atm { 1 2 1 }
OC3-ATM/{ shelf-1 slot-2 1 } read
admin> set name = atmswitch
admin> set enabled = yes
admin> set line-config clock-source = eligible
APX 8000/MAX TNT/DSLTNT ATM Configuration Guide
3-15
Configuring ATM Virtual Circuits
Configuring ATM SVCs
admin> write
OC3-ATM/{ shelf-1 slot-2 1 } written
Configuring the SVC logical interface
The following commands configure the SVC interface for the OC3-ATM port:
admin> read atm-interface { { 1 2 1 } 0 }
ATM-INTERFACE/{ { shelf-1 slot-2 1 } 0 } read
admin> set name = atmswitch
admin> set svc-options enabled = yes
admin> set svc-options atm-address numbering-plan = aesa
admin> list svc-options atm-address aesa-address
[in ATM-INTERFACE/{ { shelf-1 slot-2 1 } 0 }:svc-options:atm-address:+
format = undefined
idp-portion = { "" "" }
dsp-portion = { "" "" "" }
admin> set format = dcc-aesa
admin> set idp-portion afi = 39
admin> set idp-portion idi = abcd
admin> set dsp-portion ho-dsp = 01020304050607080900
admin> set dsp-portion esi = 226644690255
admin> set dsp-portion sel = 82
admin> write
ATM-INTERFACE/{ { shelf-1 slot-2 1 } 0 } written
Enabling incoming SVC calls
The following commands enable the system to authenticate incoming SVCs:
admin> read answer-defaults
ANSWER-DEFAULTS read
admin> set atm-answer svc-enabled = yes
admin> write
ANSWER-DEFAULTS written
Configuring a Connection profile to the far-end device
The following commands create a Connection profile to the far-end DSLTNT:
admin> new connection hanif-dsltnt
CONNECTION/hanif-dsltnt read
admin> set active = yes
admin> set encapsulation-protocol = atm
admin> set ip-options remote-address = 3.3.3.3/24
admin> set atm-options svc-options enabled = yes
admin> set atm-options svc incoming-caller-addr numbering-plan = aesa
admin> set atm-options svc outgoing-called-addr numbering-plan = aesa
3-16
APX 8000/MAX TNT/DSLTNT ATM Configuration Guide
Configuring ATM Virtual Circuits
Configuring ATM SVCs
In the following set of commands, notice that the incoming-caller-addr and
outgoing-called-addr addresses are the same. This configuration allows the SVC to be
brought up by a call to or from the far-end DSLTNT.
admin> list atm-options svc-options incoming-caller-addr aesa-address
[in CONNECTION/hanif-dsltnt:atm-options:svc-options:incoming-calleraddr:aesa-addres+
format = undefined
idp-portion = { "" "" }
dsp-portion = { "" "" "" }
admin> set format = dcc-aesa
admin> set idp-portion afi = 39
admin> set idp-portion idi = fccf
admin> set dsp-portion ho-dsp = 112233445566077889900
admin> set dsp-portion esi = 226644740255
admin> set dsp-portion sel = 28
admin> list .. .. outgoing-called-addr aesa-address
[in CONNECTION/hanif-dsltnt:atm-options:svc-options:outgoing-calledaddr:aesa-addres+
format = undefined
idp-portion = { "" "" }
dsp-portion = { "" "" "" }
admin> set format = dcc-aesa
admin> set idp-portion afi = 39
admin> set idp-portion idi = fccf
admin> set dsp-portion ho-dsp = 112233445566077889900
admin> set dsp-portion esi = 226644740255
admin> set dsp-portion sel = 28
admin> write
CONNECTION/hanif-dsltnt written
When you write the profile with outgoing-called-addr configured, the system uses the
configured value to set the dial-number parameter.
APX 8000/MAX TNT/DSLTNT ATM Configuration Guide
3-17
Configuring ATM Direct
4
Overview of ATM direct settings. . . . . . . . . . . . . . . . . . . . . . . . . . . . . . . . . . . . . . . . . . 4-1
Examples of ATM direct connections . . . . . . . . . . . . . . . . . . . . . . . . . . . . . . . . . . . . . . 4-3
Overview of ATM direct settings
TAOS units support ATM direct for concentrating incoming PPP calls onto an ATM interface.
The ATM direct configuration forwards multiple PPP connections onto the ATM interface as a
combined data stream on the basis of the ATM direct configuration. The unit does not examine
the packets. An upstream device then examines the packets and routes them appropriately.
Note: An ATM direct connection is not a full-duplex tunnel between a PPP dial-in user and a
far-end device. Although the TAOS unit does not route the packets onto the ATM interface, it
must use the router to send packets it receives on the ATM interface back to the appropriate
PPP caller. For this reason, ATM direct connections must enable IP routing.
Connection profile settings for ATM direct
Following are the ATM direct parameters in a Connection profile, shown with default settings:
[in CONNECTION/""]
encapsulation-protocol = mpp
[in CONNECTION/"":atm-options]
atm-direct-enabled = no
atm-direct-profile = ""
[in CONNECTION/"":ip-options]
ip-routing-enabled = yes
remote-address = 0.0.0.0/0
address-pool = 0
Parameter
Specifies
Encapsulation-Protocol
The encapsulation protocol. Must be set to ppp, mp, or mpp for
ATM direct connections.
ATM-Direct-Enabled
Enable/disable ATM direct mode for this connection.
ATM-Direct-Profile
Name of a Connection or RADIUS profile that specifies an ATM
link with a VPI-VCI pair.
IP-Routing-Enabled
Enable/disable IP routing for this connection. Must be enabled for
the TAOS unit to send data back to the appropriate PPP caller.
APX 8000/MAX TNT/DSLTNT ATM Configuration Guide
4-1
Configuring ATM Direct
Overview of ATM direct settings
Parameter
Specifies
Remote-Address
PPP caller’s IP address. As the TAOS unit receives return packets
for many ATM direct connections across the same ATM link, it
uses this address to determine the PPP caller that receives the
return packets.
Address-Pool
Number of the address pool from which to acquire an address. If
the Remote-Address is null and pools have been configured, the
system assigns an IP address dynamically. For details about
configuring and using dynamic IP addresses, see the
APX 8000/MAX TNT/DSLTNT WAN, Routing, and Tunneling
Configuration Guide.
RADIUS attribute-value pairs for ATM direct
RADIUS uses the following attribute-value pairs for ATM direct connections:
RADIUS attribute
Value
Framed-Protocol (7)
Encapsulation protocol. This attribute must be set to PPP (1),
MP (262), or MPP (256) for ATM direct connections.
Ascend-ATM-Direct (76) Enable/disable ATM direct mode for this connection. ATM-DirectNo (0) is the default. Set this attribute to ATM-Direct-Yes (1) for
ATM direct connections.
4-2
Ascend-ATM-DirectProfile (77)
Name of a profile that specifies an ATM link with a VPI-VCI pair.
Ascend-Route-IP (228)
Enable/disable IP routing for this connection. (IP is enabled by
default.) If this attribute is present, it must be set to Route-IP-Yes
to enable the TAOS unit to send data back to the appropriate PPP
caller.
Framed-IP-Address (8)
PPP caller’s IP address. As the TAOS unit receives return packets
for many ATM direct connections across the same ATM link, it
uses this address to determine the PPP caller that receives the
return packets. If the Framed-IP-Address attribute-value pair is
missing from the RADIUS profile and pools have been
configured, the system assigns an IP address dynamically. For
details about configuring and using dynamic IP addresses, see the
APX 8000/MAX TNT/DSLTNT WAN, Routing, and Tunneling
Configuration Guide.
Framed-IP-Netmask (9)
Subnet mask for Framed-IP-Address.
APX 8000/MAX TNT/DSLTNT ATM Configuration Guide
Configuring ATM Direct
Examples of ATM direct connections
Examples of ATM direct connections
In Figure 4-1, the TAOS unit forwards the data stream from two PPP dial-in hosts across the
same ATM link.
Figure 4-1. ATM direct concentrating PPP calls to an ATM interface
Caller-1
10.5.6.7/32
Caller-2
10.7.8.9/32
ATM
TAOS
VPI 15 VCI 35
1.1.1.1
For information about configuring the OC3-ATM or DS3-ATM line interface, see Chapter 2,
“Physical Interface Considerations,” and the APX 8000/MAX TNT/DSLTNT Physical Interface
Configuration Guide.
The following set of commands configures the ATM link with a VPI-VCI pair.
admin> new connection atm-switch-1
CONNECTION/atm-switch-1 read
admin> set active = yes
admin> set encapsulation-protocol = atm
admin> set ip-options remote-address = 1.1.1.1
admin> set telco-options call-type = ft1
admin> set telco-options nailed-up-group = 99
admin> set atm-options vpi = 15
admin> set atm-options vci = 35
admin> write
CONNECTION/atm-switch-1 written
The following set of commands configures ATM direct Connection profiles for the incoming
calls. The name of the profile for the connection to the ATM switch in this example is atmswitch-1.
admin> new conn caller-1
CONNECTION/caller-1 read
admin> set active = yes
admin> set encapsulation-protocol = ppp
admin> set ppp-options recv-password = caller1*3
admin> set ip-options remote-address = 10.5.6.7/32
admin> set atm-options atm-direct-enabled = yes
admin> set atm-options atm-direct-profile = atm-switch-1
admin> write
CONNECTION/caller-1 written
APX 8000/MAX TNT/DSLTNT ATM Configuration Guide
4-3
Configuring ATM Direct
Examples of ATM direct connections
admin> new conn caller-2
CONNECTION/caller-2 read
admin> set active = yes
admin> set encapsulation-protocol = ppp
admin> set ppp-options recv-password = caller2!!8
admin> set ip-options remote-address = 10.7.8.9/32
admin> set atm-options atm-direct-enabled = yes
admin> set atm-options atm-direct-profile = atm-switch-1
admin> write
CONNECTION/caller-2 written
Following are comparable RADIUS profiles:
caller-1 Password = "caller1*3", Service-Type = Framed-User
Framed-Protocol = PPP,
Framed-IP-Address = 10.5.6.7,
Framed-IP-Netmask = 255.255.255.255,
Ascend-ATM-Direct = ATM-Direct-Yes,
Ascend-ATM-Direct-Profile = "atm-switch-1"
caller-2 Password = "caller2!!8", Service-Type = Framed-User
Framed-Protocol = PPP,
Framed-IP-Address = 10.7.8.9,
Framed-IP-Netmask = 255.255.255.255,
Ascend-ATM-Direct = ATM-Direct-Yes,
Ascend-ATM-Direct-Profile = "atm-switch-1"
4-4
APX 8000/MAX TNT/DSLTNT ATM Configuration Guide
Configuring ATM-Frame Relay Circuits
5
ATM-Frame Relay circuits (translation mode) . . . . . . . . . . . . . . . . . . . . . . . . . . . . . . . 5-1
ATM-Frame Relay transparent-mode circuits (FRF.8) . . . . . . . . . . . . . . . . . . . . . . . . . 5-5
ATM-Frame Relay virtual channel trunking . . . . . . . . . . . . . . . . . . . . . . . . . . . . . . . . . 5-8
Note: The DS3-ATM2 card does not support ATM-Frame Relay circuit configurations.
Maximum performance with the DS3-ATM2 card is achieved using RFC1483 ATM-AAL5CPCS-PDU encapsulation.
TAOS units support translation-mode ATM-Frame Relay circuits, for which the system
translates data between ATM and Frame Relay interfaces. The translation process removes
Frame Relay Multiprotocol Encapsulation (RFC 1490) from the data stream received on a
Frame Relay interface, and adds ATM Multiprotocol Encapsulation (RFC 1483) to the data
stream sent on an ATM interface, or vice versa, from one side of the circuit to the other.
TAOS units also support transparent-mode circuits, for which no encapsulation processing is
performed. Transparent-mode ATM-Frame Relay circuits are defined in the FRF.8 Frame
Relay ATM/PVC Service Interworking Implementation Agreement.
Note: Transparent mode requires that the circuit endpoints support compatible upper-layer
protocols for applications such as packetized voice.
TAOS units also support virtual channel trunking, which allows circuits with more than two
endpoints (N:1 circuits). The system aggregates traffic from multiple host links onto one trunk
link, creating an N:1 circuit. See the APX 8000/MAX TNT/DSLTNT Frame Relay
Configuration Guide for details about Frame Relay configuration.
ATM-Frame Relay circuits (translation mode)
TAOS units can receive frames on a Frame Relay data link connection identifier (DLCI)
interface and transmit them on an ATM interface, or vice versa. The data is switched from one
interface to another on the basis of a circuit configuration. A circuit is defined in two
Connection profiles, one for each endpoint of the circuit.
Typically, when the TAOS unit receives frames on an ATM-Frame Relay circuit endpoint, it
removes the frame’s encapsulation and adds the encapsulation required by the other endpoint.
The operation of decapsulation and encapsulation is referred to as translation. An ATM-Frame
Relay circuit that performs this operation from one interface to another is a translation-mode
circuit.
APX 8000/MAX TNT/DSLTNT ATM Configuration Guide
5-1
Configuring ATM-Frame Relay Circuits
ATM-Frame Relay circuits (translation mode)
Connection profile settings for translation-mode circuits
Following are the Connection profile parameters (shown with sample settings) for configuring
an ATM-Frame Relay circuit in translation mode:
[in CONNECTION/fr-endpoint]
encapsulation-protocol = frame-relay-circuit
[in CONNECTION/fr-endpoint:fr-options]
frame-relay-profile = fr7
dlci = 100
circuit-name = atmfr-1
[in CONNECTION/fr-endpoint:telco-options]
call-type = ft1
[in CONNECTION/atm-endpoint]
encapsulation-protocol = atm-frame-relay-circuit
[in CONNECTION/atm-endpoint:fr-options]
circuit-name = atmfr-1
[in CONNECTION/atm-endpoint:atm-options]
vpi = 0
vci = 32
atm-enabled = yes
[in CONNECTION/atm-endpoint:telco-options]
call-type = ft1
nailed-groups = 111
5-2
Parameter
Specifies
Encapsulation-Protocol
Encapsulation protocol. For an ATM-Frame Relay circuit, one
endpoint specifies ATM-Frame-Relay-Circuit and the other
specifies Frame-Relay-Circuit.
Frame-Relay-Profile
Name of the Frame-Relay profile that defines the data link.
DLCI
DLCI for the Frame Relay PVC endpoint. The unit does not allow
you to enter duplicate DLCIs, except when they are carried by
separate physical links specified in different Frame-Relay
profiles.
Circuit-Name
Circuit name (up to 16 characters). The other endpoint must
specify the same circuit name. If only one profile specifies a
circuit name, data received on the specified DLCI is dropped. If
more than two profiles specify the same circuit name, only two of
the profiles are used to form a circuit.
Call-Type
Type of nailed call. Set this parameter to FT1 for PVCs.
Nailed-Groups
Group number assigned in the physical interface configuration.
VPI
Virtual Path Identifier (VPI) for the ATM PVC. A VPI identifies
the unidirectional transport of ATM cells belonging to a bundle of
virtual channels. The VPI-VCI pair must be assigned by an ATM
administrator.
VCI
Virtual Channel Identifier (VCI) for the ATM PVC.
APX 8000/MAX TNT/DSLTNT ATM Configuration Guide
Configuring ATM-Frame Relay Circuits
ATM-Frame Relay circuits (translation mode)
RADIUS attribute-value pairs for translation-mode circuits
Following are the RADIUS attribute-value pairs for configuring an ATM-Frame Relay circuit:
RADIUS Attribute
Value
Framed-Protocol (7)
Encapsulation protocol. Both endpoints of a circuit must specify
FR-CIR (263) or ATM-FR-CIR (265) encapsulation.
Ascend-FR-ProfileName (180)
Name of the Frame-Relay profile that defines the data link.
Ascend-FR-DLCI (179)
DLCI for the Frame Relay PVC endpoint. The unit does not allow
you to enter duplicate DLCIs, except when they are carried by
separate physical links specified in different Frame-Relay
profiles.
Ascend-FR-CircuitName (156)
Circuit name (up to 16 characters). The other endpoint must
specify the same circuit name. If only one profile specifies a
circuit name, data received on the specified DLCI is dropped. If
more than two profiles specify the same circuit name, only two of
the profiles are used to form a circuit.
Ascend-Group (178)
Group number assigned in the physical interface configuration.
Ascend-ATM-Vpi (94)
Virtual Path Identifier (VPI) for the ATM PVC. A VPI identifies
the unidirectional transport of ATM cells belonging to a bundle of
virtual channels. The VPI-VCI pair must be assigned by an ATM
administrator.
Ascend-ATM-Vci (95)
Virtual Channel Identifier (VCI) for the ATM PVC.
Example of configuring a translation-mode circuit
Figure 5-1 shows a TAOS unit that switches data between ATM and Frame Relay interfaces by
using a ATM-to-Frame Relay circuit configuration.
Figure 5-1. ATM-Frame Relay circuit
ATM switch
Frame Relay
switch
DLCI 100
TAOS
VPI 100
VCI 132
Using local profiles
The following commands define the data link to the Frame Relay switch:
admin> new frame fr-switch
FRAME-RELAY/fr-switch read
admin> set active = yes
admin> set nailed-up-group = 999
admin> set link-type = nni
APX 8000/MAX TNT/DSLTNT ATM Configuration Guide
5-3
Configuring ATM-Frame Relay Circuits
ATM-Frame Relay circuits (translation mode)
admin> write
FRAME-RELAY/fr-switch written
The next set of commands configures the DS3-ATM card:
admin> read ds3-atm {1 3 1}
DS3-ATM/{ shelf-1 slot-3 1 } read
admin> set name = atm-switch
admin> set enabled = yes
admin> set line nailed-group = 111
admin> set line high-tx-output = yes
admin> write
ATM-DS3/{ shelf-1 slot-3 1 } written
The next set of commands specifies the circuit between the Frame-Relay and ATM interfaces:
admin> new conn fr-endpoint
CONNECTION/fr-endpoint read
admin> set active = yes
admin> set encaps = frame-relay-circuit
admin> set ip-options ip-routing-enabled = no
admin> set telco call-type = ft1
admin> set fr-options frame-relay-profile = fr-switch
admin> set fr-options dlci = 100
admin> set fr-options circuit-name = atmfr-1
admin> write
CONNECTION/fr-endpoint written
admin> new conn atm-endpoint
CONNECTION/atm-endpoint read
admin> set active = yes
admin> set encaps = atm-frame-relay-circuit
admin> set ip-options ip-routing-enabled = no
admin> set fr-options circuit-name = atmfr-1
admin> set telco call-type = ft1
admin> set telco nailed-groups = 111
admin> set atm vpi = 100
admin> set atm vci = 132
admin> write
CONNECTION/atm-endpoint written
Using RADIUS profiles
The following frdlink pseudo-user profile defines the data link to the Frame Relay switch:
frdlink-sys-1 Password = "ascend", Service-Type = Dialout-Framed-User
Ascend-FR-Profile-Name = "fr-switch",
Ascend-Call-Type = Nailed,
5-4
APX 8000/MAX TNT/DSLTNT ATM Configuration Guide
Configuring ATM-Frame Relay Circuits
ATM-Frame Relay transparent-mode circuits (FRF.8)
Ascend-FR-Type = Ascend-FR-NNI,
Ascend-FR-Nailed-Grp = 999
The DS3-ATM card is configured in a local profile, as shown in the preceding section. The
next set of profiles specifies the circuit between the Frame Relay and ATM interfaces:
permconn-sys-1 Password = "ascend", Service-Type = Dialout-Framed-User
User-Name = "fr-endpoint",
Framed-Protocol = FR-CIR,
Ascend-Route-IP = Route-IP-No,
Ascend-FR-DLCI = 100,
Ascend-FR-Profile-Name = "fr-switch",
Ascend-FR-Circuit-Name = "atmfr-1"
permconn-sys-2 Password = "ascend", Service-Type = Dialout-Framed-User
User-Name = "atm-endpoint",
Framed-Protocol = ATM-FR-CIR,
Ascend-Route-IP = Route-IP-No,
Ascend-Group = "111",
Ascend-ATM-Vpi = 100,
Ascend-ATM-Vci = 132,
Ascend-FR-Circuit-Name = "atmfr-1"
ATM-Frame Relay transparent-mode circuits (FRF.8)
Transparent-mode ATM-Frame Relay circuits are defined in the FRF.8 Frame Relay ATM/PVC
Service Interworking Implementation Agreement. In transparent mode, the system performs no
translation, but simply passes the data stream from one side of the circuit to the other.
Transparent mode requires that the circuit endpoints support compatible upper-layer protocols
for applications such as packetized voice.
Connection profile setting for transparent-mode circuits
Following is the relevant parameter, shown with its default value for configuring an ATMFrame Relay circuit in transparent mode:
[in CONNECTION/"":atm-options]
fr-08-mode = translation
Parameter
Specifies
FR-08-Mode
Translation or transparent mode of operation for the ATM-Frame
Relay circuit. The default is translation mode, which causes
the system to convert RFC 1490 encapsulation to RFC 1483, and
vice versa. In transparent mode, the data is passes from one
side of the circuit to the other without 1490-to-1483 translation.
The encapsulation mode for the profile must be atm-framerelay-circuit for this parameter to have an effect.
APX 8000/MAX TNT/DSLTNT ATM Configuration Guide
5-5
Configuring ATM-Frame Relay Circuits
ATM-Frame Relay transparent-mode circuits (FRF.8)
RADIUS attribute-value pair for transparent-mode circuits
RADIUS uses the following attribute-value pair to specify a transparent mode circuit:
RADIUS attribute
Value
Ascend-FR-08-Mode
(30)
Translation (0) or transparent (1) mode of operation for the
ATM-Frame Relay circuit. The default is translation mode, which
causes the system to convert RFC 1490 encapsulation to
RFC 1483, and vice versa. In transparent mode, the data is passes
from one side of the circuit to the other without 1490-to-1483
translation. The encapsulation mode for the profile must be atmframe-relay-circuit for this setting to have an effect.
Example of configuring a transparent-mode circuit
In the example shown in Figure 5-2, the TAOS unit receives frames on a Frame Relay DLCI
interface and transmits them on an ATM PVC (and vice versa) without removing the frames’
encapsulation and adding the encapsulation required by the other endpoint.
Figure 5-2. ATM-Frame Relay circuit
ATM switch
Frame Relay
switch
DLCI 100
TAOS
VPI 100
VCI 132
Using local profiles
The following commands define the data link to the Frame Relay switch:
admin> new frame fr-switch
FRAME-RELAY/fr-switch read
admin> set active = yes
admin> set nailed-up-group = 999
admin> write
FRAME-RELAY/fr-switch written
The following commands configure a DS3-ATM interface:
admin> read ds3-atm {1 3 1}
DS3-ATM/{ shelf-1 slot-3 1 } read
admin> set name = atm-switch
admin> set enabled = yes
admin> set line nailed-group = 111
admin> set line high-tx-output = yes
admin> write
ATM-DS3/{ shelf-1 slot-3 1 } written
The following commands specify a transparent mode circuit between the Frame Relay and
ATM interfaces:
5-6
APX 8000/MAX TNT/DSLTNT ATM Configuration Guide
Configuring ATM-Frame Relay Circuits
ATM-Frame Relay transparent-mode circuits (FRF.8)
admin> new conn fr-endpoint
CONNECTION/fr-endpoint read
admin> set active = yes
admin> set encapsulation-protocol = frame-relay-circuit
admin> set ip-options ip-routing-enabled = no
admin> set telco-options call-type = ft1
admin> set fr-options frame-relay-profile = fr-switch
admin> set fr-options dlci = 100
admin> set fr-options circuit-name = atmfr-1
admin> write
CONNECTION/fr-endpoint written
admin> new conn atm-endpoint
CONNECTION/atm-endpoint read
admin> set active = yes
admin> set encapsulation-protocol = atm-frame-relay-circuit
admin> set ip-options ip-routing-enabled = no
admin> set fr-options circuit-name = atmfr-1
admin> set telco-options call-type = ft1
admin> set telco-options nailed-groups = 111
admin> set atm-options vpi = 100
admin> set atm-options vci = 132
admin> set atm-options fr-08-mode = transparent
admin> write
CONNECTION/atm-endpoint written
Using RADIUS profiles
The following frdlink pseudo-user profile defines the data link to the Frame Relay switch:
frdlink-sys-1 Password = "ascend"
Service-Type = Dialout-Framed-User,
Ascend-FR-Profile-Name = "fr-switch",
Ascend-Call-Type = Nailed,
Ascend-FR-Type = Ascend-FR-NNI,
Ascend-FR-Nailed-Grp = 999
The DS3-ATM or OC3-ATM interface is configured in a local profile, as shown in the
preceding section. The next set of profiles specifies the circuit between the Frame Relay and
ATM interfaces:
permconn-sys-1 Password = "ascend"
Service-Type = Dialout-Framed-User,
User-Name = "fr-endpoint",
Framed-Protocol = FR-CIR,
Ascend-Route-IP = Route-IP-No,
Ascend-FR-DLCI = 100,
Ascend-FR-Profile-Name = "fr-switch",
Ascend-FR-Circuit-Name = "atmfr-1"
APX 8000/MAX TNT/DSLTNT ATM Configuration Guide
5-7
Configuring ATM-Frame Relay Circuits
ATM-Frame Relay virtual channel trunking
permconn-sys-2 Password = "ascend"
Service-Type = Dialout-Framed-User,
User-Name = "atm-endpoint",
Framed-Protocol = ATM-FR-CIR,
Ascend-Route-IP = Route-IP-No,
Ascend-Group = "111",
Ascend-ATM-Vpi = 100,
Ascend-ATM-Vci = 132,
Ascend-FR-Circuit-Name = "atmfr-1",
Ascend-FR-08-Mode = 1
ATM-Frame Relay virtual channel trunking
Unlike standard ATM-Frame Relay circuits, which always have two endpoints (1:1 circuits),
virtual channel trunking, allows N:1 circuits. With virtual channel trunking, a circuit can have
more than two endpoints, as long as multiple endpoints are designated as host links and only
one endpoint is designated as a trunk link. The system aggregates traffic from multiple host
links onto one trunk link, creating an N:1 circuit, as shown in Figure 5-3.
Figure 5-3. N:1 circuit between multiple Frame Relay hosts and an ATM trunk
Frame Relay
ATM
TAOS
Host links
Trunk link
With virtual channel trunking, the circuit endpoints can include multiple Frame Relay DLCI
interfaces and an ATM VPI-VCI interface, as long as only one trunk link is specified.
When the system receives upstream traffic from a host link, it learns the host’s MAC address
and then forwards the data to the trunk-link interface. When the system receives downstream
traffic from the trunk link, it uses the destination MAC address to transmit the packets on the
appropriate host link.
Current limitations of virtual channel trunking
In the current software version, the virtual channel trunking implementation is subject to the
following limitations:
5-8
•
Only one ATM endpoint can be defined per circuit.
•
Broadcast and multicast packets from the trunk link are not forwarded to the host links of
the circuit.
•
Packets from the individual host links are not forwarded to the other host links.
APX 8000/MAX TNT/DSLTNT ATM Configuration Guide
Configuring ATM-Frame Relay Circuits
ATM-Frame Relay virtual channel trunking
Overview of Connection profile settings for virtual channel trunking
Following is the relevant parameter, shown with its default value for configuring ATM-Frame
Relay virtual channel trunking:
[in CONNECTION/"":fr-options]
circuit-name = ""
fr-link-type = transparent-link
Parameter
Specifies
Circuit-Name
Circuit name (up to 16 characters). The other endpoint(s) of a
circuit must specify the same circuit name.
FR-Link-Type
Type of link for the circuit endpoint. Valid values are
transparent-link (the default), host-link, and trunklink.
A transparent-link circuit is a 1:1 circuit. It requires two endpoints
that specify the same circuit name and the transparent-link
type. If only one endpoint is specified, data received on the
specified DLCI is dropped. If more than two transparent-link
endpoints are specified with the same circuit name, only two of the
profiles are used to form a circuit.
Virtual channel trunking allows an N:1 circuit. It can have more
than two endpoints that specify the same circuit name, as long as
multiple endpoints specify the host-link type and only one
endpoint specifies the trunk-link type.
Example of configuring virtual channel trunking
In the following example, two Frame Relay hosts are switched to an ATM trunk link, as shown
in Figure 5-4.
Figure 5-4. Circuit using virtual channel trunking
Trunk link
Frame Relay
ATM
DLCI 16
TAOS
VPI 101 VCI 156
DLCI 100
Host links
The example commands do not include data link or physical link configurations. For details on
those topics, see the APX 8000/MAX TNT/DSLTNT WAN, Routing, and Tunneling
Configuration Guide and the hardware installation guide for your unit.
The following commands configure the Connection profile for the ATM trunk link, where the
nailed group is configured on an ATM interface:
APX 8000/MAX TNT/DSLTNT ATM Configuration Guide
5-9
Configuring ATM-Frame Relay Circuits
ATM-Frame Relay virtual channel trunking
admin> new conn atm-trunk1
CONNECTION/atm-trunk1 read
admin> set active = yes
admin> set encapsulation-protocol = atm-frame-relay-circuit
admin> set telco-options call-type = ft1
admin> set telco-options nailed-groups = 111
admin> set ip-options ip-routing-enabled = no
admin> set fr-options circuit-name = vtrunk-cir1
admin> set fr-options fr-link-type = trunk-link
admin> set atm-options vpi = 101
admin> set atm-options vci = 156
admin> write
CONNECTION/atm-trunk1 written
The following commands configure the Connection profile for the first Frame Relay host link:
admin> read conn frhost-1
CONNECTION/frhost-1 read
admin> set active = yes
admin> set encapsulation-protocol = frame-relay-circuit
admin> set ip-options ip-routing-enabled = no
admin> set telco-options call-type = ft1
admin> set fr-options frame-relay-profile = ct1.8-fr
admin> set fr-options dlci = 16
admin> set fr-options circuit-name = vtrunk-cir1
admin> set fr-options fr-link-type = host-link
admin> write
CONNECTION/frhost-1 written
The following commands configure the Connection profile for the second Frame Relay host
link:
admin> read conn frhost-2
CONNECTION/frhost-2 read
admin> set active = yes
admin> set encapsulation-protocol = frame-relay-circuit
admin> set ip-options ip-routing-enabled = no
admin> set telco-options call-type = ft1
admin> set fr-options frame-relay-profile = ut1.3-fr
admin> set fr-options dlci = 100
admin> set fr-options circuit-name = vtrunk-cir1
admin> set fr-options fr-link-type = host-link
admin> write
CONNECTION/frhost-2 written
5-10
APX 8000/MAX TNT/DSLTNT ATM Configuration Guide
Index
A
AAL5, RADIUS attribute-value pairs for a PVC, 3-3
Active
parameter, creating, 3-15
address
assigning AESA format, 3-9
assigning AESA format, for SEL, 3-9
assigning native, 3-9
configuration for SVC options, 3-6
address formats
for ATM interfaces, 3-7
native E.164, 3-8
address pool, ATM direct
parameter, 4-2
Address-Pool parameter, ATM direct, 4-2
Address-Prefix
parameter, 3-15
AESA
address formats, 3-7
address formats for ATM interface, 3-7
address formats, AFI, 3-7
address formats, DCC, 3-7
address formats, ICD, 3-7
format address, assigning, 3-9
AESA address formats
allocating DSP, 3-7
IDP, 3-7
AESA address formats, DSP, 3-7
AESA format address
AFI, 3-10
assigning, 3-9, 3-10
assigning, for SEL, 3-9
DCC, 3-10
Numbering-Plan parameter, 3-10
AFI
AESA address formats, 3-7
assigning AESA format address, 3-9
Ascend-ATM-Direct
RADIUS attribute, 4-2
Ascend-ATM-Direct Profile
RADIUS attribute, 4-2
Ascend-ATM-Fault-Management for PVC, 3-4
Ascend-ATM-Group
for a PVC, 3-3
APX 8000/MAX TNT/DSLTNT ATM Configuration Guide
Ascend-ATM-Loopback-Cell-Loss, 3-4
Ascend-ATM-Vci for a PVC, 3-3
Ascend-ATM-Vpi for a PVC, 3-3
Ascend-FR-08-Mode (30)
RADIUS attribute parameter, ATM-Frame Relay
transparency, 5-6
Ascend-Route-IP, 3-3
Ascend-Route-IP parameter, 3-3
Ascend-Router-IP
RADIUS attribute, ATM direct, 4-2
asynchronous transfer mode (ATM). See ATM
ATM, xi
ATM adaptation layer 5 (AAL5). See AAL5
ATM address
configuration, 3-6
ATM circuits
storing user profiles, 1-4
ATM configuration
DS3-ATM port, 1-3
OC3-ATM port, 1-3
overview, 1-3
ATM direct
Address-Pool parameter, 4-2
ATM-Direct-Profile parameter, 4-1
configuration with ATM direct Connection profiles,
4-3
Connection profile settings, 4-1
enable/disable, RADIUS attribute, 4-2
Encapsulation-Protocol parameter, 4-1
Framed-Protocol RADIUS attribute, 4-2
parameters, 4-1
RADIUS attribute, Ascend-Router-IP, 4-2
RADIUS attribute, Framed-IP-Address, 4-2
RADIUS attribute, Framed-IP-Netmask, 4-2
RADIUS attribute-value pairs, 4-2
Remote-Address parameter, 4-2
ATM direct IP-Routing-Enabled parameter, 4-1
ATM direct settings, overview, 4-1
ATM end system address (AESA). See AESA
ATM endpoints
Q.SAAL layer, configuration, 3-12
ATM interface
address formats for, 3-7
SVC options on a logical ATM interface, overview,
3-8
Index-1
Index
C
ATM license, xi
ATM link
configuration with VPI-VCI pair, 4-3
ATM management features, TFTP, 1-4
ATM multiprotocol encapsulation (RFC 1483). See
RFC 1483
ATM physical port
configuration, 3-8
overview, 3-8
ATM PVC
configuration example, 3-4
parameter, 5-2
VCI, 5-3
ATM static route
configuring, 3-14
ATM SVC
Address-Prefix parameter, 3-15
configuration, 3-5
configuration, example, 3-15
configuration, static route, 3-14
Connection profile, options , 3-13
dial-in configuration, 3-5
dial-out configuration, 3-5
dial-out termination, 3-6
disconnecting, Q.93B layer, 3-11
establishing, Q.93B layer, 3-11
format address parameters, 3-10
Interface-Address parameter, 3-15
limitations, 3-6
maintaining, Q.93B layer, 3-11
parameters, 3-8, 3-13
point-to-point connection, 3-5
PVC, 3-6
UNI protocols, 3-8
ATM SVC route
configuratioan, 3-14
ATM SVC static route parameters, 3-15
ATM traffic shaping, 2-3
overview, 2-3
ATM trunk link
Connection profile configuration commands, 5-9
ATM, commands, 1-4
ATM, management features, 1-3
ATM, network configuration, 1-3
ATM-Direct-Enabled
parameter, 4-1
ATM-Direct-Profile parameter, 4-1
ATM-Frame Relay
Ascend-FR-Profile-Name parameter, 5-3
Circuit-Name parameter, 5-9
CR-Link Type parameter, 5-9
DLCI interface, 5-6
RADIUS profiles, using, 5-7
translation-mode, 1-3
Index-2
transparent-mode, 1-3
virtual channel trunking, 5-8
ATM-Frame Relay circuit
default, translation mode, 5-6
local profiles, using, 5-6
translation mode default, 5-6
transparent mode, 5-6
ATM-Frame Relay circuits, 1-2
configuration, translation mode, 5-3
configuration, translation-modet, 5-3
RFC 1483, 5-1
transparent-mode configuration example, 5-6
virtual channel trunking, 1-3, 5-1
ATM-Frame Relay local profiles, using, 5-3
ATM-Frame Relay RADIUS profiles, using, 5-4
ATM-Frame Relay translation mode
Ascend-FR-Circuit-Name parameter, 5-3
ATM-Frame Relay translation-mode
Ascend-ATM Vci, parameter, 5-3
Ascend-ATM-Vpi, parameters, 5-3
Ascend-FR-DLCI parameter, 5-3
Ascend-Group parameter, 5-3
parameters, 5-3
RADIUS profile settings, overview, 5-3
ATM-Frame Relay translation-mode circuits, 5-1
configuration, 5-2
ATM-Frame Relay translation-mode settings
Connection profile, 5-2
ATM-Frame Relay transparency
FR-08-Mode parameter, 5-5
RADIUS profile setting, ATM-Frame Relay transparency, 5-6
ATM-Frame Relay transparency, Connection profile
overview, 5-5
ATM-Frame Relay transparent-mode circuits (FRF.8),
5-5
ATM-Frame-Relay circuits, configuration, 5-1
ATM-Interface profile
configuration, static ATM SVC route, 3-14
for logical ATM, 3-6
attribute
setting, 4-2
attribute-value pairs
ATM direct, 4-2
authority and format identifier (AFI). See AFI
C
circuits, 1-3
ATM-Frame, 1-3
ATM-Frame Relay, 1-3
ATM-Frame Relay translation-mode, 5-1
transparent-mode, ATM-Frame Relay, 5-5
APX 8000/MAX TNT/DSLTNT ATM Configuration Guide
Index
D
CLI
ATM license, xi
command-line interface (CLI)
commands
ATM, 1-4
data link, traffic shaper, 2-5
DS3-ATM interface, traffic shaper, 2-5
commands, atmsvccb, 1-4
commands, atmsvcroute, 1-4
commands, ds3AtmLines, 1-4
commands, oamloop, 1-4
commands, oc3AtmLines, 1-4
configuraiton
Tidle-ms, Q.SAAL layer, 3-13
configuration
ATM direct settings, 4-1
ATM SVC, 3-5
ATM SVC example, 3-15
ATM SVC static route, 3-14
ATM-Frame Relay translation-mode circuit, 5-2
ATM-Frame-Relay circuits, 5-1
DS3-ATM card, 2-1
DS3-ATM PVC examples, 3-4
example for ATM PVC, 3-4
Max-PD parameter, Q.SAAL layer, 3-12
Max-Stat, Q.SAAL layer, 3-12
network, ATM, 1-3
OC3-ATM, 2-2
physical ATM port, 3-8
PVC, 3-1
Q.93B layer, 3-11
Q.SAAL layer, 3-12
Q93B layer, 3-11
settings, TAOS, 1-3
tasks, DS3-ATM, 1-3
tasks, OC3-ATM, 1-3
Tcc-MS, Q.SAAL layer, 3-12
Tkeepalive-ms parameter, Q.SAAL layer, 3-13
Tnoresponse-ms, Q.SAAL layer, 3-13
VPI-VCI ranges, 2-2
Window-Size parameter, Q.SAAL layer, 3-12
configuration settings
onboard flash memory, 1-3
configuration tasks, perform, 1-5
configuring
SNMP, 1-4
Connection profile
ATM direct parameters, 4-1
ATM SVC options overview, 3-13
ATM-Frame Relay transparency, overview, 5-5
configuration commands for ATM trunk link, 5-9
configuration, far-end device, 3-16
for an ATM interface, 3-6
parameter, ATM direct, 4-1
parameters, ATM-Frame Relay translation-mode, 5-2
settings for ATM-Frame Relay translation-mode, 5-2
settings, ATM direct, 4-1
Connection profile parameters, 3-1, 3-2
Connection profile setting
ATM-Frame Relay transparency, 5-5
ATM-Frame Relay transparency overview, 5-5
for ATM-Frame Relay transparency, 5-5
Connection profile settings
PVC, 3-1
virtual channel trunking, overview, 5-9
Connection profile, settings, 4-1
Connection profiles
configuration, ATM direct, 4-3
D
data connections
PPP to Frame Relay (direct), 4-1
data county code (DCC). See DCC
data link
commands, traffic shaper, 2-5
DC3-ATM card
SAR, 2-2
DCC
AESA address formats, 3-7
AESA format address, 3-10
dial-in
ATM SVC, configuration, 3-5
dial-out
ATM SVC, configuration, 3-5
termination an ATM on SVC, 3-6
DLCI parameter
Frame Relay PVC, 5-2
domain specific part (DSP). See DSP
DS3-ATM
ATM SVC, configuration, 3-5
commands, traffic shaper, 2-5
configuration logical interface, 3-8
framing formats, 2-1
DS3-ATM cards, configuration, 2-1
DS3-ATM configuration, 1-3, 2-1
DS3-ATM configuration, example, 2-1
DS3-ATM interface
configuration example, 3-4
using RADIUS profiles, 5-7
virtual circuits, configuration, 2-6
DS3-ATM profiles
configuring a physical ATM port, 3-8
DS3-ATM PVC
OAM loopback, fault management, 3-1
DSP
AESA formats, 3-7
APX 8000/MAX TNT/DSLTNT ATM Configuration Guide
Index-3
Index
E
assigning AESA format address, 3-9
DSP-Portion SEL
parameter, 3-11
FRF.8
ATM-Frame Relay transparent-mode circuits, 5-5
H
E
enable/disable
Active parameter, static route, 3-15
ATM direct, 4-2
ATM direct, RADIUS attribute, 4-2
ATM-Direct-Enabled parameter, 4-1
IP-Routing-Enabled, ATM direct parameter, 4-1
Encapsulation-Protocol parameter
ATM-Frame Relay translation-mode circuits, 5-2
end system identifier (ESI). See ESI
ESI
assigning AESA format address, 3-9
F
far-end device
Connection profile, configuration, 3-16
features
ATM management, 1-3
format address
AESA, Numbering-Plan parameer, 3-10
ICD, 3-10
IDI, 3-10
MAC, 3-11
SVC ATM, 3-10
SVC ATM, parameters, 3-10
formats
assigning DSP, 3-7
Frame Relay
slot cards to use, 1-1
Framed-IP-Address
RADIUS attribute, ATM direct, 4-2
Framed-IP-Netmask, 3-3
RADIUS attribute, ATM direct, 4-2
Framed-Protocol
RADIUS attribute, ATM direct, 4-2
RADIUS attribute-value pairs for PVC, 3-3
Frame-Relay circuits
Call-type parameter, 5-2
Circuit-Name parameter, 5-2
DLCI, 5-2
Nailed-Groups parameter, 5-2
VCI parameter, 5-2
VPI parameter, 5-2
Frame-Relay-Profile parameter
ATM-Frame Relay circuits, 5-2
framing formats, DS3, 2-1
Index-4
high-order domain-specific part (HO-DSP). See HODSP
HO-DSP
assigning AESA format address, 3-9
I
ICD
AESA address formats, 3-7
AESA format address, 3-10
IDI
format address, 3-10
IDP
AESA address formats, 3-7
IDP-Portion AFI
parameter, 3-10
IDP-Portion AFI parameter
AESA format address, 3-10
IDP-Portion IDI
parameter, 3-10
ILMI, SVC limitations, 3-6
initial domain part (IDP). See IDP
interface
ATM SVC, configuration, 3-5
configuration for ATM SVC, 3-5
for ATM address formats, 3-7
interim local management interface (ILMI). See ILMI
international code designator (ICD). See ICD
IP-Routing-Enabled parameter, ATM direct, 4-1
ITU
Q.93B, 3-11
L
LLC
ATM virtual circuits parameter, 3-2
logical interface
configuration, DS3-ATM port, 3-8
configuration, OC3-ATM port, 3-8
SVC, configuration, 3-16
logical link control (LLC). See LLC
APX 8000/MAX TNT/DSLTNT ATM Configuration Guide
Index
M
M
MAC
format address, 3-11
Max-Cc parameter
Q.SAAL layer, 3-12
Max-PD parameter
Q.SAAL layer, 3-12
Max-Stat parameter, Q.SAAL layer, 3-12
media access control (MAC). See MAC
monitoring
SNMP, 1-4
multilink Frame Relay (MFR)
slot cards that support, 1-2
N
Name
static route parameter, 3-15
O
OAM
DS3-ATM PVC, fault management, 3-1
OC3-ATM
ATM SVC, configuration, 3-5
configuring a physical ATM port, 3-8
physical interface, configuration, 3-15
OC3-ATM card
SAR, 2-2
OC3-ATM cards, configuration, 2-1
OC3-ATM configuration, 1-3, 2-2
OC3-ATM configuration, example, 2-2
OC3-ATM interface
using RADIUS profiles, 5-7
OC3-ATM port
configuration logical interface, 3-8
SVC logical interface, configuration, 3-16
onboard flash memory
configuration settings, 1-3
operation, administration, and maintenance (OAM). See
OAM
P
parameterrs
Tnoresponse-ms, Q.SAAL layer, 3-13
parameters
Active, creating, 3-15
Address-Prefix, ATM SVC, 3-15
APX 8000/MAX TNT/DSLTNT ATM Configuration Guide
Ascend-ATM-Group for a PVC, 3-3
Ascend-ATM-Loopback-Cell-Loss for a PVC, 3-4
Ascend-ATM-Vci for a PVC, 3-3
Ascend-ATM-Vci, ATM-Frame Relay translationmode, 5-3
Ascend-ATM-Vpi for a PVC, 3-3
Ascend-ATM-Vpi, ATM-Frame Relay translationmode, 5-3
Ascend-FR-08-Mode (30), RADIUS profile, 5-6
Ascend-FR-Circuit-Name, ATM-Frame Relay translation-mode, 5-3
Ascend-FR-DLCI, ATM-Frame Relay translationmode, 5-3
Ascend-FR-Profile-Name, ATM-Frame Relay, 5-3
Ascend-Group, ATM-Frame Relay translation-mode,
5-3
Ascend-Route-IP for a PVC, 3-3
assigning AESA format address, 3-10
ATM AAL5-LLC, 3-2
ATM direct address pool, 4-2
ATM direct, Connection profile, 4-1
ATM-Direct-Enabled, 4-1
ATM-Direct-Profile, 4-1
ATM-Frame Relay circuits, transparent mode, 5-5
Call-Type, Frame-Relay circuits, 5-2
Circuit-Name, ATM-Frame Relay, 5-9
Circuit-Name, Frame-Relay circuits, 5-2
configuration, ATM SVC Connection profile, 3-13
configuring logical ATM SVC, 3-8
Connection profile settings for PVC, 3-1
CR-Link-Type, ATM-Frame Relay, 5-9
DSP-Portion ESI, ATM SVC, 3-11
DSP-Portion SEL, ATM SVC, 3-11
Encapsulation-Protocol, ATM direct, 4-1
Encapsulation-Protocol, ATM-Frame Relay circuit,
5-2
FR-08-Mode, ATM-Frame Relay transparency, 5-5
Framed-IP-Netmask for a PVC, 3-3
Framed-Protocol PVC, 3-3
Framed-Protocol, ATM-Frame Relay translationmode, 5-3
Framed-Protocol, PVC, 3-3
Frame-Relay-Profile, ATM-Frame Relay circuits, 5-2
IDP-Portion AFI, 3-10
IDP-Portion IDI, ATM SVC, 3-10
Interface-Address, ATM SVC, 3-15
IP-Routing-Enabled, ATM Direct, 4-1
IP-Routing-Enabled, ATM direct, 4-1
Max-Cc, Q.SAAL layer, 3-12
Max-PD, Q.SAAL layer, 3-12
Max-Stat, Q.SAAL layer, 3-12
Nailed-Groups, Frame-Relay circuits, 5-2
Name, ATM SVC static route, 3-15
Numbering-Plan, ATM SVC, 3-10
Q.SAAL layer, 3-12
Remote-Address, ATM direct, 4-2
SVC-Address-Info, 3-10
Index-5
Index
Q
Tcc-ms, Q.SAAL layer, 3-12
Tidle-ms, Q.SAAL layer, 3-13
Tkeepalive-ms, Q.SAAL layer, 3-13
Tpoll-ms, Q.SAAL layer, 3-13
traffic shaping, 2-3
User-Name, PVC, 3-3
VCI, 5-2
VCI, Frame-Relay circuits, 5-2
virtual channel trunking, 5-9
VPI, Frame-Relay circuits, 5-2
VPI-VCI, 2-2
Window-Size, Q.SAAL layer, 3-12
parameters, ATM-Frame Relay translation mode
Connection profile, 5-2
paramters
Q.93B layer, 3-11
parrameters
default for creating ATM static route, 3-14
PDU
Q.SAAL layer, 3-12
permanent virtual circuit (PVC). See PVC
permanent virtual circuits (PVCs)
slot cards that support, 1-2
physical ATM port for ATM interface, 3-6
physical interface
OC3-0ATM, configuration, 3-15
physical interface layer, configuration, 2-1
point-to-point protocol (PPP). See PPP
PPP
ATM direct configurations, 1-2
profiles
using RADIUS, 5-7
profiles, user for ATM circuits, 1-4
protocol
adaptation layer, Q.SAAL, 3-12
ATM SVC, establishing, 3-11
protocol data unit (PDU). See PDU
protocols
Q.93B configuration, 3-11
PVC
Ascend-ATM-Group, 3-3
Ascend-ATM-Loopback-Cell-Loss, 3-4
Ascend-ATM-Vci, 3-3
Ascend-ATM-Vpi, 3-3
Ascend-IP-Network, 3-3
Ascend-Route-IP, 3-3
ATM SVC interface, 3-6
ATM, configuration, 3-1
configuration examples for DS3-ATM, 3-4
RADIUS attribute-value pairs, 3-3
settings, Connection profile, 3-1
User-Name, 3-3
PVC configuration overview, 3-1
Index-6
PVC configuration, overview, 3-1
PVC, configuration, 3-1
Q
Q.93B configuration, 3-11
Q.SAAL layer
Tpool-ms parameter, 3-13
R
RADIUS
Ascend-ATM-Fault-Management, 3-4
attribute-value pairs for a PVC, 3-3, 3-4
attribute-value pairs, ATM direct, 4-2
user profiles for ATM, 1-4
RADIUS attribute
Ascend-ATM-Direct, 4-2
Ascend-ATM-Direct Profile, 4-2
Ascend-Route-IP, 4-2
enable/disable, 4-2
Framed-IP-Address, 4-2
Framed-IP-Netmask, ATM direct, 4-2
RADIUS attribute value-pairs for PVC, 3-3
RADIUS attributes
ATM-Frame Relay translation-mode, overview, 5-3
RADIUS attribute-value pairs
Framed-Protocol, 4-2
RADIUS attribute-value pairs for a PVC
parameters, 3-4
RADIUS profile setting
ATM-Frame Relay transparency overview, 5-6
RADIUS profile settings
for ATM-Frame Relay translation-mode, 5-3
RADIUS profiles, using, 5-7
RADIUS support, 1-4
range settings
VPI-VCI, 2-2
remote address
ATM direct, parameter, 4-2
RFC 1483, 1-3, 3-2, 5-1, 5-6
ATM-Frame Relay circuits, 5-1
RFC 1490, 1-3, 5-1, 5-6
RFC 2138, 1-4
S
SAR
VPI-VCI ranges, 2-2
segmentation and reassembly (SAR). See SAR
APX 8000/MAX TNT/DSLTNT ATM Configuration Guide
Index
T
SEL
assigning AESA format address, 3-9
selector (SEL). See SEL
setting RADIUS attributes
ATM direct, 4-2
settings, 3-1
signaling protocol
ATM SVC, disconnecting, 3-11
ATM SVC, maintaining, 3-11
slot cards
Frame Relay support, on, 1-1
SNMP support
configuration, 1-4
SNMP, configuration, 1-4
SNMP, monitoring, 1-4
static route
configuration, ATM SVC, 3-14
support, RADIUS, 1-4
SVC
configuration ATM, 3-1
configuration ATM SVCs, 3-5
logical interface for OC3-ATM port, 3-16
logical interface, configuration, 3-16
SVC options, logical ATM interface, overview, 3-8
SVC-Address-Info
parameter, ATM SVC, 3-10
switched PVCs
slot cards that support, 1-2
switched virtual circuit (SVC). See SVC
switched virtual circuits (SVCs)
slot cards that support, 1-2
T
Tcc-MS parameter
Q.SAAL layer, 3-12
TFTP
ATM management features, 1-4
Tidle-ms parrameter
Q.SAAL layer, 3-13
Tkeepalive-ms parameter
Q.SAAL layer, 3-13
Tnoresponse-ms parameter
Q.SAAL layer, 3-13
Tpool-ms parameter
Q.SAAL layer, 3-13
traffic shaping
configuring example, 2-4
traffic shaping parameters, 2-3
traffic shaping, ATM, 2-3
translation-mode
ATM-Frame Relay circuits, 1-2, 1-3
translation-mode circuits
ATM-Frame Relay, 5-1
transparent-mode, 1-3
ATM-Frame Relay circuits, 1-2, 1-3
transparent-mode ATM-Frame Relay circuit
configuration example, 5-6
trivial file transfer protocol (TFTP). See TFTP
trunking
virtual channel, ATM-Frame Relay, 5-8
virtual channel, configuration example, 5-9
virtual channel, limitations, 5-8
U
UNI
protocols for ATM SVC, 3-8
User-Name
RADIUS attribute-value pairs for PVC, 3-3
user-network interface (UNI). See UNI
V
VC, configuration ATM, 3-1
VCI
ATM PVC, 5-3
for ATM PVC, 5-2
VCI parameter, 5-2
vendor-specific attribute (VSA). See VSA
virtual channel identifier (VCI). See VCI
virtual channel trunking
ATM-Frame Relay circuits, 1-3, 5-1
configuration example, 5-9
Connection profile settings, overview, 5-9
current limitations, 5-8
parameters, 5-9
virtual circuit (VC), 1-3
virtual circuit (VC). See VC
virtual circuit, DS3-ATM port, 1-3
virtual circuit, OC3-ATM port , 1-3
virtual circuits
configuration, DS3-ATM interface, 2-6
LLC parameter, 3-2
virtual path identifier (VPI). See VPI
VPI
unidirectional transport
VPI-VCI pair
configuration ATM link, commands
configuration ATM link, 4-3
VPI-VCI range
APX 8000/MAX TNT/DSLTNT ATM Configuration Guide
Index-7
Index
W
example setting, 2-3
VPI-VCI range setting, 2-2
VPI-VCI range, overview of ports, 2-2
VPI-VCI ranges
configuration, 2-2
VSA
RADIUS support, 1-4
W
Window-Size parameter
Q.SAAL layer, 3-12
Index-8
APX 8000/MAX TNT/DSLTNT ATM Configuration Guide