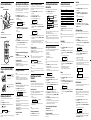
1
3-234-494-11(1)
WARNING
To prevent fire or shock hazard, do not expose the unit
to rain or moisture.
To avoid electrical shock, do not open the cabinet.
Refer servicing to qualified personnel only.
Digital Audio
Receiver
You are cautioned that any changes or modifications not expressly
approved in this manual could void your authority to operate this
equipment.
Operating Instructions
INFORMATION
Before operating the unit, install the unit correctly by referring
to the Installation Guide.
You need to subscribe for XM™ Satellite Radio Service to listen
to the radio broadcast.
OWNER’S RECORD
The model number is located on the bottom and serial number
also on the bottom. Record the serial number in the space
provide below. Refer to these numbers whenever you call upon
your Sony dealer regarding this product.
Model No.
Serial No.
Radio ID
DRN-XM01C
DRN-XM01R
DRN-XM01H
Sony Corporation © 2001 Printed in Japan
This equipment has been tested and found to comply with the limits for a
Class B digital device, pursuant to Part 15 of the FCC Rules. These limits
are designed to provide reasonable protection against harmful interference in a residential installation. This equipment generates, uses, and can
radiate radio frequency energy and, if not installed and used in accordance with the instructions, may cause harmful interference to radio
communications. However, there is no guarantee that interference will
not occur in a particular installation. If this equipment does cause harmful
interference to radio or television reception, which can be determined by
turning the equipment off and on, the user is encouraged to try to correct
the interference by one or more of the following measures:
– Reorient or relocate the receiving antenna.
– Increase the separation between the equipment and receiver.
– Connect the equipment into an outlet on a circuit different from that to
which the receiver is connected.
– Consult the dealer or an experienced radio/TV technician for help.
This device complies with Part 15 of the FCC Rules. Operation is subject
to the following two conditions: (1) This device may not cause harmful
interference, and (2) this device must accept any interference received,
including interference that may cause undesired operation.
Printed on 100%
recycled paper using
VOC (Volatile Organic
Compound)-free
vegetable oil based ink.
Caution
• Do not operate the unit in a way that might divert your attention from
driving safely. As a driver, you alone are responsible for safely
operating your vehicle in accordance with traffic safety laws at all times.
• Do not install the unit where it may obstruct your view through the
windshield or your view of your vehicle’s indicator displays.
• Do not install the unit where it may hinder the function of safety
devices such as an air-bag. Doing so may prevent the air-bag from
functioning properly in the event of an accident.
• The installation and use suggestions contained in this manual are
subject to any restrictions or limitations that may be imposed by
applicable law— purchaser should check applicable law for any
restrictions or limitations before installing and/or operating this
product.
• Failure to follow these safety instructions and warnings may result in a
serious accident.
Before You Begin
Thank you for choosing the Sony digital audio receiver!
It will give you many hours of reliable service and listening pleasure.
Before operating the receiver, please read these instructions thoroughly
and retain them for future reference.
Y
ANT
ARR o)
W
TED
udi
LIMI rtable A
(Po
If you have any questions about the product, you may call:
Sony Direct Response Center 1-(800)-222-7669 or write to:
Sony Direct Response Center 12451 Gateway Blvd. Fort Myers, FL 33913
Declaration of Conformity
Trade Name:
SONY
Model:
DRN-XM01
Responsible Party: Sony Electronics Inc.
Address:
680 Kinderkamack Road, Oradell, NJ 07649 USA
Telephone Number: 201-930-6972
This device complies with Part 15 of the FCC Rules. Operation is
subject to the following two conditions: (1) This device may not cause
harmful interference, and (2) this device must accept any interference
received, including interference that may cause undesired operation.
If you have any questions or problem concerning this product, consult
your nearest Sony dealer: 1-(866)-473-7669.
If you have any questions or problem concerning the XM Satellite
radio service including the broadcast, consult XM.
The Radio ID is required when consulting XM. It is located on the
bottom of the main unit, and you can also check it in the display of
this unit (see “Displaying the Radio ID”).
Introducing XM™ Satellite
Radio
There’s a world beyond AM and FM. XM Satellite Radio. Up to 100
channels. Coast-to-Coast Coverage. Digital quality sound. With many
commercial-free music channels. Plus, the best sports, comedy, talk, news
and entertainment, including USA Today, Discovery Radio, NASCAR,
Sesame Workshop, CNNfn and CNN/SI. Questions? Visit
www.xmradio.com. The future is waiting.
How to Subscribe
Listeners can subscribe by visiting XM on the Web at www.xmradio.com
or by calling XM’s Listener Care at (800)852-9696. Customers should have
their Radio ID ready; it is located on the bottom of the main unit, and you
can also check it in the display of this unit (see “Displaying the Radio
ID”).
Technology. It is prohibited to copy, decompile, disassemble, reverse
engineer or manipulate any technology incorporated in receivers
compatible with the XM Satellite Radio system. Furthermore, the AMBE®
voice compression software included in this product is protected by
intellectual property rights including patent rights, copyrights, and trade
secrets of Digital Voice Systems, Inc. The user of this or any other
software contained in an XM Radio is explicitly prohibited from
attempting to copy, decompile, reverse engineer, or disassemble the
object code, or in any other way convert the object code into humanreadable form. The software is licensed solely for use within this product.
Features
• This unit is exclusively for the XM Satellite radio.
• Display function for a variety of text information about the tuned-in
channel.
• Memo function enables the unit to store the text information for up to
10 memories.
• Preset function for up to 5 channels.
• Transportable type receiver, which can be attached and removed from
the cradle easily.
• Jog roller and remote commander for easy operation.
• Category Scroll function using a specified category for easy channel
selection.
• Auto Power Down function enables the unit to automatically turn
power off.
Precautions
For customers who use this unit in a car
• When you turn off the ignition switch of your car, be sure to turn off the
power of the unit by pressing the POWER button on the main unit or
remote commander. Otherwise the unit may drain car battery.
• When you get out of your car, remove the main unit from the cradle and
take it with you to prevent it from being stolen.
Troubleshooting
Icon List
Should any problem persist after you have made the following checks,
consult your nearest Sony dealer. Consult XM if you have any questions
or problem concerning the broadcast service of the XM Satellite radio.
The following icons appear in the display.
The unit cannot receive channels at all.
• When “CHECK ANTENNA” appears in the display
The supplied antenna is not connected to this unit. Check the
connection of the antenna cord, then turn the power on again.
• When “NO SIGNAL” appears in the display
The receiving condition is not good. Move to the place where the
condition is good.
The unit cannot receive a particular channel.
• You need to subscribe for XM.
• When “UPDATING” appears in the display
You have not subscribed for XM or the channel is not authorized. You
need to subscribe for XM.
• When “OFF AIR” appears in the display
The channel is not broadcasted now.
• When “ XM CH---” appears in the display
The channel to be tuned-in is void due to the change by the broadcast
service, or the receiving condition is not good.
You cannot select a desired channel.
• In Category Scroll mode, you can select only the channels that
correspond to the Channel Category you selected in the menu. Select a
different Channel Category or change to the Channel Scroll mode. See
“Using the Category Scrolls”.
“SYSTEM ERROR” appears in the display and you cannot operate the
unit.
• A system error occurs. Consult the Sony Direct Response Center.
“--------” is displayed for the text information about Artist Name/
Feature, Song/Program Title, Additional Information, or time
information.
• There is no text information or time information in the channel. This is
not an error.
• The text information may not be displayed depending on the unit
condition, for example, right after the unit has received a channel.
When selecting a channel, or if “LOADING” appears in the display
while selecting a channel, JOG roller, X ⁄ x and preset buttons may
not work.
• You cannot select a channel until the unit finishes receiving the entire
audio data or text information.
The unit automatically turns power off.
• The Auto Power Down is functioning. This turns off the unit
automatically when no operation is performed for the specified time. To
change the setting, see “Using Other Functions”.
Sound distortion occurs.
• When using the unit with the cassette adaptor, sound distortion may
occur. Adjust the Line Out Level. See “Using Other Functions”.
The sound is low.
• Adjust the Line Out Level to the maximum level. See “Using Other
Functions”.
Display is dim, or no indication is displayed.
• The unit is being used in extremely high or low temperatures or in a
place with excessive moisture.
The remote commander does not function.
• Remove any obstacles between the remote commander and the unit.
• Use the remote commander near the unit.
on the unit.
• Point the remote commander at the remote sensor
• Replace battery in the remote commander with new one if it is weak.
XM
CHAN
NAME
TITLE
INFO
TIME
CAT
MENU
indicates the Channel Number
indicates the Channel Name
indicates the Artist Name/Feature
indicates the Song/Program Title
indicates the Additional Information
indicates time and date
indicates the Category
indicates the Menu display
Installing the Main Unit in the
Cradle
Insert the main unit completely into the cradle until the main unit is
locked in the cradle.
Cradle
Cradle release
button
Main unit
Specifications
Cradle release
button
Main unit
Time display
12-hour system
Auto power down function
OFF/60 min/120 min/180 min
Output
LINE OUT jack (ø 3.5 mm stereo minijack)
Power requirements
6 V DC, DC IN 6V jack
Dimensions
Incl. projecting parts and controls:
Main unit:
Approx. 105 × 40 × 120 mm (w/h/d)
(Approx. 4 1/4 × 1 5/8 × 4 3/4 inches)
When the main unit is installed in the car cradle with the car stand:
Approx. 105 × 68 × 128 mm (w/h/d)
(Approx. 4 1/4 × 2 3/4 × 5 1/8 inches)
When the main unit is installed in the home cradle with the home
stand:
Approx. 105 × 55 × 128 mm (w/h/d)
(Approx. 4 1/4 × 2 1/4 × 5 1/8 inches)
Not incl. projecting parts and controls:
Main unit:
Approx. 102 × 38 × 120 mm (w/h/d)
(Approx. 4 1/8 × 1 1/2 × 4 3/4 inches)
When the main unit is installed in the car cradle with the car stand:
Approx. 102 × 66 × 128 mm (w/h/d)
(Approx. 4 1/8 × 2 5/8 × 5 1/8 inches)
When the main unit is installed in the home cradle with the home
stand:
Approx. 102 × 53 × 128 mm (w/h/d)
(Approx. 4 1/8 × 2 1/8 × 5 1/8 inches)
Mass
Main unit:
Approx. 220 g (7.8 oz)
When the main unit is installed in the car cradle with the car stand:
Approx. 380 g (13.4 oz)
When the main unit is installed in the home cradle with the home
stand:
Approx. 300 g (10.6 oz)
Remote commander
Power requirements
3V DC, one CR2025 lithium battery
Dimensions
Approx. 52 × 89 × 12 mm (w/h/d)
(Approx. 2 1/8 × 3 5/8 × 1/2 inches)
incl. projecting parts and controls
Mass
Approx. 30 g (1.1 oz) incl. lithium battery
Design and specifications are subject to change without notice.
To remove the main unit from the cradle
While pressing the two cradle release buttons on the left and right sides of
the main unit, pull out the main unit from the cradle.
Replacing the Lithium Battery
into the Remote Commander
Replace the battery when the buttons on the remote commander do not
work. Remove the old battery and insert a new one.
2
1
3
1
2
3
Insert a long and thin object into the hole, then pull out the
lithium battery holder.
Replace the lithium battery with the positive (+) side facing
up.
Insert the battery holder into the remote commander until it
clicks.
Battery life
Sony lithium battery CR2025
(Approx.)
1 year
Notes on lithium battery
• Keep the lithium battery out of reach of children. Should the battery be
swallowed, immediately consult a doctor.
• Wipe the battery with a dry cloth to assure good contact.
• Be sure to install the battery in the correct polarity position.
• Do not hold the battery with metallic tweezers, as doing so may cause a
short-circuit.
• Do not break up the battery or throw it into a fire, which might cause it
to explode.
• Carefully dispose of the used battery.
Note
When the unit is not to be used for a long period of time, remove the
battery to avoid damage from battery leakage and corrosion.
Parts and Identifications
Adjusting the Time Difference
Using the Category Scrolls
Main unit
This unit displays the current time by correcting the time difference
between the local time and UTC (coordinated universal time) data being
transmitted. Set the “hour” of your local time in the menu display. The
factory-set is the eastern standard time.
If the current UTC data is not received, “– – : – –” appears in the display.
In Category Scroll mode, you can search for a channel among authorized
channels that have the corresponding Channel Category you selected in
the menu display.
JOG roller (MENU/ENTER)
1
2
Cradle
release
button
Display window
Cradle release button
DSPL/BACK
MEMO
Preset buttons (1-5)*
POWER*
Press POWER to turn on the main unit.
Press JOG roller (or MENU on the remote) to show the
menu display.
1
2
Menu item
3
Turn JOG roller (or press X ⁄ x on the remote) to select
“TIME ADJUST” and press JOG roller (or ENTER on the
remote).
MENU TIME
Remote commander
*
4
POWER
MEMO
BACK
ENTER
DSPL
MENU
1
2
12:00 AM = midnight
12:00 PM = noon
3
5
Press DSPL/BACK (or DSPL on the remote) until the “ INFO ” and “ TIME ”
display appears. See “Checking the Tuned Channel Information”.
* The X and POWER button have a tactile dot.
Using the JOG Roller (MENU/
ENTER)
Turn up or down to select channels,
select the menu items and settings, or
scroll the stored text information in
the menu operation.
Playing the Receiver
Notes
• Turn down the volume of the component connected to the unit before
playing the unit.
• Adjust the volume of the component connected to the unit.
• If sound distortion occurs when playing the unit with the cassette
adaptor, adjust the Line Out Level. See “Using Other Functions”.
Manual Tuning
Press to display the menu display, or
execute the items or settings in the
menu operation.
1
2
Make settings on your car audio or amplifier, etc. so that you
can listen to the sound from this unit.
Press POWER to turn on the main unit.
The channel that you last tuned in to is displayed.
XM CH13
CHAN TOP 20
Displaying the Radio ID
The receiver has its own ID, and an ID number is required when
registering in XM.
1
2
Press POWER to turn on the main unit.
Turn JOG roller (or press X ⁄ x on the remote) to select
“ XM CH0 RADIO ID”.
The radio ID appears.
XM
CHO RADIO ID
XXXXXXXX
3
Turn JOG roller (or press X ⁄ x on the remote) to select
desired channel.
• Holding down X ⁄ x makes the channel readout to rapidly increase or
decrease respectively.
• This unit has two scroll modes: Channel Scroll and Category Scroll. See
“Using the Category Scrolls”.
Channel Scroll: searches for a channel by scrolling every single channel
among authorized channels.
Category Scroll: searches for a channel using the Channel Category you
selected in the menu display.
Radio ID
Note
The Radio ID can be displayed only in Channel Scroll mode. See “Playing
the Receiver”.
Channel Number
Channel Name
To turn off the receiver
Press POWER.
Turn JOG roller (or press X ⁄ x on the remote) to select the
desired Channel Category and press JOG roller (or ENTER
on the remote).
To cancel a selection
Press DSPL/BACK (or BACK on the remote) to return to the previous
display during menu operation.
Press MENU on the remote commander to exit the menu display. The
display returns to the tuned channel display.
Tips
• When you tune in to a channel in Category Scroll mode, the Channel
Category appears for about 2 seconds in the display.
To cancel a selection
Press DSPL/BACK (or BACK on the remote) to return to the previous
display during menu operation.
Press MENU on the remote commander to exit the menu display. The
display returns to the tuned channel display.
SCROLL
NEWS
The unit searches for a channel that has the selected Channel Category
from the Channel Number next to the current channel.
The CATEGORY indicator appears in the upper left corner of the
display.
Turn JOG roller (or press X ⁄ x on the remote) to adjust the
hour and press JOG roller (or ENTER on the remote).
To check the current time while listening to a
broadcast
Turn JOG roller (or press X ⁄ x on the remote) to select
“CATEGORY SCROLL” and press JOG roller (or ENTER on
the remote).
MENU CATEGORY
4
Note
This unit does not have the Daylight Saving Time (summer time)
function.
Preset buttons
4
ADJUST
11:12AM
Press DSPL/BACK (or DSPL on the remote).
The display mode changes as follows:
Press JOG roller (or MENU on the remote).
The selected Channel Category appears in the display.
The display returns to the tuned channel display.
*
1
MODE
CHANNEL SCROLL
The “hour” flashes.
* The POWER and preset button No. 3 have a tactile dot.
Menu
Scroll mode
Memo
Back Light
Beep
Time Adjust
Contrast
Auto Power Down
Line Out Level
MENU SCROLL
SCROLL MODE
Remote sensor
This unit has three display modes in the tuned channel display.
“SCROLL MODE” appears in the display.
Menu icon
MENU
Using other Functions
XM CH13
CHAN TOP 20
Channel Number
Channel Name
NAME Maria
TITLE Christmas
Artist Name/Feature
Song/Program Title
The current scroll mode appears in the display.
The first menu item appears.
3
Press JOG roller (or MENU on the remote) to show the
menu display.
Checking the Tuned Channel
Information
XM
CAT
CH50
News
Channel Category
• When there is no channel that has the specified Channel Category,
“--------” is displayed.
INFO Concert
TIME 11:00AM
Song
starts
12/24/01
Additional Information
Current time and date
Tips
• When the Additional Information text has more than 16 characters, text
will be scrolled every 2 seconds.
After all Additional Information is displayed, “--- + --- + --- + --- +”
appears for about 2 seconds and then repeats displaying from the
beginning.
• As the unit memorizes the display mode when the power is turned off,
the display appears in the last display mode when you turn on the unit.
Note
If the channel has no text information, “--------” will appear in the display.
Press DSPL/BACK (or BACK on the remote) to return to the previous
display.
Press MENU on the remote commander to exit the menu display.
Note
When no operation is performed for about 1 minute in the menu display,
the unit cancels a selection and the display returns to the tuned channel
display.
3
menu display.
Turn JOG roller (or press X ⁄ x on the remote) to select
“MEMO” and press JOG roller (or ENTER on the remote).
1
2
3
The preset number appears.
4
Turn JOG roller (or press X ⁄ x on the remote) to adjust
contrast while checking the display and press JOG roller (or
ENTER on the remote).
Auto Power Down function automatically turns off the unit when the
specified time passes from the last button operation. The factory-set is “60
min”.
1
Press JOG roller (or MENU on the remote) to show the
menu display.
Turn JOG roller (or press X ⁄ x on the remote) to select
“AUTO POWER DOWN” and press JOG roller (or ENTER
on the remote).
MENU AUTO
3
POWER DOWN
60min
Turn JOG roller (or press X ⁄ x on the remote) to select
setting and press JOG roller (or ENTER on the remote).
The setting changes as follows:
OFF
60 min
120 min
180 min
When you select a setting other than “OFF”, the Auto Power Down
indicator appears in the lower left corner of the display. To disable the
Auto Power Down function, select “OFF.”
When the specified time passes, the following messages appear in the
display.
Turn JOG roller (or press X ⁄ x on the remote) to select the
desired setting and press JOG roller (or ENTER on the
remote).
POWERING DOWN
2 seconds
Press JOG roller (or MENU on the remote) to show the
menu display.
Turn JOG roller (or press X ⁄ x on the remote) to select
“BEEP” and press JOG roller (or ENTER on the remote).
NO POWER DOWN?
PRESS ANY KEY
When no button is pressed, the unit turns off the power. If you press
any button, the timer duration will begin from the start.
Line Out Level
You can adjust the output level of the signal from the LINE OUT jack in 8
levels. The factory-set is level 8 (Maximum.).
MENU BEEP
ON
Memory number
tune in to the channel you wish to preset.
Hold down the preset button on the unit for more than 2
seconds.
H
Auto Power Down
LIGHT
BRIGHT
The current setting appears in the display.
MEMO 1
Tuning in to a preset channel
1 Press POWER to turn on the main unit.
2 Press the desired preset button (1–5).
3
BRIGHT: makes the display window bright.
DIM: makes the display window dim.
OFF: turns off the lighting of the display window.
MENU MEMO
Presetting a channel
1 Follow steps 1 to 3 in “Playing the Receiver”, and manually
Note
You cannot preset channels using the remote.
L
You can turn the beep on or off. The factory-set is “ON”.
2
The previous preset channel is deleted and the unit presets the
channel being received.
MENU CONTRAST
Beep
Preset Tuning
Preset number
Press JOG roller (or MENU on the remote) to show the
menu display.
Turn JOG roller (or press X ⁄ x on the remote) to select
“BACK LIGHT” and press JOG roller (or ENTER on the
remote).
MENU BACK
“MEMORIZED” appears for about 2 seconds and the information is
stored in “MEMO 1”.
The memory numbers of already stored information increases by one.
Viewing the stored information
1 Press JOG roller (or MENU on the remote) to show the
XM CH50
PRESET1
CHAN Financial News
The current setting appears in the display.
The current setting appears in the display.
Press MEMO when the channel you wish to store the
information is received.
MEMORIZED
Press JOG roller (or MENU on the remote) to show the
menu display.
Turn JOG roller (or press X ⁄ x on the remote) to select
“CONTRAST” and press JOG roller (or ENTER on the
remote).
The current setting appears in the display.
2
Presetting your Favorite
Channels
2
2
You can select the lighting level of the display window. The factory-set is
“BRIGHT”.
You can store the text information contained in the tuned-in channel. This
unit can store ten sets of the following information:
– Channel Number
– Channel Name
– Artist Name or Feature
– Song or Program Title
– Additional Information and time/date
1
1
2
Back Light
1
Note
When you store the eleventh set of information, the oldest one will be
deleted.
See
“Using the Category Scroll”
“Storing the Information”
below
below
“Adjusting the Time Difference”
below
below
below
You can adjust the contrast of the display window in 8 levels. The factoryset is level 4.
To cancel a selection
Storing the Information
Note
When the Category list cannot be received depending on the receiving
condition, “--------” is displayed in step 3 above, and you cannot select the
Channel Category.
You can preset up to 5 channels onto the preset buttons (1–5). To access
the preset channels, simply press the corresponding preset buttons (1–5).
All the preset buttons are preset to Channel Number 1 at the factory.
You can also use the following functions in the menu display.
Contrast
If no information is stored, “NO MEMO” will appear.
Turn JOG roller (or press X ⁄ x on the remote) to select the
desired memory number and press JOG roller (or ENTER
on the remote).
Turn JOG roller (or press X ⁄ x on the remote) to scroll the
stored text information.
The information appears in the following order: Artist Name/Feature
t Song/Program Title t Additional Information t Channel
Number t Channel Name t Time and date.
3
Turn JOG roller (or press X ⁄ x on the remote) to select
“ON” or “OFF” and press JOG roller (or ENTER on the
remote).
Standard level adjustment
• When the car connecting pack is connected to the LINE OUT jack of the
unit and using it in a car, turn down the Line Out Level to avoid sound
distortion.
• When the car connecting pack is not connected to the LINE OUT jack,
set the Line Out Level to the maximum level.
1
2
To return to the display for selecting the
memory number
The current setting appears in the display.
MENU LINE
Press DSPL/BACK (or BACK on the remote).
To exit the menu display
Press MENU on the remote commander. The display returns to the tuned
channel display.
Press JOG roller (or MENU on the remote) to show the
menu display.
Turn JOG roller (or press X ⁄ x on the remote) to select
“LINE OUT LEVEL” and press JOG roller (or ENTER on the
remote).
3
OUT LEVEL
Turn JOG roller (or press X ⁄ x on the remote) to adjust the
Line Out Level while listening to the radio and press JOG
roller (or ENTER on the remote).