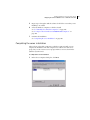
1
Symantec™ Client Security
Installation Guide
Symantec™ Client Security
Installation Guide
The software described in this book is furnished under a license agreement and may be
used only in accordance with the terms of the agreement.
PN: 10059786
Documentation version 1.1
Copyright Notice
Copyright © 2003 Symantec Corporation.
All Rights Reserved.
Any technical documentation that is made available by Symantec Corporation is the
copyrighted work of Symantec Corporation and is owned by Symantec Corporation.
NO WARRANTY. The technical documentation is being delivered to you
AS-IS, and Symantec Corporation makes no warranty as to its accuracy or use. Any use of
the technical documentation or the information contained therein is at the risk of the user.
Documentation may include technical or other inaccuracies or typographical errors.
Symantec reserves the right to make changes without prior notice.
No part of this publication may be copied without the express written permission of
Symantec Corporation, 20330 Stevens Creek Blvd., Cupertino, CA 95014.
Trademarks
Symantec, the Symantec logo, and LiveUpdate are U.S. registered trademarks of Symantec
Corporation. Symantec AntiVirus, Symantec Client Security and Symantec Security
Response are trademarks of Symantec Corporation.
Other brands and product names mentioned in this manual may be trademarks or
registered trademarks of their respective companies and are hereby acknowledged.
Printed in the United States of America.
10 9
8
7
6 5
4
3 2
1
Technical support
As part of Symantec Security Response, the Symantec global Technical Support
group maintains support centers throughout the world. The Technical Support
group’s primary role is to respond to specific questions on product feature/
function, installation, and configuration, as well as to author content for our
Web-accessible Knowledge Base. The Technical Support group works
collaboratively with the other functional areas within Symantec to answer your
questions in a timely fashion. For example, the Technical Support group works
with Product Engineering as well as Symantec Security Response to provide
Alerting Services and Virus Definition Updates for virus outbreaks and security
alerts.
Symantec technical support offerings include:
■
A range of support options that give you the flexibility to select the right
amount of service for any size organization
■
Telephone and Web support components that provide rapid response and
up-to-the-minute information
■
Upgrade insurance that delivers automatic software upgrade protection
■
Content Updates for virus definitions and security signatures that ensure the
highest level of protection
■
Global support from Symantec Security Response experts, which is available
24 hours a day, 7 days a week worldwide in a variety of languages
■
Advanced features, such as the Symantec Alerting Service and Technical
Account Manager role, offer enhanced response and proactive security
support
Please visit our Web site for current information on Support Programs. The
specific features available may vary based on the level of support purchased and
the specific product that you are using.
Licensing and registration
If the product that you are implementing requires registration and/or a license
key, the fastest and easiest way to register your service is to access the Symantec
licensing and registration site at www.symantec.com/certificate. Alternatively,
you may go to www.symantec.com/techsupp/ent/enterprise.html, select the
product that you wish to register, and from the Product Home Page, select the
Licensing and Registration link.
Contacting Technical Support
Customers with a current support agreement may contact the Technical Support
group via phone or online at www.symantec.com/techsupp.
Customers with Platinum support agreements may contact Platinum Technical
Support via the Platinum Web site at www-secure.symantec.com/platinum/.
When contacting the Technical Support group, please have the following:
■
Product release level
■
Hardware information
■
Available memory, disk space, NIC information
■
Operating system
■
Version and patch level
■
Network topology
■
Router, gateway, and IP address information
■
Problem description
■
Error messages/log files
■
Troubleshooting performed prior to contacting Symantec
■
Recent software configuration changes and/or network changes
Customer Service
To contact Enterprise Customer Service online, go to www.symantec.com, select
the appropriate Global Site for your country, then choose Service and Support.
Customer Service is available to assist with the following types of issues:
■
Questions regarding product licensing or serialization
■
Product registration updates such as address or name changes
■
General product information (features, language availability, local dealers)
■
Latest information on product updates and upgrades
■
Information on upgrade insurance and maintenance contracts
■
Information on Symantec Value License Program
■
Advice on Symantec's technical support options
■
Nontechnical presales questions
■
Missing or defective CD-ROMs or manuals
SYMANTEC SOFTWARE LICENSE AGREEMENT
SYMANTEC CLIENT SECURITY
SYMANTEC CORPORATION AND/OR ITS SUBSIDIARIES
(“SYMANTEC”) IS WILLING TO LICENSE THE SOFTWARE TO
YOU AS AN INDIVIDUAL, THE COMPANY, OR THE LEGAL
ENTITY THAT WILL BE UTILIZING THE SOFTWARE
(REFERENCED BELOW AS “YOU OR YOUR”) ONLY ON THE
CONDITION THAT YOU ACCEPT ALL OF THE TERMS OF THIS
LICENSE AGREEMENT. READ THE TERMS AND CONDITIONS
OF THIS LICENSE AGREEMENT CAREFULLY BEFORE USING
THE SOFTWARE. THIS IS A LEGAL AND ENFORCEABLE
CONTRACT BETWEEN YOU AND THE LICENSOR. BY OPENING
THIS PACKAGE, BREAKING THE SEAL, CLICKING ON THE
“AGREE” OR “YES” BUTTON OR OTHERWISE INDICATING
ASSENT ELECTRONICALLY, OR LOADING THE SOFTWARE,
YOU AGREE TO THE TERMS AND CONDITIONS OF THIS
AGREEMENT. IF YOU DO NOT AGREE TO THESE TERMS AND
CONDITIONS, CLICK ON THE “I DO NOT AGREE”, “NO”
BUTTON, OR OTHERWISE INDICATE REFUSAL AND MAKE NO
FURTHER USE OF THE SOFTWARE.
1. LICENSE.
The software and documentation that accompanies this license
(collectively the "Software") is the proprietary property of Symantec or
its licensors and is protected by copyright law. While Symantec
continues to own the Software, You will have certain rights to use the
quantity of the Software for which You have paid the applicable license
fees after Your acceptance of this license. This license governs any
releases, revisions, or enhancements to the Software that the Licensor
may furnish to You. Except as may be modified by an applicable
Symantec license certificate, license coupon, or license key (each a
“License Module”) that accompanies, precedes, or follows this license,
Your rights and obligations with respect to the use of licensed copies of
this Software are as follows:
YOU MAY:
A. use the Software in the manner described in the Software
documentation and in accordance with the License Module. If the
Software is part of an offering containing multiple Software titles, the
aggregate number of copies You may use may not exceed the aggregate
number of licenses indicated in the License Module, as calculated by
any combination of licensed Software titles in such offering. Your
License Module shall constitute proof of Your right to make such
copies. If no License Module accompanies, precedes, or follows this
license, You may make one copy of the Software You are authorized to
use on a single machine;
B. make one copy of the Software for archival purposes, or copy the
Software onto the hard disk of Your computer and retain the original
for archival purposes;
C. use the Software on a network or to protect a network such as at the
gateway or on a mail server, provided that You have a license to the
Software for each computer that can access the network;
D. after written consent from Symantec, transfer the Software on a
permanent basis to another person or entity, provided that You retain
no copies of the Software and the transferee agrees to the terms of this
license; and
E. use the Software in accordance with any additional permitted uses
set forth in Section 8, below.
YOU MAY NOT:
A. copy the printed documentation which accompanies the Software;
B. sublicense, rent or lease any portion of the Software; reverse
engineer, decompile, disassemble, modify, translate, make any attempt
to discover the source code of the Software, or create derivative works
from the Software;
C. use a previous version or copy of the Software after You have
received a disk replacement set or an upgraded version. Upon
upgrading the Software, all copies of the prior version must be
destroyed;
D. use a later version of the Software than is provided herewith unless
You have purchased corresponding maintenance and/or upgrade
insurance or have otherwise separately acquired the right to use such
later version;
E. use, if You received the software distributed on media containing
multiple Symantec products, any Symantec software on the media for
which You have not received a permission in a License Module;
F. use the Software in any manner not authorized by this license; nor
G. use the Software in any manner that contradicts any additional
restrictions set forth in Section 8, below.
2. CONTENT UPDATES:
Certain Symantec software products utilize content that is updated
from time to time (antivirus products utilize updated virus definitions;
content filtering products utilize updated URL lists; some firewall
products utilize updated firewall rules; vulnerability assessment
products utilize updated vulnerability data, etc.; collectively, these are
referred to as "Content Updates"). You may obtain Content Updates
for any period for which You have purchased upgrade insurance for
the product, entered into a maintenance agreement that includes
Content Updates, or otherwise separately acquired the right to obtain
Content Updates. This license does not otherwise permit You to
obtain and use Content Updates.
3. LIMITED WARRANTY:
Symantec warrants that the media on which the Software is distributed
will be free from defects for a period of sixty (60) days from the date of
delivery of the Software to You. Your sole remedy in the event of a
breach of this warranty will be that Symantec will, at its option, replace
any defective media returned to Symantec within the warranty period
or refund the money You paid for the Software. Symantec does not
warrant that the Software will meet Your requirements or that
operation of the Software will be uninterrupted or that the Software
will be error-free.
THE ABOVE WARRANTY IS EXCLUSIVE AND IN LIEU OF ALL
OTHER WARRANTIES, WHETHER EXPRESS OR IMPLIED,
INCLUDING THE IMPLIED WARRANTIES OF
MERCHANTABILITY, FITNESS FOR A PARTICULAR PURPOSE
AND NONINFRINGEMENT OF INTELLECTUAL PROPERTY
RIGHTS. THIS WARRANTY GIVES YOU SPECIFIC LEGAL
RIGHTS. YOU MAY HAVE OTHER RIGHTS, WHICH VARY FROM
STATE TO STATE AND COUNTRY TO COUNTRY.
4. DISCLAIMER OF DAMAGES:
SOME STATES AND COUNTRIES, INCLUDING MEMBER
COUNTRIES OF THE EUROPEAN ECONOMIC AREA, DO NOT
ALLOW THE LIMITATION OR EXCLUSION OF LIABILITY FOR
INCIDENTAL OR CONSEQUENTIAL DAMAGES SO THE BELOW
LIMITATION OR EXCLUSION MAY NOT APPLY TO YOU.
TO THE MAXIMUM EXTENT PERMITTED BY APPLICABLE LAW
AND REGARDLESS OF WHETHER ANY REMEDY SET FORTH
HEREIN FAILS OF ITS ESSENTIAL PURPOSE, IN NO EVENT WILL
SYMANTEC BE LIABLE TO YOU FOR ANY SPECIAL,
CONSEQUENTIAL, INDIRECT OR SIMILAR DAMAGES,
INCLUDING ANY LOST PROFITS OR LOST DATA ARISING OUT
OF THE USE OR INABILITY TO USE THE SOFTWARE EVEN IF
SYMANTEC HAS BEEN ADVISED OF THE POSSIBILITY OF SUCH
DAMAGES.
IN NO CASE SHALL SYMANTEC'S LIABILITY EXCEED THE
PURCHASE PRICE FOR THE SOFTWARE. The disclaimers and
limitations set forth above will apply regardless of whether You accept
the Software.
5. U.S. GOVERNMENT RESTRICTED RIGHTS:
RESTRICTED RIGHTS LEGEND. All Symantec products and
documentation are commercial in nature. The software and software
documentation are "Commercial Items", as that term is defined in 48
C.F.R. section 2.101, consisting of "Commercial Computer Software"
and "Commercial Computer Software Documentation", as such terms
are defined in 48 C.F.R. section 252.227-7014(a)(5) and 48 C.F.R.
section 252.227-7014(a)(1), and used in 48 C.F.R. section 12.212 and
48 C.F.R. section 227.7202, as applicable. Consistent with 48 C.F.R.
section 12.212, 48 C.F.R. section 252.227-7015, 48 C.F.R. section
227.7202 through 227.7202-4, 48 C.F.R. section 52.227-14, and other
relevant sections of the Code of Federal Regulations, as applicable,
Symantec's computer software and computer software documentation
are licensed to United States Government end users with only those
rights as granted to all other end users, according to the terms and
conditions contained in this license agreement. Manufacturer is
Symantec Corporation, 20330 Stevens Creek Blvd., Cupertino, CA
95014, United States of America.
6. EXPORT REGULATION:
Export, re-export of this Software is governed by the laws and
regulations of the United States and import laws and regulations of
certain other countries Export or re-export of Software to any entity
on the Denied Parties List and other lists promulgated by various
agencies of the United States Federal Government is strictly prohibited.
7. GENERAL:
If You are located in North America or Latin America, this Agreement
will be governed by the laws of the State of California, United States of
America. Otherwise, this Agreement will be governed by the laws of
England. This Agreement and any related License Module is the entire
agreement between You and Symantec relating to the Software and: (i)
supersedes all prior or contemporaneous oral or written
communications, proposals and representations with respect to its
subject matter; and (ii) prevails over any conflicting or additional
terms of any quote, order, acknowledgment or similar
communications between the parties. This Agreement shall terminate
upon Your breach of any term contained herein and You shall cease
use of and destroy all copies of the Software. The disclaimers of
warranties and damages and limitations on liability shall survive
termination. The original of this Agreement has been written in
English and English is the governing language of this Agreement. This
Agreement may only be modified by a License Module which
accompanies this license or by a written document which has been
signed by both You and Symantec. Should You have any questions
concerning this Agreement, or if You desire to contact Symantec for
any reason, please write to: (i) Symantec Customer Service, 555
International Way, Springfield, OR 97477, U.S.A. or (ii) Symantec
Customer Service Center, PO BOX 5689, Dublin 15, Ireland.
8. ADDITIONAL RESTRICTIONS FOR SPECIFIED
SOFTWARE:
i.If the product You have licensed is Symantec AntiVirus Scan Engine,
Symantec AntiVirus for NetApp® Filer/NetCache®, or Symantec
AntiVirus for Inktomi® Traffic Edge™, the following additional
restrictions apply to Your use of the Software:
A. Symantec AntiVirus for NetApp Filer/NetCache may only be used
to scan and repair files accessed through NetApp Filer/NetCache.
B. Symantec AntiVirus for Inktomi Traffic Edge may only be used to
scan and repair files accessed through Inktomi Traffic Edge.
C. Symantec AntiVirus Scan Engine may not be used to scan and
repair files accessed through NetApp Filer/NetCache or Inktomi Traffic
Edge.
ii.If the product You have licensed is Symantec Web Security,
independent of version or operating platform designation, upon the
expiration of Your right to acquire Content Updates, the filtering
definitions corresponding with all previous Content Updates will be
entirely deleted and will no longer be available for use with the
Software. Upon the expiration of Your right to acquire Content
Updates, access to updated virus definitions will no longer be available,
however, Licensee may continue to use virus definitions previously
acquired.
----------------------------NetApp and NetCache are registered trademarks of Network
Appliance, Inc. in the U.S. and other countries. Inktomi and Traffic
Edge are trademarks or registered trademarks of Inktomi Corporation
in the United States and other countries.
This Software utilizes the Standard Template Library, a C++ library of
container classes, algorithms, and iterators. Copyright © 1996-1999.
Silicon Graphics Computer Systems, Inc. Copyright © 1994. HewlettPackard Company.
Contents
Technical support
Chapter 1
Introducing Symantec Client Security
About Symantec Client Security .................................................................... 12
Components of Symantec Client Security ..................................................... 13
What’s new in this release .............................................................................. 15
How Symantec Client Security works ............................................................ 17
How the Symantec System Center works .............................................. 17
How Symantec Client Security installation works ................................ 17
How protection updating works ............................................................ 19
How Symantec Client Security communication works ........................ 21
How alerting works ................................................................................. 23
How the Digital Immune System works ................................................ 24
What you can do with Symantec Client Security .......................................... 25
Deploy protection efficiently .................................................................. 26
Protect against blended threats ............................................................... 26
Respond to blended threats .................................................................... 28
Manage Symantec Client Security clients based on their
connectivity ...................................................................................... 30
Centrally manage and update security ................................................... 31
Verify security status ............................................................................... 32
Establish and enforce policies ................................................................. 32
View history and event log data .............................................................. 33
Where to get more information about Symantec Client Security ................ 33
Chapter 2
Planning security protection
Creating a security protection plan ................................................................ 36
Learning about scan types ....................................................................... 36
Creating a plan for updating virus definitions files ............................... 37
Developing a scanning schedule ............................................................. 39
Creating firewall and intrusion detection policies ................................. 40
Creating management policies ....................................................................... 43
Creating migration plans ................................................................................ 44
8 Contents
Chapter 3
Preparing to install Symantec Client Security
Deciding which components to install ...........................................................48
Management components .......................................................................48
Symantec Client Security servers ............................................................50
Symantec Client Security clients .............................................................50
Symantec Client Security administration tools ......................................51
Best practice: Piloting Symantec Client Security in a lab setting ..................51
Simulating a realistic network environment in a lab setting .................51
Installation considerations ..............................................................................54
Preparing for the Symantec System Center installation ........................54
Preparing for Symantec Client Security server installation ...................55
Preparing for Symantec Client Security client installation ....................62
Chapter 4
Symantec Client Security installation requirements
About installation requirements .....................................................................66
Required protocols ..........................................................................................66
The Symantec System Center and snap-in requirements .............................66
Quarantine Console requirements .........................................................67
Alert Management System snap-in requirements ..................................67
Symantec Client Security antivirus protection snap-in
requirements .....................................................................................67
Symantec Client Firewall snap-in requirements ....................................67
AV Server Rollout tool requirements .....................................................67
NT Client Install tool requirements ........................................................67
Symantec Client Security server installation requirements ..........................68
Microsoft Windows operating systems ..................................................68
Novell NetWare operating system ..........................................................68
Quarantine Server requirements ....................................................................69
Symantec Client Security client installation requirements ...........................69
Symantec Client Security client (antivirus and firewall protection)
for 32-bit computers ........................................................................70
Symantec Client Security antivirus client for 32-bit computers ...........70
Symantec Client Security antivirus client for 64-bit computers ...........71
Symantec Client Security firewall client requirements ..........................71
Requirements for clients that are running IPX only ..............................71
Symantec Client Firewall Administrator requirements ................................72
Symantec Packager requirements ...................................................................72
Chapter 5
Installing Symantec Client Security management
components
Installing the Symantec System Center ..........................................................76
Installing Symantec Client Firewall Administrator .......................................81
Contents
Installing Symantec Packager ......................................................................... 84
Installing the Central Quarantine .................................................................. 87
Installing and configuring the LiveUpdate Administration Utility ............. 94
Uninstalling Symantec Client Security management components .............. 97
Uninstalling the Symantec System Center ............................................. 97
Chapter 6
Installing Symantec Client Security servers
Server installation methods .......................................................................... 100
About Symantec Client Security server installation .................................... 101
Why AMS is installed with the Symantec Client Security server ....... 101
Deploying the server installation across a network connection ................. 102
Starting the server installation .............................................................. 103
Running the server setup program ....................................................... 104
Selecting computers to which you want to install ............................... 106
Completing the server installation ....................................................... 109
Checking for errors ............................................................................... 113
Manually loading the Symantec Client Security NLMs ...................... 113
Installing Symantec Client Security with NetWare Secure
Console enabled ............................................................................. 114
Installing directly to a Windows computer using the server
installation package ........................................................................ 115
Manually installing AMS server ................................................................... 116
Uninstalling Symantec Client Security server ............................................. 117
Chapter 7
Installing Symantec Client Security clients
Client installation methods .......................................................................... 120
About Symantec Client Security client installation .................................... 122
About the antivirus client packages and configuration file ................. 123
Deploying the Symantec Client Security client installation across
a network connection ............................................................................ 123
Deploying the antivirus client installation across a network connection .. 125
Starting the antivirus client installation ............................................... 125
Running the antivirus client setup program ........................................ 125
Setting up antivirus client installations using logon scripts ....................... 129
Using the Symantec System Center to set logon script options .......... 129
Associating users with the logon script ................................................ 131
Installing from the client installation package on the server ...................... 133
Deploying installation packages using Web-based deployment ................ 134
Reviewing Web-based deployment requirements ............................... 134
Installing the Web server ...................................................................... 135
Setting up the installation Web server ................................................. 135
Customizing the deployment files ........................................................ 138
9
10 Contents
Testing the installation ..........................................................................140
Notifying users of the download location ............................................140
Installing Symantec Client Security clients locally ......................................141
Starting the installation for 32-bit and 64-bit computers ...................142
Running the antivirus client setup program ........................................143
Running the firewall client setup program ...........................................146
Completing the installation ...................................................................149
Installing preconfigured installation packages from the CD ......................150
Installing clients using third-party products ...............................................151
Installing Microsoft SMS package definition files ................................151
Installing with the Novell ManageWise ZENworks Application
Launcher .........................................................................................152
Configuring automatic client installations from NetWare servers
without the Symantec System Center ...................................................152
Post-installation client tasks .........................................................................154
Creating and using Emergency Disk sets ..............................................154
Protecting the Symantec Client Security registry key on
Windows NT 4.0 computers ..........................................................155
Configuring clients using the configurations file ........................................156
Obtaining the configurations file ..........................................................156
Copying the configurations file to the antivirus client ........................157
Uninstalling Symantec Client Security clients .............................................158
Uninstalling firewall clients ...................................................................158
Chapter 8
Using Symantec Packager with Symantec Client Security
About Symantec Packager .............................................................................160
What you can do with Symantec Packager ...........................................160
Creating custom installation packages .................................................161
Importing product modules .........................................................................162
Configuring Symantec Client Security products .........................................162
Symantec Client Security product configuration files .........................162
Selecting product features .....................................................................165
Setting product installation options .....................................................166
Including configuration files .................................................................167
Creating custom commands .................................................................168
Creating installation packages ......................................................................168
Adding products and commands to a package ....................................168
Configuring other package settings ......................................................169
Building packages ..................................................................................170
Testing packages ....................................................................................170
Deploying packages .......................................................................................171
Index
Chapter
Introducing Symantec
Client Security
This chapter includes the following topics:
■
About Symantec Client Security
■
Components of Symantec Client Security
■
What’s new in this release
■
How Symantec Client Security works
■
What you can do with Symantec Client Security
■
Where to get more information about Symantec Client Security
1
12 Introducing Symantec Client Security
About Symantec Client Security
About Symantec Client Security
Antivirus protection alone is not a sufficient defense against today’s complex
Internet security threats. The new breed of threats blend characteristics of viruses,
worms, Trojan horses, and malicious code with server and Internet
vulnerabilities. By using multiple methods and techniques, blended threats such
as Nimda and Code Red can rapidly initiate, transmit, and spread an attack,
causing widespread damage.
Effective protection from blended threats requires a security solution that
integrates multiple layers of defense and response mechanisms. The answer is
Symantec Client Security, an integrated security solution that integrates a
firewall, intrusion detection, and antivirus protection. From a single management
console, Symantec Client Security provides a comprehensive view of network
security and rapid response to security threats.
Symantec Client Security lets you do the following:
■
Manage the deployment, configuration, updating, and reporting of antivirus
and firewall protection, and intrusion detection from an integrated
management console. This reduces administrative and support costs in
comparison to the cost of managing multiple security components from
multiple vendors.
■
Quickly respond to threats such as the Nimda worm, which spread through
multiple exploits.
■
Provide a high level of protection and an integrated response to security
threats for all users that connect to your network, including telecommuters
with “always on” connections and mobile users with intermittent
connections to your network.
■
Obtain a consolidated view of multiple security components across all of the
workstations on your network.
■
Perform a customizable, integrated installation of all of the security
components and set policies simultaneously.
Introducing Symantec Client Security
Components of Symantec Client Security
Components of Symantec Client Security
Figure 1-1 shows an overview of the main components of Symantec Client
Security.
Figure 1-1
Overview of Symantec Client Security
Symantec Security Response
Symantec System Center console
Symantec Client Security server
Server & client management
Firewall policy rollout
Alert configuration
Antivirus management
Firewall protection &
intrusion detection
Client management
Antivirus configuration
Virus definitions
Alert handling
Firewall & IDS policy updates
Antivirus protection
Symantec Client
Security
unmanaged client
Symantec Client
Security managed
client (32-bit)
Symantec Client
Security managed
client (64-bit)
Symantec Client
Security client
network server
Central Quarantine
server
Antivirus protection
Antivirus protection
Antivirus protection
Antivirus protection
Antivirus protection
Firewall protection
& intrusion
detection
Firewall protection
& intrusion
detection
Table 1-1 lists and describes the main components of Symantec Client Security.
13
14 Introducing Symantec Client Security
Components of Symantec Client Security
For a specific list of supported operating systems for each feature, see “About
installation requirements” on page 66.
Table 1-1
Components of Symantec Client Security
Component
What it does
The Symantec System Center
The management console, which runs on a
supported Microsoft Windows operating system.
You can use the Symantec System Center to
perform management operations such as
installing Symantec Client Security antivirus
protection on workstations and network servers,
updating virus definitions, and managing
network servers and workstations running
Symantec Client Security.
Symantec Client Security server
A Symantec Client Security server can:
■
■
■
Push configuration and virus definitions file
updates to Symantec Client Security clients.
Push firewall and intrusion detection
policies to Symantec Client Security firewall
clients.
Protect the supported Windows and
NetWare computers on which it runs.
Symantec Client Firewall
Administrator
A tool for creating and modifying firewall and
intrusion detection rules.
Symantec Client Security client
The Symantec Client Security client provides
antivirus, firewall, and intrusion protection for
networked and non-networked computers.
Symantec Client Security protects supported
Windows computers.
LiveUpdate
LiveUpdate is a Symantec technology that allows
each computer running Symantec Client Security
to automatically pull virus definitions updates
from an internal LiveUpdate server or directly
from the Symantec LiveUpdate server.
Introducing Symantec Client Security
What’s new in this release
Table 1-1
Components of Symantec Client Security
Component
What it does
Central Quarantine
Part of the Digital Immune System, Central
Quarantine provides automated responses to
heuristically detected new or unrecognized
viruses. Infected items are isolated on Symantec
Client Security servers and clients and forwarded
to Central Quarantine. The Central Quarantine
can automatically forward suspicious files to
Symantec Security Response (formerly known as
Symantec AntiVirus Research Center), which
develops and returns updated virus definitions.
Symantec Packager
Symantec Client Security comes with installation
packages that are designed for the most common
types of Symantec Client Security installations.
You can use Symantec Packager to create,
modify, and deploy your own custom installation
packages.
What’s new in this release
Symantec Client Security includes new features, as well as improved features.
Table 1-2 lists and describes what’s new in this release.
Table 1-2
New features in Symantec Client Security
Feature
Description
Enhanced server group security
You can enhance the security that is provided by
server group passwords by creating an access list that
restricts inbound communication to only the IP and
IPX addresses that are specified in the access list. For
example, you can prevent an attacker who has access
to the Symantec System Center console and a valid
server group password from making unauthorized
changes to the following:
■
■
■
■
■
■
Server and client antivirus protection settings
File system realtime protection settings
Client group member assignments
Primary server assignments
Grc.dat file distribution
Virus definitions file rollbacks
15
16 Introducing Symantec Client Security
What’s new in this release
Table 1-2
New features in Symantec Client Security
Feature
Description
Network audit
Computers on your network that do not have
antivirus protection leave holes open in your
network security. You can run a network audit of
remote computers to determine the following:
■
■
■
Firewall log viewing
The Symantec System Center lets you display log
data for one or more Symantec Client Security
firewall clients. Using the Symantec System Center,
you can do the following:
■
■
■
64-bit computer support
Whether a Symantec Client Security antivirus
client is installed and running.
The type of protection, such as antivirus server,
client, or unmanaged client, that is installed.
Whether antivirus software from other vendors
or from Symantec (such as a Symantec
AntiVirus consumer version) is installed on the
computer. This information includes the type
and version of the software.
View data at the server group, individual server,
and individual managed workstation levels.
Sort and filter Event Log data.
Export data to Microsoft Access (as an .mdb
file) or in comma-separated value (CSV)
format.
The Symantec Client Security antivirus client
provides antivirus protection for supported 64-bit
clients and servers.
For more information on system requirements, see
“Symantec Client Security client installation
requirements” on page 69.
Windows Server 2003 support
You can install the following components to
computers running Windows Server 2003:
■
■
■
NetWare Secure Console support
Symantec Client Security server (32-bit)
Quarantine Server (32-bit)
Symantec Client Security antivirus client (32bit and 64-bit)
Symantec Client Security can be installed on
NetWare servers while NetWare Secure Console is
running.
Introducing Symantec Client Security
How Symantec Client Security works
How Symantec Client Security works
Understanding how the following key areas of Symantec Client Security work is
an important part of making intelligent decisions about the product:
■
The Symantec System Center
■
Installation
■
Protection updating
■
Communication
■
Alerting
■
The Digital Immune System
How the Symantec System Center works
The Symantec System Center console snaps in to the Microsoft Management
Console (MMC). MMC is a common framework with no management
functionality of its own. MMC serves as a central host from which you can run
multiple network and component management applications, such as the
Symantec System Center.
MMC is installed on a local drive of a Windows NT 4.0 (Workstation or Server)
computer. MMC installs automatically with Windows 2000 Professional/Server/
Advanced Server/XP Professional. When the Symantec System Center is installed
on this same computer, it snaps in to MMC.
Just as the Symantec System Center console snaps in to MMC, other Symantec
management components snap in to the Symantec System Center. For example,
the Central Quarantine snaps in to the Symantec System Center.
How Symantec Client Security installation works
Symantec Client Security provides several methods for installing servers, which
are outlined in Table 1-3.
Table 1-3
Symantec Client Security server installation sources
Source
Description
Package
You can use the preconfigured server installation
package to install a Symantec Client Security server.
You can distribute packages using Symantec
Packager, a Web-based installation, via a login script,
or a third-party tool.
17
18 Introducing Symantec Client Security
How Symantec Client Security works
Table 1-3
Symantec Client Security server installation sources
Source
Description
AV Server Rollout tool
You can push a server installation to computers that
are running supported Microsoft Windows operating
systems and NetWare 5.x or later from the Symantec
System Center or the Symantec Client Security CD.
Symantec Packager
You can create a customized package that contains a
server installation.
Web-based
You can create a Web-based installation for a
supported Web server. Administrators may also want
to create a site to download the server installation.
Table 1-4 lists and describes the Symantec Client Security client installation
methods, and outlines the preparatory tasks that you need to complete before
deployment.
Table 1-4
Symantec Client Security client installation methods
Method
Description
NT Client Install tool
You can push client installations to computers
running supported Microsoft Windows operating
systems from the Symantec System Center or the
Symantec Client Security CD.
Symantec Packager
You can use Symantec Packager to create a package
that contains a customized client installation for 32bit computers. You can distribute packages using
Symantec Packager, a Web-based installation, via a
login script, or a third-party tool. Symantec Packager
is not supported on 64-bit computers.
CD or disk image
You can install clients from a server-based disk image
or from the installation CD.
Web-based
You can create a Web-based installation for a
supported Web server. Web-based client installations
are available for computers running supported
Microsoft Windows operating systems. Once you’ve
configured the Web server, you can provide users
with a URL that links to the installation’s location.
Introducing Symantec Client Security
How Symantec Client Security works
Table 1-4
Symantec Client Security client installation methods
Method
Description
Login script
If you use login scripts on your Windows or NetWare
network, you can add a script component to the login
script that tests for and installs the client software.
The server installation program automatically creates
a NetWare logon group. You use your regular
network administration tools to add users to the
group.
Third-party tools
You can deploy clients using a third-party
deployment tool such as Microsoft Systems
Management Server.
See “Installing Symantec Client Security management components” on page 75.
How protection updating works
Symantec Client Security firewall policies are created or updated using the
Symantec Client Firewall Administrator tool. Clients can receive policy packages
via the Symantec System Center, the deployment tool in Symantec Packager,
Web-based distributions, login scripts, or other third-party tools.
The method that is used to deploy policy updates to clients depends on their
levels of client management:
■
Fully managed clients receive their policies through the Symantec System
Center.
■
Other clients can receive policy packages via the deployment tool in
Symantec Packager, Web-based distributions, login scripts, or other thirdparty tools.
19
20 Introducing Symantec Client Security
How Symantec Client Security works
Symantec Client Security provides four methods for updating virus definitions
files, which are described in Table 1-5.
Table 1-5
Virus definitions files update methods
Method
Description
Virus Definition Transport
Method
A push operation that starts when a primary server on
your network receives new virus definitions from
Symantec or an internal LiveUpdate server. The
primary server passes a virus definitions package to all
secondary servers. Secondary servers automatically
extract the virus definitions, place them in the
appropriate directory, and push the virus definitions
to the 32-bit Symantec Client Security antivirus clients
that they manage. This feature is not supported on 64bit computers.
Clients extract the virus definitions and place them in
the appropriate directory.
LiveUpdate
A pull operation that starts when a Symantec Client
Security antivirus client or server requests new virus
definitions. You can set up LiveUpdate to run on a
scheduled basis or after a specified number of days
when an Internet connection is detected.
LiveUpdate may be configured on each computer to
request the update from a designated internal
LiveUpdate server or directly from the Symantec
LiveUpdate server. In addition, the Continuous
LiveUpdate feature allows clients with intermittent
connectivity to automatically initiate LiveUpdate
when the client connects to the Internet and a set
number of days has elapsed.
LiveUpdate is the only virus definitions files update
method supported on 64-bit computers.
Central Quarantine polling
You can configure the Central Quarantine server to
poll Symantec for virus definitions files updates and
automatically push new virus definitions to computers
in your network.
Intelligent Updater
A self-extracting executable file that contains virus
definitions files. These files are available for download
from the Symantec Web site.
Introducing Symantec Client Security
How Symantec Client Security works
How Symantec Client Security communication works
Symantec Client Security employs the following forms of communication:
■
Communication during Discovery
■
Symantec Client Security antivirus server to client communication
Communication during Discovery
The Discovery service allows the Symantec System Center to learn about the
Symantec Client Security antivirus servers on a network. When you perform a
Discovery from the Symantec System Center console, the console broadcasts a
message across the network. Symantec Client Security antivirus servers listen for
and receive these messages, and return data (such as an antivirus server’s address
and server group) to the console. After the servers respond, the Symantec System
Center can query each antivirus server for additional information, such as which
computers running Symantec Client Security antivirus client report to the server.
The Symantec System Center uses the data it gathers from Discovery to display
the system hierarchy, representing each server based on its server group
membership.
Symantec Client Security antivirus server and client
communication
Symantec Client Security servers communicate with the clients that they control
to keep virus definitions files current, initiate client-side activities such as virus
scans, and provide configuration information. Symantec Client Security antivirus
clients communicate with their parent servers to provide status information and
log data.
Communication for virus definitions updates
The Virus Definition Transport Method employs two forms of communication:
■
Symantec Client Security servers communicate with the clients that they
manage to verify that virus definitions are current.
■
When virus definitions require updating, Symantec Client Security servers
push new virus definitions update files to the clients that they manage.
Symantec Client Security primary servers periodically communicate with their
secondary servers to verify that the virus definitions files on the secondary servers
are current. If the virus definitions are not current, the primary server pushes new
virus definitions files to the affected computers. Similarly, Symantec Client
Security parent servers periodically communicate with Symantec Client Security
antivirus clients to verify that their virus definitions files are current, and that
21
22 Introducing Symantec Client Security
How Symantec Client Security works
their clients have up-to-date configuration settings. If the virus definitions are
not current, parent servers push new virus definitions and configuration data to
the affected computers.
In addition to the Virus Definition Transport Method, virus definitions updates
can also be performed using LiveUpdate. LiveUpdate communication occurs
automatically when a LiveUpdate session is scheduled on the client, or when a
user performs a manual LiveUpdate. During a LiveUpdate session, clients
communicate with a LiveUpdate server to verify that their virus definitions are
current. Clients can be set up to connect to an internal LiveUpdate server, or the
Symantec LiveUpdate server. If virus definitions are not current, the client will
pull the virus definitions from the LiveUpdate server.
Communication for status information
Symantec Client Security antivirus clients provide status information to their
parent servers. By default, a client sends a small packet (less than 1 KB) called a
keep alive packet to its parent server every 60 minutes. The packet contains
configuration information about that client. When a client’s parent server
receives a keep alive packet that indicates that the client does not have current
virus definitions files or configuration data, the parent server pushes the
appropriate files to that client.
Note: Symantec Client Security uses User Datagram Protocol (UDP) for
antivirus client-antivirus server communication. Because some router policies
block UDP packets when they are sent between routers, you may need a
computer that is running Symantec Client Security server on both sides of each
router in your network.
Roaming client communication
Roaming client communication employs four components:
■
A list specifying the antivirus servers to which roaming clients can connect.
This list is merged into the registry of each Symantec Client Security roaming
client.
■
A list describing the hierarchy of parent servers in your network. Servers at
the top level cover the widest geographic area with each subsequent level
covering more specific locations.
Introducing Symantec Client Security
How Symantec Client Security works
■
Roamadmn.exe, which is the roaming client administration application that
you roll out to each roaming server.
■
A Symantec Client Security antivirus client installation with roaming
support enabled (via a registry switch).
Using Roamadmn.exe, you merge the hierarchical server list into the registry of
each roaming server. When a roaming-enabled computer starts, it examines its
list of roaming parents, and measures the access time for each parent. The client
selects the best parent, based on access time, number of computers that are
managed by that parent, and ranking within the server list. The Symantec Client
Security service periodically verifies that the connection is still active, and that it
is still the best available connection based on the list of servers.
How alerting works
You can use the Alert Management System2 (AMS2) when you manage Symantec
Client Security. To manage alerting for the firewall client, you must use Symantec
Enterprise Security alerting.
AMS2 alerting
The AMS2 console is a Symantec System Center component that supports alerts
from computers that are running AMS2 server and client. When you use the AV
Server Rollout tool, AMS2 server is installed by default to each Symantec Client
Security server. When you install an unmanaged Symantec Client Security
antivirus client, the AMS2 client is also installed. Managed antivirus clients don't
require the AMS2 client to generate alerts.
AMS2 can process notifications that are generated by Symantec Client Security
servers and antivirus clients through the following mechanisms:
■
Message Box
■
Broadcast
■
Send Internet Mail
■
Send Page
■
Run Program
■
Write to Windows NT Event Log
■
Send SNMP Trap
■
Load an NLM
23
24 Introducing Symantec Client Security
How Symantec Client Security works
How the Digital Immune System works
You can configure Symantec Client Security to use the Digital Immune System.
The Digital Immune System is a fully automated, closed-loop antivirus system
that manages the entire antivirus process, including virus discovery, virus
analysis, and deployment of a repair to the affected computers. In addition, the
Digital Immune System eliminates many of the manual tasks that are involved in
the submission, analysis, and distribution processes. Automation dramatically
reduces the time between when a virus is found and when a repair is deployed,
which decreases the severity of many virus threats.
Table 1-6 describes actions that the Digital Immune System performs.
Table 1-6
Digital Immune System actions
Action
Description
Identify and isolate viruses.
If a Symantec Client Security client is configured to
repair infected files but cannot repair a specific file, it
does the following:
■
■
Automatically moves suspicious files to a local
Quarantine
Creates a log entry for the virus event, and
optionally sends an AMS2 alert
On the local Quarantine, suspicious files are
packaged with information about the submitting
computer and forwarded to the corporate Central
Quarantine for further analysis.
Rescan and submit viruses to
Symantec Security Response.
Since the Central Quarantine may have more up-todate virus definitions than the submitting computer,
it scans files using its own set of virus definitions. If
the Central Quarantine can fix a file, it pushes the
newer virus definitions to the affected computer. If
the Central Quarantine cannot fix a file, it strips it of
potentially sensitive data (for example, text is
removed from Microsoft Word files) and encrypts it.
The Quarantine Agent transmits the file over the
Internet using Secure Sockets Layer (SSL) to a
Symantec Security Response gateway for further
analysis.
Introducing Symantec Client Security
What you can do with Symantec Client Security
Table 1-6
Digital Immune System actions
Action
Description
Analyze submissions, generate
repairs, and test the repairs.
When the Digital Immune System receives a new
submission, it does the following:
■
■
■
■
Deploy repairs.
Adds the submission to a tracking database.
Filters the submission, which eliminates clean
files and known viruses. Filtering is quick, and
since most submissions are resolved via filtering,
the response time for filtered items is very fast.
Analyzes the virus, generates a repair, and tests
the repair. In most cases, analysis and repair are
automatically generated, but some viruses may
require the intervention of Symantec Security
Response.
Builds new virus definitions files, including the
new virus fingerprint, and returns the new virus
definitions files to the gateway.
If the issue has been resolved, the Quarantine Agent
downloads the new virus definitions and installs
them on the Central Quarantine. Next, the
Quarantine Agent checks whether or not the
submitting computer needs the updated virus
definitions, and pushes them to the affected
computer, if needed. If the issue has not yet been
resolved, the Quarantine Agent polls the gateway
every 60 minutes.
What you can do with Symantec Client Security
You can use Symantec Client Security to accomplish the following key protection
tasks on your network servers and workstations:
■
Deploy protection efficiently.
■
Protect against blended threats.
■
Respond to blended threats.
■
Manage Symantec Client Security clients based on their connectivity.
■
Centrally manage and update security.
■
Verify security status.
25
26 Introducing Symantec Client Security
What you can do with Symantec Client Security
■
Establish and enforce policies.
■
View history and event log data.
Deploy protection efficiently
Symantec Client Security comes with preconfigured installation packages for
installing Symantec Client Security servers and clients.
Installation packages make it easy to deploy Symantec Client Security using any
of the following methods:
■
The Symantec System Center
■
Symantec Packager deployment tool (part of Symantec Packager)
■
Web-based installation
■
Network logon scripts
■
Third-party deployment tools, such as Microsoft Systems Management
Server (SMS), Novell ManageWise ZENworks, and Microsoft IntelliMirror
You can use Symantec Packager to create customized installation packages that
let you select only the features that you require. This provides reduced
deployment size and a smaller installation footprint. It also lets you tailor
components to adhere to your security policy, which gives users full access to all
features, or you can limit access where appropriate.
Protect against blended threats
Blended threats, such as Nimda and Code Red, attempt to exploit computer and
network vulnerabilities and perimeter weaknesses.
Blended threats are characterized by:
■
Multiple attack methods
■
Automation (no user actions are required to trigger the attack)
■
Exploitation of computer and application vulnerabilities
■
Propagation by multiple vectors
Symantec Client Security provides comprehensive protection against blended
threats. It provides antivirus protection for network servers, antivirus and firewall
protection, and intrusion detection for workstations.
Introducing Symantec Client Security
What you can do with Symantec Client Security
Protect against intrusion
You can create and manage firewall and intrusion detection policies that are as
restrictive or permissive as necessary to control access to and from workstations.
This protects individual workstations and the corporate intranet perimeter.
Firewall and intrusion detection policies let you do the following:
■
Configure and edit firewall rules and client settings for groups of firewall
clients.
■
Verify the authenticity of applications that access the Internet and specify
permitted operations.
■
Configure client settings, which include the following:
■
■
User access level: Determine the extent to which users can modify,
configure, or view firewall rules.
■
Degree of firewall protection: Protect against potential Internet threats,
such as ActiveX controls, Java applets, and communications that are
aimed at unused ports.
■
Intrusion detection: Monitor inbound and outbound network
communications for packet patterns that are characteristic of an attack.
■
Blocking: Determine whether ports, fragmented IP packets, and the
IGMP protocol are blocked.
Create trusted and restricted zones for IP addresses to facilitate internal
connections while restricting external connections.
Protect against viruses
You can protect against virus outbreaks by doing the following:
■
Set scanning options and run virus scans for all computers that are running
Symantec Client Security.
■
Set scanning options and run virus scans for computers that have the same
parent server, or are members of the same server group or client group.
■
Configure supported 32-bit and 64-bit computers that are running the
Symantec Client Security client to scan email attachments for the following
applications:
■
Lotus Notes clients
■
Microsoft Exchange/Outlook clients that use Messaging Application
Programming Interface (MAPI)
27
28 Introducing Symantec Client Security
What you can do with Symantec Client Security
On a Symantec Client Security client, you can allow users to do the following:
■
Create and save startup scans that run automatically when the computer
starts.
■
Create custom scans that run manually on the client.
■
Schedule scans of specific drives, folders, and files to run automatically at a
specific time and date.
Respond to blended threats
Symantec Client Security integrates firewall and antivirus protection and
intrusion detection, which provides a comprehensive response to blended
threats.
Respond to intrusions
Symantec Client Security assists you in creating and enforcing policies at the
firewall. Table 1-7 summarizes components that are related to intrusion
prevention.
Table 1-7
Intrusion prevention tasks
Task
Description
Create and enforce firewall rules.
You can create and enforce firewall policies that are
derived from usage requirements for workstations. At
any time, you can roll out more restrictive policies,
including complete blocking, in response to attacks
or other unwanted behavior.
Symantec Client Security includes data and default
rules to validate and permit well-known applications
to access the Internet. At the same time, the rules
block the activity of known Trojan horse programs,
which masquerade as useful programs while
performing unwanted back-door activity. Symantec
provides updated data as necessary.
Enable or disable intrusion
detection signatures.
You can enable or disable intrusion detection
signatures based on vulnerability exposure.
Symantec supplies intrusion detection signatures,
which are known, detectable network traffic patterns
that are derived from previously identified exploits,
attacks, or anomalous activities that are outside of
expected behavior or traffic. Symantec provides
updated signatures as necessary.
Introducing Symantec Client Security
What you can do with Symantec Client Security
See “Creating firewall and intrusion detection policies” on page 40.
Respond to viruses
Symantec Client Security assists you in performing the three key tasks that are
related to responding to viruses, as listed in Table 1-8.
Table 1-8
Virus response tasks
Task
Description
Update virus definitions files.
To respond to the latest virus threats, you need to
update the virus definitions on all of the computers
that are running Symantec Client Security. Symantec
Client Security includes several methods for getting
the latest virus definitions files and updating your
antivirus servers and clients. You can automate the
update process and specify when it runs.
See “How protection updating works” on page 19.
Quarantine and submit infected
files.
You can configure computers that are running
Symantec Client Security to automatically forward
infected files to a Central Quarantine server. You can
then submit the file to Symantec Security Response
for a rapid solution.
See “Central Quarantine” on page 50.
See the Symantec Central Quarantine Administrator’s
Guide for additional information.
Perform a virus trend analysis.
You can analyze the data for infection trends and take
appropriate action, such as setting configuration
options for higher risk clients. You can export virus
history and event log data to many third-party
reporting systems.
See “View history and event log data” on page 33.
29
30 Introducing Symantec Client Security
What you can do with Symantec Client Security
Manage Symantec Client Security clients based on their
connectivity
Symantec Client Security provides a range of tools for managing computers based
on their network connectivity. Table 1-9 categorizes the computers that you can
manage based on their network connectivity, and lists the available management
tools.
Table 1-9
Symantec Client Security client types
Client type
Description
Managed by
Fully
managed
Attach and log on to the network on a regular
basis. Managed clients can do the following:
The Symantec
System Center
console
■
■
■
■
■
■
■
Sometimes
managed
Regularly communicate with a parent server
and download configuration and virus
definitions file updates as often as necessary.
Display in the Symantec System Center under
their parent servers.
Immediately send alerts if Symantec Client
Security detects a virus. Client log
information is also available in the Symantec
System Center.
Have their configuration settings locked in the
Symantec System Center so that users cannot
change them.
Automatically install to a user’s hard drive
through logon scripts.
Can receive pushed software installs from the
Symantec System Center.
Receive Symantec Client Security firewall
policy updates.
Typically mobile or telecommuting users who use a The Symantec
VPN to connect to the network. They share most System Center
managed client characteristics. Settings that you
console
lock remain locked even if the client computer is
not connected to the network. The next time that
these clients log on to the network, they receive any
new configuration data and the latest virus
definitions update files.
By default, if a parent server does not communicate
with a sometimes-managed client for thirty days,
the icon is removed from the Symantec System
Center display.
Introducing Symantec Client Security
What you can do with Symantec Client Security
Table 1-9
Symantec Client Security client types
Client type
Description
Managed by
Lightly
managed
Configured outside of the Symantec System Center Configurations file
console through a configurations file (Grc.dat),
(Grc.dat)
and are otherwise not managed. Lightly managed
clients are typically mobile computers that do not
connect to the network, but have email.
If a lightly managed client requires a configuration
change, you can create a new configuration file and
copy it to the client. You can change the
configuration of lightly managed clients by
pushing a new configurations file to clients using
third-party software.
Unmanaged
Do not connect to the network and have no parent
server with which to communicate. They will not
appear in the Symantec System Center even if they
are later connected to the network.
■
■
Configurations
file during
installation
Self-managed
These clients need to download their own virus
definitions updates. LiveUpdate is built in to each
Windows client so that it can automatically get new
virus definitions file updates.
Roaming
Typically mobile computers that may not connect
to an optimal parent server while travelling.
Roaming clients dynamically connect to the best
parent server, which is based on speed and
proximity.
■
■
Roamadmn.exe
Navroam.exe
When a mobile user travels, Roaming Client
Support detects the new location and reassigns the
user’s laptop to the best parent server. In addition,
you can use Roaming Client Support to balance the
load among a pool of servers that are equal in
connection speed and proximity based on the
client load on the computers.
Centrally manage and update security
The Symantec System Center is a management framework for controlling
Symantec Client Security components, solving problems, and performing routine
maintenance.
31
32 Introducing Symantec Client Security
What you can do with Symantec Client Security
From the Symantec System Center, you can do the following:
■
Set up and administer Symantec Client Security server groups and client
groups.
■
Discover computers that are running Symantec Client Security antivirus
server.
■
Find computers that are not running antivirus protection.
■
Roll out Symantec Client Security antivirus clients to supported Windows
workstations and network servers.
■
Configure Symantec Client Security antivirus protection.
■
Manage events by using alerts.
■
Perform remote operations, such as virus scans and virus definitions file
updates.
■
Roll out Symantec Client Security firewall clients to Windows NT/2000/XP
workstations.
■
Create, update, and roll out firewall rules and intrusion detection settings.
If your site has a decentralized administration structure with multiple
administrators, you can run as many copies of the Symantec System Center
console as you need. Since each server group has its own password, you can
divide or share administrative duties in any way that works best for you.
Verify security status
Using the Symantec System Center console, you can select and view the
protection settings for any managed computer that is running Symantec Client
Security. Managed computers appear in the right pane of the console when their
parent servers are selected in the tree. You can verify the security status of any
computer without leaving your desk.
Establish and enforce policies
You can establish and enforce the following policies to control the Symantec
Client Security user experience:
■
You can lock configuration settings such as realtime scanning to ensure that
your antivirus clients remain protected from viruses at all times.
■
You can tamper-protect the Windows registry values that Symantec Client
Security uses, and receive notifications when specific registry keys are
modified. This is the default setting.
Introducing Symantec Client Security
Where to get more information about Symantec Client Security
■
You can password-protect server groups so that changes to antivirus server
and antivirus client settings can be made by authorized staff only.
■
You can allow or prevent users from setting, modifying, or viewing the
firewall policy on a workstation.
View history and event log data
The Symantec System Center console offers basic reporting tools for history and
event log data. Reports are based on Symantec Client Security antivirus servers,
server groups, or clients. You can specify a time range in which to filter the data
that appears in the report. For example, you might want to view only those scans
that ran within the last seven days. For more complex reports, you can export the
data as a comma-delimited file for use with a third-party reporting tool.
Where to get more information about Symantec
Client Security
Sources of information on using Symantec Client Security include the following:
■
Symantec Client Security Administrator’s Guide
■
Symantec Client Security Reference Guide
■
Symantec Client Security Client Guide
■
Symantec Packager Implementation Guide
■
LiveUpdate Administrator’s Guide
■
Symantec Central Quarantine Administrator’s Guide
■
Online Help that contains all of the content found in the above guides and
more
All of the documentation is available from the Docs folder on the Symantec
Client Security CD. Updates to the documentation are available from the
Symantec Technical Support and Platinum Support Web sites.
33
34 Introducing Symantec Client Security
Where to get more information about Symantec Client Security
Additional information is available from the Symantec Web sites listed in
Table 1-10.
Table 1-10
Symantec Web sites
Types of information
Web address
Public knowledge base
http://www.symantec.com/techsupp/enterprise/
Releases and updates
Manuals and documentation
Contact options
Virus information and updates
http://securityresponse.symantec.com
Product news and updates
http://enterprisesecurity.symantec.com
Platinum support Web access
https://www-secure.symantec.com/platinum/
Chapter
Planning security
protection
This chapter includes the following topics:
■
Creating a security protection plan
■
Creating management policies
■
Creating migration plans
2
36 Planning security protection
Creating a security protection plan
Creating a security protection plan
Developing a security protection plan involves the following tasks:
■
Learning about scan types
■
Creating a plan for updating virus definitions files
■
Developing a scanning schedule
■
Creating firewall protection policies
Learning about scan types
Continuously scanning all files is the most secure approach to avoid virus
infections, but it is not practical. The best approach is to layer your scanning, and
target files or computer areas that are most likely to contain viruses. Table 2-1
lists and describes the scan types.
Table 2-1
Scan types
Scan type
Description
Realtime
Realtime scans continuously inspect files and email data as they’re read
from or written to a computer. Realtime protection is enabled by default.
You can configure realtime settings for Symantec Client Security servers
at the server group or server level, and clients at the server group, server,
or client group level. When you configure realtime protection for your
file system, the configuration pages look slightly different depending on
whether you are setting options for servers or clients. You can lock
realtime protection settings on clients to enforce a virus policy. Users
cannot change options that you lock. Symantec Client Security scans
email attachments on Symantec Client Security clients only.
Scheduled
On the Symantec System Center console, you can schedule scans for
Symantec Client Security servers or clients. Users can also schedule scans
for their computers from the Symantec Client Security client, but they
cannot change or disable any scans that you schedule for their
computers. You can configure administrator scheduled scans to let users
delay or pause the scans.
When you create and save a scheduled scan, Symantec Client Security
remembers which server group, server, or computer on which to run the
scan. It also remembers the settings that you chose for that scan.
Symantec Client Security runs one scheduled scan at a time: If more
than one scan is scheduled at the same time, they will run sequentially.
If a computer is turned off during a scheduled scan, the scan will not run
unless the computer has been configured to run missed scan events.
Planning security protection
Creating a security protection plan
Table 2-1
Scan types
Scan type
Description
Manual
Manual or on-demand scans inspect selected files and folders on selected
computers. Manual scans are ideal for providing immediate results from
a scan on a small area of the network or on a local hard drive.
Creating a plan for updating virus definitions files
Symantec Client Security provides several methods for keeping the virus
definitions files current across your network. Table 2-2 lists the update methods
and the types of clients on which to use them.
Table 2-2
Virus definitions files update methods
Update method
Used with
Virus Definition Transport Method
Managed computers
LiveUpdate
Managed and unmanaged computers
Central Quarantine polling
Managed computers
Intelligent Updater
Unmanaged computers
Preparing for the Virus Definition Transport Method
The Virus Definition Transport Method is a push operation that is initiated from
the Symantec System Center. This method is not supported on 64-bit computers.
There are two planning considerations for using the Virus Definition Transport
Method:
■
Source
■
Schedule
Source
With the Virus Definition Transport Method, Symantec Client Security primary
servers can download virus definitions files from Symantec (via LiveUpdate or
FTP), or from another computer on your network. The advantage of using
another computer on your network as a virus definitions source is that it reduces
the exposure of your network to the Internet: Only one computer needs an
Internet connection.
If you want to use another computer on your network as a virus definitions files
source, you should consider configuring it as an internal LiveUpdate server, since
37
38 Planning security protection
Creating a security protection plan
this lets you automate the update procedure. You may want to create more than
one internal LiveUpdate server for a large network for failover protection.
See “Installing and configuring the LiveUpdate Administration Utility” on
page 94.
Schedule
The Virus Definition Transport Method can update virus definitions files
manually or automatically using a schedule. If you are administering a large
network with many primary servers, you should plan a staggered update schedule
to minimize network traffic, or schedule updates during off peak hours.
Preparing for LiveUpdate
With LiveUpdate, Symantec Client Security servers or clients pull virus
definitions files from Symantec or an internal LiveUpdate server.
Note: LiveUpdate is the only virus definitions files update method supported on
64-bit computers.
For managed computers, you can push LiveUpdate configurations directly from
the Symantec System Center.
To configure LiveUpdate options for unmanaged computers, you need to prepare
a custom configuration file named Liveupdt.hst. You must then copy the file into
the correct folder on each unmanaged computer.
See “Installing from the client installation package on the server” on page 133.
Preparing for Central Quarantine polling
With Central Quarantine polling, the Central Quarantine server periodically
polls the Symantec Digital Immune System gateway for new virus definitions
files. When new virus definitions are available, the Central Quarantine server can
automatically push the new virus definitions to the computers that need it using
the Virus Definition Transport Method. This method is not supported on 64-bit
computers.
Planning security protection
Creating a security protection plan
To prepare for Central Quarantine polling, do the following:
■
Install the Central Quarantine server software.
■
Install Central Quarantine Console on a computer with the Symantec System
Center.
■
Review the polling frequency setting (the default is three times a day) and the
virus definitions files installation settings in the Central Quarantine Console.
See the Symantec Central Quarantine Administrator’s Guide on the Symantec
Client Security CD.
Preparing for Intelligent Updater
Intelligent Updater files are self-extracting executable files that contain virus
definitions. They are available for download from the Symantec Security
Response Web site. This method is not supported on 64-bit computers.
When planning to update virus definitions with Intelligent Updater, you must
determine the ways in which you can distribute the Intelligent Updater files. For
example, if all company laptop users have CD-ROM drives, you could create CDs
that contain the Intelligent Updater file and mail the CDs to your users who have
slow Internet connections.
Developing a scanning schedule
You need to decide when to scan files. Symantec recommends protecting
Symantec Client Security servers by enabling realtime scanning and scheduling a
nightly, full server scan.
Scheduling Symantec Client Security client scans is not as simple as scheduling
server scans because of the complexity of computing environments and
requirements. Symantec Client Security provides a layered approach that lets you
select the scanning method that works best for your environment. A layered
approach lets you use several scan types to achieve a satisfactory protection level
without imposing too much overhead or delay at any one time.
39
40 Planning security protection
Creating a security protection plan
With a layered approach, you can do the following:
■
Perform a complete drive scan at computer start-up or program start-up for
all computers.
Startup scans are not managed or configured from the Symantec System
Center console. Users can configure startup scans directly from the Symantec
Client Security client.
■
Schedule different types of Symantec Client Security client scans, such as a
periodic complete drive scan, and a more limited scan of directories
scheduled for lunch time. Configure scheduled scans so that users can delay
or pause the scan if it starts at a time they need to use their computers. You
can set a limit to the number of times a scan can be delayed or paused to
ensure that the scan runs within an acceptable timeframe.
■
Use realtime scanning to detect any viruses that are encountered between
complete drive scans.
■
Scan only files that are being modified. Because there are fewer files being
modified on a regular basis, you might want to select all files that are
modified to be scanned or make a more inclusive selected extension list.
(Only files with the extensions that you specify in the list are scanned.)
You can also scan files that are being accessed and modified, which detects
viruses before they load into memory. However, scanning all files that are
accessed imposes more overhead than scanning only files that are being
modified as fewer files are modified than accessed. You can use the selected
extension list to minimize the impact. You might need to add .tmp or similar
extensions to let the realtime scanner detect viruses in files that are first
written to temporary files.
Creating firewall and intrusion detection policies
Firewall and intrusion detection policies can be customized and rolled out to
groups of computers that require similar protection.
Policy packages, which are native .xml or compressed .cfp files, contain all of the
firewall rules, intrusion detection signatures, and configuration settings for a
given policy.
Typically, to prepare a policy, you install the Symantec Client Security firewall on
a representative workstation for a group of users. For example, the accounting
group may require different protection settings than the art department. Exercise
the workstation, using all of the applications that access the Internet in as varied a
trial as possible. This policy is then imported into the Symantec Client Firewall
Administrator tool for user-level settings. Once you save a policy package, you
can roll out the package to all clients, to selected groups of clients, or to individual
Planning security protection
Creating a security protection plan
Symantec Client Security firewall clients. You can create as many different policy
packages for rollout as necessary.
Key components of a firewall policy include the following:
■
Rules
■
pRules
■
Zones
■
IDS exclusions
■
Client settings
Rules
Rules include system-wide, application, and Trojan horse rules. You can
configure and edit firewall rules and client settings for multiple installations of
Symantec Client Security firewall client.
System-wide firewall rules apply to all network communications of Symantec
Client Security firewall clients that access the Internet. These rules are based on
port numbers and IP addresses rather than specific applications. The rules do not
cover Trojan horses, which are handled separately.
Application rules permit or block communications between specific client
applications and the Internet. You can configure an application rule that is
specific to communications on a particular port or address, or one that applies to
all IP ports and addresses.
Trojan horses are malicious programs that are disguised as useful applications.
Symantec Client Firewall Administrator Trojan horse rules examine the network
communications of Symantec Client Security firewall clients that access the
Internet, looking for signs of these malicious programs. If a Trojan horse is
detected, the firewall rule takes immediate action against it.
pRules
Application rules are created when the firewall policy is rolled out. If all clients are
similarly configured, this is an efficient method of providing uniform protection.
If client workstations use very different sets of applications, pRules are
appropriate.
With pRules, or potential rules, data about applications is installed on the client
workstation, but the rules themselves are not created in the registry. When an
application first attempts to access the Internet, the pRule is invoked. If the
application matches the pRule criteria, then a new application rule is created
from the pRule data in the registry of the client workstation.
41
42 Planning security protection
Creating a security protection plan
Zones
With Zones, you can identify computers that you trust, and those that you want
to restrict from accessing a client computer.
Use the Trusted Zone to list computers on your local network with which you
need to share files and printers. Add computers to the Restricted Zone that have
attempted to attack computers in your organization. The Restricted Zone
provides the highest level of protection provided by Symantec Client Security.
Clients cannot interact with any computers that are in the Restricted Zone.
Keep the following in mind when you place computers in Zones:
■
Computers that are in the Trusted Zone are not regulated by Symantec Client
Security and have total access to the client computer.
■
Computers that are in the Restricted Zone are prevented from accessing
client computers.
■
Computers that are not placed in any Zone are regulated by all of the other
settings of the firewall policy.
IDS exclusions
Intrusion detection is based on signatures. A signature defines or describes a
network traffic pattern of interest, and is usually based on bit patterns or the
structure of the packet information. Attack signatures are associated with
computer probes or specific destructive effects. IDS signatures detect patterns
that are derived from an exploit or attack on the computer, or an anomalous
pattern that is outside of the realm of expected traffic patterns and could be
destructive.
Symantec supplies and periodically updates the set of signatures that are
monitored. Since each signature has a small corresponding resource impact, you
can exclude specific signatures from being processed. For example, you may not
need protection against certain attack signatures because your environment does
not contain the computers or components that they are known to attack. Once
you exclude an IDS attack signature, the signature can cross the firewall and is not
logged. Additionally, you can exclude specific IP addresses for a signature. For
example, the addresses may already be specified for automatic blocking by the
firewall or perhaps the threat from an IP address has been eliminated and you
want information from that IP address to cross the firewall.
Planning security protection
Creating management policies
Client settings
You can customize client settings for each firewall policy package to enable or
disable specific components of firewall protection, which include the following:
■
User access level: Determines the extent to which users can modify firewall
rules, configure firewall behavior outside of administrator control, and view
firewall data.
■
Degree of firewall protection: Protects against potential Internet threats, such
as ActiveX controls, Java applets, and communications that are aimed at
unused ports.
■
Intrusion detection: Monitors inbound and outbound network
communications for packet patterns that are characteristic of an attack.
■
Privacy control: Protects confidential information, blocks cookies, enforces
browser privacy, and forces secure communications (HTTPS).
■
Blocking: Determines whether ports, fragmented IP packets, and the IGMP
protocol are blocked.
In addition, you can specify whether firewall icons are displayed on the
workstation.
Creating management policies
You can establish the management policies that are listed in Table 2-3 to provide
secure and efficient management with the Symantec System Center.
Table 2-3
Management policy types and planning considerations
Policy type
Planning considerations
Feature-based security policies
As a Symantec Client Security administrator, you can
control access to many features. For example:
■
■
Event-management policies
You can lock a server group with a password to
prevent unauthorized administrators from
making configuration changes. You need to plan
which server groups to lock and who will have
the password.
You can disable many features on the Symantec
Client Security client.
You need to plan the types of events to trap, and the
alert actions that each event should trigger.
43
44 Planning security protection
Creating migration plans
Table 2-3
Management policy types and planning considerations
Policy type
Planning considerations
WAN policies
Although the Symantec System Center is a good
WAN management tool, it is not designed for use as a
WAN distribution tool. The NT Client Install option
should not be used to distribute across a WAN.
Plan server groups around WAN links so that client/
server and server/server communications are kept
within the WAN.
Creating migration plans
Symantec firewall product versions other than Symantec Client Firewall 5.x,
Symantec Desktop Firewall version 2.01, Norton Personal Firewall version 2.5,
and Norton Personal Firewall version 2002 must be uninstalled.
In general, upgrading from an earlier version of a Symantec corporate antivirus
product (such as Norton AntiVirus Corporate Edition 7.6) starts with the
migration of the management console, followed by the migration of the servers,
and ending with the migration of the clients. However, the actual sequence of
events varies depending on your environment. Table 2-4 provides general
guidelines to help you plan your migration.
Table 2-4
Migration tasks
Migration task
Description
Pilot your installation first.
Do a small-scale installation to identify issues that are
likely to occur in the larger migration. For instance, if
a particular software configuration that is prevalent
in your organization causes problems with the
installation or operation of the client, the pilot
should expose it. A good pilot candidate is the IS or
support department. These departments usually have
advanced users who will need to be familiar with the
client at the start of the installation.
Planning security protection
Creating migration plans
Table 2-4
Migration tasks
Migration task
Description
Minimize unprotected clients.
If the migration entails the removal of existing
antivirus software, there will be a short period of time
when some clients are unprotected. You can
minimize your exposure by staging the migration/
installation, and by trying to roll out as soon as
possible after the previous antivirus software
removal. Also, make sure that all of your servers,
including GroupWare servers, are protected during
this period. This will keep incidents isolated to a
single computer.
Plan your virus definitions
update strategy.
Since there are several ways to update virus
definitions files on clients and servers, you must
decide which one to use before the installation, and
test your update strategy during the pilot.
Decide how to handle remote and When migrating from a version prior to Norton
sometimes connected clients.
AntiVirus Corporate Edition 7.x, your update
mechanism and scheduled scans are not migrated
automatically. You will need to reconfigure them
when you install or update Symantec Client Security
and the Symantec System Center.
Get virus definitions updating
working immediately.
Set the update policy on migrated computers
immediately after installation, and test it immediately
after each stage of the installation.
Match management snap-in
version to client version.
You should always match the version of the
management snap-in to the latest version of
Symantec Client Security running on your clients.
You cannot manage the latest client version with an
older management snap-in.
Move servers among server
groups.
Although it is best to plan your server group
structure before you begin the migration, you can
move servers later. Unlike servers, you cannot drag
and drop clients from one parent server to another in
the Symantec System Center console.
Train your support staff and end
users.
Designate some time to train end users and staff as a
part of your installation plan. This minimizes
downtime as a result of end-user confusion.
45
46 Planning security protection
Creating migration plans
Chapter
Preparing to install
Symantec Client Security
This chapter includes the following topics:
■
Deciding which components to install
■
Best practice: Piloting Symantec Client Security in a lab setting
■
Installation considerations
3
48 Preparing to install Symantec Client Security
Deciding which components to install
Deciding which components to install
Read about each component to help you decide which ones you want to install,
and to plan where you will install them.
Management components
Table 3-1 lists and describes Symantec System Center management components.
Table 3-1
Symantec System Center management components
Component
Description
The Symantec System
Center console
The Symantec System Center is the console that you use to
administer managed Symantec products. The Symantec System
Center is a standalone application that runs under Microsoft
Management Console. You do not need to install the Symantec
System Center on a network server, and you do not need to
install it on an antivirus server in order to manage that server.
Install the Symantec System Center console to the computers
from which you plan to manage your Symantec product. You
must have at least one installation of the Symantec System
Center to view and administer your network.
If your organization is large or you work out of several offices,
you can install the Symantec System Center to as many
computers as you need by rerunning the installation program
and selecting the appropriate option.
Alert Management
System2 (AMS2)
console
The AMS2 console provides alerts from AMS2 clients and
servers.
Note: The AMS2 console is required only if you are using the
Alert Management System2 as your alerting tool. If you plan to
implement Symantec Enterprise Security alerting, you do not
need to install AMS2.
Install the AMS2 console to the same computer on which the
Symantec System Center console is installed. This lets you
configure alert actions for Symantec Client Security servers that
have the AMS2 service installed. When a problem occurs, AMS2
can send alerts through a pager, an email, and other means. If
you choose not to install AMS2, you can use the notification
and logging mechanisms that are available from the Symantec
System Center.
You must also install the AMS2 service to one or more primary
servers on which Symantec Client Security server is installed.
Preparing to install Symantec Client Security
Deciding which components to install
Table 3-1
Symantec System Center management components
Component
Description
Symantec AntiVirus
snap-in
This management snap-in for the Symantec System Center lets
you manage the Symantec Client Security antivirus client on
workstations and network servers. From the Symantec System
Center, you can do the following:
■
■
■
■
■
■
Set up and administer Symantec Client Security server and
client groups.
Manage protection on network servers that are running
Symantec Client Security.
Configure groups of computers that are running Symantec
Client Security.
Manage events.
Configure alerts.
Perform remote operations, such as virus scans and virus
definitions files updates.
Symantec Client
Firewall snap-in
This snap-in lets you roll out firewall policy packages to
workstations running the Symantec Client Security firewall
client.
NT Client Install tool
This tool lets you remotely install the Symantec Client Security
antivirus client to one or more Windows NT/2000/XP/2003
computers.
This tool is also available on the Symantec Client Security CD.
AV Server Rollout tool
This tool lets you remotely install the Symantec Client Security
server to the Windows NT/2000/XP/2003 and NetWare servers
that you select.
This tool is also available on the Symantec Client Security CD.
49
50 Preparing to install Symantec Client Security
Deciding which components to install
Central Quarantine
The Central Quarantine is a key component of a complete antivirus policy. By
default, Symantec Client Security antivirus clients are configured to isolate
infected items that cannot be repaired in a local Quarantine. In addition, any
suspicious file can be quarantined manually. Table 3-2 lists and describes the
Central Quarantine components.
Table 3-2
Central Quarantine components
Component
Description
Central Quarantine
server
If you install a Central Quarantine server on your network,
Symantec Client Security antivirus clients can automatically
forward infected items to the Central Quarantine, where they
can be submitted to Symantec Security Response via email or
the Internet for analysis. If a new virus is identified, updated
virus definitions are returned to you.
See the Symantec Central Quarantine Administrator’s Guide for
information regarding Quarantine requirements and
installation details.
Quarantine Console
snap-in
This snap-in lets you manage the Central Quarantine server
from the Symantec System Center.
Symantec Client Security servers
The Symantec Client Security server software is designed to manage other
computers running Symantec Client Security. In addition, it provides antivirus
protection for the computer on which it is installed. Install the server software
only on computers you intend to use to manage other computers running
Symantec Client Security. If you want to simply provide antivirus protection for a
network server, you do not need to install the Symantec Client Security server
software on that server; the Symantec Client Security client software is sufficient.
Symantec Client Security clients
The Symantec Client Security antivirus client provides antivirus protection for
workstations and network servers. You can manage protection for managed
computers using the Symantec System Center or by editing and distributing a
configurations file (Grc.dat). In addition, you can use the configurations file to
configure lightly managed or unmanaged computers.
The Symantec Client Security firewall client provides firewall and intrusion
protection for workstations.
Preparing to install Symantec Client Security
Best practice: Piloting Symantec Client Security in a lab setting
Symantec Client Security administration tools
Table 3-3 lists and describes the additional administration tools available (if
installed) in the Symantec System Center.
Table 3-3
Administration tools
Tool
Description
Symantec Client Firewall
Administrator
Lets you create and edit firewall rules
Symantec Packager
Lets you create and modify custom installation packages
LiveUpdate Administrator
Lets you configure one or more intranet FTP, HTTP, or
LAN servers to act as internal LiveUpdate servers
Best practice: Piloting Symantec Client Security in a
lab setting
Before you commence a full-scale installation, Symantec recommends that you
install Symantec Client Security in a nonproduction lab setting for a learning and
evaluation period. This lets you address any issues before a full enterprise
deployment.
Simulating a realistic network environment in a lab setting
When you test Symantec Client Security server and client components in a lab
setting, you should do the following:
■
Create a realistic and representative network environment.
See “Creating a representative network environment” on page 52.
■
Test Symantec Client Security server installations.
See “Testing Symantec Client Security server installations” on page 53.
■
Obtain a virus test file.
See “Obtaining a virus test file” on page 53.
■
Test Symantec Client Security installations.
See “Testing Symantec Client Security installations” on page 54.
51
52 Preparing to install Symantec Client Security
Best practice: Piloting Symantec Client Security in a lab setting
Creating a representative network environment
Table 3-4 describes how to get the most out of a trial in which you test Symantec
Client Security servers.
Table 3-4
Creating a representative network environment
Task
Description
Hardware configuration
Set up your hardware to at least the minimum
requirements needed.
Installation
■
■
■
■
■
Communication
■
■
Management
■
■
Install to at least two Symantec Client Security
servers, mixing Windows NT/2000/XP/2003 and
NetWare computers (if needed).
Perform a complete installation to each server,
including AMS2 (if needed).
Install the Symantec System Center to at least
one computer that is using a 32-bit operating
system.
Install to connected and standalone computers if
necessary.
Match client to server operating system
combinations (for example, a Windows NT
workstation logging onto NetWare servers).
The communication protocols in your test
environment should match those in your
production environment. Install to all operating
systems that you expect to use.
If your network uses routers, include a router in
your test environment (this is particularly
important for mixed protocol environments).
Create at least one server group that contains
two or more servers.
Create at least one client group that contains two
or more Symantec Client Security clients.
Preparing to install Symantec Client Security
Best practice: Piloting Symantec Client Security in a lab setting
Note: If you are using a Windows NT Workstation computer in a lab setting as a
Symantec Client Security server, note that the maximum number of computers
that can simultaneously connect to a Windows NT Workstation 3.5/3.51/ 4.0 is
10. This Microsoft-imposed limitation does not limit TCP connections that can
be made to a computer, but only affects file shares, named pipes, and so forth
(anything that requires the SERVER service). Symantec Client Security can have
as many inbound connections as it needs to function properly. To resolve
connectivity problems without losing the service’s self-tuning capability, you can
lower the AutoDisconnect time by changing the AutoDisconnect time registry
key. See the Microsoft knowledge base for more information.
Testing Symantec Client Security server installations
After you have installed Symantec Client Security servers, complete the following
tasks:
■
Configure all of the different scans for maximum protection (all files, all
drives, and so on).
■
Test virus definitions file downloads and server-to-server updates.
■
Create a virus test file (not a real virus) to see how the virus-detecting
mechanisms work without introducing a real virus on your computer.
See “Obtaining a virus test file” on page 53.
■
Let scheduled scans and other automated functions run for several days.
■
Verify that the Symantec System Center can view servers on both sides of
routers.
See “Required protocols” on page 66.
■
Verify that log files and reports accurately reflect the expected data.
Obtaining a virus test file
To obtain a virus test file to verify virus detection, logging, and alert functionality,
go to www.eicar.org and download the eicar.com file. This file is not a virus, but it
will be detected as the EICAR Test String.70 virus. Disable realtime file protection
temporarily before saving the file.
53
54 Preparing to install Symantec Client Security
Installation considerations
Testing Symantec Client Security installations
After you have installed Symantec Client Security to the computers in your lab
environment, complete the following tasks:
■
Configure all of the different scans for maximum protection (all files, all
drives, and so on).
■
Test virus definitions file downloads.
■
Obtain a virus test file to trigger the alerting system.
See “Obtaining a virus test file” on page 53.
■
Let scheduled scans and other automated functions run for several days.
■
Verify that the Symantec System Center can view Symantec Client Security
clients on both sides of routers.
See “Required protocols” on page 66.
■
Verify that connected Symantec Client Security clients appear in the
Symantec System Center console under the correct parent server.
■
Lock some Symantec Client Security client scanning parameters using the
Symantec System Center and verify that users cannot change these settings.
■
Launch a virus sweep and verify that the Symantec Client Security client
scans take place.
■
Verify that log files and reports reflect the expected data.
Installation considerations
There are many issues to consider before you install the Symantec Client Security
antivirus client and the Symantec Client Security firewall client.
Preparing for the Symantec System Center installation
You must uninstall Norton AntiVirus Corporate Edition 6.0 or LANDesk Virus
Protect before you install the Symantec System Center. You can install the
Symantec System Center console to as many computers as you need to manage
Symantec Client Security.
Preparing to install Symantec Client Security
Installation considerations
Preparing for Symantec Client Security server installation
To ensure a successful Symantec Client Security server rollout, review the
following considerations:
■
Symantec Client Security server installation options
■
Required restarts
■
Locating servers across routers during installation
■
Verifying network access and privileges
■
Installation order for Citrix Metaframe on Terminal Server
■
Installing to NetWare servers
■
Terminal Server protection
■
Preventing user-launched virus scans
Symantec Client Security server installation options
The installation program lets you install Symantec Client Security server and
administration software. During the installation process, you will select the
computers to which you want to install. They will also be added to a single server
group. Later, from the Symantec System Center console, you can create new
server groups and use drag-and-drop functionality to populate them with the
servers to which you installed.
The Symantec Client Security server Setup program copies files to the selected
Windows NT-based servers. After the files are on each server, a second Setup
program (Vpremote.exe), which requires no user input, must run on the server
to create and start Symantec Client Security services and modify the registry.
When you install Symantec Client Security, the installation program installs
Symantec Client Security NLMs to the NetWare (5.x and 6.x SP1) servers that
you select and installs services to the computers that are running Windows NT
4.x Server or Workstation that you select.
55
56 Preparing to install Symantec Client Security
Installation considerations
Required restarts
There are a few instances in which a restart is necessary:
■
When you install AMS2 to a Windows NT computer, you must restart the
computer after the installation program has completed in order for AMS2 to
run.
■
When you update Symantec Client Security files on a Windows NT computer
(for example, when you apply a service release), some files might be in use. In
this case, you must restart the computer to replace the older files.
As you install or update Symantec Client Security, the installation program
displays a status for each server to report the progress of the installation or
update, to alert you to any errors, and to prompt you for any required action.
After an installation or update, if the installation program needs to replace any
files that are in use, the status is Restart necessary for Windows NT computers.
Locating servers across routers during installation
When you run the Symantec Client Security server installation program, you can
browse for computers to which you want to install. However, computers that are
across routers might be difficult to locate. To verify that you can see a computer
when you run the Symantec Client Security server installation program, try
mapping a drive to the server using Windows Explorer. If you can see a computer
in Windows Explorer, you should see the computer when you run the Symantec
Client Security server installation program.
Browsing requires the use of the WINS (Windows Internet Name Service)
protocol. For computers that are located in a non-WINS environment (such as a
native Windows 2000 network that uses the LDAP or DNS protocol), you must
create a text file with IP addresses, and then import it to add computers to which
you want to install.
Creating a text file with IP addresses to import
You can create a text file that includes IP addresses that you want to import.
During installation, you can import the contents of the text file to add the
computers to the list of computers that you have selected for installation. This
feature is useful for adding computers that are located in a non-WINS, Windows
NT or Windows 2000/XP/2003 environment.
Note: The Import feature is designed for use with Windows NT 4.0 and
Windows 2000/XP/2003 only. It is not intended for use with NetWare.
Preparing to install Symantec Client Security
Installation considerations
To create a text file with IP addresses to import
1
Create a new text file using a text editor (such as Notepad).
2
Type the IP address of each computer that you want to import on a separate
line.
For example:
127.0.0.1
127.0.0.2
127.0.0.3
You can comment out IP addresses that you do not want to import with a
semicolon (;) or colon (:). For example, if you included addresses in your list
for computers that are on a subnet that you know is down, you can comment
them out to eliminate errors.
3
Save the file to a location that you can access when you run the server install
program.
Verifying network access and privileges
The computer that you use to run the Symantec Client Security server installation
program should have the appropriate network clients and protocols running (IP
and IPX/IPX) so that you can see all of the NetWare and Windows NT computers
on which you want to install Symantec Client Security.
Rights to install to Windows NT/2000/XP/2003 computers
During the installation, if you select a computer to which you are not currently
logged on, the installation program prompts you to log on. Log on as an
administrator because the Symantec Client Security server installation program
launches a second installation program on the computer to create and start
services and to modify the registry. You must have administrator rights for the
computer or for the Windows NT domain to which the computer belongs.
Sharing must also be enabled on the Windows NT computer on which you install
the Symantec Client Security server program. The installation program uses the
default NT shares such as c$ and admin$. When you install Windows NT, these
shares are enabled by default. If you changed the share names or disabled sharing
to the default shares, the installation program cannot complete the Symantec
Client Security server installation.
If you log on to a Windows NT/2000 domain and are put into a regular domain
group without administrator rights over the local computer, you cannot install.
57
58 Preparing to install Symantec Client Security
Installation considerations
To reestablish the credential with the local computer
◆
From a command prompt, type the following:
net use \\machinename\ipc$/user:username password
Use this command to install if you are a local administrator with a different
password than the domain administrator.
The rights that you need to install to server and client computers depend on the
server platform and version.
Installation order for Citrix Metaframe on Terminal Server
Symantec Client Security does not support drive remapping for Citrix
Metaframe. If you plan to use Citrix Metaframe and remap your drives, complete
the following tasks in the order in which they are listed:
■
Install Citrix Metaframe.
■
Remap the drives.
■
Install Symantec Client Security server or client.
Installing to NetWare servers
The Symantec Client Security server installation program copies NLMs and other
files to one or more NetWare servers that you select. Before you begin
installation, log on to all of the servers to which you want to install. To install to
the NDS or bindery, you need administrator or supervisor rights.
After you run the Symantec Client Security server installation program, go to the
server console (or have rights to run RCONSOLE) to load the Symantec Client
Security NLMs. You only need to do this manually the first time if you select the
automatic startup option during Setup.
To load the Symantec Client Security NLMs the first time
◆
On the server console, type the following:
Load sys:\nav\vpstart.nlm /install
NetWare cluster server and volume protection
Symantec Client Security protects NetWare cluster servers and volumes by
providing both realtime and manual scanning for each server in the cluster.
Antivirus scanning of each volume in a cluster is managed by the server that has
ownership of the volume. If the server with ownership of a cluster volume fails,
NetWare transfers the ownership of the volume to another server in the cluster,
which then automatically takes over the antivirus scanning tasks.
Preparing to install Symantec Client Security
Installation considerations
To protect NetWare cluster servers and volumes
◆
Launch Symantec Client Security after all volumes have been mounted and
cluster services have been started in the Autoexec.ncf file.
Launching Symantec Client Security once these tasks are completed ensures that
all volumes are detected.
Installing to NetWare servers
If you are installing to any NetWare 5.x or 6.x SP1 servers, the installation
program prompts you to enter a user name and password for the NDS container
that you choose to hold logon scripts. Using the Symantec System Center and
your network administration tools, you can enable the logon scripts to automate
Symantec Client Security client installation. You must have administrator
equivalent rights to the container you designate.
Installing to a NetWare cluster
To install Symantec Client Security to a NetWare cluster, install Symantec Client
Security on each NetWare server in the cluster following the standard installation
procedure for NetWare servers. Do not install Symantec Client Security to a
volume.
For more information on NetWare installation, see “Server installation methods”
on page 100.
Installing into NDS
If you browse to an NDS object to which you are not authenticated, the
installation program would normally prompt you to log on. However, some
versions of the Novell client might not return a logon request, and in this case the
installation program will time out or stop responding. To avoid this problem, log
on to the NDS tree before running the installation program.
59
60 Preparing to install Symantec Client Security
Installation considerations
Terminal Server protection
You can install either the Symantec Client Security antivirus client or antivirus
server to Terminal Servers. Symantec Client Security antivirus protection works
on Terminal Servers in much the same way that it works on Windows NT/2000/
2003 file servers. Alerting is the only difference.
Do not install the Symantec Client Security firewall client to Terminal Servers.
Users who are logged on to the server console will receive alerts. Users who are
connected through a terminal client session do not receive alerts.
Viewing Terminal Servers from the console
Terminal Servers appear the same as file servers in the console from which they
are managed. Both types of servers are represented with the same icon in the
Symantec System Center console.
Terminal Server and Terminal Services limitations
The following limitations apply to antivirus protection on Terminal Server and
Terminal Services:
■
Symantec Client Security does not protect mapped drives on computers that
can be accessed by applications that are running during a session on the
Terminal Server.
■
The file system realtime protection that is running on the Terminal Server
does not detect virus events, such as saving an infected file, that occur on
local drives of Terminal Server clients.
■
Symantec Client Security does not provide functionality to Terminal Server
clients. For example, Symantec Client Security does not route alerts to the
proper client session, or allow for the Symantec System Center to run within
a session.
■
Vptray.exe is the program that displays the antivirus realtime protection
status in the system tray. Launching Vptray.exe per session is not feasible
when you are scaling to a large user base due to the large footprint that is
required for each session. Vptray.exe does not run if the session is remote but
it does run on the Terminal Server console.
■
When a user logs off of a remote terminal session and the realtime setting to
check floppy disks on computer shutdown is enabled, an unnecessary access
is made to the floppy disk drive on the console. This setting is disabled by
default.
■
Session-specific information is not logged or included in virus alerts.
Preparing to install Symantec Client Security
Installation considerations
Installing AppSec
You can install AppSec for the Windows NT 4.0 Terminal Server Edition or for
Windows 2000 Terminal Services. For Windows NT 4.0 Terminal Server Edition,
AppSec installs automatically when you install Windows NT version 4.0
Terminal Server Edition. For Windows 2000 Terminal Services, AppSec is
included in the Windows 2000 Server Resource Kit.
You must install both AppSec and the AppSec hotfix. You can find information
about installing AppSec and the hotfix at:
http://www.microsoft.com/windows2000/library/resources/reskit/tools/hotfixes/
appsec-o.asp
Preventing user-launched virus scans
You can prevent users from running manual scans in Terminal sessions by doing
the following:
■
Restrict the Windows Start menu and directories for Symantec Client
Security to prevent users from running manual virus scans.
■
Use the Application security registration utility (AppSec) to restrict
nonadministrator users to running only the programs that are included in an
administrator-defined list of applications.
Prevent users from launching virus scans
You can prevent users from running virus scans during Terminal sessions on a
Windows NT 4.0 Terminal Server Edition server or a Windows 2000/2003
Terminal Services server.
To prevent users from launching virus scans from a Windows NT Terminal
Server
1
On the Terminal Server, on the Windows taskbar, click Start > Programs >
Administrative Tools > Application Security.
2
In the Authorized Applications dialog box, in the Security group box, click
Enabled.
Users are denied access to any program that is not included in the Authorized
Applications list, including the Symantec Client Security virus scanner.
61
62 Preparing to install Symantec Client Security
Installation considerations
To prevent users from launching virus scans from a Windows 2000 Terminal
Server
1
On the Terminal Server, on the Windows taskbar, click Start > Programs >
Windows 2000 Resource Kit > Tools.
2
Double-click Alphabetized List of Tools.
3
Click Application Security.
4
In the Authorized Applications dialog box, in the Security group box, click
Enabled.
Users are denied access to any program that is not included in the Authorized
Applications list, including the Symantec Client Security virus scanner.
Preparing for Symantec Client Security client installation
To ensure a successful Symantec Client Security client rollout, review the
following preinstallation considerations:
■
Rights to install to target computers
■
Symantec Client Security client on a Terminal Server
■
Windows NT/2000 cluster server protection
■
Required restarts
■
Email support
Rights to install to target computers
Users who are installing to computers that are running supported Windows
operating systems must have administrator rights on their own computers and
must be logged on with administrator rights to install Symantec Client Security.
If you do not want to provide users with administrative rights to their own
computers, use the NT Client Install utility to install the Symantec Client Security
antivirus client to computers that are running supported Windows operating
systems remotely. To run the NT Client Install utility, you must have local
administrative rights on any computer to which the installation is to be pushed.
See “Installing Symantec Client Security clients” on page 119.
Preparing to install Symantec Client Security
Installation considerations
Symantec Client Security client on a Terminal Server
The Symantec Client Security client program can be installed to a Terminal
Server. The same considerations and limitations that apply to running the
Symantec Client Security antivirus server on a Terminal Server apply to the
Symantec Client Security client program.
See “Installation order for Citrix Metaframe on Terminal Server” on page 58.
See “Terminal Server protection” on page 60.
Windows NT/2000 cluster server protection
You can protect and manage Windows NT/2000 cluster servers with Symantec
Client Security.
To protect cluster servers, complete the following tasks:
■
Install the Symantec Client Security client to each local computer that is part
of the cluster server. Do not install to the shared drives.
■
Roll out Symantec Client Security clients using the local server names rather
than the shared cluster name.
Each Symantec Client Security client is managed separately and provides
protection in the event of a failover. You can synchronize the manageability of
the clients if they are managed by the same Symantec Client Security server and
configuration is performed at the server level.
The shared drives are protected in real time by each computer’s Realtime File
System Protection when the computer has control of the drives. When control of
the shared drives is passed to another computer, that computer’s realtime file
scanning automatically takes over the protection.
If a manual scan of the shared drives is being performed when a failover occurs,
the scan does not restart on the new computer. You must initiate a new scan.
If one Symantec Client Security client in the cluster is down temporarily, it
receives the latest virus definitions when the Symantec Client Security service
starts and the client checks in with the parent.
63
64 Preparing to install Symantec Client Security
Installation considerations
Logs and alerts include the name of the local computer but they do not include
the cluster server name. This helps to identify which computer had the event.
Warning: Problems might occur if the Symantec Client Security server or client is
installed to a shared drive. For example, only one client and the shared drives will
be protected. Also, manageability is lost after a failover.
Required restarts
When you run a silent installation on computers that are running Windows 98/
Me, a forced restart is required.
Email support
The Symantec Client Security antivirus client can interface with supported email
client software. This provides an additional level of antivirus protection that
works in conjunction with Symantec server-side email protection products. It
does not replace them.
The Symantec Client Security client installation program automatically detects
installed Microsoft Exchange/Outlook and Lotus Notes clients and selects the
appropriate option for installation. You can clear the selection if you don’t need
or want the extra layer of protection provided by the email support.
If you don’t want email support to be included as part of installation, you can use
Symantec Packager to create an installation package that does not include the
mail plug-ins.
See “Configuring Symantec Client Security products” on page 162.
Note: If Lotus Notes is open when Symantec Client Security is installed, antivirus
protection will not begin until Lotus Notes is restarted. Lotus Notes should be
closed for five minutes after Symantec Client Security is installed and the
Symantec Client Security service starts.
For users who regularly receive large attachments, you may want to disable
realtime protection for email clients or not include the mail plug-in as part of the
installation package. When realtime protection is enabled for email, attachments
are immediately downloaded to the computer that is running the email client and
scanned when the user opens the message. Over a slow connection with a large
attachment, this slows mail performance.
Chapter
Symantec Client Security
installation requirements
This chapter includes the following topics:
■
About installation requirements
■
Required protocols
■
The Symantec System Center and snap-in requirements
■
Symantec Client Security server installation requirements
■
Quarantine Server requirements
■
Symantec Client Security client installation requirements
■
Symantec Client Firewall Administrator requirements
■
Symantec Packager requirements
4
66 Symantec Client Security installation requirements
About installation requirements
About installation requirements
Symantec Client Security requires specific protocols, operating systems and
service packs, software, and hardware.
All of the requirements that are listed for Symantec Client Security components
are designed to work in conjunction with the hardware and software
recommendations for the supported Microsoft Windows and NetWare
computers.
Required protocols
Symantec Client Security uses an adaptive communication method that handles
IP and IPX communication. Benefits of this method are that Symantec Client
Security does not require or create NetWare SAPs and it is compatible with IPonly networks.
Windows NT computers try to connect to NetWare servers first via IPX. If a
NetWare server does not have IPX, then the Windows NT/2000 computer tries to
connect with IP.
Specific combinations of mixed protocols can prevent proper communication.
For example, if you are using the Symantec System Center to manage some
computers running only IP and others running only IPX, you should have both
protocols installed on the computer that is running the Symantec System Center.
You should avoid using the Symantec System Center console across a link that
does not support the protocols that are used on the other side of the link. This
also applies to setting up server groups that cross a link. For example, servers and
clients will not be visible in the Symantec System Center if it is running on one
side of an IP-only WAN link that is being used to connect NetWare servers that
are running only IPX (no IP loaded) on the other side.
The Symantec System Center and snap-in
requirements
The Symantec System Center requires the following:
■
Without Quarantine Console: 10 MB hard disk space; with Quarantine
Console: 45 MB hard disk space
■
Without Quarantine Console: 64 MB RAM; with Quarantine Console: 128
MB RAM
Symantec Client Security installation requirements
The Symantec System Center and snap-in requirements
■
Windows NT 4.0 Workstation and Server with Service Pack 6a; Windows
2000 Professional, Server, Advanced Server; Windows XP Professional
■
Internet Explorer 5.5 with Service Pack 2
■
Microsoft Management Console version 1.2: If MMC is not already installed,
you will need 3 MB free disk space (10 MB during installation)
Note: If Microsoft Management Console version 1.2 is not on the computer
to which you are installing, the installation program will install it.
■
Intel Pentium processor (Pentium II or higher recommended)
Quarantine Console requirements
The Quarantine Console must be installed on the Symantec System Center
management console computer. It requires 35 MB hard disk space and 64 MB
RAM in addition to the Symantec System Center requirements.
Alert Management System snap-in requirements
The Alert Management System2 snap-in requires 10 MB disk space in addition to
the Symantec System Center requirements.
Symantec Client Security antivirus protection snap-in requirements
The Symantec AntiVirus snap-in requires 5 MB disk space in addition to the
Symantec System Center requirements.
Symantec Client Firewall snap-in requirements
The Symantec Client Firewall snap-in requires 1 MB disk space in addition to the
Symantec System Center requirements.
AV Server Rollout tool requirements
The AV Server Rollout tool requires 130 MB disk space in addition to the
Symantec System Center requirements.
NT Client Install tool requirements
The NT Client Install tool requires 2 MB disk space in addition to the Symantec
System Center requirements.
67
68 Symantec Client Security installation requirements
Symantec Client Security server installation requirements
Symantec Client Security server installation
requirements
Symantec Client Security server runs under several operating systems, each with
unique installation requirements.
Symantec recommends assigning a static IP address to Symantec Client Security
servers. If a Symantec Client Security client is unavailable when its parent server’s
address changes, it will not be able to locate the parent server when it attempts to
check in.
Microsoft Windows operating systems
Symantec Client Security server has the following Windows requirements:
■
Windows NT 4.0 Workstation, Server, and Terminal Server Edition with
Service Pack 6a or later; Windows 2000 Professional, Server, Advanced
Server; Windows XP Professional; Windows Server 2003 Web, Standard,
Enterprise, Datacenter
■
32 MB RAM (64 MB or higher recommended)
■
111 MB disk space (65 MB disk space for Symantec Client Security server
files and 46 MB disk space for the Symantec Client Security antivirus client
disk image)
■
15 MB disk space for AMS2 server files (if you choose to install AMS2 server)
■
Intel Pentium processor (Pentium II or higher recommended)
■
Static IP address (recommended)
Note: Symantec Client Security does not support the scanning of Macintosh
volumes on Windows servers for Macintosh viruses.
Novell NetWare operating system
Symantec recommends that you run the Novell client for NetWare on the
computer from which Symantec Client Security will be rolled out to NetWare
servers.
Note: Symantec Client Security is not supported on NetWare servers that are
running SFT III.
Symantec Client Security installation requirements
Quarantine Server requirements
Symantec Client Security has the following NetWare requirements:
■
NetWare 5.x/6 with Service Pack 1
■
15 MB RAM (above the standard NetWare RAM requirements) for antivirus
protection NLMs
■
116 MB disk space (70 MB disk space for antivirus server files and 46 MB
disk space for the antivirus client disk image)
■
20 MB disk space for AMS2 server files (if you choose to install AMS2 server)
■
Intel Pentium processor (Pentium II or higher recommended)
Quarantine Server requirements
Quarantine Server has the following requirements:
■
Windows NT 4.0 Workstation and Server with Service Pack 6a; Windows
2000 Professional, Server, Advanced Server; Windows XP Professional;
Windows Server 2003 Web, Standard, Enterprise, Datacenter
■
128 MB RAM
■
Minimum swap file size of 250 MB
■
40 MB disk space, 500 MB to 4 GB disk space recommended for quarantined
items
■
Internet Explorer 5.5 with Service Pack 2
■
Intel Pentium processor (Pentium II or higher recommended)
Note: If you are running Windows Me/XP, system disk space usage is increased if
the System Restore functionality is enabled. Consult the Microsoft operating
system documentation for information about the System Restore functionality.
Symantec Client Security client installation
requirements
Symantec Client Security client requirements vary based on the type of protection
installed to the computer. Disk space requirements are based on the installation
of all features.
69
70 Symantec Client Security installation requirements
Symantec Client Security client installation requirements
Symantec Client Security client (antivirus and firewall protection)
for 32-bit computers
Symantec Client Security clients have the following requirements:
■
Windows 98/98 SE/Me; Windows NT 4.0 Workstation with Service Pack 6a;
Windows 2000 Professional; Windows XP Home/Professional
■
64 MB RAM minimum
■
116 MB disk space
■
Internet Explorer 5 or later
■
Intel Pentium processor at 150 MHz (Pentium II or higher recommended)
Symantec Client Security antivirus client for 32-bit computers
The Symantec Client Security antivirus client for 32-bit computers has the
following requirements:
■
Windows 98/98 SE/Me; Windows NT 4.0 Workstation/Server/Terminal
Server Edition with Service Pack 6a; Windows 2000 Professional/Server/
Advanced Server; Windows XP Home/Professional; Windows Server 2003
Web/Standard/Enterprise/Datacenter
■
32 MB RAM minimum
■
46 MB disk space
■
Intel Pentium processor (Pentium II or higher recommended)
Terminal Server clients connecting to a computer with Symantec Client Security
antivirus protection have the following additional requirements:
■
Microsoft Terminal Server RDP (Remote Desktop Protocol) client
■
Citrix Metaframe (ICA) client 1.8 or later
Symantec Client Security antivirus client for 64-bit computers
The Symantec Client Security antivirus client for 64-bit computers has the
following requirements:
■
Windows XP 64-bit Edition Version 2003; Windows Server 2003 Enterprise/
Datacenter 64-bit Editions
■
32 MB RAM minimum
■
80 MB disk space
Symantec Client Security installation requirements
Symantec Client Firewall Administrator requirements
■
Itanium 2 processor
Symantec Client Security firewall client requirements
The Symantec Client Security firewall client has the following requirements:
■
Windows 98/98 SE/Me; Windows NT 4.0 Workstation with Service Pack 6a;
Windows 2000 Professional; Windows XP Home/Professional
■
64 MB RAM minimum
■
70 MB disk space
■
Internet Explorer 5 or later
■
Intel Pentium processor at 150 MHz (Pentium II or higher recommended)
■
32-bit operating system (64-bit operating systems are not supported)
Note: Symantec firewall product versions other than Symantec Client Firewall
5.x, Symantec Desktop Firewall version 2.01, Norton Personal Firewall version
2.5, and Norton Personal Firewall 2002 must be uninstalled before you install the
Symantec Client Security firewall client.
Requirements for clients that are running IPX only
When you install Symantec Client Security to computers that are running IPX
only, the parent server to which they will connect must have Microsoft File and
Print Services for NetWare installed. If you are installing from a network share on
the parent server, or using a configurations file (Grc.dat) that contains the IPX
address of the parent server, Microsoft File and Print Services for NetWare are
not required on the server.
Symantec Client Firewall Administrator requirements
The Symantec Client Firewall Administrator has the following minimum
requirements:
■
Windows NT 4.0 with Service Pack 6a; Windows 2000 Professional/Server/
Advanced Server; Windows XP Professional
■
64 MB RAM minimum
■
130 MB disk space (115 MB for Java Runtime Environment 1.4)
■
Microsoft Internet Explorer 5.5 with Service Pack 2
71
72 Symantec Client Security installation requirements
Symantec Packager requirements
■
Intel Pentium processor at 150 MHz (Pentium II or higher recommended)
■
Java Runtime Environment 1.4 (installed with the Symantec Client Firewall
Administrator)
Symantec Packager requirements
Symantec Packager runs only on Microsoft 32-bit operating systems and has the
following system requirements:
■
Supported operating systems:
■
Windows NT Workstation 4.0/Server 4.0 with Service Pack 6a
■
Windows 2000 Professional/Server with Service Pack 2
■
Windows XP Professional
■
Microsoft Internet Explorer 5.5 or later
■
Windows Installer 2.0
If Windows Installer 2.0 is not present, Symantec Packager installs it during
installation.
■
Pentium II 300 processor (or faster)
■
64 MB RAM (128 MB recommended)
■
60 MB disk space
■
CD-ROM or DVD-ROM drive
Symantec Client Security installation requirements
Symantec Packager requirements
Installation package requirements
Although Symantec Packager runs only on Windows NT/2000/XP, packages that
you create using Symantec Packager can be installed on the following operating
systems:
■
Windows 98
■
Windows Millennium Edition (Me)
■
Windows NT 4.0 with Service Pack 6a
■
Windows 2000
■
Windows XP Home Edition/Professional Edition
Packages that contain only custom commands might run on additional operating
systems. However, installed packages are supported on Microsoft 32-bit systems
only.
The specific system requirements for packages depend on the package contents
and options. The hardware requirements for installation packages vary
depending on the package contents.
User rights requirement
Symantec Packager requires administrator rights for installation on Windows
NT/2000/XP/2003.
Windows XP restricts users who are assigned to limited user or guest accounts
from installing or uninstalling software, changing system-wide settings, or
adding, editing, or deleting user accounts. For optimal performance, log on as a
user with administrator rights when you run Symantec Packager on Windows
XP.
73
74 Symantec Client Security installation requirements
Symantec Packager requirements
Chapter
Installing Symantec
Client Security
management components
This chapter includes the following topics:
■
Installing the Symantec System Center
■
Installing Symantec Client Firewall Administrator
■
Installing Symantec Packager
■
Installing the Central Quarantine
■
Installing and configuring the LiveUpdate Administration Utility
■
Uninstalling Symantec Client Security management components
5
76 Installing Symantec Client Security management components
Installing the Symantec System Center
Installing the Symantec System Center
The Symantec System Center is installed directly from the Symantec Client
Security CD. Install the Symantec System Center to the computers from which
you want to manage your antivirus and firewall protection.
In addition to the Symantec System Center, the following management
components are installed by default:
■
Alert Management System2 (AMS2) console: Required if you want to
use the enhanced alerting that is provided by AMS2.
■
Symantec AntiVirus snap-in: Required if you want to centrally manage
antivirus protection.
■
Symantec Client Firewall snap-in: Required if you want to centrally
distribute firewall and intrusion detection policy files.
■
AV Server Rollout tool: Adds the ability to push the antivirus server
installation to remote computers. This tool is also available on the
Symantec Client Security CD.
■
NT Client Install tool: Adds the ability to push the Symantec Client
Security antivirus client installation to remote computers running
supported Microsoft Windows operating systems. This tool is also
available on the Symantec Client Security CD.
If you elect not to install any of these management components with the
Symantec System Center, you can run the Symantec System Center installation
again and select them.
Installing Symantec Client Security management components
Installing the Symantec System Center
To install the Symantec System Center
1
Insert the Symantec Client Security CD into your CD-ROM drive.
2
In the Symantec Client Security window, click Install Administrator Tools >
Install Symantec System Center.
77
78 Installing Symantec Client Security management components
Installing the Symantec System Center
3
In the Welcome window, read the information, then click Next.
4
Read the License Agreement, click I accept the terms in the license
agreement, then click Next.
If the Microsoft Management Console version 1.2 is not installed on the
computer, a message will indicate that you must allow it to install.
Installing Symantec Client Security management components
Installing the Symantec System Center
5
In the Select Components window, check any of the following components
that you want to install:
■
Alert Management System Console
■
Symantec AntiVirus Snap-In
■
Symantec Client Firewall Snap-In
■
AV Server Rollout Tool
NT Client Install Tool
If these components are not present on the computer, all of them will be
checked automatically.
Microsoft Management Console version 1.2 must be installed before you can
install the Symantec System Center console. If it is not on your computer, the
installation program will install it.
■
6
Click Next.
79
80 Installing Symantec Client Security management components
Installing the Symantec System Center
7
8
In the Destination Folder window, do one of the following:
■
Click Next to accept the default destination folder.
■
Click Change, locate and select a destination folder, click OK, then click
Next.
In the Ready to Install the Program window, click Install.
You may be prompted to restart the computer if the Microsoft Management
Console is installed.
Installing Symantec Client Security management components
Installing Symantec Client Firewall Administrator
9
In the InstallShield Wizard Completed window, click Finish to close the
wizard.
When the installation completes, you are prompted to restart the computer.
The computer must be restarted before you can do either of the following:
■
Install Central Quarantine.
Use the AMS2 console.
If you want to install other components first, you can skip the restart.
■
10 Select one of the following:
■
Yes
■
No
11 Click Finish.
Installing Symantec Client Firewall Administrator
Symantec Client Firewall Administrator is installed directly from the Symantec
Client Security CD.
To install Symantec Client Firewall Administrator
1
Insert the Symantec Client Security CD into the CD-ROM drive.
2
In the Symantec Client Security window, click Install Administrator Tools >
Install Symantec Client Firewall Administrator.
81
82 Installing Symantec Client Security management components
Installing Symantec Client Firewall Administrator
3
In the Welcome window, click Next.
4
Read the License Agreement, click I accept the terms in the license
agreement, then click Next.
Installing Symantec Client Security management components
Installing Symantec Client Firewall Administrator
5
In the Destination Folder window, do one of the following:
■
Click Next to accept the default installation folder.
■
Click Change, locate and select a destination folder, click OK, then click
Next.
6
In the Ready to Install the Program window, specify whether you want to add
the Symantec Client Firewall Administrator shortcut to your desktop, then
click Install to begin the installation.
The InstallShield Wizard installs all of the necessary files onto your
computer.
7
Click Finish.
83
84 Installing Symantec Client Security management components
Installing Symantec Packager
Installing Symantec Packager
Symantec Client Security comes with Symantec Packager packages that are
designed for the most common types of Symantec Client Security server and
client installations. If you want to create custom installation packages, you can
use Symantec Packager.
The Symantec Packager installation program checks for the required software
and hardware resources, lets you select the installation folder, updates registry
settings, and copies the required files to your hard disk. The installation program
also checks for Windows Installer 2.0. If Windows Installer 2.0 is not installed, the
Symantec Packager installation program installs it.
You should close any applications that are open before you start the installation
process.
To install Symantec Packager
1
Insert the Symantec Client Security CD into your CD-ROM drive.
If your computer is not set to automatically run a CD, you must manually
run \Packager\Setup.exe.
2
In the Symantec Client Security window, click Install Administrator Tools >
Install Symantec Packager.
Installing Symantec Client Security management components
Installing Symantec Packager
3
In the Welcome window, click Next.
4
In the Customer Information window, type a user name and organization
name, then click Next.
85
86 Installing Symantec Client Security management components
Installing Symantec Packager
5
In the License Agreement window, accept the terms of the license agreement,
then click Next.
6
In the Destination Folder window, do one of the following:
■
Click Next to accept the default destination folder.
■
Click Change, locate and select a destination folder, click OK, then click
Next.
Installing Symantec Client Security management components
Installing the Central Quarantine
7
In the Ready to Install the Program window, click Install.
Symantec Packager copies files to the destination folder that you specified.
8
In the LiveUpdate window, do one of the following:
9
■
To check for Symantec Packager updates, click Next, then click Finish
when LiveUpdate finishes scanning for updates.
You can optionally click Configure to specify the Internet settings that
LiveUpdate uses to establish a connection.
■
To skip LiveUpdate, click Cancel.
You can run LiveUpdate later.
In the Installation Complete window, click Finish.
Installing the Central Quarantine
The Central Quarantine is composed of the Quarantine Server and the
Quarantine Console. The Quarantine Server and the Quarantine Console can be
installed on the same or different supported Windows computers.
The Quarantine Server is managed by the Quarantine Console, which snaps in to
the Symantec System Center. To manage the Central Quarantine from the
Symantec System Center console, the Quarantine Console snap-in must be
installed.
87
88 Installing Symantec Client Security management components
Installing the Central Quarantine
Installation of the Central Quarantine requires the following tasks:
■
Install the Quarantine Console snap-in.
■
Install the Quarantine Server.
■
Configure the Central Quarantine.
See the Symantec Central Quarantine Administrator’s Guide on the Symantec
Client Security CD for information regarding Central Quarantine.
Install the Central Quarantine
You must install both the Quarantine Console snap-in and the Quarantine
Server.
To install the Quarantine Console snap-in
1
On the computer on which the Symantec System Center is installed, insert
the Symantec Client Security CD into the CD-ROM drive.
2
In the Symantec Client Security window, click Install Administrator Tools >
Install Quarantine Console.
3
Follow the on-screen instructions.
Installing Symantec Client Security management components
Installing the Central Quarantine
To install the Quarantine Server
1
On the computer on which you want to install the Quarantine Server, insert
the Symantec Client Security CD into the CD-ROM drive.
2
In the Symantec Client Security window, click Install Administrator Tools >
Install Central Quarantine Server.
89
90 Installing Symantec Client Security management components
Installing the Central Quarantine
3
In the Welcome window, click Next.
4
In the License Agreement window, accept the terms of the license agreement,
then click Next.
Installing Symantec Client Security management components
Installing the Central Quarantine
5
6
7
In the Destination Folder window, do one of the following:
■
Click Next to accept the default destination folder.
■
Click Change, locate and select a destination folder, click OK, then click
Next.
In the Setup Type window, select one of the following:
■
Internet based (Recommended)
■
E-mail based
Click Next.
91
92 Installing Symantec Client Security management components
Installing the Central Quarantine
8
In the Maximum Disk Space window, type the amount of disk space to make
available on the server for Central Quarantine submissions from clients, then
click Next.
9
In the Contact Information window, type your company name, your
Symantec account number, and contact information, then click Next.
Installing Symantec Client Security management components
Installing the Central Quarantine
10 In the Web Communication window, change the gateway address if
necessary.
By default, the Gateway Name field is filled in with the gateway address.
11 In the Alerts Configuration window, check Enable Alerts to use AMS2, then
type the name of your AMS2 server.
You can leave this blank if no AMS2 server is installed.
93
94 Installing Symantec Client Security management components
Installing and configuring the LiveUpdate Administration Utility
12 In the Ready to Install the Program window, click Next, then follow the onscreen prompts to complete the installation.
13 Write down the IP address or host name of the computer on which you
installed the Quarantine Server.
This information will be required when you configure client programs to
forward items to the Central Quarantine.
Installing and configuring the LiveUpdate
Administration Utility
Use the LiveUpdate Administration Utility to create a single download point for
virus definitions and updates to Symantec products that use LiveUpdate. You can
set up a LiveUpdate server on one or more Internet-ready computers to
distribute updates across an internal local area network (LAN).
See the LiveUpdate™ Administrator’s Guide on the Symantec Client Security CD
for information regarding setting up a LiveUpdate server using the LiveUpdate
Administration Utility.
To set up a LiveUpdate server with the LiveUpdate Administration Utility, and to
set up antivirus servers to retrieve updates from the LiveUpdate server, complete
the following tasks:
■
Install the LiveUpdate Administration Utility: Configure the LiveUpdate
Administration Utility scheduling from the Symantec System Center console
to download updates from Symantec.
■
Configure the LiveUpdate Administration Utility: Specify the packages to
download and the directory to which the packages will be downloaded.
If you have workstations that are connected to a UNC network location, the
user who is logged on to the network must have access rights to the network
resource. The user name and password that are supplied in the host file are
ignored. With a Windows NT server, you can create a shared resource that all
users are authorized to access (a NULL share). For information on creating a
NULL share, see your Microsoft Windows NT server documentation.
Installing Symantec Client Security management components
Installing and configuring the LiveUpdate Administration Utility
■
Make sure that your FTP server, Web server, or UNC share is configured to
share files from the download directory that you specified.
■
On the Symantec System Center console, do the following:
■
Configure LiveUpdate for the internal LiveUpdate server.
■
Configure other servers and clients to download virus definitions and
program updates from the internal LiveUpdate server.
■
Schedule when you want LiveUpdate sessions to run.
Many administrators prefer to test virus definitions files on a test
network before making them available on a production server. If you
test your virus definitions files, test them on your test network. Once
testing is complete, run LiveUpdate from your production network.
Install and configure the LiveUpdate Administration Utility
Install the LiveUpdate Administration Utility on a Windows NT computer that is
running the antivirus server program, and then configure it.
For more information on using the LiveUpdate Administration Utility, see the
LiveUpdate™ Administrator’s Guide PDF on the Symantec Client Security CD.
To install the LiveUpdate Administration Utility
1
Insert the Symantec Client Security CD into your CD-ROM drive.
95
96 Installing Symantec Client Security management components
Installing and configuring the LiveUpdate Administration Utility
2
In the Symantec Client Security window, click Install Administrator Tools >
Install LiveUpdate Administrator.
3
Follow the on-screen instructions.
To configure the LiveUpdate Administration Utility
1
On the Windows taskbar, click Start > Programs > LiveUpdate
Administration Utility > LiveUpdate Administration Utility.
2
Click Retrieve Updates.
3
Specify the Download Directory on your LiveUpdate server.
This is the location in which the update packages and virus definitions files
will be stored once they are downloaded from Symantec. (Files are
downloaded to a temporary directory that is created by the LiveUpdate
Administration Utility. Once the file is downloaded, it is moved to the
specified Download Directory.) The Download Directory can be any
directory on your server.
4
Select the language for downloaded packages.
5
Check the Symantec product lines for which you want to receive packages.
You can select individual product components to update, but you risk
missing other available updates. For example, new virus definitions files for
Symantec Client Security might require an engine update that is also
available for download.
Since all installed Symantec products that use LiveUpdate now point to your
intranet server, it is safer to download full product lines rather than individual
products.
Installing Symantec Client Security management components
Uninstalling Symantec Client Security management components
Uninstalling Symantec Client Security management
components
You can uninstall all of the Symantec Client Security management components
using Add/Remove Programs in the Control Panel on the local computer. You
can also uninstall only the Symantec System Center.
Uninstalling the Symantec System Center
When you uninstall the Symantec System Center, all of its components, including
snap-ins, are also uninstalled.
Uninstall the Symantec System Center
You can uninstall the Symantec System Center using the Windows Add/Remove
Programs option.
To uninstall the Symantec System Center from Windows NT Server/
Workstation
1
On the Windows taskbar, click Start > Settings > Control Panel.
2
Double-click Add/Remove Programs.
3
Click Symantec System Center.
4
Click Add/Remove.
5
Click Yes to confirm.
To uninstall the Symantec System Center from Windows 2000 Professional/
Server/Advanced Server/XP
1
On the Windows taskbar, click Start > Settings > Control Panel.
2
Double-click Add/Remove Programs.
3
Click Symantec System Center.
4
Click Change/Remove.
5
When the uninstall completes, click Close.
97
98 Installing Symantec Client Security management components
Uninstalling Symantec Client Security management components
Chapter
Installing Symantec
Client Security servers
This chapter includes the following topics:
■
Server installation methods
■
About Symantec Client Security server installation
■
Deploying the server installation across a network connection
■
Manually installing AMS server
■
Uninstalling Symantec Client Security server
6
100 Installing Symantec Client Security servers
Server installation methods
Server installation methods
You can install Symantec Client Security servers using any of the methods that
are listed in Table 6-1. You can use any combination of methods that suits your
network environment.
Note: MSI administrative installation is not supported. To control which features
are installed, you can create a custom Symantec Packager installation package.
Table 6-1
Server installation methods
Method
Description
Preparation
Push
You can push a Symantec Client
Security server installation directly
from the Symantec Client Security
CD or from the Symantec System
Center.
Install the Symantec System
Center with the antivirus
management snap-in, and the AV
Server Rollout tool to push the
server installation from the
Symantec System Center.
See “Deploying the server
installation across a network
connection” on page 102.
Self-extracting
executable
You can create a custom package
with Symantec Packager or use the
preconfigured Symantec Client
Security server installation package
(Savcesrv.exe). Distribute and
execute a package to install directly
onto a computer.
See “Installing directly to a
Windows computer using the server
installation package” on page 115.
Create a custom Symantec Client
Security server installation
package, if desired.
Determine a method for
distributing and executing the
package.
Installing Symantec Client Security servers
About Symantec Client Security server installation
About Symantec Client Security server installation
The Symantec Client Security server program does the following:
■
Protects the computer on which it is running
■
Manages other Symantec Client Security servers and clients
If a Windows-based network server needs protection only, install the
Symantec Client Security client program.
See “Symantec Client Security server installation requirements” on page 68.
You can install the Symantec Client Security server program using any of the
following methods:
■
Deploy the server installation across a network connection to remote
computers from the Symantec System Center or the Symantec Client
Security CD. The Symantec Client Security server installation program
installs AMS2 by default to all computers to which you’ve installed Symantec
Client Security server.
See “Why AMS is installed with the Symantec Client Security server” on
page 101.
See “Deploying the server installation across a network connection” on
page 102.
■
Distribute the Savsesrv.exe package to the computer on which it is to be
installed, and then execute the package. AMS2 is not installed by this
package.
Why AMS is installed with the Symantec Client Security server
If you plan to use AMS2 to generate alerts based on antivirus events, you must
install AMS2 to every primary server. When you install Symantec Client Security
server to supported Windows and NetWare computers, AMS2 is selected for
installation by default.
While AMS2 is required to run only on the primary server, you should install
AMS2 to all of the computers on which you install the Symantec Client Security
server program. This lets you change primary servers without reinstalling AMS2
on the new primary server. If a secondary server needs to be made a primary
server, no AMS2 events will be lost.
From the Symantec System Center, you can select the computer that will perform
many AMS2 actions. AMS2 is required for some of the actions to run. Installing
AMS2 on more computers gives you flexibility in choosing the computers that
can perform advanced alert actions, such as sending pages.
101
102 Installing Symantec Client Security servers
Deploying the server installation across a network connection
If you do not install AMS2 when you install Symantec Client Security server, you
can install it later. You must, however, install AMS2 to the secondary server
before making the secondary server the primary server.
See “Manually installing AMS server” on page 116.
If you do not plan to change your primary servers, you may uninstall AMS2 from
secondary servers.
Deploying the server installation across a network
connection
To push the Symantec Client Security server installation to computers across
your network, complete the tasks that are listed in Table 6-2. You should
complete each task in the order in which it is listed. The final task is required for
NetWare servers only.
Table 6-2
Task list for installing servers across a network
Task
For more information
Start the installation.
See “Starting the server installation” on page 103.
Run the server setup
program.
See “Running the server setup program” on page 104.
Select the computers to
which you want to install.
See “Selecting computers to which you want to install” on
page 106.
Complete the server
installation.
See “Completing the server installation” on page 109.
Review any errors.
See “Checking for errors” on page 113.
Start Symantec Client
Security NLMs.
See “Manually loading the Symantec Client Security
NLMs” on page 113.
Installing Symantec Client Security servers
Deploying the server installation across a network connection
Starting the server installation
You can install the Symantec Client Security server using the AV Server Rollout
tool.
Start the server installation
You can install the Symantec Client Security server from the Symantec Client
Security CD or the Symantec System Center.
Note: When you are installing to NetWare, log on to all of the NetWare servers
before you start the installation. To install to NetWare Directory Services (NDS)
or bindery, you need administrator or supervisor rights.
To start the installation from the CD
1
Insert the Symantec Client Security CD into the CD-ROM drive.
2
Click Install Symantec Client Security > Deploy Symantec Client Security
Server.
3
Continue the installation.
See “Running the server setup program” on page 104.
103
104 Installing Symantec Client Security servers
Deploying the server installation across a network connection
To start the installation from the Symantec System Center
1
In the Symantec System Center, in the left pane, click System Hierarchy or
any object under it.
2
On the Tools menu, click AV Server Rollout.
AV Server Rollout is available only if the Server Rollout component was
selected when you installed the Symantec System Center. This component is
selected for installation by default.
3
Continue the installation.
See “Running the server setup program” on page 104.
Running the server setup program
The same setup program runs no matter how you started the installation.
To run the server setup program
1
In the Welcome window, do one of the following:
■
To install the server to computers that have never had Symantec Client
Security installed, click Install, then click Next.
■
To install the server to computers that have had Symantec Client
Security installed, click Update, then click Next.
Installing Symantec Client Security servers
Deploying the server installation across a network connection
2
Read the Symantec License and Warranty, click I agree, then click Next.
3
In the Select Items window, ensure that Server program is checked.
If you plan to use the Alert Management System2 (AMS2), make sure that it is
checked.
4
Click Next.
See “Why AMS is installed with the Symantec Client Security server” on
page 101.
5
Continue the installation.
See “Selecting computers to which you want to install” on page 106.
105
106 Installing Symantec Client Security servers
Deploying the server installation across a network connection
Selecting computers to which you want to install
You can install to one or more computers. In a WINS environment, you can view
the computers to which you can install. If you are installing in a non-WINS
environment, you must select computers by importing a text file that contains the
IP addresses of the computers to which you want to install. You can use the same
import method in a WINS environment.
When you install to NDS, the computer that is performing the installation must
use the Novell Client for NetWare. If you encounter problems installing to a
bindery server with the Microsoft Client for NetWare, install the Novell Client for
NetWare and try again.
Note: The Import feature is designed for use with Windows NT/2000/XP/2003
computers only. It is not intended for use with NetWare.
Select computers to which you want to install
You can select computers manually or import a list of computers.
To manually select Windows computers
1
In the Select Computers window, in the left pane, double-click Microsoft
Windows Network.
2
Select a server on which to install, then click Add.
3
Repeat steps 1 and 2 until all of the servers to which you are installing are
added.
4
Select any NetWare computers to which you want to install.
See “To manually select Novell NetWare computers” on page 108.
5
Continue the installation.
See “Completing the server installation” on page 109.
Installing Symantec Client Security servers
Deploying the server installation across a network connection
To import a list of Windows NT/2000/XP/2003 computers
1
Prepare the list of servers to import.
See “Creating a text file with IP addresses to import” on page 56.
2
In the Select Computers window, click Import.
3
Locate and double-click the text file that contains the computer names.
During the authentication process, you may need to provide a user name and
password for computers that require authentication.
107
108 Installing Symantec Client Security servers
Deploying the server installation across a network connection
4
In the Selection Summary dialog box, click OK.
During the authentication process, Setup checks for error conditions. You are
prompted to view this information on an individual computer basis or to
write the information to a log file for later viewing.
5
Select one of the following:
■
Yes: Write to a log file.
If you create a log file, it is located under C:\Winnt\Navcesrv.txt.
■
No: Display the information on an individual computer basis.
6
Select any NetWare computers to which you want to install.
See “To manually select Novell NetWare computers” on page 108.
7
Continue the installation.
See “Completing the server installation” on page 109.
To manually select Novell NetWare computers
1
In the Select Computers window, in the left pane, double-click NetWare
Services.
2
Do one of the following:
■
To install to a bindery server, double-click NetWare Servers, then select
a server (indicated by a server icon).
■
To install to NDS, double-click Novell Directory Services, then select
the SYS volume object in which you want to install Symantec Client
Security. (To locate a SYS volume object, double-click the tree object
and continue expanding the organizational objects until you reach the
organization unit that contains the SYS volume object.)
3
Click Add.
4
If you are installing to NDS, you are prompted to type a container, user
name, and password.
If you type an incorrect user name or password, installation will continue
normally. However, when you attempt to start Symantec Client Security on
the NetWare server, you will receive an authentication error and be prompted
for the correct user name and password.
Installing Symantec Client Security servers
Deploying the server installation across a network connection
5
Repeat steps 1 through 4 until the volumes for all of the servers that you are
installing to are added.
6
Select any Windows computers to which to install.
See “To manually select Windows computers” on page 106.
See “To import a list of Windows NT/2000/XP/2003 computers” on
page 107.
7
Continue the installation.
See “Completing the server installation” on page 109.
Completing the server installation
After you have selected the computers to which you want to install, you can
complete the installation. All of the computers are added to the same server
group, but you can create new server groups and move servers to them in the
Symantec System Center.
To complete the server installation
1
In the Select Computers dialog box, click Next.
109
110 Installing Symantec Client Security servers
Deploying the server installation across a network connection
2
3
In the Server Summary dialog box, do one of the following:
■
Accept the default Symantec Client Security installation path by clicking
Next.
■
Change the path by selecting a computer, then clicking Change
Destination. In the Change Destination dialog box, select a destination,
click OK, then click Next.
If you are installing to a NetWare server, the new folder name is limited
to 8 characters.
In the Select Symantec AntiVirus Server Group dialog box, do one of the
following:
■
Type a name for a new server group, then click Next.
You will be prompted to confirm the creation of the new server group
and to specify a password for the server group.
■
Select an existing server group to join, click Next, then type the server
group password when you are prompted.
Installing Symantec Client Security servers
Deploying the server installation across a network connection
4
Select one of the following:
■
Automatic startup: On a NetWare server, you must manually load
Vpstart.nlm after you install Symantec Client Security server, but
Vpstart.nlm will load automatically thereafter. (You must either create
or join a server group during the installation process before this takes
effect.)
On a Windows NT/2000/XP/2003 computer, Symantec Client Security
services (and AMS2 services, if you installed AMS2) start automatically
every time that the computer restarts.
Manual startup: On a NetWare server, you must manually load
Vpstart.nlm after you install Symantec Client Security server and every
time that the server restarts. Selecting this option will have no effect on
Windows NT/2000/XP/2003 computers.
See “Manually loading the Symantec Client Security NLMs” on page 113.
■
5
Click Next.
111
112 Installing Symantec Client Security servers
Deploying the server installation across a network connection
6
In the Using the Symantec System Center Program dialog box, click Next.
The Setup Summary dialog box reminds you that you will need your
password to unlock the server group in the Symantec System Center.
7
Click Finish.
The Setup Progress dialog box shows the status of the server installations.
8
Finish the installation.
See “Checking for errors” on page 113.
Installing Symantec Client Security servers
Deploying the server installation across a network connection
Checking for errors
When Symantec Client Security server is installed to all of the computers that you
specified, you can check to see if any errors were reported.
To check for errors
1
In the Setup Progress dialog box, select a server, then click View Errors.
2
Click Close when you are done.
If you’ve installed to any NetWare computers, see “Manually loading the
Symantec Client Security NLMs” on page 113.
Manually loading the Symantec Client Security NLMs
After the Symantec Client Security server software has been installed, you must
run Vpstart.nlm on each NetWare server to complete the installation. You can do
this at the server console if you have rights, or by using RConsole (NetWare 5.x)
for IPX protocol networks or RConsoleJ (NetWare 5.x/6) for IP protocol
networks.
Manually load the Symantec Client Security NLMs
After installation you must use the /Install switch to load Vpstart.nlm the first
time. If you chose automatic startup during installation, the NLMs will load
automatically the next time that the server restarts. If you chose manual startup,
you must manually load Vpstart.nlm every time that you restart the server.
Note: These NetWare commands are case-sensitive.
To manually load the Symantec Client Security NLMs for the first time
◆
At the server console, type the following:
Load Sys:Sav\Vpstart.nlm /Install
Warning: You only need to perform this procedure one time after software
installation. If you use the /Install switch again, you will overwrite any
current configuration settings.
113
114 Installing Symantec Client Security servers
Deploying the server installation across a network connection
To manually load the Symantec Client Security NLMs after NLM installation
◆
At the server console, type the following:
Vpstart.nlm
Note: At the NetWare console, do not add the path to the command specified.
Type the command exactly as it appears.
Installing Symantec Client Security with NetWare Secure Console
enabled
If you are using NetWare Secure Console, you can install Symantec Client
Security while Secure Console is running. After you perform a standard Symantec
Client Security installation, you must copy the NLM to the appropriate directory
and then run the NLM on each NetWare server to complete the installation. You
can do this at the server console if you have rights, or by using RConsole
(NetWare 5.x) for IPX protocol networks or RConsoleJ (NetWare 5.x/6) for IP
protocol networks.
Manually load the Symantec Client Security NLMs while running Secure
Console
After installation, you must copy Vpstart.nlm from the installation directory to
the Sys:\System directory and then use the /Install switch to load Vpstart.nlm the
first time. If you chose automatic startup during installation, the NLMs will load
automatically the next time that the server restarts. If you chose manual startup,
you must manually load Vpstart.nlm every time that you restart the server.
Note: At the NetWare console, do not add the path to the commands specified.
Type each command exactly as it appears. These NetWare commands are casesensitive.
Installing Symantec Client Security servers
Deploying the server installation across a network connection
To manually load the Symantec Client Security NLMs for the first time while
running Secure Console
1
From the Sys:\Sav default installation directory (or the directory that was
specified during installation), copy Vpstart.nlm to the Sys:\System directory.
2
At the server console, type the following:
Vpstart /install /SECURE_CONSOLE SYS:\SAV\VPSTART.NLM
Warning: You only need to perform this procedure one time after software
installation. If you use the /Install switch again, you will overwrite any
current configuration settings.
To manually load the Symantec Client Security NLMs after NLM installation
while running Secure Console
◆
At the server console, type the following:
Vpstart.nlm
Installing directly to a Windows computer using the server
installation package
The preconfigured antivirus server installation package (Savcesrv.exe) that comes
with Symantec Client Security can be used to install directly to a supported
Windows computer by executing the installation package manually or through
other deployment methods, such as distributing and executing the package using
a third-party tool.
Direct installation requires users to be logged on to the computer with
administrative rights.
Install directly to a Windows computer using the server installation
package
The installation package must be copied to a location from which it can be run.
When the package is opened, the server installation starts.
To place the installation package in a location from which it can be run
1
On the Symantec Client Security CD, open the Packages folder.
2
Copy Savcesrv.exe to the location that you want.
3
Distribute Savcesrv.exe using your preferred deployment method.
115
116 Installing Symantec Client Security servers
Manually installing AMS server
To start the installation
1
Open Savcesrv.exe.
2
In the Welcome window, click Next.
3
Read the Symantec License and Warranty, click I accept the terms in the
license agreement, then click Next.
4
Do one of the following:
■
Accept the default installation path by clicking Next.
■
Change the path by clicking Change, locating and selecting a destination
folder, clicking OK, then clicking Next.
5
Accept the default server group name or type a name for a new server group,
then click Next.
6
In the Enter Server Group Password dialog box, type a password for the
server group, then click OK.
7
Click Install to start the installation.
8
If you are prompted to close any files that are open, click Retry to resume
installation.
9
Click Finish when the installation is complete.
Manually installing AMS server
You can manually install AMS2 server to computers to which you’ve already
installed the Symantec Client Security server.
Manually install AMS server
The installation methods for AMS2 are different for Windows NT/2000/XP/2003
computers and NetWare servers.
Note: To avoid losing valuable information when you uninstall Symantec Client
Security from a primary server running under NetWare, first demote the primary
server from which you are uninstalling to secondary status and promote a new
server to primary status. For more information on selecting primary servers, see
the Symantec Client Security Administrator’s Guide.
Installing Symantec Client Security servers
Uninstalling Symantec Client Security server
To manually install AMS2 server to Windows NT/2000/XP/2003 computers
1
Insert the Symantec Client Security CD into your CD-ROM drive.
2
Run the Setup.exe program, which is located in the following directory:
Rollout\Avserver\Ams2\Winnt
3
Follow the on-screen instructions.
To manually install AMS2 server to NetWare servers
1
Uninstall the Symantec Client Security antivirus server.
2
Run the Server Setup program.
See “Running the server setup program” on page 104.
When prompted, make sure that Alert Management System2 (AMS2) is
checked.
Uninstalling Symantec Client Security server
You should uninstall Symantec Client Security servers and clients using the
automatic uninstallation program that is provided by Symantec. If a manual
uninstallation is required, refer to the support knowledge base on the Symantec
Web site.
If a Symantec Client Security server is managing Symantec Client Security clients
and you plan to uninstall and then reinstall the Symantec Client Security server
software, make sure that the computer to which you reinstall has the same
computer name and IP address. If this information changes, clients will not be
able to locate their parent server.
If you don’t plan to replace a Symantec Client Security server that is managing
Symantec Client Security clients, you should reassign any clients that are
managed by the server before you uninstall the Symantec Client Security server
software. For more information, see the Symantec Client Security Administrator’s
Guide.
117
118 Installing Symantec Client Security servers
Uninstalling Symantec Client Security server
Uninstall Symantec Client Security server
You can uninstall Symantec Client Security server from computers running
supported Microsoft Windows operating systems and NetWare computers.
Note: To avoid losing valuable information when you uninstall Symantec Client
Security from a primary server running under NetWare, first demote the primary
server from which you are uninstalling to secondary status and promote a new
server to primary status. For more information on selecting primary servers, see
the Symantec Client Security Administrator’s Guide.
To uninstall Symantec Client Security server from a computer running a
supported Windows operating system
1
On the Windows taskbar, click Start > Settings > Control Panel.
2
Double-click Add/Remove Programs.
3
Click Symantec AntiVirus Server.
4
Click Remove.
To uninstall Symantec Client Security server from NetWare computers
1
Switch to the Symantec AntiVirus Corporate Edition screen on the server by
pressing Ctrl+Esc, then click Symantec AntiVirus Corporate Edition.
2
Press Alt+F10 to unload the NLMs.
3
At the console prompt, type the following:
load Sys:\sav\Vpstart.nlm /Remote
Chapter
7
Installing Symantec
Client Security clients
This chapter includes the following topics:
■
Client installation methods
■
About Symantec Client Security client installation
■
Deploying the antivirus client installation across a network connection
■
Setting up antivirus client installations using logon scripts
■
Installing from the client installation package on the server
■
Deploying installation packages using Web-based deployment
■
Installing Symantec Client Security clients locally
■
Installing preconfigured installation packages from the CD
■
Installing clients using third-party products
■
Configuring automatic client installations from NetWare servers without the
Symantec System Center
■
Post-installation client tasks
■
Configuring clients using the configurations file
■
Uninstalling Symantec Client Security clients
120 Installing Symantec Client Security clients
Client installation methods
Client installation methods
You can install the Symantec Client Security client using any of the methods that
are listed in Table 7-1. You can use any combination of methods that suits your
network environment.
Note: MSI administrative installation is not supported. To control which features
are installed, you can create a custom Symantec Packager installation package.
Table 7-1
Client installation methods
Method
Description
Preparation
Push
You can push the Symantec Client
Security client installation directly
from the Symantec Client Security
CD. This method lets you install
on computers running supported
Microsoft Windows operating
systems without giving users
administrative rights to their
computers.
■
No preparation is
necessary.
■
No preparation is
necessary.
■
Install the Symantec
Client Security server.
Have users map a drive
to the VPHOME\
clt-inst\WIN32 share on
the Symantec Client
Security server to ensure
a successful installation.
See “Deploying the Symantec
Client Security client installation
across a network connection” on
page 123.
Logon script
You can fully automate client
installations and updates by using
logon scripts.
See “Setting up antivirus client
installations using logon scripts”
on page 129.
From a server
You can run the Symantec Client
Security antivirus client
installation package from the
Symantec Client Security server
that you want to act as a parent
server.
See “Installing from the client
installation package on the server”
on page 133.
■
Installing Symantec Client Security clients
Client installation methods
Table 7-1
Client installation methods
Method
Description
Preparation
Web
Users download a client
installation package from an
internal Web server, and then run
it. This option is available for
Windows 98/Me/XP/NT/2000/
2003 computers.
■
■
■
See “Deploying installation
packages using Web-based
deployment” on page 134.
Local
You can run the installation
directly from the Symantec Client
Security CD. This is the primary
installation method supported for
64-bit computers.
Ensure that the Web
server meets the
minimum requirements.
Prepare the internal Web
server for deployment.
Copy a preconfigured
client installation
package to the Web
server or create a custom
installation package, if
desired.
■
Copy the configurations
file (Grc.dat) from the
parent server to the
client computer.
■
Copy the files from the
Packages folder on the
Symantec Client Security
CD to a shared network
folder, if desired.
Copy the configurations
file (Grc.dat) from the
parent server to the
client computer.
See “Installing Symantec Client
Security clients locally” on
page 141.
Preconfigured
You can download or install
installation packages preconfigured installation
packages from an HTML page.
See “Installing preconfigured
installation packages from the
CD” on page 150.
Third-party tools
You can use a variety of thirdparty installation tools to
distribute the preconfigured
Symantec Client Security client
installation package or a custom
package that you’ve created with
Symantec Packager.
See “Installing clients using thirdparty products” on page 151.
■
■
■
See the documentation
that came with your
third-party installation
tool for instructions on
using the tool.
Copy a preconfigured
client installation
package or create a
custom installation
package, if desired.
121
122 Installing Symantec Client Security clients
About Symantec Client Security client installation
Table 7-1
Client installation methods
Method
Description
Preparation
NetWare server
automatic
installations
You can configure Symantec
Client Security to install
automatically to your Windows
clients from NetWare servers.
■
Install the Symantec
Client Security server on
the NetWare server.
See “Configuring automatic client
installations from NetWare servers
without the Symantec System
Center” on page 152.
About Symantec Client Security client installation
The Symantec Client Security client program does the following:
■
Protects the computer on which it runs
■
If managed, communicates with its Symantec Client Security parent server
The Symantec Client Security antivirus client runs on supported computers that
may act as network servers or workstations. If a Windows network server needs
antivirus protection only, install the Symantec Client Security antivirus client.
The Symantec Client Security firewall client runs on supported workstations
only. The Symantec Client Security firewall client should not be installed to server
operating systems.
You can install Symantec Client Security using any of the following methods:
■
Deploy the Symantec Client Security combined antivirus client and firewall
client installation package across a network connection to remote computers
from the Symantec Client Security CD.
■
Deploy the antivirus client installation package across a network connection
to remote computers from the Symantec System Center or the Symantec
Client Security CD.
See “Deploying the antivirus client installation across a network connection”
on page 125.
Installing Symantec Client Security clients
Deploying the Symantec Client Security client installation across a network connection
■
Distribute the antivirus client installation package to the computer on which
it is to be installed, and then execute the package. Common distribution
methods include the following:
■
Run a logon script.
■
Run from the client installation folder on the Symantec Client Security
server.
■
Download from an internal Web site.
■
Run directly from the Symantec Client Security CD.
■
Download and run from an HTML page on the Symantec Client
Security CD.
See “Symantec Client Security client installation requirements” on page 69.
About the antivirus client packages and configuration file
The preconfigured antivirus client packages that are included on the Symantec
Client Security CD do not include a configurations file (Grc.dat).
If you want the client to report to a specific parent server, you must do one of the
following:
■
Use Symantec Packager to create a custom installation package that contains
the appropriate configurations file.
See “Symantec AntiVirus Client feature settings and commands” on
page 163.
■
Copy the appropriate configurations file to the antivirus client after it has
been installed.
See “Configuring clients using the configurations file” on page 156.
Deploying the Symantec Client Security client
installation across a network connection
You can deploy the Symantec Client Security client to computers that are
running supported 32-bit Microsoft Windows operating systems that are
connected to the network directly from the Symantec Client Security CD. This
installation method uses the Symantec Packager deployment tool, which is part of
Symantec Packager. This feature is not supported on 64-bit computers.
You can install to multiple clients at the same time without having to visit each
workstation individually. An advantage to this installation method is that users
do not need to log on to their computers as administrators prior to the
123
124 Installing Symantec Client Security clients
Deploying the Symantec Client Security client installation across a network connection
installation if you have administrator rights to the domain to which the client
computers belong.
For detailed information about the Symantec Packager deployment tool, refer to
the Symantec Packager Implementation Guide in the Docs folder on the Symantec
Client Security CD.
To deploy the Symantec Client Security client installation using the Symantec
Packager deployment tool
1
Insert the Symantec Client Security CD into the CD-ROM drive.
2
In the Symantec Client Security window, click Install Symantec Client
Security > Deploy Symantec Client Security.
The preconfigured Symantec Client Security installation package appears in
the File deployment sequence list.
3
In the Package Deployment window, in the Target computers list, do one of
the following:
4
■
In the Enter computer name or IP address field, type the computer
name or IP address for the target computer, then click Add.
■
Click Search to browse for computers, select them, then click OK.
It may take a few moments for the Select Computers dialog box to
appear.
■
Click Import List to use a preconfigured list of target computers, select
the file, then click Open.
In the Package Deployment window, click Deploy.
Installing Symantec Client Security clients
Deploying the antivirus client installation across a network connection
Deploying the antivirus client installation across a
network connection
You can remotely install the Symantec Client Security antivirus client to
computers running supported Microsoft Windows operating systems that are
connected to the network. You can install to multiple clients at the same time
without having to visit each workstation individually.
An advantage to remote installation is that users do not need to log on to their
computers as administrators prior to the installation if you have administrator
rights to the domain to which the client computers belong.
To push the Symantec Client Security antivirus client installation to computers
across your network, complete the following tasks in the order in which they are
listed:
■
Start the antivirus client installation.
See “Starting the antivirus client installation” on page 125.
■
Run the antivirus client setup program.
See “Running the antivirus client setup program” on page 125.
Starting the antivirus client installation
You can install the Symantec Client Security antivirus client using the NT Client
Install tool.
To start the antivirus client installation from the Symantec System Center
1
In the Symantec System Center, in the left pane, click System Hierarchy or
any object under it.
2
On the Tools menu, click NT Client Install.
NT Client Install is available only if the NT Client Install tool was selected
when you installed the Symantec System Center. This component is selected
for installation by default.
3
Continue the installation.
See “Running the antivirus client setup program” on page 125.
Running the antivirus client setup program
The setup program runs after you start the installation process.
125
126 Installing Symantec Client Security clients
Deploying the antivirus client installation across a network connection
To run the antivirus client setup program
1
In the Welcome to the Client Install Utility window, click Next.
2
In the Select Computers dialog box, under Available Computers, doubleclick Microsoft windows network.
3
Do the following:
4
■
Under Available Computers, select a computer.
■
Under AntiVirus Servers, select a computer.
Click Add.
Installing Symantec Client Security clients
Deploying the antivirus client installation across a network connection
5
Repeat steps 3 and 4 until all of the clients that you want to manage are
added.
You can reinstall to computers that are already running Symantec Client
Security. You can also import a text file to add Windows NT/2000/XP/2003
clients.
6
Do one of the following:
■
If you created a text file that contains IP addresses to import computers
that are in non-WINS environments, continue to step 7.
If you did not create a text file that contains IP addresses to import
computers in non-WINS environments, continue to step 11.
See “Creating a text file with IP addresses to import” on page 56.
■
7
Click Import to import the list of computers.
127
128 Installing Symantec Client Security clients
Deploying the antivirus client installation across a network connection
8
Locate and double-click the text file that contains the computer names.
A summary list of computers to be added to the Available Computers list
appears.
During the authentication process, you may need to provide a user name and
password for computers that require authentication.
9
In the Selection Summary dialog box, click OK.
During the authentication process, Setup checks for error conditions. You are
prompted to view this information interactively on an individual computer
basis or to write the information to a log file for later viewing.
If you create a log file, it is located under C:\Winnt\Navcecln.txt.
10 Select one of the following:
■
Yes: Display the information.
■
No: Write to a log file.
11 Click Finish.
Installing Symantec Client Security clients
Setting up antivirus client installations using logon scripts
Setting up antivirus client installations using logon
scripts
You can automate antivirus client installations using the logon scripts that the
Symantec Client Security server installation program copies to each Symantec
Client Security server.
When users who are enabled to run the script log on to a protected server, the
script calls a program to check the version number of the antivirus client that is
currently available on the server. If the antivirus client version on the server is
newer than the antivirus client version on the user’s hard disk, or if the antivirus
client is not installed on the user’s hard disk, the client Setup program runs for
the platforms that you specify.
The server Setup program creates a logon group (NortonAntiVirusUser) on
NetWare servers, which simplifies setting up users to run the scripts.
To configure antivirus client installation at logon, do the following:
■
Use the Symantec System Center to set update options and enable updates.
See “Using the Symantec System Center to set logon script options” on
page 129.
■
Use your network administration tools to associate users with the logon
script. For Windows logon scripts, you must also copy files from the
Symantec Client Security server to the netlogon share.
See “Associating users with the logon script” on page 131.
Using the Symantec System Center to set logon script options
In the Symantec System Center, you configure the installation actions that you
want to occur when the user logs onto the client computer.
129
130 Installing Symantec Client Security clients
Setting up antivirus client installations using logon scripts
To set logon script options
1
In the Symantec System Center console, right-click a server, then click All
Tasks > Symantec AntiVirus > Client Login Scan And Installation.
These settings apply to all of the antivirus client computers that connect to
that server.
2
In the Client Login Options for Clients of Server dialog box, on the
Installation tab, set one of the following client logon installation options for
each computer type:
■
Automatically install: User has no option to cancel the installation at
logon.
■
Ask the user: User types Yes or No to receive the installation at logon.
■
Do not install: No changes are made to the client computer at logon.
The Windows 9x setting applies only to Windows 98/Me antivirus clients.
(Windows 95 is not supported.) The Windows NT setting applies to
Windows NT/2000/XP antivirus clients.
Installing Symantec Client Security clients
Setting up antivirus client installations using logon scripts
3
To force an update of Symantec Client Security when the client next logs on,
check Force update during next login.
This option is useful if you are installing over an installation that is corrupt
or missing files.
See “How the Force update during next login option works” on page 131.
The Force update during next login option is unchecked after the update on
the client is complete.
4
Click OK.
5
Continue with “Associating users with the logon script” on page 131.
How the Force update during next login option works
Checking Force update during next login increments a counter under
[ClientNumber] in Vp_login.ini on the Symantec Client Security server. When
the client logs on, it compares this value with the value in its registry under
HKEY_LOCAL_MACHINE\Software\Intel\VirusProtect6\CurrentVersion\
ClientNumber
Each time that you check Force update during next login, the value under
ClientNumber in Vp_login.ini increases. If the value does not match the
ClientNumber value on the client, then the client is updated.
Associating users with the logon script
On NetWare servers, the server Setup program creates a user group called
NortonAntiVirusUser. When you add a user to the group, the logon script runs
according to the options that you set in the Symantec System Center the next
time that the user logs on to the server.
For Windows computers running Symantec Client Security server, use User
Manager to assign the Vplogon.bat logon script to a user. When the user logs on,
the computer runs the script from the netlogon share on the Symantec Client
Security server, which launches the client installation according to the options
that you set in the Symantec System Center.
131
132 Installing Symantec Client Security clients
Setting up antivirus client installations using logon scripts
Associate users with a logon script
The procedure for associating users with a logon script differs for NetWare and
Windows.
To associate NetWare users with a logon script
1
Open the NetWare Administrator utility (Nwadmin32 or ConsoleOne).
2
Double-click the NortonAntiVirusUser group.
3
In the Group dialog box, click Members.
4
Click Add to add a user to the group.
5
Select the user that you want to add, then click OK.
6
Click OK to close the Group dialog box.
The user is added to the NortonAntiVirusUser group. The configured logon
installation occurs the next time that the user logs on to the protected server
from a Novell NetWare client.
7
Close the NetWare Administrator utility.
To associate Windows users with a logon script
1
Copy the following files from the Program Files\Sav\Logon directory on the
protected server to the netlogon share (by default,
C:\Winnt\System32\Repl\Import\Scripts for Windows NT and
C:\Winnt\Sysvol\Sysvol\Domainname\Scripts for Windows 2000/XP/2003):
■
Vplogon.bat
Nbpshpop.exe
If this share has been changed, copy the files to the directory that you set up
as the netlogon share.
■
2
If you are installing to a Windows domain that has PDC and BDC, copy
Vplogon.bat and Nbpshpop.exe to all PDC and BDC locations, or set up
replication.
This prevents a File Not Found error when Windows authenticates to other
servers.
3
On the Windows taskbar, click Start > Programs > Administrative Tools >
User Manager.
4
In the User Manager window, double-click the user name that you want to
receive a client logon installation.
5
In the User Properties dialog box, click Profile.
Installing Symantec Client Security clients
Installing from the client installation package on the server
6
In the logon Script Name box of the User Environment Profile, type
Vplogon.bat.
7
Click OK twice, then close the User Manager dialog box.
Installing from the client installation package on the
server
When you install a Symantec Client Security server, the server Setup program
creates a client installation shared folder on that Symantec Client Security server.
On servers running supported Microsoft Windows operating systems, the default
shared directory for Symantec Client Security server is \\Server\Vphome\Clt-inst.
Everyone has read permissions.
On NetWare servers, the default shared directory is \\Server\Sys\Nav\Clt-inst.
Setup also creates a group called NortonAntiVirusUser. If you add users to this
group, they will have the rights that they need (Read and File Scan) to run the
client installation program from the client disk image on the server.
When a networked user runs the client installation from the server that will
manage it, the client will install in managed mode. When its associated server is
selected in the Symantec System Center tree in the left pane, the client will display
in the right pane. From the Symantec System Center, you can configure and
manage the client.
If you want to make the Symantec Client Security client installation package
available on a custom shared network drive, users must map to that drive on their
workstations to ensure the successful installation of all components. They must
also have Read and File Scan rights to that shared folder.
To install from the client installation package on the server
1
Verify that users have rights to the client installation package on the server.
2
Distribute the path to users and, if necessary, drive mapping instructions to
the client installation package.
For NetWare servers, the default path is \\Server\Sys\Nav\Clt-inst. For
Windows NT servers, the default share path is \\Server\Vphome\Clt-inst.
3
The following installation folder and Setup program is available in the
Clt-inst folder on each server:
Clt-inst\Win32\Setup.exe
133
134 Installing Symantec Client Security clients
Deploying installation packages using Web-based deployment
Deploying installation packages using Web-based
deployment
Packages that are created with Symantec Packager can be deployed over your
corporate intranet using a Web-based deployment tool that is provided by
Symantec. All of the source files that are necessary to implement Web-based
deployment are included on the Symantec Client Security CD.
Deploying packages via Web-based deployment requires the following steps:
■
Review the Web-based deployment requirements.
■
Install the Web server, if necessary.
■
Set up the installation Web site.
■
Customize the deployment files: Files.ini and Start.htm.
■
Test the installation.
■
Notify users of the download location.
Packages that are created with Symantec Packager are self-extracting executable
(.exe) files. The Web-based deployment tool supports the deployment of
Symantec Packager packages and Microsoft software installer (.msi) files.
Note: The client-based, Web-installation program is not configured to install
versions of the antivirus client earlier than version 7.5.
Reviewing Web-based deployment requirements
Before you begin to implement a Web-based deployment, you should review the
requirements in Table 7-2 for the Web server and the target computer.
Table 7-2
Web server and target computer requirements
Deployment on
Requirements
Web server
■
■
HTTP Web Server.
Microsoft Internet Information Server (IIS) version 4.0/5.0,
and Apache HTTP Server version 1.3 or later (Unix and
Linux platforms are also supported).
Installing Symantec Client Security clients
Deploying installation packages using Web-based deployment
Table 7-2
Web server and target computer requirements
Deployment on
Requirements
Target computer
■
■
■
■
■
Internet Explorer 4.0 or later.
Browser security must allow ActiveX controls to be
downloaded to the target computer.
When the installation is complete, the security level can be
restored to its original setting.
Must meet system requirements for the package to be
installed.
Must be logged on to the computer with the rights that are
required for the package to be installed.
Symantec Packager is not supported on 64-bit computers.
Installing the Web server
For additional information about Web server installation, consult the
documentation that was supplied with the following products:
■
Internet Information Server (IIS) 5.0: Installs by default during a Windows
2000 Professional Server/Advanced Server installation. If the IIS installation
option was unchecked when Windows 2000 was installed, use the Windows
2000 installation CD to add the IIS service.
■
Internet Information Server (IIS) 4.0: Installs to Windows NT 4.0 from the
Microsoft Option Pack for Windows NT 4.0.
■
Apache Web Server: Installs to version 1.3 or later, for Windows NT 4.0/
2000. (UNIX and Linux platforms are also supported.) The Apache Web
Server can be downloaded from the Apache Software Foundation Web site at:
http://www.apache.org/httpd.html
Setting up the installation Web server
To set up the Web server, complete the following tasks in the order in which they
are listed:
■
Copy the installation files to the Web server.
■
Configure the Web server.
Alternately, if Symantec Client Security server is installed on the Web server, you
can copy the files in the Web Install folder to the client installation folder on that
server, and then configure the Web server to use the client installation folder as
the virtual directory.
135
136 Installing Symantec Client Security clients
Deploying installation packages using Web-based deployment
Copying the installation files to the Web server
The same procedure is used for Internet Information Server and Apache Web
Server.
To copy the installation files to the Web server
1
On the Web server, create a directory called Deploy.
2
Copy the Webinst folder from the Tools folder on the Symantec Client
Security CD to the Deploy directory.
3
Copy the installation files to the Deploy\Webinst\Webinst folder on the Web
server from one the following locations:
4
■
The Packages folder on the Symantec Client Security CD.
■
The \\Server\Vphome\Clt-inst\Win32 shared folder on the NT/2000/
XP/2003 Windows computer that is running the antivirus server that
you want to act as the parent server.
■
The \\Server\Sys\Nav\Clt-inst\Win32 shared folder on the NetWare
Server that is running the antivirus server that you want to act as the
parent server.
Ensure that the default document for the virtual directory is Default.htm.
When you are finished, the folder structure on the Web server will look as follows
(note that all files are case sensitive):
■
■
Deploy\Webinst
■
brnotsup.htm
■
default.htm
■
intro.htm
■
logo.jpg
■
oscheck.htm
■
plnotsup.htm
■
readme.htm
■
start.htm
■
webinst.cab
Deploy\Webinst\Webinst
■
files.ini
■
The installation package (for example, Savceclt.exe or Package.msi)
Installing Symantec Client Security clients
Deploying installation packages using Web-based deployment
Configuring the Web server
You must configure the Web server to create a virtual directory.
Configure the Web Server
You can configure Internet Information Server or Apache Web Server.
To configure Internet Information Server
1
Do one of the following to launch Internet Services Manager:
■
IIS version 4.0: On the Windows taskbar, click Start > Programs >
Windows NT 4.0 Option Pack > Microsoft Internet Information Server
> Internet Service Manager.
■
IIS version 5.0: On the Windows taskbar, click Start > Programs >
Administrative Tools > Internet Services Manager.
2
Double-click the Web server icon to open it.
3
Right-click Default Web Site, then click New > Virtual Directory.
4
Click Next to begin the Virtual Directory Creation Wizard.
5
In the Alias text box, type a name for the virtual directory (for example,
ClientInstall), then click Next.
6
Type the location of the installation folder (for example, C:\Client\Webinst),
then click Next.
7
For access permissions, check Read only, then click Next.
8
Do one of the following to complete the virtual directory creation:
■
IIS 4.0: Click Finish.
■
IIS 5.0: Click Next, then click Finish.
137
138 Installing Symantec Client Security clients
Deploying installation packages using Web-based deployment
To configure Apache Web Server
1
In a text editor, open Srm.conf.
The Srm.conf file is installed by default under C:\Program Files\
Apache Group\Apache\conf.
2
Type the following five lines at the end of the Srm.conf file:
DirectoryIndex default.htm
<VirtualHost 111.111.111.111>
#ServerName machinename
DocumentRoot "C:\Client\Webinst"
</VirtualHost>
For the VirtualHost
Replace 111.111.111.111 with the IP address of the
computer on which Apache HTTP Server is installed.
For ServerName
Replace machinename with the name of the server.
For the
DocumentRoot
Specify the folder in which you copied the Web install
files (for example, "C:\Client\Webinst").
Double quotation marks are required to specify the
DocumentRoot. If the quotation marks are omitted,
Apache services might not start.
Customizing the deployment files
Two files must be modified for the deployment. Start.htm resides in the root of
the Webinstall directory. Files.ini resides in the Webinst subdirectory.
Customize the deployment files
Modify Files.ini to contain the names of the packages that you want to deploy.
The parameters in the Start.htm file contain information about the Web server
and the locations of the files that need to be installed. The configuration
parameters in Table 7-3 are located near the bottom of the Start.htm file, inside
the <object> tags.
Table 7-3
Start.htm parameters and values
Parameter
Value
ServerName
The name of the server that contains the installation source
files. You can use Hostname, IP address, or NetBIOS name.
The source files must reside on an HTTP Web server.
Installing Symantec Client Security clients
Deploying installation packages using Web-based deployment
Table 7-3
Start.htm parameters and values
Parameter
Value
VirtualHomeDirectory
The virtual directory of the HTTP server that contains the
installation source files (for example, Deploy\Webinst).
ConfigFile
The file name of the Files.ini file. The default value for this
parameter does not need to be changed unless you’ve
renamed Files.ini.
ProductFolderName
The subdirectory that contains the source files to be
downloaded locally. This subdirectory contains the package
and Files.ini (for example, Webinst).
MinDiskSpaceInMB
The minimum hard disk space requirement. The default
value is appropriate.
ProductAbbreviation
The abbreviation for the product. The default value is
appropriate.
To customize Files.ini
1
In a text editor, open Files.ini.
2
In the [Files] section, edit the line File1= so that it references the package that
you want to deploy.
For example, in File1=Package.exe, replace Package.exe with the name of the
package or .msi file that you want to deploy. Long file names are supported.
3
For each additional file, add a new Filen= filename line, where n is a unique
number and filename is the name of the file.
For example, File2=Grc.dat
4
In the [General] section, edit the line LaunchApplication= so that it
references the program that you want to start after the download completes.
For a package, this is the name of the package.
For example, LaunchApplication= Package.exe
5
Save Files.ini.
To customize Start.htm
1
In a text editor, open Start.htm.
2
Search for the <object> tags and type the correct values.
See Table 7-3, “Start.htm parameters and values,” on page 138.
3
Save Start.htm.
139
140 Installing Symantec Client Security clients
Deploying installation packages using Web-based deployment
Testing the installation
To test the installation, go to the Web site (for example, <your web site>/
webinstall), and click Install.
If the installation fails, note any error messages that are displayed:
■
If there is a problem with the parameters in Start.htm, an error message
shows the path of the files that the Web-based install is trying to access. Verify
that the path is correct.
■
If there is a problem in Files.ini (for example, a File not found error),
compare the File1= value with the actual name of the package file.
■
Confirm that no other entries were changed during modification.
Notifying users of the download location
You can email instructions to your users to download the package that you want
to deploy.
To download the client installation program, users must have Internet Explorer
4.0 or later on their computers. The Internet Explorer security level for the local
intranet must be set to Medium so that Symantec ActiveX controls can be
downloaded to the client. When the installation is complete, the security level can
be restored to its original setting.
Make sure that users understand the system requirements and have the
administrative rights that are required for the products that they are installing.
For example, to install the Symantec Client Security client, users who are
installing to Windows NT/2000/XP/2003 workstations must have administrator
rights on their own computers and must be logged on with administrator rights.
If your package restarts the client computer at the end of the installation, notify
your users that they should save their work and close their applications before
they begin the installation. For example, the silent antivirus client installation on
Windows 98 computers restarts the computer at the end of Setup.
Installing Symantec Client Security clients
Installing Symantec Client Security clients locally
Include a URL in your email message that points to the client installation as
follows:
■
For Internet Information Server:
http://Server_name/Virtual_home_directory/Webinst/
where Server_name is the name of the Web-based server,
Virtual_home_directory is the name of the alias that you created, and
Webinst is the folder that you created on the Web server. (For example,
http://Server_name/Avclientinstall/Webinst/)
■
For Apache Web Server:
http://Server_name/Webinst/
where Server_name is the name of the computer on which Apache Web
Server is installed. The IP address of the server computer can be used in place
of the Server_name.
Installing Symantec Client Security clients locally
If the client computer is connected to the network, installing directly from the
Symantec Client Security CD is the least preferred option because the CD might
get damaged or lost, and only one user can install at a time. Also, installing the
Symantec Client Security client in managed mode is more difficult because the
user must specify a Symantec Client Security server to connect to when installing
from the CD.
If users do not specify a Symantec Client Security server to connect to when they
install from the Symantec Client Security CD, the Symantec Client Security client
is installed in unmanaged mode. This means that users are responsible for getting
their own virus definitions files and program updates via the Internet.
To change the client’s status to managed, use one of the following methods:
■
Reinstall the client from the server or use one of the other installation
methods.
■
Copy the configurations file (Grc.dat) from the intended parent server to the
client. (This method is faster and requires fewer resources.)
See “Configuring clients using the configurations file” on page 156.
If you make the Symantec Client Security CD available on a shared network
drive, users must map to that drive on their workstations to ensure the successful
installation of all components.
141
142 Installing Symantec Client Security clients
Installing Symantec Client Security clients locally
To run the Symantec Client Security client installation from the CD, complete
the following tasks in the order in which they are listed:
■
Start the installation.
■
Run the antivirus client setup program.
■
Run the firewall client setup program.
■
Complete the installation.
Starting the installation for 32-bit and 64-bit computers
When you start the installation from the CD, it executes the Symantec Client
Security client installation package on the CD.
To start the installation from the Symantec Client Security CD
1
If users will run the client in managed mode, inform them of the Symantec
Client Security server to which they will connect.
The installation program prompts them for this information.
2
Give users access to the Symantec Client Security CD.
3
For installation on a 32-bit computer, in the root of the CD, have users run
Setup.exe. For installation on a 64-bit computer, run Setup.exe from the
D:\SAVWIN64 folder.
Warning: If the 32-bit version of Setup.exe is run on a 64-bit computer, the
installation may fail without notification. For 64-bit installation, users must
run Setup.exe from the \SAVWIN64 folder in the root of the CD.
4
In the Symantec Client Security setup window, click Install Symantec Client
Security > Install Symantec Client Security.
5
In the Symantec Packager Welcome window, click Next.
6
In the Symantec Packager Customer Information window, in the User Name
text box, type the name of the user of the computer, then click Next.
7
In the Organization text box, type the name of the company.
8
In the Symantec Packager License Agreement window, click I accept the
terms in the license agreement, then click Next.
Installing Symantec Client Security clients
Installing Symantec Client Security clients locally
9
Wait for the antivirus client installation to start.
10 Continue with the installation.
See “Running the antivirus client setup program” on page 143.
Running the antivirus client setup program
The antivirus client setup program starts after a brief pause.
Run the antivirus client setup program
When you run the antivirus client setup program, you configure the installation,
set up a managed or unmanaged client, and complete the antivirus client setup.
143
144 Installing Symantec Client Security clients
Installing Symantec Client Security clients locally
To configure the antivirus client installation
1
In the Configuring Symantec AntiVirus Client Setup window, click Next.
2
In the Mail Snap-in Selection window, select the support for your email
client, then click Next.
The installation program automatically selects a snap-in if it detects that a
supported email client is installed on the computer. You can uncheck it if you
don’t want the antivirus client to scan your email attachments.
3
In the Destination Folder window, do one of the following:
■
Click Next to accept the default Symantec Client Security installation
path.
■
Click Change, locate and select a destination folder, click OK, then click
Next to change the destination path.
Installing Symantec Client Security clients
Installing Symantec Client Security clients locally
4
In the Network Setup Type window, do one of the following:
■
To have the antivirus client be managed by a Symantec Client Security
parent server, click Managed, then click Next.
Continue with “To set up a managed antivirus client installation” on
page 145.
■
To have the antivirus client run without a Symantec Client Security
parent server, click Unmanaged, then click Next.
Continue with “To set up an unmanaged antivirus client installation”
on page 145.
To set up a managed antivirus client installation
1
2
In the Select Server window, do one of the following:
■
In the Server Name text box, type the name, then click Next.
■
Click Browse, select a server, click OK to confirm, then click Next.
If you don’t see the server that you want, click Find Computer and
search for the computer by name or IP address.
Complete the setup program.
See “To complete the setup of the antivirus client” on page 146.
To set up an unmanaged antivirus client installation
1
In the Initial Settings dialog box, check File System Realtime Protection if
you want to enable File System Realtime Protection, then click Next.
145
146 Installing Symantec Client Security clients
Installing Symantec Client Security clients locally
2
In the Run Options dialog box, check LiveUpdate, then click Next to have
LiveUpdate run when you start the antivirus client.
3
Complete the setup program.
See “To complete the setup of the antivirus client” on page 146.
To complete the setup of the antivirus client
1
In the Setup window, click Next.
The firewall client installation starts.
2
Run the firewall client setup program.
See “Running the firewall client setup program” on page 146.
Running the firewall client setup program
The firewall client setup program starts after a brief pause.
Installing Symantec Client Security clients
Installing Symantec Client Security clients locally
To run the firewall client setup program
1
In the Configuring Symantec Client Firewall Setup window, click Next.
If you are installing to a server version of Windows, an installation notice
appears.
2
Read the information in the window and, if necessary, consult the Symantec
Knowledge Base at:
http://www.symantec.com/techsupp/enterprise/products/sym_client_fw/
sym_client_fw_3/index.html
147
148 Installing Symantec Client Security clients
Installing Symantec Client Security clients locally
3
Click Next.
4
In the Launch LiveUpdate after install dialog box, select whether or not you
want to run LiveUpdate after the installation completes.
5
Click Next.
Installing Symantec Client Security clients
Installing Symantec Client Security clients locally
6
In the Destination Folder dialog box, do one of the following:
■
Click Next to accept the default installation location.
■
Click Change, locate and select a destination folder, click OK, then click
Next to change the destination path.
7
Verify the settings that you specified, then click Next.
8
Complete the installation.
See “Completing the installation” on page 149.
Completing the installation
The final stage of installation requires you to wait while the files are being
installed.
To complete the installation
1
In the Symantec Packager window, click Install to begin installing the
antivirus client and the firewall client.
Status dialog boxes display where you are in the installation process.
2
If you chose to run LiveUpdate after installation, follow the instructions in
the LiveUpdate Wizard.
3
When the LiveUpdate Wizard is done, click Finish.
149
150 Installing Symantec Client Security clients
Installing preconfigured installation packages from the CD
4
In the Symantec Packager window, click Finish.
5
When you are prompted to restart your computer to complete the
installation, select one of the following:
■
Reboot Now
Cancel Reboot
You must restart before the computer is protected by Symantec Client
Security firewall client.
■
Installing preconfigured installation packages from
the CD
The Symantec Client Security CD contains Symantec Client Security installation
packages for 32-bit computers that you can download or install from the
included HTML page. In addition, you can override many of these settings using
command line switches. To view the available command line settings, at the
command line type the following, where “package” corresponds to the name of
the package that you have created:
package.exe /?
Table 7-4 provides a general description of the packages. The HTML page details
the features that are installed with each package.
Table 7-4
Component
Preconfigured Symantec Client Security installation packages
File name
Description
Symantec AntiVirus Savceclt.exe
Client
Full installation of the managed Symantec
Client Security antivirus client. Installation is
interactive. The user is prompted for the
parent server name.
Symantec Client
Firewall
Full installation of the Symantec Client
Security firewall client. Installation is
interactive.
Scf.exe
Symantec AntiVirus Savcesrv.exe
Server
Full installation of the Symantec Client
Security server. Installation is interactive.
Installing Symantec Client Security clients
Installing clients using third-party products
To start the installation of preconfigured installation packages from the CD
1
Insert the Symantec Client Security CD into your CD-ROM drive.
2
In the Symantec Client Security window, click Install Symantec Client
Security > Pre-configured Install Package.
3
In the HTML page, click the link for the package that you want to install.
4
Follow your browser’s instructions for downloading and installing the
package.
Installing clients using third-party products
You can install Symantec Client Security using a variety of third-party products,
including Microsoft Systems Management Server (SMS) and Novell ManageWise
ZENworks.
Installing Microsoft SMS package definition files
Microsoft SMS administrators can use a package definition file (.pdf) to
distribute Symantec Client Security to clients. For your convenience, a package
definition file (Navce.pdf) is on the Symantec Client Security CD in the
Tools\Bkoffice folder.
To distribute Symantec Client Security with SMS, you typically complete the
following tasks:
■
Create source directories to store each Symantec Client Security component
that you plan to distribute.
■
Create a query to identify clients that have sufficient free disk space to install
the software.
■
Create a workstation package to distribute the software.
■
Generate an SMS job to distribute and install the workstation package on
clients.
In a workstation package, you define the files that comprise the software
application to be distributed, and the package configuration and identification
information.
The Navce.pdf file has its package configuration and identification information
already defined. You can import the file into your workstation package. The
installation folder must be copied locally before you run the installation using
SMS.
151
152 Installing Symantec Client Security clients
Configuring automatic client installations from NetWare servers without the Symantec System Center
For more information about using SMS, see your Microsoft Systems
Management Server documentation.
Installing with the Novell ManageWise ZENworks Application
Launcher
You can use the Novell ManageWise ZENworks Application Launcher to
distribute the Symantec Client Security client.
After ZENworks is installed on the NetWare server and rolled out to NetWare
clients via a logon script, complete the following tasks:
■
From Network Administrator, locate an Organization Unit and create an
Application Object that points to the location of the Symantec Client
Security installation files on the server (for example, Sys:\Nav\
Clt-inst\Win32\Setup.exe for Windows 98/Me/NT/2000/XP).
■
Configure the Application Object. When you set options, you should do the
following:
■
■
Associate the Application Object to an Organization Unit, group of
users, or individual users.
■
When you set system requirements, select the operating system that
matches the location of the Symantec Client Security installation files on
the server.
Set the Application Object installation style. For example, select Show
Distribution Progress or Prompt User For Reboot If Needed.
After the preparation is completed, ZENworks pushes the Application Object to
the client and launches Setup when the client logs on. Nothing is required on the
client side.
Configuring automatic client installations from
NetWare servers without the Symantec System
Center
If you have a Novell NetWare server but no Windows NT workstations on which
to run the Symantec System Center, you can configure Symantec Client Security
to install automatically on your Windows clients.
Installing Symantec Client Security clients
Configuring automatic client installations from NetWare servers without the Symantec System Center
Complete the following tasks:
■
Install Symantec Client Security on your NetWare server.
See “Installing to NetWare servers” on page 58.
■
Configure automatic installations of Symantec Client Security clients on
computers running supported Microsoft Windows operating systems.
To configure automatic client installations to Netware servers
1
Add users to the NortonAntiVirusUser group using Nwadmin32 or
ConsoleOne.
2
On the server console, load Vpregedt.nlm.
3
Click (O)pen.
4
Click VirusProtect6.
5
Press Enter.
6
Click (O)pen again, click LoginOptions, then press Enter.
7
In the left pane of the window, click (E)dit to edit values.
8
Click DoInstallOnWin95, then select one of the following:
9
■
OPTIONAL: Prompts the user whether to start the installation.
■
FORCE: Silently starts the installation.
■
NONE: Do not install. These entries are case sensitive.
If you previously installed clients and need to force a new update, increment
the WinNTClientVersion to a higher number.
10 Unload the Norton AntiVirus NLM from the NetWare server.
11 Type the following command to reload the NLM:
Load Sys:\Sav\Vpstart
12 Test the client installation by logging on as a member of the
NortonAntiVirusUser group from a Novell NetWare client.
153
154 Installing Symantec Client Security clients
Post-installation client tasks
Post-installation client tasks
After the installation is complete, you may want to perform the following tasks:
■
Create an Emergency Disk set.
■
Protect the Symantec Client Security registry key on Windows NT 4.0
computers.
■
Configure clients using the configurations file.
See “Configuring clients using the configurations file” on page 156.
Creating and using Emergency Disk sets
The Emergency Disk set is a bootable floppy-disk set from which you can scan all
Windows 98 computers and Windows NT/2000/XP computers with FAT system
drives. The disk set contains NAVDX, the Symantec command-line scanner, and
virus definitions files. It does not contain any BIOS, partition, or boot record
information.
The virus definitions files on the Emergency Disk set will only be used if the virus
definitions files on the local computer are corrupt or not accessible.
Note: The Emergency Disk set cannot scan NTFS system drives.
Create and use an Emergency Disk set
You need four 1.44 floppy disks to create an Emergency Disk set.
To create an Emergency Disk set
1
Insert the Symantec Client Security CD into your CD-ROM drive.
2
On the installation menu, click Create Emergency Disk.
3
Insert a 1.44 MB floppy disk into drive A.
4
Follow the on-screen prompts to create the Emergency Disk set.
To use the Emergency Disk set
1
Turn off the computer.
2
Insert the first Emergency Disk into drive A.
3
Turn on the computer.
4
Follow the on-screen instructions.
Installing Symantec Client Security clients
Post-installation client tasks
Protecting the Symantec Client Security registry key on Windows NT
4.0 computers
With default permissions set on a Windows NT 4.0 computer, all users can
modify the data that is stored in the registry for any application, including
Symantec Client Security.
To resolve this security problem, remove the permissions that give users open
access to the registry. The Reset ACL tool (ResetACL.exe) removes the
permissions that allow full access by all users to the following Symantec Client
Security registry key and subkeys:
HKLM\SOFTWARE\Intel\LANDesk\VirusProtect6\CurrentVersion
To use the Reset ACL tool, complete the following tasks:
■
Roll out Resetacl.exe, which is located on the Symantec Client Security CD in
the Tools folder, to Windows NT 4.0 computers that are not secure.
■
Run Resetacl.exe on each Windows NT 4.0 computer.
After you run Resetacl.exe, only users with Administrator rights can change the
registry keys.
Trade-off considerations for the Reset ACL tool
While the Reset ACL tool boosts security for Symantec Client Security on
Windows NT 4.0 computers, there are several trade-off considerations.
In addition to losing access to the registry, users without Administrator rights
cannot perform the following operations:
■
Start or stop the Symantec AntiVirus Corporate Edition service.
■
Run LiveUpdate.
■
Schedule LiveUpdate.
■
Configure antivirus protection. For example, they cannot set realtime
protection or email scanning options.
The options that are associated with these operations are unavailable in the
antivirus client interface.
Users can modify scan options, but the changes are not saved in the registry nor
are they processed. Users can also save manual scan options as the default set, but
the options are not written to the registry.
155
156 Installing Symantec Client Security clients
Configuring clients using the configurations file
Configuring clients using the configurations file
You may want to use the configurations file (Grc.dat) to configure clients when
you do any of the following:
■
Install an unmanaged Symantec Client Security antivirus client.
■
Change the parent server of a managed client without having to uninstall and
reinstall the antivirus client.
To assign the antivirus client to a parent server, complete the following tasks in
the order in which they are listed:
■
Obtain the configurations file.
See “Obtaining the configurations file” on page 156.
■
Copy the configurations file to the antivirus client.
See “Copying the configurations file to the antivirus client” on page 157.
Obtaining the configurations file
The configurations file (Grc.dat) contains the name of the server that you want to
act as the parent server. If you copy the file from the server that you want to act as
the parent server, you will distribute all of the client settings for that server.
Obtain the configurations file
You can copy the configurations file from a server or create a configurations file
with the name of the parent server.
To copy the configurations file from a server
1
Open Network Neighborhood or My Network Places.
2
Locate and double-click the computer that you want to act as the parent
server.
The Symantec Client Security server must be installed on the computer that
you select.
3
Open the VPHOME\Clt-inst\Win32 folder.
4
Copy Grc.dat to the desired location.
Installing Symantec Client Security clients
Configuring clients using the configurations file
To create a configurations file with the name of a parent server
1
In a text editor, open a Grc.dat file.
You can find a minimal version of the configurations file on the Symantec
Client Security CD in the Tools folder.
2
Search for the following line:
PARENT=
3
Type the letter S and the name of your server as follows:
PARENT=S<Servername>
where <Servername> is the name of your server. (Don’t include the
brackets.)
4
Save and close the text file.
Copying the configurations file to the antivirus client
Copy the configurations file (Grc.dat) that contains the name of the parent server
that will manage the client. You can either copy the file manually or you can use
Symantec Packager to create and roll out a package that contains the
configurations file.
To manually copy the configurations file to the antivirus client
1
Copy the Grc.dat file from the desired location.
2
Paste the Grc.dat file to one of the following folders on the client:
3
■
Windows 98/Me: C:\Program Files\Symantec AntiVirus
■
Windows NT 4.0: C:\Winnt\Profiles\All Users\
Application Data\Symantec\Norton AntiVirus Corporate Edition\7.5
■
Windows 2000/XP/2003: C:\Documents and Settings\All Users\
Application Data\Symantec\Norton AntiVirus Corporate Edition\7.5
Restart the client.
The configurations file disappears after it is used to update the client.
157
158 Installing Symantec Client Security clients
Uninstalling Symantec Client Security clients
Uninstalling Symantec Client Security clients
You should uninstall Symantec Client Security clients using the uninstallation
program that is provided by Symantec. You must uninstall the Symantec Client
Security client from the local computer. If a manual uninstallation is required,
refer to the support knowledge base on the Symantec Web site.
You can uninstall the Symantec Client Security antivirus client from Windows
computers.
Note: During the uninstallation, Windows may indicate that it is installing
software. This is a general Microsoft installer message that can be ignored.
To uninstall the antivirus client
1
On the Windows taskbar, click Start > Settings > Control Panel.
2
Double-click Add/Remove Programs.
3
Click Symantec AntiVirus Client.
4
Click Remove.
Note: You must restart the computer before you reinstall the client.
Uninstalling firewall clients
You can uninstall the firewall client using Add/Remove Programs in the Control
Panel on the local computer.
Chapter
Using Symantec Packager
with Symantec Client
Security
This chapter includes the following topics:
■
About Symantec Packager
■
Importing product modules
■
Configuring Symantec Client Security products
■
Creating installation packages
■
Deploying packages
8
160 Using Symantec Packager with Symantec Client Security
About Symantec Packager
About Symantec Packager
Symantec Packager is a tool that lets you create, modify, and build custom
installation packages that you distribute to target systems. Using Symantec
Packager, you can tailor installations to fit your corporate environment, building
packages that contain only the features and settings that your users need.
Symantec products included in installation packages are protected by copyright
law and the Symantec license agreement. Distribution of packages requires a
license for each user who installs the package.
Note: Installation packages created with Symantec Packager can be installed on
all Microsoft 32-bit platforms except for Windows NT 3.51. This feature is not
supported on 64-bit computers.
This chapter includes the basic information you need to get started using
Symantec Packager with Symantec Client Security. Symantec Packager includes
more features that you can use to further customize your installations. For more
information, see the Symantec Packager Implementation Guide in the Docs folder
on the Symantec Client Security CD.
What you can do with Symantec Packager
Symantec Packager gives you the flexibility to select only the features that you
require, letting you reduce the deployment size and the installation footprint. It
also lets you tailor products to adhere to your security policy, giving users full
access to all features, or limiting access where appropriate.
Some examples of what you can do with Symantec Packager include the
following:
■
Reduce deployment bandwidth and application footprint by creating a
custom installation package that contains only the features that your users
need.
■
Reduce installation complexity by including preconfigured data files.
■
Install multiple products at once, reducing installation complexity and
minimizing deployment costs.
■
Include custom commands with product installations.
Using Symantec Packager with Symantec Client Security
About Symantec Packager
Creating custom installation packages
The process for creating custom installation packages with Symantec Packager
involves the following steps:
■
Import product modules into Symantec Packager.
Symantec Packager extracts the product installation binary files and the
product template from the product module. The product template details
the feature requirements and conflicts, making it possible to create custom
installations of the product.
When you install Symantec Packager, it automatically installs any product
modules it finds on the installation CD, so it might not be necessary to
import any product modules.
See “Importing product modules” on page 162.
■
Configure products and commands.
You can select the features that you want your users to have, as well as set
default installation options for each product.
See “Configuring Symantec Client Security products” on page 162.
You also have the option to create custom commands to include in a
package. For example, if you want to include a third-party program or batch
file in a package, you create a custom command for that program.
See “Creating custom commands” on page 168.
■
Configure, build, and test the installation package.
You add the product configurations and custom commands that you created
to a package. You further customize the package by setting package
installation options, product installation order, and other settings.
See “Creating installation packages” on page 168.
When you build a package, Symantec Packager creates an installation file
that incorporates the product, command, and package options that you
specified.
See “Building packages” on page 170.
Before you deploy a package to your users, it is crucial that you test it
thoroughly to determine whether the package settings and options are
appropriate for your users.
See “Testing packages” on page 170.
■
Deploy the package.
The Deploy Packages tab holds the packages that you create. You can use
your current deployment mechanism to deploy these packages to your users.
See “Deploying packages” on page 171.
161
162 Using Symantec Packager with Symantec Client Security
Importing product modules
Importing product modules
Product modules are imported automatically when you install Symantec
Packager. If product modules are missing, you must import them manually.
The following product modules should appear on the Import Products tab:
■
Symantec AntiVirus Client
■
Symantec AntiVirus Server
■
Symantec Client Firewall
When product modules are imported, Symantec Packager extracts the product
installation binary files and the product template from the product module. The
product template details the feature requirements and conflicts, making it
possible to create custom installations of the product.
To import a product module in Symantec Packager
1
Open Symantec Packager.
2
In the Symantec Packager window, on the Import Products tab, on the File
menu, click Import New Product.
3
In the Open dialog box, navigate to the folder that contains the product
module that you want to import.
Product modules are stored in the Packager\Product Modules folder on the
installation CD. If you copied the product modules to your hard drive,
navigate to that folder location.
4
Select the product module, then click Open.
Symantec Packager imports the product module and returns you to the
Import Products tab. Depending on the size and complexity of the product
module, the registration process may be lengthy.
Configuring Symantec Client Security products
After you import product modules into Symantec Packager, you can customize
those products by selecting the features and options that you want to include for
each product. This information is saved in a product configuration (.pcg) file.
Symantec Client Security product configuration files
Symantec Packager creates a default product configuration file for each product
module that you import into Symantec Packager.
Using Symantec Packager with Symantec Client Security
Configuring Symantec Client Security products
Symantec AntiVirus Server feature settings and commands
When you import the Symantec AntiVirus Server product module file, Symantec
Packager creates a default product configuration file that displays on the
Configure Products tab. You can edit the default file or create a new one.
Table 8-1 lists the settings for the default Symantec AntiVirus Server product
configuration file.
Table 8-1
Symantec AntiVirus Server product configuration settings
Tab
Settings
Features
The feature settings for the default Symantec AntiVirus Server
configuration file are as follows:
■
■
■
■
■
■
Installation options
The installation options for the default Symantec AntiVirus Server
configuration file are as follows:
■
■
■
■
■
■
■
■
Configuration files
Base Symantec AntiVirus Server
Full user interface
Decomposer support for all files except Symantec Ghost
image files
Scan and Deliver
Documentation
LiveUpdate
Description: Default configuration
Target location: Program Files\SAV
Shortcut name: Symantec AntiVirus Server
No shortcut on desktop
Symantec Client Security shortcut on Windows Start menu
under Symantec Client Security
LiveUpdate is not configured to run after installation
Server Group Password can be preconfigured
Server Group Name: Symantec AntiVirus 1
None
Symantec AntiVirus Client feature settings and commands
When you import the Symantec AntiVirus Client product module file, Symantec
Packager creates a default product configuration file that displays on the
Configure Products tab. You can edit the default file or create a new one.
163
164 Using Symantec Packager with Symantec Client Security
Configuring Symantec Client Security products
Table 8-2 lists the settings for the default Symantec AntiVirus Client product
configuration file.
Table 8-2
Symantec AntiVirus Client product configuration settings
Tab
Settings
Features
The feature settings for the default Symantec AntiVirus Client
configuration file are as follows:
■
■
■
■
■
■
■
Installation options
The installation options for the default Symantec AntiVirus Client
configuration file are as follows:
■
■
■
■
■
■
■
■
Configuration files
Symantec AntiVirus Client base files and virus definitions
Full user interface
Decomposer support for all files except Symantec Ghost
image files
Mail plug ins
Scan and Deliver
Help files
LiveUpdate
Description: Default configuration
Target location:
Program Files\Symantec_Client_Security\Symantec
AntiVirus
Shortcut name: Symantec AntiVirus Client
No shortcut on desktop
Symantec AntiVirus Client shortcut on Windows Start menu
under Symantec Client Security
LiveUpdate is configured to run after installation
Symantec AntiVirus Server Name for managed installations
is not set up
Network Setup Type: Unmanaged
The default Grc.dat file will be used
Symantec Client Firewall feature settings and commands
When you import the Symantec Client Firewall product module file, Symantec
Packager creates a default product configuration file that displays on the
Configure Products tab. You can edit the default file or create a new one.
Using Symantec Packager with Symantec Client Security
Configuring Symantec Client Security products
Table 8-3 lists the settings for the default Symantec Client Firewall product
configuration file.
Table 8-3
Symantec Client Firewall product configuration settings
Tab
Settings
Features
The feature settings for the default Symantec Client Firewall
configuration file are as follows:
■
■
■
■
Symantec Client Firewall base files
Documentation
Help files
LiveUpdate
Installation Options The installation options for the default Symantec Client Firewall
configuration file are as follows:
■
■
■
■
■
■
Configuration Files
Description: Default configuration
Target location:
Program Files\Symantec_Client_Security\Symantec Client
Firewall
Shortcut name: Symantec Client Firewall
No shortcut on desktop
Symantec Client Firewall shortcut on Windows Start menu
under Symantec Client Security
LiveUpdate is configured to run after installation
The default .xml or .cfp file will be used.
Selecting product features
Symantec Packager lets you customize product installations by including the
features that you want and removing the features that you do not need. The
product size and installation size changes depending on the features that you
choose. If your goal is to reduce the product and installation size by as much as
possible, include as few features as possible.
165
166 Using Symantec Packager with Symantec Client Security
Configuring Symantec Client Security products
To select product features
1
2
3
4
In the Symantec Packager window, on the Configure Products tab, do one of
the following:
■
Create a new product configuration.
■
Double-click an existing product to edit it.
In the Product Editor window, on the Features tab, do any of the following:
■
Check the product features that you want to include in the custom
installation.
■
Uncheck the features that you do not want to include.
■
Click the plus sign next to a feature to select or remove its subfeatures.
Select one of the following:
■
OK: Save your changes and close the Product Editor dialog box.
■
Apply: Save your changes and continue configuring the product
configuration.
If prompted, type a file name, then click Save.
Setting product installation options
Symantec Packager lets you specify product installation options, such as the
target installation location, product shortcuts, and other installation options that
vary by product.
To set product installation options
1
In the Symantec Packager window, on the Configure Products tab, do one of
the following:
■
Create a new product configuration.
■
Double-click an existing product to edit it.
2
In the Product Editor window, on the Installation Options tab, double-click
any item in the Product Properties list to change the setting.
3
Configure the installation option, then click OK.
Detailed information about installation settings is available in the Symantec
Packager online Help.
Using Symantec Packager with Symantec Client Security
Configuring Symantec Client Security products
4
5
Select one of the following:
■
OK: Save your changes and close the Product Editor dialog box.
■
Apply: Save your changes and continue configuring the product
configuration.
If prompted, type a file name, then click Save.
Including configuration files
If you install a Symantec product that requires a configuration file, you can
customize that configuration file and include it in the product configuration file
so that your users do not have to make configuration changes during or after
installation.
For example, if you want a Symantec Client Security antivirus client to use the
settings from a specific parent server, you can include the configurations file
(Grc.dat) from the parent server. When you include this configuration file with
the Symantec Client Security antivirus client installation package that you create,
the settings are applied automatically. After installation, the Symantec Client
Security antivirus client reports automatically to the correct parent server.
If the Configuration Files tab lists a required file and you choose not to
preconfigure the file, the product configuration file uses a default data file
provided by Symantec.
To include configuration files
1
2
In the Symantec Packager window, on the Configure Products tab, do one of
the following:
■
Create a new product configuration.
■
Double-click an existing product to edit it.
In the Product Editor window, on the Configuration Files tab, do one of the
following:
■
Click Add, navigate to the configuration file that you want to include,
then click Open.
This replaces the default data file with your preconfigured data file.
■
Select the file that you want to remove, then click Remove.
This removes your preconfigured data file and replaces it with the
default data file provided by Symantec.
167
168 Using Symantec Packager with Symantec Client Security
Creating installation packages
3
4
Select one of the following:
■
OK: Save your changes and close the Product Editor dialog box.
■
Apply: Save your changes and continue configuring the product
configuration.
If prompted, type a file name, then click Save.
Creating custom commands
In addition to creating custom products, you can create custom commands to
include in your packages. Examples of custom commands include batch files,
third-party executables, command-line arguments, or simple file copies. Custom
commands let you simplify application deployment by including multiple tasks
in one package. Once defined, you can reuse custom commands in different
packages.
When you create a custom command, Symantec Packager creates a command
configuration file. A command configuration file is a generic product
configuration file that does not reference a product template file. The build
process for custom commands creates a self-extracting executable (.exe) file,
which can be tested prior to inclusion in a package.
Symantec Client Security installation packages do not require custom
commands. To include a custom command in your Symantec Client Security
package, see the Symantec Packager Implementation Guide on the CD.
Creating installation packages
You create a custom installation package by creating a package definition and
adding products or commands to the package. The package definition contains
the configuration information and installation instructions that Symantec
Packager requires to build the package.
Within the package definition, you choose the products or custom commands
that you want to include, installation sequences, and package installation and
logging options.
Adding products and commands to a package
Symantec Packager lets you create a custom installation package that includes one
or more products or custom commands. As you add a product to a package
definition, its properties, as defined in the product configuration file, are
displayed in the Package Editor dialog box, as well as any product requirements
or conflicts. For example, to avoid product conflicts, Symantec Client Security
Using Symantec Packager with Symantec Client Security
Creating installation packages
restricts you from including both the Symantec Client Security antivirus client
and Symantec Client Security server versions in the same package. A product
configuration file is required for each product or custom command that you
want to include.
To add products and commands to a package definition
1
In the Symantec Packager window, on the Configure Packages tab, do one of
the following:
■
Create a new package definition.
■
Double-click a package definition to edit it.
2
In the Package Editor dialog box, on the Product Selection tab, click Add.
3
In the Open window, select the product or custom command (.pcg) file that
you want to add, then click Open.
The Estimated package size changes to reflect the product or command that
you include.
4
Repeat step 3 to add more products or custom commands.
5
In the Package Editor dialog box, select one of the following:
6
■
OK: Save your changes and close the Package Editor dialog box.
■
Apply: Save your changes and continue configuring the package
definition.
If prompted, type a file name, then click Save.
Configuring other package settings
Package installation options let you control the level of user interaction required
during installation, specify restart and logging options, and include user or
company-specific information such as a technical support Web address.
Optionally, your package can include the appropriate version of Windows
Installer for users who need it. If there is a discrepancy between installation
settings, package installation options override product settings.
For more information about configuring package settings, see the Symantec
Packager Implementation Guide on the CD.
169
170 Using Symantec Packager with Symantec Client Security
Creating installation packages
Building packages
During the build process, Symantec Packager retrieves information from the
package definition and product configuration files to determine which products
to include in the installation file as well as the product features, installation
instructions, and custom settings. Symantec Packager then checks the contents of
the package for product conflicts. If Symantec Packager encounters a product
conflict, the build process stops. You must resolve the conflict, and then repeat
the build process.
After checking for product conflicts, Symantec Packager verifies that product
requirements are met. This includes verification that all required products are
included in the package definition and that they are listed in the correct
installation sequence. If Symantec Packager encounters an error, the user receives
an error message; however, the build process continues.
After completing the validation phases, Symantec Packager creates a selfextracting executable file and places it on the Deploy Packages tab for testing and
distribution to licensed users.
To build a package
1
In the Symantec Packager window, on the Configure Packages tab, select the
package definition that you want to build.
2
On the File menu, click Build.
The Build Status window provides information about the progress of the
build and logs any problems that have occurred. If the package build is
successful, the last line in the Build Status window reads Package Build
completed.
3
In the Build Status window, click Close.
After the package is built successfully, Symantec Packager places the installation
files on the Deploy Packages tab.
Testing packages
It is important to test packages before deploying them to end users to ensure
proper functionality. Although some error checking occurs during the build
process, some errors cannot be detected until installation. This is especially true if
the package includes a product that requires a third-party product.
During installation, Symantec Packager checks for product conflicts and verifies
that required products are present on the target computer. The installation fails if
Symantec Packager encounters a conflict that it cannot resolve. Test packages to
Using Symantec Packager with Symantec Client Security
Deploying packages
verify that product requirements are met and that the installation sequence is
correct.
After installing a package, test each installed program to ensure that it functions
correctly. Ensure that the features that you want are present. This step is
especially important if you customized a product to reduce the installation
footprint. Product testing ensures that you have not overlooked an important
feature. Once you thoroughly test the package, you can deploy it to end users.
Deploying packages
When you are ready to deploy packages to your users, the self-extracting
executable (.exe) files that you created using Symantec Packager are stored on the
Deploy Packages tab.
On the Deploy Packages tab, you can do the following:
■
Install a package on the local computer.
■
Deploy one or more packages to one or more computers using the Symantec
Packager deployment tool.
The Symantec Packager deployment tool supports deployment to Microsoft
32-bit computers only (for example Windows NT/2000/XP). To deploy to
other operating systems, use another Symantec deployment tool or thirdparty deployment tool.
■
Copy package files from the Deploy Packages tab for use with other
deployment programs.
For more information about the Symantec Packager deployment tool, see the
Symantec Packager Implementation Guide in the Docs folder on the Symantec
Client Security CD.
171
172 Using Symantec Packager with Symantec Client Security
Deploying packages
Index
Numerics
64-bit installation 142
64-bit installation requirements 71
64-bit virus definitions files updates 20, 38
A
access level, and client settings 43
administration tools 51
Alert Management System. See AMS
alert management, planning 43
alerting, how it works 23
alias 141
AMS
about alerting 23
about the console 48
and server installation 101
installing with Symantec Client Security
server 101
installing with the Symantec System Center 76
manually installing 116
snap-in requirements 67
antivirus clients
configuring with Symantec Packager 163
copying the configurations file to 157
installation
completing 149
locally 141
managed clients 145
running setup 125, 143
starting 125
using logon scripts 129
packages and configuration files 123
requirements 70, 71
unmanaged client installation 145
antivirus protection
about 12
snap-in requirements 67
antivirus server, configuring with Symantec
Packager 163
Apache Web Server, configuring 138
AppSec 61
automatic startup
NLMs 58
services 111
Vpstart.nlm 111
AV Server Rollout tool
about 49
installing with the Symantec System Center 76
requirements 67
B
blended threats
about 12
protection against 26
responding to 28
blocking, and client settings 43
C
CD or disk image, client installation method 18
Central Quarantine
about 15
components of 50
forwarding files to 24, 29
installing 87
polling 20, 37, 38
server 50
Citrix Metaframe 55, 58
client installation methods
about 120
CD or disk image 18
login script 19
NT Client Install tool 18
Symantec Packager 18
third-party tools 19
Web-based 18
clients
configuring using the configurations file 156
evaluating components 53
174 Index
clients (continued)
fully managed 19, 30
installation
automatic from NetWare servers 152
installing to clients 62
post-installation tasks 154
preparing for 62
requirements 69
managing based on connectivity 30
roaming 31
rolling out using third-party products 151
settings 43
sometimes managed 30
unmanaged 31
cluster servers, protecting 63
commands, creating with Symantec Packager 168
communication
between antivirus server and client 21
during Discovery 21
for roaming clients 22
for status information 22
for virus definitions updates 21
how it works 21
computers, selecting for installation 106
configurations file
configuring clients with 156
copying to the antivirus client 157
managing clients with 31
obtaining 156
conflicts, viewing 168
connectivity, and managing clients 30
custom, commands
adding to package definition files 168
overview 168
scans 28
D
dependencies, viewing 168
deployment
antivirus clients across a network connection 125
customizing files 138
over the Web 134
requirements for Web-based 134
servers across a network connection 102
Symantec Client Security clients across a network
connection 123
testing Web-based packages 140
deployment (continued)
using Web-based installation packages 134
with Symantec Packager 171
Digital Immune System
how it works 24
polling for new virus definitions files 38
Discovery service, communication during 21
distribution, with SMS Package Definition Files 151
download location, notifying users of 140
E
email, scanning for viruses 64
Emergency Disk set 154
errors, server installation 113
F
files, automatic submission of infected 24
Files.ini 139
firewall
about creating rules 28
creating policies for 40
firewall clients
completing installation 149
configuring with Symantec Packager 164
requirements 71
running setup 146
Force update during next login option 131
fully managed, clients 30
G
gateway
polling 25
submitting files to 24
Grc.dat. See configurations file
I
IDS exclusions 42
infected files
automatic submission to the local Quarantine 24
avoiding viruses 36
installation
See also Symantec Packager
AMS, manual 116
antivirus clients 125
Central Quarantine 87
Index
installation (continued)
checking for errors on servers 113
clients 122
completing for servers 109
email support 64
firewall client 146
from the client installation package on the
server 133
how to create a text file with IP addresses to
import 56
into NDS 59
LiveUpdate Administration Utility 94
locating servers during 56
Novell ManageWise ZENworks Application
Launcher 152
order for Citrix Mainframe on Terminal Server 58
preconfigured packages from the CD 150
preparing 54
required restarts 56
requirements 66
running the server setup program 104
selecting computers 106
server installation package 115
server methods 100
starting from the CD 142
starting server 103
Symantec Client Firewall Administrator 81
Symantec Packager 84
Symantec System Center 76
testing 54
Web server 135
why AMS is installed with the server 101
with logon scripts 129
Intelligent Updater 20, 37, 39
intrusion
creating policies for 40
detection
and client settings 43
enabling and disabling signatures 28
protection against 27
responding to 28
IP addresses, creating a text file for install 56
IP, required protocol 66
IPX, required protocol 66
L
license agreement 160
LiveUpdate
about 14
and virus definitions update methods 20, 37
communication 22
preparing for 38
LiveUpdate Administration Utility, installing 94
logon scripts
associating users with 131
client installation methods 19
Force update during next login option 131
installing with 129
setting options for 129
M
management
and updating security 31
component uninstallation 97
components to install 48
creating policies 43
policy planning 60
manual
scans 37
startup
NLMs 113, 114
Vpstart.nlm 111
Microsoft Management Console 32
Microsoft Systems Management Server (SMS)
packages 151
Microsoft Windows requirements 68
migration
creating plans for 44
tasks 44
N
Navroam.exe 31
NetWare cluster installation 59
NetWare cluster server and volume protection 58
NetWare Secure Console installation 114
NetWare Secure Console, manually loading NLMs 114
NetWare, required rights to install to servers 58
network
connectivity, and managing clients 30
deploying antivirus clients across 125
deploying clients across 123
175
176 Index
network (continued)
deploying server installations across 102
security threats 12
traffic
client 60
planning for 66
NLMs
automatic startup for 58
manually loading 113
Novell ManageWise ZENworks Application
Launcher 152
Novell NetWare, requirements 68
NT Client Install tool
client installation method 18
installing with the Symantec System Center 76
management component 49
requirements 67
P
package definition files
adding custom commands to 168
adding custom products to 168
Packager. See Symantec Packager
packages
adding products and commands to 168
building 170
creating for installation 168
deploying 134, 171
settings 169
testing 170
viewing product requirements 168
policies
about creating 43
creating firewall and intrusion detection 40
privacy control, and client settings 43
products
configuration files, adding to package
definitions 168
configuring with Symantec Packager 162
importing modules 162
requirements 168
protection
about deploying 26
against blended threats 26
against intrusion 27
against viruses 27
protocols, required 66
pRules 41
Q
Quarantine Console
about 50
requirements 67
Quarantine Server requirements 69
R
realtime scans 32, 36
registry key, protecting on Windows NT 4.0
computers 155
Reset ACL tool 155
restarts, required 55, 56, 64
Restricted Zone 42
rights
to install to NetWare servers 58
to install to target computers 62
roaming clients
about 31
communication 22
rules 41
S
scans
and server-client communication 21
as protection against viruses 27
manual 37
preventing 55, 61
realtime 32, 36
rescanning and submitting files to Symantec
Security Response 24
scheduled 36, 39
types of 36
viewing history and event log data 33
scheduled scans 28, 36, 39
security
threats 12
verifying status 32
server groups, locking 43
server installation
about 101
completing 109
deploying 102
enabling sharing 57
methods 100
Index
server installation (continued)
options 55
requirements 68
restart may be required 56
rights 57, 58
setup program 104
starting 103
testing 53
verifying network access 57
servers, protecting cluster servers 63
setup program, for servers 104
SMS
PDF files for distributing the product 151
rolling out Package Definition Files 151
Start.htm 139
startup scans 28
status information, communication for 22
Symantec AntiVirus Server product module 163
Symantec AntiVirus snap-in, installing with the
Symantec System Center 76
Symantec Client Firewall Administrator
about 51
installing 81
requirements 72
Symantec Client Firewall snap-in, installing with the
Symantec System Center 76
Symantec Client Security
about 12
components of 13
how it works 15
Terminal Server protection 60
testing in a lab setting 51
Symantec Packager
See also Symantec Packager deployment tool
about 15, 160
adding products and commands to a package 168
as an administration tool 51
building packages 170
client installation method 18
configuration files 167
configuring
antivirus clients 163
antivirus servers 163
firewall clients 164
products 162
creating
custom commands 168
Symantec Packager (continued)
creating (continued)
installation packages 168
default product module 163
deploying packages 171
how it works with Symantec Client Security 161
installation package requirements 73
installing 84
selecting product features to install 165
setting product installation options 166
settings 169
system requirements 72
testing packages 170
Symantec Packager deployment tool
as a deployment method 26
deploying packages 171
deploying Symantec Client Security clients across a
network connection 123
updating protection with 19
Symantec Security Response 24, 25
Symantec System Center
about 14, 48
and snap-in requirements 66
how it works 17
installing 76
Microsoft Management Console requirement 32
system requirements
about 66
AMS snap-in 67
antivirus clients 70, 71
AV Server Rollout tool 67
clients 69
firewall clients 71
Microsoft Windows 68
Novell NetWare 68
NT Client Install tool 67
protocols 66
Quarantine Console 67
Quarantine Server 69
servers 68
Symantec AntiVirus snap-in 67
Symantec Client Firewall Administrator 72
Symantec Client Firewall snap-in 67
Symantec Packager 72
Symantec System Center 66
177
178 Index
T
W
Terminal Server
about 60
clients installed on 63
installation order 58
limitations 60
viewing from the console 60
third-party products
client installation methods 19
using for rollout 151
Trusted Zone 42
Web server
configuring 137
configuring Apache 138
copying installation files to 136
installing 135
setting up installation 135
Web-based deployment
about 134
client installation methods 18
deploying installation packages using 134
requirements for 134
testing packages 140
Windows NT/2000
protecting cluster servers 63
protecting the registry key on 155
workstation limitations 53
Windows Server 2003 68, 70
wizard, LiveUpdate 149
U
UDP 22
uninstallation
antivirus clients 158
firewall clients 158
management components 97
server 117
Symantec Client Security clients 158
Symantec System Center 97
user access level, and client settings 43
User Datagram Protocol. See UDP
V
Virus Definition Transport Method 20, 21, 37
virus definitions
communication for updates 21
server-client communication 21
update methods
Central Quarantine polling 20
Intelligent Updater 20
LiveUpdate 20
Virus Definition Transport Method 20
updating 37
viruses
about protection 12, 27
and the Digital Immune System 24
avoiding infections 36
creating a test file 53
reponding to 29
scanning for 27
Z
Zones 42