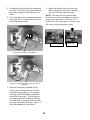
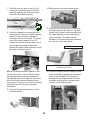
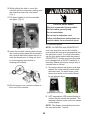
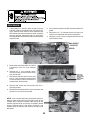
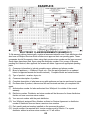
1
CLUD-2 Commercial Laundry Products SERVICE UPDATE SECOND HALF - 2003 COMMERCIAL LAUNDRY APPLIANCES Prepared by: WHIRLPOOL CONSUMER CARE PART NO. 8178139 rev a FORWARD The following service update information is provided to assist in the proper diagnosis and efficient repair of Whirlpool Commercial Laundry products. Servicer update information is designed for the experienced service specialist. TABLE OF CONTENTS NEW PRODUCTS Braille Console Overlays ............................................................................................. Dryer Vent Tester ........................................................................................................ Smart Card Cleaners .................................................................................................. ADVANTECH™ Auxiliary Card Reader Housing Assembly ........................................ Bar Coding on Model/Serial Number Tags .................................................................. Model Line Transition .................................................................................................. 2nd and 3rd Year Parts Coverage, Military Lease ...................................................... Metercase and Coinbox Cross Reference .................................................................. Roper Commercial Laundry ........................................................................................ 2001 K-Line Product Improvements ........................................................................... Hidden Lid Switch ................................................................................................ New Design CSP Stack Dryer Collar ................................................................... On Premise/Government Lease Model Improvements ............................................... 2 2 3 4 5 6 9 10 14 15 15 17 18 SERVICE ISSUES Error Codes ADVANTECH™ Control Generated Error Codes ...................................................... 21 ESD Card Reader Generated Error Codes ............................................................... 22 Greenwald Card Reader Generated Error Codes...................................................... 23 Coinslide Installation Instructions and Dryer Cycle Time Changes ................................... 24 Commercial Laundry Service Pointer Summary ............................................................... 40 L8178135 Balance Ring is Loose or Pulls Off .................................................................. 41 L8178226 GCAM2701JQ0, Timer Stuck in Spin .............................................................. 43 L8178227 Change in Location of Technical Information ................................................... 44 L8178238 EMS1000 AND ADVANTECH™ Cycle Does Not Complete ............................ 45 L8178240 CAW2762KQ0 Buttons Too Low in Console .................................................... 49 L8178268 Security Kit for CSP Stack Dryer ..................................................................... 51 L8178269 Wire Harness Not Installed Properly ................................................................ 53 L8178296 All ADVANTECH™ Commercial Dryers - Display Reads 2400 Minutes .......... 55 L8178388 Blank Display, Washer or Dryer Will Not Operate ............................................ 58 L8178398 Feature Connector Tangled in Timer Clutch .................................................... 59 ADMINISTRATION Model/Serial Number Key ........................................................................................... Whirlpool Commercial Laundry Parts Only Service Agreement ................................. Top 100 Warranty Parts .............................................................................................. Electronic Claims Processing ..................................................................................... Whirlpool Service Communication .............................................................................. Parts Distributor Commercial Laundry Claims ............................................................ Commercial Laundry Service Manuals & Job Aids ..................................................... Product Damage Claim Procedure ............................................................................. Internet Support .......................................................................................................... 1 61 62 63 64 65 66 71 72 74 NEW PRODUCTS BRAILLE CONSOLE OVERLAYS Braille console panel overlays are available for all commercial laundry product. For more information, contact Whirlpool's Special Needs Dept. at: 269-923-4201. DRYER VENT TESTER A new tester has been developed, part #8522199, that can be used on both the 29" and 27" dryers. The vent testers are useful in visually demonstrating to a consumer a clogged or restrictive vent system, without replacing a multitude of parts, which in turn will demonstrate that the dryer is OK! A proper vent system is very important to the dryer’s performance. A clear and properly installed vent system will: • Extend the Life of Dryer Parts. This will reduce the chances of needing a service call. • Dry Clothes Properly. This will increase customer satisfaction with dryer operation. • Shorten Drying Times. This will save time and money. • Extend Clothes Life. By drying quicker/less tumbling of clothes! FOR 29” DRYER with TOP MOUNTED LINT SCREEN FOR 27” DRYER with LINT SCREEN INSIDE DRYER Tester Installed on Exhaust Vent at Rear of Dryer Drum Tester Installed on Exhaust Vent below Dryer Door Entryway A. If the card falls off the hanger at least two out of three times: – The vent is CLEAR. B. If the card remains on the hanger at least two out of three times: – The vent MAY be restricted. 1. Verify vent tester is operating properly. a. Make sure hanger is fully and firmly inserted in the exhaust grill. b. Make sure the card travels freely on the hanger. 2. Make sure the vent system is not blocked. a. Check vent system for lint (especially lint filter, elbows and outside hood). b. Check if the vent system is crushed or kinked. 3. Whirlpool Corporation requires the use of heavy metal venting. Make sure the vent system is in accordance with the Installation Instructions in your owner’s manual. 2 3 ADVANTECH AUXILIARY CARD READER HOUSING ASSEMBLY GREENWALD PART NUMBER 2001-ADVM-DUAL FITS METERCASE MODELS WASHERS CAE2761KQ CAE2762KQ DRYERS CEE2760KQ CGE2761KQ The auxiliary card reader housing kit allows connection of an auxiliary card reader in place of a standard metercase top cover. The auxiliary reader can be used in conjunction with either a coinslide or a coindrop for machine mounted dual payment with all ADVANTECH metercase products. Use a coindrop card reader combo to offer customers special pricing and top offs on dry time! Greenwald Industries: www.greenwaldindustries.com 1-800-221-0982 4 BAR CODING ON MODEL/SERIAL TAGS All laundry products built at Clyde and Marion divisions have a bar coded model and serial tags starting with first quarter 2003 production. The bar code is an additional product management feature. A bar code reader combined with a business management system can increase business efficiency through: 1. Reducing errors in warranty claims submission. 2. Assist in product tracking and inventory management. 2. Grabba offers a piggyback bar code reader for the most current Palm platforms. BAR CODE READERS Grabba U1 Barcode Reader For Palm Handheld Computers with Palm OS-4 only. m125/m130/m500/m505/m515/i705 The Grabba U1 attaches to the Palm by plugging into the HotSync port and is held in place by a secure mechanical attachment. Grabba UV Barcode Reader For all older series Palm Handheld Computers. This reader connects to the infrared port via a cable. Standard software including that which allows the Grabba to be used for inventory applications may be downloaded from the Gripon web site at no charge. www.gripon.com Base price for Grabba U1 - $392.00 Quantity Purchase Discounts Available. Currently, commercial laundry is using the following 2 bar code reading devices. The two listed devices are suggested as they currently integrate with the ADVANTECH™ product line. NOTE: Other readers are available. SPT1500/SPT1800 For ordering or more information contact: Lawrence Pane and Associates 536 E. Birmingham Road, Burbank, CA 91504 www.gripon.com www.lawrencepane.com Phone: 818 729-1954 Fax: 818 729-1954 Email: [email protected] [email protected] Signal SPT1800 Features: Palm OS®, Industrial grade downward facing infrared communications, Laser bar code reader for inventory management and control. Integrated WLAN or WWAN communication. http://www.symbol.com/products/ mobile_computers/mobile_palm_spt1800.html For ordering or more information call: 888-ASK-PEAK (888-275-7325) or [email protected] NOTE: Items subject to availability. Prices subject to change without notice. 5 Starting 7/1/03 A WARRANTY ENHANCEMENT ON THE FACTORY COIN EQUIPPED MODELS CAM2752KQ WASHER, CEM2750KQ ELECTRIC DRYER, CGM2751KQ GAS DRYER NOW INCLUDE A 1-YEAR LABOR WITH 3-YEAR PARTS WARRANTY Model transition list for commercial laundry. All washers now offer the 2-speed advantage Commercial Washers OLD MODEL OLD MODEL DESCRIPTION NEW MODEL NEW MODEL DESCRIPTION MECHANICAL METERCASE MECHANICAL METERCASE CAM2752JQ 2-SPEED WASHER COINSLIDE EQUIPPED $1 vend. CAM2752KQ 2-SPEED WASHER COINSLIDE EQUIPPED $1 vend. 1-yr labor (begins 7/1/03) 3-7-10-yr parts wrnty 2-3-7-yr parts warranty CAM2761KQ MECHANICAL METERCASE CAM2762KQ 1-speed model eliminated. Up-featured to a 2-SPEED WASHER, regular and gentle cycle. High speed-spin on all cycles! Money acceptors not included. 3-7-10-year parts warranty MECHANICAL METERCASE 1-SPEED WASHER/Money acceptors not included. Designed for a coinslide. Can accept card and drop retrofit kits. 3-7-10-yr parts warranty. ELECTRONIC EMS1000/1 SPEED WASHER CAP2761KQ Money acceptors not included. Designed for coinslide, CAP2762KQ can accept card and drop retrofit kits. 3-7-10-yr parts warranty CAE2792EW CAE2761KQ CAE2791KQ ELECTRONIC EMS2000/FULL CONSOLE CARD ONLY/2-SPEED WASHER Factory card equipped. 2-3-7-yr parts warranty CAE2792KQ ELECTRONIC ADVANTECH™/METERCASE 1-SPEED WASHER. Money acceptors not included. Can accept card reader, drop slide or DUAL PAYMENT! 4-7-10-yr parts warranty CAE2762KQ ELECTRONIC EMS1000/1-speed model eliminated. Up-featured to a 2-SPEED WASHER, regular and gentle cycle. High speed-spin on all cycles! Graphics are the same. 3-7-10-year parts warranty ELECTRONIC ADVANTECH™ FULL CONSOLE CARD READER ONLY/2 SPEED WASHER Card reader not included. 4-7-10-yr parts warranty ELECTRONIC ADVANTECH™/METERCASE 1-speed model eliminated. Up-featured to 2-SPEED WASHER, regular and gentle on all cycles! Graphics are the same. Can accept card reader, drop slide or DUAL PAYMENT! 4-7-10-yr parts warranty ELECTRONIC ADVANTECH™ FULL CONSOLE 1speed model eliminated. Up-featured to 2-SPEED CAE2792KQ WASHER, regular and gentle cycle. High speed-spin on all cycles! Graphics are the same. CARD READER ONLY. Card reader not included 4-7-10-yr parts warranty ELECTRONIC ADVANTECH™ FULL CONSOLE CARD READER ONLY/1 SPEED WASHER Card reader not included 4-7-10-yr parts warranty RAK2751KQ MECHANICAL METERCASE 1-speed washer, Coinslide Equipped, $1vend 90-day labor & 2-yr parts warranty On Premise Commercial Washers GCAM2792L ON PREMISE FULL CONSOLE 2-SPEED WASHER Wrap cabinet, painted finish 1-yr labor & 3-yr parts warranty GCAM2792M 6 Changes required to meet DOE 2004 Energy Standard; 3.0 to 3.2 cu. ft. basket. Single-piece agitator replaced by dual action, added bleach dispenser, fabric softener dispenser, basket finish changed from speckle porclein to white, domestic inlet hoses. 1-yr labor & 3-7-10-yr parts warranty High Efficiency Commercial Washers 27’ MECHANICAL METERCASE MODEL High Efficiency top-loader, 3-cycle, 2-speed, CAW2762KQ 3-temperature, 2-water levels, dual-action agitator, 3-cu ft. capacity. Hidden lid switch. Extra heavy coat finish front panel. Color coded fill hoses with brass couplings. Coinslide ready, Can be converted to card reader with aftermarket kit. 3-4-7-10-yr parts warranty Commercial Dryers OLD MODEL OLD MODEL DESCRIPTION CEM2750JQ MECHANICAL METERCASE ELECTRIC DRYER COINSLIDE EQUIPPED $1 VEND 2-7-yr parts warranty (Electric) CGM2751JQ (Gas) NEW MODEL CEM2750KQ (Electric) MECHANICAL METERCASE GAS DRYER COINSLIDE EQUIPPED 2-7-yr parts warranty. CGM2751KQ (Gas) NEW MODEL DESCRIPTION MECHANICAL METERCASE ELECTRIC DRYER COINSLIDE EQUIPPED $1 VEND 1-yr labor (begins 7/1/03) 3-7-yr parts warranty MECHANICAL METERCASE GAS DRYER COINSLIDE EQUIPPED 1-yr labor (begins 7/1/03) 3-7-yr parts warranty MECHANICAL METERCASE MECHANICAL METERCASE ELECTRIC DRYER ELECTRIC DRYER CEM2760JQ CEM2760KQ Money acceptors not included. Designed for coinslide, Money acceptors not included. Designed for coinslide, (Electric) (Electric) can accept card and drop retrofit kits are the same. can accept card and drop retrofit kits. 3-7-yr parts warranty 2-7-yr parts warranty MECHANICAL METERCASE MECHANICAL METERCASE GAS DRYER GAS DRYER CGM2761JQ CGM2761KQ Money acceptors not included. Designed for coinslide, Money acceptors not included. Designed for coinslide, can accept card and drop retrofit kits. (Gas) (Gas) can accept card and drop retrofit kits. 3-7-yr parts warranty 2-7-yr parts warranty CEP2960JQ (Electric) CGP2961JQ (Gas) CEE2990EW (Electric) CGE2991EW (Gas) ELECTRONIC EMS1000 29” ELECTRIC DRYER COIN READY/Money acceptors not included 2-3-7-year parts warranty CEP2760KQ (Electric) ELECTRONIC EMS1000 29” GAS DRYER COIN READY/Money acceptors not included 2-3-7-yr parts warranty CGP2761KQ (Gas) ELECTRONIC EMS2000/FULL CONSOLE 29” ELECTRIC DRYER CARD ONLY/Factory card equipped. 2-3-7-yr parts warranty CEE2790KQ (Electric) ELECTRONIC EMS2000/FULL CONSOLE 29” GAS DRYER CARD ONLY/Factory card equipped. 2-3-7-yr parts warranty CGE2791KQ (Gas) ELECTRONIC EMS1000 27” ELECTRIC DRYER COIN READY/Money acceptors not included 3-7-yr parts warranty ELECTRONIC EMS1000 27” GAS DRYER COIN READY/Money acceptors not included 3-7-yr parts warranty ELECTRONIC ADVANTECH™ FULL CONSOLE 27” ELECTRIC DRYER 7.4 cu. ft. drum CARD ONLY!/ Card reader not included. 4-7-yr parts warranty ELECTRONIC ADVANTECH™ FULL CONSOLE 27” GAS DRYER 7.4 cu. ft. drum CARD ONLY!/ Card reader not included. 4-7-yr parts warranty CEE2760KQ ELECTRONIC ADVANTECH™ METERCASE MODEL (Electric) 27” DRYER CGE2761KQ (Gas) REK2950KQ (Electric) RGK2951KQ (Gas) 7 7.4 cu. ft. drum Money acceptors not included. 4-7-yr parts warranty ROPER MECHANICAL METERCASE MODEL 29” DRYER COINSLIDE EQUIPPED/$1.00 vend 90-day labor & 2-yr parts warranty Stacked Commercial Dryers OLD MODEL OLD MODEL DESCRIPTION NEW MODEL CSP2740KQ MECHANICAL STACK DRYER WITH SOLID DOORS CSP2760KQ 7.4 cu. ft. drum, money actuators not included. Designed for coinslide, can accept card and drop CSP2741KQ CSP2761KQ retrofit kits. 3-7-yr parts warranty CSP2760JQ MECHANICAL STACK DRYER WITH GLASS DOORS CSP2760KQ 7.4 cu. ft. drum, money acceptors not included. Designed for coinslide, can accept card and drop CSP2761JQ CSP2761KQ retrofit kits. 2-7-yr parts warranty NEW MODEL DESCRIPTION MECHANICAL STACK DRYER WITH GLASS DOORS Solid doors may be ordered as an accessory kit, at time of product order, Whirlpool part #4396720. 7.4 cu. ft. drum, designed for coinslide money acceptors not included, can accept card or drop retrofit kit 3-7-yr parts warranty ELECTRONIC EMS2000 CARD STACK DRYER ELECTRONIC ADVANTECH™ STACK DRYER CSP2770KQ Single board. 7.0 cu. ft. drum, factory card reader Dual boards, 7.4 cu. ft. drum, money acceptors not equipped. included, can accept card reader, drops or slide. 2-7-yr parts warranty (Top and bottom dryers need not have the same type (Cannot be converted to coin without substantial of money acceptor!) CSP2771HW CSP2771KQ modification not supported by Whirlpool. Set-O-Matic 4-7-yr parts warranty coin drop may fit. Consult Set-O-Matric.) CSP2770HW On Premise Commercial Dryers GCEM2990L ON PREMISE FULL CONSOLE ELECTRIC DRYER 1-yr labor & 3-yr parts warranty GCEM2990M GCGM2991L ON PREMISE FULL CONSOLE GAS DRYER 1-yr labor & 3-yr parts warranty GCGM2991M 8 ON PREMISE FULL CONSOLE ELECTRIC DRYER Model stay the same; ending changes to M-series 1-yr labor & 3-yr parts warranty ON PREMISE FULL CONSOLE GAS DRYER Model stay the same; ending changes to M-series 1-yr labor & 3-yr parts warranty NEW MILITARY LEASES: 2nd and 3rd YEAR PARTS COVERAGE Subject: Military Lease Warranty Fulfillment on Laundry Products, Revised! There has been a change in warranty policy on Whirlpool’s domestic laundry products used in Government lease programs. They will now have a 1-year labor and 3-year parts warranty. • All Whirlpool domestic laundry products come with a 1-year part and 1-year labor warranty. • To obtain parts during the 2nd and 3rd year coverage for parts, the Special Authorization box must be checked, and a code must be placed in the Special Authorization Area of the NARDA form. • This code will also be used for first year labor and third year parts coverage on the model: CSP2760HW. • This procedure applies only when sold through Military Lease programs. SPECIAL AUTHORIZATION CODE: S40038 See Example A, field 1 / Example B, field 21 / Example C, field 7 (Pages 66 - 70) MODEL NUMBERS S40038 COVERS CSP2760HW 1st year labor/3rd year parts (2-year parts already covered) CSP2760K 1st year labor (3-year parts already covered) All of the following models: Authorization Code S40038 Covers - 2nd and 3rd year parts. GSW9545 LEQ8857 LER4634 LSR6232 LXR7244 GWH9200 GWH9100 GEW9200 GGW9200 LTE6234D LTG6234D LTE5243D LTG5243D Special Procedure DOES NOT APPLY to on premise models (GCAM/GCEM/GCGM) as these and other noncurrent models that begin with “GC” that already have 1-year labor and 3-year parts warranty. CAUTION! Audits will be performed to insure proper application of this procedure. 9 METERCASE AND COIN BOX PARTS MANUFACTURER INFORMATION WHIRLPOOL ESD GREENWALD 1800 Benson Rd. 6012 270 New Jersey Drive Fort 212 Middlesex Ave. Benton Harbor, MI 49022 Washington, PA 19034 Chester, CT 06412-1254 [email protected] [email protected] [email protected] 1 (800) NO BELTS 1 (800) 523-1510 1 (800) 221-0982 MONARCH COIN AND SECURITY INC. SET-O-MATIC P. O. Box 427 291 Adams Boulevard Covington, KY 41012 Farmingdale, NY 11735 [email protected] www.setomatic.com/form.htm 1 (800) 462-9460 1 (631) 752-8008 34 33 35b 32 35a SEE CROSS REFERENCE PARTS LIST ON NEXT PAGE 10 METERCASE AND COIN BOX PARTS CROSS REFERENCE KEY PART NAME WHIRLPOOL PART NUMBER ESD PART NUMBER GREENWALD PART NUMBER MONARCH PART NUMBER 1 Meter Case 3406994 N/A 68-1245 N/A 1 1 1 2 3 4 Meter Case Meter Case Meter Case Funnel, Coin Screw, 10-32 x 3/16 Nut, Cage Meter Case Conversion Kit Bolt, 5/16-18 2.5 Bolt, 5/16-24 1 Timer Door, Service 3951145 3402835 3978748 385421 339805 90406 N/A N/A N/A N/A N/A N/A 8316238 N/A 68-1240 68-1240 68-1245 N/A N/A N/A N/A N/A N/A N/A N/A N/A N/A N/A 3353994 3349065 Model Specific 3351138 N/A N/A N/A N/A N/A N/A N/A N/A N/A N/A N/A N/A 1787 Washer 1788 Dryer 5 6 6 7 8 COMMENTS All 27” J-line product will retrofit for old meter case on washers only. Washer only prior to J-line. Meter case for 29” dryer prior to J-line. 29” dryer meter case for J-line. Must be removed to install coin drop – – Contains adapter plate (29), coin funnel (2) and screws – – GO TO PART LOOK UP – Contains V8 coinslide, washer and dryer coinslide extensions & mounting bolt extension screws, decal sheet, money box & key, and service door lock and key, installation instructions – – – Long clutch arm. Short clutch arm. – – – 9 Vertical 8 Coin Kit (washer and dryer) 3954807 72093 10 11 13 14 14 15 17 18 Cushion, Case Bracket, Timer Plate, Mounting Clutch, Timer Clutch, Timer Screw, Timer Bracket, Mounting Screw, Set 19 Key, Front Lock 3348850 385575 3353813 3976267 385571 3400064 3347825 98654 358288 N/A N/A N/A N/A N/A N/A N/A N/A Multiple Options 20 Money Box With Key 8316525 72101-XD 21 Vertical 8 Coin Slide 8316520 V8-200 (71689) N/I 22 Coin Drop Service Door Key Only N/A N/A N/A N/A 23 Service Door Lock 8316526 0400ET 8316522 21053 68-1164 15A-007 Mechanical Timer Models 8316523 3390424 21064 N/A 21921-21755 (slide mount) 72119 (metercase mount) 84-1135 84-2037 15A-008 N/A 16A-KIT-01 Universal Switch Kit For All Coinslides Freestanding mechanical dryer models CSP Stack dryer model only 24 25 26 Coinslide Extension Washer Coinslide Extension Dryer Coinslide Extension Dryer N/A N/A N/A N/A N/A N/A N/A N/A Multiple Whirlpool to be used with 358290 only. GR-888 Options Keys cannot be ordered separate from the box GBX-(lock without the key # listed inside the box. If key and code Letter UG800B number are lost, the box must be drilled and A, N, T, D or M) replaced V8L-001 All coinslides need the appropriate extensions to Chrome 20-3020 operate the washer or dryer, see items 24-27 V8L-005 Black Set-O-Matic Part Number S4EMS-U1. N/A N/A – N/A 8-20-777 Each manufacturer has several lock +key N/A 68-1174-32-777 assemblies N/A N/A N/A N/A N/A N/A N/A N/A KIT1818 (Vertical 8 slide mount) 27 Coinslide Extension, EMS1000 washer and dryer N/A 28 Bolt, Slide Mechanism 8316521 21749 77-83-8 N/A 29 Coinslide adapter plate 279950 N/A N/A N/A N/I 35a 35b Decal Kit Insert, Blank Insert, $.25 8316524 8316264 8316265 72097 21216 21193 N/A N/A N/A 30 OPL Coinless Actuator 4396490 N/A 1711 N/A N/A 2001-OPL-SD 2001-OPL-D 2001-OP;-W N/A 11-000-252 2001-WP-EMW N/A N/A 11-000-251 2001-WP-EMD N/A N/A 11-000-253 2001-WP-EMSD N/A 31 31 31 Card Reader Kit Washer Card Reader Kit Dryer Card Reader Kit Stack Dryer 11 N/A Fits both washer and dryer. These numbers also fit ADVANTECH™ models Thread lengthened to accommodate extra thickness of mounting plate. Whirlpool stock current. Other manufacturers may have mixed long and short stock. Short thread will work. Comes factory installed. Must be in place to install coinslide. Must be removed to install coin drop For pricing on the front of the coinslide To reduce coinslide price To increase coinslide price Stack Dryer (includes console lock) with 8-1223 Single Dryers Washers Fits all J and K-line mechanical models, Items 29 and 2 must be removed to install kit. Fits all J and K-line mechanical models, Items 29 and 2 must be removed to install kit. Fits all J and K-line mechanical models, Items 29 and 2 must be removed to install kit. METERCASE AND COINBOX PARTS CROSS REFERENCE KEY PART NAME WHIRLPOOL PART NUMBER ESD PART NUMBER GREENWALD PART NUMBER 32 Front Lock Assembly 358290 0300-ETWH 8-1001-49 33 Dryer Timer 3387975 N/A 50-1232-6 34 Dryer Timer Cams 3-Pin (60 minutes) 4-Pin (45 minutes) 6-Pin (30 minutes) 9-Pin (20 minutes) 12-Pin (15 minutes) 3387974 339855 343777 339854 339853 MONARCH PART NUMBER EXT030-A For most applications N/A N/A N/A 12 COMMENTS Fits all K-line product and older models, Lock blank must be removed to install front lock Includes 4-pin cam, fits all mechanical Whirlpool and Roper commercial dryers PACKED WITH EVERY MECHANICAL PRODUCT. ALSO AVAILABLE AS SERVICE PARTS OPTIONAL SERVICE PARTS NOT PACKED WITH PRODUCT. ADVANTECH™ MONEY ACCEPTOR CROSS REFERENCE 10 6 2 1 5 7 3 8 4 9 MANUFACTURER K E Y PART DESCRIPTION 1 Full Console Reader 2 Metercase Reader 3 Money Box with Key 4 Metercase Coinbox Blank 5 Single Coin Drop 6 Dual Coin Drop 7 Vert 8 Coinslide 8-9 Slide Extension and Switch 10 Auxiliary Card Reader Housing ESD 270 New Jersey Drive Fort Washington, PA 19034 [email protected] 1 (800) 523-1510 GREENWALD 212 Middlesex Ave. Chester, CT 06412-1254 [email protected] 1 (800) 221-0982 MONARCH COIN AND SECURITY INC. P. O. Box 427 Covington, KY 41012 [email protected] 1 (800) 462-9460 MUNZPRUFER/BMC Technologies. Inc. 1911 Cauley Ave. Panama City Beach, FL 32407 [email protected] 1-(850) 249-2222 11-000-261 11-000-262 2001-ADV-150T 2001-ADVM-150T N/A N/A BGNLNB-XD UG800B N/A N/A N/A GBX-(lock code letter A, N, T, D or M 11-000-902 8-1223 N/A N/A N/A N/A 41-1171* 41-1172* 20-00-000-XXX (XXX is factory preset vend price) F94* F95* 21921-21755 (VERTICAL 8) KIT 1818 (VERTICAL 8) N/A N/A 2001 - ADVM - DUAL (includes reader) N/A N/A V8-001CHROME V8-005 BLACK 16A-KIT-01 Universal Switch Kit for all Chutes N/A 71689 N/A N/A *STATE COINAGE TYPE (U.S. QUARTERS, DOLLARS OR CANADIAN QUARTERS, DOLLARS, ETC.) THE LISTED MONEY ACCEPTORS ARE NOT TESTED AND APPROVED FOR USE BY WHIRLPOOL CORPORATION. IT IS THE RESPONSIBILITY OF THE MONEY ACCEPTOR MANUFACTURER TO INSURE COMPATIBILITY AND OPERATION WITH THE WHIRLPOOL CORPORATION ADVANTECH™ PRODUCT. MODIFICATION MAY VOID THE WHIRLPOOL CORPORATION WARRANTY. 13 ROPER COMMERCIAL LAUNDRY WASHER FEATURES RAK2751KQ – 27" • Coin Kit Installed – Ready for Operation, factory preset for $1.00 vend • Extra-Large, 2.5 Cu. Ft. Wash Basket • 3 Cycles: Regular/Heavy (Hot), • • • Permanent Press (Warm), Color Fast (Cold) • Reliable One-Piece Agitator • Direct-Drive, 1/2-HP Motor with Built-In Overload Protector • PowderPlus™ Top and Lid Finish • Add Fabric Softener Indicator • Push-Button Controls • Easy-to-Follow Lid Instructions • Self-Leveling Rear Legs • Cycle Status Lights • White-on-White Styling • • • • • • • • NOTE: The washer is equipped with a wraparound cabinet and does not have a removable front panel. The wraparound cabinet consists of the cabinet, top, lid and metercase assembly. This assembly must be removed for tub, basket, or suspension service, as on noncommercial Whirlpool models. DRYER FEATURES REK2950KQ – 29" Electric RGK2951KQ – 29" Gas Coin Kit Installed – Ready for Operation, factory preset for $1.00 vend 7.0 Cu. Ft. Capacity Drum 3 Cycles: Regular/Heavy (High Heat), Permanent Press (Medium Heat), Knits/Delicates (Low Heat) Top-Mounted Lint Filter PowderPlus™ Top Finish Reversible Side-Swing Door 1/3-HP Motor with Built-In Overload Protector Push-Button Controls Easy-to-Follow Console Instructions Cycle Status Lights White-on-White Styling WARRANTY 90-Day FULL (parts and labor) on the entire product, 2-Year LIMITED (parts only) on the entire product. 14 2001 K-LINE PRODUCT IMPROVEMENTS Mechanical Line: After May 1st, 2001 Production Washer Hidden Lid Switch 3. Rotate the console up into the service position COMPLAINT: Intermittent spin, no spin, lid switch must be replaced as a result of customer tampering. CAUSE: Lid switch location and design creates opportunity for consumer to insert objects into the switch actuator opening damaging the switch. CORRECTION: Product built after May 1st, 2001 come factory equipped with a hidden lid switch. The sealed tamper proof design eliminates issues related to improper usage. To access the switch, proceed as follows: 4. Disconnect the main harness connector from the hidden lid switch connector. 5. Remove the 5/16” hex-head screw from the hidden lid switch ground wire. 6. Press the locking arm on the lid switch connector to release it, then push the connector out of the cutout. 7. Remove the two hidden lid switch mounting screws. 8. Raise the washer lid. 9. From the left side of the unit, reach between the cabinet top and the tub ring and grasp the hidden lid switch. With your other hand, press the release tab on the hidden lid switch, and remove the switch from the cabinet top. Electrical Shock Hazard Disconnect power before servicing. Replace all panels before operating. Failure to do so can result in death or electrical shock. 1. Unplug unit or disconnect power. 2. Remove the two T-15 Torx screws from the console by turning them counterclockwise. 15 Electrical Shock Hazard Connect green ground wire to ground screw. Failure to do so can result in death or electrical shock. 14. Reinstall the 5/16” hex-head screw connecting the lid switch green ground wire to the washer top. 15. Reinstall the two switch mounting screws. 10.To reinstall the switch, mount the switch into the washer top by first inserting the locking arm toward the back of the washer. 11. Push the release tab through the forward hole in the washer top. 12. Insert the ground wire through the harness connector opening in the washer top. 13.Insert the harness connector into the harness connector opening and lock into place. 16 New Design Stack Dryer Collar Improved Console and Graphics Freestanding Models All product consoles have been upgraded to a brushed stainless finish, washer model CAE2761KQ0 is pictured. The stack dryer collar assembly was redesigned with the introduction of the K-line product to enhance product security, flexibility, ease of operation and appearance. The new collar assembly, part #3978853 features: NOTE: The new collar will not retrofit older models. 1. A taller profile vs. previous designs, now offering a larger control panel opening. 2. The same removable money acceptor adapter plate as freestanding models to allow installation of coinslides, coin drops, card readers or coinless actuators. 3. Deeper coinbox openings to accommodate a larger coinbox. 4. Improved security around the money acceptor and coinbox openings. 5. A new control panel design for increased security by using push-button switches in place of rotary controls. 6. Improved industrial indicator lamps on mechanical models. 17 ON PREMISE/GOVERNMENT LEASE MODEL IMPROVEMENTS 3. For washer and dryer timer service, remove the console retaining screws, pull the console slightly forward to release the end caps and rotate the console open into the service position. 4. Proceed to next page and follow instructions for J-line and L-line timer installation. J-LINE WASHERS J-line washers have a single push to start button to actuate the single cycle. The button comes from the factory depressed with the cycle partially completed as a result of production line testing. Upon cycle completion, the start button ramps out to the start position to allow start of the next cycle. On Premise/Government Lease models GCAM2792LQ (washer), GCEM2990LQ (electric dryer) and GCGM2991LQ (gas dryer) contain the following new features: 1. Brushed stainless look console. 2. New bi-directional positive detent 8-Cycle washer timer with extra rinse replaces the one cycle push to start timer, increasing features and reducing service issues. 3. New 3-cycle dryer timer replaces previous single cycle slide timer. GCAM2701JQ0 (PUSH TO START) The timer is mounted to the console with four 5/16" hex head screws. Care must be taken during reassembly to insure proper wiring harness routing and timer shaft insertion into the start button see service pointer, part #L8178226 (Page 45) To service the timer, proceed as follows: Electrical Shock Hazard Disconnect power before servicing. Replace all panels before operating. Failure to do so can result in death or electrical shock. 1. Unplug unit or disconnect power. 2. For dryer timer service, remove the 1⁄4” retaining screws from the console back panel and remove the panel. 18 L-LINE WASHERS Retaining Tab Shaft in Release Position Mounting Tab (4) Shaft in Retain Position 4. To remove the timer, release the timer retaining tab in the console by pulling it away from the console while sliding the timer toward the water level switch. Knob removal instructions printed on timer. L-line washers use an 8-cycle Delta style timer. This timer can be turned clockwise or counterclockwise to select a cycle. The beginning of each cycle has a positive detent, or a click to help locate where it starts. The timer is mounted to the console using L-brackets and a finger-release mounting tab. The timer knob must be released prior to timer removal. 1. Push the timer knob in, then hold the slotted rod end on the back of the timer with pliers. Push Tab Up, then Push Timer toward Endcap 5. To reinstall the timer knob, make sure the timer shaft is in the release position as illustrated at top of page. 6. Align the retaining tabs on the timer knob with the timer shaft retaining holes. M-LINE WASHERS 2. Pull the timer knob out making sure the rod in the center of the timer shaft does not move. 3. Pull the timer knob off of the timer. New Features were added to the M-line starting with production in the 2nd quarter of 2003, including an energy upgrade, 3.2 cu. ft. basket, dual action agitator and a bleach dispenser. 19 L-LINE DRYERS J-LINE DRYERS The timer was redesigned to allow multiple cycle selections. The timer style and mounting is now the same as residential models. The timer is secured to the console with two 5/16" hex head screws. The timer knob is a pull off design. J-line used the same timer that was used on all commercial models, which at that time incorporated a slide and cam mechanism, with a removable timer cam used for changing cycle time. The timer is cumulative and additional actuations of the timer slide will add cycle time. Added cycle time is dependent on the timer cam installed. All GCEM2990JQ, GCGM2991JQ models are factory equipped with the 45 min. 4-pin timer cam. 20 SERVICE ISSUES Electrical Shock Hazard Disconnect power before servicing. Replace all panels before operating. Failure to do so can result in death or electrical shock. ADVANTECH™ CONTROL GENERATED ERROR CODES DISPLAY 0FF 0FF 0FF 0FF 0FF . 0FF. ERROR PROBLEM POSSIBLE CAUSE REPAIR PROCEDURE TERM. Disable manual Out of Service, run Service person placed machine service routine. Press the service Washer or dryer does not operate. out of service. See MANUAL switch, push and release keypad 2. Warm LED will blink. Buttons 1-6 OUT OF SERVICE now remapped for service routine. Machine has been set to be Disable special pricing option unavailable for customer use by manually or through loading a template without time bound Washer or dryer does not operate. means of one of the three owner special prices. See SP1, SP2 specials. See installation and SP3 (special price) in set up considerations section. table. No money device is enabled Enable the coin drop, coinslide and/ or Smart Card. See OWNER during machine setup. Washer or dryer does not start. SETTINGS. Check to insure the proper coin drop template is installed. Check Owner Setting is enabled but the connector position on the board, coin drop is not installed. single drops plug into COIN 1 only. Coin drop connector is A coin drop error has occurred. Double drops lower value coin plugs unplugged. into COIN 1. Higher value into Coin drop connector is plugged COIN 2. Check coin timing settings into the wrong connector. in template vs. manufacturer’s recommendations. Lid was not opened between the Run the service routine to reset the end of the cycle and the Washer does not start machine. 1st spin of the next cycle. Check the template installed. Make sure the installed template matches the chosen money acceptor. If a card reader template and a reader A SMART card reader is Auxiliary device error (SMART card are installed, inspect all connection P11 AUX enabled in the template but a or other device connected to the pins on the harness from the AUX connection reader is not installed. auxiliary port.) port to the card reader for corrosion at control. or bent connections. Reconnect harness and route separately from washer harness! If control output voltage not present, replace control. If output voltage per spec., replace reader. Check the installed template to A template has been loaded to insure the money acceptor installed the control that does not match matches the loaded template. On Washer or dryer does not operate. the money acceptor installed. stack dryers make sure the upper On stack dryers the display display is routed to the upper (rear) harness may be reversed. board and the lower display to the front board. 21 WIRE COLOR READ 5VD will be pressent across pins 1-3 and 2-3 Electrical Shock Hazard Disconnect power before servicing. Replace all panels before operating. Failure to do so can result in death or electrical shock. ESD CARD READER GENERATED ERROR CODES DISPLAY 00h 01h - 30h 30h - 3Fh 10h - 4Fh 50h - 5Fh D0h D1h D2h D3h D4h D5h D5h - E3h PROBLEM No error POSSIBLE CAUSE Transaction may have not been completed. REPAIR PROCEDURE Reinsert card and try again. Reinsert card. Try card in another Bad card or reader did not read machine. IF the card works in a card second machine, clean card reader. There is an error within the card Reinsert the card. Replace card Reader error reader if error occurs frequently. reader. There is an error within the card Clear reader with initialization card. Card reader setup, audit error Replace reader if occurs frequently. reader Reinsert card and retry transaction. There is an error within the card Internal card reader error Replace reader if error occurs reader frequently. Inserted setup card does not Reprogram the setup card and retry. Bad machine type match the machine type of the template. Incorrect card inserted, card Reinsert card if error reoccurs, insert Convert balance overflow-card another card. damaged or incorrect program. related Remove wiring harness from reader and ADVANTECH ™ board. Inspect Communications error, all connection pins on the harness ADVANTECH™ control link bad card reader to from the AUX port to the card reader control link for corrosion or bent connections. Reconnect harness and route separately from washer harness. Remove wiring harness from reader and ADVANTECH™ board. Inspect all connection pins on the harness Unrecognized command from control Communications error, from the AUX port to the card reader bad card reader to for corrosion or bent connections. control link Reconnect harness and route separately from washer harness. Reinsert card and remove slowly. Card read error Remove wiring harness from reader and ADVANTECH™ board. Inspect Card pulled early. all connection pins on the harness Command out of sequence-bad Bad reader to ADVANTECH™ from the AUX port to the card reader reader to ADVANTECH™ control link control link, loose connections for corrosion or bent connections. or EMI. Reconnect harness and route separately from washer harness. Remove wiring harness from reader and ADVANTECH™ board. Inspect all connection pins on the harness Assorted ADVANTECH™ link errors Bad reader to ADVANTECH™ from the AUX port to the card reader control link, loose connections for corrosion or bent connections. or EMI. Reconnect harness and route separately from washer harness. Card reader error 22 GREENWALD CARD READER GENERATED ERROR CODES DISPLAY NO SETUP PULL CARD E00 E01 E02 E03 E04 E05 E06 E07 E10 E30 E40 PROBLEM POSSIBLE CAUSE REPAIR PROCEDURE Washer or dryer will not start when a Program and insert the setup card A card reader has been installed SMART card is inserted in the card per the instructions of the card but not setup reader. reader manufacturer. Card is inserted in the reader. Card left in the reader too long Remove card. Machine may or may not operate Inspect the card for damaged Card put in the reader upside Card fail error contacts. Replace as necessary. down, invalid or damaged card Contacts must be facing up. Try another card. User card does not match to Check to make sure card in Blocked PIN error machine location or PIN on the templated for the current location. card did not match the reader. Card must be reprogrammed. PIN of card not recognized by Obtain proper card for current Invalid PIN error reader. location. The customer ID on the inserted The inserted card does not have card does not match the operator access to the current location. User Invalid Customer ID must obtain card assigned to ID programmed into the reader. current location. Location number of the card Card reader setup must be Invalid Location error reader has been corrupted. reprogrammed. Obtain a properly programmed A non-Greenwald card has been Greenwald card for the desired Card not supported error inserted into the reader. function to be performed. Reinsert card into reader. If error reError writing information to card. Card erase error displays, try another card. Blank management card inserted Properly set up management card Invalid or missing setup for the current machine and location into reader. using SMS. Card reader did not complete the Reinsert the user card and try User Card read error vend transaction. again. Reinsert the data collection card. If Error in collecting data from the Data collection error card reader to the collection card.error re-displays, insert another data collection card. Error in reception of setup Reinsert the setup card. If error reSetup card error information. displays, reprogram setup card. 23 COINSLIDE INSTALLATION INSTRUCTIONS AND DRYER CYCLE TIME CHANGES WHIRLPOOL/ROPER COMMERCIAL LAUNDRY Coinslide Applications Whirlpool Corporation Coinslide Kit, part number 3954807 is designed to fit all metercase models built since 2000. The coin box kit will not fit models built since 2000. The coinslide and extensions in the kit will fit all metercase models from approximately 1980 forward. WASHERS CAE2761KQ0 CEE2760KQ0 CAE2762KQ0 CEE2760KQ1 DRYERS ADVANTECH™ CGE2761KQ0 YCEE2760KQ0 CGE2761KQ1 YCEE2760KQ1 EMS1000 CAP2761JQ0 CEP2760KQ0 CGP2761KQ1 CAP2761KQ0 CEP2760KQ1 YCEP2760KQ0 CAP2762JQ0 CGP2761KQ0 YCEP2760KQ1 COIN EQUIPPED RAK2751KQ0 REK2950KQ0 CEM2750JQ0 CAM2752JQ0 REK2960KQ1 CEM2750KQ0 CAM2752KQ0 RGK2951KQ0 CEM2750KQ1 RGK2951KQ1 CEM2750KQ2 CAM2761JQ0 CAM2761KQ0 CAM2762JQ0 CAM2762KQ0 HE TOPLOAD CAW2762KQ0 COIN READY CEM2760JQ0 CEM2760KQ0 CEM2760KQ1 CEM2760KQ2 CGM2761KQ1 CGM2761JQ0 CGM2761KQ0 CGM2761KQ2 YCEM2760JQ0 YCEM2760KQ0 YCEM2760KQ1 YCEM2760KQ2 24 CGM2751JQ0 CGM2751KQ0 CGM2751KQ1 CGM2751KQ2 STACK DRYERS CSP2770KQ0 CSP2771KQ0 COIN READY CSP2740KQ0 CSP2740KQ1 CSP2740KQ2 CSP2741KQ0 CSP2741KQ1 CSP2741KQ2 CSP2460KQ0 CSP2760KQ1 CSP2760KQ2 CSP2761KQ0 CSP2761KQ1 CSP2761KQ2 MECHANICAL DRYER CYCLE TIME CHANGE: ALL MODELS All dryers come with the 45 minute timer cams installed from the factory. • #339855 4-Pin (45 Min.) Factory installed Available from Whirlpool Corporation as service parts are: • #339854 9-Pin (20 Min.) • #339853 12-Pin (15 Min.) 3. Decide on the appropriate cycle time desired. A 45 minute cam is factory installed. A 60 minute cycle is recommended on all 27” wide models. NOTE: The same timer part number is used on all dryer models prior to the L-Line. The mounting differs between the stack models and single models. To change the timer cam, proceed as follows: 4. On single dryers unlock the metercase access panel and remove the panel. The timer will be visible inside the metercase. This instruction sheet is designed to guide the user through a cycle time change procedure for both freestanding and stacked commercial mechanical dryers. The dryer cycle time must be selected prior to money acceptor installation. Electrical Shock Hazard Disconnect power before servicing. Replace all panels before operating. Failure to do so can result in death or electrical shock. 1. Disconnect or unplug machine from electrical power (if connected). 2. If new install, remove the installation kit from the dryer. On single dryers, this kit is packed in the drum of the product. The kit contains: • 1 ea. #343777 timing cam 6 pin (30 minutes) • 1 ea. #3387974 timing cam 3 pin (60 minutes) • 4 ea. dryer feet On stacked dryers the kit is located in the left coinbox or coinslide opening. The kit part #3390615 contains: • 2 ea. #343777 timing cam 6 pin (30 minutes) • 2 ea. #3387974 timing cam 3 pin (60 minutes) • 2 ea. #3390424 slide extensions • 4 ea. #96435 (or #340086) machine screws On stack dryers unlock the control panel lock if installed and open the console by lifting it up and off of the bottom mounting flange. 25 NOTE: Excessive pressure applied to the control panel when in the service position can damage wiring harness connections causing the dryer not to operate. Be sure to check all wiring harness connections are secure prior to closing the control panel after conducting service or money acceptor installation. 5. Locate the timer(s) within the metercase or collar. The timer(s) are located behind the upper opening in the metercase or collar. 6. Turn the timing cam counterclockwise by hand until the “V” shaped notch lines up below the ratchet tooth. 8. Install the desired cam onto the timer shaft, making sure the cam is aligned onto the drive-lug alignment tabs. NOTE: The cam must be installed and bottomed onto the timer alignment tabs for proper dryer operation. If the cam is not bottomed on the timer shaft, the dryer cycle will never stop allowing free vends. Not Bottomed V-groove in timing cam not aligned V-groove in timing cam aligned, remove cam by pulling up 7. Remove the factory installed 45 min. timing cam by lifting the cam off of the timer drive lug by hand, or by carefully inserting a small flat blade screwdriver under the timing cam. The timing cam has alignment slots of different lengths on either side of a central hole; the cam can only be installed one way. Step 7-11 must be repeated for each dryer. 26 Bottomed COINSLIDE INSTALLATION 1. MECHANICAL WASHERS Mount the coinslide extension to the coinslide using the retaining screws (#96435 or #340086, two per coinslide) as pictured below. The timer clutch roller must be facing down. For this installation instruction, Whirlpool Corporation part #3954807 is referenced. Each kit contains: #8316520 V8 coinslide (adjustable from 0-$2.00 vend) #8316522 Washer coinslide extension #8316523 Freestanding dryer coinslide extension (not used on CSP stack dryers) #8316521 Coinslide mounting bolt #96435 or Extension screws #340086 Extension screws #8316525 Money box and key #8316526 Access panel or control panel lock and key #8316524 Decal kit and instruction sheet. As this is a broad application kit designed to fit both freestanding mechanical washers and dryers, there may be unused parts based on the chosen application. For mechanical stacked dryers, the coinslide extensions come packed with the dryer. The stack dryer coinslide extension is also available separately as listed on the previous page. Coinslide extensions for electronic models are not manufactured by Whirlpool, but are available through coinslide manufacturers, see www.whirlpoolcorp.com/ cltpsc, technical information, metercase cross reference or pages 11-13 of this manual. 2. MECHANICAL DRYERS Mount the coinslide extension to the coinslide using the retaining screws (#96435 or #340086, two per coinslide) as pictured below. The dryer extension is not directional and can be reversed without impact to the operation of the dryer. 3. MECHANICAL STACK DRYER MODELS Mount the coinslide extensions to both coinslides using the retaining screws (#96435 or #340086, two per coinslide) included with the dryer as pictured below. MOUNTING COINSLIDE EXTENSIONS TO THE COINSLIDE On single washers and dryers, there is a single extension and coinslide. On stack dryers, there are 2 coinslides and extensions per stack unit. NOTE: On stack dryers the coinslide extensions must be installed with the part number facing up and the bend facing down on both slides. The timers are mounted one facing up and one facing down. This is normal, the coinslide extensions contact the timer differently for the left and right timers. 27 4. ALL ELECTRONIC MODELS A. Remove the coinslide return spring. E. Select the desired vend price amount (0-$2.00) required. The factory preset is $1.00. If another vend price is desired, follow the instructions under the vend price change section of this instruction manual, starting on page 34. B. Remove the two screws on the top of the coinslide behind the mounting flange and mount the coinslide switch assembly onto the coinslide per the manufacturer’s instructions enclosed with the switch kit. C. Turn the coinslide over and remove the coinslide extension screws if installed. D. Attach the extension to the underside of the coinslide with the screw heads facing down. Coinslide upside down, extension must go over mounting surface Side view of coinslide detailing proper extension mounting 28 INSTALLING ASSEMBLED COINSLIDE WITH EXTENSION Electronic models require several additional steps to install the coinslide and extension assembly. For ADVANTECH™ models, skip to step 4. NOTE: On EMS1000 models the switch circuit is 120VAC. As a result the coinslide must be grounded. On ADVANTECH™ models low voltage is at the switch and the coinslide does not require grounding. 4. On single washers and dryers, locate the two wiring harness connections for the coinslide switch in the metercase and thread them through the money acceptor opening. On Stack Dryers locate the two coinslide switch wiring connections inside the collar for both dryers and thread through the money acceptor opening (Stack Dryer is pictured, other models similar) Electrical Shock Hazard Connect green ground wire to ground screw. Failure to do so can result in death or electrical shock. EMS1000 ONLY 1. To ground the coinslide on EMS1000 models, unscrew green ground wire screw inside the metercase and release the ground wire. Keep screw for later use. 2. Unscrew one of the two screws on underside of coinslide which secure the coinslide extension. 3. Insert the screw from the above step through ground wire ring terminal and reattach to slide extension. Electrical Shock Hazard Disconnect power before servicing. Replace all panels before operating. Failure to do so can result in death or electrical shock. 5. Make sure power is disconnected from the unit before proceeding. On stack dryer models, it may be necessary to open the console to locate the coinslide wiring harness. 6. To open the control panel, unlock the cam lock on the right side of the control panel. 29 7. Slide the control panel to the left (top arrow) then carefully open the control panel by swinging the right side away from the collar (bottom arrow). 10. Reconnect the coinslide return spring. 11. Insert the set vend amount of coins into the slide and push the slide in. The slide should stay pushed in while inserting into the upper opening on the metercase or collar assembly. The slide must be pushed in to provide adequate clearance over the top of the coin funnel. 8. Carefully release the console and let it hang forward. The two coinslide harness wires for each coinslide originate at electronic control connection P2, center rear of the control boards. From P2 locate the coinslide harness wires and if not completed already, thread them through the upper collar opening for both the upper and lower dryers. Coinslide Extension Coinslide and extension installed over coin funnel, mechanical stack dryer. 12. Lock the coinslide into the opening in the collar assembly by applying a downward force to the coinslide. The coinslide is bottomed in the adapter plate when the coinslide mounting hole is aligned with the hole in the adapter plate. NOTE: Excessive pressure applied to the control panel when in the service position can damage wiring harness connections causing the dryer not to operate. Be sure to check all wiring harness connections are secure prior to closing the control panel after conducting service or money acceptor installation. 9. Connect the two harness wires to the coinslide switch. 30 NOTE: If the coinslide mounting hole can not be aligned with the hole in the adapter plate, remove the coinslide and slightly loosen (1/4 turn or less) the mounting bolts on the coinslide and reinstall onto the adapter plate. Electrical Shock Hazard Connect green ground wire to ground screw. Failure to do so can result in death or electrical shock. Locking Tabs 15.On EMS1000 units, after the coinslide is installed, the green ground wire connected to the coinslide must be connected to the metercase. Use screw from step 1 to attach the ground wire ring terminal to the side of the coin box. 16. Place rubber grommet of harness over end of the coinslide mounting bolt. 13. While holding the bolt in place, guide the coinslide mechanism onto the mounting bolt threads and into the mounting holes in the front of the meter case. NOTE: Moving the coinslide and bolt in small circles while turning the mounting bolt will help align the bolt threads with the coinslide. 14. Tighten the bolt by hand first as you guide the coin slide mechanism into place. Then tighten with a 5/16” socket. NOTE: On EMS1000 and ADVANTECH™ units, the vend price set for the coinslide must match the vend price programmed into the electronic control. For more information, see the tech sheet packed with the product or instructions under coin price vend change instructions section, starting on page 34 of this manual. Tighten the coinslide retaining bolt, Stack Dryers Tighten the coinslide retaining bolt, single washers and dryers 31 METERCASE TOP/CONTROL PANEL LOCK INSTALLATION For this installation instruction, Whirlpool Corporation part #8316526, which is part of kit #3954807, is referenced. Locks are available through coinslide manufacturers, see www.whirlpoolcorp.com/cltpsc, technical information, metercase cross reference or page 41 of this manual. 4. Install the lock cam onto the lock, then secure the cam with the small cam nut and nut washer. Lock installed in metercase access panel, lock cam bottomed on cover opening The access panel and control panel require a lock. The lock assemblies for both applications are the same (Whirlpool Corporation part # 8316526.) The assembly parts are shown above. Lock installed in control panel, mechanical Stack Dryer (electronic Stack similar) 5. On Stack Dryers make sure all harness connections are attached fully to the appropriate connectors, then reinstall previously removed parts. Assembly parts listed are only available from the lock manufacturer (ESD). For contact information see www.whirlpoolcorp.com/ cltpsc, technical information, metercase cross reference, or page 11 of this manual. 1. Remove the lock assembly from the plastic bag and remove the large jamb nut from the lock. 2. Install the lock into the lock hole in the console control panel or metercase access panel and then install the jam nut. 3. Make sure the wave washers are on the lock prior to installation of the cam or the cam nut. NOTE: Failure to install the wave washers will result in the console control panel or metercase access panel not locking. Closing the metercase access panel Closing the console control panel, mechanical Stack Dryers, push down, in and lock. Closing the console control panel, electronic Stack Dryers, push left, in and lock. 32 COINBOX INSTALLATION ADJUSTING THE COINBOX FIT 1. Insert the coinbox key into the coinbox. Turn the key to disengage the engagement cams on the front of the coinbox. Record the key number written on the inside of the coinbox in a safe place. NOTE: If the coinbox key is lost and the key number has not been recorded, the key number can be viewed with an inspection mirror by removing the coinslide and looking through the coin funnel opening. If the key number is not accessible, the coinbox must be drilled out and replaced at the owner’s expense! 2. Insert the coin box into the metercase or collar lower opening The tight fit of the coinbox is set at the factory. You can loosen the fit as desired by loosening the slotted rods inside the front of the coinbox. Adjust and test 1⁄4 turns at a time. Adjust the four screws at front of coin box to tighten or loosen fit. Coinbox key number 4. Check to be sure all parts are now installed. 5. Check to be sure you have all of your tools. 6. Dispose/recycle all packaging materials. 3. Turn the key to its original position and remove the key. 33 COINSLIDE PRICE VEND CHANGE INSTRUCTIONS 5. Unscrew the coinslide retaining bolt with a 5/16” socket by turning counter clock wise and remove the bolt. The following procedure will guide the user through changing the coinslide vend amount for a factory equipped or ESD vertical 8 coinslide. The procedure will be similar for other coinslide manufacturers, consult the manufacturers installation instructions. If the coinslide(s) are installed, they must be removed prior to changing the vend price. If the coinslide(s) have not yet been installed, skip to step 6. 6. Push the coinslide up, and then pull it forward to remove from the metercase. Electrical Shock Hazard Disconnect power before servicing. Replace all panels before operating. Failure to do so can result in death or electrical shock. 7. Set the coinslide and extension assembly on a level surface and remove the return spring(s) from the spring bracket. 1. Unplug unit or disconnect power. 2. Unlock the metercase access panel or collar control panel lock and remove the control panel from the collar assembly. 3. On single washer and dryer models, lift the metercase access panel up at the back and remove. 4. On mechanical stack dryer models open the console by lifting it up off the bottom mounting flange. On electronic stack dryers slide the control panel to the left, then carefully open the control panel by swinging the right side away from the collar. 8. Place coins in the coinslide of the proper vend amount (factory preset on coin equipped models is $1.00) and push the slide all the way in until the coins drop through the coinslide. 34 9. With the slide still all the way inserted, remove the spring bracket screw and spring bracket. 12. To increase the vend price, remove blank inserts and install the metal functional inserts. 10.Remove the coin inserts (2 blanks, 2 functional) from the coinslide are shown. To decrease the vend price, remove functional inserts and replace with blank inserts. 13. Reinstall the three insert retaining plate screws. Turn the coinslide over and place unused inserts (up to 4) in the slide storage. Reinstall spring bracket and screw. NOTE: The coinslide comes with enough inserts to increase or decrease the vend price by $.50, if a higher or lower vend price is desired, more functional or blank inserts are necessary. Inserts may be ordered from Whirlpool Corporation only for models that come factory coinslide equipped. If the coinslide is other than Whirlpool factory equipped, additional inserts must be ordered from the coinslide manufacturer, page 13. 14. Release the slide and reinstall the coinslide return spring(s) onto the spring bracket. $.25 US insert (Whirlpool Corp., Part No. 8316265) Insert blank (Whirlpool Corp., Part No. 8316264) 11. Turn the coinslide upside down and remove the three screws in the insert retaining plate. 15.Insert coins in the amount of the new set vend price into the coinslide and push the slide in to eject the coins. If the coins do not eject, look for missing parts and go back to Step 7. 35 16. While holding the slide in, insert the coinslide into the metercase, making sure the extension clears the coin funnel. (Fig. 1) 17. Pull down slightly to lock the coinslide into place. (Fig. 2) Electrical Shock Hazard Plug into a grounded 3 prong outlet. Do not remove ground prong. Do not use adaptor. Do not use an extension cord. Failure to follow these instructions can result in death, fire or electrical shock. 20.Reconnect power. Fig. 1 NOTE: On EMS1000 and ADVANTECH™ units, the vend price set on the coinslide must match the vend price programmed into the electronic control. For more information, see the tech sheet packed with the product. ADVANTECH™ models may have the vend price changed with a PALM™ handheld, or manually. Manual vend price change only is covered here as follows: A. On single washers and dryers, push and release the rocker switch located inside the meter case. On stack dryers, push the service switch on the control board for the selected dryer. Fig. 2 18. Insert the coinslide retaining bolt through the console access panel into the back of the coinslide and hand tighten the bolt to start the threads prior to using any tools to avoid stripping the coinslide or retaining bolt threads. 19.Affix the proper new vend price sticker to the front of the coinslide. Single Washers & Dryers Stack Dryers B. HOT temperature LED begins blinking to confirm that the switch was pushed. The machine’s lifetime cycle count now shows on the display. NOTE: The display automatically returns to the vend price after 1 minute. 36 The keypads are now mapped as illustrated: KEYPAD MAPPING WASHER KEYPAD HOT 1 DRYER KEYPAD HIGH 1 Closing the console control panel, mechanical Stack Dryers, push down, in and lock. Move up to the preceding item on the list. Move down to the MEDIUM WARM next item on the list. 2 2 COLD LOW Select an item to 3 3 view the current setting. NO FUNCTION NORMAL ON 4 4 NO FUNCTION GENTLE OFF 5 5 Exit OWNER HIDDEN START SETTINGS 6 6 program. Display returns to the cycle count. Closing the console control panel, electronic Stack Dryers, push left, in and lock. 22.Insert coins to insure the cycle starts. MECHANICAL WASHER C. Press 1, “CYC P” is displayed. D. Press 3, cycle price is displayed. Press 1 to increase the price, 2 to decrease the price until the displayed price matches the vend price set on the coinslide. E. Press 6 twice to exit the setup routine. 21. Reinstall the control panel or metercase access panel in reverse order of installation and lock. On Stack Dryers make sure all harness connections are attached fully to the appropriate connectors. MECHANICAL SINGLE DRYER MECHANICAL STACK DRYER Closing the metercase access panel All ADVANTECH™ & EMS1000 37 38 39 COMMERCIAL LAUNDRY SERVICE POINTER SUMMARY SERVICE POINTER # 8178037 8178044 DATE Sep-01 Sep-01 8178046 8178047 8178048 8178049 8178091 Aug-01 Aug-01 Aug-01 Sep-01 Sep-01 8178135 8178150 Jan-02 Sep-01 8178226 8178227 Jun-02 Jun-02 8178238 Aug-02 8178240 8178268 8178269 Aug-02 Sep-02 Sep-02 8178296 8178388 Jan-03 Sep-03 8178398 Oct-03 SUBJECT 27” ELECTRIC DRYERS NOT HEATING EMS1000 AND 2000, CONTROL PANEL DOESN’T ACCEPT COMMANDS EMS1000, CYCLE DOESN’T COMPLETE NO FILL, NOW VOLTAGE TO THE WATER VALVE NEW DESIGN MOTOR COUPLER PART #285852 DRAIN HOSE KINKS EMS1000 ELECTRIC DRYERS, NO MEDIUM OR LOW TEMPERATURE BALANCE RING IS LOOSE OR PULLS OFF EMS2000 WASHERS AND DRYERS, SMART CARD DOESN’T OPERATE GCAM2701JQ0, TIMER STUCK IN SPIN CHANGE IN LOCATION OF TECHNICAL INFORMATION EMS1000 AND ADVANTECH™, CYCLE DOESN’T COMPLETE CAW2762KQ0, BUTTONS TOO LOW IN CONSOLE IMPROVED COLLAR SECURITY, STACK DRYERS DRYER WIRING HARNESS NOT PROPERLY SECURED DRYER DISPLAY SHOWS 240 MINUTES BLANK DISPLAY, WASHER OR DRYER DOESN’T OPERATE THE TIMER DOES NOT ADVANCE, MECHANICALLY CONTROLLED LAUNDRY NOTE: Not all Commercial Laundry Service Pointers are represented in this manual. ALL S E R V IC E P OINT E R S ONLINE : http://www.s ervicematters.com/tech_ref/tech_ref_main.htm, S E R V IC E P OINT E R S C OMME R C IAL LAUNDR Y ONLY: www.whirlpoolcorp.com/cltps c, T E C HNIC AL INF OR MAT ION, S E R V IC E P OINT E R S To rec eive pointers by email or FA X , or to edit or delete a c urrent email or F ax from our dis tribution, s ee http://www.whirlpoolcorp.com/cltps c/feedback/feedbacks ubs cribe_all.html, or FA X c hanges to 269-923-5342. 40 WHIRLPOOL COMMERCIAL ONLY KITCHEN PRODUCTS 3LAUNDRY PRODUCTS REFRIGERATION PRODUCTS L8178135 January 2002 ALL COMMERCIAL FREESTANDING 27” DIRECT DRIVE WASHERS WITH 2.5 CU FT WASHBASKET CUSTOMER COMPLAINT: Balance ring is loose or has pulled off of the washbasket. CAUSE: The balance ring retaining clip is out of specification. CORRECTION: Replace the balance ring as necessary using new design part number 387868. The balance ring clips included with the balance ring have been revised in several areas to provide a better grip onto both the balance ring and the basket. The new style clips were introduced at part code date 012410, where the first 2 digits are the year, 2nd 2 digits are the day and the 3rd 2 digits are the month. A code date is located at the bottom of the part number label on every parts box. To insure reception of the improved design, only use parts starting with this code date. RETAINING CLIP IMPROVEMENTS 1 1. V Shaped basket retaining area for twp points of contact. 2. Clip lengthened to encourage bottoming of clip in the balance ring. NEW DESIGN 2 3. Retaining clips for balance ring improved. 3 41 CURRENT DESIGN WARNING Electrical Shock Hazard Disconnect power before servicing. Replace all parts and panels before operating. Failure to do so can result in death or electrical shock. BALANCE RING INSTALLATION INSTRUCTIONS 1. Disconnect electrical power before servicing the washer. 2. Remove the control panel retaining screws and flip up the control panel into the service position. 3. Remove the cabinet retaining clips; unplug the lid switch harness and any other additional harnesses (coinop models) that are necessary to remove the cabinet. Additionally on coinop models the front panel and side panel retaining screws must be removed. 4. Lift the cabinet away from the washer. 5. Release the air brake from the washer back panel, then the tub ring from the outer tub. 6. Slowly lift the balance ring from the washbasket, make sure all 8 balance ring-retaining clips are accounted for. Retaining clips can damage the pump impeller if drawn into the pump. Inspect the outer tub and pump impeller for damage. Replace the outer tub (part number 63125) and pump (part number 3363394) if either part shows signs of damage. If all 8 retaining clips are accounted for, skip to step 10. If all 8 clips are not located, continue to step 7. 7. Remove the agitator cap and retaining bolt, then remove the agitator. 8. Remove the washbasket spanner nut using the appropriate spanner wrench. 9. Apply downward pressure to the edge of the washbasket to release it from the drive block, then remove the washbasket from the washer. Check the outer tub for the remaining missing balance ring retaining clips. 10. Set the balance ring onto the washbasket. Once placed onto the basket, apply downward pressure to the balance ring with both hands to insure the balance ring is locked onto the basket. Move your hands 90° to where pressure was first applied and apply pressure on the balance ring again. Do not spin the balance ring independently from the washbasket! This may damage the new clips! 11. If the washbasket has been removed from the washer turn the basket and balance ring assembly over so the balance ring is in contact with the floor. Apply pressure onto the bottom of the washbasket to ensure the balance ring is properly seated on the washbasket. Reinstall washbasket, spanner nut and agitator. 42 12. Re install the tub ring and air brake. Replace the tub ring (part number 3360611) if it shows signs of damage. 13. Reinstall the cabinet, cabinet clips and wiring harness connections. Reinstall the side panel mounting screws and front access panel on models so equipped. 14. Close the control panel and reinstall the control panel mounting screws. PRESS DOWN IN LOCATIONS AS ILLUSTRATED. DO NOT ROTATE BASKET INDEPENDENTLY OF BALANCE RING DURING INSTALLATION WHIRLPOOL COMMERCIAL ONL Y ONLY KITCHEN PRODUCTS 3LAUNDRY PRODUCTS REFRIGERATION PRODUCTS L8178226 June 2002 ON PREMISE W ASHER MODEL WASHER GCAM2701JQO COMPLAINT: The washer is stuck in spin. CAUSE: There are two possible causes: 1. The Ramp to off feature of the timer is malfunctioning causing the timer not to advance through spin. 2. A missing wiring harness clip allows the timer wiring harness to be improperly routed tangling in the timer shaft preventing timer advancement. 4. If the clip is installed and the wiring harness is properly secured within the console, replace the timer. NOTE: Care must be taken to insert the timer shaft into the center of the start switch. If the shaft is not properly inserted into the start knob, the timer will not operate (Figure 2). SOLUTION: TIMER SHAFT MUST BE INSERTED IN CENTER HOLE Check the product to ensure the proper wiring harness clip is installed (part 3347812) and replace the timer with part 3946928. FIGURE 2 1. Disconnect electrical power to the washer 2. Remove the console screws and rotate the console into the service position. 3. Identify the wiring harness clip location behind the timer on the back panel (feature panel). If the clip is not present, install the clip as illustrated, part number 3347812 (Figure 1). Make sure the clip is bottomed onto the feature panel. Failure to bottom the clip can result in the clip releasing and the wiring harness tangling in the timer shaft. 5. Advance timer using the advance arm to the final spin. Make sure the wiring harness is routed behind, rather than under the timer (Figure 3). 6. Close the console, replace the console screws and reapply power to the washer. 7. Verify proper operation of the timer by monitoring cycle advancement from spin to off, ensuring the push to start button ramps out from the run to the start position. INCORRECT HARNESS ROUTING FIGURE 1 CORRECT HARNESS ROUTING FIGURE 3 43 WHIRLPOOL COMMERCIAL ONL Y ONLY KITCHEN PRODUCTS 3LAUNDRY PRODUCTS REFRIGERATION PRODUCTS L8178227 June 2002 K LINE ELECTRONIC COMMERCIAL WASHERS WASHERS,, ALL K LINE COMMERCIAL DRYERS WASHER MODELS CAE2761KQ0 CAE2762KQ0 CAE2792KQ0 CAP2761KQ0 ELECTRIC DRYER MODELS GAS DRYER MODELS CEE2760KQ0 CGE2761KQ0 CEE2790KQ0 CGE2791KQ0 CEM2750KQ2 CGM2751KQ2 CEM2760KQ2 CGM2761KQ2 CEP2760KQ0 CGP2761KQ0 CSP2740KQ0 CSP2741KQ0 CSP2760KQ0 CSP2761KQ0 CSP2770KQ0 CSP2771KQ0 NOTE: Canadian models affected are the same as above but begin with Y. Change in Location of Technicial Information The location of the wiring diagram, tech sheet and parts list has changed with the introduction of the above models to behind the front access panel on the washer, and behind the toe panel on the dryer. The information is enclosed in a plastic bag to insure the documents are preserved over the life of the product. The change was initiated to help ensure technicial information stays with the product, as well as preventing technicial information from interfering with product operation. ACCESSING THE LITERATURE PACK 1. Disconnect electrical power. WASHERS 2. Remove the two (2) T-20 Torx screws from the bottom of the front panel (Figure 1). 3. Tilt the bottom of the front panel up and forward to release the top panel clips and remove the front panel. DRYERS 1. Remove the dryer toe panel by inserting a putty knife approximately 3” in from the sides of the unit to release the spring clips (Figure 2). Pull the top of the panel forward to release. LITERATURE PACK (LOCATED BEHIND THE FRONT ACCESS PANEL ) LITERATURE PACK (LOCATED BEHIND THE TOE PANEL ) FIGURE 1 FIGURE 2 44 WHIRLPOOL COMMERCIAL ONL Y ONLY KITCHEN PRODUCTS 3LAUNDRY PRODUCTS REFRIGERATION PRODUCTS ADVANTECH™ and EMS1000 WASHERS AND DRYERS WASHER MODELS ELECTRIC DRYER MODELS CAE2761KQ0 CEE2760KQ0 CAE2762KQ0 CEE2790KQ0 CAE2792KQ0 CEP2760KQ0 ALL CAP2761 AND CAP2762 CSP2770KQ0 CONDITION: L8178238 September 2002 Remove & destroy pointer L8178046 dated September 2001 GAS DRYER MODELS CGE2761KQ0 CGE2791KQ0 CGP2761KQ0 CSP2771KQ0 RESOLUTION: The cycle does not complete, or the cycle resets and vend price shows when the washer finishes filling or the dryer gas valve cycles. CAUSE: The suppressor on the line in or the quencher is not operating or has been removed. Inspect the washer or dryer for installation of the quencher and the suppressor as described on the following page. The suppressor assembly is designed to absorb line spikes to prevent damage to the electronic control. Some spikes are above the ability of the suppressor to absorb and cause supressor or control failure. Visually inspect the suppressor for signs of discoloration. In the event that the line filter MOV within the suppressor fails as indicated by the MOV turning from red to black, the board should be inspected for evidence of damage. Replace suppressor with part number indicated in the suppressor /quencher table. Replace the board if there is extensive discoloration in the illustrated areas combined with erratic operation. ADVENTECH™ CONTROL EMS1000 CONTROL 45 A quencher is located in the wiring harness near the water level switch on the washer and screwed to the cabinet of the gas dryer in front of the burner assembly. The quenchers are designed to reduce EMI from the water level switch or gas valve when they change state. EMI generated from a switch state change may cause the electronic control to reset during a cycle when a quencher has failed or has been removed. Kit 3952286 is designed to replace the water level switch quencher on EMS1000 washers built prior to 1999. Starting with 1999 production the water level switch quencher is integral to the wiring harness necessitating harness replacement for quencher failure. SUPRESSOR QUENCHER APPLICATION TABLE PRODUCT EMS1000 WASHERS PRIOR TO 1999 SUPRESSOR LINE IN, PART NUMBER AND LOCATION QUENCHER PART NUMBER AND LOCATION 3952286 on water level switch in console 3951390 Located between power cord plug and wiring harness plug 1999 and after in harness near water level switch connection, harness must be replaced if quencher fails EMS1000 AND ADVANTECH™ WASHERS AFTER 1999 EMS1000 AND ADVANTECH™ GAS DRYERS 3406196 Located in the console behind the power cord access panel EMS1000 AND ADVANTECH™ ELECTRIC DRYERS 3406197 Located at the black and white harness plug near the power cord terminal block located in the wiring harness near the gas valve, harness must be replaced if quencher fails QUENCHER REPLACEMENT EMS1000 WASHERS PRIOR TO 1999 WITH WATER LEVEL SWITCH IN THE CONSOLE 1. Unplug the washer from the AC outlet. 2. Remove the screws from the front bottom of the console and rotate the console up into the service position. 3. Disconnect the violet wire with the white stripe from the pressure switch. 4. Connect either quencher wire into the pressure switch where the violet wire with the white stripe was removed. 5. Reconnect the violet wire with the white stripe to the piggyback connector on the quencher wire. 6. Disconnect the pink wire from the pressure switch. 46 7. Connect the remaining quencher wire in place of the pink wire on the pressure switch. SUPPRESSOR PART NUMBER 3951390 INSTALLED ON LINE QUENCHER WATER LEVEL SWITCH P V-W T QUENCHER PART NUMBER 3952286 INSTALLED ACROSS PRESSURE SWITCH EMPTY CIRCUIT 8. Connect the pink wire to the piggyback connector on the quencher wire. 9. Route the black quencher wires, along with the pink and tan wires, and use a wire tie to tie them together near the quencher body. 10. Close and secure the console. 11. Reconnect power to the washer. 47 SUPRESSOR REPLACEMENT EMS1000 and ADVANTECH™ WASHERS 1. Remove the 2 control panel screws at the base of the console and rotate the console open into the service position. 2. Remove the electrical tape that secures the suppressor/quencher assembly to the wiring harness. 3. Unplug the suppressor from the power cord connector and the wiring harness connector. SUPPRESSOR BYPASSED SUPPRESSOR HARNESS AND POWER CORD CONNECTORS NOTE: On washers it is possible to plug the wiring harness connector directly into the power cord connector BYPASSING the suppressor. On dryers the unit will operate without the suppressor plugged in. This will expose the control to line transients (voltage spikes) that can damage the control. Internal switch closures may also cause the control to reset. NEVER eliminate the supressor or quencher! SUPRESSOR REPLACEMENT 27” EMS1000 and ADVANTECH™ DRYERS 1. Disconnect electrical power. 2. On gas dryers remove the power cord access panel from the rear of the dryer. 3. Remove the power cord from the backsplash. 4. On electric dryers remove the control panel mounting screws and rotate the console open into the service position. 5. Unplug the suppressor from the power cord and wiring harness and replace. 6. Replace all panels and reconnect electrical power. NOTE: On 29” Dryers remove the rear access panel to gain access to the suppressor assembly located underneath the terminal block. UNPLUG SUPPRESSOR AT POWER CORD AND HARNESS CONNECTION 48 WHIRLPOOL COMMERCIAL ONL Y ONLY KITCHEN PRODUCTS 3LAUNDRY PRODUCTS REFRIGERATION PRODUCTS WASHER MODEL CAW2762KQ0, SERIAL RANGE ALL PRIOR TO CM28 COMPLAINT: The cycle selector switch buttons when pushed are below the level of the console which can cause the buttons to jam. CAUSE: The incorrect buttons were installed on the cycle selector switch for some portion of the first 500 production units. INCORRECT BUTTONS BELOW LEVEL OF THE CONSOLE CORRECT BUTTONS ABOVE THE CONSOLE SOLUTION: Replace the cycle selector switch assembly with part number 3954774 49 L8178240 September 2002 PROCEDURE: 1. If the product is in the box, open the top of the box and look at the cycle selector switch. If the top of any of the selector switch buttons when depressed are BELOW the level of the console, the switch assembly must be replaced, proceed to step 2. If the buttons when depressed are not below the level of the console, repack the box. 2. If the washer has been installed, disconnect electrical power. 3. Remove the 2 T-15 console-retaining screws and rotate the console open into the service position. 4. Unplug the main harness and ground wire from the cycle selector switch. MAIN HARNESS CONNECTOR GROUND 5. Remove the water level switch PY and PW connections from the cycle selector switch. 6. Remove the ¼” cycle selector switch mounting screws and remove the switch from the console. 7. Remove the selector switch harness one wire at a time, placing the removed wire on the new switch in the same location as removed from the old switch. WATER LEVEL SWITCH WIRES REMOVED PRIOR TO SWITCH REMOVAL FROM CONSOLE 8. Reinstall the switch into the console with the ¼” mounting screws. 9. Reconnect the selector switch harness connector and ground wire, and close the console. NOTE: Care must be taken while closing the console in order to avoid causing the indicator lights to pop off the console. After closing the console, lightly pull up on the indicator light lenses to insure they are properly locked onto the indicator lights. If the lenses are loose in the console, open the console and resecure the lights onto the lenses. 50 WHIRLPOOL COMMERCIAL ONL Y ONLY KITCHEN PRODUCTS 3LAUNDRY PRODUCTS REFRIGERATION PRODUCTS L8178268 October 2002 ALL ST ACK DRYERS STA DRYERS,, ALL MODELS THA T BEGIN WITH CS THAT CS,, CSP COMPLAINT: Income decreasing from stack dryer, or upper dryer loose from collar assembly. CAUSE: The factory ½” Hex head bolts that secure the upper dryer to the collar assembly have been removed allowing unauthorized access to the collar. PROCEDURE: 1. Disconnect electrical supply to unit. 2. Remove the lower access panel on the upper dryer unit by inserting a putty knife approximately 3” in from the sides of the unit to release the spring clips (Figure 1). Pull the top of the panel forward to release. 3. Remove the hex head bolts from the front two corners of the upper dryer (Figure 2). SOLUTION: Install Security Kit Part # 285875 Kit Contains: Screw (2) Cotter Pin (2) Instruction Sheet (1) FIGURE 1 This kit is designed to prevent unauthorized access to the collar and meter case assembly on stack dryers by replacing the original factory ½” hex head bolts that secure the upper dryer to the collar with the T40 Torx head bolts and retaining clips. After the kit is installed the upper dryer can only be removed by first gaining access to the control panel assembly with the proper key. The contents of this kit are factory installed on all stack dryers after serial numbers that begin with ML50. The kit will retrofit to all stack dryer models. FIGURE 2 4. Replace the factory installed hex head bolts with the T40 screws included in this kit and tighten in place. 51 5. Open the control panel console lock and remove the installed money acceptors (Figure 3). 6. Install the cotter pins (included) through the holes in the T40 screws (Figure 4). FIGURE 3 FIGURE 4 Upper Right Front of Collar 7. Reinstall the money acceptors. 8. Reinstall the control panel and re-lock the panel. 9. Reconnect electrical supply. 52 WHIRLPOOL COMMERCIAL ONL Y ONLY KITCHEN PRODUCTS REFRIGERATION PRODUCTS 3LAUNDRY PRODUCTS L8178269 October 2002 EMS1000 and AD VANTECH™ GAS ADV AND ELECTRIC DRYERS METERCASE MODELS FULL CONSOLE MODELS ELECTRIC DRYER MODELS YCEE, CEE2760KQ0 YCEP, CEP2760KQ0 CEE2790KQ0 COMPLAINT: The wiring harness is not properly secured in the console. CAUSE: The factory wiring harness clips were mispositioned on the wiring harness and did not align with the mounting holes on the dryer rear panel and bulkhead. As a result the wiring harness may not be properly secured at one or both mounting points. GAS DRYER MODELS CGE2761KQ0 CGP2761KQ0 CGE2791KQ0 4. Verify that both the rear bulkhead clip, located on the upper right rear facing the back of the unit (Figure 1) and the console rear panel clip (Figure 2) are in place. On some units the console rear panel warning label may be placed over the harness clip hole location. Inspect the sticker to locate the hole and insure the clip is installed. It may be necessary to open a hole in the label to install or insure installation of the clip. Do not remove the warning label. If both clips are in place in the back panel and bulkhead, no repair is necessary. SOLUTION: HARNESS CLIP INSTALLED IN BULKHEAD Install service harness clip part number 3391018 and insulator 304825 as detailed below: FIGURE 1 NOTE: On electric dryers the control panel should only be open with the power cord cover in place. If the power cord cover is removed with the console in the service position and power is applied, there is a risk of shock and product damage. 1. If the unit is still in the carton, confirm that there is not a blue dot on the carton model/serial tag label, indicating that the unit has already been serviced. If a blue dot is present, the repair has been implemented and no action need be taken. 2. If the unit is uncartoned proceed to step 4. 3. If there is no blue dot present open top flaps of carton with dryer upright. All repairs can be made without removing dryer from carton. HARNESS CLIP INSTALLED IN CONSOLE REAR PA N E L WARNING LABEL, WHICH MAY HAVE BEEN PLACED OVER CLIP HOLE. FIGURE 2 53 5. If the bulkhead clip (Figure 1) is in place as illustrated proceed to step 8. If clip is not in place, the dryer top must be removed. 6. Remove the 2 T-15 Torx screws from the console and rotate the console back on its two (2) hinges into the service position (Figure 3). FIGURE 3. T-15 TORX 7. Remove the three-rear panel to cabinet screws and gently slide the cabinet top forward to reveal the harness-mounting hole in the bulkhead. NOTE: If the factory installed front lock blank has been replaced with an optional top front lock, the lock must be removed in order to remove the dryer top. 8. Pull any excess harness slack from the drum area up into the console, and secure the harness clip(s) into the rear panel and or bulkhead hole(s) (Figures 1, 2, 4). If the harness is too tight and cannot be clipped in using the existing clip(s), new clip(s), (part # 3391018) can be added. FIGURE 5. HARNESS CLIP SECURED IN REAR PANEL IN ORIGINAL POSITION, METERCASE MODELS 11. Cut off excess free length of clip’s zip strip. 12. Place rubber insulator part# 304825 over the exposed screw. 13. Snap the new clip(s) into the existing hole(s) on the back panel or bulkhead. Make sure the harness does not contact the the drum (Figure 6). SHRINK-WRAPPED SECTION OF WIRE HARNESS NEW CLIP LOCATION FIGURE 6. PLACEMENT OF NEW CLIP ON HARNESS, FULL CONSOLE MODELS FIGURE 4. LOCATION OF SECOND CLIP (USED ON METERCASE MODELS ONLY WHEN FACTORY CLIP CANNOT BE PULLED INTO POSITION) 9. The additional clips, (part # 3391018) should only be added if the harness is too tight to secure into the mounting hole(s) with the existing clip(s). Attach the additional clip(s) onto the harness when required immediately above the existing clip(s) within 1". To attach the clip(s), the bulleted end remains on top of the harness, the free end is looped under the harness and pulled tight with pliers (Figure 3). Cut off any free length. 10. On full console models, attach the harness clip immediately above the shrink wrapped section of the harness (figure 5). Secure the clip onto the harness as detailed in step 9. 14. Check to see that the accessory plug connected to the black and white wires pulled free from the rest of the harness (Figure 7). SCREW INSULATOR PART # 304825 INSTALLED OVER EXPOSED SCREW CLIP LOCATION IN BACK PANEL ACCESSORY PLUG FREED FROM HARNESS FIGURE 7. FULL CONSOLE MODELS 15. Reassemble unit and reconnect electrical service, insert coins, tokens or user card and test operation. 54 LAUNDRY PRODUCTS 3 REFRIGERATION PRODUCTS KITCHEN PRODUCTS COMMERICAL LAUNDRY !"#$$% 7+,66(59,&(32,17(5$33/,(6727+()2//2:,1*%5$1'6 3 OEM BRANDS ELECTRIC DRYER MODELS CEE2760KQ0 CEE2790KQ0 GAS DRYER MODELS CGE2761KQ0 CGE2791KQ0 THE DRYER DISPLAY SHOWS 240 MINUTES; CUSTOMERS DO NOT HAVE TO PAY TO OPERATE DRYER. COMPLAINT: The dryer display shows 240 minutes. Customers do not have to pay to operate the dryer. CAUSE: A software issue causes the dryer to count up to 240 minutes ONLY when a coindrop is installed and the customer selects a cycle between 12:00 and 1:00PM on Monday. After operation on Several Mondays between 12:00 and 1:00PM, 240 minutes will be displayed. RESOLUTION: The firmware version on the dryer board must be updated from version 3.12 to version 3.13 by downloading a firmware update from the Trade Partner Support Center site at www.whirlpoolcrop.com/cltpsc, or by replacing the control board, part number 3407165. All ADVANTECH™ Commercial Laundry controls are reprogrammable through the infrared communications port with a Palm™ OS equipped handheld loaded with the ADVANTECH™ software application. When additional features are added to the ADVANTECH™ firmware, they can be downloaded from the link below by selecting the download FRMW for washers and download FRMD for dryers. Download to the following directory: C:\Palm\add-on. The firmware can then be imported to the ADVANTECH™ Software application, transferred to the Palm™ OS equipped handheld, then beamed via infrared into the washer or dryer control. NOTE: In order to update the firmware, ADVANTECH™ management software program must be installed and operational on your PC. NOTE: Before proceeding all passwords including service tech ID must be set and loaded onto the handheld. If collecting audit data, collect prior to reprogramming, as new firmware will delete all service, set up and audit data. 55 Archway (Form) Number N/A Whirlpool Part Number 8524745 CWLX043 8524744 Description Contains PC User’s Complete Palm™ Assembly handheld application, PC management software CD, and software manual Management Software CD only CD contains sales overview video installation and set up video, software manual and software Ordering and Viewing Information Available through Whirlpool Corp. Literature Department 1-800-851-4605 www.whirlpoolcorp.com/cltpsc Available at www.coinop.com, or call, 1-800-643-3444 Available through Whirlpool Corp. Literature Department 1-800-851-4605 www.whirlpoolcorp.com/cltpsc 1. Go to: http://www.whirlpoolcorp.com/cltpsc/techinfo/tech_support/firmware/firmwaredefault.htm and download the dryer firmware. Once downloaded to your PC, proceed as follows: 2. Boot the ADVANTECH™ software application. 3. Press the PDA sync button in the ADVANTECH™ software application. 4. Select Advanced sync features, import-reprogramming file. 5. Locate the downloaded reprogramming file on your PC in C:\Palm\ add-on\dryer313.txt. 6. Press Process ISP, then yes. 7. On the PDA sync menu, check the “include ISP” box. 8. Press the HotSync® button on the cradle. 56 9. Unlock, open and remove the metercase access door, and push and hold the rocker switch located inside the meter case. Hold down the service switch during the reprogramming process. Reprogramming takes approximately 3 minutes per unit and is complete when done is displayed. HOLD DOWN ROCKER SWITCH 10. Open the ADVANTECH™ Palm Application, choose select location, and pick the appropriate location. Choose utilities, reprogram. Aim the infrared port on the Palm device into the IR port on the ADVANTECH™ console, just to the right of the cents position on the display. NOTE: The switch must be held at the same time the firmware is transferred. Reprograming cannot begin until the display shows vend price. If the switch is released or the infrared beam is interrupted, the process can continue as soon as both actions are resumed. The process does not start over if the beam is interrupted or if the switch is released. IR Port location (white circle) Handheld should be within 3-5” of the console with the IR port on the handheld in line with the IR port on the control panel. Avoid bright light between the ports. 11. To verify updated firmware load, press service switch again and release. HOT temperature LED begins blinking to confirm that the switch was pushed. The machine’s lifetime cycle count now shows on display. NOTE: The display automatically returns to the vend price after 1 minute. 12. Press position 5, then 1, then 3. Version displayed should be 3.13 13. Select location and initialize, set serial number. 14. Select send setup, choose the proper coindrop template and select send. 15. Deposit coins to insure proper operation. 16. Select utilities, end cycle. 17. Reinstall and close and relock the metercase access panel. 57 '''' '''' KITCHEN PRODUCTS REFRIGERATION PRODUCTS 3LAUNDRY PRODUCTS % ()*$$% +**-."/ ":;:< #: +**-."/":;:< #: GAS MODELS: CGP2761, CGP2961 ELECTRIC MODELS: CAP2761/2762, CEP2760/2960 CUSTOMER COMPLAINT: CORRECTION: Replace failed board with a revised PC board. Revised boards have been modified to tolerate higher voltage spikes that are common in some areas of the country. Blank Display, washer or dryer does not operate. CAUSE: PC board failure due to irregular voltage supply to the machine, causing the protector in the PC board transformer to overheat and open. WARNING Electrical Shock Hazard Disconnect power before servicing. Replace all parts and panels before operating. Failure to do so can result in death or electrical shock. TEST FOR FAILED BOARD: With power disconnected to the machine, use an ohmmeter, set to continuity. Check for continuity between pins #3 and #4 on the transformer, there should be continuity. No continuity indicates an open thermal protector in the transformer, and a bad board. Pins 3 & 4 are the 2 pins on the right side of the transformer with the PC board oriented as in the picture. Notice the arrows on the board. NOTE: Products affected are of the EMS1000 product line only! Part numbers affected by the revision: Washer part #3407152 & Dryer part #3407149. Revised parts are marked “Revision A”; all original parts have been purged from inventory. Dealer and servicer stock should be returned to point of purchase for replacement with revised parts! 58 WHIRLPOOL COMMERCIAL ONLY KITCHEN PRODUCTS 3LAUNDRY PRODUCTS L8178398 October 2003 REFRIGERATION PRODUCTS Mechanically Controlled Commercial Laundry Gas Models: Dryers - CGM2751JQ / CGM2761JQ Electric Models: Washers - CAM2752JQ/CAM2761KQ; Dryers - CEM2750JQ/CEM2760JQ CUSTOMER COMPLAINT: The timer does not advance. Access Door CAUSE: Unused timer wire harness of the payment feature connector is tangled in the timer clutch, preventing the timer from advancing. This harness is from the lower, white terminal block of the timer. Meter Case FIGURE 1 WARNING Timer (Inside Case) Electrical Shock Hazard Coinslide Assembly Coin Box Disconnect power before servicing. Replace all parts and panels before operating. Failure to do so can result in death or electrical shock. 1. Unplug or disconnect the power to the machine! 2. Unlock and remove the service access door from the top of the meter case (figure #1). 3. Move the wire harness from in front of the timer where it can tangle in the clutch (figure #2), to a position under the timer (figure 3). 4. If the machine is to be moved around following the repair, additional securing may need to take place. 5. To additionally secure the wire harness, remove the timer by loosening the two-5/16 hex screws on the timer bracket, then pull the timer up and out of the meter case. FIGURE 2 Feature connector tangled in the timer clutch. FIGURE 3 6. Fold the wire harness in half and secure it in place behind the timer with a wire harness clip, part #3391018. 7. Reinstall the timer and the service-access door. 8. Reconnect the power to the unit and verify proper operation. Feature connector tucked under timer. 59 LAUNDRY PRODUCTS REFRIGERATION PRODUCTS KITCHEN PRODUCTS 3COMMERICAL LAUNDRY L8178410 November 2003 THIS SERVICE POINTER APPLIES TO THE FOLLOWING BRANDS: 3 OEM BRANDS Rework #S15353 For Commercial Washers and Dryers GAS MODELS: CGE2991A*, CSP2791B* ELECTRIC MODELS: CEE2990A*, CAE2791A*, CAE2792A*, CSP2790B* NOTE: * denotes that any letters or numerals may follow. Board or Battery Backup Failure, Lack of availability of Replacement Control Boards CUSTOMER COMPLAINT: After a power loss, the washer or dryer control board looses the set-up template and defaults back to factory settings reducing income. CAUSE: Battery backup on the PC board has failed. Washer PC board #3357941 and or Dryer PC board #3396010. CORRECTION: The PC board needs to be sent in for repair or rework. NOTE: Only defective PC boards #3357941 and or #3396010 should be sent in on this Special Rework Project. Repairs to other PC boards will not be performed and postage for returning other boards will need to be paid for by the customer. PROCEDURE FOR REWORK: Contact the Whirlpool Parts Department at: 1-800-3160916 extension 6776, with a request for a PC board rework, mention the Rework Project #S15353. Whirlpool Corporation will notify our vendor about the customer request. An information packet and instructions will be sent to the customer requesting the rework. If more than one board is to be reworked in a single order please notify the parts associate of the amount of boards that will be sent in. Whirlpool Corporation has arranged for an outside vendor (CGI) to replace the battery backup on the failed boards at no charge to the customer. After a new battery has been installed on a customer’s PC board, the board will be tested for proper operation. If the PC board functions, the repaired PC board will be returned to the owner, and Whirlpool Corporation will be paying for this service. If the PC board fails to operate correctly, indicating additional repairs will be needed, the customer will be given an option to further repair that board or purchase an in-stock repaired part if available. Whirlpool Corporation will not be responsible for the additional repairs made to a customer’s PC board or for the cost of replacement boards. CGI may be contacted directly at: 1-866-737-2244, select Customer Service from the prompt and ask for the Whirlpool Corporation Rework Project #S15353. CGI’s customer service representatives will collect the info needed to issue a rework info-packet to the customer, or click on the link and download the forms at the CL website > http://cltpsc.whirlpoolcorp.com > then follow the directions on the downloaded pages. ALL SERVICE POINTERS ONLINE: http://www.servicematters.com/tech_ref/tech_ref_main.htm, SERVICE POINTERS COMMERCIAL LAUNDRY ONLY: www.whirlpoolcorp.com/cltpsc, TECHNICAL INFORMATION, SERVICE POINTERS To receive pointers by email or FAX, or to edit or delete a current email or Fax from our distribution, see http://www.whirlpoolcorp.com/cltpsc/feedback/feedbacksubscribe_all.html, or FAX changes to 269-923-5342. -- NOTES -- 60 ADMINISTRATION WHIRLPOOL COMMERCIAL LAUNDRY MODEL & SERIAL NUMBER DESIGNATORS MODEL NUMBER MODEL NUMBER Y C A P INTERNATIONAL SALES INDICATOR OR MARKETING CHANNEL Y= CANADA EXCLUSIVE MODEL G=GOVERNMENT ON PREMISE (NO METERCASE) PRODUCT GROUP C=COMMERCIAL LAUNDRY PRODUCT IDENTIFICATION A=AUTOMATIC WASHER E=ELECTRIC DRYER G=GAS DRYER S=STACK DRYER CONTROL CODE E=FULL FEATURE ELECTRONIC CONTROL M= ELECTROMECHANICAL (TIMER) P= BASE ELECTRONIC CONTROL SINGLE UNIT OR ELECTROMECHANICAL PUSHBUTTON STACKED PAIR W= RESOURCE SAVER (HE TOPLOAD) FEATURE CODE CABINET WIDTH IN INCHES (29” OR 27”) FEATURE / VARIATIONS 4= METER CASE OR COINSLIDE EQUIPPED STACK W/O WINDOWS 5=METER CASE AND COINSLIDE/COINBOX EQUIPPED 6= METER CASE SINGLE/ STACK DRYER WITH COINSLIDE OR WINDOWS* 7= CARD READER READY SINGLE/ CARD READER READY OR EQUIPPED STACKED PAIR* 0,9= FULL WIDTH CONSOLE FEATURE CODE 0= ELECTRIC 1= SINGLE SPEED OR GAS 2= TWO SPEED YEAR OF INTRODUCTION E= 1995, J= 2000, K= 2001, L= 2002, M= 2003 COLOR CODE Q=WHITE ENGINEERING REVISION NUMBER 0= NO REVISIONS 1= REVISION ONE 2= REVISION TWO 2 7 6 1 K Q 0 SERIAL NUMBER SERIAL NUMBER MANUFACTURING SITE C=CLYDE, OH (WASHERS) M=MARION, OH (DRYERS) YEAR OF MANUFACTURE L=2001, M=2002, N or P=2003 WEEK OF MANUFACTURE PRODUCT SEQUENCE NUMBER C L 16 02287 *Factory coinslide equipped stack dryers and factory card equipped models have been discontinued starting with 2000 year of introduction. 61 Commercial Laundry Parts Only Service Agreement The Parts Only Service Agreement allows a trade partner that purchases at least 200 products per year to submit warranty claims for Commercial Laundry Parts. A completed Warranty Claims Form must be submitted for each product where parts where installed within the warranty period in order to receive reimbursement for the part(s) purchased. Warranty claims can be submitted on-line from the Commercial Laundry Trade Partner Support Center for Additional Details consult the Service Operating Guide at www.whirlpoolcorp.com/cltpsc, then WARRANTY CLAIMS, then OPERATING GUIDE. Submitting Warranty claims for parts used, cuts operational costs and provides vital parts usage information to Whirlpool in order to build a more robust product. For details on obtaining a Parts Only Service Agreement, or obtaining warranty service in your area, please contact Whirlpool at 1-800-446-2574, ext. 4268. LABOR WARRANTY, MODELS THAT BEGIN WITH GCA, GCE, GCG • These models come with a 1-year labor 3-year part warranty. They do not have coinslides or coin boxes, but are considered commercial. LABOR WARRANTY, MODELS CAM2752KQ, CEM2750KQ, CGM2751KQ • These Whirlpool models come factory coin equipped and if the sale date is after 7/1/2003 they have a 1-year labor and 3-year full parts warranty. LABOR WARRANTY, ROPER MODELS RAK2751, REK2950, RGK2951 • These models come with a 90-day labor & 2-year parts warranty. They have coinslides and coin boxes factory installed NO LABOR WARRANTY, MODELS THAT BEGIN WITH CA,CE,CG,CSP • Although commercial washers and dryers with models that begin as listed above do not have ANY labor warranty, Whirlpool Corporation policy allows for labor concession within 2 weeks of date of purchase (DOP) COIN MECHANISM REPAIRS • Whirlpool Corporation Independent Service Contractors are required to handle the repair/replacement of the coin mechanism on commercial laundry products that come factory equipped with coinslides. NOTE: Whirlpool and Roper commercial laundry have units that are coinslide equipped from the factory (see warranty summary). Whirlpool designated servicers must run all service requests. Coin equipment is warranteed on products factory coin equipped! For warranty repairs on these products contact Whirlpool at:1-800-NOBELTS, option 2. 62 Top 100 Parts Used in Commercial Laundry Rank Part Number Part Name Rank Part Number Part Name 1 2 3 4 5 6 7 8 9 10 11 12 13 14 15 16 17 18 19 20 21 22 23 24 25 26 27 28 29 30 31 32 33 34 35 36 37 38 39 40 41 42 43 44 45 46 47 48 49 50 3360629 3363394 3407152 3407158 285805 3954756 387868 285671 389248 3351355 3407149 63125 285792 285753 3952720 285852 3952164 279737 8316257 3946928 3949598 3407164 3950772 3360630 3387138 3407165 3360611 279570 3952709 279787 3363892 3402740 96743 3350151 279973 285790 8054980 383727 339392 387867 285785 8316437 285751 3950777 3955783 358277 8524807 285622 3355023 80040 GEARCASE PUMP-WATER CNTRL-ELEC SWITCH VALVE TIMER RING-BAL SWITCH-LID MOTOR-DRVE SCREW CNTRL-ELEC TUB-OUTER BASKTDRIVE COUPLING SWITCH-WL COUPLING VALVE TIMER LID TIMER READER-CRD CNTRL-ELEC SWITCH GEARCASE THRMST-FIX CNTRL-ELEC RING-TUB LATCH SWITCH-WL MOTOR-DRVE PUMP-WATER CNTRL-ELEC HOSE AGITATOR CUTOFF-TML LINING SWITCH-LID GASKET SCREEN CLIP CLUTCH SWITCH-PB DOG-AGIT CNTRL-ELEC TIMER VALVE TIMER AGITATOR TIMER DOG-AGIT 51 52 53 54 55 56 57 58 59 60 61 62 63 64 65 66 67 68 69 70 71 72 73 74 75 76 77 78 79 80 81 82 83 84 85 86 87 88 89 90 91 92 93 94 95 96 97 98 99 100 19119 3977289 3355803 3387134 285353 3387748 3355804 3947411 63849 357021 3358559 279347 356934D 358684 389140 3351136 385421 3391914 3951989 3954764 3362087 62697 661570 3387810 63806 3394075 18776 3407136 3389249 8528128 3390719 3390721 3390735 3394078 3359586 3395656 3357334 3355807 3406797 3407168 3407171 3352632 3351355D 341241 349241T 358276 3348552 3347034 3387975 388492 BUMPER CNTRL-ELEC HARNS-WIRE THRMST-FIX RING ELEMENT HARNS-WIRE AGITATOR TUB-OUTER CAPACITOR VALVE SWITCH-LID SEAL STRIKE BLOCK DOOR FUNNEL THRMST-FIX BASKET HARNS-WIRE SUPPORT RING BELT SWITCH-A&H RETAINER SWITCH-PB LOCK CNTRL-ELEC NUT INSERT FUSE-THRML SCREEN SEAL-DOOR SWITCH-PB SEAL-TUB MOTOR-DRVE SCREW SWITCH-LID TOEPNL SWITCH SWITCH SWITCH SCREW BELT SUPPORT VALVE HOSE BREAK-VAC TMR 60 C1 SPRING 63 ELECTRONIC CLAIMS PROCESSING Electronic warranty claims processing is available to help streamline and improve claims processing. ServiceBench serves as the collection center for claims submitted electronically and can process Customer, Stock, Rework and Policy Adjust/ Special Authorization and Service Contract claims. Remember that all claims must have the necessary information to pass both ServiceBench’s and Whirlpool edits. Please review the Narda format if in question. On Policy Adjust/Special Authorization: These are claims that a Whirlpool representative has given you authorization to assist in a repair on an out of warranty product. Remember all necessary information that is required on an in warranty document is still necessary to file a Policy Adjustment claim. If your current software package has a field for policy adjustment number please use this field for the 10 to 14 digit number. This number will be reviewed for validity by Whirlpool prior to payment. We are also allowing for claims that have a ‘Special Rework”. This 6-character number must be applied to each claim in the authorization field for review and payment. Claims submitted electronically must pass through a ServiceBench and a Whirlpool edit process. Warranty claims submitted with inaccurate information will be rejected by ServiceBench’s preliminary edit process. Whirlpool Warranty Processing’s audit process will reject claims with other inaccurate information i.e. incorrect rates, not enough tech verbiage on repair performed, etc. Please remember when parts have been used to repair a product, YOU MUST HAVE THE VALID DISTRIBUTOR NUMBER AND INVOICE NUMBER ON THE INFORMATION THAT IS SUBMITTED. It is important to remember that all claims, whether submitted electronically or on paper, are subject to the same edit process at Whirlpool. If you are dissatisfied with the results of the edits you should look first to the reject reason, and then to Whirlpool’s policies and procedures to determine how to submit valid claims in a way which will ensure that they pass our edits. ServiceBench does not reject claims - only Whirlpool rejects or pays claims. Contact the ServiceBench Help Desk for assistance in determining your requirements and ServiceBench’s options for initiating the electronic claims submittal process. ServiceBench’s Service Dealer Help Desk can be contacted by calling: 877-472-3624 or go to: http://www.servicebench.com 64 WHIRLPOOL SERVICE COMMUNICATION Date: January 24th 2003 To: All Process Partners and Independent Service Contractors From: Steven Zannos, Director of Field Operations Subject: Warranty and Service Contract Claim submission policy Changes The Service Bench claims processing toll has proven to be very successful in shortening the time it takes to process and pay Whirlpool warranty and service contract claims. Reject rates have been reduced from over 10% to less than 3% . . . an 80% improvement. Additionally, the time between claim submission and payment has been reduced from weeks to days. Service Bench has helped improve cash flow for Whirlpool’s authorized independent servicers, and provides Whirlpool with critical product warranty data in a timely manner. In our continuing effort to improve your service business cash flow and provide critical product warranty data in a more timely manner, Whirlpool is instituting a new policy. Effective March 1st 2003, all warranty and service contract claims must be submitted 45 days from the service completion date or they will be rejected. In addition to ensuring prompt payment to you, this process will allow Whirlpool to keep our customer and quality information up to date. Our manufacturing and engineering teams use this important quality data to identify and address issues that appear during the warranty period. If you have extenuating circumstances and need more than 45 days; you may contact the Exception Management Team at 888-678-8808. Your local Service Field Team can help identify and address any issues that may be slowing down claims processing and/or payment times. Whirlpool is also placing a renewed focus on receiving warranty and service contract claims electronically as we have seen the positive impact this process has on both servicers and our company. We are instituting a second new policy, effective March 1st 2003; in which all warranty and service contract claims that are not submitted electronically through Service Bench will be charged a $3 processing fee. Again we will make our Field Team available to help your business get set up with Service Bench and enable this change for the few who have not begun electronic submissions. Our goal is to get you paid quicker and gather critical product and customer data in a more timely manner. To further reduce the time it takes to have cash in hand for the Whirlpool warranty and service contract work you perform, you may choose to use the electronic funds transfer option. To take advantage of this free service, you must register with Service Bench on-line at: www.servicebench.com. 65 WARRANTY PARTS CLAIMS CHANGES Ongoing product improvement is a primary focus of Commercial Laundry. In order to facilitate continuous product improvement more complete information will now be necessary on part warranty claims in order to avoid warranty rejection. The additional information is vital in order to produce higher quality Commercial Laundry products. Commercial Laundry Parts warranty claims beginning April 1, 2002 will be subject to the same warranty edits as a product warranty claim. Each part warranty claim must have the following fields completed: NARDA FORM REQUIREMENTS (EXAMPLE A) Claims submitted to LaPorte Claims Processing Department must have a claim number of at least 7 digits. If more than 7 digits are present, only the last 7 digits will be recognized. If few than 7 digits are present, “zeros” will be added to the beginning of the number. In the case of a NARDA document, the claim number may contain both alpha and numeric with a dash and another character at the end. The last character, called a “check digit” number is either a number or an “&”. This character and the dash before it are not recognized by LaPorte Claims Processing. Only the 7-digit number before the “dash” is considered the valid NARDA number. Match the reference numbers below with the corresponding numbers on the NARDA BELOW. (1) Type service: NOTE: “Special Authorization” must be sent directly to LaPorte Indiana for processing. (2) Brand of appliance — Whirlpool, Roper (3) Type of product —washer, dryer, etc. (4) Complete model number (5) (6) (7) (8) (9) (10) (12) (14) (16) (18) (19) (20) (21) (23) (24) (29) Complete serial number Consumer information to include complete name, address and phone number Date consumer purchased Date consumer called for service Date you completed repair Consumer description of problem Complete description of what was wrong with appliance and service performed to repair Time started, completed, and total time to repair unit Selling dealer, distributor, builder, etc. Quantity of part(s) used Part number(s) used Description of part(s) used Failed motor number — See Special Procedures Section of Service Operating Guide (SOG). Distributor number. Distributor and store number will be the same for those distributors that do not have a servicer store number. You must show the FSP distributor number from which you obtained parts used to repair appliance. Failure to show distributor number may result in your being charged for parts. Your Whirlpool assigned Store Number as listed on Service Agreement or distributor number if distributor does not have a servicer store number. Invoice number is mandatory. Without an invoice number the claim will be rejected. 66 EXAMPLE A 67 REQUIREMENTS - NEW OCR NARDA FORM (EXAMPLE B) Match the reference numbers below with the corresponding numbers on the NARDA BELOW. (1) Consumer information to include complete name, address and phone number. (2) Brand of appliance — Whirlpool, Roper, etc. (See the parts filmcards for an updated listed of supported brands and model numbers). (3) Type of product —washer, dryer, etc. (4) Complete Model Number. (5) Complete Serial Number. (9) Your Whirlpool assigned Store Number as listed on Service Agreement or distributor number if distributor does not have a servicer store number. (10) Your account number with the parts distributor. (11) Consumer description of problem. (13) Purchase date of product. (14) Date service call was received. (15) Complete description of what was wrong with appliance and service performed to repair. (16) Date you completed the repair. (18) Distributor number. Distributor and store number will be the same for those distributors that do not have a servicer store number. You must show the FSP distributor number from which you obtained parts used to repair the appliance. Failure to show a distributor number may result in your payment for the parts and labor being rejected (formerly known as “Servicer State Number”). (20) Check appropriate block. (21) NOTE: “Special Authorization” must be sent directly to LaPorte Indiana for processing. (22) Quantity of part(s) used. (23) Part number(s) used. (24) Description of part(s) used. (25) Parts Total (service contract call). (28) Failed motor number — See Special Procedures Section. (29) Selling dealer, distributor, builder, etc. (30) Consumer signature and date. (32) Technician signature and date. (33) Invoice number is mandatory. Without an invoice number the claim will be rejected. 68 EXAMPLE B ELECTRONIC CLAIM REQUIREMENTS (EXAMPLE C) To file warranty claims electronically, register at www.servicebench.com. Parts distributors that also have a Whirlpool Servicer Store number must approve their own pending parts. These companies should file warranty claims using their servicer store number as the logon account. Once claims have been filed, logon using the distributor number. Print a copy of the parts pending file if desired, after approval the screen will delete. Approve all appropriate pending parts. (1) Consumer information to include complete name, address and phone number. (2) Brand of appliance — Whirlpool, Roper, etc. (See the parts filmcards for an updated listed of supported brands and model numbers). Complete Model and serial number. (3) Type of product —washer, dryer, etc. (4) Consumer description of problem. (5) Complete description of what was wrong with appliance and service performed to repair. (6) Purchase date of product, date service call was received and date you completed the repair. (7) Authorization number for labor authorized from Whirlpool for outside of the normal warranty (8) Distributor number. Distributor and store number will be the same for those distributors that do not have a servicer store number. (9) Your account number with the parts distributor. (10) Your Whirlpool assigned Store Number as listed on Service Agreement or distributor number if distributor does not have a servicer store number. (11) Part quantity and part number installed on the commercial product. (12) Invoice number is a required field. Invoice number must be filled in. For a parts distributor without a servicer store number, an “X” will suffice. 69 EXAMPLE C 70 PRODUCT DAMAGE CLAIM PROCEDURE NOTE: DAMAGE IN GENERAL IS THE RESPONSIBILITY OF THE PRODUCT SHIPPER NARDA CLAIMS FOR DAMAGE CAN ONLY BE SUBMITTED WITH AN AUTHORIZATION FROM THE WHIRLPOOL PARTNER TEAM 1-800- NO-BELTS / OPTION 4 71 SERVICE MANUALS & JOB AIDS COMMERCIAL DRYERS (CORE MANUAL CL-4 This core job aid covers basic product information and mechanical drive system service procedures for all current commercial dryer platforms including 27" and 29" freestanding, as well as commercial stacked pairs. This program is most effective if used in conjunction with Video Tape, Part #4314542. (For both new and experienced technicians.) LIT4314558 Job Aid $5.00 LIT4314542V VHS Video Tape $14.95 COMMERCIAL WASHERS (CORE MANUAL) CL-5 This core job aid covers basic product information and mechanical drive system service procedures for the current direct drive commercial washer platform. This program is most effective if used in conjunction with Video Tape, Part #4321690. (For both new and experienced technicians.) LIT4321689 Job Aid $5.00 LIT4321690V VHS Video Tape $14.95 EMS1000-2000 COMMERCIAL LAUNDRY SYSTEMS CL-6 This manual is obsolete. Service information for EMS1000 and EMS1000 have been divided into separate manuals to better serve commercial customers. For service information on EMS 1000, see literature part number 8178137. For service information on EMS 2000, see literature part number 8178138. LIT4322251 Job Aid $5.00 ADVANTECH™ SERVICE MANUAL CL-7 This job aid covers all details of the ADVANTECH™ line of commercial electronics including theory of operation, service routines, diagnosis, troubleshooting and component access. Mechanical systems are not part of this manual. For mechanical system service see job aid 4321689 for commercial washers and 4314558 for commercial dryers. LIT8178077 Job Aid $5.00 DIRECT DRIVE WASHERS L-55 The objective of this Job Aid is to have the technician become familiar with how the direct drive washer operates, how to disassemble the washer and how to diagnose problems. This Job Aid is most effective when used in conjunction with Video Tape, Part #787929. LIT787930 Rev. A Job Aid $5.00 LIT787929V Rev. A VHS Video Tape $14.95 ADVANTECH™ SOFTWARE MANUAL CL-8 This software manual covers all details of the ADVANTECH™ management software including installation, system requirements, Palm specifications and operation, audits and reporting. Also included with the manual is a complete ADVANTECH™ literature cross reference. Part #8524745 PC User’s Assembly contains one 8524743 and one 852477. LIT8524743 Software Manual $15.00 LIT8524744 Software CD $15.00 LIT8524745 PC User’s Assembly $28.00 72 COMMERCIAL RESOURCE SAVER CL-9. This job aid covers all details of the Commercial Resource Saver including theory of operation, service routines, diagnosis, troubleshooting and component access. LIT8178129 Job Aid $5.00 EMS1000 ELECTRONIC CONTROLLED COMMERCIAL LAUNDRY CL-10 This job aid covers all details of EMS1000 series of Commercial Electronic Laundry including theory of operation, service routines, diagnosis, troubleshooting and component access. For drive system service see job aid 4321689 for commercial washers and 4314558 for commercial dryers. LIT8178137 Job Aid $5.00 EMS 2000 ELECTRONIC CONTROLLED COMMERCIAL LAUNDRY CL-11 This job aid covers all details of the EMS 2000 Card reader equipped series of Commercial Electronic Laundry including theory of operation, service routines, diagnosis, troubleshooting and component access. For drive system service see job aid 4321689 for Commercial Washers and 4314558 for Commercial Dryers. LIT8178138 Job Aid $5.00 LARGE CAPACITY THIN TWIN LAUNDRY SYSTEM L-56 This Job Aid covers installation, operation, service access and technical information highlights for the Large Capacity Thin Twin Laundry System. This Job Aid is most effective when used in conjunction with Video Tape, Part #4314125. (For technicians with previous laundry service experience.) LIT4314124 Job Aid $5.00 LIT4314125V VHS Video Tape $14.95 EMS ELECTRONIC CONTROLLED COMMERCIAL LAUNDRY SERVICE MANUALS This manual contains information necessary for servicing the console and associated electronic components on the below models. Mechanical systems are not part of this manual. For mechanical system service see job aid 4321689 for commercial washers and 4314558 for commercial dryers. Washers CAE2791AW, CAE2792AW Dryers CEE2990AW, CGE2991AW Stack Dryers CSP2790BW, CSP2791BW LIT4321864 Job Aid $5.00 73 INTERNET SUPPORT New Users of Whirlpool Webworld Go to www.whirlpoolcorp.com/cltpsc and follow the instructions to register as a new user. Use either your servicer store number or sales account number when prompted for an account number. The new password should be a maximum of 8 characters! The Internet will be the key component in communication to our Valued Commercial Laundry Customers. Commercial Laundry Technical Training An Internet based training session schedule is posted on the Trade Partner Support Center Web and shortly on coinop.com. Servicers may participate in 2 ways: 1. Join the live phone teleconference by calling 1 (877) 437-9971, participant code 6169234714. Ask product questions; offer input LIVE during the Internet presentation. 2. While participating in the teleconference, join us at www.whirlpoolcorp.com/cltpsc, then TRAINING, then TRAINING LOGON.. Registration for Internet Training Events Register for sales training by choosing one option below: 1. Sending an email to: [email protected] 2. Calling 1 (800) 446-2574, extension 4714 3. Submitting a registration form from www.whirlpoolcorp.com/cltpsc, then TRAINING, then TRAINING REQUEST. Service Updates Service Updates for Commercial Laundry are available on the Trade Partner Support Center at www.whirlpoolcorp.com/cltpsc, then TECHNICAL INFO, then SERVICE UPDATES. Field Training Commercial Laundry Field Training may be requested from the Trade Partner Support Center, www.whirlpoolcorp.com/cltpsc, then TRAINING or by email or phone as listed here: 1. Sending an email to: [email protected] 2. Calling 1 (800) 446-2574, extension 4268 74 -- NOTES -- 75 -- NOTES -- 76 U.S.A. — ONE STOP FOR COMMERCIAL LAUNDRY SUPPORT 1-800-NO BELTS — (800 662-3587) Internet Support AUTHORIZED COMMERCIAL LAUNDRY SERVICERS & ROUTE OPERATORS OR DISTRIBUTORS Commercial Laundry Link WWW. WHIRLPOOLWEBWORLD.COM NEW USERS FOR ACCESS TO THE TRADE PARTNER SUPPORT CENTER GO TO: WWW. WHIRLPOOLWEBWORLD.COM REGISTER AS A NEW USER AND REQUEST THE COMMERCIAL LAUNDRY LINK, OR CALL: 1 800-NO BELTS > OPTION 1 TO ORDER LITERATURE OR PRODUCT AND WARRANTY INFORMATION: 1 800-NO BELTS > OPTION 2 or HTTP://CLTPSC.WHIRLPOOLCORP.COM TO ORDER COMMERCIAL LAUNDRY PRODUCT: 1 800-NO BELTS > OPTION 3 FOR WARRANTY CLAIMS STATUS OR PARTS BREAKDOWN INFORMATION: 1 800-NO BELTS > OPTION 4 or HTTP://CLTPSC.WHIRLPOOLCORP.COM TECHNICAL ASSISTANCE FOR ALL WHIRLPOOL COMMERCIAL LAUNDRY: Have your store number ready to identify you as an authorized servicer 1 800-NO BELTS > OPTION 5 FOR PARTS ORDERS: 1 800-NO BELTS > OPTION 6 Refer Consumers to: WWW.COINOP.COM Contact for the Technical Communications Manager for Whirlpool Commercial Laundry: 1-800-446-2574, Ex. 4268 Commercial Laundry Products