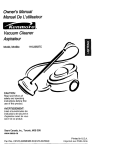
1
Vacuum
aner
116o25614
11&256!5
Model_
Before
returning
the8 product-
Sears Parts and Repair Center
(1-800-488-1222 }
At ytime, day or night
(U,S,A on_y}
Ee£a
#4e
costact;
Vacuum @eaner Neap Mr_e
( 1-877-531-7321
}
7:30am,*4:00pm ES_ M_F
(USA. and Canada)
Read and foiiow all
safety and operating
instruct ons before first
use of this product
Sears, Roebuck
www, sears,com
and Co
Hoffman
Estates
_L 60179 U,SA.
Pr nted in Mexico
....i '_
_ /
Part No_ C@IZCYN2©UGO_KC©
_';
_....
1ZCYNZ@U@
Canteter
Before Using YouF New
Vacuum Cfeaner
....
2
Kenmore Vacuum Chaser Warranty
S
important Safety hatructioas
Parts and Features
4
5-6
Assembly
Instructions
Power-Mate Jr,? Storage
7.s
8
Operatng
Inetrueions
How to Start ................
.........
9
9
Vacuum ng Tps .............
10
Suggested Pile t@igbt Betti; I
.........
11
Attac} ments
11
AttachrT eat Use E_bie ...........
12
Perler'mance Feat ires ........
12-13
How '_1a_,_r
Vae_um Cleaner Wo_ks ........
14
Care
....................
Bag Char 9 n9
C/ean_ g ExteAot and Attach _Ae_ts
Moto_ Safety Fire' C _angi _g .........
Exhaust Fiter Chang ng ..........
Power-Matd
_ Oa_e ............
Requesting
Or Service
R,_vlse ,_1,, r8cu
14
I5
I5
16
serv cia debe 5e
17
Belt Chang n9 sos Agitate_ Cleaning
L ht Bub Changing ..........
AIi ato_ Bervich'_g .....................
Traubleahootln9
t4
Desconect÷
IS
17-18
'8
19
............
2o
Assistance
,,I illi/llOll
IC' t*4r
,I
8I a's8
Back Cover
Please read ttAs g_,Ade It will help you asset _b e and c persia your new Kenmore vacuum
c aaner in tie safest and most effective way
safe.
For mere irfformation about vacuum cleaner care and operat on cal your Nearest sears
o
'_::_uwll need Ihe compete model and seral nurrbe s when aquesti_sg nformat o_ Yas_ 'vacu_rr_ c eaner s model a_d serial r Jmbers are located on the Mode a_ d Seral N_,srx_berPlateii
Use the space betow to leco[d the model numbe
vacuum cleaner
and sepal
all)I
[II10
fl_llllI
Ie Ipagl,
u T_ber of yaw new Kenmore
Model No .........................................................................................................................................................................................
¢_5a_d_ II
;_It
I d
Sera/Ha
Date of P_ rc_ase ..............................................................................................................................................................................................
Keep ths back _rd your saes check (fete pI) n a safe p/ace for f _tue rafer_ce
PI£IS:R£_,!__
:................
Li
I!
1it lI
i/tti
lillIilll>
DI
II
IIIii
When assembled
operated
and ma stained
according
to aH nstructions
supplied
with
the product, if this vacuum eIeaner faits due to a defect in materia or workmanship
within
one year frem the date of purchase, return it to any Sears store, Sears Parts & Repar
Center or ether Kenmore out_et k_r free repair_
If this vacuum cleaner is used for other than pdvate family purposes
appies for only 90 days from the date of purchase
this warranty
Th_s warranty
pay for:
Sears
1.
covers
only
defects
in matar/a_
and workmanaNpo
Expendabie terns that can wear out from normat use, including
fi tars. belts, _ight bulbs, and bags
2. A service
techn{cian
to instruct
¾
the user in correct
product
but not limited to
assembly;
3
4
A service technician to c_ean or maintain ths p oduct
Damage to or fa_ure of ths product f t s not assembled,
5
according to a[I instructions suppiied wth the product.
Damage to or failure of this product resulting frem accident,
other than its intended purpose
w#/NOT
operated
abuse,
operation
or
or mainta ned
misuse or use for
6
Damage to or faitur\e of this preduct caused by the use of detergents, canners,
chemicals or utensits other than those recommended
n a_ nstructions supp ied wth
7
Damage to or failure of parts or systems
made to ths p_oduct,,
result ng from unauthor
Hmitat_on
zad rrodif cations
D_solaimer
of _mpHed warranties;
of remedies
Customer's
as provided
see and exc!usive remedy under ths imted warranty sha/t be product repar
herein, Imp/ed warrant es, incbJding warranties of merchantab _ty or f tness
fera particular purpose, are lira ted te one year or the shortest period a _owed by _a/w.
Sears shat not be _able for incidental or consequential
damages
Some states and
provinces do not allow the exclusion or t m tation of nc[dentat or consequential
damages,
or lim tstions on the duration of imp ied warrant es of merchantability
or fitness, so these
exclusions or Imitations
may not apply to you
This warranty
appties only wh/e this vacuum
c_eanar is used in the United States
This warrant}, gives you specif c legal r ghts, and you ms.}/s/so
vary from state to state
Seare, Roebuck and Co., Hoffman
Estates, _L 60179
Sears Canada _nc_,Toronto,
Ontario, Canada M5B 2B8
have other rghts
and
which
I
Read alt instnJctions in this ma_ua before
assemb tag or usng your vacuum c_eaner_
Use extra care when cleaning on stairs Do
not put on chairs Ssbtes, etc. Keep on
floor
Sears recommended attachments
check or brash sudderfly starling
Do r_ot bare vacuum deana_ when
plugged !n Unp!eg from out_et when not in
use and before servia ng
To reduce the dak of etectdaa_ chock _ De
net use outdoors or on wet surfaces
Do not allow to be used as e toy Case
attention is necessary when used by or
near children.
fumes from these subahenees can create a
fire hazard or expiosion
hot ashes
De net use vacuum c eaner without dust
bag and/or filters in place
the bag reduce airflow and car cause the
bag to burst. Fatlu_ to change bag ooud
cause permanent damage to the vacuum
c_eaaeK
De set use th® vacuum cteanei to pick up
Do no_ pu}/o_ GsrO/by cord, use cord as a
handle_ cbse door on co_x3 or put card
around sharp edges or corners. Do not _an
vacuum cleaner over cord. Keep cord away
from heak, d satiates.
Do not unplug by pu/_ing on cord To
unplug, grasp S_tep_ug, not the co_d
The heae can_lns electrical wires. De sot
De not hande pie or vacuum cleaner with
wet hands.
Do not put any ob eats into openin9s
De not use with any opening Mocked keep
free d dust, _nt, her and anything that may
reduce ai_ew
Keep hair/ease clothing, fingers and all
parts of body away from openings and
moving pa£s.
Turn off aH controls before unp_ugging_
Or nezzfe_
You are respons ble for mak!ng sure that
your vacuum cleaner Is '_ot used by anyone
unable to operate it propedy,
THES£
Proper assembly and safe use of your vacuum cleaner are your respor!sibitities
Your vacuum cf6aner is ntended for Household
use. Read this O:,7¢ners Manua
carefully for important
use and safety informaton.
This guide con_ns
safety
statements under warning and caution symbols_
It is important to know your vacuum c eaners parts and features to ensure ts proper and safe
use. Revew these before usi_g your vacuum cleaner.
Part No,
Part No
in Canada
205240
20-40600
20,-5218
20-401 I 8
Style No,
Headl gt t Bub .......
_-
Handle
Qua_k
ReMese
Bu_ton
Telescoping
Wand .................................
...........
W_t.w_
d
Length
Adiu £
B_, ton
Be_
Handfe
Release
Peda£
Part No
in USA
20-50557
Dast Bag
Exh.,ust Fiter
Moto
Pai't: Nm
in Canada
SaFety [:i[ter
Hood
2040324
C[,:..i
20-,,,_6883
strutPlease pay speca a tention te these hazard a[et boxes and blow any Y_'
tions gven,
WARNING statemen s abrt you to such dangers as fie eectrc
shock, bums and personal njury CAUTION statements aert you to such dan9ers
as persona njury andor property damage.
H_ndle
EIectdcai
could
Shock Hazard
resutt
_n e_ectricai
shock
or
L_ck
B u#en
Beb_e asse_r bl ng vacuum cleaner check
rise RACKING UST on he cove_ of the
separate REPAR PARTS UST. Use ths/st
to verfy that you have rece ved at/the
compor ants of your new Kenmore vacuum
fhe wand I,rg_h is
adiustab e and
_equ es u_o
K_,_e
D
Hand
Above
This
Tab
adiust simls/y
push dow_ on the
wand adjusl b/.4tou_
and slide the
Wand Length
Adjust B#_to_
upper wand to the
desired height
Tte swve, o(:ated
on the PowapMa e%
slows you to tuns
the handb to the eft
sde to reach farther
under low fumit _re.
Whe_/ad ustirlg rite
wand tength you
nay have te hod the
your hard
W_nd
or foot.
ksse4 wand ino Power Mate '_'until the wa_d
button snaps into [ace,
]i} remove: Step on wand release pedal:
then pul up on wands,
7
I_ Open the ca _eer hood
2 Check to see that _e dust bag s prope_
}y nsta eG See BAG CHANGING for
3_ Check to see that the _oto_ safety fIie_ s
properly nsta ied. See MOTOR SAFETY
F_ETER CHANGNG
for _ stluctk:',_as
HOOD AND TOOL
STORAGE COVER
1. Lne up the hose
latch tab and notch
n can ster hood
and insert hose
rite caniste unli t
snaps n place,
To remove: Lfi
hose latch tab
upward and put up
on hose_
/t s normal t0_ the can ster hood and too
stopage cow_' to come off wher_ opened Iur_
ther than needed Lne up the hinge sot%
nsert the hngee rite the stets, and c_ose
the hood and too/storage cover to reinstal _
2 Insert hande
nto wand _nt/
ock button
L,ock
Never open canister
storage cover open
hood w_th the too_
This will he_p to
Neath
Haadte
Qu#k
snaps in piece.
Be sure hose
ie not twieted_
To ten%ore;
Press
quck
button
up on
handfe
re ease
aF_dpul
hand e.
To store:, D seonr ect hose from wands and
can ster ts prevent stress on hose durng
storage
Store hose n a oosey coied
position so the hose cover n 9 s _ot
stressed
[hs carfister s equ pped wiih an on,board
stoiage area for a PoweroMate Jr _÷
attachment.
To _nstalt:
Open the Power-Mate J_.:_storage cover,
nsert the Power,_Ma_e JrP press down nto
place and close the id securely.
'To Removes
Open the storage cover Remove Power°
Mate Jr _'_
from the storage area and use as
needed (see ATTAOHMENTS and
A_ACHMENT
USE TABLE)_
Powet-MaSe J_
a_otage Cbver
OPKRATING INSTRUCTIONS
Personal
Hazard
_niury
and
Product
Damage
DO NOT piug in if switch is in ON
position
Persona[ _niury or property
damage could resu_L
o The cord moves rapidly when
rewir_ding Keep children away
and provide a c_ear path when
rewinding the cord to prevent
personae _n]ury,,
_:,,d
3 Lower wand from uprght position by
press ng on the handle release pedal,
DO NOT use outlets above counters
Damage from cord to items in
surrounding area could occur.
DO NOT reave the Power Matd _
1o Pu_/cord out
of can ster to
des _'ed sngth_
The cord w/
not _ewnd untl
the cord rewad
button s
NOTE: ]b reduce the rsk of e/ectr c shock
ths vac._um cleaner has a po a zed plug
one bade s wider than the other Ths pug
wl fit n a po arzed o._}et sty one way./f
the gug does not fit fully in the out et,
reverse the pug, !f t still does not ft, corn
tact a q_,atif ed electrc an to rstat the p_op ....
er outeL Do not ct ange the pug r a_y
running in one spot in the upright
_esit_on for any length of time_
Damage to carpet may occurs
4_ Seect a pie i_eight sett ng by pressir g
the srna! pads! o_ the rea_ of the Powea
Matd _ The pie ieg tsettng
shows oi°_the
ndicato_ See SUGGESTED PILE HEIGHT
Attention:
Refer to your carpet manufao
ture_s cieanng recommendations
Some
more deica e carpets may requi e that they
be vacuumed wth the Power-Mate '*_ag tater
t_med off to preys4 carpet damage
_e sol _ swtch po,a._.
[4a:;<<.
2 PI;ug the p( [adzed power cord into a 120
V0lt out/at/oc_ ted near the floor
If
B
....
ton on tt'e handle,
I
............. I
To rewind: Unplug
the vacuurn c saner.
Hold the p_ug whle
rewinding to prevent
damage o ir/}u y
from the moving
cord. Pus_ cord
rswnd button.
FLOOR _ turns on t"_ can star motor shy
_
(
5:<
CARPET _ turns or both the canister and
the Power,Mate
roots s.
NOTE o When this switch s in the FLOOR
posit or< the headlight and dirt sensor DO
NOT function since no electr city lows to
the Power,oMatet
Suggested
sweeping
pattern,
For best c/can ag action_ the PeweroMeW ¢
soukl be pushed slraight away ffon yo
and Died straighl bacL At the end of each
pall shake he di_ecton of the Power,Mate "_
should be changed 'to pont rto the next
sect on to be c!eaned Ths pattern should
be co _t nued across the carpet wth sbw
gldng motions_
results, fu/y case
the suct on cont_o/
Personal
NOTE: Fast,
erky strokes do
not provide
complete clean.-
hiury
Hazard
Use care if canister is pbced on
staIra_ _t may falI_ causing peraonal
injury or property damage_
Product
T_hehose swve
a/Iowa t_e hose to
Damage
Hazard
Do not pull an the hose to move the
canister from one stair to the #e×t°
When fin_shed ebaahg
in one area
use the handb grip on the canister
to move the vacuum cleaner to a new
turn wit_ oat moving
the canister Ths is
he pfut k)r cbae ng n
srat areas, Check
bcatioa
hose fer twist ng
before pulng can sten
far further
charting
The tair grip Iocated
en the ,a_tar wil aid
in preventng t e
canister from
Product
Damage
s ipp ng whe_ used
}n stairs (see
Hazard
Use care If the Power@_ate
and wand is
bft in the upright position as it may tip
over easHy_ Property damage can occur
if tipped.
Persona[
Hazard
[nlary
and
Product
NOTE: Be sure the canister is 'estin 9
securely on the stars and the caster s
locked posiio _ before uing
a
For best charting
resu_ta, keep the aidlow
passage open Check each assembly area
n HOWYOUR VACUUM CLEANER
Damage
WORKS oceasonaly
br etogs
from outlet before check[ago
DO NOT run over power cord with
PoweroMate5
Peraonal [niury or
product damage could resu_L
o DO NOT pull plug from wall by
the power cord, If there is damage to
the cord or plug, personat iniury or
property damage could result.
10
Unplug
Forbestdeepdowncleanrg usethe XLO
settiryoHowever,youmayneedto raisete
heightto nake someiobseasiessuchas
scatterrgs andsomedeeppie carpets
andto preventthevacuumdeane floom
shuttn9 off Suggestedset n.gsare
HI_ Sha!:_deeppe or scatte rugs.
_aED Medumlo deeppie
LO- Lowto mediumpie
XLO_ Mostca@etsandbarefoo_s
7(} reiTiOVe
pess latch
ad ilt out
DONOTattaehor removehandleor
wands while vacuumcteaaeri_ ON_
This co_d causesparking and damage
the e_ectrtea_ ce_taets,
Laeeh
OHMENTS
ON HANDLE
ATTACHMENTS ON WAND
NOTEs _fthe
Powe _.Mate_ s
attached t_r_
1 Te
wand from
Power_
Mate®_ eek
wand _
e_ off bebie
lemovir 9 hart
de tom
wands.
1, Press ham
relea e butto_
and pu
handte
ul} on
2. Press wand quick
re ease pedal wth teet
and pu/the wand
stra ght _p and out of
Pewer Mate%
2, SIide a£tachments
frmy on handle as
needed See ATTACH_
MENT USE TABLE.
]is assemb e
Brush
dusting brush
insert the fabrc
brush into the
3 Put attachments ors war_d
as needed See
AT_CH_4ENT
dust _9 bwsh
nto place.
Fab#e
Brush
1t
I Aways cean attachme_ts beb_e usng on fabdcs.
2_ 3_way On/Off swteh should be in FLOOR position.
3. Some Modes Hand mate Jr@ and Power_mate JrX_) attachment
wt_ the pred,,_cts
4, Power_Mate Jr. can on_y be used on the hose _andle
OVERLOAD
nstructio_ss are included
PROTECTOR
The PoweroMatd _
Or®tread
Pror_c¢off
protect on age nst
motor and belt
damage sheud the
agitator jam !f the
ag tater slows down
or stops, the
ovedoad pretector shuts off the Power °
MatdL T_e can ster mote wi cent hue to
ruR_
EDGE CLEANER
Acre brush edge
cleane s are on botts
sides of the Powep
Matd '_ Gude ether
sde of the Power
To correct problems Turn off and unplug
vacuum cleaner, remove obstruction, then
press BELT RESET butten. A bati _oint
pen may be requ red,,
_f the p_oblem pe_s_ste, have the
vacuum cleaner serviced by a Sears
other qualtfbd
service agent,
Mate ®along base.,,
boards or next to
rum ture to help
remove drt trapped at
carpet edges
or
12
SUCTION
CONTROL
POWER°MATE
The suctiel
control al!ows
The wa_d has a U' shaped
fangs that sides into
the _U*_shaped sot on
the canister.
you to c sange
the vsc[ urn
s Jction for
d fferent fabr cs
The flange allows the
wands and Power_
Mate@to be stored wth
the canister to
s_cdo_
and carl et
weights. Oper/ng fhe control decreases
suction for draperies arid lig_twe ght rugs
whie clodng the contro ncreases sucton
fo' upholsteries a_d carpets.
PERFORMANCE
conserve storage
space The canister
must be stored on erd tot
tiffs eature to be used
NDICATOR
charier is running
with normat sift ow,
the light on the
problems
STAIR GRiP
D Jr n(_ no_mal el: erat cn while te ca*s ster is
in t/_e ho_ zonia [_os t ( "_ the caster wheei
rotates freely 360.
The Star Grip
feature slews
the caster
wheel to lock n
See the TROUBLE°
NOTE: The ght may come on when usng
certs n atta(h_e _ _, due to reduced arrow
through attachme_t
THERMAL
_%
The wand wfl sip out of he slot as t is
fled up fer use and w/l sde into the stot as
it is towered for storage
is oE The
}ight cemes on
whenever the
aifftow becomes blocked
If that occurs,
check the disposable dust bag, motor
sdety fiter and other possible c_og
oeations shown in HOW YOUR VACUUM
To correct
:_%_;
[b attach the Power Mate _ t must be i_
the flat post ors as showr_ in the
ilustraton
Use the handte rebase pedai
to place it in this pos tion
When the vacuum
indicator
STORAGE
t_e vacuum
c ee _er s
rotated 25 '_
PROTECTOR
\
"
from horizon a/no a vertca/postor_
o_der for tke canister to _est of slats
]his vacuum c saner has a t _erma/
protector which automat ca y trps to isretect
the vac um ceaner from overheatng
If a
clog prevents the norms flow of air to the
motori the t }ermal protector turns the
motor off automstically: This aI/ows the
motor to coo_ in order to prevent poss bie
damage to the vacuum cieaner
To correct p_oblem: _Jrn the vacuum
cleaner off and unplug the power cord
from the cutter to allow the vacuum
cteaner to coo_ and the therma_ protector
to reset Check for and remov÷ clogs, If
necessary,
Also check aad replace aey
clogged filters, Wait appro×imate_y
thirty (30} m_nutes and plug the vacuum
c{eaner In sad turn back on to see _f the
motor protector
has reset,
IS
n
The vacuum c eaner creates suction that
pcks up drt Rap dly movng ar carries the
dirt to the dust bag through the airflow pas_
sages The dust bag lets the ar pass
through, whe it traps the dirt.
Fer best cIean ng resuts keep the airflow passage open. Chock the starred
areas oceas onaHy fer clogs_ Usp _g
ifore outlet belore checkr g,
CANISTER CARE
Rsr best clea _ing results the dust bag
should be changed often Tfe e[ectrenic
perfomance
ndicator wil corne on when
the bag needs to be changed or the afow
s b ocked
7 The red bag mou°_t wt[ flip feauard afte_
removing bag, This wtl prep/ant the hood
from closing uati a new bag s installed.
Nots;
DO NOT bend or crease the middle
of the cardboard when hstaHisg
_nto the bag mount slotso
NOTEs See PARTS AND PE;_TURES fist
Bag Number,
the bay
& Rotate red bag
mount down and
rata _bag nto stots
per i k_stration,
pshng
down unti
the cardboard tab
1 Unpugcord
2_ ReMove hose
from canister
/7
Iocks nto poston
and the hoes align.
fbck tie bag
secure y into the bag cavity so that none of it
s able to be pinched by the hood
3 Pu! rood
release o£ and up
then ft carfister
hood
4 Dise_ gage
cardboard tab from
g Cbse and Iatcs can sler hood.
red bag mount by
puifir_g away and
fling up.
10. Re nstaIl !one
11_ Plug cord into wa[ outlet
5 Pu/bag out of
the red bag mount
NEVER REUSE A DUST BAG, Very fine
materiats, such as carpet fresheneB
face powder, fine dust piaster, soot_
new carpet lint, etc° can clog the bag
and cause it to burst before _t is full and
6o Cfeck the
motor safety
fiiter and
replace, if
may cause damage to vacuum cleaner
motor. Change bag more often when
vacuuming
these materials
t4
1_Ueptugcordfromwa/autbt DONOT
drlp water on vacuumcleaner
2 Cleanexteriorusng a c[ea%softcloth
thathasbeendpped in a soIut(n of md
tquiddetergentandwater,ther_wrJngdry_
W_)edry afterc_eaning,
3.]b redtce statc @celticty anddusttuldo
up wipeouer surlaca01va';uumcaarer
andattache'ants
Electrical
Do no[
use attachments
if they are wet
Attachments
used In dirty areas, such
as under a refrigerator,
should not be
used on other a_rfaees until they are
washed_ They co@d _eave marks
Shock Hazard
2_ Lit the _ Jbber
Unplug power cord from electrtca_
outleL Do not operate the vacuum
cleaner without the motor safety fi_ter.
Be aura the filter is dry and p_opedy
installed to prevent motor failure and/or
e_ectdcai shock
MOTOR SAFETY
reta nor and pull out
moor salety file_' as
show_
3_ Rap ace the ftter,
white side out, %cng
the dust bag by sdng
t back ht( pace _nder
the _bs _the bag
car y. TL_ckfter r so
that t fts complete y
under the r _bber
retainer
FILTER
This liter meat be replaced when dirt!! t
shoud be rep aced ragu a_ y depend ng on
_se canal[arts
The fiiter CANNOT be
washed as it win lose its dust trapping
NOTE: See PARTS AND FEATURES
Motor Safety Filter e msber_
1 Remove the bag as eutined
CHANGING sect on.
for
4 Replace the bag as x£1 ned in the BAG
CHANGING sectors
in the BAG
15
£ Put the exhaust
-- £xhaa_s_
M#_¢
EXHAUST FILTER
exhaust f!ter
ca trdge
Pace
tse new filter r}to
the can ste_ with
the foam seat
_he exhaust fte_ cart'dge tT_St De
a@taced when d rty,, Replace the fi!te_ w°_en
the entire surface a_ea is cove_ed eve@y
The flte_ CANNOT be washed as it will
lose its dust tFapplng
fte_ up and out
from he _ear of
the can ster
facing towards
ability,
NOTE: See PARTS AND FEATURES
Exhaust Fter r_umber,
for
,i£iA_.....
,_,................
_
_"_NI
_4,1_
1_ Pu OUt and
e×haust
4_ Repack}
flel thecover
by p a(ir g the two
tabs a_sth_'_flte_
cover into the slots
fore
up o__he
the
can ste_ and lay
aside
_otate nto place u_t/
i
"\
,,_k,
7%bs
1t
oe
it st'laps
the canisler
ck sed. and
POWERoMATE
Always foitow aH saety
EJectdcal
CARE
p ecaut o_ s wher
Shock Or Personal
iniury
perk>rming maintena
ce to _e PoweeMate _
Hazard
Disconnect
electrical supgly before pe_orm_n9
Fa[iure to do so could result in electrica_ shock
maintenance
to the vacuum cleaner
or 9erso_a_ [niury from vacuum thanes'
TO REMOVE BELT
2 Unscrew the
"TI_,
e ag_tat(
,
r Tust ase be creased accorG
ng 1o the lot ow ng scsed _e
screws
HEAVY
3 lhm
Powep
eve_7 week
(used day)
Mate e right sde
up Pess hartd e
reease peda and
lower the swve
Lilt rear [atct_es
MODERATE
every rr_o_th
0, sed 23 t n es/wee9
UGHT
every 2 mot ths
(used 1 time/week/
Sfde
La_ch
Re_r
L,a£ches
Bisco_"mect
vacuum
c_eaner from
electrical out_eL Check anc emove a_,
strng and/nt b ild,,up frequently i_ t_
PowepMate "u_agitato_ an_: end cap areas.
4, ]b remove cover
grasp the sides and
pu_ out
Remove any drt or debris in the be_t path
area or n the brus_ roler area
Ca_efuily remove any strng or debris
located on the ag tator or end caps.
5 Lift agitator
assembly out
and rerTove
worn bell
I
6, Check and ciean end cap areas, See
AGITATOR ASSEMBLY for p cture of
compete agitator assembiy
End
Cap
Brush
17
Un_
TO REPLACE
3. Line up
front of
cover and
base. Rest
BELT
t_lnstatlnew
belt over
_es
cover
o_
fl_snt edge
of base as
over
showi%
belt pu _ey_
e_ve¢
BaS¢,_
NOTE_ See
PARTS AND
End Cap
[_}%
_ii
Side
£a_ch
2_ Place ag tator
assemby back nto
Rear
_ 4 Rotate :over
back, Press
overard
frmlyrearuafi
sde
latches snal}
into pace
Latches
Make sure t_ere s no gap between the
cove and base_
5 R,lm Power Mate ups de dow_"_and
re@ace two (2} cove_ screws
3 Push in and t,_rn
buib cbckwse
to
repace
Bub must
not be higher than
15 Wal_s('130 Volts}
1_ Remove Power*Mate ® cover as shown r_
BELT CHANGING AND AG_
R
CLBAMNG sect on.
2o Push n and tun
b@b countercbck_
wee, thes p@/out
to remove.
4_ R@nsta/I Powe Mate ® cover as shown
BELT CHANGING AND AGITATOR
CLEAMNG sect on
NOTE: See PARTS AND FEATURES
bulb I_umber_
18
for
n
TO REPLACE
EIectdcal Shock Or Personal Injury
1, Remove Power°Matd _ cover e/t and
ag}tator assembiy See 7b Remove Belt' n
BELT CHANGING AND AGITATOR
Disconnect e_ectr_ca_
supply before per°
fo_min_ maintenance
to the vacuum
cleane_. Failure to do so coutd result in
electrical shock
vacuum cleaner
or persona! injury
suddeniy starth9.
2, Replace ag tater assemb y:
from
3 ReinstaI! bet and Power Mat_0 cover.
See "Tb replace bet" n BELT CHANGING
AND AGITATOR CLEAMNG,
TO CHECK THE BRUSHES
-
AGITATOR
-.-.,
_-:::::.!
......
When brushes
a'e worn o the
/eve of the base
support ba_s
rep ace the
19
Revew
this tabie to frd
service needed
de
yours@I so t,_ions Ior miner perform<msc® proNems
AW othe_
s_o@d ba pe£ms ed by a Sears or off" e_' quai fled sarv ce agent
2,
iri@<,<l }v_Nov! B_'eb?cio i,
110_ii ,Ii111
I,
P;£
[lqy
t_s
ONlOFFswtch_oON
2
Remuw? #t_y i_8@5t_t may De 8£ >!_h
e jamm_x_, then @set I wmmsm I<<an8
b_g /;<,et
3, Re_@[I! em_al !>m_sc 0'
P;_t_otml_
_;1_ V_te9
<
Inll tat_>[
1, Fu/o @:_!_gt_d
dus t;@
brly filte_s,
I, O _ _e Dag
20nangm
Ibs
4
4, [%i i_hotma
Ce4sm 8tt_clme_}1bos
!
<;i'_9e 9hi b;/t,
1, C_m
20
[xghl,eNd
tie
))we{'c_d
gO Of
s_¢
!/!i i¸}I¸ !i?¸!Lii
Your Home
ia s_ill I iii
ii_;iI
i!ai_i_
__3}
ill
!i'!' _
For repair - _n your home o of oil meier brand appliances,
lawn and garden equipment, or heating and cooling systems,
no mailer who mode it, no mo_er who so_d _tl
PdPill
v
For the replacement ports, accessories and
ownees manuab that you need to do it yourseff,
For Sears )rofess anal installation of home appliances
Li
a
S ¸
!
it i_
i_,ii_/}!i
and items like garage door openers and water heaters,
Vb¸
ii_a _ _
e
s
sai
(U S,A, add Oanad@
w_w.
e r_ii!
!!i!
ww_wos÷are,ca
_com
i!i!!i!a!a _
ii_L3iai
Our
Home
For repair of carryqn products like vacuums lawn equipment,
and electronics
call or go omline for the nearest
Sears Parts and Repair Center_
1_800_488o1222
Anytime, day or nght (U S.A, any)
To purchase a protection
or maintenance agreement (Canada)
agreement (U_&A,)
on a product sewioed
by Sears:
Au Canada pour servi_ en fra_s(?ais:
i
i
WWW_S÷8_ ca
@ Seam, Roeb_c_ af'_dCa
® Rag}stared Trademark / ' 'Trademark / _x Sawlcs Mark of Sears Brand, LLC
@ Mares Reg_strada / M'
Mares de F_bdcs
_'_(Marque
/ _o Ma_'que d@_×_see de Seal's Brands, LLC
de commerce
/ BM
' Mares de Service
de Bears Bra Roebuck
ands, LLC