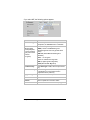
1
AP+4
U
S
E
R
G
U
I
D
E
Contents
Overview........................................................................... 5
Installing the AP+4 .......................................................... 6
Connecting the Hardware............................................... 7
Setting Up the AP+4....................................................... 8
Monitoring AP+4 Status ................................................ 16
Operating Mode ............................................................. 19
Wireless Configuration ................................................. 20
Basic Settings .............................................................. 20
Active Wireless Client Table......................................... 23
Wireless Security.......................................................... 24
Access Control ............................................................. 27
WDS Settings ............................................................... 28
Site Survey ................................................................... 29
Advanced Settings ....................................................... 31
WiFi Protected Setup™ (WPS) .................................... 34
TCP/IP Settings.............................................................. 37
LAN Interface ............................................................... 37
WAN Interface .............................................................. 39
Firewall Settings ............................................................ 50
Port Filtering ................................................................. 50
IP Filtering .................................................................... 52
MAC Address Filtering ................................................. 53
URL Filtering ................................................................ 54
Port Forwarding............................................................ 55
2
DMZ ............................................................................. 56
Denial of Service .......................................................... 57
VPN Settings .................................................................. 61
VPN Setup (Client) ....................................................... 63
Advanced VPN Settings for IKE ................................... 67
Management................................................................... 69
Statistics ....................................................................... 69
DDNS ........................................................................... 70
Time Zone Settings ...................................................... 72
Log ............................................................................... 73
Upgrade Firmware........................................................ 75
Save/Reload Configuration .......................................... 76
Password Setup ........................................................... 77
Troubleshooting ............................................................ 78
Zoom Customer Support .............................................. 83
Regulatory Information ................................................. 85
3
Package Contents
The AP+4 package contains the following:
• AP+4
• Quick Start
• Power cube
• CD containing warranty information and
• Ethernet cable
this documentation
If anything is missing or damaged, please contact Zoom
Customer Support or the vendor from whom you purchased the
AP+4.
4
Overview
You can use the AP+4 as a Router/Access Point, Universal
Repeater, Ethernet Client or Wireless ISP.
•
As a Router/AP, the AP+4 handles local network traffic both
wirelessly and through its four LAN (Local Area Network)
ports, and communicates via its WAN (Wide Area Network)
port to an ADSL modem, cable modem, or other Internetconnected device.
•
As a Repeater, the AP+4 is placed near the edge of a
wireless network – for example, a Zoom X6 network – and
wirelessly links up to 200 more devices to the network.
•
As an Ethernet Client, the AP+4 connects via its LAN ports
to up to four game consoles or computers, and links them
wirelessly to a Zoom X6 or other wireless router.
•
As a Wireless ISP, the AP+4 can connect up to four wired
PCs or game consoles, give them Network Address
Translation protection, and connect them wirelessly to an
access point. If you select this mode, use the Wireless
Basic Setup page to configure the AP+4 as a wireless
client.
See Setting Up the AP+4 on page 8 to choose an operating
mode.
This User Guide provides instructions for connecting and
configuring your AP+4 and setting up wireless and wired local
area networks. It includes details about security, firewalls, Virtual
Private Networks and administrative tasks.
When we update information about the AP+4, the information is
provided at this Zoom web site:
http://www.zoom.com/techsupport/wirelessg_support.html
5
1
Installing the AP+4
This chapter provides basic instructions for connecting the
hardware and configuring the AP+4 using the Setup Wizard. If
you have already done this by following the instructions in the
printed Quick Start, skip to Chapter 2, Wireless Configuration,
on page 20.
AP+4 Back Panel Connectors
6
Connector
Description
WAN
This port connects to the LAN or Ethernet port of an
ADSL or cable modem, using an Ethernet cable.
LAN 1 - 4
These Local Area Network ports connect via Ethernet
cable to up to four computers, game consoles or other
network devices.
PWR
This port connects to a live power source using the
supplied power cube.
RESET
To reset the modem to its factory settings, insert a
paper clip and press and hold for 10 seconds.
Zoom AP+4 User Guide
Connecting the Hardware
1 Put the AP+4 near a computer to be used for setup. That
computer needs an Ethernet (LAN) port.
2 Turn off the computer.
3 Connect one end of the supplied power cube to the AP+4
PWR jack, and the other end to a live power source.
Important! Only use the power cube shipped with the AP+4.
Other power cubes may damage the device.
The PWR LED on the AP+4 front panel should turn on and
the WLAN LED should flash. (The WLAN LED continues to
flash to signify broadcast activity as long as the Wireless
LAN is enabled. It is enabled by default.)
4 Connect one end of the supplied Ethernet cable to the
computer’s Ethernet port and the other end to one of the
AP+4’s LAN ports.
5 Turn on the computer.
The WLAN LED continues flashing and the connected LAN
port and the ACT (Activity) LEDs become steady on. (If you
have a 10 Mbps Ethernet connection, the LAN LED does not
turn on.)
If you want the AP+4 to have access to the Internet, connect
its WAN port to the Ethernet port on your cable modem,
ADSL modem, or other broadband device. When you do
this, the WAN LED turns on if the broadband device is on
and its Ethernet port is working.
Chapter 1. Installing the AP+4
7
LED
Status
The AP+4 is . . .
PWR
Steady
connected to a power source
WLAN
Flashing
broadcasting its SSID (network name)
Steady
not broadcasting its SSID and therefore
not available to wireless devices
seeking a wireless network connection
Steady
connected either wirelessly or via
Ethernet cable to a broadband modem
that connects to the Internet
Flashing
transmitting or receiving data
LAN 1-4
Steady
connected via Ethernet cable to up to
four computers or gaming devices
ACT
(Activity)
Steady
connected via the associated LAN port
to a computer or other network device
transmitting or receiving data via the
associated LAN port
WAN
Flashing
Setting Up the AP+4
1 Open your web browser, enter 10.0.0.200 in the address
bar, and press the Enter key to open the Zoom AP+4
configuration software. The Status page appears first.
2 In the left pane, select Setup Wizard.
3 On the Welcome page, click Next.
8
Zoom AP+4 User Guide
4 On the Choosing an Operating Mode page, select the way
you want to use the AP+4:
Router/Access Point. In this mode, which is the one most
users will select, the AP+4 links all wireless enabled
computers and other devices to a network and gives those
devices shared access to your broadband Internet
connection.
If you are using the AP+4 as a Repeater, on the Wireless
Basic Setup page at the Mode option, select AP+WDS.
Then, on the WDS Settings page, enter the MAC addresses
of access points you are communicating with.
Ethernet Client. This mode lets up to four computers, game
consoles or other devices plug into the AP+4 for wireless
access to a wireless network. (In this mode, the AP+4 acts
as a full bridge, just passing data back and forth between the
Internet and network devices.)
Wireless ISP. In this mode, the AP+4 connects to the
Ethernet ports of up to four wired PCs or game consoles,
and connects those devices wirelessly to a wireless access
point. Use this mode if you know you need to use the AP+4's
NAT functionality. Most users who need to connect a
computer or game console to an access point should set up
the AP+4 as an Ethernet Client instead.
If you select Wireless ISP mode, use the Wireless Basic
Setup page to configure the AP+4 as a wireless client.
Click Next to continue.
Chapter 1. Installing the AP+4
9
5 To have the AP+4’s clock automatically updated by an NTP
server, on the Selecting a Time Zone page, select a Time
Zone and an NTP Server, and click Next.
6 If you need to set up or modify your wired local network, use
the LAN Interface Setup page (see page 37 of this manual
for more information).
7 If you want to connect to the Internet, select the method on
the Setting Up Internet Access page.
10
•
If you are among the great majority of customers who
are using the AP+4 as a Router/Access Point or with a
cable modem, at WAN Access Type select DHCP
Client.
•
If you select DHCP Client and at the end of the
installation process you have not connected successfully
to the Internet, it is possible that you are running PPPoE
software. In that case, at WAN Access Type select
PPPoE (Point-to-Point Protocol over Ethernet). Then
enter the User Name and Password given to you by
your service provider.
Zoom AP+4 User Guide
•
If you are using the AP+4 as an Ethernet Client or a
Repeater, at WAN Access Type you should also select
DHCP Client unless you have requested a Static IP
from your Internet Service Provider. If so, select Static
IP and enter the values for IP Address, Subnet Mask,
Default Gateway and DNS Server that you want to use
on your network.
•
If you are setting up a Virtual Private Network (VPN)
select PPTP. (Your ISP will tell you if you need to select
this protocol. Most people don't.)
Click Next to continue.
8 On the Configuring the Wireless Network page, enter your
wireless network parameters.
•
At Band, select the type(s) of devices in your network:
¾
B+G if the network includes both 802.11b and
802.11g devices (default). This option is best for
most users.
¾
B if the network includes only 802.11b devices
Chapter 1. Installing the AP+4
11
¾
•
G if the network includes only 802.11g devices
At Wireless Operation, select
¾
AP if you are using the AP+4 as a Router/Access
Point or a Repeater
¾
Client if you are using the AP+4 as an Ethernet
Client
¾
WDS if you want to use the AP+4 as a Repeater in
WDS (Wireless Distribution System) mode.
¾
AP+WDS if you want the AP+4 to operate as both
an Access Point and a Repeater in WDS mode.
•
At Network Type (available only if the AP+4 is operating as
a Client) select Infrastructure (most users) or Ad Hoc.
•
At SSID (Service Set IDentifier), enter a network name. All
wireless devices on your network should use the same
name.
•
At Channel Number (available only if you selected Ad Hoc
channel as your Network Type), select a channel number
that isn’t being used by another nearby network. If you are
unsure which channel to use, try Channel 6.
•
Select Enable MAC Clone if for some reason you want to
use the MAC address of a device in the network instead of
the AP+4’s MAC address.
•
Enable Universal Repeater Mode (unavailable)
¾
SSID of Extended Interface (unavailable)
Click Next to continue.
12
Zoom AP+4 User Guide
9 On the Setting up Wireless Security page, select an
encryption method to protect your wireless communication.
We strongly recommend that you set up security.
Note: If all the wireless devices on your network use WPA2
or WPA security, you can automatically configure WPA2 or
WPA on each device using the Wi-Fi Protected Setup (WPS)
page on the AP+4 Advanced Setup menu. See page 34.
If you do not choose to use WPS, at Encryption select a
security method.
•
Select WPA2 (AES) if all of the devices in your network
support this method. Note: If you are not sure of the
encryption method, check the documentation that came
with the device(s).
In the Pre-Shared Key Format list, select Passphrase
or Hex (64 characters). We recommend that you select
Passphrase.
In the Pre-Shared Key text box, if you selected
Passphrase, enter a password or sentence. If you
selected Hex, enter up to 64 hexadecimal values.
Enter the Passphrase or Hex string here for future
reference:
———————————————————
Chapter 1. Installing the AP+4
13
•
Select WPA2 Mixed if some of the devices in your network
support WPA2 and some support WPA, and then follow the
instructions for WPA2 above.
•
Select WPA (TKIP) if all the devices in your network support
this method, and then follow the instructions for WPA2
above.
•
Select WEP only if the devices in your network do not
support WPA2 or WPA.
In the Key Length list, select 64 bits or 128 bits (128 bits
preferred).
In the Key Format list, if all the wireless devices in the
network are Zoom products, select ASCII. Otherwise,
select Hex.
In the Default Tx Key list, select Key 1 (the default).
In the Encryption Key 1 text box, enter Key 1 in the
format you selected, Hex or ASCII.
If you selected Hex and you chose a 128-bit key length,
write your 26-hexadecimal key in the space below for
future reference, and then enter the key in the
Encryption Key 1 box.
— — — — — — — — — — — — —
— — — — — — — — — — — — —
If you selected Hex and you chose a 64-bit key length,
write your 13-hexadecimal key in the space below for
future reference, and then enter the key in the
Encryption Key 1 box.
— — — — — — — — — — — — —
If you selected ASCII and you chose a 128-bit key
length, write your 13-ASCII-character key in the space
below for future reference, and then enter the key in the
Encryption Key 1 box.
— — — — — — — — — — — — —
14
Zoom AP+4 User Guide
If you selected ASCII and you chose a 64-bit key length,
write your 5-ASCII-character key in the space below for
future reference, and then enter the key in the
Encryption Key 1 box.
— — — — —
Click Finished, and at the Settings changed successfully!
message, click OK.
Your basic setup is complete. You don’t need to keep the AP+4
plugged into the setup computer.
•
If you are using the AP+4 as a Router/Access Point, your
broadband modem is already connected. You can plug up to
four computers, game consoles, or other devices into the
AP+4’s LAN ports. The AP+4 can also link wireless devices
to your network.
•
If you are using the AP+4 as a Repeater, you can unplug the
computer from the AP+4’s LAN port and locate the AP+4
near the edge of the wireless network you want to extend.
•
If you are using the AP+4 as an Ethernet Client or Wireless ISP
to provide access to your wireless network, you can plug up
to four computers, game consoles, or other devices into the
AP+4’s LAN ports.
If you decide that you want to make changes to any of the
parameters you have configured using the Setup Wizard, turn to
Chapter 3, Operating Mode. Continue with Chapter 4,
Wireless Configuration, and Chapter 5, TCP/IP Settings.
Chapter 1. Installing the AP+4
15
2
Monitoring AP+4 Status
The Status page is displayed when you open the AP+4
configuration software:
Field
Data displayed
System
Uptime
The elapsed time of the current AP+4 session
Firmware Version
The AP+4 revision number. If you contact
Zoom Technical Support, you will be asked for
this number.
16
Zoom AP+4 User Guide
Field
Data displayed
Wireless Configuration
Mode
Selected operating mode: AP, Client,
WDS (Wireless Distribution System), or
AP+WDS
Band
Selected wireless frequency band.
2.4 GHz B indicates a network of 802.11b
devices, 2.4 GHz G indicates a network
of 802.11g devices, and 2.4 GHz B+G
indicates a network that includes both
802.11b and 802.11g devices.
SSID
Service Set IDentifier: network name
Channel Number
Selected radio channel
Encryption
Selected security method: WPA2, Mixed,
WPA, WEP or None. See page 24.
BSSID
Basic Service Set IDentifier: the MAC
address of the AP+4
Associated Clients
MAC addresses of computers, game
consoles or other devices on the network
TCP/IP Configuration (Local Area Network)
Attain IP Protocol
DHCP or Static, depending on operating
mode
IP Address
AP+4 IP address
Subnet Mask
AP+4 subnet mask
Default Gateway
AP+4 default gateway
DHCP Server
Enabled if the AP+4 is providing dynamic
IP addresses to network clients
Client if another device on the network is
providing the addresses
None if the AP+4 is operating as a bridge
MAC Address
AP+4 MAC address
Chapter 2. Monitoring AP+4 Status
17
Field
Data displayed
WAN Configuration
Attain IP Protocol
DHCP server if the AP+4 is connected
directly to an ADSL or cable modem
Fixed IP if the AP+4 is using a static IP
address
PPPoE connected if you have an ADSL
modem and your ISP requires PPPoE
PPTP connected if you have set up a
VPN and you have a static IP address.
IP Address
AP+4 IP address
Subnet Mask
Supplied by DHCP server or entered
manually on the WAN Setup page.
Default Gateway
Supplied by DHCP server or entered
manually on the WAN Setup page
MAC Address
AP+4 WAN MAC address
18
Zoom AP+4 User Guide
3
Operating Mode
Selecting an Operating Mode is the first step in configuring your
AP+4.
You may have completed this step using the Setup Wizard
described in Chapter 1. If you want to change these settings, or if
you are manually configuring the AP+4, in the left menu pane
select Operation Mode. See the mode descriptions on page 9.
Chapter 3. Operating Mode
19
4
Wireless Configuration
To set up or modify the parameters for your wireless network, in
the left menu pane select Wireless.
Basic Settings
This page includes all the parameters on the Setup Wizard’s
Configuring the Wireless Network page.
20
Zoom AP+4 User Guide
Parameter
Select or enter . . .
Disable Wireless
LAN Interface
To deny access to the AP+4 network by
wireless devices, select this check box. When
you disable the wireless LAN, the WLAN LED
on the front panel stops flashing, indicating that
the AP+4 is no longer broadcasting its SSID.
Band
Select:
• 2.4 GHz B if you have a network of 802.11b
devices
• 2.4 GHz G if you have a network of 802.11g
devices
• 2.4 GHz B+G if your network includes both
802.11b and 802.11g devices
Mode
Select a wireless operating mode:
AP. In this mode the AP+4 handles local
network traffic wirelessly and through its four
LAN ports, and communicates via its WAN port
to an ADSL modem, cable modem, or other
Internet-connected device.
Client. In this mode the AP+4 connects via its
LAN ports to up to four game consoles or
computers, and links them wirelessly to a
Zoom X6 or other wireless router.
WDS. In this mode the AP+4 acts as a
Repeater in WDS (Wireless Distribution
System) mode.
Note: The AP+4 can act as a Repeater in
either Universal Repeater mode (see below) or
WDS mode. Most users who want to configure
the AP+4 as a repeater should choose
Universal Repeater mode, because it is easier
to set up than a WDS network and it provides
better performance. (See Error! Reference
source not found.).
AP+WDS. In this mode the AP+4 acts as both
an Access Point and a Repeater in WDS
mode.
Network Type
(Client mode only) Select Infrastructure or Ad
Hoc.
SSID
Enter the AP+4’s SSID (network name). All
wireless devices should use the same SSID.
Chapter 4. Wireless Configuration
21
Parameter
Select or enter . . .
Channel Number
Infrastructure network: Leave the default Auto.
The AP+4 automatically selects the channel
with the least interference.
Ad Hoc network: Select a channel.
Associated
Clients
Click Show Active Clients for a list of devices
on the wireless network.
Enable MAC
Clone
(Usually optional) Enter the MAC address of a
device in the LAN network if you want to use
that address for Internet access instead of the
AP+4’s MAC address.
Enable Universal
Repeater Mode
(Reserved)
SSID of Extended
Interface
(Reserved)
Click Apply Changes to save your edits.
22
Zoom AP+4 User Guide
Active Wireless Client Table
On the Wireless Basic Settings page, click Show Active
Clients to display a list of network devices (clients):
Parameter
Data displayed
MAC Address
MAC address of the network device
Tx Packet
Number of data packets transmitted without
error
Rx Packet
Number of data packets received without error
Tx Rate
Data transmission speed
Power Saving
Number of Power Save occurrences
Expired Time(s)
Indicates whether the device's DHCP lease
has expired, making the IP address available
for another device.
Chapter 4. Wireless Configuration
23
Wireless Security
We strongly recommend that you set up security to protect your
network communication. The encryption method of choice is
WPA2-AES (WiFi® Protected Access 2 – Advanced Encryption
Standard).
Note: If all the wireless devices on your network use WPA2 or
WPA security, you can automatically configure WPA2 or WPA on
each device using the Wi-Fi Protected Setup (WPS) page on the
AP+4 Advanced Setup menu. See page 34.
Parameter
Select or enter . . .
Encryption
Select:
WPA2-AES if all the devices in your network
support WPA2.
WPA Mixed if some of your network devices
support WPA2 and some support WPA.
WPA-TKIP if all the devices in your network
support WPA.
WEP only if the devices in your network do not
support WPA2 or WPA.
None (not recommended)
24
Zoom AP+4 User Guide
WPA2 (AES),
WPA (TKIP), or
WPA Mixed
Enterprise
(RADIUS)
Select this option in the unlikely event that your
network connects to a RADIUS server.
Then select Use 802.1x Authentication and
enter the RADIUS server’s Port, IP Address
and Password.
Personal (PreShared Key)
Select this option if the network does not
connect to a RADIUS server. Most users will
select this.
In the Pre-Shared Key Format list, select
Passphrase or Hex (64 values).
• Write your key in the space below for future
reference, and then enter it in the PreShared Key text box:
— — — — — — — — — — — — —
— — — — — — — — — — — — —
Enable PreAuthentication
Select this option if you want to allow devices
to authenticate before they move into the
AP+4’s wireless network range, so that they
can gain immediate access when they are
within range.
Chapter 4. Wireless Configuration
25
WEP
Click Set WEP Key and enter the following
information.
Key Length
Select an encryption key length of 64 bits or
128 bits (128 bits preferred).
Key Format
If all the wireless devices in the network are
Zoom products, select ASCII. Otherwise,
select Hex.
Default Tx Key
Select Key 1 as the default key to use for
encryption of transmitted messages.
Encryption
Key 1
If you selected Hex format and you chose a
128-bit key length, 26 hexadecimal values are
required. Write the 26-hexadecimal key in the
space below for future reference, and then
enter it in the Key 1 box.
—————————————
—————————————
If you selected Hex format and you chose a
64-bit key length, 13 hexadecimal values are
required. Write the 13-hexadecimal key in the
space below for future reference, and then
enter it in the Key 1 box.
—————————————
If you selected ASCII format, and you chose a
128-bit key length, 13 ASCII characters are
required. Write the 13-ASCII-character key in
the space below for future reference, and then
enter it in the Key 1 box.
—————————————
If you selected ASCII format, and you chose a
64-bit key length, 5 ASCII characters are
required. Write the 5-ASCII-character key in
the space below for future reference, and then
enter it in the Key 1 box.
—————
26
Zoom AP+4 User Guide
Access Control
Use this page to allow or deny access to the network.
Parameter
Select or enter . . .
Wireless Access
Control Mode
Select:
• Deny Listed to prevent access by clients
whose MAC addresses are listed
• Allow Listed to permit access by clients
whose MAC addresses are listed
MAC Address
Enter client addresses, one at a time.
• Click Apply Changes after each entry.
• Click Reset to clear the current entry before
you apply the change.
Delete Selected
In the Current Access Control List, click the
Select check box for one or more MAC
addresses and then click this button.
Delete All
Click this button to clear the list.
Reset
Click this button to clear the Select check
boxes.
Chapter 4. Wireless Configuration
27
WDS Settings
A Wireless Distribution System (WDS) expands a wireless
network by using multiple Access Points connected wirelessly.
All APs must use the same channel.
To use the AP+4 as a Repeater, on the Wireless Basic Setup
page at the Mode option, select AP+WDS. Then, on the WDS
Settings page, enter the MAC addresses of access points you
are communicating with.
Parameter
Select or enter . . .
Enable WDS
Select the check box to enable WDS.
Add WDS AP
Enter Access Point MAC addresses, one at a
time.
• Click Apply Changes after each entry. The
AP MAC addresses appear one at a time in
the Current WDS AP List.
• Click Reset to clear the current entry before
you apply the change.
• Click Set Security to open the Wireless
Security Setup page and configure
security for the additional AP. The security
method must be the same as on the AP+4.
• Click Show Statistics to display Transmit
and Receive information for each
configured AP.
28
Zoom AP+4 User Guide
Delete Selected
In the Current Access Control List, click the
Select check box for one or more MAC
addresses and then click this button to delete.
Delete All
Click this button to clear the list.
Reset
Click to clear the Select check boxes.
Site Survey
This page displays the available wireless networks in your
vicinity. Click Refresh after the page opens to make sure the list
is up-to-date.
If the AP+4 is in Client mode, you can select a network and click
Connect to join it.
Chapter 4. Wireless Configuration
29
Parameter
Displays . . .
SSID
Service Set IDentifier: Network name
BSSID
Basic Service Set IDentifier: MAC address of
the network’s access point
Channel
Radio channel and the type of devices in the
network (802.11g, 802.11b or both)
Type
Network type:
• AP (or Infrastructure), where devices
communicate with each other through an
access point
• Ad Hoc, where devices communicate
directly with each other
Encrypt
Security configured – Yes or No
Signal
Strength of the wireless signal, which generally
depends on the proximity of the access point
Select
Click a button to select a network, and then
click the Connect button to join the network.
Security configured on the AP+4 must match
the security on the selected network.
30
Zoom AP+4 User Guide
Advanced Settings
As explained on this page, the Advanced Settings are designed
for people with wireless network knowledge and experience.
Most people will not need to change these settings.
Parameter
Select or enter . . .
Authentication
Type
These settings are used with WEP.
Select:
• Open System to allow a client to associate
with the AP+4 without the correct WEP key
or even without having WEP enabled. As
long as the client has the correct SSID, it
can obtain a connection. However, no
communication will be possible.
If the AP+4 is set up as Open, it will not
work with a Shared Key client.
• Shared Key to allow a client with the
correct SSID and WEP key to connect and
communicate.
If the AP+4 is set up as Shared Key, it will
not work with an Open client.
Chapter 4. Wireless Configuration
31
• Auto to allow either Open or Shared Key
clients with the correct SSID and WEP key
to connect and communicate.
Fragment
Threshold
Fragment (Data fragmentation) Threshold: If
the AP+4 often transmits large files, you can
set a limit on packet size. If the limit is
exceeded, the AP+4 will split the packet. The
default is Disabled (2346).
RTS Threshold
RTS (Request To Send) Threshold: This is a
mechanism designed to ensure that all devices
in a network can send data to the AP+4. If
some laptops are having trouble
communicating, enter the maximum packet
size of data to be sent – 0 to 1500 is
recommended. If the packet size exceeds the
value you set, RTS will be activated. The
default is Disabled (2347).
Beacon Interval
Length of time between broadcasts of the
beacon frame by the AP. The beacon frame
contains control information and can be used
by mobile stations to locate an AP. The default
is 100 milliseconds.
Data Rate
Select the AP+4’s data transmission rate.
Preamble Type
Select the length of the message header.
Broadcast SSID
Select Enabled to allow the AP+4 to broadcast
its SSID.
Select Disabled if you want to require clients
to know the AP+4’s SSID in order to join the
network.
IAPP
IAPP (Inter-Access Point Protocol) is an
extension to the IEEE 802.11 standard that
permits wireless communications among
multivendor access points. Select Enabled or
Disabled.
802.11g
Protection
If you selected the 2.4 GHz B+G band on the
Wireless Basic Settings page, select this
option to allow 802.11b clients to work with the
AP+4.
RF Output Power
Select a Radio Frequency output of 5% to
100%.
32
Zoom AP+4 User Guide
Turbo Mode
If the device you want to connect to supports
Turbo mode, set this parameter to Auto to
achieve significantly faster communication.
Block Relay
Between Clients
Use this feature to prevent two AP+4 clients
from communicating directly. This option
enhances network security.
WMM
(WiFi Multi Media)
Enable this option to give priority to voice and
video communication.
ACK Timeout
This setting determines how long the AP+4
waits for an acknowledgement before
resending the data.
Chapter 4. Wireless Configuration
33
WiFi Protected Setup™
(WPS)
If there are devices on your home or office network that support
WiFi Protected Setup (WPS), this protocol can greatly simplify
the process of configuring WPA2 or WPA security on the
devices.
With WPS, you set security on one network device at a time.
When WPS is initiated on the AP+4, it attempts for 2 minutes to
associate with the device. When an association is made, the
AP+4 then sends its network name and security key, in
encrypted form.
At the Client PIN Number option, enter the network device's PIN
number and then click Start PIN. This is the most secure
method, because only a device with the Client PIN can associate
with the AP+4. The PIN may be printed on a sticker on the
device, or there may be a display showing the PIN.
Alternatively, if the device has a hardware Secure Setup or
similarly named button, or a virtual pushbutton on a software
display, you can use the Push Button Configuration (PBC)
option.
34
Zoom AP+4 User Guide
Parameter
Select or enter . . .
Disable WPS
Select this check box to turn off WPS. By
default, WPS is enabled.
Self PIN Number
(Display only) Automatically generated AP+4
PIN. For a different number, click Regenerate
PIN.
Push Button
Configuration
(PBC)
To have the AP+4 search for another WPSenabled device for 2 minutes, click Start PBC.
The network device you want to configure must
be turned on, have WPS enabled, be within
range of the AP+4, and – as noted above –
must have a hardware or software pushbutton.
After you click Start PBC, go to the device and
press or click its pushbutton.
Apply Changes
Click to save your settings.
Reset
Click to return to the defaults.
Client PIN Number
Enter the network device's PIN number. Look
for a sticker on the device or a display showing
the PIN.
Start PIN
Click this button to initiate the security setup
process. The device must be turned on, have
WPS enabled, and be within range of the AP+4
– approximately 150 feet , but this may vary
greatly depending on the environment.
To confirm that WPS automatic configuration has been
successful, on the menu select Wireless, and on the Wireless
Basic Settings page click Show Active Clients:
Chapter 4. Wireless Configuration
35
Note: As indicated above in the discussion of the WPS Status
option, you can use the WPS page to configure security
simultaneously on the AP+4 and the first device in the network.
When you select either Start PBC or Start PIN, the AP+4
configures itself and the network device with the defaults shown
below (the randomly generated key will not be the same):
All future devices on the network will be configured with those
settings.
36
Zoom AP+4 User Guide
5
TCP/IP Settings
LAN Interface
To modify a wired Local Area Network, in the left menu pane
select TCP/IP Settings → LAN Interface:
Parameter
Select or enter . . .
IP Address
AP+4’s IP address
Subnet Mask
AP+4’s subnet mask
Default Gateway
AP+4’s default gateway
DHCP
Select:
• Server (the default) if the AP+4 is acting as
a dynamic Internet address server.
• Client if another device on the network is
providing the dynamic IP addresses.
• None if the AP+4 is operating as a bridge.
37
Zoom AP+4 User Guide
DHCP Client
Range
The default range is shown: 10.0.0.1 to
10.0.0.199. Enter a different range if desired.
Click Show Clients to view a list of connected
devices.
Domain Name
If you have a large network that uses domains,
enter a name.
Click Apply Changes to save your entries or Reset to return to
the defaults.
Important: After you make changes, you must reboot all
devices attached to the AP+4.
38
Zoom AP+4 User Guide
WAN Interface
To set up or modify the way the AP+4 connects to the Internet, in
the left menu pane select TCP/IP Settings → WAN Interface:
Parameter
Select or enter . . .
WAN Access Type
• DHCP Client if you are connected directly
to an ADSL or cable modem. (Most users
will select this option.)
• Static IP if you are connected directly to an
ADSL modem and are using a Static IP.
You usually have to make special
arrangements with your Internet Service
Provider to get a Static (fixed) IP address.
• PPPoE if you have an ADSL modem and
your provider requires PPPoE.
• PPTP if you are setting up a Virtual Private
Network (VPN). You must get a Static IP
address from your Internet Service
Provider.
Chapter 5. TCP/IP Settings
39
DHCP Client
If you select DHCP Client as your WAN Access Type, you see
the following parameters:
Parameter
Select or enter . . .
Host name
A network name negotiated with the ISP
*MTU Size
The size of the Maximum Transmission Unit,
the largest physical packet size that a network
can transmit. The default is 1492 bytes.
Attain DNS
Automatically
If you select this option, your ISP provider
assigns a Domain Name Server (DNS), which
maps the user-friendly domain names (URLs)
that you type into your web browser (for
example, www.zoom.com) to the numerical IP
addresses that are used for Internet routing.
When you type a URL into your browser, your
PC sends a request to a DNS server to find the
equivalent numerical address.
Set DNS Manually
If you select this option, enter the IP
address(es) of one or more Domain Name
Servers in the following text boxes.
DNS 1: The IP Address of the primary Domain
Name Server
DNS 2: The address of an alternate DNS
server to use in case DNS Server #1 is down
or very slow
DNS 3: The address of an alternate DNS
server to use in case DNS Servers #1 and #2
are down or very slow
Clone MAC
Address
(Usually optional) Enter the MAC address of a
device in the LAN network if you want to use
that address for Internet access instead of the
AP+4’s MAC address.
Enable uPNP
Select this check box to enable Universal Plug
and Play, which lets LAN devices connect
automatically to one another.
Enable Ping
Access on WAN
Select this check box to allow someone to ping
the AP+4 over the Internet . This is useful for
troubleshooting – it can allow a technician to
remotely ping the AP+4 to see if it is working.
In normal use, this option should be disabled
for security reasons.
40
Zoom AP+4 User Guide
Parameter
Select or enter . . .
Enable Web
Server Access on
WAN
Select this check box to allow someone to
remotely access the AP+4’s built-in HTTP
server. Web server access is useful for
troubleshooting – it can allow a technician to
remotely check the AP+4 configuration
settings.
In normal use, this option should be disabled
for security reasons.
Enable IPsec
passthrough on
VPN connection
(PPTP/VPN only) Select this check box to let
network devices communicate via a Virtual
Private Network (VPN) using Internet Protocol
security (IPsec), in which sending and
receiving devices share a public key for
encryption and decryption. The AP+4 simply
passes the encrypted packets back and forth
between the VPN clients and the ISP’s VPN
server.
Enable PPTP
passthrough on
VPN connection
(PPTP/VPN only) Select this check box to
protect VPN communication via Point-to-Point
Tunneling Protocol. The AP+4 passes the
encrypted packets back and forth between the
VPN clients and the ISP’s VPN server.
Enable L2TP
passthrough on
VPN connection
(PPTP/VPN only) Select this check box to
protect VPN communication via Layer 2
Tunneling Protocol, an enhancement of PPTP
and L2F protocols. The AP+4 passes the
encrypted packets back and forth between the
VPN clients and the ISP’s VPN server.
Set TTL (Time to
Live timer) Value
Enter the number of hops a packet can make
before it is discarded.
Chapter 5. TCP/IP Settings
41
Static IP
If you select Static IP as your WAN Access Type, you see the
following parameters:
Parameter
Select or enter . . .
IP Address
If you are directly connected to an ADSL
modem, enter the IP Address assigned by your
Internet Service Provider.
Subnet Mask
If you are directly connected to an ADSL
modem, enter the Subnet Mask assigned by
your ISP.
Default Gateway
If you are directly connected to an ADSL
modem, enter the Default Gateway address
assigned by your ISP.
MTU Size
The size of the Maximum Transmission Unit,
the largest physical packet size that a network
can transmit. The default is 1492 bytes.
DNS 1
The IP Address of the primary Domain Name
Server
DNS 2
The address of an alternate DNS server to use
in case DNS Server #1 is down or very slow
42
Zoom AP+4 User Guide
DNS 3
The address of an alternate DNS server to use
in case DNS Servers #1 and #2 are down or
very slow
Clone MAC
Address
(Usually optional) Enter the MAC address of a
device in the LAN network if you want to use
that address for Internet access instead of the
AP+4’s MAC address.
Enable uPNP
Select this check box to enable Universal Plug
and Play, which lets devices connect
automatically to one another over the LAN,
Enable Ping
Access on WAN
Select this check box to allow someone to ping
the AP+4 over the Internet . This is useful for
troubleshooting – it can allow a technician to
remotely ping the AP+4 to see if it is working.
In normal use, this option should be disabled
for security reasons.
Enable Web
Server Access on
WAN
Select this check box to allow someone to
remotely access the AP+4’s built-in HTTP
server. Web server access is useful for
troubleshooting – it can allow a technician to
remotely check the AP+4 configuration
settings. In normal use, this option should be
disabled for security reasons.
Enable IPsec
passthrough on
VPN connection
(PPTP/VPN only) Select this check box to let
network devices communicate via a Virtual
Private Network (VPN) using Internet Protocol
security (IPsec), in which sending and
receiving devices share a public key for
encryption and decryption. The AP+4 simply
passes the encrypted packets back and forth
between the VPN clients and the ISP’s VPN
server.
Enable PPTP
passthrough on
VPN connection
(PPTP/VPN only) Select this check box to
protect VPN communication via Point-to-Point
Tunneling Protocol. The AP+4 passes the
encrypted packets back and forth between the
VPN clients and the ISP’s VPN server.
Enable L2TP
passthrough on
VPN connection
(PPTP/VPN only) Select this check box to
protect VPN communication via Layer 2
Tunneling Protocol, an enhancement of PPTP
and L2F protocols. The AP+4 passes the
encrypted packets back and forth between the
VPN clients and the ISP’s VPN server.
Set TTL (Time to
Live timer) Value
Enter the number of hops a packet can make
before it is discarded.
Chapter 5. TCP/IP Settings
43
PPPoE (ADSL only)
If you select PPPoE (Point-to-Point Protocol over Ethernet) as
your WAN Access Type, you see the following parameters:
Parameter
Select or enter . . .
User Name
The login name given to you by your ISP –
typically the characters preceding the @ sign
in your email address.
Password
The login password given to you by your ISP.
Service Name
(Usually not required) Your service provider’s
name – given to you by the ISP.
Connection Type
• Continuous if the AP+4 is automatically
connected at power up and remains
connected. If the connection is dropped, it
will automatically be restored.
• Connect on demand if you connect when
you initiate communication over the
Internet. When the Idle Time interval
expires, the connection is dropped.
44
Zoom AP+4 User Guide
• Manual if you must select the Connect and
Disconnect buttons on this page.
Idle Time
The number of minutes of inactivity after which
the connection is dropped.
MTU Size
The size of the Maximum Transmission Unit,
the largest physical packet size, measured in
bytes, that a network can transmit. The default
is 1492 bytes.
Attain DNS
Automatically
If you select this option, your ISP provider
assigns a Domain Name Server (DNS). A DNS
maps the user-friendly domain names that you
type into your web browser (for example,
www.zoom.com) to the numerical IP addresses
that are used for Internet routing.
When you type a domain name into your
browser, your PC sends a request to a DNS
server to find the equivalent numerical
address.
Set DNS Manually
If you select this option, enter the IP
address(es) of Domain Name Server(s) in the
following text boxes.
DNS 1: The IP Address of your primary
Domain Name Server.
DNS 2: The address of an alternate DNS
server to use in case DNS Server #1 is out of
service or heavily congested.
DNS 3: The address of an alternate DNS
server to use in case DNS Servers #1 and #2
are out of service or heavily congested.
Clone MAC
Address
(Usually optional) Enter the MAC address of a
device in the LAN network if you want to use
that address for Internet access instead of the
AP+4’s MAC address.
Enable uPNP
Select this check box to enable Universal Plug
and Play, which lets devices connect
automatically to one another over the LAN.
Enable Ping
Access on WAN
Select this check box to allow someone to ping
the AP+4 over the Internet . This is useful for
troubleshooting – it can allow a technician to
remotely ping the AP+4 to see if it is working.
In normal use, this option should be disabled
for security reasons.
Chapter 5. TCP/IP Settings
45
Parameter
Select or enter . . .
Enable Web
Server Access on
WAN
Select this check box to allow someone to
remotely access the AP+4’s built-in HTTP
server. Web server access is useful for
troubleshooting – it can allow a technician to
remotely check the AP+4 configuration
settings.
In normal use, this option should be disabled
for security reasons.
Enable IPsec
passthrough on
VPN connection
(PPTP/VPN only) Select this check box to let
network devices communicate via a Virtual
Private Network (VPN) using Internet Protocol
security (IPsec), in which sending and
receiving devices share a so-called public key
for encryption and decryption. The AP+4
simply passes the encrypted packets back and
forth between the VPN clients and the ISP’s
VPN server.
Enable PPTP
passthrough on
VPN connection
(PPTP/VPN only) Select this check box to
protect VPN communication via Point-to-Point
Tunneling Protocol. The AP+4 passes the
encrypted packets back and forth between the
VPN clients and the ISP’s VPN server.
Enable L2TP
passthrough on
VPN connection
(PPTP/VPN only) Select this check box to
protect VPN communication via Layer 2
Tunneling Protocol, an enhancement of PPTP
and L2F protocols. The AP+4 passes the
encrypted packets back and forth between the
VPN clients and the ISP’s VPN server.
Set TTL (Time to
Live timer) Value
Enter the number of hops a packet can make
before it is discarded.
46
Zoom AP+4 User Guide
PPTP (VPN only)
If you select PPTP (Point-to-Point Tunneling Protocol) as your
WAN Access Type, you see the following parameters:
Parameter
Select or enter . . .
IP Address
The static IP address assigned by your Internet
Service Provider
Subnet Mask
The Subnet Mask assigned by your ISP
Server IP Address
The IP address of your ISP’s PPTP server
User Name
The name assigned by your ISP
Password
The password assigned by your ISP
MTU Size
The size of the Maximum Transmission Unit,
the largest physical packet size, measured in
bytes, that a network can transmit. The default
is 1492 bytes.
Chapter 5. TCP/IP Settings
47
Request MPPE
Encryption
Select this option to use Microsoft Point-toPoint Encryption, technology developed by
Microsoft for encrypting communication over a
VPN tunnel.
Attain DNS
Automatically
If you select this option, your ISP provider
assigns a Domain Name Server (DNS). A DNS
maps the user-friendly domain names that you
type into your web browser (for example,
www.zoom.com) to the numerical IP addresses
that are used for Internet routing.
When you type a domain name into your
browser, your PC sends a request to a DNS
server to find the equivalent numerical
address.
Set DNS Manually
If you select this option, enter the IP
address(es) of Domain Name Server(s) in the
following text boxes.
DNS 1: The IP Address of your primary
Domain Name Server.
DNS 2: The address of an alternate DNS
server to use in case DNS Server #1 is out of
service or heavily congested.
DNS 3: The address of an alternate DNS
server to use in case DNS Servers #1 and #2
are out of service or heavily congested.
Clone MAC
Address
(Usually optional) Enter the MAC address of a
device in the LAN network if you want to use
that address for Internet access instead of the
AP+4’s MAC address.
Enable uPNP
Select this check box to enable Universal Plug
and Play, which lets devices connect
automatically to one another over the LAN.
Enable Ping
Access on WAN
Select this check box to allow someone to ping
the AP+4 over the Internet . This is useful for
troubleshooting – it can allow a technician to
remotely ping the AP+4 to see if it is working.
In normal use, this option should be disabled
for security reasons.
48
Zoom AP+4 User Guide
Parameter
Select or enter . . .
Enable Web
Server Access on
WAN
Select this check box to allow someone to
remotely access the AP+4’s built-in HTTP
server. Web server access is useful for
troubleshooting – it can allow a technician to
remotely check the AP+4 configuration
settings.
In normal use, this option should be disabled
for security reasons.
Enable IPsec
passthrough on
VPN connection
(PPTP/VPN only) Select this check box to let
network devices communicate via a Virtual
Private Network (VPN) using Internet Protocol
security (IPsec), in which sending and
receiving devices share a public key for
encryption and decryption. The AP+4 simply
passes the encrypted packets back and forth
between the VPN clients and the ISP’s VPN
server.
Enable PPTP
passthrough on
VPN connection
(PPTP/VPN only) Select this check box to
protect VPN communication via Point-to-Point
Tunneling Protocol. The AP+4 passes the
encrypted packets back and forth between the
VPN clients and the ISP’s VPN server.
Enable L2TP
passthrough on
VPN connection
(PPTP/VPN only) Select this check box to
protect VPN communication via Layer Two (2)
Tunneling Protocol, an enhancement of PPTP
and L2F protocols. The AP+4 passes the
encrypted packets back and forth between the
VPN clients and the ISP’s VPN server.
Set TTL (Time to
Live timer) Value
Enter the number of hops a packet can make
before it is discarded.
Chapter 5. TCP/IP Settings
49
6
Firewall Settings
The AP+4 lets you set up firewall protection for your network.
There are several ways you can filter out unwanted
communication to and from the network devices. To access the
filters, in the left menu pane click Firewall.
Port Filtering
This filter can disable a range of ports on the network clients.
Parameter
Select or enter . . .
Enable Port
Filtering
Select this check box to prevent certain types
of data from being sent over the Internet by
computers or other devices in the Local Area
Network.
Port Range
Enter a range of ports to be disabled. Note:
You can enter more than one range, but you
must click Apply Changes after each entry.
50
Zoom AP+4 User Guide
Parameter
Select or enter . . .
Protocol
Select
• TCP (Transmission Control Protocol)
• UDP (User Datagram Protocol)
• Both
Click Apply Changes to add the Port Range
and protocol to the Current Port Filter list.
Delete Selected
In the Current Filter Table, click the Select
check box for one or more Port Ranges and
then click this button to delete.
Delete All
Click this button to clear the Filter Table.
Reset
Click to clear the Select check boxes.
Chapter 7. VPN Settings
51
IP Filtering
This filter can prevent data from certain IP addresses being sent
over the Internet to computers or other devices on the Local
Area Network.
Parameter
Enable IP Filtering
Local IP Address
Protocol
Apply Changes
Reset
Delete Selected
Delete All
Reset
52
Select or enter . . .
Select this check box to protect computers or
other devices in the Local Area Network from
receiving unwanted Internet communication.
Enter the IP addresses, one at a time, of
devices that are prevented from sending data
to your LAN.
Select
• TCP (Transmission Control Protocol)
• UDP (User Datagram Protocol)
• Both
Click this button to add the IP address and
protocol to the Current Filter Table.
If you make a mistake, click this button to
return to the defaults on this page.
In the Current Filter Table, click the Select
check box for one or more IP addresses and
then click this button to delete.
Click this button to clear the table.
Click to clear the Select check boxes.
Zoom AP+4 User Guide
MAC Address Filtering
Use this page to specify the MAC addresses of devices who are
allowed to join the wireless network.
Parameter
Select or enter . . .
Enable MAC
Filtering
When you select this check box, the AP+4 will
compare the MAC address of a device
requesting access to the network with the
Current Filter Table. Devices not on the list
will be denied access.
MAC Address
Enter the MAC addresses – without separators
– one at a time.
Apply Changes
Click this button to add the MAC address to the
Current Filter Table.
Reset
If you make a mistake, click this button to
return to the defaults on this page.
Delete Selected
In the Current Filter Table, click the Select
check box for one or more MAC addresses
and then click this button to delete.
Delete All
Click this button to clear the table.
Reset
Click to clear the Select check boxes.
Chapter 7. VPN Settings
53
URL Filtering
Use this page to prevent access by devices on the Local Area
Network to certain Web sites (URLs).
Parameter
Select or enter . . .
Enable URL
Filtering
When you select this check box, the AP+4 will
block acccess by devices on the LAN to Web
site addresses (URLs) displayed in the
Current Filter Table.
URL Address
Enter Web site addresses or keywords, one at
a time. If you enter just the word poker, for
example, all URLs containing the word “poker”
will be blocked.
Apply Changes
Click this button to add the Web site address to
the Current Filter Table.
Reset
If you make a mistake, click this button to
return to the defaults on this page.
Delete Selected
In the Current Filter Table, click the Select
check box for one or more URLs and then click
this button to delete.
Delete All
Click this button to clear the table.
Reset
Click to clear the Select check boxes.
54
Zoom AP+4 User Guide
Port Forwarding
Port forwarding is a way of creating a tunnel through the AP+4’s
firewall so that computers on the Internet can communicate via a
single port to one of the computers on your LAN. Port forwarding
is safer than creating a DMZ – where all ports on one computer
inside the LAN are opened to all Internet traffic – because only
one port (or a small series of ports) is exposed to the Internet.
Parameter
Select or enter . . .
Enable Port
Forwarding
Select this check box to allow one or a small
number of ports on a network computer to be
opened to external Internet communication.
IP Address
Enter the IP address of the network computer
allowed to receive direct Internet traffic.
Protocol
Select TCP, UDP, or Both.
Port Range
Enter one port or a small range of ports to
receive direct traffic.
Apply Changes
Click this button to save your entries.
Reset
Click this button to clear all entries.
Current Port Forwarding Table
Delete Selected
In the Current Port Forwarding Table click
the Select check box for one or more IP
addresses and then click this button to delete.
Delete All
Click this button to clear the table.
Reset
Click to clear the Select check boxes.
Chapter 7. VPN Settings
55
DMZ
Use this page to designate a computer on the Local Area
Network as a DMZ (Demilitarized Zone). All ports on this
computer are opened up to all Internet traffic – the computer is
no longer protected by the AP+4’s NAT firewall.
You may want to create a DMZ if a computer in your network is
acting as a web server or hosting Internet games.
You need to assign a Static IP address to the DMZ.
Parameter
Select or enter . . .
Enable DMZ
When you select this check box, you can
designate one of the computers in the LAN as
a DMZ. That computer can serve as a web
server, email server, FTP server, or DNS
server.
DMZ Host IP
Address
Enter the IP address of the computer
designated as a DMZ.
Apply Changes
Click this button to create the DMZ.
Reset
If you make a mistake, click this button to
return to the defaults on this page.
56
Zoom AP+4 User Guide
Denial of Service
Also known as “cyber attacks” or “nukes,” Denial of Service
attacks are deliberate attempts by hackers to bring your network
down.
Attacks include
•
System floods, which overwhelm a network with more
requests than it can handle
•
Attempts to cause a particular individual’s computer to crash
•
Attempts to disrupt service to a specific system or person
Parameter
Select or enter . . .
Enable DoS
Prevention
Select this check box and then select the types
of Denial of Service attacks that you want to
prevent.
Chapter 7. VPN Settings
57
Parameter
Select or enter . . .
Whole System
Flood: SYN
This type of attack sends large numbers of
SYN (Synchronization or Start Connection)
packets, which create “half-open” connections
to the Internet and prevent the AP+4 from
accepting any new requests to connect.
Select the check box and enter the number of
SYN Packets/Second that will be accepted.
Whole System
Flood: FIN
This DoS attack involves large numbers of FIN
(Finish) packets, which terminate the
connection between the sender and recipient.
Select the check box and enter the number of
FIN Packets/Second that will be accepted.
Whole System
Flood: UDP
This type of attack sends a large amount of
traffic to ports 7 and 19 on LAN clients.
Select the check box and enter the number of
UDP Packets/Second that will be accepted.
Whole System
Flood: ICMP
This type of attack involves large numbers of
ICMP (Internet Control Message Protocol)
requests, such as ping or netmask, etc.
Select the check box and enter the number of
ICMP Packets/Second that will be accepted.
Per Source IP
Flood: SYN
This type of attack involves large numbers of
SYN packets with the source address spoofed
(faked) to appear to be the address of a LAN
client.
Select the check box and enter the number of
SYN Packets/Second that will be accepted.
Per Source IP
Flood: FIN
This type of attack involves large numbers of
FIN (Finish) packets, with the source address
spoofed to appear to be the address of a LAN
client.
Select the check box and enter the number of
FIN Packets/Second that will be accepted.
Per Source IP
Flood: UDP
This type of attack involves a large amount of
traffic directed to ports 7 and 19 on LAN
clients. In these messages the source address
is spoofed to appear to be the address of a
LAN client.
Select the check box and enter the number of
UDP Packets/Second that will be accepted.
58
Zoom AP+4 User Guide
Parameter
Select or enter . . .
Per Source IP
Flood: ICMP
This type of attack involves large numbers of
ICMP (Internet Control Message Protocol)
requests, such as ping or netmask, etc., with
the source address spoofed to appear to be
the address of a LAN client.
Select the check box and enter the number of
ICMP Packets/Second that will be accepted.
TCP/UDP Port
Scan
Select this check box to defend against a
search for open TCP or UDP ports, to which
huge amounts of data can be sent in an
attempt to trigger a buffer overflow.
Select the Sensitivity level (the rigor with
which the AP+4 looks at the data) of the scan.
ICMP Smurf
Select this check box to defend against an
attack involving large numbers of ICMP
(Internet Control Message Protocol) packets
with the source address spoofed to appear to
be the address of a LAN client.
IP Land
Select this check box to defend against a
LAND attack, which involves sending a
spoofed TCP SYN packet to the targeted
machine with an open port as both source and
destination. The attack causes the target to
reply to itself continuously and eventually
crash.
IP Spoof
Select this check box to defend against attacks
involving a forged (spoofed) source IP
address.
IP TearDrop
Select this check box to defend against a
Teardrop attack, which involves sending
message fragments with overlapping oversized
payloads to the target machine, crashing the
operating system as a result.
Ping of Death
Select this check box to defend against a
fragmented ping packet larger than 65,536
bytes, which when reassembled can cause a
system crash.
TCP Scan
Select this check box to defend against an
attack where a TCP port scanner finds an open
port, allows the target operating system to
complete the TCP three-way handshake, and
then immediately closes the connection.
Chapter 7. VPN Settings
59
Parameter
Select or enter . . .
TCP Syn with
Data
Select this check box to defend against an
attack where the TCP port scanner generates
a SYN packet. If the target port is open, it will
respond with a SYN-ACK packet. The scanner
responds with a RST packet, closing the
connection before the handshake is
completed.
UDP Bomb
Select this check box to defend against an
attack which overloads the operating system
and makes the target device difficult or
impossible to use.
UDP Echo
Chargen
Select this check box to defend against an
attack on UDP ports 7 and 19 involving large
numbers of ECHO and CHARGEN requests.
Select All
Click to select all types of attacks listed.
Clear All
Click to clear all selected types of attack.
Enable Source IP
Blocking
Select this check box to block all packets
coming from a source IP address.
Block Time
Enter the number of seconds during which all
traffic from a source IP address will be
blocked.
Apply Changes
Click to save your entries.
60
Zoom AP+4 User Guide
7
VPN Settings
Use these pages to set up a VPN (Virtual Private Network) to
allow your company’s remote employees to communicate
privately over the Internet.
From the left menu pane, select VPN Settings to open the VPN
Setup page:
Parameter
Select or enter . . .
Enable IPsec VPN
Select this check box to enable a Virtual
Private Network with Internet Protocol security.
Ipsec provides authentication and encryption at
the packet-processing layer of network
communication.
Chapter 7. VPN Settings
61
Parameter
Select or enter . . .
Enable NAT
Traversal
Select this check box to send IPsec-protected
traffic across a Network Address Translator
(NAT).
Generate RSA
Key
Click this button to create a private
cryptographic key (RSA are the initials of the
three inventors), which will be used in
conjunction with a public key.
The public key encrypts the data, while the
private key decrypts the data.
Show RSA Public
Key
Click this button to display the current RSA
public key.
Apply Changes
Click this button to save your VPN security
choices.
Current VPN Connection Table
Edit
Select the option button for a VPN client and
then click Edit to open the VPN Client Setup
page (see page 63).
Delete
Select the option button for a VPN client and
then click Delete to remove the client from the
Current VPN Connection Table.
Refresh
Click this button to refresh the Current VPN
Connection Table.
62
Zoom AP+4 User Guide
VPN Setup (Client)
On the main VPN Setup page, select the option button for a
VPN client and then click Edit to open the VPN client setup
page:
Parameter
Select or enter . . .
Enable Tunnel x
Select this check box to enable a VPN tunnel
between the AP+4 and another VPN endpoint.
Note: You can configure multiple tunnels but
you can enable only one at a time.
Connection Name
Enter a client name of your choice.
Auth Type
Select an authentication method:
• PSK, then enter a Pre-Shared Key in the
Key Management section at the bottom of
the page.
• RSA if you generated an RSA key on the
main VPN Setup page.
Chapter 7. VPN Settings
63
Local Site
Select Subnet Address or Single Address
Local IP
Address/Network
Enter 10.0.0.0
Local Subnet
Mask
(If Subnet Address is selected) Enter
255.255.255.0
Remote Site
Select Subnet Address, Single Address,
Any Address, or NAT-T Address
Remote Secure
Gateway
Enter the WAN IP address of the remote VPN
connection.
Remote IP
Address/Network
Enter the LAN IP address or the LAN network
IP address of the remote VPN connection.
Remote Subnet
Mask
Enter the Subnet Mask of the remote VPN
connection.
Local/Peer ID
These four options let you limit use of the VPN
to a single user at each end of the tunnel.
Local ID Type
Select the type of identification entered by the
user at the local site: IP, DNS (URL), or Email.
Local ID
Enter the local user’s IP address, URL, or
email address.
Remote ID Type
Select the type of identification entered by the
user at the remote site: IP, DNS (URL), or
Email.
Remote ID
Enter the remote user’s IP address, URL, or
email address.
Key Management
Select:
IKE to use Internet Key Exchange Protocol.
Click the Advanced button to configure IKE
(see page 67).
Manual to enter encryption and authentication
keys.
64
Zoom AP+4 User Guide
If you select IKE, the following options appear:
Parameter
Select or enter . . .
Connection Type
Select Responder or Initiator. If you select
Responder, the Connect button is available.
ESP
(Encapsulating
Security Payload,
an Ipsec transport
layer protocol that
provides
encryption)
Select an encryption algorithm:
3DES (a mode of the Data Encryption
Standard algorithm that encrypts data three
times)
AES 128 (128-bit Advanced Encryption
Standard)
NULL – no encryption
Select an authentication algorithm:
MD5 (A digital signature algorithm)
SHA1 (Secure Hash Algorithm)
Pre-Shared Key
If the Auth Type is PSK, enter the pre-shared
key.
Remote RSA Key
If the Auth Type is RSA, enter the private
cryptographic key which will be used in
conjunction with a public key.
Apply Changes
Click this button to save your entries.
Reset
Click to restore the VPN Client defaults.
Refresh
Click to update the connection status.
Back
Click to return to the main VPN Setup page.
Chapter 7. VPN Settings
65
If you select Manual, the following options appear:
Parameter
Select or enter . . .
ESP
(Encapsulating
Security Payload)
Select an encryption algorithm:
3DES (a mode of the Data Encryption
Standard algorithm that encrypts data three
times)
AES 128 (128-bit Advanced Encryption
Standard)
NULL – no encryption
Select an authentication algorithm:
MD5 (A digital signature algorithm)
SHA1 (Secure Hash Algorithm)
SPI (Security
Parameters Index)
The Security Parameters Index is a random
value added to the packet header in Ipsecprotected traffic. The SPI serves as an index to
a table of security parameters such as hash
algorithm, secret data, and many other
parameters.
Enter a numeric or hex value 100-FFF.
Encryption Key
Enter an encryption key.
Authentication
Key
Enter an authentication key.
Apply Changes
Click this button to save your entries.
Reset
Click to restore the VPN Client defaults.
Refresh
Click to update the connection status.
Back
Click to return to the main VPN Setup page.
66
Zoom AP+4 User Guide
Advanced VPN Settings for IKE
IKE (Internet Key Exchange) is the protocol used by VPNs to
establish a connection between a server and a remote client.
On the VPN client setup page, in the Key Management section
click the IKE button to open the VPN Settings for IKE page:
Parameter
Select or enter . . .
Tunnel x
Displays the VPN tunnel number.
Phase 1
Encryption
Algorithm
Select:
3DES (a mode of the Data Encryption
Standard algorithm that encrypts data three
times)
AES 128 (128-bit Advanced Encryption
Standard)
Chapter 7. VPN Settings
67
Authentication
Algorithm
Select:
MD5 (A digital signature algorithm)
SHA1 (Secure Hash Algorithm)
Key Group
Select one of the following DH (Diffe-Helman)
encryption algorithms, which allow two parties
that have no prior knowledge of each other to
establish a shared secret key:
DH1(modp768) – 768-bit prime modulus group
DH2(modp1024) – 1024-bit prime modulus
group
DH5(modp1536) – 1536-bit prime modulus
group
Key Lifetime
Enter a duration in seconds for the IKE
encryption key, after which the key
automatically changes.
Phase 2
Encryption
Algorithm
Select:
3DES (a mode of the Data Encryption
Standard algorithm that encrypts data three
times)
AES 128 (128-bit Advanced Encryption
Standard)
NULL
Authentication
Algorithm
Select:
MD5 (A digital signature algorithm)
SHA1 (Secure Hash Algorithm)
Key Lifetime
Enter a duration in seconds for the IKE
encryption key, after which the key
automatically changes.
Perfect Forward
Secrecy (PFS)
PFS involves a Diffe-Hellman shared secret
value, which guarantees that if an encryption
key is exposed, previous and future keys will
remain secure because they are not derived
from the exposed key.
Select ON or NONE.
OK
Click to save your settings and return to the
VPN client setup page, where you are
reminded to click Apply Changes.
Cancel
Click to return to the VPN client setup page.
68
Zoom AP+4 User Guide
8
Management
Statistics
In the left menu pane, under Management, select Statistics to
display the Transmit and Receive statistics for the AP+4’s
wireless and wired connections:
69
Zoom AP+4 User Guide
DDNS
DDNS stands for Dynamic Domain Name Service. If the AP+4
receives dynamic IP addresses from your Internet Service
Provider, the AP+4’s address changes whenever it connects to
your ISP. If you are running a Web server on your network,
clients will not know the AP+4’s IP address and will be unable to
connect.
However, you can use this page to assign a Static IP Address to
the AP+4.
In the left menu pane, under Management, select DDNS to
display the Dynamic DNS Settings page.
Parameter
Select or enter . . . .
Enable DDNS
Select this check box to designate a network
computer as a DMZ.
Service Provider
Select one of these DDNS providers: DynDNS
or TZO.
Domain name
If you selected DynDNS, the default is
<yourname>.dyndns.org.
If you selected TZO, enter
<yourname>.tzo.com
User name/Email
If you selected DynDNS, enter a User Name.
If you selected TZO, enter your email address.
70
Zoom AP+4 User Guide
Parameter
Select or enter . . . .
Password/Key
If you selected DynDNS, enter a password.
If you selected TZO, enter a key.
Apply Changes
Click this button to save your selections.
Reset
Click this button to restore the default settings.
Chapter 8. Management
71
Time Zone Settings
To synchronize the AP+4 with an NTP (Network Time Protocol)
server, in the left menu pane, under Management, select Time
Zone Settings:
Parameter
Select or enter . . . .
Current Time
Displays the current time in your time zone.
Time Zone Select
Select your time zone from the list.
Enable NTP client
update
Select this check box to let the AP+4 receive
time stamps from an NTP server.
NTP server
Click the option button for the time server
displayed in the text box, or click the second
option button to enter a different server.
Apply Changes
Click this button to save your Time settings.
Reset
Click this button to return to the default
settings.
Refresh
Click this button to refresh the NTP current
date and time in the Current Time text boxes.
72
Zoom AP+4 User Guide
Log
To display the AP+4’s log, in the left menu pane, under
Management, select Log:
Parameter
Select or enter . . . .
Enable Log
Select this check box to display the AP+4’s
event log.
System All
Select this check box to display all events.
Note: Enabling a system-wide log generates a
very large amount of data and may adversely
affect performance.
Wireless
Select this check box to display wireless
network events.
DoS
Select this check box to display Denial of
Service attempts.
Enable Remote
Log
Select this check box to view events at the
remote end of the VPN tunnel. The remote log
is valuable when you are troubleshooting VPN
connection problems.
Chapter 8. Management
73
Parameter
Select or enter . . . .
Log Server IP
Address
Enter the IP address of the remote log server.
Apply Changes
Click this button to save your log settings.
Refresh
Click this button to update the log display.
Clear
Click this button to clear the log.
74
Zoom AP+4 User Guide
Upgrade Firmware
From time to time, Zoom may release updated firmware for your
AP+4.
1 To see if there is an update, periodically visit the Zoom Web
site: www.zoom.com.
2 Download the upgrade files from the Web site to your
computer, and unzip the files if necessary.
3 Use the Upgrade Firmware page to install the new firmware
onto the AP+4.
To access this page, in the left menu pane, under Management,
select Upgrade Firmware:
Parameter
Select or enter . . . .
Select File
Enter the path and filename of the firmware
upgrade, or click Browse to select the file.
Upload
Click this button to upload the firmware
upgrade from your computer to the AP+4.
Reset
Click this button to clear the Select File text
box.
Chapter 8. Management
75
Save/Reload Configuration
Use this page to download the current settings from the AP+4
and save them to a file on your PC.
You can reload a previously downloaded configuration file back
to the AP+4.
This page also allows you to set the AP+4 back to its factory
default configuration.
In the left menu pane, under Management, select Save/Reload
Configuration:
Parameter
Select or enter . . . .
Save Settings to
File
Click Save to save the AP+4’s current
configuration to a file.
Load Settings
from File
Enter the path and filename of a saved
configuration file or click Browse to select a
file.
Upload
Click this button to upload the selected
configuration file to the AP+4.
Reset Settings to
Default
Click this button to restore the factory defaults
to the AP+4.
76
Zoom AP+4 User Guide
Password Setup
Use this page to set a password to protect the AP+4’s settings
from unauthorized access.
In the left menu pane, under Management, select Password:
Parameter
Select or enter . . . .
User Name
Enter a user name of up to 30 characters.
New Password
Enter a password of up to 29 characters.
Confirm
Password
Re-enter the password.
Apply Changes
Click this button to save your User Name and
Password.
Reset
Click this button to restore the page defaults.
Chapter 8. Management
77
Appendix A
Troubleshooting
Problem
I followed the instructions for connecting the AP+4 hardware and
entered 10.0.0.200 in my web browser’s address bar, but I
cannot access the AP+4.
Solution
First, manually reset the AP+4: insert a paper clip into the
RESET opening on the back panel and press and hold for 10
seconds. After you’ve done that, re-enter 10.0.0.200 in your web
browser’s address bar.
If you still cannot access the AP+4, follow these steps to check
the computer’s TCP/IP settings.
Windows Vista Users:
1 On the desktop, click the Start button, select Control Panel,
and then double-click Network and Sharing Center.
2 In the Network and Sharing Center window, in the Tasks
pane, select Manage Network Connections.
3 In the Network Connections window, select Local Area
Connection.
If a message appears saying Windows needs your
permission to continue, click Continue.
4 In the Local Area Connection Properties dialog box, select
Internet Protocol Version 4 (TCP/IPv4) and click
Properties.
Appendix A. Troubleshooting
78
5 Select Use the following IP address and enter 10.0.0.100
and 255.255.255.0 as the IP address and Subnet mask,
respectively.
6 Click OK, then click Close.
7 Re-enter 10.0.0.200 in your web browser’s address bar.
Windows XP Users:
1 On the Windows desktop, click the Start button, open
Control Panel, in the left pane select Classic View, and
double-click Network Connections.
2 Right-click the Local Area Connection icon and select
Properties.
3 Highlight the Internet Protocol (TCP/IP) entry and click the
Properties button.
4 Select Use the following IP address and enter 10.0.0.100
and 255.255.255.0 as the IP address and Subnet mask,
respectively.
5 Click OK, then click Close.
6 Re-enter 10.0.0.200 in your web browser’s address bar.
Appendix A. Troubleshooting
79
Windows 2000 Users:
1 On the Windows desktop, click Start, point to Settings,
select Control Panel and then select Network and Dial-up
Connections.
2 Right-click the Local Area Connection icon and select
Properties.
3 Highlight the Internet Protocol (TCP/IP) entry and click the
Properties button.
4 Select Use the following IP address and enter 10.0.0.100
and 255.255.255.0 as the IP address and Subnet mask,
respectively.
5 Click OK, then click OK again.
6 Re-enter 10.0.0.200 in your web browser’s address bar.
Windows Me or 98 Users:
1 On the Windows desktop, click Start, point to Settings, and
select Control Panel.
2 In the Control Panel window, double-click the Network
icon.
3 In the Network dialog box, highlight the TCP/IP entry, click
the Properties button and then click OK.
4 On the IP Address tab, ensure that Specify an IP address
is selected and enter 10.0.0.100 and 255.255.255.0 as the
IP Address and Subnet Mask, respectively.
5 Click OK, then click OK again.Re-enter 10.0.0.200 in your
web browser’s address bar.
6 Re-enter 10.0.0.200 in your web browser’s address bar.
80
Zoom AP+4 User Guide
Problem
I set up my AP+4 as an access point, but the devices I set up on
my zoom wireless network cannot access the Internet.
Solution
1 Verify that a wired computer can access the Internet.
•
If it cannot, try the following:
a Make sure the associated LAN port LED on the
AP+4 front panel is lit.
b Check the TCP/IP settings on the computer (see
above, page 78.
c Perform a Release/Renew operation on the
computer or reboot.
•
If the wired computer can access the Internet, reboot the
devices(s) on your wireless network and try to access
the Web again.
If you still cannot connect to the Internet wirelessly, go to
Step 2.
2 Verify that security is not set on the AP+4 or the client. If it is,
ensure that the wireless devices are using the same security
settings.
3 Verify that the devices are connected to the correct wireless
network and that the signal strength is adequate. (Try
repositioning the devices if the signal strength is too low.)
4 In the AP+4 menu pane, select Wireless→Site Survey to
view other wireless networks in the area. Then on the
Wireless Basic Settings page, select a channel number for
your network that is not being used by another network. If
possible, try to maintain a 5-channel difference between your
network and other nearby networks.
5 If you are using Windows XP with built-in wireless access:
a On your Windows desktop, click the Start button, then
click Control Panel.
Appendix A. Troubleshooting
81
b Double-click the Network Connections icon.
c Click the Wireless Network Connection icon.
d Look at the details that appear on the left side of the
screen. If the signal strength is low, try repositioning the
antennas of the AP+4. You can also try moving the
wireless devices closer to the AP+4. You should also
verify that zoom is selected as the wireless network. If it
is not, then you are connected to the wrong network.
6 If you are using a computer with a wireless network card
installed, access the network card’s software and verify that
it is connected to the zoom network and that the signal
strength is adequate. Refer to the documentation that came
with the network card if you need help doing this.
82
Zoom AP+4 User Guide
Appendix B
Zoom Customer Support
Please fill in the following information, since it will speed up
support if you ever need it.
Product Name __________________________________________
Product Model Number _______________________________
Product Serial Number (see below) _____________________
Date Installed _______________________________________
The serial number is easy to find. For external products, the
serial number is located on the bottom of the unit below the
barcode. The serial number for internal modems is located below
the barcode on the silver-colored bracket near the phone jacks.
The serial number for PC cards is located below the barcode on
the back of the card.
Customer Support from Zoom
Zoom has a skilled staff of Boston-based support specialists to
assist you. If you would like help, we recommend that you
familiarize yourself with the support alternatives described in this
flyer.
SmartFacts™ Q&A Search Engine
SmartFacts™ is an automated intelligent database of Frequently
Asked Questions (FAQs) about Zoom products. It allows you to
search for solutions to your Customer Support questions, by
product or via a powerful Keyword Search Engine. If you still
cannot find a solution to your question, SmartFacts lets you
access our Technicians via email for a response tailored to your
questions. SmartFacts provides you with a way to track the
history of your problem and to add or change the description
without having to enter any information that was previously sent.
SmartFacts can even contact you automatically if there is an
update to your modem or software that helps to address the
question you had. You can access SmartFacts from:
www.zoom.com/techsupport
Appendix B. Technical Support
83
World Wide Web
Zoom’s Web page lets you request assistance via e-mail,
register online, access product reviews and descriptions, and do
a whole lot more. Visit the Zoom Technical Support area for the
latest flash upgrades and drivers for your Zoom product. To
access Zoom’s Web page, please log onto your local Internet
Service Provider, then go to the Web browser and select:
www.zoom.com
From Zoom’s home page you can easily go to Customer Support
or many other useful areas on the site.
Contacting Zoom by E-mail
You can e-mail Zoom with any product questions you have, and
one of our Customer Support specialists will respond by e-mail
within 2 business days. Send your questions to:
www.zoom.com/techmail
When e-mailing Zoom, be sure to include the following:
• Your full name and e-mail address
• Product name and serial number
• A detailed description of your problem.
Contacting Zoom by Phone
Zoom's support lines can be reached by dialing this U. S. phone
number: (617) 753-0961
Certain countries can also dial an in-country number to reach
Zoom support:
United Kingdom:
Portugal:
Spain:
Switzerland:
0870 720 0090
+35 1221451012
+34 911516304
+41 435000369
For Zoom's extensive Customer Support hours, please check:
www.zoom.com/contact/contact_techsupport.html
84
Zoom AP+4 User Guide
Appendix C
Regulatory Information
U.S. FCC Part 15 Emissions Statement
This equipment has been tested and found to comply with the limits for
a Class B digital device, pursuant to part 15 of the FCC Rules. These
limits are designed to provide reasonable protection against harmful
interference in a residential installation. This equipment generates, uses
and can radiate radio frequency and, if not installed and used in
accordance with the instructions, may cause harmful interference to
radio communications. However, there is no guarantee that interference
will not occur in a particular installation. If this equipment does cause
harmful interference to radio or television reception, which can be
determined by turning the equipment off and on, the user is encouraged
to try to correct the interference by one or more of the following
measures:
•
Reorient or relocate the receiving antenna.
•
Increase the separation between the equipment and receiver.
•
Connect the equipment into an outlet on a circuit different from that
to which the receiver is connected.
•
Consult the dealer or an experienced radio/TV technician for help.
This device complies with Part 15 of the FCC Rules. Operation is
subject to the following two conditions: (1) This device may not cause
harmful interference, and (2) this device must accept any interference
received, including interference that may cause undesired operation.
FCC Caution: Any changes or modifications not expressly approved by
the party responsible for compliance could void the user's authority to
operate this equipment.
IMPORTANT NOTE:
IEEE 802.11b or 802.11g operation of this product in the U.S.A. is
firmware-limited to channels 1 through 11.
Industry Canada Emissions Statement
This Class B digital apparatus meets all requirements of the Canadian
Interference-Causing Equipment Regulations. Cet appareil numérique
85
Zoom AP+4 User Guide
de la classe B respecte toutes les exigences du Règlement sur le
matériel brouilleur du Canada.
Operation is subject to the following two conditions:
1) this device may not cause interference and
2) this device must accept any interference, including interference that
may cause undesired operation of the device.
Countries of Operation & Conditions of Use in the European
Community
This device is intended to be operated in all countries of the European
Community.
This device may be operated indoors or outdoors in all countries of the
European Community using the 2.4 GHz band: Channels 1 - 13, except
where noted below.
•
In Italy the end-user must apply for a license from the national
spectrum authority to operate this device outdoors.
•
In Belgium outdoor operation is only permitted using the 2.46 2.4835 GHz band: Channel 13.
•
In France outdoor operation is only permitted using the 2.4-2.454
GHz band: Channels 1-7.
Electrostatic Discharge Statement
The unit may require resetting after a severe electrostatic discharge
event.
Additional compliance information is located on the CD.
86
Zoom AP+4 User Guide
Declaration of Conformity
Declaration of Conformity
Δήλωση Συμμόρφωσης
Declaração de Conformidade
Uyum Beyanatı
Déclaration de conformité
Konformitätserklärung
Dichiarazione di conformità
Deklaracja zgodności
Declaración de conformidad
Konformitetsdeklaration
Cam kết về sự tuân thủ ở Châu Âu
Manufacturer/Producent/Fabrikant/Constructeur/Hersteller/
Κατασκευαστής/Fabbricante/Fabricante/Tillverkare/Üretici/
Nhà sản xuất
Brand/Varemærke/Merk/Marque/Marke/Μάρκα/
Marchio/Marka/Marca/Märke/Thương hiệu
Zoom Technologies, Inc.
207 South Street, Boston, MA 02111 USA
617-423-1072
www.zoom.com
Type/Typ/Μάρκα/Tipo/Türü/Kiểu mẫu
Models 4401, 4420-A
Zoom AP+4
The manufacturer declares under sole responsibility that this equipment is compliant to Directive 1999/5/EC
via the following. This product is CE marked.
Producenten erklærer under eneansvar, at dette udstyr er i overensstemmelse med direktivet 1999/5/EC via
følgende. Dette produkt er CE-mærket.
De fabrikant verklaart geheel onder eigen verantwoordelijkheid dat deze apparatuur voldoet aan Richtlijn
1999/5/ EC op grond van het onderstaande. Dit product is voorzien van de CE-markering.
Le constructeur déclare sous son entière responsabilité que ce matériel est conforme à la Directive
1999/5/EC via les documents ci-dessous. Ce produit a reçu le marquage CE.
Hiermit erklärt Zoom die Übereinstimmung des Gerätes modem mit den grundlegenden Anforderungen und
den anderen relevanten Festlegungen der Richtlinie 1999/5/EC. Dieses Produkt ist das gekennzeichnete
CE.
Ο κατασκευαστής δηλώνει με αποκλειστική του ευθύνη ότι αυτό το προϊόν συμμορφώνεται με την Οδηγία
1999/5/ΕC μέσω των παρακάτω. Αυτό το προϊόν φέρει τη Σήμανση CE.
Il fornitore dichiara sotto la sola responsabilità che questa apparecchiatura è compliant a 1999/5/EC direttivo
via quanto segue. Questo prodotto è CE contrassegnato.
Producent stwierdza że to urządzenie zostało wyprodukowane zgodnie z Dyrektywą 1999/5/EC. Jest to
potwierdzone poprzez umieszczenie znaku CE na urządzeniu.
O fabricante declara sob sua exclusiva responsabilidade que este equipamento está em conformidade com
a Directiva 1999/5/EC através do seguinte. Este produto possui Marcação CE.
El fabricante declara bajo su exclusiva responsabilidad que este equipo satisface la Directiva 1999/5/EC por
medio de lo siguiente. Este producto tiene marca CE.
Nhà sản xuất cam kết với trách nhiệm của mình là thiết bị này tuân theo Hướng dẫn 1999/5/EC thông qua
các mục sau. Sản phẩm này được đánh dấu là CE.
73/23/EEC – LVD
89/336/EEC – EMC
1999/5/EC
Andy Pollock
21 March, 2008
1056/TF, Boston, MA, USA
0808-B
EN 60950-1: 2001
EN 301 489-1 v1.4.1: 2002
EN 301 489-17 v1.2.1: 2002
EN 55022:1998 +A1: 2000 +A2: 2003, Class B
EN 55024:1998 +A1: 2001 +A2: 2003
EN 300 328 v1.6.1: 2004
EN 50385: 2002
Director, Hardware Engineering / Direktør, Hardware
Engineering / Director, Sustaining Engineering /
Directeur, ingénierie de soutien / Direktør, Sustaining
Engineering / Διευθυντής, Μηχανικής Διατήρησης /
Direttore, Hardware Engineering / Dyrektor, Inżynieria
ciągła / Director, Engenharia de Manutençã / Director,
Ingeniería de apoyo / Giám Đốc Kỹ thuật Phần cứng
27442
©2008