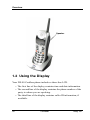
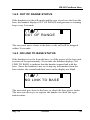
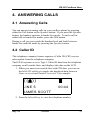
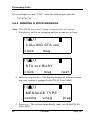
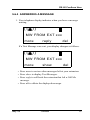
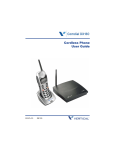
1
DX-80 Cordless Phone
User Guide
DX-80 Cordless Phone
User Guide
This manual supports the 7265-HS model on the Comdial DX-80 system.
Copyright © 2005 Comdial Corporation
All rights reserved. Unauthorized use of this
document is prohibited.
Comdial Corporation
106 Cattlemen Road, Sarasota, FL 34232
(941) 554-5000 or (800) 266-3425
-NoticeComdial reserves the right to make any
changes and improvements in the product
described in this document at any time and
without prior notice.
DX-80 and DX-80 Cordless Phone are trademarks of Comdial Corporation. All other product names are trademarks of their respective owners.
May, 2005
GCA70-413 May ‘05
ii
DX-80 Cordless User
TABLE OF CONTENTS
INTRODUCTION ................................................................ XI
Audience Description ............................................................. xi
Related Publications ............................................................... xi
Conventions Used in this Manual ........................................... xi
1. OVERVIEW.......................................................................13
1.1 Handset Buttons................................................................14
1.2 Using the Display .............................................................16
1.3 Using a Headset ................................................................17
1.4 Positioning Your Phone ....................................................17
1.5 Registering Your Phone ....................................................18
1.5.1 Registration ................................................................18
1.5.2 De-Registration ........................................................21
1.5.2.1 Using the Base Only .......................................21
1.5.2.2 Using the Base and Handset ...........................21
1.6 Status Indicators................................................................24
1.6.1 Low Battery Power Status..........................................24
1.6.2 Out Of Range Status...................................................25
1.6.3 No Link to Base Status...............................................25
1.6.4 Ring and Vibrator Status ............................................26
1.6.5 Sleep Mode Status......................................................26
1.6.6 Key Lock Mode Status...............................................27
1.6.7 Power On/Off Mode Status ........................................28
1.6.8 No Link to KSU Status ..............................................29
May ‘05
Comdial
iii
2. PROGRAMMING YOUR PHONE..................................31
2.1 System Programming Mode .............................................31
2.1.1 Changing Display Language ......................................32
2.1.2 Controlling Volume Settings ......................................34
2.1.3 Setting Background Music.........................................35
2.1.4 Do Not Disturb...........................................................35
2.2 Function Key Programming .............................................37
2.2.1 Setting the Alarm Clock Feature................................37
2.2.2 Using Automatic Hold ...............................................38
2.2.3 Using Automatic Line Selection ................................39
2.2.4 Setting Your Busy Ring Options................................39
2.2.5 Setting Your Call Forwarding Options.......................40
2.2.5.1 All ...................................................................41
2.2.5.2 Busy ................................................................42
2.2.5.3 No Answer .....................................................43
2.2.5.4 External ..........................................................45
2.2.5.5 Follow Me Here (From Another Extension
To This Extension)..........................................46
2.2.5.6 Follow Me There (From This Extension
To Another Extension)....................................48
2.2.5.7 Deleting an Existing Call Forward .................50
2.2.6 Setting Up Personal Speed Dials ...............................50
2.2.7 Clearing Custom Phone Settings and Reverting to
Default Settings .............................................51
2.2.8 Dial Pad Touch Tones ................................................51
2.2.9 Distinctive Ringing ....................................................52
2.2.10 Checking Feature Settings for your Extension .......52
2.2.11 Changing Your Extension Password ........................53
iv
Comdial
May ‘05
DX-80 Cordless User
2.2.12 Programming Feature Buttons .................................55
2.2.13 Looking Up Feature Numbers..................................57
2.2.14 Resetting Flexible Feature Buttons to Default .........58
2.2.15 Hidden Codes ...........................................................59
2.2.16 Hot Keys ..................................................................60
2.2.17 Hotline Speed Dialing ..............................................61
2.2.18 Using Status Messages.............................................62
2.2.19 Enabling/Disabling Paging at Your Extension.........65
2.2.20 Inserting a Pause in Outgoing Calls (Speed Dials) ..66
2.2.21 Locking/Unlocking Your Phone...............................66
3. MAKING CALLS .............................................................69
3.1 Making Outside Calls .......................................................69
3.2 Making Intercom (Internal) Calls .....................................69
3.3 Using the Speakerphone ...................................................69
3.4 Using Call Back................................................................70
3.4.1 Call Back – CO Line..................................................70
3.4.2 Call Back – Extension................................................71
3.5 Using Speed Dial Numbers ..............................................73
3.6 Automatic Redialing.........................................................73
3.7 Last Number Redial..........................................................74
3.8 Creating Conference Calls................................................74
3.8.1 Conference Controller Privileges...............................75
4. ANSWERING CALLS .....................................................79
4.1 Answering Calls................................................................79
4.2 Caller ID ...........................................................................79
May ‘05
Comdial
v
4.3 Retrieving Caller ID Information .....................................80
4.4 Picking Up Calls in your Group .......................................81
4.5 Answering Machine Emulation (Screening Incoming
Calls) ................................................................................82
5. PROCESSING CALLS ....................................................85
5.1 Placing Calls on Hold .......................................................85
5.1.1 System Hold ...............................................................85
5.1.2 Hold – Exclusive .......................................................85
5.1.3 Hold Reminder ...........................................................85
5.1.4 Holding Call Answer .................................................85
5.2 Transferring Calls .............................................................86
5.2.1 Making Supervised and Unsupervised Transfers.......86
5.2.2 Transfer and Answer Call ..........................................87
5.3 Parking Calls....................................................................88
5.4 Paging ...............................................................................89
5.5 Responding to a Page (Meet Me Paging) .........................89
5.6 Sending Messages.............................................................90
5.6.1 Sending a Call Me Message.......................................91
5.6.2 Sending a Text Message.............................................92
5.6.3 Sending a Voice Message...........................................96
5.6.4 Answering a Message ................................................97
5.6.5 Canceling a Sent Text Message or Call Me
Message ........................................................98
INDEX ....................................................................................99
vi
Comdial
May ‘05
DX-80 Cordless User
This equipment has been tested and found to comply with the limits
for a Class B digital device, pursuant to Part 15 of the FCC Rules.
These limits are designed to provide reasonable protection against
harmful interference in a residential installation. This equipment generates, uses and can radiate radio frequency energy and, if not
installed in accordance with the instructions, may cause harmful
interference to radio communications. However, there is no guarantee that interference will not occur in a particular installation. If this
equipment does cause interference to radio or television reception,
which can be determined by turning the equipment off and on, the
user is encouraged to try to correct the interference by one or more of
the following measures:
• Reorient or relocate the receiving antenna
• Increase the separation between the equipment and receiver
• Connect the equipment into an outlet on a circuit different from
that to which the receiver is connected
• Consult the dealer or an experienced radio/TV technician for
help
May ‘05
Comdial
vii
This Page Intentionally Left Blank
viii
Comdial
May ‘05
DX-80 Cordless User
Revision History
Version
01
May ‘05
Changes
Initial Release
Date
5/9/05
Comdial
ix
This Page Intentionally Left Blank
x
Comdial
May ‘05
DX-80 Cordless User
Introduction
This manual describes how to use the DX-80 Cordless phone.
This manual is intended to provide:
• basic knowledge of the functions and features of the DX-80
Cordless phone user interface.
• step-by-step procedures for processing calls and controlling
individual extension settings.
Audience Description
This manual is intended for persons who use DX-80 Cordless phones
on a day-to-day basis.
You should:
• read this manual in normal reading sequence before first using
the DX-80 Cordless phone User Interface.
• refer to this manual as necessary while modifying your
telephone settings.
Related Publications
This manual refers you to related publications, when appropriate, for
additional information.
Conventions Used in this Manual
Many of the procedures require you to enter settings or to choose
from a list of variables. To signify when you are to act upon an item,
parameter, button, etc. we italicize the name of the item being acted
upon. For example, the following sentences instruct you to press a
specific key on your keyboard.
• Press Enter.
• Press Esc.
• Press Page Up or Page Down.
May ‘05
Comdial
xi
• Press and hold the Shift and Ctrl keys simultaneously.
In contrast, the following sentence instructs you to type in a required
response; notice the word “Enter” when used in this way is not italicized
because you are not pushing a specific key name.
• Enter the value you want to use for this feature.
Similarly, when you select a button or LCD menu option, we italicize the
name of the button/menu item because you are required to take the action
of choosing it, even though the item may not appear in italics on the endpoint or display.
• Use the arrow keys to highlight Programming and press Enter.
At other times in the manual, we discuss prompts that the system displays
to you. In these cases, we enclose the exact wording of the prompt in
quotation marks to signify that the system is, in essence, speaking to you.
• The system prompts, “Enter your password now.”
If the system is actually playing a recording aloud, we enclose the exact
wording of the prompt in quotation marks and italics to signify that the
system is in actually speaking to you.
• The system says, “You have no more new messages.”
Italics and quotes are also of course used in their normal contexts, that is,
for emphasis and to identify what words are spoken.
• This is called a hot transfer, that is, the system transfers the call
without ringing the extension.
There are times when this manual instructs you to enter a number from
within a range of numbers. In this instance, we use the “~ “ character to
indicate the range. For example, 05-01-1~3-001~100 tells you to enter:
• 05
• 01
• a 1, 2, or 3,
• a three-digit number that falls in the 001 to 100 range.
xii
Comdial
May ‘05
DX-80 Cordless User
1. OVERVIEW
Congratulations and thank you for using a Comdial telephone! Your
DX-80 phone is supported by a communication system with a wealth
of built-in, standard features. This manual serves as a helpful guide
for using these various features.
Handset
Handset
Charger
Base
Station
May ‘05
Comdial
13
Overview
1.1 Handset Buttons
The 7265-HS handset includes the following buttons.
F2 soft key
F3 soft key
F1 soft key
Function
Trans
Talk
Hold
dial pad
14
Comdial
May ‘05
DX-80 Cordless User
Volume Up
Volume Down
Headset Jack
May ‘05
Comdial
15
Overview
Speaker
1.2 Using the Display
Your DX-80 Cordless phone includes a three-line LCD.
• The first line of the display contains time and date information.
• The second line of the display contains the phone number of the
party to whom you are speaking.
• The third line of the display contains caller ID information, if
available.
16
Comdial
May ‘05
DX-80 Cordless User
1.3 Using a Headset
To use a headset on the DX-80 Cordless phone, simply plug the
headset into the headset jack on the left side of the handset; the phone
automatically switches to headset mode. To leave the headset mode
and return function to the handset, unplug the headset from the
headset jack. Note: Do not program a feature button with headset
mode.
1.4 Positioning Your Phone
You should adjust the position of the DX-80 Cordless Phone on your
desk or table to suit your individual needs, and maximize the performance of the sound activated features if you are using the speakerphone function. When using your DX-80 Cordless Phone, the
microphone and loudspeaker are farther from you than when you use
a handset. Some speakerphone positioning tips to consider include:
• For the microphone to best detect your voice, speak within three
feet of it and face the DX-80 Cordless Phone .
• Background noise may prevent the sound-activated switches
from operating properly. Avoid placing the DX-80 Cordless
Phone where it will detect sounds from keyboards, printers,
paging systems, or other equipment.
• Place the phone on a hard surface and away from table edges.
Do not place the phone in corners or enclosures. Do not let
obstructions come between you and the microphone.
Also remember, as with any piece of electronic equipment, your
telephone may be damaged by contact with liquids. Please try to
place the phone in an area that is free from the danger of spills.
May ‘05
Comdial
17
Overview
1.5 Registering Your Phone
Registration programming allows you to register the handset to the
base unit after it has been installed by your system installer.
1. Power ON the base unit and enter the registration mode on the
base unit.
2. Make sure the handset is in the registration mode.
3. Move the handset close to the base.
4. The system automatically registers the handset and assigns the
handset ID.
1.5.1 REGISTRATION
1. Power on the base unit and enter the registration mode on the
base unit.
2. Turn off the dip switch1 and turn on dip switches 2 and 3.
Note: The down position is on, the up position is off. After 5
seconds the system enters the registration mode.
Note: The LED on the base flashes quickly when the base is in
registration mode.
3. If the handset has not been registered, the LCD displays the
following message.
(( ))
PLEASE
REGISTER!
You can also press and hold the F1 soft key for just over 2 seconds to enter the System Programming mode.
4. Once you are in System Programming mode, the LCD displays
the following.
18
Comdial
May ‘05
DX-80 Cordless User
(( ))
>LANGUAGE
REGISTRATION
5. Press the F1 (up) or F2 (down) soft key to select the registration mode.
(( ))
>REGISTRATION
DE-REGISTER
6. Press F3 (OK) key to enter registration mode.
(( ))
>REGISTRATION
NO?
7. Press the F1 or F2 key to select the YES?.
(( ))
>REGISTRATION
YES?
8. Press F3 (OK) to confirm that you want to register this phone.
(( ))
>REGISTERING
PLEASE WAIT!
May ‘05
Comdial
19
Overview
9. Move the handset close to the base. The system starts to register with the base unit.
If the registration operation is successful, the LCD displays the
following.
(( ))
>REGISTERING
HANDSET #1
Note: Up to two line cords can be used to connect two digital
station ports from the KSU to the two jacks on the base. If the
handset ID is #1 this means the handset is connected to Line
#1. If the handset ID is #2 this means the handset is connected
to line #2.
If the registration fails, the LCD displays the following.
(( ))
>FAILED!
TRY AGAIN!
(To try again, begin again at step 4.)
10.Next, change dip switch 1 to re-enter the normal mode.
Note:
• The LED on the base flashes normally when the unit enters
normal mode.
• If DIP switches are still set in the registration mode (switch 1
off, switches 2 and 3 on), the unit is not operational except for
registration during the first 30 seconds when re-powering on
the unit. After 30 seconds, the system goes back to normal
mode.
20
Comdial
May ‘05
DX-80 Cordless User
1.5.2 DE-REGISTRATION
Whether you want to de-register both handsets or remove one handset
only, you can de-register the handsets from the base unit. However,
you must move the handset unit close to the base to receive the deregistration command from base unit. After de-registration, the
handset unit no longer links with the base.
There are 2 ways to de-register the handset unit:
• using the base only
• using the base and the handset.
1.5.2.1 Using the Base Only
1. To de-register all handsets, turn off dip switches 1 and 2, and
turn on dip switch 3. After 5 seconds, the system de-registers
all the handsets.
2. To de-register Handset #1, turn off dip switch 3, and turn on
dip switches 1 and 2. After five seconds, the system de-registers handset #1.
3. To de-register Handset #2, turn off dip switches 2 and 3, and
turn on dip switch 1. After five seconds, the system de-registers handset #2.
4. Finally, change the dip switch on the base to normal mode (all
switches off). The LED on the base flashes normally when the
unit returns to normal mode.
1.5.2.2 Using the Base and Handset
1. The base is in the idle mode.
2. While the handset is in standby, press and hold the F1 soft key
for just over 2 seconds to enter System Programming Mode.
Then use the up or down soft key to select DE-REGISTER.
May ‘05
Comdial
21
Overview
(( ))
>DE-REGISTER
3. Press F3 (OK) to enter the mode. Then press either F1 or F2 to
scroll to YES?.
(( ))
>DE-REGISTER
YES?
4. Press F3 (OK) to confirm. The display responds as follows.
(( ))
DE-REGISTERING
If the de-registration is successful, the LCD displays the following.
(( ))
>DE-REGISTER
If the de-registration fails after about 20-30 seconds, the LCD
displays.
22
Comdial
May ‘05
DX-80 Cordless User
(( ))
FAILED!
Notes:
• When deregistering using either method, the system must be
in idle mode. After using either method, you must remove
the power from the base and re-power on the base.
• Using the handset only:
• If the base cannot link to the handset, the handset still deregisters.
• If the base de-registers the handset and the handset does
not receive the de-registration command from the base,
the handset still links with the base unit, however, it
cannot use the system.
• Using the handset and the base:
• The base does not need to enter the de-registration mode.
• You must move the handset unit near the base to receive
the de-registration command from base unit.
• Only one handset can de-register from the base at a time.
After de-registration, the handset LCD displays.
(( ))
PLEASE
REGISTER!
May ‘05
Comdial
23
Overview
1.6 Status Indicators
The cordless handset provides information about the following statuses.
• Low Battery
• Out of Range
• No Link to Base
• Ring/Vibrator
• Sleep Mode
• Key Lock Mode
• Power On/Off
• No Link to KSU
1.6.1 LOW BATTERY POWER STATUS
The handset displays the battery power status icon on the upper right
corner of the LCD. If the battery power is too low to work, the phone
also displays a LOW BATTERY warning on the LCD before the
battery is out of power completely.
(( ))
LOW BATTERY
When the battery power is too low, and the handset is not in the
standby mode, the phone flashes the icon at the cadence of 0.5 sec onand-off repeatedly. Note: The phone does not flash the icon when the
handset is in standby mode. If the handset is in the talk mode, the unit
also sounds a warning beep every 15 seconds.
24
Comdial
May ‘05
DX-80 Cordless User
1.6.2 OUT OF RANGE STATUS
If the handset is in the talk mode and the user travels too far from the
base, the handset displays OUT OF RANGE and generates a warning
beep every 5 seconds.
(( ))
OUT OF RANGE
The user must move closer to the base, or the call will be dropped
within 30 seconds.
1.6.3 NO LINK TO BASE STATUS
If the handset is too far from the base, or if the power of the base unit
is removed for aproximately 30 seconds, the handset displays NO
LINK TO BASE to indicate that the handset cannot link with the
base. Since the handset is not receiving any information from the
base station, the second and third rows on the display are blank.
(( ))
NO LINK TO BASE
The user must get closer to the base, or check the base power status.
The user can also try to re-register the handset to check the registration status.
May ‘05
Comdial
25
Overview
1.6.4 RING AND VIBRATOR STATUS
If you set the status to Ring mode only, the phone displays the ring
icon only on the LCD.
If you set the status to Vibrator mode only, the phone displays the
vibrator icon only on the LCD.
((
))
If you set the status to Ring and Vibrator mode, the phone displays
both the ring and vibrator icons on the LCD.
(( ))
1.6.5 SLEEP MODE STATUS
For power saving issues, the handset enters sleep mode automatically
when there is no special event in the system. The second row of the
LCD (Time and Date) is blank, while the third row continues to
display the handset extension number.
26
Comdial
May ‘05
DX-80 Cordless User
(( ))
EXT
103
The user can simply press any key to wake up the unit. The handset
automatically wakes up if it receives any special information from
base.
Note: If the handset in sleep mode, the LEDs are not turned on.
1.6.6 KEY LOCK MODE STATUS
If you press and hold the Trans key for just over two seconds, the
handset enters key lock/unlock mode.
When the handset is in the key unlock mode (normal mode) and you
hold the Trans key for a few seconds, the unit enters the lock mode.
The LCD displays the following message for three seconds to
indicate how to unlock the phone:
LONG KEY PRESS
[TRANSFER]
TO UNLOCK
After three seconds, the LCD goes back to being locked and changes
the LCD display to the following.
(( ))
May ‘05
Comdial
27
Overview
When the handset is in the key lock mode, and you press and hold the
Trans key, the LCD displays the following message for three seconds.
TO UNLOCK?
PRESS [F3]
If you press the F3 key within three seconds, the handset unlocks.
1.6.7 POWER ON/OFF MODE STATUS
When the handset is on, press the Hold key for a few seconds to turn
the phone off. The LCD displays POWER OFF for three seconds
before turning completely off.
POWER OFF
When the handset is off, press the Hold key for a few seconds to turn
the handset back on. The LCD displays POWER ON for three
seconds as it comes back up.
POWER ON
28
Comdial
May ‘05
DX-80 Cordless User
1.6.8 NO LINK TO KSU STATUS
After powering on the handset, the handset links with the base station
within approximately one minute. If the base cannot link to the KSU,
the handset displays the following.
(( ))
NO LINK TO KSU
May ‘05
Comdial
29
Overview
This Page Intentionally Left Blank
30
Comdial
May ‘05
DX-80 Cordless User
2. PROGRAMMING YOUR PHONE
The DX-80 Cordless phone provides two methods for programming
features:
• Using the System Programming Mode to program the cordlessspecific features of the phone.
• Function Key programming to program the remaining features.
This set of features is identical to those that can be programmed
using the DET phone.
2.1 System Programming Mode
You can easily program the wireless features on your DX-80 Cordless
by using the programming mode. When you enter the System Programming Mode, all soft keys are changed to the following function
keys:
• F1 key: UP
• F2 key: DOWN
• F3 key: OK
• Hold key:EXIT
To enter the System Programming Mode, press and hold F1 for over
two seconds. Once in programming mode press either F1 (Up) or F2
(Down) until the setting you want to change appears. The setting that
is selected will have a ">" next to it on the left. Once the correct
parameter is selected press the F3 button to see the actual values.
The following table lists the wireless settings and their values.
Item
Note (*: Default Value)
LANGUAGE
ENGLISH *, FRENCH,
SPANISH
REGISTRATION
May ‘05
Comdial
31
Programming Your Phone
DE-REGISTER
VIBRATION
RING *, VIBRATOR, RING
and VIBRATOR
AUTO PICK UP
RECEIVER*, HANDSFREE,
DISABLE
RELEASE CALL
RESET HANDSET
1. In the standby mode, press and hold the F1 key for over two
seconds to enter the System Programming mode. The LCD
responds by displaying the first configurable item on the list.
(( ))
>LANGUAGE
REGISTRATION
2. Press F1 (Down) or F2 (Up) button to cycle through the menu
choices. For more information on the specific choice see the
following sections.
2.1.1 CHANGING DISPLAY LANGUAGE
You can program the first line of your wireless display in one of three
different languages choices: English, French, and Spanish. The
default is English. Note: The second and third row of the display
appears in whatever language is set in the system programming for
the KSU.
1. Press and hold the F1 key for just over two seconds to enter the
System Programming mode. The LCD responds with the following.
32
Comdial
May ‘05
DX-80 Cordless User
(( ))
>LANGUAGE
ok
2. Press the ok soft key to enter the change mode. The display
responds with the following.
(( ))
LANGUAGE
ENGLISH
3. Press the F1 or F2 key to step through the language choices.
(( ))
LANGUAGE
FRENCH
4. When the lanuguage you want to use displays, press F3. The
phone sounds a confirmation beep. The display responds with
the following.
May ‘05
Comdial
33
Programming Your Phone
(( ))
LANGUAGE
FRENCH
OK!
5. After three seconds, the LCD returns to the upper level.
(( ))
LANGUAGE
2.1.2 CONTROLLING VOLUME SETTINGS
The DX-80 Cordless phone is equipped with a volume control that
you can use to adjust the various volume settings of the telephone.
You can adjust the following volumes:
• Background Music
• Ringing
• Handset
• Speaker (Includes speakerphone and
page announcement volume)
• Headset
You can adjust the volume for each function while that function is in
use. You can adjust ringer volume while the telephone is idle.
34
Comdial
May ‘05
DX-80 Cordless User
To change the volume,
press the up or down
arrows as necessary. The
volume for this function is
now set and is retained for
any future use of this
mode.
Volume Up
Volume Down
2.1.3 SETTING
BACKGROUND MUSIC
You can activate either of the two music channels to monitor music at
your extension (an external music source is required.)
While your extension is idle, enter the music channel you want to
monitor:
• Press 7 + 7 + 1 for Music Channel 1.
• Press 7 + 7 + 2 for Music Channel 2.
Enter the same number again to turn off background music.
2.1.4 DO NOT DISTURB
DND blocks all outside line and intercom call ringing. You can
activate DND while your telephone is idle or busy. Some extensions
with a higher Class Of Service may override the active DND condition.
When you have activated DND, the phone sounds a special intercom
(stutter) reminder tone when you lift the handset or use the speakerphone. If you have assigned a button on your cordless phone specifically for DND, that button lights whenever you activate the feature.
To set DND, perform the following steps.
1. While your extension is idle, press Func + 4. Do Not Disturb
activates, and the display momentarily shows the following.
May ‘05
Comdial
35
Programming Your Phone
(( ))
DO NOT DISTURB
2. When the display reverts back to idle condition, the DND condition shows in the bottom row of the display.
(( ))
SEP 25 MON 10:25
EXT
DND
103
To cancel DND, perform the following steps.
1. While your extension is idle, press Func + 4. Do Not Disturb
deactivates, and the display momentarily shows the following.
(( ))
DND DELETE
2. When the display reverts back to idle condition, the DND condition is removed from the bottom row of the display.
36
Comdial
May ‘05
DX-80 Cordless User
(( ))
SEP 25 MON 10:25
EXT
103
2.2 Function Key Programming
You can use the Func key on your DX-80 Cordless phone to control
many of the DX-80 features.
2.2.1 SETTING THE ALARM CLOCK FEATURE
You may activate your own private alarm on your telephone to
remind you of special appointments, events, etc. When the alarm
activates, you your cordless phone produces tone ringing. After the
alarm rings for a certain amount of time, the phone automatically
cancels it. You may program the alarm to operate a single time, or
repeatedly every 24 hours (sounding the alarm at the same time
everyday).
When the alarm sounds, the display shows the following.
(( ))
ALARM REACHED
ack
Press the ack soft key to stop the alarm, or wait for it to stop automatically.
To activate the alarm clock feature, perform the following steps.
May ‘05
Comdial
37
Programming Your Phone
1. Press Func + 9 + 2. The current time displays (NULL=none).
2. Press the chg soft key to enter a new alarm alert time.
3. Enter the alarm time in “HHMM” 24-hour format (HH = hr,
MM = min.).
4. Press the save soft key.
5. Select one for a one-time alarm or always for repeated alarm.
To deactivate the alarm clock feature, perform the following steps.
1. Press Func + 9 + 2. The current time displays (NULL=none).
2. Press the del soft key to turn off the alarm alert time.
2.2.2 USING AUTOMATIC HOLD
If you are on a call and you press an outside line button, the Automatic Hold feature automatically places the current call on hold. For
instance, if you are currently on a call on line 1 and you press line 2,
the call on line 1 is placed on Exclusive Hold automatically. Similarly, if you are currently on an intercom call with another DX-80
extension and you press an outside line button, the intercom call is
placed on Exclusive hold. With Automatic Hold, you do not need to
press the Hold button unless you want to place a call on System Hold.
To activate Automatic Hold, press Func + 9 + 4. You then hear confirmation tone and the display shows the following.
(( ))
AUTO HOLD ALLOW
The extension returns to an idle state.
To deactivate Automatic Hold, press Func + 9 + 4. You then hear
confirmation tone and the display shows the following.
38
Comdial
May ‘05
DX-80 Cordless User
(( ))
AUTO HOLD DENY
The extension returns to an idle state.
2.2.3 USING AUTOMATIC LINE SELECTION
This feature allows you to access a specific outside line or intercom
automatically when you lift the handset or press the speakerphone
button.
To set up automatic line selection, perform the following steps.
1. Press Func + 9 + 5. The current selection displays (ICM =
Intercom).
2. Press the icm soft key to select Intercom.
3. Press co to select a specific outside line.
4. Enter the outside line directory number (740–755 = 1–16).
5. Press save.
6. Press co gp to select a specific outside line group.
7. Enter the valid outside line group directory number (9 for outside line group 1, 800 for outside line group 2… 806 for outside line group 8).
8. Press save.
2.2.4 SETTING YOUR BUSY RING OPTIONS
Your phone rings at the lowest volume setting if a call comes in while
you are on the line. You can eliminate this low (busy) ring entirely if
you prefer.
May ‘05
Comdial
39
Programming Your Phone
To cancel (deny) a Busy Ring, press Func + # + 2. The display shows
the following.
(( ))
BUSY RING DENY
If you have Busy Ring turned off and want to turn it on again, press
Func + # + 2. The display shows the following.
(( ))
BUSY RING ALLOW
2.2.5 SETTING YOUR CALL FORWARDING OPTIONS
The DX-80 provides many choices for forwarding your calls:
• All—Forward all of your calls,
• Busy—Forward your calls when your telephone is busy.
• Follow Me—Forward calls at your extension to the extension
where you are currently working (conference room, associate’s
office, etc.)
• Follow Preset—Invoke call forward at your extension so that it
can be changed from another extension.
• No Answer—Forward your calls for no answer conditions.
40
Comdial
May ‘05
DX-80 Cordless User
• External—Forward calls transferred to your extension to a
different telephone number. (To use this feature, your System
Administrator must enable it in database administration.)
You can set forward conditions for each call forward type:
• Intercom (internal) calls only.
• Intercom and outside line (including transferred outside lines)
calls.
• Outside line (CO Line) calls only.
To set up your call forward options, perform the following steps.
2.2.5.1 All
1. Press Func + 2 or the feature button designated as CALL FWD
(if available). The display responds as follows.
(( ))
CALL FORWARD
all
busy
next
2. Press the all soft key. The display responds as follows.
(( ))
ALL FWD.
bksp
save
_
chg
3. Enter the extension number to which you want to forward calls.
4. Press save. The display responds as follows.
May ‘05
Comdial
41
Programming Your Phone
(( ))
ALL FWD 123
co
icm/co
icm
5. Select the type of calls you want to forward.
• co = outside line incoming or transferred calls
• icm/co = both intercom and outside line calls
• icm = intercom calls only.
6. You hear a confirmation tone and your extension returns to
idle. The display shows FWD in the middle of the bottom row.
2.2.5.2 Busy
1. Press Func + 2 or the feature button designated as CALL FWD
(if available). The display responds as follows.
(( ))
CALL FORWARD
all
busy
next
2. Press the busy soft key. The display responds as follows.
42
Comdial
May ‘05
DX-80 Cordless User
(( ))
BUSY FWD.
bksp
save
_
chg
3. Enter the extension number to which you want to forward calls.
4. Press save. The display responds as follows.
(( ))
BUSY FWD 123
co
icm/co
icm
5. Select the type of busy calls you want to forward.
• co = outside line incoming or transferred calls
• icm/co = both intercom and outside line calls
• icm = intercom calls only.
6. You hear a confirmation tone and your extension returns to
idle. The display shows FWD in the middle of the bottom row.
2.2.5.3 No Answer
1. Press Func + 2 or the feature button designated as CALL FWD
(if available). The display responds as follows.
May ‘05
Comdial
43
Programming Your Phone
(( ))
CALL FORWARD
all
busy
next
2. Press the next soft key. The display responds as follows.
(( ))
CALL FORWARD _
n_ans
ext
follow
3. Press n_ans. The display responds as follows.
(( ))
NO_ANS FWD. _
bksp
save
chg
4. Enter the extension number to which you want to forward calls.
5. Press save. The display responds as follows.
(( ))
NO_ANS FWD. 123
co
44
icm/co
Comdial
icm
May ‘05
DX-80 Cordless User
6. Select the type of busy calls you want to forward.
• co = outside line incoming or transferred calls
• icm/co = both intercom and outside line calls
• icm = intercom calls only.
7. You hear a confirmation tone and your extension returns to
idle. The display shows FWD in the middle of the bottom row.
2.2.5.4 External
1. Press Func + 2 or the feature button designated as CALL FWD
(if available). The display responds as follows.
(( ))
CALL FORWARD
all
busy
next
2. Press the next soft key. The display responds as follows.
(( ))
CALL FORWARD _
n_ans
ext
follow
3. Press ext. The display responds as follows.
May ‘05
Comdial
45
Programming Your Phone
(( ))
_
bksp
save
chg
4. Enter the telephone number (cell phone, other office, etc.)
where you want to forward your calls.
5. Press save.
6. You hear a confirmation tone and the display briefly shows the
telephone number where outside line transfers will be routed.
Your extension returns to idle and the display shows FWD in
the middle of the bottom row.
2.2.5.5 Follow Me Here (From Another Extension To
This Extension)
1. Press Func + 2 or the feature button designated as CALL FWD
(if available). The display responds as follows.
(( ))
CALL FORWARD
all
busy
next
2. Press the next soft key. The display responds as follows.
46
Comdial
May ‘05
DX-80 Cordless User
(( ))
CALL FORWARD _
n_ans
ext
follow
3. Press follow. The display responds as follows.
(( ))
FOLLOW ME
preset
remote
4. Press remote. The display responds as follows.
(( ))
REMOTE SELECTION
del
set
5. Press set. The display responds as follows.
(( ))
FOLLOW FM
bksp
May ‘05
save
Comdial
_
chg
47
Programming Your Phone
6. Enter the extension number from where you want calls forwarded.
7. Press save. The display responds as follows.
(( ))
FOLLOW FM 123
co
icm/co
icm
8. Select the type of busy calls you want to forward.
• co = outside line incoming or transferred calls
• icm/co = both intercom and outside line calls
• icm = intercom calls only.
9. The display display responds as follows.
(( ))
PSWD :_
bksp
save
change
10.Enter the password of the extension from which you want to
forward the call.
11.Press save. You hear a confirmation tone and your extension
returns to idle. The display shows FORWARD FROM 123 in
the middle of the bottom row.
2.2.5.6 Follow Me There (From This Extension To
Another Extension)
1. Press Func + 2 or the feature button designated as CALL FWD
(if available). The display responds as follows.
48
Comdial
May ‘05
DX-80 Cordless User
(( ))
CALL FORWARD
all
busy
next
2. Press the preset soft key. The display responds as follows.
(( ))
FOLLOW TO
bksp
save
_
change
3. Enter the extension number from which you want to forward
calls.
4. Press save. The display responds as follows.
(( ))
FOLLOW FM 123
co
icm/co
icm
5. Select the type of busy calls you want to forward.
• co = outside line incoming or transferred calls
• icm/co = both intercom and outside line calls
• icm = intercom calls only.
6. You hear a confirmation tone and your extension returns to
idle. The display shows FORWARD FROM 123 in the middle
of the bottom row.
May ‘05
Comdial
49
Programming Your Phone
2.2.5.7 Deleting an Existing Call Forward
1. Press the middle soft key (under the FWD in the display).
2. The first active mode of forward is displayed, for example as
follows.
(( ))
BUSY FWD 123
del
more
3. If you want to delete this forward, press del. To view other
active call forwards, select more.
2.2.6 SETTING UP PERSONAL SPEED DIALS
Speed Dialing allows you to store frequently dialed numbers. There
are 20 speed dial locations (bins) for most extensions, and 200 system
speed bins that are shared by all extensions.
To program a speed dial number, perform the following steps.
1. Press Func + 1.
2. Enter the location of the bin where you want to store this number (470-489). These are the default locations for the personal
speed dial numbers.
3. Press show. The system displays the current contents of the
speed dail bin you specified.
4. Press chg.
5. Enter the telephone number you want to store, using Pauses
(Func + 7 + 0), Flash (Func + 3) and Pulse To Tone Conversion (*) codes as necessary. If you are unsure whether you
need these codes, see your System Administrator.
6. Press save. The system then stores the phone number you just
entered in the location you specified.
50
Comdial
May ‘05
DX-80 Cordless User
7. In the same manner, program any other personal speed dial
numbers you desire. When you are finished, press Talk twice
to exit.
2.2.7 CLEARING CUSTOM PHONE SETTINGS AND
REVERTING TO DEFAULT SETTINGS
You can clear all active modes at your extension (Call Forward, Do
Not Disturb, etc.) and return your extension settings to the factory
default.
1. Press Func + 6 + 9. The display shows the following screen to
confirm.
(( ))
DEFAULT SET
go
2. Press go to clear the custom settings. You hear a confirmation
tone when the operation is complete.
2.2.8 DIAL PAD TOUCH TONES
Dial Pad Confirmation is the tone you hear to confirm that you have
pressed a button on the Dial Pad. You can disable this touch tone. To
do so, while the telephone is idle, press Func + # + 1. The phone
sounds a confirmation tone and the display indicates the current status
(TOUCH TONE ON or TOUCH TONE OFF).
May ‘05
Comdial
51
Programming Your Phone
2.2.9 DISTINCTIVE RINGING
You may choose one of eight distinctive ring tones for your extension
to help identify when your extension is ringing. This feature can be
especially helpful in open office areas where several phones may ring
simulatneously.
1. Press the Distinctive Ringing code Func + # + 7. The phone
sounds the current tone, and displays the setting number.
(( ))
RING TYPE
:1
chg
2. Press the chg soft key until you hear the tone you want and it
displays.
2.2.10 CHECKING FEATURE SETTINGS FOR YOUR
EXTENSION
To find out the current condition of features on your telephone, press
Press Func + # + 8 and review the following features:
• LNR = empty
• SNR = No Saved Number
• Memo = No Saved Number
• Telephone Lock = No
• Auto Hold = No
• Page Receive = Yes
• Busy Ring = Yes
• Hotline to = NULL
• Position
52
Comdial
May ‘05
DX-80 Cordless User
• Tenant Group
• Pickup Group
• Paging Group
• Day COS = 0
• Eve COS = 0
• Monitor COS = 5
• Warning Tone = No
• Drop Call Out = No
• Drop Call In = No
• Intrusion Active = Yes
• Intrusion Accept = Yes
• Intrusion Tone = Yes
• ECF Operation = No
• SMDR Output = Yes
• ICM Mode = VC-HF/PR/TN.
To display the current feature settings for your wireless phone,
perform the following steps.
1. The telephone must be idle.
2. Press Func + # + 8. The display shows the contents of LNR
(Last Number Redial).
3. Use the next soft key to advance through all of the various
extension features.
2.2.11 CHANGING YOUR EXTENSION PASSWORD
All extensions of the DX-80 system have an associated User
Password. Passwords are used to use Phone Lock, Call Forward
Remote, and Attendant features. Your password length is from four
to eight characters and is determined in system programming. For
more details on password length, see your System Administrator.
May ‘05
Comdial
53
Programming Your Phone
To change your extension password, perform the following steps.
1. Press Func + 9 + 7. The display responds as follows.
(( ))
PSWD
bksp
:_
show
chg
2. Enter the current password and then press the show soft key.
The display responds as follows.
(( ))
LOCK PHONE
pswd
yes
no
3. Press pswd. The display responds as follows.
(( ))
N PSWD
bksp
save
:_
chg
4. Enter the new password and then press the save soft key.
54
Comdial
May ‘05
DX-80 Cordless User
2.2.12 PROGRAMMING FEATURE BUTTONS
You DX-80 Cordless phone has six programmable Flexible Feature
Buttons. You can store any system feature code on any available
Feature Button for one-button operation. Certain programmed
feature buttons light when activated (DND, Call Forward, DSS/BLF,
etc.), while others such as Call Pick-Up, Background Music, Last
Number Redial, do not.
Features are separated into two distinct categories for programming
onto Flexible Buttons: Directory Numbers or Feature Codes. Note:
Before you begin to program a feature code, you must know the
feature code sequence you want to program to this button. If you do
not know this sequence, first use Feature/Directory Number Lookup
(Section 2.2.13, Looking Up Feature Numbers) to locate the feature
and code you want to program.
1. While the phone is idle, press Func + # + 3. The display
responds as follows.
(( ))
PRESS FTR KEY
You are now in Feature Key programming mode.
2. Press the Flexible Feature Button that you want to program.
The current programming displays.
May ‘05
Comdial
55
Programming Your Phone
(( ))
F98 _____
show
chg
3. Press the chg soft key. The display responds as follows.
(( ))
SELECT FUNCTION
dir
feat
4. To assign a directory number to this button, press dir. The display responds as follows.
(( ))
DIR NUMBER: _
bksp
save
chg
Enter the appropriate directory number and then press save. If
you make a mistake, use bksp and chg to re-enter the number.
5. Or, to program a feature code, press feat at the Select Function
display.
56
Comdial
May ‘05
DX-80 Cordless User
(( ))
FTR CODE: _
bksp
save
chg
6. Press the Func button., enter the feature code you want to program to this button (for example, Func + 6 + # for CID table
review). Then press save.
7. Continue programming other Flexible Feature Buttons or lift/
replace the handset to exit this programming.
2.2.13 LOOKING UP FEATURE NUMBERS
Use Feature/Directory Number Lookup to find the directory number,
Feature Codes, and Suffix Codes required to operate system features.
1. While the extension is idle (no call activity), press
Func + # + 5. The display responds as follows.
(( ))
DIR#/CODE LOOKUP
dir
ftr
suffix
• To find a system Directory Number, press the dir soft key.
• To find a system Feature Access Code, press ftr. Features are
listed abbreviated and alphabetically.
• To find a Suffix Code, press suffix. The list displays digits
dialed after system resource directory numbers.
2. Use the back and next buttons to move through the display categories.
May ‘05
Comdial
57
Programming Your Phone
3. Use the Hold button to return to a previous menu level.
4. Press the Talk button twice to exit Feature/Directory Number
Lookup.
2.2.14 RESETTING FLEXIBLE FEATURE BUTTONS
TO DEFAULT
You can use this feature to reset all Flexible Feature buttons to their
factory settings.
1. While the extension is idle (no call activity), press
Func + 5 + 8. The display prompts you to enter your extension
password.
(( ))
PSWD
bksp
:_
show
chg
2. Enter your password and then press the show soft key. The display asks you to confirm that you want to reset all flexible feature keys.
(( ))
FTR KEY RESET
go
3. Press go. The system then resets all of your feature buttons and
sounds a confirmation tone.
58
Comdial
May ‘05
DX-80 Cordless User
2.2.15 HIDDEN CODES
The Hidden Code feature allows you to store a four-digit code so you
can dial it by pressing only one button. (To operate, the Hidden Code
must be stored on a Flexible Feature button.) This feature is typically
used to store a password for the voice mail mailbox.
When you hear the prompt to enter your password, press your Hidden
Code button.
To store a code, perform the following steps.
1. While the telephone is idle, access Flexible Feature Button
Programming (Func + # + 3) and then press the feature button
you want to store with your Hidden Code.
(( ))
AVAILABLE KEY
chg
2. Press chg.
(( ))
SELECT FUNCTION
dir
feat
3. Press feat.
May ‘05
Comdial
59
Programming Your Phone
(( ))
FTR CODE:_
bksp
save
chg
4. Press the four-digit code you want to store (for example, Func
+ 6 + 1).
5. Press save.
6. Press Talk to exit Flexible Feature Button Programming.
2.2.16 HOT KEYS
Hot Key is the automatic operation of dial pad keys while the telephone is idle. That is, if the telephone is idle and you press a dial pad
key, that button operation is processed as the first command of others
that follow (like the remainder of an extension number). You can also
disable the Hot Key.
To enable hot key, while the telephone is idle, press Func + # + 6.
The display momentarily shows the feature status.
(( ))
HOT KEY ENABLED
To disable hot key, while the telephone is idle, press Func + # + 6.
The display momentarily shows the feature status.
60
Comdial
May ‘05
DX-80 Cordless User
(( ))
HOT KEY DISABLED
2.2.17 HOTLINE SPEED DIALING
Hotline allows you to access an extension or Speed Dial Directory
number simply by lifting the handset. This feature is especially
useful for elevator phones and applications that dictate a specific destination for system extensions.
To set up hotline speed dialing, perform the following steps.
1. While the telephone is idle, press Func + 9 + *. The display
responds as follows.
(( ))
HOTLINE TO: NULL
chg
1. Press chg. The display responds as follows.
(( ))
HOTLINE TO: _
bksp
May ‘05
save
Comdial
chg
61
Programming Your Phone
2. Enter the speed dial directory number or extension number to
which you want to connect this extension when the handset is
lifted. Then press save. The display responds as follows.
(( ))
HOTLINE TO: 123
immediate
delay
3. Select if this destination is to be immediate or delayed.
If you select immediate, the system plays a confirmation tone.
4. If you select delay, the display responds as follows.
(( ))
DELAY TIME: 1
chg
5. Press chg to select the delay time you want to use (in seconds).
2.2.18 USING STATUS MESSAGES
You can use a display message to inform other users of the current
status of your extension. There are six programmed messages and
one custom message that you can use. Whenever another user calls
an extension with an active Status message, the system displays the
message at the calling extension.
To set up a status message, perform the following steps.
1. While the extension is idle, press Func + 9 + 0. The display
shows the first message choice (custom).
62
Comdial
May ‘05
DX-80 Cordless User
(( ))
EMPTY
store
next
chg
2. Press next until the pre-programmed message you want to use
displays. To activate the message, press store.
3. To enter a custom message, press chg and then use the alphanumeric chart and dial-pad to write the message. Press save
when you are done.
Use the letters associated with the number keys to spell out a name or
word using lower case letters; for example, press the 5 key and the *
key for the letter “k.”
Number
Key
1*
press
2*
presses
3*
presses
2
a
b
c
3
d
e
f
4
g
h
i
5
j
k
l
6
m
n
o
7
p
q
r
8
t
u
v
9
w
x
y
4*
presses
then
press
#
s
z
Note: The # button acts as an enter key. You must press it after each
character you enter to save that character in the position. You can
also use # to enter a space.
So for example to enter “mary”, enter the following keystrokes.
6*#2*#777*#999*#
May ‘05
Comdial
63
Programming Your Phone
You can also use capital letters if you wish. Use the following table
when entering a capital letter.
Number
Key
1
press
2
presses
3
presses
2
A
B
C
3
D
E
F
4
G
H
I
5
J
K
L
6
M
N
O
7
P
Q
R
8
T
U
V
9
W
X
Y
4
presses
then
press
#
S
Z
So for example to enter “Mary”, enter the following keystrokes.
6#2*#777*#999*#
If you wish to use numerals, refer to the following table.
First
Press
Then
Number
Key
To Get
*
1
1
*
2
2
*
3
3
*
4
*
5
*
6
6
*
7
7
*
8
8
*
9
9
then
press
#
4
5
So for example to enter “1846”, enter the following keystrokes.
64
Comdial
May ‘05
DX-80 Cordless User
*1#*8#*4#*6#
To deactivate a status message, while your extension is idle, press
press Func + * + 9 + 0. The display responds as follows, and your
telephone returns to idle.
(( ))
STATUS MSG DEL
store
next
chg
2.2.19 ENABLING/DISABLING PAGING AT YOUR
EXTENSION
You can block one-way page announcements at your extension by
dialing the Page Deny code. The Page Allow/Deny feature does not
affect enabled Background Music.
1. When the extension is idle, press Func + # + 9. The display
responds as follows.
(( ))
PAGING DENY
2. Press Func + # + 9 again to enable page announcements at your
extension.
May ‘05
Comdial
65
Programming Your Phone
(( ))
PAGING ACCEPT
2.2.20 INSERTING A PAUSE IN OUTGOING CALLS
(SPEED DIALS)
You can use Pause Insertion to generate an intentional delay in dialing
on outgoing outside line calls. You can store a pause or a combination of pauses in the Speed Dial bins to allow timed access to
special services while allowing you to monitor the progress of the
call.
A pause appears as “P” on the display. When storing numbers in
speed dial, use the feature code Func + 7 + 0 to insert a pause.
2.2.21 LOCKING/UNLOCKING YOUR PHONE
Use this feature to prevent anyone from making unauthorized outside
line calls from your extension. This feature code is also used to
program your private, four-digit extension password.
To lock your phone perform the following steps.
1. Press Func + 9 + 7. The display responds as follows.
(( ))
PSWD
bksp
66
show
Comdial
:_
chg
May ‘05
DX-80 Cordless User
2. Enter the current password (the factory default is 0000) and
then press show. The display responds as follows.
(( ))
LOCK PHONE
pswd
yes
no
3. Press yes. The display responds as follows.
(( ))
PHONE LOCKED
4. No outside line calls can be made at your extension.
To unlock your phone perform the following steps.
1. Press Func + 9 + 7. The display responds as follows.
(( ))
PSWD
bksp
show
:_
chg
2. Enter the current password and then press show. The display
responds as follows.
May ‘05
Comdial
67
Programming Your Phone
(( ))
LOCK PHONE
pswd
yes
no
3. Press no. The display responds as follows.
(( ))
PHONE UNLOCKED
4. You can now make outside line calls at your extension.
68
Comdial
May ‘05
DX-80 Cordless User
3. MAKING CALLS
3.1 Making Outside Calls
You can access the CO lines (outside lines) in several different ways.
In some cases you may want to dial the specific outside line (lines
740 - 756) or outside line group (9, 800-806), but in most cases, you
can simply press the outside line button.
1. Press the outside line button of an idle outside line (LED not
lit).
2. When you hear dial tone, dial the telephone number.
3. Hang up or press Talk to end the call.
3.2 Making Intercom (Internal) Calls
Dial the extension number (the speakerphone activates automatically). Lift the handset before dialing for a private call (or press
Speaker while in hands-free mode to switch to talk mode).
Or…
Press the DSS button of the extension that you want to call.
To call the attendant (operator), press 0. This is the default (your
System Administrator may have changed it).
3.3 Using the Speakerphone
To make a call using the hands-free speakerphone of the DX-80
Wireless phone, simply press Speaker without lifting the handset
from the cradle. To hang up, press Talk.
May ‘05
Comdial
69
Making Calls
3.4 Using Call Back
3.4.1 CALL BACK – CO LINE
This feature allows you to queue a busy outside line and reserve that
outside line for use when it becomes available. This feature eliminates the need for you to observe the line status continually for availability. You may have only one Call Back active at any time.
To queue a CO line for call back, perform the following steps.
1. Press a busy (solid red LED) outside line or outside line group
button, or dial an outside line access group number (9, 800806, 740 – 755).
2. The phone sounds a busy tone and the display reads as follows.
(( ))
CO LN BUSY XXX
cbck
3. Press the cbck soft key or dial # on the dial pad.
4. The phone sounds a confirmation tone and the display reads as
follows.
(( ))
CBCK TO LINE XXX
After a few moments, the display returns to an idle state.
70
Comdial
May ‘05
DX-80 Cordless User
5. When the specified outside line (or an outside line in the same
outside line group) becomes available, the phone sounds fast
ringing at your extension. The display reads as follows.
(( ))
CBCK TO LINE XXX
reply
del
6. Press reply to connect to the available outside line and dial as
usual, or press del to delete the outside line callback.
3.4.2 CALL BACK – EXTENSION
When you call an extension that is busy, in Do Not Disturb (DND), or
idle, you can use this feature to queue your call so that the system
places it as soon as the extension is available (for busy or DND extensions) or the extension user returns (for idle extensions).
When you send a Call Back to a busy extension, the Call Back
process begins when the busy extension hangs up. When you send a
Call Back to an idle extension, the Call Back process begins once the
other user performs an operation at that extension and then hangs up.
1. Dial the extension number of the busy extension.
2. If the extension you are calling is in Tone Ringing Mode, the
display shows the following.
(( ))
EXT XXX
cbck
May ‘05
msg
Comdial
71
Making Calls
If the extension you are calling is busy, the display shows the
following.
(( ))
EXT XXX BUSY
cbck
msg
next
3. Press cbck. The phone sounds a confirmation tone and the display reads as follows.
(( ))
CBCK TO EXT XXX
4. Your extension returns to idle status.
5. When the Call Back begins (because the called extension is
now available), your extension rings a special Call Back alert
ring for 30 seconds. The display shows the following.
(( ))
CALL BACK TO EXT XXX
reply
del
6. Lift the handset or press reply to activate the Call Back.
To cancel all active Call Backs prior to receiving Call Back Alert
ringing, press Func + # + #.
72
Comdial
May ‘05
DX-80 Cordless User
3.5 Using Speed Dial Numbers
This feature provides one- or two-button speed dialing using programmable buttons at which you have previously stored numbers.
When using speed dialing, you have the choice to either select a specific outside line you want to use, or to let the system automatically
select the outside line.
To select the outside line yourself, perform the following steps.
1. Press the outside line number you want to use or dial the outside line directory number (740-755).
2. Press Func + 1.
3. Dial the location of the speed dial that you want to use (470489, or 500-699).
To let the system select the outside line, simply dial the location of the
speed dial that you want to use (500-699). The system uses the last
outside line that you used, or any outside line in the same line group.
3.6 Automatic Redialing
You can use Automatic Redial (AR) to dial the last number you
dialed. The system automatically dials the number and then waits for
a predetermined time for the call to be answered. If the call is not
answered during this time, the system hangs up and then tries the call
again. The number of attempts the phone will make is determined in
the system programming.
To use Automatic Redial, when you place a call and receive a busy
signal, hang up. Then press Func + 7 + 8.
May ‘05
Comdial
73
Making Calls
3.7 Last Number Redial
The Last Number Redial (LNR) feature automatically dials the last
number dialed from your telephone; LNR retains 16 digits for each
extension. You may either choose a specific outside line by first
pressing that outside line button, or you may allow the system to automatically select the line.
To choose an outside line first, press an outside line button. Then
press Func + 8.
To let the system choose the outside line, simply press Func + 8.
3.8 Creating Conference Calls
The system can accommodate eight, four-member (party) conferences
simultaneously. Conferences can include a maximum of three outside
lines, and any number of extensions, to a maximum of four conference members. One inside key telephone station is the controller
of the conference and constitutes one conference member. Before a
conference can be established with four members, a three-member
conference must be established first.
A Supervised Conference is a conference in which at least one
member is an extension of the DX-80 system. The DX-80 extension
that establishes a conference is the conference controller, and may
add and/or delete members of the conference at any time. The conference controller also has the privilege of establishing an Unsupervised Conference.
An Unsupervised Conference is a conference in which only callers on
outside lines are members. All members are therefore outside of the
premises and connected together using the DX-80 conference
resource. An unsupervised conference may be re-joined by the initiating DX-80 extension, however, that extension maintains control of
the conference even though it is unsupervised.
To establish a three-party conference, perform the following steps.
74
Comdial
May ‘05
DX-80 Cordless User
1.
2.
3.
4.
Answer or place the first call (internal or external).
Press Hold.
Place the second call (internal or external).
Press the feature button programmed as Conference. The system joins the connections together.
5. Hang up to end the conference.
To establish a four-party conference, perform the following steps.
1.
2.
3.
4.
First establish a three party conference.
Press Hold.
Place the third call (internal or external).
Press the feature button programmed as Conference. The system joins the connections together. You are the controller of
the conference and count as one of the four parties.
5. Hang up to end the conference.
To establish an unsupervised conference, first establish a conference
with two or three outside lines. Then press Func + 7 + 7. The system
establishes the unsupervised conference and returns your extension to
idle.
To rejoin an unsupervised conference, press Func + 7 + 7. The
system rejoins your extension to the unsupervised conference.
3.8.1 CONFERENCE CONTROLLER PRIVILEGES
As a conference controller, you can force the release of a conference
member or establish a private connection with a conference member.
To force the release of a conference member, perform the following
steps.
1. While engaged in a conference the display appears as follows.
May ‘05
Comdial
75
Making Calls
(( ))
XXX XXX XXX
2. Press forced. The display responds as follows.
(( ))
PRESS DIR#
3. Press exit to abort the operation and return to the conference.
Or…
Dial the directory number (outside line number or extension
number) you want to release. (You may also simply press the
outside line button or DSS button of the outside line/extension
you want to release.)
The system disconnects that conference member and rejoins
you in conference with the remaining members.
4. Hang up when you are ready to end the conference.
To establish a private connection with one conference member,
perform the following steps.
1. While engaged in a conference the display appears as follows.
76
Comdial
May ‘05
DX-80 Cordless User
(( ))
XXX XXX XXX
2. Press private. The display responds as follows.
(( ))
PRESS DIR#
3. Dial the directory number (outside line number or extension
number) to which you want to privately connect. (You may
also simply press the outside line button or DSS button of the
outside line/extension to which you want to privately connect.)
The system then removes that conference party from the conference and connects them to you.
4. You may re-establish the conference with all members by
pressing the Conference button.
Or…
Hang up on the current connection and rejoin the remaining
members by pressing Hold.
5. Hang up to end the conference/connection.
May ‘05
Comdial
77
Making Calls
This Page Intentionally Left Blank
78
Comdial
May ‘05
DX-80 Cordless User
4. ANSWERING CALLS
4.1 Answering Calls
You can answer incoming calls on your cordless phone by pressing
either the Talk button or the Speaker button. If you press the Speaker
button, the handset operates in hands-free mode. To end a call in
either talk or hands-free modes, press the Talk button.
During a call you can switch the handset back and forth between
hands-free and talk mode by pressing the Speaker button.
4.2 Caller ID
This telephone company feature requires a Caller ID (CID) service
subscription from the telephone company.
The DX-80 system receives Type 1 Caller ID data from the telephone
company on all outside lines, and displays this data on the LCD.
1. When you answer an outside line with CID data, you can use
the left LCD soft key to toggle the displayed data between
Name received and Number received. For example:
(( ))
LINE 5
00:44
JAMES SCOTT
2. Press the left soft key to view the telephone number.
May ‘05
Comdial
79
Answering Calls
(( ))
LINE 5
00:44
8135551212
3. Press the left soft key to return to the name display.
4.3 Retrieving Caller ID Information
The system stores Caller ID information for one hundred calls in the CID
table. You can review all call data, dial a stored number, or delete call
data.
1. While the extension is idle (no active calls), press the CID Table
code Func + 6 + #.
2. Enter the attendant extension password.
3. Press the show soft key. The display responds as follows.
(( ))
CID CALL TABLE
4. Use the VOL bar (up and down) to go through the Caller ID Table.
Press Up to review the list from the most recent. Press Down to
review the list from the oldest recorded.
Each logged call has three screens that you can view: Name, Number, Time and Date.
5. Press more to view the screens.
80
Comdial
May ‘05
DX-80 Cordless User
(( ))
JOHNSON BILL
dial
more
del
(( ))
8135551212
dial
more
del
(( ))
9/19
dial
4:32 PM
more
del
6. Press del to delete a logged call.
7. Press dial to dial a logged call.
4.4 Picking Up Calls in your Group
You may answer calls ringing at another extension using the Call Pick
Up Group feature.
When you hear another extension in your pickup group ringing, press
*.
Or…
May ‘05
Comdial
81
Answering Calls
When you hear an extension in another pickup group ringing, dial that
Pick Up Group number (440-447).
4.5 Answering Machine Emulation
(Screening Incoming Calls)
Answering Machine Emulation requires the optional DX-80 Small Office
(Voice Mail System).
This feature mimics the call-screening feature of an answering machine.
When your voice mailbox answers a call, the DX-80 allows you to screen
the caller leaving the message. This option is available for only a few
seconds after your voice mailbox has answered the call.
1. When your voice mailbox answers a caller, the system sounds an
alert tone, and flashes the feature button programmed for voice
mail (if applicable) at a fast rate.
2. Press the flashing Voice Mail button. The button LED now flashes
at a slower rate. The display responds as follows.
(( ))
MONITOR VM CALL
yes
no
3. Press yes to monitor call. The LED of the voice mail button lights
steady. At this time you are monitoring the caller and message in
progress. The display responds as follows.
82
Comdial
May ‘05
DX-80 Cordless User
(( ))
MONITORING
answer
exit
4. Press answer to connect to the caller and remove them from the
voice mailbox. The voice mail button LED extinguishes.
5. Press exit to leave the caller in the voice mailbox to record their
message. Your extension returns to the idle status.
May ‘05
Comdial
83
Answering Calls
This Page Intentionally Left Blank
84
Comdial
May ‘05
DX-80 Cordless User
5. PROCESSING CALLS
5.1 Placing Calls on Hold
5.1.1 SYSTEM HOLD
You may place any outside line on System Hold by pressing the Hold
button.
5.1.2 HOLD – EXCLUSIVE
By using the Function button and the hold button together, you can
place an outside call on private/exclusive hold. The held line appears
in use at other extensions. To do this, while connected on an outside
line, press Func + Hold.
5.1.3 HOLD REMINDER
The system provides a programmable timer to remind you that you
have left a call on System or Exclusive Hold. When Hold Reminder
is enabled, the phone sounds one ring tone repeated each time the
hold time expires.
5.1.4 HOLDING CALL ANSWER
Holding Call Answer allows you to place a call on hold and retrieve
calls from hold by simply pressing the Hold button. When multiple
calls are holding at an extension, Holding Call Answer accesses the
outside line that has been holding the longest while placing the
current call on hold.
Holding Call Answer works for all outside lines regardless of the
extension outside line button programming. It is possible to handle
calls that do not appear (no button) at an extension via Holding Call
Answer.
May ‘05
Comdial
85
Processing Calls
1. When one or multiple calls are holding at your extension, press
Hold. The system connects you to the oldest held call.
2. Press Hold again to place this call on hold.
3. Press Hold again to answer the next-oldest held call.
4. Repeat as required for any calls on hold at your extension.
Note: If you are using the handset (talk mode) when you put the call on
hold, and you retrieve the call from hold within one minute, the system
returns the call to you in talk mode. If you retrieve the call from hold
after one minute, the system returns the call to you in speakerphone
mode. To convert to talk mode again, simply press the Speaker button.
If you are using the speakerphone mode and you retrieve a call from hold,
the system always returns the call to you in speakerphone mode.
5.2 Transferring Calls
Transfer is used to deliver calls from your extension to another extension.
You can make a supervised transfer or an unsupervised transfer. During
supervised transfers, you announce the transfer to the party to whom you
are transferring the call before the transfer occurs. In unsupervised
transfers, you transfer the call without making an announcement.
5.2.1 MAKING SUPERVISED AND UNSUPERVISED
TRANSFERS
To make an unsupervised transfer, while connected to a call (outside line
or intercom extension), press Trans. Dial the destination number where
you want to transfer this call (extension, UCD Group, Virtual Number,
etc.). Note: If your phone has a button that has been programmed to a
dial specific extension, you can use that button. Then hang up to complete the transfer.
86
Comdial
May ‘05
DX-80 Cordless User
To make an unsupervised transfer, while connected to a call (outside
line or intercom extension), press Trans. Dial the destination number
where you want to transfer the call (extension, UCD Group, Virtual
Number, etc.). Note: If your phone has a button that has been programmed to a dial specific extension, you can use that button. Wait
for the extension to answer your call, and then announce the transfer.
Hang up to complete the transfer.
5.2.2 TRANSFER AND ANSWER CALL
Transfer and Answer is a convenience feature that speeds the process
of completing a transfer and answering a ringing call by making the
operation possible by pushing one button. (This feature must be used
from a feature button that has been programmed by your System
Administrator.)
If you are the process of transferring a call and another call rings in,
you can press the programmed transfer feature button to complete the
transfer and answer the ringing call at the same time.
1. While on an outside line call and another call is ringing, begin
the transfer process.
2. Press the programmed transfer feature button.
3. Dial the destination intercom extension number or its DSS button if applicable.
4. Press the programmed transfer feature button. The system
completes the transfer and answers the ringing call.
May ‘05
Comdial
87
Processing Calls
5.3 Parking Calls
The Call Park / Call Park Answer features allow you to “park” a call at
any extension. It is also used to retrieve a parked call from any extension.
You park and retrieve calls by dialing the Call Park code (Func + 7 + 3)
followed by the extension number.
To park a call, perform the following steps.
1. While connected to an outside line call, press Func + 7 + 3, or
press the feature button assigned as CALL PARK (if available).
2. Dial the extension number where you want to park this call, or
press its DSS button (if applicable).
The system parks the outside line call at the extension you specified.
3. Hang up the phone or proceed with other system functions.
To pick up a parked call, perform the following steps.
1. While the phone is idle, press Func + 7 + 3, or press the feature
button designated as CALL PARK (if available).
2. Dial the extension number where the call is parked, or press its
DSS button (if applicable).
3. The system connects you to the call.
88
Comdial
May ‘05
DX-80 Cordless User
5.4 Paging
You can make a public announcement to all extension users or to a
portion of users. The DX-80 system provides both all-call (heard by
all users) and page zone (heard by a specific group of users) paging
that you access by dialing special codes. Page announcements are
heard over extension speakers.
1. While in the idle condition, lift the handset.
2. Dial the Zone Page access code (extensions) 401 - 408 external
page 7 + 7 + 7 for the group of users you want to page. Or, to
page all users, press the feature button designated as ALL
PAGE (if available). If you do not have an assigned feature
button, dial the All Call Page access code 400. The phone
sounds the Page Alert Tone.
3. Make your paging announcement.
4. Hang up when finished.
5.5 Responding to a Page (Meet Me
Paging)
Upon hearing a page announcement (internal or external), you can
dial a single-digit Meet Me Page code from any telephone and be
connected to the person paging.
The DX-80 Cordless phone enhances this high-use feature by providing a one-button access to the operation. At any DX-80 Cordless
extension, you may dial # to answer a page announcement.
1. While a page is currently in progress, the telephone displays
the following.
May ‘05
Comdial
89
Processing Calls
(( ))
STA xx PAGE
2. Press #, or Func + 5 + 9. The display changes to the following.
(( ))
EXT xxx TALK
3. You are now connected to the paging party.
5.6 Sending Messages
A busy or unattended cordless phone may be notified of a call attempt
via one of the DX-80 system Messaging features. The display shows
messages waiting and provides prompts to assist you in responding to
the messages.
A message may be sent and received in several forms:
• A Call Me Message
• A customized text message
• A preprogrammed text message (six available)
• A Voice Mail Message.
90
Comdial
May ‘05
DX-80 Cordless User
5.6.1 SENDING A CALL ME MESSAGE
1. You place a call to an extension and get no answer or busy.
(( ))
CALLING STA XXX
cbck
msg
(( ))
STAXXX BUSY
cbck
msg
next
2. Press msg. The display responds as follows.
(( ))
MESSAGE TYPE
call me
preprog
3. Press call me. The phone sounds a confirmation tone and the
message is left at the called extension. Your extension returns
to idle after briefly displaying the following.
May ‘05
Comdial
91
Processing Calls
(( ))
MSG TO EXT XXX
5.6.2 SENDING A TEXT MESSAGE
1. You place a call to an extension and get no answer or busy.
(( ))
CALLING STA XXX
cbck
msg
(( ))
STAXXX BUSY
cbck
msg
next
2. Press msg. The display responds as follows.
92
Comdial
May ‘05
DX-80 Cordless User
(( ))
MESSAGE TYPE
call me
preprog
3. Press preprog. Select the text message you want to send.
(( ))
EMPTY
send
next
chg
4. To select from the preprogrammed list of text messages to
send, press next until the appropriate message is displayed. Or,
press chg to enter a custom message.
(( ))
_
bksp
save
chg
Use the following table and dial pad keys to enter the message.
When you are finished entering your message, press save to
send the message to the called extension.
May ‘05
Comdial
93
Processing Calls
Use the letters associated with the number keys to spell out a name or
word using lower case letters; for example, press the 5 key and the *
key for the letter “k.”
Number
Key
1*
press
2*
presses
3*
presses
2
a
b
c
3
d
e
f
4
g
h
i
5
j
k
l
6
m
n
o
7
p
q
r
8
t
u
v
9
w
x
y
4*
presses
then
press
#
s
z
Note: The # button acts as an enter key. You must press it after each
character you enter to save that character in the position. You can
also use # to enter a space.
So for example to enter “mary”, enter the following keystrokes.
6*#2*#777*#999*#
94
Comdial
May ‘05
DX-80 Cordless User
You can also use capital letters if you wish. Use the following table
when entering a capital letter.
Number
Key
1
press
2
presses
3
presses
2
A
B
C
3
D
E
F
4
G
H
I
5
J
K
L
6
M
N
O
7
P
Q
R
8
T
U
V
9
W
X
Y
4
presses
then
press
#
S
Z
So for example to enter “Mary”, enter the following keystrokes.
6#2*#777*#999*#
If you wish to use numerals, refer to the following table.
First
Press
Then
Number
Key
*
1
1
*
2
2
*
3
3
*
4
*
5
*
6
6
*
7
7
*
8
8
*
9
9
May ‘05
To Get
then
press
#
Comdial
4
5
95
Processing Calls
So for example to enter “1846”, enter the following keystrokes.
*1#*8#*4#*6#
5.6.3 SENDING A VOICE MESSAGE
Note: The DX-80 voice mail system is required for this option.
1. You place a call to an extension and get no answer or busy…
(( ))
CALLING STA xxx
clock
msg
(( ))
STA xxx BUSY
clock
msg
next
2. Press the msg soft key. The display changes as follows (assuming your system is equipped with DX-80 Voice Mail).
(( ))
MESSAGE TYPE
callme
vmsg
prep
3. Press msg. The system immediately sends you to the DX-80
Voice Mail.
96
Comdial
May ‘05
DX-80 Cordless User
5.6.4 ANSWERING A MESSAGE
1. Your telephone display indicates when you have a message
waiting.
(( ))
MW FROM EXT xxx
more
reply
del
If a Text Message was sent, your display changes as follows.
(( ))
MW FROM EXT xxx
more
show
del
• Press more to review other messages left at your extension.
• Press show to display Text Messages.
• Press reply to call back the extension that left a Call Me
message.
• Press del to delete the displayed message.
May ‘05
Comdial
97
Processing Calls
5.6.5 CANCELING A SENT TEXT MESSAGE OR CALL
ME MESSAGE
You can cancel a text or call me message that you previously sent to
another extension.
1. Press Func + * + 9 + 6. The display responds as follows.
(( ))
DEL MW_TO :xxx
bksp
save
chg
2. Enter the extension number where you left the message. Then
press save.
(( ))
DEL MW_TO :123
bksp
save
chg
3. The system deletes the message. Press msg.
(( ))
MESSAGE TYPE
callme
98
preprog
Comdial
May ‘05
DX-80 Cordless User
INDEX
A
alarm clock feature 37
All Call Forward 41
Answering a Message 97
Answering Calls 79
Answering Machine Emulation
(Screening Incoming
Calls) 82
Answering Outside Calls 85
Automatic Dialing 73
automatic hold 38
automatic line selection 39
Automatic Redialing 73
B
background music 35
Background noise 17
Busy Call Forward 42
busy ring options 39
buttons, handset 14
C
call back 70
Call Back, CO Line 70
Call Back, Extension 71
call forward delete 50
call forward options, all call 41
call forward options, busy 42
call forward options, external 45
call forward options, follow me from
here 48
call forward options, follow me to
here 46
call forward options, no answer 43
call forwarding, setting 40
call me message 91
May ‘05
call park 88
Call Pickup 81
Caller ID 79
Canceling a Sent Text Message or Call
Me Message 98
Changing Display Language 32
Changing Your Extension Password 53
Checking Feature Settings for your
Extension 52
Clearing Custom Phone Settings and
Reverting to Default
Settings 51
CO line call back 70
conference calls 74
Conference Controller Privileges 75
controller, conference 75
Controlling Volume Settings 34
Creating Conference Calls 74
D
default, reverting to 51
Deleting an Existing Call Forward 50
De-Registration Programming by the
Base 21
Dial Pad Touch Tones 51
Distinctive Ringing 52
Do Not Disturb 35
E
Enabling/Disabling Paging at Your
Extension 65
extension call back 71
External Call Forward 45
F
feature buttons 55
feature buttons, resetting to default 58
Comdial
99
Index
feature numbers 57
feature settings 52
Follow Me (From Another Extension To
This Extension) Call
Forward 46
Follow Me (From This Extension To
Another Extension) Call
Forward 48
Function Key Programming 37
H
Handset Buttons 14
Hidden Codes 59
Hold Reminder 85
Holding Call Answer 85
Hot Keys 60
Hotline Speed Dialing 61
Meet Me Paging 89
message
answering 97
call me 91
canceling 98
text 92
voice 96
messages, sending 90
Monitoring Lines 98
music, background 35
N
No Answer Call Forward 43
O
outside calls, making 69
Overview 13
I
I-Hold 85
incoming calls, screening 82
Inserting a Pause in Outgoing Calls
(Speed Dials) 66
internal calls, making 69
L
language, changing display 32
Last Number Redial 74
LCD 16
Locking/Unlocking Your Phone 66
Looking Up Feature Numbers 57
M
Making Calls 69
Making Intercom (Internal) Calls 69
Making Intercom Calls 69
Making Outside Calls 69
Making Supervised and Unsupervised
Transfers 86
100
P
Paging 89
paging 65
Parking Calls 88
password, changing 53
pause, inserting in speed dial
numbers 66
Positioning Your Phone 17
Processing Calls 85
Programming Feature Buttons 55
Programming Your Phone 31
R
redial, last number 74
redialing, automatic 73
Registering the Phone 18
Resetting Flexible Feature Buttons to
Default 58
Responding to a Page 89
Retrieving Caller ID Information 80
reverting to default settings 51
Comdial
May ‘05
DX-80 Cordless User
ring tones 52
S
screening incoming calls 82
Sending a Call Me Message 91
Sending a Text Message 92
Sending a Voice Message 96
Sending Messages 90
Setting Background Music 35
Setting the Alarm Clock Feature 37
Setting Up Personal Speed Dials 50
Setting Your Busy Ring Options 39
Setting Your Call Forwarding
Options 40
speakerphone 69
speed dial 73
speed dials, personal 50
status messages 62
supervised transfers 86
System Hold & I-Hold Indication 85
System Programming Mode 31
Using the Base Only to Deregister
Phone 21
Using the Display 16
Using the Speakerphone 69
V
voice message 96
volume, controlling 34
T
text message 92
touch tones 51
Transfer and Answer Call 87
Transferring Calls 86
U
unlocking phone 66
unsupervised transfers 86
Using Automatic Hold 38
Using Automatic Line Selection 39
Using Call Back 70
Using Speed Dial Numbers 73
Using Status Messages 62
Using the Base and Handset to
Deregister Phone 21
May ‘05
Comdial
101
GCA70-413 Rev 1 May 2005