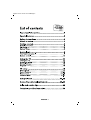
1
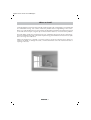
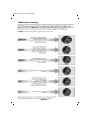
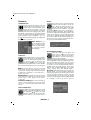
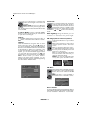
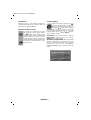
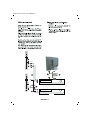
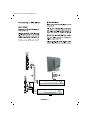
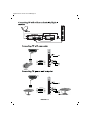
ingilizce-1.FH11 6/7/05 12:13 PM Page 1
ingilizce-1.FH11 6/7/05 12:13 PM Page 2
sorting
ENGLISH -3-
ingilizce-1.FH11 6/7/05 12:13 PM Page 3
ENGLISH -4-
ingilizce-1.FH11 6/7/05 12:13 PM Page 4
will
2X10 W
800
PAP (Picture and Picture) Feature
3
DVI-D socket
ENGLISH -5-
ingilizce-1.FH11 6/7/05 12:13 PM Page 5
Safety Instructions - For Your Safety
TO FULLY DISCONNECT THE TV,
THE MAINS PLUG IS USED AS A
DISCONNECTING DEVICE AND THEREFORE
SHALL BE READILY OPERABLE.
ENGLISH -6-
ingilizce-1.FH11 6/7/05 12:13 PM Page 6
Where to install
Locate the television away from direct sunlight and strong lights, soft, indirect lighting is recommended
for comfortable viewing. Use curtains or blinds to prevent direct sunlight falling on the screen.
Place on a sturdy platform, the mounting surface should be flat and steady It should then be secured
to the wall with a sturdy tie using the clip on the back of the television, or secured to the platform.
The LCD display panels are manufactured using an extremely high level of precision technology,
however sometimes some parts of the screen may be missing picture elements or have luminous spots.
This is not a sign of a malfunction.
Make sure the television is located in a position where it cannot be pushed or hit by objects, as
pressure will break or damage the screen, and that small items cannot be inserted into slots or
openings in the case.
ENGLISH -7-
ingilizce-1.FH11 6/7/05 12:13 PM Page 7
When not in use disconnect the mains plug from the
mains supply.
3.
bottom
be red.
4.
/
on the top of the TV
Note: Scart, DVI,VGA and RCA leads are not
supplied.
turns blue.
Connect the power cord plug to the mains socket.
Connect the input socket of the power cord to
the power socket at the back panel of the
LCD TV
go
if
▼
P
▲ –
+
ENGLISH -8-
ingilizce-1.FH11 6/7/05 12:13 PM Page 8
9
5
9
6
7
8
4
3
1
ANT IN
Video
L
Video
AV-4
16
17
18
PC-DVI
AUDIO IN
AV OUT
19
20
21
22
23
24
Source Select
11
Phono
Phono Connector (L)
Phono Connector (R)
21.
22.
23.
24.
25.
26.
output Phono
Audio RCA output (L)
Audio RCA output (R)
S-VHS
PC sound input
VGA
DVI-D
ENGLISH -9-
26
–
+
<
>
12
13
▼
>
•
Headphone jack
Scart (EXT1)
Scart (EXT2)
Scart (EXT3)
Power Input
DVI-D
25
Menu
10
PC-IN
14
P
▲
>
2
15
ingilizce-1.FH11 6/7/05 12:13 PM Page 9
Mix /TV
27
18
3
4
19
5
6
20
21
22
7
8
23
9
10
11
13
14
26
1
15
2
12
28
29
16
17
30
31
24
25
( )
Size)
ENGLISH -10-
ingilizce-1.FH11 6/7/05 12:13 PM Page 10
(
(
)
)
(– )
/
(+)
(
)/(
)
(
)/(
)
Return to Selected Button
Program (SWAP)
If you wish to return to the previous
program that you were watching then
you have the ability to return with a
single function, by pressing the SWAP
button. Regardless of whether your are
at AV, or any other program, by using
the SWAP function allows you to swap
between the program you were
watching and the last selected program. If you
hit the same button again, you will return to the
program or AV you were watching before.
E.G. 3
ENGLISH -11-
11
3
ingilizce-1.FH11 6/7/05 12:13 PM Page 11
External Device
The television has 3 SCART
connections. After every time you
press the AV button, the input settings
change as follows.
1. EXT1 when using SCART socket 1
(with RGB support)
2. EXT2 when using SCART socket 2
(with RGB support)
3. EXT3 when using SCART socket 3
4. EXT4 when using RCA socket
5. EXT5 when using S-Video socket
6. in PC mode
7. in DVI mode.
You can return to TV mode by pressing
“ ” button again.
Program tuning and saving into memory
You can either tune the programs automatically
or manually and storing them in your television.
As a result of your television’s Automatic Tuning
System (ATS), the programs found are
automatically ordered in accordance to the
selected country channels that send their title and
teletext information, followed by those programs
that do not.
Tuning The TV
Automatic tuning and storing of the
television program channels
In the SETUP menu select the country
of which you want to watch the program
with priority by pushing the Right/Left
movement button ( – / + ) in the
Language bar. Afterwards press the
down ( ) button to change the Country
setting. Later choose Auto Tuning and
press “OK” or the Left/right ( – / + )
buttons. You will see a warning sign
before Auto Tuning starts. To start Auto
Tuning press the “OK” button; the
channels will be searched automatically and those
broadcasting will be saved from the first
programme into memory. At this point, the auto
program menu appears showing an indication
that displays the position of the auto tuning bar
and the auto program operation as well as the
system, channel number of the existing channels
and, if present, their name information.
To stop the process at any given time, press the
“EXIT” button. The program numbers that have
been stored are reflected in the Programme Sort,
giving you the ability to assign any program
number to the channel of your choice.
Please note: In the case that your television
does not receive any broadcast signals for 5
minutes it will automatically go to stand-by. The
5 minute countdown OSD will be on screen.
SETUP
Language
Country
English
England
Auto tuning
Manual tuning
Manual setting
Back
ENGLISH -12-
Watch TV
ingilizce-1.FH11 6/7/05 12:13 PM Page 12
Manual Tuning
If you already know the
Channel number
By pressing the MENU and ( + )
buttons of your remote control, you
will bring up the SET UP menu on
your television screen. Using the
down button ( ) on your remote
control, highlight the Manual Tuning
bar in yellow and press “OK” or the
left/right motion ( – / + ) button. The
Manual Tuning menu will appear on
the screen. Use the ( ) and ( ) or
number buttons to manually tune your
desired program and press OK. The screen
will show the Manual Tuning menu. Choose
with the pressing of the right move button ( + )
the program and systems you want to make
a search in between the Program number,
Color System and System lines.
Here your TV can be set to one system, you can
also select from more than one systems with the
( ) and ( ) buttons. (option) access the Search
bar using the right button ( + ). Scan the channels
using the ( ) and ( ) buttons. If the program
on the screen has the desired quality store it in
the memory pressing the OK button.
Repeat the same operation for the next program.
If you need to do Manual Fine Tuning on the
current channel or to name the current channel
refer to the related parts.
By pressing the MENU and ( + ) buttons
of your remote control, you will bring
up the SET UP menu on your television
screen. Using the down button ( ) on
your remote control, highlight the Manual
Tuning bar in yellow and press “OK”
or ( + ) button. The Manual Tuning menu
will appear on the screen. Select the
desired program by using the ( ) and
( ) buttons and press the OK button.
The menu for the Manual Tuning will
be on screen. Access the System bar using the
right button ( + ). Here your TV can be set to one
system, you can also select from more than one
systems. (option) Select the Channel Band bar
pressing five times the right button ( + ). Using the
Up ( ) or down ( ) direction buttons select S
for Cable channels and C for terrestrial programs
and press the right ( + ) button. Here you can
directly enter the channel number using the
numbering buttons on remote control, you can as
well scan the channels in the ascending or
descending order using the up ( ) or down ( )
direction buttons.
If the program found on screen is acceptable in
quality, then press the OK button to store it in the
memory and repeat the same operations for the
next channel.
If you need to do Manual Fine Tuning on the
current channel or to name the current channel
refer to the related sections.
To leave the “MENU” and menus to return to the
previous menu for any reason press the EXIT
button.
ENGLISH -13-
ingilizce-1.FH11 6/7/05 12:13 PM Page 13
Fine Tuning
Manual Setting (For AV/PC Modes)
If the current channel requires fine tuning,
skip the Manual Fine Tuning bar using
the right ( + ) button on the Manual Tuning
menu. Using the up ( ) and down
( ) movement ( – / + ) buttons on your
remote control, adjust the program on the screen
to the quality you wish. Under normal conditions
you will not need Fine Tuning. Your television will
automatically lock channels, which need AFC
values. However, in the event that the TV
transmitters do not work, then you may need to
use this process. For storing the settings to the
memory press OK button.
To give names in the AV or PC mode,
use the MENU and ( – ) buttons on the
remote control, to bring the SETTINGS
menu on screen Using the down ( )
button on your remote control, yellow
highlight the Manual Setting selection
and press “OK” or the right/left ( – / + )
buttons.
The Manual Tuning menu will appear
on the screen. Using the right ( + ) button
select the Station line. Using the Up ( )
and down ( ) buttons to select the desired letter
and the direction ( – / + ) buttons for the desired
column.Press the “OK” button after you are done.
Changes are stored in memory.
Program Skipping
If you want to skip some of the channels
in the memory while selecting program
with ( ) and ( ) buttons, select the
Program Skip bar using the right button
on the Manual Tuning menu. Using the
Up ( ) and down ( ) buttons, the program for
which you select “ ” mark will be skipped.
Naming Stations
Please note: In Manual Setting selection you
can only make adjustments in AV or PC mode
you are in. To make changes in the AV or PC
mode, enter the Manual Settings menu, which
becomes active after you enter these modes.
If you wish to assign an 8- character
labelling to the channels in the memory,
select station bar using the right button
( + ) on the Manual Tuning bar. You can
choose a letter using the Up ( ) and
Down ( ) buttons and a section with the direction
( – / + ) buttons. After the process press the “OK”
button. The changes you made are now stored.
You can assign labelling to the next programme
in the same way.
ENGLISH -14-
ingilizce-1.FH11 6/7/05 12:13 PM Page 14
Programme Sorting
Quick Setup
Select Your Language
Select Your Country
Press OK to start Auto Tune
In the Setup menu use the down ( )
button to select the Programme Sorting
line and press “OK” or the left/right
( – / + ) button.
Language
Country
Watch TV
The Programme Sorting menu will be shown on
screen. Please select your
desired program using the
( )and ( ) buttons, then
press the OK or right ( + )
button. Match the program
you have selected using
the ( ) and ( ) buttons
with the program number
you want. To complete the
operation press again the “OK” button. You can
switch the next program you wish to another
program number in the same way.
AV Connection
In the Setup menu use the down ( ) button to
select the AV Connection line and press “OK” or
the right/left ( – / + ) buttons. The AV Connection
menu will be on screen. You can change the
output from your television of the devices you are
going to connect to SCART2 and SCART3 through
this menu. When you choose the TV feature; the
audio and video of
the program you are
watching
is
transferred.. When
you
choose
*NONE*, SCART2 and SCART3 outputs will be
cancelled.
Quick Setup
In the Setup menu use the down ( )
button to sellect the Quick Setup line
and press “OK” or the right/left buttons.
The Quick Setup menu will be on screen.
Here, after making your Language and
Country choice and pressing the OK
button, Auto Tuning will become active.
The channels will be searched
automatically and those with
broadcasting will be saved from the first
program into memory. At this point, the
auto program menu appears showing an
indication that displays the position of the auto
tuning bar and the auto programme operation
as well as the system, channel number of the
existing channels and, if present, their station
name. To stop the process at any given time,
press the “EXIT” button.
English
England
Start
The setup of your television
Setting up the Sound Menu
You can set the volume with the “ +”
and “–“ buttons on the television or the
( – / + ) buttons on the remote control.
You can control the other sound settings
by entering the Sound menu For this
application all you need to do is press
the MENU button of your remote control.
Press the “OK” or ( ) button selecting
the direction button on the Sound menu
bar The Sound menu appears on the
screen. Using the up/down movement
buttons ( / ) you can choose the features that
you require.
SOUND
Balance
Sound type
Effect
Volume Correction
Headphone
Back
Mono
Spatial
On
Watch TV
Balance: To adjust the volume balance
between the left and right speakers to
the desired level, select the Balance bar
using the down ( ) button. Using the
right/left movement ( – / + ) buttons
adjust the balance.
Sound Type: The program you watch
might be stereo or in two different
languages. Using the right/left keys
( – / + ) in this menu you can select
Mono/Stereo or Dual-I/Dual-II language.
Note: You can make this selection without entering
) button on your remote
the menu with the (
control.
Effect: If you want to add depth to the sound of
the program you watch, select Spatial with the
( + ) button.
ENGLISH -15-
ingilizce-1.FH11 6/7/05 12:13 PM Page 15
Volume Correction
Equalizer
Television transmitters have different
sound levels. This can be noticed from
the different volume levels that can be
heard while switching from one program
to another. Using the right/left movement
( – / + ) buttons switch to Open. The AVL
(Automatic Volume Limiting) function maintains
the same sound level as you switch from program
to program. To cancel choose Closed.
Selecting the Equalizer mark press “OK”
or ( ) button. The equalizer setting
function will be displayed. You can
selected with the right/left ( – / + )
buttons, pre-programed, unchangeable
sound enhancing Music, Sport, Cinema and
Speech settings for the programs you are watching.
These can be adjusted by you in the User selection.
To adjust the User selection; select the User
selection and press the (OK) button. You can
adjust the frequency levels with the ( ) and ( )
buttons. You can select 120Hz, 500Hz, 1.5KHz,
5KHz and 10KHz frequency bands with ( + ) and
in
( – ) buttons. Storing the adjustment levels
memory press the menu button to exit the user
option. You can exit the equalizer function pressing
the “EXIT” button at any time.
Headphones
By connecting the headphone unit to
your television you can listen to the
program sounds independently from
your television. In order to increase and
decrease the sound level of the
headphones, you can enter the HEADPHONES
menu and make the necessary adjustments using
the ( + ) and ( – ) buttons in the Volume bar.
When you only want to hear the sound from the
headphone, just press button.
Balance: To adjust the volume balance between
the left and right headphone to the desired level,
select the Balance bar using the down ( ) button.
Use the left/right button ( – / + ) to make
adjustments.
Bass: You can adjust the bass levels of the sound
you hear in the headphone.
Treble: You can adjust the treble levels of the
sound you hear in the headphone.
Sound Type: The program you watch might be
stereo or in two different languages. Using the
right/left keys ( – / + ) in this menu you can select
Mono/Stereo or Dual-I/Dual-II language.
Please note: The sound and headphone
adjustments made will be stored without any
additional transactions necessary.
Picture Set up
By pressing the MENU and “OK” or
( – ) button on your remote control please
enter the Picture menu. Select the setting
function you want using the Up and
down buttons ( ) and adjust their levels
with the right and left buttons ( – / + ).The picture
brightness, contrast, color and sharpness levels
can all be adjusted according to your desire. The
changes you make in the picture settings will be
automatically stored without any further
transactions necessary being your Personal
settings. Furthermore, you can select one of the
non-adjustable default settings in the memory
) button on
(Picture Mode) by pressing the (
your remote control. Picture Mode1, 2 and 3 are
preset values. Picture Mode M is the value you
store in the memory.
ENGLISH -16-
ingilizce-2.FH11 6/7/05 12:14 PM Page 1
Widescreen viewing
AUTO: Automatic format selection dependant on transmission.
ENGLISH -17-
ingilizce-2.FH11 6/7/05 12:14 PM Page 2
Features
Zoom
Automatic Size
Some channels broadcast with the
program also size information. If you
choose Open for the Automatic Size
feature the TV will adjust to the size
information broadcasted. To detect
Automatic Size, the screen setting needs to be at
Auto Mode. Your television is in the picture format
of 16:9. However, for the programs that do not
send automatic format information, you can
change the format of the program you watch with
the ( ) button on the RC.
In the picture menu select the Zoom
selection and press OK to enter this
menu. When you enter this menu you
will see in the lower right corner of the
screen the Zoom sub-menu. Using the
Up/down ( – / + ) buttons you can enlarge or
shrink the image in 20 steps. During the Zoom
process the image will be enlarge focused on the
center. In this case if you want to move the image
up/down or right/left press the OK button on
your remote. Later use the directional buttons to
move around. If you want to exit the Zoom menu
at any time press the MENU button.
Blue Screen: If you
chose this feature to be
On, you will see a blue
screen instead of static
on channels without
broadcasting.
Special Features Timer
Color Tint
When NTSC video is used in SCART,
Color Tint settings can be made. If you
do not use such a video type the Color
Tint choice is seen in the menu, but
Up/down ( – / + ) buttons cannot be
used to select it. If NTSC video is used in SCART
this choice becomes active and can be changed.
DNR: This feature improves noise on picture with
three levels. Dynamic Noise Reduction can be
selected with 4 settings; Off- Soft- Sharp- Sharpest
If "Off" item is seleceted, no noise reduction is
applied on picture.
Black Strech: Black Stretch enhances the contrast
of the picture. The dark regions of the picture are
made darker, while bright areas remain
unchanged.
Luminance Peaking: The Luminance Peaking
improves the overall frequency response of the
luminance. It creates blacker blacks and whiter
whites.
Select the Timer bar in the menu and
press “OK” or ( – ) button. The Timer
menu will be on screen. This function
will enable you to open and close your
television automatically.
Select the Switch-off Time and press the OK button.
The changeable number will appear grey. Enter
the hour and minute for which you can set 12
hours 59 min. at most using the numerical buttons
on the RC. Your TV will automatically switch to
standby at the end of this period. In the event
that you wish to exit the application at any given
stage, simply press the MENU button.
On Timer: Select the Switch-on Time and press
the OK button. The changeable number will
appear grey. Enter the hour and minute for which
you can set 12 hours 59 min. at most using the
numerical buttons on the RC. Your TV will be
turned on with the program automatically selected
on standby at the end of this period.
Color Temperature
To adjust the color temperature while
watching TV select this feature and use
the right/left ( – / + ) button to select
Normal, Tepid or Cool. Changes are
stored without any further action.
ENGLISH -18-
TIMER
Off timer
On timer
On timer Position
Back
Watch TV
ingilizce-2.FH11 6/7/05 12:14 PM Page 3
If any of the Timers is activated, the
Green coloured light on the front side
will flash.
Please note: If you turn your television
off from the main power supply switch
then the sleep timer modes selected will be reset
and cancelled.
In Timer Mode: Use the right/left ( – / + )
buttons to select the program you want the TV
to open when switching on.
Feature
In the MENU select Feature and press “OK” or
( ) button . The Feature menu will be on screen.
Teletext
Select the teletext bar using the “OK” or down
button in the setup menu. To right ( + ) button; If
you choose Automatic; Fastext or Toptext (option)
features can be determined for the channels with
txt broadcasting. When list is selected, if the
current channel does not broadcast Fastext or
Toptext, you can store the teletext page numbers
you want with the colour buttons or ( ) and
( ) buttons in the section there are 4 different
colour buttons when you select teletext.
While in the other pages of teletext, you can
directly access this page you selected by pressing
the colour button linked to them.
FEATURE
Teletext
List
Panel lock
Off
Back light
Back
Watch TV
Panel Lock
If you switch this feature On, the button
on the TV will not work when the TV is
in Stand-by mode and screen will show
a Panel Lock warning. In addition if the
Panel Lock is On, the TV will not switch
on with the ( ) and ( ) buttons from stand-by
mode.
Back Lighting: Using this feature you can
increase or decrease the panel light.
PIP Usage (Picture in Picture) Feature
1. Press the PIP button on your remote
control.
2. A picture will open in main picture
and will position itself in the lower
screen.
3. If you press the PIP button again,
you will enter the PAP mode in which
the main picture and the PIP picture will
be shown in equal size.
4. If you press the PIP button the third
time, the window will close and you
will have exited this mode.
Note: If you want to exit the PIP mode
at any time press the EXIT button.
PIP Menu
In the Features menu select PIP and press
the OK button or the right/left ( – / + )
buttons. The screen will show the PIP
menu.
Note: This menu is only available in
the features menu if the PIP is active.
PIP
Picture Format
PIP Size
PIP Position
Back
Watch TV
Picture Format
To change the PIP Picture Format select this feature
and press the right/left ( – / + ) buttons. PIP window
can be watched in the 4:3 or 16:9 format.
ENGLISH -19-
ingilizce-2.FH11 6/7/05 12:14 PM Page 4
Entering PAP Mode
Pressing the PIP button on the remote
control will bring the PIP window on
screen. If the same button is pressed a
second time you will enter the PAP mode.
PIP Size
This feature enables you to resize your
PIP window. Press the right/left ( – / + )
buttons after you yellow highlighted the
PIP Size selection. After you resized
your PIP window you can exit the menu
by pressing the EXIT button of the remote
control.
PIP Position
This feature enables you to position your
PIP window. Press the right/left ( – / + )
buttons after you yellow highlighted the
PIP Position selection. After you
positioned your PIP window you can
exit the menu by pressing the EXIT button
of the remote control.
Entering the PAT Mode
When the PIP button is pressed during Teletext
mode you will enter the PAT mode.To exit this
mode you only need to press the PIP button or
the EXIT button.
Selecting PIP Channel
ENGLISH -20-
Swap PIP picture with main picture.
ingilizce-2.FH11 6/7/05 12:14 PM Page 5
Introduction
PC Input Setting
Because your 27” - 30” LCD-TV equipment is
provided with VGA inputs, it may be used as a
PC monitor as well. (Plug&Play)
While in PC mode, use the down ( )
button in the Setup menu to select the
PC Input Setting and press “OK” or
left/right ( – / + ) .The PC Input Setting
menu will be on screen. In this menu
you can make the desired changes with Leftright, Up-down motion ( – / + ) ( / ) buttons
on your remote control.
Transition to the PC mode
To change your LCD-TV into monitor
(PC) mode you have to press 6 times
the ” “ button on the remote control
or press the OK button to select the PC
choice in the line-up menu on screen
and press OK to access it directly. To
change back from the PC mode to the
TV mode use the EXIT button on the
remote control.
H.Position: Horizontal position setting.
V.Position: Vertical position setting.
Phase: ADC’s phase setting.
Automatic configuration: The most suitable
geometric settings in accordance to the entry
mode is configured by this function. For this
application, choose the AUTOMATIC
CONFIGURATION option and press the OK
button.
PC Input Setup
Hor. Position
Ver. Position
Phase
Auto Position
Back
ENGLISH -21-
WatchTV
ingilizce-2.FH11 6/7/05 12:14 PM Page 6
(
(
On Screen Display
adjustment
(
)
(
(
(
)
)
twice. This will
)
ENGLISH -22-
(
)
(
)
(
)
)
)
ingilizce-2.FH11 6/7/05 12:14 PM Page 7
(
(
)
(
)
)
(
(
Press the ( ) button again to
remove the displayed time.
)
(
(
(
)
)
)
)
ENGLISH -23-
ingilizce-2.FH11 6/7/05 12:14 PM Page 8
EXT1, EXT2 or EXT3
ENGLISH -24-
Video
AV OUT
PC-DVI
AUDIO IN
PC-IN
DVI-D
ingilizce-2.FH11 6/7/05 12:14 PM Page 9
Audio In (L)
Video In
PC-DVI
AUDIO IN
PC-IN
DVI-D
ANT IN
Video
L
AV-4
Audio In (R)
Video
AV OUT
S-Video In
L
Audio In (L)
ANT IN
Video
AV-4
Audio In (R)
ENGLISH -25-
ANT IN
Video
L
AV-4
Video
AV OUT
PC-DVI
AUDIO IN
PC-IN
DVI-D
ANT IN
Video
L
AV-4
Video
AV OUT
PC-DVI
AUDIO IN
PC-IN
DVI-D
ingilizce-2.FH11 6/7/05 12:14 PM Page 10
Audio In (R)
Audio In (L)
Video In
ENGLISH -26-
ingilizce-2.FH11 6/7/05 12:14 PM Page 11
Connecting DVI-D
Your TV has DVI-D input socket. You can
connect any device such as PC etc. which
has DVI digital out using the proper cable.
At the same time you can listen to the
sound from the connected device. PC or
DVI use a special cable to PC-DVI/AUDIO
IN input at the back of your TV.
AV Outputs
You can connect any device which is
proper to Phono inputs via Phono Video
and Audio Outs at the back of your TV
set using proper AV cable (not available
with the set).
Any programme or AV input which is
seen on the main screen other than SVHS, PC or DVI (which is option) is
available as picture and sound signals at
Phono Video/Audio outs.
Scart sockets at the back of your TV set
are always give the signals of selected
programme from the set Tuner.
AV-4
Audio In (R)
Audio In (L)
Video In
ANT IN
Video
L
Video
AV OUT
PC-DVI
AUDIO IN
PC-IN
DVI-D
EXT1.
ENGLISH -27-
ANT IN
Video
ENGLISH -28-
L
AV-4
Video
AV OUT
PC-DVI
AUDIO IN
PC-IN
DVI-D
ANT IN
Video
L
AV-4
Video
AV OUT
PC-DVI
AUDIO IN
PC-IN
DVI-D
ingilizce-2.FH11 6/7/05 12:14 PM Page 12
ingilizce-2.FH11 6/7/05 12:14 PM Page 13
?
?
?
?
?
?
?
?
ENGLISH -29-
ingilizce-2.FH11 6/7/05 12:14 PM Page 14
27” 16:9
active matrix TFT
AC:
30” 16:9
active matrix TFT
2X10 W
2X10 W
120 W
140 W
<4W
<4W
110-240 V 50 Hz
4
Following information is only for EU-member states:
The use of the symbol indicates that this product may not be
treated as household waste. By ensuring this product is disposed
of correctly, you will help prevent potential negative
consequences for the environment and human health, which
could otherwise be caused by inappropriate waste handling
of this product. For more detailed information about recycling
of this product, please contact your local city office, your
household waste disposal service or the shop where you
purchased the product.
ENGLISH -30-