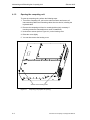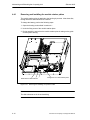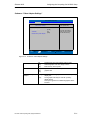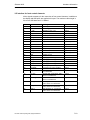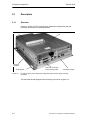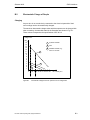
1
Preface, Contents SIMATIC PC Panel PC 670 Computing Unit Equipment Manual Product Overview 1 Starting Up the Computing Unit 2 Connecting and Switching on the Computing Unit 3 Maintaining and Extending the Computing Unit 4 Configuring the Computing Unit in BIOS Setup 5 Fault Diagnosis 6 Hardware Information 7 Distributed Configuration 8 A Appendices C Glossary, Index This manual is only valid for computing units with Order No. 6AV77xx-... Release 04/02 Safety Guidelines This manual contains notices which you should observe to ensure your own personal safety, as well as to protect the product and connected equipment. These notices are marked as follows according to the level of danger: ! ! ! Danger indicates an imminently hazardous situation which, if not avoided, will result in death or serious injury. Warning indicates a potentially hazardous situation which, if not avoided, could result in death or serious injury. Caution used with the safety alert symbol indicates a potentially hazardous situation which, if not avoided, may result in minor or moderate injury. Caution used without the safety alert symbol indicates a potentially hazardous situation which, if not avoided, may result in property damage. Notice indicates that unwanted events or status can occur if the relevant information is not observed. Note draws your attention to particularly important information on the product, handling the product, or to a particular part of the documentation. Qualified Personnel Equipment may be commissioned and operated only by qualified personnel. Qualified personnel within the meaning of the safety notices in this manual are persons who are authorized to commission, ground and identify equipment, systems and circuits in accordance with safety engeneering standards. Correct Usage Please note the following: ! Warning The device may only be used for the application cases specified in the catalog and the technical description and may only be used in combination with third-party equipment and components recommended or approved by Siemens. Appropriate transport, and appropriate storage, installation and assembly, as well as careful operation and maintenance, are required to ensure that the product operates perfectly and safely. Trademarks The registered trademarks of the Siemens AG can be found in the preface. Impressum Editor and Publisher: A&D PT1 Copyright Siemens AG 2002 Allrights reserved Exclusion of Liability The transmission and reproduction of this documentation and the exploitation and communication of its contents are not permitted without express authority. Offenders will be liable for compensation for damage. All rights reserved, especially in the case of the granting of a patent or registration of a utility model or design We have checked the content of this publication for compliance with the described hardware and software. However, discrepancies cannot be excluded, with the result that we cannot guarantee total compliance. The information in this publication is, however, checked regularly, and any necessary corrections are included in the following editions. We welcome any suggestions for improvement. Siemens AG Bereich Automation & Drives Geschäftsgebiet SIMATIC HMI Postfach 4848, D-90327 Nürnberg E Siemens AG 2002 Technical data subject to change. Siemens Aktiengesellschaft Release 04/02 For your notes Preface Purpose The SIMATIC Panel PC 670 Computing Unit equipment manual is part of the SIMATIC HMI documentation. It provides information for operators, mechanics, project engineers and maintenance personnel about the computing unit’s installation, functionality, operation and technical structure. Documentation S SIMATIC Panel PC 670, Computing Unit Equipment Manual (this document) SIMATIC Panel PC 870, Computing Unit Equipment Manual The equipment manual contains information on extension options for the computing unit, on the configuration, error diagnostics and the hardware. S SIMATIC Panel PC 670/870 Operating Unit Equipment Manual The equipment manual contains information on operating the operating unit, error diagnostics and the hardware. S SIMATIC Panel PC 670/870, Installation Guide This Installation Guide contains the information on the mechanical and electrical installation of the Panel PC 670/870 and starting it up. All the equipment manuals mentioned are supplied with the Panel PC 670/870 electronically in PDF format on the Documentation & Drivers CD and are available in German, English, French, Italian and Spanish. Target groups include installation engineers as well as service and maintenance technicians. Panel PC 670 Computing Unit, Equipment Manual v Preface Release 04/02 Notation The following conventions are used in this manual: Motor on Text that is displayed on the operating unit is printed in Courier type face. Variable Symbolic names that stand for variable quantities that appear on the screen are printed in Courier italic type face. Screens Selectable functions are printed in italic type face. ESC Names of keys and buttons are shown in a different type face. History Release Comments 03/00 Initial release of the SIMATIC Panel PC 670 – Computing Unit equipment manual. 12/01 Extension to include ”Remote mount form factor” option of the SIMATIC Panel PC 670 – Computing Unit equipment manual. 04/02 Technical update to the SIMATIC Panel PC 670 Computing Unit equipment manual Trademarks The following designations are registered trademarks of Siemens AG: vi S SIMATICR S SIMATIC HMIR S SIMATIC Multi PanelR S SIMATIC Multifunctional PlatformR S SIMATIC Panel PCR S HMIR S ProToolR S ProTool/LiteR S ProTool/ProR S MP 270R S ProAgentR Panel PC 670 Computing Unit, Equipment Manual Preface Release 04/02 Automation and Drives, Service & Support Available round the clock, worldwide: Nuremberg Johnson City Singapore SIMATIC Hotline Worldwide (Nuremberg) Worldwide (Nuremberg) Technical Support Technical Support (FreeContact) (fee-based, only with SIMATIC Card) Local time: Mon.-Fri. 8:00 to 17:00 Local time: Mon.-Fri. 0:00 to 24:00 Telephone: +49 (180) 5050-222 Telephone: +49 (911) 895-7777 Fax: +49 (180) 5050-223 Fax: +49 (911) 895-7001 E-Mail: techsupport@ ad.siemens.de +1:00 GMT: +01:00 GMT: Europe / Africa (Nuremberg) America (Johnson City) Asia / Australia (Singapore) Authorization Technical Support and Authorization Technical Support and Authorization Local time: Mon.-Fri. 8:00 to 17:00 Local time: Mon.-Fri. 8:00 to 19:00 Local time: Mon.-Fri. 8:30 to 17:30 Telephone: +49 (911) 895-7200 Telephone: +1 423 461-2522 Telephone: +65 740-7000 Fax: +49 (911) 895-7201 Fax: +1 423 461-2289 Fax: +65 740-7001 E-Mail: authorization@ nbgm.siemens.de +1:00 E-Mail: simatic.hotline@ sea.siemens.com –5:00 E-Mail: simatic.hotline@ sae.siemens.com.sg +8:00 GMT: GMT: GMT: The languages spoken by the SIMATIC Hotlines are generally German and English, the Authorization Hotline is also provided in French, Italian and Spanish. Panel PC 670 Computing Unit, Equipment Manual vii Preface Release 04/02 SIMATIC Customer Support Online Services The SIMATIC Customer Support team offers you substantial additional information about SIMATIC products via its online services: S General current information can be obtained – in the Internet unter http://www.siemens.com/simatic S Current Product Information leaflets, FAQs (Frequently Asked Questions), Downloads, Tips and Tricks can be obtained – in the Internet under http://www.siemens.com/automation/service&support Training Center Siemens offers a number of training courses to familiarize you with the SIMATIC S7 automation system. Please contact your regional training center or our central training center in D 90327 Nuremberg, Germany for details. Telephone: +49 (911) 895–3200 Internet: http://www.sitrain.com E-Mail: [email protected] Other Sources of Assistance In case of technical queries, please contact the Siemens representatives in the subsidiaries and branches responsible for your area. The addresses can be found: viii S in the Siemens Catalogue ST 80 S in the Internet under http://www.siemens.com/automation/partner S in the Interactive Catalogue CA01 http://www.siemens.com/automation/ca01 Panel PC 670 Computing Unit, Equipment Manual Contents 1 2 3 4 Product Overview . . . . . . . . . . . . . . . . . . . . . . . . . . . . . . . . . . . . . . . . . . . . . . . . . . . . . . 1-1 1.1 Advantages of the Computing Unit . . . . . . . . . . . . . . . . . . . . . . . . . . . . . . . . . 1-2 1.2 Safety Notes . . . . . . . . . . . . . . . . . . . . . . . . . . . . . . . . . . . . . . . . . . . . . . . . . . . . 1-4 1.3 Certificates, Guidelines and Declarations . . . . . . . . . . . . . . . . . . . . . . . . . . . 1-8 1.4 Certification for USA, Canada and Australia . . . . . . . . . . . . . . . . . . . . . . . . . 1-10 Starting Up the Computing Unit . . . . . . . . . . . . . . . . . . . . . . . . . . . . . . . . . . . . . . . . . 2-1 2.1 Unpacking and Checking the Computing Unit . . . . . . . . . . . . . . . . . . . . . . . 2-2 2.2 Installing the Computing Unit . . . . . . . . . . . . . . . . . . . . . . . . . . . . . . . . . . . . . . 2-3 2.3 Ensuring Readiness for Service . . . . . . . . . . . . . . . . . . . . . . . . . . . . . . . . . . . 2-7 2.4 Transport . . . . . . . . . . . . . . . . . . . . . . . . . . . . . . . . . . . . . . . . . . . . . . . . . . . . . . . 2-9 Connecting and Switching on the Computing Unit . . . . . . . . . . . . . . . . . . . . . . . . 3-1 3.1 View of Interface Side . . . . . . . . . . . . . . . . . . . . . . . . . . . . . . . . . . . . . . . . . . . . 3-2 3.2 View of Drive Side . . . . . . . . . . . . . . . . . . . . . . . . . . . . . . . . . . . . . . . . . . . . . . . 3-5 3.3 Connecting Periphery Units . . . . . . . . . . . . . . . . . . . . . . . . . . . . . . . . . . . . . . . 3-6 3.4 Working with PC Cards . . . . . . . . . . . . . . . . . . . . . . . . . . . . . . . . . . . . . . . . . . 3-10 3.5 3.5.1 3.5.2 3.5.3 3.5.4 Drives . . . . . . . . . . . . . . . . . . . . . . . . . . . . . . . . . . . . . . . . . . . . . . . . . . . . . . . . . Floppy disk drive . . . . . . . . . . . . . . . . . . . . . . . . . . . . . . . . . . . . . . . . . . . . . . . . LS240 drive . . . . . . . . . . . . . . . . . . . . . . . . . . . . . . . . . . . . . . . . . . . . . . . . . . . . Hard disk drive . . . . . . . . . . . . . . . . . . . . . . . . . . . . . . . . . . . . . . . . . . . . . . . . . . CD-ROM drive or CD RW/DVD drive (depending on unit equipment) . . . 3-13 3-13 3-13 3-16 3-16 3.6 Backup Battery . . . . . . . . . . . . . . . . . . . . . . . . . . . . . . . . . . . . . . . . . . . . . . . . . 3-17 3.7 Using the Computing Unit in a SIMATIC S5 Network . . . . . . . . . . . . . . . . . 3-18 3.8 Using the Computing Unit in a SIMATIC S7 Network (MPI/DP) . . . . . . . . 3-22 3.9 Networking the Computing Unit and Other Nodes via PROFIBUS . . . . . . 3-24 3.10 Networking Computing Unit and Other Computers via Industrial Ethernet 3-25 3.11 Connection Using Windows . . . . . . . . . . . . . . . . . . . . . . . . . . . . . . . . . . . . . . . 3-25 Maintaining and Extending the Computing Unit . . . . . . . . . . . . . . . . . . . . . . . . . . . 4-1 4.1 4.1.1 4.1.2 4.1.3 4.1.4 4-2 4-2 4-4 4-5 4-6 Opening the Unit . . . . . . . . . . . . . . . . . . . . . . . . . . . . . . . . . . . . . . . . . . . . . . . . Conditions . . . . . . . . . . . . . . . . . . . . . . . . . . . . . . . . . . . . . . . . . . . . . . . . . . . . . . Opening the computing unit . . . . . . . . . . . . . . . . . . . . . . . . . . . . . . . . . . . . . . . Functional Units Visible After Opening the Device . . . . . . . . . . . . . . . . . . . . Motherboard . . . . . . . . . . . . . . . . . . . . . . . . . . . . . . . . . . . . . . . . . . . . . . . . . . . . Panel PC 670 Computing Unit, Equipment Manual ix Contents 5 6 7 x Release 04/02 4.2 Installation of a Memory Extension . . . . . . . . . . . . . . . . . . . . . . . . . . . . . . . . . 4-8 4.3 Replacing the Backup Battery . . . . . . . . . . . . . . . . . . . . . . . . . . . . . . . . . . . . . 4-10 4.4 4.4.1 4.4.2 Installation of Extension Modules . . . . . . . . . . . . . . . . . . . . . . . . . . . . . . . . . . Removing and installing the module retainer plates . . . . . . . . . . . . . . . . . . Removing and installing an ISA/PCI module . . . . . . . . . . . . . . . . . . . . . . . . 4-12 4-14 4-16 4.5 4.5.1 4.5.2 4.5.3 4.5.4 Removing and Installing Drives . . . . . . . . . . . . . . . . . . . . . . . . . . . . . . . . . . . . Removing and installing the hard disk drive . . . . . . . . . . . . . . . . . . . . . . . . . Removing and installing a CD-ROM drive . . . . . . . . . . . . . . . . . . . . . . . . . . . Removing and installing the disk drive . . . . . . . . . . . . . . . . . . . . . . . . . . . . . . Removing and installing the LS 240 drive . . . . . . . . . . . . . . . . . . . . . . . . . . . 4-17 4-17 4-19 4-20 4-21 4.6 Removing and Installing the Power Supply . . . . . . . . . . . . . . . . . . . . . . . . . . 4-22 4.7 Removing and Installing the Bus Board . . . . . . . . . . . . . . . . . . . . . . . . . . . . . 4-23 4.8 Removing and Installing the Motherboard . . . . . . . . . . . . . . . . . . . . . . . . . . . 4-24 4.9 Removing and Installing the Fan . . . . . . . . . . . . . . . . . . . . . . . . . . . . . . . . . . 4-25 4.10 Processor Upgrade . . . . . . . . . . . . . . . . . . . . . . . . . . . . . . . . . . . . . . . . . . . . . . 4-26 4.11 Reset button . . . . . . . . . . . . . . . . . . . . . . . . . . . . . . . . . . . . . . . . . . . . . . . . . . . . 4-27 Configuring the Computing Unit in BIOS Setup . . . . . . . . . . . . . . . . . . . . . . . . . . . 5-1 5.1 5.1.1 5.1.2 5.1.3 5.1.4 5.1.5 5.1.6 5.1.7 5.1.8 Modifying the Device Configuration with SETUP . . . . . . . . . . . . . . . . . . . . . Menu Main . . . . . . . . . . . . . . . . . . . . . . . . . . . . . . . . . . . . . . . . . . . . . . . . . . . . . Menü Advanced . . . . . . . . . . . . . . . . . . . . . . . . . . . . . . . . . . . . . . . . . . . . . . . . . Menü Security . . . . . . . . . . . . . . . . . . . . . . . . . . . . . . . . . . . . . . . . . . . . . . . . . . Menu Power . . . . . . . . . . . . . . . . . . . . . . . . . . . . . . . . . . . . . . . . . . . . . . . . . . . . Menu Boot-Sequence . . . . . . . . . . . . . . . . . . . . . . . . . . . . . . . . . . . . . . . . . . . . Menu Version . . . . . . . . . . . . . . . . . . . . . . . . . . . . . . . . . . . . . . . . . . . . . . . . . . . Menu Exit . . . . . . . . . . . . . . . . . . . . . . . . . . . . . . . . . . . . . . . . . . . . . . . . . . . . . . Setup default settings . . . . . . . . . . . . . . . . . . . . . . . . . . . . . . . . . . . . . . . . . . . . 5-2 5-5 5-15 5-22 5-24 5-25 5-27 5-28 5-29 5.2 Configure PC-Card interface . . . . . . . . . . . . . . . . . . . . . . . . . . . . . . . . . . . . . . 5-32 Fault Diagnosis . . . . . . . . . . . . . . . . . . . . . . . . . . . . . . . . . . . . . . . . . . . . . . . . . . . . . . . . 6-1 6.1 Problems Using External Modules . . . . . . . . . . . . . . . . . . . . . . . . . . . . . . . . . 6-2 6.2 External Screen Remains Dark . . . . . . . . . . . . . . . . . . . . . . . . . . . . . . . . . . . . 6-3 6.3 Display on the External Screen Does Not Appear or Scrolls . . . . . . . . . . . 6-4 6.4 No Mouse Pointer Appears on the Screen/Display . . . . . . . . . . . . . . . . . . . 6-4 6.5 Computing Unit Time and/or Date are Not Correct . . . . . . . . . . . . . . . . . . . 6-5 6.6 USB Device Does Not Work . . . . . . . . . . . . . . . . . . . . . . . . . . . . . . . . . . . . . . 6-5 6.7 Error Message Appears on the Screen/Display . . . . . . . . . . . . . . . . . . . . . . 6-6 6.8 Computing Unit Self-Test Prior to Booting . . . . . . . . . . . . . . . . . . . . . . . . . . . 6-8 Hardware Information . . . . . . . . . . . . . . . . . . . . . . . . . . . . . . . . . . . . . . . . . . . . . . . . . . . 7-1 7.1 Power Consumption of the Components (Maximum Values) . . . . . . . . . . . 7-2 7.2 Overview of the Components and Interfaces . . . . . . . . . . . . . . . . . . . . . . . . 7-3 7.3 System Resources . . . . . . . . . . . . . . . . . . . . . . . . . . . . . . . . . . . . . . . . . . . . . . 7-5 Panel PC 670 Computing Unit, Equipment Manual Contents Release 04/02 8 A B C 7.4 7.4.1 7.4.2 7.4.3 7.4.4 7.4.5 Monitoring Functions . . . . . . . . . . . . . . . . . . . . . . . . . . . . . . . . . . . . . . . . . . . . . Overview . . . . . . . . . . . . . . . . . . . . . . . . . . . . . . . . . . . . . . . . . . . . . . . . . . . . . . . Signals on the front interface . . . . . . . . . . . . . . . . . . . . . . . . . . . . . . . . . . . . . . Temperature monitoring/display . . . . . . . . . . . . . . . . . . . . . . . . . . . . . . . . . . . Watchdog (WD) . . . . . . . . . . . . . . . . . . . . . . . . . . . . . . . . . . . . . . . . . . . . . . . . . Fan monitoring . . . . . . . . . . . . . . . . . . . . . . . . . . . . . . . . . . . . . . . . . . . . . . . . . . 7-6 7-6 7-6 7-7 7-8 7-9 7.5 7.5.1 7.5.2 7.5.3 Interfaces . . . . . . . . . . . . . . . . . . . . . . . . . . . . . . . . . . . . . . . . . . . . . . . . . . . . . . External interfaces . . . . . . . . . . . . . . . . . . . . . . . . . . . . . . . . . . . . . . . . . . . . . . Interface allocation for connecting a front on the main board . . . . . . . . . . Assignment of internal interfaces on the mainboard . . . . . . . . . . . . . . . . . . 7-10 7-10 7-19 7-24 7.6 7.6.1 7.6.2 7.6.3 Wiring Backplane . . . . . . . . . . . . . . . . . . . . . . . . . . . . . . . . . . . . . . . . . . . . . . . . Design and Theory of Operation . . . . . . . . . . . . . . . . . . . . . . . . . . . . . . . . . . . Pin assignmentI SA slot . . . . . . . . . . . . . . . . . . . . . . . . . . . . . . . . . . . . . . . . . . Pin assignment PCI slot . . . . . . . . . . . . . . . . . . . . . . . . . . . . . . . . . . . . . . . . . . 7-32 7-32 7-32 7-34 7.7 Power supply (AC and DC) . . . . . . . . . . . . . . . . . . . . . . . . . . . . . . . . . . . . . . . 7-37 7.8 Connecting cables . . . . . . . . . . . . . . . . . . . . . . . . . . . . . . . . . . . . . . . . . . . . . . . 7-38 Distributed configuration . . . . . . . . . . . . . . . . . . . . . . . . . . . . . . . . . . . . . . . . . . . . . . . 8-1 8.1 8.1.1 8.1.2 8.1.3 Description . . . . . . . . . . . . . . . . . . . . . . . . . . . . . . . . . . . . . . . . . . . . . . . . . . . . . Overview . . . . . . . . . . . . . . . . . . . . . . . . . . . . . . . . . . . . . . . . . . . . . . . . . . . . . . . Dimensions . . . . . . . . . . . . . . . . . . . . . . . . . . . . . . . . . . . . . . . . . . . . . . . . . . . . . Mounting . . . . . . . . . . . . . . . . . . . . . . . . . . . . . . . . . . . . . . . . . . . . . . . . . . . . . . . 8-2 8-2 8-3 8-3 8.2 Cable connection . . . . . . . . . . . . . . . . . . . . . . . . . . . . . . . . . . . . . . . . . . . . . . . . 8-4 8.3 Spare parts . . . . . . . . . . . . . . . . . . . . . . . . . . . . . . . . . . . . . . . . . . . . . . . . . . . . . 8-4 8.4 Technical data . . . . . . . . . . . . . . . . . . . . . . . . . . . . . . . . . . . . . . . . . . . . . . . . . . 8-4 Technical Data . . . . . . . . . . . . . . . . . . . . . . . . . . . . . . . . . . . . . . . . . . . . . . . . . . . . . . . . . A-1 A.1 Technical Data of the Panel PC 670 Computing Unit . . . . . . . . . . . . . . . . . A-2 ESD Guidelines . . . . . . . . . . . . . . . . . . . . . . . . . . . . . . . . . . . . . . . . . . . . . . . . . . . . . . . . B-1 B.1 What does ESD mean? . . . . . . . . . . . . . . . . . . . . . . . . . . . . . . . . . . . . . . . . . . B-2 B.2 Electrostatic Charge of People . . . . . . . . . . . . . . . . . . . . . . . . . . . . . . . . . . . . B-3 B.3 Basic Safety Measures against Discharge of Static Electricity . . . . . . . . . B-4 SIMATIC HMI Documentation . . . . . . . . . . . . . . . . . . . . . . . . . . . . . . . . . . . . . . . . . . . . C-1 Glossary . . . . . . . . . . . . . . . . . . . . . . . . . . . . . . . . . . . . . . . . . . . . . . . . . . . . . . . . . . Glossary-1 Index . . . . . . . . . . . . . . . . . . . . . . . . . . . . . . . . . . . . . . . . . . . . . . . . . . . . . . . . . . . . . . . Panel PC 670 Computing Unit, Equipment Manual Index-1 xi Contents xii Release 04/02 Panel PC 670 Computing Unit, Equipment Manual Product Overview 1 Chapter Overview In Section You Will Find 1.1 Advantages of the computing unit 1-2 1.2 Safety notes 1-4 1.3 Certificates, guidelines and declarations 1-8 1.4 Certification for USA, Canada and Australia Panel PC 670 Computing Unit, Equipment Manual on Page 1-10 1-1 Product Overview 1.1 Release 04/02 Advantages of the Computing Unit Computing unit The computing unit serves as a basic component for the PC-based HMI devices (Panel PC) and, within the scope of special configurations, as a basis for customized devices. The computing unit is intended for use in industry as well as in the residential, business and commercial areas and can also be used in building system automation or in public facilities, in addition to industrial applications. Quality The computing unit is characterized by its high quality, which is attributable, for example, by: S extensive climate, vibration and shock tests to ensure industrial compatibility; S hotline, service, spare parts; S compact dimensions; S suitability for use in a wide ambient temperature range; S a design that is easy to service and maintain. Installation The computing unit can be installed in virtually all the usual locations (refer to Chapter 2.2). There are anchorage points on both of the longs sides for securing the computing unit. Mounting brackets are screwed onto these anchorage points. Constructional designs The SIMATIC Panel PC 670/870 is available in two different designs: 1. Panel PC in a centralized design (computing unit and operating unit are integrated), 2. or as a Panel PC in decentralized design (computing unit and operating unit spatially separated, refer to Chapter 8). 1-2 Panel PC 670 Computing Unit, Equipment Manual Product Overview Release 04/02 Software equipment The computing unit is equipped with software which allows it to be used universally. It contains the operating system Windows NT 4.0, Windows 98 or Windows 2000. The computing unit additionally allows the use of: S SIMATIC supplementary software S software from the entire world of automation S software from the PC world Advantages of the computing unit S The computing unit is rugged in design and its functions make it particularly suitable for use on site under harsh industrial conditions. It meets the specific requirements of an industrial environment, such as noise immunity, compliance with standards, ruggedness and continuous operation. S Owing to the variable operating location and the many options for installation, the computing unit can be used virtually anywhere. S Integrated on the computing unit are all the ports required for SIMATIC automation. Specifically, these are: – parallel port (LPT1) – serial ports (1x V.24, 1x V.24/TTY) – PS/2 keyboard interface – PS/2 mouse port – USB interface (2x computing unit, 1x operating unit) – MPI/L2-DP (max. 12 Mbit/s) – Cardbus interface, 1 slot (type I/II/III) – VGA interface for external monitor – LVDS interface for flat-screen display Panel PC 670 Computing Unit, Equipment Manual 1-3 Product Overview 1.2 ! Release 04/02 Safety Notes Caution Please observe the safety notes on the back of the cover of this manual. Expansions to the Panel PC should only be carried out after having read Chapter 4 and the relevant safety notes. This device complies with the safety requirements in accordance with IEC, VDE, EN, UL and CSA. If you have doubts about the approval of the installation in the intended location, please contact the service representative responsible for your area. Notes on installation If the device is brought to its operating location from a cold environment, condensation may occur. Before starting up, the device must be dry and, therefore, an acclimatization period of at least 12 hours is necessary. Before installing and operating the device, please note the information on ambient conditions in the Appendix Technical Data and and on installing the device in Chapter 2.2. The device must be installed in such a way that it presents no danger of any kind (for example, by tipping over). Ensure that the air vents are not obstructed and sufficient cooling air can be drawn in inside the device. ! Warning When assembling the systems, it is essential to maintain the permissible installation positions and angles (refer to Chapter 2.2). If systems are installed at a non-approved installation location, the approvals to UL 1950, UL 508 and EN60950 are no longer valid! 1-4 Panel PC 670 Computing Unit, Equipment Manual Release 04/02 Product Overview Mains supply When connecting the device, observe the relevant information provided in Chapter 2. Never connect or disconnect power cables or data transmission lines during a thunderstorm. In an emergency situation (for instance, damage to the housing, controls or power cable, penetration by liquids or foreign bodies), pull the power plug and contact the authorized service department. When plugging in/out periphery connections (e.g. keyboard, mouse, printer), the SIMATIC Panel PC must have been switched off (not in the case of PC card and USB devices). Failure to do so can result in damage to the computing unit. Notes for devices with AC power supply The device is intended for connection to grounded power supply systems (TN networks to VDE 0100, Part 300, or IEC 364-3). No provision is made for connection to non-grounded or impedance-grounded power supply systems (IT networks). The power cable should comply with the safety guidelines of the country concerned. Check to make sure that the rated voltage for the device corresponds to that supplied by the local power supply. This device is equipped with a safety-tested power supply cable and may be connected only to a socket outlet with grounding contact. Make sure that the socket outlet on the device or the socket outlet with grounding contact of the building wiring system is freely accessible and located as near to the device as possible. To completely disconnect the PC from the mains power supply, you must pull the plug. This connection must be easily accessible. If the PC is to be installed in a cabinet, a central disconnector must be provided. Note for devices with DC power supply Devices with a DC power supply are considered open operating resources (right side of device); therefore, the assembly design must fulfill the fire protection housing requirements. ! Warning The device may only be connected to 24 V DC power supply networks which fulfill the requirements of a safe electrical low voltage (SELV). The cable cross-section must be large enough so that, should a short circuit occur in the computing unit no damage is caused by the cable. Panel PC 670 Computing Unit, Equipment Manual 1-5 Product Overview Release 04/02 Country-Specific Notes For the USA and Canada: For operation in Canada and the United States, use CSA or UL-listed power cables. The connector must comply with the NEMA 5-15 specification. 120 V power supply A flexible cable with UL approval and CSA marking and the following features must be used: SJT design with three conductors, at least 18 AWG cross-section, a maximum length of 4.5 meters and parallel grounding-type plug (15 A, at least 125 V). 240 V power supply A flexible cable with UL approval and CSA marking and the following features must be used: SJT design with three conductors, at least 18 AWG cross-section, a maximum length of 4.5 meters and Tandem grounding-type plug (15 A, at least 250 V). 230 V supply voltage outside the USA and Canada A flexible cable with the following features must be used: conductor cross section at least 18 to AWG and grounding-type plug 15 A / 250 V. Make sure that the cable set complies with the safety standards of the country where the devices will be installed and that they bear the relevant markings. Repairs Repairs to the Panel PC may only be carried out by authorized, adequately trained personnel. ! Warning Unauthorized opening and repairs to devices can lead to severe property damage or represent a danger to the user. Always unplug the power plug before opening the unit. Only install system extensions which are intended for the computer. The installation of other expansions can damage the system or violate safety and radio interference regulations. Information concerning which extensions are suitable for the system can be obtained from technical service representatives or the sales outlet. The terms of the warranty are deemed void in the case of defects caused to the Panel PC by the installation or replacement of system extensions. The power supply may only be removed or replaced by authorized, adequately trained personnel. 1-6 Panel PC 670 Computing Unit, Equipment Manual Product Overview Release 04/02 Batteries This unit contains batteries on the motherboard. The batteries may only be replaced by authorized, adequately trained personnel. When disposing of the batteries, observe the locally applicable laws on disposal of pollutants. ! Caution Improper replacement of the battery poses danger of explosion. Only replace with batteries of the same type or those of a similar type recommended by the manufacturer. When disposing of the batteries, observe the locally applicable laws on disposal of pollutants. ESD guidelines Components containing ESD (Electrostatically Sensitive Devices) may be identified by the following label: When handling components containing ESD, it is essential to observe the following guidelines: S Before working with components containing ESD, you must discharge any static electricity from your body (e.g. by touching a grounded object). S Any devices and tools used must also be free of static electricity. S Pull the power plug before connecting or disconnecting components containing ESD. S Only touch the components containing ESD at the edges. S Do not touch any contact pins or strip conductors on components containing ESD. Panel PC 670 Computing Unit, Equipment Manual 1-7 Product Overview 1.3 Release 04/02 Certificates, Guidelines and Declarations CE identification The SIMATIC product described in this manual fulfills the requirements to be awarded the CE identification. EMC guidelines Units with Power Supply 105W Power fulfill the requirements of EU Guideline “89/336/EEC Electromagnetic Compatibility” and are designed for use in the following sectors according to the CE identification: Area of use Requirements on Emitted interference Industrial sector EN 50081-2: 1993 Noise immunity EN 50082-2: 1995 Units with an AC power supply comply with the standards EN 61000-3-2:1995 (harmonic currents) and EN 61000-3-3:1995 (voltage fluctuations and flicker). Caution This is Class A equipment. The equipment may cause radio interference in residential areas; in such cases, the operator can be requested to take reasonable countermeasures. Low voltage guidelines The devices with AC power supply meet the requirements of EU Guideline 73/23/EEC ”Low voltage guideline”. Maintenance of this standard was tested according to EN60950. Declaration of Conformity The EU Declaration of Conformity and associated documentation complying with the above guideline are kept available for the authorities responsible by : Siemens AG Bereich Automation & Drives A&D AS RD 4 Postfach 1963 D-92209 Amberg Tel.: +49 (9621) 80-3283 Fax: +49 (9621) 80-3278 1-8 Panel PC 670 Computing Unit, Equipment Manual Product Overview Release 04/02 Observe installation guidelines The installation guidelines and safety notes specified in this manual must be observed when starting up and operating the system. Connection of periphery devices The requirements concerning interference immunity are met when periphery equipment suitable for industrial demands, is connected in accordance with EN50082-2:1995. Periphery devices should only be connected using shielded cables. DIN ISO 9001 certificate The quality assurance system of our entire product production process (development, production and sales) meets the requirements of DIN ISO 9001 (corresponds to EN29001: 1987). This was confirmed by the DQS – Deutsche Gesellschaft zur Zertifizierung von Qualitätsmanagementsystemen mbH) – (German quality management system approval authority). EQ Net Certificate No.: 1323-01 Panel PC 670 Computing Unit, Equipment Manual 1-9 Product Overview 1.4 Release 04/02 Certification for USA, Canada and Australia Safety If the device bears one of the following marks, the corresponding approval has been awarded: Underwriters Laboratories (UL) complying with Standard UL 1950 (I.T.E) or complying with UL508 (IND.CONT.EQ) C Underwriters Laboratories (UL) complying with Canadian Standard C22.2 No. 950 (I.T.E) or complying with C22.2 No. 142 (IND.CONT.EQ) C Underwriters Laboratories (UL) complying with Standard UL 1950, Report E11 5352 and Canadian Standard C22.2 No. 950 (I.T.E) or complying with UL508 and C22.2 No. 142 (IND.CONT.EQ) US UL Recognition Mark Canadian Standard Association (CSA) complying with Standard C22.2. No. 950 (LR 81690) or complying with C22.2 No. 142 (LR 63533) NRTL 1-10 Canadian Standard Association (CSA) complying with American Standard UL 1950 (LR 81690) or complying with UL 508 (LR 63533) Panel PC 670 Computing Unit, Equipment Manual Product Overview Release 04/02 EMC USA Federal Communications Commission Radio Frequency Interference Statement This equipment has been tested and found to comply with the limits for a Class A digital device, pursuant to Part 15 of the FCC Rules. These limits are designed to provide reasonable protection against harmful interference when the equipment is operated in a commercial environment. This equipment generates, uses, and can radiate radio frequency energy and, if not installed and used in accordance with the instruction manual, may cause harmful interference to radio communications. Operation of this equipment in a residential area is likely to cause harmful interference in which case the user will be required to correct the interference at his own expense. Shielded Cables Shielded cables must be used with this equipment to maintain compliance with FCC regulations. Modifications Changes or modifications not expressly approved by the manufacturer could void the user’s authority to operate the equipment. Conditions of Operations This device complies with Part 15 of the FCC Rules. Operation is subject to the following two conditions: (1) this device may not cause harmful interference, and (2) this device must accept any interference received, including interference that may cause undesired operation. Canada (for devices with power supply 105W) Canadian Notice This Class A digital apparatus complies with Canadian ICES-003. Avis Canadien Cet appareil numérique de la classe A est conforme à la norme NMB-003 du Canada. (for devices with power supply 85W) Canadian Notice This Class B digital apparatus complies with Canadian ICES-003. Avis Canadien Cet appareil numérique de la classe B est conforme à la norme NMB-003 du Canada. Panel PC 670 Computing Unit, Equipment Manual 1-11 Product Overview Release 04/02 Australia This product meets the requirements of the AS/NZS 3548 Norm. 1-12 Panel PC 670 Computing Unit, Equipment Manual Starting Up the Computing Unit 2 Chapter Overview In Section You Will Find on Page 2.1 Unpacking and checking the computing unit 2-2 2.2 Installing the computing unit 2-3 2.3 Ensuring Readiness for Service 2-7 2.4 Transport 2-9 Panel PC 670 Computing Unit, Equipment Manual 2-1 Starting Up the Computing Unit 2.1 Release 04/02 Unpacking and Checking the Computing Unit Unpacking the computing unit Unpack the item delivered to you as follows: 1. Remove the packaging. 2. Do not throw the original packaging away. Keep it in case you have to transport your PC at some time in the future. 3. Please keep the enclosed documentation in a safe place. You will require it when you first start up the item delivered to you and it is part of the device. 4. Check the packaging and the package contents for any visible damage. Entering the production number (SVP number) 5. Record the serial number (SDVP number) of your computing unit in the table; you will find it on the rating plate above the floppy disk drive on the side of the device. The SVP number and MLFB number provide unique identification of the device or repairs or in the case of theft. Entering the Microsoft Windows “Product Key” of the “Certificate of Authenticity” 6. Enter the Microsoft Windows ”Product Key” of the ”Certificate of Authenticity” (COA) in the table. The Product Key can be found on the unit on the power supply cover. The Windows Product Key is necessary should the operating system need to be reinstalled. SVP No. MLFB No. Microsoft Windows Product Key 2-2 Panel PC 670 Computing Unit, Equipment Manual Starting Up the Computing Unit Release 04/02 2.2 Installing the Computing Unit The unit delivered is particularly suited for installation in consoles, cabinets and panels. The computing units with AC power supply meet the requirements of the fire protection housing complying with EN60950. It can therefore be installed without an additional fire enclosure; The computing units with a DC power supply are considered open operating resources (right side of device); therefore, the assembly design must fulfill the fire protection housing requirements. Please observe the following points when installing your device: ! S Avoid extreme ambient conditions as far as possible. Protect the device from dust, moisture and heat. S Do not expose your device to direct sunlight. S The device must be installed in such a way that it presents no danger of any kind (for example, by tipping over). S The clearance around the device must be at least 100 mm to make sure it is sufficiently ventilated. S Never cover the ventilation slots. S Observe the installation locations allowed when you install your device. Warning If systems are installed at a non-approved installation location, the approvals to UL 1950 and EN60950 are no longer valid! Panel PC 670 Computing Unit, Equipment Manual 2-3 Starting Up the Computing Unit Release 04/02 297 267 80 11 Figure 2-1 Dimension drawings for installation of the computing unit (device without CD-ROM drive) The computing unit contains a CD-ROM or CD-RW/DVD drive, depending on the unit version. The installation depth of the computing unit is increased by 21 mm as a result of its installation. 2-4 Panel PC 670 Computing Unit, Equipment Manual Release 04/02 Starting Up the Computing Unit Permissible installation positions for the computing unit complying with UL1950/EN60950/CSA22. 2 No. 950 An angle of inclination of ± 20_ is allowed installation position. Position 1 (preferred position) Position 2 *) Position 3 (desktop) Position 4 (cover) **) *) Not permitted where an LS240 drive is installed. **) Not permitted where a disk/CD-ROM/LS240 drive is installed. Panel PC 670 Computing Unit, Equipment Manual 2-5 Starting Up the Computing Unit Release 04/02 Additional permissible installation position for the computing unit complying with UL508/CSA 22.2 No. 142 An installation angle of ±15_ is permitted in this position. Position 5 (interfaces at bottom) Note The possible installation locations for the computing unit do not agree with the permissible installation location of Panel PC 670 (refer to the commissioning instructions). 2-6 Panel PC 670 Computing Unit, Equipment Manual Starting Up the Computing Unit Release 04/02 2.3 Ensuring Readiness for Service Measures for equipotential Low-resistance grounding connections ensure that the user of the installation is protected against electric shock (for example, if a short-circuit occurs or if there are defects in the system). Moreover, they discharge interference transmitted by external power supply cables, signal cables or cables to I/O devices. You should therefore create a low-resistance connection (a large surface acting as the contact) between the grounding point on the system housing and the central grounding point of the cabinet or the installation in which the computer is to be installed. The minimum cross-section should not be less than 5 mm2. The grounding terminal is located on the side of the device and is identified by a symbol. Connection to the power supply Power supply connection Unit power plug Figure 2-2 ! Power supply connection (device socket for non-heating appliances) Caution The computing unit is equipped with a safety-tested power supply cable and may be connected only to a socket outlet with grounding contact. Make sure that the socket outlet on the device or the socket outlet with grounding contact of the building wiring system is freely accessible and located as near to the device as possible. The computing unit does not have a mains switch. To completely disconnect the PC from the mains power supply, you must pull the plug. This connection must be easily accessible. If the PC is to be installed in a cabinet, a central disconnector must be provided. Panel PC 670 Computing Unit, Equipment Manual 2-7 Starting Up the Computing Unit Release 04/02 The AC power supply of the computing unit is designed for 120/230/240 V mains supplies. The power supply has a wide range input. There is no need to adjust the voltage range. The DC power supply of the computing unit is designed for 24 V mains supplies. One of these power supply is installed according to selection. Connecting and switching on the computing unit Before connecting computing unit to the mains, connect the front panels ready for operation. 1. Plug the connection cables into the corresponding sockets on the interface side of the computing unit (refer to “Panel PC 670/870 Computing Unit“ equipment manual). 2. Once the peripheral devices have been connected, the device is ready for mains operation. Connect your device to the mains supply. The computing unit is now operating. Switching the computing unit off Before switching the unit off, shut down the operating system in order to prevent loss of data. The computing unit has no power switch and is disconnected from the mains supply by unplugging the power plug. Notice When working using Windows, always use Start > Shut Down in the taskbar to switch the unit off. 2-8 Panel PC 670 Computing Unit, Equipment Manual Release 04/02 2.4 Starting Up the Computing Unit Transport Shipping Despite the robust design of the computing unit, its built-in components are sensitive to severe vibrations and shock. Therefore, protect the computing unit from severe mechanical stress during transport. Only the original packing should be used when dispatching the Panel PC. Caution Risk of damage to the computing unit. When in transit in cold weather and the computer is subjected to extreme differences in temperature, care must be taken to ensure that moisture is not deposited on or in the device (moisture condensation). Allow the computer to warm up slowly to room temperature before putting it into operation. If condensation has formed, wait for approximately. 12 hours before turning the computer on. Panel PC 670 Computing Unit, Equipment Manual 2-9 Starting Up the Computing Unit 2-10 Release 04/02 Panel PC 670 Computing Unit, Equipment Manual Connecting and Switching on the Computing Unit 3 Chapter Overview In Section You Will Find on Page 3.1 View of Interface Side 3-2 3.2 View of Drive Side 3-5 3.3 Connecting Peripheral Devices 3-6 3.4 Working with PC Cards 3-10 3.5 Drives 3-13 3.6 Backup battery 3-17 3.7 Using the Computing Unit in a SIMATIC S5 Network 3-18 3.8 Using the Computing Unit in a SIMATIC S7 Network (MPI/DP) 3-22 3.9 Networking the Computing Unit and Other Nodes via PROFIBUS 3-24 3.10 Networking the Computing Unit and Other Computers via Industrial Ethernet 3-25 3.11 Connection under Windows 3-25 Panel PC 670 Computing Unit, Equipment Manual 3-1 Connecting and Switching on the Computing Unit 3.1 Release 04/02 View of Interface Side 1 2 13 12 Figure 3-1 1 3 4 11 5 10 9 8 6 7 Ports Mouse PS/2 socket for connecting a PS/2 mouse. 2 COM1 V.24 /MODEM /PLC The COM 1(TTY) interface can be used to connect e.g. S5 programmable controller (PLC). By implementing the adapter supplied, the interface can also be used as a 25-pin V.24 standard interface to connect devices with a serial interface, such as modem, mouse or printer. 3 COM 2 Serial interface 2 (V.24) to connect devices with a serial interface, such as modem, mouse or printer. 4 AC/DC power supply connection Device socket for AC voltage power supply or screw terminals for DC voltage power supply. 5 PCI slot Internal slot for expansion modules. 6 PCI/ISA slot Internal slot for expansion modules. 7 PC card Connection for PC cards of the type I/II/III. 3-2 Panel PC 670 Computing Unit, Equipment Manual Connecting and Switching on the Computing Unit Release 04/02 8 Ethernet RJ 45 Ethernet connection. The Ethernet network is a local network with a bus structure for data communication with data transmission rates of 10 or 100 megabits per second (mbps). 9 PROFIBUS/MPI Using the potential isolated PROFIBUS/MPI interface, the Box PC an can be connected to an S7 PLC or a PROFIBUS network. 10 USB Connections for Universal Serial Bus. Using the USB connection, it is possible to connect external devices, such as CD drives, printers, modems or mouse and keyboard. Older operating systems do not support this interface. 11 VGA A VGA monitor can be connected here. 12 LPT1 The parallel interface serves to connect devices with a parallel interface, e.g. a printer. 13 Keyboard Connection for a PS/2 keyboard. Caution When connecting periphery units, always be sure to use shielded cables and metal connectors to avoid invalidating your operating authorization. Use a screwdriver to fasten the interface cable connectors on the housing of the computing unit. You will thus improve the electrical shielding. If expansion boards are installed on the computing unit, there are additional interfaces. Please refer to the description of the relevant module for the significance of these additional interfaces. Panel PC 670 Computing Unit, Equipment Manual 3-3 Connecting and Switching on the Computing Unit Release 04/02 VGA interface Please observe the following note on operating a flat display and an external monitor: Note The default setting of the display is simultaneous operation of a flat display and an external monitor. If no front display element is connected, the external monitor is used for the display, at a resolution of 640 x 480 pixels. Modes with a lower resolution and text modes are expanded to this format. To optimize the display on the external monitor, set ”CRT/LCD selection: CRT enabled” in Setup in the Main menu using the ”Hardware Options” dialog box. A resolution of 1024 x 768 pixels with a higher image refresh rate is then possible. 3-4 Panel PC 670 Computing Unit, Equipment Manual Connecting and Switching on the Computing Unit Release 04/02 3.2 View of Drive Side 1 2 5 Figure 3-2 1 3 4 Drive side Unit fan The air vents for the unit fan are located here. Caution The air vents must never be covered up, otherwise there is a risk of overheating. 2 Rating plate The rating plate contains the order no. and production serial no. (F-No.) of the unit. 3 Floppy disk drive A standard floppy disk drive (1.44 MB) is installed in the computing unit. 4 Front interfaces The front interfaces are located behind the cover plate below the floppy disk drive. They serve for the connection of operating fronts: S I/O port for connecting front components S LVDS display port 5 Reset button The reset button can be operated with the aid of a pointed object (e.g. a straightened paper clip). Pressing the Reset key triggers a hardware reset. The PC is restarted (cold start). Caution There may be a loss of data with a hardware reset. Panel PC 670 Computing Unit, Equipment Manual 3-5 Connecting and Switching on the Computing Unit 3.3 Release 04/02 Connecting Periphery Units Note Make sure the components you insert exhibit industrial compatibility when connecting peripheral devices Printer connection via the parallel interface To connect your printer, perform the following steps: 1. Turn off the computing unit and the printer. 2. Plug the printer cable onto the parallel port, LPT 1. 3. Connect the printer cable to the printer. 4. Tighten (screw) the connector on the port. COM 1 Socket (serial) COM 2 Connector (serial) LPT1 Socket (parallel) Figure 3-3 Printer Connection Caution Danger of damage being caused to the device Connect printers to the parallel port only when the device on the LPT 1 port is turned off (printer likewise turned off). Make sure you are using the correct port. If you interchange the connectors, or use wrong connecting cables, the port might be damaged. Before inserting the connecting cables, the static charge of your body, the device and the connecting cables must be brought to the same level. You can do this by briefly touching the metal housing. Use the original cable to establish the connection. 3-6 Panel PC 670 Computing Unit, Equipment Manual Connecting and Switching on the Computing Unit Release 04/02 Printer connection via the parallel serial interface Alternatively, you can connect your printer via a serial COM interface to the computing unit. You will find information on how to adapt and set your port and on the connecting cable you should use in the user manual for your printer. Using a mouse A PS/2, USB or a serial mouse can be used in conjunction with the computing unit. PS/2 mouse connection You can connect an external PS/2 mouse or another external input device (pointing device) to the PS/2 mouse port. Port for PS/2 mouse (socket) Figure 3-4 COM 2 Port for Serial mouse (plug) USB port for USB mouse Connecting the Mouse Proceed as follows: 1. Disconnect the unit from the mains power supply. 2. Insert the cable of the PS/2 mouse or of another external input device (pointing device) into the PS/2 mouse socket. 3. Restart the unit. Panel PC 670 Computing Unit, Equipment Manual 3-7 Connecting and Switching on the Computing Unit Release 04/02 Serial mouse connection You can connect a serial mouse to the serial port COM 2. To operate a serial mouse, you have to install and assign parameters to the suitable mouse driver. To do this, please refer to the description of your mouse or the description of your operating system for the necessary information. 1. Turn your device off. 2. Plug your serial mouse onto the mouse connector labeled COM 2. 3. Screw the connector tight. 4. Restart your device. How to connect a USB mouse is described in “Connecting USB devices” below. PS/2 Keyboard connection You can connect a PS/2 keyboard to the computing unit. Port for PS/2 keyboard Figure 3-5 Connecting a PS/2 Keyboard Proceed as follows: 1. Disconnect the computing unit from the mains power supply. 2. Plug in the PS/2 keyboard connector. 3. Connect the computing unit to the mains power supply. Note We recommend you to use a keyboard with a straight keyboard connector so that the connector does not conceal adjacent ports. 3-8 Panel PC 670 Computing Unit, Equipment Manual Connecting and Switching on the Computing Unit Release 04/02 USB device connection Individual or several USB devices can be connected to the USB interfaces. S Plug in the USB device connector into one of the USB interfaces. The device is detected by the Plug and Play operating system. Any necessary drivers are requested by the operating system. If more than two USB devices are to be connected, use a HUB. Both interfaces can be used as High Current interfaces. USB interfaces Figure 3-6 USB connection ports Notice Operating systems which do not support “plug and play” (e.g. Windows NT 4.0) do not generally permit operation of USB devices. Devices which do not have a USB plug (e.g. printer) can be connected to the USB interface via an adapter. Panel PC 670 Computing Unit, Equipment Manual 3-9 Connecting and Switching on the Computing Unit 3.4 Release 04/02 Working with PC Cards PC cards Card bus cards (32 bit) and PCMCIA cards (16 bit) can be operated in the PC card interface. The computing unit is equipped with a PC card interface. Communication modules for MODEM, FAX/MODEM, ISDN, Token Ring, ETHERNET, memory expansions and check-card sized SCSI modules can be plugged into this interface. Type I/II/III PC card interfaces Figure 3-7 PC card interface Take note of the following when working with Cardbus/PC cards: 1. Open the port cover on the left side of the device by loosening the plastic rivet with a flat screwdriver. 2. Remove the metal cover from the guide rail. 3. Insert the PCMCIA card or Cardbus card you require. ! Caution Make sure that the eject button for Cardbus/PC cards is fully depressed before inserting the PC card. If this is not the case, a card may jam in the slot when inserting thin PC cards (flash memory cards, for example). The PC card can then not be inserted properly. The nameplate of the PC card must be visible to the rear of the device on being inserted. Do not remove the cared until data transfer has stopped (danger of loss of data and system crash). 3-10 Panel PC 670 Computing Unit, Equipment Manual Release 04/02 ! Connecting and Switching on the Computing Unit Caution Always discharge your body’s static charge before inserting or removing Cardbus/PC cards by briefly touching a grounded object (refer also the ESD Guideline, Appendix B). Damage could occur if you do not. Note Peak currents of 650 mA at 5 V referred to 3 s are allowed. Examples of PCMCIA cards on the PC card interface for hard disk drive 330 mA read/write (Maxtor MXL-131-III) . . . . . 640 mA spin up 2 s . . . . . . . . . . . . . . . . . . . . . . . . 110 mA idle fax/modem . . . . . . . . . . . . . . 60 mA idle (Dr. Neuhaus) . . . . . . . . . . . 140 mA transfer Ethernet (XIRCOM) . . . . . . . . . . . . . . 150 mA Panel PC 670 Computing Unit, Equipment Manual 3-11 Connecting and Switching on the Computing Unit Release 04/02 Installation von PC cards Observe the following points when you install these cards: Note Depending on the configuration of the computing unit, it could be that there are no free interrupts for the operation of PC cards. The interrupts required by the PC card must then be reserved as follows in the BIOS Setup menu: Define the required interrupt by setting Advanced > PCI-Configuration > PCI/PNP ISA IRQ Resource Exclusion to reserved (default: available). ! Caution Danger of PC cards and the computing unit being damaged. The PC card must be plugged into the interface with its front facing the rear side of the computing unit. This side is normally marked with a company or product name and the wording ”This side up” or something similar. If the PC card is inserted incorrectly, the computing unit and PC card may be damaged. Before inserting the connecting cables, the static charge of your body, the device and the connecting cables must be brought to the same potential. To do this, touch the metal housing briefly. Notice In order to operate the PC card set Main > Hardware Option “Cardbus/PCMCIA Slot” in the BIOS Setupmenu to “Enabled”. 3-12 Panel PC 670 Computing Unit, Equipment Manual Connecting and Switching on the Computing Unit Release 04/02 3.5 Drives The computing unit is equipped with a 3.5” floppy disk drive or LS 240 drive and a 3.5” hard disk drive as standard equipment. 3.5.1 Floppy disk drive The floppy disk drive can be used to store programs and data on disks and load them from disk into the computing unit. Disk types The following disks can be used: double sided double density diskettes ! double sided high density diskettes LS240 superdisks 3.5 inch 3.5 inch 3.5 inch 720 Kbyte 1.44 Mbyte (135 TPI) 120 MB Caution Caution: This could result in loss of data! The eject button must never be pressed while the green LED drive lamp is on. 3.5.2 LS240 drive As an alternative to a floppy disk drive, the computing unit can be equipped with an LS240 drive for customized solutions. The LS240 can save larger amounts of data on data media than a 1.44 MB floppy disk drive. The LS240 drive has the following characteristics: – is compatible with 1.44 MB floppy disk and LS120 drives, i.e. 1.44 MB and 120 Mbyte disks can be used,· – the maximum data capacity is 240 Mbyte using a LS240 data medium, – the LS240 drive is connected via an ATAPI(IDE) interface. Panel PC 670 Computing Unit, Equipment Manual 3-13 Connecting and Switching on the Computing Unit Release 04/02 Handling LS240 drive disks The disks are inserted in the disk drive as illustrated below according to the installation position: Drill hole for emergency ejection (LS240 only) Eject button Access light Eject button Access light Figure 3-8 ! Handling Floppy Disks Caution Caution: This could result in loss of data! The eject button must never be pressed while the LS240’s green LED drive lamp is on. LS240 drives are very sensitive when it comes to unacceptable vibrations. During operation, vibrations might damage the drive and/or the data medium. Refer to the technical data in the Appendix A.1 for the permissible values. 3-14 Panel PC 670 Computing Unit, Equipment Manual Connecting and Switching on the Computing Unit Release 04/02 Notes on using the LS240 superdisks The LS240 drive supports the use of standard 3.5” disks with 1.44 Mbyte capacity as well as superdisks with a capacity up to 240 Mbyte. The track density of superdisks is 10 mm as compared to 120 mm with standard disks. The LS240 drive detects the presence of a superdisk and switches to the higher capacity. Due to their higher capacity, superdisks are more sensitive to dirt, temperature fluctuations and shocks than standard disks. Notice Observe the following to ensure reliable operation and high degrees of data integrity: S Keep and transport superdisks in the protective cassette provided. This protects the data medium from dust and dirt. S Only remove the superdisk from the drive when no reading or writing operations are in progress. The data medium is protected from particles of dirt. Do not expose the data medium to unnecessarily high operating temperatures. Notice When operations are in progress using the superdisk, avoid vibrating the unit. Superdisks are more sensitive to vibrations due to the higher track density. Emergency eject: When the unit is switched off, the disk can be ejected by inserting a pinted object (e.g. straightened paper clip) in the relevant opening provided. Panel PC 670 Computing Unit, Equipment Manual 3-15 Connecting and Switching on the Computing Unit 3.5.3 Release 04/02 Hard disk drive The hard disk is used to store large quantities of data. It is installed on a vibration-damped mounting that is easy to replace. ! 3.5.4 Caution Danger of data being lost and the drive damaged Drives are very sensitive to unacceptable vibrations. During operation, vibrations can result in a loss of data or damage to the drive or a data medium. If you wish to ship the device, wait until the drive has come to rest after you turn off the device. (Approximately 20 s.) CD-ROM drive or CD RW/DVD drive (depending on unit equipment) The computing unit contains a CD-ROM or CD-RW/DVD drive, depending on the unit version. The installation depth of the computing unit is increased by 21 mm as a result of its installation. Operation After pressing the Open/Close button, the CD/DVD tray is extended following a short delay. Insert the CD/DVD in the tray with the inscription side up. The CD/DVD tray is automatically retracted after either pushing the tray lightly or pressing the Open/Close button. Press the Eject button to extend the CD tray. The CD/DVD can then be removed. Emergency eject When the unit is switched off, the CD/DVD can be ejected by inserting a pinted object (e.g. straightened paper clip) in the relevant opening provided. Notice After the tray has been closed, the CD is tested and the access LED on the drive starts to flash: – If the LED flashes continually, the CD/DVD is faulty but can still be read. – If the LED flashes several times and then remains on, the CD/DVD inserted is defective and cannot be read. – The access light is normally on when reading information from the CD/DVD. 3-16 Panel PC 670 Computing Unit, Equipment Manual Release 04/02 Connecting and Switching on the Computing Unit Caution CD-ROM drives are sensitive to unacceptable vibrations. During operation, vibrations might damage the drive and/or the data medium. Additional software In order to use the full functional scope of the DVD-ROM/CD-RW drive, additional siftware is required (DVD player or printer software). It is part of the material supplied, being available on the CD. To install the software, insert the CD in the drive and follow the instructions which appear on the screen. 3.6 Backup Battery A backup battery (3.6 V lithium battery) powers the real-time clock even after the unit has been turned off. This unit contains a battery on the motherboard. The batteries may only be replaced by authorized, adequately trained personnel. Observe the information in the documentation on the CPU module. When disposing of the batteries, observe the locally applicable laws on disposal of pollutants. ! ! Caution Improper replacement of the battery poses a danger of explosion. Only replace with batteries of the same type or those of a similar type recommended by the manufacturer. Dispose of used batteries according to the applicable laws or manufactuer’s information. Warning Danger of personal injury and damage to property, danger of release of noxious matter. A lithium battery can explode if mistreated and noxious matter might be released if old batteries are disposed of wrongly. Do not throw new or empty lithium batteries into the fire, and do not solder on the cell housing; do not recharge lithium batteries or force them open. Obtain lithium batteries only from Siemens (Order No: W79084-E1003-B1). If possible, return old lithium batteries to the manufacturer or recycling facility or dispose of them as special waste. Panel PC 670 Computing Unit, Equipment Manual 3-17 Connecting and Switching on the Computing Unit 3.7 Release 04/02 Using the Computing Unit in a SIMATIC S5 Network Point-to-point connection This section describes the options for connecting your computing unit to a programming unit or an S5 programmable controller in a point-to-point connection. A point-to-point connection is possible by connecting the computing unit to another programming unit or a PLC via: S S a V.24 connection a TTY connection Configuring notes for interfaces with current loop (TTY, 20 mA) Different criteria have to be taken into account for reliable operation of a connection. The maximum data transfer rate (baud rate) depends on the required distance, the type of cable, the pin assignment of the interface and external interference. Rules To reduce interference by a favorable choice and correct connection of the cable, you should comply with the following rules: S The shielded cable used must have a low line resistance (< 130 W / km) and a low capacitance (< 90 pF/ m). Twisted-pair cables are less susceptible to inductive interference. A low line resistance result in reduced voltage excursions and shorter charge reversal times; the line resistance decreases with increasing conductor cross-section for the same length of cable. S The shorter the data transmission link, the higher the maximum possible transfer rate. S If there is an active transmitter and an active receiver at the same end of the transmission link, the sequence of access priority to the transmission circuit must be taken into account in order to achieve the longest possible transmission link. S Signal lines and power lines must not be run together. Signal lines must be installed as far away as possible from sources of strong interference (for example, 400 V 3-phase power cables). S The active TTY interface with a 12 V open-circuit voltage has been tested on a 100 m long cable at a transmission rate of 9600 bps in an environment with normal levels of noise (field strength < 3 V/ m). If a LiYCY 5 x 1x 0.14 shielded cable is used, reliable transmission is possible over a distance of up to 100 m. The AS511 driver was used for testing (only one transmitter at a time). Note The interference field of the source of interference is reduced by the square of the distance. 3-18 Panel PC 670 Computing Unit, Equipment Manual Connecting and Switching on the Computing Unit Release 04/02 Connecting the computing unit to an S5 PLC You can connect the computing unit to a SIMATIC S5 programmable controller using the COM 1/TTY interface. COM 1 (Socket) Figure 3-9 Connection to an S5 Programmable Controller To connect the computing unit to a SIMATIC S5 programmable controller, perform the following steps: 1. Disconnect the computing unit from the mains power supply. 2. Plug the connecting cable onto the COM 1 port. 3. Screw the connector tight. 4. Plug the connecting cable into the corresponding port on the CPU of the programmable controller. 5. In order to enable TTY operation, you must set TTY to “enabled” in the BIOS setup. Access the BIOS Setup by pressing the F2 key during the boot routine. ! Caution Danger of damage being caused to the device If you interchange the connectors, or use wrong connecting cables, the port might be damaged. Be careful not to plug the TTY cable in the LPT 1 port of the computing unit instead of the COM1/TTY port. Before inserting the connecting cables, the static charge of your body, the device and the connecting cables must be brought to the same potential. To do this, touch the metal housing briefly. Use only the original connecting cable for the connection to the programmable controller. Panel PC 670 Computing Unit, Equipment Manual 3-19 Connecting and Switching on the Computing Unit Release 04/02 Connecting the computing unit via an adapter An adapter is available for connecting the computing unit to the PLC with earlier standard connecting cables. Table 3-1 Adapters for connecting the computing unit Interface Connection Connecting cable Order No. Adapter 6ES5 734-2BF00 COM 1 as TTY port Computing unit to a SIMATIC S5 programmable controller 6ES5 731-1xxx0 15-pin 6ES5 731-6AG00 6ES5 731-0xxx0 25-pin 6ES5 731-6AG00 In order to maintain a data transmission rate of 9600 bps up to a distance of 1000 m, the receive diode is connected to ground (reference) via the connecting cable. Note Lengths deviating from the standard connection cable (6ES5 734-2BF00) can be obtained using Order No. 6ES5 734-2xxx0, whereby xxx stands for the cable length length code. 3-20 Panel PC 670 Computing Unit, Equipment Manual Connecting and Switching on the Computing Unit Release 04/02 Connecting the computing unit to programming units (TTY) In order to connect the computing unit, connect the corresponding connection cable to the TTY interface. Table 3-2 Connecting the computing unit to other programming units Interface Connection COM 1 as TTY port with PG 6xx Connecting cable Order No. Series connection of 6ES5 733 -2xxx02) and 6ES5 731-6AG001) Adapter 6ES5 731-6AG00 Notice 1. When connected in series, it is essential to connect the cable in the right direction (refer to Figure 3-10). 2. The connecting cable is available for order only as a spare part. A description of the connecting cables is provided in Chapter 7. Adapter PG 7xx 6ES5 731-6AG00 Figure 3-10 Connecting cable Active Passive PG 6XX 6ES5 733-2xxx0 Direction of Connection: Adapter - Connecting Cable Notice When connecting the computing unit to another programming unit, switch the TTY ports (COM 1) in one of the programming units by changing the jumper setting. When the computing unit is delivered to you, this port is always set to active. Panel PC 670 Computing Unit, Equipment Manual 3-21 Connecting and Switching on the Computing Unit 3.8 Release 04/02 Using the Computing Unit in a SIMATIC S7 Network (MPI/DP) Connecting an S7 PLC via the MPI/DP interface Using the potential isolated*) MPI/DP interface, the computing unit can be connected to a SIMATIC S7 PLC or a PROFIBUS network. Using the MPI connection cable (5 m) for connection to the SIMATIC S7 CPUs (Order No.: 6ES7901-0BF00-0AA0), only transmission rates of up to 187.5 Kbit/s are possible. For baud rates from 1.5 Mbit/s, the PROFIBUS 12 Mbit/s (Order No. 6ES7901-4BD00-0XA0) connection cable is necessary. In interference environment: Bus connector 6ES7972-0BB10-0XA0 or 6ES7972-0BB20-0XA0 MPI/DP Interface Figure 3-11 6ES7901-0BF00-0AA0 (5 m long) Connection Using the MPI/DP Interface To connect the computing unit to a SIMATIC S7 programmable controller, perform the following steps: 1. Disconnect the computing unit from the mains power supply. 2. Plug the connecting cable onto the MPI/DP interface ! Caution Danger of damage being caused to the device Before inserting the connecting cables, the static charge of your body, the device and the connecting cables must be brought to the same potential. To do this, touch the metal housing briefly. *) Potential isolation within the SELV circuit. Connection Using the MPI/DP interface, it is possible to connect PCs with: 3-22 S MPI networks (S7 200, S7 300 and S7 400) or S PROFIBUS-DP networks (DP components). Panel PC 670 Computing Unit, Equipment Manual Release 04/02 Connecting and Switching on the Computing Unit MPI/PROFIBUS-DP network Up to 32 devices (PCs, programming units or PLCs) can be connected to the MPI/DP interface to form a network segment. The physical connection to the MPI/PROFIBUS-DP network is via an isolated RS485 interface, which is an integral part of the PC’s basic board. Several MPI/PROFIBUS-DP network segments can be connected via repeaters. The complete MPI/PROFIBUS-DP network can consist of up to 127 nodes. Data transmission rates of 9.6 Kbits to 12 Mbit/s are possible using the PROFIBUS-DP MPI network. Panel PC 670 Computing Unit, Equipment Manual 3-23 Connecting and Switching on the Computing Unit 3.9 Release 04/02 Networking the Computing Unit and Other Nodes via PROFIBUS Networking the computing unit via PROFIBUS PROFIBUS is an open and robust bus system for industrial use. It can be used to configure networks with up to 32 nodes per segment. PROFIBUS-DP supports data rates of 9.6 KBaud to 12 MBaud. How the network functions The network operates on the ”token passing with subordinate master/slave” principle (complying with DIN 19245, PROFIBUS). It distinguishes between active and passive nodes. An active node receives the token and passes it on to the next node within a specified time. Hardware requirements Using the following components, for example, you can connect or network the computing unit to/with PROFIBUS: S interface RS 485, MPI/DP interface, integrated S shielded, twisted pair cable (bus cable or spur line) Note Please refer to the SIMATIC NET Catalog IK IP for more information on the SIMATIC Net PC cards. 3-24 Panel PC 670 Computing Unit, Equipment Manual Release 04/02 3.10 Connecting and Switching on the Computing Unit Networking Computing Unit and Other Computers via Industrial Ethernet Networking the computing unit via Industrial Ethernet The RJ45 Ethernet interface is a Twisted Pair (TP) interface with a data transmissin rate of 10/100 Mbaud. The onboard interface is compatible with the Intel pro/100+ PCI adapter. The interface is Plug & Play capable and is automatically detected in Windows. The protocol settings are defined in the Windows Control Panel. Notice In order to operate the 100 Mbaud, an Class 5 Ethernet cable is required. Note Please refer to the SIMATIC NET Catalog IK IP for more information on the SIMATIC Net PC cards. 3.11 Connection Using Windows Windows supports point-to-point connection via the LPT or COM. The connecting cables are standard, commercially available connecting cables. Refer to the section on networks in your Windows description or online Help “Connection to Another Computer”. Panel PC 670 Computing Unit, Equipment Manual 3-25 Connecting and Switching on the Computing Unit 3-26 Release 04/02 Panel PC 670 Computing Unit, Equipment Manual Maintaining and Extending the Computing Unit 4 Chapter overview You can enhance the functionality of your computing unit by installing additional main memory. This chapter describes how to expand your computing unit. Please observe the safety notes it contains. In Section You Will Find 4.1 Opening the Device 4-2 4.2 Installing Additional Memory 4-8 4.3 Replacing the Backup Battery 4-10 4.4 Installing Expansion Boards 4-12 4.5 Removing and Installing Drives 4-17 4.6 Removing and Installing the Power Supply 4-22 4.7 Removing and Installing the Bus Board 4-23 4.8 Removing and Installing the Motherboard 4-24 4.9 Removing and Installing the Fan 4-25 4.10 Processor Upgrade 4-26 4.11 Reset Button 4-27 Panel PC 670 Computing Unit, Equipment Manual on Page 4-1 Maintaining and Extending the Computing Unit 4.1 Opening the Unit 4.1.1 Conditions Release 04/02 The device is designed for easy maintenance so that any work that may be necessary can be done quickly and economically. Caution The electronic components on the printed circuit boards are extremely sensitive to electrostatic discharge. Certain precautionary measures are therefore necessary when handling such components. These measures are explained in the guidelines for electrostatic sensitive devices at the end of this manual (ESD Guidelines). Restricted liability All technical specifications and approvals apply only to expansion modules approved by Siemens AG. No liability can be accepted for impairment of functions caused by the use of non-Siemens devices or non-Siemens components. All the modules and components are electrostatically sensitive. Please observe the ESD notes. The following symbol indicates that electrostatically sensitive modules are present. 4-2 Panel PC 670 Computing Unit, Equipment Manual Maintaining and Extending the Computing Unit Release 04/02 Before opening the device Note the following rules before opening the device: ! S Before you disconnect the power supply cable, discharge the electrostatic charge on your body. You can do this by briefly touching the mounting plate for the interfaces on the left side of the device. S Discharge the electrostatic charge from tools you are using. S Wear a grounding strap when handling components. S Leave components and component parts in their packaging until you are ready to install them. S Disconnect the device from its power supply before plugging in or removing any components or component parts. S Touch components and module only on their edges. Do not touch contact pins or printed conductors. Warning Never operate the device with the cover open. Tools You can perform all necessary installation work on the computing unit with screwdrivers of the type TORX T10 and TORX T8. Panel PC 670 Computing Unit, Equipment Manual 4-3 Maintaining and Extending the Computing Unit 4.1.2 Release 04/02 Opening the computing unit To open the computing unit, perform the following steps: 1. Turn off the computing unit, pull out the mains connector and remove all interconnecting cables and connecting cables from the device, including the keyboard cable. 2. Remove the computing unit from its mounting/cabinet (only necessary if mounting screws are inaccessible as a result of installation). 3. Undo the two screws (refer to Figure 4-1) on the housing cover. 4. Raise the cover slightly. 5. You can then remove the housing cover. Screws on the housing cover Figure 4-1 4-4 Computing unit prepared for opening Panel PC 670 Computing Unit, Equipment Manual Maintaining and Extending the Computing Unit Release 04/02 4.1.3 Functional Units Visible After Opening the Device View The function units become visible after removing the top cover of the unit and removing the hard disk module. Power supply unit Wiring backplane Figure 4-2 Memory expansion module Disk drive or LS 240 Processor Fan Computing unit open Panel PC 670 Computing Unit, Equipment Manual 4-5 Maintaining and Extending the Computing Unit 4.1.4 Release 04/02 Motherboard S1 X401 Figure 4-3 4-6 X28 X128 T1 X29 X24 X20 X19 X500 X600 X40 X11 X9 X6 X14 X700 X10 X70 X25 X13 T3 X26 X41 X4 X5 X71 X3 X31 T2 X420 X1 X23 X44 X400 X402 The motherboard is the heart of the computing unit. Here, data are processed and stored, and interfaces and device I/Os are controlled. Motherboard Panel PC 670 Computing Unit, Equipment Manual Maintaining and Extending the Computing Unit Release 04/02 Components on the motherboard The following components are located on the computing unit: Number Functions X1 Processor module with heat sink X3 IDE connector for CD-ROM X4 IDE connector for 2.5” hard disk X5 Floppy disk cable connector X6 PS/2 mouse connector X6 PS/2 keyboard connector X9 Serial port COM 1/TTY X9 Parallel port LPT 1 X11 Serial interface COM 2 X11 Socket for VGA monitor X13 Connection for 105 W power supply X14 Connection for 85 W power supply X19, X20 System memory, 2 slots X23 Not connected X24 Connector for clock battery X26 Connector, alternative COM2 X28 Not connected X29 Plug for CPU fan X31 IDE connector for LS 120 X40 USB bus connector X41 IDE connector for 3.5” hard disk X44 Plug for front interfaces X70, X71 TTY sender/receiver X128 Connector for unit fan X400 Connector for LVDS display (3.3 V/5 V) X401 Not connected X402 Not connected X420 Connector for 5 V CMOS display X500 RJ45 socket for Ethernet LAN X600 MPI/DP port X700 PC card slot S1 Momentary-contact switch for hardware reset T1 Temperature sensor (in processor) T2 Temperature sensor T3 Temperature sensor Panel PC 670 Computing Unit, Equipment Manual 4-7 Maintaining and Extending the Computing Unit 4.2 Release 04/02 Installation of a Memory Extension Standard memory The motherboard has 2 slots for 144 pin SO DIMM memory modules. This allows you to expand the memory capacity of your computing unit to 512 Mbytes. One or two modules can be equipped. Memory Modules 64 MB 256 MB 64 MB 1 – – 128 MB 2 – – 128 MB – 1 – 192 MB 1 1 – 256 MB – – 1 256 MB – 2 – 384 MB – 1 1 512 MB – – 2 Bank 0 Figure 4-4 4-8 128 MB Bank 1 Position of SO DIMM memory modules Panel PC 670 Computing Unit, Equipment Manual Release 04/02 ! Maintaining and Extending the Computing Unit Caution The electronic components on the printed circuit boards are extremely sensitive to electrostatic discharge. Certain precautionary measures, therefore, have to be taken when handling them. These measures are explained in the guidelines for electrostatically sensitive devices in Appendix B. Installing the SO DIMM Modules To insert the modules, perform the following steps: 1. Open the unit first as described in section 4.1. 2. Insert the modules into the sockets. Note the cutout (locking element) on the connector side of the SO DIMM module. 3. Press the module down applying light pressure until it locks into place. 4. Close the device. ! Caution Danger of damage! The modules must be fitted firmly in the slots, otherwise they might fall out and be damaged. Installation The memory capacity is detected automatically. When you switch on the device, the distribution of base and extended memory is displayed on the screen. Panel PC 670 Computing Unit, Equipment Manual 4-9 Maintaining and Extending the Computing Unit 4.3 Release 04/02 Replacing the Backup Battery Battery power supply for real-time clock and configuration A backup battery (3.6 V lithium battery) powers the real-time clock even after the unit has been turned off. In addition to the time of day, all the information about the device (device configuration) is stored. If the backup battery fails or is removed from its plug, these data are lost. The clock uses very little power and the lithium battery has a high capacity so that the battery can provide back-up power for the real-time clock for many years. The battery seldom needs to be replaced for that reason. Battery voltage too low If the battery voltage is too low, the time is lost, and a correct configuration of the device can no longer be guaranteed. Replacing the battery In this case, you must replace the backup battery. The battery is located on the motherboard. To change the battery, perform the following steps: 1. Disconnect the unit from the mains power supply and then disconnect all the connection cables. 2. Open the device as described in section 4.1. 3. Change the backup battery inserted in the motherboard by pulling out the cable and undoing the cable tie. 4. Secure the new battery in its mounting with a cable tie. 5. Insert the battery connector in the motherboard. 6. Close the device. 7. Connect the unit to the power supply again and press the Reset button (refer to Chapter 4.11). 4-10 Panel PC 670 Computing Unit, Equipment Manual Maintaining and Extending the Computing Unit Release 04/02 Backup battery Figure 4-5 ! Position of the backup battery Caution Danger of damage! Only replace the lithium battery with an identical battery or with a type recommended by the manufacturer (Order No: W79084-E1003-B1). If possible, return old lithium batteries to the manufacturer or recycling facility or dispose of them as special waste. Changing SETUP If you change a battery or unplug the battery connector, you must run SETUP to reset your device’s configuration data (refer to Chapter 5). Panel PC 670 Computing Unit, Equipment Manual 4-11 Maintaining and Extending the Computing Unit 4.4 Release 04/02 Installation of Extension Modules Notes on the boards The computing unit is designed for the use of cards as per the AT/PCI specification. The dimensions of the cards must not exceed the stated dimensions. If the height is exceeded, contact problems, malfunctions and difficulties with installation cannot be ruled out. The illustrations show full length AT/PCI cards. Depending on the slot, there might be constraints concerning the overall length. 106.7 mm 4.201” 175 mm 6.89 A31 Figure 4-6 A1 XT card 121.92 mm 4.8” 175 mm 6.89 C18 Figure 4-7 4-12 C1 A31 A1 AT card Panel PC 670 Computing Unit, Equipment Manual Maintaining and Extending the Computing Unit Release 04/02 Figure 4-8 106.68 mm 4.2” 8.19 mm 0.322” 174.63 mm 6.875” Short PCI card (5 V) Figure 4-9 106.68 mm 4.2” 8.19 mm 0.322” 265 mm 10.48 ” Long PCI card (5 V) Note on long PCI cards Before long PCI cards can be inserted in the guides of the fan trough, they must be fitted with an extender (this should be included with the long PCI board). Long PCI cards can be inserted in the guides of ISA modules by means of this extender. Panel PC 670 Computing Unit, Equipment Manual 4-13 Maintaining and Extending the Computing Unit 4.4.1 Release 04/02 Removing and installing the module retainer plates The module retainer plate is attached to the housing by a screw. It has three slits, through which the slide elements are inserted. To change the battery, perform the following steps: 1. Open the housing as described in section 4.1. 2. Undo the fixing screw of the module retainer plate. 3. During assembly, ensure that the module retainer plate is resting on the guide on the system housing. Guide slits for slide elements Figure 4-10 Fixing screw of module retainer plate. Removing and installing an expansion board Note The slide elements are in the enclosed bag. 4-14 Panel PC 670 Computing Unit, Equipment Manual Maintaining and Extending the Computing Unit Release 04/02 Adjusting the module retainer plate Proceed as follows to install the module retainer plate. 1. Insert the slide element through the guide slit until it is resting firmly on the module. The module must now be introduced into the notch. Caution Do not exert pressure on the module! Therefore, do not use force to press the slide module onto the module. 2. Remove the surplus slide element: – Score the slide element at the top edge of the support with a knife and snap it off. – Nip off the surplus with a sharp side cutter. Panel PC 670 Computing Unit, Equipment Manual 4-15 Maintaining and Extending the Computing Unit 4.4.2 Release 04/02 Removing and installing an ISA/PCI module To change the battery, perform the following steps: 1. Open the housing as described in section 4.1. 2. Disconnect all the connectors from the expansion module and note their assignment. 3. Remove the module retainer plates as described in section 4.4.1. 4. Undo the screw on the slot plate of the module. 5. Pull the module out of its slot. 6. Proceed in the reverse order to install the new expansion module. Slots for expansion boards Figure 4-11 4-16 Module retainer plate Removing and installing an expansion board Panel PC 670 Computing Unit, Equipment Manual Maintaining and Extending the Computing Unit Release 04/02 4.5 Removing and Installing Drives The basic configuration of the computing unit includes a 3.5” floppy disk drive and a 3.5” hard disk drive. An LS 240 drive is possible for custom solutions. 4.5.1 Removing and installing the hard disk drive 1. Remove the 4 screws on the back of the system housing. 2. Swing open the drive cage. 3. Detach the drive holder from its mounting and place it face down on the housing. 4. Make a note of the cable assignment and detach the cables. 5. Loosen the 4 screws with which the hard disk drive is secured to the shock absorbing part of the holder. Remove the hard disk drive from the holder. 6. Proceed in the reverse order to install the new drive. The new drive must be of the same type as the one removed. Fixing screws Figure 4-12 Removing and installing the drive holder Panel PC 670 Computing Unit, Equipment Manual 4-17 Maintaining and Extending the Computing Unit Figure 4-13 4-18 Release 04/02 Hard disk drive, with holder, removed Panel PC 670 Computing Unit, Equipment Manual Maintaining and Extending the Computing Unit Release 04/02 4.5.2 Removing and installing a CD-ROM drive Depending on the hardware configuration of the device, a CD-ROM drive is installed on the computing unit. The installation depth of the computing unit is increased by 21 mm as a result of its installation. 1. Undo the 2 screws on the back of the system housing. 2. Remove the cover of the CD-ROM drive. 3. Undo the three screws which secure the CD-ROM on the mounting. 4. Remove the CD-ROM drive from the mounting and carefully pull off the data cable. 5. Proceed in the reverse order to install the new drive. Fixing screws for CD-ROM cover Figure 4-14 CD-ROM drive with cover Computing unit with CD-ROM drive Panel PC 670 Computing Unit, Equipment Manual 4-19 Maintaining and Extending the Computing Unit 4.5.3 Release 04/02 Removing and installing the disk drive 1. Open the housing as described in Chapter 4.1. 2. Remove the drive mounting as described in section 4.5.1. 3. Undo the interlocking of the controller flexible cable on the motherboard and pull the flexible cable out of the plug connection. 4. Undo the two fixing screws (TORX T8) on the housing. 5. Lift the floppy disk drive up and out of the housing. 6. Proceed in the reverse order to install the new drive. The new drive must be of the same type as the one removed. Floppy disk drive fixing screws Figure 4-15 4-20 Assembly of the computing unit floppy disk drive Panel PC 670 Computing Unit, Equipment Manual Maintaining and Extending the Computing Unit Release 04/02 4.5.4 Removing and installing the LS 240 drive To remove and install the LS240 drive, perform the same steps as for installing the floppy disk drive. 1. Open the housing as described in Chapter 4.1. 2. Remove the drive mounting as described in section 4.5.1. 3. Release the cable clamp assembly of the controller flexible cable on and pull the flexible cable out of the plug connection. 4. Undo the two fixing screws (TORX T8) on the housing. 5. Lift the LS240 drive up and out of the housing. 6. Proceed in the reverse order to install the new drive. Screws for the LS240 cable clamp assembly LS240 drive fixing screws Figure 4-16 Assembly of the LS240 drive Panel PC 670 Computing Unit, Equipment Manual 4-21 Maintaining and Extending the Computing Unit 4.6 Release 04/02 Removing and Installing the Power Supply 1. Open the housing as described in section 4.1. 2. Remove the drive mounting as described in section 4.5.1. 3. Remove the 3 screws from the cover of the power supply unit from the housing. 4. Disconnect the internal SV cable on the power supply (only applicable to units with 105 W power supplies). 5. Remove the two fixing screws (TORX T10) on the housing. 6. Pull the power supply unit up and out of the housing. 7. Proceed in the reverse order to install the new power supply unit. Cover of the power supply unit Power supply unit Figure 4-17 4-22 Removing and installing the power supply Panel PC 670 Computing Unit, Equipment Manual Maintaining and Extending the Computing Unit Release 04/02 4.7 Removing and Installing the Bus Board 1. Open the housing as described in section 4.1. 2. Remove all the modules from their slots (perform the steps described in section 4.4.2). 3. Remove the drive mounting as described in section 4.5.1. 4. Remove the power supply unit as described in section 4.6. 5. Undo the screw on the motherboard. 6. Pull the wiring backplane from the motherboard. 7. Proceed in the reverse order to install the new wiring backplane. Wiring backplane Figure 4-18 Wiring backplane fixing screws Removing and installing the bus board Panel PC 670 Computing Unit, Equipment Manual 4-23 Maintaining and Extending the Computing Unit 4.8 Release 04/02 Removing and Installing the Motherboard 1. Open the housing as described in section 4.1. 2. Remove all the modules from their slots (perform the steps described in section 4.4.2). 3. Remove the drive mounting as described in section 4.5.1. 4. Remove the power supply unit as described in section 4.6. 5. Undo 7 screws on the motherboard and undo 10 hexagon head cap screws at the interfaces. 6. Remove the wiring backplane and the motherboard. 7. Proceed in the reverse order to install the motherboard. Fixing screws on the motherboard Figure 4-19 Fixing screws on the motherboard The motherboard is supplied as a spare part without a processor, memory modules or wiring backplane. 4-24 Panel PC 670 Computing Unit, Equipment Manual Maintaining and Extending the Computing Unit Release 04/02 4.9 Removing and Installing the Fan The computing unit is cooled by means of a fan, which extracts hot air out of the housing. 1. Open the housing as described in section 4.1. 2. Disconnect the fan cable connector from the motherboard. 3. The fan is secured to the housing by two plastic rivets. Undo the rivets by pressing out the gudgeon from the rear of the rivet shank. 4. Remove the fan. 5. Proceed in the reverse order for assembly. Unit fan Figure 4-20 Plastic rivets Removing and installing the fan Notice Fit only a fan of the same type! ! Caution To ensure that the device is adequately cooled, ensure that the running direction of the fan is correct when installing. Ensure that the arrow on the fan is pointing towards the housing wall. Panel PC 670 Computing Unit, Equipment Manual 4-25 Maintaining and Extending the Computing Unit 4.10 Release 04/02 Processor Upgrade You can boost the performance capability of your computing unit by installing other processors. Proceed as follows to replace the processor (the numbers in brackets relate to Figure 4-21): 1. Disconnect the fan cable connector from the motherboard. 2. Remove the heat sink, secured by a metal bar. 3. Press the lever in the direction of the arrow (1) and pivot it up as far as possible (2). 4. Lift the old processor from the slot (3). 5. Insert the new processor in the slot ensuring that the marking on the top side of the processor coincides with the position of the marking (4) on Slot A. Caution The marking on the top side of the processor may be covered by the heat sink. In such cases, align the processor with the marking in the row of pins at the bottom of the processor. 6. Pivot the lever back down until it locks into place (5). 7. Disassemble the unit fan. 8. Secure the heat sink with the metal bar. 9. Connect the fan cable connector back on the motherboard. 10.Assemble the unit fan. Caution If the processor is driven with a frequency higher than permitted, it may be destroyed or cause loss of data or loss of data integrity. 3 2 4 5 1 A Figure 4-21 4-26 Upgrading the processor Panel PC 670 Computing Unit, Equipment Manual Maintaining and Extending the Computing Unit Release 04/02 4.11 Reset button A hardware reset is initiated by means of the Reset button on your device. The computing unit is restarted. On the computing unit, the Reset button is located on the drive side beside the floppy disk drive. The Reset button can only be operated with the aid of a pointed object (e.g. the tip of a ball-point pen or straightened paper clip). The position of the Reset button is marked in the illustration of the computing unit below. Reset Button Figure 4-22 Reset button Panel PC 670 Computing Unit, Equipment Manual 4-27 Maintaining and Extending the Computing Unit 4-28 Release 04/02 Panel PC 670 Computing Unit, Equipment Manual Configuring the Computing Unit in BIOS Setup 5 Chapter Overview In this chapter, you will learn how to configure your computing unit. You need to do this if you want to change your system by adding, removing, or exchanging an extension board, memory expansion module, or by replacing a system module. In Section You Will Find on Page 5.1 Modifying the Device Configuration with SETUP 5-2 5.1.1 The Main Menu 5-5 5.1.2 The Advanced Menu 5-15 5.1.3 The Security Menu 5-22 5.1.4 The Power Menu 5-24 5.1.5 The Boot Sequence Menu 5-25 5.1.6 The Version Menu 5-27 5.1.7 The Exit Menu 5-28 5.1.8 Default Setup Settings 5-29 5.2 Configuring the PC Card Interface 5-32 Panel PC 670 Computing Unit, Equipment Manual 5-1 Configuring the Computing Unit in BIOS Setup 5.1 Release 04/02 Modifying the Device Configuration with SETUP Changing the Device Configuration The device configuration of your computing unit is preset for working with the software supplied to you. You should only modify the preset values if you have performed technical modifications to your device or if a fault occurs when the unit is powered up. BIOS SETUP Program The SETUP program is in the ROM-BIOS. The system configuration settings are stored in the battery-protected memory of the computing unit. You can use BIOS Setup to set the hardware configuration (for example, hard disk type) and define the system characteristics. You can also use SETUP to set the time of day and date. Incorrect BIOS Data If there are detected incorrect BIOS data during the boot process you are asked by the BIOS to S Start BIOS SETUP by pressing F2 or S continue booting by pressing F1. start SETUP On completion of the startup test, the BIOS gives you the opportunity of starting the SETUP program The following message appears on the display: PRESS < F2> to enter SETUP To start SETUP, proceed as follows: 1. Reset the computing unit (warm or cold reset). 2. Press the key F2 until the BIOS message is displayed. BIOS SETUP menus The various menus and submenus are listed on the following pages. You will find information on the ”Item Specific Help” part of the specific menu for the selected SETUP value. 5-2 Panel PC 670 Computing Unit, Equipment Manual Release 04/02 Configuring the Computing Unit in BIOS Setup Screen Display Following Power On For example, the default setting of your computing unit will display the following figure on the display on power on: Phoenix BIOS 4.0 A5E00123801–ES02 Copyright 1985-2001 Phoenix Technologies Ltd. All Rights Reserved. SIMATIC Box PC 620 V02.01.02 CPU = Pentium[III 866MHz 637K System RAM Passed 119MB Extended RAM Passed 0128K Cache SRAM Passed System BIOS shadowed Video BIOS shadowed UMB upper limit segment address: .... Fixed Disk 0: xxxx ATAPI CD-ROM: Txxx Mouse initialized Press to enter SETUP By pressing the F2 key when the above figure is displayed you will change to the BIOS Setup program based on the ROM. In this program, you can set a number of system functions and hardware configurations of your programming device. The default settings are effective on delivery. You can change these settings using the BIOS setup. The modified settings become effective when you have saved them and terminated the BIOS setup. The following screen shots may differ from what is shown here, depending on the device configuration. Panel PC 670 Computing Unit, Equipment Manual 5-3 Configuring the Computing Unit in BIOS Setup Release 04/02 Menu items After BIOS Setup has started, the following dialog box appears on the screen: PhoenixBIOS Setup Utility Title bar Main Advanced Security Power Boot Sequence Version Exit Menu bar Selectable submenu System Time: System Date: [ 15:35:32 ] [ 03/12/2002] Diskette A: Primary Master Primary Slave Secondary Master Secondary Slave [1.44 MB, 31/2”] [20496 MB] [None] [CD–ROM] [None] Memory Cache: [Write Back] Boot Options Keyboard Features Hardware Options System Memory: Extended Memory: F1 ESC Help Exit Operator control bar Figure 5-1 Item Specific Help <Tab>, <Shift-Tab>, <Enter> selects field. Example: Hour/Minute/Second Month/Day/Year or Help window 640 KB 121856 KB Select Item Select Menu + / – Change Values Enter Select Sub-Menu F9 Setup Defaults F10 Save and Exit SETUP Main Menu (Example) The screen is divided into four sections. In the top section, you can select the menu screens [Main], [Advanced], [Security], [Power], [Boot Sequence], [Version], [Exit]. In the left of center section, you can choose the different settings or submenus. Brief help texts appear on the right for the currently selected menu entry. The bottom section contains information for operator inputs. Yellow stars to the left of the interface designation (for example, Internal COM 1) indicate a resource conflict between the interfaces managed by the BIOS. In this case you should select the default settings (F9) or eliminate the conflict. You can move between the menu screens using the cursor keys [←] and [→]. Menu 5-4 Meaning Main System functions are set here Advanced An extensive system configuration can be performed here Security Security functions are set here, for example a password Power Power conservation functions can be chosen here Boot Sequence The boot priorities are set here Version Information about the programming device’s release status Exit Used for exiting and saving Panel PC 670 Computing Unit, Equipment Manual Configuring the Computing Unit in BIOS Setup Release 04/02 5.1.1 Menu Main PhoenixBIOS Setup Utility Main Selectable submenu Advanced Security System Time: System Date: [ 15:35:32 ] [ 03/12/2002 ] Diskette A: Primary Master Primary Slave Secondary Master Secondary Slave [1.44 MB, 31/2”] [20496 MB] [None] [CD–ROM] [None] Memory Cache: [Write Back] Boot Options Keyboard Features Hardware Options System Memory: Extended Memory: F1 ESC Figure 5-2 Power Help Exit Boot Sequence Version Exit Item Specific Help <Tab>, <Shift-Tab>, <Enter> selects field. Example: Hour/Minute/Second Month/Day/Year or Help window 640 KB 62976 KB Select Item Select Menu + / – Change Values Enter Select Sub-Menu F9 Setup Defaults F10 Save and Exit SETUP Main Menu (Example) Setting in the Main Menu In the Main menu, you can move upwards and downwards using the cursor keys [↑] and [↓] to select the following system parameters: Field Meaning System Time For viewing and setting the current time System Date For viewing and setting the current date Disk A: Type of built in floppy disk drive With LS 240 drive [Disabled] Memory Cache For setting the cache options by submenus Primary Master Type of build in drives Secondary Master Type of build in drives Boot Options For setting boot options Keyboard Features For setting keyboard interface options (e.g. NUM Lock, Typematic Rate) Hardware Options For setting hardware options Panel PC 670 Computing Unit, Equipment Manual 5-5 Configuring the Computing Unit in BIOS Setup Release 04/02 System Time und System Date Time and date System Time and System Date indicate the current values. Once you have selected the appropriate option, you can use the [+] and [–] keys to modify the time setting Hour:Minute:Second and the date Month/Day/Year. You can move between the entries in the date and time options (for example, from hour to minute) using the tabulator key. Floppy disk A Floppy disk drive Here you can set up the floppy disk drive of your specific computing unit. The following entries are possible: [Disabled] if there is no floppy disk drive and there is a LS 240 drive. Default setting for an installed LS 240 drive. [360 KB,5 1/4”] [1.2 MB,5 1/4”] [720 KB,3 1/2”] [1.44 MB, 3 1/2”] Default setting for an installed floppy drive A [2.88 MB, 3 1/2”] 5-6 Panel PC 670 Computing Unit, Equipment Manual Configuring the Computing Unit in BIOS Setup Release 04/02 Primary Master, Primary Slave, Secondary Master, Secondary Slave The system jumps to the following submenu when you select this type of menu field: PhoenixBIOS Setup Utility Main Primary Master [20496 MB] [ Auto ] Type: Total Sectors: Maximum Capacity: LBA Format 40031712 20496 MB Multi-Sector Transfers: LBA Mode Control: 32 Bit I/O: Transfer Mode: Ultra DMA Mode: F1 ESC Figure 5-3 Help Exit [16 Sectors] [Enabled] [Enabled] [FPIO 4 / DMA 2] [Disabled] Select Item Select Menu Item Specific Help [Auto] (recommended) Autotypes installed IDE-devices [USER] Enter parameters of IDE-devices installed at this connection + / – Change Values Enter Select Sub-Menu F9 Setup Defaults F10 Save and Exit Primary Master Field Type The parameters you can select here are normally stored on your IDE drive. The ’Auto’ setting in the Type field means that these values are automatically read from the drive and written into memory (Autodetect). If Type is selected for a drive that cannot be detected, a timer times out in approximately 1 minute and the entries remain unchanged. You should always check that the interfaces for which you select ’Auto’ are in fact connected to drives. Select “User” if you want to define the hard-disk type yourself, in which case remember that you also have to set the other fields, including Cylinder, Heads, Sectors/Track and WritePrecomp, to the correct values for the type of hard disk in question. Panel PC 670 Computing Unit, Equipment Manual 5-7 Configuring the Computing Unit in BIOS Setup Release 04/02 Multi Sector Transfer field In the box Multi Sector-Transfer the number of blocks (sectors) are defined that will be transmitted with one interrupt. The value depends on the drive and should be set only by setting the Type field to ”Auto”. Disabled 2,4,8,16 sectors LBA Mode Control field If the LBA Mode Control field (enabled,disabled) is set to ’Enabled’, the system supports hard disks with capacities greater than 528 Mbytes. The value depends on the drive and should be set only by setting the Type field to ”Auto”. 32 Bit-IO field The box 32 Bit-IO defines the access type for the drive Disabled 16-Bit access Enabled 32-Bit access (default) Transfer Mode and Ultra DMA Mode fields The settings in these fields define the interface’s data transfer rate. The value depends on the drive and should be set only by setting the Type field to ”Auto”. Hit ESC to exit the submenu. 5-8 Panel PC 670 Computing Unit, Equipment Manual Configuring the Computing Unit in BIOS Setup Release 04/02 ”Memory Cache” Submenu The following pop-up menu appears when you select the submenu “Memory cache” in the main menu: PhoenixBIOS Setup Utility Main System Time: System Date: Diskette A: [ 15:35:32 ] [ 03/12/2002 ] [1.44 MB, 31/2” ] Primary Master Primary Slave Secondary Master Secondary Slave [20496 MB] [None] [CD–ROM] [None] Disabled Write Through Write Back [Write Back] Memory Cache: Item Specific Help Controls caching of system conventional memory and memory above one megabyte. Boot Options Keyboard Features Hardware Options System Memory: Extended Memory: F1 ESC Figure 5-4 Help Exit 640 KB 121856 MB Select Item Select Menu + / – Change Values Enter Select Sub-Menu F9 Setup Defaults F10 Save and Exit “Memory Cache” Field A cache is a fast memory buffer between the CPU and main memory (DRAM). Recurrent memory access operations are executed in the fast cache, instead of the main memory, if the function is enabled. In rare instances involving some hardware and software combinations, it may be necessary to disable the cache because the program runtimes or waits are too short on account of the fast cache. [Disabled] Cache is disabled [Write Through] Write access is not concluded until the entry has been made in main memory [Write Back] Write access is concluded immediately; the entry in main memory takes place in the backround (default) Panel PC 670 Computing Unit, Equipment Manual 5-9 Configuring the Computing Unit in BIOS Setup Release 04/02 Submenu ”Boot Options” The following submenu appears when you select the option “Boot Options” in the main menu: PhoenixBIOS Setup Utility Main Boot Options QuickBoot Mode: [Enabled] SETUP prompt: POST Errors: [Enabled] [Enabled] Floppy check: [Disabled] Summary screen: [Enabled] F1 ESC Figure 5-5 5-10 Item Specific Help Help Exit Select Item Select Menu Allows the system to skip certain tests while booting. This will decrease the time needed to boot the system. + / – Change Values Enter Select Sub-Menu F9 Setup Defaults F10 Save and Exit ”Boot Options” Submenu Quick Boot Mode Some hardware tests are skipped when the system starts up, thus speeding up the boot procedure. SETUP prompt The message PRESS <F2> to enter Setup appears at the bottom of the screen during the system load phase. POST Errors The boot process is stopped if an error is detected; you must press F1 to acknowledge. Enter “Disabled”to avoid the necessity of acknowledging errors, for example if no keyboard is connected. Panel PC 670 Computing Unit, Equipment Manual Configuring the Computing Unit in BIOS Setup Release 04/02 Floppy check The floppy head is stepped inward and then back to its original position during the system run-up phase. This test is useful because it reinitializes the drive. Summary screen The most important system parameters are displayed when the system run-up phase completes. ’Enabled’ means that the feature is active. ’Disabled’ means that the feature is inactive. Example of a summary screen: PhoenixBIOS Setup Utility Figure 5-6 SIMATIC Box CPU Type CPU Speed : PC 620 : Pentium(R) III : 866 MHz BIOS Number System ROM BIOS Date : A5E00123801–ES02x : E6E3 – FFFF : 03/12/02 System Memory Extended Memory Shadow Ram Cache Ram : 640 KB : 119 MB : 384 KB : 512 KB COM Ports LPT Ports Display Type PS/2 Mouse : 03F8 : 0378 : VGA : Installed Hard Disk 0 Hard Disk 1 Hard Disk 2 Hard Disk 3 : 20496 MB : None : CD–ROM : None Diskette A : 1,44 MB, 31/2 ” Summary Screen The Summary screen appears when the system run-up phase completes. Panel PC 670 Computing Unit, Equipment Manual 5-11 Configuring the Computing Unit in BIOS Setup Release 04/02 Submenu ”Keyboard Features” The following submenu appears if you select the “Keyboard Features” field in the main menu: PhoenixBIOS Setup Utility Main Keyboard Features Item Specific Help Selects Power-On state for NumLock on next boot [ On ] NumLock: Key Click: [Disabled] [30/sec] Keyboard auto-repeat rate: Keyboard auto-repeat delay: [1/2 sec] F1 ESC Figure 5-7 5-12 Help Exit Select Item Select Menu + / – Change Values Enter Select Sub-Menu F9 Setup Defaults F10 Save and Exit ”Keyboard Features”Submenu Numlock Switches Numlock on or off following power on Key Click A keystroke can be heard Keyboard auto-repeat rate Increase in automatic key repeat rate Panel PC 670 Computing Unit, Equipment Manual Configuring the Computing Unit in BIOS Setup Release 04/02 Submenu ”Hardware Options” The following submenu appears when you select the “Hardware Options” field in the main menu: PhoenixBIOS Setup Utility Main Hardware Options PCI – MPI / DP: Onboard Ethernet: Ethernet Address: LAN Remote Boot: Cardbus/PCMCIA Slot: SafeCard functions: Legacy USB Support: Fan Control: CRT / LCD selection: LCD-Screensize: DSTN Contrast: [ Enabled ] [Enabled] 08000624xxxx [Disabled] [Enabled] [Enabled] [Disabled] [Enabled] [SIMULTAN] [Expand] [154] PS/2 Mouse: [Enabled] F1 ESC Figure 5-8 Item Specific Help Help Exit Select Item Select Menu Enable or disable the PCI - Multi Point Interface (MPI/DP) + / – Change Values Enter Select Sub-Menu F9 Setup Defaults F10 Save and Exit ”Hardware Options” Submenu The parameters of the interfaces present on the basic module are set here. Entry Meaning PCI-MPI/DP Enables the CP5611-compatible MPI/DP interface. The recourses are managed by the BIOS PCI plug and play mechanism. On Board Ethernet [Enabled] The ethernet port on the motherboard is enabled. [Disabled] The ethernet port on the motherboard is disabled. Ethernet Address The individual ethernet address is displayed here. LAN Remote Boot [Enabled] [Disabled] Panel PC 670 Computing Unit, Equipment Manual It is possible to boot over a connected LAN. The respective boot source is displayed as Intel Boot-Agent in the boot sequence menu Booting using LAN is not possible. 5-13 Configuring the Computing Unit in BIOS Setup Entry Card bus / PCMCIA Slot SafeCard functions Release 04/02 Meaning [Disabled] Release the Cardbus / PCMCIA interfaces is disabled. [Enabled] The resources are managed by the BIOS PCI plug and play mechanism. [Enabled] On board monitoring functions are enabled. [Disabled] No monitoring functions. The relevant driver and application must be started for operation of the monitoring functions. Legacy USB Support CRT / LCD selection [Disabled] In order to connect a USB keyboard or a USB mouse the operating system has to support USB devices. You can adjust the Setup settings with a USB keyobard. [Enabled] USB keyboard and USB mouse are supported by the BIOS. Non-USB capable operating systems can be used. [LCD Enabled] All data is output only to the internal LCD, the 15-way VGA port is disabled for the highest resolution the display signals are only sent to the 15-pin VGA interface. The LCD interface of the VGA controller is disconnected. Both display interfaces are enabled and operate simultaneously. Note, however, that the LCD does not support all resolutions. [CRT Enabled] [SIMULTAN] LCD-Screensize 5-14 [Normal] The display window in Text and Graphic modes is not expanded to full screen size. [Expanded] The whole display area is used even if the resolution is higher than the pixel size of the monitor. DSTN Contrast The contrast of DSTN displays is set here. Range: 0-255 PS/2 mouse [Internal] The PS/2 port is activated. This is the default for the Box PC. IRQ 12 is assigned. [Disabled] The PS/2 port is deactivated, IRQ12 is available. Note: Invariably, changes to this interface do not come into effect until the PC is switched off and on again. Panel PC 670 Computing Unit, Equipment Manual Configuring the Computing Unit in BIOS Setup Release 04/02 5.1.2 Menü Advanced Menu structure PhoenixBIOS Setup Utility Advanced Main Security Power Boot Sequence Exit Item Specific Help Setup Warning Setting items on this menu to incorrect values may cause your system to malfunction COM/LPT Configuration PCI Configuration Installed O/S: Reset Configuration Data: Floppy disk controller: Local Bus IDE adapter: Large Disk Access Mode: Memory Gap at 15 Mbyte: Version [ Other ] [ No ] [Enabled] [Both] [DOS] [Disabled] Select the operating system installed on your system which you will use most commonly. Note: An incorrect setting can cause some operating systems to display unexpected behavior. Video Adapter Settings F1 ESC Figure 5-9 Help Exit Select Item Select Menu + / – Change Values Enter Select Sub-Menu F9 Setup Defaults F10 Save and Exit “Advanced” Menu Settings of the Advanced menu Installed O/S Plug and Play means that all modules are automatically detected and installed, providing they support the Plug and Play functionality. [other] BIOS handles the entire Plug and Play capability, default configuration [Win98] The operating system handles some of the Plug and Play functions Reset Configuration Data [Yes] means that all previous Plug and Play are deleted. During the next system booting procedure the configuration will be started again. The entry is then reset to [No]. System components that do not support Plug and Play have to be entered manually. Floppy disk controller Enables or disables the floppy-disk controller on the motherboard. Local Bus IDE adapter [Primary] [Secondary] [Both] One IDE interface for max. two drives. [Disabled] No local IDE interface. Panel PC 670 Computing Unit, Equipment Manual Two IDE interfaces for max. four drives. 5-15 Configuring the Computing Unit in BIOS Setup Large Disk Access Mode [DOS] Release 04/02 The drive tables are adapted for DOS access operations in accordance with Enhanced IDE. [OTHER] The tables are not adapted. Memory Gap at 15 MByte [Disabled] The complete onboard RAM memory is available. [Enabled] A 1MB area of the RAM above 15MB (Addresses F0 0000 – FF FFFF) can be used by ISA expansion cards. Submenu“COM/LPT Configuration” PhoenixBIOS Setup Utility Advanced COM/LPT Configuration Item Specific Help Configure serial port A using options: Internal COM 1: Base I/O address: Interrupt: Internal COM2: Base I/O address: Interrupt: [Enabled] [3F8] [IRQ 4] [Enabled] [2F8] [IRQ 3] Internal LPT1: Mode: Base I/O address: Interrupt: [Enabled] [Output only] [378] [IRQ 7] [Disabled] No configuration [Enabled] User configuration [Auto] BIOS or OS chooses configuration [OS Controlled] Displayed when controlled by OS F1 ESC Figure 5-10 Help Exit Select Item Select Menu + / – Change Values Enter Select Sub-Menu F9 Setup Defaults F10 Save and Exit ”COM/LPT Configuration” Submenu The resources used by an interface are released when you disable the interface in question. The I/O addresses and interrupts are preassigned to be operated as COM1, COM2 and LPT1 and we recommend you use them accordingly. 5-16 Panel PC 670 Computing Unit, Equipment Manual Configuring the Computing Unit in BIOS Setup Release 04/02 Printer Port Internal LPT1 Mode: Use this setting to set the operating mode of the printer interface. Refer to the table below to ensure that the setting matches the printer connected to the printer port. Settable Mode Features Output Only S Standard setting for the 8 bit parallel transfer Standard parallel port – unidirectional (SPP) S Feedback of the output device is only possible via according to IEEE1284 specifications the control cables Bidirectional as for SPP – unidirectional, however: Standard parallel port – bidirectional S Feedback of the output device is also possible via EPP S Enhanced parallel port (data transfer rate from Enhanced parallel port the 8 bit data cables 500kbps up to 2Mbps) S Hardware handshake S different devices can be addressed ECP as for EPP, however: Extended capability port S own DMA channel S FIFO backup S Data compression Panel PC 670 Computing Unit, Equipment Manual 5-17 Configuring the Computing Unit in BIOS Setup Release 04/02 PCI Configuration Submenu PhoenixBIOS Setup Utility Advanced PCI Configuration Item Specific Help PCI Device, Slot #1 PCI Device, Slot #2 Setup items for configuring The specific PCI device PCI/PNP ISA IRQ Resource Exclusion PCI PCI PCI PCI line line line line 1: 2: 3: 4: Help Exit F1 ESC Figure 5-11 IRQ IRQ IRQ IRQ [Auto Select] [Auto Select] [Auto Select] [Auto Select] Select Item Select Menu + / – Change Values Enter Select Sub-Menu F9 Setup Defaults F10 Save and Exit ”PCI Configuration” Submenu ”PCI Devices” Submenu If the PCI devices field is selected, the following submenu appears: PhoenixBIOS Setup Utility Advanced PCI Devices, Slot #1 Option Rom Scan Enable Master: Latency Timer F1 ESC Figure 5-12 5-18 Help Exit [Enabled] [Enabled] [0040h] Select Item Select Menu Item Specific Help Initialize device expansion ROM + / – Change Values Enter Select Sub-Menu F9 Setup Defaults F10 Save and Exit ”PCI Devices, Slot #1” Submenu Panel PC 670 Computing Unit, Equipment Manual Configuring the Computing Unit in BIOS Setup Release 04/02 Option ROM Scan: [Enabled] [Disabled] The option ROM of the PCI module (if present) is enabled The option ROM of a PCI module is disabled. Enable Master: [Enabled] [Disabled] This slot can assume the PCI master function This slot can only operate as a PCI slave. Latency Timer [Default] The number of active PCI clock cycles of the master modules are determined by the module With these settings, the maximum active PCI clock to is set to the selected values. [0020H 00E0H] Submenu “PCI/PNP ISA IRQ Resource Exclusion” “Available” means that the BIOS Plug and Plug device can assign IRQs to Plug and Play compatible modules or main board functions. You should only change it “Reserved” if the specific interrupt is to be assigned to not Plug and Play compatible PCMCIA modules. PhoenixBIOS Setup Utility Advanced PCI/PNP ISA IRQ Resource Exclusion IRQ 3: IRQ 4: IRQ 5: IRQ 9: IRQ 10: IRQ 11: F1 ESC Figure 5-13 [ Available ] [Available] [Available] [Available] [Available] [Reserved] Help Exit Select Item Select Menu Item Specific Help Reserves the specified IRQ for use by legacy ISA devices + / – Change Values Enter Select Sub-Menu F9 Setup Defaults F10 Save and Exit ”PCI / PNP ISA IRQ Resource Exclusion” Submenu Panel PC 670 Computing Unit, Equipment Manual 5-19 Configuring the Computing Unit in BIOS Setup Release 04/02 “PCI IRQ line” Field PhoenixBIOS Setup Utility Advanced PCI Configuration Item Specific Help PCI Device, Slot #1 PCI Device, Slot #2 Reserves the specified IRQ for use by legacy ISA devices Disabled PCI/PNP ISA IRQ Resource Exclusion Autoselect 3 PCI IRQ line 1: 4 PCI IRQ line 2: 5 7 PCI IRQ line 3: 9 PCI IRQ line 4: 10 11 12 14 15 F1 ESC Figure 5-14 5-20 Help Exit Select Item Select Menu + / – Change Values Enter Select Sub-Menu F9 Setup Defaults F10 Save and Exit ”PCI Configuration” Submenu Disabled No interrupt possible for this PCI-IRQ line AutoSelect Plug and Play mechanism in BIOS selects unassigned interrupts and allocates them to the on-board PCI devices. 3 to 15 The PCI-IRQ line is assigned to the selected interrupt. Do not use this setting unless it is specifically required in your application’s documentation. Panel PC 670 Computing Unit, Equipment Manual Configuring the Computing Unit in BIOS Setup Release 04/02 Submenu “Video Adapter Settings” PhoenixBIOS Setup Utility Advanced Video Adapter Settings Frame Buffer Size: AGP Rate: [8 MB] [2x] Default Primary Video Adapter: [AGP] F1 ESC Figure 5-15 Item Specific Help Help Exit Select Item Select Menu On board video adapter buffer size, which is shared with Main Memory + / – Change Values Enter Select Sub-Menu F9 Setup Defaults F10 Save and Exit Submenu ”Video Adapter Settings” Frame Buffer Size [8] [16] [32] Specifies the size of the graphic memory used Onboard graphic card. This range is in the Main memory of the system. AGP Rate [1x] [2x] [4x]. Specifies the AGP transfer speed to the Onboard graphic card Default Primary Video Adapter [AGP] The Onboard video graphic card is used as a primary display unit. A PCI graphic card may be used as a primary display device. This input is ignored if no additional graphic card is inserted. [PCI] Panel PC 670 Computing Unit, Equipment Manual 5-21 Configuring the Computing Unit in BIOS Setup 5.1.3 Release 04/02 Menü Security Overview You can only edit the fields enclosed in square brackets. In order to protect your computing unit against illegal use it is possible to enter two passwords. With the supervisor password, the setup access can be restricted or denied to normal users. PhoenixBIOS Setup Utility Advanced Main Security Power Boot Sequence Version Exit Item Specific Help Supervisor Password is User Password is Disabled Disabled Set Supervisor Password Set User Password [ Enter ] [ Enter ] Password on boot: [Disabled] Fixed disk boot sector: Diskette access: [Normal] [Supervisor] F1 ESC Figure 5-16 Help Exit Select Item Select Menu Select the operating system installed on your system which you will use most commonly. Note: An incorrect setting can cause some operating systems to display unexpected behavior. + / – Change Values Enter Select Sub-Menu F9 Setup Defaults F10 Save and Exit ”Security” Menu Supervisor Password is Disabled Enabled Password not set. All setup entries can be processed without a password. Passwort is enabled. The BIOS setup can only be processed after entering a password. This password has a higher priority than a User Password. The input field automatically changes from [Disabled] to [Enabled] when the password is entered. User Password is Disabled Enabled No User Password is assigned. If a Supervisor Password is assigned, only the Supervisor can operate the setup. User Password is active. A user is thus given the right to process some setup fields. The input field automatically changes from [Disabled] to [Enabled] when the password is entered. Set User Password 5-22 This field opens the dialog box for entering a password. Once it has been entered correctly, the user password can be changed or deleted by pressing ”Return” and thus deactivated. Panel PC 670 Computing Unit, Equipment Manual Configuring the Computing Unit in BIOS Setup Release 04/02 Password on boot [Disabled] No password required for system boot. [Enabled] Supervisor or user password must be entered for system boot. Fixed disk boot Sector [Normal] All types of hard-disk access are permitted. Diskette access This mode of protection is not active unless ”Password on boot ” is set to [enabled]. [Write protect] No operating system can be installed. This is a way of protecting against boot viruses. [Supervisor] Diskette access is not possible unless the supervisor password was entered during system boot. [User] Panel PC 670 Computing Unit, Equipment Manual Diskette access is not possible unless the user password was entered during system boot. Note: This function can not be used under Windows NT/2000, since this operating system does not access the diskette via BIOS routines. Please use the system programs in Windows NT/2000. 5-23 Configuring the Computing Unit in BIOS Setup 5.1.4 Release 04/02 Menu Power Overview This menu has the following structure. PhoenixBIOS Setup Utility Main Advanced Security APM: Power Power Savings: [Enabled] [Disabled ] Standby Timeout: Off Hard Disk Timeout: Boot Sequence Version Exit Item Specific Help APM (Advanced Power Management) allows APM aware software to manage power savings, if enabled [Disabled] Disabled Customized Maximum Power Savings Maximum Performance Not valid for ACPI Operating Systems F1 ESC Figure 5-17 Help Exit Select Item Select Menu + / – Change Values Enter Select Sub-Menu F9 Setup Defaults F10 Save and Exit “Power” Menu The Power menu offers a number of power saver modes for environmentally friendly computing: 5-24 APM (Advanced Power Management) [Enabled] Power Savings [Disabled] No power-saving functions [Customize, Maximum Power Savings, Maximum Performance] freely adjustable power saving functions for maximum and minimum power saving functions. You can set the parameters for Standby/Suspend Timeouts and Fixed Disk Timeout or they set automatically to their defaults. Standby Timeout [Off] [30 seconds or 1, 2, 4, 8, 12, 16] [Disabled] The operating system can shut down system resources when they are not needed. The operating system is denied APM access. No Standby mode ...minutes after your PC enters standby mode. Panel PC 670 Computing Unit, Equipment Manual Configuring the Computing Unit in BIOS Setup Release 04/02 Hard Disk Timeout 5.1.5 [Disabled] [10, 15, 30, 60] The hard disk does not shut down. Time since the last hard-disk access, the hard disk is shut down. On the next access the hard disk will be activated again with a short delay. Menu Boot-Sequence Overview This menu lists the boot devices in prioritized groups. PhoenixBIOS Setup Utility Main Advanced Security Power Boot Sequence Version Exit Item Specific Help + Removable Device + Hard Drive ATAPI CD-ROM Drive F1 ESC Figure 5-18 Help Exit Select Item Select Menu Keys used to view or configure devices: <Enter> expands or collapses devices with a + or – <Ctrl+Enter> expands all <+> and <–> moves the device up or down. + / – Change Values Enter Select Sub-Menu F9 Setup Defaults F10 Save and Exit “Boot Sequence” Menu This menu lists the boot devices in groups. The group with the highest priority is at the top. The procedure for changing the sequence is as follows: Use the ↑↓ keys to select a group and the + or – keys to move the group to its new position in the sequence. Note During booting the boot drive can be selected with the ESC key. Panel PC 670 Computing Unit, Equipment Manual 5-25 Configuring the Computing Unit in BIOS Setup Release 04/02 Groups marked + contain more than one device. When you select a group marked in this way, hit Enter to view the list of devices in the group. See the figure below for an illustration: PhoenixBIOS Setup Utility Main Advanced Security Power Boot Sequence Version Exit Item Specific Help –Removable Devices Legacy Floppy Drive –Hard Drive FUJITSU MPF3204AT-(PM) Alternate Device CD-ROM Drive F1 ESC Figure 5-19 Help Exit Select Item Select Menu Keys used to view or configure devices: <Enter> expands or collapses devices with a + or – <Ctrl+Enter> expands all <+> and <–> moves the device up or down. + / – Change Values Enter Select Sub-Menu F9 Setup Defaults F10 Save and Exit “Boot Sequence” Menu (Example) This screen shows all possible boot devices; within a given group the highest priority device is always listed first. Here again, you can change the sequence as described above. If a boot device is not available, the next device in the sequence is automatically checked to ascertain whether it is bootable. 5-26 Panel PC 670 Computing Unit, Equipment Manual Configuring the Computing Unit in BIOS Setup Release 04/02 5.1.6 Menu Version This menu contains the information you will have to quote when you send us technical questions about your system. PhoenixBIOS Setup Utility Main Advanced Security Power Boot Sequence Version Exit Item Specific Help SIMATIC Box PC 620 Bios Version Bios Number V02.01.02 A5E00123801–ES0x Board Revision V01 MPI/DP Firmware Ethernet Config Version V01 V01 CPU Type CPU Speed CPU ID Code Revision Pentium(R) III 866 MHz 0683 0014 F1 ESC Figure 5-20 Help Exit Select Item Select Menu If any items require changes, please consult your system Supervisor. + / – Change Values Enter Select Sub-Menu F9 Setup Defaults F10 Save and Exit “Version” Menu Panel PC 670 Computing Unit, Equipment Manual 5-27 Configuring the Computing Unit in BIOS Setup 5.1.7 Release 04/02 Menu Exit The Exit Menu The setup program is always terminated using this menu. PhoenixBIOS Setup Utility Main Advanced Security Power Version Boot Sequence Exit Item Specific Help Exit Saving Changes Exit Discarding Changes Setup Defaults Load Discard Changes Save Changes F1 ESC Figure 5-21 Help Exit Select Item Select Menu Exit System Setup and save your change to CMOS. + / – Change Values Enter Select Sub-Menu F9 Setup Defaults F10 Save and Exit Menu “Exit” Save Changes & Exit All changes are saved; a system restart is carried out with the new parameters. Discard All changes are rejected; a system restart is carried out with the old Changes & Exit parameters. 5-28 Get Default Values All parameters are set to safe values. Load Previous Values The last saved values are reloaded. Save Changes Save all Setup settings. Panel PC 670 Computing Unit, Equipment Manual Configuring the Computing Unit in BIOS Setup Release 04/02 5.1.8 Setup default settings Documenting your device configuration If you have made any modifications to the default Setup settings, you can enter them in the following table. You can then refer to these entries if you need to make any hardware modifications later. Note Print the following table out and keep the pages in a safe place once you have filled in your entries. System Parameters Main System Time System Date Disk A: Standard Settings Primary Master Primary Slave Secondary Master Secondary Slave hh:mm:ss MM/DD/YYYY 1,44 MB, 3 1/2” bei LS 240: Disabled C: 20496 MB None CD-ROM drive None Memory Cache Write back Your Entries Boot Options Quick Boot Mode Enabled SETUP prompt POST Errors Floppy check Summary screen Enabled Enabled Disabled Enabled Keyboard Features Num Lock Key Click Keyboard auto-repeat rate: Keyboard auto-repeat delay On Disabled 30/s 1/2s Hardware Options PCI-MPI/DP: On Board Ethernet Ethernet Address LAN remote boot Enabled Enabled 08000624xxxx Disabled Panel PC 670 Computing Unit, Equipment Manual 5-29 Configuring the Computing Unit in BIOS Setup System Parameters Cardbus/PCMCIA Slot SafeCard Functions Legacy USB Support CRT/LCD selection LCD Screensize DSTN Contrast PS2 Mouse Advanced COM/LPT Configuration Internal COM1 Base I/O address Interupt Internal COM2 Base I/O address Interrupt Internal LPT1 Mode Base I/O address Interrupt DMA Channel (only for ECP) PCI Configuration PCI Device Slot 1 Option ROM Scan Enable Master Latency Timer PCI Device Slot 2 Option ROM Scan Enable Master Latency Timer PCI/PnP ISA IRQ Exclusuion IRQ3 IRQ4 IRQ5 IRQ9 IRQ10 IRQ11 Standard Settings Your Entries Enabled Enabled Disabled SIMULTAN Expanded 154 Enabled Enabled 3F8 IRQ4 Enabled 2F8 IRQ3 Enabled Bi-directional 378 IRQ7 DMA 3 Enabled Enabled 0040 h Enabled Enabled 0040 h Available Available Available Available Available Reserved PCI IRQ Line 1 PCI IRQ Line 2 PCI IRQ Line 3 PCI IRQ Line 4 Auto Auto Auto Auto Installed O/S Reset Configuration Data Other No 5-30 Release 04/02 Select Select Select Select Panel PC 670 Computing Unit, Equipment Manual Configuring the Computing Unit in BIOS Setup Release 04/02 System Parameters Standard Settings Floppy disk controller Local Bus IDE adapter Large Disk Access Mode Hard Disk Pre-Delay Memory Gap at 15 MByte Enabled Both DOS Disabled Disabled Video Adapter Settings Frame Buffer Size AGP Rate Default Primary Video Adapter 8 MB 2x AGP Security Supervisor Password Is User Password Is Set Supervisor Password Set User Password Password on boot Fixed disk boot sector Diskette Access Disabled Disabled F0 5A F0 5A Disabled Normal Supervisor Power APM Power Savings Standby Timeout Hard Disk Timeout Fan Control Enabled Disabled Off Disabled Enabled Your Entries Boot Sequence Diskette Drive Removable Devices Hard Drive ATAPI CD-ROM Drive Version SIMATIC BIOS Version Board Revision BIOS Number MPI/DP Firmware Ethernet Config Version CPU Type CPU Speed Code Revision Box PC 620 V7.xx V01 A5E16562-ESxx V01 V01 Pentium III 1,2 GHz 001A Panel PC 670 Computing Unit, Equipment Manual 5-31 Configuring the Computing Unit in BIOS Setup 5.2 Release 04/02 Configure PC-Card interface You can obtain the software you require for using PC cards under MS DOS, such as S Socket Services S Card Services S Client Drivers S Flash File System can be obtained from the nearest Siemens sales office or representative. Your PC comes supplied with Windows 98 / NT4 / 2000 already installed; this supports the PC Card interface. After completing the configuration the computing unit has to be booted. 5-32 Panel PC 670 Computing Unit, Equipment Manual Fault Diagnosis 6 Chapter overview This chapter provides information on localizing problems which frequently occur and how to clear them. Note Please refer to the operating system documentation with regard to error messages concerning the operating system. In Section You Will Find on Page 6.1 Problems Using External Modules 6-2 6.2 External Screen Remains Dark 6-3 6.3 Display on the External Screen Does Not Appear or Scrolls 6-4 6.4 No Mouse Pointer Appears on the Screen 6-4 6.5 Computing Unit Time and/or Date are Not Correct 6-5 6.6 USB Device Does Not Work 6-5 6.7 Error Message Appears on the Screen/Display 6-6 6.8 Computing Unit Self Test Prior to Booting 6-8 Panel PC 670 Computing Unit, Equipment Manual 6-1 Fault Diagnosis 6.1 Release 04/02 Problems Using External Modules Fault screen Computing unit crashes during boot routine. Cause The following causes are possible: – Double assignment of input/output addresses, – Double assignment of hardware interrupts and/or DMA channels, – Signal frequencies or signal levels are not maintained, – Deviating assignment of the connector Remedy Checking the computer configuration: S If the computer configuration corresponds to state on delivery, please contact your technical service department. S If the computer configuration has been modified, restore the state on delivery; to do this, remove the external modules and restart the computer: – If the computing unit crashes again, contact the technical service department. – If the fault no longer occurs, the external module used was the cause of the fault. Replace the module with a Siemens module or get advice from the supplier of the external module. 6-2 Panel PC 670 Computing Unit, Equipment Manual Fault Diagnosis Release 04/02 6.2 External Screen Remains Dark Cause/Remedy The following causes are possible: Monitor is switched off S Switch on the screen. Screen has been dimmed S Press any key on the keyboard. Brightness control set to dark S Set the screen brightness control lighter. Please refer to the monitor operating manual for more detailed information. Power cable or monitor cable not connected S Switch the monitor and computing unit off. S Check that the power cable is properly connected to the monitor and to the computing unit or a grounded shockproof socket. S Check that the monitor cable is properly connected to the computing unit and monitor (where a plug is available). S Switch the monitor and computing unit on. Note If the monitor screen remains dark following these checks and corrective measures, contact the technical service department. Panel PC 670 Computing Unit, Equipment Manual 6-3 Fault Diagnosis 6.3 Release 04/02 Display on the External Screen Does Not Appear or Scrolls Cause/Remedy The incorrect line frequency and/or resolution is set for the screen or the application program. 6.4 S Exit from the application program. If the fault continues to occur after terminating the program, switch the monitor off and then on again following a wait of at least 3 seconds. S Adapt the entries for the screen in the CONFIG.SYS file accordingly (on the hard disk). S Correct the settings for monitor/graphics in the application program. S Select the correct monitor driver for the application program. No Mouse Pointer Appears on the Screen/Display Cause/Remedy If no mouse pointer appears, it may be due to the following reasons: Mouse driver not loaded S Check whether the mouse driver has been properly installed and is available when the application program is started. Please refer to the mouse or application program manuals for detailed information on the mouse driver. Mouse not connected S Switch the computing unit off. S Check that the mouse cable is properly connected to the computing unit. If an adapter or extension cable is used for the mouse cable, check the plug in connection. S Turn your computing unit on. Note If the mouse pointer still does not appear following these checks and corrective measures, contact the technical service department. 6-4 Panel PC 670 Computing Unit, Equipment Manual Release 04/02 6.5 Fault Diagnosis Computing Unit Time and/or Date are Not Correct Remedy Correct the time and date in the Setup menu. Press F2 during the boot routine to call in the Setup menu (refer to Chapter 5). Note If the date and time remain incorrect after switching the unit off and on again, the battery is empty. Information on changing the backup battery is available in Chapter 4.3. 6.6 USB Device Does Not Work The USB interface is not detected by the operating system. It is only fully supported, at present, by Windows 98, Windows 2000 and Windows XP. In the case of Windows NT, only the connection of a USB keyboard and USB mouse are supported. Panel PC 670 Computing Unit, Equipment Manual 6-5 Fault Diagnosis 6.7 Release 04/02 Error Message Appears on the Screen/Display Error messages The error messages issued by the system BIOS are listed below. Refer to the relevant program manuals in the case of error messages issued by the operating system or programs. Press F2 during the boot routine to call in the Setup menu (refer to Chapter 5). Error message on screen Significance/Advice Address conflict Plug and Play Problem Contact your technical service department. Combination not supported Plug and Play Problem Contact your technical service department. IO device IRQ conflict Plug and Play Problem Contact your technical service department. Invalid System Configuration Data Plug and Play Problem Set the RESET CONFIGURATION.DATA option in the Advanced Setup menu. Contact your technical service department. Allocation Error for ... Plug and Play Problem Please revert the last hardware modification. Contact your technical service department. System battery is dead Replace and run SETUP Battery on the CPU module is defect or empty. Contact your technical service department. System CMOS checksum bad Run SETUP Call in SETUP, define settings and store. If this message appears during each boot routine, contact your technical service department. Incorrect Drive A type Run SETUP Check the SETUP entries for drive A. Incorrect Drive B type Run SETUP Check the SETUP entries for drive B. Diskette drive A error Fault accessing drive A Contact your technical service department. Diskette drive B error Fault accessing drive B. Contact your technical service department. Failure Fixed Disk Fault accessing the hard disk. Check the SETUP settings Contact your technical service department. Keyboard error Check that the keyboard is connected correctly. Stuck Key Check whether a key on the keyboard is jammed. System RAM Failed at offset: Memory error Contact your technical service department. Shadow RAM Failed at offset: Memory error Contact your technical service department. Extended RAM Failed at offset: Memory error Contact your technical service department. Failing Bits: Memory error Contact your technical service department. 6-6 Panel PC 670 Computing Unit, Equipment Manual Fault Diagnosis Release 04/02 Error message on screen Significance/Advice Operating system not found Possible causes: No operating system available Wrong drive triggered (disk in drive A/B) Wrong active boot partition Wrong drive entries in SETUP Previous boot incomplete Default configuration used Termination of the previous boot routine, e.g. through power failure. Correct entries in SETUP. System cache error Cache disabled Fault in the cache module of the CPU module Contact your technical service department. Monitor type does not match CMOS Run SETUP Monitor does not match the SETUP entries. Adapt the SETUP entries on the monitor. System timer error Hardware error Contact your technical service department. Real time clock error Clock module fault Contact your technical service department. Keyboard controller error Keyboard error Contact your technical service department. Panel PC 670 Computing Unit, Equipment Manual 6-7 Fault Diagnosis 6.8 Release 04/02 Computing Unit Self-Test Prior to Booting After switching on the SIMATIC PC a self-test is initiated (POST = Power On Self Test). If errors are detected during the POST, the corresponding sequence of POST beeps (beep code) are issued. Each beep code consists of 2 x 2 sequences. In addition, the individual test steps which the self-test executes, are issued on the I/O port 80h. Conversion table for the beep codes to hexadecimal representation: Beeps Hex Code B B B BB 0 1 B BBB 2 B BB BBBB B 3 4 BB BB 5 BB BBB 6 BB BBB BBBB B 7 8 BBB BB 9 BBB BBB BBB BBBB A B BBBB B C BBBB BB D BBBB BBBB BBB BBBB E F Example B BBB BBB 2 8 Test system memory B Beeps Hex Code Meaning Special codes In addition to the beep codes listed below, there are also special codes: 6-8 3x short INSERT button has been pressed during the system start: The Onboard Device Installation is skipped. The Onboard Graphic is used as the standard output. 1x long 8x short Fault reading the MPI system information: Contact your technical service department. 4x short MPI EPROM was programmed for the first time. 1x long 5x short Ethernet error: Contact your technical service department. Panel PC 670 Computing Unit, Equipment Manual Fault Diagnosis Release 04/02 POST codes The POST codes in order of occurrence: Display (hex) Meaning Description 02 TP_VERIFY_REAL Test whether the CPU is in real mode 1C TP_RESET_PIC Reset the interrupt controller 12 TP_RESTORE_CRO Restore the controller register 13 TP_PCI_BM_RESET Reset the PCI bus master 36 TP_CHK_SUTDOWN Check the shutdown code 24 TP_SET_HUGE_ES Switch the ES to special mode 03 TP_DISABLE_NMI Switch off the NMI 0A TP_CPU_INIT Early initialization of the CPU 04 TP_GET_CPU_TYPE Determine the CPU type AE TP_CLEAR_BOOT Edit the boot flag 06 TP_HW_INIT Initialize the main hardware 18 TP_TIMER_INIT Initialize the timer 08 TP_CS_INIT Initialize the chip set C4 TP_PEM_SIZER_INIT Reset system error 0E TP_IO_INIT Initialize IO 0C TP_CACHE_INIT Initialize the cache 16 TP_CHECKSUM EPROM checksum test 28 TP_SIZE_RAM Determine the RAM size 3A TP_CACHE_AUTO Determine the cache size 2A TP_ZERO_BASE Set 512k base RAM to 0 2C TP_ADDR_TEST Test the base RAM address cables 2E TP_BASERAML Basis RAM, check 1st 64k 0A TP_CPU_INIT Initialize the CPU 38 TP_SYS_SHADOW BIOS shadow 0B TP_CPU_CACHE_ON Switch on the cache 0F TP_FDISK_INIT Initialize the hard disk 10 TP_PM_INIT Initialize the power management 14 TP_8742_INIT Initialize module 8742 1A TP_DMA_INIT Initialize the DMA modules 1C TP_RESET_PIC Reset the interrupt controller 32 TP_COMPUTE_SPEED Determine the clock pulse speed C1 TP_740_INIT Initialize the PG 740 I/Os 34 TP_CMOS_TEST Test the CMOS RAM 3C TP_ADV_CS_CONFIG Configure the advanced chip set 42 TP_VECTOR_INIT Initialize the interrupt vectors Panel PC 670 Computing Unit, Equipment Manual 6-9 Fault Diagnosis Release 04/02 Display (hex) Meaning Description 46 TP_COPYRIGHT Test the copyright 49 TP_PCI_INIT Initialize the PCI interface 48 TP_CONFIG Check the configuration 4A TP_VIDEO Initialize the video interface 4C TP_VID_SHADOW Copy the video BIOS to RAM 24 TP_SET_HUGE_ES Switch the ES to special mode 22 TP_8742_TEST Test module 8742 52 TP_KB_TEST Keyboard available? 54 TP_KEY_CLICK Switch the keyboard click on/off 76 TP_KEYBOARD Check the keyboard 58 TP_HOT_INT Test for unexpected interrupts 4B TP_QUIETBOOT_START If necessary, disable any boot messages 4E TP_CR_DISPLAY Display the copyright notice 50 TP_CPU_DISPLAY Display the CPU type 5A TP_DISPLAY_F2 Display the F2 message for ”SETUP” 5B TP_CPU_CACHE_OFF Switch off the cache if applicable (SETUP setting) 5C TP_MEMORY_TEST Test the system memory 60 TP_EXT_MEMORY Test the extended memory 62 TP_EXT_ADDR Test the A20 address line 64 TP_USERPATCH1 Area for own initializations 66 TP_CACHE_ADVNCD Determine and enable the cache size 68 TP_CACHE_CONFIG Configure and test the cache 6A TP_DISP_CACHE Display the cache configuration 6C TP_DISP_SHADOWS Configuration and size of the shadow Display RAM 6-10 6E TP_DISP_NONDISP Display non-disposable segment 70 TP_ERROR_MSGS Display post error 72 TP_TEST_CONFIG Check SETUP irregularities 7C TP_HW_INTS Set the IRQ vectors 7E TP_COPROC Check whether the CO processor is present 96 TP_CLEAR_HUGE_ES Switch the ES back 80 TP_IO_BEFORE Disable IO modules 88 TP_BIOS_INIT Various initializations 8A TP_INIT_EXT_BDA Initialize the external BIOS data area 85 TP_PCI_PCC Determine the PCI modules Panel PC 670 Computing Unit, Equipment Manual Fault Diagnosis Release 04/02 Display (hex) Meaning Description 82 TP_RS232 Determine the serial interfaces 84 TP_LPT Determine the parallel interface 86 TP_IO_AFTER Re-enable the IO modules 83 TP_FDISK_CFG_IDE_CTRLR Configure the IDE controller 89 TP_ENABLE_NMI Enable the NMI 8C TP_FLOPPY Initialize the floppy controller 90 TP_FDISK Initialize the hard disk controller 8B TP_MOUSE Test the internal mouse interface 95 TP_CD Test the CP 92 TP_USERPATCH2 Area for own initializations 98 TP_ROM_SCAN Search for BIOS expansions 69 TP_PM_SETUP Initialize the power management 9E TP_IRQS Enable the hardware IRQ A0 TP_TIME_OF_DAY Set the clock time and date A2 TP_KEYLOCK_TEST Preset the keylock C2 TP_PEM_LOCK Stop the error manager C3 TP_PEM_DISPLAY Display any possible errors A8 TP_ERASE_F2 Delete the F2 message AA TP_SCAN_FOR_F2 Was F2 pressed? AC TP_SETUP_CHEK If necessary, Switch F1/F2 message AE TP_CLEAR_BOOT Cancel the self-test flag B0 TP_ERROR_CHECK Check for any possible errors B2 TP_POST_DONE End of the self-test BE TP_CLEAR_SCREEN Clear the screen B6 TP_PASSWORD Password query (option) BC TP_PARITY Cancel the parity flag BD TP_BOOT_MENU Display the boot menu (option) B9 TP_PREPARE_BOOT Prepare the boot C0 TP_INT19 Boot via Interrupt 19 00 Panel PC 670 Computing Unit, Equipment Manual Message after startup is complete 6-11 Fault Diagnosis 6-12 Release 04/02 Panel PC 670 Computing Unit, Equipment Manual Hardware Information 7 Chapter Overview In Section You Will Find 7.1 Current Requirement of the Components (Maximum Values) 7-2 7.2 Overview of the Components and Ports 7-3 7.3 System Resources 7-5 7.4 Monitoring Functions 7-6 7.5 Interfaces 7-10 7.6 Wiring backplane 7-32 7.7 Power Supply Unit 7-37 7.8 Connecting Cables 7-38 Panel PC 670 Computing Unit, Equipment Manual on Page 7-1 Hardware Information 7.1 Release 04/02 Power Consumption of the Components (Maximum Values) Basic system Component Voltage +5V Pentium III Motherboard 0.5 A Processor Pentium III 1260 5A Floppy disk drive / LS 240 0.56 A Hard disk 0.4 A CD RW/DVD drive 0.92 A +3.3V 2.5 A –12V 0.02 A 0.5 A 0.2 A Sum (max. for basic configuration) 7.38 A 2.5 A ISA/PCI slots (Sum) 3A 4A 1 PC card slot 0.5 Sum (max. for maximum configuration) 13.5 A Total power consumption 105W 7-2 –5V 0.1 A Fan 1 2 +12V 0.6 A 8.5 A 1 0.8 A 0A 0.02 A 0.6 A 0.1 A 0.1 A 0.1 A 0.3 A 0.12 A 2.5 A 2 Alternative 5V or 3.3V 3A, if the total power consumption is not exceeded Panel PC 670 Computing Unit, Equipment Manual Hardware Information Release 04/02 7.2 Overview of the Components and Interfaces Component/ Port Description Chipset VIA PN133T BIOS Update via software CPU Pentium III / Celeron (type FC-PGA370) Parameters S SDRAM S 512K in 4 pages S Upgradeable S Multimedia support S On Board L2-Cache with 128 k/256 k /512 K Memory Graphics card DIMM modules up to max. 256MB/DIMM UXGA LCD Controller on the AG Bus is integrated Chip set (S3) S S S S S S S S S Data capacity of 64 bits + ECC Modules with ECC possible 3.3 V SDRAM to PC100 specification up to 128MBit chip size on the module 66/100MHz bus speed 2 DIMMs can be used Easy to replace variable from 64-512MB/DIMM S up to 32 Mbytes of SDRAM are part of the main memory and can be configured (8/16/32MB) S CRT: up to1600x1200/85Hz 65536 colors with PC133 memory modules up to1280x1024/85Hz 65536 colors with PC100 memory modules Hard disk ATA-33 mode CD-ROM drive Master on secondary EIDE channel S Ultra DMA capable S 24 speed CD-RW/DVD Master on secondary EIDE channel Multi Spin Writer Drive S Read: CD-ROM, CD-R 14-32 times, CD-RW 8-20 times Speed S Write: CD-R 12 times, CD-RW 10 times Speed suppors recording: S Disc at once, Track at once, Session at once, Packet writing Floppy Notebook port for 34-pin ribbon cable LS240 Slave on secondary EIDE channel Keyboard Port for PS2 keyboard Mouse PS2 mouse port Serial COM1/25 pins COM2/9 pins. TTY S S S S S 1.44 MB 1.44 MB standard floppy disks 120MB/240MB SuperDisk Standard Standard S TTY *2 and V24 S Standard Communication with SIMATIC S5-CPUs S Range up to 1000 m Panel PC 670 Computing Unit, Equipment Manual 7-3 Hardware Information Component/ Port Release 04/02 Description Parameters Parallel Standard, bidirectional, EPP and ECP modes S 25 pin subminiature Cannon connector DP12 Communication port SIMATIC S7 S potentially isolated DP12 *1 (CP 5611 compatible) S 12MBaud USB Universal Serial Bus S three high current (500mA) USB ports (2x external and 1x internal) Ethernet *1 7-4 10BaseT/100Base-TX (Intel 82559) S 10/100 Mbps, potentially isolated *1 Electrically isolated in a safety extra-low voltage circuit (SELV) Panel PC 670 Computing Unit, Equipment Manual Release 04/02 7.3 Hardware Information System Resources All system resources (Hardware adresses, Memory allocation, Interrupt allocation, DMA channels) are dinamically assigned by the Windows operating system depending on the specific hardware, drivers and connected external devices. You can view the current configuration of system resources or possible conflicts with the following operating systems: Windows 98 Start > Programs > Accessories > System Tools > System Information Windows 2000 Start > Settings > Control Panel > Administrative Tools > Computer Management > System Information Windows NT 4.0 Start > Programs > Administrative Tools (Common) > Windows NT Diagnostics Panel PC 670 Computing Unit, Equipment Manual 7-5 Hardware Information 7.4 Release 04/02 Monitoring Functions The LEDs described in the following sections are only available on specific versions of the device. The basic configuration of the computing unit does not have any LEDs. The hardware signals are described in Section 7.5.2. 7.4.1 Overview Function The following individual functions are implemented: S temperature monitoring and indication of overheating and underheating S watchdog S monitoring the processor fan Messages can be passed by the monitor modules to applications. The program SOM (Safecard On Motherboard) as well as drivers for Windows are available on the units for this. These tools can be used to display the status and assign parameters to limit values. You will find a driver description of the SOM program for each specific operating system on the CD Documentation and Drivers in the directory \PC670. 7.4.2 Signals on the front interface The meaning of the indicators is as follows: LED 7-6 OFF GREEN RED Run Watchdog not active Watchdog active Watchdog executed Temp System turned off Inside temperature normal Inside temperature outside the permissible range. Panel PC 670 Computing Unit, Equipment Manual Hardware Information Release 04/02 7.4.3 Temperature monitoring/display Temperature monitoring The temperature is measured by means of three temperature sensors. One sensor monitors the processor temperature, the second the temperature in the area of the memory module and the expansion cards and the third the temperature in the area of the power supply unit. S If the temperature near the power supply exceeds 45oC (fixed value), the fan is set to maximum rpms. To activate this feature, the setting “Fan Control” has to be turned on in the Setup menu (Sec. 6.1.4). S If the temperature exceeds one of the three temperature values of the set thresholds, a temperature error is registered with the following effects: Reaction Options Temp LED from GREEN to RED Always Fan goes to maximum rpms. Always Trigger IRQ Adjustable Temperature errors do not occur during the normal approved use of the device. If a temperature error occurs, check the following possible causes: S Are the ventilation slots blocked? S Is the fan working? S Is the ambient temperature higher than the allowed value? S Has the total capacity for the power supply been exceeded? The temperature error remains saved until the temperature thresholds are again exceeded and are reset by one of the following measures: S Acknowledge the error message via the SOM program S Restarting the device. Panel PC 670 Computing Unit, Equipment Manual 7-7 Hardware Information 7.4.4 Release 04/02 Watchdog (WD) Function The watchdog monitors the execution of a program. The purpose of the WD is to report a program crashing to the user by means of different reactions. After switching on the computing unit or after a HW-RESET (cold start) the watchdog remains in standby, i.e. no WD reaction is activated and the RUN-LED remains switched off. If the watchdog is activated (by driver or SOM program) the Run LED is green. WD-Reaktionen If the WD is not retriggered within the set time (by driver or SOM program), the following reactions are triggered: Reaction Options RUN LED switches from green to red Always Acknowledge WD Always Initiate reset on the computing unit Adjustable IRQ an die Rechnereinheit absetzen Adjustable SOM application is displayed Adjustable The reactions you want to have triggered can be set by drivers or the SOM program. WD monitoring times TWD The monitoring times can be adjusted in increments of one second over the range from 3 to 255 seconds. Note If the watchdog time is modified after the watchdog has been activated – in other words, while the watchdog is running – the watchdog will be retriggered as a result! 7-8 Panel PC 670 Computing Unit, Equipment Manual Hardware Information Release 04/02 7.4.5 Fan monitoring The operation of the processor fan is monitored. If the fan should fail, the following reactions are triggered: Reaction Options Temp LED from GREEN to RED – Trigger IRQ Adjustable The error remains saved until the cause of the failed fan is removed and the temperature error is reset by one of the following measures. S Acknowledgement of the error message via the SOM program. S Restarting the device. Panel PC 670 Computing Unit, Equipment Manual 7-9 Hardware Information 7.5 Release 04/02 Interfaces The following interfaces are available on the computing unit’s mainboard: S ports for connecting external devices S ports for connecting displays S ports for internal connections (drives, wiring backplane, etc.) The connector pin-outs of the different ports are described in the sections below. 7.5.1 7-10 External interfaces Interface Position Connec- Description tor COM 1 external X9 3F8h-3FFh, can be disabled IRQ4, edge-triggered 25-pin, socket, V.24/V.28 and 20mA (TTY isolated) COM 2 external X11 2F8h-2FFh, can be disabled IRQ3, edge-triggered 9-pin, standard connector LPT1 external X9 378h-37Fh, can be disabled IRQ7, edge-triggered 25-pin, standard socket PS/2 mouse external X6 060h-064h IRQ12, edge-triggered 6-pin, mini DIN socket PS/2 keyboard external X6 060h-064h IRQ1, edge-triggered 6-pin, mini DIN socket USB external X40 First USB channel, additional internal second USB channel for front interface MPI /DP12 external X600 Can be disabled IRQ5, edge-triggered 9-pin, standard socket, isolated port Ethernet external X500 RJ45 VGA external X11 PCCard/CardBus port external X700 3B0h-3BFh, 3C0h-3CFh, 3D0h-3DFh, can be disabled IRQ9, edge-triggered 15 pin, standard socket 3E0h-3E1h 100-pin SMD socket connector Panel PC 670 Computing Unit, Equipment Manual Hardware Information Release 04/02 Serial interface COM1 (AG/V24/Modem) The serial interface (COM 1) of the computing unit is assigned as follows: 1 13 Figure 7-1 14 25 Serial interface COM1 (female) Pin No. Short Name Meaning Input/Output 1 - Shield - 2 TxD (D1) Serial transmission data Output 3 RxD (D2) Serial received data Input 4 RTS (S2) Request to send Output 5 CTS (M2) Clear to send Input 6 DSR (M1) Data set ready Input 7 GND (E2) Functional ground (reference potential) - 8 DCD (M5) Data carrier detect (carrier) Input 9 +TTY RxD TTY receive Input 10 - 17 - Not assigned - 18 +TTY TxD TTY send Output 19 +20mA Isolated current source - 20 DTR (S1) Data terminal equipment ready Output 21 -TTY TxD TTY send Output 22 RI (M3) Incoming call Input 23-25 - Not assigned - Panel PC 670 Computing Unit, Equipment Manual 7-11 Hardware Information Release 04/02 Serial interface COM2 (V24/Mouse) The serial interface (COM2) of the computing unit is assigned as follows 5 9 1 Figure 7-2 7-12 6 Serial interface COM2 (male) Pin No. Short Name Meaning Input/Output 1 DCD (M5) Data carrier detect Input 2 RxD (D2) Received data Input 3 TxD (D1) Transmission data Output 4 DTR (S1) Data terminal equipment ready Output 5 GND (E2) Station ground - 6 DSR (M1) Data set ready Input 7 RTS (S2) Request to send Output 8 CTS (M2) Clear to send Input 9 RI (M3) Incoming call Input Panel PC 670 Computing Unit, Equipment Manual Hardware Information Release 04/02 Parallel interface LPT1 The parallel interface (LPT1) of the computing unit is assigned as follows: 1 13 Figure 7-3 14 25 Parallel interface LPT1 (female) Pin No. Short Name Meaning Input/Output 1 / Strobe (CLK) Data message Output (open collector) 2 Data bit 0 Data line 0 Output (TTL level) 3 Data bit 1 Data line 1 Output (TTL level) 4 Data bit 2 Data line 2 Output (TTL level) 5 Data bit 3 Data line 3 Output (TTL level) 6 Data bit 4 Data line 4 Output (TTL level) 7 Data bit 5 Data line 5 Output (TTL level) 8 Data bit 6 Data line 6 Output (TTL level) 9 Data bit 7 Data line 7 Output (TTL level) 10 /ACK Acknowledge Input (4.7 kW pull up) 11 BUSY Not ready Input (4.7 kW pull up) 12 PE (PAPER END) No paper Input (4.7 kW pull up) 13 SELECT Device selection Input (4.7 kW pull up) 14 / AUTO FEED Automatic new line Output (open collector) 15 / ERROR Device error Input (4.7 kW pull up) 16 / INIT Reset / Initialization Output (open collector) 17 / SELECT IN Printer selection Output (open collector) 18 - 25 GND Chassis ground - Panel PC 670 Computing Unit, Equipment Manual 7-13 Hardware Information Release 04/02 PS/2 mouse interface It is possible to connect a PS/2 mouse to the computing unit. The port is assigned as follows: 6 5 4 3 2 1 View of Socket Figure 7-4 Connector Pinout for a PS/2 Mouse Pin No. Short Name Meaning Input/Output 1 DAT Mouse data line Input/Output 2 - Not assigned - 3 GND Chassis ground - 4 P5VFK +5V (fused) Output 5 CLK Clock line, mouse Input/Output 6 - Not assigned - PS/2 trackball keyboard interface It is possible to connect an external keyboard to the computing unit. The port is assigned as follows: 7-14 Panel PC 670 Computing Unit, Equipment Manual Hardware Information Release 04/02 6 5 4 3 2 1 View of Socket Figure 7-5 Connector Pinout for an External Keyboard Connecting Cable Pin No. Short Name Meaning Input/Output 1 DAT Keyboard data Input/Output 2 - Not assigned - 3 GND Chassis ground - 4 P5VFK +5V ( fused) Output 5 CLK Keyboard clock line Input/Output 6 - Not assigned - USB interface The allocation of the Universal Serial Bus interfaces is as follows: 4 3 2 1 Figure 7-6 USB interface Pin No. Short Name Meaning Input/Output 1 VCC +5V ( fused) Output 2 - Data Data Input/Output 3 + Data Data Input/Output 4 GND Chassis ground - The connector is of type A. The port is rated as a high current USB (500mA). Panel PC 670 Computing Unit, Equipment Manual 7-15 Hardware Information Release 04/02 MPI/DP interface The MPI/DP port on the computing unit is assigned as follows: 1 5 Figure 7-7 9 PROFIBUS/MPI Socket Connector Pin No. Short Name Meaning Input/Output 1 - Not assigned - 2 - Not assigned - 3 LTG_B Signal lead B of MPI module Input/Output 4 RTS_AS RTSAS, control signal for received data stream. The signal is ’1’ active when the directly connected AS is sending. Input 5 M5EXT M5EXT return line (GND) of the 5 V power supply. The current load caused by an external user connected between P5EXT and M5EXT must not exceed 90 mA. Output 6 P5 EXT P5EXT supply (+5 V) of 5 V supply. The current load caused by an external user connected between P5EXT and M5EXT must not exceed 90 mA. Output 7 - Not assigned - 8 LTG_A Signal lead A of MPI module Input/Output 9 RTS_PG RTS output signal of the MPI module. The signal is ’1’ when the PG is sending. Output Shield 7-16 6 On connector casing Panel PC 670 Computing Unit, Equipment Manual Hardware Information Release 04/02 Ethernet RJ45 connection The Ethernet-RJ45 interface of the computing unit is assigned as follows: LED yellow 1 Figure 7-8 LED green 8 Ethernet port Pin No. Short Name Meaning Input/Output 1 TD+ Transmission data Output 2 TD– Transmission data Output 3 RD+ Received data Input 4, 5 * SYMR Internal 75 Ω output - Received data Input Internal 75 Ω output - Shield - LED green Connection - LED yellow Activity - 6 7, 8 * SYMT S * Not required for data transmission Panel PC 670 Computing Unit, Equipment Manual 7-17 Hardware Information Release 04/02 VGA interface The VGA socket on the computing unit is assigned as follows: 6 11 1 5 Figure 7-9 7-18 10 15 VGA Socket Connector Pin No. Short Name Meaning Input/ Output 1 R red Output 2 G green Output 3 B Blue Output 4 - Not assigned - 5 GND Chassis ground - 6 GND Chassis ground - 7 GND Chassis ground - 8 GND Chassis ground - 9 5V +5V (fused) Output 10 GND Chassis ground - 11 - Not assigned - 12 DDC_DAT Display Data Channel Data Input/Output 13 EXT_H Horizontal synchronizing pulse Output 14 EXT_V Vertical synchronizing pulse Output 15 DDC_CLK Display Data Channel Clock Input/Output Panel PC 670 Computing Unit, Equipment Manual Hardware Information Release 04/02 7.5.2 Interface allocation for connecting a front on the main board Interface Position Connector Description Display (CMOS) Internal X420 Connection of LC displays with CMOS port Display (LVDS) Internal X400 Connection of LC displays with single chip LVDS port I/O Front Internal X44 Port for front-panel I/O COM 2 Internal X26 Internal COM2 port Display port (CMOS, X420) D-STN and TFT displays with 5 V CMOS port and VGA resolution (640x480) can be connected to this port. The display is selected and the D-STN/TFT signals are allocated automatically according to the Display Select inputs. The maximum cable length is 50 cm at a display clock rate of 25 MHz. Panel PC 670 Computing Unit, Equipment Manual 7-19 Hardware Information Pin Release 04/02 Signal Meaning DSTN DSTN 1 P5V_D_fused +5V (fused) Display VCC 2 P5V_D_fused +5V (fused) Display VCC 3 GND 4 CLK Signal Meaning TFT TFT 1 P5V_D_fused +5V (fused) Display VCC 2 P5V_D_fused +5V (fused) Display VCC 3 GND 4 CLK 5 GND 5 GND 6 LP Horizontal sync 6 HSync Horizontal sync 7 FP Vertical sync 7 VSync Vertical sync 8 - - 8 R0 Signal red bit 0 (LSB) 9 - - 9 R1 Signal red bit 1 10 UD6 Upper data bit 6 10 R2 Signal red bit 2 11 GND 11 GND 12 UD7 Upper data bit 7 12 R3 Signal red bit 3 13 UD2 Upper data bit 2 13 R4 Signal red bit 4 14 UD3 Upper data bit 3 14 R5 Signal red bit 5 (MSB) 15 GND 15 GND 16 UD1 Upper data bit 1 16 G0 Signal green bit 0 (LSB) 17 UD0 Upper data bit 0 17 G1 Signal green bit 1 18 LD3 Upper data bit 3 18 G2 Signal green bit 2 19 GND 19 GND 20 LD2 Lower data bit 2 20 G3 Signal green bit 3 21 LD1 Lower data bit 1 21 G4 Signal green bit 4 22 LD0 Lower data bit 0 22 G5 Signal green bit 5 (MSB) 23 GND 23 GND 24 25 26 27 28 29 30 31 32 33 34 UD5 UD4 LD7 GND LD6 LD5 LD4 VCON M DispOn Res. 24 25 26 27 28 29 30 31 32 33 34 B0 B1 B2 GND B3 B4 B5 ENAB DispOn Res. 7-20 Shift clock Upper data bit 5 Upper data bit 4 Lower data bit 7 Lower data bit 6 Lower data bit 5 Lower data bit 4 Contrast voltage Data enable Display On Reserved Pin Shift clock Signal blue bit 0 (LSB) Signal blue bit 1 Signal blue bit 2 Signal blue bit 3 Signal blue bit 4 Signal blue bit 5 (MSB) Data enable Display On Reserved Panel PC 670 Computing Unit, Equipment Manual Hardware Information Release 04/02 Display port (LVDS), X400 TFT displays with an LVDS port can be connected to this port. 18-bit displays having a resolution up to 1024x768 pixels can be connected. The permissible display clock rate is 20 MHz to 66 MHz. The display is selected automatically according to the code of the Display Select inputs. The display supply voltages (3,3 V and 5 V) are connected as a function of the requirements for the connected displays via the graphics controller. The maximum cable length is 50 cm at a transfer rate of 455 MHz. Specific cable properties have to be taken into account for differential cable pairs in accordance with the LVDS specification. Pin No. Short Name Meaning Input/Output 1 P5V_D_fused +5V (fused) Display VCC Output 2 P5V_D_fused +5V (fused) Display VCC Output 3 RXIN0– LVDS output signal bit 0 (-) Output 4 RXIN0+ LVDS output signal bit 0 (+) Output 5 P3V3_D_fused +3.3V (fused) display VCC Output 6 P3V3_D_fused +3.3V (fused) display VCC Output 7 RXIN1– LVDS output signal bit 1 (-) Output 8 RXIN1+ LVDS output signal bit 1 (+) Output 9 GND Chassis ground - 10 GND Chassis ground - 11 RXIN2– LVDS output signal bit 2 (-) Output 12 RXIN2+ LVDS output signal bit 2 (+) Output 13 GND Chassis ground - 14 GND Chassis ground - 15 RXCLKIN– LVDS clock signal (–) Output 16 RXCLKIN+ LVDS clock signal (+) Output 17 GND Chassis ground - 18 GND Chassis ground - 19 Reserved 20 Reserved Panel PC 670 Computing Unit, Equipment Manual 7-21 Hardware Information Release 04/02 Assignment of display to display select pins Automatic configuration of one of 15 possible displays is performed by means of the Display Select inputs. The Display Select inputs have pull-up resistors – in other words, if these inputs are not connected, they go to High. The input has to be connected to GND for them to go Low. Pin No. 7-22 LCD_SEL3 LCD_SEL2 LCD_SEL1 LCD_SEL0 Display type 0 Low Low Low Low reserved 1 Low Low Low High reserved 2 Low Low High Low reserved 3 Low Low High High reserved 4 Low High Low Low 640 x 480 (VGA), TFT, 18 bit 5 Low High Low High reserved 6 Low High High Low 1024 x 768 (XGA), TFT, 18 bit 7 Low High High High 800 x 600 (SVGA), TFT, 18 bit 8 High Low Low Low reserved 9 High Low Low High reserved 10 High Low High Low reserved 11 High Low High High reserved 12 High High Low Low reserved 13 High High Low High reserved 14 High High High Low reserved 15 High High High High No display / DDC selected display Panel PC 670 Computing Unit, Equipment Manual Hardware Information Release 04/02 I/O interface for front control elements All the signals necessary for the connection of front control elements, in addition to the display and USB ports, are applied to this port. The maximum cable length is 50 cm at a USB data rate of 12 Mbaud. Pin No. Short Name Meaning Input/Output 1 GND Chassis ground - 2 P12V Power supply for inverter Output 3 BL_ON Backlight on (5V = On) Output 4 P5V_fused +5V ( fused) Output 5 GND Chassis ground - 6 P3V3_fused +3.3V (fused) Output 7 K_CLK Keyboard clock Output 8 K_DATA Keyboard data Input/Output 9 M_CLK Mouse clock Output 10 M_DATA Mouse DATA Input/Output 11 P5V_fused +5V ( fused) Output 12 USB_D1M USB data- channel 1 Input/Output 13 USB_D1P USB Data+ port 1 Input/Output 14 GND Chassis ground - 15 LCD_SEL0 Display type select signal 0 Input 16 LCD_SEL1 Display type select signal 1 Input 17 LCD_SEL2 Display type select signal 2 Input 18 LCD_SEL3 Display type select signal 3 Input 19 RESET_N Reset signal (Low active) Input 20 SPEAKER Connection for system speaker Output 21 HD_LED HD LED, anode with 1kΩ in series on motherboard Output 22 DP_LED MPI/DP LED, anode above 1kΩ in series on motherboard Output 23 Ethernet_LED Ethernet LED, anode above 1kΩ in series on motherboard Output 24 TEMP_ERR LED temperature error, anode with 1kΩ in series on motherboard Output 25 RUN_R LED watchDog error, anode with 1kΩ in series on motherboard Output 26 RUN_G LED watchdog o.k., anode with 1kΩ in series on motherboard Output Panel PC 670 Computing Unit, Equipment Manual 7-23 Hardware Information Release 04/02 Internal serial interface COM2 (V.24), X26 This port is connected in parallel to the external COM2 port. Both ports can therefore only be used as alternately. They are assigned such that a 1:1 connection can be established to a 9-pin D-SUB socket when insulation displacement connectors are used. The maximum cable length is 100 cm at a data rate of 9.6 kbaud. 7.5.3 7-24 Pin No. Short Name Meaning Input/Output 1 DCD Data carrier detect Input 2 DSR Data set ready Input 3 RxD Received data Input 4 RTS Request to send Output 5 TxD Transmission data Output 6 CTS Clear to send Input 7 DTR Data terminal equipment ready Input 8 IP Incoming call Input 9 GND Functional ground (reference potential) - 10 P5V +5V power supply Output Assignment of internal interfaces on the mainboard Interface Position Connector Description Memory Internal X19, X20 Processor Internal X1 Socket for MMC2 mobile processor Bus expansion Internal X10 Socket for bus extender, assigned with ISA and PCI bus signals Power supply 105W Internal X13 20 pin connector for DC signals of the power supply unit with 85W Floppy Internal X5 two drives are possible (82078 compatible) 360kB, 720kB, 1.2MB, 1.44MB 3F0h-3F7h, 370h-377h, can be disabled IRQ 6, edge-triggered 26 pin, socket for flex-lead (notebook connection) 3.5” hard disk Internal X41 170h-177h, 1F0h-1F7h, can be disabled IRQ14, IRQ15, edge-triggered 40 pin, 2.54mm male connector (3.5” HD, primary), a maximum of two drives can be connected 2 SO-DIMM slot, 64Bit Panel PC 670 Computing Unit, Equipment Manual Hardware Information Release 04/02 2.5” hard disks Internal X4 170h-177h, 1F0h-1F7h, can be disabled IRQ14, IRQ15, edge-triggered 44 pin, 2mm male connector (2.5” HD, primary), a maximum of two drives can be connected CD-ROM drive Internal X3 170h-177h, 1F0h-1F7h, can be disabled IRQ14, IRQ15, edge-triggered 44 pin, 2mm male connector (CD ROM, secondary slave with connected LS120, otherwise secondary master), a maximum of one drive is operable LS240 Internal X31 170h-177h, 1F0h-1F7h, can be disabled IRQ14, IRQ15, edge-triggered 1x41 pin (Hirose DF9-41, LS240, secondary master with connected drive), a maximum of one drive is operable TTY sender/receiver Internal X70/71 Connection for TTY transmitter/receiver hybrid (physical interface) PS connection for 3.5” hard disk Internal X25 Power supply for 3.5” hard disk, 4 pin, male connector PS connection for CPU fan Internal X29 Power supply for CPU fan, 3 pin, male connector PS connection for device fan Internal X28 Power supply for device fan, 2 pin, male connector Backup battery Internal X24 Power supply for device fan, 2 pin, male connector Interface to wiring backplane The computing unit has a wiring backplane with one PCI slot and one shared ISA/PCI slot. Expansion boards can be installed complying with ISA specification (Rev. 3.1) and PCI specification (Rev. 2.0) with a maximum length of 265mm (175 mm for shared ISA/PCI modules). All PCI slots can be used as masters. Only 5V PCI modules are operable. The bus unit is executed as a purely passive module, i.e. there are only socket contacts for the expansion cards and any necessary backup capacitors. The power supply to the expansion cards is effected via the connection of the bus unit with the basic board. The -5V voltage is not provided for in the power supply and is produced from the -12V on the bus unit via in-phase voltage control. Panel PC 670 Computing Unit, Equipment Manual 7-25 Hardware Information Release 04/02 DC interface of the power supply 105W The power supply unit has a connector (X2) through which all the signals on the DC side are connected with the motherboard. 7-26 Pin No. Short Name Meaning 1 P5V +5V 2 P5V +5V 3 P5V +5V 4 P5V +5V 5 P5V +5V 6 PS_NAU_N Power failure, early warning signal 7 PS_PWROK Power Good signal 8 GND Chassis ground 9 GND Chassis ground 10 GND Chassis ground 11 N12V –12V 12 GND Chassis ground 13 GND Chassis ground 14 GND Chassis ground 15 P12V +12V 16 P12V +12V 17 P3V +3.3V 18 P3V +3.3V 19 P3V +3.3V 20 P3V +3.3V Panel PC 670 Computing Unit, Equipment Manual Hardware Information Release 04/02 Interface to floppy disk drive By means of this interface a notebook floppy disk drive may be connected. The maximum connection length of the data cable may not exceed 40cm. Pin No. Short Name Meaning Input/ Output 1 P5V +5V Output 2 INDEX_N Index hole recognition Input 3 P5V +5V Output 4 DS_N0 Drive 0 selection Output 5 P5V +5V Output 6 DCHG_N Disk change display Input 7 n.c. Not assigned - 8 n.c. Not assigned - 9 Reserved Reserved - 10 MOT_N0 Activate motor 0 Output 11 Reserved Reserved - 12 DIR_SL_N Step motor direction Output 13 n.c. Not assigned - 14 STEP_N Step motor pulse 15 GND Chassis ground - 16 WR_DAT_N Write data signal Output 17 GND Chassis ground - 18 WR_GAT_N Enable data signal Output 19 Reserved Reserved - 20 TRACK_N0 Track 0 signal Input 21 Reserved Reserved - 22 WR_PRT_N Write protection signal Input 23 GND Chassis ground - 24 RD_DAT_N Read Data signal Input 25 GND Chassis ground - 26 SIDE_1_N Page selection Output Panel PC 670 Computing Unit, Equipment Manual 7-27 Hardware Information Release 04/02 Allocation of IDE intefaces The primary IDE port is designed for alternatively installing 2.5” and 3.5” hard disks. 3.5” drives are connected by means of a 40-pin 2.54 mm pitch connector and 2.5” drives by means of a 44-pin 2 mm pitch connector. The two connectors are connected in parallel. The secondary IDE port is intended for the optional connection of a CD ROM and / or an LS 240 drive. It can be adapted using a 44-pin 2 mm pitch connector. The maximum connection length of the data cables must not be longer than 40 cm. 7-28 Panel PC 670 Computing Unit, Equipment Manual Hardware Information Release 04/02 Pin No. 1 2 3 4 5 6 7 8 9 10 11 12 13 14 15 16 17 18 19 20 21 22 23 24 25 26 27 28 29 30 31 32 33 34 35 36 37 38 39 40 X41 Meaning RESET GND D7 D8 D6 D9 D5 D10 D4 D11 D3 D12 D2 D13 D1 D14 D0 D15 GND n.c. DREQ GND IOW_N GND IOR_N GND IORDY Reserved DACK_N GND IOCS16 n.c. AD_1 Reserved AD_0 AD_2 CS1_N CS3_N HDACT_N GND Reset Data signal D7 Data signal D8 Data signal D6 Data signal D9 Data signal D5 Data signal D10 Data signal D4 Data signal D11 Data signal D3 Data signal D12 Data signal D2 Data signal D13 Data signal D1 Data signal D14 Data signal D0 Data signal D15 Code DMA Request IO Write I/O read I/O ready DMA Acknowledge I/O Chip Select 16 Address 1 Reserved Address 0 Address 2 Chip Select 1 Chip Select 3 HD active Panel PC 670 Computing Unit, Equipment Manual Pin No. 1 2 3 4 5 6 7 8 9 10 11 12 13 14 15 16 17 18 19 20 21 22 23 24 25 26 27 28 29 30 31 32 33 34 35 36 37 38 39 40 41 42 43 44 X4/X3 Meaning RESET GND D7 D8 D6 D9 D5 D10 D4 D11 D3 D12 D2 D13 D1 D14 D0 D15 GND n.c. DREQ GND IOW_N GND IOR_N GND IORDY CSEL DACK_N GND IOCS16 n.c. AD_1 reserved AD_0 AD_2 CS1_N CS3_N HDACT_N GND P5V P5V GND reserved Reset Data signal D7 Data signal D8 Data signal D6 Data signal D9 Data signal D5 Data signal D10 Data signal D4 Data signal D11 Data signal D3 Data signal D12 Data signal D2 Data signal D13 Data signal D1 Data signal D14 Data signal D0 Data signal D15 Code DMA Request IO Write I/O read I/O ready Master/slave DMA Acknowledge I/O Chip Select 16 Address 1 Reserved Address 0 Address 2 Chip Select 1 Chip Select 3 HD active +5V power supply +5V power supply Reserved 7-29 Hardware Information Release 04/02 Connection of an LS240 drive The optional LS240 drive is connected via this port. This port is connected in parallel to the secondary IDE port. The connected LS240 drive is automatically master (i.e. bootable drive) as the result of a special RC circuit. The maximum connection length of the data cable may not exceed 40cm. 7-30 Pin No. Short Name Meaning Input/ Output 1 2 3 4 5 6 7 8 9 10 11 12 13 14 15 16 17 18 19 20 21 22 23 24 25 26 27 28 29 30 31 32 33 34 35 36 37 38 39 40 41 Reserved Reserved reserved GND RESET D8 D7 D9 D6 D10 D5 D11 D4 D12 D3 D13 D2 D14 D1 D15 D0 DREQ GND IOR_N IOW_N GND IORDY DACK_N irq15 AD_1 AD_0 AD_2 CS_N HDACT_N CS1_N CSEL GND P5V P5V P5V P5V Reserved Reserved Reserved Chassis ground Reset Data signal D8 Data signal D7 Data signal D9 Data signal D6 Data signal D10 Data signal D5 Data signal D11 Data signal D4 Data signal D12 Data signal D3 Data signal D13 Data signal D2 Data signal D14 Data signal D1 Data signal D15 Data signal D0 DMA request Chassis ground Read signal Write signal Chassis ground Ready signal DMA confirmation Interrupt signal Address line 1 Address line 0 Address line 2 Selection signal Activity Selection signal 1 Selection signal Chassis ground +5V power supply +5V power supply +5V power supply +5V power supply Input/Output Input/Output Input/Output Input/Output Input/Output Input/Output Input/Output Input/Output Input/Output Input/Output Input/Output Input/Output Input/Output Input/Output Input/Output Input/Output Input/Output Input Output Output Input Output Input Output Output Output Output Input Output Output Output Output Panel PC 670 Computing Unit, Equipment Manual Hardware Information Release 04/02 SV connection for hard disk The power supply of the 3.5” hard disk is effected via this connection. Pin No. Short Name Description Input / Output 1 P12V +12 V Output 2 GND Chassis ground – 3 GND Chassis ground – 4 P5V +5 V Output Connection for CPU fan The CPU fan is connected via this connection. Pin No. Short Name Description Input / Output 1 GND Chassis ground – 2 +12V Switched power supply Output 3 CPU FAN_CLK Speed signal Input Connection for device fan The device fan is connected via this connection. Pin No. Short Name Description Input / Output 1 +12V Switched power supply Output 2 GND Chassis ground – Connection for buffer battery The battery for the standby supply to the CMOS RAM is connected to this connection. The battery used is a 3.6 V lithium battery with a capacity of 750 mAh. Pin No. Short Name Description Input / Output 1 +12V Switched power supply Output 2 GND Chassis ground – Panel PC 670 Computing Unit, Equipment Manual 7-31 Hardware Information Release 04/02 7.6 Wiring Backplane 7.6.1 Design and Theory of Operation The bus board is designed as a passive link between the motherboard and the expansion modules. It is mounted with a screw. The bus board has two ISA slots and two PCI slots, as well as a shared ISA /PCI slot. The power supply to the expansion cards is effected via the connection of the bus unit with the basic board. An external power supply (+5V and +12V) is provided. Figure 7-10 7.6.2 Pin assignmentI SA slot Pin No. 7-32 Wiring Backplane Short Name Type* Pin No. Short Name I B1 0V SD 07 I/O B2 RESET DRV SD 06 I/O B3 + 5V VCC A4 SD 05 I/O B4 IRQ 9 I A5 SD 04 I/O B5 – 5V VCC A6 SD 03 I/O B6 Reserved A7 SD 02 I/O B7 – 12V A8 SD 01 I/O B8 Reserved A9 SD 00 I/O B9 + 12V VCC A10 IOCHRDY I B10 0V GND A11 AEN O B11 SMEMW# A1 IOCHCK A2 A3 Type GND O I VCC I O Panel PC 670 Computing Unit, Equipment Manual Hardware Information Release 04/02 Pin No. *) # Type* Pin No. A12 Short Name SA 19 I/O B12 Short Name SMEMR# Type O A13 SA 18 I/O B13 IOW# I/O A14 SA 17 I/O B14 IOR# I/O A15 SA 16 I/O B15 DACK3# O A16 SA 15 I/O B16 DRQ 3 I A17 SA 14 I/O B17 –ACK1# O A18 SA 13 I/O B18 DRQ 1 I A19 SA 12 I/O B19 REFRESH# I/O A20 SA 11 I/O B20 CLK O A21 SA 10 I/O B21 IRQ 7 I A22 SA 09 I/O B22 Reserved I A23 SA 08 I/O B23 IRQ 5 I A24 SA 07 I/O B24 IRQ 4 I A25 SA 06 I/O B25 IRQ 3 I A26 SA 05 I/O B26 reserved O A27 SA 04 I/O B27 TC O A28 SA 03 I/O B28 BALE O A29 SA 02 I/O B29 + 5V VCC A30 SA 01 I/O B30 OSC A31 SA 00 I/O B31 0V O GND I/O defines the direction of the signals from the point of view of the CPU module. low active Panel PC 670 Computing Unit, Equipment Manual 7-33 Hardware Information Pin Release 04/02 Signal Name Type * Pin Signal Name Type C1 –SBHE O D1 –MEMCS16 I C2 LA 23 I/O D2 –IOCS16 I C3 LA 22 I/O D3 IRQ 10 I C4 LA 21 I/O D4 IRQ 11 I C5 LA 20 I/O D5 IRQ 12 I C6 LA 19 I/O D6 IRQ 13 I C7 LA 18 I/O D7 IRQ 14 I C8 LA 17 I/O D8 –DACK0 O C9 –MEMR I/O D9 DRQ 0 I C10 –MEMW I/O D10 –DACK5 O C11 SD 08 I/O D11 DRQ 5 I C12 SD 09 I/O D12 –DACK6 O C13 SD 10 I/O D13 DRQ 6 I C14 SD 11 I/O D14 –DACK7 O C15 SD 12 I/O D15 DRQ 7 C16 SD 13 I/O D16 + 5V C17 SD 14 I/O D17 –MASTER C18 SD 15 I/O D18 0V I VCC I GND Under normal conditions, the signals –SBHE, LA17 – LA23, –MEMR and MEMW are operated as outputs (sending from CPU). Only CPU modules that are suitable for use as a master CPU for system bus access send and receive these signals. A minus sign, ”–”, in front of the signal name shows that the signal is LOW active. 7.6.3 Pin assignment PCI slot The table on the next page resumes the pin assignment of the PCI slot. 7-34 Panel PC 670 Computing Unit, Equipment Manual Hardware Information Release 04/02 1 2 3 4 5 6 7 8 9 10 11 12 13 14 15 16 17 18 19 20 21 22 23 24 25 26 27 28 29 30 31 32 33 34 35 36 37 38 39 40 41 42 43 44 45 46 47 48 5V System Environment Side B Side A –12V TRST# TCK +12V Ground TMS TDO TDI +5V +5V +5V INTA# INTB# INTC# INTD# +5V PRSNT1# Reserved Reserved +5V (I/O) PRSNT2# Reserved Ground Ground Ground Ground Reserved Reserved Ground RST# CLK +5V (I/O) Ground GNT# REQ# Ground +5V (I/O) Reserved AD[31] AD[30] AD[29] +3.3V Ground AD[28] AD[27] AD[26] AD[25] Ground +3.3V AD[24] C/BE[3]# IDSEL AD[23] +3.3V Ground AD[22] AD[21] AD[20] AD[19] Ground +3.3V AD[18] AD[17] AD[16] C/BE[2]# +3.3V Ground FRAME# IRDY# Ground +3.3V TRDY# DEVSEL# Ground Ground STOP# LOCK# +3.3V PERR# SDONE +3.3V SBO# SERR# Ground +3.3V PAR C/BE[1]# AD[15] AD[14] +3.3V Ground AD[13] AD[12] AD[11] AD[10] Ground Panel PC 670 Computing Unit, Equipment Manual 49 50 51 52 53 54 55 56 57 58 59 60 61 62 63 64 65 66 67 68 69 70 71 72 73 74 8 76 77 78 79 80 81 82 83 84 85 86 87 88 89 90 91 92 93 94 5V System Environment Side B Side A Ground AD[09] CONNECTOR KEY CONNECTOR KEY AD[08] C/BE[0]# AD[07] +3.3V +3.3V AD[06] AD[05] AD[04] AD[03] Ground Ground AD[02] AD[01] AD[00] +5V (I/O) +5V (I/O) ACK64# REQ64# +5V +5V +5V +5V CONNECTOR KEY CONNECTOR KEY Reserved Ground Ground C/BE[7]# C/BE[6]# C/BE[5]# C/BE[4]# +5V (I/O) Ground PAR64 AD[63] AD[62] AD[61] Ground +5V (I/O) AD[60] AD[59] AD[58] AD[57] Ground Ground AD[56] AD[55] AD[54] AD[53] +5V (I/O) Ground AD[52] AD[51] AD[50] AD[49] Ground +5V (I/O) AD[48] AD[47] AD[46] AD[45] Ground Ground AD[44] AD[43] AD[42] AD[41] +5V (I/O) Ground AD[40] AD[39] AD[38] AD[37] Ground +5V (I/O) AD[36] AD[35] AD[34] AD[33] Ground Ground AD[32] Reserved Reserved Reserved Ground Ground Reserved 7-35 Hardware Information Release 04/02 Assignment of slot-specific PCI bus signals 7-36 PCI Socket Pin No. PCI Slot 1 Shared ISA PCI Slot B16 A6 clk (slot 1) inta# clk (slot2) intb# A7 B7 B8 B18 intc# intb# intd# req1 intd# intc# inta# req0 A17 A26 gnt1 ad29 gnt0 ad30 Panel PC 670 Computing Unit, Equipment Manual Hardware Information Release 04/02 7.7 Power supply (AC and DC) Technical Data Voltage Max. current Voltage stability +12 V 2.5 A " 4% –12 V 0.3 A " 5% +5V 13.5 A " 3% +3.3 V 8.5 A " 3% Voltage Input voltage 120/230V AC 24V DC +15%/–20% +20%/–15% Power consumption v 132 Watt Stored energy time upon power failure 20 ms at rated voltage Maximum continual power output 105 W Degree of protection IP20 (when installed) Protection class VDE 0106 Approvals EN 60950/IEC 950, UL/cUL1950, UL/cUL508 Power-Good-Signal Power Good signal Input voltage +5 V secondary voltage POWER GOOD T1 T1: T2: T3: Figure 7-11 preset time hold-up time save time T2 T3 100 to 500 ms 16.6 ms minimum 1 ms minimum Time Characteristics of the Power Good Signal Panel PC 670 Computing Unit, Equipment Manual 7-37 Hardware Information 7.8 Release 04/02 Connecting cables SIMATIC S5 Connecting Cable By means of the SIMATIC S5 connecting cable (not included in all supply variants) you can connecto your computing unit with a SIMATIC S5 automation device. Please study the notes in Chapter 3. Box PC 840 - Seite Connecting cable PLC side 25–pin plug connector 6ES5 734-2BD20 15–pin plug connector Active (included with device) Passive 330 ohm +U 9 19 2 18 21 –U 330 ohm +U 19 6 9 7 10 –U Casing 1 3 8 1 Shield/ Casing 20 Figure 7-12 SIMATIC S5 Standard Connecting Cable SIMATIC S7 Connecting Cable for MPI/DP With the connecting cable 6ES7901-0BF00-0AA0 you can connect your computing unit with a SIMATIC S7 automation device. Please study the notes in Chapter 3. 7-38 Panel PC 670 Computing Unit, Equipment Manual Distributed configuration 8 Chapter Overview This chapter describes all specifications of the distributed configuration that are different from those of the integrated configuration (described in chapters 2 – 7). Where this manual focuses on the computing unit. Note The part of the description referring to the Remote mount of the control unit will be found in ”SIMATIC Panel PC 670/870 Control Unit” manual. In chapter 5.1 of the manual “SIMATIC Panel PC 670/870 control unit” you will find general information about the concept of the distributed configuration. In Section You Will Find 8.1 Description 8-2 8.2 Cable connection 8-4 8.3 Spare parts 8-4 8.4 Technical Data 8-4 Panel PC 670 Computing Unit, Equipment Manual on Page 8-1 Distributed configuration 8.1 Description 8.1.1 Overview Release 04/02 Figure 8-1 shows a PC 670 computing unit (distributed configuration) with the transmitter fitted between mounting brackets. CDROM drive PC 670 computing unit Mounting brackets Mounting slot Figure 8-1 Socket for connecting interconnecting cable Transmitter housing PC 670 computing unit in distributed configuration (230 V power supply) including transmitter The transmitter boards integrated into the housing are shown in figure 8-3. 8-2 Panel PC 670 Computing Unit, Equipment Manual Distributed configuration Release 04/02 8.1.2 Dimensions 104,1 8 43.5 25 Figure 8-2 shows the dimensions of the PC 670 computing unit with transmitter. 304.6 74.3 289.6 297.2 211 253 Transmitter Dimensions in mm Figure 8-2 Dimensions computing unit PC 670 without CD-ROM drive in distributed configuration including transmitter 8.1.3 Mounting The computing unit is supplied as a complete combination with the transmitter installed ex works. The device is fitted with the help of four elongated holes in the mounting brackets (refer to Figures 8-1 and 8-2). Mounting positions The computing unit may be mounted in a vertical and a horizontal position (see chapter 2.2). We recommend a vertical position. Panel PC 670 Computing Unit, Equipment Manual 8-3 Distributed configuration 8.2 Release 04/02 Cable connection Transmitter and receiver are connected by a cable with a maximum length of 20 m. For operation, the angled cable connector is inserted in the socket of the transmitter and locked. The interconnecting cable must also be fixed in position. For further details refer to the ”SIMATIC Panel PC 670/870 Control Unit” manual, Chapter 5. 8.3 Spare parts The following spare parts are available: 8.4 S Conecting cable for Panel PC distributed configuration (see manual “SIMATIC Panel PC 670/870 control unit”) S Transmitter housing with transmitter assembly and connecting cable Technical data Of relevance to the user, in addition to the technical specifications listed in Appendix B, are only the: S Dimensions: see Figure 8-2. S S30 encoder setting of the transmitter: the transmitter setting to the display you are using is performed before it is supplied. Display codes In case a control or modification of the values is necessary, follow this procedure: 1. Unscrew the computing unit from the installation wall. 2. Loosen the four outer fastening screws slightly (Figure 8-1) and and remove the two center fastening screws of the transmitter housing (Figure 8-3). 3. Remove the transmitter housing from the computing unit (there is no need to unplug the cables). 8-4 Panel PC 670 Computing Unit, Equipment Manual Distributed configuration Release 04/02 Computing unit Groove for outer fastening screws Encoder S30 Transmitter housing Transmitter Port for interconnecting cable Center screwhole Figure 8-3 Transmitter in opened transmitter housing 4. Check (or set) the switch setting as shown in the table below: Table 8-1 Display type adjustment via encoder S30 Type Resolutio n S30/4 S30/3 S30/2 S30/1 12” (SVGA) 800 x 600 OFF ON ON ON 15” (XGA) 1024 x 768 OFF ON ON OFF 5. Install in reverse order. Panel PC 670 Computing Unit, Equipment Manual 8-5 Distributed configuration 8-6 Release 04/02 Panel PC 670 Computing Unit, Equipment Manual Technical Data A In this Appendix This appendix contains the following technical specifications for the Panel PC 670 computing unit: S General Information S Safety S Electromagnetic Compatibility (EMC) S Ambient Conditions S Mechanical environmental conditions S Motherboard S Drives S Graphics card S Interfaces S Function displays (light-emitting diodes) on device Panel PC 670 Computing Unit, Equipment Manual A-1 Technical Data A.1 Release 04/02 Technical Data of the Panel PC 670 Computing Unit General Order nos. See order documentation Dimensions 297x267x80 (WxHxD in mm), without CD-ROM drive 297x267x101 (WxHxD in mm), with CD-ROM drive approx. 6kg (13.5 lbs.) 120 V (85 V to 132 V (AC), or 230 V (170 V to 264 V) AC (autorange) Weight Supply voltage (UN) (Line voltage frequency, AC alternative: 24 V (20.4 bis 28.8 V) DC, SELV 50/60 Hz (47 to 63 Hz) Short-term power interruption complying to to Namur Max. power consumption max. 20 ms at 0.85 UN (max. 10 times per hour; min. recovery time 1 s) 120W max. current output (DC), according to form of power supply +5V/ 13,5A 3,3V/ 8,5A +12V/ 2,5A –12V/0,3A (in total max. 105W) Noise emission < 55dB(A) to DIN 45635 Degree of protection Safety IP20 Protection class Protection class I pursuant IEC 60536 Safety specifications with AC power supply UL1950/IEC 60950 entspr. DIN VDE 0805, UL 508 Safety specifications with DC power supply Electromagnetic compatibility (EMC) UL508 Emitted interference with power supply 105W Emitted interference with power supply 85W EN 55022 Class A (requirement for industrial sector) for devices with AC power supply EN6100-3-2 class D and EN61000-3-3 EN 55022 Class B (requirement for domestic and industrial sector) for devices with AC power supply EN6100-3-2 class D and EN61000-3-3 Noise immunity: ± 2 kV Mains borne disturbance variables on supply lines ± 1 kV (to IEC 61000-4-5; Surge symm) ± 2 kV ± 1 kV (to IEC 61000-4-5; Surge unsymm) (IEC 61000-4-4; Burst; length < 5 m) ± 2 kV (IEC 61000-4-4; Burst; length > 5 m) ± 2 kV (to IEC 61000-4-4:1995; Surge unsymm; length > 30 m) Noise immunity on signal lines (to IEC 61000-4-4; Burst) Noise immunity to discharges of static electricity ± 6 kV contact discharge Noise immunity to high-frequency radiation (to IEC 61000-4-2) ± 8 kV discharge in air (to IEC 61000-4-2) 10 V/m 80-1000 MHz, 80% AM (to IEC 61000-4-3) 10 V/m 900 MHz and 1,89 GHz, 50% ED (to IEC 61000-4-3) 10 V 9KHz- 80MHz (to IEC 61000-4-6) Magnetic field A-2 30 A/m 50Hz (to IEC 61000-4-8) Panel PC 670 Computing Unit, Equipment Manual Technical Data Release 04/02 Environmental conditions Temperature tested to DIN EN 60068-2-2:1994, DIN IEC 60068-2-1, DIN IEC 60068-2-14, – – operation storage/transport +5 °C to +45 °C - 20°C to +60°C – gradient max 10°C/h (no condensation) Relative humidity tested to DIN IEC 60068-2-3, DIN IEC 60068-2-30, DIN IEC 60068-2-56 – – operation storage/transport 5% to 80% at 25°C (no condensation) 5% to 95% at 25°C (no condensation) – gradient max 10°C/h (no condensation) Mechanical environmental conditions Vibration *) tested to DIN IEC 60068-2-6 – 10 to 58 Hz: 0.075 mm, 58 to 500 Hz: 9.8 m/s2 operation – storage/transport Shock 5 to 9 Hz: 3,5 mm, 9 to 500 Hz: 9.8 m/s2 tested to DIN IEC 60068-2-29 – 50 m/s2, 30 ms, operation – storage/transport Special Features 250 m/s2, 6 ms, Quality assurance to ISO 9001 Mainboard Processor Intel Pentium III / Celeron (see order documentation) Internal processor cache Main memory 2x 16KB first level, 128/256/512 KB second level, dependent on the processor used maximum 512 MB SDRAM, 2. Level Cache memory configuration (see order documentation) Processor internal Free expansion slots 1 shared ISA/PCI (max 175 mm long), – max. permissible current input per ISA slot 1 PCI (max 265mm long) 5V 2A, 12V 0.3A, -12V 0.1A – max. permissible current input per PCI slot 5V 2A, 12V 0.3A, -12V 0.1A – in total (all slots) Drives Floppy disk/LS240 drive 5V 3A, 12V 0.6A, -12V 0.15A may not be exceeded Hard disk 3,5”, EIDE, UDMA33, hard disk capacity (see order documentation) 650 MB / 4.7 GB CD-ROM-/CD-RW-/DVD(Combo) drive 3.5” (1.44 MB) / 3.5” (240 MB, 120 MB or 1.44 MB) *) Restrictions for LS 240 with 120/240 MB data carrier and CD ROM /CD RW /DVD 10 to 58 Hz: 0.019 mm, 58 to 500 Hz: 2.5 m/s2 Panel PC 670 Computing Unit, Equipment Manual A-3 Technical Data Graphic Graphic controller Graphic store Resolutions/frequencies/colors Interfaces COM 1 Release 04/02 UXGA LCD controller on the AGP bus bis zu 32 MB SDRAM sind Bestandteil des Hauptspeichers und können konfiguriert werden (8/16/32MB) CRT: up to 1600x1200/85 Hz / 65536 colors with PC133 up to 1280x1024/85 Hz / 65536 colors with PC100 memory modules LPT1 Serial port 1 (V.24 / TTY), 25 pin subminiature Cannon connector Serial port 2 (V.24), 9 pin subminiature Cannon connector Parallel port (standard, EPP and ECP modes) VGA Keyboard Interface for printer with parallel port VGA port, connection for external monitor PS/2 keyboard connection Mouse PS/2 mouse connection USB Card bus 3 channels (1x internal, 2x external) 1 port (max. type III) DP12 port, potentially isolated 9-pin sub D socket connector, screw-type locking • Transfer rate • 9,6 kBaud to 12 Mbaud, configurable by SW • Mode • potentially isolatedt*3: data lines A, B COM 2 control lines RTS AS, RTS_PG - 5V voltage supply (max. 90 mA) • ground connection: • Physical interface • - shield of the DP12 connecting line RS485, potentially isolatedt*3 • Memory address area • 0CC000h ...0CC7FFh or 0DC000h ...0DC7FFh • Interrupts • IRQ5, 10, 11 or 15 configurable by SW Ethernet Ethernet port (RJ45) Function displays (light-emitting diodes) on device Computing unit SIMATIC Panel PC 670 FD/LS240 access (on FD/LS240 drive on the side of the computer box) CD ROM access (on CD ROM drive, if installed) *3 A-4 Electrical isolation through an extra-low voltage safety circuit (SELV) Panel PC 670 Computing Unit, Equipment Manual ESD Guidelines B Chapter Overview In chapter You Will Find on Page B.1 What does ESD mean? B-2 B.2 Electrostatic charge of people B-3 B.3 Basic safety measures against discharge of static electricity B-4 Panel PC 670 Computing Unit, Equipment Manual B-1 ESD Guidelines B.1 Release 04/02 What does ESD mean? Definition All electronic components are equipped with high-integrated modules or components. Conditioned by their technology, these electronic components are extremely sensitive to overvoltages and therefore to discharges of static electricity. These Electrostatically sensible components/assemblies are internationally known under the abbreviation as ESD. At the same the internationally used denomination ESD for electrostatic sensitive device is also used. Electrostatic sensitive assemblies are identified by the following symbol: ! B-2 Caution Electrostatic sensitive devices can be destroyed by voltages which are far below the limit of perception of human beings. These voltages occur when you touch a component or the electrical connections of a assembly without being electrostatically discharged. The damage which arises in a assembly as a result of overvoltage cannot usually be detected immediately, but only becomes apparent after a lengthy operating period. Panel PC 670 Computing Unit, Equipment Manual ESD Guidelines Release 04/02 B.2 Electrostatic Charge of People Charging Anyone who is not conductively connected to the electrical potential of their surroundings can be electrostatically charged. The maximum electrostatic voltage values which an operator can be charged with when contacting the materials stated in the illustration are shown in Fig. B-1. These values correspond to the specifications of IEC 801-2. Voltage in kV (kV) 16 15 14 13 12 11 10 9 8 7 6 5 4 3 2 1 1 synthetic material 2 wool 3 antistatic material, e.g. wood or concrete 1 2 3 5 10 20 30 40 50 60 70 80 90 100 Figure B-1 rel. humidity in % Electrostatic voltages which an operator can be charged with Panel PC 670 Computing Unit, Equipment Manual B-3 ESD Guidelines B.3 Release 04/02 Basic Safety Measures against Discharge of Static Electricity Ensuring a good ground connection When handling electrostatic sensitive devices, ensure that your person, the workplace and packaging are grounded. In this manner you avoid static charge. Avoid direct contact As a general principle, only touch electrostatic sensitive devices when this is unavoidable (e.g. during maintenance work). To prevent discharge energy from reaching and damaging sensitive components, hold the components in such a way that you do not touch the pins or the printed conductors. If you have to perform measurements on an assembly, discharge your body by touching a grounded metallic object before carrying out the work. Use only grounded measuring instruments. B-4 Panel PC 670 Computing Unit, Equipment Manual SIMATIC HMI Documentation C Target groups This manual is part of the SIMATIC HMI documentation. The documentation is aimed at the following target groups: S Newcomers S Users S Configurers S Programmers S Commissioning engineers Structure of the documentation The SIMATIC HMI documentation consists of the following components: S User’s Guides for: – Configuration software – Runtime software – Communication between PLCs and operating units S Equipment Manuals for the following operating units: – SIMATIC Panel PC – MP (Multi Panel) – OP (Operator Panel) – TP (Touch Panel) – TD (Text Display) – PP (Push Button Panel) S Online Help on the configuration software S Start-up Guides S First Steps Overview of complete documentation The following table provides an overview of the SIMATIC HMI documentation and shows you when you require the different documents. Panel PC 670 Computing Unit, Equipment Manual C-1 SIMATIC HMI Documentation Release 04/02 Documentation Target Group Content First Steps with ProTool Newcomers This documentation guides you step by step through the configuration of Product Brief S a screen with various objects S a change of display and S a message. This documentation is available for: S Text-based Displays S Graphics Displays S Windows-based systems ProTool Configuring Windows-based systems Configurers Contains information about the configuration software for: S Installation, S Basic configuration and S detailed description of configurable objects and User’s Guide functions. This documentation is valid for all Windows-based systems. ProTool Configuring Graphics Displays Configurers Contains information about the configuration software for: S Installation, S Basic configuration and S detailed description of configurable objects and User’s Guide functions. This documentation is valid for graphic display operating units. ProTool Configuring Text-based Displays Configurers Contains information about the configuration software for: S Installation, S Basic configuration and S detailed description of configurable objects and User’s Guide functions. This documentation is valid for text-based display operating units. ProTool Configurers Online Help Contains information on the configuration computer while working with ProTool. The Online Help consists of: S S S S ProTool/Pro Runtime User’s Guide C-2 Commissioning engineers, Users Direct help Detailed procedures and examples Detailed information All information of the user manual Describes the installation of the visualization software ProTool/Pro RT as well as the installation and operation of the software on Windows-based systems. Panel PC 670 Computing Unit, Equipment Manual SIMATIC HMI Documentation Release 04/02 Documentation Target Group Content Copy Protection Start-up Guide Commissioning engineers, Users The ProTool/Pro Runtime visualization software is a copyright product. This manual contains information on the installation, repair and uninstallation of authorizations. Application Example Newcomers ProTool is supplied with example configurations and the corresponding PLC programs. This documentation describes how you Start-up Guide S load the examples onto the operating unit and PLC S use the examples and S upgrade the connection to the PLC to suit your own specific application. SIMATIC Panel PC 670 Computing Unit SIMATIC Panel PC 870 Commissioning engineers, Users Describes the computer and control unit of the SIMATIC Panel PC 670 and the SIMATIC Panel PC 870 as well as of the SIMATIC Panel PC IL. Commissioning engineers, Users Describes the hardware and the general operation of Windows-based devices: Computing Unit SIMATIC Panel PC IL Computing Unit Device manuals MP 370 MP 270 MP 270B, OP 270, TP 270 TP 170B, OP 170B TP 170A TP 070 S S S S Installation and commissioning instructions Unit Description Operation Instructions for connecting the PLC, printer and programming computer, S Maintenance OP37/Pro Computing Unit Commissioning engineers, Users Describes the hardware, installation and inclusion of upgrades and options for the OP 37/Pro. TP 27, TP 37 Computing Unit Commissioning engineers, Users Describes the hardware and general operation. It contains OP 27, OP 37 Computing Unit OP 25, OP 35, OP 45 Computing Unit programming computer, S operating modes S operating instructions S description of the standard screens supplied with OP7, OP17 Computing Unit OP5, OP15 Computing Unit the operating unit and how to use them TD17 Computing Unit OP 3 Computing Unit PP7, PP17 Computing Unit S installation and commissioning instructions S a description of the equipment S instructions for connecting the PLC, printer and S fitting options S maintenance and fitting of spare parts. Commissioning engineers, Users, Programmers Describes the hardware of the OP 3, the general operation and the connection to the SIMATIC S7. Commissioning engineers, Users Describes the hardware, installation and commissioning of the Push Button Panel PP 7 and PP 17. Panel PC 670 Computing Unit, Equipment Manual C-3 SIMATIC HMI Documentation Release 04/02 Documentation Target Group Content Communication Programmers Contains information on connecting line- and graphic-based control panels to the following controls: User’s Guide S S S S SIMATIC S5 SIMATIC S7 SIMATIC 500/505 drivers for other PLCs This documentation describes the S configuration and parameters required for connecting the devices to the PLC and the network S user data areas used for exchanging data between operating unit and PLC. Communication for Windows-based systems Programmers Contains information on connecting Windows-based systems to the following controls: S S S S S S S User’s Guide SIMATIC S5 SIMATIC S7 SIMATIC WinAC SIMATIC 505 Integration in SIMATIC iMap SIMOTION drivers for other PLCs This documentation describes the S configuration and parameters required for connecting the devices to the PLC and the network S user data areas used for exchanging data between operating unit and PLC. Other PLCs Programmers Online Help Contains information on connecting control units to the OPC and to the controls of: S S S S S S S Allen Bradley GE Fanuc Lucky Goldstar GM Mitsubishi Modicon Omron Telemecanique When the drives are installed, the relevant Online Help is installed at the same time. ProAgent for OP User’s Guide ProAgent/PC and ProAgent/MP User’s Guide Configurers Contains the following information on the option package ProAgent (process diagnosis): S configure installation-specific process diagnosis S detect process errors, find the cause of an error and correct error S adjust the supplied diagnosis figures to user requirements C-4 Panel PC 670 Computing Unit, Equipment Manual Glossary A APM Advanced Power Management. Application An application is a program directly linked to the MS-DOS or Windows operating system. Applications on SIMATIC PCs are, for example, the visualization packages SIMATIC ProTool/Pro, SIMATIC WinCC and others. Automation system (AS) A controller in the SIMATIC S7 series (for example, SIMATIC S7-200/300/400). C Cache Buffer between working memory and central processing unit. COM1 port Serial V.24/modem port, 25-pin, sub-D connectors, sockets. The port is suitable for asynchronous data transmission. It can also be used to connect printers having a serial interface. COM2 port Serial V.24 port, 9-pin, sub-D connectors, pins. Preferred for connecting a mouse of other external devices (for example, a printer). Configuration file Contains data which define the appearance of a configuration following a complete restart. These files are e.g. register files. Panel PC 670 Computing Unit, Equipment Manual Glossary-1 Glossary Release 04/02 Configuration software Configuration software updates the device configuration when modules are fitted. This is done either by copying the configuration files supplied with the device of by manual configuration. D Device configuration The device configuration of a SIMATIC PC contains details about its features and options such as memory capacity, drive types, monitor, network address, etc. The data are stored in a configuration file and are used by the operating system to select the correct drivers and device parameters. When the basic configuration changes, the user can modify the settings using a program that configures the system (SETUP). Drivers Program parts of the operating system. They convert the data of applications into specific formats required by the peripheral devices (for example, hard disks, monitors, printers). E Ethernet port For connecting a local area network (bus structure) for text and data communications at a data transfer rate of 100 Mbaud. Expanded memory Expansion memory modules can be installed to expand the default working memory of a SIMATIC PC. I Interface module Module for connecting hardware I/O. Interface, multipoint The multipoint interface (MPI) is the SIMATIC PC interface to the SIMATIC S7/M7. This enables programmable modules, (module, programmable), text displays and operator panels to be reached from a central point. The nodes on the MPI can communicate with each other. Glossary-2 Panel PC 670 Computing Unit, Equipment Manual Release 04/02 Glossary Interrupt Discontinuation in the processor of a programmable controller by an interrupt event. IRQ Interrupt request. ISA Industrial Standard Architecture (bus for expansion board) K Keyboard port PS/2 keyboard connector Keyboards with an integrated trackball can be connected. L LPT 1 port The LPT 1 port (Centronics interface) is a parallel interface which can be used for attaching a printer. LS 120 drive The LS 120 drive is compatible with the familiar 3.5” floppy disk drive. The LS 120 drive supports both standard floppy disks (1.44 MB) and superdisks with a capacity of up to 120 MB. M Main memory Main memory is the whole RAM on a SIMATIC PC. Motherboard The motherboard is the heart of SIMATIC PCs. Data are processed and saved from here, and interfaces and device peripherals are controlled and managed. Mouse port PS/2 mouse connector. Panel PC 670 Computing Unit, Equipment Manual Glossary-3 Glossary Release 04/02 MPI/DP port (Multi-Point-Interface/Profibus-DP) for connecting an S7 programmable controller. P Parallel port Information is transferred on a byte by byte basis through a parallel port. High data transfer rates are achieved as a result. SIMATIC PCs have one parallel port (LPT) for attaching a printer. PC card interface For connecting PC cards (types I/II/III). PCI or PCI/ISA slot (Peripheral Component Interconnect) for expansion boards. PCMCIA (Personal Computer Memory Card International Association). Association of computer manufacturers formed with the aim of defining an international standard for memory modules and PC expansion cards. Cooperates with JEIDA. Port, parallel Information is transferred on a byte by byte basis through a parallel port. High data transfer rates are achieved as a result. SIMATIC PCs have one parallel LPT1 port. Port, serial Data are transferred bit by bit through serial ports. They are used in instances where large distances have to be traversed with minimum cabling. Printer interface Parallel port, 25-pin, sub-D connectors, sockets. For attaching printers. Programmable logic controller (PLC) A controller in the SIMATIC S5 series (for example, AG S5-115U/135U). R RTC Real time clock Glossary-4 Panel PC 670 Computing Unit, Equipment Manual Glossary Release 04/02 S SCSI interface Small Computer System Interface. Interface for connecting SCSI devices (for example, hard disks, CD-ROM drives) SETUP (BIOS Setup) A program which defines information about the device configuration. The device configuration of the SIMATIC PC is preset. Changes have to be made when a memory expansion module, new modules or drives have to be activated. T TFT display Thin-film transistor color display U USB port (Universal Serial Bus) for connecting devices to the USB port. V V.24 interface The V.24 interface is a standard interface for data transmission, and printers, modems, etc. can be connected to it. VGA port (Video Graphics Array) for connecting an external monitor, 15-pin, sub-D connectors, sockets. W Warm restart By warm restart we mean a restart after a program abort. The operating system is reloaded and started. A warm restart is performed by pressing the keys CTRL+ ALT+ DEL. Panel PC 670 Computing Unit, Equipment Manual Glossary-5 Glossary Glossary-6 Release 04/02 Panel PC 670 Computing Unit, Equipment Manual Index A Bus board, removing and installing, 4-23 Acclimatization, 1-4 APM (Advanced Power Management), 5-24 AT modules, 4-12 C B Backup battery, 3-17 replacement, 4-10 Batteries, 1-7 disposal, 1-7 Battery, 3-17 safety notes, 3-17 Beep Codes, 6-8 BIOS, error messages, 6-6 BIOS Setup, 5-1 call, 5-2 Configure APM, 5-24 Configure COM/LPT, 5-16 Configure interfaces, 5-13 Configure Memory Gap, 5-15 Configure passwords, 5-22 Default settings, 5-29 Floppy disks-Setting up drive type, 5-6 Hard disks-Setting up drive type, 5-7 Menu items, 5-4 Menus, 5-2 Advanced, 5-15 Boot Sequence, 5-25 Exit, 5-28 Main, 5-5 Power, 5-24 Security, 5-22 Version, 5-27 MPI/DP interface, 5-13 Numlock-Setup, 5-12 Setting up time and date, 5-6 start, 5-2 Buffer battery, connect, 7-31 Panel PC 670 Computing Unit, Equipment Manual Cardbus cards, 3-10 CD ROM drive, removing and installing, 4-19 CD ROM drive, 3-16 CD ROM drive, Emergency eject, 3-16 CD RW/DVD drive, emergency eject, 3-16 CD RW/DVD drive, 3-16 additional software, 3-17 CD RW drive, 3-16 CE identification, 1-8 CMOS Interface, 7-19 COM1, 7-11 COM2, 7-12 COM2 (internal), 7-24 Computing unit BIOS-Setup, 5-1 connecting USB- devices, 3-9 connection, 2-7 , 3-1 dimension drawings, 2-4 Drive side, 3-5 drives, 3-13 electromagnetic compatibility (EMV), A-2 Environmental conditions, A-2 , A-3 expand, 4-1 front interfaces, 3-5 Function displays (light-emitting diodes), A-4 installation, 2-3 Interface side, 3-2 interfaces, 3-2 , 3-5 maintaining, 4-1 mechanical conditions, A-3 motherboard, 4-6 opening, 4-4 operating PC- cards, 3-10 operation, 3-1 Index-1 Index Computing unit permissible installation positions, 2-5 , 2-6 printer connection, 3-6 , 3-7 Protection class, A-2 PS/2 keyboard connection, 3-8 PS/2 mouse connection, 3-7 rating plate, 3-5 Reset button, 4-27 Reset button, 3-5 serial mouse connection, 3-8 starting up, 2-1 switching off, 2-8 switching on, 2-8 transportation, 2-9 unpacking, 2-2 VGA interface, 3-4 Connecting cables, 7-38 Connection, 3-22 to programming unit, 3-21 to S5-PLC, 3-19 via MPI/PROFIBUS-DP, 3-23 with S7-PLC, 3-22 Connection , using Windows, 3-25 Constructional designs, 1-2 D Date, setting up, 5-6 Device configuration, 5-1 DIN ISO 9001 certificate, 1-9 Disk drives, disk types, 3-13 Disk drive, removing and installing, 4-20 Display Select Pins, 7-22 Distributed configuration, 8-1 Cable connection, 8-4 Dimensions including transmitter, 8-3 Display Codes, 8-4 Receiver, 8-4 Mounting, 8-3 Mounting angle, 8-2 Mounting positions, 8-3 Spare parts, 8-4 technical data, 8-4 Transmitter, 8-4 Documentation for SIMATIC HMI, C-1 Overview, C-1 Structure, C-1 Target groups, C-1 Documentation-Structure, C-1 Index-2 Release 04/02 Drives, 3-13 CD ROM, 3-16 CD RW/DVD, 3-16 disk, 3-13 hard disk, 3-16 LS240, 3-13 removing and installing-, 4-17 drives, technical specifications, A-3 DVD-drive, 3-16 E Electromagnetic compatibility (EMV), A-2 Electrostatic charge, B-3 Safety measures, B-4 EMC guidelines-, 1-8 Environmental conditions, A-2 , A-3 Equipotential, 2-7 ESD Definition, B-2 electrostatic charge, B-3 Safety measures, B-4 ESD guidelines, 1-7 ESD notes, 4-2 ESD Guidelines, B-1 EU Declaration of Conformity, 1-8 Ethernet Interface, 7-17 Extension modules dimensions, 4-12 removing and installing, 4-12 , 4-16 External monitor, 3-4 external monitor, VGA-Interface, 7-18 F Fan, removing and installing, 4-25 Fan monitoring, 7-9 Fault diagnosis, 6-1 BIOS, 6-6 external screen, 6-3 , 6-4 mouse pointer does not appear, 6-4 POST (Power On Self Test), 6-8 POST codes, 6-9 self-test, 6-8 system date is incorrect, 6-5 System time is incorrect, 6-5 USB device does not work, 6-5 using external modules, 6-2 Floppy disk drive, 3-13 Panel PC 670 Computing Unit, Equipment Manual Index Release 04/02 Front interfaces, 3-5 G Graphic, technical data, A-4 Green PC, 5-24 H Hard disk, 3-16 Hard disk drive, 3-16 removing and installing, 4-17 Hardware Information, 7-1 Connecting cables, 7-38 Interfaces and parameters, 7-3 Monitoring functions, 7-6 Power consumption of the system components, 7-2 Power supply (AC and DC), 7-37 System resources, 7-5 Wiring backplane, 7-32 Hardware clock, 3-17 I Industrial Ethernet, 3-25 Installation positions, with centralized design, 2-5 , 2-6 Interfaces, 3-2 , 3-5 , 7-10 Allocation AG/V24/Modem, 7-11 Ethernet (RJ45), 7-17 external monitor (VGA), 7-18 Keyboard/Trackball (PS/2), 7-14 Mouse (PS/2), 7-14 MPI/DP, 7-16 parallel (LPT1), 7-13 serial (COM1), 7-11 serial (COM2), 7-12 USB, 7-15 V24/Mouse, 7-12 configure in BIOS-Setup, 5-13 external, 7-10 Overview and parameters, 7-3 technical data, A-4 ISA slot, 7-32 ISA modules, 4-12 Panel PC 670 Computing Unit, Equipment Manual K Keyboard, PS/2, 3-8 keyboard, 3-8 L Literature, for SIMATIC HMI, C-1 Lithium battery, 3-17 , 4-10 Low voltage guidelines, 1-8 LPT1, 7-13 LS240 drive, removing and installing, 4-21 LS240 drive, 3-13 disk types, 3-15 handling disks, 3-14 notes on use, 3-15 LVDS Interface, 7-21 M Mainboard Display-Internal connection, 7-19 CMOS Interface, 7-19 Display-Select Pins, 7-22 I/O Interface for front control elements, 7-23 internal COM2, 7-24 LVDS Interface, 7-21 Interfaces in BIOS-Configure setup, 5-13 internal interfaces, 7-24 Buffer battery, 7-31 CPU fan, 7-31 DC Interface to power supply, 7-26 Device fan, 7-31 Floppy disk drive, 7-27 IDE interfaces, 7-28 LS240 drive, 7-30 SV connection for hard disk, 7-31 Wiring backplane, 7-25 ISA slot, 7-32 PCI slot, 7-34 technical data, A-3 Mains power, 1-5 Mechanical conditions, A-3 Memory extension, installation, 4-8 Memory Gap, in BIOS-Configure Setup, 5-15 Module retainer plate, adjusting, 4-15 Index-3 Index Module retainer plates, removing and installing, 4-14 Monitor, 3-4 Monitoring functions, 7-6 Fan monitoring, 7-9 Signals on the front interface, 7-6 SOM (Safecard On Motherboard), 7-6 Temperature monitoring, 7-7 Watchdog, 7-8 Watchdog-monitoring times, 7-8 Motherboard, 4-6 removing and installing, 4-24 replacing the processor, 4-26 Mounting angle, 8-2 Mounting positions, in distributed configuration, 8-3 Mouse PS/2, 3-7 serial, 3-8 MPI/DP Interface, 7-16 MPI/DP interface, 3-22 O Opening the unit, 4-2 tools required, 4-3 P parallel interface (LPT1), 7-13 PC Cards, Configure interface, 5-32 PC cards, installation, 3-12 PC cards, 3-10 PC PU connection, 3-21 PCI slot, 7-34 PCI modules, 4-12 PCMCIA cards, 3-10 Periphery units, connection, 3-6 Permissible installation positions, 2-5 , 2-6 Point-to-point connection, 3-18 Ports, 3-2 POST (Power On Self Test), 6-8 POST codes, 6-9 Power consumption, 7-2 Power supply, 2-7 removing and installing, 4-22 Printer connection, 3-6 , 3-7 Processor, replacement, 4-26 Processor upgrade, 4-26 Product overview, 1-1 Production number , 2-2 Index-4 Release 04/02 PROFIBUS, 3-24 PROFIBUS-DP- network, 3-23 Protection class, A-2 PS/2 Keyboard, 7-14 PS/2 Mouse, 7-14 R Rating plate, 3-5 Real–time clock, 4-10 Receiver, distributed configuration, 8-4 Repairs, 1-6 Reset button, 3-5 , 4-27 RJ45 Ethernet Interface, 7-17 RJ45 Ethernet interface, 3-25 S Safety notes, 1-4 , 3-17 batteries, 1-7 battery, 3-17 ESD guidelines, 1-7 Mains power, 1-5 repairs, 1-6 Self-test, 6-8 Beep Codes, 6-8 POST codes, 6-9 Special codes, 6-8 serial interface COM1, 7-11 COM2, 7-12 Setup Default settings, 5-29 SIMATIC HMI docmentation, Overview, C-1 SIMATIC HMI Documentation, C-1 SIMATIC HMI documentation Structure, C-1 Target groups, C-1 Starting up, 2-1 Structure of the documentation, C-1 SVP number, 2-2 Switching off, 2-8 Switching on, 2-8 System resources, 7-5 Panel PC 670 Computing Unit, Equipment Manual Release 04/02 Index T Target groups, C-1 Technical data Computing unit, A-2 distributed configuration, 8-4 Graphic, A-4 Interfaces, A-4 Time, setting up, 5-6 Tools, 4-3 Transmitter, distributed configuration, 8-4 Transport, 2-9 TTY- interface, 3-19 U USB Interface, 7-15 USB devices, connection, 3-9 V VGA Interface, 7-18 VGA interface, 3-4 W Watchdog, 7-8 Reactions, 7-8 Wiring backplane, 7-32 X XT modules, 4-12 Panel PC 670 Computing Unit, Equipment Manual Index-5 Index Index-6 Release 04/02 Panel PC 670 Computing Unit, Equipment Manual