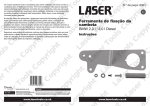
1
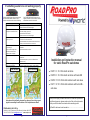
If something seems to be not working properly:
If the red satellite indicator lights chase along the
row, the selected satellite cannot be found.
Check for obstructions such as trees & buildings.
Symptom
The control box does not power up.
The system seems to operate
correctly but no satellite is found.
A satellite is found but there’s no
picture on your TV.
You can see a picture on the TV but
it is breaking up.
If you are near the edge of the
satellite’s transmission area
(footprint) this can happen.
The TV has sound but no picture.
You’ve tried the suggestions but the
system is still not working.
If the POWER, LNB & LOCK lights come on
together (POWER & LOCK will blink) check the
cable between controller & sat-dome.
What you should do
1) Check the power supply.
2) Switch the control unit off and on again.
1) Make sure that the dish has a clear view of the satellite –
avoid trees, buildings, pylons, etc.
2) Check cables and connections.
3) Switch the control unit off and on again.
1) Check that you have selected the correct satellite and that
your receiver is set for the same one.
2) Check that cables and connectors between the sat-dome
controller, the receiver and the TV are all secure.
1) Check that there are no obstructions between the dish and
the satellite.
2) Check all cables and connectors.
1) Check that you have not selected radio on your receiver
instead of TV.
2) Check that the power to your TV is sufficient for it to
operate correctly.
1) Contact your installer or dealer.
2) If they are unable to fix the problem, contact RoadPro.
30cm Sat-dome
40cm Sat-dome
Installation and instruction manual
for static RoadPro sat-domes
Ÿ D3201 / 2: 30 / 40cm static sat-dome
Ÿ D3205 / 6: 30 / 40cm static sat-dome with twin LNB
Ÿ D3209 / 10: 30 / 40cm static sat-dome with auto skew
Ÿ D3211 / 12: 30 / 40cm static sat-dome with twin LNB +
auto skew
Auto-skew will significantly improve the chances of receiving a good
signal in areas away from the centre of the footprint areas shown.
Thank you for buying a RoadPro sat-dome. To enable us to provide the
best after-sales service, please make a note of the unit’s serial number
which you will find above the external cable connecting socket.
My RoadPro sat-dome’s serial number is:................................................
Distributed in the U.K. by
RoadPro Ltd, Unit 7, Stephenson Close, Daventry, Northants, NN11 8RF
Tel: 01327 312233 E-mail: [email protected] www.roadpro.co.uk
4
1
DELIVERY
RoadPro sat-domes come with the following parts in the box:
- Sat-dome
- Control box incl. power supply
- 1 HQ co-ax cable (10m) with F-plugs (2
cables are supplied with twin-LNB models
- 1 HQ co-ax cable (1m)
- 1 Cable-entry box
- 12 screws (3 in dome cover, 9 in bag)
- Installation and usage instructions
INSTALLATION
We strongly recommend getting the sat-dome fitted to your vehicle or boat by
a professional installer!
Preparation:
1.
2.
3.
4.
5.
6.
7.
8.
9.
10.
11.
12.
Ensure that the roof of your vehicle is able to carry the sat-dome. If you are not sure, check
with your dealer or the vehicle's manufacturer.
Check that you have all the parts that are listed above.
Find a suitable place on the roof of your vehicle to mount the sat-dome. The sat-dome’s
external cable connector must face towards the rear of the vehicle. The mounting place
must be level and even. Mark the outline of the sat-dome’s feet with a pencil.
Ensure that the underside of the mounting feet and the area of the roof where they will sit
is clean and dry. If necessary, clean with a suitable cleaning agent. Methylated spirits works
well on most surfaces and with many adhesive / sealants. If in doubt, test the surface first
and consult the manufacturer of the sealant / adhesive.
It may be necessary to roughen the underside of the feet and the fixing area on the roof:
follow the instructions that came with the adhesive / sealant and then apply it evenly to the
underside of the mounting feet. The minimum thickness of the adhesive layer must be at
least 2mm. Within 5 minutes of applying the adhesive, replace the sat-dome on the roof in
the pre-selected position. Press the feet onto the roof and trim off any excess adhesive.
It is essential that you give the adhesive enough time to harden completely. The time this
takes will vary according to the adhesive used and the ambient temperature and humidity.
Always follow the instructions that come with the adhesive / sealant and, if you are in any
doubt as to how it should be applied, seek professional advice.
We strongly advise screwing the mounting feet to the roof after the adhesive has been
applied.
At this point you should remove the cover of the dome, cut the cable tie and remove all
packaging. Replace the cover with the screws supplied.
Use the cable-entry box supplied to take the 10M cable from the sat-dome through the
roof to the controller. Ensure that the cable is secure and cannot be caught by obstacles.
Install the controller in a convenient position inside the vehicle and, using the power cable
supplied, connect to a reliable 12V or 24V power source.
Connect the cable from the sat-dome to the connector marked ANTENNA on the back of
the controller and the short cable supplied to the connector marked RECEIVER. Connect
the other end of that cable to your satellite receiver.
The installation is now complete and you can connect a TV to the receiver, turn everything
on and use your sat-dome for the first time.
BASIC OPERATION
The RoadPro sat-dome controller has a red on/off
switch and a white “satellite selector” button. These
control all operational functions of the sat-dome.
Three LEDs show the status of the sat-dome and
seven other LEDs show which satellite is being
searched for or has been located. The controller is
set for Astra 2 (south) when it is first delivered and
other satellites can be chosen as required. Astra 2 is the satellite which carries all TV and radio channels
intended for viewing and listening in the U.K.
Before attempting to operate the system, make sure that the controller is connected to a 12V / 24V power
supply and that a suitable receiver is also connected. Make sure that the receiver is set to work with the
same satellite that you want the sat-dome to find and that a TV or monitor is connected to the receiver and is
switched to the appropriate “source”.
To switch the system on:
Press the red button on the left of the controller.
The system will immediately begin searching for the selected satellite - the one with a corresponding red LED
illuminated. It may find a different satellite first and then after calculating its position, move to the chosen
satellite and lock on. This can take between 10 - 60 seconds depending on how far the system is from where
it was when it was last used. Fine tuning will then be carried out and, shortly afterwards, a picture will appear
on the TV or monitor.
When the satellite has been found, and you can see a picture on the screen, you can turn the
controller off using the red button. The dish will remain in position until the next time you turn the
controller on.
To select a different satellite:
The controller enables you to select a number of satellites: Astra 2, Astra 1, Hotbird, Sirius 4.8 (Astra 4),
Hispasat and Atlantic Bird 3.
To select a different satellite* from the one currently selected, tap the white button on the controller. This
will cause the illuminated LED to move along the row of marked satellites. When the satellite you want is
illuminated, stop tapping. The system will now search for that satellite and will return to the same satellite
the next time you turn the system on after you have turned it off.
*Make sure you’ve selected the same satellite on your receiver.
What the LEDs mean:
System set to search for Astra 2 south.
System has found a satellite and will now
move to Astra 2 south.
Astra 2 south LED blinks once - the selected
satellite has been found.
System has confirmed that the selected
satellite (Astra 2 south) has been found and
has locked on. Turn off power switch.
Very important. Please read this!!
It is essential that your sat-dome is installed using the cables supplied and that these cables are not
cut or modified in any way. If any other cables or connectors are used, or if the cables are cut, the
system will not work correctly. This applies to both original and secondary installations.
2
3