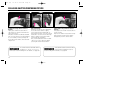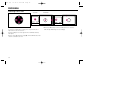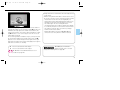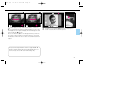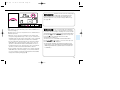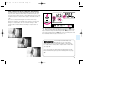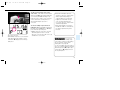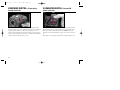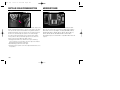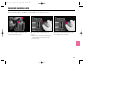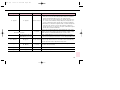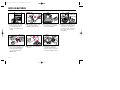
1
P400 (E) 02.12.27 6:42 PM Page 1 Instruction Manual E P400 (E) 02.12.27 6:42 PM Page 2 FOREWORD Thank you for choosing the Nikon F5 for your photography. Designed with a combination of strong and reliable construction, plus today’s newest and most advanced technology, the F5 35mm SLR and the Nikon system will provide you with the opportunity to advance your picture-taking capability. The Nikon F5 has been designed and built to meet the needs of demanding professionals, for sports, photojournalism, scientific, industrial, forensic and nearly every other professional use of photography, as well as high-quality personal photography. The F5 features Nikon’s F system bayonet lens mount, and offers its highest level of performance and features, with D-type Nikkor lenses. Performance and operation of available features will vary when used with Nikon lenses other than D-type Nikkor. Refer to the chart in “LENS” section for details. The F5 features an all-metal, die-cast chassis, a moisture- and dust-resistant metal exterior cover, and the world’s first selfdiagnostic, self-adjusting, high-performance shutter — to provide truly reliable performance. To design the F5, Nikon invented many new features, surpassing all others previously available. The F5 will provide you with the most advanced performance for its fast motor drive with Focus Tracking and Lock-On™, new 1,005-sensor Nikon 3D Color Matrix Meter, variable Center-Weighted Meter, Spot Meter selectable with five points, Multi-Sensor Balanced Fill-Flash, near-silent Cs film advance mode and more. Available options include the near-silent Nikon AF-S Silent Wave Motor Lens, Multi-Control Back, and more. Nikon, the long-standing leader in professional quality photographic equipment, offers the F5’s leading-edge technology to meet the demanding needs of today’s photography. Because the F5 includes so many new and innovative features, you should thoroughly read the instruction material provided. Experiment, enjoy — your personal experience will provide you with the ultimate education. You’ll also want to inquire about unique Nikon accessories designed for the F5. These include the Multi-Control Back, the personal computer link system, AF-Nikkor interchangeable optics, the Nikon close-up system, remote control system and much more. We hope that you enjoy using your new Nikon F5, and thank you again for choosing Nikon. 2 P400 (E) 02.12.27 6:42 PM Page 3 Special new features: • Nikon’s exclusive new cross-ranged, five-area autofocus sensor (Multi-CAM1300) system covers a wider area than any system before it in both the horizontal and vertical ranges in the viewfinder. • Choice of two modes for Nikon’s exclusive five-area autofocus operation—Dynamic AF for moving subjects, and fixed Single Area AF. • Five focus areas are selectable, and the focus bracket turns from grey to black to indicate the selected focus area (with standard EC-B type focusing screen). • Exclusive new powerful motors and CPU enable a highspeed film advance of up to 8 frames per second (fps) even with automatic Focus Tracking operation. • Exclusive 3D Color Matrix Metering using a new 1,005pixel RGB sensor to read a scene’s color as well as brightness and contrast. • Flexible Center-Weighted Meter enables sensing area size to be changed (with Custom Setting). • Spot Metering changes the meter’s sensing area to correspond to the manually selected focus area. • Self-diagnostic double-bladed shutter that’s tested to 150,000 cycles, featuring Nikon’s exclusive shutter monitor. • AF start button activates AF independently of the shutter release button (with Custom Setting). • 1/300 High-Speed Flash Sync (with Custom Setting; 1/250 sec. at normal setting). • Menu of 24 Custom Settings for added versatility. • Fortified aluminum-alloy die-cast body covered by durable aluminum housing, titanium viewfinder housing and easy-to-grip, slip-proof rubber-reinforced surface finish. Your Nikon F5 is fully guaranteed against any manufacturing defects for three full years from the date of purchase. During this period, repairs or adjustments will be made free of charge only upon presentation of the Nikon Worldwide Service Warranty Card to any of the Nikon service facilities listed. Contact an authorized Nikon dealer or service center for more details. 3 P400 (E) 02.12.27 6:42 PM Page 4 NOTES Have Nikon spot check your camera regularly Nikon recommends that you have your camera serviced at an authorized dealer or service center, at least once every two years. 4 Using your camera correctly The F5 camera’s performance has been optimized for use with Nikon brand accessories. Accessories from other manufacturers may not meet Nikon’s criteria for specifications, and nonconforming accessories could damage the F5’s components. Nikon cannot guarantee the F5’s performance when it is used with other than Nikon brand accessories. P400 (E) 02.12.27 6:42 PM Page 5 ABOUT THIS MANUAL How this instruction manual is organized Reference tag Reference tag on the edge of the righthand pages corresponds to the sections described in “How this instruction manual is organized”. Index Use alphabetically listed index on pages 162 and 163 to check your desired page number. Before You Begin Describes information required before you start using your camera. P.2 -P.15 Preparation Describes preparation of camera, loading of batteries and film before taking pictures. P.16 -P.24 Basic Operation Introduces basic shooting using the most basic settings. P.25 -P.34 General Functions Explains photography fundamentals with the F5 including film advance mode, focus area, focus mode, metering system and exposure mode. P.35 -P.56 Advanced Operation Presents advanced F5 applications for obtaining various photographic effects P.57 -P.94 Controls in Detail Describes the F5’s various features in detail, points to be checked and other pertinent items. P.95 -P.107 Flash Photography Introduces various flash photography methods using an optional Nikon Speedlight. P.108 -P.126 Miscellaneous Lists lens, accessories, tips on camera and battery care, and other miscellaneous information. P.127 -P.168 Glossary Refer to alphabetically listed “Glossary” on pages 155 to 161 to get definitions on various terms used in this manual. 5 P400 (E) 02.12.27 6:42 PM Page 6 CONTENTS BEFORE YOU BEGIN .............................................................2-15 FOREWORD..........................................................................2-3 NOTES .....................................................................................4 ABOUT THIS MANUAL .............................................................5 CONTENTS ...........................................................................6-7 NOMENCLATURE ...............................................................8-13 LCD panels........................................................................12 Viewfinder ..........................................................................13 HOW TO OPERATE COMMAND DIALS ............................14-15 PREPARATION ...................................................................16-24 MOUNTING LENS .............................................................17-18 Removing lens ...................................................................18 INSTALLING BATTERIES........................................................19 CHECKING BATTERY POWER...............................................20 LOADING FILM..................................................................21-24 BASIC OPERATION ............................................................25-34 RELEASING SHUTTER/COMPOSING THE PICTURE........26-27 BASIC SHOOTING ............................................................28-34 About Two-Button Reset ...................................................34 GENERAL FUNCTIONS........................................................35-56 FILM ADVANCE MODE .....................................................36-37 Single-Frame Shooting ......................................................36 Continuous Shooting .........................................................37 FOCUS AREA....................................................................38-40 Selecting Focus Area....................................................38-39 Selecting AF Area Mode ....................................................40 6 FOCUS MODE...................................................................41-48 Autofocus.....................................................................41-45 Single Servo AF with Focus-Priority ..........................42-43 Continuous Servo AF with Release-Priority ...............44-45 Manual Focus...............................................................45-48 Manual focus with Electronic Rangefinder.................46-47 Manual focus using clear matte field...............................48 EXPOSURE METERING SYSTEM......................................49-51 3D Color Matrix Metering ...............................................49 Center-Weighted Metering .............................................50 Spot Metering ................................................................50 Setting Metering System ....................................................51 EXPOSURE MODE ............................................................52-56 Selecting Exposure Mode.............................................52-55 Setting Exposure Mode .....................................................56 ADVANCED OPERATION.....................................................57-94 SHOOTING IN EACH EXPOSURE MODE ..........................58-67 Operation in Shutter-Priority Auto Exposure Mode........58-60 Operation in Aperture-Priority Auto Exposure Mode......61-63 Operation in Manual Exposure Mode ............................64-67 FLEXIBLE PROGRAM........................................................68-69 FOCUS LOCK—To take off-center subjects ......................70-71 AE/AF LOCK .....................................................................72-73 EXPOSURE COMPENSATION...........................................74-81 To Obtain Meter Reading for a Particular Subject in Manual Exposure Mode ............................................75-76 Exposure Compensation Function ................................77-78 Auto Exposure/Flash Exposure Bracketing ...................79-81 P400 (E) 02.12.27 6:42 PM Page 7 SELF-TIMER......................................................................82-83 LONG TIME EXPOSURE....................................................84-85 MULTIPLE EXPOSURE......................................................86-87 CUSTOM SETTING ...........................................................88-94 To Make a Custom Setting ................................................91 CONTROLS IN DETAIL ......................................................95-107 VIEWFINDER DIOPTER—To see clearly through viewfinder ....96 ILLUMINATION SWITCH—To view LCD panels in the dark .....96 USING NON-DX-CODED FILM ...............................................97 FILM REWIND CRANK—To rewind film manually...............97-98 MIRROR LOCKUP LEVER— To lock reflex mirror in up position......................................99 DEPTH-OF FIELD PREVIEW BUTTON ..................................100 ACCESSORY SHOE .............................................................100 SYNC TERMINAL .................................................................101 REMOTE TERMINAL.............................................................101 OPERATION WITH PERSONAL COMPUTER ................102-103 SELF-DIAGNOSTIC SHUTTER SYSTEM...............................104 CHANGING CAMERA BACK ................................................105 CHANGING VIEWFINDERS...................................................106 CHANGING FOCUSING SCREENS ......................................107 FLASH PHOTOGRAPHY ..................................................108-124 TTL AUTO FLASH—Automatic Balanced Fill-Flash and Standard TTL Flash ..............................................109-117 Types of TTL Auto Flash ...........................................109-113 Shutter Speed/Aperture for Each Exposure Mode in TTL Auto Flash .....................................................114-115 Flash shooting distance range in 1/300 TTL High-Speed Sync.........................................................116 Selecting flash sync mode ...............................................117 TTL Auto Flash Operation .........................................118-119 SLOW SYNC— To make dark background more visible ....................120-121 REAR-CURTAIN SYNC— To create a natural-looking stream of light ................122-123 AVAILABLE SPEEDLIGHT AND FLASH FUNCTIONS ....124-125 NOTES ON FLASH PHOTOGRAPHY....................................126 MISCELLANEOUS...........................................................127-168 LENS.............................................................................128-131 ATTACHING NON-AI LENS ..................................................132 OPTIONAL ACCESSORIES ...........................................133-145 SPECIAL FOCUSING SITUATIONS IN AF ......................146-147 TROUBLESHOOTING....................................................148-150 CAMERA CARE TIPS ....................................................151-153 NOTES ON BATTERIES........................................................154 GLOSSARY ...................................................................155-161 INDEX............................................................................162-163 SPECIFICATIONS..........................................................164-168 7 P400 (E) 02.12.27 6:42 PM Page 8 NOMENCLATURE Lens release button Mirror lockup lever (p. 99) Depth-of-field preview button (p. 100) Focus mode selector: S for Single Servo AF (pp. 42-43) C for Continuous Servo AF (pp. 44-45) M for Manual focus (pp. 45-48) Power/LCD panel illumination switch: Rotate to turn camera ON/OFF or illuminate LCD panels. (p. 96) Sub-Command Dial: Rotate to set various functions. (p. 15) Camera back lock release: To open camera back, lift film rewind knob while sliding camera back lock release. Power switch lock release Shutter release button: To activate exposure meter and autofocus function, lightly press; to release shutter, depress fully; exposure meter automatically switches off after approx. 8 sec. Film rewind crank Metering system selector lock release Film rewind knob Diopter adjustment knob (p. 96) Multi-Meter Finder DP-30 Metering system selector (p. 51) 8 P400 (E) 02.12.27 6:42 PM Page 9 Sync terminal Self-timer indicator LED (pp. 82-83) Camera strap eyelet Exposure mode (MODE) button (p. 56) Exposure compensation (=) button (p. 77) Camera strap eyelet Film advance mode selector lock release Film advance mode/self-timer selector (pp. 36, 82) Accessory shoe: For Nikon dedicated Speedlights. Film plane indicator: Exact distance from lens mounting flange to film plane is 46.5mm. Top LCD panel (p. 12) AF area mode button (˝) (p. 40) Multiple exposure (Z) button (p. 86) 9 P400 (E) 02.12.27 6:42 PM Page 10 Viewfinder eyepiece Eyepiece shutter lever: Used to prevent stray light from entering viewfinder. Finder release button Alert LED AE-L/AF-L (Auto Exposure/Autofocus Lock) button: Locks auto exposure and focus when pressed and held in. AF start (AF-ON) button: Pressing AF start button starts autofocus operation. Film rewind lever (2 „) lock release Film rewind lever (2 „) Film cartridge confirmation window Main-Command Dial: Rotate to set various functions. (p. 14) Film rewind button (1 „) Battery holder release knob Auto Exposure/Flash Exposure Bracketing (‚) button (p. 79) Film speed (°) button (p. 21) Shutter speed/aperture/focus area lock (—) button (p. 39, 59, 61) Flash sync mode (±) button (p. 117) 10 10-pin remote terminal: For Personal Computer Connecting Cord MC-33 or MC-34, Remote Cord MC-30/MC-20, etc. Focus area selector (p. 38) Rear LCD panel (p. 12) Custom Setting Menu (·) button (p. 91) P400 (E) 02.12.27 6:42 PM Page 11 AF start (AF-ON) button for vertical shooting: Pressing AF start button starts autofocus operation and switches exposure meter on. Vertical-shooting shutter release button Lock lever for vertical-shooting shutter release button Camera back Tripod socket 11 P400 (E) 02.12.27 6:42 PM Page 12 LCD Panels Top LCD panel indications Rear LCD panel indications 1. Shutter speed lock 2. Shutter speed 3. Multiple exposure 4. Auto Exposure/Flash Exposure Bracketing 5. Exposure mode 6. Flexible Program 7. Exposure compensation value 8. Aperture lock 9. Aperture 10. Focus area lock 11. Battery level 12. Frame counter 13. Focus area/AF area mode 14. Exposure compensation 15. Film speed/Bracketing information/Custom Setting 16. Film speed setting mode 17. Auto Exposure/Flash Exposure Bracketing 18. Bracketing bar graphs 19. Flash sync mode 20. Personal computer connection 21. Custom Setting 12 • At high temperature (60°C/140°F or above), the entire display turns black, making it hard to read display information. When the temperature drops, the display can again be read normally. • When the temperature drops below freezing, the LCD response time slows. When the temperature rises, the display works normally again. P400 (E) 02.12.27 6:42 PM Page 13 Viewfinder 1. Focus area indicators 2. Exposure level (for Waist-Level Finder DW-30 or 6X HighMagnification Finder DW-31, in Manual exposure) 3. 12mm-dia. reference circle for Center-Weighted Metering 4. Focus brackets/Spot Metering (4mmø) area 5. Ready-light 6. Focus indicators: / indicates a subject is in focus; blinking ? indicates autofocus is impossible; < and > arrows indicate front and rear focus, respectively 7. Aperture direct-readout 8. Focus area indicators 9. Shutter speed lock indicator 10. Aperture lock indicator 11. Exposure mode 12. Exposure compensation 13. Metering system 14. Shutter speed 15. Aperture 16. Electronic analog exposure display 17. Frame counter/exposure compensation value Lightly pressing the shutter release button turns on the exposure meter and switches on the viewfinder illuminator. 13 P400 (E) 02.12.27 6:42 PM Page 14 HOW TO OPERATE COMMAND DIALS The F5’s Main- and Sub-Command Dials are used alone or in combination with other buttons to select/set various functions or modes. Rotating Main-Command Dial while pressing various buttons: • Selecting exposure mode. See page 52. • Selecting Custom Setting menu. See page 91. Main-Command Dial Rotating Main-Command Dial by itself: • Performing exposure compensation. See page 77. • Selecting shutter speed in ShutterPriority Auto or Manual exposure mode. See page 58 or 64. • Performing Flexible Program in Programmed Auto exposure mode. See page 68. • Setting/canceling Auto Exposure/Flash Exposure Bracketing. See page 79. • Selecting auto film speed setting or manually selecting film speed. See pages 21 and 97. • Selecting flash sync mode. See page 117. • Setting/canceling multiple exposure. See pages 86-87. • Locking shutter speed. See page 59. • Selecting AF area mode. See page 40. 14 P400 (E) 02.12.27 6:42 PM Page 15 Sub-Command Dial Rotating Sub-Command Dial by itself: • Selecting aperture in Aperture-Priority Auto or Manual exposure mode. See pages 61 or 64-66. * Aperture can also be set on the lens’ aperture ring (except for G-type Nikkor lens). Aperture can only be set on the lens’ aperture ring with non-CPU lens. Rotating Sub-Command Dial while pressing various buttons: • Setting number of exposure and compensation value in the Auto Exposure/Flash Exposure Bracketing. See pages 79-81. Focus Area Selector Pressing one of the focus area selector arrows changes the focus area in the corresponding direction. See pages 3839. • Selecting and making a Custom Setting. See page 91. ‚ and · Buttons • Locking aperture. See page 59. Pressing ‚ and · buttons simultaneously for more than two seconds resets various functions to the initial settings. See page 34. 15 P400 (E) 02.12.27 6:42 PM Page 16 PREPARATION This section shows you how to prepare the camera for shooting— e.g., how to mount lens, load film. Whether you are a beginner or a seasoned photographer, you should master this section before proceeding further. 16 P400 (E) 02.12.27 6:42 PM Page 17 MOUNTING LENS Position lens in the camera’s bayonet mount so that the mounting indexes on lens and camera body are aligned. Taking care not to press the lens release button, twist lens counterclockwise until it locks into place. 2 • When mounting/removing lens, make sure that the camera’s power is turned off and avoid direct sunlight. • For Nikon lens compatibility, see pages 128-131. • To mount non-AI lens, see page 132. Some non-AI lens cannot be attached. For more details, see page 131. G-type Nikkor and other CPU Nikkor lens 1 Remove camera body cap and front and rear lens caps. • The G-type Nikkor lens has no aperture ring; aperture should be selected from camera body. Unlike other CPU Nikkor lenses, aperture does not need to be set to minimum (largest f-number). • CPU Nikkor lenses other than G-type Nikkor lens have an aperture ring. Set the lens aperture to its minimum and lock. When the lens is not set to its minimum aperture setting and the power switch is turned on in Programmed Auto or Shutter-Priority Auto exposure mode, ƒEE blinks in the LCD panel and viewfinder. 17 P400 (E) 02.12.27 6:42 PM Page 18 Removing Lens Minimum aperture: Set lens to its minimum aperture when using CPU Nikkor lens other than G-type. The largest f-number of aperture on the lens’ aperture index is the lens’ minimum aperture. • Aperture setting operations are performed using the Sub-Command Dial on the camera body. Do not move the lens’ aperture once it is set to its minimum aperture. • Aperture can also be set with the lens’ aperture ring in Aperture-Priority Auto or Manual exposure mode when using CPU Nikkor lens other than G-type. In this case, aperture can only be verified through aperture direct-readout. • When G-type Nikkor lens is attached, aperture does not need to be set to minimum unlike other CPU Nikkor lenses with aperture ring. 18 Push and hold lens release button and turn lens clockwise. When lens is detached from camera for a long time Make sure to attach the supplied body cap or optional body cap BF-1A. (BF-1 body cap cannot be attached to the F5 camera body.) P400 (E) 02.12.27 6:42 PM Page 19 INSTALLING BATTERIES Before installing batteries: • Make sure the power switch is set at OFF position. • Use AA-type alkaline or lithium batteries, or optional Ni-MH Battery Unit MN-30 with the F5. • When installing/replacing batteries, always read “NOTES ON BATTERIES”, page 154. Install eight AA-type batteries with the “+” and “–” terminals positioned as shown inside the holder. 3 1 Pull out and turn battery holder release knob as shown. 2 4 Return battery holder MS-30 to battery chamber. 5 Remove battery holder MS-30. Turn battery holder release knob clockwise until it stops. • To install Ni-MH Battery Unit MN-30, follow steps 1-2 and 4-5. CAUTION: When carrying the battery holder MS-30 removed from the camera body, remove its batteries or install it in a case to avoid possible short-circuit caused by contacts with other metal objects. 19 P400 (E) 02.12.27 6:42 PM Page 20 CHECKING BATTERY POWER About exposure meter Rotate power switch to ON position while pressing the lock release, and confirm that the full battery mark appears in the top LCD panel, indicating sufficient battery power. The battery mark and exposure indications automatically turn off after 8 sec. N Sufficient battery power. M You can check battery power anytime by lightly pressing the shutter release button. This also activates the exposure meter, so that the LCD panel and viewfinder LCD show aperture/shutter speed indications, and autofocus operation starts (unless camera is set for manual focusing). The exposure indications and battery mark stay on for approx. 8 sec. after you take your finger off the shutter release button, then automatically turn off. Batteries are nearing exhaustion. Have a fresh set ready. M If M blinks, batteries are almost exhausted. Rotate power switch to OFF and replace batteries with a fresh set. If no indication/mark appears, batteries are completely exhausted or improperly installed. Replace. An exhausted battery can temporarily regain normal battery level after a pause. When the installed batteries are exhausted but the sufficient battery power indication N is shown in the LCD panel, battery level may quickly become low after shutter release and the camera does not function normally. To resume normal operation, replace the batteries with new ones. 20 To set the c meter for automatic switch-off after 4 sec., 16 sec. or 32 sec. as desired, use Custom Setting #15. For details, see page 89. P400 (E) 02.12.27 6:42 PM Page 21 LOADING FILM Auto film speed setting with DX-coded film is explained in this section. • The usable film speed range for DXcoded film is ISO 25 to 5000. • For non-DX coded film, see page 97. • IX240 film cartridge cannot be used with the F5. Confirm whether s for DX-coded film is shown on the rear LCD panel. If not, rotate Main-Command Dial while pressing the ° button so s appears on the LCD panel. 1 When film speed is set manually and DX-coded film is loaded, the manually set film speed becomes effective. While sliding camera back lock release, lift the film rewind knob. The camera back will pop open. 2 • To avoid fogging of film (especially high-ISO film), do not load/unload film in direct sunlight. • Do not touch the shutter curtains with your finger or with film leader. 21 P400 (E) 3 22 02.12.27 6:42 PM Insert film cartridge. Page 22 4 Pull film leader across to red film index mark. Check to ensure film is properly positioned with no slack, then gently close camera back until it locks. 5 P400 (E) 02.12.27 6:42 PM Page 23 Fully depress shutter release button to advance film to frame #1. • If non-DX-coded film or film with an unacceptable DX code is loaded, the Err in the top and rear LCD panel and viewfinder, a and s marks in the rear LCD panel blink and the shutter locks. Set ISO speed manually (see page 97). 6 To check if the film is loaded properly before closing the camera back, hold the film leader with your finger and fully depress shutter release button. Film winds up and you can confirm if the film leader is properly wound to the film spool. The camera can c be set to advance the film automatically when the camera back is closed and the power is on. For details, see Custom Setting #8, page 89. 23 P400 (E) 02.12.27 6:42 PM Page 24 Confirm frame counter shows 1 on the top LCD panel and viewfinder. The rear LCD panel shows automatically set film speed. 7 E appears and Err blinks in the top LCD panel and viewfinder, and alert LED blinks if film is incorrectly positioned. Open camera back and reload film properly. 24 P400 (E) 02.12.27 6:42 PM Page 25 BASIC OPERATION This section features the settings for most common picture-taking situations when using the standard Multi-Meter Finder DP-30 and a D-type Nikkor lens (including AF-S and AF-I). The shooting modes explained in this section cover most of your shooting situations. Shooting modes/functions explained in this section are as follows: Film advance mode AF area mode Focus area AF mode Exposure metering Exposure mode Lens attached Single frame Single Area AF* Center* Single Servo Autofocus 3D Color Matrix Metering Programmed Auto* D-type Nikkor * Can be set using the Two-Button Reset. See page 34. 25 P400 (E) 02.12.27 6:42 PM Page 26 RELEASING SHUTTER/COMPOSING PICTURE Lightly pressing shutter release button Lightly press shutter release button to start autofocus operation and switch the exposure meter on. Indications inside the viewfinder and LCD turn on. They remain on for approximately 8 seconds after you take your finger off the shutter release button, then automatically turn off. AF start button Autofocus can be set not to start when the shutter release button is lightly pressed using Custom Setting #4. To start autofocus in this case, press the AF start button. To release the shutter, fully depress shutter release button while pressing the AF start button. Also, use AF start button when it is difficult to focus on the subject by lightly pressing the shutter release button. To set the meter for automatic switchc off after 4 sec., 16 sec. or 32 sec. as desired, use Custom Setting #15. For details, see page 89. 26 Fully depressing shutter release button Fully depress the shutter release button to release shutter. Depress the shutter release button slowly. Depressing the shutter release button abruptly may result in camera shake. To deactivate autofocus when shutter c release button is lightly pressed, use Custom Setting #4. For details, see page 88. P400 (E) 02.12.27 6:42 PM Page 27 Hold camera properly Stand with one foot forward a half step to balance your body. Grasp the camera handgrip with your right hand. Use your left hand to cradle the camera with your elbow propped against your body for support, as you look through the viewfinder. Use your right index finger to press the shutter release button. A vertical-shooting shutter release button is also provided for smoother shutter release in vertical-format shooting. To use the vertical-shooting shutter release button, turn the lock lever for vertical-shooting shutter release button to • position to release the lock. At other times, keep the shutter release button locked by setting the lock to Ò. Notes • Do not block the lens with your hair or hand. • When taking a picture without looking through the viewfinder, make sure nothing (such as your camera strap) is between your camera and the subject. • Do not block the flash or AF-assist illuminator LED during flash photography. 27 P400 (E) 02.12.27 6:42 PM Page 28 BASIC SHOOTING Make sure that the lens’ aperture is set to its minimum position when using CPU Nikkor lens other than G-type. 1 28 2 Set the film advance mode selector to Í for Single-frame shooting. 3 Set the focus mode selector to Í for Single Servo AF. P400 (E) 02.12.27 6:42 PM Page 29 Select Single Area AF mode by rotating the Main-Command Dial while pressing the AF area mode (˝) button. • The selected focus area of the top LCD displays only g. • Focus bracket also appears in the viewfinder. 4 While pressing lock release, set the metering system selector to q for 3D Color Matrix Metering. 5 29 P400 (E) 02.12.27 6:42 PM Page 30 Select Programmed Auto exposure mode by rotating the Main-Command Dial while pressing the exposure mode (MODE) button so ¡ appears in the top LCD panel and P in the viewfinder. 6 7 Compose picture. Position the focus brackets on your main subject by pressing the focus area selector. • You can change the focus brackets position as long as the exposure meter is on. When the exposure meter is off, lightly press the shutter release button before selecting the focus area. Slide film images may be partially cropped by the mount. Also, the edges of negative film are partially cropped by most labs. 30 P400 (E) 8 02.12.27 6:42 PM Page 31 Lightly press the shutter release button. Confirm / appears inside the viewfinder and fully depress the shutter release button to take the picture. The camera automatically advances the film by one frame, and LCD frame counter increases by one. 9 Shutter cannot be released when: ? blinks: Focus manually. See page 146. > appears: Subject is too close. Move away from your subject. See page 43. If HI appears in the shutter speed position—Overexposure alert: Use Nikon ND filter. If Lo appears in the shutter speed position— Under-exposure alert: Use accessory Nikon Speedlight. 31 P400 (E) 02.12.27 6:42 PM Page 32 At the end of the film roll, End blinks in the top LCD panel and viewfinder, the alert LED lights, and the shutter can no longer be released. Confirm that the film has reached the end of film roll. • The number of frames on the loaded film roll can be read through the film cartridge confirmation window. 10 Film advance can be set to stop autoc matically at the 35th or 36th frame using Custom Setting #12. See page 89. 32 To rewind film, first open the film rewind button 1 „ cover and press the film rewind button 1 „, then turn the film rewind lever 2 „ while pressing the 2 „ lock release. This starts film rewinding automatically. During film rewind, the frame counter counts backward, rewind knob turns and alert LED blinks. • To rewind film manually, see page 97. • You can rewind film before it reaches the end of the roll in the same manner. 11 P400 (E) 02.12.27 6:42 PM Page 33 • If film rewind does not start, check battery power. See page 20. • If film rewind has stopped at midroll, check the battery power. If battery power is insufficient, turn the power switch off, replace batteries with a fresh set, turn power on, then press 1 „ button and turn 2 „ lever to restart film rewind. • If you accidentally press 1 „ button, lightly press the shutter release button. The film advances one frame without exposure and 1 „ button pops up. Confirm “E” is displayed in the top LCD panel and viewfinder, and film rewind is complete. 12 13 Open camera back and remove film cartridge. To conserve battery power, turn off the power switch when you are not using the camera. Always remove batteries before storing a camera to prevent damage due to leaking batteries. 33 P400 (E) 02.12.27 6:42 PM Page 34 About Two-Button Reset Pressing ‚ and · buttons simultaneously for more than two seconds resets various modes to their initial settings. Two-Button Reset sets the following modes: Exposure mode Programmed Auto Page 53 AF area mode Single Area AF Page 40 Focus area Center Page 38 Flash sync mode* Front-curtain sync Page 117 * When using SB-26, SB-25 or SB-24, Speedlight settings will override camera settings. Two-Button Reset cancels the following modes: Flexible Program Canceled Exposure compensation 0.0 Auto Exposure/Flash Exposure Bracketing Canceled Multiple Exposure Canceled Custom Setting Initial setting (except for menu 0, page 88) Functions on Multi-Control Back MF-28 Canceled, but data remains Shutter speed lock Canceled Aperture lock Canceled Focus area lock Canceled 34 P400 (E) 02.12.27 6:42 PM Page 35 GENERAL FUNCTIONS This chapter explains the various modes of the F5 camera’s operation. Please review it thoroughly. 35 P400 (E) 02.12.27 6:42 PM Page 36 FILM ADVANCE MODE Single-Frame Shooting There are four automatic film advance modes. To choose a mode, rotate the film advance mode/self-timer selector while pressing the film advance mode selector lock release. Set S for Single-frame shooting, CL for Continuous low-speed shooting, CH for Continuous high-speed shooting or CS for Continuous silent-low-speed shooting. 36 With the film advance mode at S, fully depressing the shutter release button takes one picture and automatically advances the film by one frame. Film advances immediately after the shutter closes whether you remove your finger from the shutter release button or keep the button depressed. To take the next shot, lift your finger from the button, then fully depress it again. Use Single-frame shooting for stationary subjects or subjects that do not require several frames of rapid firing. P400 (E) 02.12.27 6:42 PM Page 37 Continuous Shooting Shots are taken continuously as long as you keep the shutter release button fully depressed. You have a choice of shooting speeds: up to approx. 7.4 fps (frames per second) in CH mode, up to approx. 3 fps in CL mode and approx. 1 fps in CS mode— with fresh AA-type alkaline or lithium batteries at normal temperature (20°C or 68°F) and a shutter speed of 1/250 sec. or higher in Manual exposure and Continuous Servo AF modes. With shutter speeds slower than 1/250 sec., the framing rate becomes progressively slower in proportion to the shutter speed in use. Film advance speed using fully charged optional rechargeable Ni-MH Battery Unit MN-30 is up to approx. 8 fps in CH mode, up to approx. 3 fps in CL mode and approx. 1 fps in CS mode. In C and C modes, the shooting c speeds can be changed using Custom Setting #9, 10. See page 89. H L 37 P400 (E) 02.12.27 6:42 PM Page 38 FOCUS AREA Selecting Focus Area Top LCD Viewfinder Center Five focus areas are available with the F5. To select your desired focus area, press top, bottom, left or right on the focus area selector. Corresponding focus areas appear in the viewfinder and top LCD panel. Arrows on top (m) and to the right (>) of the viewfinder also indicate the selected focus area. 38 Left • When Spot Metering is selected, shifting the focus area also shifts the Spot Metering area accordingly. P400 (E) 02.12.27 6:42 PM Right Page 39 Top Bottom Focus area can be locked using the x lock function. To lock the focus area, select desired focus area, then press the focus area selector to any position while pressing the — button. x appears above the focus area indication in top LCD panel. To release the lock, press the focus area selector while pressing the — button again so x above the focus area indication disappears from top LCD panel. 39 P400 (E) 02.12.27 6:42 PM Page 40 Selecting AF Area Mode While pressing AF area mode (˝) button, rotate the Main-Command Dial to select Single Area AF or Dynamic AF mode. Dynamic AF is useful when shooting moving subjects without changing the composition, or when it is difficult to predict the position of subjects at the moment of exposure. 40 Single Area AF Dynamic AF When Single Area AF mode is selected, you may designate the focus area you wish to use, and that choice will remain unchanged regardless of subject movement. g (or h) appears in the selected focus area of the top LCD. (Example is when center focus area is selected.) You may alternately choose any one of the five available focus areas. In Single Area AF mode, the focused distance is calculated exclusively by the sensor in the selected focus area. When Dynamic AF mode is selected, g (or h) appears in the selected focus area and f in all five focus areas of the top LCD, and all five AF sensors are active. (Example shows center focus area selection.) Using Dynamic AF, you will designate the primary sensor, the one which will be first to detect a subject, then if the detected subject moves, the Dynamic AF operation will automatically shift to the next sensor which detects the subject, progressively shifting among the sensors as the subject moves; Dynamic AF is capable of following and maintaining accurate focus on moving subjects. • Viewfinder indication does not change even though the sensor is shifted in Dynamic AF mode. P400 (E) 02.12.27 6:42 PM Page 41 FOCUS MODE Autofocus The Nikon F5 has two autofocus modes, Single Servo AF with Focus-Priority and Continuous Servo AF with Release-Priority. In either of these modes—and in any film advance mode—Focus Tracking automatically activates when the subject starts moving, provided you are not using Single Servo AF mode and the focus has already locked, or you are using Continuous Servo AF mode and are pressing the AE-L/AF-L button. See page 42 for more details on Single Servo AF with FocusPriority; page 44 for Continuous Servo AF with Release-Priority. Caution Do not attempt to turn the lens focusing ring or impede its rotation when the focus mode selector is set to Single Servo AF (S) or Continuous Servo AF (C). Release-Priority can be given to Single c Servo AF or Focus-Priority to Continuous Servo AF using Custom Setting #1, 2. See page 88. 41 P400 (E) 02.12.27 6:42 PM Page 42 Single Servo AF with Focus-Priority For Single Servo AF, set the focus mode to S. Lightly press the shutter release button to activate focus adjustment. Because the priority is on correct focus, the shutter cannot be released until the subject is in focus. After focus is achieved with a stationary subject, the focus remains locked for as long as the shutter release button is lightly pressed. Focus locks with any one of the five focus areas selected (in Single Area AF mode). If the camera-to-subject distance changes however, you must refocus by lifting your finger from the shutter release button momentarily, then lightly pressing the button again. 42 With a stationary subject: Lightly press shutter release button. When the subject is in focus, the lens stops moving, the infocus indicator / appears in the viewfinder, and the focus locks. You can release shutter. If the subject moves before shutter releases, remove your finger from the shutter release button, then lightly press it again to reactivate autofocus. P400 (E) 02.12.27 6:42 PM Page 43 With a moving subject: Lightly press shutter release button to automatically activate Focus Tracking. Confirm / appears in the viewfinder, then fully depress the shutter release button. (The shutter release button can in fact be depressed without confirming / indication; as soon as the subject comes into focus, the shutter will be released.) Focus Tracking remains activated as long as you keep the shutter release button lightly pressed. If the subject stops and / appears, focus is locked. If subject moves again, remove your finger from the shutter release button and lightly press it again to start autofocus with Focus Tracking. > Lens is focused at rear of the subject. < Lens is focused at front of the subject. ? If ? blinks in the viewfinder: Autofocus is not possible. See page 146. • Single Servo AF is convenient for off-center subjects. See pages 70-71. • After shooting with the film advance mode selector set at S, you do not have to remove your finger from the shutter release button to take the next shot. Slightly lift your finger from the button (while maintaining the button in the half-depressed position) then fully depress it to release the shutter again. The focus setting will remain unchanged from the prior setting. In Single Servo AF with Focus-Priority mode, the focus remains locked even after the shutter is released, unless you remove your finger from the shutter release button. With the film advance mode set at CL, CH or CS, the camera refocuses every time the shutter is released. > and < display in viewfinder in c Autofocus mode can be canceled using Custom Setting #23. See page 90. 43 P400 (E) 02.12.27 6:42 PM Page 44 Continuous Servo AF with Release-Priority Set focus mode to C for Continuous Servo AF. In Continuous Servo autofocus mode, as you lightly press the shutter release button, focus detection begins and the lens continues to focus for as long as you keep the shutter release button lightly pressed. Since the priority is on shutter release, you can fully depress the shutter release button regardless of focus status. Whenever the subject distance changes due to recomposition or movement of the subject in Continuous Servo AF mode, the F5 will refocus on the subject at the new distance. 44 Lightly press shutter release button to start autofocus operation. When the subject is in focus, the camera’s autofocus motor (or the built-in motor of an AF-S or AF-I Nikkor lens) stops driving the autofocus lens and / appears in the viewfinder. Unless you remove your finger from the shutter release button, the motor will start driving the lens again to obtain an in-focus picture if the focus distance changes. P400 (E) 02.12.27 6:42 PM Page 45 Manual Focus > Lens is focused at rear of the subject. < Lens is focused in front of the subject. ? If ? blinks in the viewfinder: Autofocus is not possible. See page 146. As focus is not locked in Continuous Servo AF, to take an off-center subject, use AE-L/AF-L button and recompose picture. See pages 72-73. To focus manually when using Nikon lenses that do not have an A/M switch, set the camera’s focus mode selector to M. When using a Nikon lens that has an A/M switch, set the lens’ switch to M; when using an AF-S or AF-I Nikkor lens, set the switch to M or M/A; with these lens types it is not necessary to change the camera’s focus mode selector. There are two ways of assuring precise manual focus—with the Electronic Rangefinder or with the viewfinder’s clear matte field. 45 P400 (E) 02.12.27 6:42 PM Page 46 Manual focus with Electronic Rangefinder The Electronic Rangefinder provides you with viewfinder indications that show the focus status while you are focusing. It works with most Nikon lenses (including AF Nikkor when operated manually) having a maximum aperture of f/5.6 or faster. (For a complete list of usable lenses, see Lens Compatibility on pages 128-131). Look through viewfinder and position the selected focus bracket on main subject. Then lightly press shutter release button. You may select any one of the focus brackets. 1 46 P400 (E) 02.12.27 6:42 PM Page 47 While lightly pressing shutter release button, rotate lens focusing ring in the direction indicated by the focus-to-left arrow (>) or focus-to-right arrow (<), until arrow disappears and in-focus indicator / appears. If focus-to-left arrow (>) does not disappear when you turn the focus ring counterclockwise to the limit, subject is closer than the distance at which the lens is able to focus. Move back from subject. 2 3 Confirm in-focus indicator / appears, then fully depress shutter release button to take the picture. For special focusing situations shown on page 146, ? blinks to indicate that the Electronic Rangefinder does not work correctly. Focus with clear matte field (p. 48). 47 P400 (E) 02.12.27 6:42 PM Page 48 Manual focus using clear matte field Look through viewfinder and rotate lens focusing ring until image on clear matte field appears sharp. 48 P400 (E) 02.12.27 6:42 PM Page 49 EXPOSURE METERING SYSTEM The Nikon F5 has three types of exposure metering systems–– 3D Color Matrix Metering, Center-Weighted Metering and Spot Metering. q 3D Color Matrix Metering (with the Multi-Meter Finder DP-30 This system is ideal for quick operation in any exposure mode. With D- or G-type AF Nikkor lenses including AF-I or AF-S Nikkor, 3D Color Matrix Metering is automatically activated. 3D Color Matrix Metering uses various types of data: scene brightness, scene contrast, focused subject’s distance (Distance Information) and color distribution of the entire frame. Data on scene brightness, contrast and color distribution are detected by the camera’s 1,005-pixel Matrix Sensor, while data on the focused subject’s distance is detected and relayed by your Dor G-type AF Nikkor lens. Information sent by the camera’s autofocus system indicating whether the main subject is centered is also considered in the computation. By analyzing these data, the F5’s built-in microcomputer is able to provide correct exposure even in extremely complex lighting situations. If a non-D/G-type lens is used, Matrix Metering is performed. Although lens’ Distance Information is not given, 1,005-pixel Matrix Sensor provides the correct exposure in most lighting situations. Note that Matrix Metering system can only be used with lenses having a built-in CPU (such as AF Nikkor and AI-P lenses.) 49 P400 (E) 02.12.27 6:42 PM Page 50 w Center-Weighted Metering e Spot Metering With approximately 75% of the meter’s sensitivity concentrated on the 12mm-dia. circle within the viewfinder and 25% outside this circle, this meter becomes useful in situations where you want to base exposure on a specific area in the scene. In auto exposure mode, to measure the brightness of the picture’s offcenter portion, use the camera’s AE-L/AF-L button (see pages 72 and 73). Nearly 100% of the meter’s sensitivity is concentrated on the 4mm-dia. area (approx. 1.5% of entire frame) within the selected focus area of the viewfinder. (6mm-dia. area or approx. 3.3% of entire frame with focusing screens other than EC-B/ECE-type.) Use this meter for highly selective exposure control— achieving the best results requires experience. In Center-Weighted Metering, the area c that concentrates 75% of the meter’s sensitivity can be changed to 8mm-dia., 15mm-dia., 20mm-dia. circle or average on entire viewfinder using Custom Setting #14. See page 89. 50 When Spot Metering is selected, shifting focus area also shifts Spot Metering area to corresponding position (with EC-B/EC-E focusing screen only). P400 (E) 02.12.27 6:42 PM Page 51 Setting Metering System 3D Color Matrix Metering Center-Weighted Metering Spot Metering Rotate the metering system selector while pressing the metering system selector lock release to select your desired symbol—q for 3D Color Matrix Metering, w for CenterWeighted Metering or e for Spot Metering—in the viewfinder. If you are using a lens without CPU, or accessories such as bellows or extension rings The 1,005-pixel 3D Color Matrix Metering automatically switches to Center-Weighted Metering and the w symbol appears. (If Programmed Auto or Shutter-Priority Auto is set on the camera, the exposure mode also switches automatically to Aperture-Priority Auto with F-- and blinking exposure mode indicator in the top LCD panel, and A appears in the viewfinder.) In this case, use Center-Weighted Metering or Spot Metering. 51 P400 (E) 02.12.27 6:42 PM Page 52 EXPOSURE MODE Selecting Exposure Mode Light reaching the film is controlled by shutter speed and lens aperture. The proper combination results in a correct exposure. Shutter speed and lens aperture settings are based on the ISO speed set for the film in use and the operation of the camera’s exposure control system. The relationship between aperture and shutter speed is as follows: For example, a shutter speed of 1/500 sec. admits half the light of 1/250 and double the light of 1/1000 sec. An aperture of f/8 admits half the light of f/5.6 and double the light of f/11. If the correct exposure for a scene is 1/500 at f/8, then we can also select 1/250 at f/11 or 1/1000 at f/5.6 and achieve the same exposure results, and so on. 52 In selecting the exposure control mode, you can choose whether you want to set the shutter speed and/or lens aperture automatically or manually. The Nikon F5 camera offers four types of exposure modes: Programmed Auto (¡), Shutter-Priority Auto (™), AperturePriority Auto (£) and Manual (¢) exposure modes. Page 53 13 11 12 9 10 8 8 7 4 14 F1 15 F1.4 16 1 /3 16 F2 17 F2.8 18 F4 19 F5.6 20 F8 21 F11 F16 22 In Programmed Auto exposure mode, you can use the Flexible Program function to temporarily shift an automatically selected shutter speed/aperture combination and obtain the desired shutter speed/aperture while retaining the same or a consistent exposure (see pages 68 and 69). 6 2 5 1" 4 2 2" 3 1 EV 0 To check shutter speed and aperture values, follow the red line to where it intersects the diagonal line. This shows the combination of aperture (vertical line) and shutter speed (horizontal line). ISO 100 –1 With the F5’s microcomputer choosing the combination of shutter speed and aperture automatically, you can concentrate on picture composition without worrying about exposure. Note that programmed auto exposure modes operate only with Nikon lenses that have a built-in CPU (AF Nikkor and AI-P Nikkor lenses). Programmed Auto exposure mode is used for most common picture-taking situations. Program chart –3 Programmed Auto exposure mode (¡) –2 02.12.27 6:42 PM –4 P400 (E) F22 F32 30" 15" 8" 4" Sec. 15 30 60 125 250 500 1000 200040008000 ——: With 50mm f/1.4 -----: High-brightness limit for 3D Color Matrix Metering 53 P400 (E) 02.12.27 6:42 PM Page 54 Shutter-Priority Auto exposure mode (™) Aperture-Priority Auto exposure mode (£) Allows you to manually set your desired shutter speed. To freeze the action, use a high shutter speed; to create motion effects, choose a slower shutter speed. The F5’s microcomputer automatically selects the proper aperture to match the manually set shutter speed to ensure a correct exposure. See pages 58-59 for Shutter-Priority Auto operation. Note that Shutter-Priority Auto exposure mode operates only with Nikon lenses having a built-in CPU (AF Nikkor and AI-P Nikkor lenses). By varying the aperture, you can control the depth of field. Smaller apertures make the background and foreground sharper (recommended for landscape pictures) while larger apertures tend to blur the background (recommended for portraits). Your selected aperture will determine the shutter speed that is automatically set by the camera’s microcomputer. When using smaller apertures with correspondingly slower shutter speeds, remember that, generally, any speed below 1/(focal length in use) second, requires the use of a tripod to prevent picture blur due to camera shake. The higher the corresponding shutter speed to the aperture you set, the easier it is to stop action. Adjust the selected aperture if the speed is not appropriate for conditions or the specific effect you want. For Aperture-Priority Auto operation, see pages 61-63. Manual exposure mode (¢) Manual exposure control allows you to make both aperture and shutter speed settings. For a technically correct exposure, follow the recommendation of the camera’s light meter, as indicated by the LCD readout. To achieve a specific creative effect (e.g., intentional blur, intentional under- or over-exposure), disregard the LCD and modify the recommended exposure settings. For Manual exposure operation, see pages 64-67. 54 P400 (E) 02.12.27 6:42 PM Page 55 Pictures taken at different shutter speeds Pictures taken at different apertures High shutter speed Large aperture Slow shutter speed Small aperture 55 P400 (E) 02.12.27 6:42 PM Page 56 Setting Exposure Mode While pressing ¨ button, rotate Main-Command Dial. The exposure mode changes as in the following sequence: ¡ Programmed Auto ¢ Manual 56 ™ Shutter-Priority Auto £ Aperture-Priority Auto For users of lenses that have no CPU, or accessories such as bellows attachment or extension rings Use Aperture-Priority Auto or Manual exposure mode. Programmed Auto or Shutter-Priority Auto exposure mode automatically shifts to Aperture-Priority Auto exposure mode with ƒ-- and the blinking exposure mode indicator in the top LCD panel, and A appears in the viewfinder. (If 3D Color Matrix Metering is set on the camera, metering system is also automatically shifted to Center-Weighted.) P400 (E) 02.12.27 6:42 PM Page 57 ADVANCED OPERATION This chapter explains advanced photographic techniques and applications. 57 P400 (E) 02.12.27 6:42 PM Page 58 SHOOTING IN EACH EXPOSURE MODE Operation in Shutter-Priority Auto Exposure Mode While pressing ¨ button, rotate Main-Command Dial until ™ appears in the top LCD panel and S in the viewfinder. • When using CPU Nikkor lens other than G-type, make sure to set lens to its minimum aperture position (largest f-number). 1 • This operation can be performed only with lenses having a built-in CPU. • If meter and LCD readout have turned off, turn on again by lightly pressing shutter release button. • If “bulb” is set on the camera, selecting the ShutterPriority Auto mode will cause buLb to blink—a warning that the “bulb” setting cannot be used in Shutter-Priority mode. 58 Remove finger from ¨ button, and rotate MainCommand Dial to select desired shutter speed. Shutter speed indications change in 1/3 steps between 30 sec. and 1/8000 sec., and flash sync speed of 1/250 sec. (X25o). 2 The direction that the Main-Command c Dial is turned to increase/decrease shutter speed can be changed using Custom Setting #6. See page 88. P400 (E) 02.12.27 6:42 PM Page 59 Look inside viewfinder, compose and lightly press shutter release button. Confirm the automatically set aperture value. 3 4 To take the picture, fully depress shutter release button. The selected shutter speed can be x locked using the lock function to avoid accidental changes of settings. To lock the shutter speed, rotate the Main-Command Dial while pressing the — button. x appears in the top LCD panel and Ò in the viewfinder above the shutter speed indications. To release the lock, rotate Main-Command Dial while pressing the — button again, or select another exposure mode. x and Ò disappear. • Lock function operates only with lenses having a CPU, when the lens is set and locked at its minimum aperture. (With G-type Nikkor lens, aperture does not need to set to minimum.) 59 P400 (E) 02.12.27 6:42 PM Page 60 If HI appears in the aperture position—Overexposure alert: Select a higher shutter speed or use a Nikon ND filter. If Lo appears in the aperture position—Underexposure alert: Select a slower shutter speed or use an accessory Nikon Speedlight. 60 If ƒEE blinks in the aperture position—Lens setting error alert: CPU Nikkor lens other than G-type is not set to its smallest aperture setting. Set lens to its smallest aperture, and lock setting. P400 (E) 02.12.27 6:42 PM Page 61 Operation in Aperture-Priority Auto Exposure Mode While pressing ¨ button, rotate Main-Command Dial until £ appears in the top LCD panel and A in the viewfinder. 1 The selected aperture can be locked x using the lock function to avoid accidental change of settings. To lock aperture, rotate SubCommand Dial while pressing the — button. x appears in the top LCD panel and Ò in the viewfinder above the aperture indications. To release the lock, rotate Sub-Command Dial while pressing the — button again, or select another exposure mode. x and Ò disappear. • Lock function operates only with lenses having a CPU, when the lens is set and locked at its minimum aperture. (With G-type Nikkor lens, aperture does not need to set to minimum.) Remove finger from ¨ button, and rotate SubCommand Dial to select desired aperture. (When using CPU Nikkor lens other than G-type, make sure to set lens to its minimum aperture position.) Aperture set is indicated in the top LCD panel and viewfinder. Aperture indication changes in 1/3 steps between lens’ maximum and minimum apertures. (Available apertures limited to those of lens in use.) 2 • Aperture can also be set by rotating the lens aperture ring (except for G-type Nikkor lens). In this case, ƒ-- blinks in the viewfinder and top LCD panel, and aperture can be confirmed only through the aperture direct-readout in the viewfinder. • To select minimum aperture with the lens aperture ring (with CPU Nikkor lens other than G-type), make sure to also set aperture to minimum with Sub-Command Dial; the reason being that when the lens’ aperture ring is set to its minimum, aperture set with SubCommand Dial will be effective. • If you regularly set aperture using the lens’ aperture ring with CPU Nikkor lens other than G-type, it is recommended that you cancel aperture change by rotating Sub-Command Dial using Custom Setting #22 (page 90). 61 P400 (E) 02.12.27 6:42 PM Page 62 If meter and LCD readout have turned off, turn on again by lightly pressing shutter release button. With lenses having no CPU, ƒ-- blinks instead of aperture value in the LCD panel and viewfinder. Set the aperture manually with lens’ aperture ring. With AI-type lenses including AI-modified Nikkor lenses: Confirm aperture value on lens barrel. With lenses having fixed aperture, such as ReflexNikkor lenses: Aperture cannot be changed. With lenses having no auto diaphragm such as PCNikkor lenses: Switch to Manual exposure mode (see pages 64-67). Aperture can be set not to change by c rotating Sub-Command Dial using Custom Setting #22. Set aperture by rotating the lens’ aperture ring in this case. See page 90. 62 3 Look inside viewfinder, compose and lightly press shutter release button. Confirm automatically set shutter speed. P400 (E) 02.12.27 6:42 PM Page 63 If HI appears in the shutter speed position— Overexposure alert: Select smaller aperture (large fnumber) or use Nikon ND filter. 4 To take picture, fully depress shutter release button. If Lo appears in the shutter speed position— Underexposure alert: Select wider aperture (smaller fnumber) or use accessory Nikon Speedlight. 63 P400 (E) 02.12.27 6:42 PM Page 64 Operation in Manual Exposure Mode While pressing ¨ button, rotate Main-Command Dial until ¢ appears in the top LCD panel and electronic analog exposure display in the viewfinder. 1 Remove finger from ¨ button, set shutter speed by rotating the Main-Command Dial. Shutter speed can be set in 1/3 steps. • In Manual exposure mode, you can set shutter speed to buLb for extended time exposures. For details about buLb setting, see pages 84-85. 2 Slowest shutter speed can be c changed from 30 sec. to as much as 30 minutes using Custom Setting #19. See page 90. 64 P400 (E) 02.12.27 6:42 PM Page 65 Aperture can be set not to change by c rotating Sub-Command Dial using Custom Setting #22. Set aperture by rotating the lens’ aperture ring in this case (except for G-type Nikkor lens). See page 90. Set aperture by rotating the Sub-Command Dial. (Lens’ aperture set to its minimum position with CPU Nikkor lens other than G-type.) Aperture can be set in 1/3 steps between lens’ maximum and minimum apertures. • Aperture can also be set by rotating the lens aperture ring (except for G-type Nikkor lens). In this case, ƒ-- blinks in the viewfinder and top LCD panel, and aperture can be confirmed only through the aperture direct-readout in the viewfinder. • To select minimum aperture with the lens aperture ring with CPU Nikkor lens other than G-type, make sure to also set aperture to minimum with Sub-Command Dial; the reason being that when the lens’ aperture ring is set to its minimum, aperture set with Sub-Command Dial will be effective. • If you regularly set aperture using the lens’ aperture ring with CPU Nikkor lens other than G-type, it is recommended that you cancel aperture change by rotating Sub-Command Dial using Custom Setting #22 (page 90). 3 The selected shutter speed/aperture x can be locked using the lock function to avoid accidental changes of settings. To lock the shutter speed/aperture, rotate the Main-/Sub-Command Dial while pressing the — button. x appears in the top LCD panel and Ò in the viewfinder above the shutter speed/aperture indications. To release the lock, rotate Main-Command Dial while pressing the — button again, or select another exposure mode. x and Ò disappear. • Lock function operates only with lenses having a CPU, when the lens is set and locked at its minimum aperture. (With G-type Nikkor lens, aperture does not need to set to minimum.) 65 P400 (E) 02.12.27 6:42 PM Page 66 Look into viewfinder, compose shot and lightly press shutter release button. Adjust aperture and/or shutter speed until the electronic analog exposure display shows “0” or your desired amount. 4 Examples Over +2EV 66 +2EV +1/3EV ±0EV –2/3EV Below –2EV P400 (E) 02.12.27 6:42 PM Page 67 With lenses having no CPU, ƒ-- blinks instead of aperture value in the LCD panel and viewfinder. Set aperture manually with the lens’ aperture ring. With lenses having fixed aperture, such as ReflexNikkor lenses: Aperture cannot be changed; adjust exposure by changing the shutter speed. 5 Fully depress shutter release button to take the picture. With lenses having no auto diaphragm such as PCNikkor lenses: Lens is stopped down when a smaller aperture (larger f-number) is selected. Focus manually with the lens set at maximum aperture. Exposure compensation with AF Micro lens When an AF Micro lens is attached to the F5 camera body and exposure is measured with a seperate exposure meter, compensation is not necessary when selecting aperture with the Sub-Command Dial. However, exposure compensation indicated in lens’ manual is required when selecting aperture with lens aperture ring. 67 P400 (E) 02.12.27 6:42 PM Page 68 FLEXIBLE PROGRAM To change the shutter speed/aperture combination in Programmed Auto exposure mode, use the Flexible Program function. Flexible Program lets you temporarily change an automatically set shutter speed/aperture combination in 1/3 EV steps, while maintaining the same or consistent exposure. Flexible Program function can also be used with any Nikon Speedlight. Note that selectable shutter speeds are limited to those below the sync speed of the Speedlight. When performing flash photography, however, you cannot shift to a shutter speed faster than 1/250 sec. (Changeable to 1/300 sec. with Custom Setting.) 68 Make sure Programmed Auto exposure mode (¡) is selected, and lightly press the shutter release button. Shutter speed and aperture appear in the top LCD and viewfinder. 1 P400 (E) 02.12.27 6:42 PM Page 69 Rotate Main-Command Dial until desired shutter speed or aperture value appears in the viewfinder and top LCD panel. The Flexible Program indicator (§) appears to indicate the program has been shifted or changed. 2 • The shifted program is maintained unless you rotate the MainCommand Dial to the previous shutter speed/aperture. Flexible Program is canceled when you switch the exposure mode to another mode, pressing ‚ and · buttons simultaneously to activate Two-Button Reset or turn off the power switch. 69 P400 (E) 02.12.27 6:42 PM Page 70 FOCUS LOCK—To take off-center subjects In Single Servo AF mode, focus remains locked as long as the shutter release button is kept lightly pressed. Focus can be locked from any of the five focus areas selected. • In Continuous Servo AF mode, lock focus using AE-L/AF-L button. See page 72. In this case, both exposure and focus are simultaneously locked. 1 With a moving subject, focus cannot be locked. 70 Position focus brackets on subject and lightly press shutter release button to start autofocus operation. Both exposure and focus can be set c to lock simultaneously when the shutter release button is lightly pressed using Custom Setting #7. See page 89. P400 (E) 2 02.12.27 6:42 PM Page 71 Confirm in-focus indicator / appears in the viewfinder. Autofocus can be deactivated and c lens does not start focusing when the shutter release button is lightly pressed using Custom Setting #4. In this case, focus can be locked by keeping the AF start button pressed. See page 88. Keeping shutter release button lightly pressed, recompose, then fully depress shutter release button to take the picture. 3 Provided a subject is covered by one of the five focus brackets, you can also shoot an off-center subject by shifting the focus to the relevant focus area without changing the composition. See page 38. 71 P400 (E) 02.12.27 6:42 PM Page 72 AE/AF LOCK Pressing the AE-L/AF-L button will simultaneously lock both exposure and focus. This function can be used with both Single Area AF or Dynamic AF operation, and with all metering systems used for automatic exposure control functions. • Using Single Servo AF, when Single Area AF mode and Spot Metering are selected, correct exposure can be achieved by choosing a focus area which corresponds to your picture composition. • Aperture in Aperture-Priority Auto and shutter speed in Shutter-Priority Auto can be changed even while pressing the AE-L/AF-L button. • You cannot change the metering system while pressing the AE-L/AF-L button. • To lock only focus in Single Servo AF, lightly press the shutter release button and recompose. See pages 70-71. • Pressing the AE-L/AF-L button locks exposure only in manual focus mode. About AE Lock In the auto exposure mode, when you want to control exposure based on the brightness of a specific area within the scene, use AE lock. With the F5, pressing the AE-L/AF-L button locks both exposure and focus, but it can be changed to lock only exposure (or focus) using the Custom Setting. Center-Weighted or Spot Metering is recommended when using AE lock. 72 1 Position focus brackets on subject and lightly press shutter release button to start autofocus operation. AE-L/AF-L button can be set to lock c only focus or exposure by using Custom Setting #21. See page 90. AE-L/AF-L button can be set to lock camera’s controlled shutter speed and aperture instead of detected exposure value using Custom Setting #5. See page 88. Autofocus can be deactivated and lens does not start focusing when the shutter release button is lightly pressed using Custom Setting #4. In this case, focus can be locked by keeping the AF start button. See page 88. P400 (E) 02.12.27 6:42 PM Page 73 Keeping shutter release button lightly pressed, confirm infocus indicator / appears in viewfinder. Then press and hold the AE-L/AF-L button to lock focus and exposure—and continue holding until step #3 is complete. 2 3 While holding AE-L/AF-L button in, recompose, then fully depress shutter release button to take picture. 73 P400 (E) 02.12.27 6:42 PM Page 74 EXPOSURE COMPENSATION Exposure compensation is a photographic technique that enables you to vary the final exposure settings from those measured by the camera’s light meter. Nikon’s 3D Color Matrix Metering employs methods of exposure calculation that automatically apply exposure compensation, depending upon scene brightness, contrast, focused subject’s distance and color distribution of the entire frame. As a result, your subject, whether it is centered in the viewfinder or not, is given corrected exposure in most lighting situations. We do not recommend using any manually or automatically applied exposure compensation when using 3D Color Matrix Metering. If you identify an extreme condition under which Matrix may have some difficulty, such as a severely backlit scene or one with extremes of contrast, we recommend using your camera’s other built-in meters, Center-Weighted or Spot. 74 Ultimately, only you know what the subject or a part of it requires in terms of exposure measurement. That’s why the F5 camera incorporates three meters plus a variety of exposure compensation systems. The photographer’s creativity is always the final deciding and controlling factor. To use the various exposure compensation functions, please refer to the following: • Using AE-L/AF-L (Auto Exposure/Autofocus Lock) button (pages 72-73) • To obtain meter reading for a particular subject in Manual exposure mode (pages 75-76) • Using exposure compensation button (pages 77-78) • Auto Exposure/Flash Exposure Bracketing (pages 79-81) Results will vary, depending on conditions, so you will want to experiment with each method. P400 (E) 02.12.27 6:42 PM Page 75 To Obtain Meter Reading for a Particular Subject in Manual Exposure Mode In Manual exposure mode, if you want to set an exposure for a specific brightness value within the scene, switch metering system to Center-Weighted or Spot and use the following method. Center main subject inside viewfinder and/or move in closer until the reference circle for Center-Weighted Metering or Spot Metering is fully covered by the subject. 1 2 Lightly press shutter release button. 75 P400 (E) 02.12.27 6:42 PM Page 76 Adjust shutter speed and aperture by rotating the Main- and/or SubCommand Dials until the electronic analog exposure display shows desired exposure. 3 76 4 Recompose the picture and shoot. • In Single Servo AF mode, if recomposing the picture could change subject-tocamera distance, refocus by briefly removing your finger from shutter release button and lightly pressing it. • Continuous Servo AF is not recommended if the subject becomes offcentered after recomposing. P400 (E) 02.12.27 6:42 PM Page 77 Exposure Compensation Function To modify exposure control (from the ISO standard), use the exposure compensation button. Compensation can be applied from –5EV to +5EV in 1/3 steps. After taking your photographs, be sure to reset the control to “0” to resume normal operation. • If Auto Exposure/Flash Exposure Bracketing is also set, exposure compensation will be combined compensation values. Rotate Main-Command Dial while pressing = (Exposure Compensation) button to set desired compensation value. = and the compensated value will appear in the top LCD panel and viewfinder. 1 Without compensation With compensation 77 P400 (E) 02.12.27 6:42 PM Page 78 Once set, exposure compensation remains fixed until reset. = and the compensated value remain on in the top LCD panel. Although the = symbol in the viewfinder stays on to indicate that exposure compensation is on, the compensation value disappears from the readout when you remove your finger from = button. To confirm compensation value in the viewfinder, press = button again. 2 78 3 After shooting, be sure to reset the amount of compensation to “0.0” to resume normal operation. P400 (E) 02.12.27 6:42 PM Page 79 Auto Exposure/Flash Exposure Bracketing In situations where you might find it difficult to obtain a proper exposure, Auto Exposure/Flash Exposure Bracketing lets you shoot the same subject at two or three different exposures, with a variable exposure compensation degree of 0.3 EV, 0.7 EV or 1 EV. If you set a compensation degree of 1 EV in a three-step bracket for example, you will take three pictures, the first shot having no compensation, the second shot having a –1 EV compensation and the third shot having a compensation of +1 EV. Rotate Main-Command Dial while pressing the ‚ (Auto Exposure/Flash Exposure Bracketing) button to select Auto Exposure/Flash Exposure Bracketing mode. z appears in the top and rear LCD panels and = blinks in the top LCD panel and the viewfinder while the exposure meter is on. 1 In Auto Exposure/Flash Exposure c Bracketing, you can set Custom Setting #3 to start shooting with negative compensation, no compensation and positive compensation in that order. See page 88. You can perform only Auto Exposure Bracketing or Flash Exposure Bracketing using Custom Setting #24. See page 90. 79 P400 (E) 02.12.27 6:42 PM Page 80 While pressing the ‚ button, rotate Sub-Command Dial to select your desired number of shots and compensation value from one of the following: 2 Number of shots Two Two Two Two Two Two Three Three Three 80 Compensated EV value 0 and +1/3 0 and –1/3 0 and +2/3 0 and –2/3 0 and +1 0 and –1 0, –1/3 and +1/3 (default) 0, –2/3 and +2/3 0, –1 and +1 Rear LCD panel Compose picture, confirm focus and exposure, then fully depress shutter release button. With the film advance mode at single-frame shooting (S), fully depress the shutter release button the set number of times to perform bracketing. With film advance mode at continuous shooting (CH, CL or CS), fully depress the shutter release button and hold in until the set number of shots has been taken and film advance stops automatically. 3 2F0.3 2F0.3 2F0.7 2F0.7 2F1.0 2F1.0 z @#$ z $%^ z @#$ z $%^ z @#$ z $%^ 3F0.3 z @#$%^ In Manual exposure mode, various c factors (flash output level, shutter speed, aperture or shutter speed/aperture combination) 3F0.7 3F1.0 z @#$%^ z @#$%^ within the bracketing operation can be changed using Custom Setting #17. See page 90. P400 (E) 02.12.27 6:42 PM Page 81 After the set number of shots has been taken, rotate the Main-Command Dial while pressing the ‚ button so z disappears in the top and rear LCD panels to cancel Auto Exposure/Flash Exposure Bracketing. The number of shots and compensation value disappear when you remove your finger from the ‚ button. • The set number of shots and compensation value remain unchanged after Auto Exposure/Flash Exposure Bracketing is canceled. 4 • In Auto Exposure/Flash Exposure Bracketing, the shutter speed and aperture in Programmed Auto, aperture in Shutter-Priority Auto, shutter speed in Aperture-Priority Auto and Manual exposure mode are varied. Flash output level is varied in flash photography with dedicated Nikon Speedlight. • If exposure compensation function is also set, Bracketing will be combined with the exposure compensation values. • Bracketing with varying flash output levels can be performed at the buLb setting. • If film reaches the end of the roll during shooting, rewind, load a new roll and fully depress shutter release button to advance film to frame 1, then fully depress shutter release button again to resume operation. • Bracketing is performed with one frame at a time when the self-timer is set. • Bracketing settings made on Multi-Control Back MF-28 have priority over settings on the F5 camera body. • When a prolonged shutter speed (slower than 40 sec.) is selected with a Custom Setting, shutter speed is not varied in Bracketing. • When flash sync speed is selected in Manual exposure mode, shutter speed is not varied in Bracketing. • When the Photo Secretary for F5 is used, Bracketing on the camera body cannot be performed. Perform Bracketing on the Photo Secretary for F5. 81 P400 (E) 02.12.27 6:42 PM Page 82 SELF-TIMER While pressing the lock release, set the film advance mode/self-timer selector to V (self-timer) position. 1 82 With all auto exposure modes, use the eyepiece shutter before starting the self-timer to prevent stray light from entering the viewfinder and affecting the exposure. Compose picture, lightly press shutter release button, and confirm focus and exposure. 2 P400 (E) 02.12.27 6:42 PM Page 83 The self-timer c duration can be changed to any interval from 2 to 60 sec. by using Custom Setting #16. See page 90. Fully depress shutter release button. Self-timer LED starts blinking and shutter will be released after 10 sec. During the final two seconds, the LED lights up warning you to get ready for the shot. • To cancel self-timer operation, turn the film advance mode selector/self-timer to another position. 3 • In Single Servo AF with FocusPriority, self-timer operates only when the in-focus indicator ˇ appears in the viewfinder. Once self-timer starts, shutter will be released even though subject is out of focus at the time of shutter release. • Selecting buLb automatically sets the shutter speed to 1/250 sec. 83 P400 (E) 02.12.27 6:42 PM Page 84 LONG TIME EXPOSURE At buLb setting, the shutter stays open as long as the shutter release button remains depressed. To avoid camera shake, which may cause picture blur, use a tripod. Use of remote control accessories, such as Nikon Remote Cord MC-20 or MC-30, Modulite Remote Control Set ML-3 is also recommended. 1 Long Time Exposures from 40 sec. to c 30 minutes can also be selected using Custom Setting #19. See page 90. Alert LED can be set to blink while Long Time Exposure using Custom Setting #11. See page 89 84 Select ¢ for Manual exposure mode by rotating MainCommand Dial while pressing ¨ button. P400 (E) 02.12.27 6:42 PM Page 85 Remove finger from ¨ button and rotate MainCommand Dial until buLb (for Bulb exposure) appears in top LCD panel and viewfinder. 2 Use of new batteries is recommended when performing Long Time Exposure. Fully depress shutter release button. Hold shutter release button as long as desired. To close the shutter, remove finger from shutter release button. 3 Note that duration of an exposure may depend on the condition of the batteries inside the F5. At low temperatures, batteries weaken and continuous shooting time shortens. We recommend using lithium batteries or Ni-MH Battery Unit and keeping the camera body warm in cold conditions. See page 168 for continuous shooting time of the F5. 85 P400 (E) 02.12.27 6:42 PM Page 86 MULTIPLE EXPOSURE Multiple exposure consists of two or more exposures of one or more subjects on the same frame. Activate multiple exposure by rotating the Main-Command Dial while pressing Z (multiple exposure) button. Z appears in top LCD panel. 1 86 Take first shot by depressing the shutter release button. Film will not advance to next frame. Z blinks in top LCD panel. 2 P400 (E) 02.12.27 6:42 PM Page 87 To take more than two shots on the same frame, rotate Main-Command Dial while pressing Z button before taking the second shot (while Z is blinking in top LCD panel). The shutter can be released on the same frame as many times as desired until multiple exposure is canceled. Take next shot. Multiple exposure is canceled automatically and the film advances to the next frame. Z disappears from the top LCD panel. 3 To cancel multiple exposure before taking first shot, rotate Main-Command Dial while pressing Z button so Z disappears from the top LCD panel. • Multiple exposure cannot be canceled after taking the first shot. To avoid exposure, cover the lens with a lens cap and take the second shot. • Note that in multiple exposure operation, exposure compensation will be required depending on subject brightness, background brightness and number of exposure. You must determine the necessary exposure compensation and make adjustment. • When data imprint is selected on the MF-28 or MF-27 camera back, the data is imprinted only at the first shot. You can set c multiple exposure mode to remain on after taking the second shot using Custom Setting #13. See page 89. To cancel multiple exposure mode in this case, rotate the Main-Command Dial while pressing Z (multiple exposure) button so Z disappears from the top LCD panel. 87 P400 (E) 02.12.27 6:42 PM Page 88 CUSTOM SETTING Using the Custom Setting feature, you can create a combination of functions that are different from the initial factory settings. The functions listed below can be selected with the F5. When the F5 is connected to a personal computer via the optional Personal Computer Connecting Cord MC-33 or MC-34 and optional Photo Secretary for F5, even more Custom Setting choices are available in addition to the following. For more about Phto Secretary for F5, see page 102. By using Two-Button Reset, selected Custom Setting menu can be reset to its default setting. See page 34. 3 0 5 1 2 88 Selecting Custom Setting: To store a combination of your Custom Settings, select 0-A or 0-b and make settings #1 to #24. Then, you can easily switch between one combination of your settings (A) and another (B) by selecting 0-A or 0-b. To change settings in (A) or (B), select 0-A or 0-b first and change settings #1 to #24. When Two-Button Reset is performed, all the settings in selected Custom Setting menu 0-A or 0-b are reset to their default setting. If you wish to keep any of the settings in 0-A or 0-b do not perform Two-Button Reset. Continuous Servo AF: The F5’s default setting with Continuous Servo AF is Release-Priority. To set it to FocusPriority instead, simply choose 1-1. Single Servo AF: The F5’s default setting with Single Servo AF is Focus-Priority. To set it to Release-Priority instead, simply choose 2-1. 4 6 Bracketing order: At the default setting in bracketing, shots are taken in progressive order from no compensation to negative compensation to positive compensation. To change the order and take the first shot with negative compensation, select 3-1. Autofocus activated when shutter release button is lightly pressed: At the default setting, autofocus is activated and lens starts focusing when the shutter release button is lightly pressed. To deactivate autofocus when the shutter release button is lightly pressed, select 4-1. Use the AF start button to start autofocus in this case. AE Lock: At the default setting, exposure is locked based on the conditions detected when the AE-L/AF-L button is pressed. In this case, shutter speed/aperture combination can be shifted in Programmed Auto exposure mode, shutter speed in Shutter-Priority Auto exposure mode and aperture in Aperture-Priority Auto exposure mode. To lock the shutter speed and aperture, select 5-1. Direction of Command Dial rotation: At the default setting, turning the Command Dials counterclockwise increases selected value or selects a certain function. To change the direction to clockwise, select 6-1. P400 (E) 7 02.12.27 6:42 PM Page 89 AE Lock when shutter release button is lightly pressed: At the default setting, exposure does not lock when the shutter release button is lightly pressed. To lock exposure when the shutter release button is lightly pressed, select 7-1 in Custom Setting. 8 Auto film loading when camera back is closed: At the default setting, loaded film is advanced to frame #1 when the camera back is closed and the shutter release button is fully depressed once. By selecting 8-1 in Custom Setting, film automatically advances to frame #1 when the camera back is closed after film loading. 9 Film advance speed in CH: To change the film advance speed to 6 fps from 7.4 fps with AA-type alkaline or lithium batteries or 8 fps with Ni-MH Battery Unit in (CH) Continuous High-Speed film advance mode, select CH6. 10 Film advance speed in CL: To change the film advance speed to 5 fps or 4 fps from 3 fps in (CL) Continuous LowSpeed film advance mode, select CL5 or CL4. 11 Alert LED in buLb exposure: To enable alert LED to blink during buLb exposure, select 11-1. 12 Auto film stop: At the default setting, film advances until the end of the film roll is reached. To stop film advance at frame number 35 or 36, select E35 or E36. 13 Multiple exposure: Multiple exposure mode is automatically canceled when the second shot is taken. To continue multiple exposure after the second shot, select 13-1. 14 Center-Weighted Metering: 75% of the meter’s sensitivity is concentrated in the 12mm-dia. circle within the viewfinder and 25% outside this circle in Center-Weighted Metering. To change the size of the circle to 8mm, 15mm, 20mm, average on entire viewfinder or create a custom-size (by Computer Link) diameter, select C 8, C15, C20, A or PC. 15 Time delay for auto meter-switch-off: Camera’s meter remains on approximately 8 seconds after the shutter release button is pressed. To change the delay time to 4 sec., 16 sec. or 32 sec., select L 4, L 16 or L32. 89 P400 (E) 02.12.27 6:42 PM Page 90 16 Self-timer duration: At the default setting, shutter is released 10 sec. after the shutter release button is fully depressed. To change the delay time to 2 to 60 sec. in one sec. steps, select L 2, L 3, L 4, ... or L60. 17 Bracketing in manual exposure mode: At the default setting in Manual Exposure mode, shutter speed shifts with each shot taken when bracketing is performed. To change the shifting factor to a shutter speed/aperture combination, shutter speed, aperture, flash output level, select 11A, 10A, 01A or 00A. 18 Focusing screen compensation: To change the EV level of the focusing screens C, F, G1-G4 or U to –2.0 to +2.0 in 0.5EV steps, select -2.0, -1.5, -1.0, -0.5, 0, 0.5, 1.0, 1.5 or 2.0. See the instruction manual of the focusing screen for the required compensation value. 19 Prolonged shutter speed: Long Time Exposures of 40 sec. to 30 minutes can be selected by rotating the MainCommand Dial when the Custom Setting is set to 19-1. Selectable shutter speeds are: 40 sec., 50 sec., 1 min., 1.5 min., 2 min., 3 min., 4 min., 5 min., 6 min., 8 min., 10 min., 13 min., 15 min., 20 min., 25 min. and 30 min. Shutter speed is not varied when bracketing is performed and electronic analog display does not appear. 90 20 TTL flash sync speed: To set the top TTL flash sync speed at 1/300, 1/250, 1/200, 1/160, 1/125, 1/100, 1/80 or 1/60, select 3oo, 25o, 2oo, 16o, 125, 1oo, 8o or 6o. 1/300 can be selected only in Shutter-Priority Auto or Manual exposure mode. (To select 1/300, set 3oo after selecting flash sync speed of X25o by rotating the Main-Command Dial. Shutter speed is controlled to 1/250 in Programmed Auto or Aperture-Priority Auto exposure mode.) • When 1/300 TTL High-Speed Sync is selected, see page 116 to determine the correct flash shooting distance range. 21 AE-L/AF-L button: At the default setting, pressing the AEL/AF-L button locks both focus and exposure. To change this to lock exposure or focus only, select AEL or AFL. 22 Aperture setting via Sub-Command Dial: At the default setting, aperture can be changed by rotating the SubCommand Dial. To disable this function, select 22-1. Set aperture by rotating the lens’ aperture ring in this case. 23 > and < focus indicators: To stop display of > or < (focused at rear or in front of the subject) in viewfinder in Autofocus mode, select 23-1. 24 Auto Exposure/Flash Exposure Bracketing: At the default setting when bracketing is activated, both Auto Exposure and Flash Exposure Bracketing are performed. To change this to perform only Auto Exposure Bracketing or Flash Exposure Bracketing, select 01E or 10E. P400 (E) 02.12.27 6:42 PM Page 91 To Make a Custom Setting Select Custom Setting mode by rotating Main-Command Dial while pressing · (Custom Setting Menu) button. 1 Keeping · button pressed, rotate Main-Command Dial further to select your desired function number, then rotate Sub-Command Dial to set your desired option. c appears in the rear LCD panel. 2 To cancel all Custom Settings, press ‚ and · buttons simultaneously. Custom Settings except for #0 are canceled to initial factory settings. To cancel each Custom Setting, select the setting you want to cancel, then select “0” (default setting). Refer to the following tables for available functions and options, and to the Custom Setting’s corresponding LCD panel displays of numbers and symbols. Note that those numbers with 0 at the end represent the F5’s default settings. 91 P400 (E) 02.12.27 6:42 PM Page 92 Number Function 92 0 Selecting Custom Setting 1 Continuous Servo AF 2 Single Servo AF 3 Bracketing order 4 Autofocus activated when shutter release button is lightly pressed 5 AE Lock 6 Direction of Command Dial rotation 7 AE Lock when shutter release button is lightly pressed 8 Auto film loading when camera back is closed Your option Custom setting A Custom setting B Release-Priority Focus-Priority Focus-Priority Release-Priority 0, –, + –, 0, + Activated Disabled Detected value Controlled value Default Opposite Disabled Activated Disabled Enabled (when power is on) LCD panel 0-A 0-b 1-0 1-1 2-0 2-1 3-0 3-1 4-0 4-1 5-0 5-1 6-0 6-1 7-0 7-1 8-0 8-1 P400 (E) 02.12.27 6:42 PM Page 93 Number Function 9 Film advance speed in CH 10 Film advance speed in CL 11 Alert LED in buLb exposure 12 Auto film stop 13 Multiple exposure 14 Center-Weighted Metering 15 Time delay for auto meter-switch-off 16 Self-timer duration Your option Default (8 fps) 8 fps, 6 fps Default (3 fps) 5 fps, 4 fps, 3 fps Does not blink Blinks Disabled 35 frame, 36 frame, Disabled Canceled after release Remains after release Default (75% concentration in 12mm dia. area) (75% concentration in ) 8mm dia.,12mm dia., 15mm dia., 20 mm dia., Average, Custom (by PC) Default (8 sec.) 4, 8, 16, 32 sec. Default (10 sec.) 2 to 60 sec. LCD panel 9-0 CH8, CH6 10-0 CL5, CL4, CL3 11-0 11-1 12-0 E35, E36, -13-0 13-1 14-0 C 8, C12, C15, C20, A, PC 15-0 L 4, L 8, L16, L32 16-0 L 2, L 3, L 4 ... L60 93 P400 (E) 02.12.27 6:42 PM Page 94 Number Function 94 17 Bracketing in Manual exposure mode 18 Focusing screen compensation 19 Prolonged shutter speed 20 TTL flash sync speed 21 AE-L/AF-L button 22 Aperture setting via Sub-Command Dial 23 > and < focus indicators 24 Auto Exposure/Flash Exposure Bracketing Your option Default (shifts shutter speed) Shifts shutter speed/aperture combination, shutter speed, aperture, flash output level 0 –2.0 to +2.0 in 0.5EV steps Disabled Enabled Default (1/250) 1/300, 1/250, 1/200, 1/160, 1/125, 1/100, 1/80, 1/60 Default (Double lock) AE Lock, AF Lock, Double lock Enabled Disabled Displayed Not displayed Default (Auto Exposure/Flash Exposure Bracketing) Auto Exposure Bracketing, Flash Exposure Bracketing, Auto Exposure/Flash Exposure Bracketing LCD panel 17-0 11A, 10A, 01A, 00A 18-0 -2.0, -1.5, -1.0 ... 2.0 19-0 19-1 20-0 3oo, 25o, 2oo, 16o, 125, 1oo, 8o, 6o 21-0 AEL, AFL, L-L 22-0 22-1 23-0 23-1 24-0 01E, 10E, 11E P400 (E) 02.12.27 6:42 PM Page 95 CONTROLS IN DETAIL This chapter explains how to operate the various controls of the F5. 95 P400 (E) 02.12.27 6:42 PM Page 96 VIEWFINDER DIOPTER—To see clearly ILLUMINATION SWITCH—To view LCD through viewfinder panels in the dark With supplied Multi-Meter Finder DP-30, adjusting the finder diopter enables near- or far-sighted photographers to adjust the eyepiece diopter within a continuous range of from –3 to +1. Pull the diopter adjustment knob and rotate it in either direction until the focused image in 12mm-dia. circle within the viewfinder appears sharp, then push back to lock. In dim light, rotate Power/LCD panel illumination switch toward Œ to illuminate the top and rear LCD panels. Power/LCD panel illumination switch automatically returns to ON position, but LCD panels remain illuminated as long as the camera’s meter is on. After shutter is released, the illumination automatically turns off. 96 P400 (E) 02.12.27 6:42 PM Page 97 USING NON-DX CODED FILM FILM REWIND CRANK—To rewind film manually With non-DX coded film, rotate the Main-Command Dial while pressing the ° (film speed) button to set film’s ISO number in the rear LCD panel. The usable range for manual film speed setting is ISO 6 to 6400 in 1/3 steps. • If DX-coded film is loaded but manual film speed setting is selected, camera gives priority to the manually set ISO number. To rewind film manually, press the film rewind button 1 „, then lift the film rewind crank and turn in the direction of arrow until the film leader is rewound completely back into the cartridge. Turn the film rewind crank a few times more after the tension is gone. • Frame counter counts backward when film is rewound manually with the meter on. • Do not press the shutter release button until the film leader is rewound completely back into the cartridge. Doing so may damage the shutter curtain. 1 97 P400 (E) 2 98 02.12.27 6:42 PM Page 98 Open camera back and remove film cartridge. P400 (E) 02.12.27 6:42 PM Page 99 MIRROR LOCKUP LEVER—To lock reflex mirror in up position When using super-telephoto lenses or performing photomicrography, it is necessary to reduce camera vibration to the absolute minimum. Lock the reflex viewing mirror in the “up” position by rotating the mirror lockup lever counterclockwise until it stops. With the mirror lock up, you cannot operate the camera in any Auto Exposure or autofocus mode, even though the viewfinder LCD may indicate otherwise. Any indication of light in the LCD is a result of spurious light entering through the viewfinder eyepiece. When the reflex mirror is locked in the up position, make sure not to leave the camera in direct sunlight. The sunlight may enter through the lens and may damage the shutter curtain. 99 P400 (E) 02.12.27 6:42 PM Page 100 DEPTH-OF-FIELD PREVIEW BUTTON ACCESSORY SHOE In Aperture-Priority Auto or Manual exposure mode, depress the depth-of-field preview button to stop the lens down to the aperture set with the Sub-Command Dial. In Programmed Auto or Shutter-Priority Auto exposure mode, the lens will be stopped down to the automatically set aperture. The viewed image becomes progressively darker as the aperture gets smaller. Those portions of the picture that appear in focus when the button is pressed are within the depth of field. • During preview with lenses with meter coupler, attaining correct exposure is not possible, because exposure must be determined by full-aperture metering. • Use Metering system other than Spot. • During preview, aperture cannot be adjusted and autofocus is not possible. Located at the top of the Multi-Meter Finder DP-30, the ISOtype hot shoe allows direct mounting of a wide range of Nikon dedicated electronic Speedlights, including SB-50DX, SB-29, SB-28/28DX, SB-27, SB-26, SB-25, SB-24, SB-23, SB-22s, SB-22, SB-20, SB-18, SB-16B and SB-15. Other Nikon Speedlights may be mounted with a compatible Nikon flash unit coupler. 100 P400 (E) 02.12.27 6:42 PM Page 101 SYNC TERMINAL REMOTE TERMINAL The F5 features a separate sync terminal that accepts all standard PC-type plug-in sync cords. A 10-pin remote terminal is provided for remote operation of the F5 with Personal Computer Connecting Cord MC-33 or MC-34, Remote Cord MC-20 or MC-30, etc. For available remote control accessories, see page 145. • Make sure to keep the supplied cap on when not using the remote terminal. 101 P400 (E) 02.12.27 6:42 PM Page 102 OPERATION WITH PERSONAL COMPUTER Remote control functions When the F5 is connected to a MS® Windows® 95- or Macintosh®- based personal computer via optional Personal Computer Connecting Cord MC-33 or MC-34 and loaded with AC-1WE for MS® Windows® 95 or AC-1ME for Macintosh® Photo Secretary for F5, shooting information stored in the F5 can be downloaded to your personal computer. Also, downloaded shooting information can be linked to scanned image data (from an image scanner) for editing on your personal computer. For details, see Photo Secretary for F5 instruction manual. t appears in the rear LCD while data transmission is taking place with a personal computer. For further information, contact an authorized Nikon dealer or service center. MS® Windows® 95 is a U.S. registered trademark of Microsoft Corporation. Macintosh® is a registered trademark of Apple Computer, Inc. 102 • Downloading of function settings, exposure conditions and shooting information on the F5*. • Additional Custom Settings are available. Various combinations of settings can be edited and stored. • Exposure mode, Metering system, shutter speed or aperture settings can be selected on a personal computer. • Selection of special shooting modes, such as Multiple Exposure, Interval Timer, Long Time Exposure, and simultaneous shooting on several camera bodies. • Program Shooting in which combinations of various settings in preset order can be selected. • Files in Program Shooting can be edited and stored. • Shooting information data on each film roll can be downloaded and stored as a file. * Shooting data of up to 80 rolls of 36-exposure films can be stored in the F5. The storage size can be doubled by increasing the memory. P400 (E) 02.12.27 6:42 PM Page 103 Filing/editing shooting data • Storage of image data scanned from a scanner as PHOTOCD format data. • Linkage of each shooting information file with image data. • Editing of each shooting information file. • Deletion of shooting information data files or image data files. • Display of image data or shooting information data in any of the following three formats: 1. Thumbnail & Text 2. Text 3. List • Fast search of shooting information data/image data. • Printout of shooting information data/image data. • Display of image data in five different resolutions. 103 P400 (E) 02.12.27 6:42 PM Page 104 SELF-DIAGNOSTIC SHUTTER SYSTEM The F5 is equipped with a self-diagnostic shutter that automatically controls the shutter speed for each release of the shutter. The self-diagnostic shutter automatically detects inaccuracies in performance and re-adjusts the shutter speed for accuracy for subsequent shooting. 104 If a malfunction is detected or the shutter curtain fails to operate, an alert LED blinks and Err blinks in the top LCD panel and in the viewfinder. In this case, turn the camera power off once then turn it on again. If the alert LED and Err in the top LCD panel stop blinking, the malfunction is corrected. If the alert LED and Err in the top LCD resume blinking, turn the camera power off and take it to an authorized Nikon dealer or service center for repair. P400 (E) 02.12.27 6:42 PM Page 105 CHANGING CAMERA BACK Optional Data Back MF-27 and Multi-Control Back MF-28 are available for the F5. While sliding the camera back lock release, lift film rewind knob. The camera back will pop open. 1 Remove the camera back while pressing the camera back lock release. • Be sure not to touch the camera back contacts, film pressure plate or film pressure roller. 2 To attach camera back Attach the camera back while pressing the camera back lock release. 105 P400 (E) 02.12.27 6:42 PM Page 106 CHANGING VIEWFINDERS The Multi-Meter Finder DP-30 is the F5’s standard finder. To remove the finder, turn the camera power off first and push the finder release button toward the finder and, while holding it in, slide the viewfinder away from the lens. To attach the finder, slide the finder in until it clicks into place. Make sure that the finder release button is up to its original level. See pages 133-134 for interchangeable viewfinders. • Make sure the viewfinder is attached when shooting. If the shutter is released without a viewfinder attached, stray light may enter through the focusing screen and film may be fogged. • When removing a viewfinder, be careful not to leave smudges or fingerprints. Place the detached viewfinder on a soft, clean cloth. 106 P400 (E) 02.12.27 6:42 PM Page 107 CHANGING FOCUSING SCREENS In addition to the advanced EC-B-type screen supplied with the F5 camera, 13 other optional interchangeable focusing screens are available for the F5. For a chart listing all interchangeable screens, see pages 135-136. 1 Make sure the camera power is off and remove the finder. Insert your fingernail under the rear edge of the screen and lift the focusing screen out. 3 To install a screen, simply insert the front edge under the central ridge, then push the rear edge down into place. 2 When removing a focusing screen, be careful not to leave smudges or fingerprints. Place the detached finder screen on a soft, clean cloth. 107 P400 (E) 02.12.27 6:42 PM Page 108 FLASH PHOTOGRAPHY You can enjoy the excitement of the Nikon F5 camera’s advanced flash technology by using Nikon’s advanced Speedlight such as SB-28 or SB-27. With the F5 system you’ll discover the benefits of flash for more picture-taking situations than ever. Make fill-flash a standard part of your photography. Brighten dull scenes and erase harsh shadows for beautiful portraits. With the F5 system’s automatic operation, you can make better flash pictures than ever before. There’s no other system like it in the world. 108 P400 (E) 02.12.27 6:42 PM Page 109 TTL AUTO FLASH—Automatic Balanced Fill-Flash and Standard TTL Flash Types of TTL Auto Flash TTL auto is recommended for most flash shooting conditions. With a compatible Nikon TTL Speedlight set for TTL auto flash operation (see chart on page 124 for compatibility), you can choose from either Automatic Balanced Fill-Flash or standard TTL flash. Standard TTL flash, while automatic in operation, does not automatically compensate for complex lighting conditions. With Automatic Balanced Fill-Flash, working together with the 3D Color Matrix or Center-Weighted Metering, flash output is automatically compensated to balance the ambient light exposure setting. The result is improved overall exposures and a better balance between ambient light and the fill-flash. The type of TTL auto flash performed by the F5 depends on the Speedlight and lens combination in use, as well as the metering system and exposure mode selected. 109 P400 (E) 02.12.27 6:42 PM Page 110 3D Multi-Sensor Balanced Fill-Flash Center-Weighted Fill-Flash 3D Multi-Sensor Balanced Fill-Flash can be performed only with a combination of F5 camera, D- or G-type Nikkor lens and Nikon SB-50DX/SB-28/SB-28DX/SB-27/SB-26/SB-25 AF Speedlight. In this flash mode, just after you depress the shutter release button and before the shutter is activated, the SB-50DX/SB-28/SB-28DX/ SB-27/SB-26/SB-25 will fire a series of imperceptible pre-flashes (Monitor Pre-flashes) that are detected by the F5’s TTL Multi Sensor, then analyzed for brightness and contrast. Furthermore, it integrates Distance Information from the D- or G-type Nikkor lens in use, with other exposure control information, to automatically compensate the flash output level so that flash output and ambient light are balanced. The Monitor Pre-flashes enable 3D Multi-Sensor Balanced Fill-Flash to ensure a correct exposure even in difficult situations, including scenes with a very reflective object such as a mirror or a white wall, or scenes with a very dark background. 3D Multi-Sensor Balanced Fill-Flash can be performed with the Matrix or Center-Weighted Metering. This feature can be used with all AF Nikkor lenses. Use CenterWeighted Metering to determine the ambient exposure control settings, and the F5’s TTL flash sensor will automatically control the flash output for a balanced fill-flash effect. Experiment by determining which brightness value you want to use for the ambient exposure setting and which flash compensation setting you want to use. This combination of features enables you to maintain exceptional control over the system, yet allows the system’s automation to work for you at the same time. Multi-Sensor Balanced Fill-Flash When the F5 camera and SB-50DX/SB-28/SB-28DX/SB-27/ SB-26/SB-25 are used with a non-D/G-type Nikkor lens, MultiSensor Balanced Fill-Flash, which offers the same flash output control system but without Distance Information, is performed. Multi-Sensor Balanced Fill-Flash can also be performed with the SB-24 and other dedicated Speedlights that do not have the Monitor Pre-flash feature. 110 Standard TTL Flash In standard TTL flash, automatic flash output level compensation is not available. This means that, even though the main subject is correctly exposed, the background may not be. With SB-50DX, SB-28/28DX, SB-27, SB-26, SB-25 or SB-24, standard TTL flash offers manual selection of the flash output level compensation instead of having the computer do it automatically. So, with SB-50DX, SB-28/28DX, SB-27, SB-26, SB25 or SB-24, you can intentionally cancel Automatic Balanced Fill-Flash by pressing the Speedlight’s M button (or MODE button with the SB-50DX/SB-28/28DX). P400 (E) 02.12.27 6:42 PM Page 111 With SB-50DX/SB-28/SB-28DX/SB-27/SB-26/SB-25 Lens D-type AF Nikkor lens, G-type AF Nikkor lens, AF-S and AF-I Nikkor lens Non-D/G-type AF Nikkor lens (except for AF Nikkor for F3AF) and AI-P-Nikkor lens PC Micro-Nikkor 85mm f/2.8D*1 Other lenses (or with accessories) Metering system 3D Color Matrix Center-Weighted Spot Matrix Center-Weighted Spot Matrix Center-Weighted Spot Matrix Center-Weighted Spot Exposure mode Aperture-Priority Auto Programmed and Shutter-Priority Auto Manual 3D Multi-Sensor Balanced Fill-Flash Standard TTL flash Multi-Sensor Balanced Fill-Flash Standard TTL flash — 3D Multi-Sensor Balanced Fill-Flash Standard TTL flash Center-Weighted Fill-Flash*2 Center-Weighted Fill-Flash*3 Center-Weighted Fill-Flash*4 Center-Weighted Fill-Flash Standard TTL flash *1 The camera’s exposure metering and flash control system do not work properly when shifting and/or tilting the lens, or when using an aperture other than the maximum aperture. *2 Metering system and exposure mode automatically switch to Center-Weighted and Aperture-Priority Auto, respectively. *3 Metering system automatically switches to Center-Weighted. *4 Exposure mode automatically switches to Aperture-Priority Auto. • In the Speedlight’s LCD readout, ˆ and ¬ appear for Automatic Balanced Fill-Flash with TTL Multi Sensor, ˆ and Ø appear for Center-Weighted Fill-Flash. • By pressing the Speedlight’s M button (or MODE button with the SB-50DX/SB-28/28DX), you can cancel Automatic Balanced Fill-Flash control to perform standard TTL flash operation. For standard TTL flash, the Speedlight’s LCD panel shows ˆ without ¬/Ø. For details, see the Speedlight manual. 111 P400 (E) 02.12.27 6:42 PM Page 112 With SB-24 Lens Metering system D- or G-type AF Nikkor lens, non-D/G- Matrix type AF Nikkor lens (except for AF Center-Weighted Nikkor for F3AF) and AI-P-Nikkor lens Spot Matrix PC Micro-Nikkor 85mm f/2.8D*1 Center-Weighted Other lenses (or with accessories) Spot Matrix Center-Weighted Spot Programmed and Shutter-Priority Auto Exposure mode Aperture-Priority Auto Multi-Sensor Balanced Fill-Flash Standard TTL flash — Multi-Sensor Balanced Fill-Flash Standard TTL flash Center-Weighted Fill-Flash*2 Center-Weighted Fill-Flash*3 Center-Weighted Fill-Flash*4 Center-Weighted Fill-Flash Standard TTL flash *1 The camera’s exposure metering and flash control system do not work properly when shifting and/or tilting the lens, or when using an aperture other than the maximum aperture. *2 Metering system and exposure mode automatically switch to Center-Weighted and Aperture-Priority Auto, respectively. *3 Metering system automatically switches to Center-Weighted. *4 Exposure mode automatically switches to Aperture-Priority Auto. • In all the cases listed above, ˆ and Ø for Automatic Balanced Fill-Flash appear in the SB-24’s LCD panel. • By pressing the SB-24’s M button, you can cancel Automatic Balanced Fill-Flash control to perform standard TTL flash operation. For standard TTL flash, the SB-24’s LCD panel shows ˆ and blinking Ø. For details, see the SB-24 manual. 112 Manual P400 (E) 02.12.27 6:42 PM Page 113 With SB-29, SB-23, SB-22s, SB-22 , SB-20, SB-21B*1, SB-16B , SB-15, SB-14*2, SB-11*2 or SB-140*2 Lens Metering system D- or G-type AF Nikkor lens, non-D/G- Matrix type AF Nikkor lens (except for AF Center-Weighted Nikkor for F3AF) and AI-P-Nikkor lens Spot Matrix PC Micro-Nikkor 85mm f/2.8D*3 Center-Weighted Spot Matrix Other lenses Center-Weighted (or with accessories) Spot Programmed and Shutter-Priority Auto Exposure mode Aperture-Priority Auto Manual Multi-Sensor Balanced Fill-Flash Standard TTL flash — Standard TTL flash Center-Weighted Fill-Flash*4 Center-Weighted Fill-Flash*5 Center-Weighted Fill-Flash*6 Center-Weighted Fill-Flash Standard TTL flash *1 Although possible with SB-21B, Automatic Balanced Fill-Flash is not recommended. SB-21B is not available in EU countries. *2 Via TTL Remote Cord SC-23. *3 The camera’s exposure metering and flash control system do not work properly when shifting and/or tilting the lens, or when using an aperture other than the maximum aperture. *4 Metering system and exposure mode automatically switch to Center-Weighted and Aperture-Priority Auto, respectively. *5 Metering system automatically switches to Center-Weighted. *6 Exposure mode automatically switches to Aperture-Priority Auto. 113 P400 (E) 02.12.27 6:42 PM Page 114 Shutter Speed/Aperture for Each Exposure Mode in TTL Auto Flash Camera’s exposure mode Programmed Auto (¡) Shutter-Priority Auto (™) Aperture-Priority Auto (£) Manual (¢) Shutter speed 1/250 sec. to 1/60 sec.1) Manually set as desired from 1/250 sec. to 30 sec.2) 1/250 sec. to 1/60 sec. Manually set as desired from 1/250 sec. to 30 sec.2) Aperture Set lens to its minimum aperture. Aperture is automatically controlled between f/2.83) and lens minimum aperture Manually set as desired 1) With Slow Sync or Rear-Curtain Sync, the automatically controlled shutter speed range extends down to 30 sec. 2) If you set the shutter speed at 1/500 sec. or faster, camera automatically shifts to 1/250 sec. as soon as the Speedlight is turned on. The manually set shutter speed indication blinks in the LCD panel, while the viewfinder shows 25o. With optional Speedlight (except for a Speedlight for F3) in TTL Auto Flash mode, 1/300 TTL High-Speed Sync is possible with option available in Custom Setting. See page 90. 3) Maximum available aperture depends on film speed in use. See chart below. Maximum available aperture for each film speed in Programmed Auto exposure mode ISO film speed Maximum available aperture 25 50 100 200 400 800 1000 f/2.8 f/3.3 f/4 f/4.8 f/5.6 f/6.7 f/7.1 As film speed increases by one step, maximum available aperture is stopped down by 1/2 f/stop. If you are using a lens with a maximum aperture smaller than listed above, the entire aperture range will be automatically controlled. 114 P400 (E) 02.12.27 6:42 PM Page 115 Note for selecting aperture • Make sure your subject is within flash shooting distance range. • The larger the aperture (the smaller the f-number) you select, the farther the maximum shooting distance, whereas the smaller the aperture (the larger the fnumber), the nearer the maximum shooting distance will be. • If subject distance remains the same, the larger the aperture you select, the less the depth of field; however, Speedlight recycling time is shorter. On the other hand, the smaller the aperture, the greater the depth of field will be, but recycling time will be longer. Note for selecting shutter speed 1/300 TTL High-Speed Sync c In Shutter-Priority Auto or Manual exposure mode with an optional Speedlight (except for a Speedlight for F3) set to TTL Auto Flash mode and connected to the F5, you can select 1/300 sec. TTL HighSpeed Sync. To select 1/300 TTL High-Speed Sync, select 3oo in Custom Setting #20 after selecting flash sync speed of X25o by rotating the Main-Command Dial. See page 90. • When 1/300 TTL High-Speed Sync is selected, guide number of the attached Speedlight is limited. See page 116 to determine the flash shooting distance range. Top TTL flash sync speed can be set at 1/300, 1/250, 1/200, 1/160, 1/125, 1/100, 1/80 or 1/60 using Custom Setting #20. See page 90. With a slower shutter speed, a smaller aperture is automatically selected, resulting in a shorter shooting distance range. 115 P400 (E) 02.12.27 6:42 PM Page 116 Flash shooting distance range in 1/300 TTL High-Speed Sync When 1/300 TTL High-Speed Sync is selected in TTL Auto Flash mode, the guide number of the attached Speedlight (except for a Speedlight for F3) is limited to the values shown in the table below. Therefore, maximum flash shooting distance cannot be calculated from each Speedlight’s flash shooting distance scale or flash shooting distance range table provided. ISO 100, m/ft., 20°C/68°F Zoom-head position 18mm 20mm 24mm 28mm 35mm 50mm 70mm 85mm Guide number 8/26 8/26 11/36 12/39 14/46 16/53 18/59 19/62 (m/ft.) To obtain maximum flash shooting distance in 1/300 TTL HighSpeed Sync: Guide number Flash-to-subject distance = ——————— f/stop 116 Example: Speedlight attached—SB-26, film sensitivity—ISO 100, zoom-head position—35mm, aperture—f/5.6 14 46 —— = 2.5m or —— = 8.2 ft. 5.6 5.6 Therefore, the maximum flash shooting distance of the example is 2.5m or 8.2 ft. • The minimum flash shooting distance can be obtained from the Speedlight’s flash shooting distance scale or flash shooting distance range table provided. • For film sensitivity other than ISO 100, multiply the following coefficient to the guide number provided. ISO number 25 50 200 400 800 Coefficient 0.5 0.71 1.4 2.0 2.8 • To select 1/300 TTL High-Speed Sync, set the camera’s exposure mode to Shutter-Priority Auto or Manual, then set the TTL flash sync speed to 3oo with the Custom Setting #20 (page 90). Other settings are the same as the Automatic Balanced Fill-Flash (page 118). • In 1/300 TTL High-Speed Sync, under-exposure warning may not appear on the Speedlight when flash has fired at maximum output. Confirm exposure with the ready-light in the viewfinder. • Since the 1/300 TTL High-Speed Sync is an unique setting, warning indications after flash is fired do not appear. Make sure to confirm the flash shooting distance range. P400 (E) 02.12.27 6:42 PM Page 117 Selecting flash sync mode While pressing the flash sync mode (±) button, rotate MainCommand Dial to select desired flash sync mode. The flash sync mode changes as in the following sequence: (¡/£) ⁄ › ¤ Front-Curtain Sync (Normal Sync) Slow Sync (™/¢) ‹ Rear-Curtain Sync 117 P400 (E) 02.12.27 6:42 PM Page 118 TTL Auto Flash Operation The difference between Automatic Balanced Fill-Flash and standard TTL flash is in whether the flash output level is automatically compensated or not. Operation is the same. • Usable film speed range in TTL auto flash is ISO 25 to 1000. 1 2 3 Set camera’s metering system and exposure mode, referring to the table on pages 111-113. Turn Speedlight on. Set Speedlight’s mode selector to TTL. • With the SB-23, setting the mode selector to TTL simultaneously turns the Speedlight on. Look through the viewfinder, compose picture and lightly press shutter release button, to confirm exposure indication in the LCD readout. In autofocus operation, also confirm that in-focus indicator (/) appears. • Do not block the flash or AF-assist illuminator LED during flash photography. • In Programmed or Shutter-Priority Auto exposure mode, if you fail to set CPU Nikkor lens other than G-type to minimum aperture, ƒEE blinks. 4 118 Confirm exposure and shooting distance. Refer to the shooting distance bars of SB-28/28DX, SB-27, SB-26, SB-25 or SB-24, or the flash shooting distance range table of the SB-23, SB-22s, SB-22 or SB-20. (See page 116 when 1/300 TTL High-Speed Sync is selected.) For details, see Speedlight’s manual. 5 6 Confirm that ready-light is on, then fully depress shutter release button to take a picture. P400 (E) 02.12.27 6:42 PM Page 119 If ready-light blinks for a few seconds after shooting: Flash has fired at maximum output, but the light might have been insufficient for correct exposure of subject. Confirm shooting distance and, if necessary, move closer to the subject, or select a wider aperture. 119 P400 (E) 02.12.27 6:42 PM Page 120 SLOW SYNC—To make dark background more visible Without Slow Sync, the automatically controlled shutter speed is controlled between 1/250 sec. and 1/60 sec. When flash pictures are taken with this rather narrow shutter speed range in dim light, the subject will appear bright and well exposed, but the background may come out very dark, almost black. Setting Slow Sync extends the automatic controlled shutter speed range down to 30 sec., enabling background details to come out. Slow Sync Normal Sync 120 P400 (E) 1 2 02.12.27 6:42 PM Page 121 Set camera’s exposure mode to ¡ for Programmed Auto or £ for Aperture-Priority Auto. While pressing the camera’s ± button, rotate MainCommand Dial until ¤ appears in the rear LCD panel. Then follow steps 2-6 of TTL Auto Flash Operation, on page 118. Use a tripod to prevent camera shake. 121 P400 (E) 02.12.27 6:42 PM Page 122 REAR-CURTAIN SYNC—To create a natural-looking stream of light Normally in flash synchronization, the Speedlight fires at the beginning of the exposure. When the shutter speed is slow, the result is a streaking light pattern in front of the subject. When Rear-Curtain Sync is set, the Speedlight fires at the end of the exposure, turning available light into a stream of light that follows the flash-illuminated moving subject. Since Rear-Curtain Sync is especially effective at a slow shutter speed, Slow Sync is automatically set at the same time that Rear-Curtain Sync is set in Programmed Auto or AperturePriority Auto exposure mode. To set a specific shutter speed, set the F5 to Shutter-Priority Auto or Manual exposure mode. • When using the SB-26, SB-25 or SB-24, note that the RearCurtain Sync setting on the camera body is ignored. You must set the Speedlight unit itself for Rear-Curtain Sync. Rear-Curtain Sync with slow shutter speed Front-Curtain Sync with slow shutter speed 122 P400 (E) 1 2 02.12.27 6:42 PM Page 123 Set camera’s exposure mode to ™ for Shutter-Priority Auto or ¢ for Manual exposure mode. Set Rear-Curtain Sync. For a Speedlight other than the SB-26, SB-25 or SB-24: While pressing the camera’s ± button, rotate MainCommand Dial until ‹ appears in the rear LCD panel. For SB-26, SB-25 or SB-24 users: Set the Speedlight’s sync mode selector to REAR position. In Programmed Auto or Aperture-Priority Auto exposure mode, Slow Sync is simultaneously set and ⁄ appears in the rear LCD panel. (See your Speedlight’s instruction manual.) The Rear-Curtain Sync setting on the camera is ignored. • You can use Rear-Curtain Sync in either non-TTL auto or manual flash mode. For non-TTL auto or manual flash mode, see your Speedlight manual. Note that in either flash mode, you must use Aperture-Priority Auto or Manual exposure mode. • Rear-Curtain Sync cannot be used with a studio flash system since the correct synchronization cannot be attained. See pages 4 and 126. Next, follow steps 2-6 for TTL Auto Flash Operation, on page 118. When using a slow shutter speed, mount the F5 on a tripod to prevent camera shake. 123 P400 (E) 02.12.27 6:42 PM Page 124 AVAILABLE SPEEDLIGHT AND FLASH FUNCTIONS The table below shows the available flash modes for each Nikon Speedlight. Speedlight Available flash mode Connection SB-28/28DX, SB-27, SB-26, SB-25, SB-24, SB-22s, SB-22, SB-20, Direct SB-16B2) and SB-15 SB-50DX, SB-29, SB-23 and SB-21B2) Direct SB-21A2) and SB-16A2) Via Flash Unit Coupler AS-6 Via TTL Remote Cord SC-23 Via Sensor Remote Cord SC-13 SB-11, SB-14 and SB-1404) with sensor unit or Sync Cord SC-11 or SC-15 TTL Auto1) Non-TTL Auto2) Manual3) Yes Yes Yes Yes No Yes No Yes Yes Yes Yes Yes No Yes Yes 1) In TTL auto flash mode, the F5 performs Automatic Balanced Fill-Flash or standard TTL flash. For details, see pages 109-113. 2) The difference between SB-21A and SB-21B, or between SB-16A and SB-16B, is the type of controller attached. (For details, see the relevant Speedlight manual). 3) Set the F5’s exposure mode to Aperture-Priority Auto or Manual. 4) Ultraviolet and infrared photography can be performed in manual flash mode only. : Automatic Balanced Fill-Flash possible. When using Programmed Auto exposure mode Only TTL auto flash mode can be used. 124 P400 (E) 02.12.27 6:42 PM Page 125 Nikon Speedlights, combined with the F5 camera, offer various features and functions. The main features and functions are listed below. Autofocus using AF-assist illuminator SB-28/28DX, SB-26 or SB-25 Yes SB-27 Yes SB-24 Yes SB-50DX, SB-23, SB-22s, SB-22 or SB-20 Yes SB-16B No SB-29 or SB-21B No SB-15, SB-11, SB-14 or SB-140 No Speedlight Speedlight SB-28/28DX, SB-26 or SB-25 SB-27 SB-24 SB-50DX, SB-23, SB-22s, SB-22 or SB-20 SB-16B SB-29 or SB-21B SB-15, SB-11, SB-14 or SB-140 Manual flash output level compensation Yes Yes Yes No No No No Slow Sync Rear-Curtain Sync Repeating Flash Yes Yes Yes Yes Yes Yes Yes Yes Yes Yes Yes Yes Yes Yes Yes No Yes No No No No FP High-Speed Sync 1/300 TTL High-Speed Sync* Yes No No No No No No Yes Yes Yes Yes Yes No No * 1/300 TTL High-Speed Sync is available using Custom Setting. See page 90. 125 P400 (E) 02.12.27 6:42 PM Page 126 NOTES ON FLASH PHOTOGRAPHY • Use only Nikon Speedlights. Other units may damage the camera’s electrical circuits due to incompatible voltage requirements*, electric contact alignment or switch phase. * Not compatible with 250V or higher. • When using a special Speedlight, such as a studio strobe system, with a time-lag provision or one with a long flash duration (i.e., Medical-Nikkor 120mm f/4*), adjust the shutter speed down to 1/125 sec. or slower. * Medical-Nikkor 120mm f/4 is not available in EU countries. • SB-26 can be used for multiple flash photography in its wireless mode. See Speedlight instruction manual for details. • When the center focus area is not selected, AF-assist illuminator does not light. 126 • For multiple flash photography with the F5, if the electric current in the synchro circuit exceeds a certain level, you may not be able to take a second shot. Take care that the combined total of the coefficient (numbers shown in parentheses below) for all Speedlights used at any one time does not exceed 20 at 20˚C (68°F) or 13 at 40˚C (104°F). SB-50DX (1) SB-29 (1) SB-28/28DX (1) SB-27 (1) SB-26 (1) SB-25 (1) SB-24 (1) SB-23 (4) SB-22s (1) SB-22 (6) SB-21 (4) SB-20 (9) SB-19 (2) SB-18 (16) SB-17 (4) SB-16 (4) SB-15 (4) SB-14 (1) SB-12 (1) SB-11 (1) If you are unable to take a second shot, disconnect the master Speedlight from the camera, or turn each of the Speedlights off and on. This resets the circuits so you can resume shooting. This also applies when using any non-Nikon studio Speedlight system. P400 (E) 02.12.27 6:42 PM Page 127 MISCELLANEOUS The Nikon F5 is a high-performance, precision instrument, designed to give you superior pictures. You’ll want to take good care of your camera to ensure the best performance. Take time to review this section thoroughly, and you will add to the pleasure of taking pictures. We’ve also included a detailed section with technical specifications and a glossary of terms that will help you understand the F5 system more fully. Please read them carefully. 127 P400 (E) 02.12.27 6:42 PM Page 128 LENS Lens Compatibility Chart With AF Nikkor lenses or some other lenses in combination with the TC-16A autofocus teleconverter, the F5 provides full autofocus operation. Full manual focusing, or manual focusing with the F5’s electronic rangefinder, is available with virtually all Nikon F-mount Nikkor and Nikon lenses. Use the following table as a guide. * Exposure compensation is necessary depending on the focusing screen used. See accompanied “Focusing Screen Selector Chart” for details. Lens/accessory AF-S Nikkor AF-I Nikkor D-type AF Nikkor1) G-type AF Nikkor Non D-type AF Nikkor AI-P Nikkor AI Nikkor AI-modified Nikkor2) Non-AI-type Nikkor3) Medical-Nikkor 120mm f/4 Reflex Nikkor PC-Nikkor D-type PC Nikkor Teleconverter TC-16A AI-type Teleconverter Bellows Focusing Attachment PB-6 PK-Series Rings 128 R R R R R Y4) Y4) T T T T T T R7) T Focusing Manual with electronic rangefinder R R R R R R5) R5) R5) R5) R T R6) R6) T R8) Manual with matte field R R R R R R R R R R R R R T R T R8) R T R8) R Autofocus R: Compatible Y: Compatible with conditions T: Incompatible 1) This camera is compatible with the Vibration Reduction function of the VR Nikkor lens. 2) AI-modification is no longer available. 3) F5 camera body must be modified to connect Non-AI-type Nikkor lenses. See page 132. 4) With TC-16A attached and maximum effective aperture of f/5.6 or faster (lens aperture of f/3.5 or faster). 5) With maximum aperture of f/5.6 or faster. 6) Without shifting and/or tilting. 7) With maximum aperture of f/3.5 or faster. However, some lenses cannot be used with the TC-16A. (See TC-16A instruction manual.) 8) With maximum effective aperture of f/5.6 or faster. P400 (E) 02.12.27 6:42 PM Lens/accessory AF-S Nikkor AF-I Nikkor D-type AF Nikkor G-type AF Nikkor1) Non D-type AF Nikkor AI-P Nikkor AI Nikkor AI-modified Nikkor Non-AI-type Nikkor2) Medical-Nikkor 120mm f/4 Reflex Nikkor PC-Nikkor D-type PC Nikkor3) Teleconverter TC-16A AI-type Teleconverter Bellows Focusing Attachment PB-6 PK-Series Rings Page 129 Programmed Auto R R R R R R T T T T T T Exposure mode Shutter-Priority Aperture-Priority Auto Auto R R4) R R4) R R4) R R4) R R4 R R4) T R T R T Y5) T T T R T Y8) Manual R4) R4) R4) R4) R4) R4) R R R6) Y7) R R9) T T T T T T T R R R R R T T Y5) R6) T T R R 1) G-type Nikkor lens has no aperture ring. Aperture should be selected from camera body. 2) F5 camera body must be modified to connect Non-AI-type Nikkor lenses. See page 132. 3) The camera’s exposure metering and flash control system do not work properly when shifting and/or tilting the lens, or when using an aperture other than the maximum aperture. 4) Aperture can also be selected via SubCommand Dial. 5) By stop-down metering. (Release shutter while pressing depth-of-field preview button.) 6) By stop-down metering. 7) With shutter speed set to 1/125 sec. or slower. 8) By stop-down metering. Exposure determined by presetting lens aperture. Exposure must also be determined before shifting; use AE-L/AF-L button before shifting. 9) By stop-down metering. Exposure determined by presetting lens aperture. Exposure must also be determined before shifting. 129 P400 (E) 02.12.27 6:42 PM Lens/accessory AF-S Nikkor AF-I Nikkor D-type AF Nikkor G-type AF Nikkor Non D-type AF Nikkor AI-P Nikkor AI Nikkor AI-modified Nikkor Non-AI-type Nikkor1) Medical-Nikkor 120mm f/4 Reflex Nikkor PC-Nikkor D-type PC Nikkor2) Teleconverter TC-16A AI-type Teleconverter Bellows Focusing Attachment PB-6 PK-Series Rings 130 Page 130 3D Color Matrix Metering R R R R R5) R5) T T T T T T Metering system Center-Weighted Metering R3) R3) R3) R3) R3) R3) R R Y6) Y6) R Y7) R5) T T R R8) R8) R R8) R8) T R9) R9) T R9) R9) Spot Metering R4) R4) R4) R4) R4) R4) R R Y6) Y6) R Y7) 1) F5 camera body must be modified to connect Non-AI-type Nikkor lenses. See page 132. 2) The camera’s exposure metering and flash control system do not work properly when shifting and/or tilting the lens, or when using an aperture other than the maximum aperture. 3) Distribution of sensor output balance can be changed. 4) Spot area selectable with certain conditions. 5) Matrix Metering instead of 3D Color Matrix Metering is possible. 6) By stop-down metering. 7) Without shifting. 8) Exposure compensation necessary depending on the lens. 9) By stop-down metering. Exposure compensation may be necessary. P400 (E) 02.12.27 6:42 PM Page 131 The following Nikkor lenses cannot be attached to the F5: The following Nikkor lenses can be attached after camera body modification (at charge): • Fisheye 8mm f/8 • Old-type 21mm f/4 • Old-type PC 35mm f/3.5 • Old-type Reflex 1000mm f/6.3 • AF Teleconverter TC-16 • 80mm f/2.8 for F3AF • 200mm f/3.5 for F3AF • K2 Ring • Non-AI lens • Lens with Focusing Unit AU-1 (400mm f/4.5, 600mm f/5.6, 800mm f/8 and 1200mm f/11) • PC 28mm f/4 (Factory Serial No. 180900 or below) • PC 35mm f/2.8 (No. 851001 to 906200) • Reflex 1000mm f/11 (No. 142361 to 143000) • Reflex 2000mm f/11 (No. 200111 to 200310) • ED 180-600mm f/8 (No. 174041 to 174180) • ED 360-1200mm f/11 (No. 174031 to 174127) • 200-600mm f/9.5 (No. 280001 to 300490) The following Nikkor lenses and accessories can be attached under certain conditions: • Old-type Reflex 500mm f/8: Rotate tripod mounting collar 90° • Reprocopy Outfit PF-4: Camera Holder Adapter PA-4 is required • Bellows Focusing Attachment PB-6: Attachment ring is required 131 P400 (E) 02.12.27 6:42 PM Page 132 ATTACHING NON-AI LENS To attach a non-AI lens, the F5’s meter coupling lever must be modified beforehand. Contact an authorized Nikon dealer or service center for modification. After modification, follow the instructions for attaching a non-AI lens. 1 Push the meter coupling lever up while pressing the lever lock release. When mounting an AI lens again, make sure to press the meter coupling lever down to its original position. 132 Position lens in the camera’s bayonet mount so that the mounting indexes on the lens and camera body are aligned. Taking care not to press the lens release button, twist lens counterclockwise until it locks into place. 2 P400 (E) 02.12.27 6:42 PM Page 133 OPTIONAL ACCESSORIES Interchangeable Viewfinders In addition to the standard Multi-Meter Finder DP-30, the F5 accepts various other interchangeable viewfinders. Available metering systems depend upon the type of viewfinder used. See pages 49-50 for the exposure metering system and instruction manual of each finder for details. To remove the finder (see page 106), press the finder release button and slide the finder toward you. To attach the finder, slide the finder as far as it goes. The chart below shows the compatibility of viewfinders and metering systems. Multi-Meter Finder DP-30 AE Action Finder DA-30 6X High-Magnification Finder DW-31 Waist-Level Finder DW-30 3D Color Matrix R Center-Weighted R Spot (size) R (4mm ø*1)) T*2) T T R*3) T T R*4) (3.2mm ø) R*4) (3mm ø) R (3mm ø) *1) With focusing screens other than EC-B/EC-E, Spot size is 6mm dia. *2) Five-segment Matrix Metering is available with AE Action Finder DA-30. *3) Center-Weighted Metering area of 12mm dia. cannot be changed using Custom Setting. Metering area does not shift with the focus area. *4) Metering area does not shift with the focus area. 133 P400 (E) 02.12.27 6:42 PM Page 134 AE Action Finder DA-30 Perfect for situations where normal viewing is difficult or impossible, such as when wearing a helmet or goggles, or with the camera encased in a special housing for underwater photography. Rubber hood and rubber eyepiece cover are provided. 134 6X High-Magnification Finder DW-31 For critical high-magnification close-up work and photomicrography. Its sophisticated optical system provides a clear, sharp view of the entire image at approx. 6X magnification. Fitted with a –5 to +3 diopter adjustment for individual eyesight correction, plus a rubber eyecup and rubber eyepiece cover. Waist-Level Finder DW-30 Used with the F5 when shooting at a low angle or on a copystand. Fold-up-type viewing hood provided. The built-in flip-up magnifier provides approx. 5X magnification at the center of the image for accurate focusing. P400 (E) 02.12.27 6:42 PM Page 135 Interchangeable Focusing Screens Nikon offers you a choice of 14 interchangeable focusing screens. The advanced EC-B-type screen is supplied with the F5 as standard equipment. See list of all interchangeable screens. For details on changing focusing screens, see page 107. • Focusing screens for F4, F3, F2 or F series cannot be used with the F5. • When a Multi-Meter Finder DP-30 or AE Action Finder DA-30, which has built-in exposure sensors, is attached to the F5, EV level of the focusing screen may require compensation depending upon the focusing screen, lens, or teleconverter attached. To compensate the EV level of a focusing screen, use Custom Function #18. (See page 90.) For required compensation value for each focusing screen, see the instruction manual of the focusing screen. • Matrix Metering is available only with screens EC-B, EC-E, B, E, J, A and L. Type EC-B Fine-ground matte field with focus brackets. Selected focus brackets are displayed darker for easy confirmation. Good for general photography. Type EC-E Matte field focusing screen with etched horizontal and vertical lines added to a type EC-B focusing screen to aid you when composing a picture. Type B Matte/Fresnel field with 12mm-dia. reference circle and focus brackets. Good for general photography. Type U Matte/Fresnel field with 12mm-dia. reference circle and focus brackets. Suitable with telephoto lenses longer than 200mm. Type C Fine-ground matte field with 5mm-dia. clear spot and cross hair. For photomicrography, astrophotography and other high-magnification applications that use parallax for focusing on aerial images. 135 P400 (E) 02.12.27 6:42 PM Page 136 Type M Fine-ground matte field with 5mmdia. clear spot and cross hair for use in parallax focusing on aerial images, plus millimeter scales for calculating magnification of individual objects or for measuring objects. Brilliant image in dim light. Suitable for close-ups, photomicrography and other highmagnification applications. Type E Matte/Fresnel field with 12mm-dia. reference circle, focus brackets and etched horizontal and vertical lines. Ideal for architectural photography. Type J Matte/Fresnel field with central 5mm-dia. microprism focusing spot and 12mm-dia. reference circle. Good for general photography. 136 Type A Matte/Fresnel field with 5mm-dia. BriteView split-image rangefinder. Rapid and accurate focusing for subjects with both straight lines and ill-defined contours. Suitable for general photography. ;; ;; ;; Type L Same as Type A but with BriteView split-image rangefinder line at a 45° angle. Rapid and accurate focusing for subjects with both straight lines and ill-defined contours. Suitable for general photography. Type G Clear Fresnel field with extra-bright 12mm-dia. microprism focusing spot for viewing and focusing in poor light. Four models (G1, G2, G3, G4) available for lenses of different lengths. Depth-of-field preview not available. P400 (E) 02.12.27 6:42 PM Page 137 Filters Nikon filters can be divided into four types: screw-in, drop-in, rear-interchange and slip-in type. As shown in the table on page 138, there are Nikon filters available for use with color and black-and-white film, color film only, black-and-white film only and for light with a wavelength in the 300nm to 950nm range. Nikon offers such a wide variety because photographic needs vary. For example, a color-temperature converting filter can balance the color temperature of the light and your film. Filters for black-and-white film alter contrasts and tones to suit your purposes. Polarizing filters reduce the amount of light reflected from non-metallic surfaces like glass and water. And ND (Neutral Density) filters limit the light entering the camera and are useful on bright, sunny days. With the F5, filter factor need not be considered except for ND 400x and X1 filters and when Spot Metering is selected. Compensate exposure –2/3 EV when using ND 400x filter and +1 EV when using X1 filter. Note that when special filters available from manufacturers other than Nikon are used, autofocus or electronic rangefinder may not operate properly. • Use circular-polarizing filter C-PL instead of polarizing filter Polar. Polarizing filter cannot be used with the F5. • Use NC filter when using the filter to protect the lens. • Moire may occur when shooting subject against bright light or if a bright light source is in the frame. Remove the filter before shooting in this case. • Use Center-Weighted Metering when using a filter with filter factor such as ND 8x or ND 4x, or a filter for black-and-white film. The effect for the 3D Color Matrix Metering may not be fully obtained with these filters. 137 P400 (E) 02.12.27 6:42 PM Page 138 ( ) = f/stop compensation Film Type Designation Neutral Black & white Skylight and color Ultraviolet Ultraviolet Light Yellow Medium Deep Black & white Orange Red Light Green Deep Soft Polarizing Circular-polarizing Special photography (black & white and color) Neutral density Amber Color Blue 138 Light Deep Light Medium Deep NC L 1BC L 37C L 39 Y 44 Y 48 Y 52 O 56 R 60 X0 X1 Soft 1 Soft 2 Polar C-PL ND 2xS ND 4x ND 4xS ND 8x ND 8xS ND 400x A2 A 12 B2 B8 B 12 Filter factor Daylight Tungsten light 1 1 1 1 1 1 1 1 1.5 (1/2) 1 1.7 (2/3) 1.2 (1/3) 2 (1) 1.4 (1/2) 3.5 (1 5/6) 2 (1) 8 (3) 5 (2 1/3) 2 (1) 1.7 (2/3) 5 (2 1/3) 3.5 (1 5/6) 1 1 1 1 2-4 2-4 (1-2) (1-2) 2 (1) 2 (1) 4 (2) 4 (2) 8 (3) 8 (3) 400 (8.6) 400 (8.6) 1.2 (1/3) 2 (1) 1.2 (1/3) 1.6 (2/3) 2.2 (1 1/6) 39 R R R R R R R Screw-in attachment size (mm) Drop-in Rear-interchange Slip-in 52 58 62 72 77 82 95 122 160 Series IX Bayonet R R R R R R R R R R R R R R R R R R R R R R R R R R R R R R R R R R R R R R R R R R R R R R R R R R R R R R R R R R R R R R R R R R R R R R R R R R R R R R R R R R R R R R R R R P400 (E) 02.12.27 6:42 PM Page 139 Power Sources Optional Camera Backs Ni-MH Battery Unit MN-30 Ni-MH Battery Unit MN-30 is designed for using the Ni-MH rechargeable battery with the F5. Compared to regular AA-type alkaline batteries, the Ni-MH battery is more durable and maintains better performance at low temperatures. Multi-Control Back MF-28 Multi-Control Back MF-28 enables imprinting of any of the following data: date, time, frame number, serial upcount number, fixed number, shutter speed, aperture, exposure compensation value, or any desired letters/numbers up to 6 digits inside the frame or up to 22 digits between frames. The MF-28 also enables the camera to be used for various other advanced functions. Ni-MH Battery Charger MH-30 MH-30 is the exclusive charger for Ni-MH Battery Unit MN-30. Data Back MF-27 A compact alternative to the MF-28, it allows you to imprint the data desired — year/month/day, month/day/year, day/year/month, day /hour/minute — or leave the film blank. External Power Cord MC-32 Especially recommended when using the F5 for extended studio use, the MC-32 connects 12V external power source to the F5. 139 P400 (E) 02.12.27 6:42 PM Page 140 Optional Speedlights Speedlight SB-28 The SB-28 offers a variety of convenient features to enhance your flash photography. • Fully Automatic Fill-Flash including Multi-Sensor Balanced FillFlash, Matrix Balanced Fill-Flash, Center-Weighted Fill-Flash. When used with a D-type lens, it also offers 3D Multi-Sensor Balanced Fill-Flash. • Standard TTL flash • AF-assist illuminator • Automatic power zoom coverage from 24mm to 85mm • FP High-Speed Sync Flash • Rear-Curtain Sync Flash • Repeating Flash 140 Speedlight SB-27 • Compact and lightweight Speedlight • Fully Automatic Fill-Flash including Multi-Sensor Balanced FillFlash, Matrix Balanced Fill-Flash, Center-Weighted Fill-Flash. When used with a D-type lens, it also offers 3D Multi-Sensor Balanced Fill-Flash. • Standard TTL flash • AF-assist illuminator • Automatic power zoom coverage from 24mm to 50mm • Rear-Curtain Sync Flash • Built-in diffuser card and bounce flash adapter Speedlight SB-23/SB-22s SB-23/SB-22s is equipped with an AF-assist illuminator that enables autofocus even in total darkness. Various types of balanced fill-flash photography and other operations possible. P400 (E) 02.12.27 6:42 PM Page 141 Personal Computer Links Nikon F5 connected to the personal computer TTL Remote Cord SC-17 Use coiled cord SC-17 for TTL auto flash operation when using a Speedlight off an F5 fitted with either a Multi-Meter Finder DP-30 or AE Action Finder DA-30. The SC-17 provides automatic setting of sync speed and the same ready-light indication as if the flash unit were directly mounted on the camera. The SC-17 comes with two TTL multiple flash terminals and one tripod socket. It is approx. 1.5m (4.9 ft.) long. MS® Windows® 95/Macintosh® Photo Secretary AC-1WE or AC-1ME for F5 Nikon Photo Secretary for F5 links the F5 and your MS® Windows® 95- or Macintosh®-based personal computer via Personal Computer Connecting Cord MC-33 or MC-34. Various F5 operations can be set from your personal computer and shooting data stored on the F5 can be downloaded and manipulated on your personal computer. TTL Remote Cord SC-24 Use the SC-24 for TTL auto flash operation when using a Speedlight off an F5 fitted with either a 6X High-Magnification Finder DW-31 or Waist-Level Finder DW-30. The SC-24 comes with two TTL multiple flash terminals and one tripod socket. It is approx. 1.5m (4.9 ft.) long. MS® Windows® 95 is a U.S. registered trademark of Microsoft Corporation. Macintosh® is a registered trademark of Apple Computer, Inc. 141 P400 (E) 02.12.27 6:42 PM Page 142 Viewing Accessories DK-2 Eyepiece Correction Lenses Five lenses — –3, –2, 0, +1 and +2m–1 — are available. When used with the diopter adjustment dial of the Multi-Meter Finder DP-30, the combined adjustment range will extend from –5 to +4m–1. Rubber Eyecup DK-2 The eyecup prevents stray light from entering the viewfinder from the rear and allows eyeglass wearers to use the F5 without fear of scratching their glasses. DK-7 DG-2 DR-4 Right-Angle Viewing Attachment DR-4 Excellent for copy work, the DR-4 provides an upright, unreversed image for right-angle viewing. Individual eyesight adjustments are possible. Eyepiece Magnifier DG-2 Provides 2X magnification of the central portion of the finder image with Eyepiece Adapter DK-7. Eyesight adjustment provided. Useful for critical focusing in close-up photography. Eyepiece Adapter DK-7 Lets you attach the DR-3 or DG-2 to the Multi-Meter Finder DP-30’s eyepiece. 142 P400 (E) 02.12.27 6:42 PM Page 143 Close-Up Accessories PK-11A PK-12 PK-13 Auto Extension Rings Compact and lightweight, Nikon Auto Extension Rings slide on and off your camera in seconds for a wide range of reproduction ratios. Models include the PK-11A, 12 and 13. Lens aperture information is relayed via the PK ring to the camera, resulting in an exposure that is determined by TTL full aperture metering. Exposure modes usable: Aperture-Priority Auto or Manual. Bellows Attachment PB-6 Mounts between the F5 and the lens for close-up and macro photography. Lets you vary lens extension at the twist of a knob, for reproduction ratios of 1:1.1 to 4:1 with a normally mounted 50mm lens. The lens can also be mounted in reverse to provide aberration correction in the extreme close-up range. The PB-6 has a stop-down lever so you can use stop-down metering. Usable exposure modes are Aperture-Priority Auto and Manual. 143 P400 (E) 02.12.27 6:42 PM Page 144 Repro-Copy Outfit PF-4 Enables you to make high-quality photographic copies of photographs, illustrations, drawings and diagrams. 144 Macro Adapter Ring BR-2A Fits between camera and lens to enable a lens to be mounted in reverse; an inexpensive means of obtaining a relatively high reproduction ratio. The BR-2A also increases the working distance for normal or wideangle lenses. Focusing Stage PG-2 Simplifies close-up focusing when using a tripod-mounted F5. P400 (E) 02.12.27 6:42 PM Page 145 Remote Control Accessories MC-20 MC-30 MC-21 Remote Cord MC-20 Enables remote firing of the F5 and setting of long time exposures up to 9 hrs. 59 min. 59 sec. The LCD tells you the exposure time. Remote Cord MC-30 Enables remote firing with a trigger-lock function. MC-23 MC-25 Extension Cord MC-21 Available for 10-pin remote accessories. Connecting Cord MC-23 Connects two F5 cameras for simultaneous shutter release. Modulite Remote Control Set ML-3 Provides infrared remote control on three separate channels to enable automatic operation at distances up to 8 meters (26 ft.). Compact and easy to handle. Wireless multiple flash operation is also possible. Adapter Cord MC-25 Enables the use of Remote Cord MC-12B, Radio Control Set MW-2 and Modulite Remote Control Set ML-2. 145 P400 (E) 02.12.27 6:42 PM Page 146 SPECIAL FOCUSING SITUATIONS IN AF Autofocus operation depends on general lighting, subject contrast and detail, and other technical factors. In rare situations where autofocus (and manual focus with Electronic Rangefinder) A. Very dark subject Focus manually with clear matte field, or for Single Servo AF, focus on another brighter subject located at the same distance, then lock the focus and recompose (pages 70-71). To perform autofocus with Speedlight’s AF-assist illuminator, use a Nikon AF Speedlight (SB-50DX, SB-29, SB-28/28DX, SB-27, SB-26, SB25, SB-23, SB-22s, SB-22 or SB-20). 146 is not possible, ? blinks telling you to focus manually with the clear matte field (page 48) or perform autofocus on another subject located at the same distance. B. Low-contrast subject Focus manually with clear matte field, or for Single Servo AF, focus on another subject at the same distance but with more contrast, then lock focus and recompose (pages 70-71). C. Strongly backlit subject, bright subject with shiny surface such as silver or aluminum, or scene in which there is a pronounced difference in brightness. Use Single Area AF mode and select subject’s focus area (page 38) or focus manually with clear matte field. P400 (E) 02.12.27 6:42 PM Page 147 In the following situations, ignore in-focus indicator /. • Subject obscured by an object, such as a fence, in the foreground Use Single Area AF mode and select subject’s focus area (page 38) or focus manually with clear matte field. • With an extremely bright object near your subject Use Single Area AF mode and select subject’s focus area or focus manually with clear matte field. • When using a linear polarizing filter* or other special filter such as a soft-focus filter. Focus manually with clear matte field. * Circular polarizing filter can be used in connection with autofocus operation. 147 P400 (E) 02.12.27 6:42 PM Page 148 TROUBLESHOOTING LCD panel Viewfinder Shutter Cause and remedy No indication No indication Locked Batteries are completely exhausted or improperly installed. Rotate power switch to OFF and replace batteries. M appears — Can be released Batteries are nearing exhaustion. Have a fresh set ready. Locked Batteries are just about exhausted. Rotate power switch to OFF and replace batteries with a fresh set. Err blinks and E appears Err blinks and E appears Alert LED also blinks Locked Film is incorrectly positioned. Reload film. Err, a and s blink Err blinks Locked Non-DX-coded film or film with unacceptable DX code is loaded. Set manually to correct film speed. End blinks End blinks Alert LED also lights Locked Film has reached end of roll. Rewind film. M blinks ƒEE blinks 148 — ƒEE blinks Can be released In Programmed Auto or Shutter-Priority Auto exposure mode, lens is not set to the smallest aperture setting. Set lens to the smallest aperture. P400 (E) 02.12.27 6:42 PM LCD panel ƒ-- appears Page 149 Viewfinder ƒ-- appears Err blinks Err blinks Alert LED also blinks — Shutter Can be released Locked w appears when 3D Color Can be released Matrix Metering is selected. Cause and remedy • With built-in CPU lens in Aperture-Priority Auto or Manual exposure mode, lens is not set to the smallest aperture setting. To set aperture with the Sub-Command Dial, set lens to the smallest aperture. Aperture can also be set by rotating the lens aperture ring. In this case, ƒ-- remains in the viewfinder and top LCD panel, and aperture can only be confirmed through the aperture direct-readout in viewfinder. • Non-CPU lens is attached. Programmed Auto or Shutter-Priority Auto exposure mode cannot be selected. Set aperture by rotating lens aperture ring. In this case, aperture can only be confirmed through the aperture direct-readout in viewfinder. F5 has detected abnormality in the shutter diaphragm. Turn camera power off once and on again. If the same warnings continue to blink, take camera to an authorized Nikon dealer or service center. 3D Color Matrix Metering is set even though attached lens has no CPU; camera automatically resets meter to Center-Weighted Metering. ¡ or ™ blinks A appears Can be released Programmed Auto or Shutter-Priority Auto exposure mode is set even though attached lens has no CPU. Camera automatically resets exposure mode to Aperture-Priority Auto. — ? blinks Locked Autofocus (and manual focus with Electronic Rangefinder) is not possible. Focus manually. HI appears HI appears Can be released Overexposure possible. Lo appears Lo appears Can be released Underexposure possible. 149 P400 (E) 02.12.27 6:42 PM Page 150 LCD panel Viewfinder Shutter Selected shutter speed blinks 25o or Custom set sync speed appears Can be released In Shutter-Priority Auto or Manual exposure mode, selected shutter speed is faster than 1/250 or selected flash sync speed in Custom Setting. — fi blinks in red Can be released Flash fired at its full output and light might have been insufficient. Re-adjust focusing distance, aperture, flash shooting distance range, etc. and shoot again. z appears = blinks Can be released Auto Exposure/Flash Exposure Bracketing is selected. buLb blinks buLb blinks Locked t blinks — Alert LED blinks 150 Can be released Locked Cause and remedy buLb is set in Shutter-Priority Auto exposure mode. Set exposure mode to Manual or set another shutter speed. Shooting data is full in F5’s memory. Download data to your personal computer using the optional Personal Computer Connecting Cord MC-33 or MC-34 and the Photo Secretary for F5. If you continue shooting, the oldest data will be erased one roll at a time. With Photo Secretary for F5, shutter can be set to lock when memory is full. 2 „ lever is accidentally pressed. Pull the 2 „ lever to original position. P400 (E) 02.12.27 6:42 PM Page 151 CAMERA CARE TIPS 1. Do not touch the camera’s reflex mirror or focusing screen. Remove dust with a blower brush. 2. Do not touch the shutter curtains. 3. Do not touch the DX contacts. Keep them clean with a blower brush. 4. Clean the viewfinder eyepiece with a soft, clean cloth. Do not use alcohol. Caution! 5. Clean lens surface with a blower brush. To remove dirt and smudges, use a soft, clean cotton cloth or lens tissue moistened with ethanol (alcohol) or lens cleaner. Wipe in a circular motion from center to outer edge, taking care not to leave traces and not to touch the other lens parts. A spray gun-type blower may damage the optical glass if used to clean the lens, especially if ED glass is used for the front lens element. To avoid damage, hold the blower upright with its nozzle more than 30cm (approx. 12 inches) from the lens surface, and keep the nozzle moving so the stream of air is not concentrated in one spot. 151 P400 (E) 02.12.27 6:42 PM Page 152 6. Do not lubricate the camera. 7. Do not leave the camera in an excessively hot place. 10.If the camera malfunctions, take it immediately to an authorized Nikon dealer or service center. 11.Store the camera in a cool, dry place away from naphthalene or camphor (moth repellent). In a humid environment, store the camera inside a vinyl bag with a desiccant to keep out dust, moisture and salt. Note, however, that storing leather cases in vinyl bags may cause the leather to deteriorate. 152 8. Keep the camera away from water or moisture. When using the camera near water, guard against splashes, especially saltwater spray. 9. Make sure not to drop or bump the camera body/lens against a hard surface. Strong shock may cause malfunction. P400 (E) 02.12.27 6:42 PM Page 153 In certain cases, due to static electricity or poorly loaded batteries, the F5’s microcomputer may turn the camera off. For the same reason, film may not advance properly. In each of these cases, to resume operation, simply turn the power off, then on again, or remove batteries and install them again. Nikon cannot be held responsible for any malfunction resulting from use of the camera other than as specified in this manual. 153 P400 (E) 02.12.27 6:42 PM Page 154 NOTES ON BATTERIES 1. Keep batteries out of children’s reach. If someone accidentally swallows a battery, call a doctor immediately. 2. Do not disassemble, short circuit or heat batteries. Do not charge dry cells. 3. If you do not intend to use the camera for a long time, remove the batteries. 5. When replacing batteries, be sure to replace all batteries at the same time. Always use fresh batteries of the same brand. 6. Do not throw used batteries into a fire. 7. If the battery chamber is contaminated by battery leakage, take the camera to an authorized Nikon dealer. 154 4. Battery power diminishes at extremely low temperatures — make sure the batteries you buy are new, and wrap the camera body in something warm. P400 (E) 02.12.27 6:42 PM Page 155 GLOSSARY AE (Automatic Exposure) lock Balanced fill-flash operation Used to hold an automatically controlled shutter speed and/or aperture. Recommended when the photographer wants to control an exposure based on a scene’s particular brightness area with Center-Weighted or Spot Metering. A flash photography technique that balances flash illumination with the scene’s ambient light. This automatic operation utilizes the F5’s Automatic Balanced Fill-Flash System with TTL Multi Sensor and a compatible Nikon TTL Speedlight. Automatic Balanced Fill-Flash Continuous Servo AF A type of TTL auto flash operation which uses the camera’s exposure meter to control ambient light exposure settings, integrated with flash exposure control. That is, flash output level is automatically compensated to balance with ambient light, resulting in a better exposure for both subject and background. Nikon’s Automatic Balanced Fill-Flash system includes: 3D Multi-Sensor Balanced Fill-Flash, Multi-Sensor Balanced FillFlash, Matrix Balanced Fill-Flash, Center-Weighted Fill-Flash and Spot Fill-Flash. 3D Multi-Sensor Balanced Fill-Flash and MultiSensor Balanced Fill-Flash together comprise Automatic Balanced Fill-Flash with TTL Multi Sensor. Performance varies with the combination of camera body, Speedlight and lens used. Focus detection continues as long as shutter release button is lightly pressed and the reflex mirror is in the viewing position. Useful when the camera-to-subject distance is likely to change. CPU Central Processing Unit. The electronic component that controls an electronic product’s functions. AF Nikkor (including D-type Nikkor) and AI-P-Nikkor lenses have built-in CPUs. 155 P400 (E) 02.12.27 6:42 PM Page 156 Depth of field EV The zone of sharpest focus in front of, behind, and around the subject on which the lens is focused; can be previewed in the F5 and some other Nikon cameras. Exposure Value: A number representing the available combinations of shutter speeds and apertures that give the same exposure effect under conditions of similar scene brightness and ISO. At ISO 100, the combination of a one-second shutter speed and an aperture of f/1.4 is defined as EV1. The camera may be used only within the EV range of the exposure meter. For example, with the F5, the exposure metering range is from EV0 to EV20 for 3D Color Matrix Metering and Center-Weighted Metering, at ISO 100 with an f/1.4 lens. D-type AF Nikkor lenses AF Nikkor lenses that send Distance Information to the F5’s microcomputer. Used for 3D Color Matrix Metering or 3D MultiSensor Balanced Fill-Flash (with Nikon SB-50DX/SB-28/ SB-28DX/SB-27/SB-26/SB-25 Speedlight). DX code Film information code printed on film cartridge. When the F5 is set to its automatic film speed setting mode and DX-coded film is loaded, it senses the film speed (ISO 25 to 5000). 156 Exposure bracketing Shooting the same subject at a range of different exposures. The F5 camera provides Auto Exposure Bracketing/Flash Exposure Bracketing. Auto Exposure Bracketing: Auto Exposure Bracketing performs automatic exposure bracketing with varied shutter speed and/or aperture. Flash Exposure Bracketing: Enables a photographer to automatically bracket exposures at varied flash output levels, in TTL auto flash shooting, without changing the shutter speed and/or aperture. P400 (E) 02.12.27 6:42 PM Page 157 Exposure compensation Fill-flash Exposure compensation for available light is activated by changing the shutter speed and/or lens aperture. This is done by using AE-L/AF-L (Auto Exposure/Autofocus Lock) button or exposure compensation button, or by Auto Exposure Bracketing. In flash photography with a Nikon-dedicated TTL Speedlight, exposure compensation can also be performed by varying the amount of flash output. Camera-originated exposure compensation affects both the foreground subject and the background; variations in flash output amount affect only the foreground. A method of flash photography that combines flash illumination and ambient light, but does not attempt to balance these two types of illumination. Exposure control Programmed Auto: Camera sets both shutter speed and aperture for correct exposure. Shutter-Priority Auto: User selects shutter speed and camera sets matching lens aperture for correct exposure. Aperture-Priority Auto: User selects aperture and camera sets matching shutter speed for correct exposure. Manual: User selects both shutter speed and aperture, following or ignoring the meter’s recommendations to achieve the desired exposure. Flash output level compensation A control used to adjust a TTL auto flash operation, enabling an increase or decrease of flash output to lighten or darken the flash effect. Flash shooting distance range The distance range over which a flash can effectively provide light. Flash shooting distance range is controlled by the amount of flash output available. Each automatic Speedlight’s flash output varies from maximum duration to minimum duration. Close-up subjects will require lower (to minimum) output, while more distant subjects will require more light up to the maximum output. The flash shooting distance range varies with the aperture, film speed, etc. 157 P400 (E) 02.12.27 6:42 PM Page 158 Flash synchronization Focus Tracking Timing of the flash so it coincides with release of the camera’s shutter. There are two types of synchronization: Front-Curtain Sync, which fires the flash at the start of the exposure, and Rear-Curtain Sync, which fires the flash at the end of the exposure. Enables the camera to analyze the speed of the moving subject according to the focus data detected, and to obtain correct focus by anticipating the subject’s position—and driving the lens to that position—at the exact moment of exposure. f-number Flash sync speed Shutter speed at which the entire film frame is exposed when the flash is fired in flash shooting. The F5’s flash sync speed is 1/250 sec. or slower, changeable to 1/300 sec. with the Custom Setting. Flexible Program Flexible Program function temporarily shifts an automatically selected shutter speed/aperture combination while maintaining correct exposure. That is, a desired shutter speed or aperture can be selected in Programmed Auto exposure mode. Focus-Priority for autofocus Shutter cannot be released until the subject is in focus. For situations when an in-focus subject is important. With the F5 camera body, Focus-Priority is given to Single Servo AF mode while Release-Priority is given to Continuous Servo AF. Using Custom Setting, however, you can change the priority to Release-Priority Single Servo AF or Focus-Priority Continuous Servo AF. 158 The numbers on the lens aperture ring and in the camera’s LCD that indicate the relative size of the lens aperture opening. The fnumber series is a geometric progression based on changes in the size of the lens aperture, as it is opened and closed. As the scale rises, each number is multiplied by a factor of 1.4. The standard numbers for calibration are 1.0, 1.4, 2, 2.8, 4, 5.6, 8, 11, 16, 22, 32, etc., and each change results in a doubling or halving of the amount of light transmitted by the lens. Focal length The distance from the principal point to the focal point. In 35mm-format cameras, lenses with a focal length of approx. 50mm are called normal or standard lenses. Lenses with a focal length less than approx. 35mm are called wideangle lenses, and lenses with a focal length more than approx. 85mm are called telephoto lenses. Lenses which allow the user to continuously vary the focal length without changing focus are called zoom lenses. P400 (E) 02.12.27 6:42 PM Page 159 Front-Curtain Sync ISO film speed The flash fires an instant after the front curtain of a focal plane shutter has completed its travel across the film plane. This is the way the F5 operates with the flash sync mode at Normal Sync. (See “Rear-Curtain Sync”.) The international standard for representing film sensitivity. The higher the number, the greater the sensitivity, and vice versa. A film speed of ISO 200 is twice as sensitive as ISO 100, and half that of ISO 400 film. G-type AF Nikkor lenses LCD G-type AF Nikkor lens has no aperture ring; aperture should be selected from camera body. Unlike other CPU Nikkor lenses, aperture does not need to be set to minimum (largest fnumber). G-type AF Nikkor lenses send Distance Information to the F5’s microcomputer. Used for 3D Color Matrix Metering or 3D Multi-Sensor Balanced Fill-Flash (with Nikon SB-50DX/ SB-28/SB-28DX/SB-27/SB-26/SB-25 Speedlight). Liquid Crystal Display. The F5 has three: the panels on top and at the rear of the camera body, and inside the viewfinder. Guide number The guide number indicates the power of a flash in relation to ISO film speed. Guide numbers are quoted in either meters or feet. Guide numbers are used to calculate the f/stop for correct exposure as follows: guide number f/stop = ——————————— flash-to-subject distance Using a selected aperture, we can calculate the required flashto-subject distance with the formula: guide number flash-to-subject distance = ——————— f/stop Useful for determining the maximum flash-to-subject distance for flash photography. Manual flash Flash output is controlled manually in manual flash mode, unlike in auto flash mode, where flash output power varies automatically according to the selected aperture. Some Speedlights, including the Nikon SB-50DX, SB-28/28DX, SB-27, SB-26, SB25, SB-24 and SB-20, provide selectable manual outputs (full, 1/2, 1/4, 1/8, 1/16, etc.), while others provide full manual output only. 159 P400 (E) 02.12.27 6:42 PM Page 160 Matrix Metering system Monitor Pre-flash(es) An advanced exposure metering system using a multi-segment sensor and computer. Available in the F5 and other Nikon SLR cameras. 3D Color Matrix Metering: With Multi-Meter Finder DP-30 and D-type Nikkor lenses, 3D Color Matrix Metering is automatically activated with the F5. With the classic techniques of evaluating for 18% reflectance, factors such as brightness and contrast are primarily used to determine exposure. In addition, it is essential to evaluate each scene’s esthetic factors such as color to get the best exposure. The shadows of a building, cool with blue. A panoramic landscape with a bright blue sky. Or a winter scene covered with pristine white snow. The F5’s 3D Color Matrix Meter evaluates not only each scene’s brightness and contrast but, using a special Red-Green-Blue (RGB) sensor, it also evaluates the scene’s colors. Then its powerful microcomputer and database together guide it to unequaled exposure control. When performing Automatic Balanced Fill-Flash with TTL Multi Sensor, the Speedlight fires a series of scarcely visible preflashes to enable the camera’s computer to pre-analyze the scene. The TTL Multi Sensor inside the camera body reads the amount of reflected light, then the camera’s microcomputer determines the area of the TTL sensor to be used for flash output control and adjusts the flash output level. The Monitor Pre-flashes are visible but not recognizable. Rear-Curtain Sync Flash fires an instant before the second (rear) curtain of the focal plane shutter begins to move. When slow shutter speeds are used, this feature can create a blur effect from the ambient light, i.e., a flowing-light patterns following a moving subject with subject movement frozen at the end of the light flow. (See “Front-Curtain Sync”.) Release-Priority for autofocus Shutter can be released anytime (i.e., even when subject is not in focus). Helps you avoid missed opportunities when you are not concerned with absolute focusing precision. With the F5 camera body, Release-Priority is given to Continuous Servo AF mode while Focus-Priority is given to Single Servo AF. Using Custom Setting, however, you can change the priority to Focus-Priority Continuous Servo AF or Release-Priority Single Servo AF. 160 P400 (E) 02.12.27 6:42 PM Page 161 Single Servo AF TTL Once the subject is in focus, focus is locked. Useful for recomposing the picture. Through-the-Lens. Most SLR cameras have built-in meters which measure light after it has passed through the lens, a feature that enables exposure readings to be taken from the actual image about to be recorded on film, whatever the lens angle of view and regardless of whether a filter is used or not. Slow Sync A flash technique for using the flash at a slow shutter speed. Flash shooting in dim light or at night at a fast shutter speed often results in a flash-illuminated subject against a dark background. Using a slower shutter speed with the flash brings out the background details in the picture. Use of a slow shutter speed with Rear-Curtain Sync is particularly effective for illustrating the movement of a stream of light. The F5’s Slow Sync mode extends the automatically controlled shutter speed range (in Programmed Auto and Aperture-Priority Auto) down to 30 sec. TTL auto flash The camera’s light sensor measures flash illumination, as reflected by the subject on the film and shuts off the flash when measurement indicates a correct exposure. Because the sensor that controls the flash receives light through the lens, TTL auto flash can be used for bounce flash photography, fill-flash, multiple flash photography, etc. An additional advantage of TTL auto flash is that it enables you to use a wide range of aperture settings, while ensuring correct exposure. SLR Single Lens Reflex. A type of camera that allows you to see through the camera’s lens as you look in the camera’s viewfinder. Other camera functions, such as light metering and flash control, also operate through the camera’s lens. Vignetting Progressively diminished illumination on the film from the center to the corners. There are two kinds of vignetting—natural vignetting caused by the lens, and vignetting that is caused by improper use of accessories such as a lens hood or filter. Standard TTL flash A type of TTL auto flash that does not apply any automatic flash output level compensation. Flash output is controlled independently from the ambient light exposure measurement and, in most cases, illuminates a subject somewhat more strongly than with Automatic Balanced Fill-Flash, making the subject stand out distinctly from the background. 161 P400 (E) 02.12.27 6:42 PM Page 162 INDEX 3D Color Matrix Metering ——————————49 Accessory Shoe —————————————100 AE-L/AF-L Button —————————————72 AF Area Mode Dynamic AF Mode ————————————40 Single Area AF Mode———————————40 Aperture-Priority Auto Exposure Mode ————61 Auto Exposure/Flash Exposure Bracketing ——79 Autofocus —————————————————41 Special focusing situations in AF —————146 Automatic Balanced Fill-Flash ———————109 Basic Shooting ——————————————28 Battery Installing batteries ————————————19 Checking battery power —————————20 Notes on batteries ———————————154 Camera Care Tips—————————————151 Center-Weighted Metering —————————50 Composing the Picture ———————————26 162 Continuous Servo AF ————————————44 Continuous Shooting ————————————37 Custom Setting ——————————————88 Depth-of-Field Preview ——————————100 Exposure Metering System —————————49 Exposure Compensation ——————————74 Exposure Mode ——————————————52 Film Loading film ——————————————21 Non-DX-coded film ———————————97 Rewinding film —————————————32 Rewinding film manually —————————97 Film Advance Mode ————————————36 Flash Photography TTL auto flash —————————————109 Standard TTL flash ———————————109 Type of TTL auto flash——————————109 Shutter speed/aperture in TTL auto flash operation ———————114 Available Speedlight and flash functions ——124 Notes on flash photography ———————126 P400 (E) 02.12.27 6:42 PM Page 163 Flexible Program——————————————68 Focus Area ————————————————38 Focus Lock ————————————————70 Focusing Screen —————————————107 Illumination Switch —————————————96 Lens Mounting lens ——————————————17 Removing lens —————————————18 Lens compatibility ———————————128 Non-AI lens ——————————————132 Long Time Exposure ————————————84 Manual Focus ———————————————45 Manual Exposure Mode ——————————64 To obtain meter reading —————————75 Mirror Lockup Lever ————————————99 Multiple Exposure —————————————86 Rear-Curtain Sync ————————————122 Remote Terminal —————————————101 Self-Timer —————————————————82 Shutter Releasing shutter ————————————26 Self-diagnostic shutter —————————104 Shutter-Priority Auto Exposure Mode ————58 Single-Frame Shooting ———————————36 Single Servo AF ——————————————42 Slow Sync ————————————————120 Spot Metering ———————————————50 Sync Terminal ——————————————101 Troubleshooting —————————————148 Two-Button Reset —————————————34 Viewfinders————————————————133 Viewfinder Diopter —————————————96 Optional Accessories ———————————133 163 P400 (E) 02.12.27 6:42 PM Page 164 SPECIFICATIONS Type of camera Picture format Lens mount Lens Integral-motor autofocus 35mm singlelens reflex 24mm x 36mm (standard 35mm film format) Nikon F mount Nikkor and Nikon lenses having Nikon F mount* * With limitations; see pages 128-131. Focus mode AF area mode Autofocus area Autofocus mode Focus Tracking Autofocus detection system Autofocus detection range Autofocus lock 164 Autofocus, and Manual with Electronic Rangefinder Single Area AF and Dynamic AF selectable Five selectable focus areas Single Servo AF with Focus-Priority and Continuous Servo AF with ReleasePriority Automatically activated when subject moves Nikon Multi-CAM1300 autofocus module Approx. EV –1 to EV +19 (at ISO 100) Possible once stationary subject is in focus in Single Servo AF; in Continuous Servo AF, focus can be locked with AE-L/AF-L button Electronic rangefinder Available in Manual focus mode with AF Nikkor and other AI-type Nikkor lenses with a maximum aperture of f/5.6 or faster Exposure metering Three built-in exposure meters ––3D Color Matrix, Center-Weighted and Spot Metering range EV0 to EV20 in 3D Color Matrix and (at ISO 100 with Center-Weighted, EV2 to EV 20 in Spot f/1.4 lens) Exposure meter Activated by shutter release button or ON/OFF AF start button is pressed or when other camera controls are operated; turns off after 8 sec. or camera is switched off Exposure mode Programmed Auto, Shutter-Priority Auto, Aperture-Priority Auto and Manual Programmed auto Camera sets both shutter speed exposure control and lens aperture automatically; Flexible Program possible in increments of 1/3 EV Shutter-priority auto Aperture automatically selected exposure control to match manually set shutter speed Aperture-priority auto Automatically selected shutter speed exposure control to match manually set aperture Manual exposure Both aperture and shutter speed are control set manually P400 (E) 02.12.27 6:42 PM Exposure compensation Auto exposure lock Multiple exposure Shutter Shutter speeds Viewfinder Eyepoint Eyepiece shutter Focusing screen Page 165 With exposure compensation button; ±5 EV range, in 1/3 EV steps By pressing AE-L/AF-L button while meter is on Activated with multiple exposure button Electromagnetically controlled verticaltravel focal-plane shutter Lithium niobate oscillator-controlled speeds from 1/8000 to 30 sec. (in 1/3 steps); electromagnetically controlled Bulb setting Nikon Multi-Meter Finder DP-30 provided as standard; fixed eyelevel pentaprism high-eyepoint type; 0.7X magnification with 50mm lens set at infinity; approx. 100% frame coverage; metering system selector, diopter adjustment knob, accessory shoe and eyepiece shutter lever provided; interchangeable with Nikon AE Action Finder DA-30, 6X High-Magnification Finder DW-31 and Waist-Level Finder DW-30 Approx. 20.5mm Provided Nikon advanced EC-B-type screen; interchangeable with 13 other optional screens Viewfinder information LCD shows metering system, focus indication, exposure mode, shutter speed, aperture, electronic analog exposure display, frame counter/exposure compensation value and exposure compensation mark; exposure level indicators, flash ready-light LED, aperture direct-readout, focus indicators and focus area indicators are also shown Top LCD panel Shutter speed, aperture, exposure information mode, AF area mode, focus area, Flexible Program mark, exposure compensation mark, frame counter, exposure compensation value, exposure bracketing mark, multiple exposure mark, shutter speed/aperture/ focus area position lock marks and battery power Rear LCD panel Flash sync, film speed, DX mark, information Custom mark, exposure bracketing indications and personal computer mark LCD panel illumination LCD panel illuminated by rotating power/LCD panel illumination switch Film speed range ISO 25 to 5000 for DX-coded film; ISO 6 to 6400 can be manually set Film speed setting At DX position, automatically set to ISO speed of DX-coded film used; manual setting possible (ISO 6 to 6400) Film loading Film automatically advances to first frame when shutter release button is depressed once 165 P400 (E) 02.12.27 6:42 PM Film advance Frame counter Film rewind 166 Page 166 In single-frame shooting mode, film automatically advances one frame when shutter is released; in CH (Continuous High) CL (Continuous Low) or CS (Continuous Silent) shooting mode, shots are taken as long as shutter release button is depressed; in CH mode, shooting speed is approx. 8 fps, in CL mode, approx. 3 fps, and in CS, approx. 1 fps using Ni-MH Battery Unit MN-30; in CH mode, shooting speed is approx. 7.4 fps, in CL mode, approx. 3 fps, and in CS, approx. 1 fps using AAtype batteries Additive type; counts back while film is being rewound Choice of automatic or manual; automatically rewinds when film rewind button and lever are used; takes approx. 4 sec. with Ni-MH Battery Unit and 6 sec. with eight AA-type batteries per 36-exposure roll; stops automatically when film is rewound; manual rewind when film rewind button and film rewind crank are used Self-timer Electronically controlled; 10 sec. duration Depth-of-field Provides visual verification of depth preview button of field Reflex mirror Automatic, instant-return type Camera back Hinged back; interchangeable with Nikon Multi-Control Back MF-28 or Data Back MF-27 Accessory shoe Standard ISO-type hot-shoe contact; ready-light contact, TTL flash contact, monitor contact; mount receptacle for SB-28/SB-28DX/SB-27/SB-26/ SB-25’s Posi-Mount System provided Flash sync control Slow Sync and Rear-Curtain Sync built-in Flash synchronization In Programmed Auto or AperturePriority Auto, shutter operates from 1/250 to 1/60 sec. in normal sync, 1/250 to 30 sec. in slow sync; in Shutter-Priority Auto or Manual exposure mode, shutter operates at speed set, or at 1/250 if speed is set between 1/250 and 1/8000 sec. 1/300 TTL High-Speed Sync can be selected using Custom Setting #20 in Shutter-Priority Auto or Manual exposure mode. P400 (E) 02.12.27 6:42 PM Page 167 TTL Multi Sensor Five-segment TTL Multi Sensor used for TTL auto flash control Automatic Balanced Possible with AF Nikkor lens and Nikon Fill-Flash with TTL Speedlight SB-50DX, SB-29, SB-28/ Multi Sensor 28DX, SB-27, SB-26, SB-25, SB-24, SB-23, SB-22s, SB-22, SB-20, etc. Monitor Pre-flash Nikon Speedlight SB-28/SB-28DX/ SB-27/SB-26/ SB-25 fires Monitor Preflash(es) for TTL Multi Sensor when using an AF Nikkor lens Flash ready-light Speedlight attached: Lights up in red when Nikon dedicated Speedlight is ready to fire, or blinks to warn of insufficient light for correct exposure Number of 36-exposure film rolls per set of fresh batteries Test 1 Camera setting: Using an AF Zoom-Nikkor 80-200mm f/2.8D ED lens, in Continuous Servo AF mode with film advance mode at S and a shutter speed of 1/250 sec. or faster. Autofocus operation: After lightly pressing the shutter release button for 8 sec., autofocus operation covers the full range from infinity (∞) to the closest distance and back to infinity (∞) before each shot. After the exposure meter automatically turns off (8 sec.), the same operation follows for the next shot. At 20˚C or 68°F Test 2 Camera setting: Same as test 1 Autofocus operation: After lightly pressing the shutter release button for 3 sec., autofocus operation covers the full range from infinity (∞) to the closest distance and back to infinity (∞) three times before each shot. After the exposure meter automatically turns off (8 sec.), the same operation follows without intermission for the next shot. At 20˚C or 68°F At –10˚C or 14°F Eight AA-type alkaline batteries Approx. 50 Approx. 7 Eight AA-type lithium batteries Approx. 100 Approx. 50 Optional Ni-MH Battery Unit MN-30 Approx. 60 Approx. 30 Test 3 Camera setting: Using an AF Zoom-Nikkor 28-70mm f/3.5-4.5D lens, in same setting as test 1 Autofocus operation: Autofocus operation covers the full range from infinity (∞) to the closest distance and back to infinity (∞) before each shot. The same operation follows without intermission for the next shot. At –10˚C or 14°F At 20˚C or 68°F At –10˚C or 14°F Approx. 90 Approx. 10 Eight AA-type alkaline batteries Approx. 25 Approx. 2 Eight AA-type alkaline batteries Eight AA-type lithium batteries Approx. 50 Approx. 25 Eight AA-type lithium batteries Approx. 250 Approx. 70 Optional Ni-MH Battery Unit MN-30 Approx. 32 Approx. 15 Optional Ni-MH Battery Unit MN-30 Approx. 100 Approx. 60 167 P400 (E) 02.12.27 6:42 PM Page 168 Continuous shooting time in Long Time Exposure per set of fresh batteries At 20˚C or 68°F At –10˚C or 14°F Eight AA-type alkaline batteries Approx. 5 hours Approx. 30 min. Eight AA-type lithium batteries Approx. 8 hours Approx. 120 min. Optional Ni-MH Battery Unit MN-30 Approx. 4 hours Approx. 140 min. Power source Eight AA-type batteries or optional Ni-MH Battery Unit MN-30 Battery power N for sufficient power; M confirmation indicates batteries are nearing exhaustion; blinking M indicates batteries are just about exhausted; no indication/mark appears when batteries are completely exhausted or improperly installed Dimensions (WxHxD) Approx. 158 x 149 x 79mm or 6.2 x 5.9 x 3.1 inches Weight Approx. 1,210g or 42.7 oz. (without batteries) All specifications apply with fresh batteries used at normal temperature (20˚C or 68°F). Specifications and design are subject to change without notice. LR6 (AA-type alkaline) batteries characteristically get extremely weak in low temperatures. So we recommend use of FR6 (AA-type lithium) batteries or Ni-MH Battery Unit MN-30 for shooting in low temperatures. (Battery life is shortened especially by bulb shooting in low temperatures.) 168 P400 (E) 169 02.12.27 6:42 PM Page 169 P400 (E) 02.12.27 6:42 PM Page 170 No reproduction in any form of this manual, in whole or in part (except for brief quotation in critical articles or reviews), may be made without written authorization from NIKON CORPORATION. K NIKON CORPORATION FUJI BLDG., 2-3, MARUNOUCHI 3-CHOME, CHIYODA-KU, TOKYO 100-8331, JAPAN Printed in Japan K2A0101401 (S898) 11