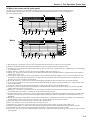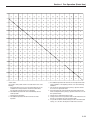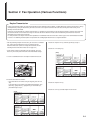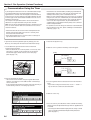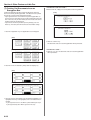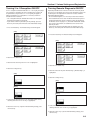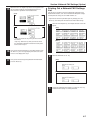
1
FAX System (F) Operation Guide ALWAYS read this Operation Guide thoroughly before use. After reading, maintain it in good condition and keep it together with the Operation Guide for your copier. NOTICE This Operation Guide contains information that corresponds to using both the inch and metric versions of fax machines using this Fax System. Since the messages and terminology for keys and indicators on those respective operation panels differs between these two versions, for purposes of clarification and easier understanding we have listed the names used in BOTH types of machine in the section herein titled Names of Parts. However, in the main text of this handbook, when the difference in a name or message is only one of upper- and lowercase spelling, we have listed the information as it specifically pertains to the inch version of this machine. When there is even a slight difference in the message, key/indicator name or other specifications, we have listed the information for the inch version followed, in brackets, by the corresponding information for the metric version. Trademark Information • Microsoft, Windows, Windows NT and Internet Explorer are registered trademarks of Microsoft Corporation of the US and other countries. • Windows ME and Windows XP are trademarks of Microsoft Corporation. • Ethernet is a registered trademark of Xerox Corporation. • IBM and IBM PC-AT are trademarks of International Business Machines Corporation. • Adobe and Acrobat are registered trademarks Adobe Systems Incorporated. All other company and product names contained in this Operation Guide are trademarks or registered trademarks of their respective companies. The designations ™ and ® will not be used in this handbook. Please read the Operation Guide before using the facsimile. Keep it close to the facsimile for easy reference. The sections of this handbook and parts of the facsimile marked with symbols are safety warnings meant to protect the user, other individuals and surrounding objects, and ensure correct and safe usage of the facsimile. The symbols and their meanings are indicated below. DANGER: Indicates that serious injury or even death will very possibly result from insufficient attention to or incorrect compliance with the related points. WARNING: Indicates that serious injury or even death may result from insufficient attention to or incorrect compliance with the related points. CAUTION: Indicates that personal injury or mechanical damage may result from insufficient attention to or incorrect compliance with the related points. Symbols The symbol indicates that the related section includes safety warnings. Specific points of attention are indicated inside the symbol. ........ [General warning] ........ [Warning of danger of electrical shock] ........ [Warning of high temperature] The symbol indicates that the related section includes information on prohibited actions. Specifics of the prohibited action are indicated inside the symbol. ........ [Warning of prohibited action] ........ [Disassembly prohibited] The ● symbol indicates that the related section includes information on actions which must be performed. Specifics of the required action are indicated inside the symbol. ........ [Alert of required action] ........ [Remove the power plug from the outlet] ........ [Always connect the facsimile to an outlet with a ground connection] Please contact your service representative to order a replacement if the safety warnings in the handbook are illegible or if the handbook itself is missing. (fee required) <Note> Due to performance updating, information in this Operation Guide is subject to change without notice. Introduction The explanations contained in this Operation Guide have been separated into different sections in order to allow those using a fax for the first time, as well as those well familiar with such operation, to use this machine efficiently, properly and with relative ease. A basic introduction to each section can be found below for reference. Refer to the related section when using this fax. Important! Please read first. This section contains notes and cautions on installation and operation that should be read prior to using this fax machine for the first time and then strictly obeyed in order to ensure its safe and proper operation. BE SURE to read the notes and cautions contained in the Operation Guide for your copier as well. Section 1 Basic Use of this Fax Section 2 Various Functions of this Fax Section 3 Troubleshooting Section 4 Other Features of this Fax i This section contains explanations on the names of parts and their functions, as well as basic instructions on fax operation. Reading this section alone will make it possible for you to perform basic fax transmission and fax reception procedures. This section contains explanations on attempting procedures that will enable more effective use of this fax by those individuals who have already become somewhat familiar with its basic operation. It includes such instructions as setting the time for a transmission to begin, transmitting the same documents automatically to multiple destinations and for transmitting both sides of duplex (2-sided) documents. This section contains explanations on handling problems that may occur during operation of this fax. It includes information on responding to error messages that are displayed as well as check points regarding the various settings made. BE SURE to read this section carefully and follow all procedures and cautions precisely. This section contains explanations on using the more specialised functions of this fax for those individuals who have become knowledgeable about and quite comfortable with its operation. It includes such special instructions as how to limit who can transmit and receive documents with this machine as well as on the procedures for receiving confidential documents that should not be seen by third parties. In addition, this fax contains F-Code Based Communication capabilities that enable more functional compatibility with other companies’ fax machines and a Restricted Access function that enables the convenient control of fax communication performed with this machine. Introduction Section 5 Managing Information About Your Fax Communications Section 6 Various Settings and Registration in this Fax Section 7 Optional Equipment Section 8 Network FAX Settings (Option) Section 9 Reference Information This section contains explanations on checking the message display for information on the conditions surrounding recent fax transmissions and reception. In addition, it includes explanations on how to print out the management reports and lists that contain information about the result of fax communications and other settings made in this fax. This section contains explanations on certain settings and registration such as adjusting the volume of the alarm that sounds in the event of some sort of error. Use this section to perform the settings and registration most appropriate to how you use this fax. This section contains explanations on the functions available when each of the various optional equipment is installed in this fax. It includes an explanation on Duplex Reception – in which paper is turned over inside the fax machine and printing accomplished on the back side – as well as on the Ultra Fine resolution that enables even clearer transmission and reception of documents. This section contains explanations on the setup procedure and settings to be performed on the machine in order to use the Network FAX functions available when the optional Printer/Scanner Kit is installed on this fax machine. Be sure to read the On-Line Manual on the included CD-ROM as well. This section contains information on the specifications for this fax machine, a flowchart of the menus that are shown in the message display and tables with explanations related to various error codes. Use this section as reference when using this fax. ii Contents Important! Please read it first. ............................. v Redialing Functions ............................................................. 1-33 (1) Automatic Redialing .......................................................... 1-33 (2) Manual Redialing .............................................................. 1-33 INSTALLATION PRECAUTIONS ........................................... v PRECAUTIONS FOR USE ..................................................... v Section 2 Fax Operation (Various Functions) ............ 2-1 Section 1 Fax Operation (Basic Use) .......................... 1-1 Names of Parts ....................................................................... 1-1 (1) Main Body Parts and their Functions .................................. 1-1 (2) Operation Panel Parts and their Functions ......................... 1-2 (3) Basic fax screen on the touch panel ................................... 1-3 Preparations ........................................................................... 1-4 (1) Setting the Type of Phone Line .......................................... 1-4 (2) Turning TTI Transmission ON/OFF ..................................... 1-4 (3) Registering Your Self-Station Information ........................... 1-5 (4) Setting the Date and Time .................................................. 1-6 Features and Functions of this Fax ..................................... 1-7 (1) Switching from the Copy Operation Mode to the Fax Operation Mode .................................................................. 1-7 (2) Initial Mode ......................................................................... 1-7 (3) When You Press the Reset Key... ....................................... 1-8 (4) Auto Clear Function ............................................................ 1-8 (5) Document Number ............................................................. 1-8 (6) Auto Shut-Off Function ....................................................... 1-8 (7) Network FAX Functions (option) ......................................... 1-9 (8) Dual Access Function ......................................................... 1-9 (9) Batch Transmission Function ........................................... 1-12 (10) Rotate & Transmit Function ............................................ 1-12 (11) F-Code Based Communication ....................................... 1-12 (12) Memory Reception Function ........................................... 1-12 (13) Rotate Received Documents .......................................... 1-13 (14) Imaging Memory Back-Up Function ............................... 1-13 (15) Fax Priority Printout ........................................................ 1-13 (16) Abbreviated numbers ...................................................... 1-13 Sending Documents ............................................................ 1-14 ● Acceptable documents ....................................................... 1-15 ● Notes on acceptable documents ........................................ 1-15 ● Resolutions ........................................................................ 1-16 ● Document contrast ............................................................. 1-17 Receiving Documents (Automatic Fax Reception) ........... 1-19 ● Changing the reception mode ............................................ 1-19 ● Making copies during a reception ...................................... 1-20 ● Memory Reception ............................................................. 1-20 Canceling a Communication ............................................... 1-21 (1) Canceling a Memory Transmission (during scanning) ...... 1-21 (2) Canceling a Memory Transmission (during transmission) ... 1-21 (3) Canceling a Direct Feed Transmission ............................. 1-21 (4) Canceling a Reception ..................................................... 1-22 Entering Characters ............................................................. 1-23 (1) Character Input screen ..................................................... 1-23 (2) Procedure ......................................................................... 1-24 One-touch Keys ................................................................... 1-25 (1) Registering ....................................................................... 1-25 (2) Modifying and Deleting ..................................................... 1-28 (3) Dialing ............................................................................... 1-29 (4) Printing Out a One-Touch Key List ................................... 1-29 Dialing with Abbreviated Numbers ..................................... 1-30 Address Book ....................................................................... 1-31 (1) Search Criteria .................................................................. 1-31 (2) Searching with the Address book ..................................... 1-31 (3) Printing Out a Telephone Directory List ............................ 1-32 iii Duplex Transmission ............................................................. 2-1 Standby Transmission ........................................................... 2-3 Broadcast Transmission ....................................................... 2-4 Interrupt Transmission .......................................................... 2-5 Communication Using the Timer .......................................... 2-6 Chain Dial Keys ...................................................................... 2-7 (1) Registering ......................................................................... 2-7 (2) Modifying and Deleting ....................................................... 2-8 (3) Using a Chain Dial Key ....................................................... 2-9 Editing a Communication in Memory ................................. 2-10 (1) Printing Out a Sample Image of Waiting Documents ....... 2-10 (2) Force-Starting the Communication ................................... 2-10 (3) Deleting the Communication ............................................. 2-11 (4) Modifying the Contents of the Communication ................. 2-12 Manual Fax Transmission ................................................... 2-14 Manual Fax Reception ......................................................... 2-15 Section 3 Troubleshooting ........................................... 3-1 When the Fax Data Indicator is Lit... .................................... (1) CAUTIONS before Disconnecting the Power Cord ............ (2) If a Power Failure Report is Printed Out... .......................... If an Error Occurs... ............................................................... When One of These Message is Displayed... ...................... Troubleshooting Tables ......................................................... 3-1 3-1 3-1 3-1 3-2 3-4 Section 4 Other Features of this Fax .......................... 4-1 Auto FAX/TEL Switching ....................................................... 4-1 TAD Reception ........................................................................ 4-2 D.R.D. Reception (Available in inch versions only) ............ 4-3 Remote Switching .................................................................. 4-4 (1) Changing the Remote Switching Number .......................... 4-4 (2) Operation ............................................................................ 4-5 Polling Communication ......................................................... 4-6 (1) Polling Transmission ........................................................... 4-6 (2) Polling Reception ................................................................ 4-7 F-Code Based Communication ............................................. 4-9 (1) Codes used for F-Code Based Communication ................. 4-9 (2) F-Code Boxes ..................................................................... 4-9 F-Code Based Confidential Communication ..................... 4-10 (1) Registering F-Code Confidential Boxes ........................... 4-10 (2) Modifying and Deleting F-Code Confidential Boxes .......... 4-11 (3) F-Code Based Confidential Transmission ........................ 4-12 (4) Printing Out Documents from an F-Code Confidential Box ..... 4-13 (5) Printing Out an F-Code Confidential Box List ................... 4-14 (6) Entering Documents into an F-Code Confidential Box ..... 4-14 (7) F-Code Based Bulletin Board Reception .......................... 4-15 Contents F-Code Based Relay Broadcast Communication ............. (1) Registering F-Code Relay Boxes ..................................... (2) Modifying and Deleting F-Code Relay Boxes ................... (3) F-Code Based Relay Broadcast Transmission ................. (4) Printing Out an F-Code Relay Box List ............................. Fax Forwarding .................................................................... (1) Registering ....................................................................... (2) Modifying Registered Information ..................................... (3) Turning Fax Forwarding ON/OFF ..................................... Group Dial Keys ................................................................... (1) Registering ....................................................................... (2) Modifying and Deleting ..................................................... (3) Dialing ............................................................................... (4) Printing Out a Group Dial List ........................................... Program Keys ....................................................................... (1) Registering ....................................................................... (2) Modifying and Deleting ..................................................... (3) Using a Program Key ....................................................... (4) Printing Out a Program Dial List ....................................... Password Check Communication ...................................... (1) Registering Permit Telephone Numbers ........................... (2) Modifying and Deleting Permit Telephone Numbers ........ (3) Registering Permit IDs ...................................................... (4) Modifying and Deleting Permit IDs ................................... (5) Turning Password Check Communication ON/OFF ......... Encrypted Communication ................................................. (1) Registering Encryption Keys ............................................ (2) Modifying and Deleting Encryption Keys .......................... (3) Registering Encryption Boxes .......................................... (4) Modifying and Deleting Encryption Boxes ........................ (5) Required Operation (Transmitting party) .......................... (6) Required Operation (Receiving party) .............................. (7) Printing Out Documents from an Encryption Box ............. (8) Printing Out an Encryption Key List .................................. (9) Printing Out an Encryption Box List .................................. Restricted Access ................................................................ (1) Preparations Before Use .................................................. (2) Changing the Management Password ............................. (3) Registering Access Codes ................................................ (4) Modifying and Deleting Access Codes ............................. (5) Turning Restricted Access ON/OFF ................................. (6) Printing Out a Restricted Access Report .......................... (7) Printing Out a Department List ......................................... (8) Clearing the count for all departments .............................. 4-17 4-17 4-18 4-19 4-20 4-21 4-21 4-22 4-22 4-23 4-23 4-24 4-25 4-25 4-26 4-26 4-27 4-28 4-28 4-29 4-29 4-30 4-30 4-31 4-32 4-33 4-33 4-34 4-35 4-36 4-36 4-37 4-38 4-39 4-39 4-40 4-40 4-40 4-41 4-42 4-43 4-43 4-45 4-45 Section 6 Various Settings and Registration ............. 6-1 Turning Report Print Out ON/OFF ........................................ 6-1 Turning the Bulletin Board ON/OFF ..................................... 6-2 Setting the Number of Rings (Auto Fax Reception) ........... 6-3 Making Volume Settings ........................................................ 6-3 Setting the Document Size for Scanning from the Document Processor ...................................................... 6-4 Setting the Default Transmission Mode ............................... 6-5 Selecting the Automatic Reception Mode ........................... 6-5 Turning Reception Date & Time Print Out ON/OFF ............. 6-6 Selecting the Paper Feed Selection Mode ........................... 6-7 Turning Manual Paper Feed ON/OFF .................................... 6-8 Turning 2 in 1 Reception ON/OFF ......................................... 6-9 Turning Remote Diagnosis ON/OFF ..................................... 6-9 Registering the Remote Test ID .......................................... 6-10 Section 7 Optional Equipment .................................... 7-1 Duplex Unit (Duplex Reception ON/OFF) ............................. 7-1 ● Turning Duplex Reception ON/OFF ..................................... 7-1 Optional Memory .................................................................... 7-1 Section 8 Network FAX Settings (Option) ................... 8-1 Setup ....................................................................................... Connecting the fax machine and the computer .................. Initial settings on the fax machine ....................................... (1) Network FAX Reception Setting ......................................... (2) Setting for Saving the Documents for Transmission ........... (3) File Type Setting ................................................................. Network FAX Registration ..................................................... Printing Out a Network FAX Settings List ........................... 8-2 8-3 8-3 8-3 8-4 8-4 8-5 8-7 Section 9 Reference Information ................................ 9-1 Section 5 Managing Information About Your Fax Communications ......................................... 5-1 Communication Result Display ............................................ (1) Transmission Result Display .............................................. (2) Reception Result Display ................................................... Printing the Management Reports/Lists .............................. (1) Activity Report ..................................................................... (2) Confirmation Report ........................................................... (3) User Setting List ................................................................. 5-1 5-1 5-2 5-3 5-3 5-3 5-4 Specifications ......................................................................... Special Characters Chart ...................................................... Paper Size and Priority Feed Chart (Inch version) ............. Paper Size and Priority Feed Chart (Metric version) .......... Menu Flow Charts .................................................................. Error Code Tables .................................................................. 9-1 9-2 9-3 9-4 9-5 9-7 iv Important! Please read it first. This Operation Guide contains information on using the facsimile functions of this machine. BE SURE to read the Operation Guide for your copier as well and maintain both handbooks in good condition in a location close to the machine. During use, refer to the Operation Guide for your copier for information regarding the sections listed at right. Caution Labels INSTALLATION PRECAUTIONS PRECAUTIONS FOR USE How to load paper Replacing the toner cartridge and waste toner tank When paper misfeeds Troubleshooting Cleaning the copier INSTALLATION PRECAUTIONS ■ Environment ■ Power supply/Grounding the product • Avoid installing this product in locations where the top or • DO NOT connect this product to the same outlet as an air upper rear portion of the unit will be exposed to direct sunlight. Such conditions might adversely effect the unit’s conditioner or copier, etc. ability to detect the correct size of originals and documents. When such a location cannot be avoided, change the direction the unit is facing in order to eliminate exposure to direct sunlight. PRECAUTIONS FOR USE CAUTION • DO NOT leave the Document Processor open as there is a danger of personal injury. ……………… Other precautions • DO NOT open the front cover or left cover, turn off the main switch, or pull out the power plug while transmitting, receiving, or copying. • This product may only be used within the country of pur chase due to the different safety and communication standards in each country. (International communication standards, however, make the communication between countries possible.) • This product may be inoperable in areas with poor telephone lines or communication conditions. v • “CALL WAITING” or other telephone company optional services that produce audible tones or clicks on the line can disrupt or cause termination of facsimile communications. • No matter what the status of the unit, if the sound of the motor within the unit is audible, never open either the front cover or the left cover, nor turn off the main switch. • Return used battery to point of sales. Section 1 Fax Operation (Basic Use) Names of Parts (1) Main Body Parts and their Functions The following contains information on the names and functions of the parts that are required when this machine is used as a facsimile. Refer to the Operation Guide for your copier for information on other parts of this machine. Main Body + Duplex Document Processor attached 1 Operation panel...Use the operation panel to perform the procedures required for fax communication. 2 Fax storage section...Received documents are ejected and stored face-down in the fax storage section. Up to 250 sheets can be stored in this section at one time. 3 Drawers...This fax machine comes standard with two drawers installed. Each drawer can hold up to 500 sheets of plain paper (60 g/m2 - 105 g/m2). Refer to the Operation Guide for your copier for more detailed information regarding the use of the drawers. 4 Multi-Bypass...Paper can be set in the Multi-Bypass as well. In order to use the Multi-Bypass, it is necessary to select “ON” under “Turning Manual Paper Feed ON/OFF” on page 6-8. Refer to the Operation Guide for your copier for more detailed information regarding the use of the Multi-Bypass. 5 Telephone jack (T)...Use this jack to connect a separately purchased telephone to the fax. 6 Line jack (L)...Use this jack to connect the fax to a telephone line using the modular cord. 7 Main switch...Turn this switch ON ( | ) in order to perform fax and copy operations. The touch panel will light and operation will be possible. Document Processor ● Document Processor There are 2 optional document feeders available for use with this machine: the Document Processor for feeding one-sided documents, and the Duplex Document Processor for using both sides of 2-sided documents. * Both the Document Processor and Duplex Document Processor can be used with the 25 copies per minute machine. However, only the Duplex Document Processor can be used with both the 35 copies per minute machine and the 40 copies per minute machine. 8 Document table...Set the documents you want to transmit on this table. Up to 70 sheets of up to 11" x 8 1/2" [A4] size paper, or up to 50 sheets of 8 1/2" x 14" or 11" x 17" [A3 or Folio] size paper, can be set at one time. 9 Document insert guides...Adjust these guides to match the width of the documents. 0 Document Processor reversing cover...Open this cover if a document jams. ! Document eject cover...Documents are ejected onto this cover after being scanned. @ Eject guide...Open this guide when transmitting documents of a large size such as 8 1/2" x 14" or 11" x 17" [A3 or Folio]. # Document Processor open/close lever...Operate this lever when opening and closing the Document Processor. $ Document set indicator...This indicator indicates the status of the documents set in the Document Processor. Documents are set properly when the indicator is lit green. 1-1 Section 1 Fax Operation (Basic Use) (2) Operation Panel Parts and their Functions The following contains explanations on the names and functions of the keys and indicators that are utilized when this machine is used as a facsimile. Refer to the Operation Guide for your copier for information on the keys and indicators that are utilized when this machine is used as a copier. 1 Touch panel...Indicates operation procedures as well as trouble with the machine. Keys related to operational procedures which appear on the touch panel with their name displayed are indicated in this handbook within double quotation marks. In addition, you will be instructed to “touch” any keys which appear on the touch panel rather than “press” them. (Ex.: Touch the “xxx” key.) 2 Keypad...Use the keypad to enter fax numbers, etc. * Even if your telephone service is for pulse dialing, press the star (*) key and any key pressed on the keypad after that will transmit the related tone signal. (Inch version only) 3 Start key...Press this key when you want to initiate a fax communication. 4 Fax key / Fax indicator...Press this key when you want to switch between the Copy Operation and Fax Operation modes. The Fax indicator is lit when the machine is in the Fax Operation mode. 5 Fax data indicator...This indicator blinks during a fax communication. When this indicator is lit, there are received documents or documents to be transmitted, etc., stored in memory. 6 Reset key...Press this key when you want to cancel an operation in progress and have the touch panel return to the initial mode settings. 7 Stop/Clear key...Press this key when you want to delete registered fax numbers or names, as well as when you want to stop an operation in progress. 8 Fax Priority key...Press this key when you want to give priority to printing out a received fax during a copy operation. 9 Default key...Press this key when you want to perform settings related to the various default modes for the fax functions of this machine. 0 Interrupt key/indicator lamp...Press this key when you want to interrupt a fax reception in order to make copies. The indicator lamp in the Interrupt key will light when the machine is in the Interrupt mode. 1-2 Section 1 Fax Operation (Basic Use) (3) Basic fax screen on the touch panel The initial screen that appears in the touch panel when you press the Fax key in any other mode in order to change to the Fax Operation mode is called the "basic fax screen". The following contains information on the basic keys which are displayed in this screen and their functions. Inch Metric 1 Message display...Current status, the next step in a procedure and error messages are shown in the message display. 2 Number of destinations display...The number of destinations that you have chosen to dial to is shown in this area. 3 Speed-dial keys...Keys that you have registered to function as either a one-touch key, a group dial key (G), a program key (P) or a chain dial key (C) are displayed here. 4 “Address book” key...Touch this key when you want to use the address book. (Refer to page 1-31.) 5 “Abbrev.” key...Touch this key when you want to use the abbreviated number that a destination number is registered under in order to dial that number. (Refer to page 1-30.) 6 “TX setting” key...Touch this key when you want to perform settings related to transmission conditions such as the size of the documents to be transmitted, the image quality of those documents, the contrast at which you want to send them and the time when they should be sent. Once you press this key, the TX Setting screen will appear. 7 “▼” and “▲” cursor keys...Use these keys when you want to display speed-dial keys other than those which are currently displayed. 8 “Dest. check” key...Touch this key when you have entered multiple destination fax numbers using speed-dial keys, etc., and you want to check the list of those numbers. 9 “Re-dial” key...Touch this key when you want to have the fax automatically redial the most recently dialed number 0 “On-hook” key...When a separately purchased telephone is connected to this fax machine and you touch this key, you can dial a destination number without having to pick up the receiver. ! “Memory TX” / “Dir. Feed Tx” key...When you want to switch between the Memory Transmission mode (“Memory Tx”) and the Direct Feed Transmission mode (“Dir. Feed Tx”). The mode will change each time you touch this key. @ Reception mode select key...Touch this key when you want to select a different reception mode. The display will change to the reception mode selection screen where you can select the desired reception mode by touching the “Auto RX”, “Manual RX” or “Answering Machine” key, as appropriate. # Memory bar...Indicates the amount of data stored in memory. As documents are being stored, the bar will move towards “100%” indicating that the data stored in memory is increasing. Once it reaches “100%”, no more documents can be stored in memory. $ Fax number display...The number that you have entered to dial is displayed here. % “Basic” key...Touch this key when you want to return to the basic fax screen. ^ “Application” key...Touch this key when you want to use one of the various functions of this fax machine such as polling, etc. & “Register” [“Registration”] key...Touch this key when you want to perform one of the various registration procedures of this fax machine. * “Print Report” key...Touch this key when you want to print out one of the various reports or lists of this fax machine. ( “Status” [“Act status”] key...This key is displayed during a transmission, reception or printout. Touch this key when you want to verify the contents of the operation. 1-3 Section 1 Fax Operation (Basic Use) Preparations When using the fax functions of this machine for the first time after purchasing your Fax System, perform the procedures as explained in “(1) Setting the Type of Phone Line” through “(4) Setting the Date and Time”. * If your service representative performs these settings during set-up of your Fax System, there is no further need for you to perform these procedures. 4 Touch either the “Tone Line(DTMF)” key or the “Pulse Line(10PPS)” key, as appropriate. 5 Touch the “Close” key. The message display will return to the same screen as was displayed in step 3. 6 If you are finished making settings, touch the “Close” key 2 more times. (1) Setting the Type of Phone Line (Inch version only) Set the type of phone line here to correspond to the type of telephone service that you are using. BE SURE the type of phone line you select here is correct because, if the setting is incorrect, fax communication will be impossible. * Prior to operation, check the message display to make sure that the touch panel is in the initial mode for fax operation. (Refer to “(2) Initial Mode” on page 1-7.) * If you want to cancel the procedure part way through, press the Reset key. The touch panel will return to the basic copy screen. 1 Press the Default key. The Default Setting screen will appear. (2) Turning TTI Transmission ON/OFF (Inch) 2 The TTI (Transmit Terminal Identifier) refers to information – such as the time of the transmission, the number of pages, your station name and fax number, etc. – that is automatically sent to the receiving party's fax and printed out on the received documents. With this fax, you can select here whether or not that TTI information will be sent to the receiving party's fax, and – if it is – whether it will be printed inside or outside the border of the transmitted page. * Prior to operation, check the message display to make sure that the touch panel is in the initial mode for fax operation. (Refer to “(2) Initial Mode” on page 1-7.) * If you want to cancel the procedure part way through, press the Reset key. The touch panel will return to the basic copy screen. Touch the “FAX default” key. 1 Press the Default key. The Default Setting screen will appear. (Inch) 3 Make sure that “Line Type” is highlighted and touch the “Change #” key. (Inch) (Metric) 1-4 Section 1 Fax Operation (Basic Use) 2 Touch the “FAX default” key. (3) Registering Your Self-Station Information If you register information identifying your station (fax number, station name and station ID) here, it can be sent to the receiving party's fax and printed on the received documents, thereby instantly notifying that party of the source of the fax transmission. 3 Touch the “▼” cursor key until “TTI” is highlighted and then touch the “Change #” key. (Inch) (Metric) * Use the following procedure as well when you want to change information that is already registered. * Prior to operation, check the message display to make sure that the touch panel is in the initial mode for fax operation. (Refer to “(2) Initial Mode” on page 1-7.) * If you want to cancel the procedure part way through, press the Reset key. 1 Touch the “Register” [“Registration”] key. The Registration Select screen will appear. (Inch) 4 If you want your TTI information to be sent to the other party, touch the desired location where you want it to be printed. If you do NOT want it to be sent, touch the “Not Printed” key. 5 Touch the “Close” key. The message display will return to the same screen as was displayed in step 3. (Metric) 2 6 If you are finished making settings, touch the “Close” key 2 more times. Touch the “Location Info.” key. The currently registered information will be displayed. * To register your fax number: Touch the “v” key and go to step 3. To register your station name: Touch the “Own Name” key and go directly to step 5. To register your station ID: Touch the “Own ID” key and proceed directly to step 7. (Inch) (Metric) 1-5 Section 1 Fax Operation (Basic Use) 3 ● Registering your fax number Use the keypad to enter your fax number. * The fax number can be up to 20 digits in length. * If you want to clear the currently displayed number from the message display, simply press the Stop/Clear key. * If you want to revise the entered number, touch the “r” or “R” cursor key to move the cursor to the number that you want to change. Then touch the “Delete” key to delete that number and enter the correct number as desired. 7 ● Registering your station ID Use the keypad to enter the desired station ID (4 digits). * If you want to reset the displayed number to “0000”, simply press the Stop/Clear key. * If you want to revise the entered number, touch the “r” or “R” cursor key to move the cursor to the number that you want to change. Then enter the correct number as desired. (Inch) (Inch) (Metric) (Metric) 4 5 8 Touch the “Confirm” key. The message display will return to the same screen as was displayed in step 2. 9 If you are finished making settings, press the Reset key. Touch the “OK” key. The message display will return to the same screen as was displayed in step 2. ● Registering your station name Enter the desired name for your station. (Refer to “Entering Characters” on page 1-23.) * Your station name can be up to 32 characters in length. (4) Setting the Date and Time 6 1-6 In the Character input screen, touch the “Confirm” key. The message display will return to the same screen as was displayed in step 2. Set the date and the time that will appear in the message display here. BE SURE that the date and time that you set here are correct since they will serve as a basis for all communications that use the timer. * Prior to operation, check the message display to make sure that the operation panel is in the initial mode for fax operation. (Refer to “(2) Initial Mode” on page 1-7.) * If you want to cancel the procedure part way through, press the Reset key. Section 1 Fax Operation (Basic Use) 1 Touch the “Register” [“Registration”] key. The Registration Select screen will appear. Features and Functions of this Fax The following contains explanations about features and functions that should be understood when this machine is used as a facsimile. (Inch) (1) Switching from the Copy Operation Mode to the Fax Operation Mode (Metric) 2 Touch the “Date & Time” key. The currently registered information will be displayed. This machine was fundamentally designed for use as a copy machine and the default setting is the Copy Operation mode. Therefore, if you want to send a fax to another party it is first necessary to switch to the Fax Operation mode. However, in terms of receiving a fax. since the Automatic Fax Reception mode is the default setting, fax reception is possible and the documents will be printed out automatically even when the machine is in the Copy Operation mode. When the machine is in the Copy Operation mode, the COPY indicator will be lit. To switch to the Fax Operation mode, simply press the Fax key. Once the machine is in the Fax Operation mode, the Fax indicator will light and the touch panel will change to the basic fax screen. (Inch) (Metric) (2) Initial Mode 3 Use the keypad to enter the present date, in order of the month, day and year (day, month and year). * Use the “r” or “R” cursor keys to move the cursor as required. 4 Touch the “Time” key and then use the keypad to enter the present time. * The time should be entered on a 24-hour basis (00:00 - 23:29). 5 The initial screen that appears in the touch panel when you press the Fax key and change to the Fax Operation mode, or that normally appears in the Fax Operation mode after a successful fax transmission or reception, is called the “basic fax screen”. The accompanying default settings and related operational status is known as the “initial mode”. When the fax machine is in the initial mode for fax operation, “Ready for fax transmission” will be shown in the message display. Always check the touch panel to make sure that is it is in the initial mode and displaying this basic fax screen PRIOR to performing any facsimile operation. The fax machine will also return to the initial mode when the Auto Clear function engages. (Inch) Touch the “Confirm” key. The message display will return to the same screen as was displayed in step 2. (Metric) 6 If you are finished making settings, press the Reset key. 1-7 Section 1 Fax Operation (Basic Use) ● Message display when Restricted Access is turned ON... Even if the fax machine is in the initial mode for fax operation, the message display will differ if Restricted Access (page 4-43) is turned ON. (Inch) (4) Auto Clear Function The Auto Clear function will clear all entered settings and the touch panel will return to the initial mode settings after any type of transmission or print out, or if you do not press any keys within 90 seconds during any procedure. * If, however, documents are set when the Auto Clear function engages, the displayed size of those documents will remain in the message display. (5) Document Number (Metric) In this case, it is necessary to enter your access code or the registered management password in order to use the fax. If a viable access code or the registered management password is entered, the touch panel will change to the standard initial mode for fax operation. CAUTION When Restricted Access is turned ON, it is necessary to enter the registered management password in the Restricted Access Login Screen in order to access the various setting and registration procedures of this fax. Even if a viable access code that enables fax operation is entered, the menus that correspond to the various management-related setting and registration procedures of this fax will not be available. (Refer to “Restricted Access” on page 4-40.) The fax uses a 3-digit document number in order to manage each fax communication. This document number is assigned during each procedure and in the order that each communication that uses the timer, as well as each transmission or reception, is accomplished. The actual timing of the determination of each document number will differ depending upon the operation being carried out. In addition to appearing in the message display, this document number can be verified by checking the Transaction Result display, the Delayed Communication Report that is printed out for each communication that uses the timer or by printing out a Confirmation Report. (Refer to “Transaction Result display” on page 5-1, “(2) Confirmation Report” on page 5-3, and “Turning Report Print Out ON/OFF” on page 6-1.) (Inch) (Metric) (3) When You Press the Reset Key... When you want to cancel a procedure part way through, simply press the Reset key. The touch panel will automatically return to the initial mode for fax operation. * If, however, documents have already been set when you press the Reset key, the displayed size of those documents will remain in the message display. * Depending on the status of the operation, there are occasions when pressing the Reset key may have no effect. 1-8 (6) Auto Shut-Off Function Anytime there is no operation of or activity with this fax (no keys are pressed, no documents are set, nothing is printed out, etc.) for a designated period of time, the Auto Shut-Off function will engage for energy saving purposes and the fixing section heater and fan inside the machine will shut down. The amount of time most copy or fax machines spend waiting for some operation to begin is generally greater than the time actually spent on copying or fax communication. Thus, the energy consumed during that time is a great percentage of the overall energy used by the machine. Shutting down the fixing section heater and fan enables energy and cost reductions by minimizing unnecessary energy consumption while the machine is in this waiting state. * It is possible to change the amount of time that will elapse before the Auto Shut-Off function is to engage (factory default: 60 minutes). It is recommended that this be set to a longer period of time if the machine is used frequently during the day, and to a shorter time if there are normally long periods between use. (Refer the Operation Guide for your copier.) Section 1 Fax Operation (Basic Use) ● Reception Documents sent by an outside fax machine, etc., will be received by this fax and saved via the Printer/Scanner Kit into a designated folder on the network’s server computer (the computer on which the included Scanner File Utility is installed). In this case, the received document will be saved as a PDF or a TIFF file. * Once the Auto Shut-Off function engages, the main switch will turn OFF (O) and all indications on the operation panel will go out. It is therefore necessary to turn the main switch back ON ( | ) in order to send a fax or perform other fax operations on this machine. * If a fax comes in while the main switch is in the OFF (O) position, that fax reception will still be received and printed out. (7) Network FAX Functions (option) By installing the optional Printer/Scanner Kit, you will be able to use the Network FAX functions of this machine. Use these functions to send a document made on a network computer to the other fax machine, or to receive a document from the other fax machine onto your network computer. The main functions are as follows. ● Address Book Destination fax numbers can be registered in advance for transmission. Groups of up to 80 fax numbers can be registered in this machine and can be used conveniently for Broadcast Transmission, etc. In addition, it is possible to import CSV format address books created with other applications. ● Transmission When this fax machine and a computer are connected over the same network, the image data of a document created on the computer can be sent through the Printer/Scanner Kit that is installed on the fax machine and then transmitted to the other fax, etc. (8) Dual Access Function The Dual Access function allows the machine to simultaneously process 2 operations. For example, you can perform the procedure to transmit documents even during an ongoing fax communication. It is also possible to receive a fax during copying with the received document(s) printed out automatically once the copy operation is completed. Because the Dual Access function is constantly enabled, no matter what operation is currently in progress, you can perform fax transmission procedures anytime that “Ready for fax transmission” appears in the message display. No special settings are required to use the Dual Access function. 1-9 Section 1 Fax Operation (Basic Use) > Checking the status of a fax communication in progress (Inch) ● Table of Operations Available/ Unavailable under Dual Access Additional operation Initial operation (Metric) Touch the “Status” [“Act status”] key in the bottom right of the touch panel. The document number and information related to the other party will be displayed. (NOTE: It is possible to cancel that ongoing communication by touching the “Stop” key.) * Touch the “Close” key to return to the previous screen. 1 During set-up for sending documents in the Direct Feed Transmission mode* 2 During set-up for sending documents in the Memory Transmission mode 3 During scanning of documents in the Memory Transmission mode 4 During transmission in the Direct Feed Transmission mode 5 During direct reception of documents (w/o using the memory) 6 During transmission in the Memory Transmission mode 7 During Memory Reception 8 During direct print out of received documents (w/ the transmitting party still connected) 9 During print out of received documents from memory (after being disconnected from the transmitting party) 0 During print out of a Transmission or Reception Report, or an Activity Report, AFTER a communication ! During manual print out of a Report or List @ During procedures for fax-related settings or registration # During use of both the Scanning and Printing sections when the machine is used as a copier $ During use of the Printing section when the machine is used as a copier % During use of the Printing section when the machine is used as a printer ^ During use of the Printing section when the machine is used as a scanner > Checking the status of a print out in progress (Inch) (Metric) Touch the “Status” [“Act status”] key in the bottom right of the touch panel. * Touch the “Close” key to return to the previous screen. <When the Dual Access function is not available> There are cases in which the Dual Access function is not available. For example, during a fax communication to one party, you will not be able to receive a fax from another party, nor can you perform setting or registration procedures during any fax transmission or reception. In such cases, perform the desired operation after the current communication is completed. Refer to “● Table of Operations Available/Unavailable under Dual Access”, for more detailed information regarding which operations can and cannot be performed simultaneously. * Communications that use the timer will not be accomplished, even upon reaching the designated time for the communication to begin, until the current operation has been completed. 1-10 Section 1 Fax Operation (Basic Use) 1 2 3 4 5 6 7 8 9 0 ! X X X O O O O O O X X O O O O O X O O O O X X X X X @ # $ % ^ X 5 m 4 m 4 m O X O X 5 m 4 m 4 m O X O O X X X X O X X X X X X X X O X X X X X X X X X X X O X O X X X O X O X X X X 3 m 3 m 3 m X m X X 3 m 3 m 3 m X X X 3 m 3 m 3 m X X 3 m 3 m 3 m X m 4 m 4 m O X – – X – X X X X X X O O O X O O O X X O O O X X X O O O X X X X O O O O O O O 1 m O O O O O O O 1 m 1 m O O O O O O O 1 m 1 m X X X X X X X X X X X 2 m O O 2 m 1 m O O O O 2 m O O 2 m 1 O O O O 2 m O O 2 m 1 X X X X 2 m O O <Table codes> The numbers and symbols shown in the table above refer to the following: * : During procedures that use the message display but are not included in the initial procedures listed in the table above, the procedure will work just like this operation. O : The additional operation will work unconditionally with the initial operation. – : Unrelated to fax operation. X : The additional operation will NOT work with the initial operation. 1 X X 1 X m 5 3 m 3 m m X O O O O O O X X 1 m X X m 1 m X O – m 1 m X O – – X X X X X X 3 X X m: The additional operation will work with the initial operation under certain conditions. The adjoining numerals refer to the following conditions: 1 : Print out will be accomplished once printing is possible and the fax is in the Fax Operation mode. 2 : Direct Reception will switch to Memory Reception and print out will be accomplished once printing is possible and the fax is in the Fax Operation mode. 3 : Printing can be stopped and copies made. 4 : Settings made in the Fax Operation mode will be deleted once the machine is switched to the Copy Operation mode. 5 : It is possible to add fax default settings, but those communication settings, etc., that have already been made will be canceled. 1-11 Section 1 Fax Operation (Basic Use) (9) Batch Transmission Function (11) F-Code Based Communication Any time the destination as well as the scheduled time of transmission is the same for separate sets of documents in memory, up to 10 of these multiple sets of documents will be automatically pooled together and transmitted during the same communication. This Batch Transmission function eliminates the need for you to dial the same destination multiple times, thereby lowering communication costs. * Direct Feed Transmissions will not be included in a Batch Transmission. * If you register the same destination fax number for two separately scheduled Broadcast Transmissions, those transmissions will not be included in a Batch Transmission even if they are scheduled for the same time. * When the start time for a scheduled communication arrives and another communication to the same party is currently waiting for automatic redialing, both communications will be grouped together and sent using Batch Transmission. * When Restricted Access is turned ON, only communications that were scheduled using the same access code will be sent using Batch Transmission. Therefore, if different access codes were used when scheduling two separate communications, those documents will be transmitted separately even if the destination and the scheduled time of transmission are the same. F-Code Based Communication involves fax communication that includes certain codes (in the form of numbers and symbols), the base of a protocol that has been adopted for use by other facsimile manufacturers as well. By using these codes, methods of confidential communication – previously available only between facsimiles that were both from the same manufacturer – are now becoming possible between models from different manufacturers. This fax has such F-Code capabilities. By using an F-Code Box that has been registered in this machine and designated for F-Code Based Communication to transmit and receive documents, you can perform Confidential and Bulletin Board Communications, as well as Relay Broadcast Communications, between this machine and models from other manufacturers. In order to perform an F-Code Based Communication, the other party’s fax must have F-Code Based capabilities specific to the communication you are attempting. Therefore, you should thoroughly discuss in advance with the party you plan to communicate with the capabilities of your respective models before attempting to transmit or receive using F-Code Based Communications. Refer to “F-Code Based Communication” on page 4-9, for a more detailed information regarding the F-Code Based Communication capabilities of this fax. (12) Memory Reception Function (10) Rotate & Transmit Function If 11" x 8 1/2" [A4] (width-wise) size documents are set in the Document Processor or on the platen, this function will automatically rotate the scanned data 90˚ counter-clockwise and transmitted them as 8 1/2" x 11" [A4] (length-wise) documents. * To enable the Rotate & Transmit function for documents set in the Document Processor, you must select “Standard size” when setting the document size for scanning from the Document Processor. (Refer to “Setting the Document Size for Scanning from the Document Processor” on page 6-4.) * The Rotate & Transmit function will only engage for 11" x 8 1/2" [A4] size documents. 1-12 When you cannot print out because paper has run out or a paper jam occurs, the data for all received documents will be temporarily stored in memory and will then be printed out automatically once printing is enabled. * If, for any reason, power to the fax is disconnected or lost, data received into memory may be lost. Ask the other party to retransmit any documents for which data was lost. (Refer to page 1-19.) Section 1 Fax Operation (Basic Use) (13) Rotate Received Documents (15) Fax Priority Printout Even if the orientation of the received documents and of the paper set in the drawers differs, if their size is the same (11" x 8 1/2" [A4]), this function will automatically rotate the received data 90˚ counterclockwise before printing it out. No special settings are required to use this function. * If paper of the same size is set in different orientations, depending on the type of communication that is involved, there are times when rotation of the received data is not possible. For further information on paper orientation, refer to “Paper Size and Priority Feed Chart” on pages 8-3 and 8-4. * If the transmitting party’s TTI information is set to be printed outside the border of the transmitted page, received data cannot be rotated and the received image will be reduced slightly to enable the appropriate information to be printed out. It is possible to have incoming faxes, which are received during a copy operation, printed out without having to wait for that copy operation to be completed. > A fax has been received... The Fax data indicator will light. > Printing out that fax... Press the Fax Priority key. The copy operation will continue after the fax documents are printed out. (14) Imaging Memory Back-Up Function If, for any reason, power to the fax is disconnected or lost, the backup battery in this machine will protect all data related to documents that were already received into Imaging Memory, or that are waiting for transmission, for up to 60 minutes (8 MB of optional memory must be installed [totaling 16 MB in the machine]). Thus, if power is restored to the fax within that time period, those communications that were scheduled and waiting in memory prior to the failure will be carried out as scheduled. If power cannot be restored in time and data is lost, a Power Failure Report that indicates what information was lost will be automatically printed out once power is restored to the fax. * The actual length of time the back-up battery will protect the data in memory may differ depending on the conditions and environment of use of this machine. (16) Abbreviated numbers 600 speed-dial keys are available and each of these keys can be designated to function as either a one-touch key, a group dial key, a program key or a chain dial key. Each of these keys is given a 3-digit “abbreviated number” between 001 and 600. It is then possible to dial a destination number by simply entering the corresponding abbreviated number. (Refer to page 1-30.) Since only 20 of these speed-dial keys can be display on the touch panel at one time, using the corresponding abbreviated number may be faster than the time required to change screens and find a desired key. (Inch) (Metric) 1-13 Section 1 Fax Operation (Basic Use) Sending Documents The following contains explanations on the standard method for transmitting documents. Carefully read all the notes regarding acceptable documents, etc., to ensure correct operation. 1 (Inch) Switching to the Fax Operation mode Check the message display to make sure that the touch panel is in the initial mode for fax operation (the basic fax screen is displayed). If the touch panel is not in the initial mode, press the Reset key. (Metric) 2 Check the transmission mode Make sure that the fax machine is in the desired transmission mode. * There are two transmission modes available in this fax: Memory Transmission and Direct Feed Transmission. Memory Transmission is the default setting in this fax and, in this case, “Memory TX” will be displayed. * To switch from the Memory Transmission mode to the Direct Feed Transmission mode, touch the “Memory TX” key until “Dir. Feed Tx” is displayed. (Inch) (Metric) <Transmission Modes> ● Memory Transmission mode (Transmitting from the Document Processor) The destination fax number is dialed automatically AFTER the documents are set in the Document Processor, scanned and then entered into memory. This is an extremely convenient mode because your documents are returned to you, ready to use, without making you wait until the actual transmission is complete. This is the most appropriate method to use when transmitting multiple page documents. ● Memory Transmission mode (Transmitting from the platen) This mode is ideal for transmitting books and the like that cannot be placed in the Document Processor. Documents are set one at a time directly on the platen and, after all the documents are scanned and entered into memory, the destination fax number is then dialed. In this case, it is necessary – after each page is scanned – to select whether or not you want to transmit more pages. (Refer to <If the Documents Were Set on the Platen...> on page 1-18.) ● Direct Feed Transmission mode (Transmitting from the Document Processor) The destination fax number is dialed first, and – once the connection with the other fax machine is established – the documents that are set in the Document Processor are scanned and then transmitted. If the transmission involves a multi-page document, the second page is scanned after the data for the first page is transmitted. * If you want to stop the transmission in progress, press the Stop/Clear key and remove the remaining documents from the Document Processor. ● Direct Feed Transmission mode (Transmitting from the platen) This mode is ideal for transmitting books and the like that cannot be placed in the Document Processor. Documents are set one at a time directly on the platen, the destination fax number is then dialed first, and – once the connection with the other fax machine is established – scanning of the document begins and the document is transmitted. This process is carried out for each page that you want to transmit and it is necessary, after each page is scanned, to select whether or not you want to transmit more pages. (Refer to <If the Documents Were Set on the Platen...> on page 1-18.) 1-14 Section 1 Fax Operation (Basic Use) 3 Setting the documents ● Duplex Document Processor 1 Adjust the document insert guides to match the width of the documents you want to transmit. ● Document Processor 1 Adjust the document insert guides to match the width of the documents you want to transmit. > When set on the platen... • Maximum size: 11" x 17" [A3] 2 Open the eject guide when transmitting documents of a large size such as 8 1/2" x 14" [B4] or 11" x 17" [A3]. 3 Set the documents face-up on the document table. * If the documents are set properly, the document set indicator will be lit green. ● Acceptable documents > When set in the Document Processor... • Type...Standard sheet documents • Size...5 1/2" x 8 1/2" - 11" x 17" [A5R - A3] * If you attempt to transmit a document over 63" [1600 mm] in length, a message indicating that a document jam has occurred in the Document Processor will appear in the message display. • Paper weight...1-sided documents: 35 g/m2 - 160 g/m2 Duplex (2-sided) documents: 50 g/m2 - 120 g/m2 (Only available with the RADF installed) • Number (plain paper)...Under 8 1/2" x 11" [A4]: 70 sheets (Document Processor) or 100 sheets (Duplex Document Processor) 8 1/2" x 14" or 11" x 17" [B4, A3 or Folio]: 50 sheets (Document Processor) or 70 sheets (Duplex Document Processor) 2 Set the documents face-up on the document table. ● Notes on acceptable documents • If documents with very low contrast images or light colored text are transmitted, they may not be received clearly by the other party. • MAKE SURE that documents written in ink or containing glue, etc., have dried COMPLETELY before setting them for transmission. • When setting documents in the Document Processor, ALWAYS set documents AFTER removing any clips and staples as they can cause damage to the machine. • Documents of sizes outside the prescribed range may not be transmitted successfully. • If documents with punch holes are set in the Document Processor for transmission, gray streaks may appear on the documents received by the other party. In this case, set the documents in a different direction and try to transmit them again. <Setting the Documents on the Platen> Documents can also be transmitted by lifting open the Document Processor and setting one document at a time directly on the platen. ALWAYS use the platen when transmitting pages from books and the like. * DO NOT set more documents than indicated by the paper volume lines that are located on the inside of the rear document insert guide. Setting more than the acceptable number of documents can be the cause of document jams. * Refer to the Operation Guide for your Duplex Document Processor for more detailed information regarding use of the Duplex Document Processor. * It is possible to set duplex (2-sided) documents and have both the front and back sides of those documents transmitted. (Refer to page 2-1.) * DO NOT set more documents than indicated by the paper volume lines that are located on the inside of the rear document insert guide. Setting more than the acceptable number of documents can be the cause of document jams. * Refer to the Operation Guide for your Document Processor for more detailed information regarding use of the Document Processor. 1 Set the document face-down and align it properly with the lines on the original size scales. 2 When transmitting single-sheet documents directly from the platen, BE SURE to close the Document Processor. CAUTION DO NOT leave the Document Processor open as there is a danger of personal injury. 1-15 Section 1 Fax Operation (Basic Use) 4 5 Dialing a destination fax number Use the keypad to enter the destination fax number. * The destination fax number can be up to 32 digits in length. * If a mistake is made at any point in entering the fax number, touch the “r” or “R” cursor key to move the cursor to the desired position and enter the correct number as desired, or press the Stop/Clear key and enter the full number once again from the beginning. Selecting the resolution It is possible to select a resolution from among the 5 available settings. * The default setting is for Normal resolution. 1 If you want to change the resolution, touch the “Orig image quality” [“Quality Original”] key. (Inch) (Metric) 2 Select the desired resolution from among the 5 available. 1-16 ● Resolutions • Normal: For transmitting documents with standard size characters • Fine: For transmitting documents with relatively small characters or thin lines • Super fine: For transmitting documents with detailed lines and characters • Ultra fine: For transmitting the clearest reproduction of documents with detailed lines and characters • Half tone [Half-tone]: For transmitting the clearest reproduction of documents containing both photographs as well as text <Notes> • The Fine and Super fine resolutions reproduce clearer images in comparison to transmission with the Normal resolution, but transmission time is longer. • The Half tone [Half-tone] resolution reproduces grays clearly, but transmission time is longer than with the Normal or Fine resolutions. • To transmit with the Ultra fine resolution, 8 MB of optional memory must be installed. If the additional memory is NOT installed, the Ultra fine resolution will not selectable. • To transmit with the Super fine or Ultra fine resolutions, the receiving fax must have the corresponding resolution capabilities in order to benefit from their features. If the receiving fax does not have the corresponding capability, transmission will be accomplished with the Fine resolution. Section 1 Fax Operation (Basic Use) 6 Selecting the contrast It is possible to select a contrast from among the 3 available settings. * The default setting is for Regular contrast. 1 If you want to change the contrast, touch the “Exposure mode” key. 2 Select the desired contrast from among the 3 available. ● Document contrast Dark: For transmitting light documents at a darker contrast Regular: For transmitting document with a normal contrast Light: For transmitting dark documents at a lighter contrast (Inch) (Metric) 1 7 Indicating the document size When you set any documents that you want to transmit on the platen, you will need to indicate the size of those documents. This procedure is not necessary when transmitting documents from the Document Processor. 1 In order to indicate the document size, touch the “Orig. size setting” [“Original setting”] key. 2 Select the appropriate document size. Saving a document for transmission When the optional Printer/Scanner Kit is installed... Perform the following procedure in order to save a document for transmission on the administrator’s network computer. The document can be saved as a PDF file or a TIFF file. * In order to save a document for transmission, the IP address or host name must be registered in the administrator’s computer. (See page 8-5) 4 (Inch) 1 Touch the “Save Tx. original” key. 2 Touch the “On” key. 2 (Inch) (Metric) 5 (Metric) 3 Select the desired type of file by touching the “PDF” or “TIFF” key. 1-17 Section 1 Fax Operation (Basic Use) 8 Initiating the fax transmission Press the Start key. The transmission operation will begin automatically. * You can select or change the resolution or contrast during scanning or dialing. <If the Documents Were Set on the Platen...> Whenever you set the documents that you want to transmit on the platen, close the Document Processor in order to allow the machine to detect the size of those documents. If you are transmitting information from books or other types of documents that will not allow you to close the Document Processor, it is necessary to indicate the document size manually. (Refer to page 1-17.) * In addition, any time you set documents on the platen for transmission, a menu like that shown below will appear in the message display once you press the Start key and the documents have been scanned. In this case, perform the following procedure. (Inch) (Inch) (Metric) (Metric) > Checking the status of the transmission... Touch the “Status” [“Act status”] key in the bottom right of the touch panel. The document number and information related to the other party will be displayed. (Inch) > If you have more documents to send... 1 Set the next page to be scanned on the platen. * The next document(s) may also be set in the Document Processor. 2 Touch the “Yes” key. 3 Press the Start key. * If you set the document(s) in the Document Processor, scanning and then transmission of the documents will begin automatically. * Repeat steps 1 through 3 for all remaining documents. (Metric) > Stopping the transmission in progress It is possible to cancel the ongoing operation by touching the “Stop”key in the confirmation screen that was accessed above. * Touch the “Close” key to return to the previous screen. 1-18 > Once there are no further pages to be scanned... 1 Touch the “No” key. Transmission of the documents will begin automatically. Section 1 Fax Operation (Basic Use) Receiving Documents (Automatic Fax Reception) Automatic Fax Reception is the default setting for fax reception in this machine and no special settings are required for its use. * Fax reception is possible even if the main switch is turned OFF (O). If a fax comes in while the main switch is in the OFF (O) position, that fax reception will still be received and printed out. Checking the reception mode Make sure that “Auto RX” is displayed. <Reception modes> This fax machine offers the following 4 or 5 (depending upon the region of use) ways to receive a fax. • Automatic Fax Reception • Manual Fax Reception • Auto FAX/TEL Switching • TAD Reception • D.R.D. Reception ● Changing the reception mode Touch the reception mode select key when you want to change the reception mode. (Inch) (Inch) (Metric) (Metric) Touch the key that corresponds to the desired reception mode. 1-19 Section 1 Fax Operation (Basic Use) 1 Receiving a fax When a fax comes in, fax reception will begin automatically after the amount of time equal to a designated number of rings. * Once fax reception begins, the “Status” [“Act status”] key will appear in the bottom right of the touch panel. (Inch) ● Making copies during a reception It is possible to make copies even during a reception in which documents are being directly printed out (whereby Imaging memory is not used to save the documents). • Press the Interrupt key during a reception. The fax will switch to Memory Reception and copying will be possible. ● Memory Reception When you cannot print out because paper has run out or a paper jam occurs, the data for all received documents will be temporarily stored in memory and will then be printed out automatically once printing is enabled. (Metric) > Stopping the reception in progress 1 Touch the “Status” [“Act status”] key in the bottom right of the touch panel. 2 Touch the “Stop” key and the reception will be canceled. * If, for any reason, power to the fax is disconnected or lost, data received into memory may be lost. Ask the other party to retransmit any documents for which data was lost. (Inch) (Metric) 2 1-20 Printing out the received documents Received document(s) will be printed out and ejected facedown in the copy store section. * Up to 250 sheets of plain paper can be stored in the copy store section at one time. When the maximum number of sheets has been reached, remove all of the documents from the copy store section. * Even if you cannot print out because paper has run out or a paper jam occurs, reception is still possible (Memory Reception). * 8 MB of optional memory must be installed in order to use the Ultra fine resolution. Section 1 Fax Operation (Basic Use) Canceling a Communication You can cancel a communication even if it is already in progress. The methods for canceling a communication differ depending on whether that communication is a fax transmission or a fax reception, and whether that transmission was initiated using the Memory Transmission mode or the Direct Feed Transmission mode. The following contains explanations on the various methods used for canceling communications. (1) Canceling a Memory Transmission (during scanning) 1 If you want to cancel a Memory Transmission during scanning of the documents, simply press the Stop/Clear key. The document that is currently being scanned will be ejected and the touch panel will return to the initial mode settings. If there are any documents left in the Document Processor, remove them from the document table. Touch the “Status” [“Act status”] key in the bottom right of the touch panel. The status of the communication currently in progress will appear in the message display. (Inch) (Metric) (2) Canceling a Memory Transmission (during transmission) If you want to cancel a Memory Transmission in which scanning all of the documents has been completed and the dialing or transmission operation has already begun, perform the following procedure. 2 Touch the “Stop” key or press the Stop/Clear key. The touch panel will return to the initial mode settings. * If you attempt to cancel a transmission that is scheduled to multiple destinations (such as a Broadcast Transmission) and there were destinations still remaining to be transmitted to, a message will appear in the message display asking whether or not you want to continue the transmissions to the remaining destinations. (Inch) (3) Canceling a Direct Feed Transmission (Metric) A message such as that shown below will be displayed after dialing the destination party in the Direct Feed Transmission mode. If you want to cancel a Direct Feed Transmission, touch the “Stop” key or press the Stop/Clear key. When a display to confirm the cancel appears, touch the “Yes” key. The document that is currently being scanned will be ejected and the touch panel will return to the initial mode settings. If there are any documents left in the Document Processor, remove them from the document table. (Inch) (Metric) 1-21 Section 1 Fax Operation (Basic Use) (4) Canceling a Reception If you want to cancel a reception, perform the following procedure. (Inch) (Metric) 1 Touch the “Status” [“Act status”] key in the bottom right of the touch panel. The status of the communication currently in progress will appear in the message display. (Inch) (Metric) 2 1-22 Touch the “Stop” key or press the Stop/Clear key. The touch panel will return to the initial mode settings. * If you attempt to cancel a reception that is scheduled from multiple transmitting faxes (such as a Polling Reception) and there were fax machines still remaining to be received from, a message will appear in the message display asking whether or not you want to continue the receptions from the remaining faxes. Section 1 Fax Operation (Basic Use) Entering Characters The Character Input screen will appear during registration of your own name (self-station name), destination names, etc. (1) Character Input screen Inch version There are 3 different Character Input screens. One for uppercase input, one for lowercase input and one for special character input. Touch the “Capital” key, the “Letter” key and the “Num./Sym.” key, respectively to access the desired input screen. Uppercase input Lowercase input • The functions of each key in the Character Input screen... “Capital” key...Touch this key when you want to enter uppercase letters. “Letter” key...Touch this key when you want to enter lowercase letters. “Num./Sym.” key...Touch this key when you want to enter numerals and other available symbols. “Space” key: Touch this key when you want to enter a space. “r“ and “R” keys: Touch these keys when you want to move the cursor. “AllDel.” key: Touch this key when you want to delete all of the currently entered information. “Del. prev.” key: Touch this key when you want to delete the character to the left of the cursor. “Back” key: Touch this key when you want to return to the screen prior to character input. “End” key: Touch this key when you want to register the entered information. Numbers & Special characters input Metric version The Character Input screen is actually composed of two separate screens: one for uppercase letters and the other for lowercase. Touch the “q Shift” key to switch between these two screens. Lowercase input Uppercase input • The functions of each key in the Character input screen... “Back” key...Touch this key when you want to return to the screen prior to character input. “Close” key, “Next” key and “OK” key...Touch these keys when you want to register the entered information. “q Shift” key...Touch this key when you want to switch between input of uppercase and lowercase letters. “Space” key...Touch this key when you want to enter a space. “r” and “R” cursor keys...Use these keys when you want to move the cursor. “Back” key...Touch this key when you want to delete the character to the left of the cursor. “Del.” key...Touch this key when you want to delete the character that the cursor is currently under. * Enter numerals with the keypad. 1-23 Section 1 Fax Operation (Basic Use) (2) Procedure Inch Version [Ex.] To enter “Km@4” 1 Verify that the “Capital” key is highlighted and touch the “K” key. Metric Version [Ex.] To enter “Km-4” 1 2 2 3 Touch the “m” key. 3 Touch the “Num./Sym.” key to switch to input of numerals and other available symbols. 5 Touch the “@” key and then the “4” key. 1-24 Touch the “K” key. Touch the “Letter” key to switch to lowercase input. 4 6 Touch the “q Shift” key to switch from lowercase input to uppercase input. Touch the “End” key to register the entered information. Touch the “q Shift” key to switch from uppercase input back to lowercase input. 4 Touch the “m” and then the “-” keys. 5 Press “4” on the keypad. 6 Touch the “Close” key to register the entered information. Section 1 Fax Operation (Basic Use) One-touch Keys 2 If you register a fax number under a one-touch key in advance, you will be able to dial that number with the touch of a key. You can also use one-touch keys to designate destination fax numbers for F-Code Based Communication and Encrypted Transmissions. Touch the “Dial” key. The touch panel will switch to dial registration. (Inch) (1) Registering * 600 speed-dial keys are available and each of these keys can be designated to function as either a one-touch key, a group dial key, a program key or a chain dial key. * The abbreviated number for the speed-dial key that you press (001 - 600) will automatically become the abbreviated number for the destination fax number registered under that one-touch key. * You CANNOT designate a one-touch key for both F-Code Based Communication AND Encrypted Transmission. * If you want to check the information already registered under each one-touch key, print out a One-Touch Key List. * It is recommended that you register the name of the other party as well as the fax number under each one-touch key. If you register the other party's name as well, you will be able to use the address book to search for their fax number. * Prior to operation, check the message display to make sure that the touch panel is in the initial mode for fax operation. (Refer to “(2) Initial Mode” on page 1-7.) * If you want to cancel the procedure part way through, press the Reset key. The touch panel will return to the initial mode settings. (Metric) 3 Touch an unregistered speed-dial key on the touch panel. * If there are no unregistered speed-dial keys displayed, use the “▼” and/or “▲” cursor keys to switch to a screen that displays an unregistered key. (Inch) 1 Touch the “Register” [“Registration”] key. The Registration Select screen will appear. (Inch) (Metric) (Metric) 4 Touch the “One-touch key” key. 1-25 Section 1 Fax Operation (Basic Use) 5 Use the keypad to enter the fax number you want to register under that one-touch key. (Maximum 32 digits) 9 (Inch) 10 If you want to perform more detailed settings like selecting the transmission speed, or designating this one-touch key for F-Code Based Communication or Encrypted Transmission, touch the “Setting” key and then go to the next step. If you want to register this one-touch key with the entered information as is, go directly to step 20. Select the desired transmission speed from among those available: “33600bps”, “14400bps” and “9600bps”. (Metric) (Inch) • “r” and “R” cursor keys...Use to move the cursor. “Delete” key...Touch to delete the character that the cursor is currently under. (When the cursor is at the last space, the previous character will be deleted.) “Space” key...Touch to enter a space. “Pause” key...Touch to enter a slight pause (indicated by a hyphen) at that point in dialing. 6 7 8 (Metric) Touch the “Next” key. 11 If you want to designate this key for F-Code Based Communication, touch the “Subaddress Tx” key and then go to the next step. If you want to designate this key for Encrypted Transmission, go directly to step 15. If you want to register this one-touch key with the entered information as is, touch the “Close” key and proceed directly to step 20. 12 To use this key for F-Code Based Communication, touch the “On” key. The Subaddress/Password Input screen will appear. Enter the name of the other party. (Maximum 20 characters) * In order to enter characters, refer to “Entering Characters” on page 1-23.) Check the registered information. If you want to change any portion of it, touch the key that corresponds to the desired item and change the information as desired. (Inch) (Metric) 1-26 Section 1 Fax Operation (Basic Use) 13 14 Use the keypad to enter the desired subaddress and F-Code password. (Maximum 20 digits) * To switch between the subaddress and password input screens, touch the “Password” key. * A subaddress is required during F-Code Based Communication in order to designate the other party's corresponding F-Code Box. * An F-Code password is used during F-Code Based Communication. However, you do not have to enter an F-Code password here if you have determined in advance with the other party not to use one. Touch the “Close” key twice and then go directly to step 20. 15 If you want to designate this key for Encrypted Transmission, touch the “Encryption TX” [“Encryption”] key. 16 To use this key for Encrypted Transmission, touch the “On” key. The Key Code/Box Number Input screen will appear. 17 Use the keypad to enter the 2-digit Key Code (01 - 20) that corresponds to the Encryption Key you want to use for this one-touch key. 18 19 20 21 Touch the “Encryption box #” key and then use the keypad to enter the number of the destination party's Encryption Box. Touch the “Close” key twice. To register this one-touch key with the entered information as is, touch the “OK” key. The message display will return to the same screen as was displayed in step 3. If you want to continue registering other one-touch keys, repeat steps 3 through 20. If you are finished registering one-touch keys, press the Reset key. (Inch) (Metric) 1-27 Section 1 Fax Operation (Basic Use) (2) Modifying and Deleting * If the one-touch key that you want to modify is designated for F-Code Based Communication, you will NOT be able to change the designation of that key into one for Encrypted Transmission. Likewise, if it is designated for Encrypted Transmission, you can NOT change the designation into one for F-Code Based Communication. 1 2 Touch the “Register” [“Registration”] key. The Registration Select screen will appear. Touch the “Dial” key. 4 5 If you want to delete the registered one-touch key, touch the “Delete” key and then go to the next step. If you want to modify the registered information, touch the “Change contents” key and then go directly to step 6. > Deleting a one-touch key Touch the “Yes” key. The message display will return to the same screen as was displayed in step 3. If you want to continue deleting other one-touch keys, repeat steps 3 through 5. If you are finished deleting one-touch keys, press the Reset key. 6 > Modifying registered information If you want to modify the abbreviated number (the displayed number of the speed-dial key under which the one-touch key is registered), touch the “Abbr. #” key. If you want to modify any other basic information, touch the key that corresponds to that information. (To modify information, refer to the corresponding step under “(1) Registering” on page 1-25.) * If you want to change more detailed settings, touch the “Setting” key and select the desired item. 7 Enter the abbreviated number of an unregistered speed-dial key (001 - 600). * Once a 3-digit number is entered, that number may be changed using the “+” and “-” keys. (Inch) (Metric) (Inch) (Metric) 3 Touch the speed-dial key (one-touch key) containing the information you want to modify or delete. * If that key is not displayed, use the “▼” and/or “▲” cursor keys to switch to the screen that displays the key that you want. (Inch) (Metric) 1-28 8 Touch the “Close” key. 9 Once you are finished modifying all of the items that you want, touch the “OK” key. The message display will return to the same screen as was displayed in step 3. If you want to continue modifying other one-touch keys, repeat steps 3 through 9. If you are finished deleting onetouch keys, press the Reset key. Section 1 Fax Operation (Basic Use) (3) Dialing You can dial a fax number by simply pressing the one-touch key under which that number is registered. * To select the conditions related to transmitting documents, such as the resolution and contrast, refer to pages 1-16 and 1-17. * Prior to operation, check the message display to make sure that the touch panel is in the initial mode for fax operation. (Refer to "(2) Initial Mode" on page 1-7.) * If you want to cancel the procedure part way through, press the Reset key. The touch panel will return to the initial mode settings. 6 Press the Start key. The transmission operation will begin automatically. * Any time you set documents on the platen, after each document is scanned you will need to select whether or not you want to scan more pages into memory. (Refer to page 1-18.) (4) Printing Out a One-Touch Key List 1 If the operation involves the transmission of documents, set the documents you want to transmit. 2 If you want to change the transmission conditions, such as the resolution and contrast, touch the “TX setting” key. If you do NOT want to change the current conditions, go directly to step 5. 3 Touch the key that corresponds to the desired item and change the information as desired. (To change each transmission condition, refer to pages 1-16 and 1-17.) Print out this list in order to check the fax numbers registered under one-touch keys. * If there are no one-touch keys registered in this fax, a One-Touch Key List will not be printed out. * Prior to operation, check the message display to make sure that the touch panel is in the initial mode for fax operation. (Refer to “(2) Initial Mode” on page 1-7.) * If you want to cancel the procedure part way through, press the Reset key. The touch panel will return to the initial mode settings. 1 Touch the “Print Report” key. The Report Select screen will appear. (Inch) (Metric) 4 Once you are finished changing transmission conditions, touch the “One touch destinat.” key. 5 Touch the one-touch key under which the desired fax number is registered. 2 Touch the “One-touch key list” key. (Inch) (Inch) (Metric) (Metric) 3 To print out that list, touch the “Yes” key. A One-Touch Key List will be printed out. 1-29 Section 1 Fax Operation (Basic Use) Dialing with Abbreviated Numbers Speed-dial keys are available to be registered as either a one-touch key, a group dial key, a program key or a chain dial key. Each of these keys is given a 3-digit number between 001 and 600 and this number is referred to as that key's “abbreviated number”. It is then possible to dial a destination number by simply entering the corresponding abbreviated number. * Prior to operation, check the message display to make sure that the touch panel is in the initial mode for fax operation. (Refer to “(2) Initial Mode” on page 1-7.) * If you want to cancel the procedure part way through, press the Reset key. The touch panel will return to the initial mode settings. 1 Set the documents you want to transmit. 2 If you want to change the transmission conditions, such as the resolution and contrast, touch the “TX setting” key. If you do NOT want to change the current conditions, go directly to step 5. 3 Touch the key that corresponds to the desired item and change the information as desired. (To change each transmission condition, refer to pages 1-16 and 1-17.) 4 Once you are finished changing transmission conditions, touch the “Abbrev.” key and then go directly to step 6. 5 Touch the “Abbrev.” key. (Inch) (Metric) 1-30 6 Use the keypad to enter the abbreviated number (001 - 600) that corresponds to the speed-dial key under which the desired fax number is registered. * Once a 3-digit number is entered, that number may be changed using the “+” and “-” keys. 7 Touch the “Close” key. The touch panel will return to the basic fax screen and the corresponding speed-dial key will be highlighted. 8 Press the Start key. The transmission operation will begin automatically. Section 1 Fax Operation (Basic Use) Address Book The address book searches for the name of the other party as it is registered under a one-touch key, group dial key, program key or chain dial key and will dial the corresponding fax number(s) upon command. This function is extremely useful when a large number of fax numbers have been registered. * In order to use the address book, it is necessary that you register a name for the other party (or the group or program name) during registration of the one-touch key, group dial key, program key or chain dial key. * The directory may also be used during registration of program keys, group dial keys, Fax Forwarding, and F-Code Relay Boxes, as well as for entering the fax number of the other party in each of the other various types of fax communication available in this fax. (1) Search Criteria Address book searches are performed using the first three characters of the name as it is registered under the one-touch key, group dial key, program key or chain dial key. If the first 3 characters of any two destinations are the same, those names will be displayed in the numerical order of the abbreviated number. ● Search order The search order is as follows with the order of precedence shown from left to right. English Alphabet [A - Z] R numerals [0 - 9] R symbols [. : , - + / & ' ( )] R special characters* R space * The available special characters will differ depending upon the language being used. Refer to “Special Characters Chart” on page 8-2. (2) Searching with the Address book 3 Touch the key that corresponds to the desired item and change the information as desired. (To change each transmission condition, refer to pages 1-16 and 1-17.) 4 Once you are finished changing transmission conditions, touch the “Address book” key and go directly to step 6. 5 Touch the “Address book” key. [Ex.] To search for "New York" and then transmit documents to that destination (Inch) * Prior to operation, check the message display to make sure that the touch panel is in the initial mode for fax operation. (Refer to “(2) Initial Mode” on page 1-7.) * If you want to cancel the procedure part way through, press the Reset key. 1 Set the documents you want to transmit. (Metric) 6 2 On the touch panel, touch the first letter of the name that you want to search for. If you want to change the transmission conditions, such as the resolution and contrast, touch the “TX setting” key. If you do NOT want to change the current conditions, go directly to step 5. 1-31 Section 1 Fax Operation (Basic Use) 7 The speed-dial keys that are registered with a name that starts with that first letter will be displayed. (Inch) (3) Printing Out a Telephone Directory List Print out this list in order to check the fax numbers that can be found in a address book search. * If there are no fax numbers registered that can be found in a address book search, a Telephone Directory List will not be printed out. * Prior to operation, check the message display to make sure that the touch panel is in the initial mode for fax operation. (Refer to “(2) Initial Mode” on page 1-7.) * If you want to cancel the procedure part way through, press the Reset key. (Metric) 1 Touch the "Print Report" key. The Report Select screen will appear. (Inch) 8 9 Touch the speed-dial key under which the desired destination is registered. * If that key is not displayed, use the "▼" and/or "▲" cursor keys to switch to the screen that displays the key that you want. (Metric) Touch the "OK" key. The touch panel will return to the basic fax screen. 2 Touch the “Telephone direct. list” key. (Inch) 10 Press the Start key. The transmission operation will begin automatically. (Metric) 3 1-32 To print out that list, touch the “Yes” key. A Telephone Directory List will be printed out. Section 1 Fax Operation (Basic Use) Redialing Functions 3 Redialing refers to dialing the most recently dialed number once again. (1) Automatic Redialing When attempting to transmit documents, etc., the other party's fax machine may be busy with another communication and may not respond. In this type of situation, your fax machine will automatically attempt to redial that same number. * Automatic Redialing is performed automatically by this fax and no special settings are required for its use. As redialing will be performed a number of times at a set interval, this function is effective even if the other party's communication takes an extended period of time. * Automatic Redialing will not engage when documents are being transmitted in the Direct Feed Transmission mode. 1 (2) Manual Redialing What if you try to transmit documents but the other party's fax line is busy and can't answer your call? In this type of situation, you will be able to redial that last number dialed once again by simply touching the “Re-dial” key. Touch the “Re-dial” key. The fax will automatically begin redialing the most recently dialed number. (Inch) 4 2 (Metric) 5 1-33 Section 2 Fax Operation (Various Functions) Section 2 Fax Operation (Various Functions) Duplex Transmission Duplex Transmission enables the transmission of both the front and back sides of duplex (2-sided) documents. Duplex transmission is always accomplished by setting the documents you want to transmit in the Duplex Document Processor and scanning them into memory in the Memory Transmission mode. During the set-up procedure for a Duplex Transmission, it is possible to select whether or not you want to include a separate cover page with the transmission as well as whether the image on the back side of the document needs to be inverted during transmission to match the orientation of the image on the front side. It is also possible to use Duplex Transmission capabilities in combination with each of the other various types of fax communication available in this fax. The following method explains the procedure for sending duplex documents to a single destination. * Prior to performing Duplex Transmission, you must select “Standard size” when setting the document size for scanning from the Document Processor. (Refer to “Setting the Document Size for Scanning from the Document Processor” on page 6-4.) 3. Touch the “Duplex TX” key and then go directly to step 6. 4. Touch the “TX setting” key. * If you want to cancel the procedure part way through, press the Reset key. The touch panel will return to the initial mode settings. (Inch) 1. Set the 2-sided documents in the Duplex Document Processor. (Metric) 2. Enter the destination fax number. * If you entered the fax number using the keypad, go to the next step. If you entered the fax number using abbreviated numbers, onetouch keys, group dial keys, program keys or chain dial keys, proceed directly to step 4. 5. Touch the “Duplex TX” key. 6. Touch the “On” key to enable Duplex Transmission. (Inch) (Metric) 2-1 Section 2 Fax Operation (Various Functions) 7. Select whether or not you want to include a cover page with the transmission by touching either the “Yes” key or the “No” key, as appropriate. > If you want to send a 1-sided document as a cover sheet to the rest of the 2-sided documents, select “Yes”. In this case, the fax will transmit the documents WITHOUT scanning the back side of the first page. > If you want to transmit the 2-sided documents WITHOUT a cover page, select “No”. (Inch) (Metric) 8. Select whether or not you want the image on the back side of the documents to be inverted during transmission to match the orientation of the front side by touching either the “On” key (invert rear images) or the “Off” key (do NOT invert images), as appropriate. > If you transmit documents as shown in the illustration immediately below, select “On”. The fax will then invert the image of the rear side of each document in memory 180°. <Scanning> R <Printout at the destination fax> (Direction of document feed) > If you transmit documents as shown in the illustration below, select “Off”. <Scanning> (Direction of document feed) 2-2 R <Printout at the destination fax> 9. Touch the “Close” key. 10. Press the Start key. The documents will be scanned into memory and the transmission operation will begin automatically. Section 2 Fax Operation (Various Functions) Standby Transmission Standby Transmission refers to the process of preparing documents for transmission while the fax is occupied with another communication. If, during that communication, the documents you want to transmit are set and the destination fax number is entered, those documents will be automatically transmitted once the current communication has been completed. * A maximum of 50 communications (including any combination of Standby Transmissions, communications that use the timer and Interrupt Transmissions) can be scheduled at one time. * You can also designate each of the various types of fax communication available in this fax such as Broadcast Transmission as a Standby Transmission. * If you want to cancel the procedure part way through, press the Reset key. The touch panel will return to the initial mode settings. ● Canceling a waiting transmission in the Direct Feed Transmission mode... 1 Touch the “Stop transmit” [“Stop Tx”] key on the touch panel, or press the Stop/Clear key. 1. Set the documents you want to transmit in the Document Processor or on the platen. (Inch) (Metric) 2. Enter the destination fax number. * You can enter the fax number(s) using the keypad, abbreviated numbers, one-touch keys, group dial keys, program keys or the address book. Chain dial keys can be used as well. 2 If you DO want to cancel the Standby Transmission, touch the “Yes” key. 3. Press the Start key. The documents will be scanned into memory. * If the fax is in the Direct Feed Transmission mode, the documents will remain in the Document Processor or on the platen waiting for the transmitting operation to begin. • Once the other communication is completed, the transmission operation will begin automatically. 2-3 Section 2 Fax Operation (Various Functions) Broadcast Transmission Broadcast Transmission allows the same documents to be transmitted to a number of destinations one after another, in a single operation. If, for example, you want to transmit the same documents from a central office to multiple branch offices, this function is quite convenient as it only requires you to perform the transmission operation one time. The documents you want to transmit are first entered in memory, and dialing and transmitting operations are repeated automatically for each destination. * If you enter all of the destination numbers using abbreviated numbers, one-touch keys or group dial keys, this fax can automatically transmit the same documents to up to 300 different destinations in a single operation. * You can also perform Broadcast Transmission as F-Code Based Transmission or in conjunction with the timer. * During a Broadcast Transmission to multiple destinations, documents will be transmitted using the Memory Transmission mode even if the fax is currently in the Direct Feed Transmission mode. * If you want to cancel the procedure part way through, press the Reset key. The touch panel will return to the initial mode settings. 1. Set the documents you want to transmit in the Document Processor or on the platen. * When the documents are set on the platen, it is necessary, after each page is scanned, to select whether or not you want to transmit more pages and to select the size of each page. (Refer to page 1-18.) (Inch) (Metric) 2. Enter a destination fax number. * You can enter the fax number(s) using the keypad, abbreviated numbers, one-touch keys, group dial keys or the address book. Chain dial keys can be used as well. Touch the speed-dial key that is registered with the one-touch or group dial information that you want to use. The selected key will be highlighted. * It is also possible to use a registered chain dial key followed by another speed-dial key. 3. Press the Start key. The transmission operation will begin automatically. > Entering the fax number with the keypad... (Inch) If you want to enter more than one destination fax number, touch the “Next destinat.” [“Next dest.”] key after you enter the first fax number and you will be able to enter the next number. * If you want to enter the next number with one of the speed-dial keys, touch the “One touch destinat.” key instead. The speed-dial keys will appear. (Metric) > Entering the fax number with a speed-dial key... 2-4 Section 2 Fax Operation (Various Functions) Interrupt Transmission Interrupt Transmission lets you send your documents before others, eliminating the need to wait until all communications are complete whenever the fax is currently scheduled for multiple communications (Broadcast Transmission or Polling Reception, etc.), or there are other communications already scheduled in memory ahead of yours. * Interrupt Transmission may only be accomplished to a single destination. * A maximum of 50 communications (including any combination of Interrupt Transmissions, communications that use the timer and Standby Transmissions) can be scheduled at one time. * Depending on the timing of when you perform the Interrupt Transmission procedure, there are occasions where your documents may not be send “immediately” after the current communication. * If you want to cancel an Interrupt Transmission, simply remove the set documents. * To cancel an Interrupt Transmission while it is still waiting to start, perform the same procedure as in “● Canceling a waiting transmission in the Direct Feed Transmission mode...” on page 2-3. * If you want to cancel the procedure part way through, press the Reset key. The touch panel will return to the initial mode settings. 1 3. Enter the destination fax number. * You can enter the fax number using the keypad, abbreviated numbers, one-touch keys or the directory. Chain dial keys can be used as well. 1. Touch the “Memory TX” key until it changes to “Dir. Feed Tx”. (Inch) 4. Press the Start key. The documents will remain in the Document Processor or on the platen, without being scanned, waiting for the transmitting operation to begin. Once the operation currently in progress is completed, the transmission operation for your documents will begin automatically. (Metric) 2. Set the documents you want to transmit in the Document Processor or on the platen. * When the documents are set on the platen, it is necessary, after each page is scanned, to select whether or not you want to transmit more pages and to select the size of each page. (Refer to page 1-18.) 6 2-5 Section 2 Fax Operation (Various Functions) Communication Using the Timer If you designate in advance the time for a communication to begin, that communication will be carried out automatically once the appointed time is reached. You can designate a communication to be one that uses the timer during the operation procedure for each of various types of fax communication available in this fax such as Broadcast Transmission. The example in the procedure below is for the transmission of documents to a single destination using the timer function. Note: The time for the communication to begin is based on the time that is set in this machine. Make sure to check the time set in this machine in advance. * A maximum of 50 communications (including any combination of communications that use the timer, Interrupt Transmissions and Standby Transmissions) can be scheduled at one time. * When 2 or more communications that use the timer are scheduled to begin at the same time, fundamentally each communication will be accomplished in the order that they were registered. However, even if it has been registered later, any communication that scheduled with a single location will take priority over a communication to multiple locations. * It is possible to cancel or change the contents of a communication that is waiting for a start time, (Refer to “Editing a Communication in Memory”, page 2-10.) * All transmissions that use the timer will be accomplished in the Memory Transmission mode even if the fax is currently in the Direct Feed Transmission mode. * Each communication that uses the timer can be set to begin at any minute between 00:00 - 23:59. * If you want to cancel the procedure part way through, press the Reset key. The touch panel will return to the initial mode settings. 1. Set the documents you want to transmit in the Document Processor or on the platen. * When the documents are set on the platen, it is necessary, after each page is scanned, to select whether or not you want to transmit more pages and to select the size of each page. (Refer to page 1-18.) 3. Touch the “Delayed TX” key. 4. Touch the “On” key and the Time Entry screen will appear. (Inch) (Metric) 2. Enter the destination fax number. * You can enter the fax number using the keypad, abbreviated numbers, one-touch keys or the address book. Chain dial keys can be used as well. * If you entered the destination fax number with a one-touch key or a chain dial key, touch the “TX setting” key after that. 5. Use the keypad to enter the desired time for the transmission to begin. * If you want to change the entered time, use the “r” and/or “R” keys to move the cursor to the desired location. (Inch) 6. Touch the “Close” key. (Metric) 2-6 7. Press the Start key. The documents will be scanned into memory, and the transmission operation will begin when the appointed time is reached. * If the Delayed Communication Report print out setting is turned “ON”, a Delayed Communication Report will be printed out. (Refer to page 6-1.) Section 2 Fax Operation (Various Functions) Chain Dial Keys If you register a chain dial number under a speed-dial key in advance, that speed-dial key will function as a chain dial key and the chain dial key can be used to enter the initial portion of the other party’s fax number. Example: If the number “0123” is registered under a speed-dial key (which then functions as a chain dial key) and you want to dial the number 0123-XXXXXX, press the key under which “0123” is registered and enter the rest of the number with the numeric keys. * You can only use chain dial keys once in a dialing sequence: to enter the initial digits of the other party’s fax number. * You can use chain dial keys when entering destination fax numbers in each of the various types of fax communication available in this fax such as Broadcast Transmission. * You CANNOT use chain dial keys in combination with group dial keys. (1) Registering * You can register any number of the 600 speed-dial keys for use as chain dial keys. * If you want to cancel the procedure part way through, press the Reset key. The touch panel will return to the initial mode settings. 3. Touch an unregistered speed-dial key on the touch panel. * If there are no unregistered speed-dial keys displayed, use the “▼” and/or “▲” cursor keys to switch to a screen that displays an unregistered key. (Inch) 1. Touch the “Register” [“Registration”] key. The Registration Select screen will appear. (Inch) (Metric) (Metric) 4. Touch the “Chain” key. 5. Use the keypad to enter the desired chain dial number. (Maximum 32 digits) (Inch) 2. Touch the “Dial” key. The touch panel will switch to dial registration. (Inch) (Metric) (Metric) * “r” and “R” cursor keys...Use to move the cursor. “Delete” key...Touch to delete the character that the cursor is currently under. (When the cursor is at the last space, the previous character will be deleted.) “Space” key...Touch to enter a space. “Pause” key...Touch to enter a slight pause (indicated by a hyphen) at that point in dialing. 2-7 Section 2 Fax Operation (Various Functions) 6. Touch the “Next” key. (2) Modifying and Deleting * If you want to cancel the procedure part way through, press the Reset key. The touch panel will return to the initial mode settings. 7. Enter the desired name for the chain dial key. (Maximum 20 characters) * In order to enter characters, refer to “Entering Characters” on page 1-23.) 1. Touch the “Register” [“Registration”] key. The Registration Select screen will appear. 2. Touch the “Dial” key. (Inch) 8. Check the registered information. If you want to change any portion of it, touch the key that corresponds to the desired item and change the information as desired. (Metric) (Inch) (Metric) 3. Press the speed-dial key (chain dial key) containing the information you want to modify or delete. * If that key is not displayed, use the “▼” and/or “▲” cursor keys to switch to the screen that displays the key that you want. (Inch) 9. To register this chain dial key with the entered information as is, touch the “OK” key. The message display will return to the same screen as was displayed in step 3. If you want to continue registering other one-touch keys, repeat steps 3 through 9. (Metric) 10. Once you are finished registering chain dial keys, press the Reset key. 4. If you want to delete the registered chain dial key, touch the “Delete” key and then go to the next step. If you want to modify the registered information, touch the “Change contents” key and then go directly to step 6. 2-8 Section 2 Fax Operation (Various Functions) > Deleting a chain dial key 5. Touch the “Yes” key. The message display will return to the same screen as was displayed in step 3. If you want to continue deleting other chain dial keys, repeat steps 3 through 5. If you are finished deleting chain dial keys, press the Reset key. (3) Using a Chain Dial Key * If you want to cancel the procedure part way through, press the Reset key. The touch panel will return to the initial mode settings. 1. If the operation involves the transmission of documents, set the documents you want to transmit. > Modifying registered information 6. If you want to modify the abbreviated number (the displayed number of the speed-dial key under which the chain dial key is registered), touch the “Abbr. #” key. If you want to modify any other basic information, touch the key that corresponds to that information. (To modify information, refer to the corresponding step under “(1) Registering” on page 2-7.) 7. Enter the abbreviated number of an unregistered speed-dial key (001 - 600). * Once a 3-digit number is entered, that number may be changed using the “+” and “-” keys. 2. Press the desired speed-dial key that was registered as a chain dial key. (Inch) (Inch) (Metric) (Metric) 8. Touch the “Close” key. 9. Once you are finished modifying all of the items that you want, touch the “OK” key. The message display will return to the same screen as was displayed in step 3. If you want to continue modifying other chain dial keys, repeat steps 3 through 9. If you are finished deleting chain dial keys, press the Reset key. 3. Enter the other party’s fax number. * You can enter the fax number using the keypad, abbreviated numbers, one-touch keys or the address book. * Once the other party’s fax number is entered, only the registered chain dial name will be displayed, followed by the other party’s fax number or name. * If you want to enter the fax number once again from the beginning during input with the keypad, simply press the Stop/ Clear key. 4. Press the Start key. The communication operation will begin automatically. 2-9 Section 2 Fax Operation (Various Functions) Editing a Communication in Memory You can modify certain information relating to a scheduled communication that uses the timer or even cancel the communication completely. You can also print out a sample image of the corresponding documents as well as initiate (force-start) the communication without waiting for the actually scheduled start time. * If the scheduled communication begins automatically while you are in the middle of any editing operation, it will impossible to continue that procedure. (1) Printing Out a Sample Image of Waiting Documents If you want to check the documents that correspond to a specific transmission that is in memory and waiting for transmission, you can print out a sample page of those documents. * Even if you print out a sample image of the documents, the transmission will be carried out on schedule. * If you want to cancel the procedure part way through, press the Reset key. The touch panel will return to the initial mode settings. 1. Touch the “Application” key. The Application screen will appear. (2) Force-Starting the Communication You can force-start a communication that is waiting in memory, without having to wait for the scheduled start time. * You can also force-start a communication that is waiting for Automatic Redialing. * If you want to cancel the procedure part way through, press the Reset key. The touch panel will return to the initial mode settings. 1. Perform steps 1 through 3 of “(1) Printing Out a Sample Image of Waiting Documents”. (Inch) 2. Touch the “Immediate TX” key. (Inch) (Metric) (Metric) 2. Touch the “Reserved TX status” key. The content of the first schedule communication will be displayed. (Inch) 3. Touch the “Yes” key. The corresponding operation will begin automatically. (Metric) 3. Use the “▼” and/or “▲” cursor keys to switch to the communication that you want. 4. Touch the “Print” key. 5. Touch the “Yes” key. A sample image of the corresponding documents will be printed out. 2-10 Section 2 Fax Operation (Various Functions) (3) Deleting the Communication You can delete a scheduled communication that is in memory and waiting for a start time. * You CANNOT delete a scheduled communication that is in memory waiting to be forwarded to a destination fax. * If you want to cancel the procedure part way through, press the Reset key. The touch panel will return to the initial mode settings. 4. Touch the “Delete” key. (Inch) 1. Touch the “Application” key. The Application screen will appear. (Metric) (Inch) (Metric) 5. Touch the “Yes” key. The selected communication will be deleted and the touch panel will return to the initial mode settings. If you want to continue deleting other scheduled communications, repeat steps 1 through 5. Once you are finished deleting scheduled communications, press the Reset key. 2. Touch the “Reserved TX status” key. The content of the first schedule communication will be displayed. (Inch) (Metric) 3. Use the “▼” and/or “▲” cursor keys to switch to the communication that you want. 2-11 Section 2 Fax Operation (Various Functions) (4) Modifying the Contents of the Communication You can modify the information relating to a scheduled communication that is presently saved in memory. The scheduled time for the communication to start can be changed, destinations changed, added and deleted, or the communication can be canceled completely. The actual procedure and information available for modification is slightly different depending on the type of communication involved. The example in the procedure below is for a scheduled Broadcast Transmission that uses the timer. If you want to modify the information relating other types of communications, simply refer to this example but follow the flow of the message display in order to perform the actual procedure. * You CANNOT modify a scheduled communication that is waiting for Automatic Redialing, nor is it possible to modify a scheduled Polling Communication, a scheduled transmission using the optional Network FAX functions, a scheduled Broadcast Transmission, or an F-code Transmission. 4. Touch the “Program/Change” key. (Inch) (Metric) * If you want to cancel the procedure part way through, press the Reset key. The touch panel will return to the initial mode settings. 1. Touch the “Application” key. The Application screen will appear. (Inch) 5. If you want to change the scheduled start time, touch the “Delayed TX” key and then go to the next step. If you want to modify the destination information, touch the “v” key and then go directly to step 8. (Metric) > Changing the scheduled start time 6. Use the keypad to enter the desired time for the communication to begin. * If you want to change the entered time, use the “r” and/or “R” keys to move the cursor to the desired location. 2. Touch the “Reserved TX status” key. The content of the first schedule communication will be displayed. (Inch) 7. Touch the “Close” key. The message display will return to the same screen as was displayed in step 5. If you also want to modify the destination information, touch the “v” key. If you do NOT want to modify the information, go directly to step 17. (Metric) > Modifying destination information 3. Use the “▼” and/or “▲” cursor keys to switch to the communication that you want. 2-12 8. The currently registered information will be displayed. • If you want to delete a fax number(s), touch the corresponding speed-dial key (or keys) and then go to the next step. • If you want to add a fax number(s), touch the “Add” key and then go directly to step 11. • If you want to change a fax number(s), touch the corresponding speed-dial key and then proceed directly to step 13. Section 2 Fax Operation (Various Functions) ● Deleting fax numbers 9. Touch the “Delete” key. ● Changing fax numbers 13. Touch the “Change” key. (Inch) 14. Enter the new destination fax number. * You can enter the fax number(s) using the keypad, abbreviated numbers, one-touch keys, group dial keys and the address book. Chain dial keys can be used as well. (Metric) (Inch) 10. Touch the “Yes” key. The message display will return to the same screen as was displayed in step 8 and you can continue to delete, add or change other fax numbers. If you are finished with this procedure, touch the “Close” key and go to step 17. ● Adding fax numbers 11. Enter the additional fax number(s). * You can enter the fax number(s) using the keypad, abbreviated numbers, one-touch keys, group dial keys and the address book. Chain dial keys can be used as well. (Metric) 15. Touch the “Finish dest. Set” [“Dest. set”] key. If you want to change other destination fax numbers, touch the corresponding speed-dial key and repeat steps 13 through 15. (Inch) (Metric) 16. Touch the “Close” key. The message display will return to the same screen as was displayed in step 8 and you can continue to delete, add or change other fax numbers. If you are finished with this procedure, touch the “Close” key and go to the next step. 12. Touch the “Finish dest. Set” [“Dest. set”] key. The message display will return to the same screen as was displayed in step 8 and you can continue to delete, add or change other fax numbers. If you are finished with this procedure, touch the “Close” key and go to step 17. 17. Touch the “Confirm” key. If the Delayed Communication Report print out setting is turned “ON”, a Delayed Communication Report will be printed out. (Refer to page 6-1.) 2-13 Section 2 Fax Operation (Various Functions) Manual Fax Transmission Once you are connected with the destination party, transmission can be initiated manually by pressing the Start key. Use this mode when you want to talk to the other party prior to actual transmission of the documents, or when the other party must manually switch to fax reception. * If you want to cancel the procedure part way through, touch the “Onhook” key or hang up the receiver. * Speaking to the other party and/or performing Manual Fax Transmission is only possible if a separately purchased telephone is connected to this fax machine. 4. Check whether or not you are connected to a fax machine. > If you hear a fax tone... You are connected to a fax machine. Press the Start key. Fax transmission will begin. 1. Set the documents you want to transmit in the Document Processor. * It is not possible to set documents on the platen with this mode. 2. Pick up the telephone receiver or touch the “On-hook” key. * If you touched the “On-hook” key, that key will be highlighted. > If the other party answers... You are connected to a telephone. Press the Start key at the end of the conversation. Fax transmission will begin. * It is only possible to speak to the other party when a separately purchased telephone is connected to this fax machine. 5. Hang up the receiver when “Status” [“Act status”] appears in the message display or the reception begins. 3. Dial the destination fax number. 2-14 Section 2 Fax Operation (Various Functions) Manual Fax Reception Once you are connected with the other party, reception can be initiated manually by pressing the Start key. Use this mode when you want to talk to the other party prior to actual reception of the documents. ● Preparation * Make sure that “Manual RX” is displayed. If it is not, touch the reception mode select key and then touch the “Manual RX” key. (Inch) * Conversation with the other party is only possible if a separately purchased telephone is connected to this fax machine. * Auto Fax Reception is the default setting in this fax, so, in order to manually initiate reception, it is usually necessary to change the reception mode to Manual Fax Reception. 3. Check whether or not the call is from a fax. > If you hear a fax tone... You are connected to a fax machine. Press the Start key. Fax reception will begin. * If the separately purchased telephone has tone dialing capabilities, you can use the Remote Switching function. (Refer to “Remote Switching” on page 4-4.) (Metric) 1. When a call comes in, the separately purchased phone will ring. > If the other party’s voice can be heard... You are connected to a telephone. Press the Start key at the end of the conversation. A tone will sound to inform the other party that this machine has switched to the fax reception mode. Fax reception will begin once the transmission is initiated by the other party. 4. Hang up the receiver when “Status” [“Act status”] appears in the message display or the reception begins. 2. Pick up the telephone receiver. 2-15 Section 3 Troubleshooting Section 3 Troubleshooting When the Fax Data Indicator is Lit... During a fax communication that use the memory, documents will be entered into memory and, to indicate this, the Fax data indicator will light. The Fax data indicator will also light when documents are received directly into memory (Memory Reception) during copying in the Copy Operation mode. * The Fax data indicator will flash while documents are being entered into memory. (2) If a Power Failure Report is Printed Out... If documents, schedule communications or other information contained in memory are lost because power to the fax is disconnected or lost, a Power Failure Report will be printed out once power is restored. Refer to this report to find out what information was lost. * If no data or information was lost, a Power Failure Report will not be printed out. If an Error Occurs... (1) CAUTIONS before Disconnecting the Power Cord • As electricity is necessary to retain documents in memory, BE SURE to check whether the Fax data indicator is lit or not BEFORE intentionally disconnecting the power cord to this machine. If the indicator IS lit indicating there ARE documents in memory, print out all important documents from memory and then make sure that the Fax data indicator is out BEFORE disconnecting the power. * The Imaging Memory back-up function of this machine will protect the contents of memory for up to 60 minutes (8 MB of optional memory must be installed) even if, for any reason, power to the fax is disconnected or lost. In the event of trouble, an explanation in regard to the error will appear in the message display. Refer to “When One of These Message is Displayed” on page 3-2 and follow the necessary procedure to eliminate the trouble. If a communications error occurs, along with the information in the message display, a Transmission or Reception Report, as appropriate, will be printed out and an alarm will sound. Check the error code that is displayed the corresponding report and then refer to “Error Code Tables” on page 8-7 to confirm the cause of the error. It is also possible to check the error code on the regularly printed Activity Report. (Refer to “(1) Activity Report” on page 5-3.) * Whether or not a Transmission or Reception Report is printed out (and the alarm sounds) will depend upon the setting made under “Turning Report Print Out ON/OFF” on page 6-1. 3-1 Section 3 Troubleshooting When One of These Message is Displayed... When any of the following messages appear in the message display, follow the corresponding procedure. Message Procedure “Close XX Cover.” “Check the cover.” [“Check cover.”] The cover indicated in the message display is open. Close it securely. “Add paper (top cassette)” [“Add paper (1st cassette)”] • There is no paper in the selected drawer. Refer to the Operation Guide for your copier and add paper to the drawer indicated in the message display. • This message will also be displayed when one or more of the drawers is not set properly. Insert the drawers securely into the machine. “Load XX paper in cassette.” • The Fixed Size mode is selected in the Paper Feed Selection setting. Load paper of the size indicated in the message display. • The sizes of the received documents and the paper in the selected drawer are not compatible for printing. Load paper of the same size as that of the received documents. “Receive document in memory” Data for received documents was stored in memory (Memory Reception) because there was no paper in any of the drawers. Once you load paper into one of the drawers, the documents that were stored in memory will be printed out. If “Add paper (top cassette)” [“Add paper (1st cassette)”] is also displayed at the same time, load paper into that drawer. If a specific size is indicated as well in the message display, load paper of that particular size. “Add toner” “Paper Misfeed.” “Memory Full” 3-2 There is insufficient toner left in the toner cartridge. Refer to the Operation Guide for your copier and replace the toner cartridge, and the waste toner tank as well, as soon as possible. Paper has jammed somewhere in the fax machine. Refer to the Operation Guide for your copier and remove the jammed paper from the fax machine without leaving any loose scraps. A document has jammed in the Document Processor. Refer to the Operation Guide for your copier and remove the jammed document. Then, reset all of the documents in the Document Processor. The fax will recount the number of documents that were already scanned and will start the scanning operation once again from the document that jammed. The memory has reached its capacity. Select whether to continue with the communication or cancel it. If this message appears while you are scanning in documents, you can select whether or not you want to continue and transmit only those documents have already been successfully scanned. If you touch the “Yes” key, the transmission operation will begin automatically. If you touch the “No” key, the operation will be canceled and the touch panel will return to the initial mode settings. Page _ _ _ _ _ _ _ Section 3 Troubleshooting Message Procedure Page “Call for Service” Maintenance by qualified service personnel is required. Contact your service representative, an authorized service center or the place of purchase. If “C” and a 4-digit number are displayed as well, inform the service personnel of the displayed number. _ “Time for maintenance” [“Time for scheduled maintenance”] Maintenance by qualified service personnel is required. Contact your service representative, an authorized service center or the place of purchase. _ “Communication Error” An error has occurred during a fax transmission or fax reception. Check the error code – that indicates the origin of the error – on the corresponding Transmission Report (or Reception Report) that is printed out in order to confirm the cause of the error. 9-7 “No DC Loop” “No Dial Tone” The modular cord may not be connected properly to either the telephone or the line jack (L) on the fax. Either that, or there is a problem with the telephone line. In this case, contact your telephone company. _ “No Response” Dialing was accomplished, but connection to the other party was not possible. Check with the other party. _ “No encryption code is registered.” The destination was dialed using a one-touch key that was designated for Encrypted Transmission, but the Encrypted Transmission was not possible because the corresponding Encryption Key is no longer registered in your fax. 4-33 4-39 3-3 Section 3 Troubleshooting Troubleshooting Tables If you experience trouble with your fax machine, refer to the tables below for the appropriate corrective procedures. If the trouble persists, contact your service representative, an authorized service center or the place of purchase. Problem Corrective procedure Reference page Is the machine installed in a location where it is exposed to strong light from directly overhead, or from above and behind? If the machine is installed in such a location, document size detection may be influenced by the light. Consult with your service representative, an authorized service center or the place of purchase. _ Is the modular cord connected correctly? Connect the modular cord correctly. _ Is “Communication Error” displayed? Perform the necessary procedure to correct the error and try to transmit the documents again. 9-7 Is Password Check Transmission turned ON? Turn Password Check Transmission OFF. 4-32 I am not able to perform Broadcast Transmission. Is the memory in your fax machine full? Try the Broadcast Transmission procedure again after memory becomes available or after you create available space in memory. 2-11 4-13 4-38 During registration of an Encryption Box, an error occurs when I enter the box number and I cannot register the Encryption Box. Is the box number you are trying to enter the same as the subaddress already registered for an F-Code Box? You CANNOT register an Encryption Box number that is identical to a registered F-Code Box subaddress. Select a different Encryption Box number. _ I am not able to print out documents from my Encryption Box. Are the Encryption Box number and ID that you entered correct? Check the registered Encryption Box information. The detected document size is often wrong. Check point I am not able to send my documents. 3-4 4-35 Section 3 Troubleshooting Problem I am not able to perform Encrypted Communication. I am not able to perform Remote Switching. Corrective procedure Check point Did the transmitting party perform the appropriate registration procedure for the one-touch key (designated for Encrypted Transmission) as decided in advance with the receiving party? Check the information to be registered once again with the other party. Is the Encryption Key you used correct? Check the Encryption Key to be registered once again with the other party. 4-33 Is your telephone service set for pulse dialing? Some telephones allow you to transmit the desired tone signals by simply pushing the appropriate buttons. Refer to the Instruction Manual for the telephone being used. _ Did you use the correct Remote Switching number? Check the registered number. (Factory default setting: 55) 4-4 Check the Fax Forwarding setting. 4-21 Is the modular cord connected correctly? Connect the modular cord correctly. _ Is “Communication Error” displayed? Perform the necessary procedure to correct the error and try to receive the documents again. 9-7 Is Password Check Reception turned ON? Turn Password Check Reception OFF. 4-32 Is the memory in your fax machine full? Try to receive the documents once again after memory becomes available or after you create available space in memory. 2-11 4-13 4-38 6 I am not able to receive documents into memory (Memory Reception). 1-25 Did the receiving party perform the appropriate registration procedure for the Encryption Box as decided in advance with the transmitting party? I was able to receive a fax, but it was not printed out and the documents are Is Fax Forwarding turned ON? not in memory. I am not able to receive documents. Check the information to be registered once again with the other party. Reference page 4-35 3-5 Section 3 Troubleshooting Problem I am not able to perform Polling Reception. I am not able to perform F-Code Based Relay Broadcast Transmission. During registration of an F-Code Box, an error occurs when I enter the subaddress is entered and I cannot register the F-Code Box. I am not able to perform F-Code Based Confidential Transmission. 3-6 Check point Corrective procedure Reference page _ Did the transmitting party perform the Polling Transmission procedure correctly? Check with the transmitting party. Does the relay station fax machine have the appropriate F-Code Based Relay capabilities? If the relay station fax machine does not one have the appropriate F-Code Based Relay capabilities, Relay Broadcast Transmission will NOT be possible. Check with the relay station. Is there an appropriate box (equal to an F-Code Relay Box) registered in the relay station's fax machine? Check with the relay station. _ Do the subaddress and the F-Code password that you entered match the corresponding subaddress and password that are registered in the relay station's fax machine? If you think the information you entered IS correct, check with the other party. _ Is the memory in the relay station's fax machine full? Check with the relay station. _ Is the subaddress you are trying to enter the same as a registered Encryption Box number? You CANNOT register an F-Code Box subaddress that is identical to a registered Encryption Box number. Select a different subaddress. _ Does the destination party's fax machine have the same F-Code Based Confidential Communication capabilities as your fax machine? If the destination fax machine does not have the same F-Code Based Confidential Communication capabilities as your machine, F-Code Based Confidential Transmission will NOT be possible. Check with the destination party. _ Is there an appropriate box (equal to an F-Code Confidential Box) registered in the destination fax? Check with the destination party. Are the subaddress and the F-Code password that you entered correct? If you think the information you entered IS correct, check with the other party. Is the memory in the receiving party's fax full? Check with the receiving party. _ _ _ _ Section 3 Troubleshooting Check point I am not able to print out documents from my F-Code Confidential Box. Are the subaddress and the F-Code password that you entered correct for that F-Code Confidential Box? Check the registered F-Code Confidential Box information. Does the transmitting party's fax machine have the same F-Code Based Bulletin Board Communication capabilities as your fax machine? If the transmitting party's fax machine does not have the same F-Code Based Bulletin Board Communication capabilities as your machine, F-Code Based Bulletin Board Reception will NOT be possible. Check with the transmitting party. _ Is there an appropriate box (equal to an F-Code Confidential Box) registered in the transmitting party's fax? Check with the transmitting party. _ Are the subaddress and the F-Code password that you entered correct? If you think the information you entered IS correct, check with the other party. _ Is the subaddress that you entered correct for that F-Code Confidential Box? Check the registered F-Code Confidential Box information. 4-10 I am not able to perform F-Code Based Bulletin Board Reception. I am not able to enter documents into my F-Code Confidential Box. Corrective procedure Reference page Problem 4-10 6 3-7 Section 4 Other Features of this Fax Section 4 Other Features of this Fax Auto FAX/TEL Switching This reception mode is convenient for using a separately purchased telephone together with this fax on a single telephone line. If an incoming call is from a fax machine, fax reception will start automatically. If the call is from a telephone, the fax will ring to let you know that you should answer. ● Preparation * Refer to “Selecting the Automatic Reception Mode” on page 6-5, and select “Auto Fax/Tel. SW”. * Make sure that “Auto RX” is displayed on the basic fax screen. If it is not, touch the reception mode select key and then touch the “Auto RX” key. * Auto FAX/TEL switching is only possible if a separately purchased telephone is connected to this fax machine. * Even if you do not answer the telephone, the calling party will incur telephone charges after the phone rings a predetermined number of times. > If the call is from a telephone... 1 The fax will ring to let you know that you should answer. Pick up the telephone receiver within 30 seconds after the ringing starts. * If the telephone receiver is not picked up within 30 seconds, the fax machine will switch to fax reception. (Inch) (Metric) 2 Speak with the other party. * At the end of the conversation, fax reception can be initiated manually. (Refer to “Manual Fax Reception” on page 2-15.) 1. When a call comes in, the telephone will ring. * The telephone will ring only once in the metric version models. In the inch version models, you can set the number of times the telephone will ring. (Refer to “Setting the Number of Rings (Auto Fax Reception)” on page 6-3.) > If the call is from a fax... Fax reception will start automatically. 2. Answering the call... 4-1 Section 4 Other Features of this Fax TAD Reception This reception mode is convenient for using a separately purchased telephone with answering machine capabilities together with this fax. If an incoming call is from a fax machine, fax reception will begin automatically. If the call is from a telephone, the functions of the answering machine will engage, so, even if you cannot answer, the caller will be able to leave a message. ● Preparation * Make sure that “Answering Machine” is displayed on the basic fax screen. If it is not, touch the reception mode select key and then touch the “Answering Machine” key. * TAD Reception is only possible if a separately purchased telephone with answering machine capabilities is connected to this fax machine. * Refer to the Instruction Manual for the telephone in use for details on recording and listening to messages, etc. * BE SURE that the number of times your answering machine is set to ring is LESS than the number of times the fax is set to ring. * If you have selected TAD Reception as the current reception mode, MAKE SURE that, in the first minute after the telephone answers the incoming call, there are no silent pauses of 9 seconds or more [6 seconds or more for metric versions] in either the message you record or the message you receive. If there is such a pause, the silence detection function of this fax will be activated and the fax machine will switch to fax reception. 1. The telephone will ring a designated number of times. (Inch) (Metric) * You can set the number of times the telephone will ring. Refer to “Setting the Number of Rings (Auto Fax Reception)” on page 6-3. * If the telephone receiver is picked up while the telephone is still ringing, the fax will deal with the call in the same manner as a standard Manual Fax Reception. (Refer to “Manual Fax Reception” on page 2-15.) 2. Your answering machine will answer the call as follows: > If the call is from a telephone, but you do not answer... The functions of the answering machine will engage, your message will be played and the caller will be able to leave a message. * If there is a silent pause of 9 seconds or more [6 seconds or more for metric versions], the fax machine will switch to fax reception. > If the call is from a fax... Fax reception will start automatically. 4-2 Section 4 Other Features of this Fax D.R.D. Reception (Available in inch versions only) This reception mode utilizes the Distinctive Ring Pattern service available from some telephone companies. With this service, you can use two or more telephone numbers on a single telephone line. Thus, you can use this fax and a telephone on the same line, but you can still designate a different telephone number for each of them. As each number is given a different ring pattern, the fax machine is able to differentiate between incoming calls. If one of these numbers is designated for this fax machine, and the desired ring pattern is designated for that number in advance, fax reception will be initiated automatically whenever the machine detects the ring pattern distinctive to the fax. ● Preparation * Refer to “Selecting the Automatic Reception Mode” on page 6-5, and select “D.R.D.”. * Make sure that “Auto RX” is displayed on the basic fax screen. If it is not, touch the reception mode select key and then touch the “Auto RX” key. * Using D.R.D. Reception to receive a telephone call is only possible if a separately purchased telephone is connected to this fax machine. * D.R.D. reception is only possible if you subscribe to the Distinctive Ring Pattern service provided by your telephone company. Contact your telephone company for further information on the Distinctive Ring Pattern service available. 2. The fax machine will then ring using the predetermined ring pattern. > If the call is from a telephone... Pick up the telephone receiver and speak with the other party. At the end of the conversation, fax reception can be initiated manually. 1. When a call comes in, the telephone will ring. > If the call is from a fax... Once the bell stops ringing, fax reception will start automatically. * If the telephone receiver is picked up while the telephone is still ringing, the fax will deal with the call in the same manner as a standard Manual Fax Reception. (Refer to “Manual Fax Reception” on page 2-15.) 4-3 Section 4 Other Features of this Fax Remote Switching Remote Switching lets you initiate fax reception from a telephone that is connected to this fax machine. This function is thus convenient if you want to be able to initiate fax reception from a location separate from the fax machine itself. (1) Changing the Remote Switching Number The factory default setting for the Remote Switching Number is “55”, but you can change this if you want. * If you want to cancel the procedure part way through, press the Reset key. The touch panel will return to the initial mode settings. * Remote Switching is only possible if a separately purchased telephone with tone dialing capabilities is connected to this fax machine. 3. Use the keypad to enter the new Remote Switching Number (2 digits). * If you want to change the entered number, use the “r” and/or “R” keys to move the cursor to the desired location. * If you want to reset the displayed number to “00”, simply press the Stop/Clear key. 1. Touch the “Register” [“Registration”] key. The Registration Select screen will appear. (Inch) 4. Touch the “Confirm” key. Registration of the new Remote Reception Number is complete. (Metric) 5. If you are finished making settings, press the Reset key. 2. Touch the “Remote SW dial” key. Remote Switching registration is now possible. (Inch) (Metric) 4-4 Section 4 Other Features of this Fax (2) Operation When you want to initiate fax reception from a telephone that is connected to this fax machine, perform the following procedure. 3 1. When a call comes in, the telephone will ring. 1 2. Pick up the telephone receiver. 4 2 3. If you hear a fax tone, use the tone signal capabilities of the telephone to enter the 2-digit Remote Switching Number. * The factory default setting for the Remote Switching Number is “55”. 6 4. The connection will switch to the fax machine and fax reception will start automatically. 4-5 Section 4 Other Features of this Fax Polling Communication Polling refers to the method of communication whereby transmission is not initiated by the transmitting party, but is requested and initiated at the convenience of the receiving party. There are two types of polling procedures available in this fax: Polling Transmission and Polling Reception. * Since the polling operation is initiated by a call from the receiving party, telephone charges will be billed to the receiving party. (1) Polling Transmission The documents to be transmitted using the Polling Transmission procedure are first scanned into memory and then, when a polling request comes from the receiving party, those documents are transmitted automatically to that party. * During a Polling Transmission, documents will be transmitted using the Memory Transmission mode even if the fax is currently in the Direct Feed Transmission mode. * It is possible to add documents to the Polling Transmission as long as you are still waiting for the polling request. * If you use Polling Transmission in combination with the Bulletin Board function, the same documents can be made available and transmitted to an unlimited number of receiving parties. (Refer to “Turning the Bulletin Board ON/OFF” on page 6-2.) * If you want to cancel the procedure part way through, press the Reset key. The touch panel will return to the initial mode settings. > Entering documents for the first time 4. If you want to limit who can request transmission of the documents from your fax, use the keypad to enter a 4-digit Polling ID (the selfstation ID of the receiving fax). * If you DO NOT want to designate any specific fax, do not enter a Polling ID here. * If a Polling ID other than “0000” is entered, the receiving fax must be one of our models that has the corresponding capabilities. (Inch) (Metric) 1. Set the documents you want to transmit. * When the documents are set on the platen, it is necessary, after each page is scanned, to select whether or not you want to transmit more pages. (Refer to page 1-18.) 2. Touch the “Application” key. The Application screen will appear. 5. Touch the “Confirm” key and then go directly to step 8. (Inch) (Metric) > Adding or replacing documents 6. If you want simply to add documents to those already in memory, touch the “Add” key. If you want to delete all of the documents currently in memory and replace them with new documents, touch the “Overwrite” key. (Inch) 3. Touch the “TX Polling” key. If you are entering documents for this Polling Transmission for the first time, go to the next step. If you want to add documents to those which have already been saved into memory or replace them completely, go directly to step 6. 4-6 (Metric) Section 4 Other Features of this Fax 7. Touch the “Confirm” key. If you selected “Overwrite”, the message display will return to the same screen as was displayed in step 4. 8. Select any related transmission settings that you want to use. * If the optional Duplex Document Processor is installed and you are using duplex (2-sided) documents, touch the “Duplex TX” key. Refer to “Duplex Transmission” on page 2-1 for setting procedures. 9. Press the Start key. The documents will be scanned and stored in memory where they will awaiting the polling request. (2) Polling Reception In Polling Reception, the receiving party dials the number of the transmitting fax, triggering transmission of the documents set in that other fax machine. If reception of documents from more than one transmitting fax is designated, those destinations will be dialed in order and reception will be carried out from each fax. It is possible for the receiving party to use the timer to have the documents received at a time convenient to them. * If you enter all of the transmitting fax numbers using abbreviated numbers, one-touch keys and/or group dial keys, this fax can automatically receive documents from up to 300 different fax machines in a single operation. However, you CANNOT enter the number of a transmitting fax with abbreviated numbers or one-touch keys that have been designated for Encrypted Transmission. * Polling Reception is only possible if the transmitting parties have first performed the necessary Polling Transmission operation. (Refer to “(1) Polling Transmission” on page 4-6.) * If you want to cancel the procedure part way through, press the Reset key. The touch panel will return to the initial mode settings. 1. Touch the “Application” key. The Application screen will appear. (Inch) (Metric) 2. Touch the “RX Polling” key. (Inch) (Metric) 4-7 Section 4 Other Features of this Fax 3. Enter the fax number of the transmitting party. * You can enter the fax number using the keypad, abbreviated numbers, one-touch keys, group dial keys or the address book. Chain dial keys can be used as well. 4. If you want to designate a time for the reception to begin, touch the “Delayed TX” key. 5. Touch the “On” key. 6. Use the keypad to enter the desired time for the reception to begin. * If you want to change the entered time, use the “r” and/or “R” keys to move the cursor to the desired location. (Inch) (Metric) 4-8 7. Touch the “Close” key. 8. Press the Start key. The reception operation will begin automatically. * If a time for the reception to begin was designated, the reception operation will begin when the appointed time is reached. Section 4 Other Features of this Fax F-Code Based Communication F-Code Based Communication involves fax communication that includes certain codes (in the form of numbers and symbols), the base of a protocol that has been adopted for use by other facsimile manufacturers as well. By using these codes, such operations as Confidential Communication and Relay Broadcasting – previously available only between facsimiles that were both from the same manufacturer – are now becoming possible between models from different manufacturers. This fax uses an F-Code Box to transmit documents to, and receive documents from, another party's fax during an F-Code Based Communication. In this case, in order to designate the F-Code Box and password, special codes are used (in this fax they are called the "subaddress" and "F-Code password", respectively). In this way, this fax is able to perform F-Code Based Confidential Communications, as well as carry out and Relay Broadcasting, with facsimiles made by other manufacturers and, naturally, with our own models that have F-Code Based Communication capabilities. (1) Codes used for F-Code Based Communication In this fax there are two codes used for F-Code Based Communication: a “subaddress” and an “F-Code password”. ● Subaddress This code must be entered by the transmitting party during an F-Code Based Confidential Transmission and F-Code Based Relay Broadcast Transmission. The subaddress is used to designate the desired box (equal to the F-Code Confidential Box or the F-Code Relay Box, as appropriate, in this fax) that is registered in the other party's fax. The acceptable length of the subaddress differs depending on model and maker of the fax machine and, if the entered numbers do not match within the parameters of the fax machine that has the shortest acceptable length, F-Code Based Communication will not be successful. Consult with the other party and compare the parameters of both faxes before actually attempting an F-Code Based Communication. In this fax, the subaddress can be up to 20 digits in length and can include any combination of the numerals 0 - 9 and the symbols “*” and “#”. When attempting an F-Code Based Confidential Communication or an F-Code Based Relay Broadcast Transmission with another fax of this same model, the last 4 digits of the subaddress that you enter must match the 4-digit subaddress that the other party has registered in their fax. ● F-Code password This code must also be entered by the transmitting party during an F-Code Based Confidential Transmission and F-Code Based Relay Broadcast Transmission. The F-Code password is used to designate the password of the desired box (equal to the F-Code Confidential Box or the F-Code Relay Box, as appropriate, in this fax) that is registered in the other party's fax. The acceptable length of the F-Code password differs depending on model and maker of the fax machine and, if the entered numbers do not match within the parameters of the fax machine that has the shortest acceptable length, F-Code Based Communication will not be successful. Consult with the other party and compare the parameters of both faxes before actually attempting an F-Code Based Communication. In this fax, the F-Code password can be up to 20 digits in length and can include any combination of the numerals 0 - 9 and the symbols “*” and “#”. * In order to perform an F-Code Based Communication, the other party's fax must have F-Code Based capabilities specific to the communication you are attempting. * F-Code Based Communication can be used in combination with the other various types of fax communication available in this fax. In addition, if you register, in advance, the appropriate subaddress and F-Code password under a speed-dial key, you will not need to enter that information during the actual transmission or reception procedure. Refer to the procedures for each type of fax communication and for the related registration procedures for more detailed information. * If you are going to receive documents into an F-Code Confidential Box registered in this fax, F-Code Based Confidential Communication is possible even if the transmitting party does not enter an F-Code password. In order to receive documents into an F-Code Relay Box, however, the transmitting party must enter the appropriate F-Code password. * If you are going to transmit documents from this fax using the Bulletin Board function and if you register "0000" as the F-Code password for that operation, the receiving party will not need to enter an F-Code password during the actual reception procedure. (2) F-Code Boxes By using codes developed for F-Code based Communication, more functional fax communications such as Confidential Communication and Relay Broadcasting are possible with facsimiles made by other manufacturers. In order to accomplish this, you register in the memory of your fax, in advance, a memory box and use that box to transmit documents to, and receive documents from, the other party. That memory box is called an “F-Code Box” in this handbook and there are two such boxes in this fax: an “F-Code Confidential Box” when it is designated for F-Code Based Confidential Communication and an “F-Code Relay Box” when it is designated for F-Code Based Relay Communication. Each F-Code Box is registered with a subaddress and an F-Code password. The subaddress is used to designate the desired box (equal to the F-Code Box in this fax) that is registered in the other party's fax. In this fax, that box is registered as a 4-digit number from “0000” to “9999”. The F-Code password is used to retrieve the documents from the box (equal to the F-Code Box in this fax). In this fax, that password is registered as a 4-digit number that can include any combination of the numerals 0 - 9 and the symbols “*” and “#”. * You can register up to 100 F-Code Confidential Boxes and 15 FCode Relay Boxes in this fax machine. (Refer to “(1) Registering FCode Confidential Boxes” on page 4-10 and “(1) Registering F-Code Relay Boxes” on page 4-17.) * If you want to check the information in regard to each F-Code Box, such as the box numbers and data regarding the existence of documents in each respective box, print out an F-Code Confidential Box List or an F-Code Relay Box List, as appropriate. (Refer to “(5) Printing Out an F-Code Confidential Box List” on page 4-14 and “(4) Printing Out an F-Code Relay Box List” on page 4-20.) 4-9 Section 4 Other Features of this Fax F-Code Based Confidential Communication F-Code Based Confidential Communication involves the reception of documents into an F-Code Confidential Box that is registered in the receiving party's fax. In this way, confidential documents can be received without being seen by others. (1) Registering F-Code Confidential Boxes Perform the following procedure to register a new F-Code Confidential Box. <Caution> When registering the subaddress for an F-Code Confidential Box, you must use a different number than all of the box numbers used for the Encryption Boxes and all of subaddresses that have already been registered for F-Code Relay Boxes. * If, for any reason, you lose reference to an F-Code password, you will not be able to print out documents that are received into the corresponding F-Code Confidential Box nor will you be able to delete that box. Therefore, you exercise DUE CAUTION in the management of the F-Code password. 4. Touch an unregistered key. * The subaddress will be displayed for all keys that have already been registered. (Inch) (Metric) * If you want to cancel the procedure part way through, press the Reset key. The touch panel will return to the initial mode settings. 1. Touch the “Register” [“Registration”] key. The Registration Select screen will appear. (Inch) 5. Use the keypad to enter the subaddress 4-digit that you want to use for this F-Code Confidential Box. 6. Touch the “Password” key and enter the 4-digit F-Code password that you want to use for this F-Code Confidential Box. * The password can include any combination of the numerals 0 - 9 and the symbols “*” and “#”. * If you register “0000” as the F-Code password, it will not be necessary to enter a password when you print out documents from that F-Code Confidential Box. (Metric) 7. If the optional Printer/Scanner Kit is installed and you want to use the NW-FAX Reception function, touch the “On” key. If the optional Printer/ Scanner Kit is not installed, go to the next step. (Inch) 2. Touch the “Box” key. F-Code Confidential Box registration is now possible. 3. Touch the “Subaddress confi. box” [“Subaddr. confid. box”] key. (Metric) (Inch) (Metric) 4-10 8. Touch the “Confirm” key. The message display will return to the same screen as was displayed in step 4. If you want to continue registering other F-Code Confidential Boxes, repeat steps 4 through 8. Once you are finished registering F-Code Confidential Boxes, press the Reset key. Section 4 Other Features of this Fax (2) Modifying and Deleting F-Code Confidential Boxes Perform the following procedure when you want to modify the registered subaddress or F-Code password for an F-Code Confidential Box, as well as when you want to completely delete one of those boxes. * In order to modify the contents of or completely delete an F-Code Confidential Box, it is necessary to enter the corresponding F-Code password during the procedure. * You CANNOT delete an F-Code Confidential Box which still contains received documents. * If you want to cancel the procedure part way through, press the Reset key. The touch panel will return to the initial mode settings. 4. Touch the “Confirm” key. (Inch) (Metric) 1. Perform steps 1 through 3 of “(1) Registering F-Code Confidential Boxes” on page 4-10. 2. Touch the key which displays the subaddress for the F-Code Confidential Box you want to modify or delete. (Inch) (Metric) 5. If you want to completely delete the F-Code Confidential Box, touch the “Delete” key and go to the next step. If you want to modifiy the information for that F-Code Confidential Box, touch the “Change contents” key and go to step 7. > Deleting an F-Code Confidential Box 6. Touch the “Yes” key. The message display will return to the same screen as was displayed in step 2. If you are finished deleting FCode Confidential Boxes , press the Reset key. > Modifying information 7. Modify the imformation under either or both settings as desired. (To modify information, refer to the corresponding step under “(1) Registering F-Code Confidential Boxes” on page 4-10.) 8. Touch the “Confirm” key. The message display will return to the same screen as was displayed in setp 2. If you are finished F-Code Confidential Boxes, press the Reset key. 3. Enter the F-Code password (4-digits) for that F-Code Confidential Box. 4-11 Section 4 Other Features of this Fax (3) F-Code Based Confidential Transmission It is necessary for you to perform the following procedure in order to transmit documents to an F-Code Confidential Box that is registered in the destination party's fax machine. * If you designate a time for the transmission to begin, the Direct Feed Transmission mode will not be available. 2. Use the keypad to enter the destination party's fax number. * You can also enter the fax number using one-touch keys that have been designated for F-Code Based Communication as well. If you do use such a one-touch key, press the Start key and the transmission operation will begin automatically. (Inch) <Conditions> ● You (the transmitting party) must... know, in advance, the number (in this fax, a 4-digit number called the “subaddress”) that corresponds to the desired box (in this fax, called the “F-Code Confidential Box”) in the receiving party's fax and enter that, AND the related F-Code password, during the transmission procedure. (Metric) ● The receiving party must... have a facsimile that has the same F-Code Based Confidential Communication capabilities as your fax machine. In addition, they must register, in advance, the corresponding box (in this fax, called the “F-Code Confidential Box”) in their fax, inform you (the transmitting party) of the registered number (in this fax, a 4-digit number called the “subaddress”) for that box, and enter that number and the corresponding password during the procedure to print out the received documents. (Refer to “(4) Printing Out Documents from an F-Code Confidential Box” on page 4-13.) 3. Touch the “Subadd.” key. 4. Touch the “On” key. * If you want to cancel the procedure part way through, press the Reset key. The touch panel will return to the initial mode settings. (Inch) 1. Set the documents you want to transmit. (Metric) 4-12 Section 4 Other Features of this Fax 5. Use the keypad to enter the appropriate subaddress. * This subaddress is required during an F-Code Based Communication in order to designate the box in the destination party's fax. It can be up to 20 digits in length and can include any combination of the numerals 0 - 9 and the symbols “*” and “#”. * You can use the “r” and/or “R” keys to move the cursor to a desired location, and you can clear the entered number by touching the “Delete” key. 6. Touch the “Password” key. (4) Printing Out Documents from an F-Code Confidential Box Perform the following procedure to print out documents that have been received into your F-Code Confidential Box. If the documents are printed out correctly, the data will be deleted from that box. If you are using an F-Code Confidential Box for F-Code Based Bulletin Board Transmission and you want to delete that data, simply print the documents out and the data will be deleted from that box. * If you registered “0000” as the F-Code password for your F-Code Confidential Box, it is not necessary to enter a password just to print out documents from that box. * If you want to cancel the procedure part way through, press the Reset key. The touch panel will return to the initial mode settings. 1. Touch the “Application” key. The Application screen will appear. 7. If necessary, use the keypad to enter the predetermined F-Code password. * The password can be up to 20 digits in length and can include any combination of the numerals 0 - 9 and the symbols “*” and “#”. * This password is not required if you agree in advance with the destination party not to use one. (Inch) (Metric) 8. Touch the “Close” key. The message display will return to the same screen as was displayed in step 2. You can now change any transmission settings that you want or set the time for the transmission to begin. 2. Touch the “Print data in box” [“Sub.conf. box output”] key. (Inch) 9. Press the Start key. The transmission operation will begin. (Metric) 4-13 Section 4 Other Features of this Fax 3. Touch the key that corresponds to the desired F-Code Confidential Box if it is highlighted. If the key is not highlighted, there are no documents in that box. * If you registered “0000” as the F-Code password, go to the next step. If you registered any other password, proceed directly to step 5. 2. Touch the “Subad conf box list” key. (Inch) 4. Touch the “Yes” key. The documents that are in that F-Code Confidential Box will be printed out. 5. Use the keypad to enter the F-Code password (4 digits) that corresponds to that F-Code Confidential Box. (Metric) (Inch) 3. To print out an F-Code Confidential Box List, touch the “Yes” key. An F-Code Confidential Box List will be printed out. (Metric) (6) Entering Documents into an F-Code Confidential Box 6. Touch the “Confirm” key. The documents that are in that F-Code Confidential Box will be printed out. (5) Printing Out an F-Code Confidential Box List Print out this list in order to check the information in each F-Code Confidential Box as well as data regarding the existence of documents in each respective box. * If there are no F-Code Confidential Boxes registered in this fax, an F-Code Confidential Box List will not be printed out. * If you want to cancel the procedure part way through, press the Reset key. The touch panel will return to the initial mode settings. 1. Touch the “Print Report” key. The Report Selection screen will appear. (Inch) (Metric) 4-14 Perform the following procedure when you want to enter documents into your F-Code Confidential Box for transmission under the F-Code Based Bulletin Board function. Using this procedure, you can add new documents to those currently in your F-Code Confidential Box, and you can also delete all of the documents currently in that box and replace them with new documents. * If you want to delete the data for documents stored in an F-Code Confidential Box, simply print out those documents. (Refer to “(4) Printing Out Documents from an F-Code Confidential Box” on page 4-13.) * If you want to cancel the procedure part way through, press the Reset key. The touch panel will return to the initial mode settings. 1. Set the documents you want to transmit. Section 4 Other Features of this Fax 2. Touch the “Application” key. The Application screen will appear. (Inch) (Metric) 3. Touch the “Scan orig. to box” key. (Inch) (Metric) 4. Touch the key which displays the subaddress for the F-Code Confidential Box you want to enter documents into. If you want simply to add documents to those already in memory, or you want to delete all of the documents currently in memory and replace them with new documents, go to the next step. If you are entering documents for this Confidential Transmission for the first time, go directly to step 7. 5. If you want to add documents, touch the “Add” key. If you want to replace the documents, touch the “Overwrite” key. 6. Touch the “Confirm” key. (7) F-Code Based Bulletin Board Reception F-Code Based Bulletin Board Communication involves fax communication that uses an F-Code Box (in this fax, called an “F-Code Confidential Box”) that is registered in memory in the transmitting fax machine and that works like a Bulletin Board server, allowing the same documents to be made available and transmitted to an unlimited number of receiving parties. The transmitting party registers, in advance, an F-Code Box in the their fax, and enters the documents to be transmitted into that box. Until the data for those documents is deleted, the documents will remain in that box for transmission any time they are requested with the correct subaddress and F-Code password. Each receiving party can then simply perform the appropriate Polling Reception procedure and retrieve the documents from that box using the corresponding subaddress and F-Code password to designate and access that F-Code Confidential Box. Using certain codes (called the “subaddress” and “F-Code password” in this fax) – the base of a protocol that has been adopted for use with facsimiles made by other manufacturers as well – communication is possible with other facsimiles even if they are not one of our models, as long as they have the corresponding F-Code Based Bulletin Board Communication capabilities. Restriction: It is necessary that the other fax machine has the same F-Code Based Bulletin Board Communication capabilities as your fax machine. However, depending upon the fax machine, there is a possibility that they may not be able to enter documents in their box or may not be able to perform Polling Reception, so both the transmitting party and the receiving party should check in advance whether the appropriate conditions are met. (For example, even if you are going to transmit documents with this fax and you enter documents into your F-Code Confidential Box, the receiving party's fax must have Polling Reception capabilities or Bulletin Board Communication will not be possible.) <Conditions> ● The transmitting party must... register a corresponding box (F-Code Confidential Box) and store the documents to be transmitted in that box. They must then inform the receiving party of the registered box number (a 4-digit subaddress in this fax) and password (called the F-Code password in this fax) for that F-Code Confidential Box. (Refer to “(6) Entering Documents into an F-Code Confidential Box” on page 4-14.) ● You (the receiving party) must... enter – during the procedure for the Polling Reception – the box number (a 4-digit subaddress in this fax) and password (a 4-digit F-Code password in this fax) that corresponds to the box (F-Code Confidential Box) that the transmitting party registered in their fax. Thus, this information must be known in advance. 7. Select any related transmission settings that you want to use. * If you are using duplex (2-sided) documents, touch the “Duplex TX” key. Refer to “Duplex Transmission” on page 2-1 for setting procedures. 8. Press the Start key. The documents will be scanned into memory. 4-15 Section 4 Other Features of this Fax 1. Touch the “Application” key. The Application screen will appear. (Inch) 6. Use the keypad to enter the appropriate subaddress. * This subaddress is required during an F-Code Based Communication in order to designate the box in the destination party's fax. It can be up to 20 digits in length and can include any combination of the numerals 0 - 9 and the symbols “*” and “#”. * You can use the “r” and/or “R” keys to move the cursor to a desired location, and you can clear the entered number by touching the “Delete” key. 7. Touch the “Password” key. (Metric) 8. If necessary, use the keypad to enter the predetermined F-Code password. * The password can be up to 20 digits in length and can include any combination of the numerals 0 - 9 and the symbols “*” and “#”. * This password is not required if you agree in advance with the destination party not to use one. 2. Touch the “RX Polling” key. (Inch) 9. Touch the “Close” key. The message display will return to the same screen as was displayed in step 3. You can now change any transmission settings that you want or set the time for the transmission to begin. You can additionally select another transmitting fax to receive documents from. (Metric) 3. Use the keypad to enter the fax number of the transmitting party. * You can also enter the fax number using one-touch keys that have been designated for F-Code Based Communication as well. If you do use such a one-touch key, press the Start key and the reception operation will begin automatically. 4. Touch the “Subadd.” key. 5. Touch the “On” key. (Inch) (Metric) 4-16 10. Press the Start key. The reception operation will begin. Section 4 Other Features of this Fax F-Code Based Relay Broadcast Communication F-Code Based Relay Broadcast Communication involves the transmission of documents to multiple, long distance destinations by transmitting the documents through a relay station, generally located between the initial transmitting station and the final destinations. This function can help you to reduce telephone costs if, for example, the documents are transmitted from the initial transmitting station to the relay station through an international connection and are then transmitted from the relay station to the multiple final destinations through a local (domestic) connection. * The fax machine acting as the relay station must have Initial transmitting an F-Code Relay Box registered in advance. (Refer to station “(1) Registering F-Code Relay Boxes”.) The content of such a box can be verified by printing out an F-Code Relay Box List. (Refer to “(4) Printing Out an F-Code Relay Box List” on page 4-20.) Relay station * Refer to “(3) F-Code Based Relay Broadcast Transmission” on page 4-19 for the procedure on acting as the initial transmitting station and sending documents through a relay station. (1) Registering F-Code Relay Boxes Perform the following procedure to register a new F-Code Relay Box. * You can register up to 15 F-Code Relay Boxes in this fax machine. Final destination 2. Touch the “Box” key. F-Code Relay Box registration is now possible. 3. Touch the “Subaddress relay box” key. (Inch) <Caution> When registering the subaddress for an F-Code Relay Box, you must use a different number than all of the box numbers used for the Encryption Boxes and all of subaddresses that have already been registered for F-Code Confidential Boxes. * If, for any reason, you lose reference to the F-Code password that you register here, you will not be able to delete that box. Therefore, you should exercise DUE CAUTION in the management of the F-Code password. (Metric) * If you want to cancel the procedure part way through, press the Reset key. The touch panel will return to the initial mode settings. 4. Touch an unregistered key. * The subaddress will be displayed for all keys that have already been registered. 1. Touch the “Register” [“Registration”] key. The Registration Select screen will appear. (Inch) (Inch) (Metric) (Metric) 5. Use the keypad to enter the subaddress 4-digit that you want to use for this F-Code Relay Box. 4-17 Section 4 Other Features of this Fax 6. Touch the “Password” key and enter the 4-digit F-Code password that you want to use for this F-Code Relay Box. * The password can include any combination of the numerals 0 - 9 and the symbols “*” and “#”. 12. Enter the fax number of the initial transmitting station. * You can use the keypad and one-touch keys to enter the fax number. 13. Touch the “Finish dest. Set” [“Dest. set”] key. 7. Touch the “Next” key. 8. Repeat steps 1 and 2 below until all of the final destination fax numbers are registered. (Max. 300 destinations) 1 Enter the fax number of a final destination. * You can use the keypad, abbreviated numbers, one-touch keys and group dial keys to enter the fax number. Chain dial keys can be used as well. 2 If you entered the fax number with the keypad, touch the “Next destinat.” [“Next dest.”] key. 14. Check the registered information. Each item can be modified. 15. Touch the “OK” key. The message display will return to the same screen as was displayed in step 4. If you want to continue registering other F-Code Relay Boxes, repeat steps 4 through 15. Once you are finished registering F-Code Relay Boxes, press the Reset key. (Inch) (2) Modifying and Deleting F-Code Relay Boxes (Metric) Perform the following procedure when you want to add or delete final destinations or change other information registered under any F-Code Relay Box, as well as when you want to completely delete one of those boxes. * In order to modify the contents of or completely delete an F-Code Relay Box, it is necessary to enter the corresponding F-Code password during the procedure. * If you want to cancel the procedure part way through, press the Reset key. The touch panel will return to the initial mode settings. 9. Touch the “Finish dest. Set” [“Dest. set”] key. (Inch) 1. Perform steps 1 through 3 of “(1) Registering F-Code Relay Boxes” on page 4-17. 2. Touch the key which displays the subaddress for the F-Code Relay Box you want to modify or delete. (Inch) (Metric) (Metric) 10. Select whether or not you want the received documents to be printed out at your fax (touch the “On” key to have them printed and the “Off” key to stop print out), and whether or not you want send a Transmission Report regarding the results of the final transmissions to the initial transmitting station (touch the “On” key to send a report and the “Off” key to not send a report.). 3. Enter the F-Code password (4-digits) for that F-Code Relay Box. 11. Touch the “Next” key. If you selected to send a Transmission Report to the initial transmitting station, go to the next step. If you selected NOT to send a report, proceed directly to step 14. 4-18 Section 4 Other Features of this Fax 4. Touch the “Confirm” key. (Inch) (Metric) 5. If you want to completely delete the F-Code Relay Box, touch the “Delete” key and go to the next step. If you want to modifiy the information for that F-Code Relay Box, touch the “Change contents” key and go to step 7. > Deleting an F-Code Relay Box 6. Touch the “Yes” key. The message display will return to the same screen as was displayed in step 2. If you are finished deleting FCode Relay Boxes , press the Reset key. > Modifying information 7. Modify the imformation under either or both settings as desired. (To modify information, refer to the corresponding step under “(1) Registering F-Code Relay Boxes” on page 4-17.) <Conditions> ● In the initial transmitting station... As it is necessary to enter, exactly as it is registered in the relay station's fax, the number (the 4-digit “subaddress” in this fax) of the box (called the “F-Code Relay Box” in this fax) that will receive the documents, as well as its corresponding F-Code password, be sure to verify that information in advance. * The fax number of each relay station can be entered with the keypad or using one-touch keys that have been designated for F-Code Based Communication. If you use the keypad it will be necessary to enter the corresponding subaddress during the set-up procedure. * The final destinations must be registered in advance under the corresponding F-Code Relay Box in the relay station fax. ● In the relay station... The box (called the “F-Code Relay Box” in this fax) that will receive the documents must be registered in advance and the initial transmitting party must be informed of the number (the 4-digit “subaddress” in this fax) of that box. (Refer to “(1) Registering F-Code Relay Boxes” on page 4-17.) * If, during registration of the F-Code Relay Box, the fax numbers of all of the final destinations that the received documents will be transmitted to are entered using onetouch keys, this fax is capable of automatically transmitting the same documents to up to 300 different final destinations in a single operation. 1. Set the documents you want to transmit. 8. Touch the “Confirm” key. The message display will return to the same screen as was displayed in setp 2. If you are finished F-Code Relay Boxes, press the Reset key. (3) F-Code Based Relay Broadcast Transmission Perform this procedure when you want to act as the initial transmitting station and send documents, first to an F-Code Relay Box that is registered in a relay station, and then from that relay station onward to its final destination. <Restrictions> ● It is necessary that the other fax machine has the same F-Code Based Relay Broadcast Communication capabilities as your fax machine. However, depending upon the machine, there is a possibility that only transmission or only reception under the F-Code protocol is available, so both the initial transmitting party and the party acting as the relay station should check in advance whether the appropriate conditions are met. ● The subaddress that is required when this fax is acting as the initial transmitting station can be up to 20 digits in length, but the number of digits acceptable in the destination fax may differ. Check with the relay station and make sure that you register a subaddress that is within the number of digits that is acceptable to the other party's fax machine. 2. Use the keypad to enter the fax number of a relay station. * You can also enter the fax number using one-touch keys that have been designated for F-Code Based Communication as well. If you do use such a one-touch key, press the Start key and the transmission operation will begin automatically. (Inch) (Metric) 4-19 Section 4 Other Features of this Fax 3. Touch the “Subadd.” key. 4. Touch the “On” key. (Inch) (Metric) (4) Printing Out an F-Code Relay Box List Print out this list in order to check the information registered for each F-Code Relay Box. * If there are no F-Code Relay Boxes registered in this fax, an F-Code Relay Box List will not be printed out. * If you want to cancel the procedure part way through, press the Reset key. The touch panel will return to the initial mode settings. 1. Touch the “Print Report” key. The Report Selection screen will appear. (Inch) 5. Use the keypad to enter the appropriate subaddress. * This subaddress is required during an F-Code Based Communication in order to designate the box in the destination party's fax. It can be up to 20 digits in length and can include any combination of the numerals 0 - 9. * You can use the “r” and/or “R” keys to move the cursor to a desired location, and you can clear the entered number by touching the “Delete” key. 6. Touch the “Password” key. 7. If necessary, use the keypad to enter the predetermined F-Code password. * The password can be up to 20 digits in length and can include any combination of the numerals 0 - 9 and the symbols “*” and “#”. * This password is not required if you agree in advance with the destination party not to use one. 8. Touch the “Close” key. The message display will return to the same screen as was displayed in step 2. You can now change any transmission settings that you want or set the time for the transmission to begin. (Metric) 2. Touch the “Subad. rel box list” key. (Inch) (Metric) 9. Press the Start key. The transmission operation will begin. 3. To print out an F-Code Relay Box List, touch the “Yes” key. An F-Code Relay Box List will be printed out. 4-20 Section 4 Other Features of this Fax Fax Forwarding Fax Forwarding allows documents received during designated hours to be saved into memory and automatically forwarded to another fax number that is registered in advance. In order to use Fax Forwarding, the destination and designated hours must be registered here and it is additionally necessary to turn Fax Forwarding ON in advance. (1) Registering The following procedure must be performed when registering Fax Forwarding information for the first time. * If you want to cancel the procedure part way through, press the Reset key. The touch panel will return to the initial mode settings. 1. Touch the “Register” [“Registration”] key. The Registration Select screen will appear. * If the Fax Forwarding operation is not successful, the received documents will be printed out at your fax and then deleted from your fax machine's memory. * With different types of communications such as Encrypted Communication, etc., Fax Forwarding may not be available depending on the type of communication. 4. Touch the “Finish dest. Set” [“Dest. set”] key. (Inch) (Metric) (Inch) (Metric) 2. Touch the “Fax Forwarding” key. 5. Select whether or not you want the received documents to be printed out at your fax. Touch the “On” key to have them printed and the “Off” key to stop print out. 6. Select whether or not you want to designate a time for the Fax Forwarding operation to begin and end. To set the time, touch the “Delayed TX” key and go to the next step. If you do not want to designate a time for the operation to begin and end, touch the “All Day” key and go to step 9. If you select “All Day”, the Fax Forwarding operation will continue indefinitely, regardless of the time of the day. 3. Enter the fax number of the destination fax. * You can enter the fax number using the keypad, abbreviated numbers or one-touch keys. Chain dial keys can be used as well. * If you want to use F-Code Based Communication to forward the fax, you must enter the fax number with the keypad. In this case, touch the “Subadd.” key and then enter the appropriate subaddress and F-Code password (if necessary). You can also use a one-touch key that is already designated for F-Code Based Communication. > Designating the time for Fax Forwarding to begin and end 7. Use the keypad to enter the desired time for Fax Forwarding to begin. * If you want to change the entered time, use the “r” and/or “R” keys to move the cursor to the desired location. (Inch) (Metric) 4-21 Section 4 Other Features of this Fax 8. Touch the “Shut-off Time” key and use the keypad to enter the desired time for Fax Forwarding to end. 9. Touch the “Next” key. The currently registered information will be displayed. 10. Check that information and touch the key that corresponds to any item that you want to modify. (3) Turning Fax Forwarding ON/OFF In order to use Fax Forwarding, it is necessary to turn it ON in advance. * If you want to cancel the procedure part way through, press the Reset key. The touch panel will return to the initial mode settings. 1. Press the Default key. The Default Setting screen will appear. (Inch) 11. Touch the “OK” key. The message display will return to the same screen as was displayed in step 2. If you are finished making settings, press the Reset key. (Metric) (2) Modifying Registered Information Perform the following procedure in order to modify information already registered for Fax Forwarding. * If you want to cancel the procedure part way through, press the Reset key. The touch panel will return to the initial mode settings. 1. Touch the “Register” [“Registration”] key. The Registration Select screen will appear. 2. Touch the “Fax default” key. (Inch) 3. Touch the “▼” cursor key until “Fax forwarding” is highlighted. 4. Touch the “Change #” key. (Metric) (Inch) (Metric) 2. Touch the “Fax Forwarding” key. The currently registered information will be displayed. 3. Check that information and touch the key that corresponds to any item that you want to modify. Refer to “(1) Registering” on page 421 in order to modify that information. 4. Once you are finished modifying information, touch the “OK” key. The message display will return to the same screen as was displayed in step 2. If you are finished making settings, press the Reset key. 4-22 5. To turn Fax Forwarding ON, touch the “ON” key. 6. Touch the “Close” key. If you are finished making settings, press the Reset key. Section 4 Other Features of this Fax Group Dial Keys If you register multiple destinations under a speed-dial key in advance, that key will then function as a group dial key and you will be able to dial all those number with the touch of a key. * Group dial keys can be used for entering the other party's fax numbers during a number of the various functions of this fax such as Broadcast Transmission, etc.. * You CANNOT use group dial keys in combination with chain dial keys. (1) Registering * A maximum of 50 speed-dial keys can be registered as group dial keys (or program keys). * The abbreviated number for the speed-dial key that you press (001 - 600) will automatically become the abbreviated number for the destination fax numbers registered under that group dial key. * If you register a group name for each group dial key, you will be able to use the address book to search for the related fax numbers. * If you want to cancel the procedure part way through, press the Reset key. The touch panel will return to the initial mode settings. 1. Touch the “Register” [“Registration”] key. The Registration Select screen will appear. 3. Touch an unregistered speed-dial key on the touch panel. * If there are no unregistered speed-dial keys displayed, use the “▼” and/or “▲” cursor keys to switch to a screen that displays an unregistered key. 4. Touch the “Group” key. 5. Enter the other party's fax numbers. * You can enter the fax numbers using the keypad, abbreviated numbers, one-touch keys or the address book. Chain dial keys can be used as well. * If you want to enter multiple fax numbers with the keypad, touch the “Next destinat.” [“Next dest.”] key after each fax number. (Inch) (Inch) (Metric) (Metric) 2. Touch the “Dial” key. The touch panel will switch to dial registration. 6. Touch the “Finish dest. Set” [“Dest. set”] key. (Inch) 7. Enter the desired group name. (Maximum 20 characters) * In order to enter characters, refer to “Entering Characters” on page 1-23.) (Metric) 8. Check the currently registered information and touch the key that corresponds to any item that you want to modify. 4-23 Section 4 Other Features of this Fax 9. Touch the “OK” key. The message display will return to the same screen as was displayed in step 3. If you want to continue registering other group dial keys, repeat steps 3 through 9. If you are finished registering group dial keys, press the Reset key. > Modifying registered information 6. If you want to modify the abbreviated number (the displayed number of the speed-dial key under which the group dial key is registered), touch the “Abbr. #” key. If you want to modify any other basic information, touch the key that corresponds to that information. (To modify information, refer to the corresponding step under “(1) Registering” on page 4-23.) (2) Modifying and Deleting 1. Touch the “Register” [“Registration”] key. The Registration Select screen will appear. 2. Touch the “Dial” key. 7. Enter the abbreviated number of an unregistered speed-dial key (001 - 600). * Once a 3-digit number is entered, that number may be changed using the “+” and “-” keys. (Inch) 3. Touch the speed-dial key (group dial key) containing the information you want to modify or delete. * If that key is not displayed, use the “▼” and/or “▲” cursor keys to switch to the screen that displays the key that you want. (Inch) (Metric) (Metric) 8. Touch the “Close” key. 4. If you want to delete the registered one-touch key, touch the “Delete” key and then go to the next step. If you want to modify the registered information, touch the “Change contents” key and then go directly to step 6. > Deleting a group dial key 5. Touch the “Yes” key. The message display will return to the same screen as was displayed in step 3. If you want to continue deleting other group dial keys, repeat steps 3 through 5. If you are finished deleting group dial keys, press the Reset key. 4-24 9. Once you are finished modifying all of the items that you want, touch the “OK” key. The message display will return to the same screen as was displayed in step 3. If you want to continue modifying other group dial keys, repeat steps 3 through 9. If you are finished deleting group dial keys, press the Reset key. Section 4 Other Features of this Fax (3) Dialing (4) Printing Out a Group Dial List * You CANNOT use group dial keys in combination with chain dial keys. * You can use group dial keys not only for standard transmission, but also for such operations as Broadcast Transmission and Polling Reception. Print out this list in order to check the contents of group dial keys currently registered in this fax, such as the registered fax numbers and the group name. * If there are no group dial keys registered in this fax, a Group Dial List will not be printed out. * If you want to cancel the procedure part way through, press the Reset key. The touch panel will return to the initial mode settings. 1. If the operation involves the transmission of documents, set the documents you want to transmit. 1. Touch the “Print Report” key. The Report Select screen will appear. (Inch) 2. If you want to change the transmission conditions, such as the resolution and contrast, touch the “TX setting” key. If you do NOT want to change the current conditions, go directly to step 5. (Metric) 3. Touch the key that corresponds to the desired item and change the information as desired. (To change each transmission condition, refer to pages 1-16 and 1-17.) 2. Touch the “Group dial List” key. 4. Once you are finished changing transmission conditions, touch the “One touch destinat.” key. (Inch) 5. Touch the group dial key under which the desired fax numbers are registered. (Inch) (Metric) (Metric) 3. To print out a Group Dial List, touch the “Yes” key. A Group Dial List will be printed out. 6. Press the Start key. The transmission operation will begin automatically. 4-25 Section 4 Other Features of this Fax Program Keys The operational procedures for various types of communication, such as Broadcast Transmission, Polling reception, etc., can be registered under a speed-dial key that will then function as a program key for one-touch operation. It is also possible to use the timer function, etc., when registering a program key. (1) Registering * A maximum of 50 speed-dial keys can be registered as program keys (or group dial keys). * The abbreviated number for the speed-dial key that you press (001 - 600) will automatically become the abbreviated number for the destination fax numbers registered under that program key. * If you register a program name for each program key, you will be able to use the address book to search for the related program. * If you want to cancel the procedure part way through, press the Reset key. The touch panel will return to the initial mode settings. 4. Touch the “Program” key. (Inch) (Metric) 1. Touch the “Register” [“Registration”] key. The Registration Select screen will appear. (Inch) 5. If you do NOT want to designate a time of day for the operation to begin, touch the “Off” key under “Delayed TX” and go directly to step 7. (Metric) 6. Use the keypad to enter the desired time of day for the operation to begin. * If you want to change the entered time, use the “r” and/or “R” keys to move the cursor to the desired location. 7. Touch the key corresponding to the type of operation you want to register: “Send” or “RX Polling”. 2. Touch the “Dial” key. The touch panel will switch to dial registration. 8. Touch the “Next” key. (Inch) 9. Enter the destination fax number. * You can enter the fax number using the keypad, abbreviated numbers, one-touch keys or the address book. Chain dial keys can be used as well. * If you want to enter multiple fax numbers with the keypad, touch the “Next destinat.” [“Next dest.”] key after each fax number. (Metric) 3. Touch an unregistered speed-dial key on the touch panel. * If there are no unregistered speed-dial keys displayed, use the “▼” and/or “▲” cursor keys to switch to a screen that displays an unregistered key. 4-26 (Inch) (Metric) Section 4 Other Features of this Fax 10. Touch the “Finish dest. Set” [“Dest. set”] key. 11. Enter a name for the program. (Maximum 20 characters) * In order to enter characters, refer to “Entering Characters” on page 1-23.) 12. Check the currently registered information and touch the key that corresponds to any item that you want to modify. 13. Touch the “OK” key. The message display will return to the same screen as was displayed in step 3. If you want to continue registering other program keys, repeat steps 3 through 13. If you are finished registering program keys, press the Reset key. (2) Modifying and Deleting * If you want to cancel the procedure part way through, press the Reset key. The touch panel will return to the initial mode settings. 1. Touch the “Register” [“Registration”] key. The Registration Select screen will appear. 4. If you want to delete the registered program key, touch the “Delete” key and then go to the next step. If you want to modify the registered information, touch the “Change contents” key and then go directly to step 6. > Deleting a program key 5. Touch the “Yes” key. The message display will return to the same screen as was displayed in step 3. If you want to continue deleting other program keys, repeat steps 3 through 5. If you are finished deleting program keys, press the Reset key. > Modifying registered information 6. If you want to modify the abbreviated number (the displayed number of the speed-dial key under which the program key is registered), touch the “Abbr. #” key. If you want to modify any other basic information, touch the key that corresponds to that information. (To modify information, refer to the corresponding step under “(1) Registering” on page 4-26.) 7. Enter the abbreviated number of an unregistered speed-dial key (001 - 600). * Once a 3-digit number is entered, that number may be changed using the “+” and “-” keys. (Inch) 2. Touch the “Dial” key. 3. Touch the speed-dial key (program key) containing the information you want to modify or delete. * If that key is not displayed, use the “▼” and/or “▲” cursor keys to switch to the screen that displays the key that you want. (Metric) (Inch) 8. Touch the “Close” key. (Metric) 9. Once you are finished modifying all of the items that you want, touch the “OK” key. The message display will return to the same screen as was displayed in step 3. If you want to continue modifying other program keys, repeat steps 3 through 9. If you are finished deleting program keys, press the Reset key. 4-27 Section 4 Other Features of this Fax (3) Using a Program Key 1. If the operation involves the transmission of documents, set the documents you want to transmit. If it involves a polling reception, go directly to step 5. (4) Printing Out a Program Dial List Print out this list in order to check the content of program keys currently registered in this fax. * If there are no program keys registered in this fax, a Program Dial List will not be printed out. * If you want to cancel the procedure part way through, press the Reset key. The touch panel will return to the initial mode settings. 1. Touch the “Print Report” key. The Report Select screen will appear. (Inch) 2. If you want to change the transmission conditions, such as the resolution and contrast, touch the “TX setting” key. If you do NOT want to change the current conditions, go directly to step 5. 3. Touch the key that corresponds to the desired item and change the information as desired. (To change each transmission condition, refer to pages 1-16 and 1-17.) (Metric) 4. Once you are finished changing transmission conditions, touch the “One touch destinat.” key. 5. Touch the program key under which the desired program is registered. (Inch) (Inch) (Metric) (Metric) 6. Press the Start key. The transmission or reception operation, as appropriate, will begin automatically. 4-28 2. Touch the “Program dial list” key. 3. To print out a Program Dial List, touch the “Yes” key. A Program Dial List will be printed out. Section 4 Other Features of this Fax Password Check Communication Password Check Communication allows you to limit to and from whom fax communication can be accomplished but making it necessary to meet specific conditions regarding certain passwords. More specifically, the passwords (Permit Telephone Number and Permit ID) are registered in advance and Password Check Communication is turned ON. No special settings are required during the operation to transmit or receive faxes. When actual transmission or reception of documents begins, <Preparation> * You must register the desired password (Permit Telephone Number and/or Permit ID) in your fax in advance. * The other party must register its self-station fax number or self-station ID in advance. * In order to use Password Check Communication, it is necessary to turn it ON in advance. Refer to “(5) Turning Password Check Communication ON/OFF” on page 4-32. communications that satisfy the specific password conditions will be carried out and communications that do not satisfy these conditions will result in an error. * Prior to using Password Check Communication, carefully read “<Preparation>” and “<Conditions Required for Successful Communication>” below in addition to consulting with those party's that will have access to password privileges. 1. Touch the “Register” [“Registration”] key. The Registration Select screen will appear. (Inch) (Metric) <Conditions Required for Successful Communication> • The Permit Telephone Number registered in your fax must match the self-station fax number registered in the other party's fax. • The Permit ID registered in your fax must match the selfstation ID registered in the other party's fax. • When you are transmitting documents and the other party's fax number is dialed with a one-touch key, the last 4 digits of the registered number must match the last 4 digits of the other party's self-station fax number (not applicable with Manual Fax Transmission). • When you are receiving documents, the last 4 digits of a fax number registered under one of your one-touch keys must match the 4 digits of the transmitting party's self-station fax number. 2. Touch the “Password check” key. 3. Touch the “Permit Tel No.” [“Permit tel. nr.”] key. (Inch) (1) Registering Permit Telephone Numbers * You can register up to 5 numbers as Permit Telephone Numbers in this fax. * If you want to cancel the procedure part way through, press the Reset key. The touch panel will return to the initial mode settings. (Metric) 4. Touch an unregistered key. * The information will be displayed for all keys that have already been registered. 4-29 Section 4 Other Features of this Fax 5. Use the keypad to enter the desired Permit Telephone Number. (Maximum 20 digits) * You can use the “r” and/or “R” keys to move the cursor to a desired location, and you can clear the entered number by touching the “Delete” key. (Inch) (Metric) 3. If you want to delete the registered Permit Telephone Number, touch the “Delete” key and then go to the next step. If you want to modify the registered information, touch the “Change contents” key and then go directly to step 5. > Deleting a Permit Telephone Number 4. Touch the “Yes” key. The message display will return to the same screen as was displayed in step 2. If you are finished deleting Permit Telephone Numbers, press the Reset key. > Modifying information 5. Press the Stop/Clear key to delete the old number and then enter the new Permit Telephone Number, or use the “r” and/or “R” keys to move the cursor to a desired location and reenter the number as desired. Touching the “Delete” key will delete the number directly above the cursor. (Inch) 6. Touch the “OK” key. The message display will return to the same screen as was displayed in step 4. If you want to continue registering other Permit Telephone Numbers, repeat steps 4 through 6. If you are finished registering Permit Telephone Numbers, press the Reset key. (Metric) (2) Modifying and Deleting Permit Telephone Numbers * If you want to cancel the procedure part way through, press the Reset key. The touch panel will return to the initial mode settings. 1. Perform steps 1 through 3 of “(1) Registering Permit Telephone Numbers” on page 4-29. 2. Touch the key which displays the Permit Telephone Number you want to modify or delete. 6. Touch the “OK” key. The message display will return to the same screen as was displayed in step 2. Once you are finished modifying and/or deleting Permit Telephone Numbers, press the Reset key. (3) Registering Permit IDs * You can register up to 5 numbers as Permit IDs in this fax. * If you want to cancel the procedure part way through, press the Reset key. The touch panel will return to the initial mode settings. (Inch) 1. Touch the “Register” [“Registration”] key. The Registration Select screen will appear. (Inch) (Metric) (Metric) 4-30 Section 4 Other Features of this Fax 2. Touch the “Password check” key. 3. Touch the “Permit ID No.” [“Permit ID nr.”] key. 2. Touch the key which displays the Permit ID you want to modify or delete. (Inch) (Inch) (Metric) (Metric) 4. Touch an unregistered key. * The information will be displayed for all keys that have already been registered. 5. Use the keypad to enter the desired 4-digit Permit ID. * If you want to change the entered number, use the “r” and/or “R” keys to move the cursor to the desired location. (Inch) 3. If you want to delete the registered Permit ID, touch the "Delete" key and then go to the next step. If you want to modify the registered information, touch the “Change contents” key and then go directly to step 5. > Deleting a Permit ID 4. Touch the “Yes” key. The message display will return to the same screen as was displayed in step 2. If you are finished deleting Permit IDs, press the Reset key. > Modifying information 5. Press the Stop/Clear key to delete the old number and then enter the new Permit ID, or use the “r” and/or “R” keys to move the cursor to a desired location and reenter the number as desired. (Inch) (Metric) (Metric) 6. Touch the “Confirm” key. The message display will return to the same screen as was displayed in step 4. If you want to continue registering other Permit IDs, repeat steps 4 through 6. If you are finished registering Permit IDs, press the Reset key. (4) Modifying and Deleting Permit IDs * If you want to cancel the procedure part way through, press the Reset key. The touch panel will return to the initial mode settings. 6. Touch the “Confirm” key. The message display will return to the same screen as was displayed in step 2. Once you are finished modifying and/or deleting Permit IDs, press the Reset key. 1. Perform steps 1 through 3 of “(3) Registering Permit IDs” on page 4-30. 4-31 Section 4 Other Features of this Fax (5) Turning Password Check Communication ON/OFF Turn Password Check Communication ON when you want to limit to and from whom fax communication can be accomplished. There are separate settings for controlling transmissions and receptions. * If there are no Permit Telephone Numbers or Permit IDs registered in this fax, Password Check Communication will not be possible even if it is turned ON here. * If you want to cancel the procedure part way through, press the Reset key. The touch panel will return to the initial mode settings. 1. Press the Default key. The Default Setting screen will appear. (Inch) (Metric) 2. Touch the “Fax default” key. 3. Touch the “▼” cursor key until “Password Check Comm.” is highlighted. 4. Touch the “Change #” key. (Inch) (Metric) 4-32 5. To turn Password Check ON for transmissions, touch the “ON” key under “Send”. 6. To turn Password Check ON for receptions, touch the “ON” key under “Receive”. 7. Touch the “Close” key. The message display will return to the same screen as was displayed in step 3. If you are finished making settings, press the Reset key. Section 4 Other Features of this Fax Encrypted Communication Encrypted Communication involves the encryption of documents prior to their transmission. In this way, third parties are prevented from seeing the actual documents even if they should be able to access the transmission itself. Those documents are then decrypted and printed out in their original form only after receipt by the receiving party, making this function extremely beneficial for sending strictly confidential information. (1) Registering Encryption Keys The Encryption Key to be used must be selected by the transmitting party during the registration of the corresponding one-touch key which is to be designated for Encrypted Transmission, and by the receiving party during registration of the corresponding Encryption Box. Each Encryption Key contains 16 characters that can include any combination of the numerals 0 - 9 and the letters A - F. This key will then be registered under a 2-digit “Encryption Key ID” from 01 - 20. * You can register up to 20 Encryption Keys in this fax. * If Restricted Access is turned ON, it is necessary to enter the currently registered management password before you can register Encryption Keys. * You can also modify a registered Encryption Key by following the procedure below. * If you want to cancel the procedure part way through, press the Reset key. The touch panel will return to the initial mode settings. 1. Touch the “Register” [“Registration”] key. The Registration Select screen will appear. * To accomplish Encrypted Communication, the other party's fax machine must be one of our models that has the same Encrypted Communication capabilities as your fax machine. * To successfully accomplish encryption, and then the corresponding decryption, both the transmitting and receiving parties must use the same 16-character Encryption Key. If the Encryption Keys used by both parties do not match EXACTLY, Encrypted Communication will not be possible. Therefore, it is necessary for both parties to determine, in advance, the Encryption Key that will be used and register it under a 2-digit Encryption Key ID. 2. Touch the “Encryption key” key. * If Restricted Access is turned OFF, go to the next step. If Restricted Access is turned ON, proceed directly to step 4. 3. Use the keypad to enter the currently registered management password (4 digits). * If the password that you entered matches the registered one, the message display will change. (Inch) (Metric) (Inch) (Metric) 4-33 Section 4 Other Features of this Fax 4. Touch an unregistered key. * The information will be displayed for all keys that have already been registered. 2. Touch the key which displays the Encryption Key you want to modify or delete. (Inch) 5. Use the numerals (0 - 9) and the English alphabet (A - Z) that is shown on the touch panel to create the desired 16-character Encryption Key. * If you want to change the entered key, use the “r” and/or “R” keys to move the cursor to the desired location. (Inch) (Metric) (Metric) 3. If you want to delete the registered Encryption Key, touch the “Delete” key and then go to the next step. If you want to modify the registered information, touch the “Change contents” key and then go directly to step 5. <Understanding the Encryption Key and key ID> Each Encryption Key is registered under an “Encryption Key ID” (a 2-digit number from “01” to “20”). When you want to designate an Encryption Key for a certain communication, it is this 2-digit number that you must enter. * In order to receive document successfully, while it is absolutely necessary that the Encryption Key used by the transmitting party matches the Encryption Key that is registered for the corresponding Encryption Box in the receiving party's fax, it is not necessary that the key IDs match. For example, if the transmitting party initiates an Encrypted Transmission using an Encryption Key of ABFE468C2569D341 that is registered under key ID “18”, and the receiving party has registered the same Encryption Key, but it is registered under key ID “09”, as long as the receiving party has registered key ID “09” for the Encryption Box that will receive the encrypted documents, the 2 Encryption Keys will match so reception and correct print out will be successful. > Deleting an Encryption Key 4. Touch the “Yes” key. The message display will return to the same screen as was displayed in step 2. If you are finished deleting Encryption Keys, press the Reset key. > Modifying information 5. Press the Stop/Clear key to delete the old key and then enter the new Encryption Key, or use the “r” and/or “R” keys to move the cursor to a desired location and reenter the Encryption Key as desired. (Inch) (Metric) 6. Touch the “OK” key. The message display will return to the same screen as was displayed in step 4. If you want to continue registering other Encryption Keys, repeat steps 4 through 6. If you are finished registering Encryption Keys, press the Reset key. (2) Modifying and Deleting Encryption Keys * If you want to cancel the procedure part way through, press the Reset key. The touch panel will return to the initial mode settings. 1. Perform steps 1 through 3 of “(1) Registering Encryption Keys” on page 4-33. 4-34 6. Touch the “OK” key. The message display will return to the same screen as was displayed in step 2. Once you are finished modifying and/or deleting Encryption Keys, press the Reset key. Section 4 Other Features of this Fax (3) Registering Encryption Boxes An Encryption Box must be registered in your fax machine in order to receive an Encryption Communication. During that registration procedure, you will also need to select whether or not you want the received documents to be printed out immediately or not. * You can register up to 15 Encryption Boxes in this fax machine. * If, for any reason, you lose reference to an Encryption Box number, you will not be able to modify information for the corresponding box nor will you be able to delete that box. Therefore, you exercise DUE CAUTION in the management of the Encryption Box numbers. * If you want to cancel the procedure part way through, press the Reset key. The touch panel will return to the initial mode settings. <Cautions> • The box number that you enter during the registration of any Encryption Box CANNOT be the same number as the subaddress of a registered F-Code Confidential Box or F-Code Relay Box. • If you want to have received documents automatically printed out from the Encryption Box immediately after reception, select “On” in step 8. If you want to have received documents stored in the Encryption Box and allow print out only when the appropriate procedure is performed, select “Off”. In this case, since the only person who can print out the received documents is the individual who knows the corresponding Encryption Box number and that box's ID, confidentiality is maintained. 1. Touch the “Register” [“Registration”] key. The Registration Select screen will appear. 4. Touch an unregistered key. * The box number will be displayed for all keys that have already been registered. (Inch) (Metric) 5. Use the keypad to enter the 4-digit number that you want to use as the Encryption Box number. 6. Touch the “Box. ID” key and enter the 4-digit number that you want to use for the Encryption Box ID. * If you register “0000” as the Encryption Box ID, it will not be necessary to enter an ID-code when you print out documents from that Encryption Box. 7. Touch the “Encryption Code” [“Encr. code”] key and use the keypad to enter the 2-digit key ID-code (01 - 20) that corresponds to the Encryption Key to be used for this Encryption Box. (Inch) 8. Select whether or not you want documents received into this Encryption Box to be automatically printed out. If you want to have received documents printed out immediately after reception, select “On”. If you want to allow print out only when the appropriate procedure is performed, select “Off”. (Metric) 9. If the optional Printer/Scanner Kit is installed and you want to use the NW-FAX Reception function, make sure that the “On” key is highlighted. If the optional Printer/Scanner Kit is not installed, go to the next step. (Inch) 2. Touch the “Box” key. 3. Touch the “Encryption box” key. (Inch) (Metric) (Metric) 10. Touch the “Confirm” key. The message display will return to the same screen as was displayed in step 4. If you want to continue registering other Encryption Boxes, repeat steps 4 through 10. Once you are finished registering Encryption Boxes, press the Reset key. 4-35 Section 4 Other Features of this Fax (4) Modifying and Deleting Encryption Boxes * If you want to cancel the procedure part way through, press the Reset key. The touch panel will return to the initial mode settings. 1. Perform steps 1 through 3 of “(3) Registering Encryption Boxes” on page 4-35. > Modifying registered information 7. The currently registered information will be displayed. Refer to “(3) Registering Encryption Boxes” in order to modify that information. 8. Touch the “Confirm” key. The message display will return to the same screen as was displayed in step 2. Once you are finished modifying and/or deleting Encryption Boxes, press the Reset key. 2. Touch the key which displays the box number for the Encryption Box you want to modify or delete. (5) Required Operation (Transmitting party) (Inch) Encrypted Transmission is accomplished by dialing with a one-touch key that has been designated in advance for Encrypted Transmission. * Encrypted Transmission is possible to a single destination, as well as in combination with a Broadcast Transmission. * F-Code Based Communication is not available for use with Encrypted Communications. * If you want to cancel the procedure part way through, press the Reset key. The touch panel will return to the initial mode settings. (Metric) 1. Register the Encryption Key agreed to in advance with the receiving party. (Refer to “(1) Registering Encryption Keys” on page 4-33.) * If the Encryption Key has already been registered, go directly to step 2. 3. Enter the Box ID (4-digits) for that Encryption Box. 4. Touch the “Confirm” key. (Inch) 2. Register the one-touch key that will be used to dial the destination fax number and designate it for Encrypted Transmission. (Refer to “One-Touch Keys” on page 1-25.) * If a one-touch key has already been registered in this way, go directly to step 3. 3. Set the documents you want to transmit. (Metric) 5. If you want to delete the registered Encryption Box, touch the “Delete” key and then go to the next step. If you want to modify the registered information, touch the “Change contents” key and then go directly to step 7. > Deleting an Encryption Box 6. Touch the “Yes” key. The message display will return to the same screen as was displayed in step 2. Once you are finished modifying and/or deleting Encryption Boxes, press the Reset key. 4-36 Section 4 Other Features of this Fax 4. Use the one-touch key described in step 2 to enter the destination fax number. (Inch) (Metric) (6) Required Operation (Receiving party) Perform the following procedure in order to receive and print out documents under Encrypted Communication. * F-Code Based Communication is not available for use with Encrypted Communications. * If you want to cancel the procedure part way through, press the Reset key. The touch panel will return to the initial mode settings. 1. Register the Encryption Key agreed to in advance with the transmitting party. (Refer to “(1) Registering Encryption Keys” on page 4-33.) * If the Encryption Key has already been registered, go directly to step 2. 2. Register the Encryption Box that will be used to receive the encrypted documents. (Refer to “(3) Registering Encryption Boxes” on page 4-35.) * If an Encryption Box has already been registered in this way, go directly to step 3. 5. Press the Start key. The transmission operation will begin. * If the Encryption Key ID designated for the one-touch key is no longer registered in this fax, an error will occur and the transmission will not be completed. 3. The transmitting party will send you the encrypted documents. Once they are received, they are normally decrypted to their original form and then stored in a specified Encryption Box. * If the Encryption Box has been registered for manual print out of the documents, go to the next step. * If the Encryption Box has been registered for automatic print out of the documents, received documents will be automatically printed out upon reception into that box. 4. Refer to “(7) Printing Out Documents from an Encryption Box” on page 4-38, and print out the received documents from the corresponding Encryption Box. 4-37 Section 4 Other Features of this Fax (7) Printing Out Documents from an Encryption Box Perform the following procedure to print out documents that have been received into your Encryption Box. If the documents are printed out correctly, the data will be deleted from that box. * If you registered “0000” as the Box ID for your Encryption Box, it is not necessary to enter a Box ID just to print out documents from that box. In this case, only the box number you enter needs to be correct in order to print out your documents. * If you want to cancel the procedure part way through, press the Reset key. The touch panel will return to the initial mode settings. > If the Box ID is other than “0000”... 4. Enter the Box ID (4 digits) that corresponds to that Encryption Box. (Inch) (Metric) 1. Touch the “Application” key. The Application screen will appear. (Inch) 5. Touch the “Confirm” key. The documents that are in that Encryption Box will be printed out. (Metric) 2. Touch the “Print encr data box” [“Encry.code box output”] key. (Inch) (Metric) 3. Touch the key that corresponds to the desired Encryption Box if it is highlighted. If the key is not highlighted, there are no documents in that box. * If you registered “0000” as the Box ID, proceed directly to step 6. If you registered any other Box ID, go to the next step. 4-38 > If the Box ID is “0000”... 6. Touch the “Yes” key. The documents that are in that Encryption Box will be printed out. Section 4 Other Features of this Fax (8) Printing Out an Encryption Key List (9) Printing Out an Encryption Box List Print out this list in order to check the contents of Encryption Keys currently registered in this fax. * Print out of this list is only possible if the currently registered management password is entered during the procedure. If the entered password does not match the registered one, an Encryption Key List CANNOT be printed out. * If there are no Encryption Keys registered in this fax, an Encryption Key List will not be printed out. * If you want to cancel the procedure part way through, press the Reset key. The touch panel will return to the initial mode settings. Print out this list in order to check the information in each Encryption Box as well as data regarding the existence of documents in each respective box. * If there are no Encryption Boxes registered in this fax, an Encryption Box List will not be printed out. * If you want to cancel the procedure part way through, press the Reset key. The touch panel will return to the initial mode settings. 1. Touch the “Print Report” key. The Report Selection screen will appear. 1. Touch the “Print Report” key. The Report Selection screen will appear. (Inch) (Inch) (Metric) (Metric) 2. Touch the “Encryption box list” key. 2. Touch the “Encryption key list” key. (Inch) (Inch) (Metric) (Metric) 3. To print out an Encryption Box List, touch the “Yes” key. An Encryption Box List will be printed out. 3. To print out an Encryption Key List, touch the “Yes” key. An Encryption Key List will be printed out. * If Restricted Access is turned OFF, it is necessary to enter the currently registered management password here before you can print out this list. 4-39 Section 4 Other Features of this Fax Restricted Access By allowing certain communication and operation only upon entry of one of the viable access codes, use of this fax – such as the number of communications initiated – can be effectively scrutinized for up to 50 individual departments by printing out the corresponding report. * It is necessary to register these access codes in advance. (Refer to “(3) Registering Access Codes” on page 4-41.) * In order to clear the number of documents that have been sent for all departments, refer to “(8) Clearing the count for all departments” on page 4-45. > The following methods of communication can be managed under Restricted Access. • Standard transmission • Transmission that uses the timer • Broadcast Transmission • F-Code Based Relay Broadcast Transmission • Polling Communication • F-Code Based Confidential Communication • F-Code Based Bulletin Board Communication • Encrypted Transmission • Manual transmission/reception when dialing is initiated from this fax <Available functions in Restricted Access> Restricted Access limits the available functions of this fax to those individuals who enter a viable access code – or to the person-in-charge of managing use who enters the registered management password. <Notes> * It is possible to dial a fax or telephone number or view the Communication Result Display, as well as print out the Activity Report, without entering an access code or the registered management password. * If Restricted Access is turned ON, only those sets of documents entered using the same access code will be pooled together under the Batch Transmission function. Any documents that were entered using different access codes will be sent during different transmissions. (Refer to “(8) Batch Transmission Function” on page 1-12.) * If Restricted Access Report print out is turned ON, a Restricted Access Report will be automatically printed out upon reaching 50 individual transactions. (Refer to “Turning Report Print Out ON/OFF” on page 6-1.) * Ordinarily, the registered self-station name will be displayed as part of the TTI, but, if Restricted Access is turned ON and the transmission is initiated by entering an access code, the department name corresponding to that access code will be displayed. If the transmission is initiated by entering the management password, the self-station name will be displayed as it normally is. > The following functions of this fax are available upon entering a viable access code. • Standard transmission • Transmission that uses the timer • Broadcast Transmission • F-Code Based Relay Broadcast Transmission • Polling Communication • F-Code Based Confidential Communication • F-Code Based Bulletin Board Communication • Encrypted Transmission • Editing a communication in memory • Restricted Access report print out > All functions of this fax, including registration, settings and report/list print out, are available when you enter the registered management password. (1) Preparations Before Use (2) Changing the Management Password 1. Verify the management password. It is possible to change that password. (Refer to “(2) Changing the Management Password”.) In order to manage each individual's or each department's use of this fax in the Fax Operation mode – and enhance security during Encrypted Communication as well – it is necessary to enter the registered management password in those cases noted in 1 and 2 below. As you can only register one management password, it is recommended that the person-in-charge of managing use of this fax be the one to register that password. * The factory default management password is “6482”. 2. If the desired access code is not registered in this fax, perform the appropriate registration procedure. (Refer to “(3) Registering Access Codes” on page 4-41.) 3. Turn Restricted Access ON. (Refer to “(5) Turning Restricted Access ON/OFF” on page 4-43.) 4-40 1 You must enter the management password when... • turning Restricted Access ON and OFF. • registering access codes. • printing out the Department List. • registering Encryption Keys. • printing out the Encryption Key List. Section 4 Other Features of this Fax 2 If Restricted Access is turned ON, you must enter the management password when... • printing out any report or list other than the Activity Report. • performing any setting or registration procedure. 4. Use the keypad to enter the currently registered management password (4 digits). * The factory default management password is “6482”. * If you want to change the entered number, use the “r” and/or “R” keys to move the cursor to the desired location. (Inch) WARNING! It is suggested that you make some sort of note of the new management password after changing it. If, for any reason, you lose reference to the password, you will not be able to access to the various setting, registration, modification and deletion procedures of this fax. (Metric) * If you want to cancel the procedure part way through, press the Reset key. The touch panel will return to the initial mode settings. 1. Touch the “Register” [“Registration”] key. The Registration Select screen will appear. (Inch) 5. Touch the “Confirm” key. 6. Use the keypad to enter the new management password (4 digits). * If you want to change the entered number, use the “r” and/or “R” keys to move the cursor to the desired location. 7. Touch the “Confirm” key. Registration of the new management password is complete. Press the Reset key. (Metric) (3) Registering Access Codes To enable Restricted Access, it is necessary to register access codes in this fax in advance. Each access code is a 4-digit number that can include any combination of the numerals 0 - 9. You can register up to 50 access codes in this fax. 2. Touch the “Restricted Access” key. 3. Touch the “Management password” key. * You will need to enter the registered management password when you want to register access codes. * Registration of access codes is possible whether Restricted Access is turned ON or OFF. Even when Restricted Access is turned OFF, registered access codes and their corresponding department names will be usable once it is turned ON again. * If you want to check the registered access codes and their corresponding department names, print out a Department List. (Refer to “(7) Printing Out a Department List” on page 4-44.) * No two access codes can be exactly the same, nor can an access code be the same number as the management password. * If you want to cancel the procedure part way through, press the Reset key. The touch panel will return to the initial mode settings. 4-41 Section 4 Other Features of this Fax 1. Touch the “Register” [“Registration”] key. The Registration Select screen will appear. 6. Use the keypad to enter the desired 4-digit access code. * If you want to change the entered key, use the “r” and/or “R” keys to move the cursor to the desired location. (Inch) (Inch) (Metric) (Metric) 2. Touch the “Restricted Access” key. 7. Touch the “Next” key. 8. Enter the desired department name. (Maximum 32 characters) * In order to enter characters, refer to “Entering Characters” on page 1-23.) 3. Touch the “Access Code” key. 9. Check the currently registered information and touch the key that corresponds to any item that you want to modify. 4. Use the keypad to enter the currently registered management password (4 digits). * If Restricted Access is turned ON and you already entered the management password, this step is not necessary. (Inch) 10. Touch the “OK” key. The message display will return to the same screen as was displayed in step 5. If you want to continue registering other access codes, repeat steps 5 through 10. If you are finished registering access codes, press the Reset key. (4) Modifying and Deleting Access Codes * If you want to cancel the procedure part way through, press the Reset key. The touch panel will return to the initial mode settings. (Metric) 1. Perform steps 1 through 4 of “(3) Registering Access Codes” on page 4-41. 5. Touch an unregistered key. * The information will be displayed for all keys that have already been registered. * If the desired key is not displayed, use the “▼” and/or “▲” cursor keys to switch to the screen that displays the key that you want. 2. Touch the key which contains the access code you want to modify or delete. * If that key is not displayed, use the “▼” and/or “▲” cursor keys to switch to the screen that displays the key that you want. (Inch) (Metric) 4-42 Section 4 Other Features of this Fax 3. If you want to delete the registered access code, touch the “Delete” key and then go to the next step. If you want to modify the registered information, touch the “Change contents” key and then go directly to step 5. 4. Touch the “Change #” key. If Restricted Access is turned OFF, the Management Password input screen will apear. * If Restricted Access is turned ON and you have thus already entered the management password, go directly to step 6. (Inch) > Deleting an access code 4. Touch the “Yes” key. The message display will return to the same screen as was displayed in step 2. If you are finished deleting access codes, press the Reset key. > Modifying information 5. Touch the key that corresponds to the item that you want to modify and refer to “(3) Registering Access Codes” on page 4-41 in order to modify that information. 6. Touch the “OK” key. The message display will return to the same screen as was displayed in step 2. If you are finished modifying access codes, press the Reset key. (Metric) 5. Use the keypad to enter the currently registered management password (4 digits). 6. To turn Restricted Access ON, touch the “ON” key. (5) Turning Restricted Access ON/OFF Perform the following procedure when you want to turn Restricted Access ON or OFF. * You will need to enter the registered management password when you want to turn Restricted Access ON or OFF. (Refer to “(2) Changing the Management Password” on page 4-40.) * If you want to cancel the procedure part way through, press the Reset key. The touch panel will return to the initial mode settings. 1. Press the Default key. The Default Setting screen will appear. (Inch) (Metric) 7. Touch the “Close” key. The message display will return to the same screen as was displayed in step 3. If you are finished making settings, press the Reset key. (6) Printing Out a Restricted Access Report Print out this report in order to check the details of communications occurring under Restricted Access. If you print out this report by entering an access code, a report only for the department that corresponds to that code will be printed out. If you enter the registered management password, it is possible to print out a report for an individual department, or for all departments at the same time. * You will need to turn Restricted Access ON and enter a viable access code or the registered management password before you can print out this report. * If no communications have taken place in this fax under Restricted Access, a Restricted Access Report will not be printed out. * If you want to cancel the procedure part way through, press the Reset key. The touch panel will return to the initial mode settings. 1. Use the keypad to enter a viable access code or the registered management password (both 4 digits). * If the information that you entered matches the registered data, the message display will change. (Inch) 2. Touch the “Fax default” key. 3. Touch the “▼” cursor key until “Restri. Access” [“Restr. Access”] is highlighted. (Metric) 4-43 Section 4 Other Features of this Fax 2. Touch the “Print Report” key. The Report Selection screen will appear. > If you entered the management password... (Inch) (Metric) > If you entered your access code... 4. Touch the “Yes” key. A Restricted Access report will be printed out for that department. > If you entered the management password... 5. Select the department for which you want to print out a Restricted Access Report by touching the corresponding key. It is possible to select more than one department. * If you want to print out a report for all the departments at one time, touch the “All Depart.” [“All ID-codes”] key. All of those access code key that are registered and have been used under Restricted Access will be highlighted. (Inch) (Metric) > If you entered your access code... (Inch) 6. Touch the “Close” key. (Metric) 7. Touch the “Yes” key. A Restricted Access Report will be printed out for the selected departments. 3. Touch the “Restricted access rep” key. If you entered your access code in step 1, go to the next step. If you entered the management password, proceed directly to step 5. 4-44 Section 4 Other Features of this Fax (7) Printing Out a Department List (8) Clearing the count for all departments Print out this list in order to check the access codes and corresponding department names currently registered in this fax. * You will need to turn Restricted Access ON and enter the registered management password before you can print out this list. * If there are no access codes registered, a Department List will not be printed out. * If you want to cancel the procedure part way through, press the Reset key. The touch panel will return to the initial mode settings. Perform the following procedure when you want to clear the number of documents that have been sent under all access codes. * You will need to enter the registered management password when you want to clear the count for all departments. * If you want to cancel the procedure part way through, press the Reset key. The touch panel will return to the initial mode settings. 1. Touch the “Register” [“Registration”] key. The Registration Select screen will appear. 1. Use the keypad to enter the currently registered management password (4 digits). (Inch) (Inch) (Metric) (Metric) 2. Touch the “Restricted Access” key. 3. Touch the “Counter clear” key. 2. Touch the “Print Report” key. The Report Selection screen will appear. (Inch) (Inch) (Metric) (Metric) 3. Touch the “Department code list” [“ID-code list”] key. 4. Touch the “Yes” key. A Department list will be printed out. 4. If you want to clear the count for all departments, touch the “Yes” key. The message display will return to the same screen as was displayed in step 3. If you are finished making Restricted Access settings, press the Reset key. 4-45 Section 5 Managing Information About Your Fax Communications Section 5 Managing Information About Your Fax Communications Communication Result Display You can use the message display to check certain information regarding the 10 most recent fax transmissions and/or receptions. The communication result display lets you check the document number, date and time, destination name, number of pages, type of communication and the result of your communication. (1) Transmission Result Display Information for up to 10 of the most recent fax transmissions can be checked in the message display. Information for Broadcast Transmissions and F-code Transmissions which have been performed using Network FAX functions will also appear in the Transmission Result Display. * If you want to cancel the procedure part way through, press the Reset key. The touch panel will return to the initial mode settings. 3. Touching the “▼” cursor key will display the next previous transmission and touching the “▲” cursor key will change the display back towards the most recent transmission. 4. Once you have finished checking the desired information, press the Reset key. 1. Touch the “Application” key. The Application screen will appear. (Inch) (Metric) 2. Touch the “TX result on LCD” [“Tx report on display”] key. Information for the most recent transmission will be displayed. (Inch) (Metric) 5-1 Section 5 Managing Information About Your Fax Communications (2) Reception Result Display Information for up to 10 of the most recent fax receptions can be checked in the message display. * If you want to cancel the procedure part way through, press the Reset key. The touch panel will return to the initial mode settings. 1. Touch the “Application” key. The Application screen will appear. (Inch) (Metric) 2. Touch the “RX result on LCD” [“Rx result display”] key. Information for the most recent reception will be displayed. (Inch) (Metric) 3. Touching the “▼” cursor key will display the next previous reception and touching the “▲” cursor key will change the display back towards the most recent reception. 4. Once you have finished checking the desired information, press the Reset key. 5-2 Section 5 Managing Information About Your Fax Communications Printing the Management Reports/Lists The results of your fax communications as well as certain fax-related settings in this machine can be checked whenever you want by printing out different management reports. The following procedures explain how to print out the Activity Report, Confirmation Report and User Setting List. Each of these reports can be printed out at any time. (1) Activity Report (2) Confirmation Report Print out this report in order to check the results of the transmissions and receptions that were carried out on this fax. Information for the 50 most recent communications will be printed on the Activity Report. * If no communications have taken place, an Activity report will not be printed out. * If you want to cancel the procedure part way through, press the Reset key. The touch panel will return to the initial mode settings. Print out this report in order to check the status of fax communications held in memory in the waiting state. * If there are no related communications or documents for Polling Transmission held in memory, a Confirmation Report will not be printed out. * If you want to cancel the procedure part way through, press the Reset key. The touch panel will return to the initial mode settings. 1. Touch the “Print Report” key. The Report Selection screen will appear. 1. Touch the “Print Report” key. The Report Selection screen will appear. (Inch) (Inch) (Metric) (Metric) 2. Touch the “Confirm. report” key. 2. Touch the “Activity Report” key. (Inch) (Inch) (Metric) (Metric) 3. To print out an Activity Report, touch the “Yes” key. An Activity Report will be printed out. 3. To print out Confirmation Report, touch the “Yes” key. A Confirmation Report will be printed out. 5-3 Section 5 Managing Information About Your Fax Communications (3) User Setting List Print out this list in order to check the settings made (Line Type, etc.) and other registered information (own name, etc.) in this fax. * If you want to cancel the procedure part way through, press the Reset key. The touch panel will return to the initial mode settings. 1. Touch the “Print Report” key. The Report Selection screen will appear. 2. Touch the “User set. list” key. (Inch) (Metric) 3. To print out a User Setting List, touch the “Yes” key. A User Setting (Inch) (Metric) List will be printed out. 5-4 Section 6 Various Settings and Registration Section 6 Various Settings and Registration Turning Report Print Out ON/OFF 1. Press the Default key. The Default Setting screen will appear. Five different reports can be printed out for checking such points as whether a transmission or reception was accomplished correctly or not. You can also have each of these reports printed out automatically or turn OFF automatic print out of each report. (Inch) <Activity Report> Set this report to be printed out upon reaching a predetermined number of communications in order to check the details of those communications. (Metric) <Transmission Report> Set this report to be printed out after each transmission to check whether the transmission was accomplished correctly or not. * Select “Output on condition” and then, it is possible to set this report to be printed out only under certain condition such as a communication error, a Broadcast Transmission, and a transmission that uses the timer . . <Reception Report> Set this report to be printed out after each reception to check whether the reception was accomplished correctly or not. * Select “Output on condition” and then, it is possible to set this report to be printed out only under certain condition such as a communication error, a Polling Reception, an Encryption Reception and an F-Code Based Confidential Reception. 2. Touch the “Fax default” key. 3. Touch the “▼” cursor key until “Print Report” is highlighted. 4. Touch the “Change #” key. (Inch) <Delayed Communication Report> Set this report to be printed out after each communication that uses the timer is scheduled to check the information related to that communication. <Restricted Access Report> Set this report to be printed out whenever Restricted Access is turned ON in order to check the details, listed by department, of all communications occurring under Restricted Access. (Metric) <NW-FAX Transmission Report> When the optional Printer/Scanner Kit is installed on this fax machine, you can have this report attached to an e-mail message in order to check whether each Network FAX transmission was accomplished correctly or not. * Select “Output on condition” and then, it is possible to set this report to be printed out only under certain condition such as a communication error, a Broadcast Transmission, and a transmission that uses the timer. * If you want to cancel the procedure part way through, press the Reset key. The touch panel will return to the initial mode settings. 6-1 Section 6 Various Settings and Registration 5. In the screen for step 4, select whether or not you want the Activity Report to be automatically printed out. Touch the “ON” key to have it printed automatically and the “OFF” key to stop print out. 6. In the screen for step 4, select whether or not you want the Transmission Report to be automatically printed out. Touch the “ON” key to have it printed automatically and the “OFF” key to stop print out. If you want it to be printed out only under certain conditions, touch the "Output on condition" key. 7. In the screen for step 4, select whether or not you want the Reception Report to be automatically printed out. Touch the “ON” key to have it printed automatically and the “OFF” key to stop print out. If you want it to be printed out only under certain conditions, touch the “Output on condition” key. Turning the Bulletin Board ON/OFF If you use the Bulletin Board function, you only need to enter documents into memory once and they will be available for transmission to any number of receiving parties upon receipt of their polling request. (Refer to “(1) Polling Transmission”, page 4-6.) In order to use the Bulletin Board function, it is necessary to turn it ON here in advance. * If you want to cancel the procedure part way through, press the Reset key. The touch panel will return to the initial mode settings. 1. Press the Default key. The Default Setting screen will appear. (Inch) 8. In the screen for step 4, select whether or not you want the Delayed Communication Report to be automatically printed out. Touch the “ON” key to have it printed automatically and the “OFF” key to stop print out. 9. In the screen for step 4, select whether or not you want the Restricted Access Report to be automatically printed out. Touch the “ON” key to have it printed automatically and the “OFF” key to stop print out. 10. In the screen for step 4, select whether or not you want the NW-FAX Transmission Report to be automatically sent by e-mail when the optional Printer/Scanner Kit is installed on the fax machine. Touch the “On” key to have it sent automatically and the “Off” key to stop sending it. Touch the “Output on condition” key to have it sent only under certain conditions (a communication error, a Broadcast Transmission, and a transmission that uses the timer.). 11. Touch the “Close” key. If you are finished making settings, press the Reset key. (Metric) 2. Touch the “Fax default” key. 3. Touch the “▼” cursor key until “Bulletin Board” is highlighted. 4. Touch the “Change #” key. (Inch) (Metric) 5. Select whether you want to turn the Bulletin Board function ON or OFF. Touch the “Save doc. after Tx” key to turn it ON and the “Del. doc. after Tx” key to turn it OFF. * If you select “Del. doc. after Tx”, the documents to be deleted from memory after they are transmitted once. If you select “Save doc. after Tx”, the documents will remain in memory waiting for the next polling request even after they are transmitted. 6. Touch the “Close” key. If you are finished making settings, press the Reset key. 6-2 Section 6 Various Settings and Registration Setting the Number of Rings (Auto Fax Reception) The number of times the fax will “ring” before an incoming call is answered in the Auto Fax Reception mode, the Auto FAX/TEL Switching mode [this setting is not available in metric models] or the TAD Reception mode can be set here to any number between 1 and 15. * If you want to cancel the procedure part way through, press the Reset key. The touch panel will return to the initial mode settings. 1. Press the Default key. The Default Setting screen will appear. (Inch) (Metric) Making Volume Settings The volume of the alarm, the monitor and the speaker can be adjusted here, or you can make the alarm inaudible. <Alarm Volume> Sets the volume of the alarm that sounds in the event of an error or when you press an incorrect key on the operation panel. <Monitor Volume> Sets the volume of the internal speaker that allows you to listen to conditions on the telephone line when the “On-hook” key was NOT touched. <Speaker Volume> Sets the volume of the internal speaker that allows you to listen to conditions on the telephone line when the “On-hook” key WAS touched. * If you want to cancel the procedure part way through, press the Reset key. The touch panel will return to the initial mode settings. 1. Press the Default key. The Default Setting screen will appear. 2. Touch the “Fax default” key. (Inch) 3. Touch the “▼” key until “# of Rings” is highlighted. 4. Touch the “Change #” key. (Metric) (Inch) (Metric) 2. Touch the “Fax default” key. 3. Touch the “▼” cursor key until “Set Volume” [“Set the sound volume”] is highlighted. 5. Use the “+” or “-” key to select the number of “rings” before an incoming call is answered in each mode: the Auto Fax Reception mode, the Auto FAX/TEL Switching mode [this setting is not available in metric models] and the TAD Reception mode. 6. Touch the “Close” key. If you are finished making settings, press the Reset key. 6-3 Section 6 Various Settings and Registration 4. Touch the “Change #” key. (Inch) (Metric) Setting the Document Size for Scanning from the Document Processor Select here whether documents that are set in the Document Processor will be scanned as 8 1/2" x 11" [A4R] or other such standard size paper, or as long documents (in the direction of the paper feed). * It is necessary to select “Standard size” here when transmitting both sides of duplex (2-sided) documents. (Refer to “Duplex Transmission” on page 2-1.) * If you select “Long original [Long orig.]” here, it will not be possible to have documents rotated for transmission (Refer to “(9) Rotate & Transmit Function” on page 1-12.) * If you want to cancel the procedure part way through, press the Reset key. The touch panel will return to the initial mode settings. 1. Press the Default key. The Default Setting screen will appear. 5. Select the desired alarm volume from among “Large”, “Small” and “Off”. (Inch) 6. Select the desired monitor volume from among “Large”, “Medium”, “Small” and “Off”. (Metric) 7. Select the desired speaker volume from among “Large”, “Medium”, “Small” and “Off”. 8. Touch the “Close” key. If you are finished making settings, press the Reset key. 2. Touch the “Fax default” key. 3. Touch the “▼” key until “Scan from DP” [“DP scanning”] is highlighted. 4. Touch the “Change #” key. (Inch) (Metric) 5. Select the desired original size setting by touching either the “Standard size” key or the “Long original [Long orig.]” key, as appropriate. 6. Touch the “Close” key. If you are finished making settings, press the Reset key. The touch panel will return to the initial mode settings. 6-4 Section 6 Various Settings and Registration Setting the Default Transmission Mode Selecting the Automatic Reception Mode You can select which transmission mode, Memory Transmission or Direct Feed Transmission, will be the default setting in this fax. If you select “Dir. Feed Tx” here, the “Dir. Feed Tx” key will be shown in the basic fax screen. * If you want to cancel the procedure part way through, press the Reset key. The touch panel will return to the initial mode settings. This fax has 2 or 3 automatic reception modes (depending upon the model version). The inch version of this fax offers the Automatic Fax Reception, Auto FAX/TEL Switching and D.R.D. Reception modes. The metric version contains the Automatic Fax Reception and Auto FAX/TEL Switching modes. Select from among the available modes that are available for your fax machine. * If you want to cancel the procedure part way through, press the Reset key. The touch panel will return to the initial mode settings. 1. Press the Default key. The Default Setting screen will appear. 1. Press the Default key. The Default Setting screen will appear. (Inch) (Metric) (Inch) (Metric) 2. Touch the “Fax default setting” key. 2. Touch the “Fax default” key. 3. Touch the “▼” cursor key until “TX Mode/Default” is highlighted. 3. Touch the “▼” key until “Receive Mode” [“Reception mode”] is highlighted. 4. Touch the “Change #” key. 4. Touch the “Change #” key. (Inch) (Inch) (Metric) (Metric) 5. Select the desired transmission mode setting by touching either the “Memory TX” key or the “Dir. Feed Tx” key, as appropriate. 6. Touch the “Close” key. If you are finished making settings, press the Reset key. 5. Select the desired reception mode by touching either the “Fax Reception” [“Fax Rx”] key, the “Auto Fax/Tel. SW” key or the “D.R.D.” key, as appropriate. * The “D.R.D.” key will not be displayed in the metric version of this fax machine. * If you selected “D.R.D.”, go directly to step 7. 6-5 Section 6 Various Settings and Registration 6. If you selected “Fax Reception” [“Fax Rx”] or “Auto Fax/Tel. SW”, touch the “Close” key. If you are finished making settings, press the Reset key. 7. Select the desired ring pattern. • Pattern 1: Normal Ring [1 ring] • Pattern 2: Double Ring [2 rings] • Pattern 3: S-S-L (Short-Short-Long) • Pattern 4: S-L-S (Short-Long-Short) (Inch) Turning Reception Date & Time Print Out ON/OFF Select here whether or not you want information – such as the time of the reception, information related to the transmitting party and the number of pages transmitted – to be printed out at the top edge of received documents. This information is convenient for checking the actual time you received documents, especially when they were sent from a location that is in a different time zone than you are. In order to have this information printed out, it is necessary to turn this function ON here in advance. * If a received page is split and printed onto 2 or more separate sheets of paper, the time and date of reception will be printed only on the first of those sheets. * If Fax Forwarding is turned ON, the true date and time of reception at this fax will not be printed out on the documents received at the selected destination. If, however, the forwarding operation is unsuccessful even after redialing the predetermined number of times, the reception date and time information WILL be displayed on the documents that will then be automatically printed out at this fax. * If you want to cancel the procedure part way through, press the Reset key. The touch panel will return to the initial mode settings. 1. Press the Default key. The Default Setting screen will appear. 8. Touch the “Close” key. If you are finished making settings, press the Reset key. (Inch) (Metric) 2. Touch the “Fax default” key. 3. Touch the “▼” key until “RX Date/Time” is highlighted. 4. Touch the “Change #” key. (Inch) (Metric) 6-6 Section 6 Various Settings and Registration 5. Select whether you want to turn Reception Date and Time Print Out ON or OFF by touching either the “ON” or “OFF” key, as appropriate. 6. Touch the “Close” key. If you are finished making settings, press the Reset key. Selecting the Paper Feed Selection Mode Select here from among the 3 available modes for feeding paper to print out all documents that are received when the fax is in the Fax Operation mode - as well as for printing out reports and lists: the Auto Selection mode, the Fixed Size mode or the Fixed Cassette mode. * This setting CANNOT be changed while there are documents remaining in memory. <Auto Selection mode> In this mode, the fax will automatically select and feed the most appropriate paper. <Fixed Size mode> In this mode, paper feed will be accomplished from the drawer that contains the selected size of paper. If there is no paper of the selected size in any drawer, the documents will be received directly into memory. * You CANNOT select more than one size of paper in this setting. * If the same size of paper is set in more than one location, the upper drawer will have priority for paper feed. <Fixed Cassette mode> In this mode, paper feed will be accomplished from a specified drawer regardless of the size of the received documents. If there is no paper in the selected drawer, the documents will be received directly into memory. * You CANNOT select more than one drawer in this setting. * If you want to cancel the procedure part way through, press the Reset key. The touch panel will return to the initial mode settings. 1. Press the Default key. The Default Setting screen will appear. (Inch) (Metric) 2. Touch the “Fax default” key. 6-7 Section 6 Various Settings and Registration 3. Touch the “▼” key until “Fax pap.feeding tray” [“Fax paper tray”] is highlighted. 4. Touch the “Change #” key. (Inch) Turning Manual Paper Feed ON/OFF Select here whether or not you want to use the Multi-Bypass to feed paper for printing our received faxes. * If you want to cancel the procedure part way through, press the Reset key. The touch panel will return to the initial mode settings. 1. Press the Default key. The Default Setting screen will appear. (Inch) (Metric) (Metric) 5. Select the desired paper feed mode by touching either the “Auto Select” [“Auto sel.”] key, the “Fix Size” [“Fixed size”] key or the “Fixed Cassette” key, as appropriate. If you selected “Auto Select” [“Auto sel.”], proceed directly to step 8. If you selected “Fix Size” [“Fixed size”], go the next step. If you selected “Fixed Cassette”, go directly to step 7. 2. Touch the “Fax default” key. 6. Select the desired paper size and then proceed directly to step 8. 3. Touch the “▼” key until “Bypass feeding” is highlighted. 7. Select the desired drawer. 4. Touch the “Change #” key. (Inch) 8. Touch the “Close” key. If you are finished making settings, press the Reset key. (Metric) 5. Select whether you want to turn the Manual Paper Feed function ON or OFF by touching either the “On” or “Off” key, as appropriate. 6. Touch the “Close” key. If you are finished making settings, press the Reset key. 6-8 Section 6 Various Settings and Registration Turning 2 in 1 Reception ON/OFF Turning Remote Diagnosis ON/OFF If 2 in 1 reception is turned ON and two 5 1/2" x 8 1/2" [A5] size pages are received in a row during the same reception, those 2 pages will be printed onto a single sheet of 11" x 8 1/2" [A4R] size paper. In order to accomplish 2 in 1 Reception, it is necessary to turn this function ON here in advance. * 2 in 1 Reception will not be available when both 2 in 1 Reception and Duplex Reception are turned ON. * If you want to cancel the procedure part way through, press the Reset key. The touch panel will return to the initial mode settings. Especially if trouble occurs in this fax in which it is necessary to call for service, it is possible for our service center computer to access the fax directly over the telephone line and check its status and other information about the trouble. * To use Remote Diagnosis, it is necessary to enter into a contract with an authorized service center in advance and also to register a predetermined Remote Test ID in advance. (Refer to "Registering the Remote test ID" on page 6-10.) For further information, contact your service representative, an authorized service center or the place of purchase. * If you want to cancel the procedure part way through, press the Reset key. The touch panel will return to the initial mode settings. 1. Press the Default key. The Default Setting screen will appear. (Inch) 1. Press the Default key. The Default Setting screen will appear. (Inch) (Metric) (Metric) 2. Touch the “Fax default” key. 3. Touch the “▼” cursor key until “2 in 1 RX” is highlighted. 2. Touch the “Fax default” key. 4. Touch the “Change #” key. 3. Touch the “▼” cursor key until “Remote Diag.” [“Remote diagn.”] is highlighted. (Inch) 4. Touch the “Change #” key. (Inch) (Metric) (Metric) 5. Select whether you want to turn 2 in 1 Reception ON or OFF by touching either the “On” or “Off” key, as appropriate. 6. Touch the “Close” key. If you are finished making settings, press the Reset key. 5. Select whether you want to turn Remote Diagnosis ON or OFF by touching either the “On” or “Off” key, as appropriate. 6. Touch the “Close” key. If you are finished making settings, press the Reset key. 6-9 Section 6 Various Settings and Registration Registering the Remote Test ID If you have entered into a contract with an authorized service center for their Remote Diagnosis service, it is necessary to register here in advance the Remote Test ID that they designate for you. * A previously registered Remote Test ID can also be modified by performing the following procedure. * If you want to cancel the procedure part way through, press the Reset key. The touch panel will return to the initial mode settings. 1. Touch the “Register” [“Registration”] key. The Registration Select screen will appear. (Inch) (Metric) 2. Touch the “Remote Test ID” key. (Inch) (Metric) 3. Use the keypad to enter the designated 4-digit Remote Test ID. * If you want to revise the entered number, touch the “r” or “R” cursor key to move the cursor to the number that you want to change. 4. Touch the “Confirm” key. The message display will return to the same screen as was displayed in step 2. If you are finished making settings, press the Reset key. 6-10 Section 7 Optional Equipment Section 7 Optional Equipment Duplex Unit (Duplex Reception ON/OFF) By installing the optional Duplex Unit, Duplex Reception – in which paper is turned over inside the fax machine and printing accomplished on the back side – will be possible. When the width of each page received is exactly the same, the documents will be printed onto the front and back sides of that size of paper. * To use the Duplex Reception function, it is necessary to turn it ON in advance. * When the Duplex Reception function is turned ON, all pages of a fax reception will be temporarily stored in memory – regardless of the reception mode setting – and they will then be printed out at one time. ● Turning Duplex Reception ON/OFF * 2 in 1 Reception will not be available when both 2 in 1 Reception and Duplex Reception are turned ON. * If you want to cancel the procedure part way through, press the Reset key. The touch panel will return to the initial mode settings. 4. Touch the “Change #” key. (Inch) (Metric) 5. Select whether you want to turn Duplex Reception ON or OFF by touching either the “ON” or “OFF” key, as appropriate. 6. Touch the “Close” key. If you are finished making settings, press the Reset key. 1. Press the Default key. (Inch) Optional Memory By adding 8 MB of optional memory, the amount of memory available for Bitmapping will be increased and you will thus be able to transmit and receive documents using the Ultra fine resolution mode. In addition, you will be able to store a greater number of documents into memory (for transmission or through reception). (Metric) 2. Touch the “Fax default” key. 3. Use the “▼” cursor key until “Duplex RX” [“2-sided RX”] is highlighted. 7-1 Section 8 Network FAX Settings (Option) This section contains explanations on the Network FAX functions available when the optional Printer/Scanner Kit is installed on this FAX machine and in particular on the setup procedure and settings to be performed on the machine. As the contents of the settings will differ according to the environment of the computer connected to this machine, make sure to read the explanations corresponding to your computer environment and to perform the appropriate procedure. Be sure to read the On-Line Manual on the included CD-ROM as well. It contains explanations on Network FAX transmission and reception procedures, the various corresponding settings, and on operation at the computer. About the On-Line Manual A pfd format On-Line Manual is included on the provided CD-ROM. This On-Line Manual contains explanations on the applications required in order to use the Network FAX functions. Its contents are as follows: • How to install the various applications • How to perform Network FAX Transmission • How to perform Network FAX Reception • How to use the Address Book Opening the On-Line Manual Perform the following procedure in order to open the On-Line Manual. 1. Insert the provided Network FAX CD-ROM in the CD-ROM drive of your computer. The Main Menu screen will automatically be displayed for set-up. 2. In the Main Menu screen, click on “Documents” to open the OnLine Manual. * In order to open the On-Line Manual, Adobe Acrobat Reader version 4.05 or later must be installed in your computer. If it is not already installed in your computer, install it from the provided CDROM. 8-1 Section 8 Network FAX Settings (Option) Setup In order to use the Network FAX functions, the following setup procedure needs to be performed. 1 Connecting the FAX machine and the computer [Example connection] Connect the network cable (100 BASE-TX or 10 BASE-T) to the FAX machine. Hub See page 8-3. PC 2 Procedure on the FAX machine Perform the basic settings (Network FAX Reception setting, setting for saving the documents for transmission, file type setting, Network FAX registration) on the FAX machine. See pages 8-3 ~ 8-6. 3 Procedure on the computer Install the required software (included in the provided CDROM). Refer to the On-Line Manual PC Setup is complete 8-2 Section 8 Network FAX Settings (Option) Connecting the FAX machine and the computer 1 Turn the main switch of the FAX machine OFF (O). Note: Always make sure to turn the main switch of the FAX machine OFF (O) before connecting the network cable. Initial settings on the FAX machine (1) Network FAX Reception Setting Turn this setting ON in order to perform Network FAX Reception. The received documents can also be printed with this machine. * If you want to cancel the procedure part way through, press the Reset key. The touch panel will return to the initial mode settings. 1 Press the Default key. The Default Setting screen will appear. (Inch) (Metric) 2 3 Insert the connector of an Ethernet 10BASE-T cable or 100BASE-TX cable into the scanner interface connector on the FAX machine. 2 Touch the “FAX default” key. 3 Use the “▼” cursor key to select “NetworkFAX Rx.” [“NW-FAX RX”]. 4 Touch the “Change #” key. Turn the main switch of the FAX machine ON (|). (Inch) (Metric) 5 Select whether you want to turn Network FAX Reception ON or OFF by touching either the “On” or “Off” key, as appropriate. If you selected “On”, go to the next step. If you selected “Off”, go to step 7. 8-3 Section 8 Network FAX Settings (Option) 6 Select whether you want to print out the documents received with this machine or not by touching either the “On” or “Off” key, as appropriate. 7 Touch the “Close” key. If you are finished making settings, press the Reset key. (2) Setting for Saving the Documents for Transmission Perform this procedure to select whether you want to save the transmitted documents on the server computer (the computer on which the provided Scanner File Utility is installed) or not. * If you want to cancel the procedure part way through, press the Reset key. The touch panel will return to the initial mode settings. 1 6 Touch the “Close” key. If you are finished making settings, press the Reset key. (3) File Type Setting Perform this procedure to select the file type in which the documents for transmission, or of received documents, will be saved in the server computer (the computer on which the provided Scanner File Utility is installed). The document can be saved as a PDF file or a TIFF file. * If you want to cancel the procedure part way through, press the Reset key. The touch panel will return to the initial mode settings. 1 Press the Default key. The Default Setting screen will appear. (Inch) Press the Default key. The Default Setting screen will appear. (Inch) (Metric) (Metric) 2 2 Touch the “FAX default” key. 3 3 Use the “▼” cursor key to select “Save Tx. original”. 4 4 Touch the “Change #” key. Touch the “FAX default” key. Use the “▼” cursor key to select “File type”. Touch the “Change #” key. (Inch) (Inch) (Metric) (Metric) 5 5 8-4 Select whether you want to save the documents or not by touching either the “On” or “Off” key, as appropriate. 6 Touch the “PDF” or “TIFF” key. Touch the “Close” key. If you are finished making settings, press the Reset key. Section 8 Network FAX Settings (Option) Network FAX Registration Register the following items when you want to use the Network FAX functions. • File name (Transmission/Reception)...For registering the default file name when documents which have been transmitted or received using the Network FAX functions are saved in the designated folder. • IP address / Host name...For registering the IP address or host name of the server computer in which documents which have been received using the Network FAX functions are saved. In this case, the Scanner File Utility needs to be installed. • Administrator's e-mail address...For registering the e-mail address of the computer to be notified in case of an error, as well as where to send Transmission and Reception Reports. * If no information is entered here, the Activity Report and Power Failure Report will be printed out at the FAX machine. • Save Folder Number...For registering the number of the folder in which documents which have been transmitted or received using the Network FAX functions will be saved. * The folder in which the documents will be saved is set in the Scanner File Utility. ● Registering the file name (factory default setting: “RX” and “TX”) 3 Touch the “File name” key. 4 If you want to register the file name for received FAXes, touch the “NetworkFAX Rx.” [“NW-FAX RX”] key. If you want to register the file name for transmitted FAXes, touch the “Save Tx. original” key. * The procedure to register the name is the same for both received FAXes and transmitted FAXes. 5 Enter the desired name using the English alphabet, numerals or other available symbols. (Maximum 13 digits) Use the keypad to enter numerals. (Inch) * If you want to cancel the procedure part way through, press the Reset key. The touch panel will return to the initial mode settings. 1 Touch the “Register” [“Registration”] key. The Registration Select screen will appear. (Inch) (Metric) (Metric) 2 * “Shift” key: Touch this key when you want to switch between uppercase and lowercase input. “r” and “R” keys: Touch these keys when you want to move the cursor. “Back” key: Touch this key when you want to delete the character to the left of the cursor. “Del.” key: Touch this key when you want to delete the character that the cursor is currently under. “Stop” key: Touch this key when you want to cancel the registration procedure and return the touch panel to the screen in step 2. Touch the “Network FAX” key. If the Network FAX registration procedure has already been performed, the registered information will be displayed. (Inch) 6 Once you are finished entering the file name, touch the “End” key. The message display will return to the same screen as was displayed in step 2. (Metric) ● Registering the IP address or host name 7 Touch the “IP addr./Host name” key. * If you want to register the file name, go to step 3. If you want to register the IP address or host name, go to step 7. If you want to register the administrator's e-mail address, go to step 10. If you want to register the save folder number, go to step 13. 8-5 Section 8 Network FAX Settings (Option) 8 Enter the IP address (numerals) or the host name (using the English alphabet, numerals or other available symbols). (Maximum 32 digits) Use the keypad to enter numerals. 11 * “Shift” key: Touch this key when you want to switch between uppercase and lowercase input. “r” and “R” keys: Touch these keys when you want to move the cursor. “Back” key: Touch this key when you want to delete the character to the left of the cursor. “Del.” key: Touch this key when you want to delete the character that the cursor is currently under. “Stop” key: Touch this key when you want to cancel the registration procedure and return the touch panel to the screen in step 2. 12 Once you are finished entering the administrator’s e-mail address, touch the “End” key. The message display will return to the same screen as was displayed in step 2. (Inch) (Metric) * “Shift” key: Touch this key when you want to switch between uppercase and lowercase input. “r” and “R” keys: Touch these keys when you want to move the cursor. “Back” key: Touch this key when you want to delete the character to the left of the cursor. “Del.” key: Touch this key when you want to delete the character that the cursor is currently under. “Stop” key: Touch this key when you want to cancel the registration procedure and return the touch panel to the screen in step 2. 9 ● Registering the save folder number (factory default setting: “RX001” and “TX001”) 13 Touch the “Saving Folder No.” [“No.of save folder”] key. 14 Use the keypad to enter the save folder number in which documents which have been received using the Network FAX functions will be saved. (Inch) Once you are finished entering the IP address or host name, touch the “End” key. The message display will return to the same screen as was displayed in step 2. (Metric) ● Registering the administrator's e-mail address 10 Touch the “Admin. E-mail ad.” key. 11 Enter the administrator’s e-mail address using the English alphabet, numerals or other available symbols. (Maximum 64 digits) Use the keypad to enter numerals. (Inch) (Metric) 8-6 * “Clear” key: Touch this key when you want to reenter the number. “Stop” key: Touch this key when you want to cancel the registration procedure and return the touch panel to the screen in step 2. Section 8 Network FAX Settings (Option) 15 Touch the “Save Tx. original” key and use the keypad to enter the save folder number for transmitted documents in the same manner as you did for received documents. (Inch) Printing Out a Network FAX Settings List Print out this list in order to check the information registered for the Network FAX functions, such as the Network FAX Reception settings, the auto print out setting, the save folder number, etc. * If you want to cancel the procedure part way through, press the Reset key. The touch panel will return to the initial mode settings. (Metric) 1 Touch the “Print Report” key. The Report Selection screen will appear. (Inch) * “Clear” key: Touch this key when you want to reenter the number. “Stop” key: Touch this key when you want to cancel the registration procedure and return the touch panel to the screen in step 2. 16 (Metric) Once you are finished entering the save folder number, touch the “Enter” key. The message display will return to the same screen as was displayed in step 2. 2 17 Touch the “NW-FAX set. list” key. (Inch) Once you are finished registering Network FAX information, press the Reset key. (Metric) 3 To print out a Network FAX Settings List, touch the “Yes” key. A Network FAX Settings List will be printed out. 8-7 Section 9 Reference Information Section 9 Reference Information Specifications Type ............................................................ Optional FAX Kit Compatibility ............................................... Group 3 Line Requirement ........................................ Subscription telephone line Transmission Speed ................................... Within 3 seconds (33600 bps, JBIG, ITU-T #1 chart) Modem Speed ............................................. 33600/31200/28800/26400/24000/21600/19200/16800/14400/12000/9600/7200/4800/2400 bps Data Compression ...................................... JBIG/MMR/MR/MH Error Correction .......................................... ECM Maximum Document Dimensions ............... Width: 11" [297 mm] Length: 63" [1600 mm] Automatic Document Processor Capacity .. Duplex Document Processor: Max. 100 pages, Document Processor: Max. 70 pages Auxiliary Scanning Line Density .................. Horizontal x Vertical Normal (8 dots/mm x 3.85 lines/mm) Fine (8 dots/mm x 7.7 lines/mm) Super fine (8 dots/mm x 15.4 lines/mm) Ultra fine (16 dots/mm x 15.4 lines/mm) Recording Resolution .................................. 600 dpi x 600 dpi Grayscale .................................................... 128 levels (Value differential diffusion) Speed-Dial Keys ......................................... Max. 600 destinations Broadcast Transmission .............................. Max. 300 destinations Polling Reception ........................................ Max. 300 locations Installed Bitmap Memory ............................ 4 MB Installed Imaging Memory ........................... 4 MB (including 1 MB of working memory) Management Reports and Lists .................. Activity Report, Confirmation List, User Setting List, One-Touch Key List, Telephone Directory List, Program Dial List, Group Dial List, Encryption Key List, Restricted Access Report, Department List Options ........................................................ Memory (8 MB), Printer/Scanner Kit * Specifications are subject to change without notice. 9-1 Section 9 Reference Information Special Characters Chart Depending upon the language being used in the message display, certain characters other than those in the English alphabet may be available for use. Such characters are dealt with as “special characters” when registering information in this FAX. The following chart lists separately the special characters available for each language. Use this chart as reference when registering destination names, etc. For more detailed information on entering characters, refer to “Entering Characters” on page 1-23.) * When special characters are displayed on 2 lines, the top line will show uppercase characters and the bottom line will show lowercase characters Display language Available characters Danish Ä ä Å å Ö ö Ø ø Æ æ ! @ = Dutch ; ? [ ] % ! @ = English ; ? [ ] % ! @ = Finnish Ä ä Å å Ö ö Ø ø Æ æ ! @ = French Œ œ ? [ ] % ! @ = German Ä ä Ü ü Ö ö ß % ! @ = Italian È è ? [ ] % ! @ = Spanish a o ¿ ? ¡ ! Ñ ñ = Portuguese Á á à ã Ó ó Õ õ É é Ê ê Í í Ç ç Swedish Ä ä Å å Ö ö Ø ø Æ æ ! @ = Norwegian Å å É é Ø ø Æ æ % æ ! @ = Polish ; ? [ ] % ! @ = 9-2 Section 9 Reference Information Paper Size and Priority Feed Chart (Inch version) If the drawers do not contain paper that is of a size and orientation exactly the same as that of the received documents, the FAX will automatically select the most appropriate paper for print out. The following chart indicates the order of priority for paper selection in such a case. Received Document Size Paper in Drawers Order of Selection <Notes for this Chart> * The abbreviations in the chart above refer to the following paper sizes: ST: 5-1/2" x 8-1/2" [width-wise] STR: 5-1/2" x 8-1/2" [length-wise] LT: 8-1/2" x 11" [width-wise] LTR: 8-1/2" x 11" [length-wise] LG: 8-1/2" x 14" LD: 11" x 17" * The top edge of the paper in these illustrations indicates the direction of feed for transmission or print out. * If the same size of paper is set in more than one location, the upper drawer will have priority for paper feed. * If the either of the Fixed Size or Fixed Cassette modes are selected in the Paper Feed Selection Mode setting, that setting will take precedent over the order indicated here. *1: Indicates that the Rotate Received Documents function will be used. *2: When the image of received documents is automatically reduced to fit onto the paper, 8-1/2" x 14" size images will be reduced to fit onto 8-1/2" x 11" [length-wise] size paper. : Indicates that a received page will be split and printed onto 2 or more separate sheets of paper. 9-3 Section 9 Reference Information Paper Size and Priority Feed Chart (Metric version) If the drawers do not contain paper that is of a size and orientation exactly the same as that of the received documents, the FAX will automatically select the most appropriate paper for print out. The following chart indicates the order of priority for paper selection in such a case. Received Document Size Paper in Drawers Order of Selection <Notes for this Chart> * The top edge of the paper in these illustrations indicates the direction of feed for transmission or print out. * FL refers to Folio size paper. * If the same size of paper is set in more than one location, the upper drawer will have priority for paper feed. * If the either of the Fixed Size or Fixed Cassette modes are selected in the Paper Feed Selection Mode setting, that setting will take precedent over the order indicated here. *1: Indicates that the Rotate Received Documents function will be used. *2: If the received image of Folio size documents is automatically reduced to fit onto the paper, it will be accomplished onto A4R size paper. : Indicates that a received page will be split and printed onto 2 or more separate sheets of paper. 9-4 Section 9 Reference Information Menu Flow Charts The following charts represent the flow of the message display when the “function” keys on the touch panel (“Application”, “Register” [“Registration”] and “Print Report”) are touched, as well as when the Default key is pressed. Refer to this chart as a reference when operating the FAX. “Register” [“Registration”] Key Speed-Dial One-Touch Keys Chain Dial Keys Group Dial Keys Program Keys Self-Station Information Your Own FAX Number Your Own Name Your Own ID Date and Time Print Out Boxes F-Code Confidential Boxes F-Code Relay Boxes Encryption Boxes Password Check Communication Permit Telephone Numbers Permit IDs FAX Forwarding Remote Switching Remote Test ID Restricted Access Management Password Access Codes Encryption Keys NW-FAX File Name IP Address / Host Name Administrator’s E-Mail Address Save Folder Number “Application” key Polling Transmission Polling Reception Entering Documents into an F-Code Confidential Box Printing from an F-Code Confidential Box Printing from an Encryption Box Status Verification of Scheduled Communications Transmission Result Display Reception Result Display 9-5 Section 9 Reference Information Default key “FAX default” key Type of Phone Line (Inch version only) TTI Transmission ON/OFF Report Print Out ON/OFF Password Check Communication ON/OFF FAX Forwarding ON/OFF Bulletin Board Function ON/OFF Number of Rings (Auto FAX Reception) Volume Settings Document Size for Scanning from the Document Processor TX mode default Automatic Reception Mode Reception Date & Time Print Out ON/OFF Paper Feed Selection Mode Manual Paper Feed ON/OFF 2 in 1 Reception ON/OFF Duplex Reception ON/OFF NW-FAX Reception (Only available when the Printer/ Scanner Kit is installed.) TX Document Save (Only available when the Printer/ Scanner Kit is installed.) File Format (Only available when the Printer/Scanner Kit is installed.) Remote Diagnosis ON/OFF Restricted Access ON/OFF “Print Report” key Activity Report Confirmation Report User Setting List F-Code Confidential Box List F-Code Relay Box List Encryption Box List One-Touch Key List Group Dial List Program Dial List Telephone Directory List Encryption Key List Network FAX Setting List (Only available when the Printer/Scanner Kit is installed.) Restricted Access Report (Print out available only when Restricted Access is turned ON.) Department List (Print out available only when Restricted Access is turned ON.) 9-6 Section 9 Reference Information Error Code Tables When a communications error occurs, one of the following error codes will be printed out on the corresponding Transmission Report or Reception Report as well as the Activity Report. Refer to the following tables for a more detailed explanation of the error. * If an error occurs during communication at a transmission speed of 33600 bps, the “U” in the error codes noted below will change to an “E”. CODE CAUSE AND/OR PROCEDURE FOR CORRECTION Busy The line is busy or the other party does not answer after automatically redialling the set number of times. Perform transmission or reception procedures again. Stopped Transmission has been interrupted by pressing the Stop/Clear key. Reception has been interrupted by pressing the Stop/Clear key. During multiple communication (Broadcast Transmission, Polling Reception, etc.), this unit was unable to transmit to all destinations due to a communications interruption. U00300 The destination FAX has run out of recording paper. Check with the destination party. U00420 U00462 Connection was made on a call initiated by the transmitting party, but the transmission has been interrupted because the transmitting party does not possess the necessary communication capabilities. U00600 U00690 Communication was interrupted due to trouble with your unit. Perform transmission or reception procedures again. U00700 Communication was interrupted due to trouble with the other party’s FAX unit. Check with the other party. U00800 U00810 Unsuccessfully transmitted page(s) remain. Perform transmission procedures again. U00900 U00910 Unsuccessfully received page(s) remain. Perform reception procedures again. U01000 U01092 A communication error occurred during transmission. Perform transmission procedures again. U01100 U01199 A communication error occurred during reception. Perform reception procedures again. U01400 A communication which uses the timer was scheduled, and a number was entered using an abbreviated number or one-touch key, etc., but communication with that party was impossible because that number was no longer registered when the scheduled time arrived. Check your unit. U01500 A communication error occurred during transmission at high transmission speed. Perform transmission procedures again. U01600 A communication error occurred during reception at high transmission speed. Perform reception procedures again after having the transmitting party lower the transmission speed. U01700 U01720 A communication error occurred during transmission at high transmission speed. Perform transmission procedures again. 9-7 Section 9 Reference Information CODE CAUSE AND/OR PROCEDURE FOR CORRECTION U01721 A communication error occurred during transmission at high transmission speed. The destination party’s FAX may not have the corresponding high speed reception capabilities. If the destination party’s FAX number was dialled using an abbreviated number or one-touch key, change the transmission speed registered for that number to a lower setting and perform transmission procedures again. U01800 U01820 A communication error occurred during reception at high transmission speed. Perform reception procedures again after having the transmitting party lower the transmission speed. U01821 A communication error occurred during reception at high transmission speed. Your unit may not have the corresponding high speed reception capabilities. Perform reception procedures again after having the transmitting party lower the transmission speed. U02200 An F-Code Based Relay Broadcast Transmission command was received, but transmission to the remaining final destination(s) was impossible because the destination FAX phone number(s) that was(were) registered for the corresponding F-Code Relay Box in your FAX machine has(have) been deleted. Check the information registered in your FAX and have the initial transmitting station perform the transmission operation again. U02400 An F-Code Based Relay Broadcast Transmission command was received, but was unsuccessful because the F-Code Relay Box ID that the initial transmitting station entered did not match the one registered in your FAX. Check the information registered in your FAX and have the initial transmitting station perform the transmission operation again. U03000 Polling Reception was attempted, but was unsuccessful because no documents had been placed in advance in the transmitting party’s FAX. Check with the transmitting party. U03200 The transmitting party’s FAX is one of our models and an F-Code Based Bulletin Board Reception was attempted in order to receive documents from that party’s F-Code Box, but was unsuccessful because there were no documents stored in the corresponding F-Code Box. U03300 An error has occured due to one of the following reasons. Check with the other party. 1 A Polling Reception was attempted in order to receive documents from the other party’s FAX, but was unsuccessful because Password Check Communication was turned ON in the other party’s FAX and the necessary password did not match. 2 The transmitting party’s FAX is one of our models and an F-Code Based Bulletin Board Reception was attempted in order to receive documents from that party’s F-Code Box, but was unsuccessful because Password Check Communication was turned ON in the other party’s FAX and the necessary password did not match. U03400 Polling Reception was attempted, but was unsuccessful because the password input in the transmitting party’s FAX and the self-station ID of the receiving party did not match. Check with the other party. U03500 The transmitting party’s FAX is one of our models and an F-Code Based Bulletin Board Reception was attempted in order to receive documents from that party’s F-Code Box, but was unsuccessful because the F-Code Box number that you entered was not registered in the other party’s FAX. 9-8 Section 9 Reference Information CODE CAUSE AND/OR PROCEDURE FOR CORRECTION U03600 The transmitting party’s FAX is one of our models and an F-Code Based Bulletin Board Reception was attempted in order to receive documents from that party’s F-Code Box, but was unsuccessful because the F-Code password that you entered did not match the one registered in the transmitting party’s FAX. U03700 An F-Code Based Bulletin Board Reception was attempted in order to receive documents from the other party, but was unsuccessful because the other party’s FAX does not have F-Code Based Bulletin Board Transmission capabilities or because there were no documents stored in the corresponding box. U04000 The destination FAX is one of our models and an F-Code Based Confidential Transmission was attempted in order to transmit documents to that party’s F-Code Box, but was unsuccessful because the F-Code Box number that you entered was not registered in the destination party’s FAX. U04100 A transmission to a destination party’s box (ex. F-Code Box) was attempted, but was unsuccessful because the destination party’s FAX does not have F-Code Based Confidential Reception capabilities. U04200 Encryption Transmission was attempted, but was unsuccessful because the Encryption Box was not registered in the other party’s FAX. U04300 Encryption Transmission was attempted, but was unsuccessful because the other party’s FAX does not possess Encryption Communication capabilities. U04400 Encryption Transmission was attempted, but was unsuccessful because the Encryption Keys did not match. U04401 Encryption Transmission was attempted, but the other party was not dialled because the designated Encryption Key is not registered in your unit. U04500 Encryption Reception was attempted, but was unsuccessful because the Encryption Keys did not match. U05100 Transmission was attempted, but was unsuccessful because Password Check Communication was turned ON in your unit and the necessary password did not match. Check with the destination party. U05200 A transmission was attempted by the other party, but was unsuccessful because Password Check Communication was turned ON in your unit and the necessary password did not match. U05300 Transmission was attempted, but was unsuccessful because Password Check Communication was turned ON in the destination party’s FAX and the necessary password did not match. Check with the destination party. 9-9 Section 9 Reference Information CODE CAUSE AND/OR PROCEDURE FOR CORRECTION U09000 Communication was attempted but, but was unsuccessful because the other party’s FAX does not match the communication protocol in use (the other party is using a G2 facsimile). U12000 An F-Code Based Relay Broadcast Transmission command was received, but all the data to be transmitted was not received because the memory in your FAX machine has become full. Check the contents of your machine’s memory and, after you have created sufficient space in memory, have the initial transmitting station perform the transmission operation again. U14000 A reception from an F-Code box was attempted, but was unsuccessful because the memory in your FAX machine has become full. Print out data from memory and try again or abandon the F-Code Based Confidential Reception attempt. U14100 The destination FAX is one of our models and a transmission to a destination party’s F-Code Box was attempted, but was unsuccessful because memory in the destination party’s FAX machine has become full. U19000 Memory Reception was attempted, but was unsuccessful because your memory has become full. Clear your memory of all other data and attempt reception again. U19100 Transmission was attempted, but was unsuccessful because the destination party’s memory has become full. Check with the destination party. U19200 The data stored in memory is faulty. Perform the necessary communication procedures again. U19300 A transmission was attempted, but was unsuccessful because the data to be transmitted is faulty. Perform the transmission procedure again. U19400 A reception was attempted, but was unsuccessful because the received data is faulty. Perform the reception procedure again. 9-10 FCC PART 68 REQUIREMENTS 1. This equipment complies with Part 68 of the FCC rules and the requirements adopted by the ACTA. On the rear side cover of the equipment to install FAX System (F) is a label that contains, among other information, a product identifier in the format US:AAAEQ##TXXXX. If requested, this number must be provided to the telephone company. 2. This equipment connects to the network via USOC RJ11C. 3. A plug and jack used to connect this equipment to the premises wiring and telephone network must comply with the applicable FCC Part 68 rules and requirements adopted by the ACTA. A compliant telephone cord and modular plug is provided with this product. It is designed to be connected to a compatible modular jack that is also compliant. See installation instructions for details. 4. The REN is used to determine the number of devices that may be connected to a telephone line. Excessive RENs on a telephone line may result in the devices not ringing in response to an incoming call. In most but not all areas, the sum of RENs should not exceed five (5.0). To be certain of the number of devices that may be connected to a line, as determined by the total RENs, contact the local telephone company. For products approved after July 23, 2001, the REN for this product is part of the product identifier that has the format US:AAAEQ##TXXXX. The digits represented by ## are the REN without a decimal point (e.g., 03 is a REN of 0.3). For earlier products, the REN is separately shown on the label. 5. If this equipment causes harm to the telephone network, the telephone company will notify you in advance that temporary discontinuance of service may be required. But if advance notice isn't practical, the telephone company will notify the customer as soon as possible. Also, you will be advised of your right to file a complaint with the FCC if you believe it is necessary. 6. The telephone company may make changes in its facilities, equipment, operations or procedures that could affect the operation of the equipment. If this happens the telephone company will provide advance notice in order for you to make necessary modifications to maintain uninterrupted service. 7. If trouble is experienced with this equipment, please contact the following company for repair and (or) warranty information: KYOCERA MITA AMERICA, INC. 225 Sand Road, P.O.Box 40008 Fairfield, New Jersey 07004-0008 U.S.A. (973) 808-8444 If the equipment is causing harm to the telephone network, the telephone company may request that you disconnect the equipment until the problem is resolved. 8. This equipment cannot be used on public coin service provided by the telephone company. Connection to Party line service is subject to state tariffs. Contact the state public utility commission, public service commission or corporation commission for information. 9. If your home has specially wired alarm equipment connected to the telephone line, ensure the installation of this equipment does not disable your alarm equipment. If you have questions about what will disable alarm equipment, consult your telephone company or a qualified installer. 10. The Telephone Consumer Protection Act of 1991 makes it unlawful for any person to use a computer or other electronic device, including FAX machines, to send any message unless such message clearly contains in a margin at the top or bottom of each transmitted page or on the first page of the transmission, the date and time it is sent and an identification of the business or other entity, or other individual sending the message and the telephone number of the sending machine or such business, other entity, or individual. (The telephone number provided may not be a 900 number or any other number for which charges exceed local or longdistance transmission charges.) In order to program this information into your FAX machine, you should complete the following steps:(Insure that it will be transmitted, refer to Selfstation registration, page 1-5, Setting the date and time, page 1-6, and Transmit Terminal Identifier, Page 1-4.) IMPORTANT SAFETY INSTRUCTIONS When using your telephone equipment, basic safety precautions should always be followed to reduce the risk of fire, electric shock and injury to persons, including the following: 1. Do not use this product near water, for example, near a bath tub, wash bowl, kitchen sink or laundry tub, in a wet basement or near a swimming pool. 2. Avoid using a telephone (other than a cordless type) during an electrical storm. There may be a remote risk of electric shock from lightning. 3. Do not use the telephone to report a gas leak in the vicinity of the leak. 4. Use only the power cord and batteries indicated in this manual. Do not dispose of batteries in a fire. They may explode. Check with local codes for possible special disposal instructions. SAVE THESE INSTRUCTIONS IMPORTANTES MESURES DE SECURITE Certaines mesures de sécurité doivent être prises pendant l'utilisation de matériel téléphonique afin de réduire les risques d'incendie, de choc électrique et de blessures. En voici quelques unes: 1. Ne pas utiliser l'appareil près de l'eau, p. ex., près d'une baignoire, d'un lavabo, d'un évier de cuisine, d'un bac à laver, dans un sous-sol humide ou près d'une piscine. 2. Eviter d'utiliser le téléphone (sauf s'il s'agit d'un appareil sans fil) pendant un orage électrique. Ceci peut présenter un risque de choc électrique causé par la foudre. 3. Ne pas utiliser l'appareil téléphonique pour signaler une fuite de gaz s'il est situé près de la fuite. 4. Utiliser seulement le cordon d'alimentation et le type de piles indiqués dans ce manuel. Ne pas jeter les piles dans le feu: elles peuvent exploser. Se conformer aux règlements pertinents quant à l'élimination des piles. CONSERVER CES INSTRUCTIONS CANADIAN IC REQUIREMENTS “This product meets the applicable Industry Canada technical specifications” “The Ringer Equivalence Number is an indication of the maximum number of devices allowed to be connected to a telephone interface. The termination on an interface may consist of any combination of devices subject only to the requirement that the sum of the RENs of all the devices does not exceed five.” The REN (CANADA) of this product is 0.3. CONDITIONS DE L'IC CANADIENNE “Le présent matériel est conforme aux spécifications techniques applicables d’Industrie Canada.” “L'indice d'équivalence de la sonnerie (IES) sert à indiquer le nombre maximal de terminaux qui peuvent être raccordés à une interface téléphonique. La terminaison d'une interface peut consister en une combinaison quelconque de dispositifs, à la seule condition que la somme d'indices d'équivalence de la sonnerie de tous les dispositifs n'excède pas 5.” Le IES (CANADA) pour ce produit est 0.3. WARNING This equipment has been tested and found to comply with the limits for a Class A digital device, pursuant to Part 15 of the FCC Rules. These limits are designed to provide reasonable protection against harmful interference when the equipment is operated in a commercial environment. This equipment generates, uses, and can radiate radio frequency energy and, if not installed and used in accordance with the instruction manual, may cause harmful interference to radio communications. Operation of this equipment in a residential area is likely to cause harmful interference in which case the user will be required to correct the interference at his own expense. * The use of a non-shielded interface cable with the referenced device is prohibited. CAUTION – The changes or modifications not expressly approved by the party responsible for compliance could void the user's authority to operate the equipment. * The above warning is valid only in the United States of America. REMARQUE De l'ozone est libéré pendant le processus d'impression, mais en quantité insuffisante pour provoquer un quelconque effet toxique sur la santé. Si toutefois le télécopieur est utilisé pendant une période prolongée dans une pièce mal aérée ou si vous tirez un nombre extrêmement important de copies, l'odeur dégagée peut devenir incommodante. Dès lors, pour conserver un environnement de travail approprié au télécopieur, nous recommandons d'aérer correctement la pièce. CAUTION! The power plug is the main isolation device! Other switches on the equipment are only functional switches and are not suitable for isolating the equipment from the power source. ATTENTION! Le débranchement de la fiche secteur est le seul moyen de mettre l'appareil hors tension. Les interrupteurs sur l'appareil ne sont que des interrupteurs de fonctionnement : ils ne mettent pas l'appareil hors tension. A1 This machine has passed all quality controls and final inspection. 2002. 8 3DB80020A