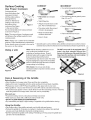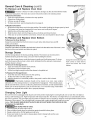
1
®
GAS
E
ESTUFA A GAS
Models, modelos 790.7540@
= color number, n_mero de color
iii.........
\
Sears Roebuck
www,sears,com
d
and Co., Hoffrnan
Estates, IL 60179 U.S.A.
P/N 318200759 Rev. C (0801)
Table of Contents
Surface Cooking .......................................................................
11
Before Setting Oven Controls .................................................
12
Air Circulation in the Oven ......................................................
12
Control Pad Features ...............................................................
13
Setting Oven Controls .........................................................
14-21
Adjusting Oven Temperature ..................................................
21
Self-Cleaning .......................................................................
22-23
General Care & Cleaning ....................................................
24=27
Before You Call ....................................................................
28-29
Sears Service ...........................................................................
30
Range Warranty ......................................................................... 2
iMPORTANTSAFETY iNSTRUCTiONS .................................. 3-5
Product Record .......................................................................... 5
Serial Plate Location .................................................................. 5
Protection Agreements ............................................................. 6
Grounding instructions .............................................................. 7
Conversion to Liquefied Petroleum Gas .................................. 7
Range Features .......................................................................... 8
Before Setting Surface Controls .............................................. 9
Setting Surface Controls ......................................................... 10
Kenmore
Elite Appliance Warranty
OneYear Limited Warranty
When installed, operated and maintained according to all instructions supplied with the product, if this appliance fails due to
a defect in material or workmanship within one year from the date of purchase, call 1-800-4-MY-HOME ® to arrange for free
repair. If this appliance is used for other than private family purposes, this warranty applies for only 90 days from the date of
purchase.
This warranty covers only defects in material and workmanship. Sears will NOT pay for:
1. Expendable items that can wear out from normal use, including but not limited to filters, belts, light bulbs, and bags.
2. A service technician to instruct the user in correct product installation, operation or maintenance.
3. A service technician to clean or maintain this product.
4. Damage to or failure of this product if it is not installed, operated or maintained according to all instructions supplied with
the product.
5. Damage to or failure of this product resulting from accident, abuse, misuse or use for other than its intended purpose.
6. Damage to or failure of this product caused by the use of detergents, cleaners, chemicals or utensils other than those
recommended in all instructions supplied with the product.
7. Damage to or failure of parts or systems resulting from unauthorized modifications made to this product.
FIVE-YEAR LIMITED WARRANTY
For the second through the fifth year from the date of purchase, when installed and operated according to the Installation
Instructions and Use & Care Guide, Sears will supply the following range parts free of charge if they fail for the reasons
listed below. Customer must pay labor cost of installation.
•
Cooktop glass if it fails due to thermal shock.
•
Cooktop elements if they are defective.
What Sears will not cover:
=
=
Failure of the product if it is abused, misused, or used for other than the intended purpose.
Damage to the cooktop glass caused by the use of cleaners or utensils other than the recommended cleaning cream
and tools.
•
Damage to the cooktop glass caused by hardened spills of sugary materials (including starches from vegetables or
pastas) or melted plastic that are not cleaned according to the directions in the Use & Care Guide.
= Repairs to parts or systems resulting from unauthorized modifications made to the appliance.
Disclaimer of implied warranties; limitation of remedies
Customer's sole and exclusive remedy under this limited warranty shall be product repair as provided herein. Implied
warranties, including warranties of merchantability or fitness for a particular purpose, are limited to one year or the shortest
period allowed by law. Sears shall not be liable for incidental or consequential damages. Some states and provinces do not
allow the exclusion or limitation of incidental or consequential damages, or limitations on the duration of implied warranties
of merchantability or fitness, so these exclusions or limitation may not apply to you.
This warranty applies only while this appliance is used in the United States and Canada.
This warranty gives you specific legal rights, and you may also have other rights which vary from state to state.
Sears, Roebuck and Co., Dept. 817WA, Hoffman Estates, IL 60179
Sears Canada Inc.,Toronto, Ontario, Canada M5B 2B8
Printed in United States
2
important Safety instructions
Read all instructions before using this appliance.
Save these instructions for future reference.
This manual contains many important safety messages.
Always read and obey all safety messages.
The safety symbol _ calls your attention to safety messages that inform you of hazards that can kill or hurt you or
others, or cause damage to the product.
Indicates an imminently hazardous situation which, if not avoided may result in death or serious injury.
Indicates an imminently hazardous situation which, if not avoided may result in minor or moderate injury, or
product damage.
All safety messages will identify the hazard, tell you how to reduce the chance of injury, and tell you what can happen if the
instructions are not followed.
if the information in this manual is not followed
exactly, a fire or expJosion may result causing property
damage, personal injury or death.
FOR YOUR SAFETY:
-- Do not store or use gasoline or other flammable vapors and
liquids in the vicinity of this or any other appliance.
-- WHAT TO DO IFYOU SMELL GAS:
= Do not try to light any appliance.
• Do not touch any electrical switch; do not use any phone in
your building.
• immediately call your gas supplier from a neighbor's phone.
Follow the gas suppJier's instructions.
= if you cannot reach your gas supplier, call the fire department.
-- installation and service must be performed by a qualified
installer, servicer or the gas supplier.
= Remove all tape and packaging before using the
range. Destroy the carton and plastic bags after
unpacking the range. Never allow children to play with
packaging material.
= Proper Installation=Be sure your appliance is properly
installed and grounded by a qualified technician in
accordance with the National Fuel Gas Code ANSi
Z223.1 latest edition, and National Electrical Code
ANSI/NFPA No. 70--latest edition, and local code
requirements.
Install only per installation instructions
provided in the literature package for this range.
Sears Parts & Repair is the recommended repair service
for this appliance. Know how to disconnect the power to
the range at the circuit breaker or fuse box and gas
supply at the main shutoff valve in case of an
emergency. Remove the drawer to access the valve.
= User servicing--Do
not repair or replace any part of
the appliance unless specifically recommended in
the manuals. All other servicing should be done only by
a qualified technician. This may reduce the risk of
personal injury and damage to the range.
= Never modify or alter the construction
of a range by
removing leveling legs, panels, wire covers, anti=tip
brackets/screws,
or any other part of the product.
Stepping, leaning or sitting on the door
or drawer of this range can result in serious injuries
and also cause damage to the range. Do not allow
children to climb or play around the range. The weight of a
All ranges can tip.
_,
Injuryto persons could result.
_:
with range.
See
Instructions.
nstallInstallation
anti-tip device
packed
To reduce the risk of tipping,
the range must be secured by properly
installed anti-tip bracket(s) provided with the
range. To check if the bracket(s) is installed
properly, remove the lower panel or storage
drawer and verify that the anti-tip bracket(s) is
engaged. Refer to the Installation Instructions
for proper anti-tip bracket(s) installation.
child on an open door may cause the range to tip, resulting
in serious burns or other injury. An open drawer, when hot,
may cause burns.
Do not use the oven or warmer drawer (if
equipped) for storage.
Do not store items of interest to children
in the cabinets above a range. Children climbing on the
range to reach items could be seriously injured.
NEVER use this appliance as a space heater
to heat or warm the room. Doing so may result in carbon
monoxide poisoning.
= Storage in or on Appliance--Flammable
materials should
not be stored in an oven, near surface burners or in the
drawer (if equipped). This includes paper, plastic and cloth
items, such as cookbooks, plasticware and towels, as well
as flammable liquids. Do not store explosives, such as
aerosol cans, on or near the appliance. Flammable materials
may explode and result in fire or property damage.
= Do not leave children alone--Children
should not be
left alone or unattended in the area where appliance
is in use. They should never be allowed to sit or stand
on any part of the appliance.
•
DO NOTTOUCH SURFACE BURNERS, AREAS NEAR
THESE BURNERS, OVEN BURNER OR iNTERiOR
SURFACES OF THE OVEN OR WARMER DRAWER (if
equipped). Areas near surface burners may become hot
enough to cause burns. During and after use, do not
important Safety instructions
touch, or let clothing or other flammable materials touch
these areas until they have had sufficient time to cool.
Among these areas are the cooktop, surfaces facing the
cooktop, the oven vent openings and surfaces near
these openings, oven door and window.
Wear proper apparel--Loose=fitting
or hanging
garments should never be worn while using the
appliance. Do not let clothing or other flammable
materials contact hot surfaces.
• Do not use water or flour on grease fires--Smother
the fire with a pan lid, or use baking soda, a dry
chemical or foam-type extinguisher.
• When heating fat or grease, watch it closely. Fat or
grease may catch fire if allowed to become too hot.
In case of fire or gas leak, be sure to turn
IMPORTANT
INSTRUCTIONS
FOR USING
YOUR COOKTOP
• Know which knob controls each surface heating unit.
Always turn the knob to the LITE position when igniting
the burners. Visually check that burner has lit. Then
adjust the flame so it does not extend beyond the edge
of the utensil.
• Use proper pan size. This appliance is equipped with
one or more surface burners of different sizes. Select
utensils having flat bottoms large enough to cover the
surface burner. The use of undersized utensils will
expose a portion of the surface burner to direct contact
and may result in ignition of clothing. Proper relationship
of utensil to the surface burner will also improve
efficiency.
• Use only dry potholders--Moist
or damp potholders
on hot surfaces may result in burns from steam. Do
not let potholders touch hot heating elements. Do not use
a towel or other bulky cloth instead of a potholder.
• Utensil handles should be turned inward and not
extend over adjacent surface burners--To reduce the risk
of burns, ignitionof flammable materials, and spillage due
to unintentional contact with the utensil. The handle of the
utensil should be positioned so that it is turned inward, and
does not extend over adjacent surface burners.
• Do not heat unopened food containers--Buildup
of
pressure may cause container to burst and result in
injury.
• Neverleavesurfaceburnersunattendedathighheat
settings--Boilovers
cause smoking and greasy spillovers
that may ignite,or a pan that has boiled dry may melt.
• Remove the oven door from any unused range if it is
to be stored or discarded.
• Protective liners--Do not use aluminum foil to line oven
bottom or any other part of the appliance. Only use
aluminum foil as recommended for baking if used as a
cover placed on the food. Any other use of protective
liners or aluminum foil may result in a risk of electric
shock or fire or short circuit.
off the main gas shutoff valve.
IMPORTANT--Do
not attempt to operate the oven during
a power failure. If the power fails, always turn the oven
off. If the oven is not turns off and the power resumes, the
oven may begin to operate again. Food left unattended
could catch fire or spoil.
Use proper flame size--Adjust
flame size
so it does not extend beyond the edge of the utensil.
The use of undersize utensils will exposed a portion of the
burner flame to direct contact and may result in ignition of
clothing. Proper relationship of utensil to flame will also
improve efficiency.
Do not use stove top grills on the burner
grates of sealed gas burners. If you use a stove top grill on
a sealed gas burner, it will cause incomplete combustion
and can result in exposure to carbon monoxide levels above
allowable current standards. This can be hazardous to your
health.
Electronic controllers can be damaged
by cold temperatures. When you use your appliance for
the first time, or if it has not been used for a long
period of time, make sure that it has been exposed to a
temperature above 0°C/32°F for at least 3 hours before
connecting it to the power supply.
• Glazed cooking utensils--Only
certain types of glass,
glass/ceramic, ceramic, earthenware, or other glazed
utensils are suitable for rangetop service without breaking
due to the sudden change in temperature. Check the
manufacturer's recommendations for rangetop use.
• Do not use decorative
surface burner covers.
If a
burner is accidentally turned on, the decorative cover will
become hot and possibly melt. Burns will occur if the hot
covers are touched. Damage may also be done to the
cooktop or burners because the covers may cause
overheating. Air will be blocked from the burner and
cause combustion problems.
FOR GLASS
COOKTOPS
ONLY
• Do not clean or operate a broken cooktop--lf
cooktop
should break, cleaning solutions and spillovers may
penetrate the broken cooktop and create a risk of electric
shock. Contact a qualified technician immediately.
• Clean cooktop glass with caution--If
a wet sponge or
cloth is used to wipe spills on a hot cooking area, be
careful to avoid a steam burn. Some cleaners can
produce harmful fumes if applied to a hot surface.
• Avoid scratching
objects.
the cooktop glass with sharp
important Safety instructions
IMPORTANT
INSTRUCTIONS
FOR USING
YOUR OVEN
• Use care when opening oven door or warmer drawer (if
equipped)--Stand to the side of the range when opening
the door of a hot oven. Let hot air or steam escape before
you remove or replace food in the oven/warmer drawer.
• Keep oven vent ducts unobstructed. The oven vent is
located at the rear of the cooktop. Touching the surfaces in
this area when the oven is operating may cause severe
burns. Also, do not place plastic or heat-sensitive items on
or near the oven vent. These items could melt or ignite.
iMPORTANT
INSTRUCTIONS
YOUR RANGE
FOR CLEANING
• Clean the range regularly to keep all parts free of
grease that could catch fire. Exhaust fan ventilation
hoods and grease filters should be kept clean. Do not
allow grease to accumulate on hood or filter. Greasy
deposits in the fan could catch fire. When you are flaming
food under the hood, turn the fan on. Refer to the hood
manufacturer's instructions for cleaning.
SELF CLEANING
OVENS
NEVER cover any slots, holes or passages
in the oven bottom or cover an entire rack with materials
• in the self-Cleaning cycle only clean the parts listed in this
Use and Care Guide. Before self cleaning the oven, remove
the broiler pan and any utensils or foods from the oven.
such as aluminum foil. Doing so blocks air flow through the
oven and may cause carbon monoxide poisoning. Aluminum
foil linings may trap heat, causing a fire hazard.
• Do not use oven cleaners--No
commercial oven cleaner
or oven liner protective coating of any kind should be
used in or around any part of the oven.
• Placement of oven/warmer drawer (if equipped) racks.
Always place oven racks in desired location while oven/
warmer drawer (if equipped) is cool. If rack must be
moved while oven is hot use extreme caution. Use
potholders and grasp the rack with both hands to
reposition. Do not let potholders contact the hot heating
elements in the oven/warmer d rawer (if equipped).
Remove all utensils from the rack before moving.
• Do not clean door gasket--The door gasket is essential
for a good seal. Care should be taken not to rub, damage
or move the gasket.
• Do not use the broiler pan without its insert. The
broiler pan and its insert allow dripping fat to drain and be
kept away from the high heat of the broiler.
• Do not cover the broiler insert with aluminum
Exposed fat and grease could ignite.
foil.
• Do not touch a hot light bulb with a damp cloth. Doing
so could cause the bulb to break. Disconnect the
appliance or turn off the power to the appliance before
removing and replacing light bulb.
• _
The health of some birds is extremely
sensitive to the fumes given off during the selfcleaning cycle of the range. Move the birds to another
well ventilated room.
important
Safety
Notice
The California Safe Drinking Water and Toxic Enforcement Act
requires the Governor of California to publish a list of
substances known to the state to cause cancer, birth defects
or other reproductive harm, and requires businesses to warn
customers of potential exposure to such substances.
Product Record
Serial Plate Location
In this space below, record the date of purchase, model and
serial number of your product. You will find the model and serial
number printed on the serial plate.
You will find the model and serial number printed on
the serial plate. The serial plate is located on the
right side of the drawer body (see illustration below).
Model No.
Remember to record
the serial number for
futu re reference.
790.
Serial No.
Date of purchase
Save these instructionsand your sales receipt for future reference.
Please carefully
read and save these instructions
This Use & Care Manual contains general operating instructions
for your appliance and feature information for several models. Your
product may not have all the described features. The graphics
shown are representative. The graphics on your appliance may not
look exactly like those shown. Common sense and caution must
be practiced when installing, operating and maintaining any
appliance.
SAVETHESE
Serial Plate
Location
INSTRUCTIONS
PROTECTION AGREEMENTS
in the U.S.A.
Master Protection
Agreements
Congratulations on making a smart purchase. Your new
Kenmore ® product is designed and manufactured for years
of dependable operation. But like all products, it may
require preventive maintenance or repair from time to time.
That's when having a Master Protection Agreement can
save you money and aggravation.
Purchase a Master Protection Agreement now and protect
yourself from unexpected hassle and expense.
The Master Protection Agreement also helps extend the life
of your new product. Here's what's included in the
Agreement:
[Y_ Expert service by our 12,000 professional repair
specialists
lY_ Unlimited service and no charge for parts and labor on
all covered repairs
5_ "No=lemon"guaranteereplacement
of your covered product if four or more product failures
occur within twelve months
5_ Product replacement if your covered product can't be
fixed
Annual Preventive Maintenance Check at your
request- no extra charge
Fast help by phone - phone support from a Sears
technician on products requiring in-home repair, plus
convenient repair scheduling
5_ Power surge protection against electrical damage
due to power fluctuations
5_ Rental reimbursement
if repair of your covered
product takes longer than promised
Once you purchase the Agreement, a simple phone call is
all that it takes for you to schedule service. You can call
anytime day or night, or schedule a service appointment
on-line.
Sears has over 12,000 professional repair specialists, who
have access to over 4.5 million quality parts and
accessories. That's the kind of professionalism you can
count on to help prolong the life of your new purchase for
years to come. Purchase your Master Protection
Agreement today!
Some limitations and exclusions apply.
For prices and additional information call
1-800-827-6655.
Sears Installation Service
For Sears professional installation of home
appliances, garage door openers, water heaters,
and other major home items, in the U.S.A. call
1-800-4-MY-HOME®
in Canada
Maintenance
Agreements
Your purchase has added value because you can
depend on Sears HomeCentral®for service. With over
2400 Service Technicians and more than a million parts
and accessories, we have the tools, parts, knowledge
and skills to ensure our pledge: We Service What We
Sell.
Your Kenmore ®product is designed, manufactured
and tested to provide years of dependable operation. But
like all products, it may require service from time to time.
The Sears Maintenance Agreement offers you an
outstanding service program, affordably priced.
The Sears Maintenance
Agreement:
Is your way to buy tomorrow's service at today's price
Eliminates repair bills resulting from normal wear and
tear
Provides phone support from a Sears technician on
products requiring in-home repair
Even if you don't need repairs, provides an annual
Preventive Maintenance Check, at your request, to
ensure that your product is in proper running condition.
Some limitations apply. For more information about
Sears Canada Maintenance Agreements,
call 1=800=361=6665
Grounding instructions
For personal safety, the cooktop must be properly grounded. For
maximum safety, the power cord must be plugged into an electrical
outlet that is correctly polarized and properly grounded.
DO NOT Operate the cooktop using a 2-prong
cord. If a 2-prong wall receptacle is the only
personal responsibility of the consumer to
properly grounded 3-prong wall receptacle
electrician.
Grounding type
wall receptacle
adapter or an extension
available outlet, it is the
have it replaced with a
installed by a qualified
Power supply cord with
3-prong grounding plug
See the INSTALLATION INSTRUCTIONS packaged with this range
for complete installation and grounding instructions.
This appliance is equipped with a 3-prong grounding
plug for your protection against shock hazard and should be plugged
directlyintoa properlygrounded receptacle. DO NOTcut or removethe
grounding prong from this plug.
Personal injury or death from electrical shock may
Do not, under any
circumstances,
cut, remove, or
bypass the
grounding prong.
_Avoid
fire hazard or electrical shock.
DO NOT use an adapter plug, an extension cord, or
remove g rounding prong from electrical power cord.
Failure to follow this warning can cause serious
injury, fire or death.
occur if the range is not installed by a qualified installer or
electrician.
Conversion to Liquefied Petroleum Gas (or L. P. Gas)
This natural gas range is designed to allow for conversion
to Liquefied Petroleum (L. P.) Gas.
Only a qualified service agent should perform the L. P.
conversion. Call I=800=4=IVIY=HOME® if you wish to have
Sears Service perform the conversion. An L. P.
Conversion Kit is provided with this range and is located on
the main back of the range. The kit contains installation
instructions which must be read before and followed
carefully when installing the kit.
To avoid serious injury, any additions,
changes or conversions required in order for this appliance
to satisfactorily meet the application needs must be made
by a qualified service agent.
/_
Range Features
Your
Range
Features
BurnerValve & Knob
Electronic Oven Controls with
Clock and Kitchen Timer
Oven Vent
At a Glance
BurnerValve & Knob
Burner Valve
& Knob
\
BurnerValve & Knob
Burner Valve
Knob
Interior Oven Light
Self-Cleaning
Interior Oven
Adjustable
Oven Racks
One Piece
Door Handle
Stainless
Steel Oven
Door
Searing Grill
Broil Pan Insert
Broil Pan
Ceramic
Glass
Cookto
il
ii
ii
i
Storage Drawer
5,000 BTU
Simmer
Bumer
9_
/
ii
Burner
Griddle
17,200 BTU
Power
Bumer
14,
Power Burner
Stainless Steel Frame
12,000 BTU Burner
Note: The features of your range
will vary according to model.
8
Before Setting Surface Controls
Assembly
of the Surface
Burner
Heads, Burner Caps and Burner Grates
It is very important to make sure that all of the Surface Burner Heads, Surface Burner Caps
and Surface Burner Grates are installed correctly and at the correct locations.
1. Remove all packing tape from cooktop. Remove Burner Caps and Burner Heads.
2. Discard all packing material located under all Burner Heads.
3. To replace Burner Heads & Caps, match the letters located under center of Burner Caps
with the letters located inside Burner Head (See Figure 2).
4. Match the letters stamped on Burner skirts with Burner Heads and Burner Caps on
cooktop (See Figure 2). Carefully align the Electrodes into slots or holes of the Burner
Heads (Figure 1). Note: The Burner Heads should sit flat on
Cooktop Burner Skirts.
5. Unpack Burner Grates and position on cooktop.
REMEMBER-DO NOT ALLOW SPILLS, FOOD, CLEANING
AGENTS OR ANY OTHER MATERIAL TO ENTER THE GAS
ORIFICE HOLDER OPENING. Always keep the Burner Caps and
Burner Heads in place whenever the surface burners are in use.
_BUpe_
.......
must align into slot or hole
for each Burner Head
Figure
Locations
Figure
1
of the
Gas
Surface
2
Burners
The SIMMER burner is best used for simmering
delicate sauces, etc. This burner is located at the right
rear burner position on the cooktop.
The STANDARD sized burners are used for most
surface cooking needs. These burners are located at
the left rear and center positions on the cooktop.
The POWER burners are best used for bringing large
quantities of liquid rapidly up to temperature or when
preparing larger quantities of food. These burners are
located at the right front and left front positions on the
cooktop.
Figure 3
Setting Surface Controls
Do not place plastic
items such as salt and pepper shakers,
spoon holders or plastic wrappings on
top of the range when it is in use.
These items could melt or ignite.
Potholders, towels or wood spoons could
catch fire if placed too close to a flame.
In the event of an electrical power outage,
the surface burners can be lit manually.
To light a surface burner, hold a lit match
to the burner head, then slowly turn the
surface control knob to LITE. After burner
lights push in and turn knob to desired
setting. Use caution when lighting surface
burners manually.
OFF
LITE
HI
6
5
4
3
2
LO
Figure 1
Proper
flame size
Improper
flame size
Figure 2
Operating
t.
2.
3.
4.
5.
the Gas Surface
Controls:
Place cooking utensil on surface burner.
Push the surface control knob down and turn counterclockwise
out of
the OFF position (See Figure 1).
Release the knob and rotate to the LITE position. Note: All four
electronic surface ignitors will spark at the same time. However, only
the burner you are turning on will ignite.
Visually check that the burner has a flame.
Turn the control knob counterclockwise
to the desired flame size.
The control knobs do not have to be set at a particular setting. Use the
knob indicator settings to adjust the flame as needed. DO NOT cook
with the surface control knob in the LITE position. (The electronic
ignitor will continue to spark if the knob is left in the LITE position.)
Setting
Proper Surface
Burner
Flame Size
For most cooking, start on the highest control setting and then turn to a
lower one to complete the process. Use the recommendations below as a
guide for determining proper flame size for various types of cooking. The
size and type of utensil used and the amount of food being cooked will
influence the setting needed for cooking.
*Flame Size
Type of Cooking
High Flame
Medium Flame
Start most foods; bring water to a boil; pan broiling.
Maintain a slow boil; thicken sauces, gravies; steaming.
Low Flame
Keep foods cooking; poach; stewing.
*These settings are based on using medium-weight
metal or
aluminum pans with lids. Settings may vary when using other types
of pans. The color of the flame is the key to proper burner adjustment. A
good flame is clear, blue and hardly visible in a well-lighted room. Each
cone of flame should be steady and sharp. Clean burner if flame is yelloworange.
Regardless of size, always select cookware that is suitable for the amount
and type of food being prepared. Select a burner and flame size
appropriate to the pan. Never allow flames to extend beyond the outer
edge of the pan.
Never extend the flame beyond the outer edge of the utensil. A higher
flame wastes heat and energy and increases your risk of being burned
by the flame (Figure 2).
For deep fat frying, use a thermometer and adjust the surface control
knob accordingly. If the fat is too cool, the food will absorb the fat and be
greasy. If the fat is too hot, the food will brown so quickly that the center
will be undercooked. Do not attempt to deep fat fry too much food at once
as the food will neither brown nor cook properly.
10
Surface
CORRECT
Cooking
Use Proper
INCORRECT
Curved and warped pan bottoms.
Cookware
Cookware should
have flat bottoms that
make good contact
with the entire surface
heating element.
Check for flatness by
rotating a ruler across
Pan overhangs burner grate by more
than 2.5 cm (1").
= Fiat bottom and straight
sides.
• Tight fitting lids.
the bottom of the
Figure 1
cookware (See Figure
1). Be sure to follow
the recommendations for using cookware
as shown in Figure 2.
Note: The size and type of cookware used
will influence the setting needed for best
cooking results.
• Weight of handle does not tilt
pan. Pan is well balanced.
Heavy handle tilts pan.
Pan sizes match the amount
of food to be prepared.
Made of material that
conducts heat well.
Flame extends beyond pan.
V
Easy to clean.
Note: Always use a utensil for its intended
Figure 2
purpose. Follow manufacturer's instructions.
Some utensils were not made to be used in * Specialty pans such as lobster pots, griddles and pressure cookers may be
used but must conform to the above recommended cookware requirements.
the oven or on the cooktop.
Using
a wok
Woks with flat bottoms suitable for use on
your cooktop are available in most
cookshop or hardware stores. Roundbottomed woks (with a support ring that
does not extend beyond the burner
circumference) may also be used. The metal
ring was designed to support the wok safely
when it is filled with large amounts of liquids
(soup making) or fat (frying).
DO NOT use a wok if it is equipped with a
metal ring that extends beyond the :_
burner circumference.
Because this ring
traps heat, the surface unit and cooktop
surface could be damaged.
Wire trivets: Do not use wire trivets.
Cookware bottoms must be in direct contact
Figure 3
with the grates.
Figure 4
Care & Seasoning
of the Griddle
Before first use:
• Wash Griddle in hot soapy water. Rinse and then dry completely.
• Apply a thin coat of vegetable oil to the entire surface (front and back of griddle).
• Preheat your oven to 350°R Place the griddle on the upper rack in your oven.
• Bake griddle for 1 hour at 350°E then turn oven OFF and let cool before removing.
• The surface may appear to have a tacky feel to it from the seasoning process. If desired,
wash the griddle in hot soapy water, rinse well, and dry completely.
After each use:
• To prevent rusting, store in a dry place and keep uncovered.
• After each use, clean with a stiff brush and hot water only.
• DO NOT CLEAN GRIDDLE iN DISHWASHER.
• Dry immediately and apply a light coating of vegetable oil to griddle before storing.
Using the Griddle:
• Place either side of the griddle centered over the left side gas burners.
• Preheat the griddle for 5 minutes on medium to medium low setting. Slow preheat
ensures even heat distribution during the cooking process.
• DO NOT preheat the griddle on Hi setting. Preheating on Hi may warp the griddle and
prevent even heat distribution.
11
Figure 5
Before Setting Oven Controls
_This
range has a fan that wi_ tum ''_N'' and ''_FF'' by itseif t_ keep the e_ect_nic_ c_
itmay c_ntinue
to run after the range has been turned "OFF", but may aJso stop immediateJy and then turn "ON" after a whiJe.
Oven Vent Location
Removing
The oven vent is located in the center rear on the
cooktop. When the oven is on, warm air passes through
the vent. This venting is necessary for proper air
circulation in the oven and good baking results. DO NOT
BLOCK OVEN VENT. Never close off the openings with
aluminum foil or any other material.
and Replacing
Oven Racks
To remove, pull the rack forward until it stops. Lift up
front of rack and slide out. To repJace, fit the rack onto
the guides on the oven walls. Tilt the front of the rack
upward and slide the rack back into place.
OVEN VENT
Arranging
Oven
RECOMMENDED RACK POSITIONS FOR
BROILING, BAKING & ROASTING
Rack position
Racks
ALWAYS ARRANGE OVEN RACKS WHEN
THE OVEN IS COOL (PRIOR TO
OPERATING THE OVEN). Always use oven
mitts when the oven is hot.
Food
Broiling meats, chicken or fish
3 or 4
Cookies, cakes, pies, biscuits & muffins
1 rack
Multiple racks
2 or 3
2 &4
Frozen pies, angel food cake, yeast, bread,
casseroles, small cuts of meat or poultry
1 or 2
Turkey, roast or ham
1
Note: Always use caution when removing food.
Rack
positions
Air Circulation
in the Oven
For best air circulation and baking results allow 2-4" (5-10 cm) around the
cookware for proper air circulation and be sure pans and cookware do not touch
each other, the oven door, sides or back of the oven cavity. The hot air must
circulate around the pans and cookware in the oven for even heat to reach
around the food.
1 Oven Rack
Multiple Oven Racks
12
Control Pad Features
READ THE iNSTRUCTiONS CAREFULLY BEFORE USING THE OVEN. For satisfactory use of your oven, become
familiar with the various features and functions of the oven as described below. Detailed instructions for each feature
and function follow later in this Use & Care Guide.
I
Note: The oven function will not work if the time of day clock is not set.
I
Oven Interior Light PadUsed to turn oven interior
light ON and OFF.
Cook Time Pad- Used Up and Down arrow pads- Used
to enter the length of
along with the function pads to
the baking time.
select oven temperature, cooking
time, start time (when programming
Clock Padan automatic start time), time of day,
Used to set the
clean time and minute timer.
J
time of day.
....
\
Feature indicator
lights- These light
show which feature is
in use.
X
Select Clean PadUsed to select the
self-cleaning cycle.
/\
_
'" _
mode temperature.
/\. _
,,,_-,,,,_j_
Broil Pad- Used to
_(: _#UT1E)
(BAKE) (BRoiL_-seleet
the variable broil
_
_
_
function.
_\
_\_
Kitchen Timer
Pad- Used to set
or cancel the
minute timer. The
minute timer
not start or stop
cooking.
_
O
OVEN
_}
o
PREHEAT
/
_
__Warm&HoldPad_,_b-oK) _,,_L_)
Used to set the Keep
_
DOOR LOCKED
_
For a silent
_
_
j
Delay Start Pad- Used
to set the desired start
time for baking. Can be
used with OVEN COOK
TiME to program a
delayed bake cycle.
Add 1 Minute Pad- Used to add 1
minute to the Timer Countdown=This
feature works with the Kitchen Timer
only and does not affect any cook time
or start time functions=
Bake Pad- Used to
_
enter the normal baking
Warm feature.
_
'-._'
_
OrE
Lg_K_o_
_
Used to set the Slow
Cook feature.
.........
Oven, Preheat, Door Locked & Cooktop Locked
lights- The "oven" light indicates that the oven is
functioning. The "Preheat" light will glow when the
oven is first set to operate, or if the desired
temperature is reset higher than the actual oven
temperature. The "Door Locked" light will flash until
the door locks when the self-clean cycle is in use. It
glows constantly after the door locks.
control
Recipe
Reca.--!::i,i
Stop Pad- Used to clear
any function previously
entered except the time of
day and minute timer.
Push Clear pad to stop
cooking. Also used to
activate the Oven Lock
feature.
Used to set the
Recipe Recall
feature.
panel
When choosing a function, a beep will be heard each time a pad is pushed. If desired, the controls can be programmed for silent
operation.
To tell if your oven is set for normal or silent operation push and hold
for 7 seconds. "- -" or "SP" (speaker) appears in
the display. Within 5 seconds, press ,,% or v to switch between normal sound operation and silent operation mode. The display
will show either "--" or"SP". Wait 5 seconds to return to normal operating mode. Note: If "SP" appears, the control will operate
with normal sounds and beeps. If "- -" appears, the control is in the silent operation mode.
Temperature
Conversion
(Fahrenheit
/ Celsius)
The electronic oven control is set to operate in °F (Fahrenheit) when shipped from the factory. The oven can be
programmed for any temperature from 170°F to 550°F (77°C to 288°C).
To change the temperature
to °C (Celsius) or from °C to °F (control should
1.
Press and hold _
2.
Press A
3.
Wait 5 seconds or press _
or V
To Operate
not be in a Bake or Clean mode):
for 7 seconds until °F or °C appears in the display.
to change °F to °C or °C to °F.
the Oven
to accept the changes.
Light
The interior oven light will automatically turn ON when the oven door is opened. Press _
to turn the interior light ON
and OFF whenever the door is closed. The interior oven light is located at the upper left rear wall of the oven interior and is
covered with a glass shield held by a wire holder. The glass shield must be in place whenever the oven is in use. To change
the interior oven light, see changing the Oven Light in the General Care & Cleaning section in this Use and Care Guide.
13
Setting the Clock and Minute Timer
Note: The time of day must first be set in order to operate the
I
OVER.
/
To set the Clock
When the range is first plugged in, or when the power supply to the appliance has been interrupted, the display will flash
"12:00".
1.
Press
) once (do not hold pad down).
2.
Within 5 seconds, push and hold A
3.
Press
or V
until the correct time of day appears in the display.
to accept the new time of day. If
is not pressed, the timer will return automatically
to the new time
of day after 7 seconds.
Note: The clock cannot be changed during any bake, timed bake, delayed time bake, clean cycle or delayed clean cycle.
Changing
between
12 or 24 HourTime
of Day Display
1.
Press and hold,
t for 7 seconds. After 7 seconds, "12Hr" or "24Hr" will appear in the display and the control will
2.
beep once.
Press _. or V
"24Hr".
3.
Wait 5 seconds or press @
4.
Reset the correct time as described in To set the Clock above. Please note that if the 24 hour time of day mode was
chosen, the clock will now display time from 0:00 through 23:59 hours.
to switch between the 12 and 24 hour time of day display. The display will show either "12Hr" or
to return to the time of day display.
To Set the MinuteTimer
1.
Press @.
"0:00" will appear in the display.
ONIO_
2.
3.
4.
Press A to increase or V to decrease the time in one minute increments. The timer can be set for any amount of
time from 1 minute to 11 hours and 59 minutes.
The display shows the timer count down in minutes if more than 1 hour remains. When less than 1 hour remains, the
display will count down in seconds.
When the set time has run out, the timer will beep 3 times and "End" appears in the display. It will continue to beep 3
times every 8 seconds until the _
is pressed.
ONtOFF
Note: To cancel the Minute Timer at any time press _.
ONtO_F
Note: The minute timer does not start or stop cooking. It serves as an extra timer in the kitchen that will beep when the set
time has run out. The minute timer can be used alone or during any of the other oven functions. When the minute timer is
in use with any other mode, the minute timer will be shown in the display. To view other functions, press the function pad
for that mode.
To Cancel
the MinuteTimer
before the set time has run out: Press (_.
ON/OFF
To Set Add 1 Minute Feature
The @
is used to set the Add 1 Minute feature. When @
is pressed, 1 minute is added to the Minute Timer
feature if this feature is already active. If the Minute Timer feature is not active and _
is pressed, the Minute Timer
feature will become active and will begin counting down from 1 minute. For further information on how to set the Minute
Timer feature see To Set the Minute Timer instructions above.
14
Setting
Oven Controls
To Set Control
for Continuous
Bake or 12 Hour Energy
Saving
The oven control has a built-in t 2 Hour Energy Saving feature that will shut off the oven if the control is left on for more
than t t hours and 59 minutes. The oven can be programmed to override this feature for continuous baking.
To set control for continuous baking:
1.
Press and hold _
pad for 7 seconds until a tone is heard.
0NIOFF
2.
Within 5 seconds, press A or V to switch between Continuous Bake and 12 Hour Energy Saving mode. The
display will show either "---- hr" or "12hr". If "---hr" appears, the oven will be set to continuous baking. If "12hr"
appears, the oven is set to 12 hour energy saving mode.
3.
Wait 5 seconds or press _..
To Set Control
for Oven
to accept the changes.
Lockout
The control can be programmed to lock the oven door and lock the oven control pads. The Oven Lockout feature prevents the
oven from being accidentally turned on. It does not disable the clock, minute timer or the interioroven light.
To Set Control for Oven Lock feature:
t.
Press @
and hold for 3 seconds. "LOC" will appear in the display. The "Door Locked" indicator light will flash and
the motor driven door lock will begin to close automatically. DO NOT open the oven door while the indicator light is
flashing. Allow about t 5 seconds for the oven door to lock. Once the oven door is locked, the "Door Locked" indicator
light will stop flashing and remain on in display.
2.
To cancel the Oven lockout feature, press @") and hold for 3 seconds. The control will unlock the oven door and
resume normal operation.
To Set or Change
the Temperature
for Baking
The oven can be programmed to bake at any temperature from t 70°F to 550°F (77°C to 288°C).
To Set the Controls for Baking:
t. Arrange the interior oven racks and place food in the oven.
2.
Press _.'
....
appears in the display.
v
3.
4.
5.
Within 5 seconds, Press A or V. The display will show "350°F (177°C)." By holding j_. or -,,!, the temperature can
then be adjusted in 5°F (1°C if control is set to display Celsius) increments.
8 seconds after A or V is released, the oven will begin heating to the selected temperature. When the displayed
temperature reaches the desired baking temperature, the preheat indicator light will turn OFF.
To cancel the baking function, press @.
To Change the Oven Temperature after Baking has Started: Press _% or V
Setting
to increase or decrease the set temperature.
the Warm & Hold Feature
The WARM & HOLD pad turns ON the Keep Warm feature and will maintain an oven temperature of 170 ° F (77°C). The
Warm & Hold feature will keep oven baked foods warm for serving up to 3 hours after cooking has finished. After 3 hours
the Warm & Hold feature will shut the oven OFF automatically. The Warm & Hold feature may be used without any other
cooking operations or can be used after cooking has finished using a Timed Bake or Delayed Timed Bake.
To set Keep Warm:
t. Arrange the interior oven racks and place baked food in the oven.
2.
Press _.
"
"will appear in the display and the Keep Warm indicator light above the pad will turn ON.
Note: if no further pads are touched within 25 seconds the request to turn ON Keep Warm will be cleared.
3.
Press A
or V
to start. "Hid" will be displayed.
4.
To turn Warm & Hold feature OFF at any time press @
or _.
v
OFF.
15
The Keep Warm indicator light above the pad will turn
Setting Oven Controls
Setting
(cont'd)
the Warm & Hold Feature
(Cont'd)
To set Keep Warm to turn ON automatically:
1. Arrange the interior oven racks and place food in the oven. Set the oven properly for Timed Bake or Delayed Timed
Bake (see page 19).
2.
Press _.
3.
Press _,
finished.
4.
To turn Warm & Hold feature OFF at any time press @
"
"will appear in the display and the Keep Warm indicator light above the pad will turn ON.
or Mr to start. Keep Warm is set to turn ON automatically
after Timed Bake or Delayed Timed
Bake has
The Keep Warm indicator light above the pad will turn
or _.
OFF.
Oven
Baking
information
For best results, preheat the oven before baking cookies, breads, cakes, pies or pastries, etc. There is no need to
preheat the oven for roasting meat or baking casseroles.
The cooking times and temperatures needed to bake a product may vary slightly from your previously owned
appliance. Refer to "Adjusting
the Oven Temperature"
section.
Baking problems and solutions
Baking Problems
Cookies and
biscuits burn on
the bottom.
Causes
o
Corrections
Cookies and biscuits put into
the oven before the preheating
time is completed.
Oven rack overcrowded.
•
Allow oven to preheat to the selected temperature
before placing food in oven.
Choose pan sizes that will permit 2" to 4" (5.1 cm to
10.2 cm) of air space on all sides when placed in the
oven.
Cakes too dark on
•
Dark pan absorbs heat too fast.
•
•
Cakes put into the oven before
preheating time is completed.
Oven rack position too high or
low.
Oven too hot.
,, Allow oven to preheat to the selected temperature
before placing food in the oven.
Use proper rack position for baking needs.
top or bottom.
•
Cakes not done in
the center.
•
Oven too hot.
Foods not done
•
Range not level.
•
Pan too close to oven wall or
rack overcrowded.
•
Pan warped.
•
Oven too cool.
•
•
Oven overcrowded.
Oven door opened too
frequently.
Set oven temperature 25°F/12°C lower than
recommended.
Use pan size suggested in recipe.
Use proper rack position and place pan so there is 2"
to 4" (5.1 cm to 10.2 cm) of space on all sides of pan.
•
Place marked glass measuring cup filled with water
on the center of the oven rack. If water level is
uneven, refer to the installation instructions for
leveling the appliance.
Be sure to allow 2" to 4" (5.1 cm to 10.2 cm) of
clearance on all sides of each pan in the oven.
Do not use pans that are dented or warped.
Set oven temperature 25°F/12°C higher than
suggested and bake for the recommended time.
Be sure to remove all pans from the oven except the
ones to be used for baking.
Open oven door only after shortest recommended
baking time.
when cooking time
is up.
aluminum baking sheet.
Set oven temperature 25°F/12°C lower than
recommended.
Incorrect pan size.
Pan not centered in the oven.
Cakes not level.
Use a medium-weight
16
Setting
Oven Controls
(cont'd)
Setting the Slow Cook Feature
The SLOW COOK _cL_
pad is used to activate this feature. The Slow Cook feature may be used to cook foods more
slowly, at lower oven temperatures and provides cooking results much the same way as a Slow Cooker or Crock-Pot. The
Slow Cook feature is ideal for roasting beef, pork & poultry. Slow Cooking meats may result in the exterior of meats
becoming dark but not burnt. This is normal.
There are 2 settings available, high (HI) or low (LO). The high setting is best for cooking foods from a 4 to 5 hour time
period. The low setting is best for cooking foods from a 8 to 9 hour time period. The maximum cook time for the Slow
Cook feature is 12 hours unless the oven control has been changed to the Continuous Bake mode. This feature may be
used with the additional settings of a Timed Bake or a Delayed Start (Delayed Timed Bake).
Some tips you should review for best possible results using Slow Cook feature:
• Completely thaw all frozen foods before cooking with the Slow Cook.
• When using a single rack, place in position 2 or 3 (from bottom).
• Position multiple racks to accommodate size of cooking utensils when cooking multiple food items.
• Do not open the oven door often or leave the door open when checking foods, if the oven heat escapes often, the
Slow Cook time may need to be extended.
• Cover the foods to keep them moist or use a loose or vented type cover to allow foods to turn crisp or brown.
• Roasts may be left uncovered so browning can occur. Cook times will vary; depending on the weight, fat content, bone
& the shape of the roast.
• Use the recipe's recommended food temperature and a food thermometer to determine when the food is done.
• Preheating the oven will not be necessary when using the Slow Cook feature.
• Add any cream or cheese sauces during the last hour of cooking.
To Program
the Oven to begin
baking
with the Slow Cook feature
1.
Place the food in the oven.
2.
Press _.
3.
4.
Press A or V. If _,, is pressed "HI" will appear in the display. The Slow Cook feature will be set to the high
setting. This setting is best for cooking foods from a 4 to 5 hour time period. If V is pressed "LO" will appear in the
display. The Slow Cook feature will be set to the low setting. This setting is best for cooking foods from a 8 to 9 hour
time period.
If desired, add any Timed Sake or Delayed Start settings at this time (see page 19).
5.
To cancel the Slow Cook feature press _
"
" will appear in the display.
at anytime.
17
Setting
Oven Controls
(cont'd)
Broil
Broiling is a method of cooking tender cuts of meat by direct heat under the broil element of the oven. A beep lets you know
when the broil temperature is reached. Be sure you center the broiler pan directly under the broil burner for best results.
Arrange oven rack while oven is still cool. Position the rack as needed.
The broiler pan and its insert allow dripping grease to drain and be kept away from the high heat of the broiler. DO NOT use
the pan without its insert. DO NOT cover the insert with foil. The exposed grease could ignite.
Should an oven fire occur, close the oven door and turn off the oven. If the fire continues, throw baking
soda on the fire or use a fire extinguisher. DO NOT put water or flour on the fire. Flour may be explosive and water can
cause a grease fire to spread and cause personal injury.
Grid
To set for broiling:
\
1.
Arrange the oven rack while oven is still cool.
2.
Press _f_.
3.
Press A or V until the desired broil setting level appears in the display. Press
for HI broil or V for LO broil. Most foods may be broiled at the HI broil setting. Select
the LO broil setting to avoid excess browning or drying of foods that should be cooked
to the well-done stage.
Place the insert on the broiler pan, then place the food on the insert. DO NOT use the
pan without the insert or cover the insert with aluminum foil. The exposed grease
could ignite.
Place the pan on the oven rack. Close the oven door when broiling.
Broil on one side until food is browned. Turn and broil food on 2nd side.
4.
5.
6.
"----"
will appear in the display.
Note: Always pull the rack out to the stop position before turning or removing food.
7.
When broiling is finished, press _,.
Broiling
Times and Searing Grill
Use the following table for approximate broiling times. Increase or decrease broiling times,
or move the broiling pan to a different rack position to suit for doneness. If the food you
are broiling is not listed in the table, follow the instructions provided in your cookbook and
watch the item closely. Use the Searing Grill for meats and steaks if desired. Before
placing the meat, be sure to heat the Searing Grill using Broil for 10 minutes. Cook times
should be reduced 1-2 minutes per side when cooking with the Searing Grill. Place
Searing Grill on top of Broiler Pan and insert for meats and steaks (See Figure 2).
Broiler Pan
Figure 1
Note: The broiler pan and the
insert allows grease to drain
and be kept away from the
high heat of the broiler. DO
NOT use the pan without the
insert. DO NOT cover the
insert with foil; the exposed
grease could ignite.
Searing
Broiling Table Recommendations
Food
Item
Rack Position
(see figure 3)
Temp
Setting
Cook Time in minutes
1st side
2nd side
Doneness
Figure 2
Broil Pan
...........................................................................
...............................................
...................................................................................
6100
.......................................................................
......................
& insert
Pork Chops 3/4" thick
Chicken - Bone In
Chicken - Boneless
Fish
Shrimp
Hamburger 1" thick
3rd or 4th
3rd
2rid
3rd
3rd
2nd
4th
3rd
550 °
550°
450 °
450 °
500 °
550°
550°
550 °
F
F
F
F
F
F
F
F
10:00
12:00
25:00
10:00
as directed
as directed
12:00
14:00
8:00
8:00
15:00
8:00
as directed
as directed
10:00
12:00
Medium
Well
Well
Well
Well
Well
Well
Well
Figure 3
18
Setting
Oven Controls
To Set the Timed
(continued)
Bake and Delayed
Timed
Bake Features
The COOK TiME and DELAY START pads operate the features that will turn the oven ON and OFF at the times you
select in advance. The oven can be programmed to start immediately and shut off automatically (Timed Bake) or to begin
baking at a later time with a delayed start time (Delay Start). Note: During Timed Bake the preheat indicator light will
function during the preheat operation.
To Program the Oven to Begin Baking immediately and To Shut Off Automatically (Timed Bake):
t. Be sure that the clock shows the correct time of day.
2. Place the food in the oven.
3.
Press _'_.
'....
appears in the display.
4.
5.
Within 5 seconds, press A or V. The display will show "350°F (177°C) ''. By holding _,_ or V,
then be adjusted in 5°F increments (1 ° if the control is set to display Celsius).
Wait 8 seconds for the control to accept the temperature.
6.
Press
the temperature can
_. "0:00" will flash in the display (MIN:SEC) or (HR:MIN) if programmed for more than 60 minutes.
7. Press A or V until the desired baking time appears in the display.
8. The oven will turn ON and begin heating.
Note: When the control is set for this function the oven temperature will be displayed. To see the cook time remaining
press
and to see the time of day press
To Program Oven for a Delayed Start Time and to Shut=Off Automatically (Delayed Start Bake):
t. Be sure that the clock shows the correct time of day.
2. Place the food in the oven.
'....
appears in the display.
3.
Press _.
4.
5.
Within 5 seconds, press _ or V. The display will show "350°F (177°C) ". By holding _
then be adjusted in 5°F increments (1 ° if the control is set to display Celsius).
Wait 8 seconds for the control to accept the temperature.
6.
Press
7.
8.
Press,/_ or V until the desired baking time appears.
Wait 5 seconds for the control to accept the time.
9.
Press
or V,
the temperature can
. "0:00" will flash in the display (MIN:SEC) or (HR:MIN) if programmed for more than 60 minutes.
The earliest possible start time will appear in the display.
10. Press _ or V until the desired start time appears in the display and wait 7 seconds to accept.
11. Once the start and cook times are set, the control calculates the time when baking will stop.
12. The oven will turn ON at the delayed start time and begin heating.
Note: When the control is set for a delayed start the time of day is displayed until the delayed start time is reached. When
the oven turns on, the oven temperature will be displayed. To see the cook time remaining press
and to see the
time of day press
When the Set Bake Time Runs Out:
1. "End" will appear in the display window and the oven wiil shut off automatically.
2.
The control will beep 3 times every 25 seconds until _.')
is pressed.
To Change the Oven Temperature or Bake Time after Baking has Started:
t. Press the function pad you want to change.
2. Press A or V to adjust the setting.
Use caution with the Timed Bake and Delayed Timed Bake features. Foods that can easily spoil such as
milk, eggs, fish, meat or poultry, should be chilled in the refrigerator first. Even when chilled, they should not stand in the
oven for more than 1 hour before cooking begins, and should be removed promptly when cooking is completed.
19
Setting Oven Controls (continued)
To Set the Sabbath
Feature
(for use on the Jewish Sabbath
& Holidays)
The OVEN COOK TIME and DELAY START pads are used to set the Sabbath feature. The Sabbath feature may only be
used with the BAKE pad. The oven temperature may be set higher or lower after setting the Sabbath feature, however the
display will not visibly show or provide any audible tones indicating whether the change occurred correctly. Once the oven
is properly set using Bake with the Sabbath feature active, the oven will remain continuously ON until cancelled. This will
override the factory preset 12-Hour Energy Saving feature.
If the oven light will be needed during the Sabbath, press the _
or pad before activating the Sabbath feature. Once
the oven light is turned ON and the Sabbath feature is active, the oven light will remain ON until the Sabbath feature is
turned OFF. If the oven light needs to be OFF, be sure to turn the oven light OFF before activating the Sabbath feature.
IMPORTANT NOTES: It is not advised to attempt to activate any other program feature other than BAKE while the
Sabbath feature is active. ONLY the following key pads will function after setting the Sabbath feature; UP or DOWN
ARROW, BAKE & STOP. ALL OTHER KEYPADS will not function once the Sabbath feature is properly activated.
To Program the Oven to Begin Baking Immediately
& activate the Sabbath feature:
1.
2.
Be sure that the clock is set with the correct time of day.
Place the food in the oven.
3.
Press _.
4.
6.
Within 5 seconds, press A or V. The display will show "350°F (177°C)." By holding _% or "V, the temperature can
then be adjusted in 5°F increments (1 °C if the control is set to display Celsius).
If you desire to set the oven control for a Timed Bake or a Delayed Timed Bake do so at this time. If not, skip this
step and continue to step 6. Refer to the Bake Time (complete steps 6-7) / Delayed Timed Bake (complete steps 610) section for complete instructions. Remember the oven will shut down after using Bake Time or Delayed bake
Time and therefore may only be used once during the Sabbath/Jewish Holidays. The maximum Delayed Bake Time is
11 hours & 59 minutes.
The oven will turn ON and begin heating.
7.
Press and hold both
5.
'....
appears in the display.
and _
for at least 3 seconds. SAb will appear in the display. Once SAb appears in
the display the oven control will no longer beep or display any further changes and the oven is properly set for the
Sabbath feature.
Note: You may change the oven temperature once baking has started by pressing ,/_ or V. The oven temperature
will be adjusted in 5°F increments with each press of these pads (1 °C if the control is set to display Celsius).
Remember that the oven control will no longer beep or display any further changes once the oven is set for the
Sabbath feature.
8.
The oven may be turned OFF at any time by first pressing _.
Sabbath feature press and hold both
and
(this will turn the oven OFF only). To turn OFF the
for at least 3 seconds. SAb will disappear from the display.
Should you experience a power failure or interruption, the oven will shut off. When power returns, the oven remembers that
it is set to SAb and will not turn back on automatically. If your food was nearly fully cooked, you may allow the trapped
heat in the oven to finish the cooking process. Otherwise, you should remove the food when the power failure occurs,
because you may only start the oven once during the Sabbath/Jewish Holidays. After the Sabbath/Jewish Holiday observance turn OFF the Sabbath feature. Press and hold both the
and t_
pads for at least 3 seconds. SAb will
disappear from the display and the oven may be used with all normal functions. For further assistance, guidelines for
proper usage, and a complete list of models with the Sabbath feature, please visit the web at http:\\www.star-k.org.
2O
Setting
Oven Controls
To Set the Recipe
Recall
(cont'd)
Feature
This feature will ONLY recall a recipe for Bake or Timed Bake. This feature will not work with any other function including
a Slow Cook, a Warm & Hold, a Delayed Timed Bake, a Clean Cycle or a Broil setting. You can only set one recipe
for recall. For a different recipe you have to reprogram the oven.
To Program
the Oven to Begin
Baking
Immediately
and record
a Recipe
t.
Place the food in the oven.
2.
Press_.
3.
4.
Within 5 seconds, press/_
or V. The display will show "350°F (177°C) ''. By holding A
then be adjusted in 5°F increments (1 ° if the control is set to display Celsius).
If you want to include a Timed Bake follow the instructions on page 19.
5.
Press and hold _
'....
appears.
or V,
the temperature can
until a beep is heard. The beep indicates that this recipe has been recorded for future recall.
Note: It is not possible to erase the recipe, but you can overwrite it with another temperature and time.
To Begin
Baking
with the Stored
Recipe
1.
Place the food in the oven.
2.
Press _.
3.
Press ./_. The oven will immediately begin to cook with the stored recipe. The temperature is recalled and if a Timed
Bake was recorded this feature will also recall the cooking time.
'....
appears.
Adjusting the Oven Temperature
Your oven thermostat has been precisely set at the factory. This setting may differ from your previous oven, however, so
your recipe times may not give you the results you expect. If you think that the oven is cooking too hot or cool for your
recipe times, you can adjust the thermostat so that the oven cooks hotter or cooler than the temperature displayed.
To Adjust Oven Temperature:
1.
Press and hold _
for 8 seconds. The display now indicates the amount of degrees offset between the original
factory temperature setting and the current temperature setting. If the oven control has the original factory calibration,
the display will read "0".
2. The temperature can now be adjusted up or down 35°F or 19°C, in I°F or 1 °C steps by pushing and holding A or
V. Adjust until the desired amount of degrees offset appears in the display. When lowering the oven temperature, a
minus sign (-) will appear before the number to indicate that the oven will be cooler by the displayed amount of
degrees.
3. When you have made the desired adjustment, wait 5 seconds and the display will go back to the time of day.
Note: Oven temperature adjustment made will not change the Self-Cleaning or Broil feature temperature.
21
Self-Cleaning
0
During the SelfCleaning cycle, the outside of the
range can become very hot to the
touch. DO NOT leave small children
unattended near the appliance.
The health of some
birds is extremely sensitive to the
fumes given off during the SelfCleaning cycle of any range. Move
birds to another well-ventilated room.
DO NOT line the
oven walls, racks, bottom or any
other part of the range with
aluminum foil. Doing so will destroy
heat distribution, produce poor baking
results and cause permanent damage
to the oven interior (aluminum foil will
melt to the interior surface of the
oven).
DO NOT force the
oven door open. This can damage the
automatic door locking system. Use
caution when opening the door after
the Self-Cleaning cycle is completed.
The oven may still be VERY HOT.
o
@OG.
0
PREHEAT
0
OVEN
o boo.LOCKED
0
_
@
@
@
8 Lo°%".,
Self-Cleaning
Oven
A Self-Cleaning oven cleans itself with high temperatures (well above cooking
temperatures) which eliminate soils completely or reduces them to a fine
powdered ash you can wipe away with a damp cloth.
Adhere to the following cleaning precautions:
•
DO NOT use oven cleaners or oven protective coatings in or around any
part of the Self-Cleaning oven.
•
DO NOT clean the oven door gasket. The woven material of the oven door
gasket is essential for a good seal. Care should be taken not to rub,
damage or remove the gasket.
•
DO NOT use any cleaning materials on the oven door gasket. Doing so
could cause damage.
•
Remove the broiler pan and insert, all utensils and any aluminum
foil. These items cannot withstand high cleaning temperatures.
•
Porcelain oven racks do not have to be removed. After the cycle is
complete and the oven has cooled, rub the sides of the oven racks with
wax paper or a cloth containing a small amount of salad oil (this will make
the racks glide easier into the rack position).
•
Remove any excessive spillovers in the oven cavity before starting the
Self-Cleaning cycle. To clean, use hot, soapy water and a cloth. Large
spillovers can cause heavy smoke or fire when subjected to high
temperatures. DO NOT allow food spills with a high sugar or acid content
(such as milk, tomatoes, sauerkraut, fruit juices or pie filling) to remain on
the surface as they may leave a dull spot even after cleaning.
•
Clean any soil from the oven frame, the door liner outside the oven door
gasket and the small area at the front center of the oven bottom. These
areas heat sufficiently to burn soil on. Clean with soap and water.
NOTE: Prior to setting the Self-Clean cycle, any spills remaining on the oven
bottom should be removed.
/
DO HAND
CLEAN DOOR
v
DO NOT HAND
CLEAN SEAL
Note: See additional cleaning information for the oven door in the General
Care & Cleaning section.
What to Expect during Cleaning
While the oven is in operation, the oven heats to temperatures much higher
than those used in normal cooking. Sounds of metal expansion and contraction
are normal. Odor is also normal as the food soil is being removed. Smoke may
appear through the oven vent.
If heavy spillovers are not wiped up before cleaning, they may flame and cause
more smoke and odor than usual. This is normal and safe and should not
cause alarm. If available, use an exhaust fan during the self-cleaning cycle.
_To
avoid possible burns use care when opening the oven door
after the Self-Cleaning cycle. Stand to the side of the oven when opening the
door to allow hot air or steam to escape.
22
Self=Cleaning
Self=Clean Cycle time length
For satisfactory results, use a 2 hour Self-Clean cycle for light soils, a 3 hour cycle for
average, and a 4 hour cycle for heavy soils. NOTE: The kitchen area should be well
ventilated using an open window, ventilation fan or exhaust hood during the Self-Clean cycle.
This will help eliminate the normal odors associated with the Self-Clean cycle.
To Set the Controls for a Self-Clean CycJe or a Delayed Start Serf-Clean Cycle:
To avoid
possible burns use care
when opening the oven
door after the SelfCleaning cycle. Stand to
the side of the oven when
opening the door to allow
hot air or steam to escape.
(Note: if you do not want to start a Delayed Self-Clean Cycle, skip steps 2 & 3.)
1.
Be sure the clock shows the correct time of day.
2.
Press
3.
Press and hold _, to scroll to the time to start the delayed Self-Clean cycle. Release the
pad when the desired time is displayed.
4.
Press @.
5.
Press the /_ or v once. "3:00" appears Jnthe display for a 3 hour cycle. To change to a 2
hour cycle press ",,,f. "2:00" appears in the display. To select a 4 hour cycle press A.
"4:00" appears in the display. As soon as the controls are set, the motor driven lock will begin
to close automatically and the "Door Locked" indicator light will flash. DO NOT open the oven
door while the light is flashing (it takes about 15 seconds for the oven door to lock).
"CLn" will appear in the display during the Self-Clean cycle and the "Door Locked" light
will glow until the Self-Cleaning cycle is complete or cancelled and the oven temperature
has cooled.
6.
"- -" appears in the display.
When the Self-Clean
Cycle
DO NOT
force the oven door open.
This can damage the
automatic door locking
system. Use caution and
avoid possible burns when
opening the door after the
Self-Cleaning cycle has
completed. The oven may
still be VERY HOT.
NOTE: A smoke eliminator
in the oven vent converts
most of the soil into a
colorless vapor.
is Completed:
t.
2.
The time of day or "End" will appear in the display and the "Clean" and "Door Locked" light will continue to glow.
Once the oven has cooled down for about t HOUR and the "Door Locked" light has gone out, the oven door can be opened.
3.
If "End" is in the display and the Select Clean indicator light remains ON, press @.
The time of day will appear in
the display.
NOTE: When the oven is cool, wipe away any residue or powdered ash with a damp cloth or paper towel.
Stopping
or interrupting
a Self-Cleaning
Cycle
If it becomes necessary to stop or interrupt a Self-Cleaning cycle:
1.
Press @.
2.
3.
Once the oven has cooled down for about 1 HOUR and the "Door Locked" light has gone out, the oven door can be opened.
Restart the Self-Clean cycle once all conditions have been corrected.
23
General Care & Cleaning
Cleaning
Various
Parts of Your Range
Before cleaning any part of the range, be sure all controls are turned OFF and the range is cool. Remove spillovers and
heavy soiling as soon as possible. Regular cleanings will reduce the effort required for major cleanings later.
Surfaces
How to Clean
Aluminum & Vinyl
Control Panel and Trim
Pieces
Use hot, soapy water and a cloth. Dry with a clean cloth.
Before cleaning the control panel, turn all controls to OFF and remove the control
knobs. To remove, pull each knob straight off the shaft. Clean using hot, soapy
water and a dishcloth. Rinse with a clean water and a dishcloth. Be sure to squeeze
excess water from the cloth before wiping the panel; especially when wiping around
the controls. Excess water in or around the controls may cause damage to the
appliance. Be sure to rinse the cleaners as bluish stains may occur during heating
and cannot de removed. To replace knobs after cleaning, line up the flat sides of
both the knob and the shaft; then push the knob into place.
Glass, Painted and Plastic
Body Parts, Control Knobs
and Decorative Trim
Pieces
Using a soft cloth, clean with mild dish detergent and water or a 50/50 solution of
vinegar and water. Follow by rinsing the area with clean water; dry and polish with a
soft cloth. Glass cleaners may be used if sprayed on a soft cloth first. DO NOT spray
liquids directly on the control pad and display area. Do not use large amounts of water
on the control panel - excess water on the control area may cause damage to the
appliance. Do not use other liquid cleaners, abrasive cleaners, scouring pads, or
paper towels - they will damage the finish. To remove control knobs, turn to the OFF
position; grasp firmly and pull straight off the shaft. To replace knobs after cleaning,
line up the flat sides of both the knob and the shaft; then push the knob into place.
Stainless Steel (some
models) Oven door &
drawer front panel
Clean with hot, soapy water and dishcloth. Rinse with clean water and cloth. Do not
use cleaners with high concentrations
of chlorides or chlorines. Do not use
harsh scrubbing cleaners. Only use kitchen cleaners that are especially made for
cleaning stainless steel. Always be sure to rinse the cleaners off from the surface as
bluish stains may occur during heating that cannot be removed.
Oven Racks
This oven comes with lubricated porcelain oven racks, which can remain in the oven
during the self-clean cycle. Do not clean this vegetable oil lubrication off the racks. It
is important that the sides of the oven racks always have a light coating of vegetable
oil. To maintain optimal rack performance, re-apply a thin layer of vegetable oil to
the sides of the rack after every self-clean cycle or when the rack becomes difficult
to slide.
Porcelain Enamel
Broiler Pan and Insert, Door
Liner, Body Parts and
Warmer Drawer and Drawer
Gentle scouring with a soapy scouring pad will remove most spots. Rinse with a 1:1
solution of clear water and ammonia. If necessary, cover difficult spots with an
ammonia-soaked paper towel for 30 to 40 minutes. Rinse with clean water and a
damp cloth, and then scrub with a soap-filled scouring pad. Rinse and wipe dry with
a clean cloth. Remove all cleaners or the porcelain may become damaged during
future heating. DO NOT use spray oven cleaners on the cooktop.
Cavity.
Oven Door
ME
\ :L "O'HA'D
\
EA AOVE "T
CLEAN DOOR
DOHAND
Use soap & water to thoroughly clean the top, sides and front of the oven door.
Rinse well. You may use a glass cleaner on the outside glass of the oven door. DO
NOT immerse the door in water. DO NOT spray or allow water or the glass
cleaner to enter the door vents. DO NOT use oven cleaners, cleaning powders or
any harsh abrasive cleaning materials on the outside of the oven door.
DO NOT clean the oven door gasket. The oven door gasket is made of a woven
material, on Self-Cleaning models, which is essential for a good seal. Care should
be taken not to rub, damage or remove this gasket.
_
Cooktop, Burner Heads,
Burner Caps & Grates
See Cleaning the Cooktop, Burner Caps, Burner Heads & Grates in the General
Care & Cleaning section for complete instructions.
24
General Care & Cleaning
Cleaning
the Cooktop,
Burner
(cont'd)
Heads,
Caps & Grates
The cooktop is designed to make cleaning easier. Because the gas Burners are sealed, cleanups are easy when spillovers
are cleaned up immediately.
The cooktop, Burner Heads and Caps should be routinely cleaned. Keeping the Burner Head Ports clean will prevent
improper ignition and an uneven flame. Refer to the following instructions:
THE COOKTOP IS NOT REMOVABLE.
Do not attempt to remove or lift the cooktop.
THE FIXED OVEN VENT IS NOT REMOVABLE.
Do not attempt to remove the fixed oven vent cover.
Use caution when replacing the Burner Caps so the Electrodes are not damaged. This may cause a
delayed ignition or prevent the burner from igniting.
To Remove and Replace the Surface Burner Caps and Burner Heads- Remove
in the following order: (t st) surface Burner Grates, (2nd) Burner Caps and (3rd)
Burner Heads. Replace in the following order: Burner Heads, Burner Caps and
BumerGrates.
Surface
Burner
Grate
Do not remove any parts from the cooktop until they have completely cooled
and are safe to handle. Do not operate the surface Burners without the Burner
Caps and Burner Heads properly in place.
Surface
To Clean the Burner Grates- The Burner Grates are dishwasher safe and may be
cleaned in the dishwasher. Remove any excessive soils before placing in the
dishwasher.
Orifice
holder
Figure 1
Ceramic
To Clean the surface Burner Caps and Burner Heads (all models)- Use a soapfilled scouring pad or a mild abrasive cleanser to clean the surface Burner Caps
and Burner Heads. The ports (or slots) around the Burner Heads must be routinely
cleaned, if residue still remains in these ports, use a small-gauge wire or needle to
clean the slots or holes. For proper flow of gas and ignition of the burner--DO NOT
ALLOW SPILLS, FOOD, CLEANING AGENTS OR ANY OTHER MATERIAL TO
ENTER THE GAS ORIFICE HOLDER OPENING. ALWAYS keep the surface
Burner Caps and Burner Heads in place whenever the gas Burners are in use.
To Clean the Ceramic Glass CooktopMaintenance later in this section.
Glass
Cooktop
Consistent
Cleaning
and
and proper cleaning
See Ceramic Glass Cooktop Cleaning &
Maintenance
is essential
to maintaining
your ceramic glass cooktop
Prior to using your cooktop for the first time, apply the recommended CookTopQ Cleaning Creme to the ceramic surface
(on the web visit www.sears.com for replacement cooktop cleaner, item number 40079). Buff with a non-abrasive cloth or
no-scratch cleaning pad. This will make cleaning easier when soiled from cooking. The special cooktop cleaning cream
leaves a protective finish on the glass to help prevent scratches and abrasions.
Sliding aluminum or copper clad bottom pans on the cooktop can cause metal markings on the cooktop surface. These
marks should be removed immediately after the cooktop has cooled using the cooktop cleaning cream. Metal marks can
become permanent if not removed prior to future use.
Cookware (cast iron, metal, ceramic or glass) with rough bottoms can mark or scratch the cooktop surface. Do not slide
anything metal or glass across the cooktop. Do not use your cooktop as a cutting board or work surface in the kitchen.
Do not cook foods directly on the cooktop surface without a pan. Do not drop heavy or hard objects on the glass cooktop,
because they may cause it to crack.
25
ii:i,'il
General Care & Cleaning
Cleaning
Recommendations
(cont'd)
for the Ceramic
Glass
Cooktop
Before cleaning the cooktop, be sure the controls are turned to OFF and the cooktop is COOL.
DO NOT use a cooktop cleaner on a hot cooktop. The fumes can be hazardous to your health, and can
chemically damage the ceramic-glass
surface.
For light to moderate soil:
Apply a few drops of CookTopO Cleaning Creme
type no-scratch cleaning pad to clean the entire
residue.
For heavy, burned on soil:
Apply a few drops of CookTop(b Cleaning Creme
type no-scratch cleaning pad, applying pressure
purpose.
..................
.....
directly to the cooktop. Use a paper towel or use a non-abrasive plastic
cooktop surface. Make sure the cooktop is cleaned thoroughly, leaving no
directly to the soiled area. Rub the soiled area using a non-abrasive plastic
as needed. Do not use the pad you use to clean the cooktop for any other
If soils remain, carefully scrape soils with a metal razor blade scraper,
holding scraper at a 30 degree angle to the surface. Remove loosened soils
with cooktop cleaning cream and buff surface clean.
IMPORTANT NOTE: Damage to the ceramic glass cooktop may occur if
you use an abrasive type scratch pad. Only use cleaning products that
have been specifically designed for ceramic glass cooktop.
%
Plastic or foods with a high sugar content:
These types of soils need be removed immediately if spilled or melted onto
the ceramic cooktop surface. Permanent damage (such as pitting of the
cooktop surface) may occur if not removed immediately. After turning the
surface elements OFF, use a razor blade scraper or a metal spatula with a
mitt and scrape the soil from the hot surface (as illustrated). Allow the
cooktop to cool, and use the same method for heavy or burned on soils.
Do not use the following on the ceramic glass cooktop:
• Do not use abrasive cleaners and scouring pads, such as metal
and some nylon pads. They may scratch the cooktop, making it
more difficult to clean.
• Do not use harsh cleaners, such as chlorine bleach, ammonia or
oven cleaners, as they may etch or discolor the cooktop.
• Do not use dirty sponges, cloths or paper towels, as they can leave
soil or lint on the cooktop which can burn and cause
discoloration.
Special Caution for Aluminum Foil and Aluminum Cooking Utensils
• Aluminum foil
Use of aluminum foil will damage the cooktop. Do not use under any
circumstances.
• Aluminum utensils
Since the melting point of aluminum is much lower than that of other
metals, care must be taken when aluminum pots or pans are used.
Pans that boil dry may permanently damage cooktop by breaking,
fusing to, or marking it.
Care and Cleaning
of Stainless Steel (StainlessSteel models only)
Some models are equipped with stainless steel exterior parts. Special care and cleaning are required for maintaining the
appearance of stainless parts. Please refer to the table provided at the beginning of the General Care & Cleaning section
in this Use & Care Guide.
26
General Care & Cleaning
To Remove
and Replace
Removing the Oven Door
(cont'd)
Oven Door
The door is heavy. For safe, temporary storage, lay the door flat with the inside
of the door facing down. The oven door can be removed to make oven cleaning easier.
To Remove Oven Door:
1.
2.
3.
4.
Open door approximately 4 inches to the stop position.
Grasp door at side edges.
Lift door up and off hinges.
To clean oven door, see the cleaning chart on page 24.
To Replace Oven Door:
1. Be sure the hinge arms are in the stop position. Be careful if pulling the hinges open by hand.
The hinges may snap back against the oven frame and could pinch fingers.
2. Hold the door at the sides near the top.
3. Slide the door down onto the hinges as far as it will go and close the door.
4. If the door is not in line with the oven frame, remove door and repeat the above steps.
To Remove
and Replace
Oven
!!!U! II!!III!' !II,IIIII
Bottom
To Remove the Oven Bottom:
Grasp the oven bottom by the front corner on each side, slide toward you and lift
up the oven bottom.
To Replace the Oven Bottom:
Grasp the oven bottom and position the back tabs in place in the slots at the rear of the oven. Lower
the front of the oven bottom and slide into place.
Storage
!!ii_i!ii_ii,i
;,''_
_,i_iiiiiiiiiii/_
_
iliiii
.....
Drawer
Use the storage drawer for storing cooking utensils. The drawer can be removed to
facilitate cleaning under the range. Use care when handling the drawer.
To open the storage drawer, push the drawer in gently and it will spring open.To close,
push the drawer until you hear a click, which indicates that the spring is compressed,
and the drawer is closed.
To
1.
2.
3.
Remove the Storage Drawer:
Open and empty the drawer of all utensils.
Pull drawer out to the drawer stop.
Lift the front high enough to allow the drawer to be pulled out.
To
1.
2.
3.
Replace the Storage Drawer:
Insert the rear end of the drawer into the opening.
Fit the end rollers onto the guide rails.
Hold the drawer in a horizontal position, then push in until a click is heard.
Grasp the oven bottom by the
front corner on each side to
raise and lower the oven
bottom.
Flammable materials should not be stored in an oven, near surface
elements or in the storage drawer or compartment (if equipped). This includes paper,
plastic and cloth items, such as cookbooks, plasticware and towels, as well as flammable
liquids. Do not store explosives, such as aerosol cans, on or near the range. Flammable
materials may explode and result in fire or property damage.
Changing
Oven
Storage
Drawer
Front Frame
Light
Be sure the oven is unplugged and all parts are COOL before replacing the oven light bulb. Do not turn the oven light on
during a self-cleaning cycle. High temperature will reduce lamp life. The interior oven light will turn on automatically when
the oven is opened. The oven light may be turned on when the door is closed by using the oven light switch located on the
holder. THIS GLASS SHIELD MUST ALWAYS BE IN PLACE WHEN THE OVEN IS IN USE.
To Replace the Light Bulb:
BE SURE OVEN IS COOL
t. Turn the power off at the main source.
2. Wear a leather-faced glove for protection against possible broken glass.
Electronic Oven control. The oven light bulb is covered with a glass shield held in place by a wire
3. Replace bulb with a 40 Watt appliance bulb only.
4. Press wire holder to one side to release glass shield, change bulb and be sure
to replace glass shield.
27
_2iii%
Before You Call
SoJutions
to Common
ProbJems
Before you carl for service, review this list. It may save you time and expense. The list includes common occurrences
that are not the result of defective workmanship or materials in this appliance.
OCCURRENCE
POSSIBLE
Range
Poor installation. Place oven rack in center
is not level.
CAUSE/SOLUTION
of oven. Place a level on the oven rack.
Adjust leveling legs at base of range until the rack is level. When
may appear out of alignment if countertop is not level.
Weak, unstable floor. Be sure floor is level and can adequately
carpenter to correct sagging or sloping floor.
range is level, cooktop
support
Kitchen cabinet misalignment
may make range appear to be unlevel.
are square and have sufficient room for range clearance.
Cannot
move appliance
easily. Appliance
must
accessible for service.
Cabinets
be
Contact
Carpeting
or oven
does
Contact
a
Be sure cabinets
not square or are built in too tight. Contact a cabinet maker to correct the problem.
builder
or installer to make appliance
accessible.
interferes with range. Provide sufficient
Gas line is hard-plumbed.
connector
installed.
Entire range
not operate.
range.
Have a flexible
space so range can be lifted over carpet.
C.S.A
international approved
metal appliance
Make sure cord/plug is tightly into outlet.
Service wiring is not complete. Call 1-800-4-MY-HOME® (See back cover).
Electrical power outage. Check house lights to be sure. Call your local electric company
for service. Surface burners can be lit manually.
Surface burners do not
light.
Surface control knob has not been completely turned to LITE. Push in and turn the
surface control knob to LITE until burner ignites and then turn the surface control knob to
the desired flame size.
Burner ports are clogged. Clean burners. See "Cleaning the Burner Grates, Burner Caps
and Burner Heads" under General Cleaning.
Range power is disconnected from outlet. Be sure cord is securely plugged into the
outlet.
Electrical power outage.
Be sure the gas supply to the range is turned "ON".
Surface
burns
burner
flame
Burner ports are clogged. With the burner off, clean ports by using a small-gauge wire or
needle.
half way around.
Moisture is present after cleaning. Lightly fan the flame and allow burner to operate until
flame is full. Dry the burners thoroughly following instructions in the "General Care &
Cleaning" section.
Surface burner flame is
Dust particles
blue.
orange.
in main line. Allow the burner to operate
Salt air in coastal
Scratches or abrasions
cooktop surface.
on
areas.
A slightly
orange
a few minutes
until flame turns
flame is unavoidable.
Coarse particles such as salt or sand between cooktop and utensils can cause scratches. Be
sure cooktop surface and bottoms of utensils are clean before usage. Small scratches do not
affect cooking and will become less visible with time.
Cleaning materials not recommended for ceramic-glass cooktop have been used. See "Ceramic
Glass Cooktop Cleaning & Maintenance" section under General Care & Cleaning.
Cookware
with rough bottom
has been used.
28
Use smooth,
flat-bottomed
cookware.
Metalmarks.
Brown
Sliding or scraping of metal utensils on cooktop surface. Do not slide metal utensils on cooktop
surface. Use a ceramic-glass cooktop cleaning cream to remove the marks. See "Ceramic Glass
Cooktop Cleaning & Maintenance" section under General Care & Cleaning.
streaks
or specks.
Areas of discoloration
metallic
sheen.
with
Boilovers are cooked onto surface. Use razor blade scraper to remove soil. See "Ceramic
Cooktop Cleaning & Maintenance" section under General Care & Cleaning.
Mineral deposits from water and food. Remove
cream. Use cookware with clean, dry bottoms.
using a ceramic
glass cooktop
Glass
cleaning
*Oven control
beeps and
displays
any F code error
(for example F11)
Electronic control has detected a fault condition. Press STOP/CLEAR
to clear the display
and stop beeping. Reprogram oven. if fault recurs, record fault number. Press STOP/
CLEAR and call t-800-4-MY-HOME
® for assistance
(See back cover).
Oven
light
Replace bulb. See "Changing
Poor
baking
Fan noise
operation.
Flames
smoking
does
not work.
results.
during
in this Use and Care Guide for instructions.
Many factors affect baking results. Make sure the proper rack position
food in the oven and space pans to allow air to circulate, if conventional
oven to preheat to the set temperature
before placing food in the oven.
recipe's recommended
temperature or baking time. if you feel the oven
see "Adjusting
the Oven Temperature"
section in this Use and Care
cooking
inside oven or
from
Oven Light"
vent.
A cooling fan may automatically
turn on and off to cool internal parts. It is normal, and the
fan may continue to run after the range has been turned "OFF", but may also stop
immediately and then turn "ON" after a while.
Excessive
spillovers
in oven.
Set self-clean
Excessive spillovers in oven. This
grease on the oven bottom. Wipe
If flames or excessive smoke are
under "Stopping
or Interrupting
Oven smokes
excessively
during
broiling.
is used. Center
baking, allow the
Try adjusting the
is too hot or cool,
Guide.
Control(s) not set properly.
Care Guide.
cycle for a longer
cleaning
time.
is normal, especially for pie spillovers or large amounts of
up excessive spillovers before starting the self-clean cycle.
present, stop the self-clean cycle and follow the steps
a Self-Cleaning
Cycle" in this Use and Care Guide.
Follow instructions under
Meat is too close to the element. Reposition
the meat and the oven broil element.
"Self-Cleaning"
the rack to provide
in this Use and
proper clearance
between
The insert on broiler pan wrong side up and grease not draining. Always place insert on
the broiler pan with ribs up and slots down to allow grease to drip into pan.
Meat is not properly prepared. Remove
edges to prevent the meat from curling,
excess fat from meat. Remove remaining
but do not cut into the lean of the meat.
fatty
Broiler pan used without the Broiler Pan Insert or insert is covered with foil. DO NOT use
the Broiler Pan without the Broiler Pan Insert or cover the insert with foil.
Broiler Pan or Broiler Pan Insert needs to be cleaned. Excessive smoking is caused by
build-up of grease or food spatters, Clean the Broiler Pan and Insert on a regular basis,
Oven door is open, Oven door should be closed when broiling,
Self-cleaning
not work.
cycle does
Control(s) not set properly, Follow instructions under "Self-Cleaning"
Care Guide,
in this Use and
Self-cleaning cycle was interrupted. Stop time must be 3 to 4 hours past the start time.
Follow steps under "Stopping or Interrupting a Self-Cleaning Cycle" in this Use and Care
Guide,
Soil not completely
removed after selfcleaning cycle.
Excessive smoking
oven vent.
Set Self-Clean
cycle for a longer cleaning
time.
Hand clean bottom, front top of oven, frame or door area outside oven seal before the
self-cleaning
is started. These areas are not in the self-cleaning
area, but get hot enough
to burn on residue. Burned-on residue can be cleaned with a stiff nylon brush and water or
nylon scrubber. Be careful not to damage the oven seal by attempting to clean it.
from
Excessive spillovers in oven, especially for pie spillovers or large amounts of grease on
the oven bottom. Wipe up excessive spillovers before starting the Self-Clean cycle. If
flames or excessive smoke are present, stop the Self-Clean cycle and follow the steps
under "Stopping
or Interrupting
the Self-Cleaning
Cycle" in this Use and Care Guide.
29
iiiiiiiiiiiiiiiiiil
Your
.,,me
For repair-in
your home-of
all major brand appliances,
lawn and garden equipment, or heating and cooling systems,
iiiiiiiiiiiiiiiiii
For the replacement
owner's
manuals
parts, accessories
and
that you need to do-it-yourself.
iiiiiiiiiiiiiiiiii
For Sears professional
and items like garage
installation
door openers
of home appliances
and water
heaters.
iiiiiiiiiiiiiiiiii
1-8 00-4-MY-H 0 ME ® (14oo-469-4663)
ca,,
ao ti o, oioht and
Oaoada
_._.oo_
For repair of carry-in
and electronics,
_._._
items like vacuums,
lawn equipment,
call or go on-line for the location of your nearest
Sears Parts & Repair Center.
t-800-488-1222
Call anytime,
day or night (U.S.A. only)
w_.sears.oom
To purchase a protection agreement (U.S.A.)
or maintenance agreement (Canada)on
a product serviced by Sears:
1-800-827-6655
(U.S.A.)
1-800-361-6665
(Canada)
iiiiiiiiiiiiiiiiiii
..........................
Pare pedir servicio
iiiii!,i!_i!
de reparacien
a dom c o, y pard ordenar
1-888-SU-HOGAR
Au Canada pour service en francais:
1 -8 00 .......
LE FOYER Mc
p ezas •
®
(1-800-533-6937)
(1-888-784-6427)
® Registered
Trademark
/ TM Trademark
www•sears•ca
/ SMService
Mark of Sears
® Marca Registrada / TMMarca de F_brica / SM Marca de Servicio
MC Marque de commerce / MD Marque d_pos_e de Sears Brands,
Brands,
de Sears
LLC
LLC
Brands,
LLC
® Sears
Brands,
LLC