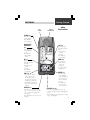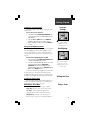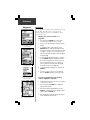
1
eMap
!
electronic map
owner’s
manual
and
reference
guide
© 1999-2001` GARMIN Corporation
GARMIN International, Inc.
1200 E 151st Street, Olathe, Kansas 66062 U.S.A.
Tel. 913/397.8200 or 800/800.1020
Fax. 913/397.8282
GARMIN (Europe) Ltd.
Unit 5, The Quadrangle, Abbey Park Industrial Estate, Romsey, SO51 9AQ U.K.
Tel. 44/1794.519944
Fax. 44/1794.519222
GARMIN (Asia) Corporation
No. 68, Jangshu 2nd Road, Shijr, Taipei County, Taiwan
Tel. 886/2.2642.9199
Fax. 886/2.2642.9099
All rights reserved. Except as expressly provided herein, no part of this manual may be
reproduced, copied, transmitted, disseminated, downloaded or stored in any storage medium, for
any purpose without prior written consent of GARMIN Corporation. GARMIN Corporation
hereby grants permission to download a single copy of this manual onto a hard drive or other
electronic storage medium to be viewed for personal use, provided that such electronic or
printed copy of this manual contains the complete text of this copyright notice and provided
further that any unauthorized commercial distribution of this manual is strictly prohibited.
Information in this manual is subject to change without notice. GARMIN Corporation reserves
the right to change or improve its products and to make changes in the content without
obligation to notify any person or organization of such changes. Visit the GARMIN website for
current updates and supplemental information concerning the use and operation of this and other
GARMIN products.
Web site address: www.garmin.com
GARMIN®, AutoLocate®, and TracBack® are registered trademarks, eMapTM and MapSourceTM are
trademarks of GARMIN Corporation and may not be used without the express permission of
GARMIN Corporation.
July 2001
Part Number 190-00152-00 Rev. D
Printed in Taiwan
SECTION 1
Introduction
About This
Manual
Thank you for choosing the GARMIN eMap. To get
the most from your new eMap, take time to read through
this owner’s manual in order to understand all of the
operating features. This manual is organized into four
sections.
The Introduction section provides FCC and safety
information and the Table of Contents.
The Getting Started section introduces you to basic
features and methods for operating the eMap.
The Reference section provides details about using
the features of the eMap according to topic.
The Appendices contain information on items such
as Accessories, Specifications, a Troubleshooting Guide
and an Index by Subject.
Standard Package Contents:
eMap Unit
Lanyard
Owner’s Manual
Quick Start Guide
i
Introduction
FCC Compliance
Statement
Warnings
and
Precautions
ii
NOTE: This device complies with Part 15 of the FCC limits
for Class B digital devices FOR HOME OR OFFICE USE
(“home” or “office” interference requirements are more stringent
than “outdoor” requirements). Operation of this device is
subject to the following conditions: (1) This device may not
cause harmful interference, and (2) this device must accept any
interference received, including interference that may cause
undesired operation.
The eMap does not contain any user-serviceable parts.
Repairs should only be made by an authorized GARMIN service
center. Unauthorized repairs or modifications could result in
permanent damage to the equipment, and can void your warranty
and your authority to operate this device under Part 15
regulations.
CAUTION: The Global Positioning System (GPS) is
operated by the government of the United States, which is
solely responsible for its accuracy and maintenance. The
system is subject to changes which could affect the
accuracy and performance of all GPS equipment.
Although the eMap is a precision electronic NAVigation
AID (NAVAID), any NAVAID can be misused or misinterpreted and, therefore, become unsafe.
CAUTION: IT IS THE USER’S RESPONSIBILITY TO
USE THIS PRODUCT PRUDENTLY. THIS PRODUCT IS
INTENDED TO BE USED ONLY AS A TRAVEL AID AND
MUST NOT BE USED FOR ANY PURPOSE REQUIRING
PRECISE MEASUREMENT OF DIRECTION, DISTANCE,
LOCATION, OR TOPOGRAPHY. THIS PRODUCT
SHOULD NOT BE USED AS AN AID TO DETERMINE
GROUND PROXIMITY FOR AIRCRAFT NAVIGATION.
Introduction
MAP DATA INFORMATION: One of the goals of
GARMIN is to provide customers with the most complete
and accurate cartography that is available to us at a
reasonable cost. We use a combination of governmental and
private data sources, which we identify as required in
product literature and copyright messages displayed to the
consumer. Virtually all data sources contain inaccurate or
incomplete data to some degree. This is particularly true
outside the United States, where complete and accurate
digital data is either not available or prohibitively
expensive.
WARNING: For use in vehicles, it is the sole
responsibility of the owner/operator of the eMap to secure
the GPS unit so that it will not interfere with the vehicle’s
operating controls, obstruct the driver’s view of driving
conditions, or cause damage or personal injury in the event
of an accident. Do not mount the eMap over air bag panels
or in the field of air bag deployment. AIr bags expand with
a rapid force that can propel objects in their path toward
the driver or passengers, causing possible injury. Refer to
air bag safety precautions contained in the vehicle owner’s
manual. Do not mount the eMap in a place where the
driver or passengers are likely to impact it in an accident
or collison. The mounting hardware provided by GARMIN
is not warranted against collision damage or the consequences thereof.
Warnings
and
Precautions
#!"#$"%#&"'(%#;<+,+#!,.*+,=4
#5.+37#"6#>.4."(#.4#/3"?@+7
!"#$"%#230?+
A(4+?',+7#"(
%<+#>+<.?3+#!04<
!"#$"%#&"'(%
)*+,# -.,# /01
20(+34
!"#$"%#&"'(%
.(#5,"(%#"6#0(
-.,# /01# 5.+37
"6#!+83"9:+(%
WARNING: When used in vehicles, it is the sole
responsibility of the driver of the vehicle to operate the
vehicle in a safe manner, maintain full surveillance of all
driving conditions at all times, and not become distracted
by the eMap to the exclusion of safe driving practices. It is
unsafe to operate the controls of the eMap while you are
driving. Failure by the driver of a vehicle equipped with an
eMap to pay full attention to operation of the vehicle and
road conditions while the vehicle is in motion could result
in an accident or collision with property damage and
personal injury.
iii
Introduction
Table of
Contents
Section One – Introduction
About This Manual................................i Location Averaging.....................................20
FCC Compliance Statement...................ii Saving as a Waypoint.............................20
Warnings and Precautions........................ii-iii Using the Find Menu............................21-25
Using Goto.........................................26
The Main Menu...........................................27
The Trip Computer......................................27
Section Two - Getting Started
Tracks Page.......................................28
eMap Key Function.......................................1
Route Page........................................29
BatteryInstallation...................................2
The GPS Info Page...................................30
Start-Up.....................................................2
Sun and Moon Page..................................31
Determining Your Location..........................3
MapSource Info....................................31
Using the Map Page...............................3-5
System Info Page..................................31
The Map Page Options Menu........................6
System Setup Options............................32-34
The Main Menu............................................7
The Find Menu..........................................8
Contrast Settings.......................................9
Backlighting..............................................9 Section Four - Appendices
Appendix A:
Accessories.......................35
Setting the Time.........................................9
Appendix B:
Specifications....................36
Beeper Tones.........................................9
Appendix C: Messages..........................37
Map Data Card Installation.........................10
Appendix D: Maintenance......................38
Transferring Map Data............................10
Appendix E: Wiring/Interfaces................39
Appendix F:
UTC Time Offset Chart.........40
Appendix G: MapSource Data.................41
Section Three - Reference
Appendix H: Limited Warranty...............42
Option Menus....................................11 Appendix I:
Index.............................43-44
On-Screen Buttons.................................11 .
Entering Data......................................12
Check Boxes...............................................12
The Map Page......................................13-14
Map Page Options.................................15-17
Waypoints...................................................18
Creating a Waypoint..............................18-19
Editing a Waypoint................................20
iv
Getting Started
SECTION 2
-./
/012'&3
!"#$%"&'
()*+,"#$""&
eMap
Key Function
2);CD+4$3
Press and release to
turn the eMap On.
Press and hold to
turn the eMap Off.
/-EFGHIJBK
E)$BD-LB
4$3
)AB+4$3
Press and release to
turn backlighting On
or Off.
Press and hold to
adjust backlight/
contrast.
Displays increasingly
larger map areas with less
detail.
Press and release to
zoom out by
increments.
Press and hold to
zoom out rapidly.
H$+4$3
&C$A+4$3
Displays increasingly
smaller map areas with
more detail.
Press and release to
zoom in by
increments.
Press and hold to
zoom in rapidly.
Press and release to
display a menu of
options for the
current page.
Press twice to display
the Main Menu.
C$BCD+4$3
5H$!+4$3
Press and release to
select a highlighted
menu option, initiate an
entry, accept selected
data, or acknowledge
a message.
Press and hold, at
any time, to mark
your current location
Press and release to display a
menu of waypoints, cities,
exits (also points of interest,
streets and intersections when
using MapSourceTM map data).
Press and hold to display the Goto,
Track, or Route currently being
navigated.
CLE-2C+4$3
Press and release to return to the previous
page, restore a previous value, cancel data
entry or return from the panning arrow to
map scrolling.
Press and hold, at any time, to return to the
Map Page.
D)EFCD+4$32&5
Press and release to highlight menu options, enter
data, move through lists on pages, and highlight data
fields.
Press and hold to move the panning arrow on the Map
Page or... scroll through lists.
1
Getting Started
Battery
Installation
>?@+,,++,'8&'0"$
++++++6&##$%0$1
.9=$%
6&78+9:
$;&2
<"0#
Remove battery compartment
cover, observe polarity markings,
install batteries and reinstall
cover.
NOTE: When using fully charged
rechargeable batteries, the
Battery Capacity Indicator may
typically indicate less than full.
This is a characteristic of
rechargeables and does not
necessarily indicate that they
will not last as long as
disposable Alkaline batteries.
Start Up
Installing the Batteries
The eMap operates on two AA batteries, which are
installed by removing the cover on the back of the unit. These
batteries will provide up to 12 hours of continuous use.
Rechargeable NiCad, NiMH, or Lithium batteries may be also
used. Stored data will not be lost when the batteries are
removed. Refer to battery care information on page 38.
To install the batteries:
1. Open the battery compartment on the back of the
unit by pressing the two arrows on the cover. Slide
it back and then lift up to remove.
2. Install the batteries according to the polarity markings
in the battery compartment. Use only new batteries.
Do not mix battery types, (i.e. alkaline, NiCad, Lithium)
3. Press the cover onto the compartment then slide
forward until it clicks back in place.
NOTE: If you have purchased a MapSource
. CD-ROM
and a Data Card for use with the
eMap, refer to page 10 for Data Card
installation and map data transfer instructions. For more information about
MapSource, refer to Appendix G.
Start Up The eMap
To Start Up the eMap, take the unit outside and find an
open area where the built-in antenna has a clear view of the
sky. Hold the receiver at a comfortable height with the front of
the eMap pointing up.
Press and release the POWER key to turn the
eMap On.
The Title Page followed by
information pages will be
displayed when the eMap is
turned on.
2
The Title Page and Information Pages will be displayed,
and then followed by the Map Page.
Getting Started
Each time you turn on the eMap it must determine its
location. The first time you use your eMap, this may take
from five to fifteen minutes. After first use, the eMap should
determine your location in less than one minute.
When your location has been determined, the Compass
in the upper left corner of the Map Page will display
Cardinal letters (North, South, East, West) and your current
location will be shown on the map beneath it.
If there are not enough satellites in view to determine
its location, the eMap will display a ‘Poor Satellite
Reception’ message with four options. A brief explanation
for each option will appear when it is highlighted.
Use the ROCKER keypad to highlight the logical
option and then press the ENTER key to activate it.
If the time displayed in the time field on the Map Page
is not correct, you will need to set the time zone for your
current location. Detailed instructions for setting the time
zone are contained on pages 32 and 40 of this manual.
Determining Your
Location
About the Map Page
The Map Page is the main operating page of the eMap.
It graphically shows you map details, your current
location, marks your route to a destination with a route line,
and leaves a trail (track log) of where you’ve been.
It tells you what direction to go or the direction you are
traveling.
It tells you your speed, the distance you have traveled,
or the distance to travel, and the time of day or the time
remaining before reaching a destination.
Using the
Map Page
Direction Field
Position Icon
The Map Page
Speed Field
Trip Distance or
Distance to Go
Field
Time or
Time To Go
Field
Map Scale
Geographical
Features
3
Getting Started
Using the
Map Page
A Goto
A Track
A Route
Travel when not on a Goto,
Track, or Route
Direction Fields
Direction to Go when stopped
on a Goto, Track or Route
Direction to
Go when moving on a Goto,
Track, or Route
Direction you are moving
when not on a Goto,
Track, or Route
4
Using the Map Page to Navigate
The Map Page provides graphic display for the four
methods of eMap navigation:
Goto - A direct path to a map location, (waypoint, city,
address, etc.)
Track - A previous path of travel that has been stored
(logged) in the eMap. A Track allows you to repeat a
path or to return to your starting point on the same path
using the GARMIN TracBack® feature.
Route - A path to a destination consisting of landmarks
along the way (waypoints, cities, highway exits, points
of interest, intersections, etc.)
Travel when not on a Goto, Track or Route - This is
best described as travel without entering a destination
in the eMap. The Map Page displays your real time
movement as you travel with the unit turned on and
receiving satellites. It can be saved (logged) as a Track.
Data Fields
Several Data Fields support the Map Page and consist of
the following elements.
Direction Fields
There are three types of direction fields, each providing
direction information dependent on whether you are
stopped while navigating, navigating to a destination, or
traveling without a recorded destination.
Direction To Go (N. S. E. W.) - Cardinal letters
indicate the direction to go when starting out or to
resume after having stopped while on an active Goto,
Track or Route. These letters can be changed to degrees.
Refer to page 33.
Direction To Go (Arrow) - An arrow that points to the
direction you should be traveling when moving on an
active Goto, Track or Route.
Compass - A compass that shows the direction you are
moving when not on a an active Goto, Track or Route.
Getting Started
Speed, Distance and Time Fields
Speed - Your rate of travel can be displayed in miles
per hour, kilometers per hour, or nautical miles per hour.
Distance - When traveling on a Goto, Track or Route
the distance remaining to go to a destination will be
displayed. When not on a Goto, Track or Route, the
accumulated Trip Distance will be displayed.
Time - When on a Goto, Track or Route, the time to go
before reaching a destination is displayed. When not on
a Goto, Track or Route, the time for the current time
zone is displayed in either 12 or 24 hour format.
The Map Display
The map display shows your present position and
direction of movement as a triangular ‘Position Icon’ in the
center of the map. As you travel, the map display leaves a
“trail” (track log) of where you’ve been. The map display also
shows the map scale and geographic details such as lakes,
rivers, highways, and towns.
Use the IN and OUT keys to change the map scale to
show more map area with less detail, or less map area with
more detail. Press and hold to zoom the map scale rapidly.
In many instances the map will display an ‘Accuracy
Circle’ surrounding the ‘Position Icon’. The eMap uses both
map resolution and GPS accuracy in defining your location to
a point within the circle. The smaller the circle, the more
accurate your location.
More detailed map features as well as information about
those features can be displayed using a data card containing
map data transferred from a GARMIN MapSource CD-ROM.
When using MapSource data, the word “MapSource” will appear
below the map scale whenever you zoom in to view map details.
The Panning Arrow (Map Pointer)
The Panning Arrow is controlled by the ROCKER
keypad and is used to identify map objects and move the map
in order to view areas of the map not currently within the
display. The Panning Arrow can be used to establish a ‘Point of
Reference’ when measuring distance between map items. It can
be used to create a waypoint or to move a waypoint to a new
location. Refer to pages 14, 16, 18, and 19 for detailed
information about these applications.
Press the ROCKER keypad at an angle to move diagonally.
Press and hold the ROCKER keypad to move to new areas of
the map. Press the ESCAPE key to cancel the panning arrow.
Using the
Map Page
Speed Data Field
‘Distance’ Data Fields
‘Time To Go’ Data Field
Hours Minutes
Minutes Seconds
When counting down to
minutes and seconds the ‘Time
To Go’ Data Field will move
minutes to the former hour
position and display smaller
digits to indicate seconds.
Position Icon
Zooming Map Scales
Zoom IN
Accuracy Circle
MapSource Indicator
Zoom OUT
Panning Arrow
5
Getting Started
Map Page Options
The Map Page Options
Map Page options allow a variety of operating and
customizing features for the eMap.
Pressing the MENU key from the Map Page will
display the Map Page Options Menu.
Map Page Options Menu
Not all of the Map Page options are available at the same
time. Many are replaced by another option when they are
selected, while others are methods of canceling an option when
you no longer want to use it.
You can choose an option by highlighting and pressing
the ENTER key:
Use Indoors - Allows operation indoors without
receiving satellites.
Use Outdoors - Returns to receiving satellites for use
outdoors.
Full Screen Map - Expands the map to fill the entire
screen.
Show Data Fields - Displays data fields on the Map Page.
Show Next Street - Displays the names of upcoming
streets.
Hide Next Street - Removes the display of upcoming
streets.
Stop Navigation - Stops any active Goto, Track or
Route navigation. Will be appear gray if no active
navigation is taking place.
Resume Navigation - Returns to active navigation.
Measure Distance - Allows you to measure the
distance from your current location to another point on
the map or to measure between two points on the map.
Stop Measuring - Stops the Measuring Distance option.
Setup Map - Displays the Setup Map Pages, which
allows you to tailor the map display to your requirements, such as changing text size, map orientation, and
map detail.
More detailed information about using Map Page
Options can be found on pages 15 through 17 of the
Reference Section.
6
Getting Started
The Main Menu
The Main Menu provides access to additional eMap feature
pages. The pages listed below provide either enhancements to
eMap operation or display data about operating information.
The Main Menu
Press the MENU key twice to display the Main
Menu.
Trip Computer Page - This page provides information
such as distance traveled, average speed, and elapsed time.
Tracks Page - Provides access to the track log and saved
tracks.
Route Page - Allows you to create and store routes for
repeated use.
GPS Information Page - provides you with information
about speed, location, elevation and the satellites that the
GPS receiver is tracking.
Sun and Moon Page - Provides sun and moon
information according to date, time, and location.
MapSource Information Page - Provides information
about MapSource map data loaded on the data card, if
installed.
System Information Page - Displays the eMap
software version and unit i.d. number.
Setup Options - Allow tailoring of items such as
backlighting timeout, time format, time zone selection,
beeper tones, and interface setups.
Information about the status of backlighting, stored data
space used, and unit power are displayed in small windows at
the bottom of the Main Menu.
For more detailed information about the Main Menu
options, refer to page 27 of the Reference Section.
7
Getting Started
The Find Menu
The Find Menu
The Find Menu allows you to find stored locations
(waypoints) and map items (cities, exits, etc.). They can be
found by name or those nearest to your Current Location
(Position Icon) or to the Map Pointer (Panning Arrow).
Press the FIND key to access the Find Menu.
The Find Menu referencing
items from your current location
When you select a category from the menu, you will also
be able to choose from two methods of listing. The ‘By Name’
list contains every item in the map database for the selected
category, while the ‘Nearest’ list contains only those items that
are near to your location or the Map Pointer.
The Find Menu allows you to locate or travel to:
The Find Menu referencing
items from the location of
the panning arrow (Map Pointer).
8
Waypoints - Marked and saved locations on the map
used as a destination or points on the way (waypoints)
to a destination. Refer to pages 18 and 19 to mark or
create a waypoint.
Cities - A list of cities on the maps.
Interstate Exits - A list of all Exits on the nearest
Interstate Highway, categorized by ‘All Types’, ‘Services’,
‘Rest Areas’, and ‘Other’ (weigh stations, etc.).
Points of Interest - A list of restaurants, museums,
hospitals, lodging, etc.
Addresses - A page with data entry fields for address
number, street name, city and postal code, used to
define an address.
Intersections - A page with data entry fields for two
streets, a city, and postal code, used to define an
intersection.
These pages are structured with a set of sub-menus and
location information pages that guide you through the
process of finding locations (waypoints, cities, points of
interest, etc.). Use them to construct a Route, establish a
direct line of travel (Goto), or to merely find them on the map
when gathering information.
The Points of Interest, Addresses, and Intersections
options require a data card with MapSource data. If
MapSource data is not used, these three options will
appear gray and will not be accessible.
More detailed information about using these features is
contained in the Reference Section of this manual.
Getting Started
Setting the Screen Contrast
You may adjust the contrast setting for best viewing of the
display screen.
To Set the Screen Contrast:
Contrast
Settings
1. Press and hold the BACKLIGHT/CONTRAST key
on the side of the unit until the Backlight/Contrast
page appears.
2. Press the LEFT or RIGHT side of the ROCKER
keypad to adjust the level of contrast, (Left to
lighten and Right to darken). Press the ENTER key
to save.
Using the Backlighting Feature
You may turn on the screen backlighting for easy viewing in
dim and dark lighting conditions. The backlight is set at the
factory to turn Off after 15 seconds to extend battery life. To
select from shut-off time options, refer to the section on Setup
Options.
To turn the backlighting On and Off:
1. Press and release the BACKLIGHT/CONTRAST key
to toggle the backlight ON and OFF.
2. You can also turn the backlight function ON or OFF
by pressing and holding the BACKLIGHT/
CONTRAST key until the ‘Backlight/Contrast’
window appears. Then, press the ROCKER keypad
UP for ON or DOWN for OFF.
If set for automatic time-out, it will shut-off automatically
after the last key press. Pressing any key will reactivate the
backlight. If the timeout is set for ‘Stays On’ it will not turn off.
Extended use of backlight will significantly reduce battery life.
Setting the Correct Time
If the time displayed in the ‘Time’ field of the Map Page is
not the correct time for your Time Zone, you will need to set
the time. Refer to ‘Time Settings’ on page 32.
What Beeper Tones Mean
The eMap Beeper produces three types of signals.
Single Beep - Indicates that a key has been pressed.
Two Beeps - Indicate that a message has been
displayed with information about unit operation.
Multiple Beeps - Indicate an incorrect key press.
Refer to ‘Beeper’ on page 32 for detailed information.
To adjust the screen contrast,
use the LEFT or RIGHT
ROCKER keys to move the
contrast adjustment lever.
Backlighting
Use the UP or DOWN
Rocker keys to move the
Backlighting switch up for ON
or down for OFF.
Setting the Time
Beeper Tones
9
Getting Started
Map Data
Card
Installation
/&#&+.&%5+*'9#
Installing an Optional Map Data Card
GARMIN map data cards allow your unit to display
detailed mapping data. Data can be transferred to a map data
card from a GARMIN MapSourceTM CD-ROM (a collection of
data for a specific area, MetroGuide® U.S.A., World Map, etc.)
using a PC and interface cable. If you have already purchased
MapSource and a data card, you will want to install the data card
before continuing. If you would like to order MapSource, refer to
Appendix A for information.
To install a map data cards:
Install the map data card in
the slot inside the battery
compartment. Push in
carefully, until it is completely
inserted.
AB#%&7#9%
C&"5'$
Pull out the extractor handle
to remove the map data card
from the eMap battery
compartment.
Transferring
Map Data
1. Open the battery compartment cover on the back of
the unit by pressing the arrows, sliding back, and
then lifting up and away.
2. Remove the batteries to expose the card slot inside
the compartment.
3. Insert the card in the slot with the label facing you.
Be certain the connector end is inserted into the slot
and not the end with the extractor handle. Press
the card completely in place until the handle is flush
with the side of the compartment.
4. To remove the card, use a fingernail to pull out the
extractor handle and then slide the card free of the
slot.
5. Reinstall the batteries, noting polarity, and close
the cover.
Map Data Transfer
After you have installed a data card in the eMap, it must be
loaded with map data from a MapSource CD-ROM. In order to
transfer map data you will need to install MapSource on your
PC and connect the eMap PC Interface Cable to your PC and the
eMap unit.
Instructions for using MapSource are provided with the
CD-ROM. Instructions for transferring map data are
contained in the Reference section of the same manual
under the title “Transferring Data”.
To make the Interface Cable connection:
1. Connect the RS232 Serial Port Connector portion of
the Interface Cable to the serial port on your PC.
Interface Cable Plug
Data
Indexing Slot
Connection
10
2. Slide the eMap Connector into the Data Connection
at the base of the eMap. The connector is indexed
to fit only one way. (See the illustration to the left)
SECTION 3
How To Use Option Menus
Option Menus are lists of options that are specific for each
page.
To select and use an option:
Reference
Option
Menus
1. With any page displayed, press the MENU key to
display the option menu for that page.
2. Use the ROCKER keypad to move up and down
within the menu to highlight the desired option.
3. Press the ENTER key to activate the highlighted
option.
Options Menu with ‘Use
Indoors’ highlighted
4. Press the ESCAPE key before pressing the ENTER
key to prevent activation of an option.
Use the ROCKER keypad to
highlight the next option.
Press ENTER to activate.
How to Use On-Screen Buttons
Some pages contain on-screen buttons, like those
shown on the Mark Waypoint Page in the lower right
picture.
Some of the common buttons found on many pages
are:
OK - Closes the page, saving any changes you have
made.
Map - Shows a location on a map.
Goto - Creates a direct route to a location on the map.
Delete - Deletes the item.
On-Screen
Buttons
On-Screen Buttons, highlight
and press ENTER to activate.
To select and activate an on-screen button:
1. Use the ROCKER keypad to move Up/Down or
Right/Left to highlight the desired button.
2. Press the ENTER key to activate the button.
11
Reference
Entering Data
Data entered using the
ROCKER keypad.
How To Enter Data
Some pages contain Data Fields that allow you to define the
information that will be placed in that field. Data can be entered
in two ways; by entering each letter or number, or by selecting
from lists of pre-defined information.
Entering each letter or number:
1. With the entire field highlighted, press the ENTER
key to highlight the first character or number to
begin entering data.
Data selected from a list.
Street Data List
2. Press the ROCKER keypad Up or Down to cycle
through a list of numerals 0 to 9, plus symbol,
minus symbol, blank space, and the alphabet.
Pressing and releasing the keypad moves character
by character through the list; pressing and holding
the keypad moves rapidly through the list.
3. Press the ROCKER keypad Left or Right to move to
the next or previous character on the line.
4. To clear the data field, highlight the left character
and press the left side of the ROCKER keypad.
When highlighting some data fields and pressing the
ENTER key, a list of pre-defined choices will be displayed.
Selecting data from lists:
1. Highlight the item you want by:
pressing the ROCKER keypad Up or Down to
move item by item.
or... pressing the ROCKER keypad Left or Right to
move through the list page by page.
Check Boxes
2. Press the ENTER key to complete your selection.
How to Use Check Boxes
Some pages have check boxes that activate or deactivate
the display of a feature (e.g. MapSource Info Page).
To use check boxes:
1. Highlight the box and press the ENTER key to
activate or deactivate the feature.
Active Check Box
12
Reference
Zooming In and Out
Use the Zoom keys (IN and OUT) to adjust the map scale,
which is displayed at the bottom of the Map Page.
To change the map scale:
The Map Page
Accuracy Circle
1. Press the IN Zoom key to select a scale that shows
more detail for a smaller map area.
2. Press the OUT Zoom key to select a scale that
displays a larger map area, but with less detail.
The map scale is shown in the lower left corner of the map
display area. The scale is shown in the unit of measure selected
from the ‘Units’ field of the ‘General’ setup page. Refer to page
32 for setup details.
It is possible to zoom in so far that the resolution of the
map data is exceeded and the appearance of the map will no
longer be accurate. When this occurs, the word “overzoom”
will appear just below the map scale.
When using a map data cartridge, the word
“MapSource” will appear below the map scale when you
zoom in to see more detailed map features. When driving
on city streets within a MetroGuide or other MapSource
coverage area, more detailed map scales (800 to 300 feet)
may be preferred since they provide a good view of all
streets and not just major roadways. When traveling on
major roadways (highways and Interstates) map scales of
two miles or more may be more practical.
With certain types of MapSource data, such as
MetroGuide data, the eMap may match your location to
roads on the map. In these instances, the ‘Accuracy Circle’
(discussed on page 5) will not be shown.
You can control the display of map details at specific
map scales by using the Map Setup Options as explained on
page 17. Using the setup options allows you to create clearer,
less “cluttered”, maps as you desire.
Zoom IN to view more map
details.
Zoom OUT to view more map
area.
The Map Scale
Overzoom shown below the
Map Scale
Map Scale when using
MapSource information on
a map data cartridge.
13
Reference
The Map Page
Use the ROCKER keypad
to move the panning arrow
about the Map Page.
Using the Panning Arrow
The Map Page pan function allows you to display an arrow
to point at and identify items on the map, and to move the map
in order to view areas beyond the current viewing area on the
display.
The pan function is activated by the ROCKER keypad
which moves the arrow in the desired direction. As the arrow
moves to the edge of the display screen, the map will also
move to reveal more map area. When moving to the edge of
the display, the map will take some time to draw the new area
of the map.
Pressing the ESCAPE key cancels the pan function.
The detail of map features will be enhanced when you are
using MapSource information loaded on a map data card. But,
when using any map data, whenever the panning arrow is
placed on a map item, the name of the object will be
highlighted. This feature applies to waypoints, roads, lakes,
rivers...almost everything that is displayed.
To find details about a map item:
1. Move the panning arrow to the map item that you
want to learn more about.
Information page for a
specific location on the map.
Using the panning arrow
(Map Pointer) as a location
reference when finding a map
item.
14
2. When the item’s name is highlighted, press and
release the ENTER key to display the Information Page
for that item.
The information page is type specific with such titles as
‘Address’, ‘City’, or ‘Exit’ followed by a name and description
field, a distance field, and on-screen buttons.
You can also use the panning arrow to measure the
distance between two map items as explained in the section
titled “Measure Distance” on page 16.
When using the panning arrow on the map page and
pressing the FIND key, the Find Menu will display items
with the panning arrow (map pointer) location used as a
reference for distance. The Find Menu will display “Using
Map Pointer” just beneath the page title.
Reference
More About Map Page Options
Here is a more detailed description about the Map Page
options discussed on page 6 with instructions for activation.
Use Indoors
The ‘Use Indoors’ option stops satellite reception,
conserves power usage, and speeds Map Page drawing. The
‘Use Outdoors’ option turns on the GPS receiver for realtime navigation.
To activate ‘Use Indoors’:
1. With the Map Page Options Menu displayed, use
the ROCKER keypad to highlight the ‘Use Indoors’
option and then press ENTER.
Map Page
Options
You can select a variety of
display and feature options
from the Map Page Options
Menu.
2. The Map Page will appear with an on-screen
message stating, ‘GPS turned off (for use indoors)’.
Press the ENTER key to confirm.
3. To return to continuous satellite updating with the
GPS receiver, press the MENU key, highlight ‘Use
Outdoors’ and press the ENTER key.
‘Use Indoors’ Option
1
WARNING: Remember that the ‘Use Indoors’
option stops GPS receiver operation and should
never be used for actual navigation.
Full Screen Map
The ‘Full Screen Map’ option uses the full screen to
display the map.
To display a ‘Full Screen Map’:
‘Full Screen Map’ Option
1. With the Map Page Options Menu displayed,
highlight ‘Full Screen Map’.
2. Press the ENTER key and the Map Page will display
a full screen map.
3. To return to a Map Page with data fields displayed,
repeat the process. You will notice that the ‘Full
Screen Map’ option now reads ‘Show Data Fields’.
When this option is highlighted and the ENTER key
is pressed, the page will display the data fields again.
“Full Screen Map” display.
15
Reference
Map Page
Options
‘Show Next Street’ option
‘Show Next Street’ display.
Show Next Street
The ‘Show Next Street’ option allows you to see the
name of the next street or interstate exit you are approaching while traveling.
When ‘Show Next Street’ is highlighted and activated, a
field to display the next street information will appear at
the top of the map. The option list will then display ‘Hide Next
Street’.
The next street name will be displayed only if the
eMap is “matching” your position to roads on the map and
there is a nearby street.
The next interstate exit will be displayed only if you are
traveling on an interstate highway.
The field which displays the ‘Next Street’ information is
not present when a full screen map is used.
Stop Navigation
The ‘Stop Navigation’ option stops any active Route,
Goto or Track navigation. The option will appear gray and
cannot be selected if there is no active navigation.
When activated, the ‘Stop Navigation’ option will be
replaced by a ‘Resume Navigation’ option.
Measure Distance
The ‘Measure Distance’ option allows you to view the
distance and direction from your current location to another
location on the map or from one map location to another.
To use the ‘Measure Distance’ feature:
1. With the Map page displayed, highlight and select
‘Measure Distance’ from the list of options.
2. Press the ENTER key. A field for distance will appear
at the top of the map.
You can display the distance
and direction between two
locations on the map.
3. Move the panning arrow to the location you want to
measure from and press the ENTER key.
4. Move the panning arrow to the location you want to
measure to and the distance information will be
displayed in the field.
5. Press the ESCAPE key to exit this feature.
16
Reference
Setup Map
The Setup Map Option displays the Map Setup Pages. Map
Setup pages determine how the map is displayed, allowing you
to custom tailor the map display.
Common Settings
Text - Specifies the text size for a displayed map item.
Selecting ‘None’ will turn off the text display for that item.
Zoom - Specifies the maximum map scale at which a
map item will be displayed. If ‘Auto’ is selected, the
maximum map scale will be determined by the ‘Detail’
setting to prevent map clutter.
Map Options
Detail - Adjusts the amount of map information, such
as roads, that is displayed. ‘Most’ shows maximum
detail and ‘Least’ shows minimum detail. The higher
level of detail, the slower the map redrawing time.
Orientation - Selecting ‘North Up’ will display the map
with North at the top. Selecting ‘Track Up’ will
automatically rotate the map to keep your current
direction of travel at the top of the screen. The map
displays a ‘North’ indicator when in the ‘Track Up’ mode.
AutoZoom - When ‘On’, this option will automatically
adjust the map scale to show both your current location
and the next item to which you are navigating.
Map Page
Options
Map Options
Line Options
Road Options
Other Map Item Options
Line Options
Saved Tracks - Controls the display of Saved Tracks.
Track Log - Controls the display of the ‘Track Log’ on the map.
Route Line - Controls the display of the Route Line on the map.
Road Options
Lock to Roads - Places the Position Icon on the nearest road.
Street Label - Controls text size and displays at a set scale.
Other Options
Points of Interest - Controls the display of points of
interest on the map.
Waypoints - Controls the display of waypoints on the map.
Land Cover - Controls the display of land cover such
as swamps, etc. on the map. Land cover data is found
primarily on Topographical MapSource map data.
The Map Setup Pages allow
you to customize map details.
17
Reference
Waypoints
The ‘Mark Waypoint’ Page
with automatically assigned
waypoint number.
Personalize a waypoint by
assigning a name.
Waypoints
A waypoint is a location you have identified and stored
in the eMap. The eMap can store 500 waypoints in
memory. Waypoints can be used to build Routes and as
destinations to ‘Goto’.
Marking your current location as a
waypoint:
1. Press and hold the ENTER key for more than 1
second to mark a waypoint for your current
location. It will automatically be assigned a 3-digit
number.
2. To change the name of the waypoint, use the
ROCKER keypad to highlight the waypoint name
field. Follow instructions titled “Entering Each Letter
or Number” on page 12. You can enter a total of 10
characters in the field. This waypoint name will appear
on the Map Page.
3. To assign an identifying map symbol to a waypoint,
use the ROCKER keypad to highlight the field to
the left of the waypoint name. Follow instructions
titled “Selecting Data from Lists” on page 12 to
select a symbol. The selected symbol will appear
along with the name on the Map Page.
4. To save the waypoint highlight ‘OK’ and press the
ENTER key.
5. If you do not want to save it as a new waypoint,
press the ESCAPE key before pressing any other
The Waypoint Symbol List
identifies a waypoint on the
map with a symbol.
To create a waypoint using the panning
arrow to highlight a map item:
1. Move the panning arrow to the item (a city, address,
or intersection, road, etc.)
2. Press and release the ENTER key to display the
item information page.
3. With the information page displayed, press the
MENU key to display the ‘Save as Waypoint’ option
and then press the ENTER key.
18
Creating a waypoint using
the panning arrow.
4. The ‘New Waypoint’ page will display the waypoint
newly created from the map item.
Reference
To create a waypoint using the panning
arrow when a map item is not highlighted:
1. Press and release the ENTER key with the panning
arrow positioned where you want to mark the
waypoint (off of roads, streets or other map items).
Creating a
Waypoint
2. The ‘New Waypoint’ page will display the waypoint
that was created at the panning arrow location.
Be certain to press and release the ENTER key for
these operations. Pressing and holding the key will mark
your current location. See ‘Marking Your Current Location”
on page 18.
To create a new waypoint by manually
entering its coordinates (lat/lon):
1. Press and hold the ENTER key to access the Mark
Waypoint Page.
Creating a New Waypoint by
placing the panning arrow on a
location without highlighting a
feature.
2. Highlight the Location field on the Mark Waypoint
Page and follow instructions titled “Entering Each
Letter or Number” on page 12.
3. If desired, you may also change the waypoint name
and/or symbol.
To move a waypoint by dragging it on the map:
1. Use the Find Feature to display the Waypoint Page
as described on page 21.
2. Highlight the ‘Map’ button and press ENTER to
display the waypoint on the map.
3. With the waypoint highlighted by the panning
arrow, press the ENTER key once. The word
“Move” will appear beneath the panning arrow.
Use the ROCKER keypad to
move to and highlight the
Location and Elevation fields
and then enter the coordinates
and elevation desired.
4. Use the panning arrow to move the waypoint to
the new location and then press the ENTER key.
5. Press the ESCAPE key to cancel moving the
waypoint.
Using the ‘Mark Waypoint’ feature to quickly
determine your latitude and longitude:
Press and hold the ENTER key to display the ‘Mark
Waypoint’ page. Your current lat/lon will be displayed in
the ‘Location’ field. Press the ESCAPE key before pressing
any other key to close the page without storing your
location as a waypoint.
Use the Panning Arrow to drag
a waypoint to a new location.
19
Reference
Editing a
Waypoint
Use the ROCKER keypad to
enter data and the ENTER
key to confirm entries.
Location
Averaging
Editing a Waypoint
A waypoint can be edited to change the map symbol, name,
coordinates, or elevation. It can also be deleted.
To edit a waypoint:
1. Use the Find feature as described on page 21 or use
the panning arrow to highlight a waypoint on the
map and press ENTER to display the Waypoint Page.
2. Make changes as desired to the waypoint symbol,
name, location, and elevation fields following the
instructions in the section titled “How To Enter
Data” on page 12.
3. Highlight the ‘OK’ button and press the ENTER key
to save changes.
To delete a waypoint:
1. Select a waypoint from the Waypoints List and press
ENTER to display the Waypoint Information Page.
2. Highlight the ‘Delete’ button and press the ENTER key.
Using the ‘Average Location’ Option
You can average location calculations to create a more
accurate waypoint by reducing the effects of GPS location
errors. Remember that when you average a waypoint from the
Waypoint List or create a new waypoint without actually being
at the site of the waypoint, the location for that waypoint will
be changed to your current GPS location.
To Average a Location:
1. With the Waypoint Page displayed, press the MENU
key to display the Waypoint Option Menu.
Waypoints can be averaged
to produce a more accurate
location. Best results require
approximately an hour of
averaging.
Saving As
A Waypoint
‘Save As Waypoint’ Option
20
2. With ‘Average Location’ highlighted, press the
ENTER key to display the ‘Average Location’ Page.
3. Observe the ‘Estimated Accuracy’ field and press the
ENTER key with ‘Save’ highlighted when the
estimated accuracy reaches the desired value.
4. Press the ESCAPE key to cancel ‘Average Location’
and leave the waypoint unchanged.
To Save any map item or Find Menu option
as a Waypoint:
1. Access the information page for that item
(highlighted on the map or selected from the Find
Menu) and press the MENU key to display the
‘Save As Waypoint’ option.
2. Press the ENTER key to complete.
Reference
Using the Find Menu
You can locate Waypoints, Cities, and Interstate Exits
included in the eMap basemap. You can also locate Cities,
Exits, Points of Interest, Addresses and Intersections when
using MapSource data. Cities and Points of Interest are also
available in other selected MapSource maps. If this data is not
present, these options are not available and will appear gray.
Your current location is normally used as the reference
point for the ‘Nearest’, ‘Distance’, and ‘Direction’ features.
However, if you are using the panning arrow (Map Pointer), it
is used as the reference point.
Using the
Find Menu
The Find List with waypoints
highlighted.
Using ‘By Name’ and ‘Nearest’ Lists
All items on Find Menu option lists can be viewed in two
formats, ‘By Name’ (a list of every item available for a category)
or ‘By Nearest’ (a list of only those items for a category that are
nearby).
To switch between ‘By Name’ and ‘Nearest’:
1. Press the MENU key.
2. Highlight ‘Find Nearest’ or ‘Find By Name’ and
press the ENTER key.
Finding an item by name:
1. The first character in the name field at the top of the
page will be highlighted.
2. Begin entering the name of the item you want,
using the method for entering each letter or
number described on page 12.
3. When you can see that the names of the items in
the list below are near the name of the item you
want, press the ENTER key to move the highlight to
the list.
Waypoints By Name List.
Use the ROCKER keypad to
enter the first characters of
the waypoint name or scroll
through the list.
Nearest Waypoints Option
4. Highlight the item you want from the list using the
method for selecting data from lists as described on
page 12.
5. Press the ENTER key to display the information
page for the item.
Finding a nearest item:
1. Highlight the item you want from the nearest list
using the method for selecting data from lists
described on page 12.
2. Press the ENTER key to display the information
page for the item.
Nearest Waypoints List with
the first waypoint highlighted.
21
Reference
Using the
Find Menu
The Waypoint Information
Page.
Finding a Waypoint
Waypoints that you have created and stored in the eMap
can be found by selecting the ‘Waypoint’ option of the Find
Menu. You can find a waypoint from a list of waypoints ‘By
Name’ or by ‘Nearest’ using the procedure explained on the
previous page to display the Waypoint Information Page.
The Waypoint Information Page displays the waypoint
name, a map symbol, the location in lat/lon, elevation and
four on-screen buttons for viewing the waypoint on the map,
creating a Goto, confirming changes, or deleting the
waypoint.
Finding a City
Cities listed in the map database can be found by
selecting the ‘Cities’ option of the Find Menu. You can find a
city from a list of cities ‘By name’ or by ‘Nearest’ using the
procedure explained on the previous page to display the City
Information page. You can use the options menu ‘Select Map’
option to display the city from the maps contained in your
map data card.
The City Information Page for the selected city displays
the city name, the size by population and the distance from
your location. You can view it on the map or create a Goto
direct route to the city from your current location or from a
location defined by the panning arrow (Map Pointer).
Use the ROCKER keypad to
spell the first part of the city
name then press ENTER to
highlight it on the list.
To view a city’s location on the map,
highlight the ‘Map’ button and press
ENTER. To Goto its location,
highlight the ‘Goto’ button and press
ENTER.
Scroll down the list to highlight
your selection, then press
ENTER.
22
The Map page for a city. The city
name appears under the page
title with distance and direction
from your current location or the
map pointer. The city is also
highlighted on the map.
You can zoom in or out to view
map detail around the city.
Reference
Finding an Exit
You can use the Find Exit option to locate a nearby exit on
an interstate highway. Exits are listed only by ‘Nearest’.
Using the
Find Menu
To find an Exit:
1. Press the FIND key to display the Find Menu.
2. Use the ROCKER keypad to highlight ‘Exits’ and
then press the ENTER key. An exits menu will
appear with a choice of exit types.
3. Highlight the type of exits you wish to view, then
press the ENTER key.
4. A list of the nearest exits ahead of you will be
displayed. The title of the list indicates the interstate
for the exits listed. At the bottom of the list, a
distance field indicates the distance from your location
to the highlighted exit on the list. The options menu
provides a ‘Select Exit Road’ and a ‘Select Map’
option if the exit is shown on more than one map on
your map data card.
Nearest Exits List with
Highlighted Selection.
5. Scroll through the list to highlight the desired exit.
6. Press the ENTER key to display the Exit Page for
that exit. This page contains the exit description at
the top of the page and a list of services near that
exit at the bottom.
7. Use the ROCKER keypad Up/Down keys to move
the highlight into the list of services. Press the ESCAPE
key to move the highlight back to the ‘OK’ button.
Exit Page with list of services.
8. Highlight an item from the list of services then press
the ENTER key.
9. The Exit Services detail page will display, showing the
type of services, its direction from the exit and a list of
services available, each
marked by a check.
You can select ‘Goto
Exit’ to create a direct
line route to the exit
on the map.
A Goto from your current
location to a selected Exit.
Service page with detailed
list of services.
Selecting ‘Goto Exit’ takes you
to the Exit associated with the
service. To find the service,
refer to location information on
the page.
23
Reference
Using the
Find Menu
Finding a Point of Interest
You must be using MapSource MetroGuide which
provides this type of map data, otherwise this option will
appear gray and will not be available.
To locate a point of interest:
1. Press the FIND key to display the Find Feature
Menu. Highlight ‘Points of Interest’ and then, press
the ENTER key to display a list of categories.
2. Highlight the category of your choice and then
press the ENTER key to display the list of types.
3. Highlight the type of your choice and then press
the ENTER key to display the list of the points of
interest of that type.
Category and Types Lists
4. A ‘Select Map’ option is available if there is more
than one map on the cartridge that has the
information you are trying to find. Press the MENU
key to access the ‘Select Map’ option and then
press the ENTER key to display the map choices.
Highlight the map you wish to use and press the
ENTER key to return to the list.
5. Follow instructions on page 21 to find a point of
interest by name or nearest.
6. Highlight the desired point of interest on the list
and press the ENTER key to display the information
page. The information page will include the full
name, address, and often the phone number.
Highlighted Item
When searching for points of interest using the ‘By
Name’ list, multiple items with the same name appear only
once on the list (for example: McDonalds). When you highlight
it and press ENTER, a list of ‘Nearest’ locations for that name
will appear.
Point of Interest Selection on a Goto
Location highlighted
on the Map Page
Your current
location
Information Page with Map
and Goto buttons.
24
Direct line to the Point
of Interest
Reference
Finding an Address or an Intersection
You must be using MapSource MetroGuide which provides
this type of map data, otherwise these options will appear
gray and will not be available.
To locate an address:
Using the
Find Menu
1. Press the FIND key to display the Find Feature
Menu. Highlight the ‘Address’ option and then,
press the ENTER key to display the ‘Find Address’
page.
2. Highlight the Number field and use the method for
entering numbers and letters as explained on page 12.
3. Move to the ‘Street’ field using the ROCKER keypad.
4. Press the ENTER key to display the ‘Select Street
Name’ list. Find the street you want following the
instructions for finding a an item by name on page
21 of this manual.
5. With the desired street highlighted, press the ENTER
key to place the street name on the find page.
Make entries in each field. City
and Postal Code are optional.
When finished, press the ‘Find’
button at the bottom of the page
to view the ‘Select Address’ and
then the Information Page.
6. Highlight the ‘Find’ button and press the ENTER key
to view the ‘Select Address’ page with a list of
possible address matches. A window at the bottom of
the list displays the quality of each address match.
7. Select an address and press the ENTER key to display
the ‘Address’ page, from which you can view the
address on the map or ‘Goto’ it.
8. If there are many matches, use the optional city and
postal code fields to place the best matches near the
top of the list.
To locate an intersection:
The Find Intersection feature operates like the Find
Address feature, with the exception that you enter first and
second street names instead of an address and a street name.
Lists of streets, cities and
postal codes allow selection
and entry in Find Page fields.
‘Select Address’ page with
listing of possible matches
with match quality.
25
Reference
Using Goto
To Goto to a map item or Find Menu item
You can use the eMap to guide you to a map or Find Menu
item using the Goto feature. A Goto is a straight-line from
your current location to one you’ve selected.
To Goto to a map item location:
1. Use the ROCKER keypad to move the panning
arrow to the item (waypoint, city, exit, etc.) on the map.
2. Press the ENTER key to display an information page.
3. Highlight the ‘Goto’ button on the page and press
the ENTER key.
To Goto a Find Menu Item:
1. Use the Find Menu to display the item’s information
page which contains the ‘Goto’ button.
2. Highlight the ‘Goto’ button on that page, and then
press the ENTER key.
To select a Goto destination from
the Find Menu options, highlight
the desired waypoint, city, exit,
point of interest, address or
intersection and press ENTER.
Once a Goto destination is selected, use the Map Page to
navigate as you head toward your destination. A ‘Direction To
Go’ field tells what direction to start traveling, then changes to a
‘Direction Arrow’ once you begin movement. ‘Speed’, ‘Distance
To Go’ and ‘Time To Go’ fields keep track of your progress.
‘Speed’ and ‘Time To Go’ will not display until you are moving
toward the destination.
The Map Page with the destination
displayed and route line from your
present location.
Direction To Go
Distance To Go
Present Location
Direct Route Line
Destination Location
To Goto a waypoint, map
item, city, point of interest,
address, etc., highlight the
Goto button on the
Information Page and press
ENTER.
26
Reference
Using the Main Menu
The Main Menu provides access to additional eMap
features that are explained on following pages. For an
introduction to the Main Menu, refer to page 7.
The
Main Menu
To display the Main Menu, press the MENU key
twice.
To select a Main Menu option, highlight the desired
option and press the ENTER key.
Status Icons
The Main Menu displays three unit status icons:
Light - This shows the backlighting status. When
backlighting is on the lamp appears to be lit.
Memory - This indicates the percentage of stored data
space used. User controlled items in the stored data
include waypoints, routes, tracks and the track log.
Power - A battery with a gray fill to indicate remaining
capacity. The more gray the more capacity. When powered by
an external source the icon changes to a power cord plug.
6&78'0FG#0"F
Trip Computer
++++++;$D9%3
6&##$%3
.&2&70#3
The Main Menu lists eight
features.
The
Trip Computer
AB#$%"&'
)9E$%
The Trip Computer page provides you with readings
for:
Trip Odometer: The total miles for a trip.
Stopped Time: Accumulated time when not moving.
Moving Average: Your average speed while moving.
Moving Time: The accumulated time while moving.
Overall Average: Your average speed, during the total time
of the trip.
Total (of the Trip) Time: The total elapsed time since
you began your trip.
Maximum Speed: The highest rate of travel achieved
during the trip.
Odometer: A cumulative record of all trips.
Options Menu: Reset Trip, Reset Max Speed and Reset
Odometer.
The Trip Computer Page
provides information about
time and speed.
There are three reset options.
27
Reference
Tracks Page
The Tracks Page with a list of
saved tracks. Tracks that are
not named are assigned a date.
Saving and Using a Track
The eMap automatically records a history of your locations
in the ‘Track Log’, creating an electronic ‘breadcrumb’ trail of
the path you have traveled.
You may save all or part of the track log to create a
‘Track’. You can save ten ‘Tracks’ and 2,000 tracking points.
You can use the Tracback feature to navigate saved
tracks on the Map Page.
The page shows what percentage of track log memory
has been used. Once full, new track points will replace the
oldest track points.
The beginning of the track is the earliest point while
the end is the most recent.
To view a track on a track map, press the ‘Map’ button
on the Track page. The beginning and end of the track is
labeled as well as the turn points in between.
To save a track:
1. With the ‘Tracks’ Page accessed from the Main
Menu, highlight the ‘Save’ button, then press the
ENTER key.
Track Page with named track
and ‘TracBack’ feature
selected.
TracBack navigation option
menu.
2. This will display the ‘Save Back Through’ menu. Scroll
down the list to select the time frame you want to
save. Press the ENTER key to save the track.
3. This will display a ‘Track’ page for the track. A date
and number for the track are displayed in the name
field. You can rename the track.
4. You can move to the ‘Show on Main Map’ field to
place a check mark in the box if you wish to have the
track shown on the Main Map Page.
5. Highlight the ‘OK’ button to save and return to the
Tracks Page.
To navigate any saved track:
1. Highlight the saved track on the Tracks Page and
press the ENTER key.
2. Highlight ‘TracBack’ and press the ENTER key.
3. Select an option for ‘Direction to Navigate’ and press
the ENTER key.
A Track on the Track Map
with BEGIN and END designators.
28
Choosing “Original” from the “Direction to Navigate”
menu guides you from beginning to end, ‘Reverse’ takes you
back to the beginning. Use the Main Map Page to navigate
as you follow your track.
Reference
Creating and Using a Route
Route navigation allows you to create a sequence of
intermediate waypoints which lead you to your final
destination. The eMap will store fifty routes, each with up to
fifty waypoints. A Route can be created and modified from
the Route Page or complex routes can be created on a PC and
transferred into the eMap.
To create a route by entering each
waypoint:
1. Access the ‘Routes’ page from the Main Menu. The
page has a ‘New’ button, a list of routes, and the
number of unused route spaces.
2. Highlight the ‘New’ field and press the ENTER key
to open a new ‘Route’ page. The name field will
state “Empty”.
3. Press the MENU key to pop-up the options menu.
With ‘Add Waypoint’ highlighted, press the ENTER
key to display the ‘Find’ menu. All categories can be
used to create a waypoint on the ‘Route’ list.
Route Page
Route Page with a named
Route, list of waypoints, and
cities. When navigating a
Route, the Distance and ETA
(arrival time) will display at
the bottom of the page.
4. Use the Find menu to locate and display the
Information page for an item. Highlight the ‘OK’
button and press the ENTER key to add it to the route.
5. Repeat steps 3 and 4 to continue adding waypoints
to your route until completed.
To navigate the route:
1. When you have finished adding waypoints to the
Route, press the MENU key to pop-up the route
options menu.
Select Waypoints, Cities,
Exits, Points of Interest,
Addresses and Intersections to
build your route.
2. Select ‘Start Navigation’ and press the ENTER key.
The Map Page is displayed with the direction to go to the
first waypoint on the route and the distance to the first
waypoint displayed above the map.
When you begin to move, the “Direction To Go” message
will be changed to a direction arrow.
A route line on the map connects all of the route
waypoints. Travel to each waypoint on the route using the
pointer and route line for guidance.
When the route direction changes, an “Approaching Turn”
message will appear. You will notice that the route line does
not follow the roads on the map but from waypoint to waypoint.
To make the route to approximate the roads, place
waypoints at major turns along the roads (cities, intersections, etc.).
Route Displayed on Map Page
29
Reference
GPS Info Page
Status Bars
Skyview
The GPS Information Page
acquiring satellites. Hollow bars
indicate satellites being
acquired. Solid bars indicate
acquired satellites and are
identified by the highlighted
numbers in the skyview.
The GPS Information Page
The GPS Information Page provides a visual reference
of various receiver functions. As the receiver locks onto
satellites, a signal strength bar will appear for each satellite
in view, with the appropriate satellite number (01-32)
underneath.
When you first turn the unit on, the page title will be
“Acquiring Satellites”. After it has determined your location
the title will be “2D GPS Location” or “3D GPS Location”.
Options
North Up/Track Up - You can set the GPS Information Page skyview orientation to either ‘North Up’ with
the skyview oriented north or ‘Track Up’ with the skyview oriented toward your current direction of travel.
These settings affect only the satellite skyview.
Elevation and Location - You can set a new elevation
and new location to help the eMap obtain a position fix.
These two options will not be available if your location
has been determined.
If the GPS receiver is turned off, the page title will be
“Simulating GPS”.
GPS Status Page Options
GPS Information Page
Elevation Entry Field
Receiver Status
Location Coordinates
Elevation
Speed
Accuracy
Skyview
Signal Strength Bars
30
Reference
The Sun and Moon Page
The Sun and Moon Page displays data for sun and
moon rise and set times, the phase of the moon and the
approximate skyview location of the sun and moon for your
current location.
The moon phase is displayed with the visible portion of the
moon as a light color.
The skyview displays the position of the sun and moon
relative to your current location. The center represents
directly overhead and the outer ring represents the horizon.
Using the ROCKER keypad to highlight the Date, Time
or Location fields, you may view the sun and moon information for anywhere in the world at any date and time. The
highlighted Data and Time fields may be changed using the
instructions in the “How To Enter Data” section on page 12.
The highlighted Location field may be changed by pressing the
ENTER key and selecting from the list of options.
You can return to the current date and time by selecting ‘Use
Current Time’ from the Sun and Moon Page option menu.
The Rise and Set times are displayed using the time zone
that the eMap is set to, not the time zone of the location selected.
The MapSource Information Page
The MapSource Information Page shows you information about detailed map data you have transferred from a
MapSource CD-ROM to the optional map data card installed
in the eMap.
The upper field displays the map name and date.
If the check box for a map in the middle field is checked,
that map will be shown on the Map Page. Highlight the map
name and press the ENTER key to check or uncheck the
box.
The lower field displays complete information for the
highlighted map.
The System Information Page
The System Information Page tells you the version of
operating software installed in your eMap unit and the unit
I.D. number. You may need to refer to this page only when
upgrading software or when service to the unit is required.
Sun and Moon
Date
Time
Sun and Moon
Skyview Window
Location
Moon
Phase
New Location Options
Sun & Moon Option Menu
MapSource Info
MapSource Info Page
System Info
31
Reference
System Setup
‘General’ Settings Page
Operating Mode Options
Backlight Timeout Options
Beeper Options
Units of Measure Options
‘Time’ Settings Page
Time Format
Options
32
Time Zone Options
Setting Up System Options
Setup provides four pages to allow you to choose from
various system setup options for ‘General’, ‘Time’,
‘Advanced’, and ‘Interface’ settings.
General Settings
Mode - Allows you to choose between three operating
modes, ‘Normal’ with the GPS receiver operating,
‘Battery Saver’ with a less frequent satellite signal
updating process to save on battery power, and ‘GPS
Off’ which allows you to operate the eMap with GPS
receiver turned Off to save even more on battery power.
The ‘Use Indoors’ option on the Map Page options
menu sets the operating mode to ‘GPS Off’.
Backlight Timeout - The delay can be set to stay on or
to turn off automatically 15 seconds, 30 seconds, 1 or 2
minutes after the last time you have pressed a keypad
key. When using the external power (cigarette lighter)
adapter, the backlight does not timeout.
Beeper - The audible ‘Beeper’ setting can be programmed to sound whenever a key is pressed or an onscreen message appears, only when a message appears,
or Off altogether.
Units - Units of measure can be set to Statute, Metric,
or Nautical (miles and miles per hour, kilometers and
kilometers per hour, or nautical miles and knots).
Language - Choose from 5 languages to display text.
Time Settings
Time Format - Allows you to choose from a 12 or 24
hour time format. When you select the 12 hour time
format, the clock will read like a standard clock with 12
hour AM and PM cycles. The 24 hour option sets the
clock to display a 24 hour cycle (Military Time).
Time Zone - Can be set to one of the U.S. Time
Zones, or by selecting ‘Other’ you can enter the UTC
Time Offset for any other time zone. Refer to the
instructions for setting UTC Time Offset and the Time
Offset Chart on page 40.
Daylight Savings Time - Can be turned On or Off or
set to Automatic.
Current Date and Current Time - Are determined by
the satellites being received and are not changeable.
Reference
Advanced Settings
These features are best used by individuals with a working
knowledge of map grids and datums. To learn more about these
subjects, visit the National Imagery and Mapping Agency at http://
www.nima.mil or inquire at your library.
Location Format - Allows you to choose from different
grid formats. The default location format ‘hdddomm.mmm’
displays the latitude and longitude in degrees and minutes
and is the one most commonly used. Selecting a location
format will cause the map datum to change to match the
new location format.
Map Datum - Offers a selection of nearly all map
datums in common use. Every map is based on a map
datum (a reference model of the earth’s shape) and is usually listed in the title block of the map. If you are
comparing GPS coordinates to a paper map, chart, or other
reference, the map datum in this field must match the
horizontal map datum used to generate the map or other
reference. The default datum is WGS 84 (World Geodetic
Survey 1984) and should only be changed when using
maps or charts specifying a different datum. If a map
specifies a datum, use the list to find datums applicable to
the region of the map, select one that provides the best
positioning at a known point. Choose the ‘User’ datum for
custom designed grids.
North Reference - Allows control of what the eMap
considers ‘North’. True - Uses True North. Magnetic - Uses
Magnetic North, which is continually updated based on
your current location. Grid - Uses North as defined by the
selected grid. User - Uses the Magnetic North Offset
determined by the value in the Magnetic Variation Field.
1
WARNING: If User Magnetic Variation is
selected, you must periodically update the
magnetic variation as your position changes.
When using this setting, the eMap will not
automatically calculate and update the magnetic
variation at your current location. Failure to
update this setting may result in substantial
differences between the information displayed on
the unit and external references, such as a
magnetic compass.
Direction Display - Changes the ‘Direction To Go’ field
and Map Panning box on the Map Page and Find pages from
Cardinal Letters (N, S, E, W) to Numeric Degrees (147o).
System Setup
‘Advanced’ Settings Page
Location Format Options Menu
Map Datum Options Menu
User Grid and Datum Setup Pages
require a working knowledge of custom
designed map grids and datums.
Direction Display Options
33
Reference
System Setup
‘Interface’ Settings Page
Serial Data Format Options
Serial Data Format Page for a
GARMIN Beacon Receiver.
When set for ‘Scan’ the unit
will stop at the first received
beacon signal. When set for
‘User’ you must enter the
frequency of the desired beacon
and adjust the bit rate. The
‘Status’ field provides advisory
information about the beacon
status and a message will
appear if the beacon signal is
not being received.
34 (See Appendix C)
Interface Settings
The ‘Interface’ Settings Page allows you to choose from
seven different input/output serial data formats, or none at all.
This feature is used when connecting your eMap unit to external
NMEA devices, DGPS beacon receiver, a personal computer, etc.
It is necessary to have a working knowledge of these applications. Below is a description of each format:
GARMIN - the proprietary format used to exchange
waypoint, track, and map data with a PC.
GARMIN DGPS - Allows DGPS input using a
GARMIN beacon receiver and a standard RTCM
SC-104 format and DGPS tuning.
NMEA - supports the input and output of standard
NMEA 0183 version 2.3 data.
Text Out - allows simple ASCII text output of
location and velocity information, without any
input capabilities.
RTCM In - allows DGPS input using a standard
RTCM SC-104 format without any output capabilities.
RTCM In/NMEA Out - allows DGPS input using a
standard RTCM SC-104 format and supports the
output of standard NMEA 0183 version 2.3 data.
RTCM In/Text Out - allows DGPS input using a
standard RTCM SC-104 format and simple ASCII text
output of location and velocity information.
None - Provides no interfacing capabilities.
Select the desired Serial data Format from the list. If
‘GARMIN DGPS’ or ‘RTCM In/NMEA Out’ format is
selected, additional fields are provided to control a
GARMIN differential beacon receiver (e.g. GBR 21) directly
from your eMap unit. Tuning is automatic with ‘Scan’ or
you can enter the beacon frequency and bit rate when you
select ‘User’ from the Beacon list to manually tune the
receiver. For more information, refer to instructions
supplied with the beacon receiver.
When selecting, ‘Text Out’, ‘RCTM In’, and ‘RCTM In/
Text Out’ formats, a Baud field with a list of options will
display.
SECTION 4
Standard Accessories
Appendix A
(Included with the eMap Unit)
Lanyard -Provides convenient method for carrying the eMap.
Attaches to a slot on the back of the unit.
Accessories
Owner’s Manual
Quick Start Guide
Optional Accessories
(Not included with the eMap Unit)
Lanyard
Impact Resistant Cover -Provides impact and moisture
barrier to protect the eMap. (Not Shown)
Carrying Case -Protects the eMap while not in use.
Vehicle Dash Mount -Attaches to vehicle dash or any flat
surface.
Vehicle Suction Mount -Attaches to vehicle windshield
Carrying Case
or any smooth flat surface.
Bicycle Mount - Attaches eMap to bicycle handlebar.
Cigarette Lighter Adapter - Provides unit operation from
an automobile cigarette lighter. Converts 12-VDC input to 3-VDC
output. Not interchangeable with power adapters for VHF 720,
725 and 725e, or GPS 170, 175, 190, and 195.
Vehicle Dash Mount
GA 27C Remote GPS Antenna -Magnetic or windshield
mount for enhanced satellite acquisition.
PC Interface Cable - Allows transfer of map data from a PC
to an eMap data cartridge.
PC Interface Cable w/Vehicle Power Adapter -
Vehicle Suction Mount
Allows transfer of map data from a PC to an eMap data cartridge
and provides unit operation from an automobile cigarette lighter.
(3-VDC output)
Data Cable - Wiring harness. Connections for data input/
output.
Bicycle Mount
MapSourceTM Map Data CD-ROMs - Allows transfer
of detailed map data to eMap data cards. See your GARMIN
dealer for MapSource details.
8, 16, 32, 64 ,or 128 MB Blank Data Card - Stores
Cigarette Lighter Adapter
detailed map information via transferable GARMIN MapSource
CD-ROMs.
Replacement Battery Cover - Replaces lost or damaged
battery cover.
PC Interface Cable with
Vehicular Power Adapter
Spare Vehicle Dash Mount Base - Allows transfer of
the eMap to a second vehicle.
USB Data Card Programmer -Allows high speed transfer of map data to data cards. Requires PC with a USB port.
GA 27C Remote Antenna
35
Appendix B
Specifications
PHYSICAL
Case:
High-impact plastic alloy,
waterproof to IPX2 standards
5.5”H x 2.375”W x .815”D
Approx. 6.7 oz. (190g) w/batteries
Size:
Weight:
Operating Temperature
Range: 5° to 158°F (-15° to 70°C)
PERFORMANCE:
Receiver:
Acquisition Time:
Differential ready PhaseTrac12®
Approximately 15 seconds
(warm start)
Approximately 45 seconds
(EzInit®/cold start)
Approximately 2 minutes
(AutoLocate®)
Update Rate:
1/second, continuous
GPS Accuracy:
15 meters (49 feet) RMS 1
DGPS (USCG) Accuracy: 1-5 meters (3-15 ft) with DGPS
corrections 2
Velocity Accuracy:
0.1 knots RMS steady state
Dynamics:
Performs to specifications to 6 g’s
Interfaces:
RS232 w/NMEA 0183, RTCM 104
DGPS data format and proprietary
GARMIN data formats
Antenna:
Built-In (Patch)
POWER:
Input:
Power Consumption:
Battery Life:
Voltage Range:
Two 1.5 volt AA batteries. 3
340 mW
Up to 12 hours (with 2 AA Alkaline
batteries)
- in Power Saver Mode 4
+
3.15 0.15 volts DC 5
Specifications subject to change without notice.
1. Subject to accuracy degradation to 100m 2DRMS under the U.S. DoD-imposed
Selective Availability Program.
2. With optional GARMIN GBR 21 Beacon Receiver input.
3. The temperature rating for the eMap may exceed the usable range of some
batteries. Alkaline batteries can rupture at high temperatures. Alkaline batteries
lose a significant amount of their capacity as temperature decreases. If using the
eMap in below freezing temperatures, use lithium batteries for longer battery life.
4. Extensive use of backlighting will also significantly reduce battery life.
5. External power can only be applied using the GARMIN Vehicular Power Adapter or PC
36
Interface Cable with Vehicular Power Adapter with self-contained voltage regulation
Appendix C
Messages
The eMap uses “pop-up” messages to alert you to unit operating characteristics.
Press the ENTER key to acknowledge and return to the page you were viewing.
Approaching Turn - You are less than one minute away from a turn in your
route.
Arriving at Destination - You have reached your destination.
Base Map Failed - The unit’s base map has failed. Return your unit to GARMIN
for service.
Batteries Low - The batteries in your unit are low and no longer capable of
supporting unit operation. Install new batteries.
Database Error - There was an error in the unit’s database.
GPS Turned Off (for use indoors) - The eMap’s GPS receiver has been turned
off to conserve battery power and speed Map Page display drawing.
Lost Satellite Reception - The unit has lost satellite signals. Try moving to
another location with a clearer view of the sky.
Memory Full - The unit’s memory is full. To reduce the amount of memory
used, delete unused routes, waypoints or tracks.
No Differential GPS Position - The beacon receiver is not communicating
with the unit. Refer to the ‘Interface’ setup page of the unit to view the ‘Status’ field.
None Found - There is no such address, intersection, point of interest, or city
in the map information database. Check spelling or number entry and try again.
RAM Failed - The eMap has detected a failure in its internal memory. If the
message persists, service is required.
ROM Failed - The permanent memory has failed and the unit is not operable.
Service is required.
Route Already Exists - The name you selected has already been assigned.
Choose another name.
Route Memory Full - No additional route waypoints can be added.
Route Truncated - A complete uploaded route will not fit into memory. Modify
the route to reduce size.
Route Waypoint Memory Full - There is no more space for map-based
waypoints.
Track Already Exists - The name selected has been assigned.
Track Memory Full - All of the saved track locations are used.
Track Truncated - A complete uploaded track will not fit into memory. Clear
existing track memory or reduce the amount of new track data.
Transfer Complete - The eMap has finished uploading or downloading
information to the connected device.
Waypoint Already Exists - The name you selected has already been assigned.
Choose another name.
Waypoint Memory Full - All of the waypoints have been assigned.
37
Appendix D
Maintenance
If using rechargeable
NiMH, NiCad or
Lithium batteries, use
proper methods for
disposal of used
batteries. Many states
and cities require
environmentally
sound collection and
recycling of these
battery types.
Impact Resistant
Cover
Troubleshooting
Guide
To resolve problems
that cannot be
remedied using this
guide: Contact
GARMIN
Customer Service at
800-800-1020.
38
Cleaning
The eMap is constructed of high quality materials and
does not require user maintenance other than cleaning.
Clean the unit using a cloth dampened with a mild
detergent solution and then wipe dry. Avoid chemical
cleaners and solvents that may damage plastic components.
Battery Care and Storage
Do not mix old and new batteries when replacing
batteries. Do not mix Alkaline, NiCad or Lithium batteries.
Check battery polarity when installing. In order to reduce the
chance for battery leakage in the battery compartment and
map data cartridge slot, remove the batteries when storing
the unit for more than six months.
Water Immersion
The eMap is not waterproof. It may withstand
momentary immersion if retrieved quickly and wiped dry.
However, the battery compartment and map cartridge slot
may retain residual water and should be wiped out with a
clean cloth and allowed to air dry with the compartment
cover removed before re-installing batteries.
Impact Resistance
The eMap unit will withstand occasional impact from
hand to ground without major damage. However, if
frequently used in an outdoor environment, the Impact
Resistant Cover is recommended. (Shown at left.)
Symptom
“Poor GPS Coverage”
message is constant.
Probable Cause
Remedy
Your location does not allow a Move to a new location.
clear view of the sky.
UnitdoesnotturnON.
Batteries are exhausted.
Replace batteries.
Unit will not power ON
even with new batteries.
Batteries may be installed
backwards.
Reinstall batteries.
Unit has sustained damage
from water or impact.
Return unit to GARMIN
for service.
Unit powers up, but
then turns OFF.
Batteries may be nearly
exhausted.
Replace batteries.
Can’t highlight
FindFeatures.
MapSource MetroGuide
map data required.
Install a map data card
and transfer MetroGuide.
The eMap is programmed to provide “pop-up” messages concerning operational
characteristics and conditions. Refer to Appendix C.
Appendix E
Interface formats are selected from the Setup ‘Interface’
on page 30 of this manual. The input/output lines on your
eMap unit are RS-232 compatible, allowing easy interface to
a wide range of external devices, including PC’s, differential
beacon receivers, marine autopilots and /or a second GPS
receiver.
The NMEA 0183 version 2.3 interface format is
supported by the eMap and enables the unit to drive up to
three NMEA devices.
Wiring/
Interfaces
NMEA 0183 Version 2.3 Approved Sentences:
GPGGA, GPGLL, GPGSA, GPGSV, GPRMB, GPRMC,
GPRTE, GPWPL, GPBOD
GARMIN Proprietary Sentences:
PGRME (estimated error), PGRMZ (altitude),
PSLIB (beacon receiver control)
)*+,-
/&#&+.&I'$
/&#&+!"
/&#&+K<#
(%9<"5
.9""$7#9%
)0"1
&'%%(
$;&2+H"0#
.9""$7#9%
!"#$%
(%9<"5+>J@
/&#&+K<#
/&#&+!"
)9E$%+>L@
DGPS (Differential GPS) corrections are accepted in
RTCM SC-104 version 2.0 format through the ‘Data In’ line.
The GARMIN GBR 21 is the recommended beacon receiver
for use with the eMap. Other beacon receivers with the
correct RTCM format may be used, but may not correctly
display status or allow tuning control from the GPS unit.
The eMap may be hard-wired to a serial connector using
the Data Cable (see Appendix A for ordering information).
Refer to the wiring diagram and the eMap unit data
connection illustrated below.
An optional PC Interface Cable is also available to
connect your eMap to a PC-compatible computer’s serial
port.
39
Appendix F
UTC Time
Offset Chart
To determine your
longitudinal zone: press
and hold the ENTER key
and observe the
longitudinal coordinate in
the Location field.
Match it to a set of values
on the chart to the right
and select the Offset value
to be entered in the UTC
Offset field on the Time
tab of the setup menu.
Note that when you select
a time zone from the ‘Time
Zone’ list, the ‘UTC Time
Offset’ is automatically
entered. You need to enter
the ‘UTC Offset’ only
when not in a listed
time zone.
40
This chart is provided to help you determine the time
offset settings for your current location if it is not in one of
the time zones listed on the Time Setup Page. To change
the UTC Offset, if necessary, press the MENU key twice to
access the Main Menu. Then scroll down to the Setup
option, press the ENTER key to access and then tab over
to the ‘Time’ page. Highlight the UTC Offset field and
press the ENTER key to enter the appropriate offset value
from the chart below. To determine your longitudinal
zone, press and hold the ENTER key and observe the
longitude value in the Mark Waypoint Location field. It
should fall between one of the sets of values on the chart.
Press the ESCAPE key to avoid marking a waypoint.
!"#$%&'(%#)*+,"#-++++++++++++.//0-&
!"#$%$°&'(&!")*%+°
,"*%$$
!")*%+°&'(&!"+)%+°
,""%$$
!"+)%+°&'(&!"-*%+°
,"$%$$
!"-*%+°&'(&!"*)%+°
,$.%$$
!"*)%+°&'(&!""*%+°
,$#%$$
!""*%+°&'(&!$.)%+°
,$)%$$
!$.)%+°&'(&!$#*%+°
,$/%$$
!$#*%+°&'(&!$/)%+°
,$+%$$
!$/)%+°&'(&!$+*%+°
,$-%$$
!$+*%+°&'(&!$0)%+°
,$0%$$
!$0)%+°&'(&!$**%+°
,$*%$$
!$**%+°&'(&!$$)%+°
,$"%$$
!$$)%+°&'(&1$$)%+°
,$$%$$
1$$)%+°&'(&1$**%+°
1$**%+°&'(&1$0)%+°
1$+*%+°&'(&1$/)%+°
1$/)%+°&'(&1$#*%+°
1$#*%+°&'(&1$.)%+°
1$.)%+°&'(&1""*%+°
1""*%+°&'(&1"**%+°
1"**%+°&'(&1"*)%+°
1"*)%+°&'(&1"-*%+°
1"-*%+°&'(&1"+)%+°
1"+)%+°&'(&1")*%+°
1")*%+°&'(&1"#$%+°
2$"%$$
2$*%$$
2$0%$$
2$-%$$
2$+%$$
2$/%$$
2$)%$$
2$#%$$
2$.%$$
2"$%$$
2""%$$
2"*%$$
Appendix G
MapSource CD-ROM data transferred to the map data
card can dramatically increase the mapping capability of the
eMap in both the amount of map detail and available maps.
MetroGuide® maps contain detailed information and are
required for using the Find Menu, Points of Interest,
Addresses and Intersections options. MapSource maps can
also provide U.S. Geological Survey topographical data,
local streets and roads, nautical navigation aids, political
boundaries and all major traffic routes for specified
geographical areas.
The eMap can display a maximum of 525 MapSource
maps depending on the size of each map and size of the data
card (MetroGuide® maps contain so much data that they fill the
capacity of an 8 MB map data card, thus allowing only one
map to be transferred onto the card). If you desire to transfer
many maps you may want to use optional 16, 32, 64, or 128
MB map data cards. Refer to Appendix A for ordering
information.
You cannot view multiple types of MapSource data in the
same location at the same time (one will draw over the other).
When you leave a MetroGuide area for example and enter the
area of a topographic map, the display will change to contour
lines. The same is true when moving from a topo map to a
MetroGuide map.
The MetroGuide maps are at the top of the hierarchy and
will replace any other map information. Here is the list of the
hierarchy for your reference beginning with those titles that
take precedence:
1. City Navigator 2. MetroGuide 3. U.S. Waterways & Lights
4. Fishing Hot Spots 5. Roads and Recreation 6. U. S. Topo
7. WorldMap
You can use the check boxes on the MapSource Info Page
to select which maps will display. Checking the box for a map
allows it to display. Removing the check prevents it from
drawing over a map you want to view. Refer to page 31 for
details.
MapSource
Data
MapSource PC system
requirements are:
Pentium® processor or equivalent,
Windows®95, 98, 2000
or Windows NT 4.0 or ME,
32 MB minimum RAM,
at least 20 MB free hard drive
space,
CD-ROM drive,
256-color display adapter and
monitor,
mouse or other pointing device.
Refer to the MapSource User’s
Manual for more information.
An available serial port is
required for interfacing with the
eMap.
Check the GARMIN website (www.garmin.com) or ask
your GARMIN dealer for MapSource product descriptions.
41
Appendix H
Limited
Warranty
GARMIN Corporation warrants this product to be free from defects in materials and
workmanship for one year from the date of purchase. GARMIN will, at its sole option,
repair or replace any components which fail in normal use. Such repairs or replacement
will be made at no charge to the customer for parts or labor. The customer is, however,
responsible for any transportation costs. This warranty does not cover failures due to abuse,
misuse, improper installation, accident or unauthorized alteration or repairs.
THE WARRANTIES AND REMEDIES CONTAINED HEREIN ARE EXCLUSIVE AND IN
LIEU OF ALL OTHER WARRANTIES EXPRESSED OR IMPLIED, INCLUDING ANY
LIABILITY ARISING UNDER WARRANTY OF MERCHANTABILITY OR FITNESS FOR A
PARTICULAR PURPOSE, STATUTORY OR OTHERWISE. THIS WARRANTY GIVES YOU
SPECIFIC LEGAL RIGHTS, WHICH MAY VARY FROM STATE TO STATE.
IN NO EVENT SHALL GARMIN BE LIABLE FOR ANY INCIDENTAL, SPECIAL,
INDIRECT OR CONSEQUENTIAL DAMAGES, WHETHER RESULTING FROM THE USE,
MISUSE OR INABILITY TO USE THIS PRODUCT OR FROM DEFECTS IN THE PRODUCT. SOME STATES DO NOT ALLOW THE EXCLUSIONS OF INCIDENTAL OR
CONSEQUENTIAL DAMAGES, SO THE ABOVE LIMITATIONS MAY NOT APPLY TO
YOU.
To obtain warranty service, call the GARMIN Customer Service department (913-397-8200)
for a returned merchandise tracking number. The unit should be securely packaged with the
tracking number clearly marked on the outside of the package, and sent freight prepaid and
insured to a GARMIN warranty service station. A copy of the original sales receipt is required as
the proof of purchase for warranty repairs. GARMIN retains the exclusive right to repair or
replace the unit or software or offer a full refund of the purchase price at its sole discretion.
SUCH REMEDY SHALL BE YOUR SOLE AND EXCLUSIVE REMEDY FOR ANY BREACH OF
WARRANTY.
42
Appendix I
Index
A
Addresses, Finding.................................25
Altitude Entry......................................30
Antenna.............................................1, 2
Arrow, Panning..................................5, 14
AutoZoom..........................................................17
Averaging Location................................20
Accessories..........................................35
B
Backlighting/Contrast Key........................1
Backlighting..................................1, 9, 32
Battery Installation/Replacement............2
Battery Level Indicator.............................27
Battery Type...........................................2
Bearing (Direction)..................................4
Beeper Settings.................................9, 32
C
Cautions.........................................................iii
Cities, Finding......................................22
Check Boxes..........................................12
Contrast, Setting..............................1, 9
D
Data Entry.............................................12
Data Fields........................................4-5
Distance (Measuring)............................16
E
Elevation.........................................30
Enter Key...............................................1
Escape (ESC) Key.....................................1
Exits,Finding.....................................23
F
Features.........................................1, 3-8
Find Key............................................1
Find Menu..................................8,21-25
G
Goto Function..................................4, 26
GPS Info Page.......................................30
Grids(Map).............................................33
H
Highlighting....................................11-12
I
In Key..............................................1, 13
Interface Formats.............................34, 39
Intersections, Finding.............................25
K
Key Usage...............................................1
L
Language..............................................32
Location Format..............................33
M
Main Menu........................................7, 27
Maintenance..........................................38
Map Data Cards....................................10
Map Datums..........................................33
Map Orientation.....................................17
Map Page...................................3-5, 13-14
Map Page Options..........................6, 15-17
Map Scale...........................................5, 13
Map Setup..........................................6, 17
MapSource............10, 21, 24, 25, 31, 35, 41
Marking a Waypoint..........................18-19
Maximum Speed....................................27
Measuring Between Points........................16
Menu Key................................................1
Messages...............................................37
Moving a Waypoint.................................19
43
Appendix I
Index
N
Navigation on the Map Page........................4
Nearest Cities List....................................22
Nearest Exits List...................................23
Nearest Points of Interest...........................24
Nearest Waypoints List.............................21
North Reference.................................33
North Up..........................................17, 30
O
Offset, Local Time............................32, 40
Odometer..............................................27
On-screen Buttons...............................11
Operating Mode..................................32
Option Menus ................................11
Orientation, Map.....................................17
Orientation, Satellite View........................30
Out Key..............................................1, 13
P
Panning..............................................5, 14
Pointer Arrow (Location icon)................5
Points of Interest, Finding........................24
Power Key...............................................1
R
Receiver Status........................................30
Rocker Keypad......................................1
Routes................................................4, 29
Activating............................29
Creating................................29
Editing ..........................29
Inverting...............................29
Naming...............................29
Options...............................29
Planning............................................29
S
Setup Options (Map Page).....................6, 17
Setup Options (System).......................32-34
Show Next Street....................................16
Signal Strength Bars.................................30
Sky View Display.....................................30
Specifications.........................................36
Speed...............................................17, 27
44
Starting Up.........................................2-3
Stop Navigation..................................16
Submenus..........................................12-13
Sun and Moon Page (Celestial)....................31
System INfoo Page..................................31
T
Time format...........................................32
Time Settings.....................................32, 40
Time Setup......................................32, 40
Track..................................................4, 28
Track Logs........................................28
Clearing Active.......................28
Deleting...............................28
Setup.....................................28
Track Up............................................17, 30
Trip Computer......................................27
Trip Odometer.........................................27
Troubleshooting......................................38
U
Unit Features..............................1, 4-8
Units of Measure.....................................32
Use Indoors......................................6, 15
Use Outdoors.......................................6
UTC Time.........................................32, 40
W
War nings...............................ii-iii
Warranty..........................................42
Waypoints........................................18-20
Deleting...........................20
Editing.............................20
Finding.............................22
Marking...............................18
Moving..............................19
Naming........................18
Nearest..........................21
Saving As.............................20
Symbols.........................18
Waypoint List...................................21
Wiring/Interfaces................................39
Z
Zoom In/Out................................1, 13
Product Registration
Help us to better support you by completing our on-line registration today!
Have the serial number of your eMap handy and connect to our website
(www.garmin.com). Look for the Product Registration link on the Home Page.
Why should you register your eMap unit?
• Notification of Product Updates
• Notification of New Products
• Lost or Stolen unit tracking
Serial Number
Use this area to record the serial number (8-digit number located on the back of the
unit) in case it is lost, stolen, or needs service. Be sure to keep your original sales
receipt in a safe place or attach a photocopy inside the manual.
Serial Number:
*
*
© 1999-2001 GARMIN Corporation
GARMIN International, Inc.
1200 E 151st Street, Olathe, KS 66062 U.S.A.
GARMIN (Europe) Ltd.
Unit 5, The Quadrangle, Abbey Park Industrial Estate, Romsey, SO51, 9AQ U.K.
GARMIN (Asia) Corporation
No. 68, Jangshu 2nd Road, Shijr, Taipei County, Taiwan
www.garmin.com
Part Number 190-00152-00 Rev. D