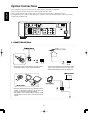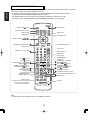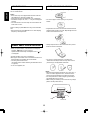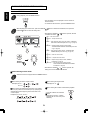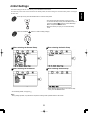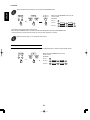
1
Introduction
READ THIS BEFORE OPERATING YOUR UNIT
This symbol is intended to alert the user to the
presence of uninsulated "dangerous voltage"
within the product's enclosure that may be of
sufficient magnitude to constitute a risk of
electric shock to persons.
CAUTION
WARNING
: TO REDUCE THE RISK OF
ELECTRIC SHOCK, DO NOT
REMOVE COVER (OR BACK). NO
USER-SERVICEABLE PARTS
INSIDE. REFER SERVICING TO
QUALIFIED SERVICE PERSONNEL.
This symbol is intended to alert the user to the
presence of important operating and
maintenance (servicing) instructions in the
literature accompanying the appliance.
: TO REDUCE THE RISK OF FIRE OR ELECTRIC SHOCK,
DO NOT EXPOSE THIS APPLIANCE TO RAIN OR MOISTURE.
Note to CATV System Installer :
This reminder is provided to call the CATV system installer’s attention to Article 820-40 of the NEC that provides
guidelines for proper grounding and, in particular, specifies that the cable ground shall be connected to the
grounding system of the building, as close to the point of cable entry as practical.
FCC INFORMATION
This equipment has been tested and found to comply with the limits for a Class B digital device, pursuant to Part 15 of
the FCC Rules. These limits are designed to provide reasonable protection against harmful interference in a residential
installation. This equipment generates, uses and can radiate radio frequency energy and, if not installed and used in
accordance with the instructions, may cause harmful interference to radio communications. However, there is no
guarantee that interference will not occur in a particular installation. If this equipment does cause harmful interference to
radio or television reception, which can be determined by turning the equipment off and on, the user is encouraged to
try to correct the interference by one or more of the following measures:
Reorient or relocate the receiving antenna.
Increase the separation between the equipment and receiver.
Connect the equipment into an outlet on a circuit different from that to which the receiver is connected.
Consult the dealer or an experienced radio/TV technician for help.
Caution : Any changes or modifications in construction of this device which are not expressly approved by the party
responsible for compliance could void the user’s authority to operate the equipment.
FOR YOUR SAFETY
Units shipped to the U.S.A and Canada are designed for operation on 120 V AC only.
Safety precaution with use of a polarized AC plug.
However, some products may be supplied with a nonpolarized plug.
U.S.A
CANADA
120 V
CAUTION
: To prevent electric shock, match wide blade of plug to wide slot, fully
insert.
ATTENTION
•
•
•
•
•
•
•
•
: Pour éviter chocs électriques, introduire la lame la plus large de la
fiche dans la borne correspondante de la prise et pousser jusqu’ au
fond.
Avoid high temperatures. Allow for sufficient heat dispersion when installed on a rack.
Keep the set free from moisture, water, and dust.
Do not let foreign objects in the set.
Handle the power cord carefully. Hold the plug when unplugging the cord.
Unplug the power cord when not using the set for long periods of time.
Do not obstruct the ventilation holes.
Do not let insecticides, benzene, and thinner come in contact with the set.
Never disassemble or modify the set in any way.
2
SAFETY INSTRUCTION
1. Read Instructions - All the safety and operating instructions should
be read before the product is operated.
2. Retain instructions - The safety and operating instructions should
be retained for future reference.
3. Heed Warnings - All warnings on the product and in the operating
instructions should be adhered to.
4. Follow Instructions - All operating and use instructions should be
followed.
5. Cleaning - Unplug this product from the wall outlet before cleaning.
Do not use liquid cleaners or aerosol cleaners. Use a damp cloth for
cleaning.
6. Attachments - Do not use attachments not recommended by the
product manufacturer as they may cause hazards.
7. Water and Moisture - Do not use this product near water - for
example, near a bath tub, wash bowl, kitchen sink, or laundry tub; in
a wet basement, or near a swimming pool; and the like.
8. Accessories - Do not place this product on an unstable cart, stand,
tripod, bracket, or table. The product may fall, causing serious injury
to a child or adult, and serious damage to the product. Use only with
a cart, stand, tripod, bracket, or table recommended by the
manufacturer, or sold with the product. Any mounting of the product
should follow the manufacturer’s instructions, and should use a
mounting accessory recommended by the manufacturer.
9. A product and cart combination should be moved with care. Quick
stops, excessive force, and uneven surfaces
may cause the product and cart combination
to overturn.
10. Ventilation - Slots and openings in the
cabinet are provided for ventilation and to
ensure reliable operation of the product and
to protect it from overheating, and these
openings must not be blocked or covered.
The openings should never be blocked by
placing the product on a bed, sofa, rug, or other similar surface.
This product should not be placed in a built-in installation such as a
bookcase or rack unless proper ventilation is provided or the
manufacturer’s instructions have been adhered to.
11. Power Sources - This product should be operated only from the
type of power source indicated on the marking label. If you are not
sure of the type of power supply to your home, consult your product
dealer or local power company. For products intended to operate
from battery power, or other sources, refer to the operating
instructions.
12. Grounding or Polarization - This product may be equipped with a
polarized alternating-current line plug (a plug having one blade
wider than the other). This plug will fit into the power outlet only one
way. This is a safety feature. If you are unable to insert the plug
fully into the outlet, try reversing the plug. If the plug should still fail
to fit, contact your electrician to replace your obsolete outlet. Do not
defeat the safety purpose of the polarized plug.
Alternate Warnings - This product is equipped with a three-wire
grounding-type plug, a plug having a third(grounding) pin. This plug
will only fit into a grounding-type power outlet. this is a safety
feature. If you are unable to insert the plug into the outlet, contact
your electrician to replace your obsolete outlet. Do not defeat the
safety purpose of the grounding-type plug.
13. Power-Cord Protection - Power-supply cords should be routed so
that they are not likely to be walked on or pinched by items placed
upon or against them, paying particular attention to cords at plugs,
convenience receptacles, and the point where they exit from the
product.
14. Outdoor Antenna Grounding - If an outside antenna or cable
system is connected to the product, be sure the antenna or cable
system is grounded so as to provide some protection against
voltage surges and built-up static charges. Article 810 of the
National Electrical Code, ANSI/NFPA 70, provides information with
regard to proper grounding of the mast and supporting structure,
grounding of the lead-in wire to an antenna discharge unit, size of
ENGLISH
grounding conductors, location of antenna-discharge unit,
connection to grounding electrodes, and requirements for the
grounding electrode. See Figure 1.
15. Lightning - For added protection for this product during a lightning
storm, or when it is left unattended and unused for long periods of
time, unplug it from the wall outlet and disconnect the antenna or
cable system. This will prevent damage to the product due to
lightning and power-line surges.
16. Power Lines - An outside antenna system should not be located in
the vicinity of overhead power lines or other electric light or power
circuits, or where it can fall into such power lines or circuits. When
installing an outside antenna system, extreme care should be taken
to keep from touching such power lines or circuits as contact with
them might be fatal.
17. Overloading - Do not overload wall outlets, extension cords, or
integral convenience receptacles as this can result in a risk of fire or
electric shock.
18. Object and Liquid Entry - Never push objects of any kind into this
product through openings as they may touch dangerous voltage
points or short-out parts that could result in a fire or electric shock.
Never spill liquid of any kind on the product.
19. Servicing - Do not attempt to service this product yourself as
opening or removing covers may expose you to dangerous voltage
or other hazards. Refer all servicing to qualified service personnel.
20. Damage Requiring Service - Unplug this product form the wall
outlet and refer servicing to qualified service personnel under the
following conditions:
a) When the power-supply cord or plug is damaged,
b) If liquid has been spilled, or objects have fallen into the product,
c) If the product has been exposed to rain or water,
d) If the product does not operate normally by following the
operating instructions. Adjust only those controls that are
covered by the operating instructions as an improper adjustment
of other controls may result in damage and will often require
extensive work by a qualified technician to restore the product to
its normal operation.
e) If the product has been dropped or damaged in any way, and
f) When the product exhibits a distinct change in performance - this
indicates a need for service.
21. Replacement Parts - When replacement parts are required, be
sure the service technician has used replacement parts specified by
the manufacturer or have the same characteristics as the original
part. Unauthorized substitutions may result in fire, electric shock, or
other hazards.
22. Safety Check - Upon completion of any service or repairs to this
product, ask the service technician to perform safety checks to
determine that the product is in proper operating condition.
23. Wall or Ceiling Mounting - The product should be mounted to a
wall or ceiling only as recommended by the manufacturer.
24. Heat - The product should be situated away from heat sources
such as radiators, heat registers, stoves, or other products
(including amplifiers) that produce heat.
3
ENGLISH
CONTENTS
• Introduction
READ THIS BEFORE OPERATING YOUR UNIT
SAFETY INSTRUCTION
| 3
• System Connections
| 2
| 6
• Controls & Displays
FRONT PANEL CONTROLS(VR-670)
| 9
UNIVERSAL REMOTE CONTROLS
| 10
ENTERING A SETUP CODE
| 11
OPERATING COMPONENTS WITH REMOTE CONTROL
REMOTE CONTROL OPERATION RANGE
| 12
LOADING BATTERIES
| 13
ACTIVE SUBWOOFER CONTROLS(ASW-670)
| 13
OPERATION OF ACTIVE SUBWOOFER
| 14
• Basic Operation
LISTENING TO A PROGRAM SOURCE
| 12
| 15
• Operation of DVD player
PRELIMINARY KNOWLEDGE ABOUT DISCS
| 17
ABOUT MP3 DISCS
| 18
SYMBOL ABOUT INVALID OPERATION
| 18
CARE AND HANDLING OF DISCS
| 18
DEFINITION OF TERMS
| 19
BASIC PLAYBACK
| 20
DISPLAYING DISC INFORMATION DURING PLAYBACK
| 23
PLAYING THE DESIRED SECTION OF DISC
| 24
PLAYING A SPECIFIC ITEM [DVD Video only]
| 26
REPEAT PLAYBACK
| 27
PLAYING TRACKS IN RANDOM ORDER [CD only]
| 28
PLAYING TRACKS IN DESIRED ORDER [CD only]
| 28
CHANGING THE AUDIO LANGUAGE [DVD Video only]
| 30
CHANGING THE SUBTITLE LANGUAGE [DVD Video only]
| 30
CHANGING THE CAMERA ANGLE [DVD Video only]
| 31
ZOOMING IN/OUT A SCENE [DVD Video only]
| 31
CHANGING THE VIDEO SIGNAL FORMAT
| 32
CHANGING THE COMPONENT VIDEO OUTPUT SIGNAL
| 32
• Initial Settings
| 33
SETTING THE GENERAL SETUP | 34
SETTING THE AUDIO SETUP | 37
SETTING THE PREFERENCE | 38
• Operation of Tuner
LISTENING TO RADIO BROADCASTS
| 43
4
• Troubleshooting Guide
• Specifications
| 53
• DVD Language Code List
• Setup Code Table
| 51
| 55
| 56
5
ENGLISH
• Operation of Other Functions
RECORDING WITH TAPE DECK
| 45
DIGITAL AUDIO RECORDING WITH MD RECORDER
| 45
SETTING THE CLOCK
| 46
OPERATING THE SLEEP TIMER
| 47
OPERATING THE TIMER
| 47
ADJUSTING THE BRIGHTNESS OF THE DISPLAY
| 50
ENGLISH
System Connections
• Do not plug the AC input cord into the wall AC outlet until all connections are completed.
• Be sure to observe the color coding when connecting audio and video cords.
• Make connections firmly and correctly. If not, it can cause loss of sound, noise or damage to the unit.
• The supplied cords are a audio cord for subwoofer, a composite video cord and speaker cables only. Other cords are
commercially-available cords.
2
1
2
5
4
4
3
1. CONNECTING ANTENNAs
• Change the position of the FM indoor antenna until you
get the best reception of your favorite FM stations.
• A 75Ω outdoor FM antenna may be used to further
improve the reception. Disconnect the indoor
antenna before replacing it with the outdoor one.
• Place the AM loop antenna as far as possible from the
receiver, TV set, speaker cords and the AC input cord
and set it to a direction for the best reception.
• If the reception is poor with the AM loop antenna, an AM
outdoor antenna can be used in place of the AM loop
antenna.
6
ENGLISH
2. CONNECTING AUDIO/VIDEO COMPONENTs
• The AUX IN jacks may be connected to an additional audio component such as a CD player, a tape deck, etc.
• The AUDIO OUT jacks may be connected to an additional amplifier or receiver.
• The COMPONENT VIDEO OUTs of this unit are capable of outputting either conventional interlacing video signal or
progressively scanned video signal (that can reproduce high-density pictures with less flicker)
• According to the kinds of VIDEO OUTs, the excellence in picture quality is as follows :
Progressive “COMPONENT” > Interlaced “COMPONENT” > “S-VIDEO” > “(composite)VIDEO”
• When making COMPONENT VIDEO connections, connect “Y” to “Y”, “PB/CB” to “CB”(or “B-Y”, “PB”) and “PR/CR” to “CR”(or
“R-Y”, “PR”).
• Depending on the type of the COMPONENT VIDEO INs of your TV, be sure to set the COMPONENT VIDEO OUTPUT to the
corresponding setting.(Refer to “CHANGING THE COMPONENT VIDEO OUTPUT SIGNAL” on page 32.)
Notes :
• When the “Progressive” is selected as the video output signal, the S-VIDEO and (composite) VIDEO OUTs cannot output the
normal video signals, meaning the picture will not be shown.
• When the progressive video signals are input into non-progressive COMPONENT VIDEO INs of your TV, the picture may not
be shown normally, too. Therefore, when the progressive COMPONENT VIDEO INs of TV are not connected to, you should
select the “Interlace” as the video output signal.
• Do not connect the unit to the TV through a VCR. Otherwise the picture may be disturbed due to the copy protection function.
• CONSUMERS SHOULD NOTE THAT NOT ALL HIGH DEFINITION TELEVISION SETS ARE FULLY COMPATIBLE WITH
THIS PRODUCT AND MAY CAUSE ARTIFACTS TO BE DISPLAYED IN THE PICTURE. IN CASE OF 525 OR 625
PROGRESSIVE SCAN PICTURE PROBLEMS, IT IS RECOMMENDED THAT THE USER SWITCH THE CONNECTION TO
THE “STANDARD DEFINITION” OUTPUT. IF THERE ARE QUESTIONS REGARDING OUR TV SET COMPATIBILITY WITH
THIS MODEL 525p AND 625p DVD PLAYER, PLEASE CONTACT OUR CUSTOMER SERVICE CENTER.
3. CONNECTING DIGITAL OUT
• You can enhance the sound quality be connecting this
OPTICAL DIGITAL OUT to the OPTICAL DIGITAL IN of an
amplifier, MD recorder, etc.
The digital audio signal from a disc is directly transferred.
If you connect to a DTS or Dolby Digital decoder, etc. or an
amplifier with built-in decoder, you can enjoy theater-quality
audio in your home.
7
ENGLISH
continued
Notes :
• To output the digital audio signals, you should set the SPDIF Output to “(SPDIF/) RAW” or “(SPDIF/) PCM” (Refer to “When
selecting the SPDIF Output” on page 35.)
• When the DIGITAL OUT of the unit is connected to the DIGITAL IN of an amplifier which does not contain the Dolby Digital or
DTS decoder, etc.(which processes the bitstream digital), you should set the SPDIF Output to “(SPDIF/)PCM”. If not, loud
noise or no sound may be heard from the speakers, and it may be harmful to your ears and damage the speaker.
• Even when the DIGITAL OUT is connected to MD recorder or CD recorder, because digital recording cannot perform properly
for the digital audio signals(such as Dolby Digital, DTS bitstream, etc.) other than PCM(2 channel) of 48 or 44.1 kHz, be sure
to check the digital audio signal format before digital recording.(For details, refer to the operating instructions of the
component connected.)
Audio output from the unit’s OPTICAL DIGITAL OUT
Disc
Audio recording
format
Audio output
Dolby Digital
Dolby Digital bitstream (2~5.1ch) or
PCM(48 kHz/16bit) (2ch) (Note 1)
DTS
DTS bitstream or PCM(48 kHz/ 16
bit) (2ch) (Note 1)
DVD
Video
MPEG-2
Linear PCM(48/96
kHz, 16/20/24bit)
CD /
MP3 disc
Linear PCM
Note 1 : The type of audio output from the OPTICAL
DIGITAL OUT can be selected by the SPDIF output
settings.
(Refer to “When selecting the SPDIF Output” on
page 35.)
• Linear PCM is a signal recording format used in music
CDs. While music CDs are recorded in 44.1 kHz/16 bit,
DVD Videos are recorded in 48 kHz/16 bit to 96 kHz/24 bit.
• “DTS” and “DTS 2.0+ Digital Out” are trademarks of Digital
Theater Systems, Inc.
PCM(48 kHz/ 16 bit) (2ch)
PCM(48 kHz/ 16 bit)
Linear PCM (44.1 kHz)
4. CONNECTING SPEAKERS
• Be sure to connect speakers firmly and correctly according
to the channel(left and right) and the polarity(+and-).
If the connections are faulty, no sound will be heard from
the speakers, and if the polarity of the speaker connection is
incorrect, the sound will be unnatural and lack bass.
• Connect the SUBWOOFER PREOUT jack to the
active(powered) subwoofer.(For details on the operation of
the subwoofer, refer to “OPERATION OF ACTIVE
SUBWOOFER” on page 14.)
Caution :
• Be sure to use the speakers with the impedance of 6 ohms
or above.
• Do not let the bare speaker wires touch each other or any
metal part of this unit. This could damage this unit and/or
the speakers
SPEAKER PLACEMENT
Place the speakers as follows :
• Front speakers: Place the front speakers with their front
surfaces as flush with TV or monitor screen
as possible.
• Subwoofer: Place the subwoofer any where in the front as
desired because the low frequencies it
reproduces are non-directional.
5. AC INPUT CORD
Plug this cord into a wall AC outlet.
8
Controls & DIsplays
ENGLISH
FRONT PANEL CONTROLS(VR-670)
PHONES
1. POWER button
2. FUNCTION SELECT button
3. VOLUME UP/DOWN (+/-) buttons
4. TONE/BALANCE SELECT button
5. PRESET TUNING UP/DOWN,
FORWARD/BACKWARD SKIP(
/
buttons
6. PLAY/PAUSE( / ) button
7. STOP( ) button
8. OPEN/CLOSE( ) button
9. PHONES jack
10. STANDBY indicator
11. DISC TRAY
12. REMOTE SENSOR
13. FLUORESCENT DISPLAY
• For details, see below.
)
FLUORESCENT DISPLAY
9
ENGLISH
UNIVERSAL REMOTE CONTROLS
This universal remote control can operate not only this unit but also most popular brands of video components
such as TVs, VCRs, cable boxes, satellite receivers, etc.
• To operate 4 components other than this unit, you should enter the setup code for each component.
(For details, refer to “ENTERING A SETUP CODE” on page 11.)
• The numbered buttons on the remote control have different functions in other device modes.
For details, refer to “FUNCTION TABLE of the NUMBERED BUTTONS” on the next page.
OPEN/CLOSE(
POWER button
) button
FUNCTION SELECT buttons
DISPLAY button
MENU button
DIMMER button
TOP MENU button
CURSOR CONTROL( / / / ),
ENTER buttons
LISTENING MODE button
TONE/BALANCE SELECT button
SEARCH button
AUDIO button
NUMERIC(0~9, +10) buttons
SUBTITLE button
ANGLE button
CLEAR button
STEP(
PROGRAM button
ZOOM button
TUNING UP( ), FORWARD
) button
SEARCH(
PLAY/PAUSE( / ) button
PRESET TUNING UP( ),
) button
FORWARD SKIP(
STOP( ) button
) button
SLOW( ) button
TUNING DOWN( ), BACKWARD
) button
SEARCH(
PRESET TUNING DOWN( ),
) button
BACKWARD SKIP(
REPEAT button
REPEAT A-B button
SETUP button
PAL/NTSC button
TIME ADJUST button
SLEEP/TIMER button
RANDOM PLAY button
VOLUME UP/DOWN(+/-) buttons
INTERLACED/PROGRESSIVE button
MUTING button
DEVICE buttons
SET LED
To operate the desired component with
this remote control, first select the
corresponding DEVICE button.
Note :
• On the remote control, the PBC button is not available for this unit.
10
ENGLISH
FUNCTION TABLE of the NUMBERED BUTTONS
Notes:
• Some functions for each component may not be available or may work differently.
• Depending on other kinds of components that are available for each DEVICE button, some functions may not be available or
may work differently, too.
• For details about functions, refer to the operating instructions of each component.
ENTERING A SETUP CODE
• This remote control can control up to 4 different components.
• Before operating video components other than this unit with using this remote control, the setup code for each component
should be entered.
1
3
Turn on the component you want to control
2
Press and hold down both the ENTER
button and the DEVICE button you want for
more than 1 second.
4
Enter a 3 digit code, aiming the remote
control at the remote sensor on the
component.
Example) When entering “001”.
• If entering is performed successfully, the SET LED will
flicker twice.
• To be sure that the setup code is correct, press the
POWER button. If your component is turned off, the setup
code is correct.
• When your component is not turned off, repeat the above
steps 2 to 4, trying each code for your component until
you find one that works.
Notes:
• If the SET LED did not flicker twice, then repeat the above
steps 3 to 4 and try entering the same code again.
• Manufacturers may use different setup codes for the
same product category. For that reason, it is important
that you check to see if the code you have entered
operates as many controls as possible. If only a few
functions operate, check to see if another code will work
with more buttons.
• The SET LED will flicker once.
Note:
• The MAIN button is unavailable for the components other
than this unit.
5
Find the setup code according to the type and
the brand name of your component, referring
to “Setup Code Table” on page 56.
Repeat the above steps 1 to 4 for each of
your components.
11
ENGLISH
OPERATING COMPONENTS WITH REMOTE CONTROL
1
Enter the setup code for each component other than this unit you wish to control.
For details, refer to “ENTERING A SETUP CODE” on page 11.
2
Turn on the component you want to operate.
3
Press the DEVICE button on the remote control corresponding to the component you wish
to operate.
4
Aim the remote control at the REMOTE SENSOR of the component you wish to control and
press the button corresponding to the operation you want.
Example) When selecting “MAIN” to operate this unit.
REMOTE CONTROL OPERATION RANGE
• Use the remote control unit within a range of about
5 meters (16 feet) and angles of up to 30 degrees
aiming at the remote sensor.
12
• When the remote control does not operate, the old batteries should be replaced. In this case, load new batteries within
several minutes after removing old batteries.
• If the batteries are removed or have been exhausted for a longer period of time, memorized contents will be cleared.
Should this happen, you should memorize them again.
1
Remove the cover.
2
Load two batteries (“AAA” size, 1.5V)
matching the polarity.
• Remove the batteries when they are not used for a
long time.
• Do not use the rechargeable batteries(Ni-Cd type).
• Be sure to use alkaline batteries.
ACTIVE SUBWOOFER CONTROLS(ASW-670)
POWER
OFF
ON
VOLUME
MIN
MAX
13
ENGLISH
LOADING BATTERIES
OPERATION OF ACTIVE SUBWOOFER
ENGLISH
• Before operation of main unit, first set the active subwoofer as desired for optimum performance.
Enter the standby mode.
1
2
• The SIGNAL IN indicator lights up in amber.
This means that the subwoofer is not disconnected from
the AC mains and a small amount of current is retained to
support the operation readiness.
• To switch the power off, push the POWER switch again.
Then power is cut off and the SIGNAL IN indicator goes
off.
POWER
OFF
ON
In the standby mode, set the SIGNAL switch
to the desired power-operation mode.
• Depending on the selected mode the subwoofer is turned
on or off as follows :
* ON: The subwoofer is turned on and enters the operating mode.
* AUTO: Only when the signal is being input, it is automatically
turned on to enter the operating mode.
If the signal is not input for more than 10 minutes, it will be
automatically turned off to enter the standby mode.
* OFF: The subwoofer is turned off and enters the standby mode.
• If the AUTO mode is set to, you need not turn the
subwoofer off cumbersomely after every use.
3
While playing any source at the desired
listening level on the main unit, adjust the
volume balance between this subwoofer and
your front speakers.
Notes :
• Extreme high volume setting may damage your subwoofer.
• Once the volume balance between this subwoofer and
your front speakers is adjusted, you can adjust the volume
of your whole speaker systems by using only the main
unit’s volume control.
VOLUME
MIN
4
MAX
Adjust the crossover frequency according to
your front speaker’s frequency characteristics.
• In case of combination of this subwoofer with the supplied
front speakers, because the frequency range of the front
speakers is 140Hz~20kHz, adjust the crossover frequency
to 140Hz or slightly higher.
* The crossover frequency adjustment determines the highest
frequency your subwoofer will reproduce. It allows a seamless
transition from subwoofer to front speakers.
5
Set the PHASE switch to the position (0˚ or
180˚)where the optimum bass effect can be
obtained.
• Normally the PHASE switch is to be set to the “0˚”
(normal)position. However, according to your speaker
systems or the listening condition, there may be a cause
when better sound quality is obtained by setting this switch
to the “180˚”(reverse) position. Select the better position by
monitoring the sound.
14
Before operation
• Before operating this unit with the supplied remote control, refer to "UNIVERSAL REMOTE CONTROLS" on page 10 for details
about operation.
LISTENING TO A PROGRAM SOURCE
Turn the power on.
1
• Each time the POWER button is pressed, the unit is turned on to
enter the operating mode(the STANDBY indicator lights up in
blue)or off to enter the standby mode(the STANDBY indicator lights
up in amber).
• In the standby mode, if the PLAY/PAUSE( / ) or
OPEN/CLOSE( ) button is pressed, the unit can be also turned on.
Standby mode
This means that the unit is not disconnected from the AC mains and
a small amount of current is retained to support the operation
readiness.
2
Turn on the supplied active subwoofer and
source component for playback.
• For details on operating the supplied active subwoofer, refer to
“OPERATION OF ACTIVE SUBWOOFER” on page 14.
Select the desired input source.
3
• Each time the FUNCTION SELECT button on the front panel, the
input source changes as follows :
DVD
FM
AM
TAPE
AUX
(frequency display)
Operate the selected component for playback.
4
Adjust the(overall) volume to a comfortable listening level.
5
To mute the sound.
6
• “MUTE” flickers.
• To resume the pervious sound level, press the MUTING button
again.
To listen with the headphones.
7
PHONES
• Then the sound from the speakers is cut off.
15
ENGLISH
Basic Operation
Adjusting the tone(bass and treble) and balance
• You can adjust the tone(bass and treble) and the sound volume balance between the left and right speakers as desired.
• Each time this button is pressed, the mode changes and is
displayed for several seconds as follows :
TRBL
BASS
BAL
ENGLISH
Select the desired mode
8
(Treble)
(Balance)
• When the mode display disappears, press this button
again.
• On the remote control, when adjusting the treble or bass,
use the CURSOR UP/DOWN( / ) buttons and when
adjusting the sound volume balance, use the CURSOR
LEFT/RIGHT( / ) buttons.
• To complete the adjustment, repeat the above steps 8 and
9.
Notes:
• Extreme settings at high volume may damage your
speakers.
• In general, we recommend the bass, treble and balance to
be adjusted to 0(flat)level.
At the desired mode, adjust it as desired.
9
Selecting a listening mode
• While playing the selected input source
• Each time this button is pressed, the listening mode
changes depending on the selected input source as
follows :
In case of selecting DVD
(Dolby VS REF
Dolby VS WIDE) or <DOLBY HP>
STEREO
In case of selecting a input source except DVD
(VS REF
VS WIDE) or <HP SOUND>
STEREO
( ) : Possible only when listening via the speakers.
< > : Possible only when listening via the headphones.
Listening modes
• Dolby Virtual Speaker
This mode creates a virtual surround sound field as few as two front speakers and subwoofer, allowing you to experience
listening from 5.1 channel speakers.
* Dolby Virtual Speaker Reference(“Dolby VS REF”)
The width of the front sound image is defined by the actual distance between front speakers.
* Dolby Virtual Speaker Wide(“Dolby VS WIDE”)
The width of the front sound image seems to extend beyond the front speakers.
• Dolby Headphone(“DOLBY HP”)
This mode simulates 5.1 channel surround sound, which allows you to enjoy 5.1 channel surround sound through 2 channel
headphones, just like listening from 5.1 channel speakers.
• Dolby Virtual Speaker and Dolby Headphone modes are effective not only for 5.1 channel sources but also for stereo(2
channel) sources.
Manufactured under license from Dolby Laboratories. “Dolby”, “Pro Logic” and the double-D symbol are trademarks of Dolby
Laboratories.
• Virtual Speaker
This mode simulates a virtual 5.1 channel surround sound and includes two listening modes(Virtual Speaker Reference(“VS
REF”) and Virtual Speaker Wide(“VS WIDE”) like Dolby Virtual Speaker mode.
• Headphone Sound(“HP SOUND”)
This mode simulates a virtual 5.1 channel surround sound through 2 channel headphones like Dolby Headphone mode.
• The Virtual Speaker and Headphone Sound modes are effective for stereo(2channel) sources only.
16
Operation of DVD player
Playable disc types
This unit can play not only the discs bearing any of the
following marks but also CD-R/CD-RW discs recorded with
Audio CD or MP3 format and DVD-R discs recorded with
DVD-Video format.
Markings on the DVD Videos
Mark
Description
Indicates the region code where the disc can be
played.
DVD VIDEO
CD
Disc size
3 (8 cm) /
5 (12 cm)
3 (8 cm) /
5 (12 cm)
Played sides
One or both
One side only
Contents
Audio + Video
Audio
Logo mark
Number of audio languages recorded with
multiple audio languages. The number in the
mark indicates the number of audio languages.
(Up to 8 languages)
Number of subtitle languages recorded with the
multiple subtitle languages. The number in the
mark indicates the number of subtitle languages.
(Up to 32 languages)
“
” is a trademark of DVD Format/Logo Licensing
Corporation.
Notes :
• This unit cannot play discs (such as DVD-AUDIO, SACD,
CD-ROM, DVD-RW, DVD-RAM, DVD-ROM, etc.) other
than those listed above.
Playing them may generate noise and damage speakers.
• CD-R, CD-RW and DVD-R discs will play only if they are
finalized.
• This unit cannot play CD-R, CD-RW and DVD-R discs that
include unavailable contents or are recorded in nonstandized condition of recording.
• Depending on the disc characteristics or recording
condition, etc. some of CD-R, CD-RW and DVD-R discs
may not be played properly.
• Depending on the countries, this unit conforms to either the
NTSC color system for U.S.A, Canada, etc. or the PAL for
Europe, Australia, China, etc.
Number of angles recorded from the multiple
camera angles. The number in the mark
indicates the number of angles. (Up to 9 angles)
Aspect ratio and TV screen type.
“16:9”, “4:3”, etc. stands for aspect ratio, “LB” for
letter box, “PS” for pan-scan, “WIDE” for wide
screen.
Notes on copyright
• Please check the copyright laws in your country to record
from DVD Video, CD and MP3 disc, etc. Recording of
copyrighted material may infringe copyright laws.
• DVD Video discs are protected by the copyguard system,
and any recordings made from these discs will be
distorted.
Notes on DVD Videos
Region code
• DVD players and DVD Videos have their own Region Code
numbers which are assigned to each country or area as
shown below. DVD players are set to your Region Code
number at the factory. As a result, if the region code
number of this DVD player is different from that of the DVD
Video, playback of the DVD Video will not be allowed by
the DVD player.
Major
countries
or area
All
regions
North
America
Europe,
Japan,
Middle East
Southeast
Asia
Oceania,
South
America
Russia
This product incorporates copyright protection technology
that is protected by U.S. patents and other intellectual
property rights. Use of this copyright protection technology
must be authorized by Macrovision, and is intended for
home and other limited viewing uses only unless otherwise
authorized by Macrovision. Reverse engineering or
disassembly is prohibited.
China
Playable
Region
code
Examples of playable DVD Videos :
• In U.S.A:
• In Europe:
17
ENGLISH
PRELIMINARY KNOWLEDGE ABOUT DISCS
ABOUT MP3 DISCS
CARE AND HANDLING OF DISCS
ENGLISH
This unit can play back MP3 files on a private CD-R/CD-RW
disc or commercial CD.
• In handling a disc, hold it carefully with edges.
Notes:
• Some discs may not be played back because of the disc
characteristics or recording condition, etc.
• Folder and file names are displayed up to 14 characters.
• Characters except “A~Z”, “0~9”, “ - ” may be not displayed
correctly.
• The order shown in the menu may not be the same to the
order shown in a PC.
• Do not stick paper or write anything on the printed
surface.
Note for making a private MP3 disc using a CD-R/CD-RW
disc:
• We recommend to record MP3 files in 44.1 kHz sampling
frequency / 128 kbps bit rate.
• Fingermarks and dust on the recorded surface should be
carefully wiped off with a soft cloth. Wipe straight from the
inside to the outside of the disc.
SYMBOL ABOUT INVALID OPERATION
• Always keep the discs in their cases after use to protect
them from dust and scratches.
• When you press a button, if the unit does not accept its
operation,
appears on the TV screen.
Operations are occasionally unacceptable even if
is
not displayed.
Invalid operation may occur as expected if :
• The region code number of the unit is different from that of
the DVD Video and playback will not be allowed.
• The rating level function works.
(For details, refer to “When selecting the Parental Control”
on page 39.)
• A disc is not playable, etc.
• Do not use a cracked, deformed, or repaired disc.
These discs are easily broken and may cause serious
personal injury and apparatus malfunction.
Notes:
• Because the temperature inside this unit is very high, in
case of no further playback of disc, unload the disc to
prevent the high temperature from deforming the disc.
• Do not expose discs to direct sunlight, high humidity or
high temperature for a long time.
• When loading or unloading a disc in the disc tray, always
place it with the printed side up.
Tray
18
Printed side
Component video
Video signals with three channels of separate information
that makes up the picture. There are some types of
component video, such as Y/CB(Pb)/CR(Pr) and R/G/B.
DVD Video
This refers to a high-density optical disc on which highquality pictures and sound have been recorded by means
of digital signals. Incorporating a new video compression
technology (MPEG-2) and high-density recording
technology. DVD Video enables esthetically pleasing fullmotion video to be recorded over long periods of time (for
instance, a whole movie can be recorded).
DVD Video has a structure consisting of two 0.6 mm thin
discs which are adhered to each other. Since the thinner the
disc, the higher the density at which the information can be
recorded, a DVD Video has a greater capacity than a single
1.2 mm thick disc. Since the two thin discs are adhered to
each other, there is the potential to achieve double-sided
play sometime in the future for even longer duration play.
Bitstream
The digital signal form of multichannel audio data (e.g., 5.1
channel) before it is decoded into its various channels.
Linear PCM
PCM stands for Pulse Code Modulation. Linear PCM is the
usual digital method without compression, used for audio
playback of audio CDs, DVD Videos, etc.
Title, Title number (DVD Video)
The title is the largest unit of the video/audio recording in
DVD Videos. Usually, the title corresponds to a movie of
video software or an album (or a piece) of music software.
Title numbers are sequential numbers assigned to titles.
MPEG
MPEG stands for Moving Picture Expert Group. It is regarded
as an international standard for compressing and restoring
digital video and audio signal. “MPEG” standards include
MPEG-1, MPEG-2 and MPEG-4. Video CD and MP3 are
based on MPEG-1, while DVD Video is based on MPEG-2.
Chapter, Chapter number (DVD Video)
Chapters are divisions, which are smaller than the titles, of
the contents recorded on DVD Videos. Every title is
composed of more than one chapter. Chapter numbers are
the sequential numbers assigned to the chapters in a DVD
Video.
MP3
MP3 is an audio data reduction format, which stands for
MPEG-1 Audio Layer 3. Using MP3, you can achieve a data
reduction of about 1:10.
Track number (CD)
Track numbers are used to designate the various sections of
a disc.
Aspect ratio (DVD Video)
The aspect ratio is the ratio between the vertical and
horizontal size of the picture displayed on a TV screen. The
aspect ratio of normal TV screen is 4:3 while that of the
wide-screen TV and HDTV screen is 16:9.
Folder (MP3 disc)
Folder is the largest unit of the contents recorded on MP3
discs.
Subtitle (DVD Video)
Some DVD Videos contain the recording of more than one
subtitle languages. With these discs, this unit can select one
of the subtitle languages as desired during playback.
File (MP3 disc)
Each material (song) is recorded on a file.
Files may be grouped into a folder by artist, album, category,
etc.
• DVD Video structure
Angle (DVD Video)
Some DVD Videos contains scenes which have shot
simultaneously from multiple camera angles. With these
discs, the same scene can be viewed from each of these
different angles.
• CD structure
Interlaced scan
In the conventional video system, a picture is shown on the
screen in two halves. The interlaced scanning system places
lines of the second half of the picture in-between lines of the
first half of the picture.
• MP3 disc structure
On an MP3 disc, a folder can be a member of another folder,
creating hierarchical folder layers. If you are familiar with a
personal computer, you may easily understand the
hierarchical file/folder construction.
Progressive scan
Progressive scanning displays all the horizontal lines of a
picture at one time, as a single frame.
Composite video
A single video signal commonly used in most consumer
video products that contains all luminance, color, and
synchronization information.
S-video
A video signal which improves picture quality over the
standard composite video signal.
19
ENGLISH
DEFINITION OF TERMS
Before starting playback
ENGLISH
For your convenience, the OSD(On-Screen-Display) language of this unit may be set to English as initial setting. If you want to
change the OSD language to French, Italian, German, etc., please refer to “When selecting the OSD Language” on page 35.
BASIC PLAYBACK
Preparations
• Turn on the TV and select the video input source connected to the unit.
• Set the TV screen type and the COMPONENT VIDEO OUTPUT SIGNAL correctly to match your TV.(Refer to “When selecting
the TV Display” on page 34 and “CHANGING THE COMPONENT VIDEO OUTPUT SIGNAL” on page 32.)
Select DVD as input source.
1
Open the disc tray to load a disc with the printed side up, then close it.
2
• 8 cm (3 inch) discs can be loaded on the inside circle of
the tray, too.
• When a CD or DVD that doesn’t contain any menu is
loaded, playback automatically starts.
Note :
• Opening or closing the disc tray by force may damage it’s
mechanism.
Note :
• When you play a DVD Video that contains a menu or a MP3 disc, the menu display may appear on the TV screen. In this case,
see “To start playback from the menu of DVD Video” below or “To start playback from the menu of MP3 disc” on the next page.
• Example of DVD Video
• Example of MP3 disc
To start playback from the menu of DVD Video
• Press the CURSOR
button).
/ / /
buttons to select the preferred item and press the ENTER button (or PLAY/PAUSE(
)
• Playback of the selected item starts.
• When the selected item contains the subitems, repeat the
above step until the preferred item is selected,
To stop playback and return to the menu display
• Press the TOP MENU or MENU button on the remote control.(Which button is pressed differs depending on the discs.)
• Playback is suspended and the menu display appears.
20
To start playback from the menu of MP3 disc
1
• Each time this button is pressed, the list mode changes as
follows:
Folder list mode : It displays the folder/file structure as they
were recorded.
File list mode : It displays all the files on a disc, ignoring
the folders in which they belong.
• Example of folder list mode
Press the CURSOR
• Example of file list mode
/
buttons to select the preferred folder or file, then press the ENTER button.
2
• When selecting the preferred file, playback starts from the
selected file.
• In the folder list mode, when selecting the preferred folder,
the file menu screen of the selected folder is displayed. In
this case, repeat this step to select the preferred file in its
file menu.
) or BACKWARD
• Each time the FORWARD SKIP(
) button is pressed, the next or previous
SKIP(
folder/file menu is skipped to.
Notes :
• Depending on the MP3 disc and the condition of recording, some of MP3 discs may not be played or may be played differently.
• The DVD Videos continues to rotate while the menu display appears. When no further selections are to be played, be sure to
press the STOP( ) button repeatedly to enter the stop mode and to clear the menu display.
• A TV screen may be burned out if a static picture is displayed for a long time in the stop or the pause mode, etc.. To prevent
this, set the Screen Saver to ON (refer to “When selecting the Screen Saver” on page 35). Then, the unit automatically
activates the screen saver function if a static picture, etc. is displayed for over 5 minutes.
Pressing any button will cancel the screen saver function and return to the previous display.
• When you press a button, if the corresponding operation is prohibited by the unit or the disc,
appears on your TV screen.
To stop playback
• When playback of DVD Video is stopped, the unit
memorizes the point where the STOP( ) button was
pressed(RESUME function: DVD Video only).
(“R-STOP” is displayed on the unit’s display when this
function is activated.)
) button again, and playback
Press the PLAY/PAUSE(
will resume from that point. When the STOP( ) button is
pressed again, the RESUME function will be canceled and
it enters stop mode.(“STOP” is displayed.)
• In case that the Last Memory is set to ON, during playback of DVD Video, even when selection of the input source changes
from DVD input source or the unit is turned off, the resume function is activated, too.(Refer to “When selecting the Last
Memory” on page 36.)
• When about 20 minutes elapses in the stop mode, etc., the power is automatically turned off and it enters standby
mode.(Auto power-off function)
21
ENGLISH
In the stop mode, select the desired list mode.
To pause playback
ENGLISH
• DVD Video :
The unit will be in the still picture mode.
• CD/MP3 disc :
The unit will be in the pause mode.
• To return to normal playback, press the PLAY/PAUSE(
) button.
Frame advance playback [DVD Video only]
• During playback or in the still picture mode.
) button is pressed, the disc is
• Each time the STEP(
advanced by one frame.
• To return to normal playback, press the PLAY/PAUSE(
) button.
To skip ahead or back during playback
• To skip ahead
• To skip back
• Each time the button is pressed, a chapter/track on a DVD
Video/CD is skipped.
)
• In case of MP3 disc, each time the FORWARD SKIP(
) button is pressed, the next or
or BACKWARD SKIP(
previous folder/file menu is skipped to.
• When the button is pressed once midway through a
chapter/track, playback returns to the beginning of that
chapter/track. When it is pressed again, a chapter/track is
skipped.
• You can select a track/file on a CD/MP3 disc directly with pressing the NUMERIC buttons.
In case of MP3 disc, press the corresponding NUMERIC
buttons(0~9) and press the ENTER button, then the
selected file will be played.
In case of CD, press the corresponding NUMERIC
buttons(0~9, +10), then the selected track will be played.
Examples) For “3” :
Examples) For “3” :
For “10” :
For “10” :
For “21” :
For “21” :
• In case of MP3 disc, when the folder list mode is selected,
you can select a file in the current folder only.
22
Rapid playback during playback
(normal playback)
• To return to normal playback, press the PLAY/PAUSE
) button.
(
Slow playback during playback[DVD Video only]
• Each time the button is pressed, the disc is advanced or
reversed slowly at 4 step speed.
SF X 1/2
SF X 1/4
SF X 1/8
SF X 1/16
SR X 1/16
SR X 1/8
SR X 1/4
SR X 1/2
Off
(normal playback)
* SF: Slow advance playback, SR : Slow reverse playback
• To return to normal playback, press the PLAY/PAUSE
(
) button.
DISPLAYING DISC INFORMATION DURING PLAYBACK
• The unit features the on-screen display function showing disc information (title/chapter/track number, elapsed/ remaining time, etc.).
• Press the DISPLAY button.
• Then the disc information is displayed on the TV screen.
• Each time this button is pressed, the disc information is
changed depending on the kinds of discs as follows :
• Depending on the disc and some operation status as playback of DVD Video using a title or DVD menu, etc., the disc
information may not be displayed.
23
ENGLISH
• Each time the button is pressed, the disc is advanced or
reversed fast at 5 step speed.
X2
X4
X8
X 16
X 32
Off
PLAYING THE DESIRED SECTION OF DISC
ENGLISH
In case of DVD Video
During playback, press the SEARCH button.
1
2
• Then the search menu is displayed on the TV screen for
several seconds.
• To cancel the search function, press the SEARCH button.
While displaying the search menu, press the CURSOR
button to select its setting menu.
CURSOR
/
buttons to select the desired item, then press the
• Each time the CURSOR
is selected as follows :
or
button is pressed, the item
“Title~” : Title search mode
“Chapter~” : Chapter search mode
“Audio~” : Audio language setting mode (For details, “CHANGING
THE AUDIO LANGUAGE [DVD Video only]” on page 30)
“Subtitle~” : Subtitle language setting mode(For details,
“CHANGING THE SUBTITLE LANGUAGE [DVD Video
only]” on page 30)
“Angle~” : Angle search mode(For details, “CHANGING THE
CAMERA ANGLE [DVD Video only]” on page 31)
“TT Time~” : Title time search mode
“CH Time~” : Chapter time search mode
“Repeat~” : Repeat setting mode(For details, “REPEAT
PLAYBACK” on page 27)
“Time Disp.~” : Time display setting mode(For details,
“DISPLAYING DISC INFORMATION DURING
PLAYBACK” on page 23)
• Each time the CURSOR
or
button is pressed, the
setting menu or the item menu is selected.
When selecting a search mode
Select the section to be played with the NUMERIC buttons.
3
When entering the title or chapter number
When entering the angle number
Examples) For “3” :
Example) For “2” :
For “12” :
When clearing the numbers entered before playback
When entering the elapsed time of the title or the chapter
You can play a disc from the desired point by specifying the
elapsed time from the beginning of the current title or the
current chapter.
Examples) For “3 min. 15 sec.” :
• Then the numbers are all cleared.
Note:
• Depending on the disc, a search
playback will not work or may work
differently.
For “2 hou. 59 min. 35 sec.” :
24
Continued
When selecting a setting mode
/
buttons to select the preferred setting, then press the ENTER button.
ENGLISH
Press the CURSOR
3
In case of CD or MP3 disc
During playback, press the SEARCH button.
1
• Then the search mode is displayed on the TV screen for
several seconds depending on the kinds of discs.
• Each time the SEARCH button is pressed, the search mode
change as follows :
Select the section to be played with the NUMERIC buttons.
2
When entering the track number
When entering the file number
Examples) For “3” :
Examples) For “3” :
For “11” :
For “11” :
When entering the elapsed time
You can play a disc from the desired point by specifying
the elapsed time from the beginning of the disc(for disc
time search mode) or the current track/file (for track/file
search mode).
Examples) For “3 min. 15 sec.” :
When clearing the numbers entered before playback
For “53 min. 25 sec.” :
• Each time the CLEAR button is pressed, the numbers
entered are cleared one by one in the opposite order.
25
PLAYING A SPECIFIC ITEM [DVD Video only]
ENGLISH
When using a title menu
• If some DVD Videos which contain more than one title may have the menu like as a list of the titles, the TITLE button can be
used to select the desired title. (The details of operation differ depending on the disc used.)
During playback, press the TOP MENU button.
1
• Then a list of titles on the disc is displayed on TV screen.
• If the disc does not have the menu such as a list of titles,
this function does not work.
2
Press the CURSOR
button.
/ / /
buttons to select the desired title, then press the ENTER or PLAY/PAUSE( / )
• The unit starts playback of the selected title.
• When the menu continues onto another screen, repeat
this step until the desired title is selected.
When using a DVD menu
• Some DVD Videos have unique menu structures called DVD menus. For example, the discs programmed with complex
contents provide guide menus, and those recorded with various languages provide menus for audio and subtitle language.
Although the DVD menu’s contents and operation differ from disc to disc, the following explains basic operation when this
feature is used.
During playback, press the MENU button.
1
2
• Then the DVD menu available on the disc is displayed
on TV screen.
• If the disc does not have the DVD menu, this function
does not work.
Press the CURSOR
button.
/ / /
buttons to select the desired item, then press the ENTER or PLAY/PAUSE( / )
• The unit starts playback of the selected item.
• When the menu continues onto another screen, repeat
this step until the desired item is selected.
26
REPEAT PLAYBACK
Note :
• The repeat playback may not work correctly on some DVD Videos and MP3 discs.
Repeating a disc, title, chapter, folder, track or file
• During playback of the desired title, chapter, folder, track or file, press the REPEAT button.
• Then the selected repeat mode is displayed on the TV
screen.
• Each time this button is pressed, the repeat mode changes depending on the disc as follows :
• To return to normal playback, press the REPEAT button repeatedly to select the repeat mode off.
Repeating the desired part
During playback at the beginning of the part you want to repeat, press the REPEAT A-B button.
1
• Then “A - ” is displayed on the TV screen.
At the end of the part, press the REPEAT A-B button again.
2
• Then “A-B” is displayed on the TV screen, and the part between points A and B is played back repeatedly.
• To return to normal playback, press the REPEAT A-B button again during repeat A-B playback.
Notes :
• You may not use the repeat A-B playback of the part that includes multiple camera angles.
• Repeat A-B playback works only within a title,track or file.
27
ENGLISH
• You can play a current title, chapter, folder, track, file, disc or part, etc. repeatedly.(Title repeat, chapter repeat, folder
repeat, track repeat, file repeat, 1 disc repeat, repeat A-B, etc.)
PLAYING TRACKS IN RANDOM ORDER[CD only]
During playback, press the RANDOM PLAY button.
ENGLISH
• “RANDOM” indicator and “R-” light up and the tracks are
played in random order.
• To return to normal playback, press the RANDOM PLAY
button again.
• After all the tracks have been played, it enters stop mode
and the random play mode is canceled.
PLAYING TRACKS IN DESIRED ORDER [CD only]
• Up to 20 tracks can be programmed to be played in any desired order.
Press the PROGRAM button.
1
• Then the program menu is displayed on the
TV screen for several seconds.
• Each time the PROGRAM button is
pressed, the program mode is canceled or
the program menu is displayed.
While displaying the program menu, select the desired track with pressing the NUMERIC buttons.
2
• If the program menu disappears during
programming, the program mode will be
canceled and the programmed tracks will be
all cleared.
Example) When the track 5 and 11 are programmed.
Repeat the above step 2 until the desired tracks are programmed.
3
• When programming more than 10 tracks, press the CURSOR / / / buttons to select the “NEXT
” on the bottom of
the program menu, then press the ENTER button.
Note: During programming, only the buttons required for programming of DVD operation buttons will function.
4
To start program play, press the CURSOR / / /
program menu, then press the ENTER button.
buttons to select the “Start” on the bottom of the
• Play will start in the programmed order.
• After all the programmed tracks have been played, it enters
the stop mode and the program mode is canceled.
28
Continued
Rectifying any wrong programmed tracks.
buttons to select the wrong programmed tracks, then select the
• The new track will be programmed in its place.
Clearing the programmed tracks
[To clear one by one]
• During programming, press the CURSOR
button.
/ / /
buttons to select the tracks to be cleared, then press the CLEAR
• Then the selected track is cleared.
[To clear all programmed tracks]
• During programming, press the PROGRAM button, or press the CURSOR
bottom of the program menu, then press the ENTER button.
/ / /
buttons to select the “Exit” on the
• Then the programmed tracks are all cleared.
• Opening the disc tray or selecting an input source,
etc. clears all programmed tracks.
29
ENGLISH
• During programming, press the CURSOR / / /
desired track with pressing the NUMERIC buttons.
ENGLISH
CHANGING THE AUDIO LANGUAGE [DVD Video only]
• It is possible to change the audio language to a different language from the one selected at the initial settings.
(For details, refer to “When selecting the Audio, Subtitle or Disc Menu” on page 38.)
This operation works only with DVD Videos on which multiple audio languages are recorded.
• During playback, press the AUDIO button.
• Then the audio language menu is displayed on the TV
screen for several seconds.
• Each time this button is pressed, the audio language changes as follows:
Example)
Notes:
• You cannot select the preferred audio language when the disc contains only one.
• When the disc is changed, etc., the language heard is the one selected at the initial settings. If this is not recorded on the
disc, only the available language on the disc will be heard.
• On some discs, an audio language except the selected one at the initial settings may be heard.
CHANGING THE SUBTITLE LANGUAGE [DVD Video only]
• It is possible to change the subtitle language to a different language from the selected one at the initial settings.
(For details, refer to “When selecting the Audio, Subtitle or Disc Menu” on page 38.)
This operation works only with discs on which multiple subtitle languages are recorded.
• During playback, press the SUBTITLE button
• Then the subtitle language menu is displayed on the TV
screen for several seconds.
• Each time this button is pressed, the subtitle language changes as follows:
Example)
Notes :
• You cannot select the preferred subtitle language when the disc does not contain the available language.
• When the disc is changed,etc., the displayed language is the selected one at the initial settings. If this is not recorded on the
disc, the available language on the disc may be displayed.
• On some discs, a subtitle language except the selected one at the initial settings may be displayed.
• When a disc supporting the closed caption is played, the subtitle and the closed caption may overlap each other on the TV
screen. In this case, turn off the display of subtitle language.
30
• Some DVD Videos contain scenes which have been shot simultaneously from multiple camera angles.
For these discs, the same scene can be viewed from each of these different angles.
• The recorded angles differ depending on the disc used.
• During playback at the scene recorded from multiple camera angles, press the ANGLE button.
• During playback at the scene recorded from multiple camera
angles, the angle symbol(
) is displayed on the TV
screen only when the ANGLE MARK is set to ON.(Refer to
“When selecting the Angle Mark” on page 34.)
• Each time this button is pressed, the angle changes as follows:
Example)
Note :
• This function works only at scenes recorded from multiple angles.
ZOOMING IN/OUT A SCENE [DVD Video only]
• In the zoom-in mode only, you can select and view any part of the scene close-up.
During playback or in the still picture mode, press the ZOOM button.
1
2
• The unit zooms in to the center part of the scene or zooms
out the scene depending on the selected zoom mode.
• Each time this button is pressed, zoom scale changes as
follows:
Only while zooming in a scene, press the CURSOR
the scene close-up.
/ / /
buttons to select and to view the desired part of
• To return to the previous operation status, press the
ZOOM button repeatedly until the zoom playback is
canceled.
Note:
• Depending on some operation status such as playback of
DVD Video by using a title or DVD menu, etc., the zoom
playback does not work.
31
ENGLISH
CHANGING THE CAMERA ANGLE [DVD Video only]
ENGLISH
CHANGING THE VIDEO SIGNAL FORMAT
• Depending on the countries, this DVD player conforms to either the NTSC color system for U.S.A, Canada, etc., or the PAL
for Europe, Australia, China, etc.
If the color system of this DVD player is different from that of your TV monitor and the discs to be played, the screen may be
somewhat hard to see or the picture quality may be poor.
Only in this case, change the video signal format to another.
(For details about the video signal format of your TV monitor or the discs, refer to the operating instruction of your TV or the
disc’s jacket.)
• You can set the video signal format to the desired at initial settings, too.
(For details, refer to “When selecting the TV Type” on page 34.)
• In the stop mode, press the PAL/NPSC button.
• Each time this button is pressed, the video signal
format changes as follows:
PAL
NTSC
CHANGING THE COMPONENT VIDEO OUTPUT SIGNAL
• Only during playback of DVD Video on this unit, the COMPONENT VIDEO OUTs of this unit can be capable of outputting
either conventional interlacing video signal or progressively scanned video signal (that can reproduce high-density pictures
with less flicker).
• When the COMPONENT VIDEO OUTs of this unit are connected to the COMPONENT VIDEO INs of TV or projector, etc.,
depending on whether the video signal system of your TV or projector, etc. supports the conventional interlacing(simply
called interlaced) video signals or the progressively scanned(simply called progressive) video signals(that can reproduce
high-density pictures with less flicker), you should select the corresponding video signal.
Notes:
• When you select the “Progressive”, the S-VIDEO and (composite) VIDEO OUTs of this unit cannot output the normal video
signals, meaning the picture will not be shown.
• When the progressive video signals are input into the non-progressive COMPONENT VIDEO INs of your TV, etc., the
picture may not be shown normally.
Therefore, when the progressive COMPONENT VIDEO INs of TV are not connected to, you should select “Interlace”.
• In the stop mode, press the PROGRESSIVE SCAN button.
• Each time this button is pressed, the component video
output signal changes and “Interlace” or “Progressive” is
displayed on the TV screen.
32
The initial settings of the unit at the factory can be modified as desired later.
Even after the power of the unit is switched to the standby mode, the initial settings are stored in memory until it is changed
the next time.
In the stop mode, press the SETUP button to enter the setup mode.
1
• The general setup menu appears on the TV screen.
• To exit from the setup mode, press the SETUP button, or
press the CURSOR / buttons to select “Exit Setup
Menu” and press the ENTER button.
• When the disc tray is open, you can enter the setup
mode.
Press the CURSOR
/
buttons to select a setting category.
2
When selecting the General Setup
When selecting the Audio Setup
When selecting the Preference
When selecting the Exit Setup
• When selecting the Exit Setup to exit from the setup
mode, press the ENTER button.
• For the setting details, see page in
.
Note :
• During setting operation, only the buttons required for setting of DVD operation buttons will function.
33
ENGLISH
Initial Settings
ENGLISH
SETTING THE GENERAL SETUP
Press the CURSOR
/
buttons to select the preferred item.
1
• Then the setting menu of the selected item is displayed.
When selecting the TV Type
• Depending on the countries, this DVD player conforms to either the NTSC color system for U.S.A, Canada, etc., or the PAL for
Europe, Australia, China, etc.
If the color system of this DVD player is different from that of your TV monitor and the discs to be played, the screen may be
somewhat hard to see or the picture quality may be poor.
Only in this case, change the video signal format to another.
(For details about the video signal format of your TV monitor or the discs, refer to the operating instruction of your TV or disc’s
jacket.)
• You can select the desired video signal format with pressing the PAL/NTSC button, too.
(For details, refer to “CHANGING THE VIDEO SIGNAL FORMAT” on page 32.)
When selecting the TV Display
• When you connect a normal TV with 4:3 aspect ratio to the unit, select either “(Normal/)LB” or “(Normal/)PS” and when you
connect a wide TV with 16:9 aspect ratio, select “Wide”.
When selecting the Angle Mark
34
Continued
• You can select the OSD(On-Screen Display) language to be displayed.
• You can select the desired of ENGLISH, FRENCH,
ITALIAN, GERMAN, SPANISH, PORTUGUESE and
DUTCH.
When selecting the SPDIF Output
Notes :
• This unit can output a preferred digital signal format or no digital signal to the OPTICAL DIGITAL OUT jack. Therefore, you
should set the SPDIF Output to either OFF or corresponding setting(RAW or PCM) according to system connections, etc.
• When the OPTICAL DIGITAL OUT of the unit is connected to the DIGITAL IN of an amplifier which does not contain the DTS,
Dolby Digital decoder, etc.(which processes the bitstream signal) or MD recorder, etc.
You should set the SPDIF Output to(SPDIF/) PCM to convert Dolby Digital or DTS bitstream, etc. to linear PCM(2 channel) of
48 kHz/16bit and to output it.
• If the SPDIF Output is not set correctly, loud noise or no sound may be heard from the speakers, and it may be harmful to
your ears and damage the speakers.
When selecting the Captions
When selecting the Screen Saver
• A TV screen may be burned out if a static picture is displayed for a long time in the stop mode or the pause mode, etc.. To
prevent this, set the Screen Saver to ON. Then the unit automatically activates the screen saver function if a static picture is
displayed for over 5 minutes.
Note :
• The monitor screen of a projector or projection TV is easily burned out if a static picture is displayed for a long time. Be careful
not to allow the monitor screen to be burned out when the Screen Saver is set to OFF.
35
ENGLISH
When selecting the OSD Language
Continued
ENGLISH
When selecting the Last Memory
• If the Last Memory is set to ON, the unit can memorize the point where an input source other than DVD is selected or the
power is turned off during playback of DVD Video.
When DVD is selected as an input source again or the power is turned on, playback will resume from that point.
Press the CURSOR
button to select the setting menu.
2
• Each time the CURSOR
or
button is pressed, the
setting menu or the item menu is selected.
Press the CURSOR
/
buttons to select the preferred setting, then press the ENTER button.
3
• The selected setting is colored.
Press the CURSOR
button to select the item menu.
4
Set other setups to your preference.
5
36
ENGLISH
SETTING THE AUDIO SETUP
Press the CURSOR
/
buttons to select the Dynamic Range Compression.
1
• This function can be activated while playing the Dolby Digital program sources only.
Press the CURSOR
button to select the setting menu.
2
• Each time the CURSOR
or
button is pressed, the
setting menu or the item menu is selected.
Press the CURSOR
/
buttons to select the preferred setting, then press the ENTER button.
3
• The selected setting is colored.
Press the CURSOR
button to select the item menu.
4
Set other setups to your preference.
5
37
ENGLISH
SETTING THE PREFERENCE
When selecting the Audio, Subtitle or Disc Menu
Note :
• If the selected language is not recorded in the DVD Video, one of the recorded languages is automatically selected.
Press the CURSOR
/
buttons to select the preferred item.
1
Example) When selecting the Audio
• Then the language menu of the selected item is displayed.
Press the CURSOR
button to select the language menu.
2
• Each time the CURSOR
or
button is pressed, the
language menu or the item menu is selected.
Press the CURSOR
/
buttons to select the preferred language, then press the ENTER button.
3
• The selected language is colored.
• You can select one of languages listed in the language
menu.
• When you want to select a language other than languages
listed in the language menu, select “Others”.
38
Continued
• Then 4-digit language code input screen is displayed.
• Refer to “DVD Language Code List” on page 55 to find the 4-digit language code for the preferred language and input it with
pressing the NUMERIC buttons, then press the ENTER button.
Example) When inputting “8076”
• When the 4-digit code is input correctly, the previous menu screen is displayed.
• When a wrong code which is not listed in DVD Language Code List is input, press the ENTER button to return to the previous
menu, then perform the step 3 again.
Press the CURSOR
button to select the item menu.
4
Set other setups to your preference.
5
When selecting the Parental Control
Press the CURSOR
/
buttons to select the Parental Control.
1
Notes :
• When you set the rating level low, some discs may not be played at all. In this case, set the rating level higher or to “8 ADULT”.
• DVD Videos may or may not respond to the rating level setting. Make sure this function works with your DVD Videos.
39
ENGLISH
When selecting “Others”
Continued
ENGLISH
Press the CURSOR
button to select the level menu.
2
• Each time the CURSOR
or
button is pressed, the
level menu or the item menu is selected.
Press the CURSOR
/
buttons to select the preferred level, then press the ENTER button.
3
• Then password input screen is displayed.
Input a 4-digit password with pressing the NUMERIC buttons, then press the ENTER button.
4
• When the password is input correctly, the rating level is set to the preferred level and the previous menu screen is displayed.
• If you input a wrong password, it will not return to the previous menu. In this case, input the password again.
• While displaying the password input screen, when the SETUP button is pressed, the setup mode is canceled.
Note :
• If you forgot your password, input “3308” that has been set to at factory.
• To play back a DVD that supports the parental lock feature, you should enter the password.
Press the CURSOR
button to select the item menu.
5
Set other setups to your preference.
6
40
Continued
Press the CURSOR
/
buttons to select the Password.
Press the CURSOR
buttons to select the Change, then press the ENTER button.
1
2
3
Input 4-digit passwords in sequence for old password, new password and confirmation, then press the ENTER
button.
• When each password is input correctly, new password is memorized and the previous menu screen is displayed.
• If you input a wrong password, you cannot change the password to the desired. In this case, input the password again.
Note :
• Do not forget the password.
If you forgot your password, input “3308” that has been set to at factory.
Press the CURSOR
button to select the item menu.
4
Set other setups to your preference.
5
41
ENGLISH
When selecting the Password
Continued
ENGLISH
When selecting the Default
Press the CURSOR
/
buttons to select the Default.
Press the CURSOR
button to select the setting menu, then press the ENTER button.
1
2
or
button is pressed, the
• Each time the CURSOR
setting menu or the item menu is selected.
• Then the settings are reset to initial settings and the
setup mode is canceled.
Set other setups to your preference.
3
42
Operation of Tuner
ENGLISH
LISTENING TO RADIO BROADCASTS
Auto tuning
Select the desired band.
1
• Press the button repeatedly to select FM or AM band.
Press the TUNING UP( ) or DOWN(
) button for more than 0.5 second.
2
• Then “AUTO” in indicator lights up on the display.
• The tuner will now search until a station of sufficient
strength has been found. The display shows the tuned
frequency and “TUNED”.
• If the station found is not the desired one, simply repeat
this operation.
• Weak stations are skipped during auto tuning.
Manual tuning
• Manual tuning is useful when you already know the frequency of the desired station.
• After selecting the desired band with pressing the “FM/AM” button or “FUNCTION” button, press the TUNING UP( ) or
DOWN( ) button repeatedly until the right frequency has been reached.
Presetting radio stations
• You can store up to 30 preferred stations in the memory.
Tune in the desired station with auto or manual tuning.
1
Press the PROGRAM button.
2
• Then the preset number (“01”,etc.) is flickering for several
seconds.
• If flickering the preset number stops, press the PROGRAM
button again.
43
Continued
ENGLISH
Select the desired preset number(1~30) and press the PROGRAM button.
3
• When using the NUMERIC buttons on the
remote control.
Examples)
For “3” :
For “21” :
For “30” :
• The stations has now been stored in the memory.
• When using the NUMERIC buttons, the station is stored automatically without pressing the PROGRAM button.
• A stored frequency is erased from the memory by storing another frequency in its place.
Repeat the above steps 1 to 3 to memorize other stations.
4
Tuning to preset stations
• After selecting the tuner with pressing the “FM/AM” button or “FUNCTION” button, select the desired preset number.
• When using the NUMERIC buttons on the
remote control.
Examples)
For “3” :
For “21” :
For “30” :
44
Operation of Other Functions
• The volume, tone(bass, treble) settings, etc. have no effect on the recording signals.
• While playing a disc in a Dolby Virtual Speaker or Dolby Headphone mode, the selected mode has effect on the recording signals.
Select the desired input as recording source except TAPE.
1
Start recording on the component connected to TAPE.
2
Start play on the desired input.
3
DIGITAL AUDIO RECORDING WITH MD RECORDER
• When the OPTICAL DIGITAL OUT of the unit is connected to the DIGITAL IN of an MD recorder or CD recorder, you can
enjoy high-quality sound of digital recording.(Refer to “CONNECTING AUDIO/VIDEO COMPONENTs” and “CONNECTING
DIGITAL OUT” on page 7 and the operating instructions of the MD recorder or CD recorder.)
Notes :
• Digital recording is available for the digital audio program sources such as CDs, MP3 discs, some DVDs, etc.
• In most DVDs as well as some CDs recorded in bitstream signal format, digital recording may not be available.
In this case, you should set the SPDIF Output to (SPDIF/)PCM.(Refer to “When selecting the SPDIF Output” on page 35.)
• There are some restrictions on recording digital signals. When making digital recordings, refer to the operating instructions of
your digital recording equipment to know what restrictions are imposed.
Select DVD as recording source.
1
Start recording on the component connected to OPTICAL DIGITAL OUT.
2
Start play on DVD player of the unit.
3
45
ENGLISH
RECORDING WITH TAPE DECK
SETTING THE CLOCK
ENGLISH
Press the TIME ADJUST button.
1
Example) When setting to 2:20 PM
• Each time this button is pressed, the time or the
current operation status is displayed.
• When the time has not been set yet, or the time is
cleared due to the electricity failure, etc. the time
display flickers.
Press the CURSOR
/
buttons to set the hour and press the CURSOR
/
buttons to set the minute.
2
Press the ENTER button to memorize.
3
• To display the current operation status, press the TIME
ADJUST button again.
Note :
• If the electricity fails or the AC input cord is unplugged, the
current time may be cleared. Should this happen, set the
clock again.
When checking the time while displaying operation status
• Press the TIME ADJUST button.
• Each time this button is pressed, the time or the current
operation status is displayed.
46
OPERATING THE SLEEP TIMER
ENGLISH
• The sleep timer allows the unit to continue to operate for a specified period of time before automatically shutting off.
• While displaying the time, you cannot operate the sleep timer.
Press the SLEEP/TIMER button.
1
• Then “SLP OFF” is displayed for several seconds.
Press the CURSOR
/
button to select the desired sleep time.
2
• Each time the CURSOR
or
button is pressed, the
sleep time changes and disappear in several seconds as
follows:
10
20
30
60
90
OFF
• While operating the sleep timer, “
” lights up.
• When the sleep time is selected, the display of the unit is
dimly lit.
OPERATING THE TIMER
• Once the timer is set to ON, it will operate at the preset time every day.
• While displaying the time, you cannot operate the timer.
Before setting the timer
• Make sure the clock has been set correctly. If not, when the SLEEP/TIMER button is pressed for more than 2 seconds,
“TIME ADJust” message flickers for several seconds.
In this case, first set the clock performing “SETTING THE CLOCK” procedure on page 46.
Press the SLEEP/TIMER button for more than 2 seconds to enter the timer setting mode.
1
• “TMR OFF”(or “TMR ON”)is displayed.
• To cancel the timer setting mode, press this button for
more than 2 seconds again.
Select the timer on mode and press the SLEEP/TIMER button.
2
• Then it enters the on time setting mode.
• Each time the ENTER button is pressed, the timer mode
changes as follows :
“TMR ON” : Timer on mode(“
“TMR OFF” : Timer off mode(“
47
” lights up.)
” goes off.)
ENGLISH
Continued
3
Press the CURSOR / buttons to set the hour for on time, press the CURSOR
and press the SLEEP/TIMER button.
/
buttons to set the minute
/
buttons to set the minute
• Then is enters the off time setting mode.
4
Press the CURSOR / buttons to set the hour for off time, press the CURSOR
and press the SLEEP/TIMER button.
• Then it enters the input setting mode.
Note :
• If the on time and the off time are the same, when the SLEEP/TIMER button is pressed, “ERROR” is displayed. In this case,
perform the above steps 3 and 4 to set the time correctly.
Press the CURSOR
/
buttons to select the desired input source and press the SLEEP/TIMER button.
5
• Then it enters the volume setting mode.
• Each time CURSOR
or
buttons is pressed, the input source changes as follows :
Press the CURSOR
/
DVD
FM
AM
buttons to adjust volume level as desired.
6
Press the SLEEP/ TIMER button for more than 2 seconds to memorize.
7
• Then the timer settings are memorized and it returns to
the previous status.
48
Continued
8
When selecting “DVD”
When selecting “FM” or “AM”
1. Load a CD or DVD Video
• Tune in the desired station
• If you do not specify the station, the station you
listened to last will be tuned in.
2. In case of DVD Video, set the Last Memory to
ON.(Refer to “When selecting the Last Memory” on
page 36.)
3. Play back a DVD Video.
Notes :
• In case of most DVD videos that have menu structures,
you should perform the above steps 2 and 3.
• Timer function cannot play back MP3 discs.
• To play back a DVD Video, set the timer of your TV as
desired, too.
Turn the power off.
9
• To operate the timer, you should turn the power off
before the preset time.
• At the preset time, the power is turned on and the timer
function is performed automatically.
• In case of DVD Video, turn the power off while playing
back the desired scene.
49
ENGLISH
According to the selected input source, make preparations for timer play.
Continued
ENGLISH
When canceling the TIMER
Press the SLEEP/TIMER button for more than 2 seconds to enter the timer setting mode.
1
• “TMR ON”(or “TMR OFF”) is displayed.
• To cancel the timer setting mode, press this button for
more than 2 seconds again.
Select the timer off mode.
2
• Each time the ENTER button is pressed, the timer mode
changes as follows :
“TMR ON” : Timer on mode(“
“TMR OFF” : Timer off mode(“
” lights up.)
” goes off.)
To confirm your selection, press the SLEEP/ TIMER button for more than 2 seconds.
3
• Then the timer is deactivated.
ADJUSTING THE BRIGHTNESS OF THE DISPLAY
• Each time the DIMMER button is pressed, the brightness
of the display changes as follows :
On
dim
off
• In the display off mode, pressing any button will restore
the display on mode.
50
If a fault occurs, run through the table below before taking your system for repair.
If the fault persists, attempt to solve it by switching the unit off and on again. If this fails to resolve the situation, consult
your dealer. Under no circumstances should you attempt to repair the unit yourself. This could void the warranty.
REMOTE CONTROL UNIT
PROBLEM
No operation
POSSIBLE CAUSE
• Batteries are not loaded or exhausted.
• The remote sensor is obstructed.
REMEDY
• Replace the batteries.
• Remove the obstacle.
MAIN UNIT(VR-670)
[AMPLIFIER SECTION]
PROBLEM
POSSIBLE CAUSE
REMEDY
No power
• The AC input cord is disconnected.
• Poor connection at AC wall outlet or the outlet is
inactive.
• Connect the cord securely.
• Check the outlet using a lamp or another
appliance.
No sound
• The speaker cords are disconnected.
• The volume is adjusted too low.
• The MUTING button on the remote control is
pressed to ON.
• Incorrect selection of the input source.
• Incorrect connections between the components.
• Check the speaker connections.
• Adjust the volume.
• Press the MUTING button to cancel the muting
effect.
• Select the desired input source correctly.
• Make connections correctly.
Noise or distorted sound
• Poor connections.
• Check the connections and connect all cords
securely.
[DVD PLAYER SECTION]
PROBLEM
No playback
POSSIBLE CAUSE
• The disc is loaded upside down.
• The disc is not playable.
• The disc is dirty.
• The rating level is not set correctly.
• The symbol about invalid operation is displayed.
REMEDY
• Reload the disc with the printed side up.
• Use a playable disc.
• Clean the disc.
• Set the rating level setting correctly.(Refer to
“When selecting the Parental Control” on page 39.)
• Adjust the setting correctly.(Refer to “SYMBOL
ABOUT INVALID OPERATION” on page 18.)
Malfunction
• The disc is scratched or dirty badly.
• Unplug the AC input cord, then plug it again.
No picture
• The video cords are disconnected.
• The incorrect selection of input source on the TV.
• The disc is not playable.
• Connect the cords correctly.
• Select the input source correctly.
• Use a playable disc.
Noisy or distorted picture
• The unit is connected to a VCR directly and the
copyguard function is activated.
• The disc is dirty.
• It is in rapid advance or reverse playback, or in
frame advance playback.
• Connect the unit so that the picture signal is
transferred directly to the TV.
• Clean the disc.
• Sometimes a small amount of picture distortion
may appear. This is not malfunction.
Abnormal or no picture
• The component video output signal is not
selected correctly.
• Select the component video output signal correctly.
(Refer to “CHANGING THE COMPONENT
VIDEO OUTPUT SIGNAL” on page 32.)
Slight pause of picture
• The layer transition occurs during playback of
DVD Videos recorded in dual-layer format.
• Sometimes slight pause may occur.
This is not malfunction.
Noise or distorted sound
• The disc is dirty.
• Clean the disc
51
ENGLISH
Troubleshooting Guide
[TUNER SECTION]
ENGLISH
PROBLEM
POSSIBLE CAUSE
REMEDY
Stations cannot be
received
• No antenna is connected.
• The desired station frequency is not tuned in.
• The antenna is in wrong position.
• Connect an antenna.
• Tune in the desired station frequency.
• Move the antenna and retry tuning.
Preset stations cannot be
received
• An incorrect station frequency has been
memorized.
• The memorized stations are cleared.
• Memorize the correct station frequency.
• No antenna is connected.
• The antenna is not positioned for the best reception.
• Connect an antenna.
• Change the position of the antenna.
Poor FM reception
• Memorize the stations again.
SPEAKER SYSTEM
[FRONT SPEAKER(ST-670)
PROBLEM
POSSIBLE CAUSE
REMEDY
No sound
• The speaker cords are disconnected.
• Check the speaker connections.
Sound level is too low
• The speaker cords are not connected correctly.
• Connect them correctly according to the channel
(left and right) and the polarity (+ and -).
[ACTIVE SUBWOOFER(ASW-670)]
PROBLEM
POSSIBLE CAUSE
REMEDY
No power
• The AC input cord is disconnected
• Poor connection at AC wall outlet or the outlet is
inactive.
• Connect the cord securely.
• Check the outlet using a lamp or another
appliance.
No sound even though
the POWER switch is set
to the ON position.
• The SIGNAL switch is set to the OFF position.
• Set the SIGNAL switch to the AUTO or ON
position.
• Turn the VOLUME knob clockwise.
• Connect it securely.
Sound level is too low.
• The volume is adjusted too low.
• A source sound with few bass frequencies is
played.
• The CROSSOVER FREQUENCY knob set to
the 50Hz position.
• The VOLUME knob is set to the MIN position.
• The connection cord is not connected correctly.
52
• Turn the VOLUME knob clockwise.
• Play a source sound with bass frequencies.
• Turn the CROSSOVER FREQUENCY knob
clockwise.
Specifications
[AMPLIFIER SECTION]
• Power output, stereo mode, 6 Ω, THD 0.5 %, 20 Hz~20 kHz | 2 25 W
• Total harmonic distortion, 6 Ω, 25 W, 1 kHz | 0.09 %
• Intermodulation distortion
60 Hz : 7 kHz=4:1 SMPTE, 6 Ω, 25 W | 0.05 %
• Signal to noise ratio, IHF “A” weighted, Line (AUX, TAPE) | 90 dB
• Frequency response
Line(AUX, TYPE), 20 Hz~60 kHz | ±3 dB
• Output level
TAPE REC, 2.2 kΩ | 180 mV
• Bass/Treble control, 100 Hz/10 kHz | ±10 dB
• Optical digital output level, 660 nm | -15~-21 dBm
[VIDEO SECTION]
• Output level, 75Ω
Video (Composite(normal)) | 1 Vp-p
S-Video (Luminance signal) | 1 Vp-p
(Chrominance signal) | 0.286 Vp-p
Component video (CR signal) | 0.7 Vp-p
(CB signal) | 0.7 Vp-p
(Y signal) | 1 Vp-p
[DVD PLAYER SECTION]
• Pickup | Semiconductor laser, wavelength 650/780 nm
• D/A conversion | 24 bit
• Oversampling
Sampling frequency : 44.1, 48 kHz/96 kHz | 8 fs, 8 fs/4 fs
• Video format | NTSC/PAL
• Frequency response
Sampling frequency : 44.1 kHz | 10 Hz~20 kHz
Sampling frequency : 48 kHz | 10 Hz~22 kHz
Sampling frequency : 96 kHz | 10 Hz~44 kHz
• Signal to noise ratio, A weighted
CD | 95 dB
• Dynamic range
16/20/24 bit | Move than 99/108/108 dB
• Total harmonic distortion, 1 kHz
CD | Less than 0.03 %
• Wow and flutter | Unmeasurable(less than ±0.002 %)
[FM TUNER SECTION]
• Tuning frequency range | 87.5~108 MHz
• Usable sensitivity, THD 3 %, S/N 30 dB | 17.2 dBf
• Signal to noise ratio, 65 dBf, mono/stereo | 55/45 dB
• Total harmonic distortion, 65 dBf, 1 kHz, mono/stereo | 0.5/0.8 %
• Frequency response, 30 Hz~15 kHz | ±3 dB
53
ENGLISH
MAIN UNIT(VR-670)
ENGLISH
[AM TUNER SECTION]
• Tuning frequency range | 520~1710 kHz
• Usable sensitivity | 500 µV/m
• Signal to noise ratio | 40 dB
• Selectivity | 25 dB
[GENERAL]
• Power supply | 120 V~60 Hz
• Power consumption | 95 W
• Dimensions(W H D) | 360 102
• Weight(Net) | 5.4 kg(11.9 lbs)
275 mm(17-1/8
4
10-7/8 inches)
SPEAKER SYSTEM
[FRONT SPEAKER(ST-670)]
• Type | 2 way 2 speaker system(magnetic shielding, closed type)
• Unit | 3 inch woofer 1, 1inch soft dome tweeter 1
• Frequency response | 140 Hz~20 kHz
• Power handling | 25~30 W
• Impedance | 6 Ω
• Sound pressure level | 82 dB/W/M
• Dimensions(W H D) | 110 220 100 mm(4-1/4 8-5/8 4 inches)
• Weight(Net.)/unit | 0.94 kg(2.1 lbs)
[ACTIVE SUBWOOER(ASW-670)]
• Type | Bass reflex system(magnetic shielding type)
• Unit | 6 inch woofer 1
• Frequency response | 50 Hz~150 Hz
• Amplifier output | 50 W / 4 Ω
• Power supply | 120 V~60 Hz
• Power consumption | 50 W
• Dimensions(W H D) | 200 300 305 mm(7-7/8 11-7/8
• Weight(Net) | 7.1 kg(15.7 lbs)
12 inches)
Note: Design and specifications are subject to change without notice for improvements.
54
DVD Language Code List
Language
Code
6566
Abchazian
7176
6565
Afar
6570
Afrikaans
8381
Albanian
6577
Amharic
6582
7289
6583
Assamese
6583
6590
Language
Code
Language
Code
Language
Galician
7773
Maori
8476
6869
German
7565
Georgian
7782
Marathi
8471
Tajik
7779
Moldavian
8465
Tamil
6976
Greek
7576
Greenlandic
7778
Mongolian
8484
Tatar
8469
Telugu
Arabic
7178
Guarani
7865
Nauru
8472
Thai
Armenian
7185
Gujarati
7869
Nepali
6679
Tibetan
7879
Norwegian
8473
Tigrinya
Aymara
7265
Hausa
8479
Tonga
Azerbaijani
7387
Hebrew
7273
Hindi
7285
Hungarian
7982
Oriya
8083
Pashto, Pushto
7065
Persian
Tagalog
8482
Turkish
8475
Turkmen
8487
Twi
6665
Bashkir
6985
Basque
6678
Bengali, Bangla
7383
Icelandic
8076
Polish
8575
Ukrainian
6890
Bhutani
7378
Indonesian
8084
Portuguese
8582
Urdu
6672
Bihari
7365
Interlingua
8065
Punjabi
8590
Uzbek
6682
Breton
7165
Irish
6671
Bulgarian
7384
Italian
8185
Quechua
8673
Vietnamese
7789
Burmese
8679
Volapuk
6669
Byelorussian
7465
Japanese
8277
Rhaeto-Romance
7487
Javanese
8279
Romanian
6789
Welsh
8285
Russian
8779
Wolof
8872
Xhosa
7473
Yiddish
8979
Yoruba
9085
Zulu
7577
Cambodian
6765
Catalan
7578
Kannada
9072
Chinese
7583
Kashmiri
8377
Samoan
7282
Croatian
7575
Kazakh
8365
Sanskrit
6779
Corsican
7589
Kirghiz
7168
Scots Gaelic
6783
Czech
7579
Korean
7585
Kurdish
6865
Danish
7876
Dutch
8382
Serbian
8372
Serbo-Croatian
7679
Laothian
8378
Shona
7665
Latin
8388
Sindhi
6978
English
7686
Latvian, Lettish
8373
Singhalese
6979
Esperanto
7678
Lingala
8375
Slovak
6984
Estonian
7684
Lithuanian
8376
Slovenian
8379
Somali
7079
Faroese
7775
Macedonian
6983
Spanish
7074
Fiji
7771
Malagasy
8385
Sidanese
7073
Finnish
7783
Malay
8387
Swahili
7082
French
7776
Malayalam
8386
Swedish
7089
Frisian
7784
Maltese
55
ENGLISH
Code
Setup Code Table
ENGLISH
TV
AOC
Admiral
Aiko
Akai
Alaron
Ambassador
America Action
Ampro
Anam
Audiovox
Baysonic
Belcor
Bell & Howell
Bradford
Brockwood
Broksonic
CXC
Candle
Carnivale
Carver
Celebrity
Cineral
Citizen
Concerto
Contec
Craig
Crosley
Crown
Curtis Mathes
Daewoo
Daytron
Denon
Dumont
Dwin
Electroband
Emerson
Envision
Fisher
Fujitsu
Funai
Futuretech
GE
Gibralter
Goldstar
005
041
014
005
026
024
027
043
027
030
027
003
019
027
003
028
027
005
005
010
050
030
012
011
027
027
010
027
007
012
022
030
003
016
002
044
050
019
003
005
019
026
027
027
007
004
002
005
Gradiente
Grunpy
Hallmark
Harley Davidson
Harman/Kardon
Havard
Hitachi
Infinity
Inteq
JBL
JCB
JVC
KEC
KTV
Kenwood
LG
LXI
Logik
Luxman
MGA
MTC
Magnavox
Magestic
Marantz
Matsushita
Magatron
Memorex
003
031
047
027
048
014
049
034
001
031
011
014
005
006
010
005
032
003
011
019
016
038
006
006
008
011
040
014
014
030
001
041
006
034
035
Midland
Minutz
Mitsubishi
Motorola
Multitech
NAD
NEC
NTC
Nikko
Onwa
Optimus
Optonica
Orion
Panasonic
Penney
003
036
028
026
031
006
026
023
008
015
005
025
030
038
003
003
027
024
041
040
029
034
029
025
035
Pilco
Philips
Pilot
Pioneer
Portland
Prism
025
011
56
009
027
025
026
010
027
016
010
002
010
050
046
027
027
005
011
007
001
011
017
012
010
001
010
042
025
019
001
007
004
041
041
027
020
005
014
005
027
019
041
028
008
007
004
010
010
005
022
003
008
011
026
011
018
009
005
003
003
010
006
019
020
005
005
005
025
003
026
003
011
016
042
031
017
025
002
008
006
015
017
025
003
025
003
022
011
025
014
042
021
031
042
020
003
031
022
003
006
006
014
025
005
011
026
008
011
005
012
006
016
005
015
003
025
040
Radio Shack
Realistic
Runco
SSS
Sampo
Samsung
Samsux
Sansei
Sansui
Sanyo
Scimitsu
Scotch
Scott
Sears
Semivox
Semp
Sharp
Sherwood
Shogun
Signature
Sony
Soundesign
Squareview
Starlite
Supreme
Sylvania
Symphonic
TMK
Tandy
Technics
Technoi Ace
Techwood
Teknika
Telefunken
Toshiba
Totevision
Vector Research
Victor
Vidikron
Vidtech
Wards
White Westinghouse
Yamaha
Zenith
007
025
002
008
007
037
007
003
019
011
002
027
005
012
006
030
031
019
003
025
028
007
011
027
020
041
000
003
001
050
027
023
027
050
010
023
025
041
008
026
008
010
011
011
019
006
005
009
010
025
010
026
031
005
002
032
003
042
008
038
019
011
021
006
005
003
006
005
027
010
006
021
025
VCR
021
041
039
021
006
027
003
040
027
013
015
005
025
005
025
003
003
011
045
Admiral
Adventura
Aiko
Aiwa
Akai
America Action
America High
Asha
Audiovox
Beaumark
Bell & Howell
Brocksonic
Broksonic
CCE
Calix
Canon
Carver
Cineral
Citizen
Colt
Craig
Curtis Mathes
Cybernex
Daewoo
Denon
Dynatech
Electrohome
Electrophonic
Emerex
Emerson
033
025
025
019
003
020
026
025
026
006
026
005
011
Fisher
Fuji
Funai
GE
Garrard
Go Video
GoldStar
Gradiente
HI-Q
Harley Davidson
Harman/Kardon
Harwood
Headquarter
Hitachi
Hughes Net.Sys
JVC
Jensen
KEC
KLH
Kenwood
024
042
011
027
001
017
006
020
012
003
021
011
034
003
031
012
014
005
001
035
025
001
014
003
004
026
003
57
027
000
025
005
026
025
004
023
005
023
017
021
020
015
005
004
081
025
005
015
005
013
023
010
008
000
005
005
002
005
001
012
004
000
013
000
052
005
000
012
000
016
015
011
000
008
014
026
005
015
014
021
ENGLISH
Proscan
Proton
Pulsar
Quasar
RCA
000
018
025
021
001
023
026
015
028
024
020
025
017
003
000
018
009
004
027
023
025
012
004
025
006
006
008
026
026
025
026
006
021
ENGLISH
Kodak
LXI
Lloyd’s
Logik
MEI
MGA
MGN Technology
MTC
Magnasonic
Magnavox
Magnin
Marantz
Marta
Matsushita
Memorex
Minolta
Mitsubishi
Motorola
Multitech
NEC
Nikko
Noblex
Olympus
Opimus
Orion
Panasonic
Penny
Pentax
Philco
Philips
Pilot
Pioneer
Profitronic
Proscan
Protec
Pulsar
Quarter
Quartz
Quasar
RCA
Radio Shack
Radix
Randex
Realistic
Runco
STS
Samsung
Sanky
Sansui
Sanyo
004
005
000
015
004
023
023
023
025
004
023
004
005
004
004
000
008
027
004
000
017
005
023
004
005
031
020
004
004
008
004
004
005
014
023
013
015
007
011
011
004
013
000
005
005
004
011
007
008
023
027
000
012
005
Scott
Sears
Semp
Sharp
Shintom
Shogun
Singer
Sony
Syvania
Symphonic
TMK
Tatung
Teac
Technics
Teknika
Thomas
Toshiba
Totevision
Unitech
Vector
Vector Research
Video Concepts
Videosonic
Wards
009
000
007
016
000
019
028
005
017
029
027
021
007
011
012
031
023
032
014
027
015
014
009
026
006
027
032
021
028
005
017
028
029
030
001
022
023
029
008
031
006
028
004
029
027
031
023
008
019
005
027
012
000
017
010
007
014
023
033
026
011
024
016
White WestingHouse
XR-100
Yamaha
Zenith
Ameira High
Brocksonic
Colt
Cutis Mathes
Daewoo
Emerson
Funai
GE
021
016
021
017
Hitachi
HQ
Lloyds
MGA
Megavox
Magnin
Memorex
Mitsubishi
Orion
Panasonic
Penney
58
020 010 018 009
004 005 012 000 008 017
011
010
027
015
023
015
004 002 000 003
004 016 000 009
000
023
026
000 026
004 028
004 005 000
000
010 009
005 023
023
010
006
010
023
013 004 027 012 016 023
000 008 015 019
021 025
004 000 015
006
007 000 021 003
004 (TV use 008)
001
015
004 (TV use 008)
025
001
000
004 (TV use 008) 013 (TV use 012)
027 (TV use 041) 023
004 (TV use 008) 000
000
000
023
016 (TV use 010) 004 (TV use 008)
000
023
005 028 (TV use 025)
027 (TV use 041)
001
004 (TV use 008) 028 (TV use 042)
004 (TV use 008) 023
028 (TV use 042)
Sansui
Sanyo
Sear
Sharp
Sony
Symphonic
Zenith
004 (TV use 008) 028 (TV use 042)
013 (TV use 012) 004 (TV use 008)
027 (TV use 041)
000
023
000 005
027 (TV use 041)
002 (TV use 000)
000
000
CBL
ABC
Allegro
Archer
Bell&Howell
Century
Citizen
Comtronics
Contec
Easten
Emerson
Everquest
Focus
Garrard
Gemini
General Instrument
GoldStar
Goodmind
Hamlin
Hitachi
Hytex
Jasco
Jerrold
Memolex
Movie Time
NSC
Oak
Optimus
Panasonic
Paragon
Philips
Pioneer
Popular Mechanics
Pulsar
Quasar
RCA
Radio Shack
Recoton
002
007
018
018
009
018
018
014
011
001
026
010
022
018
010
033
017
026
012
006
007
010
002
006
000
015
015
011
031
000
000
018
017
022
000
000
031
010
022
003
006
021
026
009
008
030
021
Regal
Regency
Rembrandt
Runco
SL Marx
Smasung
Scientific Atlanta
Signal
Signature
Sprucer
Starcom
Stargate
Starquest
TV86
Teleview
Tocom
Toshiba
Tusa
Unika
United Artists
Universal
Viewstar
Zenith
Zentek
012
001
006
000
014
017
003
010
006
031
002
010
010
015
014
007
000
010
018
007
153
015
000
022
020
014
023
014
010
014
030
027
026
008
019
024
014
SAT
276
040
006
034
020
004
013
018
007
034
021
033
032
016
031
009
010
025
021
026
028
59
AlphaStar
Chaparral
Echostar
Expreevu
008
001
009
009
General Instrument
HTS
Hitachi
Hughes Net.Sys
JVC
Jerrold
Megavox
Memorex
Next Level
Panasonic
Philips
Primestar
RCA
Radio Shack
Realistic
Sony
Star Choice
Toshiba
Uniden
Zenith
016
009
011
007
009
016
006
006
006
017
006
016
003
018
014
004
018
010
006
013
015
018
015
005
005
015
000
002
005
014
012
ENGLISH
Quasar
RCA