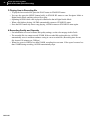
1
User’s Guide
2
COPYRIGHT NOTICE
General
• iAUDIO is a registered trademark of COWON SYSTEMS, INC.
• This product is for home use only and should not be used for commercial purposes.
• The copyright for all contents in this manual belongs to COWON SYSTEMS, INC.
Illegal distribution of this Manual in part or whole is prohibited.
• The copyrights for JetShell and JetAudio belong to COWON SYSTEMS, INC. and these products
cannot be distributed for commercial use without the written consent of COWON SYSTEMS, INC.
• MP3 files created with the MP3 conversion feature of JetShell and JetAudio are for personal use only
and not to be for commercial purposes. Disobedience of this restriction will be in direct violation of
international copyright law.
• COWON SYSTEMS, INC. is in compliance with all record/video/game related laws and regulations.
Users also are responsible for conforming to the relevant codified laws.
• We recommend our customers to register at http://www.iAUDIO.com as an official customer to
receive specialized iAUDIO services. When you complete the proper customer registration form, you
can receive various benefits offered only to regular members.
• Various examples, drawings and pictures contained in this Manual are subject to change without prior
notice whenever improvements are made to product features.
BBE Related
• iAUDIO is produced under the license of BBE Sound, Inc.
• BBE Sound, Inc. has the licensing rights for BBE by U.S.PATENTS: 38258, 5510752 and 5736897.
• BBE and the BBE symbol are registered trademarks of BBE Sound, Inc..
All rights reserved by COWON SYSTEMS, Inc. 2004
iAUDIO M3
Table of Contents
3
1. iAUDIO
What is iAUDIO?
Package Components
Features and Specifications
Names of Parts
Using AC Power Adapter /USB Connection
Summary of Status by LCD Display/LED Lights
Basic Usage
Simple Usages by Mode
Detailed Features by Menu
Terminology
Troubleshooting
Using Buttons
Menu Table
6
7
8
9
10
11
12
16
23
29
30
31
33
2. JetShell
What is JetShell?
Connecting iAUDIO and Installing JetShell
Configuration of JetShell
Spectrum Screen and Sound Effects
Downloading MP3 Files onto iAUDIO
Deleting MP3 Files from iAUDIO
Formatting Memory
Converting Audio CD Tracks to MP3 Files and Transferring Them to iAUDIO
Converting Various Files
Miscellaneous Functions
Installing and Using JetAudio
34
34
37
39
40
41
41
42
44
46
48
Upgrading Firmware
49
iAUDIO M3
4
Precautions for Use
Do not use this product for
purposes other than those stated
in this User’s Guide.
Do not expose the product to
water or keep it in a damp or
humid place for long periods.
If this happens, it is categorized as a
product failure by submersion. You
cannot receive free warranty services.
Furthermore, service or repairs may
be impossible and you may not be
able to use the product any more.
Pay attention to the USB cable’s
direction when connecting this
product to a PC. If you connect the
USB cable in the wrong direction,
the PC or the product may be
damaged.
Avoid using this product if the USB
cable is bent severely or underneath
any heavy objects.
Touching the product with
wet hands may cause a
malfunction. Hold and
handle the AC power plug
with dry hands to prevent
electric shock.
Note that malfunctions may
occur if you use the product
in places where a build up
of static electricity occurs
frequently.
iAUDIO M3
Take care not to cut your
hands when handling
the product box, User’s
Guide, or components.
If you disassemble or
modify the product in any
way, you cannot receive free
warranty services and may
be refused service if service
center warrants it.
If you smell the product burning
or find it overheating while
using it, remove the battery and
contact our Customer Support
Team or A/S Center as soon as
possible.
If you listen to this product
at high volumes for long
periods, you may damage
your hearing.
Always back up important files.
All or some the user data stored in
this product may be deleted during
servicing.
The A/S Center does not back up
files already stored in the product.
Please be advised that our
company is not liable for any loss
of data in the products entrusted to
us for service repairs.
Precautions for Use
Use only the AC Power adapter
and USB cable supplied by
COWON SYSTEMS with the
packaged product.
When removing iAUDIO while
it is connected to the cradle
or sub pack by USB cable, be
sure to use the ‘Safely Remove
Hardware’ or ‘Unplug or Eject
Hardware’ features of Windows.
Always use a soft and dry
cotton cloth when cleaning
the product.
(Use of water/detergent/
benzene/surfactants as
cleaning agents is strictly
prohibited. And VOID the
warranty)
Do not connect the linein/out jacks of the cradle
(or sub pack) and the USB
port simultaneously to
a PC. The power of the
product may be turned off.
Connect only the required
jacks or ports.
5
Only use the USB port on the
main board or the USB HOST
card when connecting to a PC.
It is strictly prohibited to use
any external USB hub. (E.g.,
USB port in the keyboard,
External USB hub, etc.)
Be sure to disconnect the
power supply to the PC and
AC adapter during lightning or
thunderstorms, so as to prevent
danger to the user or eliminate
the risk of fire.
Do not put the product
near a magnet or magnetic
field. It may cause
malfunctions.
Do not drop or subject
the product to any hard
impact. This may result
in malfunctions and/or
unit failure and VOID the
warranty.
iAUDIO M3
6
What is iAUDIO?
What is iAUDIO?
iAUDIO is a unique brand of MP3 player produced by Cowon Systems, Inc. It is a super mini portable digital
audio device that plays many different multimedia sound files in addition to MP3 files.
iAUDIO also offers FM radio listening/recording, as well as voice recording and direct encoding through the
built-in microphone and Line-In input jack.
Highly portable, stylish and super-slim design
iAUDIO M3’s ultra-slim size of 103.7 mm X 60.8mm X 14.2mm provides high portability and convenience. The
high-quality aluminum cover on the body gives an elegant and contemporary look.
목차
Super-high capacity MP3 player of the portable HDD type
The super-high capacity of iAUDIO M3 can store up to 5,000 MP3 files (for 20GB model) classified into 1,000
folders. In addition to MP3, many other music file types including WMA and OGG are supported as well.
Long continuous playback with embedded lithium ion battery
The ultra power-saving circuit of iAUDIO M3 enables up to 14 hours of continuous playback with fully charged
lithium ion battery (Based on company test research).
High-quality Voice Recording
iAUDIO M3 allows professional level voice recordings through its built-in high-fidelity microphone. You can
record important meetings or lectures, and save them on your PC for playback later on.
Direct Encoding (Line-in Recording)
iAUDIO M3 provides a direct encoding feature that accepts output from an external audio source for 1:1
recording. This means that iAUDIO’s 3.5 mm. Line-in jack and the output jack from the external audio device
can be connected to a 2-way stereo cable for recording. With this feature, iAUDIO can directly accept music input
from an audio device such as a Walkman, MD (mini disk), LP phonograph, or TV to convert and store as various
types of digital files in iAUDIO for your future listening pleasure.
Simultaneous Listening/Recording of FM broadcasts
You can listen to FM radio broadcasts and record them at the same time. This feature is very useful for studying
foreign languages because you can listen to the recorded files repeatedly and immediately on demand.
You can also save up to 20 displayed radio frequencies as preset stations.
Remote controller with a wide 6-line graphic LCD
With the 128 x 96, 6-line and 4-gray LCD with LED backlight, you can conveniently check the overall operational
status of iAUDIO M3.
The Most Powerful Sound Fields Recognized Worldwide
iAUDIO M3 provides the most unique, powerfu and fine quality sound which is recognized the world over. You
can take advantage of all the following sound field effects:
• BBE: Sound field effects that provide the clearest music
• Mach3Bass: A bass booster that enhances super low -end bass.
• MP Enhanced: Sound field effects that compensate for missing sound segments.
• 3D Surround: Three-dimensional sound that gives a sense of spatial separation and depth.
Easy Upgrade with Firmware Download
You can easily upgrade your iAUDIO M3 with the firmware download feature. We provide new firmware
versions incorporating improvements from the actual requirements and suggestions of iAUDIO users.
Mobile Disk
iAUDIO M3 is recognized as a mobile disk peripheral as soon as you plug it into a PC via a USB cable. Extra
small-capacity USB drives are not necessary any more.
iAUDIO M3
������������������
7
MP3 conversion (encoding) software
JetShell, the file transfer software included in the iAUDIO package, allows you to easily and quickly convert
and save music from a CD as MP3 files. Now you can conveniently store your audio CD music in iAUDIO and
listen to them.
JetAudio
With JetAudio World-class integrated multimedia player software, ou can either listen to music or watch videos
on your PC.
Package Components
LCD Remote Controller
iAUDIO (MP3 player body)
Sub pack
Installation CD (JetShell and JetAudio)
User’s Guide
USB 2.0 cable / Line-in recording cable
Earphone
Fashionable carrying case
AC Power Adapter
Cradle (Option)
iAUDIO M3
8
Features and Specifications
Features
MP3, MP2, WMA, ASF, and WAV (Up to 44.1khz mono) Playback, Voice Recording, FM Radio
Listening and Recording, Direct MP3 Encoding, Mobile Disk.
Built-in HDD (20GB)
6-Line, 4-Gray Graphic LCD Remote Controller (Indigo Blue Backlight)
USB 2.0 Interface
Long Play Time: Up to 14 hours (Based on company test research)
Note: (The playing time may be shortened if backlight is used.)
Multi-Language Support
Enhanced Integrated Navigator
Play/Pause/Stop, Record/Pause during Recording
Next Track/Previous Track, Fast Forward/Fast Rewind
Infinite Loop
Resume, Fade In, Auto Play
Search Speed & Skip Speed Setting
40 levels of digital volume control
Various EQ and sound field effects
• User adjustable 5-band Equalizer
• Normal, Rock, Pop, Jazz, Classic, Vocal, User
• BBE, Mach3 Bass, MP Enhance, 3D Surround Support
Hold
Backlight ON Time Control, Scroll Speed Control, Selection of Scroll Direction, Power-Save Auto
Stop, Sleep Timer
Firmware & Logo Download
ID3V2, ID3V1, Filename Support
Product Info Display (Firmware version, HDD Total Capacity/Usage, Total Number of Folders, Total
Number of Files)
MAC OS Support (Only Data Transfer Supported)
Software
• JetShell (File Transfer, MP3/WMA/WAV/Audio CD Playback, MP3 Encoding)
• JetAudio (Integrated multimedia playing software)
Specifications
Supported File Types MPEG 1/2/2.5 Layer 3,WMA, OGG,ASF,WAV (11/22/44Khz,16Bit,MONO/STEREO)
Hard disk 20GB
PC Interface USB 2.0 (Max.480M bps)
Battery Rechargeable Lithium Ion battery (Max.14 Hours Continuous Playback)
Power Supply AC adapter DC 5V 1.5A 3A
Charging Time About 3 hours (When using AC Power Adapter)
Buttons Remote : PLAY/PAUSE, FF, REW, MENU (NAVI), OL+, VOL−, MODE, REC
Main Body: PLAY/PAUSE, FF, REW, Mode, VOL+, VOL−, MODE, REC
Switch Hold
Display 128 X 96 dot, 6-Line 4-Gray LCD with LED backlight (Multilingual Support)
SNR 95 dB
Output Frequency 20Hz~20KHz
Output 16 Ohm Earphone: 20mW+20mW
Size 103.7 mm x 60.8mm x 14.2mm (Height x Width x Thickness)
Weight 136g (Including built-in battery)
iAUDIO M3
Names of Parts
9
Names of Parts
Remote Controller Jack
(Earphone jack)
HDD, MODE, CHARGE LED
Right
Front
Left
PLAY/STOP button
FF button
MODE/VOL+/
VOL- Button
REC/A B
Button
REW button
HOLD Switch
MIC
RESET
Left
Front
LCD Display
MENU/
VOL+/VOLButton
Right
PLAY/STOP/FF/
REW Button
MODE Button
REC/A B Button
HOLD Switch
Bottom
Earphone Jack
iAUDIO M3
10
Using AC Power Adapter / USB Connection
Using AC Power Adapter
1. Use only the supplied AC power adapter for safety.
This product is for both 100V and 220V.
2. Connect the adapter to the 5V DC socket of iAUDIO and then to the Main Power socket.
USB Connection
Precautions
• Use only the supplied USB cable.
• Never use a USB hub.
Connecting with sub pack
• Connect the sub pack to the connector at the bottom of iAUDIO M3.
• Connect the USB cable from the PC to the USB port at the bottom of the sub pack.
Connecting with cradle
• Mount the iAUDIO M3 on the cradle.
• Connect the USB cable from the PC to the USB port at the back of the cradle.
iAUDIO M3
LCD Display / Summary of States by LED Lights
11
LCD Display
Mode
Play Status
Battery Level
Block Repeat
Hold (Body, Remote Controller)
Play Sequence
Current Track /Total Tracks
Singer Name, Album Title
Song Title
Progress Bar
Play Time
Total Time
BIT RATE
SAMPLING RATE
JetEffect (BBE,M3B,3D,MP)
5 Band EQ
The battery level icon indicates how much battery life is left. The number of segments in
the icon becomes less as the battery discharges. For some batteries or re-chargeable dry
cells, the number of segments in the battery icon may increase or decrease irregularly
when the remaining charge is being measured. This is normal.
When the battery runs out, the battery icon starts blinking. If this happens, connect the
AC Power Adapter to re-charge the battery. If you don’t have the AC Power Adapter,
"safety power off".
When an ID3V2 or ID3V1 tag is used, the disk icon and the Artist + Album information
are displayed. When the display setting is ‘Filename’, or the tag does not include the
Artist information, the folder icon and the folder name are displayed. When the song is
contained in the root folder, "iAUDIO" is displayed in the folder name.
Summary of States by LED Lights
HDD LED
Lights up GREEN when HDD starts
MODE LED
DIGITAL AUDIO Mode: Blue
FM RADIO Mode: Green
VOICE RECORDER, LINE IN RECORDER Mode: Orange
CHARGE Mode: Bluish Green when fully charged
CHARGE LED
Lights up RED while the battery is being re-charged, and goes off when it is fully charged
iAUDIO M3
12
Basic Operation
Power On/Off, Charging & Connecting
Basic Operation
1. Power On/Off
• When you connect the power cable to the charge jack or press the "PLAY" button for a few moments, the
"iAUDIO" logo appears and the power comes on.
• To turn the power off, press the "PLAY" button for a few moments again. (Power cannot be turned off
during recording or in the USB mode.)
• If the AC Power Adapter is connected when you turn the power off, the charge window is displayed and
iAUDIO goes into Charge mode.
• To use iAUDIO again in the Charge mode, press the "PLAY "button for a few moments again.
• When you set "Auto Off" or "Sleep Timer", the power automatically turns off.
Press for a few
moments
Press for a few
moments
2. Charging
• To re-charge the battery, connect the AC Power Adapter to iAUDIO. (iAUDIO will then turn on
automatically if it was off.)
• The iAUDIO’s "CHARGE" LED lights up while the battery is being charged, and goes off when it is fully
charged.
• If you turn the power off while the AC Power Adapter is connected, the "Charge" window appears and
iAUDIO goes into Charge mode. The battery will recharge to 90% capacity after two hours.
• In Charge mode, when re-charging finishes, the "Charge Complete" window appears and the MODE LED
of iAUDIO lights up in bluish green.
• The battery is also charged when the USB cable is connected.
(The charging speed is slower than using AC Power Adapter. The supplied current of the AC Power
Adapter is 500mA, while that of USB is ONLY 100mA.)
Charge in Progress
Charge Completed
Connecting to PC via USB cable
Safely Disconnect from PC
3. USB Connection
■ Connecting USB Cable
When you connect the USB cable to the PC while iAUDIO is turned on, used or charged, it enters USB Mode.
(iAUDIO cannot enter USB Mode while recording.)
When the USB cable is connected, the built-in battery is not used but the USB supplies electric power (up to
500mA).
When you connect iAUDIO to a USB hub that supplies low current (e.g., a bus power type hub installed in
the keyboard or monitor), an error message may appear and iAUDIO may not work normally.
■ Disconnecting USB Cable
• First, select "Release device connection" from the Windows tray menu.
When "OK to disconnect" appears on the LCD window of iAUDIO, disconnect the USB cable.
• If the AC Power Adapter was not connected, iAUDIO automatically powers off.
• If the AC Power Adapter was connected, iAUDIO automatically enters Charge mode.
• When you press the "PLAY" button for a few seconds in the Charge mode, iAUDIO is rebooted.
You should always reboot iAUDIO because the song files in HDD are searched during the first booting after
the USB cable is disconnected. This takes some time if there are many song files. (20 to 25 seconds if the HDD
is full.)
iAUDIO M3
Basic Operation
Basic Operation for Switching Mode
13
4. Basic Operation for Switching Mode: There are four modes: Digital Audio, FM Radio, Voice Recorder, and
Line-in Recorder.
Example: Switching from "Digital Audio" to "FM Radio" mode
Press MODE button.
Move to the desired mode.
Select with PLAY, MODE or
MENU buttons.
■ Opening the Mode Selection window.
• To switch from one mode to another mode, press the MODE button.
• The Mode window appears for you to select one of the 4 modes.
■ Changing Mode
• Using the VOL−/VOL+ button or FF/REW button, change to the desired mode icon among the four
mode icons.
■ Selecting Mode
• After changing to the desired mode icon, select it by pressing the MODE, PLAY, or MENU button.
• The selected mode window appears, completing the mode switching process.
■ Canceling Mode Switching
• To cancel mode switching and return to the previous mode, press the REC button.
• The mode switching is cancelled and the previous mode window appears.
■ Simple Mode Switching
• When you press the MODE button for a few moments in any mode, it is immediately switched to the
next mode.
• The mode changes in the following order: Digital Audio →FM Radio →Voice Recorder →Line-in
Recorder.
- The MODE button on iAUDIO is activated only when you press it for a few moments.
(Only Simple mode switching is supported.)
- You cannot enter the Mode Switching window if you press the MODE button on iAUDIO briefly.
- This is a remote control function. You can only use this feature through the LCD display of the remote
controller.
■ 'MODE' LED Status by Mode
• You can easily find out the operation status of iAUDIO by looking at the ‘MODE ’ LED.
• The LED display changes to blue for Digital Audio Mode, green for FM Radio Mode, and orange for
Recorder Mode.
• When iAUDIO is stopped, paused, or in standby mode for recording, the ‘MODE ’ LED blinks at 1
second intervals.
• If there is no user input for some time while the MODE LED is blinking, the Auto Off setting.
automatically powers off the unit.
iAUDIO M3
14
Basic Operation
Basic Operation for Using Menu
5. Basic Operation for Using Menu
Example: Changing the Equalizer of JetEffect from NOR(Normal) to ROC(Rock)
MENU
JetEffect
PlayMode
Display
Timer
General
JetEffect
Equalizer
BBE
Mach3Bass
MP Enhance
3D Surround
Select JetEffect Menu
Equalizer
USR
0
0
0
0
Equalizer
0
NOR
6
0
JAZ
ROC
Select Equalizer Menu.
9
6 11
ROC
NOR
Press VOL+
Select with
PLAY button.
■ Opening Menu Window
• To enter the Menu window, press the MENU button for a few seconds.
• The Menu window appears with various setup items.
■ Changing Menu Item
• Press the VOL−/VOL+ button to change to another menu item.
• To display the sub menu, press the FF or MENU button.
• To return to the higher menu, press the REW button. (If you are viewing the top menu window, the Menu
window is then closed and the previous Mode window appears.)
• To return to the previous Mode window after changing the setting, press the PLAY button.
■ Changing Setting of Menu Item
• You can change the settings in the last menu item window.
• Use the VOL−/VOL+ button to change the values.
• Press the MENU button to select the setting.
• The changed setting is immediately applied.
• To return to the Mode window after changing the setting, press the PLAY button.
■ Canceling Setting of Menu Item/Closing Menu Window
• When you press the REC button, the changed setting of the current menu item returns to the previous
value and the Menu window is closed.
• When you press the PLAY button, the current setting is saved and the Menu window is closed.
- Since there is no Menu button on the main body, you cannot enter the Menu window by using any
button on main body.
- This is a remote control function. You can only use this feature through the LCD display of the remote
controller.
■ Setting Equalizer Menu Item
• Enter the Equalizer menu item.
• Select the predefined Equalizer with the VOL−/VOL+ button. (Normal, Rock, Jazz, Classic, Pop, Voice,
Usr)
• Press the FF button to select a specific band in the selected Equalizer.
• Adjust the dB level of the selected band with the VOL−/VOL+ button (0 ~12 dB).
• Return to the previous menu by pressing the REW button, or finish equalizing the sound by pressing the
PLAY button.
iAUDIO M3
Basic Operation
Basic Operation for Using Navigator
15
6. Basic Operation for Using Navigator
Example: Choosing and playing "01.MP3" file in the b-2 folder when the iAUDIO folder structure is as follows:
Press MENU
briefly.
Root
A
B
C
D
E
Press VOL+.
Root
A
B
C
D
E
B
b-1
b-2
If you press MENU, select Expand from pop-up menu.
Press Play, FF, or
MENU button.
b-1
01.MP3
02.MP3
03.MP3
04.MP3
05.MP3
If you press MENU, select Expand from pop-up menu.
If you press Play button:
→ iAUDIO returns to the Digital Audio
Mode and plays "01.MP3."
Press Play, FF, or
MENU button.
If you press FF button:
→ "01.MP3" is played in Navigator.
If you press MENU and select PLAY now
from pop-up menu:
→ iAUDIO returns to the Digital Audio
Mode and plays "01.MP3."
■ Opening Navigator window
• Press the Menu button to display the Navigator window.
• In the Digital Audio, Voice Recorder, or Line-in Recorder Mode, the Navigator window for browsing the
folders/files in HDD opens.
• In the FM Radio Mode, the Navigator window for browsing and setting the pre-set channel values opens.
■ Moving between items in Navigator
• Press the VOL−/VOL+ button to move between items in Navigator.
• To move to the sub-folder, press the PLAY or FF button.
• To move to the parent folder, press the REW button. (If it is the root folder, the Navigator is closed and the
previous Mode window returns.)
■ Selecting items in Navigator
• When you select a file and press the PLAY or FF button, the file is played.
• When you select a folder and press the PLAY or FF button, the files in the folder are displayed.
■ Navigator popup window
• When you press the MENU button, appropriate pop-up window for a folder and a file, "Dynamic Play List"
file or Radio Mode appears.
• Press the VOL−/VOL+ button to move to a desired item in the pop-up window.
• Press the PLAY or FF button to select an item in the pop-up window.
• Press the REC button to cancel the selection and close the pop-up window.
• Items in pop-up window for file: Play Now, Add to List
When you select a file and press MENU.
• Items in pop-up window for folder: Expand, Play Now, Add to List
• Items in pop-up window for Dynamic Playlist file: Delete, Delete all
• Items in pop-up window for Radio Mode Navigator: Listen Ch, Save Current,
Delete Ch
■ Closing Navigator
When you select a folder and press MENU.
• Press the REC button to close the Navigator window and return to the
previous window.
- Since there is no Menu button on the main body, you cannot enter the Navigator window by using any
button on main body.
- This is a remote control function. You can only use this feature through the LCD display of the remote
controller.
iAUDIO M3
16
Simple Operations by Mode
Digital Audio Mode
Digital Audio Mode (Listening to music file)
1. Playback
• Press the PLAY button for a few moments. The iAUDIO logo appears and the power turns on.
• To enter Digital Audio Mode from other modes, enter the Mode Switching window by pressing the Mode
button, and then select "Digital Audio".
• If AutoPlay is set to "ON", play starts as soon as iAUDIO powers on. Otherwise, iAUDIO is on standby.
In the latter case, press the PLAY button to play music.
• If the Resume feature is set, iAUDIO plays from the last stopped position.
• iAUDIO pauses when you press the PLAY button briefly during playback, and resumes when you press
it again.
• iAUDIO automatically powers off if the "AUTO OFF" or "SLEEP" setting is preset.
2. Adjusting Volume
• Press VOL+ or VOL−button to adjust volume while iAUDIO is playing.
• The volume changes by 1 level when you press the button briefly, and it changes rapidly when you press
and hold the button.
• The volume level can be adjusted between 0 (mute) and 40.
3. Block Repeat:
• Use the REC (A B) button while a track is played in Digital Audio Mode.
• When you press the button at the beginning position of the desired block of music, (A ) icon is displayed
at the top middle of LCD window.
When you press the button again at the end of the desired block, the icon changes to (A B).
• Now this block is played repeatedly in a loop.
• To release this block, press the REC button again.
• You can select only three seconds or longer repeat blocks.
4. Searching tracks in Playback window
■ Searching tracks in Play status
• You can skip to the next track by pressing the FF or REW button briefly in Play status.
- Unlike memory-type players, a HDD type player should power on the HDD if it is turned off to read
tracks. Therefore, there can be a little delay before a track is played. In this case, the "WAIT" pop-up
window appears, and playback starts after 2 or 3 seconds.
- You can easily find out the operation status of HDD from the HDD icon at the top of LCD window and
the HDD LED on the main body.
■ Searching tracks in STOP or PAUSE status
• You can skip to the next track by pressing the FF or REW button briefly in STOP or PAUSE status as well.
• The next track stays in STOP status unlike the above case, where you skipped it in PLAY status.
• When you press and hold the FF or REW button, you can skip through consecutive tracks.
- Since HDD doesn’t have to be accessed in STOP status, previous and next tracks can be searched for
immediately.
5. What is Dynamic Play-List (DPL)?
• There is a special folder named "D-PLAYLIST " under the root folder (it is not displayed on HDD), in
which the links to user-selected tracks are saved.
• You can add or delete desired links or you can select the "D-PLAYLIST " folder and links in it from
Navigator to listen to selected DPL tracks only.
iAUDIO M3
Simple Operations by Mode
Digital Audio Mode
17
■ Adding tracks to DPL
• Select a track in Navigator, open the pop-up menu, and select "Add To Playlist." The track is added to
DPL.
• Select a folder in Navigator, open the pop-up menu, and select "Add To Playlist." The tracks in the folder
will be added to DPL.
• When you press REC button while playing a track not included in DPL, it is added to DPL.
■ Removing Tracks from DPL
• Select a track to delete in the "D-PLAYLIST " folder in Navigator, open the pop-up menu, and select
"Delete." Then the link is removed from the list.
• Select any track in the "D-PLAYLIST " folder in Navigator, open the pop-up menu, and select "Delete
All." Then all links are removed from the list.
• When you press the REC button for a few moments while playing a track in DPL, the link for the track is
removed.
- When you select a link in the "D-PLAYLIST" folder, the link is played and the boundary is
automatically set to DPL at the same time.
- When you delete the link you are currently listening to in the DPL Boundary, the next link is automatically
played. If you delete the last link or all links and there is no link to play next, the current track keeps
playing, the DPL Boundary is released, and iAUDIO returns to the boundary set in Menu. (E.g., if the
Menu setting is Dir, iAUDIO returns to the Dir Boundary based on the currently playing track.)
- If iAUDIO enters USB Mode, DPL is automatically deleted.
6. M3U Play-List
There is a "PLAYLIST " folder under the root folder, and m3u files saved in this folder can be played according
to the play list in the file.
■ Adding M3U files
• Connect iAUDIO to a PC with a USB cable and iAUDIO is recognized as a portable disk.
• Using JetAudio or Winamp software, create an M3U file with the tracks in the HDD of iAUDIO M3.
• Save the created M3U file in the "PLAYLIST " folder under Root.
• Disconnect the USB cable, power on iAUDIO. You can play the M3U file saved in the "PLAYLIST
"folder in Navigator.
- When you select a M3U link, it is played and the Boundary is automatically set to M3U at the same
time.
■ Deleting M3U files
• Connect iAUDIO to a PC with a USB cable and iAUDIO is recognized as a portable disk.
• Delete M3U files in the "PLAYLIST " folder under Root.
7. DPL, M3U and Boundary
• You can set four boundaries from Menu: All, Single, Dir and SubDir.
• In addition to these 4 boundaries, there are also DPL and M3U Boundaries.
• When you play a link in the "D-PLAYLIST " folder, it is automatically set to DPL Boundary, and only the
tracks in DPL are played.
• When you play a link in the "PLAYLIST" folder, it is automatically set to M3U Boundary, and only the
tracks in the selected M3U file are played.
• If you select a track in other ordinary folders in Navigator, the DPL or M3U Boundary is automatically
released, and iAUDIO returns to the boundary set in Menu.
iAUDIO M3
18
Simple Operations by Mode
FM Radio Mode (Listening to FM Radio)
FM Radio Mode (Listening to FM Radio)
Guide to General Operations in FM Radio Mode
Select FM TUNER Mode
FM Tuner Mode
Change frequency with REW/FF buttons (in 0.1 MHz intervals).
Preset Ch
01 None
02 None
03 None
04 None
05 None
Press MENU button to enter Preset Ch menu.
Preset Ch
01 None
02 None
03 None
04 None
05 None
Display pop-up menu. Save the current channel.
Switch to FM Pre-set Mode
Preset Ch
01 89.30
02 None
03 None
04 None
05 None
The current channel is saved. Press REW or PLAY
button to return to
FM RADIO Mode.
Use REW/FF buttons to change between pre-set channels.
1. Listening to FM Radio
• Press the PLAY button briefly. The iAUDIO logo appears and the power turns on.
• If you were listening to the radio before turning off iAUDIO, iAUDIO comes on in FM Radio Mode and
you can listen to the radio.
• To change to FM Radio Mode from other modes, press the Mode button. In the Mode Switching window,
select FM Radio.
2. Selecting Station
• When you press the FF/REW buttons while listening to FM radio, the frequency changes by 0.1 MHz (or
0.05 KHz).
• When you press the FF or REW button for over 1 second, the nearest station with good reception is
automatically searched.
• When you press the PLAY button briefly while listening to FM radio, iAUDIO switches to Preset mode
for you to choose a preset channel.
Press the FF/REW button to change between preset channels.
3. Preset Setting
• Press the MENU button for a few moments. The FM Radio Navigator window appears in which you can
edit the preset channels.
• Select a preset number in Navigator and press the MENU button. When a pop-up menu appears, edit the
pre-set setting.
- Listen Ch: Listen to the current channel.
- Save Current: Set the current frequency to the pre-set channel.
- Delete Ch: Delete the current pre-set channel.
• You can save up to 24 pre-set channels.
iAUDIO M3
Simple Operations by Mode
FM Radio Mode (Listening to FM Radio)
19
4. Recording FM Radio
• Press the REC button for a few moments to record the FM broadcast while listening to it.
• The file recorded in preset recording quality is saved as ENC***.MP3 in the RECORD folder
(***: a 3-digti serial number).
• Press the Play button to pause recording, and press it again to resume recording.
• To finish recording, press the REC button again. "Wait" message appears while the file is saved, and
iAUDIO returns to the Radio window when saving finishes.
- For information on record quality settings, see the relevant page in this Guide.
- The recorded file size cannot exceed 512MB. If the recorded file reaches this size, iAUDIO
automatically saves it and then continues saving in a new recorded file. (Recording time for one file:
Around 218 minutes per 320kbps)
- When free space in HDD is less than 128MB, recording does not start. If free space becomes less than
128MB during recording, iAUDIO automatically stops.
Press REC for a few moments.
FM recording starts.
Press REC button to finish recording.
iAUDIO M3
20
Simple Operations by Mode
Voice Recorder (Recording Voice with Built-in Microphone)
Voice Recorder
(Recording Voice with Built-in Microphone)
Select Voice Recorder Mode.
Voice Recorder is in
Stand By status.
Press REC button.
Voice Recording Starts.
Press REC button to finish recording.
1. Preparing Voice Recording
• Turn on iAUDIO, press the MODE button and select Voice Recorder.
• iAUDIO enters Voice Recording Mode and stays in STAND BY status.
2. Voice Recording Start/Pause/Stop
• In STAND BYstatus, press the REC button to start recording.
• Press the Play button to pause recording, and press it again to resume recording.
• Press the REC button again to finish recording. A "Wait" message appears while the file is being saved, and
iAUDIO returns to STAND BY status when the saving finishes.
• The recorded file is saved as VOC***.MP3 in the VOICE folder according to the preset recording quality
(***: a 3-digit serial number).
• You cannot turn off iAUDIO, nor change Menu, Navigator or Mode while recording.
3. Playing Voice Recording file
• To play the last recorded file, press the PLAY button in STAND BY status.
• You can also press the MENU button briefly in STAND BY status to enter Navigator Mode or Digital
Audio Mode, and then select a file to play.
• Operating iAUDIO while a file is played is identical to that of Digital Audio Mode.
• When a file finishes playing, iAUDIO automatically returns to STAND BY status.
• Press the REC button any time to stop playing. iAUDIO returns to STAND BY status again.
4. Recording Quality and Capacity
• For information on recording volumes and quality settings, see the relevant page in this Guide.
• The recorded file size cannot exceed 512MB. If the recorded file reaches this size, iAUDIO automatically
saves it and then continues saving in a new recorded file. (Recording time for one file: Around 546 minutes
per 128kbps)
• When free space in HDD is less than 128MB, recording does not start. If free space becomes less than
128MB during recording, iAUDIO automatically stops.
iAUDIO M3
Simple Operations by Mode
Line-in Recorder (Direct Encoding)
21
Line-in Recorder (Direct Encoding)
1. Preparing Line-in Recording
• Turn on iAUDIO, press the MODE button and select LINE-IN Recorder.
• iAUDIO enters LINE-IN Recorder Mode and stays in Stand By status.
• Connect the headphone jack of CDP and the LINE-IN jack of iAUDIO with a bi-directional stereo jack
cable.
2. Line-in Recording Start/Pause/Stop
• Press the REC button in STAND BY status to start recording, and play CDP as soon as recording starts.
• Press the PLAY button to pause recording, and press it again to resume recording.
• Press the REC button again to finish recording. "Wait" message appears while the file is being saved, and
iAUDIO returns to STAND BY status when the saving finishes.
• The recorded file is saved as ENC***.MP3 in the RECORD folder according to the preset recording
quality (***: a 3-digit serial number).
• You cannot turn off iAUDIO, nor change Menu, Navigator and Mode while recording.
Select Line-in Recorder Mode.
iAUDIO is in Stand By.
Press REC button.
Line-in Recording starts.
Press REC button to finish recording.
iAUDIO M3
22
Simple Operations by Mode
Line-in Recorder (Direct Encoding)
3. Playing Line-in Recording file
• To play the last recorded file, press the PLAY button in STAND BY status.
• You can also press the MENU button briefly in STAND BY status to enter Navigator Mode or
Digital Audio Mode, and then select a file to play.
• Operating iAUDIO while a file is played is identical to that in Digital Audio Mode.
• When a file finishes playing, iAUDIO automatically returns to STAND BY status.
• Press the REC button any time to stop playing. iAUDIO returns to STAND BY status again.
4. Recording Quality and Capacity
• For information on record volumes and quality settings, see the relevant page in this Guide.
• The recorded file size cannot exceed 512MB. If the recorded file reaches this size, iAUDIO
automatically saves it and then continues saving in a new recorded file. (Recording time for one
file: Around 218 minutes per 320kbps)
• When free space in HDD is less than 128MB, recording does not start. If free space becomes less
than 128MB during recording, iAUDIO automatically stops.
iAUDIO M3
Detailed Features by Menu
JetEffect
23
JetEffect
1. Equalizer
JetEffect
Equalizer
BBE
Mach3Bass
MP Enhance
3D Surround
Equalizer
NOR
9
6
0
Equalizer (EQ) allows you to adjust the volumes of frequency bands according to your
taste.
You can choose among 7 pre-set equalized categories according to the music genre:
Normal, Rock, Jazz, Classic, Pop, Vocal EQ and User EQ.
You can directly adjust each band in any EQ. setting
Changing Band: FF, REW
6 11
Changing Band Level: VOL +, VOL -
ROC
JAZ
2. BBE :
BBE
10
BBE is the sound field effect for making music clear.
You can turn this off or select a level between 1 and 10.
3. Mach3Bass :
Mach3Bass
10
Mach3Bass is the bass amplifying feature that emphasizes super low bandwidth.
You can turn this off or select a level between 1 and 10.
4. MP Enhance :
JetEffect
Equalizer
BBE
Mach3Bass
MP Enhance
3D Surround
MP Enhanced is the sound field effect that compensates for lost sound segments.
Select On to apply this or Off otherwise.
5. 3D Surround :
3D Surround
10
3D Surround provides 3-dimensional sound effects.
You can turn this off or select a level between 1 and 10.
6. Pan (Left & Right Balance)
Pan
0
Pan is the feature to adjust the balance between left and right sound volumes.
The same volume for left and right is 0, and you can select a level between –20 and +20
from left to right.
iAUDIO M3
24
Detailed Features by Menu
Play Mode
Play Mode
1. Boundary: All, Single, Dir, SubDir
Boundary
All
Single
Dir
SubDir
2. Repeat
PlayMode
Boundary
RepeatE
Shuffle
3. Shuffle
PlayMode
Boundary
Repeat
Shuffle
iAUDIO M3
This menu is for setting various boundaries of playback.
"All" plays all tracks, "Single" plays one track, "Dir" plays all tracks in a folder,
"SubDir" plays al tracks in the folder and subfolders.
The recording files under RECORD and VOICE folders are excluded.
You can set repeat playing for the tracks in the boundary.
Check this to listen to the tracks in the boundary repeatedly.
When you uncheck this, iAUDIO returns to Stop status after playing all tracks in
the boundary.
This sets whether or not to play tracks randomly within the boundary.
Check this to play the tracks in the boundary in random order
When you uncheck this, the tracks are played in their original order.
Detailed Features by Menu
Display
25
Display
1. Play Time
Play Time
Elapsed
Remain
2. Scroll Speed
Scroll Speed
1
2
4
8
16
• Select the display time format for the track being played.
• Elapse: The elapsed time from the beginning of the current track to the present is displayed.
• Remain: The remaining play- time of the current track is displayed.
• Set the scroll speed for texts on the LCD display.
• You can select 1, 2, 4, 8, or 16 times.
3. Scroll Type (Song Title Animation Effect)
Scroll Type
One way
Two way
4. Song Title
Song Title
Filename
ID3 tag
5. Backlight Time
Backlight Time
Off
1
2
4
8
• Set the scroll type for texts on the LCD display.
• One way: Texts scroll from right to left.
• Two way: Texts scroll to left and right.
• Set the display type for song title.
• ID3 Tag: The ID3 tag information is displayed. If it does not exist, the file name is
displayed.
• FileName: The file name is displayed.
• Set the time for which the LCD backlight is turned on.
• You can select Off, or 1, 2, 4, 8 seconds, or Always.
6. Contrast (Window Brightness)
Contrast
5
7.Language
Language
Chinese(Simp.)
Chinese(Trad.)
English
Hangul(Korean)
Japanese
• Set the brightness of the LCD window.
• You can select a level between 0 and 10.
• Select a display language.
• If this setting is incorrect, the song information may not be displayed properly.
• You can select Chinese (Simp), Chinese (Trad), English, Hangul(Korean), Japanese, or
Russian.
iAUDIO M3
26
Detailed Features by Menu
Timer, General
Timer
1. Auto Off
• iAUDIO turns off if no button is pressed within a preset time while it is stopped.
• You can select Off, 30 seconds, or 1, 5, 10, 30 or 60 minutes.
Auto Off
Off
30 sec
1 min
5 min
10 min
2. Sleep
• iAUDIO turns off after a preset time has elapsed.
• You can select Off, or 10, 20, 30, 40, 50, 60, 90 or 120 minutes.
Sleep
Off
10 min
20 min
30 min
40 min
General
1. Skip Length
Skip Length
Track
2 sec
3 sec
4 sec
5 sec
2. Scan Speed
Scan Speed
X4
X7
X10
X20
3. Resume
General
Skip Length
Scan Speed
Resume
AutoPlay
FadeIn
4. Auto Play
General
Skip Length
Scan Speed
Resume
AutoPlay
FadeIn
iAUDIO M3
• Set the skip time when the FF/REW button is pressed once.
• You can select Track, or 2, 3, 4, 5, 10, 15, 20 or 30 seconds.
• Set the scan speed for fast forward/rewind when the FF/REW button is pressed for a few
moments.
• You can select x4, x7, x10 or x20.
• Memorize the last played position (track).
• You can select On or Off.
• iAUDIO automatically starts playing after it powers on.
• You can select On or Off.
Detailed Features by Menu
Recording
5. Fade in
FadeIn
Off
1 sec
2 sec
3 sec
4 sec
6. Load Default
Load Default
Cancel
OK
27
• The volume increases slowly when iAUDIO starts playing after it has been stopped or
paused.
• You can set the time period over which the volume increases.
• You can select Off, or 1, 2, 3, 4 or 5 seconds.
• The settings in the memory are returned to the factory pre-set values at the time when
iAUDIO was shipped from the factory.
• Select OK to apply this.
Recording
1. FM Radio bps (FM Tuner)
FM Radio bps
64kbps
96kbps
128kbps
256kbps
320kbps
2. Line-in bps
Line-in bps
64kbps
96kbps
128kbps
256kbps
320kbps
3. Line Volume
Line Volume
8
• Set the quality of MP3 files when FM Radio is recorded.
• You can select 64, 96, 128, 256 or 320 kbps. A higher value means higher quality.
• Set the quality of MP3 files when recording with LINE-IN Recorder.
• You can select 64, 96, 128, 256 or 320 kbps. A higher value means higher quality.
• Set the volume level of the sound coming in from the Direct Encoding jack.
• You can select a level between 1 and 10. A higher value means higher amplification.
4. Voice bps (Builit-in Microphone)
Voice bps
32kbps
48kbps
64kbps
5. Mic Volume
Mic Volume
Low
High
• Set the quality of MP3 files when recording with Voice Recorder.
• You can select 32, 48, 64, 96, 128 kbps. A higher value means higher quality.
• Set the volume level of the sound coming in from the built-in microphone.
• You can select Low or High. When you select High, the recording sound quality may become
poor if the input sound is too loud.
iAUDIO M3
Detailed Features by Menu
28
FM Radio/Information
FM Radio
1. Stereo
Stereo
Stereo
Mono
• Select Stereo or Mono when listening to FM Radio.
2. FM Region (Country Setting)
FM Region
China/Europe
Japan
Korea
US
• Set the country in which you are listening to FM radio.
• You can select China, Europe, Japan, Korea, Russia or the U.S..
Information
•
•
•
•
•
Version: The version of the firmware currently installed in iAUDIO is displayed.
HDD Tot: The total capacity of HDD is displayed.
HDD Free: The free space in the HDD is displayed.
Dirs: The total number of directories excluding the system directories is displayed.
Songs: The total number of music files excluding the recorded files is displayed.
iAUDIO M3
Terms and Definitions
29
Terms and Definitions
BBE
Sound field effects of high frequency resolution that reinforce treble sound and make music clearer
Mach3Bass
An elaborate bass booster that reinforces super bass EQ of low - frequency bands, creating a richer and
denser bass sound
MP Enhance
Sound field effects that compensate for lost sound segments of tracks in the device during playback
3D Surround
Three-dimensional sound that gives a sense of spatial separation
Boundary
The range of playback.
You can select Track, All tracks, Folder or Subfolder.
Contrast
A feature to adjust the brightness of the LCD display
Resume
A feature to memorize/recall the last playback position
Fade-in
The sound volume increases slowly from the lowest to the set upper volume limit when iAUDIO starts
playing.
DPL
DPL stands for Dynamic Play-List. This feature allows user to create his/her own play list and listen to it.
iAUDIO M3
30
Troubleshooting
Symptom
Remedy
Explanation
Check if the ‘Hold’ button is set to ON.
If it is, set the ‘Hold’ button to OFF and
try again.
iAUDIO does not work when the Hold button
is set to ON.
See if the same phenomenon occurs
when you connect the adapter.
If the built-in battery is completely discharged,
charge it with the adapter.
You cannot hear
any sound or there
is noise.
Make sure that there are mp3 files in the
memory.
iAUDIO does not work if there are no files in
the memory.
FM Radio does not
work.
FM reception sensitivity may be weak and you many not be able to hear FM Radio clearly
depending on where you are, such as inside a building, subway or moving car. In addition,
listening to the radio may become impossible if you are in radio wave shade areas.
iAUDIO does not
power on.
Check if the volume is set to "0."
Check if the remote controller/earphone is disconnected or if there is any foreign substance
in/on the in/phone jacks.
(Noise may be generated if there is foreign substance.)
If data in the audio file is damaged, noise may be generated or the sound may break up.
If FM radio does not work where you know that radio reception should be possible, there
may be a problem in the reception module. In this case, please contact our A/S Center.
Characters on LCD
are illegible.
Change the language setting to ‘English’ in the ‘Country & Language’ menu of iAUDIO,
and select ‘File name’ in the ID3 tag setting menu. However, if the same symptom is
discovered in other iAUDIO products of the same model, some special fonts or foreign
characters may be broken because iAUDIO was developed on the Korean Windows OS.
JetShell does not
work and “iaudio
IS NOT FOUND”
appears in a window.
A separate driver must be installed for Windows 98 or 98 SE.
See "Installing USB Driver for Windows 98."
The HDD capacity is
displayed incorrectly.
(E.g.: 18GB is
displayed for 20GB
memory)
For example, with a 20GB product, about 18.6GB of memory capacity after FAT32
formatting is normal. Some of the memory in iAUDIO is used for system area which is
essential for normal operation of iAUDIO. Therefore, the actual displayed capacity of the
HDD is somewhat reduced when you exclude this.
iAUDIO does not
work or works
abnormally after
Hundreds of files are
saved in Root folder.
iAUDIO uses FAT32. Owing to the
limitations of FAT32, you are advised
NOT to save many files in the root
directory.
There are more limitations for Windows 98.
For Windows 2000 or XP, we recommend that
you create a separate folder and subfolders
under it for saving files.
When ‘JetShell’ is activated, it controls the iAudio drive. Therefore, you should exit ‘JetShell’ before
performing the following tasks:
• Installing the USB drive
• Format in ‘Windows Explorer’
• Upgrade the firmware
iAUDIO M3
Using Buttons
Digital Audio Mode / FM Radio Mode
31
Digital Audio Mode
Button
Main
Body
Remote
Controller
Operation
Play/
Pause
FF
REW
MENU
MODE
VOL +
VOL -
During Stop
Play the current
track
Stop the current track
Power On
Power Off
Skip to the next
track
Skip to the next track or move forward by
5sec or 10sec. (SKIP setting)
Fast Forward
Fast Forward
Skip to the
previous track
Skip to the previous track or move
backward by 5sec or 10sec. (SKIP setting)
Fast Rewind
Fast Rewind
Navigator
Setup menu
Setup menu
Navigator
Select a mode
Select a mode
Increase volume
Increase volume
Decrease volume
Decrease volume
REC/
A B
For Operation,
During Play
Start or Stop Repeat A B (Block Repeat)
indicates pressing the key briefly, and
indicates pressing the key for more than 1 second.
FM Radio Mode
Key
Operation
General Mode
Preset Mode
Enter Preset mode
Exit Pre-set mode
Power ON
Power Off
Increase frequency
Skip to the next pre-set
Search the next FM station
Skip to the next pre-set
Decrease frequency
Skip to the next pre-set
Search the previous FM station
Skip to the previous pre-set
Preset mode setting
Preset mode setting
Setup menu
Setup menu
MODE
Select a mode
Select a mode
VOL +
Increase volume
Increase volume
VOL -
Decrease volume
Decrease volume
Stop recording
Stop recording
Start recording
Start recording
Play/Pause
FF
REW
MENU
REC/A B
iAUDIO M3
32
Using Buttons
Voice Recorder /Line-in Recorder Mode
Voice Recorder /Line-in Recorder Mode
Key
Operation
During Stop
Play the previous recording file
Play/Pause
In the Preset Mode
Pause/Continue recording
Power Off
FF
REW
Navigator
MENU
Setup menu
MODE
Select a mode
VOL +
Increase volume
VOL -
Decrease volume
Start recording
REC/A B
Stop recording
Navigator
Key
Operation
When Selecting a File
When Selecting a Folder
Play/Pause
The selected file is played and then iAUDIO
changes to MP3 Player mode.
Go to the selected folder.
FF
The selected file is played and iAUDIO stays
in Navigation mode.
Go to the selected folder.
Go to the parent folder.
Go to the parent folder.
Pop-up Menu
Pop-up Menu
VOL +
Move down
Move down
VOL -
Move up
Move up
REW
MENU
MODE
REC/A B
iAUDIO M3
Exit Navigator
Menu Table
JetEffect
Play Mode
Display
Timer
Equalizer
:
Equalizer
Skip Length
:
Skip Length
BBE
:
BBE
Scan Speed
:
Scan Speed
General
Mach3Bass
:
Mach3Bass
Resume
:
Resume
MP Enhance
:
MP Enhance
Auto Play
:
Auto Play
3D Surround
:
3D Surround
Fade- In
:
FadeIn
Balance
:
Pan
Battery Type
:
Load Default
Boundary
:
Boundary
FM
:
FM Radio bps
Repeat
:
Repeat
Music
:
Line-in bps
Shuffle
:
Shuffle
Line Volume
:
Line-in Volume
Play Time
:
Play Time
MIC
:
Voice bps
Scroll Speed
:
Scroll Speed
Mic. Volume
:
Mic Volume
Scroll Type
:
Scroll Type
Stereo
:
Stereo
ID3 Tag
:
Song Title
FM Region
:
Region
Backlight Time
:
Backlight Time
Contrast
:
Contrast
Language
:
Language
Auto Off
:
Auto Off
Sleep
:
Sleep
Recording
FM
Information
33
Firmware Version
HDD Total Capacity
HDD Free Space
Total Directories
Total Track Files (Excluding
recorded files)
iAUDIO M3
34
What is JetShell?
What is JetShell?
JetShell is the iAUDIO manager program providing the following features:
• Downloading/Uploading files from/to iAUDIO (some files excluded).
• File management with the same structure as Windows Explorer
• Playing MP3, MP2, WAV, WMA, ASF, Audio CD, and Play List (M3U)
• MP3 file ripping from Audio CD
• Conversion between WAV/MP3/WMA
• Changing MP3 Bit rates
• Convenient file transfer using Download List
• A wide variety of spectrums, equalizers, and effects
• Editing CDDB and ID3 tags
• iAUDIO logo transfer
• Memory formatting
Running Environment for JetShell
•
•
•
•
•
•
•
Pentium 200 Mhz or higher
Memory of 32MB or more
Free hard disk space of 20 MB or more
Graphic card of 256 colors or higher
Windows 98 SE/ME/2000/XP (NT is not supported)
USB Port 1.1 or higher
CD-ROM
Connecting iAUDIO and Installing JetShell
Installing JetShell
1. Insert the iAUDIO Installation CD in the CD-ROM drive. The installation program starts automatically. It
may not start automatically sometimes depending on the status of the Windows operating system. In this
case, directly run CD-ROM:\Setup.exe or CD-ROM:\JetShell\Setup.exe.
2. When the installation finishes, JetShell is registered in Start → Programs → Cowon Systems → iAUDIO
M3 program group.
Connecting iAUDIO
Windows ME/2000/XP
1. Connect the USB ports of iAUDIO and your PC with a USB cable. (You should not use a USB hub, but
directly connect to the USB port on the main board.)
2. To make sure that the installation was complete, check if a new local disk has been created in ‘My
Computer’ as shown in the following picture (based on XP Home edition).
iAUDIO M3
Connecting iAUDIO and Installing JetShell
35
For Windows 98 / 98 SE
1. The E:\ drive shown in the illustration is an example, and it may be different from the actual drive name
used by your PC. It was given for your reference only.
2. Connect iAUDIO and PC with a USB cable. In the
normal Windows environment, a message saying
that the iAUDIO M3 Digital Audio Player device
was found will be displayed as shown in the left
picture. Click on the ‘Next’ button.
3. Check "Search the best driver for your device" and
click ‘Next’.
iAUDIO M3
36
Connecting iAUDIO and Installing JetShell
4. Check "Specify a location" and click on the
[Browse] button.
5. From the ‘Browse’ window, select the [Win98]
folder on the iAUDIO Installation CD, and click on
the ‘Next’ button. When the model name "iAUDIO
M3 Digital Audio Player" appears on the [Add
New Hardware Wizard] window as shown in the
picture, click on the [Next] button.
6. The driver files are copied and installed from the
Installation CD. When the installation finishes, a
message notifying you of completion appears as
shown in the picture.
7. Finally, make sure that installation of iAUDIO M3
was completed normally by checking "iAUDIO
M3 Digital Audio Player" displayed under Control
Panel →System →Device Manager → Hard Disk
Controller.
iAUDIO M3
JetShell Configuration
37
The Whole Picture
Play and
MP3
Management
Section
File
Management
Section
Memory
Management
Section
File
Management
Window
Download List
Management
Section
When JetShell is activated, it controls the iAudio drive. Therefore, you should exit JetShell before performing the following
tasks.
• Installing the USB drive
• Formatting in Windows Explorer
• Upgrading the firmware
Playing MP3, MP2, WAV, WMA, ASF, Audio CD, and Play List (m3u)
Double click an MP3, MP2, WAV, WMA, ASF, Audio CD file, or Play List (m3u) in the ‘File
Management’ Window, or drag and drop the file on the ‘Player’ shown above. Then the file starts
playing. In addition, you can also select multiple files and then press the ‘Play’ button. On the black
screen in the middle, the progress bar and song names of the selected tracks scroll to the left, and two
types of spectrum screens appear.
You can start and stop playing the file with the buttons at the right, and adjust the volume with the + and
- buttons. To skip instantly to a specific position of the track being played, click on the position bar.
iAUDIO M3
38
JetShell Configuration
Playing MP3, MP2, WAV, WMA, ASF, Audio CD, and Play List (m3u)
The File Management Section of JetShell looks just like Windows Explorer. The left window shows
folders, disks, and CD-ROM in a tree structure, and the right window shows the file list in a folder.
Memory Management
The bottom part of JetShell consists of ‘Memory Management Section’ and ‘Download List.’ When
iAUDIO is working normally, the red lamp flashes with the message ‘iAUDIO is working’ as shown in
the figure. The files transferred from PC to iAUDIO by the user are displayed in the middle window. The
"Memory used" bar shown at the bottom right indicates the used memory size of the total flash memory of
iAUDIO. If this bar is almost full, it means that there is almost no free space available in iAUDIO.
Button
Function
Up
Registration Info
Display the registration information of the file.
Refresh
The contents of flash memory are reread and updated.
Delete
Delete the selected file or folder.
New folder
Cut
Create a new folder.
Cut the selected file or folder.
Copy
Copy the selected file or folder.
Paste
Paste the cut or copied file.
Transfer to Memory
Transfer to PC
iAUDIO M3
Explanation
Move to the upper folder.
Transfer the selected files or folder from PC to iAUDIO.
Transfer the selected files or folder from iAUDIO to PC.
Spectrum Screens and Sound Effects
39
JetShell displays visually cool spectrums. When you click on the spectrum display area, the screen
changes as follows.
You can also enjoy various equalizers and effects.
Various Equalizers
Various Effects
iAUDIO M3
40
Downloading MP3 files to iAUDIO
Downloading MP3 files to iAUDIO
1. Downloading sound files to iAUDIO is very
simple. Select files to download from the ‘File
Management Section’ and click on the down
arrow.
2. Or you can also drag and drop the selected
files from the ‘File Management Section’ to
the window at the bottom as if you were using
Windows Explorer.
3. The following window shows the file
downloading process.
The backlight turns on during file download.
Never disconnect the USB cable while the
backlight is turned on.
4. Another method is to enter the files in the
‘Download List’ window as shown below before
downloading.
This is useful when you wish to enter files in
different folders with the + button and then
download them all at once.
5. You can also download the files existing outside
of JetShell by dragging and dropping them onto
the ‘Memory’ Window.
iAUDIO M3
Deleting MP3 files in iAUDIO / Formatting HDD
41
Deleting MP3 Files from iAUDIO
You can delete files in iAUDIO in the same manner as in Windows Explorer.
Select the files to delete and click on the
button. Then the confirmation window "Delete from flash
memory?" appears. Click ‘Yes’ to delete them.
You can also delete files from the pop-up menu that appears when you right click your mouse after selecting a
file in the memory window.
Formatting HDD
iAUDIO requires formatting as HDD does. You should be careful when formatting iAUDIO since all data in
the memory will be deleted.
1. Select Format Device Memory from File menu. When the following window appears, select ‘FAT32’. If
you select a format other than ‘FAT32’ and format, iAUDIO is recognized as just a USB storage media and
will not function normally as an MP3 Player. Therefore, be sure to format as ‘FAT32’ only, and never use the
NTFS file system supported by Windows 2000 and XP.
You can also format by right clicking your mouse on the iAUDIO drive in Windows Explorer.
iAUDIO M3
42
Converting Audio CD Tracks to MP3 Files and Directly Downloading Them to iAUDIO
Converting Audio CD Tracks to MP3 Files and Directly Downloading Them to iAUDIO
With JetShell, you can easily convert your Audio CD into MP3 files and download them to iAUDIO.
Since the Audio CD tracks are digitally converted to MP3 without transforming them to wave files first,
the speed is very fast.
1. Before getting started, you must choose the quality of the MP3 files to create. Click [Setup] –[MP3
Encoder Option] to set the desired bit rate of the MP3 files. (The files compressed in a high bit rate
have a higher sound quality and a bigger file size.)
2. From the ‘File Management’ section, select the CD-ROM drive in which the Audio CD is inserted.
Select the audio tracks from the right window and click
or [File] –[Convert CD to MP3]
from the menu.
3. Specify the path ‘iAUDIO’ (Mobile Disk) to save the MP3 files in.
iAUDIO M3
Converting Audio CD Tracks to MP3 Files and Directly Downloading Them to iAUDIO
43
4. The converting process is displayed as shown below.
iAUDIO M3
44
Converting Files
Converting WAV file to MP3 file
You can convert WAV files in PC to MP3 files.
Select File menu in JetShell and click on the "Convert WAV to MP3" button.
The conversion window appears.
Converting WMA file to MP3 file
You can convert WMA files in PC to MP3 files.
Select File menu in JetShell and click on the "Convert WMA to MP3" button.
iAUDIO M3
Converting Files
45
The conversion window appears.
Converting MP3 file to WAV file
You can convert MP3 files in PC to WAV files.
Select File menu in JetShell and click on the "Convert MP3 to WAV" button.
The conversion window appears.
iAUDIO M3
46
Other Features
1. Ripping Enhanced CD
For some enhanced CDs, you cannot directly select the tracks on the CD.
In this case, you can right click your mouse and select a track to convert to
file as shown in the picture
below. However, for some Audio CDs for which copy protection technology is applied, this ripping method may not
work.
What is an enhanced CD?
This is an audio CD that contains video or data for a PC.
The tracks appear when you right click your mouse.
2. Accessing CDDB
When you press the
button, the information on the CD, such as the singer and song title can be acquired
through the Internet.
To use CDDB, the Internet connection must be enabled. You may not be able to use this feature depending on the
status of the network or the proxy server.
When incorrect data is included in the CD text received from CDDB, the fonts (including Korean letters) may appear
broken on your PC. This is not an error of JetShell but the information stored in CDDB.
iAUDIO M3
Other Features
47
3. Editing ID3 Tag
You can edit the ID3 tag of a MP3 file by selecting [Tools] – [Edit MP3 ID3 Tag] from the JetShell menu.
4. Changing MP3 Bit Rate
You can change the bit rate of MP3 files by selecting ‘MP3 Bit Rate Conversion’ from the menu.
5. Downloading Logo File
You can download a logo file to change the logo screen that appears when iAUDIO powers on.
Select ‘Download Logo File’ from the menu. When the ‘Open’ window appears, locate the desired logo file and
click ‘Open’. Then the logo file is automatically downloaded and applied.
iAUDIO M3
48
Installing and Using JetAudio
Installing and Using JetAudio
The worldwide renowned integrated multimedia playing program ‘JetAudio’ is included in the
iAUDIO Installation CD. To install ‘JetAudio’, run the file "CD-ROM:\JetAudio \setup.exe."
For detailed information on using JetAudio, refer to the JetAudio ‘Help’ after installation, or post your
question on the Q&A board at the site "http://www.jetAudio.com."
iAUDIO M3
Upgrading Firmware
49
Upgrading Firmware
A. What is Firmware?
Firmware is a program embedded in the hardware, which activates various features.
By upgrading the firmware, you can enhance the features of the product and eliminate the bugs in the
software.
B. Notice for Legal Limitations and Responsibilities Regarding Firmware
• The performance and menu of iAUDIO may change without prior notice through firmware upgrades of
regular or beta versions supported by the manufacturer.
• When you upgrade the firmware, all data in the flash memory can be deleted.
Therefore, users should personally back up important MP3 files and data saved in iAUDIO to their PC
before upgrading the firmware.
• All firmware upgrades are intended for overall enhancement of performance. The upgrades will be
provided when available, based on our company’s judgment.
• Some beta versions of the firmware included in our development roadmap may have minor bugs
that will be corrected in the official versions of the firmware. We are warning you beforehand of this
possibility when you read this Guide.
C. Conditions for Firmware Upgrade
• Upgrading the firmware of iAUDIO requires that the UMS feature of the Windows OS should work
properly.
• You can check "iAUDIO" in ‘My Computer’ on Windows 98 /ME /XP.
For Windows 2000, "Mobile Disk" may be displayed instead of ‘iAUDIO’.
• Either ‘iAUDIO’ or ‘Mobile Disk’ must be displayed for a firmware upgrade to be possible. If it is not
displayed, we recommend that you check the menu that asks whether or not to use a USB Device from
the main board CMOS, or reinstall Windows, or have the USB port on the main board examined.
D. Downloading and Installing Firmware
• You can download the latest firmware from Library in the iAUDIO.COM site free of charge.
1. Connect iAUDIO to your PC.
2. Copy the downloaded firmware file (cowon_m3.bin) in the firmware folder in iAUDIO.
3. Click on the icon in the tray and select "Unplug or Eject Hardware."
4. Disconnect the USB cable.
5. Connect the adapter after confirming that iAUDIO has powered off.
6. When you connect the adapter, iAUDIO powers on and the firmware is upgraded.
iAUDIO M3
Address : COWON SYSTEMS, Inc., 7th Floor, STX Building, 448-2, Dogok-dong, Gangnam-gu,
Seoul, Korea
Customer Support Team : 080-668-8282 (Free Collect Call)
A/S Center : Room No.23, 5th Floor, Tourist Terminal, 40-969, Hangangno 3-ga, Yongsan-gu, Seoul, Korea
Homepage : COWON SYSTEMS - http://www.cowon.com
iAUDIO User Community - http://www.iAUDIO.com